When it comes to point-and-click mystery games, 3D Escape Room Detective Story is an enjoyable example of the genre. In this walkthrough of Chapter 4 of 3D Escape Room Detective Story, I'll guide you through each puzzle hidden within the train and the easiest ways to solve them.
Due to the amount and complexity of the puzzles, each chapter of the game has been split into its own guide. If you've not yet made it to Chapter 4, or need help with Chapter 5, follow the links below to check out the other four guides.
Unlike the past three chapters, Chapter 4 begins with a mysterious call from an unnamed person. They mention the work you've been doing and tell you to get some rest, after which the screen fades to black. When you wake up, you receive a call from Sheriff Roden about the death of the sheriff you had been working with. You'll have to hurry over to the train station to uncover what happened.
3D Escape Room Detective Story Chapter 4 guide
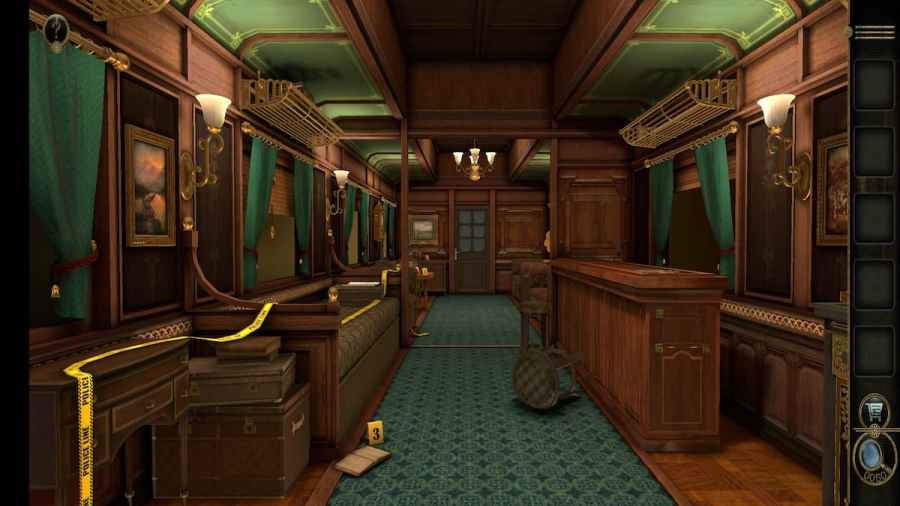
When you appear on the scene, you'll be in the first room facing the second. There is a gray cabinet and a counter to your right.

Head towards the counter to see a Record lying on top of it. Grab it before entering the next room.

This room provides you with access to a painting, a clock on the left wall, and a record player.

Record player slide puzzle
Head over to the record player.

Place the Record onto the record player. Take note of the dots and numerals on the Record, as you will need them later.

Placing the Record will unlock a sliding puzzle on the front of the stand.

From left to right, start by lowering the longer diamond piece and spinning the top left corner piece so that the gap faces the right. In the right corner, spin the half-circle so that its flat side faces the inside of the puzzle.

Then push the two long diamond pieces from the top toward their respective corners.

Rotate the top center piece and slide the center diamond against it.

Completing this puzzle reveals a symbol and word that can be used for the puzzle on the record player.

Use the red selector to select the "P" shaped symbol and spell the word "Circus" in the number lock.

This will unlock a secret door at the bottom of the stand. Click on it to enter a hidden compartment of the train.

Circus room
The circus room looks like a normal sitting room, except for a circus cart on the table in the center and a box in the right corner.

First, go to the box in the corner.

Rotate the lock to open the drawer and get a Wheel.

Circus cart puzzles
Then head to the circus cart in the center. Looking at it from the right will reveal a round empty space.

Place the Wheel here.

Flag puzzle
Rotate the Wheel clockwise, which will rotate the weather vane at the top and allow the flags to be rotated freely.

Rotate the flags so that they all face the direction of the arrow to unlock a Handle.

The Handle can be placed on the right side beneath the wheel. Pull it to open the bars on the cart so that the monkey figure can be grabbed.

Box standee puzzle
Then place the Monkey Figure in the empty pedestal at the back of the box.

To solve the puzzle, you need to move the standees around so that they're in the third row of the column of the figure they match. Standees can be moved into other columns from the first and third rows, with the figures turning to face the front when a standee is directly in front of them. Solving this will give you a Square Carving and remove you from the circus room.

Bar puzzles
Return to the counter where the Record was originally placed.

Place the Square Carving at the top right corner of this hidden compartment.

Rotate the Square Carvings so that their empty spaces face the puzzle. This will unlock a Crank, which will be placed into your inventory after being used to open the next puzzle.

Golden handle puzzle
This puzzle requires you to get the golden handle from the top of the puzzle to the bottom by rotating the rings to create a path.

First, rotate the inner ring on both sides so that they have a pathway leading to the lower left corner.

Slide the handle down to the end of this path.

Then twist the outer rings so they extend this path even further.

Pull the handle down into the outer rings.

Spin the inner rings so that they form a path from the lower left corner toward the bottom of the puzzle.

Complete the puzzle by rotating the outer rings to finish the path and dragging the handle down.

This will unveil a set of train tracks on the bar, which will be ignored until later.

Tresor room
If you open the Crank handle in your inventory, you'll notice that it has a symbol and a code that fit the puzzle on top of the record player.

Head over to the record player to enter the code, which consists of the center symbol and the word "Tresor". This will unlock the door to another secret room, which can be entered the same way as the circus room.

The Tresor room has the same general layout but with an antique box in the center and a cash register to the right.

Cash register puzzle
Start at the cash register.

Rotate your camera to the right to see that the register is missing a piece.

Place the Crank Handle into this hole.

Crank the handle to get a receipt. Write the numbers down, as you'll need them immediately.

This puzzle involves moving the sliders on the register up and down to get the amount on the register's screen to match the amount on the receipt. Correct numbers will have a green light above them, while the light above incorrect numbers will remain red.

The switch on the left pushes some of the switches into the air while lowering others into the base. Raised switches act as barriers to the sliders, so use them carefully to prevent numbers from going too high or too low. Use the slider at the right to move the black sliding mechanisms up and down and directly change the numbers on the screen.

Antique box keyhole
Completing the register's first puzzle gives you a Key, which can be used in the keyhole at the base of the antique box.

Insert the Key into the hole, rotating each section until it fits. Successfully inserting the Key will give you a Pull Handle.

Return to the register and insert the Pull Handle into the empty gap to the left of the slider.

Antique box slider puzzle
Pull the handle down to get Double Locking Pliers, which can be used on the front of the antique box.

Rotating them unlocks a rotating slider puzzle at the top of the box. The button on the left flips the puzzle, while the slider on the left rotates all of the rings that the gemstone slider is not currently on.

The goal of the puzzle is to get the gemstone slider to the middle. The process of getting to the center will vary, but it will involve this combination of middle and center rings.

Getting the gemstone slider to the center unlocks a Key, which can be used in the locked drawer at the bottom of the cash register. The locked drawer contains a Slider.

By rotating to view the left side of the register, you can see a mechanism that is missing the actual slider piece.

Place the Slider at the top of this piece and slide it down to release a colorful puzzle.

Multi-colored slider puzzle
The goal of this puzzle is to place each colored slider on the area in the puzzle with the matching color. The easiest order to do this in is the yellow slider first, the green slider second, the red slider third, the purple slider fourth, and the blue slider fifth. Solving this will give you a Round Carving and kick you out of the Tresor room.

Gray cabinet puzzles
Open the Round Carving and pull out the star-shaped piece on the back.

Tetrahedron puzzle
Now head over to the grey cabinet, which has an indent on the front identical to the shape on the Round Carving.

Insert the Round Carving into this whole to unlock both a lever and a secret compartment on the cabinet's left side containing a Tetrahedron.
While on the left side of the cabinet, examine the side to find two dots preceding a set of coordinates. Take note of these for a future puzzle.

Now pull the lever to unlock a board game on top of the cabinet. Place the Tetrahedron in the triangular gap to begin the game. The objective of each round of this game is to get the Tetrahedron from its starting position to the end position indicated on the board using the number of moves listed on the bottom. If you make a mistake, the number at the bottom can be tapped to undo the last move made.

The first round gives you three moves. Slide the Tetrahedron left twice and up once to beat this round of the game.

The second round gives you six moves to get to the finish. Move the Tetrahedron left four times, down one time, and right once to complete this round.

The third and final round gives you 11 moves to get to a nearby spot. To accomplish this, you'll need to go down, right, right, up, left, up, right, right, down, right, and then down to finish.

Beating all three levels of the game will give you a Metal Carving, which can be placed on the slider-like section on the front of the cabinet.

Front of the cabinet
The two sliders on the left and right of the section can be pushed against the Metal Carving, unlocking the Bas Relief of a Beauty item.

Place the Bas Relief of a Beauty item into the front of the cabinet to unlock a new puzzle.

Rotating slider puzzle
This metal puzzle has a rotating gear on the left, three columns of sliders, and three symbols with numbers next to them. The goal is to move the sliders so that each image has a red number next to it. Moving a slider off of an image lowers its number while moving the slider to point at an image increases its number.

The crown-like image should have a "2" next to it, the heart should have a red "2", and the helmet should have a red "5". Completing the puzzle will give you a Metal Apple.

Metal Apple lock
Open up the Metal Apple in your inventory and twist the stem to open it.

It will turn into an apple core with the image of a tree surrounded by slices of apple with sliders on them. The bottom row is locked where it is, so build the tree from the bottom up. The final image of the apple and the positions of each slider will appear like the image below when complete.

Solving the metal apple puzzle turns the core into a key, which can be inserted into the keyhole beneath the previous puzzle to obtain Train Part A.

Train Part A puzzle
Head over to the set of train tracks on the counter where the Record used to be.

Place the rain part on the third platform from the right to get the Transforming Key.

Storie room puzzles
Open the Transforming Key in your inventory to see the final code for the record player.

On the record player, slide the red slider to the arrow symbol on the left and change the letters to spell out "Storie".

This will open the pathway to the "Storie Room", which only contains a large wooden box.

Look at the keyhole on the box.

The three segments on the key can be rotated so that they fit into the keyhole.

Twisting the key will reveal a large Medieval castle filled with puzzles.

Left tower gear
Looking at the tower on the left will reveal a gear surrounding it. Rotate it to open a compartment at the bottom of the tower, which contains a Plaque.

Entryway rotating puzzle
Place the Plaque above the front door to reveal a rotating puzzle within it.

Rotate the pieces until they form a square with rectangular offshoots on the left and bottom.

The Transforming Key in your inventory can be transformed one more time to match this new lock.

Placing it into the gap to unlock part of the top of the castle. Keep in mind that the new part of the castle has an empty spot for an item.

Constellation puzzle
From here, head to the back of the puzzle to view a constellation-themed puzzle.

The goal of the puzzle is to rotate the inner and outer rings until the constellation in the center completely lights up. Combining the outer piece with four close stars on the right with the inner piece with four regular stars and one brighter star on the left will complete the puzzle. I pulled the right slider once and the left slider three times to solve it.

This will reveal an opening beneath the puzzle containing the top of a turret. This can be easily placed, as the tower missing its top can be seen to the right.

Metal bar puzzle
Place the top onto the tower to unlock a metal puzzle at its base.

The gear on the base is used to rotate the metal pieces on the right side while the red slider moves them up.

To solve the puzzle, you'll need to rotate the metal pipes so that they won't hit the metal bars on the left when moved up. They'll need to be rotated every time they move up to get passed each metal bar. Once the final metal pipe is at the top, the puzzle will complete itself and give you a Shield.

The Shield can be placed at the front of the castle on the empty spot we noticed earlier.

Castle orb puzzle
The placement of the Shield will make an orb appear on top of the castle.

Rotate the orb until there is a sun at the top and an infinity symbol at the front.

Rotating image-matching puzzle
The final puzzle in the room involves rotating two sets of metal pieces to make the symbol inscribed on the front.

The first symbol to be created is an infinity symbol.

The second symbol to be created looks like a staircase.

The third and final image is a crescent moon.

Completing all three will open the base, give the Handle item, and remove you from the Storie room.

Clock puzzles
After exiting the Storie room, make sure to grab the Train Car B from the record player.

Look at the train car. Make note of the single dot and the numerals, as you will need them later.

Then head over to the clock on the opposing wall.

The left side of the clock
Viewing the left side of the clock hints at the proper place for the handle.

Drag the Handle to the left side to attach it.

Twisting the handle reveals a small puzzle using a large golden gear. Rotate the gear to push the Strange Key forward and tap it to take it.

Compass puzzle
Go to the front of the clock and look at the keyhole at the bottom. Insert the Strange Key into the hole and twist it to unlock the next puzzle.

The first part of the puzzle requires moving the slider to get rid of all eight metal bars. Tapping on the right arrow moves the slider to the right and tapping on the left moves the slider to the left.

Removing all of the bars allows you to interact with the compass in the back.

Rotate the outer ring of the compass until the two red arrows point at each other.

Pocket watch
Select the pocket watch and pull its cover to the right to open it.

Move the hands so that they mirror the clock hands on the back of the cover.

This will open a hidden compartment within the watch holding a Small Key.

The right side of the clock
Head to the face of the clock.

Insert the Small Key into the keyhole on the left side.

On the clock face lies a pair of Metal Butterfly Wings. Pick them up and head to the right side of the clock.

There will be a panel with a gold metal piece at the top.

Rotate the metal piece to reveal a keyhole with six points.

Open up the Strange Key used earlier and add the Metal Butterfly Wings on top of it. Rotate the wings to change the shape of the key to fit into the new lock.

Insert the Strange Key into the lock and rotate it to get a Decorative Wooden Block.

Bottom of the clock
Take the Decorative Wooden Block to the bottom of the clock. One side has a matching block, while the other side is empty.

Place the Decorative Wooden Block in the space on the right.

Open the decoration in the center to get a Clock Pointer.

Clock face
Return to the face of the clock.

Add the Clock Pointers to the center of the clock.

Rotate the hands around until all of the numerals are flipped to be zodiac symbols. Keep in mind that once you cross a zodiac sign and change it to a numeral, you can immediately pull the pointer back to it to make it a zodiac sign again and then continue forward.

To set the clock to the proper time, check the compartment on the right side of the clock again. The piece of paper within it will have the clock's time written on the top left.

This clue is written upside-down, meaning that the first symbol corresponds to the longer hand while the second symbol depicts where the shorthand should point.

Positioning the hands properly will unlock the clock face, revealing a set of gears.

Grab the Spring off of the gears and slide the top left one down.

Move the small slider on the right side of the clock up.

This reveals a small peg where the Spring can be placed. Insert it and rotate it to unlock it to reveal a compartment containing a Carving on the top of the clock.

Painting puzzle
Look at the painting to the right of the clock.

Add the Carving from your inventory to the empty bottom left corner of the frame. This will unlock a four-digit number lock at the bottom of the frame.

Four-digit code
To solve this puzzle, you'll need to use the three sets of dots and coordinates found throughout the train car. Using the first code, which was obtained from Train Part B, drag the golden poles on the frame around to reveal the symbol for the Leo zodiac sign.

On the clock, this corresponds to the number 6.

The second set of coordinates, found on the side of the gray cabinet, is connected to the zodiac sign Cancer.

On the clock, this represents the number 5.

The last coordinate came from the record and leads us to the symbol for the Saggitarius sign.

On the clock, Saggitarius represents the number 10.

These three numbers create the code "6510".

The painting opens, revealing the final piece of the train, Train Car C.

Train puzzles
Head back to the tracks with the two remaining train pieces. Add the black Train Car B to the two pedestals behind the red one.

Then add the engine, Train Car C, in front of the red cart. This will open up the top of the red cart, leading to the next room.

The coal room
The room within the train looks like an engine room and is filled with puzzles on one wall.

The first puzzle is on the left. It involves flipping the two switches on either side to get the arrow to match up with the red eight.

Moving the left switch to face upwards and the right switch to face the front will complete this puzzle.

The second puzzle involves the lever with the black tip.

Rotate it to face the right side.

Then head upwards to the gold off and on switch.

Rotate the lever into the "on" position.

The next puzzle features two dials, each connected to the meter. The goal is to spin the dials so that the meters are pointed towards the blue sections. However, when the dials stop spinning the numbers in the meters decrease.

Start by spinning the top dial all the way, then spin the bottom dial all the way.

While the bottom value declines, spin the top dial to keep it in the blue while the bottom dial's meter decreases. The bottom meter will quickly hit blue, solving the puzzle and leading you to the final off-and-on switch.

Turn the dial to "on" to complete the room.

This will open a circular compartment on the bottom containing a Linkage Shaft.

The top of the locomotive
Grabbing the Linkage Shaft from the train's room returns you to the front of the train.

Place the Linkage Shaft on the wheels of the locomotive.

Head to the top of the locomotive to solve the puzzle.

First, rotate the engine to move the slider up.

Then move the slider to the left.

Rotate the engine to move the slider down.

Move the slider to the left twice.

Rotate the engine to move the slider up twice. Then move it left twice and rotate the engine down to complete the puzzle.

This will reveal a Handle item at the front of the locomotive.

Add the Handle on top of the Linkage Shaft to lower the train and set it in motion.

Train sign puzzle
The moving train will come to a stop at a small station on the edge of the counter.

Slide the sign to the right to get the note for this level.

The note reads "Do you know the other side of Claude?"

If you want to check out the ever-popular Adventure Escape Mysteries series, look no further than our Vanishing Act walkthrough here on Pro Game Guides.