
Scientific machines meets point-and-click detective work in chapter 2 of Boxes Lost Fragments. In this guide, I'll walk you through all of the science-themed puzzles in the second half of Chapter 2.
Boxes Lost Fragments Chapter 2 Nexus part 2 walkthrough
This guide covers the second and fourth rooms in Chapter 2, plus the final puzzles in the main room. If you're stuck on a puzzle in any of the other chapters, the guides for each of them are linked below.
- Chapter 1 part 1
- Chapter 1 part 2
- Chapter 2 part 1
- Chapter 2 part 2
- Chapter 3 part 1
- Chapter 3 part 2
- Chapter 4 part 1
- Chapter 4 part 2
- Chapter 5 part 1
- Chapter 5 part 2
Third room puzzles
The third room contains a green chest with gold details.

Start by pulling the handle on the right side of the box. There will be an Ornament Piece in the left corner. Tap it and place it in your inventory.

Rotate the camera to view the back of the chest. Looking closely shows that the golden decoration on the left side is missing.

Placing the Ornament Piece here will give you a Mechanical Item.

Mechanical Item puzzle
Open the Mechanical Item in your inventory.

Pull the green sider around the circular track it's on to turn the Mechanical Item into a Gear.

Place the Gear on the top portion of the center of the box, between the two spiked golden locks.

This unlocks a puzzle consisting of a handle and three rotatable rows.

Rotate each row until they have two empty spaces where each bar of the handle is, allowing it to freely slide passed them.

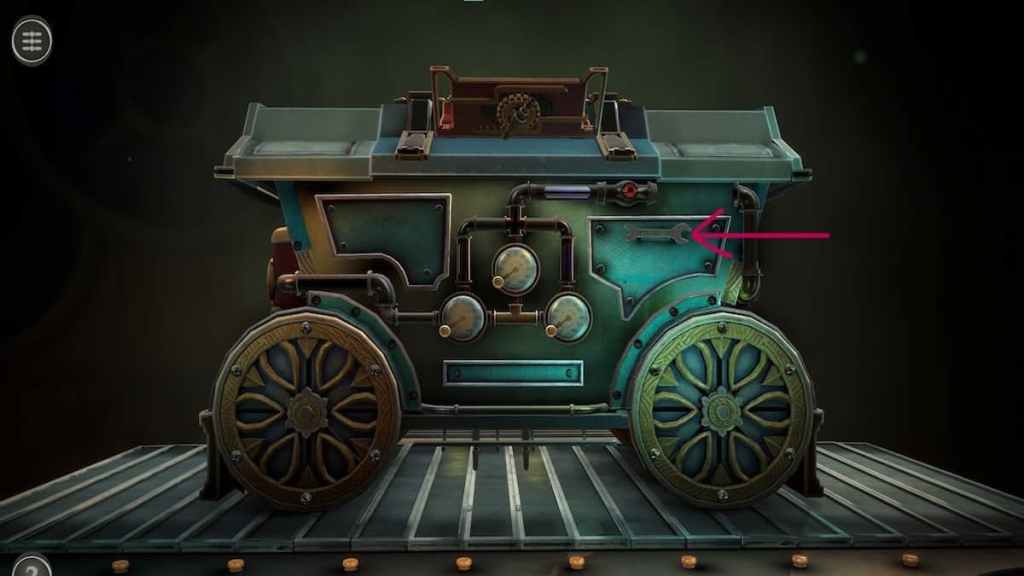
Doing so will drop the front and back walls of the box, turning it into a circus cart. I used the handle on the left wall to lower it here as well.

Red canister colored ball puzzle
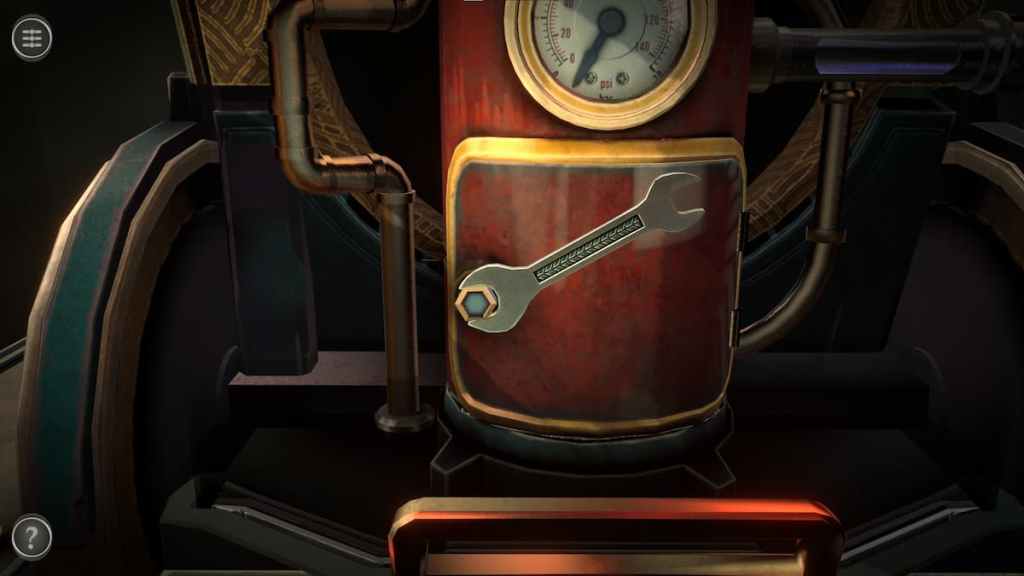
Before starting the puzzle, grab the wrench on the back of the box.
Use the wrench on the green nut to open the red capsule's door.
This reveals a puzzle containing five colored balls, each with two segments of pipe beneath them with two colored rings on each segment.
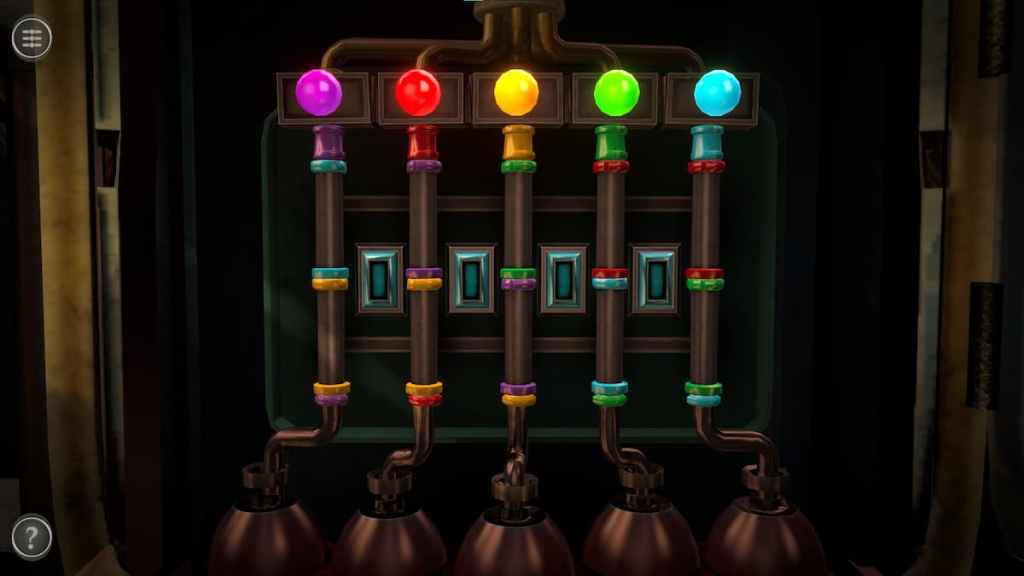
Pressing a button rotates the four pipe segments around it.
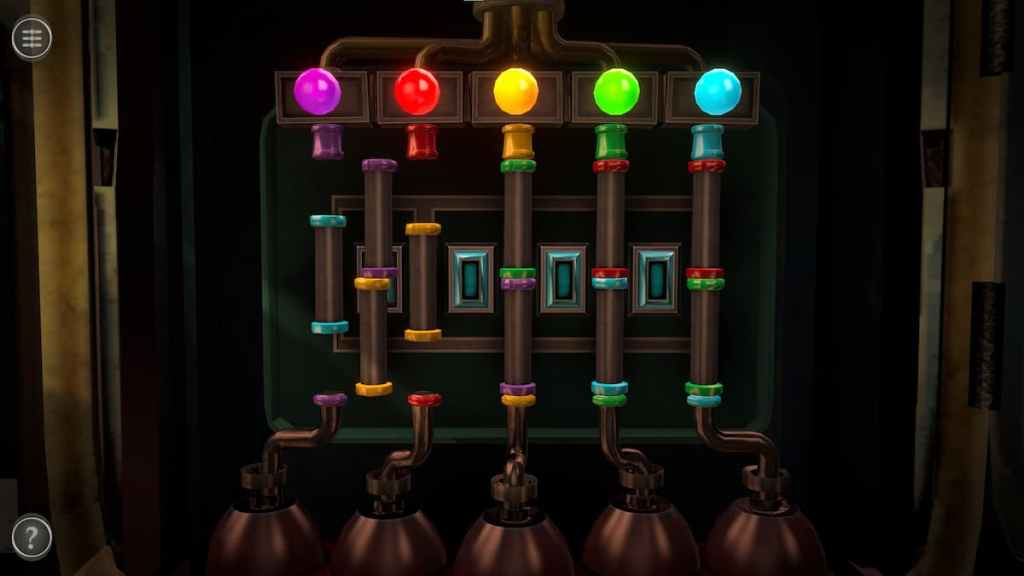
When all of the sections of piping match the color of the ball they're underneath, the ball will glow. When all of the balls glow, the puzzle will be completed.

Completing this puzzle gives you a hint for the gauges puzzle.

Gauges puzzle
This puzzle consists of three gauges found on the back of the chest.

Make the gauges match the clue from the colored ball puzzle to complete their puzzle.

Doing so will fill the pipes with steam. However, part of the pipe on the top right is missing, preventing it from going any further.

Checking the left side will allow you to pick up a small red Valve.

This valve can be placed onto the red num and rotated to extend the pipe until it connects with the other pipe on the corner.

Doing so will lead you back to the left side to watch the pressure gauge rise.

Pull the golden handle next to the gauge to turn the table into a set of tracks and put the box in motion.

Mechanical claw puzzle
The final puzzle is hidden behind the front doors of the cart. Flip the lock and pull each door to the side to look into the room.

This room has a claw in the center and spaces for three missing gears on the right side of the room. The goal of the puzzle is to place the missing three gears into their places. Each gear is in a hidden compartment beneath the floor that appears for a short window of time as the conveyor belt rotates. To grab a gear, you need to tap the green button on the claw so that it can move down and pick up the gear before the compartment closes.

When all three gears are added, a compartment will open containing the Mechanical Console.

Picking up the Mechanical Console removes you from the third room, then unlocks the fourth one.

Fourth room puzzles
The fourth room displays a scientific cube as a box.

Looking at the back of it reveals three deactivated lights. You'll need to turn each light green to continue on.

Lightbulb puzzle
Before working with the actual lightbulbs, you need to complete the puzzle at the top of the box.

Rotate each of the outside shapes until their gaps face the inside. This will cause the hourglass in the center to rise, revealing a lightbulb matching those on the wheel to the right.

Rotating the wheel shows that one of the lightbulbs is missing.

Place the Lightbulb item into this hole.

This will light up the lightbulb light in the center.

Power charge puzzle
The puzzle that activates the power light is on the back right corner of the box. Pull each of the sliders to open the compartment.

Connect each of the jumper cables to the electrical mechanisms directly above them.

This will turn the light on the right green.

Electric pathway puzzle
To activate the final light, we need to do the puzzle on the front of the cube.

Start by aligning the outer row to the pathway at the top of the puzzle.

Then align the two inner rows.

This turns the final light green and unlocks a slider beneath the lights. Slide it to start a sliding symbol puzzle.

Sliding symbol puzzle
Turning all of the lights green unlocks this puzzle. The center has six symbols, with each symbol having a short piece and a long piece matching them.

Two of these pieces can be stored on the left and right sides of the puzzle. There can be two small, two large, or one of each.

The goal of the puzzle is to get the two pieces in each row to match the piece in the center.

Once every piece is in its rightful place, the box will undergo a transformation.

Slider puzzle
On the left side of the machine, a small puzzle containing four red sliders can be seen. Rotate the small mechanism on the left side of the puzzle to reveal a black button.

Press the button to flip the puzzle, which reveals the solution for it.

Press the button again and move the four sliders into position to open an electrical outlet puzzle beneath them.

Before continuing on, return to the ball of plasma in the center. The Electric Plug can be found on one side of it.

While you're here, grab the Fuse from the other side.

Open the Electric Plug in your inventory and push the slider to the right.

Now it can be added onto the left side of the electrical puzzle beneath the sliders.

Pull the handle to the left to connect the plug and the outlet.

The left side will fire a plasma beam at the ball in the center.

Plug puzzle
At the base of the right side of the box, there is a plug with an empty slot to its left. Place the Plug into the empty spot.

This makes the right side shoot a beam of plasma at the ball in the center, turning it into a portal. A helping hand reaches out of it, holding a Power Source. Take it to return to the main room.

Completing the Chapter 2 main room
With all the smaller rooms completed, it's time to turn your attention to the room within the main room.

Engine puzzle
Start with the engine on the left.

Place the Mechanical Console into the gap on the podium to begin the puzzle.

The left and right buttons on the bottom can be pressed to rotate the central lights clockwise and counterclockwise. The button in the center rotates the three bottom lights around. The goal of the puzzle is to have the lights in the center match the lightbulbs on the outside.

Doing so causes the engine to move and shoot a beam of plasma into the mechanism on the right wall.

Circular wall puzzle
Focus on the puzzle on the wall.

Rotate the gear around the sphere to reveal an empty space.

Place the Mechanical Sphere into this empty spot to release a set of four screens.

Click the green button beneath the screens to make a symbol pop up on each screen. This will be a hint for the next puzzle.

Electrical Key puzzle
Place the Electrical Key into the slot next to the fuse box.

Rotate each of the circles until they match the screens from the previous puzzle.

This brings a gear down from the ceiling, powering the fuse box.

Fuse box
Place the Power Source into the fuse box.

Pull the lever down to reveal a containment device.

A small compartment can be seen on the front of the device.

Open it to reveal a box identical to the previous two token holders.

After the animation, take the token out of the box.

Place it into the pedestal to begin chapter 3.

Looking for more escape room fun? Check out our 25 Best Free Virtual Escape Room Games list here on Pro Game Guides.