Our Destiny 2 Menagerie Guide
features all of the known information on this six player matchmade activity! We're currently gathering up information on what will be involved in the Menagerie, and how-to obtain the Chalice of Opulence via The Invitation quest.
The Menagerie has opened in the Season of Opulence on June 4th, 2019!
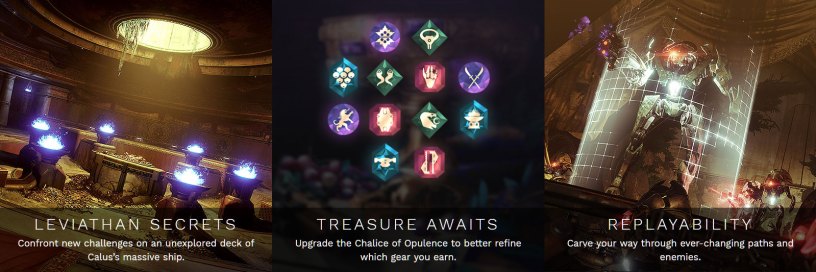
Assembling your Chalice of Opulence is just the first step. Calus has crafted a maze of challenges in his lost vaults. Test your strength in the all-new six-player matchmade activity, the Menagerie, and meet his challenges head on to unlock your rewards.
If you want to know how to grind up some Imperials, check out our guide for that here.
Obtaining the Chalice of Opulence
Emperor Calus has invited you to Nessus, but you think it wise to drop in with Ikora before you go.
First thing we're going to want to do is obtain the Chalice of Opulence. You'll want to head over to Benedict 99-40 at the Traveler. He will give you The Invitation quest step that send you over to Ikora. She has some intelligence that indicates the Cabal barge has landed at Nessus. She'll also give you a gift of some higher grade armor and weapons that are quite useful if you haven't been playing much. You'll also get some upgraded gear over at the Eververse, so make sure to hit that before you leave!
Quest Steps of The Invitation
Here's a list of the steps for fully completing The Invitation Quest. I've got a full guide to how to complete them all below this list.
- The Invitation: Emperor Calus has invited you to Nessus, but you think it wise to drop in with Ikora before you go.
- The Invitation: Ikora's intelligence indicates that a Cabal barge has just landed on the surface of Nessus. That lines up with Calus's promise that he sent a "gift" to Nessus for you. Locate the barge on Nessus.
- Cracked Chalice: Calus, via Werner 99-40, has given you a Chalice of Opulence, an artifact that he promises will bring you great power if it is restored. Defeat Cabal on Nessus to collect lost Chalice fragments.
- Mended Chalice: Prepare an adhesive to rebind the Chalice fragments. Defeat Vex on Nessus with melee damage without dying.
- The Invitation: As you finish the adhesive, you receive a transmission from Werner 99-40. Recover Imperials, a currency of the Cabal Empire, from Red Legion deserters in the Conflux Lost Sector on Nessus.
- The Invitation: Upgrade the Chalice by fusing it with the Imperials you recovered.
- The Invitation: Ghost receives another transmission from Werner 99-40—this time with a bounty note attached. Complete the bounty from Werner 99-40.
- The Invitation: Slot the rune you found in the treasure chest into the Chalice.
- The Invitation: Return to Werner 99-40 on the Imperial Barge on Nessus.
- The Invitation: Calus has invited you to enter his Menagerie on the Leviathan. There, he promises you'll be able to unleash the true potential of your Chalice of Opulence. Board the Leviathan and experience the Menagerie. You must loot the final chest at the end of the activity in order to progress this quest.
- The Invitation: Claim your reward from the Menagerie Triumph.
- The Invitation: Purchase an upgrade on the Chalice.
- The Invitation: Return to Werner 99-40 on the Imperial Barge on Nessus and open the chest that awaits you.
Head on over to Nessus, the barge is near the Watcher's Grave landing zone. You will be then given the Cracked Chalice, and you will need to defeat some Cabal to gather Chalice fragments. I found some of them in The Cistern, near the public event in the Pools of Luminance. Gather up 10 of these, and you'll be off to needing to punch some Vex in the face with your melee ability. You'll need to do this 25 times without dying. You can find Vex close to the barge at Watcher's Grave. There's a little portal you can enter with some Vex nearby, head into there and you'll find quite a few.
Now, you'll need to get some adhesive to mend the Chalice back together. To find that, you'll need to go to the Conflux Lost Sector that is on Nessus and in The Cistern. Check out our maps to Lost Sectors to find the exact location.
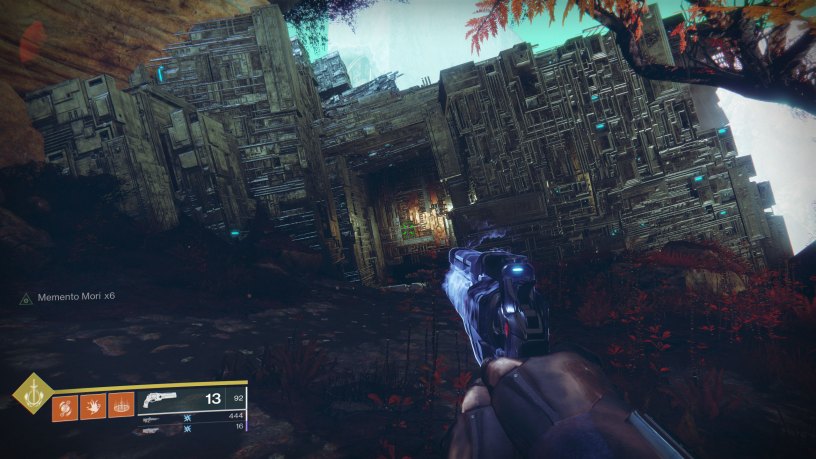
Head on into the Conflux and defeat the main bad guy of the area. That will unlock the sector chest, and you will find the Imperials you require to complete the quest step.
You will now have 1,000 Imperials, you can use those to upgrade the Chalice and fuse it together.

Unlock this rune slot to control the archetype of weapon or armor that drops from the final chest in the Menagerie.
Now that you've unlocked that, you'll be given the Glorious Harvest bounty to earn a Legendary rune for your Chalice.
Generate Orbs of Light, earn experience, and complete any challenge.
Basically, you just need to play the game. Do some weekly stuff, you just need to passively complete this quest step. You'll also need to complete a challenge, you should get some kind of daily challenge for the day. Mine for instance was on Nessus to complete the (Heroic) Unbreakable Adventure. You generate orbs by using your super, so try to use that as much as possible.
Once you've completed your bounty, you'll receive a location to track down your treasure. It's called the Imperial Treasure Map.
Riches await you somewhere near the Well of Flames on Nessus.
Look to the area it describes, you'll notice a circle with an X marked through it. That's where you'll want to go to collect the rune.
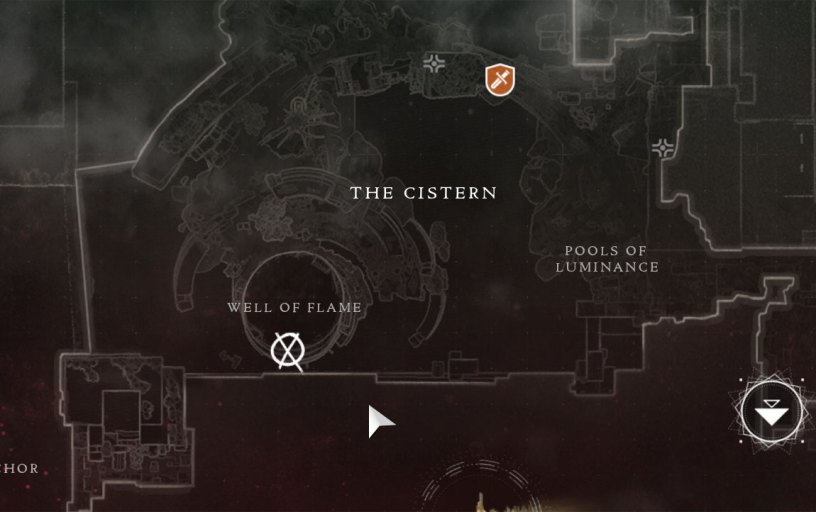
Mine was in the Well of Flame, I'm not sure if it's the same for everyone or not. I had to go pretty deep into the area to find it, look for a golden glowing chest.
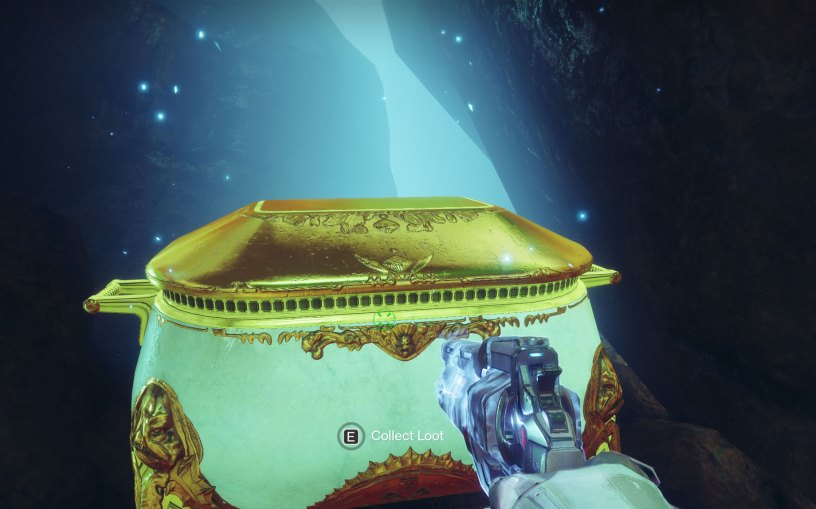
Open that up and you'll receive your first rune. Again, I'm not sure if everyone gets the same runes or not. I got the Rune of Jubilation:
Weapons rolled with this rune active are guaranteed to be Sniper Rifles.
Place the rune you received into your Chalice of Opulence to activate it. After that, we're going to head back to Watcher's Grave in Nessus and visit Werner 99-40 on the barge. He will give you another batch of high level gear if you are in need, and you will then be invited to go partake in the Menagerie on the Leviathan. While you are here, you should grab some of the bounties that Werner has available so you can get started on working towards completing those for the week. These unlock powerful gear and more runes for your Chalice.
Calus has invited you to enter his Menagerie on the Leviathan. There, he promises you'll be able to unleash the true potential of your Chalice of Opulence.
Board the Leviathan and experienced the Menagerie. You must loot the final chest at the end of the activity in order to progress this quest.
To locate the Menagerie, look at the map of Nessus and hover over Nessus Orbit to find it. Once you complete the Menagerie, you will finish the "A Taste of Power" Triumph, this will unlock an additional slot for your Chalice. This will also give you 500 Imperials. For defeating whatever boss you faced in the Menagerie, you will get an additional 500 Imperials. Once you've collected both of those Triumphs, you will move onto the next part of The Invitation quest.
Purchase an upgrade on the Chalice.
You most likely have 1,000 Imperials, so the only upgrade you can purchase at the moment is the Power and Efficiency 1:
Grants an additional weekly powerful reward from the final chest in the Menagerie and unlocks chests found on the Imperial Barge on Nessus.
From here, we're going to be going back to the Imperial Barge.
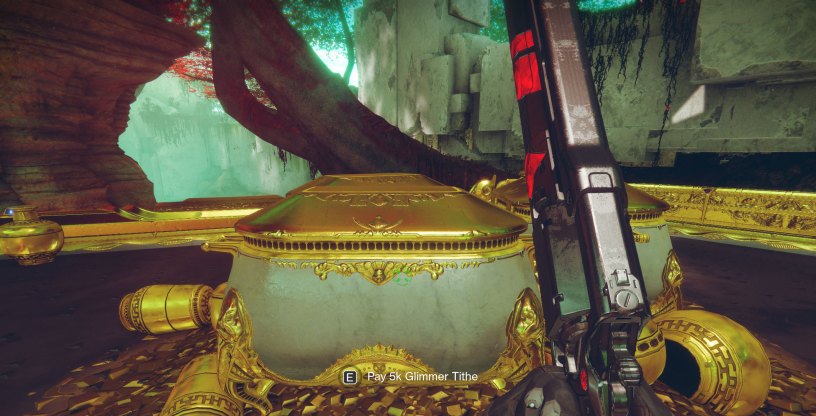
Return to Werner 99-40 on the Imperial Barge on Nessus and open the chest that awaits you.
Once you've reached the barge, go to the top of it. At the back of the ship, you'll see a bunch of treasure chests. You can open each and everyone of these by paying 5k Glimmer Tithe, and you will gain a bunch of Runes and some more Imperials.
From there, you can upgrade your Chalice of Opulence further and you can go head back into the Menagerie to gain some more loot!
Chalice of Opulence Rune Combinations
If you're curious what you can get by combining different Runes in your Chalice, then check out this awesome spreadsheet guide that displays all of the combinations.
Menagerie Event Guide
The Menagerie Event is pretty hectic, and there's quite a few parts to it. You will be matched up with five other players and attempt to make your way through the ship to collect the prize at the end. There's multiple sections you'll need to complete to make your way throughout the Menagerie. Each one requires you to do something a bit different, and it culminates with a final boss.
Notes about The Menagerie
While the event states that it requires 690 Power Level, the rooms get harder if you take too long to complete them. You'll notice from time to time that the recommended power level will change.
It's also important to note that you cannot actually fail in the Menagerie (unless you just leave). While there is a timer, that is only really used to determine if you've completed it quick enough to gain a Triumph. You will keep getting new rooms to play until you completely fill up the Menagerie gauge.
The Lamplighting
The first section of the Menagerie has you lighting lamps ablaze. You'll need to take down special Lamplighter Knights and they will drop orbs. Take those orbs to the lamps that are circled around the middle treasure area and they will light up and add to the percentage you need to complete. Do enough of these and it will unlock the next area.
There's a lore item in the middle of this room, it's a big Vase with a bunch of treasure surrounding it.
The Riposte
This one is pretty crazy, a bunch of different Fallen enemies will spawn that you'll have to lay waste to. Try to stick with your team as much as possible, and pick up any downed teammates because people will likely be getting killed left and right due to the amount of enemies there are. The object of this one is to slay as many Tamed Knights as you can. The more you destroy, the more the percentage you'll get towards completing The Menagerie. You have a certain amount of time to complete this, so try to kill as many as possible before it ends.
There are other knights called Cherished Darkblades you can kill, and when you do they will drop an ancient relic sword. You can use this to deal some pretty heavy damage to those Tamed Knights and other enemies.
The Crystals
The Crystals is kind of a small room with a lot of vertical space to it. You'll be killing various Vex enemies, and eventually Void Cannons will spawn. You need to grab one of these and find one of the purple crystals that are randomly spawned on the walls of this room. Use the Void Cannon to destroy the crystals, and you will gain points towards completing this room. The Void Cannon can also be used to meltdown enemies as well, but they have a very limited supply of ammunition.
The Arkborn
The Arkborn requires you to gather up Arkborn Souls that spawn around the room in the form of glowing yellow light. Run through these and you will gather up the souls, bring them over to the yellow bonfire on either side of the room. You only have a limited amount of time to turn these in, so do it quickly (you can carry multiple at a time). At some point during this round, a big Treasure Ogre will spawn and the bonfires and souls will be removed from the room. You'll need to destroy the Ogre before going back to collecting and turning in souls.
Don't mistake the souls for the similar looking yellow traps that get scattered around the room. You are likely familiar with the look of these, but the traps kind of look like small bonfires, and the souls are just beams of light.
The Hunted
In The Hunted you will need to locate a glowing circle in one of the four corners of the map. Your team will need to sit in this area and defend it by slaying tons of Fallen enemies. This includes a pretty tough Treasure Knight that will spawn and attempt to kill you. It has a ton of health and will pretty much one shot you if you get too close. Once you've fully captured one of the circles, another one will spawn and you will need to move onto that one.
The Mockery
There will be a field in the room that you and your team will need to stand in. If you go outside of it, you will be dealt damage. Kill the Wizards that spawn around the area, they will drop orbs that you will have to go retrieve and bring back to the safe area to place into the receptacle that's in the field.
The Gauntlet
You start off with killing some monsters and a boss. Then you'll run the actual gauntlet, which has you running a lap around an area that has a bunch of obstacles. There's pits to fall into and there's some jets of flame that will attempt to kill you along the way. Avoid all of these and make it across the finish line. You then do another round of killing monsters, and another round in the gauntlet.
Boss Fight
Once you've gathered up enough percentage towards The Menagerie percentage bar, you will then be tasked with fighting a boss battle.
Hasapiko, Beloved By Calus
This is a huge Vex boss with an impenetrable shield around it. To be able to damage that shield, you'll need to kill Hasapiko's Living Firewalls that spawn. Once you kill one of these, it will leave behind a white glowing area that you can stand in and that allows you to deal damage to the boss. If you deal enough damage to the boss's shield, they will become vulnerable to damage.
Once you've knocked down the shield, you'll need to start dealing damage. This is made marginally difficult by the walls that Hasapiko starts flinging forward at you. If you touch one of these white glowing walls, you will instantly die. So, be sure to avoid those while you deal damage.
As you take down Hasapiko's health, it will start spawning more walls when it's vulnerable. The walls will start coming two at a time, so you'll want to kind of ride the middle area and decide which part of the map is clear for you to reside in.
If you get Hasapiko down to its last bit of health, it will spawn three Quantum Hydras. You will need to destroy these before the final Living Firewalls spawn, and you can then take down Hasapiko for good.
Up on the left side of this room is a ledge where Hobgoblins spawn. Jump up here and you'll find another lore item!
Triumph: Only have one player in the pool that the Living Firewalls spawn.
Arunak, Beloved By Calus
Cursed Thralls will spawn and once killed they will drop relics that can be thrown at Arunak to drop its shield. You can only deal damage while the shields are down. Once you've gotten Arunak down in health, it will spawn a couple of Treasure Knights. You don't have to kill these, but they obviously deal a ton of damage if you get too close. Continue gathering relics and dealing damage to Arunak until it's dead.
Triumph: Don't kill the Treasure Knights.
Pagouri, Beloved By Calus
There are three plates scattered around the room. The first phase requires your team to stand on one of the plates to lure the boss out from behind its shield. The second phase requires two, and the third requires three. Once you capture the plates, you'll be able to deal damage freely until it retreats behind the shield again.
Triumph: Lure Pagouri out to each plate only once.
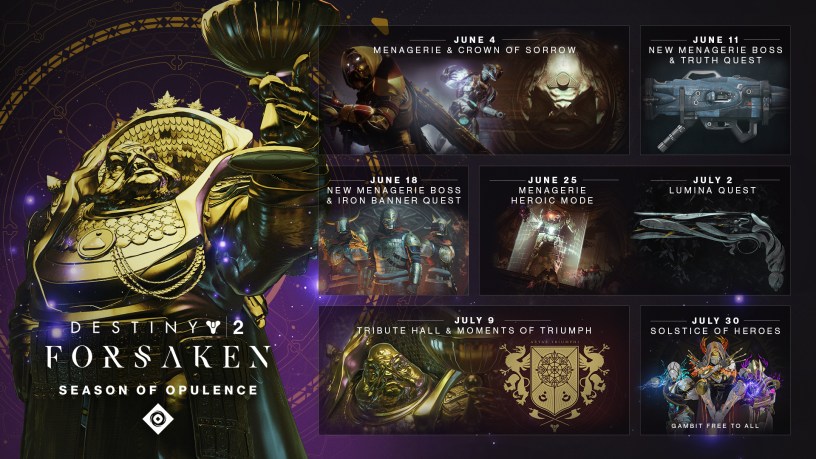
Future Menagerie Updates
The Menagerie will be getting updates throughout June, including new bosses, and even the Menagerie Heroic Mode!
Owners of the Annual Pass will see new Menagerie bosses introduced throughout the first month of June, concluding with the introduction of Heroic difficulty. Matchmaking will be available for normal difficulty, but Heroic will require a pre-made fireteam to take on the greater challenge.