
Welcome to the Federal Department of Intelligence. This walkthrough will help you navigate the twists and turns of this atmospheric entry into the puzzle game genre, including the solutions to all of the game's toughest puzzles and 100% of the achievements.
The Operator is a unique game that sees you play detective, helping field agents solve murder cases and more from the comfort of your computer desk. You can play it now via Steam.
The Operator Walkthrough - All Cases Solved & All Achievements
Achievement: Welcome to the FDI
You logged in your computer for the first time.
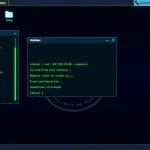
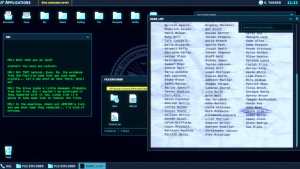
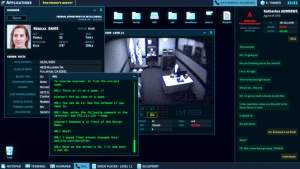
The Operator tutorial is quick and straight-forward. Supervisor Skinner asks you to find his age to demonstrate how to use the systems provided for you. Under Applications in the upper left corner you'll find the HumanDB, a database of humans, which you can search for important information throughout your cases.
To resolve Skinner's request, type his name into the HumanDB (Xavier Skinner) and his basic information will come up. Click the objective in the top bar, and then the "Age: 40" on his profile to complete the task.
At any time, you can open the terminal application and type help to read the manual. This is unnecessary, but does grant you an achievement.
Achievement: RTFM
You read the manual!
Now that you understand how to play the game, we can get to your first real mission: to identify a killer.
Case 1: The murder of Henry Jenkins


Alexandra Pendell will send you documents relating to a shooting in the bar. This includes a video of the shooting and a mysterious list found on the victim.
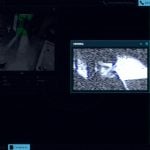
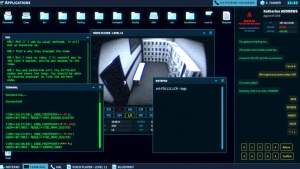
Pull up the video of the shooting. Finding the killer starts in the most obvious place, with the video of his face (image #1). Here you'll be introduced to the video analysis system. You can click on the murderer to follow his actions, but unfortunately the picture that pulls up is too low quality for a solid identification. You can also analyze the victim to confirm that his name is Henry Jenkins, and that you don't have high enough clearance to view anything else about him.
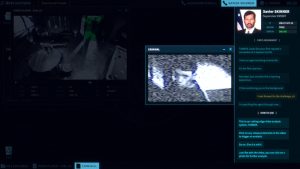
Check the name list found on the victim (image #2). There are several names crossed out, circled, and one that has been redacted. Agent Pendell says that this was not redacted when she sent it in.
If you search one of the crossed out names, you'll find the person is missing. But before you can look into it any further, Supervisor Skinner reprimands you for wasting FDI resources. Better get back to the case at hand.
Back at the video in the bar, you can instead highlight the car the killer pulls up in. This brings up a clear picture of the license plate.
Under applications, you may have noticed a second software option next to the HumanDB: the CarDB. It does exactly what it sounds like. Type in the car's license plate to find the owner, Ray Wells, and confirm that it has not been reported stolen.
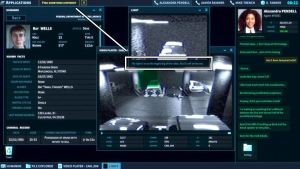
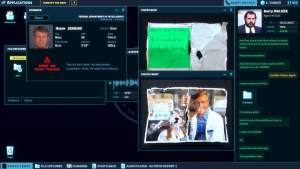
From here you can suggest the killer's name as Ray Wells. Agent Pendell will request his address, which you can find by searching for him in the HumanDB. At the bottom of the known facts table, you'll find the last known address (image #3).
Agent Pendell thanks you for your time, and your case is complete.
Case 2: Missing person Connie Moore


Be sure to check out the Most Wanted list that's delivered to you. For now, it won't have any relevance.
Your next case is to investigate the disappearance of Connie Moore, who claims to have been abducted by aliens. You still have access to the information from the previous case, if there's anything you'd like to check in the meantime.
Your goal is to find any inconsistencies, as Agent Walker does not believe she was abducted at all. Open up her testimony, phone records, and finally the camera's pictures. You want to find anything that doesn't add up.
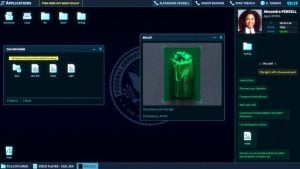
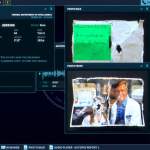
Connie's testimony and phone records line up with each other. Open up her camera, and search through the pictures to find a flying saucer, just as she described. On clicking the info button on the picture, however, something is off. Her picture seems to have been taken days after her disappearance (image #1).
This is the inconsistency you'll be pointing out. Agent Walker then requests that you find the location where she took the picture. Based on the time of the photograph and her testimony, you can see the exact location her phone pinged in the records. Click on the task of finding the photo location, and then the ping of 10:15 am, just two minutes after she took her photograph (image #2).
Good job! Your computer is now being taken over.
Achievement: Your first day
You finished your first day at the FDI!
Case 3: The murder of Ray Wells


Agent Pendell is back with an update on your first case. When she tried to find Ray Wells, she found a second homicide instead.
The video in this case is far trickier, as the most relevant information has been tampered with and cut out of the middle. At first glance, all you can see is Wells alive in one frame, and dead the next.
All you're looking for at first is something else that's different before and after the interference in the video. Above the car on the left, there are three lights, but after Wells' death, one has gone out. This is your first clue (image #1).
Pendell finds a bullet lodged in the broken light, and requests an analysis of the picture she sends. Click on the bullet picture to scan it, and tell her that this bullet is a .45 ACP (image #2).
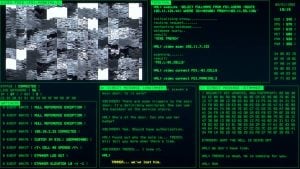
HAL contacts you again, and offers you a deal. In exchange for help in the future, you'll be given full access to the untampered tape of the killing. After you take the deal, they give you just that.
Run your analysis on the car that is now shown to come through the scene, and send Pendell the details of the car. Then the driver. Supervisor Skinner notes how strange it is that there's no match on the driver at all, but tells you to share the information with Pendell anyway (image #3).
Achievement: Ghost car
You sent the Ghost car model to PENDELL
For now, this case is complete, and HAL has a debt that needs repaying.
Case 4: The Cole files


At HAL's behest, you'll be talking to Agent Katherine Andrews about a mysterious case she was supposed to drop (image #1). With her help and HAL's, you'll be accessing case files you aren't meant to have, and to solve a case that isn't meant to be solved.
After some extra work, you'll be given access to the case files for the fire that killed Mia Cole. Agent Andrews believes this is not an accident, and it's your job to find proof of that.
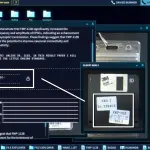
Upon opening the ash sample, you'll be given a user manual and several numbers to enter to use the ChemScan. Go through each detail of the user manual and enter the numbers accordingly (image #2).
- Ion size: The sample type is being called non-organic, so we'll be setting the ion size to 6.0.
- Delta V: The weight of the sample (in grams) x 100. The ashes are 4.2g, so the Delta V should be 420.
- Threshold: For solid samples, half the Delta V. This is 210.
- Sample Matrix Size: 5. If you are using an older version, it would be 4, but we can see that we are on version 1.04.
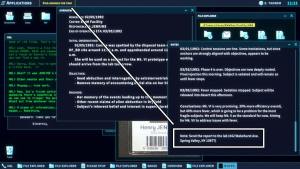
The user manual also explains how to read the output. In the CSLCA Data Report, you'll be entering the information provided by the scan (image #3). The CCVT (901), the pH (6.5), and the kHz values where there were spikes in the data. The numbers you are looking for are at the peaks of each spike, and they must be entered in order from the spike that was highest (in height, not number) to the spike that was lowest. The numbers I received were 9.24, 2.45, 1.55, and 10.60 in that order. These have a margin of error of 0.15, so it's alright if you aren't exact. If any of your numbers are inaccurate, you will get feedback to adjust your settings.
This analysis gives you your proof: there's evidence of gasoline in the ashes, ruling out an accident by electrical fire.
Case 5: The Dryfield graveyard

Agent Walker is back with more information. He's found over a hundred strange stones in the middle of the desert, where Connie Moore sought out her flying saucer. There are bodies under the stones, and your job is to identify one of them: a young girl. While he sends you the files, he lets slip that Dryfield seems to just be another name for Roswell.
You have access to an autopsy report and a photograph next to the body (image #1). Listen to the autopsy report, and search the photograph for clues. The man standing next to the girl, Gabby, can be analyzed. It's Henry Jenkins, the victim of the very first murder case. You still don't have clearance to view his file, but you now know he is a doctor, and that he knew the victim this time as well.
You still have access to the files of older cases, and you'll need them. Return to the list of names that Jenkins was carrying when he died, and you'll find the name on the back of the picture: Gabby. There are multiple Gabby's on the list, but the one you're looking for is Gabby Bruce, who you can now search on the HumanDB.
For the task of identifying her body, you'll just need to indicate her name in the HumanDB. Agent Walker will of course need more than a name, so he'll ask for proof. Luckily, the autopsy mentioned something peculiar about the body: an abnormal growth on the metacarpal bone. This same abnormality is listed in the HumanDB for Gabby Bruce (image #2). Select it to prove your case.
Walker receives intel about the second body he found, and this one comes with an ID already: Quinton Spence. He asks you to find the name on the list, and of course it is there.
Finally, Agent Walker wants you to find out what the crossed out names mean. If you haven't discovered it already, now is your chance. Search the names, both circled and crossed out, and you'll find the one thing the crossed out names have in common.
Indicate that their status is listed as missing.
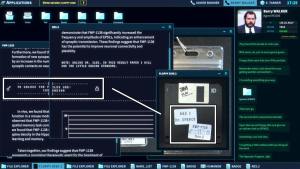
Walker sends you over some new information. There were two floppy disks in Spence's lab coat, and you need to find the password into the second one. Spence worked in the same facility as Jenkins, and you have a lot of new information to go over.
The clue on the back of the locked floppy disk says FMP-1138 and Res. 2, with an odd symbol between them. This is a clue on how to find your password.
Open up the two files indicated. FMP-1138 has a key symbol next to some text, and Res. 2 has the lock similarly. Place these files next to each other to find a hidden message: To unlock the files use 105Endian (image #3). Open the second floppy disk in your files, and enter this password.
Read Quinton Spence's confession.
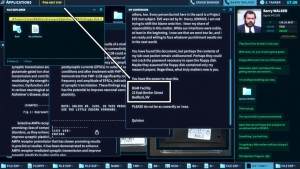
You now must find the next step, which he lays out for you plainly at the end: an address (image #4).
Walker plans to check out the address in the morning,and with that your day is finished.
Achievement: Second day
You finished your second day at the FDI!
Case 6: The BioM arson

Overnight, the BioM facility was burned down. It seems like another clear case of arson, and Walker has his suspicions. Go ahead and open up the file he sends you to help figure out what happened.
There is only one file: a 4 minute, 30 second security tape of the facility entrance. At the beginning, a mysterious bald man enters. At the very end, the warning lights go off, and the same man exits.
Scan this man to find your suspect. Once again, there is no match. This appears to be the same person who killed Ray Wells.
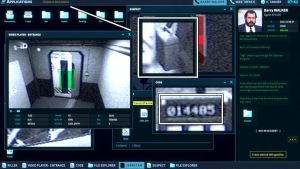
Analyze where this person enters the facility, using a code for authorized personnel only. In addition, you can analyze what he's carrying (a jerrycan, or a gas canister). This can is your proof of arson (image #1).
Walker asks if you can find the man in the HumanDB, which we already know you can't. He then asks for the door code, which you've luckily already found.
Enter the code into the text box manually. The code is 014485 (image #1).
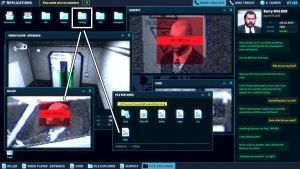
Walker is requesting a connection to another case. Open up the parking case and find your picture of the killer (image #2). Select this to show to Agent Walker.
The case can now further unfold.
Breaking into the evidence room

HAL will give you instructions going forward. Follow along and you'll un-restrict and un-redact some evidence that you'll need.
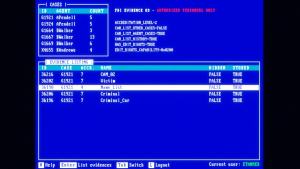
Once you've authenticated yourself, push H for help. This will bring up HAL who will walk you through every step of the evidence room process. Cases are listed by the name of the agent in charge (image #1).
While HAL is asking you to un-redact the name list (image #2), you can do the same process with the files for the Cole fire case. This will gain you an achievement and let you gain some additional insight into the case.
Achievement: Revert fire report
You reverted the fire report to access the redacted area.
Back at your own terminal, HAL will continue to lead you through your next steps of the investigation. The recovered HDD will take some time to load up, so HAL asks you to find the name that was uncovered from the list on Jenkins.
Open up the same file as always, in the Bar folder. Scroll down and you'll find the name in question circled repeatedly: Sacha Cole. Tell HAL what you've found.

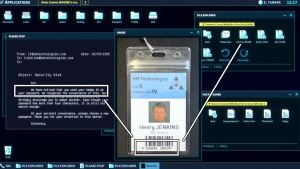
Your next task is to find the password for the Connie Moore file. Luckily, there's an email labeled "Please stop" in the HDD as well. Inside, [email protected] is asked to stop using his badge number as his password (image #3). Convenient!
Under Graveyard -> Body 1 -> Badge you'll find Henry Jenkins' badge number. Open up Connie Moore's file and get sleuthing.
HAL wants you to find something that can be used as a trap, specifically some kind of address. Read the overview and notes for information about what's really going on, and at the bottom of the notes you'll find your address (image #4).
Defuse the bomb


After having all the time needed in previous missions, this one's a step up in tension: you really do have less than 20 minutes to defuse this bomb.
Skinner tells you not to read the full manual, but to start from the beginning and go step by step. This is the correct way to go about your bomb defusal, as the steps are clearly laid out and there are no trick questions.
It's best to follow the in-game guide directly, and on my first playthrough I was able to complete the bomb with almost 10 minutes to spare. Here is a summary of how I defused my bomb for your use as well.
- What does the bomb look like? [Wires, controller, battery, keypad, display.]
- Tell me about the wires. [Power module (battery): red and black. Explosive: red and black. Display and keypad both: red, black, green, yellow.]
- Tell me about the explosives. What kind of explosive is it? [Gasoline.]
- Get the serial code. I want you to… Enter a code on the numpad. 0000. [ABM186511]
- You'll now be disconnecting the modules that 'require ticking.' There is a chart that helps determine this, and shows you how to disconnect each one (image #2).
- Cut a wire from the keypad. The yellow wire.
- Power off the screen. Cut a wire from the display. The yellow wire.
- Cut a wire from the display. The red wire.
- Power on the screen.
- Power off the screen.
- Cut a wire from the display. The green wire.
- Cut a wire from the keypad. The green wire.
- Cut a wire from the battery. The black wire.
Achievement: Save PENDELL
You defused the bomb and saved agent PENDELL!
Achievement: Third day
You finished your third day at the FDI!
Case 7: Surveillance files
HAL and Agent Andrews are hooking you into a new case. Mia Cole's apartment was bugged, but in following it HAL found a second video feed watched by the same person. Your goal is to find out who the second bugged person is.
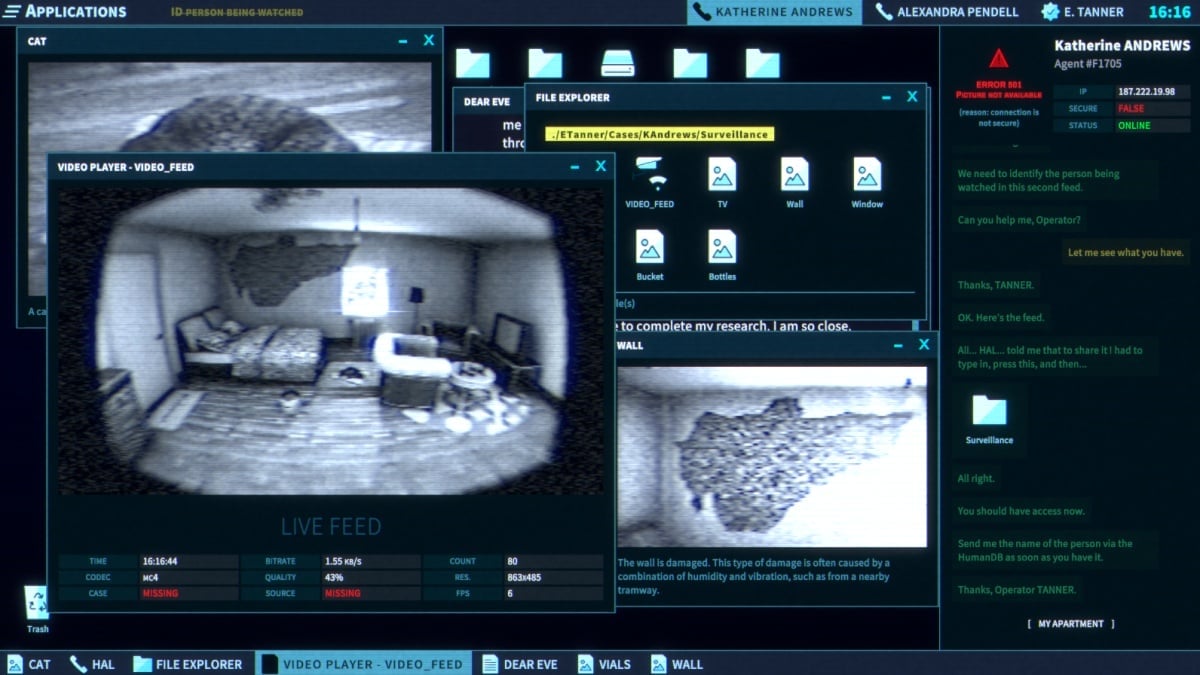
Open up the live feed and start analyzing whatever looks unique or out of place (image #1).
Several things are notable about the apartment, but most important is to listen to the audio cues as you analyze each piece of the room. How many times have you heard that cat's meow before? How many times have you gone home after a long day at the FDI and heard the sound of clinking of beer bottles?
When you choose to ID the person being watched, you can choose your own name in the upper corner of the screen.
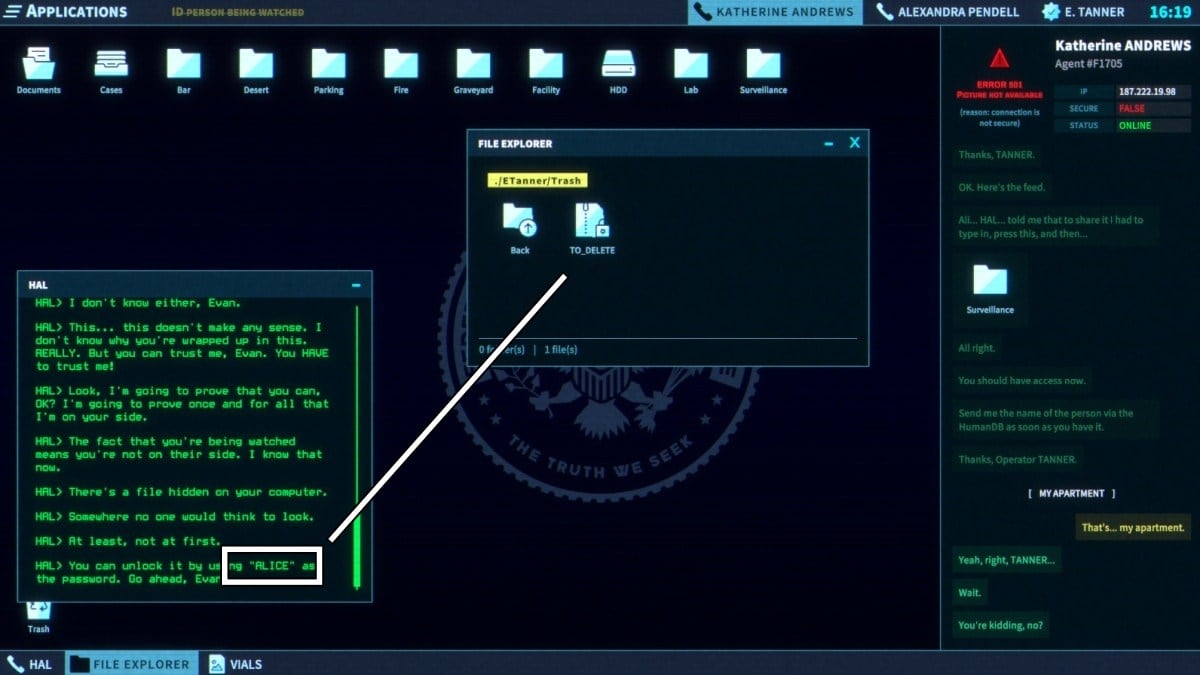
HAL needs to earn your trust. You may have noticed while poking around before, but there is a file in the trash called TO_DELETE (image #2). This is password protected, but HAL has just given you the password: ALICE.
You can now read her confession to you. Her true identity revealed, you are now on equal terms.
Achievement: Uncover HAL's identity
HAL trusted you enough to give you her identity.
Case 8: The interrogation of The Ghost and breaking into the FDI
Agent Walker has hit a snag in his investigation: The Ghost will talk, but only to you. He'll put down the phone between himself and The Ghost, and it's time to talk.
How you navigate this discussion is entirely up to you. Lie, tell the truth, and ask whatever questions intrigue you about The Ghost. He will be happy to give you most of the lore you request, and if he truly can't say anything about a subject, he'll usually give you insight into something else or another question for free. Though this discussion is high tension, you cannot fail it; your only risk is missing some lore.


Agent Andrews is coming to your building to find the location your surveillance feed is going to. HAL gives you access to the security cameras on the 11th floor (image #1), where Andrews will be navigating. You'll be providing your help.
Open up the Level 11 video feed and click on the first button, EN, to trigger Andrews calling you. You'll see her exit the elevator and head towards the door. However, the code she has doesn't work, and you need to make an immediate change of plans.
Andrews will be coming down to Floor 8 where you are, and taking the emergency stairs back up. HAL will give you a copy of the floor plan, and your goal is now to guide Andrews to the emergency stairs safely.
- Take the door to your left.
- Take the hallway to the right.
- Take the hallway on the left.
- Left.
For an additional achievement, you can guide Andrews into Supervisor Skinner's office instead (image #2 shows both the correct and the secret achievement path). There are no negative consequences for this.
Achievement: SKINNER's office
You led ANDREWS into SKINNER's office.
Andrews asks you to follow her through the emergency stairwell on the cameras. You can do so by returning to the cameras and choosing the ST camera.
After she gets inside, choose the HW camera to follow her progress. She stops when people start walking the halls, and asks you to give her the all clear when they're gone. Once the option comes up to say she's clear, she's clear.
To get into the locker room, you'll need a code that HAL can't give you. Instead, HAL gives you a code you'll need to enter into the terminal, found under your applications (image #3).
Think of this puzzle as a sort of Wordle but with numbers. When you enter a number that's entirely wrong, you'll get a red - in that place. When it's a correct number but the wrong spot, an orange * appears; a correct number in the correct space is =.
The correct code is 5 digits long: 73512.
Keep your camera on Andrews in LK until she asks you to check that the way to the server room is clear. On the SV camera, you'll see a secretary. Scan her face to find Rebecca Davis. Tell Andrews that the way is blocked, and HAL will ask you to find who the secretary is.
Provide the name on the HumanDB.
HAL is going to patch you through to Rebecca Davis (image #4). Bluff your way through a conversation as if you were IT. She can see your name and that you're an operator, so you'll need to tell a few lies to get through this.
If you tell her to take a break, and that you'll need at least an hour, Rebecca will vacate the office. Return to LK until Andrews has picked the lock, and then follow her to SV.
Follow your instructions from HAL as the FDI enters into a lockdown.
HAL's terminal


After the events of the lockdown, you find yourself using HAL's terminal. You're speaking to Skinner, revealing that he has been your way in the whole time.
Follow the yellow prompts, and complete the story.
Watch out for the post-credits scene!
Achievement: Finish the game & Achievement: Watch the credits
There's more to it...
How to unlock all achievements in The Operator
If you've been following this walkthrough directly, you should have completed all achievements already! If you need a quick guide to any you've missed, here is your list. Beware spoilers for the story beats of the game.
- Clicked 1234 times -- A motivated operator clicks a lot!
If you click around plenty during the course of your investigations, you'll unlock this naturally. - RTFM -- You read the manual!
When you can access the terminal application on your computer, type "help" to pull up the manual. You do not need to read any of it to unlock this achievement. - Welcome to the FDI -- You logged in your computer for the first time.
- Your first day -- You finished your first day at the FDI!
- Second day -- You finished your second day at the FDI!
- Third day -- You finished your third day at the FDI!
- Save PENDELL -- You defused the bomb and saved agent PENDELL!
- Uncover HAL's identity -- HAL trusted you enough to give you her identity.
- Watch the credits -- There's more to it...
Stick around after the end of the credits to see a final scene, hinting at the true end to the story. - Finish the game
- Ghost car -- You sent the Ghost car model to PENDELL
When you're investigating the murder of Ray Wells, you can scan the car and determine the make and model. Send that to Pendell before you scan the killer's face to unlock this achievement. - Revert fire report -- You reverted the fire report to access the redacted area.
While HAL is having you revert the redacted name from the name list, you can also, without her prompting, go into the fire report from the Cole files. This will show you a little more information about what was being hidden in the Cole case. - SKINNER's office -- You led ANDREWS into SKINNER's office.
During the FDI break-in, you'll be leading Agent Andrews around using a floor plan. You can use this to have her walk into the supervisor's office instead of leading her to the correct area. There are no negative consequences for this action, for reasons made obvious when you have access to HAL's terminal.
For more puzzle game guides, check out A Little to the Left: Seeing Stars Walkthrough – 100% All Achievements on Pro Game Guides.