
Until Vana is Healed is a standalone World Quest that can be considered a sequel to Vimana Agama. After Aranyaka: Part II, you meet up with Ararycan to find that the little Aranara is still stressing about Vana's deteriorating situation. Help him solve riddles to find a coveted research document, and hand it over to Jazari to deactivate the giant Ruin Grader's core in Dev's Cavern once and for all.
How to unlock Until Vana is Healed Sumeru World Quest in Genshin Impact
To unlock this World Quest, you must first complete the following prerequisites:
- Aranyaka: Part I - Woodland Encounter
- Aranyaka: Part II - Dream Nursery
- The World of Aranara
- Children of the Forest (including all the World Quests and questlines required to complete this quest)
- For A Better Reunion
- Festival Utsava (including all the mini World Quests required to complete this quest)
Once all the above prerequisites are done, you'll automatically unlock Until Vana is Healed.
How to complete Until Vana is Healed Sumeru World Quest in Genshin Impact
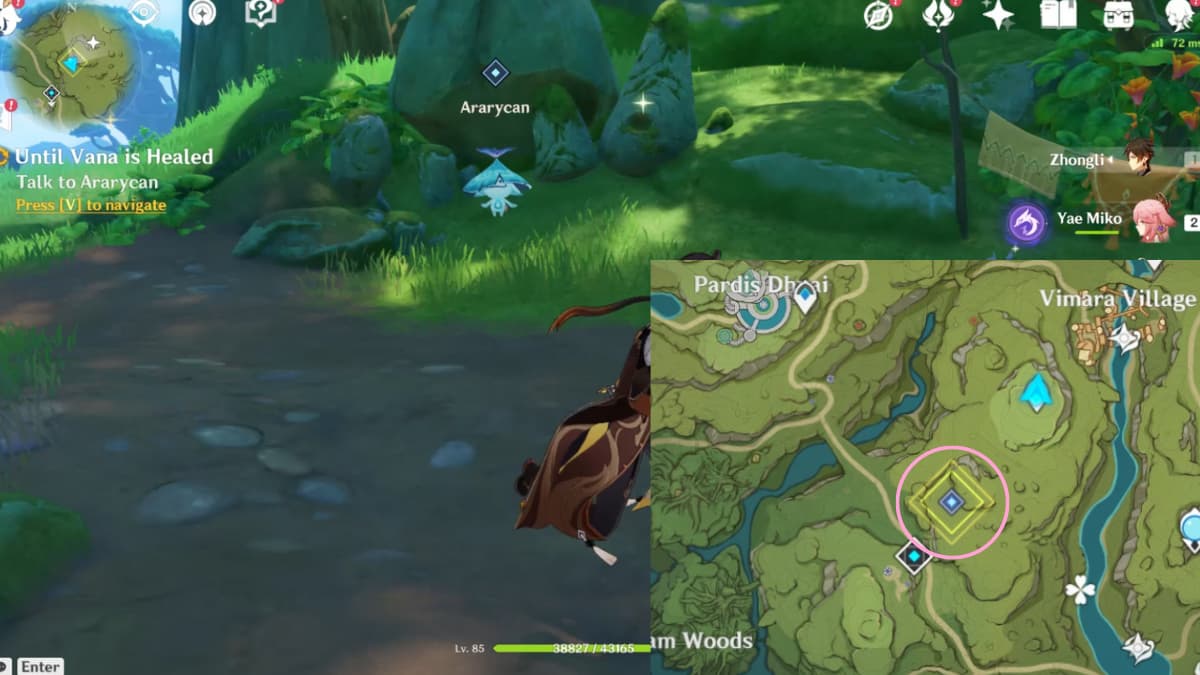
Follow the quest marker to Ararycan's location south of Vimara Village. Approach him to begin the World Quest. Ararycan will then ask you to get rid of a nearby Withering Zone.
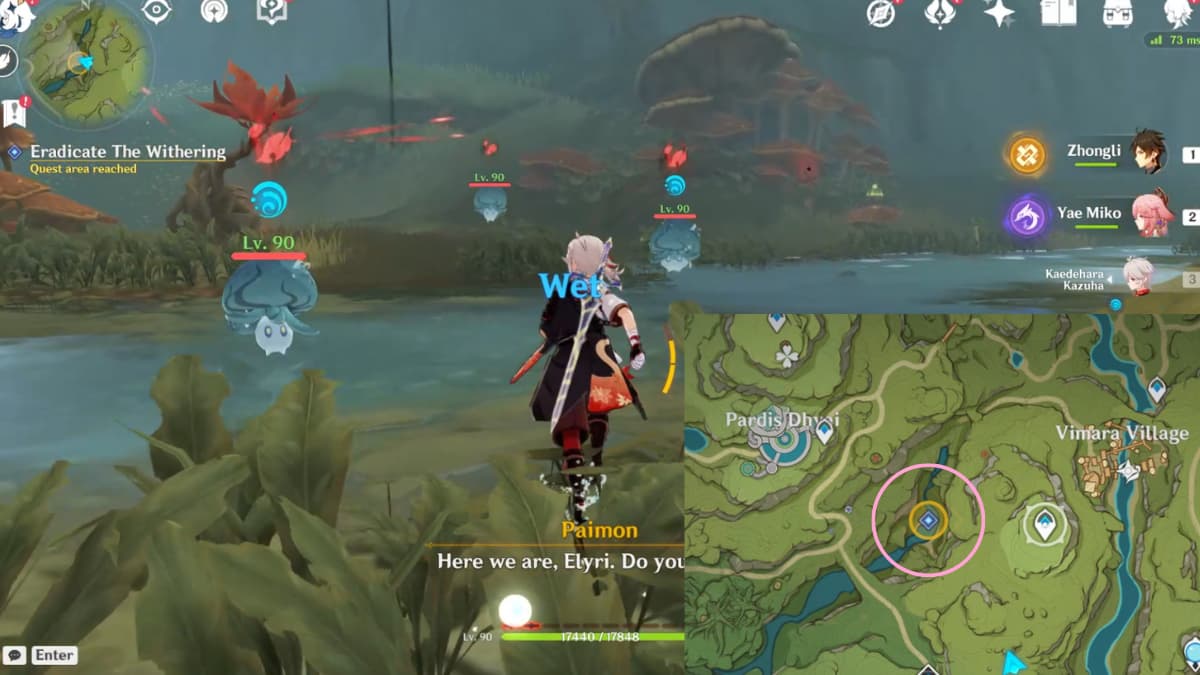
Follow the quest marker to the west of Vimara Village, where you'll find a Withering Zone. Get rid of the Withering to complete the objective. Next, follow the quest marker toward a cave entrance with a glowing spot. Two Abyss Mages (Cryo and Pyro) will spawn—defeat them to prompt dialogue with Ararycan and proceed with the quest.
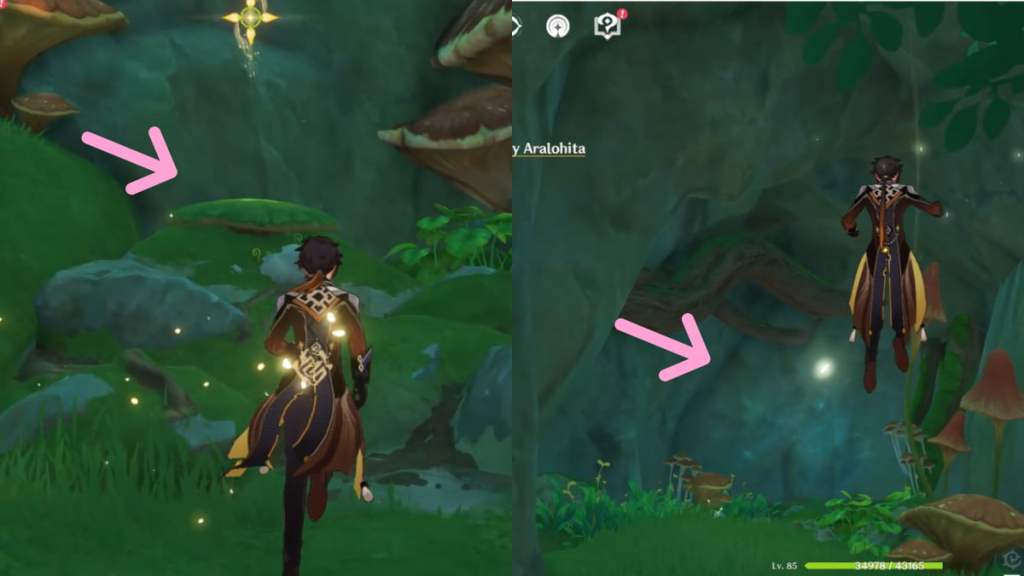
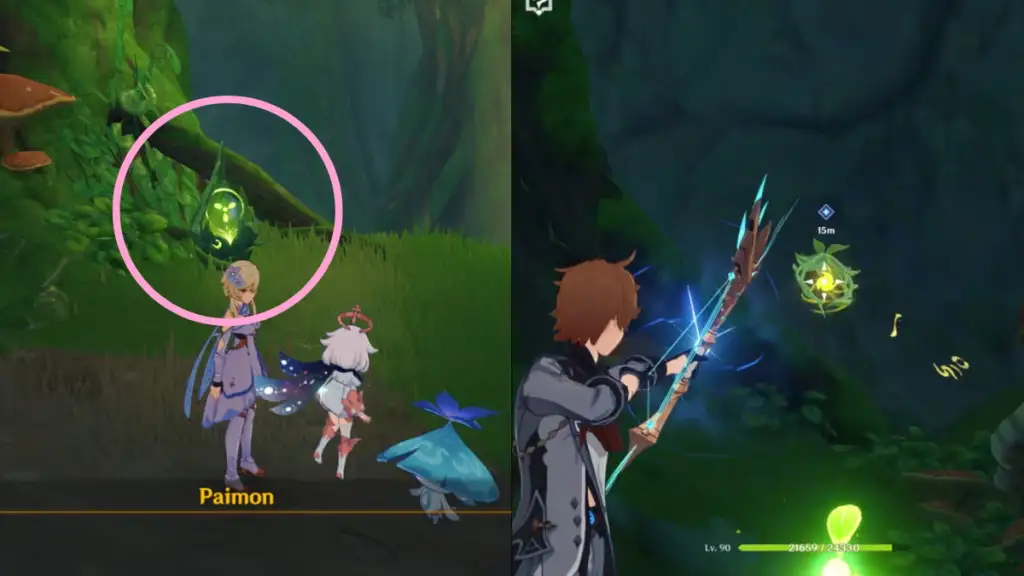
You'll find a Bouncy Mushroom right in front of you. Use it to jump toward the cave entrance. Once inside, follow the path forward until the bright clearing is in sight. Follow the quest marker by gliding toward the right side, where you'll find a glowing spot in front of runes. Interact with the runes to continue with the quest.
Search for the answer(s) to the riddle
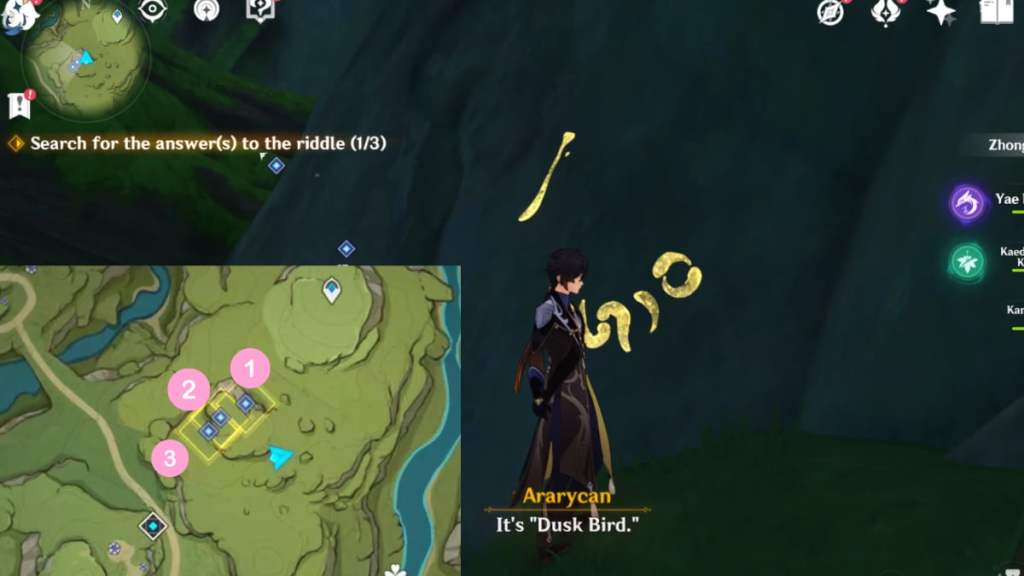
In this segment, three quest markers will appear in the World Map and mini-map, indicating the locations of the three answers. You can interact with them in any order, but you must memorize the order that you interact with them. For example, if you interact with the rightmost answer first, then the middle, then the left, make sure to take note of this order as you need to remember it for the next puzzle.
From right to left, you will get the following clues:
- Dusk Bird
- Shroomboar
- Rishboland Tiger
Once you've interacted with all three clues, speak with Ararycan to proceed.
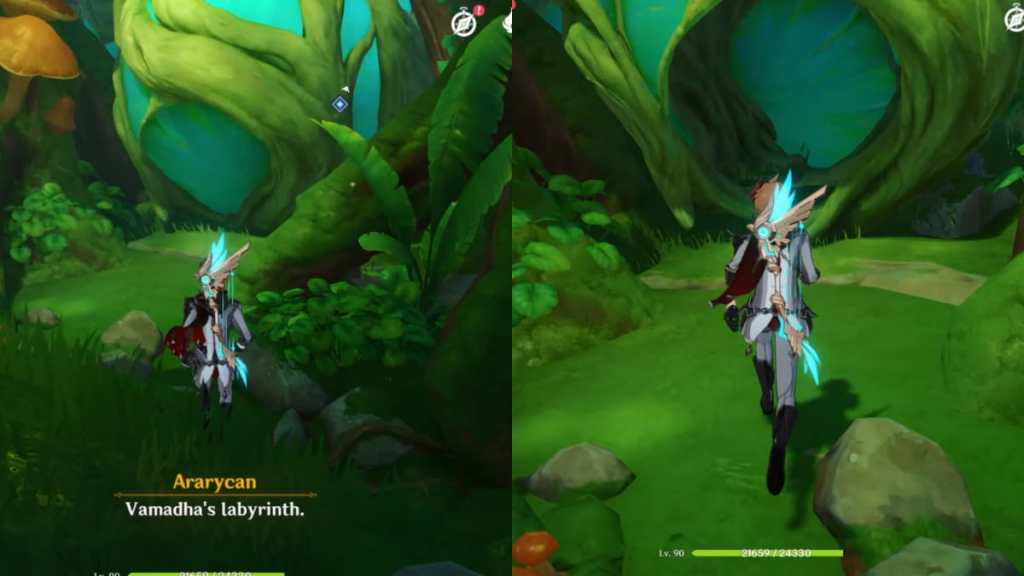
Solve Aralohita's riddle
For this part, you need to summon Dendrograna from the nearby Auspicious Branch and shoot the floating projectiles in front of the runes. You must shoot them in the same order that you activated them in the previous segment. For example, if you activated the middle, then left, then right, then you should shoot the middle, then left, then right.
After shooting all three projectiles in the right order, follow the quest marker in front of the hollow tree and equip the Vintage Lyre. Play the Rhythm of the Gloomy Path (mi > re > mi > re > la on the first line) to enter the labyrinth.
Related: Genshin Impact Where Are the Fierce Creatures? hidden World Quest guide
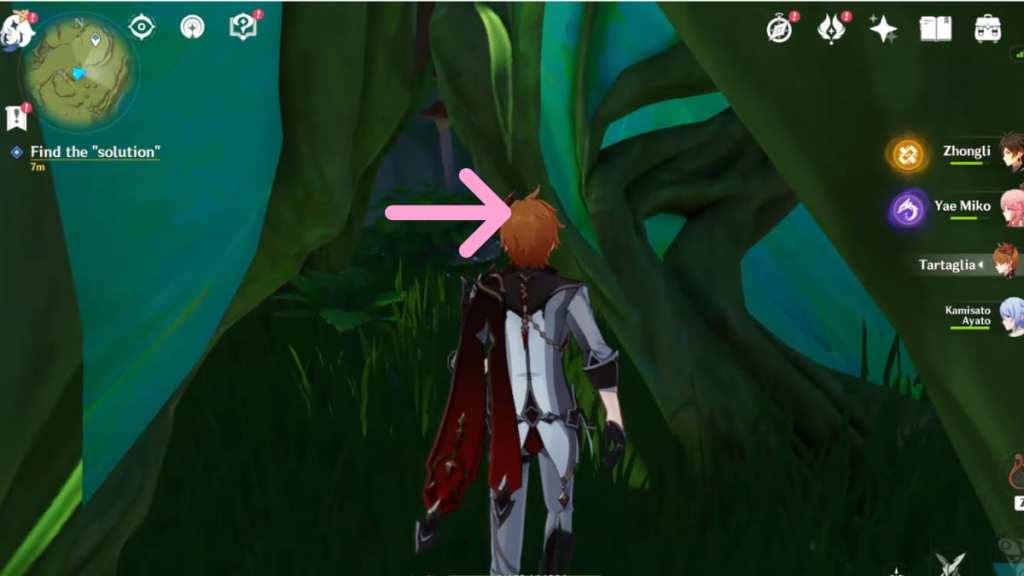
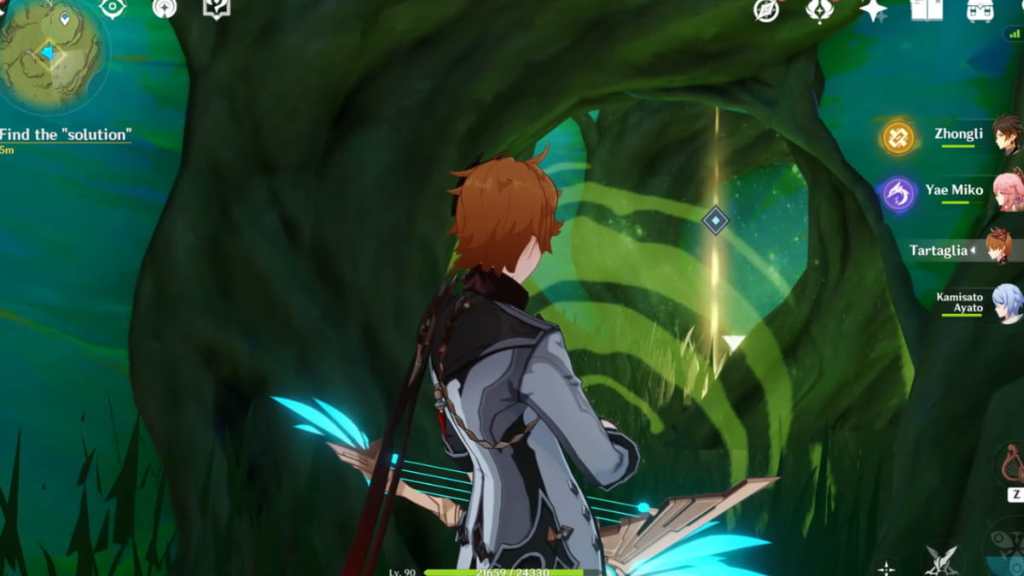
Find the "solution"
This labyrinth puzzle is a little confusing, so make sure to follow the steps below in the exact order to solve it. First, step in front of the giant obstacle and play the Rhythm of Vamadha (fa > mi > mi > re > do on the first line), then attack it twice so that it rotates two times. This will create an entrance, allowing you to enter the pod. Step inside and attack twice so that it rotates two more times.
This part is optional, but we recommend that you step out and turn left until you see the purple mushrooms in front of you. There's a pod to the right, where the arrow is pointing in the image above. Step on it to find a Common Chest that you can loot.
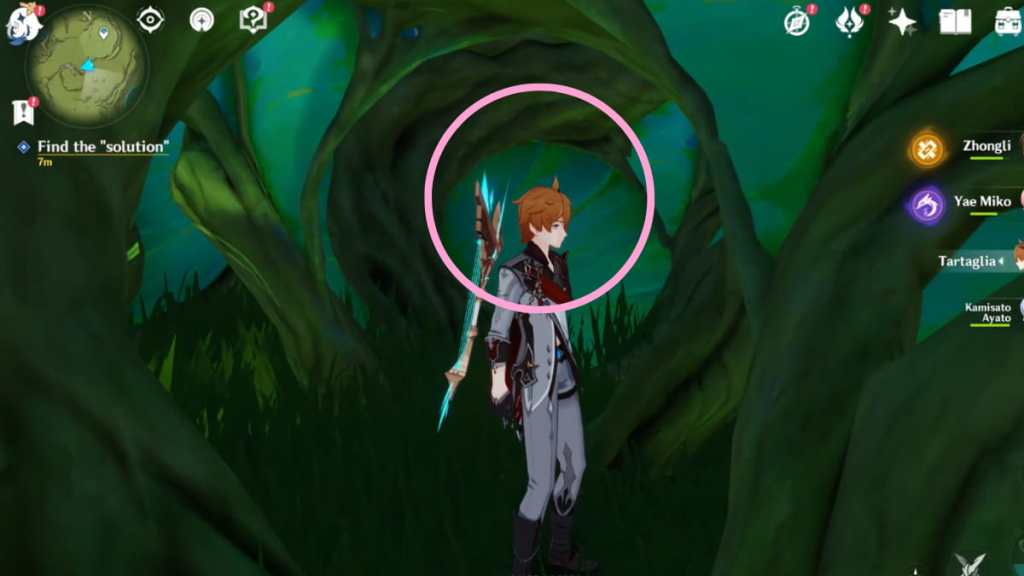
After looting the Chest, turn back and return to the first pot, then look in front of you, where you will find yet another pod. Step inside the pod circled in the image above and attack it twice so that it rotates two times.
If you did the above steps correctly, you'll see the exit in front of you, marked by a glowing Investigate spot. Approach it and interact with the item on the ground to prompt dialogue with Ararycan.
Ask Jazari for information
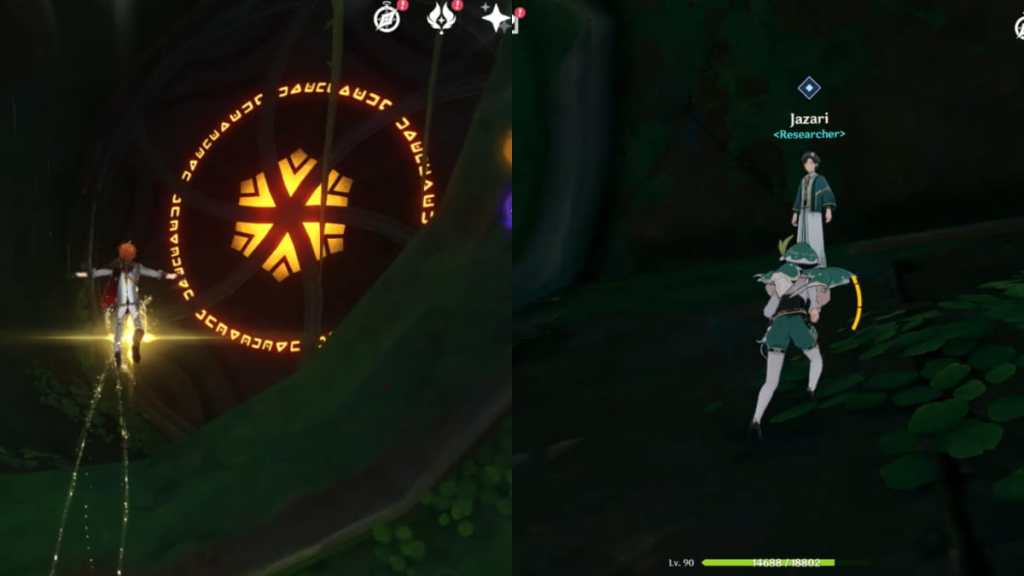
Follow the quest marker toward the underground ruins in Devantaka Mountain using the Teleport Waypoint southeast of the giant Ruin Grader in the World Map. Then use the Four-Leaf Sigils to propel yourself forward and enter the Ruin Grader Core. Once inside, do not glide down. Instead, immediately turn left to find Jazari. Speak with him to proceed with the quest.
Go to the Dev's Cavern & Protect Jazari
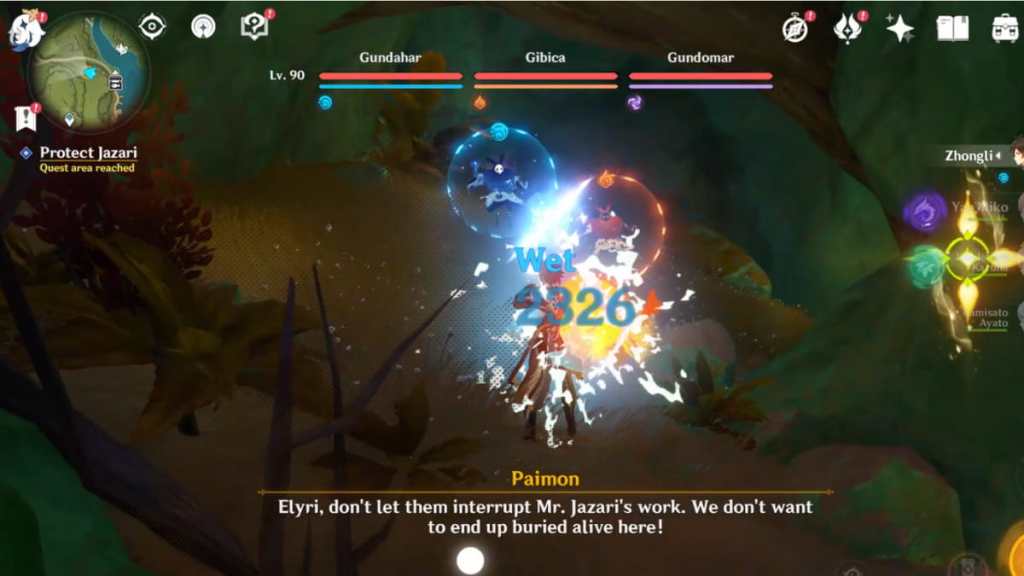
Follow the quest marker toward the entrance to Dev's Cavern, which leads further underground. Jump down the entrance and follow the path until you see the glowing spot. Approach it to prompt dialogue with Jazari.
Once that's done, three waves of Abyss Mages will spawn (Electro, Pyro, Hydro). Defeat them to protect Jazari. After, glide toward the Ruin Grader's core at the center and speak with Jazari to complete the World Quest. You'll unlock the Wonders of the World Achievement called Walking with Water and Wind.
Check out our Genshin Impact Static Views Sumeru World Quest guide and How to complete the Drusus Riddle Sumeru City bulletin board puzzle in Genshin Impact to unlock more content in Sumeru.