
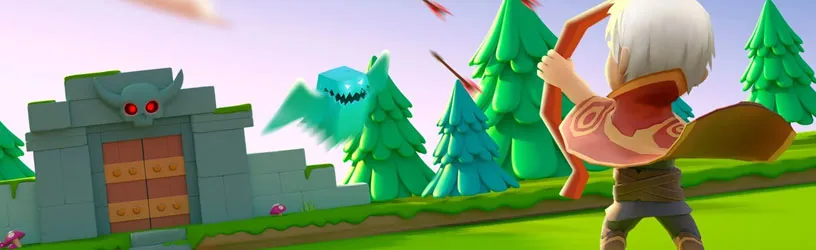
Our Archero Chapter 3 Tips & Tricks Guide will walk you through some tips and tricks that should help you complete this stage and all its levels in the game. The third chapter of Archero is the first to introduce enemy phase spawn levels to the game. Instead of completing one level after another, you enter a room and have to kill multiple waves of monsters. Each wave has a timer, so if you don't complete the previous wave before that timer goes off, then the next wave will spawn! Once you complete all the waves, you'll get your experience and get access to an Angel.
Archero Chapter 3: General Tips & Ability Choices
Ability Choices
You are going to just pick the pretty standard stuff from the tier list for chapter 3. Ricochet (not as good against the final boss), Multishot, Front Arrow, Bouncy Arrow, Piercing (if you aren't using Tornado), Diagonal Arrows, Attack Boost, Attack Speed Boost, Crit Master, HP Boost, and Blaze are your primary targets. The other one you'll probably want is Invincibility Star and/or Shield Guard, because these can help against the dragon boss that gives people a tough time.
General Tips
- Always try to grab the buff from the Angel in the middle of the level. Only take health if it's absolutely necessary. You will get a heal from the angry chest right before the boss, so you should hopefully be able to avoid losing up until then. You can also sometimes get a random heal from an enemy you've killed.
- If you get the Health Boost option, then this will actually give you a small heal because it increases your health pool by a percentage. So, if you need to heal, you might just want to take the boost instead.
- Always be very careful around environmental hazards like spikes. While they are usually pretty easy to avoid, sometimes they are placed in a way that can set you up to take unnecessary damage. Go slow around these to make sure you don't take a hit!
- Focus on dodging rather than damaging. It's easy to get in the habit of just wanting to deal a ton of damage, but it's usually better to focus on maneuvering around projectiles and enemies to preserve your health.
- Always try to take the Devil's offer. This is a pretty valuable ability, and unless it's a really bad option, you should always be trying to take it. I generally avoid the walking on water and walk through walls abilities. They aren't bad, but I don't find them super useful.
- Use the water spots on the map to separate yourself from melee monsters. They will have to walk around these obstacles to get to you, and that gives you time to deal a bunch of damage before they do!
- Try to kill as many monsters as you can as quickly as possible. You don't want to get overrun by multiple waves, so try to get as many kills as quick as you can.
Archero Chapter 3: Enemy Tips
In chapter three you get a pretty good mix of enemies from the previous two chapters. You should be pretty familiar with them all, if not, there's some tips below to help you out!
- Rock Elementals: These are the boulder looking guys from chapter one. They fire out a few projectiles wherever they are facing. Pretty easy to dodge, just look for the areas that are open.
- Blue Rock Elementals: Very similar to the regular version, but they throw more projectiles.
- Normal Haunted Trees: The trees jump up in the air and drop down firing projectiles out of the front, back, left, and right. They are pretty easy to avoid, but if you're getting a bunch of spawns you'll need to be more careful about dodging these projectiles.
- Blue/Gray Version: Similar behavior to the normal version, but these fire projectiles from diagonal directions as well.
- Green Slimes: Simple melee monsters that kind of just randomly jut around the map. They don't target you, so you just need to kill them quickly.
- Red Slimes: Very similar behavior to the green version, but when you deplete its health, it will spawn a couple of green slimes in its place!
- Bats: The bats kind of just hover for a bit and once they target you they will bolt forward towards you. Just keep your distance from these if you can, or wait for them to lock onto you and immediately move.
- Bomb Ghosts: They lob single bombs at you. Pretty easy to dodge, but they do have a small explosion area that deals damage.
- Red Bomb Ghosts: Similar to the regular version, but these ones lob multiple bombs at you. Always try to remain moving against them, because the bombs these ones throw leave a small fire hazard where they drop.
- Purple Stationary Plants: These are the ones chapter one, they stay still and fire off projectiles. They will lock onto your current position, and then fire in that direction. Just wait for them to target, and then move out of the way!
- Skeleton Archers: They are the same archers you fought against in the first chapter. They target you with a thin red beam, and after a second they will fire off an arrow based on that red line. Very easy to avoid if you just keep moving, but if there's multiple of them, look for the gap between the red lines to find a safe spot.
- Bouncy Archers: If you get further into the chapter, you'll go against the archers that have arrows that bounce off the walls. It's a similar strategy as the previous ones, you just need to more actively find the gaps between the red lines.
- Blue Spiders: They are kind of just like the green slimes from chapter 1, but they're a bit more beefy and move quickly. They don't aggressively target you, so just try to stay out of their way.
- Hiding Plants: Not sure what to call these monsters, but they are brown and they burrow under the ground and pop up to shoot projectiles at you. The best way to deal with these is to stand still for a slight bit and let them aim at you, once they've locked on the area they are going to fire, you can move. They won't shoot elsewhere once they've locked to the spot, so you can safely avoid the flying red orbs. It's also important to note that the walls won't block the projectiles! These can be a bit annoying if you are playing a slow weapon, because you might not get a lot of shots in on them.
- Purple Spotted Plants: These kind of remind me of the Piranha Plants from Mario games. They will target you pretty quickly once they see you, and you'll see a red path on where they are going to fire. These enemies shoot quite a bit faster than the archers from the first chapter, so you'll just want to find a spot on the map that isn't covered in red immediately. They do take a bit afterwards to target you again, so you should be able to burn these guys down pretty quickly.
- Tornado Skeletons: These monsters fire off tornadoes that go left and right horizontally from where they fired. These will actively attempt to track you, while still doing their whole weaving left and right. The walls stop these from hitting you, so I've found that's the easiest way to avoid them. Put yourself close to the side walls and hopefully they will fire off a whirlwind and it will just get lost into the wall.
- Green Snakes: These are melee styled monsters, and they will kind of move around and eventually lock onto you. Once they lock on, they are going to lunge forward after you! So, always be moving around these guys, and try to stay as far away from them as possible.
- Purple Crocodiles: These dinosaur looking guys are pretty big and bulky and fire a large amount of flames once they've settled in on a target. The key to these guys is getting a feel for the distance you need to be away from them and their flames. The flames they fire have a specific reach distance, and if you learn that you can always avoid them and just easily hit them with your weapon. Once they lock in, they won't move until they complete their attack. So, you should be able to avoid these pretty easily.
- Yellow Skeletons: Standard melee style of monster, they split into multiple skeletons when you kill the first phase.
Archero Chapter 3: Boss Tips
Bat Boss
The big bat boss has similar behavior to its small counterpart. It will target you, and then lunge forward which is fairly easy to avoid. The big difference with the boss, is that it fires out multiple green projectiles in kind of a spiral as it spins towards you. You'll need to dodge these as well as dodge the boss to avoid damage. They aren't too difficult to dodge as long as you take your time and only fire off a couple of projectiles at a time before moving.
Big Hiding Plants x2 Boss
The big Hiding Plant is back and this time it brought a friend. They have all the same attacks you remember from before, which is the fireball that leaves fire on the ground behind, the multiple angled projectile, and then the just big mess of projectiles. The good thing about these is that there's a pretty nice trick where you can get up right next to one of them and be fully protected from the attacks. However, now that there's two of them, you will be vulnerable to the other one's attacks. So, try to stay in close to one of them, and attempt to move around it to avoid the projectiles from the other. You can also get lucky and they will kind of stack on top of each other which should protect you from all the attacks.
If you don't have luck with staying extremely close to them, you can try staying as far away as possible. The projectiles spread out the further away you are from them, so you can more easily avoid them if you create some distance between yourself and the plants. Try to kill one quickly, then you can get up really close to the surviving one.
Big Stationary Plants x2
These are like the purple plants from chapter one that are stationary and fire projectiles. The difference with these are they are super sized, and they lob a ton of red projectiles at you. The real key is to stay as far back from them as possible, but also only focus on damaging one of them. You need to eliminate one as quickly as you can so you'll have less projectiles to worry about. So, pick one to deal damage to by staying on to the left or right side until one goes down.
Dragon Boss
This is the hardest and final boss of the chapter. If you are missing health before heading into it, make sure to grab the heal from the Angel! The dragon takes up the majority of the room, so you're going to have to be constantly moving and on your toes. He drops lightning circles just like the Lightning Turrets from chapter two. Those are fairly easy to avoid, the hardest part is the other attacks.
The dragon will launch a wall of lightning that goes down towards you. It has a couple of gaps in between it, so you'll have to make a precise move to these safe spots to avoid damage. Keep an eye on the furthest part of the room, you should be able to see where the gaps are a bit ahead of time this way.
The other attack it does is a lunging forward-ish attack that fires out small lightning balls that will bounce around the room. These pile up a bit overtime, so you'll need to be trying to dodge these as much as possible.


2 Comments
Archero Chapter 3 Guide – Tips & Tricks, How-to Beat the Dragon Boss!
This site is protected by reCAPTCHA and the Google Privacy Policy and Terms of Service apply.