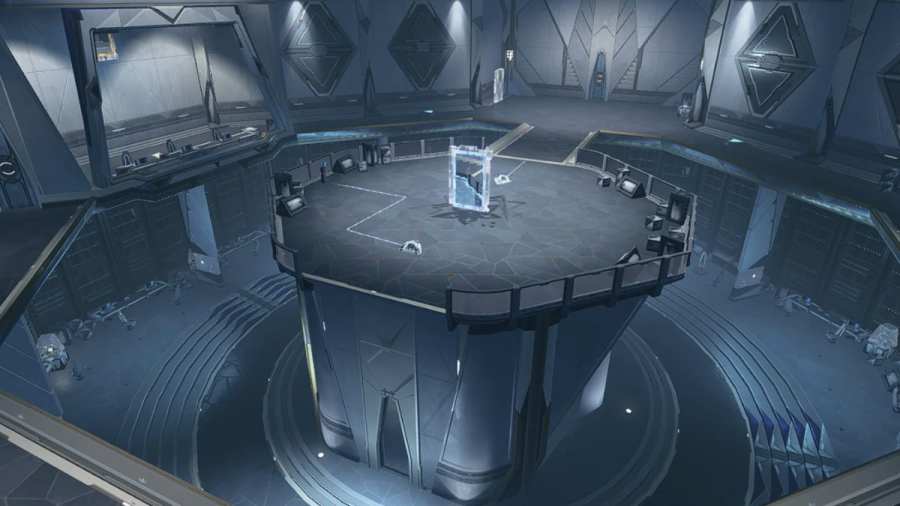
In the Wuthering Waves quest called From the Echoes of Destruction, you must clear the corrupted data and head to the lower level of the building, which will unlock the underground section of Tethys' Deep. If you're having trouble completing it, follow my steps below.
Clear the corrupted data and head to the lower level solution in Wuthering Waves – From the Echoes of Destruction
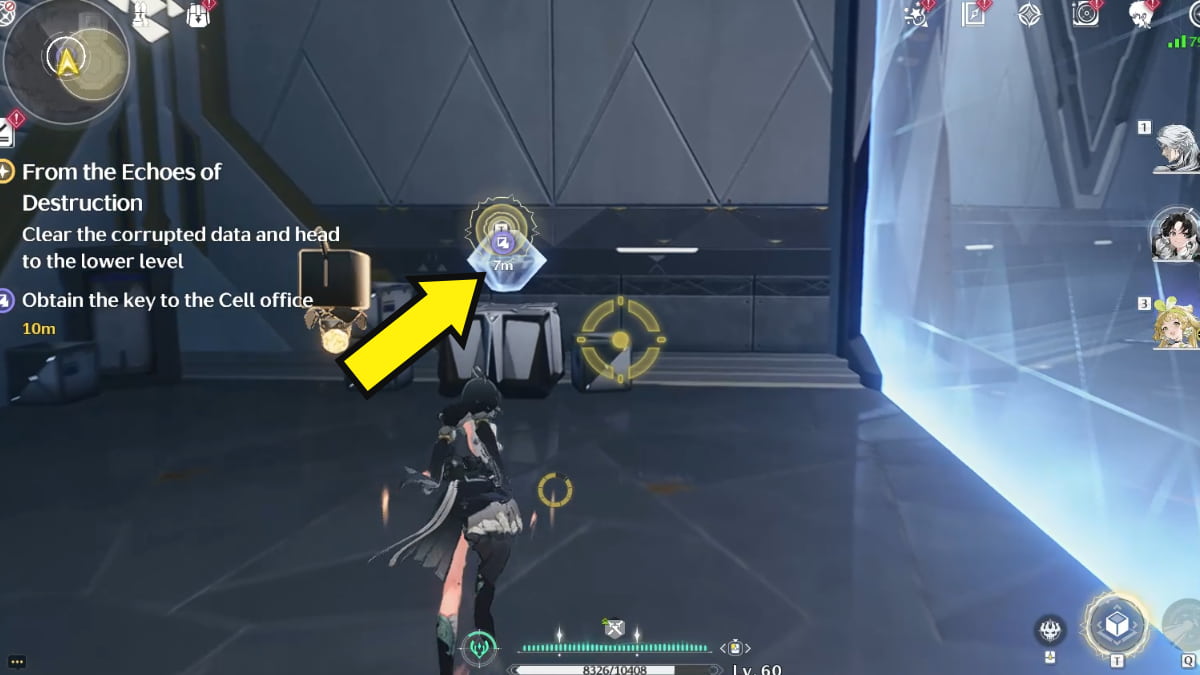
Upon starting the puzzle, your first goal will be to obtain the key to the cell office, but it's blocked by a wall that you can't bypass. However, on the opposite end of the wall, you'll find a door blocked by cells. Target and attack it using Normal Attack, which will open up the door for later.
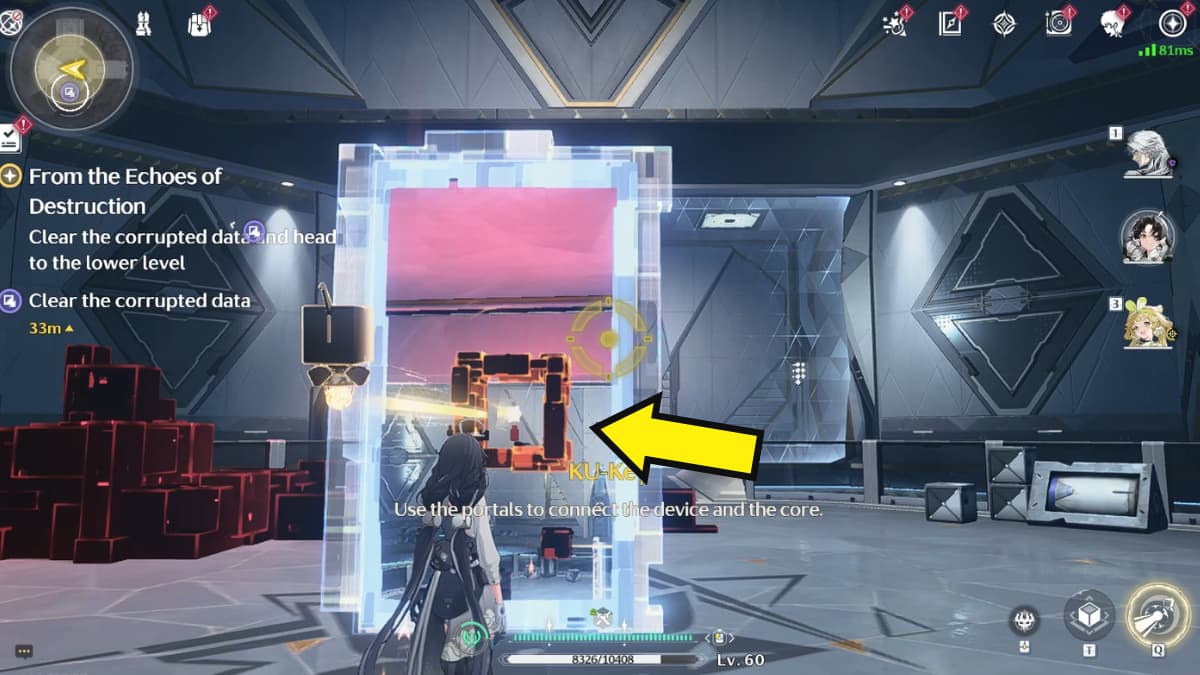
Since you still can't bypass the wall, head to the center of the room to find another door. Go through the door to conveniently get to the other side of the wall, where the key is located.
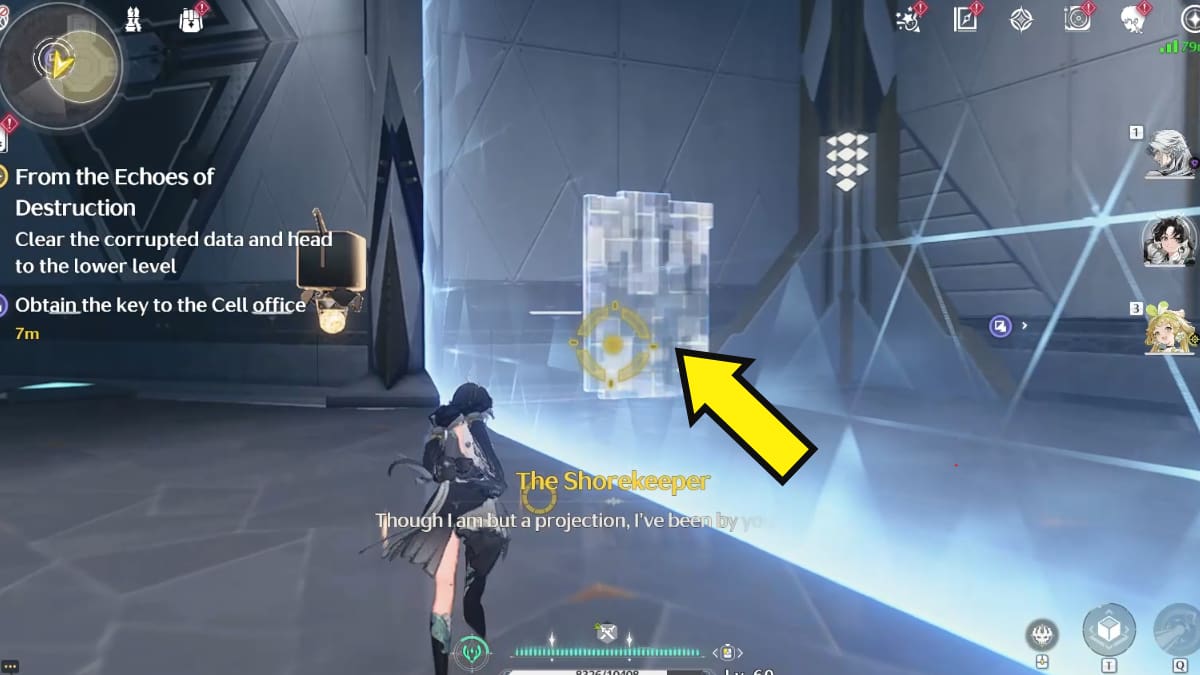
Upon entering the door, you'll find yourself in the room blocked by the wall. Levitate the key (T button on PC) to trigger a small cutscene causing the side of the room to be blocked by corrupted data cells.
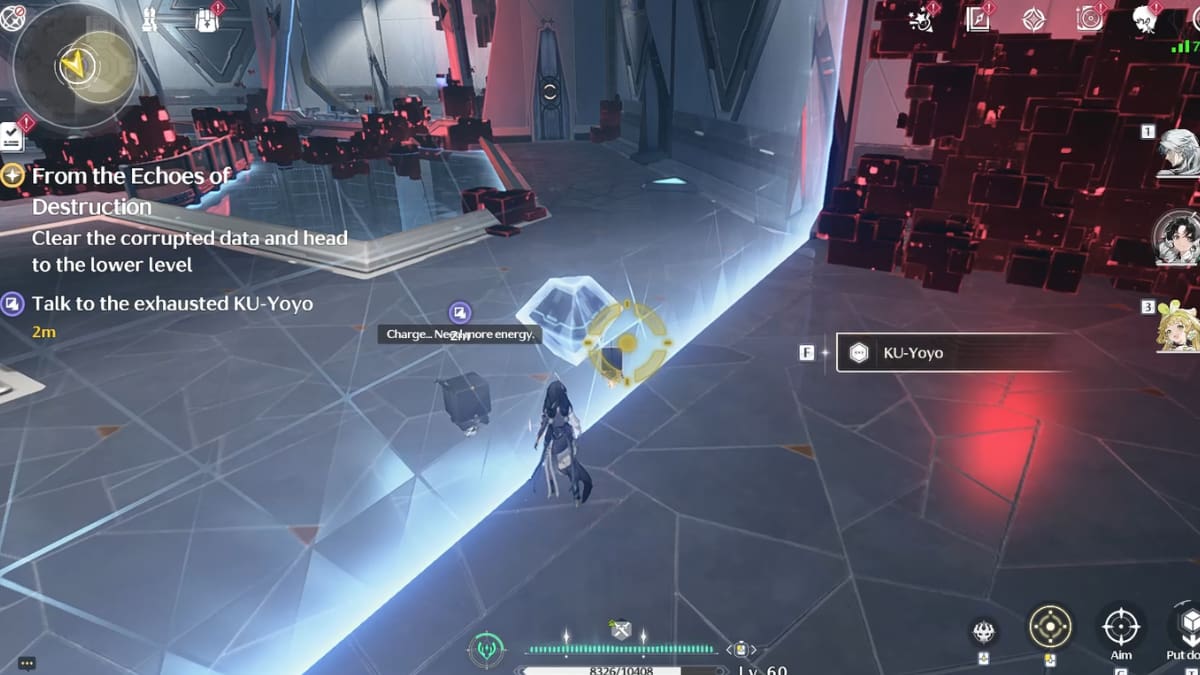
Wait for KU-Yoyo to approach you from the other side of the blocked wall. When the robot is close enough, interact with it to receive instructions and trigger a small cutscene.
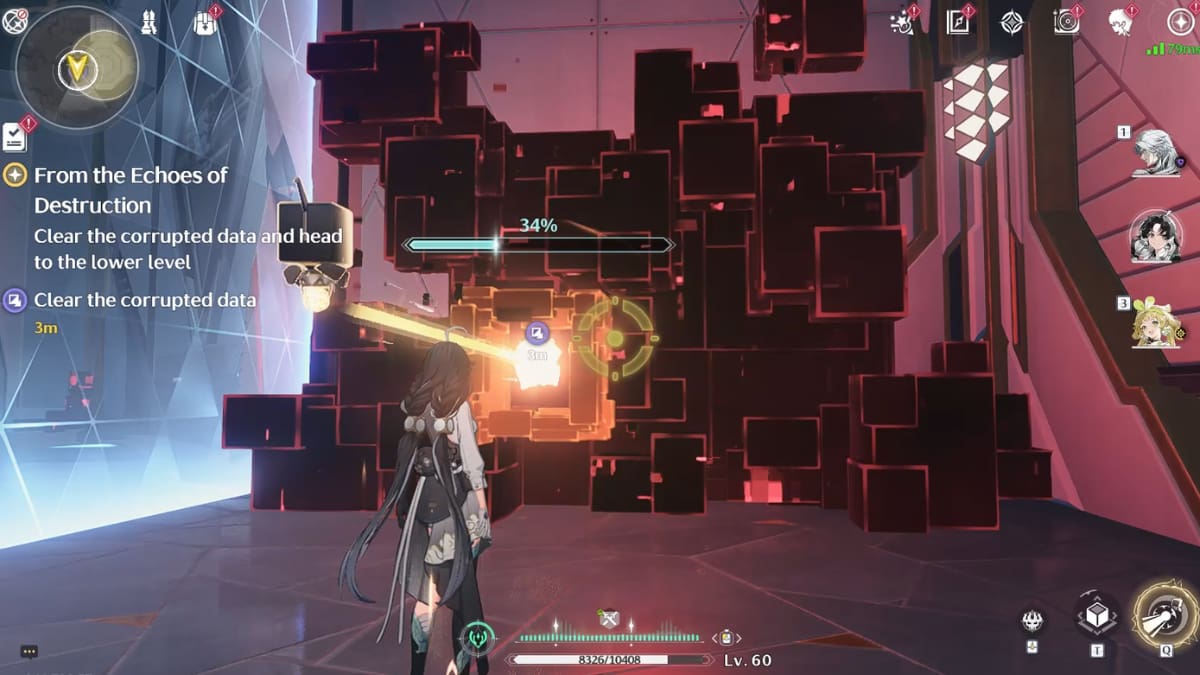
Next, you need to clear the corrupted data. Approach the corrupted core, then press and hold the Q button to use the robot's ability to destroy it.
After destroying the corrupted cells, the door you previously opened will reveal itself, allowing you to enter. If you didn't unblock this door at the start of the objective, you can do so now using the same method.
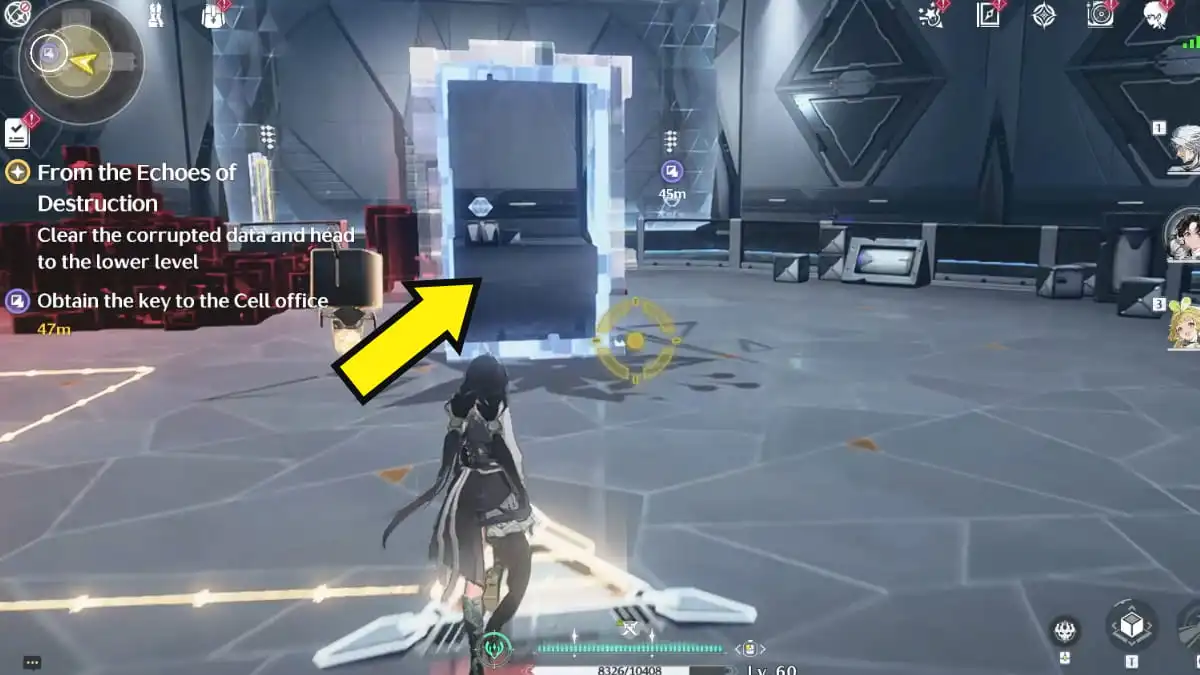
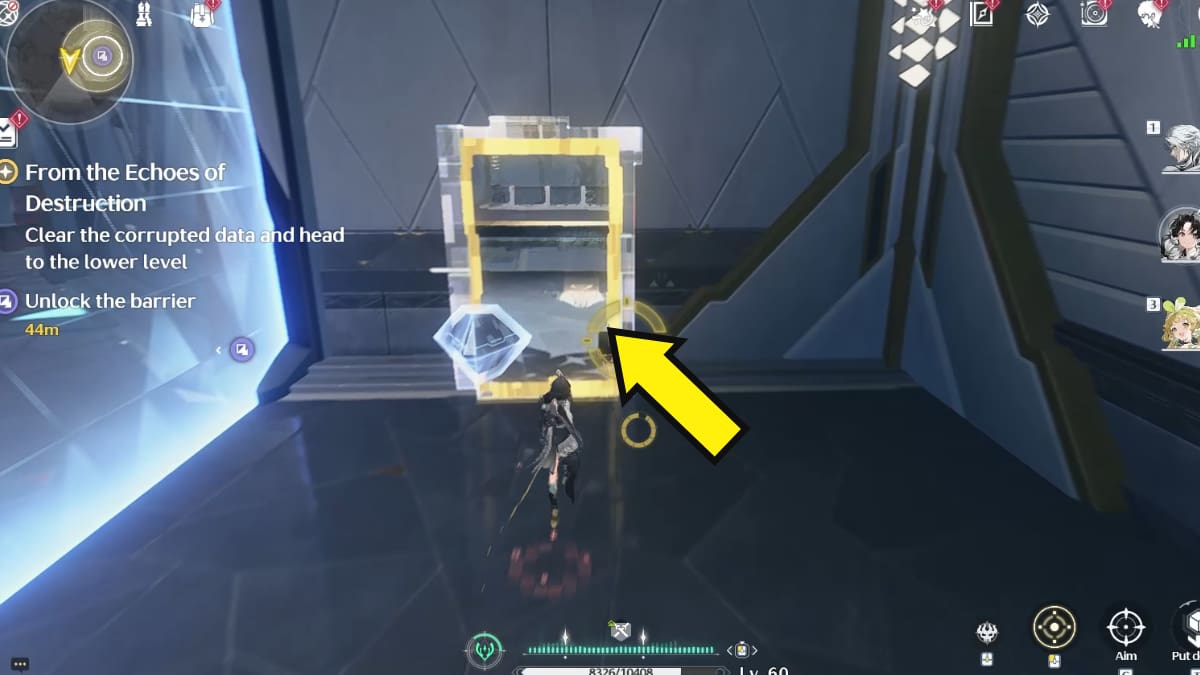
As soon as you get through the door, you'll immediately spot the switch on the ground. Throw the key onto the switch using a Normal Attack. Doing so will unlock a mechanism connected to the switch through the same electrical line. Interact with the mechanism to activate the Data Wall.
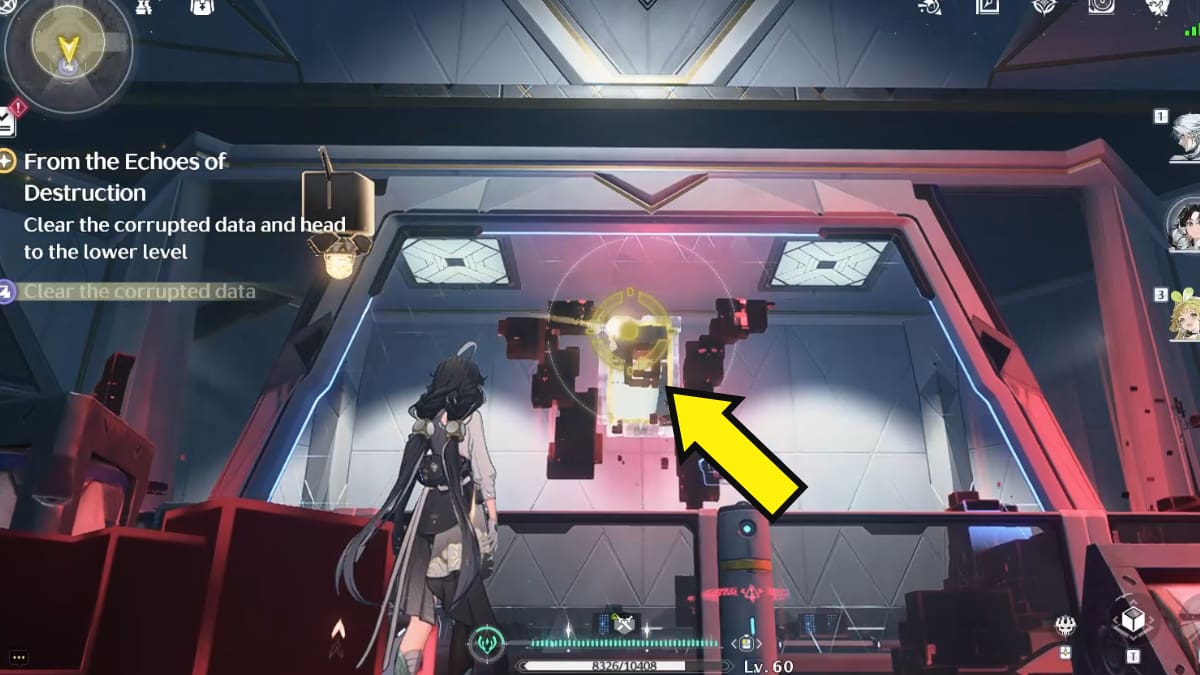
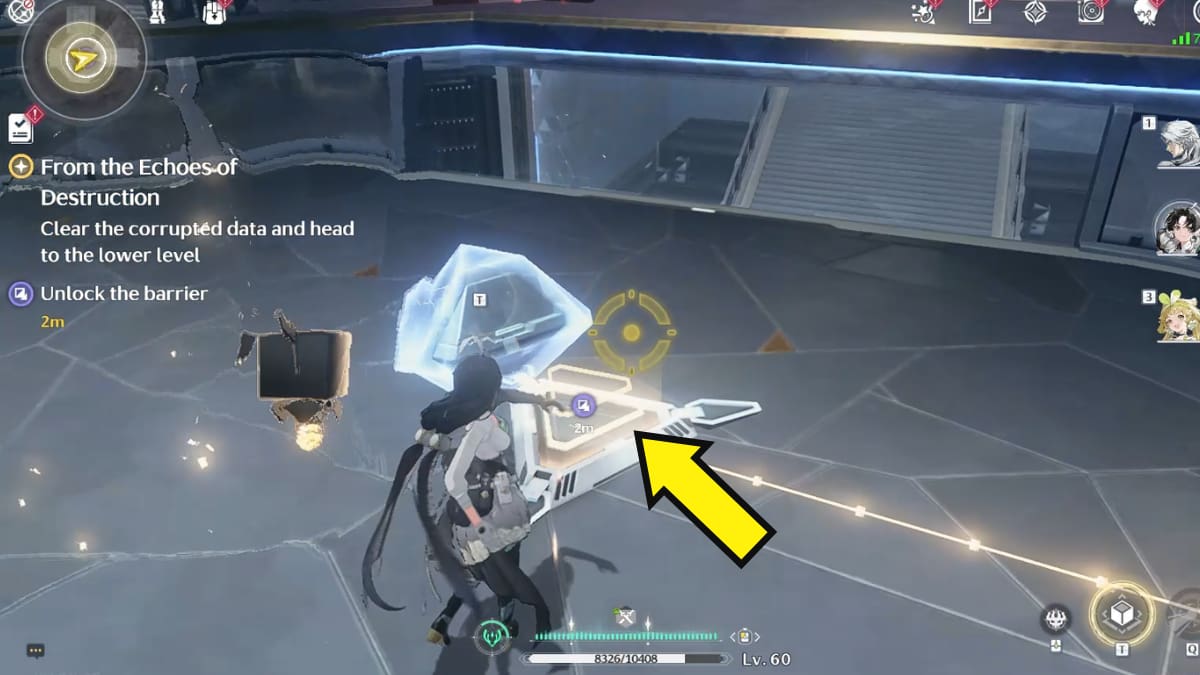
This part is a little confusing—even I was stuck for a while! After activating the Data Wall, you'll be tasked with clearing the corrupted data. However, the data core is located at a distance where the robot's ability doesn't reach it. To get through this part, you need to attack the white cells behind the data core repeatedly using Normal Attacks to trigger the cells to break.
When the cells break, head to the door at the center of the room to find that the data core is now visible in front of it. Press and hold the Q key to use the robot's ability to destroy the data core, effectively destroying the nearby corrupted data. Once done, enter the door to reach the next room.
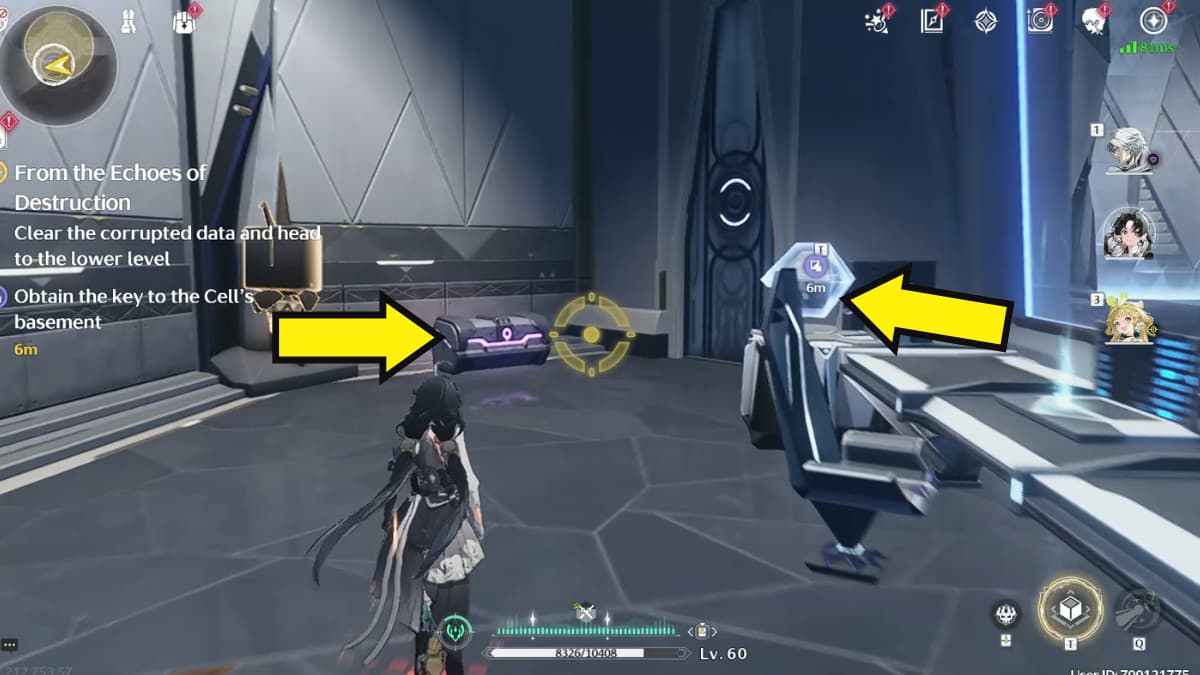
Inside the room, there are two things you need to do:
- Loot the Advanced Supply Chest, which will open the door in front of it. I suggest looting Chests instead of saving them for later as it may be difficult to return to this area after completing the quest.
- Levitate (T button) the diamond-shaped key.
After doing both of the above, go through the door that just opened.
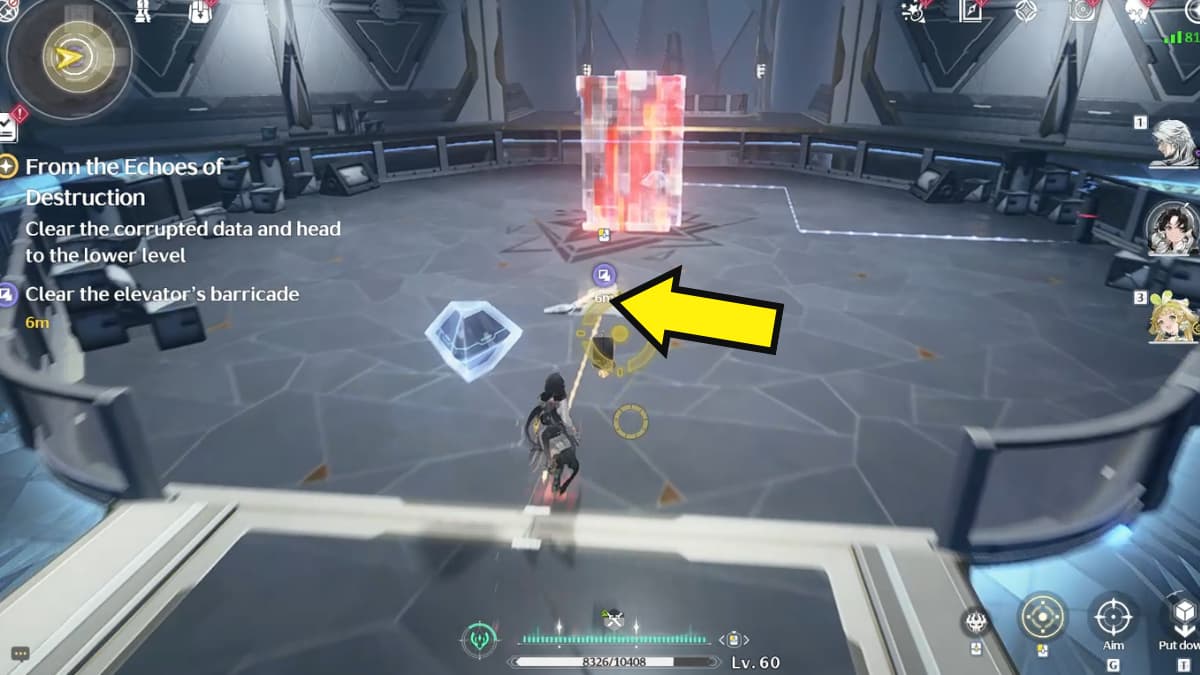
Once you've gone through the door, throw the key onto the switch on the ground using a Normal Attack. Doing so will trigger dialogue with the Shorekeeper, completing the objective.
If you're having trouble with low-quality graphics, check out our guide on All graphics cards & CPUs that support 120 FPS in Wuthering Waves here on Pro Game Guides.