Cat Quest 3 is filled with all sorts of small quests, puzzles, and items to find. In this work-in-progress walkthrough, I'll help you with many of the questions you may ask while playing this action RPG.
Cat Quest 3 is available on PC, Switch, Xbox One, Xbox Series X|S, PlayStation 4, and PlayStation 5.
Cat Quest 3 Quest List
There are tons of short quests to complete in Cat Quest 3. This list contains all of them, their starting locations, and a bit about what they are like.
- Patchy's Booty - Speak to Patchy outside of Booty Cave. Begin the quest by searching through the cave, then follow Patchy back through the cave and fight him to complete it. Start the quest by catching the catfish a short walk away. Afterward, complete the quest by finding and catching the Fursome Four.
- The Furlorn Fishercat - Sail to Straits Island and speak to the fisherman at the top of it.
- Lovepurr Chronicles - Enter the Lovepurr Castle on Lovepurr Island. Speak to Clawford, then find the three Lovepurr Chronicles books hidden in caves around the map. Bring them to Clawford and complete the tower to finish this quest.
- The Golden Tower - Sail your ship through Purrvana's rivers and destroy the barricade in front of the Golden Tower to unlock this quest. Completing it will require you to find all three golden keys and defeat the boss of the tower.
- Going Pawstal - Visit PostMutt Inc on the right side of Purrvana. Speak with the Postmutt to begin delivering letters for him. Each recipient will be clearly denoted and their location marked on the map, making it a pretty easy quest to follow.
- The Monster Researcher - This quest is in Purrvana's lower right corner. Speak to the researcher and bring him the requested monsters to start the quest.
- One Cat's Treasure - Get this quest from the Watchcat in the Strait's Watchtower on Purrvana. Find the items at all of the locations indicated by the Watchcat to complete the quest.
- The Purrmaid's Booty - Destroy the enemies around the Purrmaid on Sunset Island and talk with her to get the Shell Phone and this quest. Use the Shell Phone at all eight treasure locations and return to the Purrmaid to complete the quest.
- The Eight-Bit Castle - Destroy the barrier in front of the Eight-Bit Castle to unlock this quest. Complete it by taking down the boss of the castle.
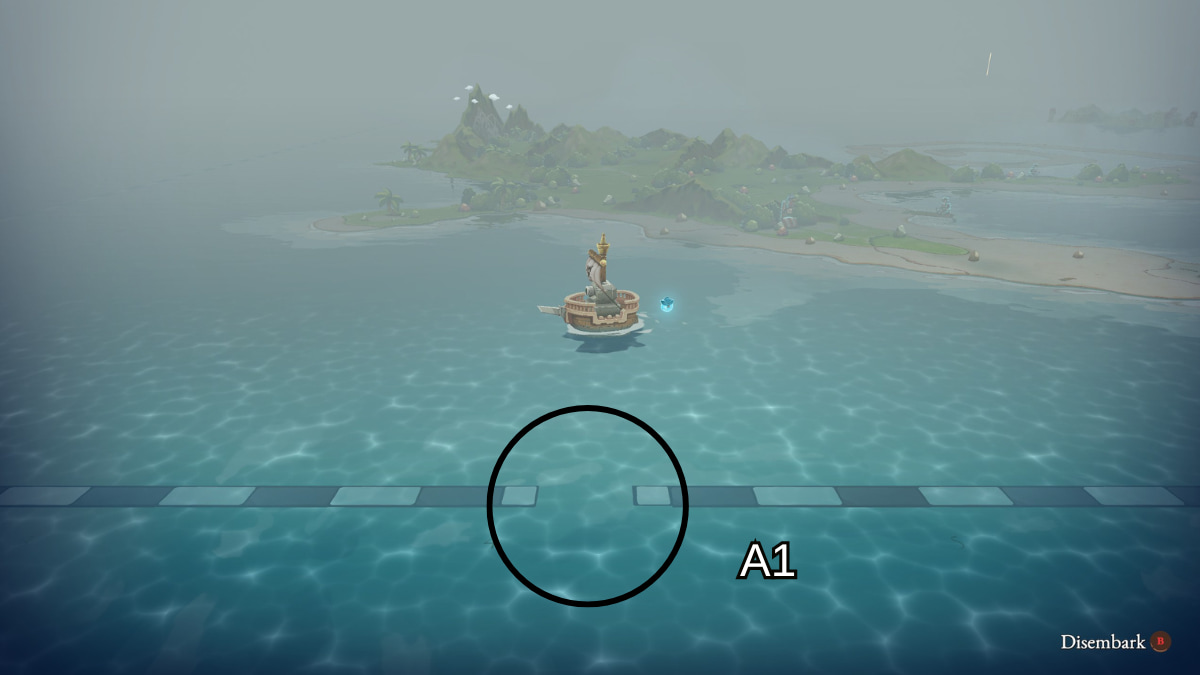
- The Speech - The Speech is a quest hidden beyond the boundaries of the map. Sail through the gap near the gap in the boundary by the 4 on the bottom boundary (A1), then follow the path created by the lighter portions of the ocean to find the Gentlebros. Gather their pages to complete the quest.
While these three are requests rather than actual quests, completing them will give you helpful new gear. They're necessary for anyone wanting to 100% the game.
- Kidd Cat's Request - As you upgrade weapons and armor at Kidd Cat's, he'll ask you to find a Dragon Bone for him. Find and bring it to him to get a new weapon.
- Mage Bonney's Request - As you progress through the game, speaking to Mage Bonney will result in her asking you to find the Necropawmicon. Bring it to her to complete the quest and gain a new spell.
- Momma Milka's Request - Momma Milka will request that you slay Cathulu for her. Return after defeating him to get milk, like you would from bounties.
All Puzzle Stone Solutions in Cat Quest 3
Long Island Puzzle Stones solution
Hit the Puzzles Stones based on how many small rocks are next to them. They'll give you a Magical Punching Bag trinket.
Code Island Puzzle Stones
Hit the five puzzle stones from smallest Roman numeral to largest to get a Magic Purse trinket.
Sandy Island Puzzle Stones
This puzzle requires you to hit all the stones quickly so they glow at the same time. I recommend equipping the Warrior's Braid trinket and using the dash attack to hit multiple at once. Your reward will be a Magical Purse trinket.
Strait's Island Puzzle Stones
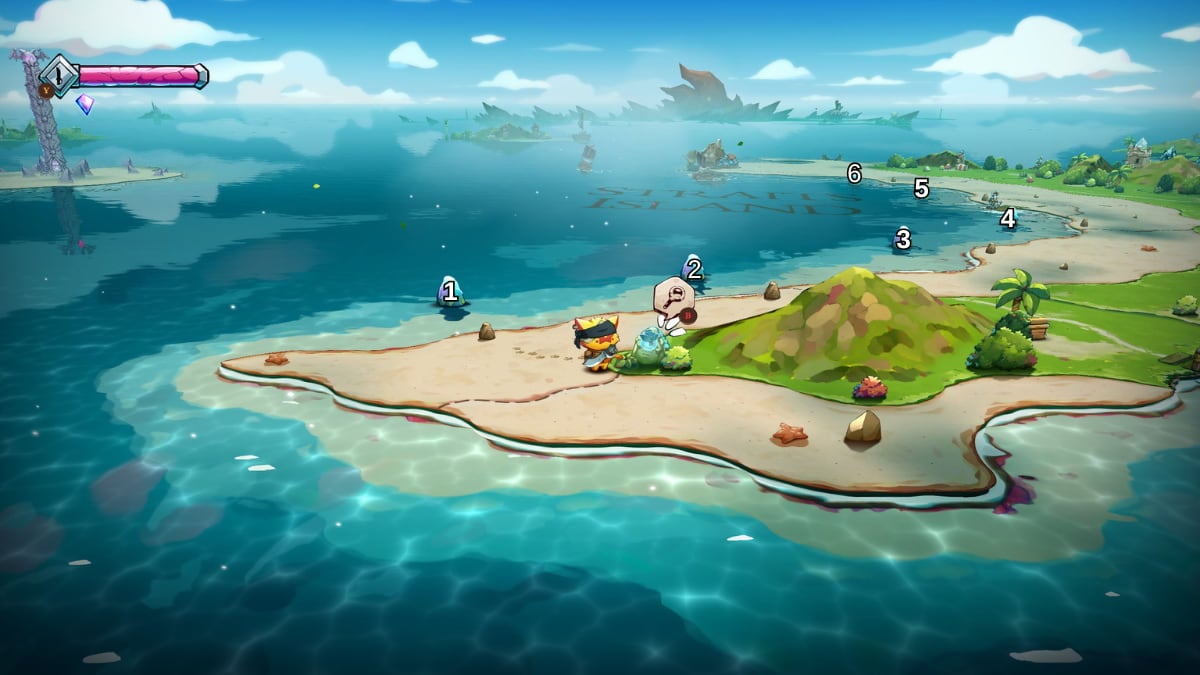
Quickly hit all of the Puzzle Stones from left to right to complete this puzzle and get a Magical Glove trinket.
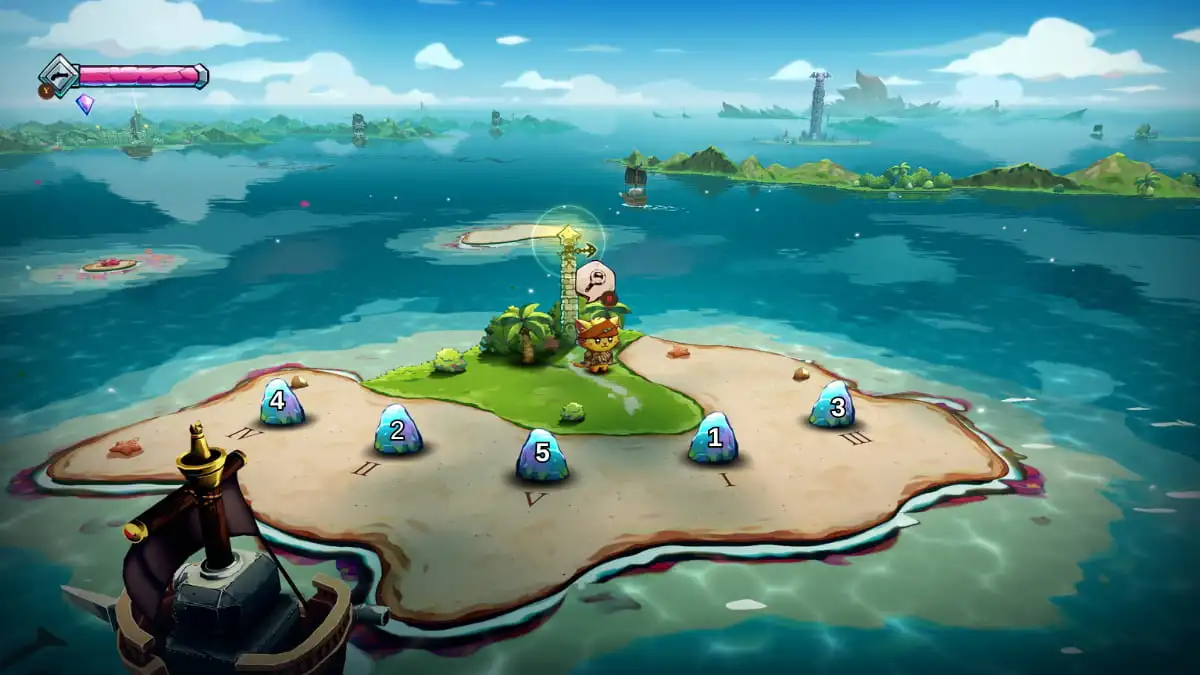
Purrvana Numeral Puzzle Stones
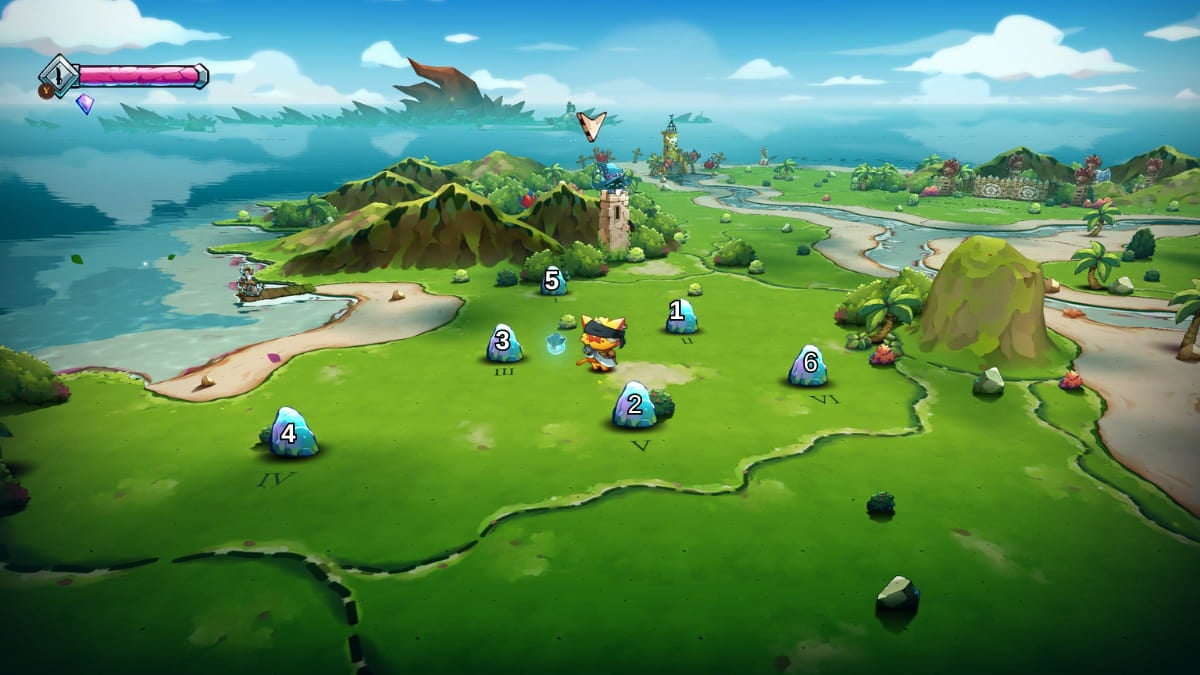
To solve this puzzle, you'll need to attack the stones in the order listed by the wizard in the tower behind them. Solving it gives you a Magical Punching Bag trinket.
Purrvana Beach Puzzle Stones
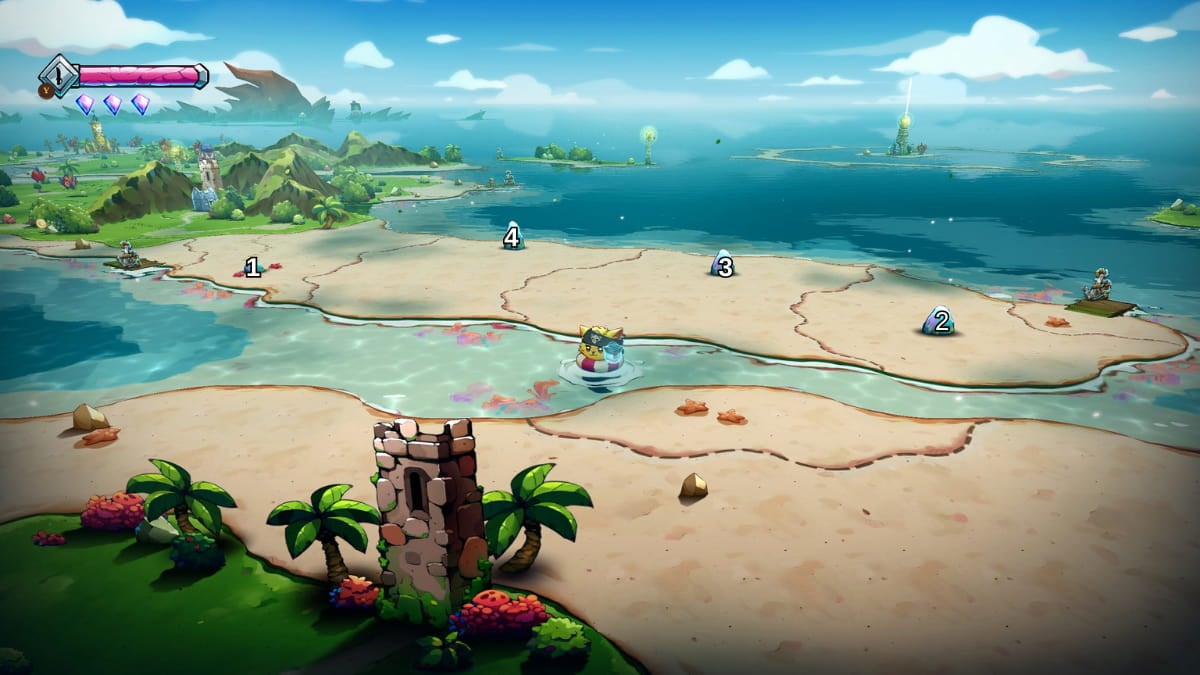
Start by hitting the leftmost stone, which has paw prints leading up to it. Next, hit the remaining stones from right to left to get a Magical Glove trinket.
Polaris Ruins First Floor Puzzle Stones
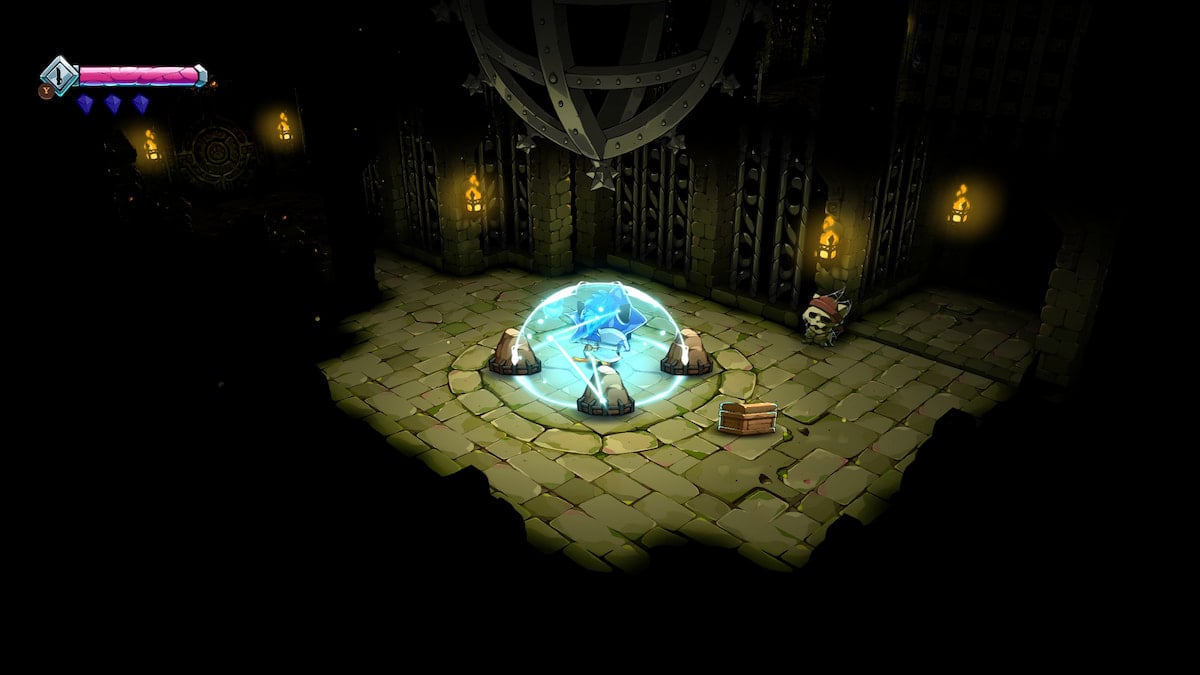
To solve this puzzle, you must use the Lightwhisker spell while standing in the middle of the stones to activate them all at once.
Polaris Ruins Second Floor Puzzle Stones
While standing in front of the gap, cast Flamepurr to activate all of the stones in the row in one spell.
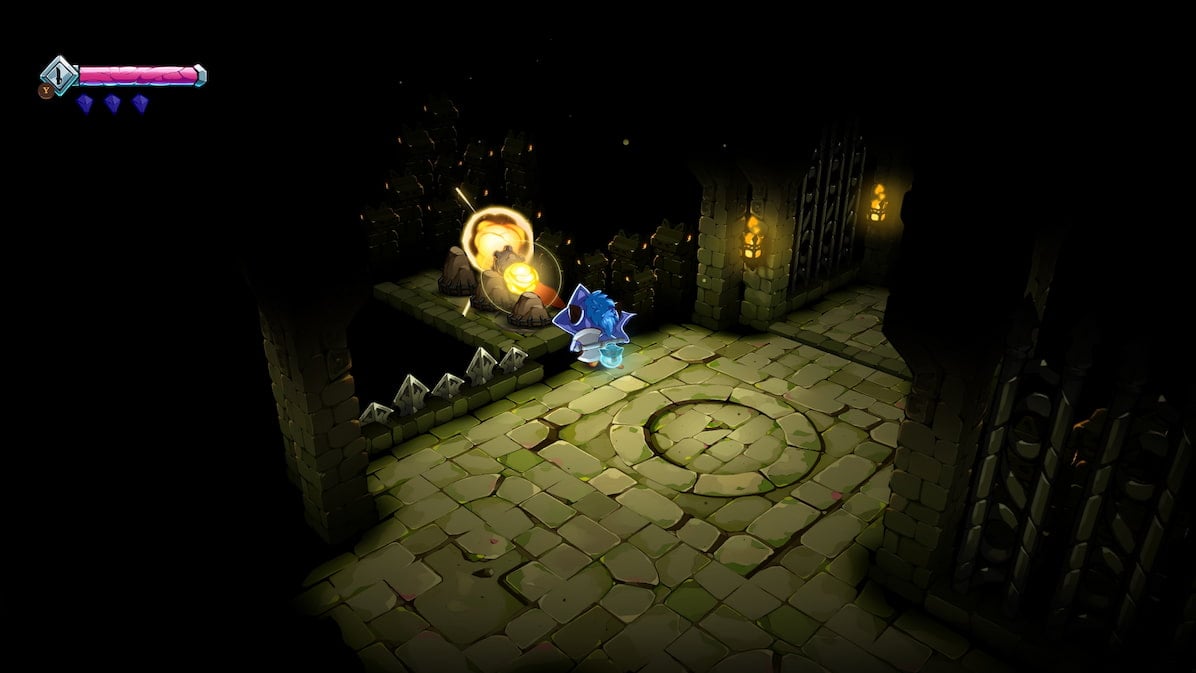
Polaris Ruins Third Floor Puzzle Stones
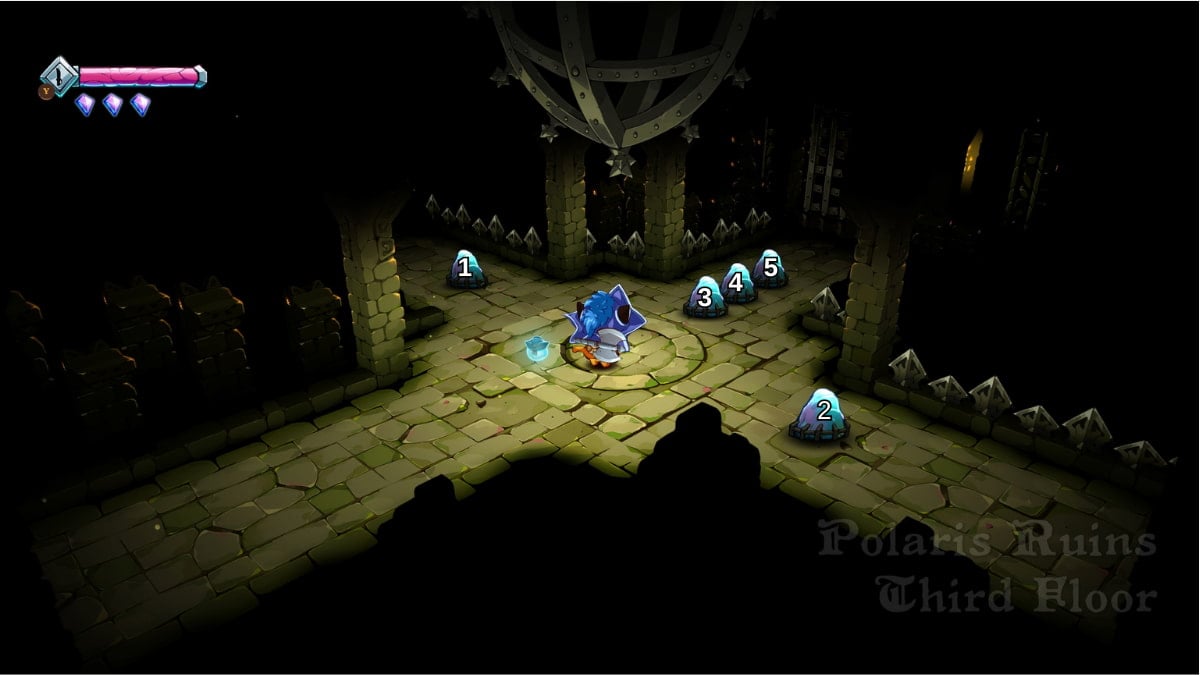
This is another timed Puzzle Stone puzzle. Start by firing a shot at the stone on the left then hit the stone on the right while the shot travels. Quickly dart towards the three stones in the center and swipe at them with your main weapon to complete the puzzle.
8-Bit Castle Island Puzzle Stones
The large floating maze surrounding 8-Bit Castle is one large Puzzle Stones puzzle. You'll need to start with the Puzzle Stone on the right side of the island, then sail through the maze in the counterclockwise direction to hit the remaining three stones. Hitting every stone before the timer runs out gives you the Cannon Reload ++ ship upgrade.
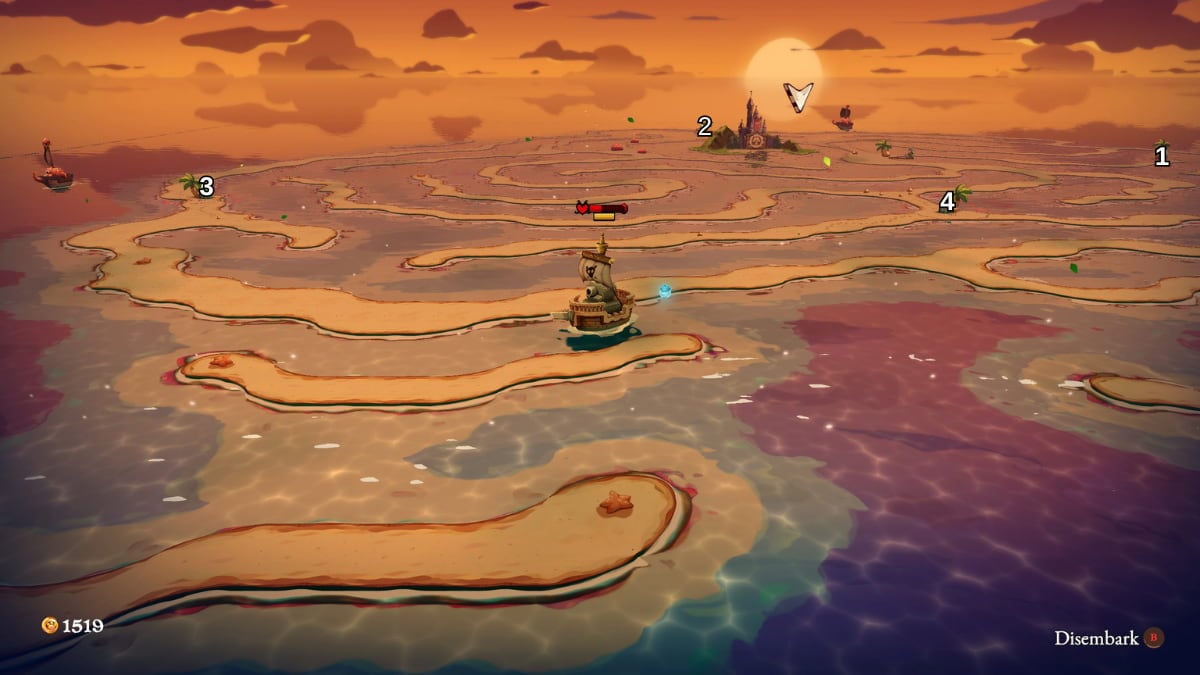
Sunset Island Puzzle Stones
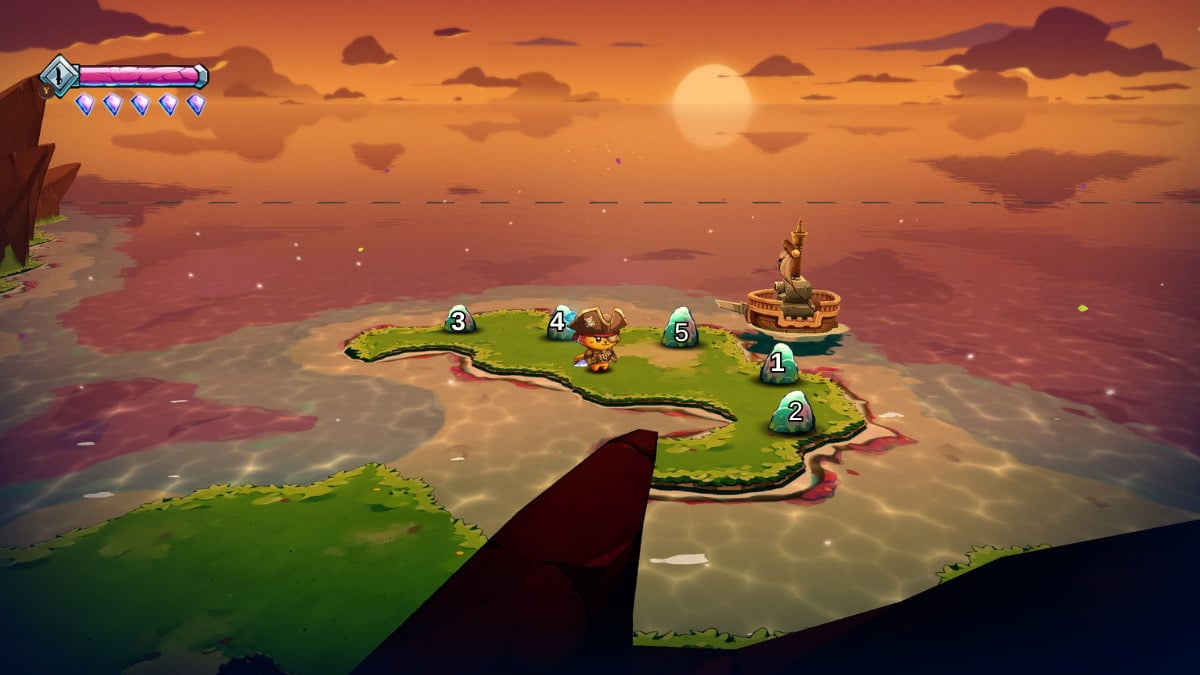
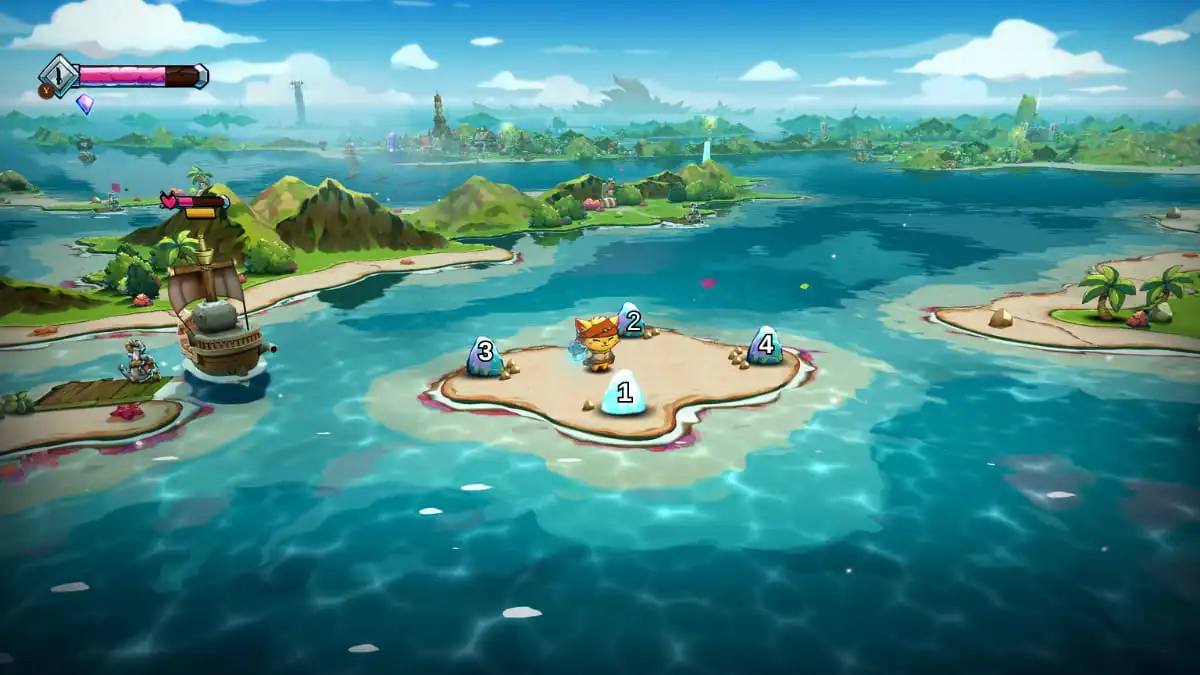
These puzzle stone are found on the right side of the Sunset Island gate with three tentacle locks. To get the solution, players must sail to a matching island on the left side of the gate with rocks and Roman numerals. Hit the blue puzzle stones in the following order:
- The stone to the right of the central one.
- The rightmost stone.
- The leftmost stone.
- The stone to the left of the center stone.
- The central stone.
Do this to get a Magical Glove.
Tall Puzzle Stones from Meowgus' Note


After giving Mage Bonney the Necropawmicon, she'll give you a note from her mentor Meowgus. The note lists five islands, each of which has a tall puzzle stone to hit.
- First, hit the Pawt Purrvana stone below the town.
- Second, hit the stone on the right side of Lovepurr Island.
- Third, find and hit the stone resting in the back of the Sunset Islands to the left of the triple-locked gate.
- Fourth, sail to Twilight Isles, travel through the river, and hit the tall puzzle stone to the left of the Rest Beakon.
- Lastly, head to Furrgy Island and hit the final puzzle stone in front of the gate to the Pi-Rat King's hideout.
Doing this will give you another Mana slot.
How to get all three Heirloom Keys


The Pawman Islands is home to a set of triplets with three treasure chests. To get the treasure here, you'll need to find the Heirloom Key Piece belonging to each triplet.
- The first triplet's key is held by the starfish on the upper right island (A1). Defeat it to get the Left Heirloom Key.
- The second triplet's key is the Middle Heirloom Key, which is hidden on the island to the left of the triplets. Search beneath the small rock third from the left to get it.
- The final key belongs to the third triplet and is found roaming beneath the water. Float to it and position yourself in its path, which it travels over and over. Wait for it to float by, then hit the interact button to get the Right Heirloom Key.
Return to the triplets with all three keys to finish the quest.
All Fursome Four Catfish locations


- The Rock Catfish is found on Purvanna to the right of Straits Island (C1).
- The Lover Catfish is located on the island beneath and to the right of Lovepurr Islands (C2).
- The Ghost Catfish is on the right side of Furggy Island in the center of the spiral (C3).
- The Sunset Catfish is on the island in the top left corner of the map to the left of the 8-Bit Castle (C4).
All Lovepurr Chronicles locations
The Lovepurr Chronicles unlock the areas of Lovepurr Castle. There are three to collect.
- Lovepurr Chronicles: Book 1 is hidden in Furrlorn Cave on Purvanna.
- Lovepurr Chronicles: Book 2 can be found in Heartpurreak Cave on Twilight Isles.
- Lovepurr Chronicles: Book 3 is located in Lovepurr's Cave on Lovepurr island.
How to fix the Lovepurr Chronicles
In Lovepurr Castle, you'll need to enter each book and choose the route the story will take place. For Lovepurr Chronicles Book 1, you can decide how you want Clawford to observe or intervene with Purrscilla for the first three parts of the book. However, when the Pi-Rats attack her he must join in and fight with her. Afterward, tell her she is "ameowzing" to successfully complete the chapter.
In Loverpurr Chronicles Book 2, you can freely decide how Clawford and Purrscilla fight until they meet the Raider's Captain. After asking who he is, have Clawford recognize him as his brother. At the end, pick the option where Clawford announces Purrscilla has changed him for the better and that he'll protect her to finish this chapter.
The third book of Lovepurr Chronicles requires Clawford to recognize his earlier mistakes against his brother. When the house is lit on fire, grab Purrscilla and escape. Next, call her my love and mention how happy you are to have escaped. When Snoutford shows up, tell him you've always regretted what happened the night of your family's fire. Afterward, say that he's the only family you have left. This final choice will complete the last Loverpurr Chronicles chapter.
As rewards, you'll receive several pieces of Clawford gear, the Heartbreaker shield, and the Heartmender shield. You'll also complete the Love is Furrever achievement.
How to get every Golden Key
Players need three Golden Keys to enter the Golden Tower.
- The chest for the first golden key is hidden behind a moving coin on the outer left side of Twilight Isles. This chest will be empty, leaving you without the key. To get it enter the Golden Tower to fight a lone Pi-Rat for it.
- The second golden key is obtained by following the moving gold coin starting at the top of Purrvana.
- The third golden key is found by catching the moving coin on Furtigua island.
- The fourth golden key is obtained by following the moving golden coin on one of the left islands in the Sunset Islands.
- The fifth golden key comes from a moving gold coin on the top left side of Furggy Island.
All Lost Item locations and recipients
There are three Lost Items in Cat Quest 3. Each Lost Item is found near a small tombstone providing a hint at its location.
- The Jug o' Milk is found on the beach at the bottom of Purrvana. Give it to Mama Milka for a Knight Shield and to unlock her quest to defeat Cathulu.
- The Smithy Hammer is on Twilight Isles near the Rest Beakon. Give it to Kidd Cat for Knight Armor and his request for a Dragon Bone to forge a new weapon.
- The Voodoo Doll is on the small island northeast of the Fire Pi-Rat's Hideout. It will be under the small red bush behind the North Star's pillar. Give it to Mage Bonney to get the Icepaw spell and have her request you to find the Necropawmicon.
All Aelius Locations
The first place you'll find Aelius is near the left door switch on Twilight Isle. The second time you see him will be on the lower left side of Furtigua. The third Aelius is on the back of the Sunset Islands near the gate with three locks.
How to defeat the Heartpurroken
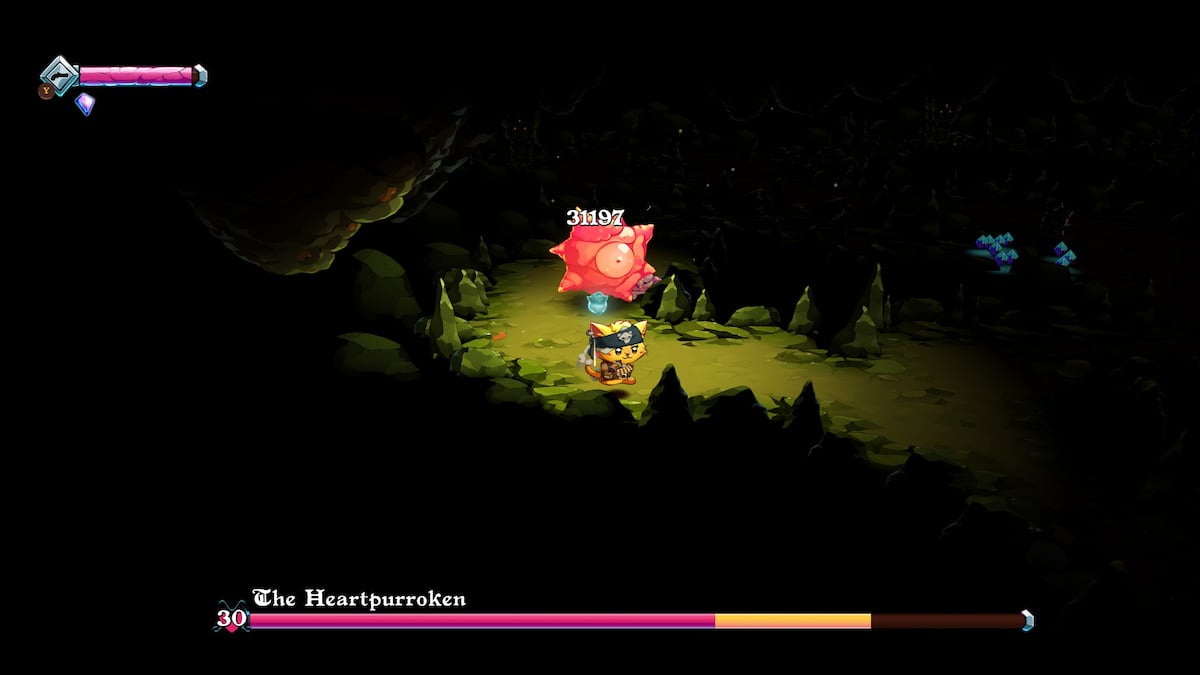
To hurt the Heartpurroken, run around so that they hit the smaller versions of themselves. Do this until their health is fully depleted.
Where to find the Latitude Longitude treasure

The treasure marked for 6 longitude, 32 latitude is found beneath the small rock left of the Rest Beakon on Twilight Isles.
Where to get a Dragon Bone in Cat Quest 3
The Dragon Bone is given to you after defeating Pi-Rat King's The Undying Ship and the Pi-Rat King himself on Furrgy Island.
How to get the Necropawmicon
The Necropawmicon is on the Twin Islands found on the bottom right corner of the map. Go back and forth between the two Twin Castle Manors as directed until you reach the Boss Room in the right manor. After defeating the Necromouser here, you'll receive the Necropawmicon.
How to get the Happurrly Ever After Achievement
To get the Happurrly Ever After achievement, you first need to meet the Purrmaid on the large central island of the Sunset Islands. Once you defeat the pirates gathered around her, speak with her to get the Shell Phone. Next, sail to the following eight islands, find the ripples in the water, and call them using the Shell Phone while floating outside of your ship.
- Sunset Island southwest of the Purrmaid.
- In the middle of the Twin Islands.
- On the southern coast of Furtigua.
- On Furrgy's southern coast.
- On the northwestern beach near Pawt Purrvana.
- In the lake to the right of Catface Mountain on Purrvana.
- Near where you got your ship on Catuga.
- In Twilight Isles' minefield.
After finding them all, return to the Purrmaid to see her and her prince charming.
Looking for more cozy games to play? Check out our Fields of Mistria Walkthrough Guide here on Pro Game Guides.