Our Destiny 2 The Fourth Horseman Quest Steps Guide will walk you through everything we currently know about this Exotic Shotgun and how-to start the quest in the Season of the Worthy. The information is based on leaks currently, but we will be adding to this guide as more details about this new weapon are revealed!
The Fourth Horseman's quest launched on March 17th, 2020!
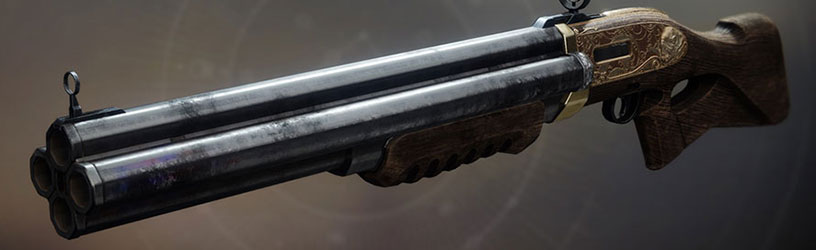
The Fourth Horseman Perks & Stats
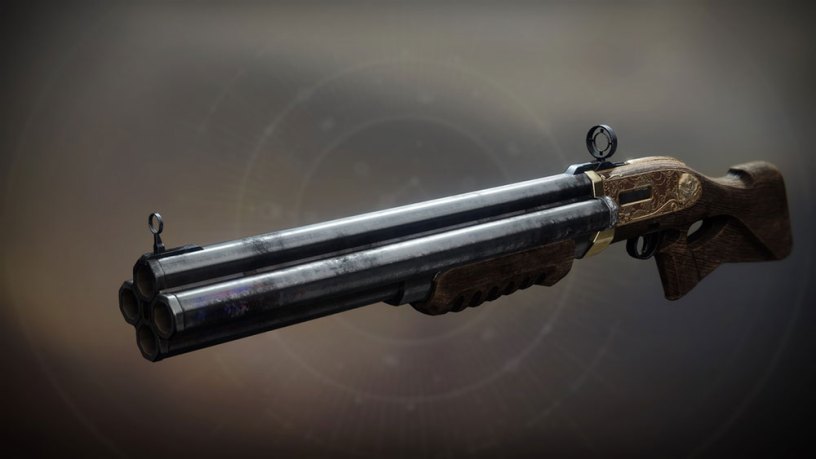
It's not a holdout weapon; it's a pathfinder.
Unique Weapon Perks & Traits
- Broadside - Each successive shot has more damage and more spread.
Other Perks & Traits
- Arrowhead Brake - Lightly vented barrel. Greatly controls recoil, Increases handling speed.
- Assault Mag - This shotgun's magazine is optimized for quick combat. Greatly increases stability, Increases rate of fire.
- Fitted Stock - This stock makes the weapon stable but heavy. Increases stability, Moderately controls recoil, Slightly decreases handling speed.
The Fourth Horseman Catalyst
It will generate Orbs on multikills and gain a tracker that displays the number of combatants defeated with it. The Masterworked weapon will also receive additional capabilities.
- And its name was Death. - Adds an additional round to the magazine and increases reload speed.
- This can be unlocked by defeating 400 enemies with this weapon.
Weapon Stats
- Impact: 80
- Range: 30
- Stability: 27
- Handling: 35
- Reload Speed: 42 (40 w/Catalyst)
- Rounds Per Minute: 100
- Magazine: 4 (10 w/Catalyst)
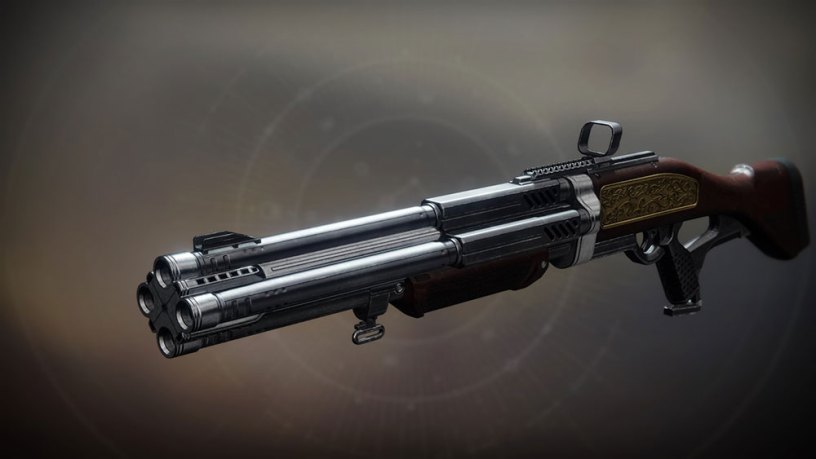
Death Comes Calling Weapon Ornament
Equip this weapon ornament to change the appearance of the Fourth Horseman. Once you get an ornament, it's unlocked for all characters on your account.
The Fourth Horseman Lore
"There's a reason the Cabal want to take this weapon from us.
"When you hold the Fourth Horseman in your hands, you bring the storm. You instill fear by commanding the thunder and firing off rounds with lightning speed. Tear through your enemies like light piercing through clouds after the rain subsides.
"You are a force of nature. Unstoppable. Unpredictable. Undeniable.
"Don't forget what the Fourth Horseman brings, after all."
—Commander Zavala
The Fourth Horseman Quest Steps
The quest is now live, so check out all of the steps below! All you need to do to start the quest is talk to Zavala at The Tower!
Step 1: Enter the Vault
Gain access to the vault through the secret pathway in Zavala's office.
"I'm trusting you, Guardian." —Commander Zavala
IF THE DOOR IS CLOSED TO ZAVALA'S OFFICE THEN YOU NEED TO RELOAD YOUR TOWER!!! You might need to do this multiple times for it to work (it's a bug).
Believe it or not, Zavala has an office! It's down some of the ramps and scaffolding at The Tower (right in front of where you spawn, between where Zavala and Lord Shaxx are located). You can check out how-to get there in this video:
This is all demonstrated in the video, but here's a written description:
Go into the office and to the right. You'll find a stairway, run down this set of stairs and then turn around back towards them. You can crouch down and go under the platform and go into the ducts. Go through the duct and you'll encounter some more stairs. Head up these and keep going until you can't move forward anymore and have the option to go left or right. Go left and you will come to a room with some shelves in it. Look for a set of shelves that has a large pipe over it and jump on top of it. You should find some more ducts to run through here. Run all the way through the ducts until you fall down onto some stairs. Go up the stairs, go left and climb up some boxes and into more ducts. Run a bit until you see an opening in the duct on your right, you should be able to drop down from here and into the vault.
Step 2: Missing in Action
Return to Zavala and inform him the weapon is missing from the vault.
"Not a simple retrieval, after all." —Ghost
The gun isn't there and it looks like we're going to have to track it down!
Step 3: Fresh Lead
See if Ana has some tech to help track the missing weapon.
"Time to do some digging." —Ana Bray
Ana is over at Mars, so hop in your ship and go talk to her!
Step 4: On the Hunt
Collect intel for Ana by defeating Cabal or completing public events on Mars.
"This reeks of Cabal. Truthfully, a lot of this planet does, but this instance has their fingerprints all over it. This gun was designed to be the ultimate Cabal slayer. Of course they'd want to take it out of our hands. I need you to collect some intel from the Cabal to track it down."
Either look for ongoing public events on Mars or head to the Glacial Drift and kill the many Cabal that spawn there! Killing Cabal is really slow, so make sure to look for public events to do for a speedier way to complete this part of the quest. Escalation Protocols will also count towards this percentage, so those are another good option you can do.
Step 5: Return to Ana
Take the collected intel back to Ana and see what she can discover.
"We're close. I can feel it." —Ana Bray
Head back to Ana on Mars and turn in the intelligence you gathered from the Cabal and public events.
Step 6: In the Shadows
Ana will need you to bring her some information from Calus's double agents in the Red Legion. Defeat Psions and loot Cabal chests to gather it.
"Calus's network reaches far and wide. His shadows are everywhere." —Ana Bray
Cabal chests can be found on EDZ around the Winding Cove or pretty much anywhere on the EDZ. These are specifically the red Cabal Chests and they will give you 20% each towards your goal! If you have one, equip a Ghost Shell that has Treasure Hunter to make them easier to find.
Step 7: Under Our Nose
Now that you've gathered intel from Calus's agents, see if Benedict 99-40 can be persuaded to help.
"Why do we let him stay here?" —Ghost
Head on back to The Tower and give the intelligence over to Benedict 99-40.
Step 8: Dirty Work
Benedict needs you to eliminate the encryption signals coming from the EDZ. Defeat combatants, complete public events, and complete patrols.
"I'm sure Devrim will appreciate this, at least." —Ghost
Not much to this one, you just need to do public events or complete patrols on EDZ. You can vary it up, either of these gives a fair amount of percentage while you can also gain for defeating combatants while doing these.
Step 9: Rein It In
Return to Benedict 99-40.
"No more cleaning up Calus's messes, agreed?" —Ghost
Back to The Tower and talk to Benedict 99-40 again!
Step 10: Lost and Found (Time Gated) FIXED!
Benedict has given you the location of the missing weapon in exchange for using this Cabal slayer to smash the Red Legion.
"The old smash and grab. Let's remind them not to mess with Vanguard." —Ghost
It looks like this part of the quest was slightly bugged, and you didn't originally have access to the Legendary Quarry Lost Sector. Bungie has pushed an override that allows you to access it:
Looks like there was an issue with the Legendary Lost Sector Scheduling as Quarry was suppose to available today.
We just did an override and the Quarry Legendary Lost Sector will be active today and tomorrow.
Sorry about any inconvenience.
Go to The Sludge on the EDZ and complete the Daily Bunker Buster. Once you've done that you should get access to The Quarry! Once you're done with this you will get The Fourth Horseman in the chest at the end.