Tricky Doors is an escape room puzzle game available free on Steam. Tricky Doors provides a massive 20 different worlds that all give a complex web of three-room puzzles. If you're finding yourself stuck on where to go next, skip the hint coins and follow this guide instead.
Tricky Doors World 1: Magic World complete walkthrough guide
Exploring the witch's home
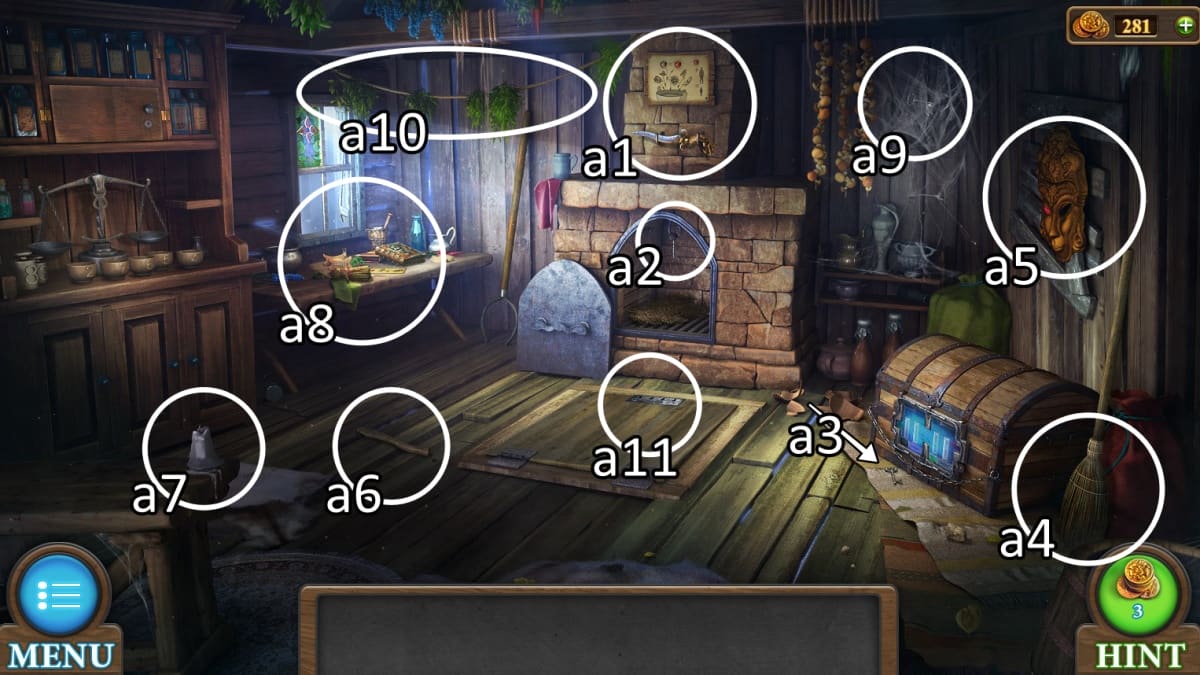
As you load into the first room, you'll want to immediately fill up your pockets with a ton of useful items for the road.
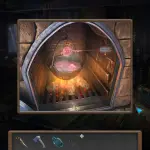
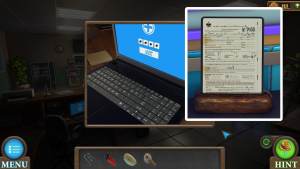
- a1. Above the mantle you'll find a ritual dagger and the recipe for a potion you'll be making.
- a2. In the fireplace hangs one of four keys you'll need to leave this first room.
- a3. At the foot of the chest on the right is a second key.
- a4. Pick up the broom next to the chest.
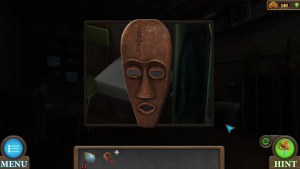
- a5. The mask above the chest contains a ruby eye. Click this eye to extract it.
- a6. On the floor next to the trap door is a wooden handle.
- a7. On the table to your left is a partially melted candle.
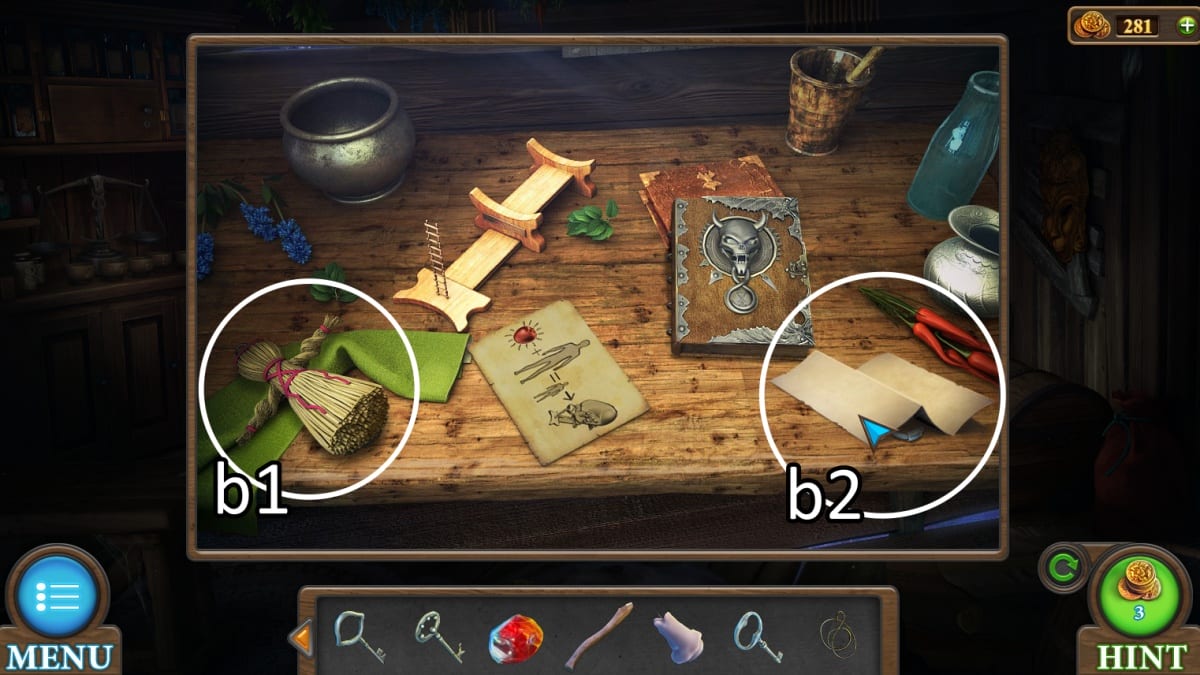
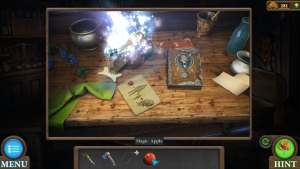
- a8. The table, once you get closer, has a doll (b1, below) to pick up as well. The magic book can't be used yet. You can read the instructions (b2, below) in the two pieces of paper there, and as you close one of the papers, you'll find a third key.
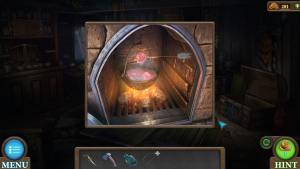
- a9. Zooming back out to the larger room, use your broom on the cobwebs in the upper left corner to free the final key.
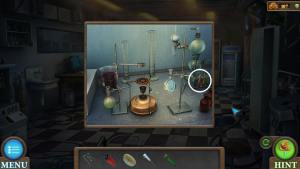
- a10. Before you go, use the ritual knife on the string of herbs in the upper middle of the screen, between the fireplace and window. This will get you the rope.
- a11. Match the four keys by their shape to the four slots on the trap door. Once all four are inserted, the trap door opens. Head on down!
The woods outside the cabin
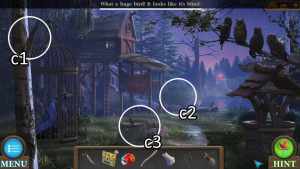
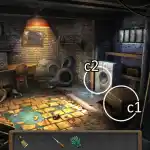
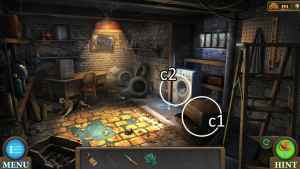
At the bottom of the trap door's ladder, you come across another busy scene. You'll be coming back here, but for now there's just a few things to get done.
- c1. Use your ritual knife on this piece of bark. You can lighten up your inventory by adding the ingredients to the potion recipe as you gather them. This bark is one of them.
- c2. Pick the berries and add them to the potion ingredients.
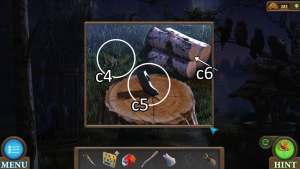
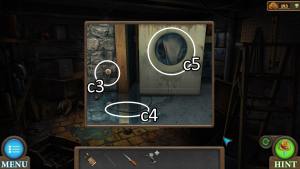
- c3. Click the stump to approach. As you get closer you'll pick up the feathers (c4) and extract the axe blade (c5) from the wood. In your inventory, click on the axe blade to pull it up and add the handle you picked up earlier. This doesn't quite fit, so you'll need to use the ritual knife again to pare down the handle and make yourself a full axe. With that done, click the logs (c6) and use your shiny new axe to make some firewood!
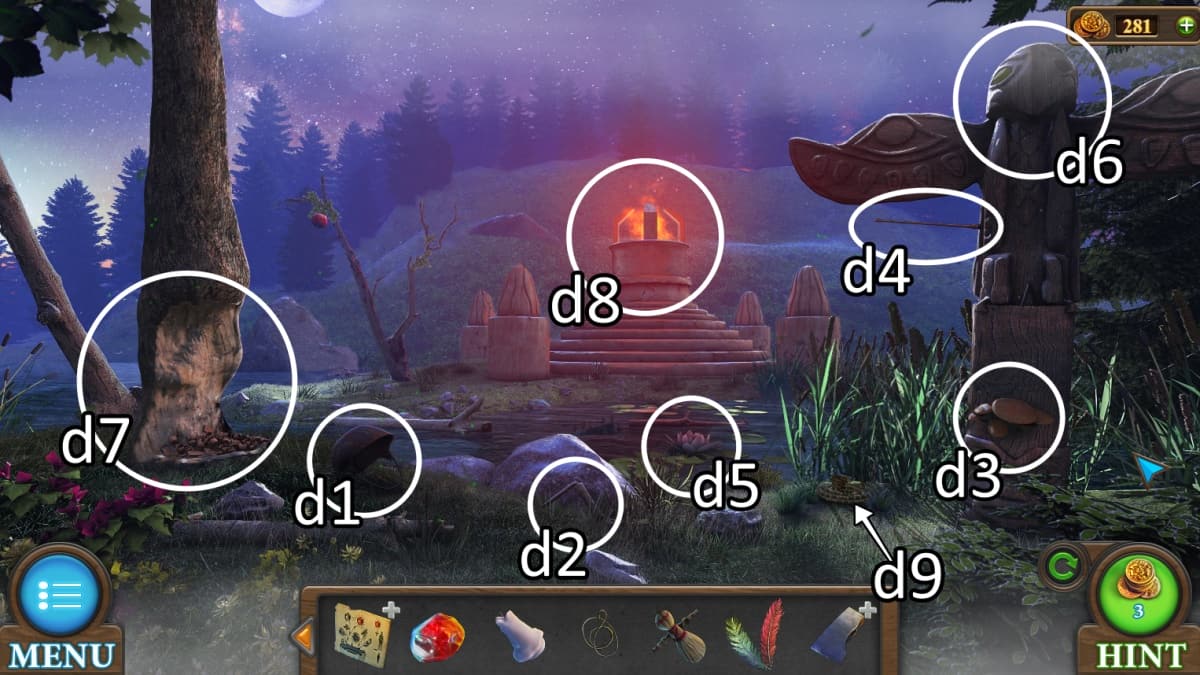
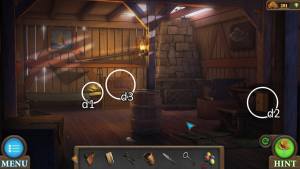
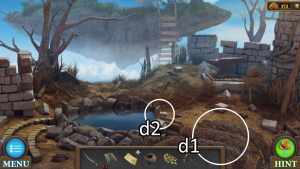
Head forward past the berry bush and you'll find the third 'room' of the world, the riverside. There's a lot to get done here, so let's get started.
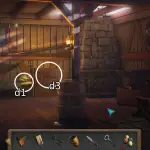
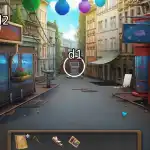
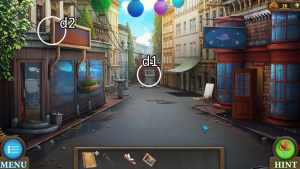
- d1. Pick up the empty cauldron.
- d2. Grab the handle as well.
- d3. Use your ritual knife to cut the mushrooms from the bottom of the totem pole.
- d4. Pull the arrow out of the side of the totem pole.
- d5. Get in close to the lily in the water and use your ritual knife once more. Add the lily and the mushrooms (d3) to your potion ingredients.
- d6. Click on the totem pole and insert the ruby into the empty eye slot. This unlocks your first puzzle, detailed below.
- d7. Use your axe on the partially-chewed tree trunk. This gives you a path to cross the water.
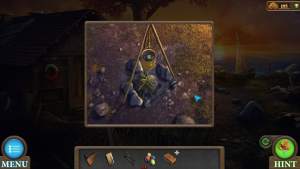
- d8. Approach the fiery altar. Here you will burn both your candle, giving you a burning candle, and your doll, giving you a smoking doll.
- d9. Use your smoking doll on the snakes to scare them away. Now you can pick up the red gem they were covering.
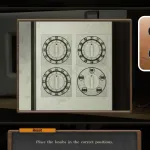
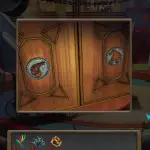
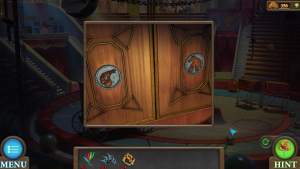
How to complete the totem puzzle
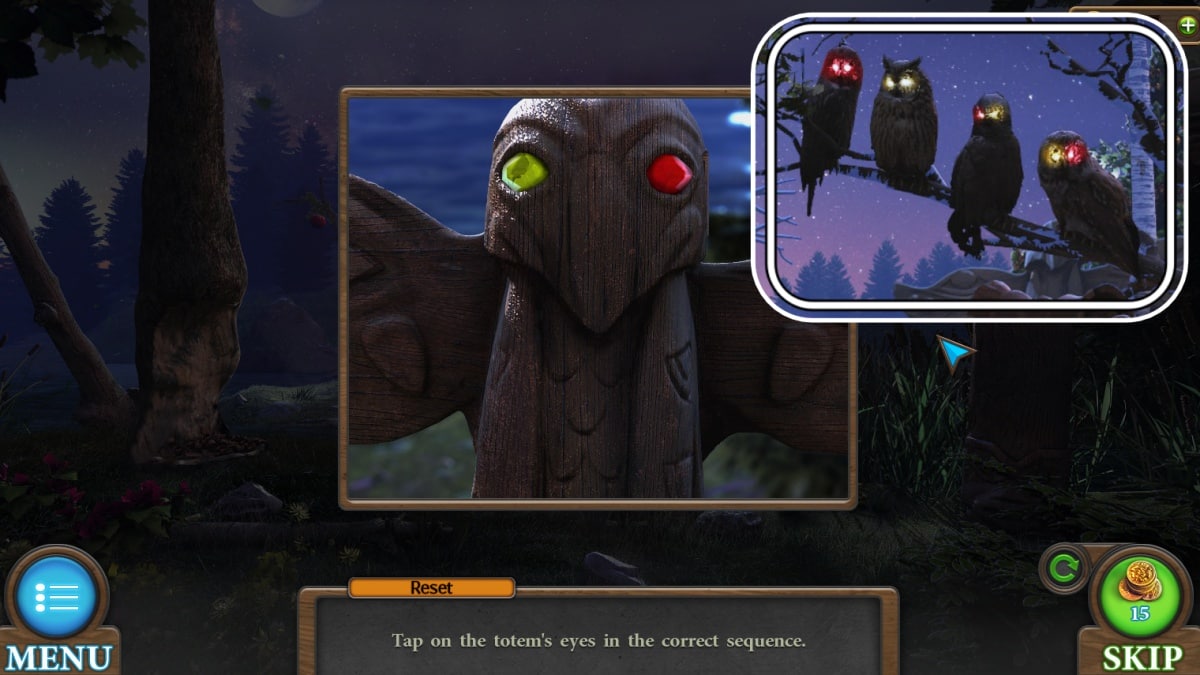
"Tap on the totem's eyes in the correct sequence."
The clue for this puzzle is in the owls on the previous screen. Click all four owls and their eyes will light up, showing you the correct order to click the yellow and red gems in. For my game, this order was (as shown above): red red yellow yellow red yellow yellow red.
Completing this puzzle grants you a crystal.
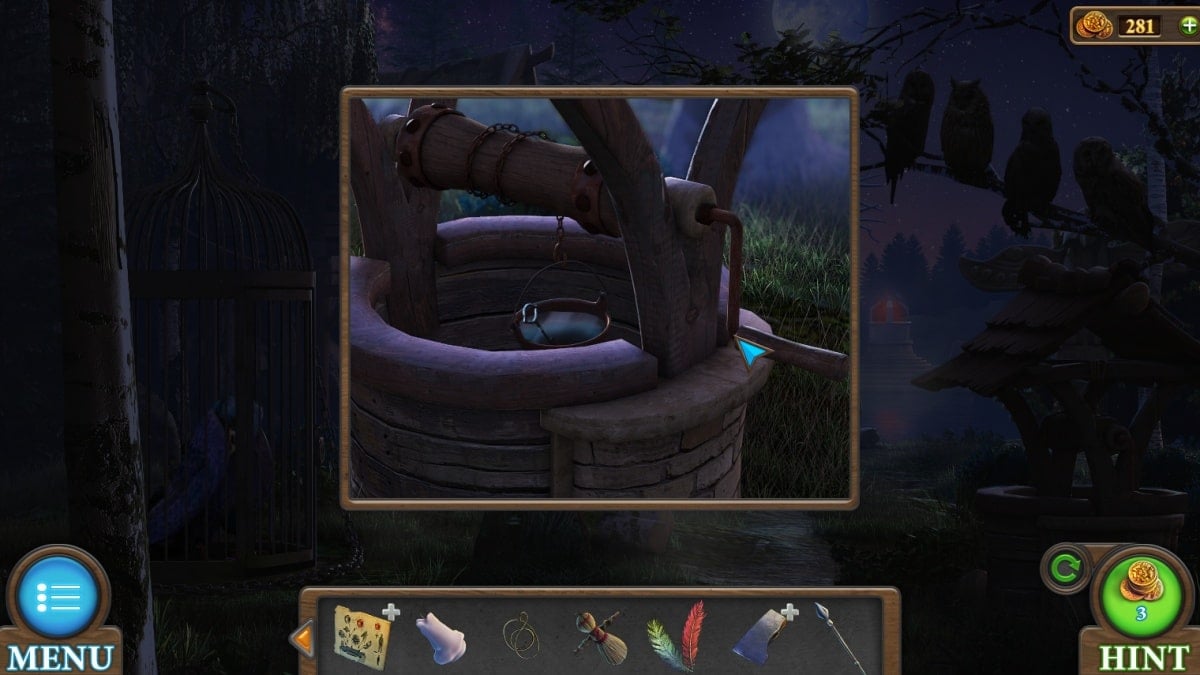
While you're getting your clue from the owls, directly below them you'll see a well. Attach the handle and empty cauldron. After clicking the handle, you'll get a key out of the water. Don't forget to return the cauldron, now full of water, to your inventory.
Back inside the treehouse
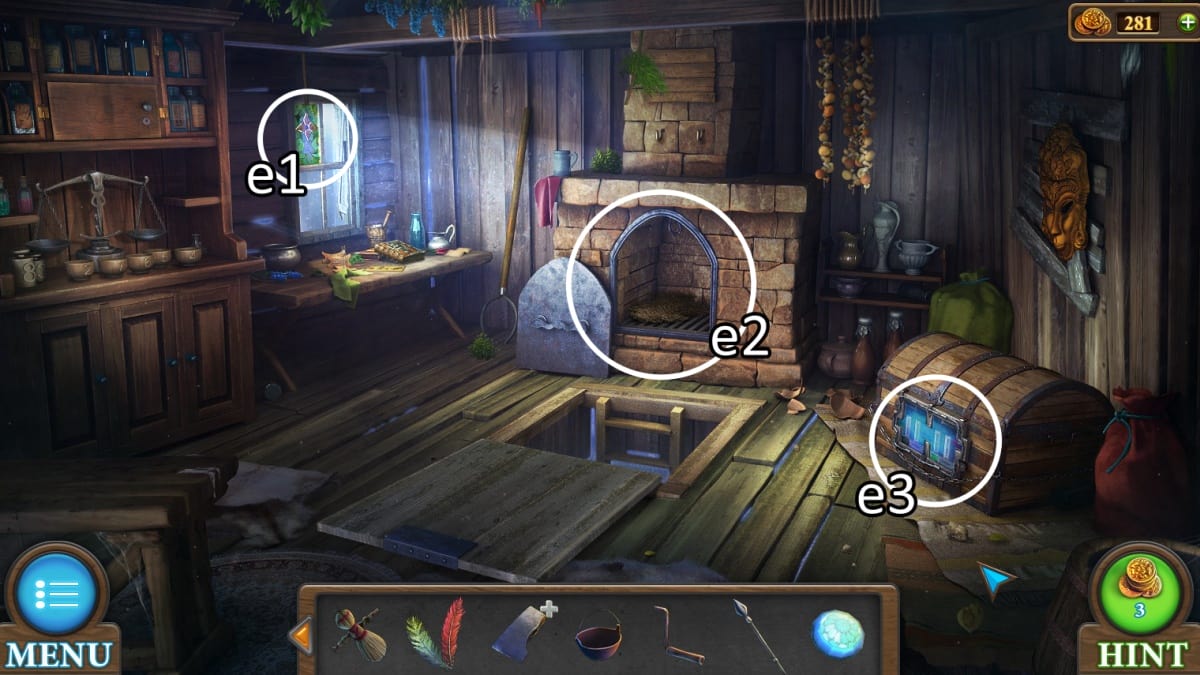
Now that you're back inside, it's time to empty your pockets a little.
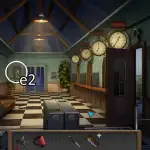
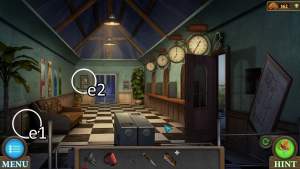
- e1. The crystal from the totem puzzle will go into the center of the flower image on the window. This lights up the table, but for now does nothing.
- e2. Place the firewood and cauldron of water into the fireplace. Light the fire with your burning candle to start the cauldron boiling.
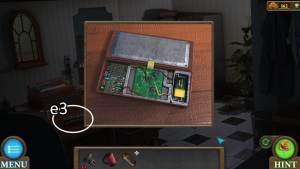
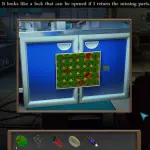
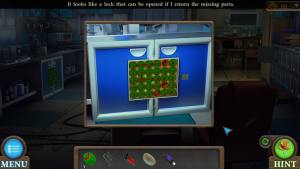
- e3. Place the red gem into the chest to unlock the gem puzzle.
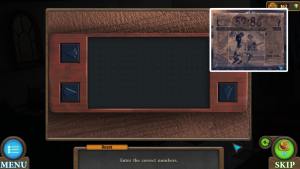
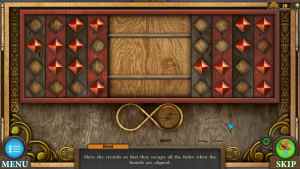
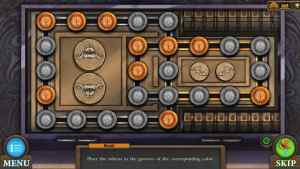
How to complete the gem puzzle
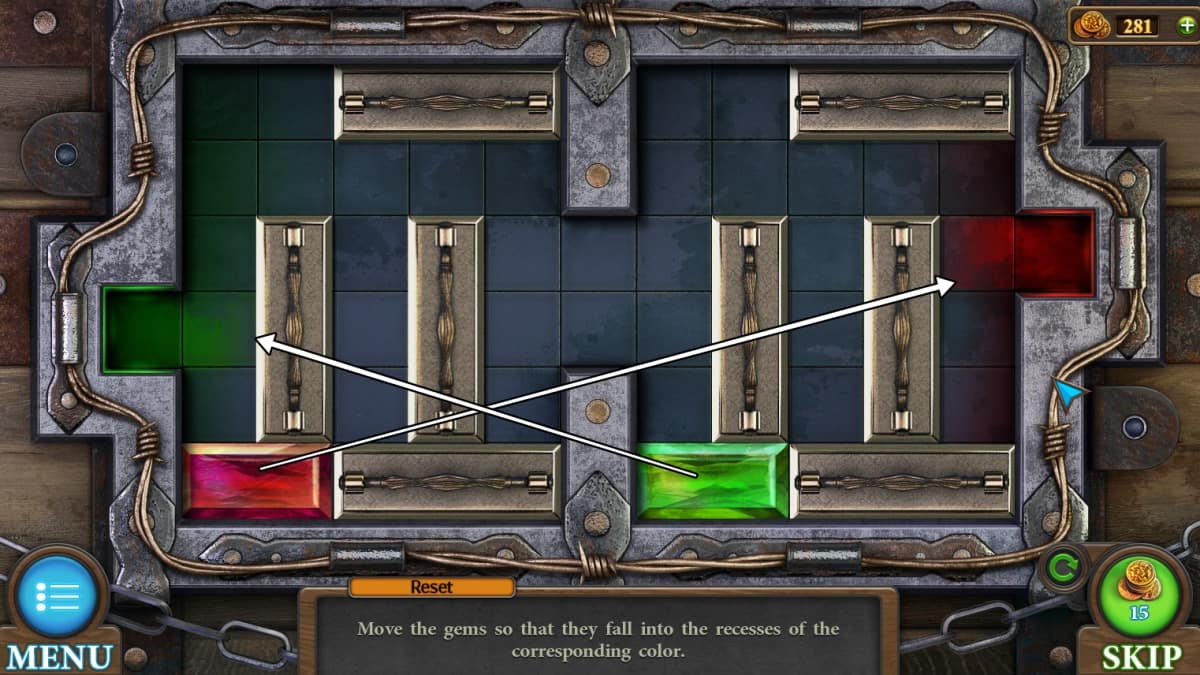
"Move the gems so that they fall into the recesses of the corresponding color."
The direction of every silver block is fixed, and they can only move longways. The red and green gem blocks can move both up and down and left and right freely. I recommend focusing on one gem at a time. By keeping one out of the way, the other has more room to get where it needs to go.
Successfully completing this puzzle grants you the stick and the net.
You can immediately open up the stick to add the following items in order: rope, which turns it into a bow, the arrow, and the feathers to make the arrow fly straight.
Gather the final potion ingredients
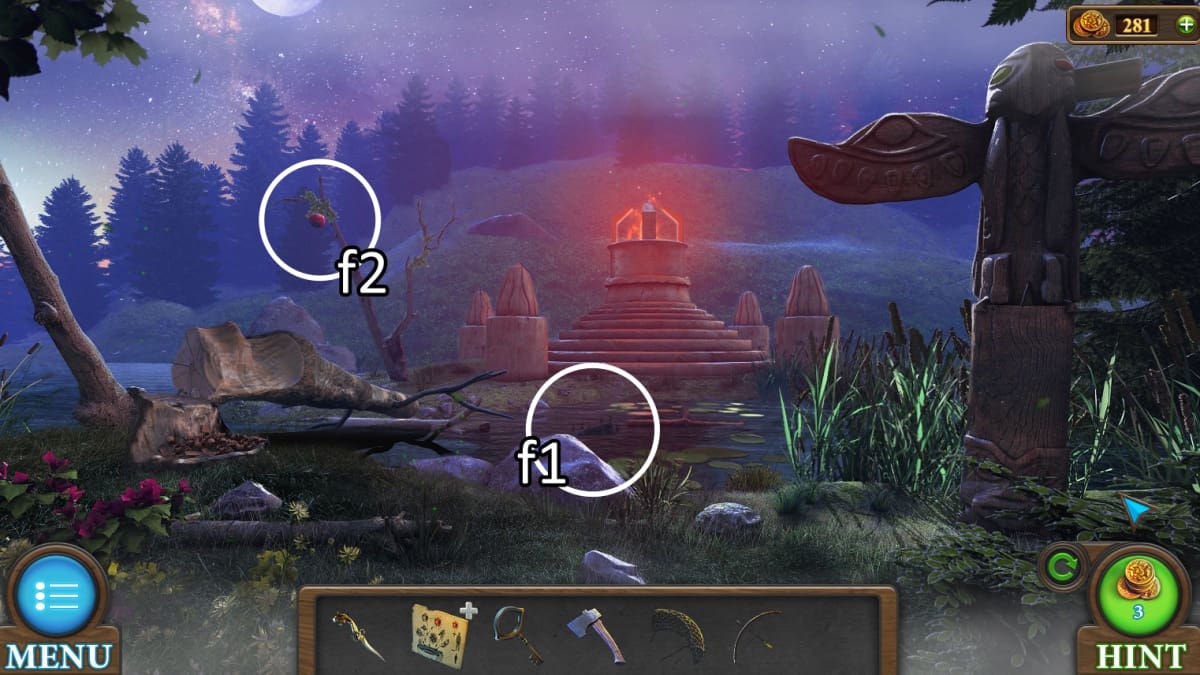
Back at the riverside, you now have the means to get the final two pieces to your magic apple recipe.
- f1. At the riverbank, use your net to pull the treasure chest close to shore. It's wrapped up in seaweed, but your ritual knife hasn't failed you yet. Add the seaweed to your potion recipe to change it into potion ingredients. Your key can also be used on this chest! This gives you a bottle. The inside of the chest looks a little magical as well, but does nothing.
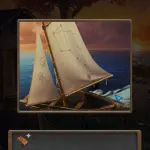
- f2. Use your bow and arrow on the hanging apple. This gives you an apple and the empty bow, which you'll use later.
After returning inside, you can add the potion ingredients to your bubbling cauldron and then dip your apple to make a magic apple. Approach the table, add the bottle you got from the chest next to the little ladder, and you can use the magic apple on the bottle to shrink down and walk inside.
Inside the shrunken world of the bottle
This magical world is full of new things to collect, so I hope you didn't get too attached to all that room in your inventory.
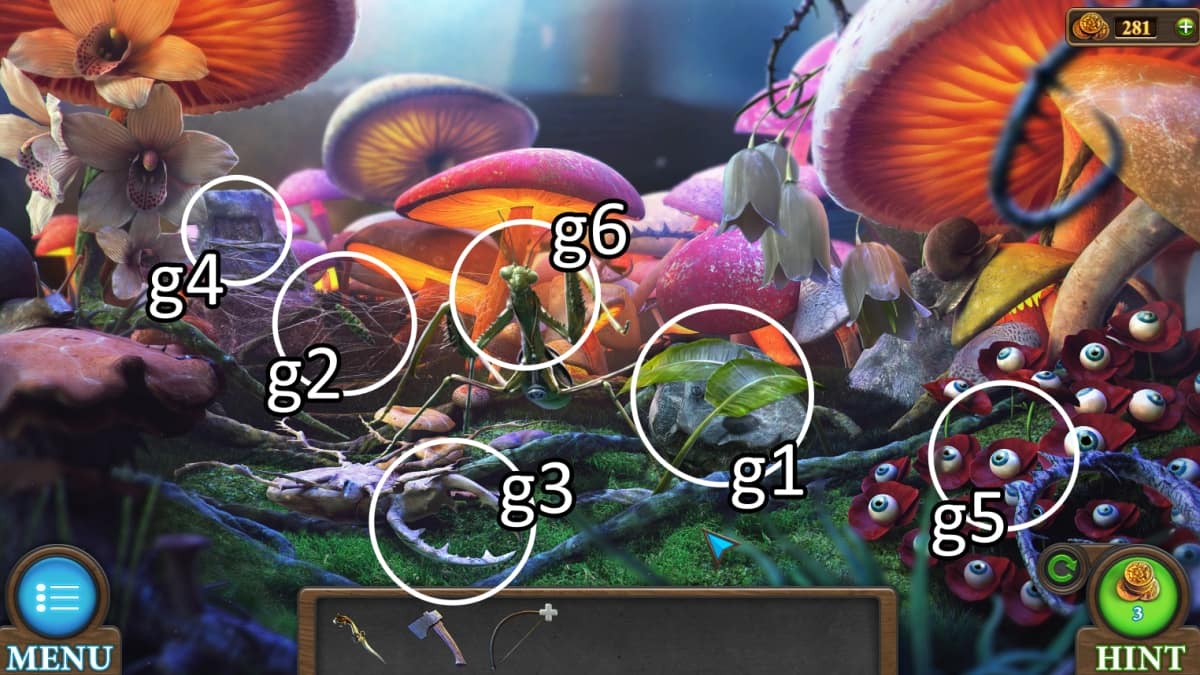
- g1. Brush aside the leaves to reveal a clue about the fiery altar. Note this for later.
- g2. Use your axe on the web. This will break the axe and give you just the handle.
- g3. Approach the dead beetle and break off its horn. Add your handle to the beetle's horn. You now need the string off your bow, so open it up in your inventory and apply the ritual knife. Your rope can now be added to the beetle horn to create the sharp tool.
- g2. Return to the web to use the sharp tool and pick up a nymph.
- g4. Behind the web you can now approach this recess which contains the bug puzzle, detailed below.
- g5. Pick an eyeball flower to make it wither. Use the golden spatula gathered from the bug puzzle on the dirt underneath the flower to find a bulb.
- g6. Give the nymph to the praying mantis to satisfy the bug and earn the stamp around its neck.
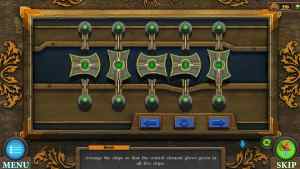
How to complete the bug puzzle
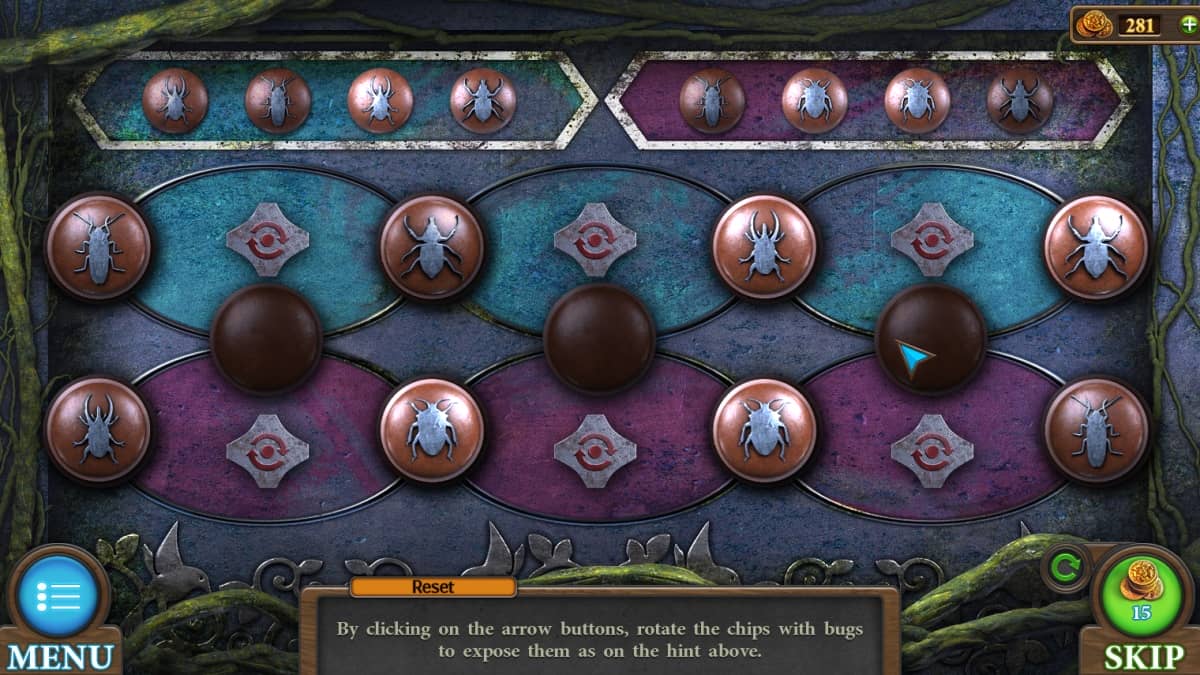
"By clicking on the arrow buttons, rotate the chips with bugs to expose them as on the hint above."
Along the top is the order you'll need the bugs to be in, with the left half being the blue top row, and the right half being the pink bottom row. Some of the bugs start on the wrong rows entirely.
Your reward, above the recess, is a note about the eyeball-shaped flower of insight and the golden spatula.
Finding the Magic Ink recipe
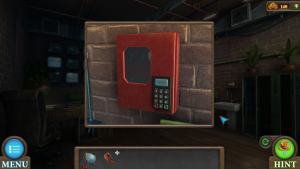
You can leave the bottle to grow again, and you still have another recipe to complete. At the table, use your new stamp on the book with a devil skull on the cover. The book contains an ink recipe, a key, and an amulet.
It's time to go all the way out to the fiery altar. You now have the means to put out the fire.
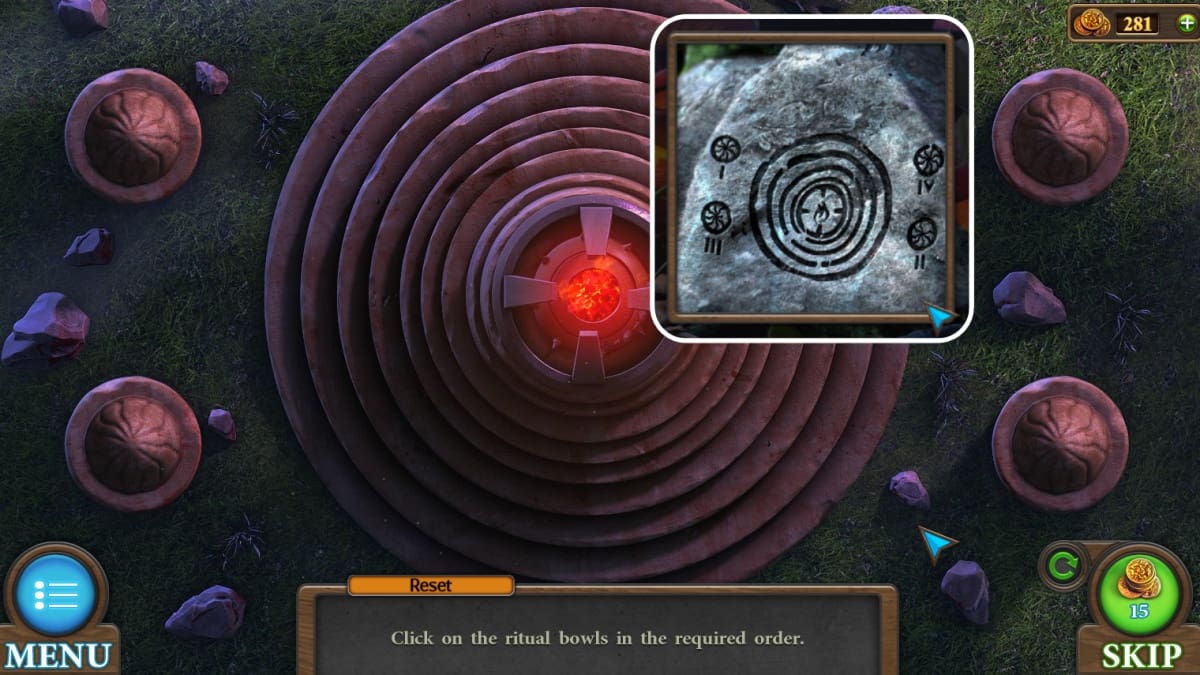
"Click on the ritual bowls in the required order."
My solution is pictured on screen, but yours may be different. Choosing the correct combination puts out the fire.
Use your golden spatula on the extinguished fire pit, add the bulb, and pick the flower of insight. Return to the screen with the giant bird cage.
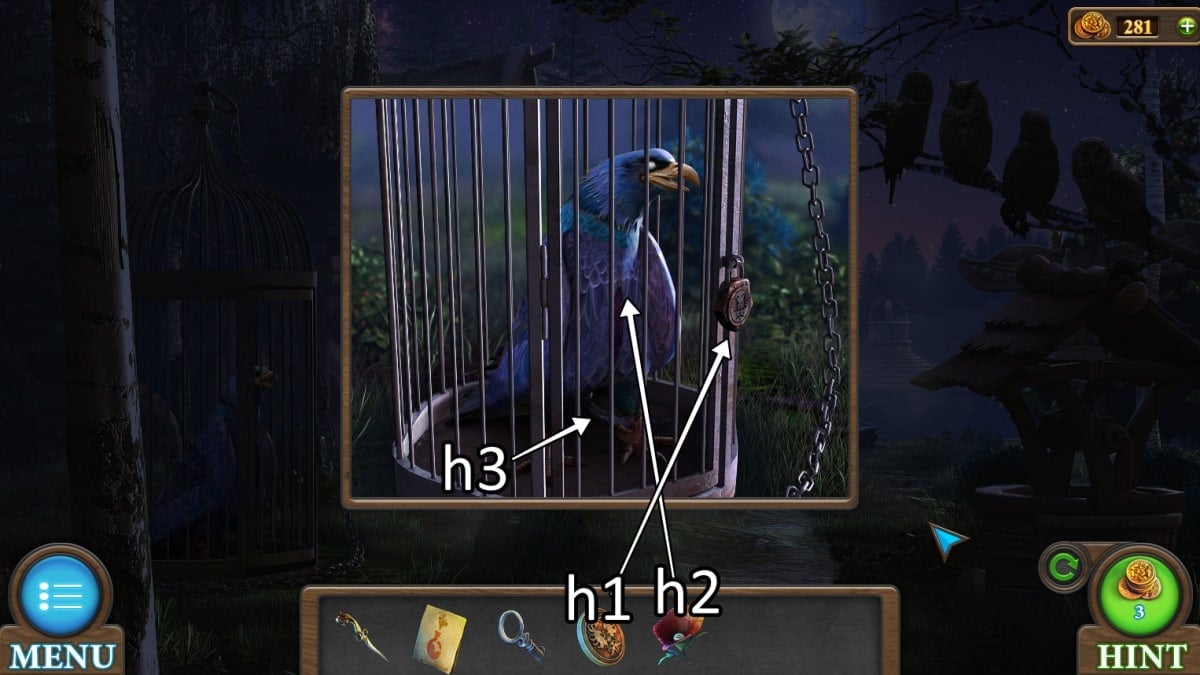
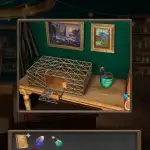
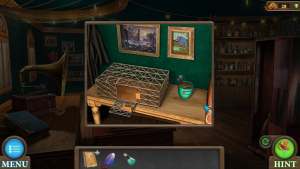
- h1. Use the amulet to open the cage.
- h2. Feed the flower of insight to the bird, curing its blindness and realizing that this is not a trick of perspective, this bird is actually massive.
- h3. With the bird gone, you can pick up its feather from the bottom of the cage.
Collecting the ink's ingredients

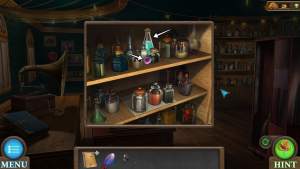
One last return to the cabin, and it's finally time to address the mysterious numbered bowls on the left side of the room. At the top of the cabinet, use your key to pick up three empty bottles.
While you're looking at the bowls, there's a nail on the left-hand side where you can drag the magic ink recipe to see what you need to collect.
Pink salt and liquid chlorophyll are already on the shelf, so you'll need to collect the dewdrop, flower pollen, and orchid stem juice. All of these will be obtained back in the miniature world in the bottle.
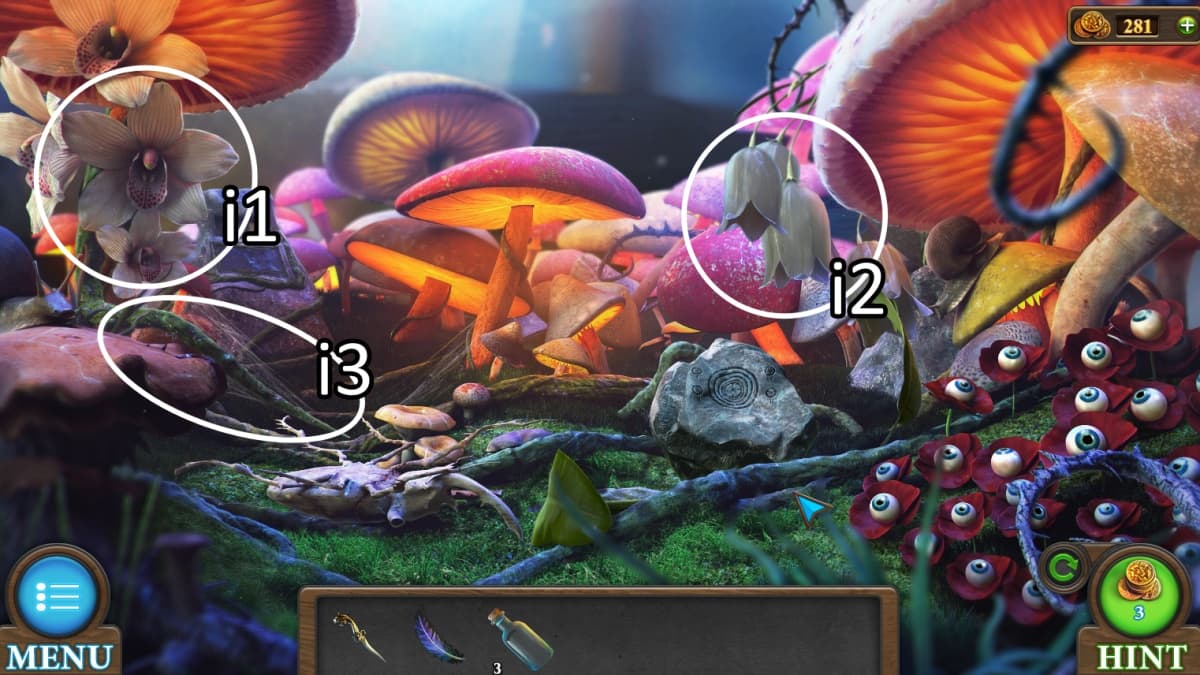
- i1. Hold a bottle up to the flower to gain dew.
- i2. Your second bottle will collect pollen from this flower.
- i3. Once you've zoomed into this stem, stab it with the ritual knife and use your last bottle to obtain the orchid juice.
Back to the bowls and scales, and you can start the magic ink puzzle.
How to complete the magic ink puzzle

"Using bowls and weights for scales, measure out as many ingredients as indicated in the recipe in each bowl."
The jars are labeled above by the amount/weight of each that you'll need, not the order to complete them in. These are also indicated by color in the recipe.
To complete this puzzle, you place weights and bowls by dragging them onto each side of the scale. As an example: To fill a bowl with 5, you'll place the 8 weight on one side, and the 3 weight and the empty 5 bowl on the other side. You'll then pour j5 into the 5 bowl. You can use the filled bowls the measure the rest of the recipe.
The order I filled them in was:
- 8 weight = 3 weight + 5 bowl (fills 5 bowl with orange j5)
- 5 bowl = 3 weight + 2 bowl (fills 2 bowl with green j2)
- 8 weight + 2 bowl = 3 weight + 7 bowl (fills 7 bowl with pink j7)
- 8 weight + 3 bowl = 5 bowl + 6 bowl (fills 6 bowl with blue j6)
- 7 bowl + 2 bowl = 5 bowl + 4 bowl (fill 4 bowl with yellow j4)
This creates the magic ink which you can now pick up.
Escaping the Magic World

Return to the magic book on the table one last time. With the ink and the bird feather, you can write in the book and complete the stage!
Tricky Doors World 2: Secluded Island complete walkthrough guide
Starting at the docks
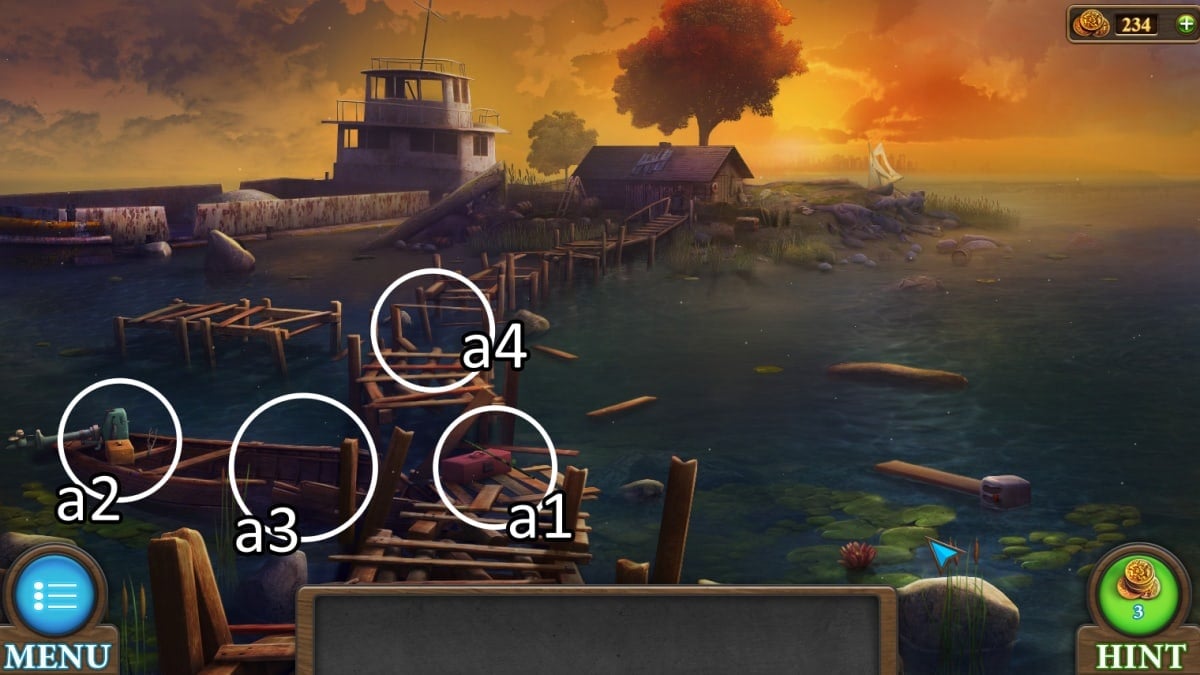
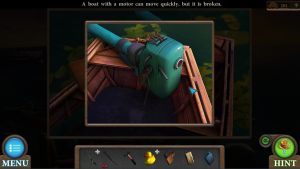
The Secluded Island world is your second challenge in Tricky Doors, with the ultimate goal of fixing up a boat to sail away to safety. You begin at the docks.
- a1. Pick up the fishing pole to get your inventory started.
- a2. Grab the first of eight brushwood you'll be collecting. Open the yellow box to collect the hammer and saw.
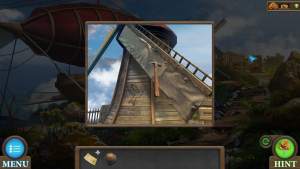
- a3. While zoomed out, use your saw on the closer half of the boat. This will give you wooden boards.
- a4. You can immediately use those wooden boards to finish the dock, granting you access to the second area.
Collect your tools on dry land
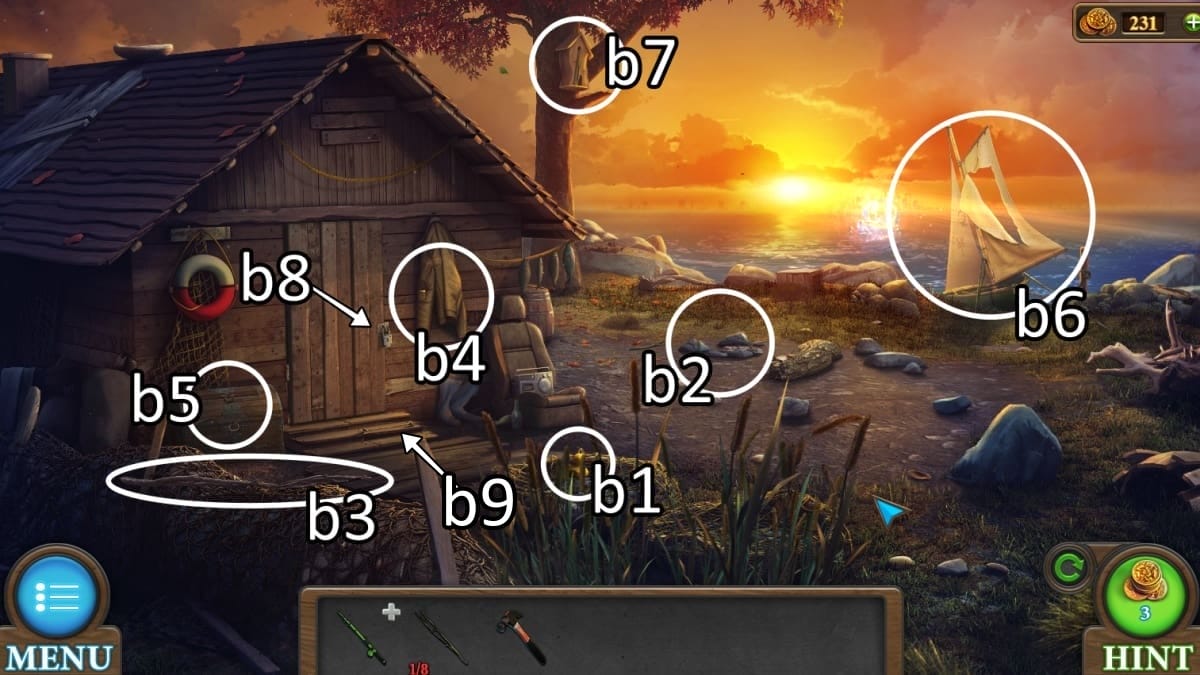
There's plenty to do now that you're in the second area of the map, the island's outdoors.
- b1. Pick up the rubber duck from the nest.
- b2. Zoom in to this area. On the upper left side, you'll see a piece of brushwood.
- b3. Another piece of brushwood.
- b4. Approach the coat to take the lighter from its arm pocket.
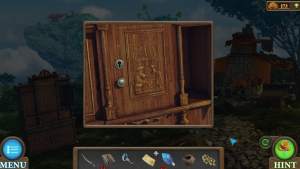
- b5. This chest must be opened by completing the rope puzzle, detailed below.
- b6. From the boat, click the ripped sail twice to pick it up and put it in your inventory. There is also a piece of brushwood on the left side.
- b7. The birdhouse is too tall to reach on your own. Climb the ladder from the rope puzzle to get closer. Inside the birdhouse is a key, and hanging off the side is another brushwood.
- b8. Use your key to open the door, but before you go inside...
- b9. Use your hammer on the broken board of the steps. This will grant you a brushwood and the first of four chips.
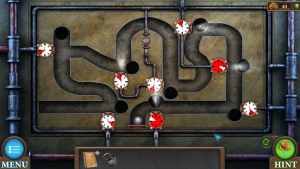
How to complete the rope untangling puzzle
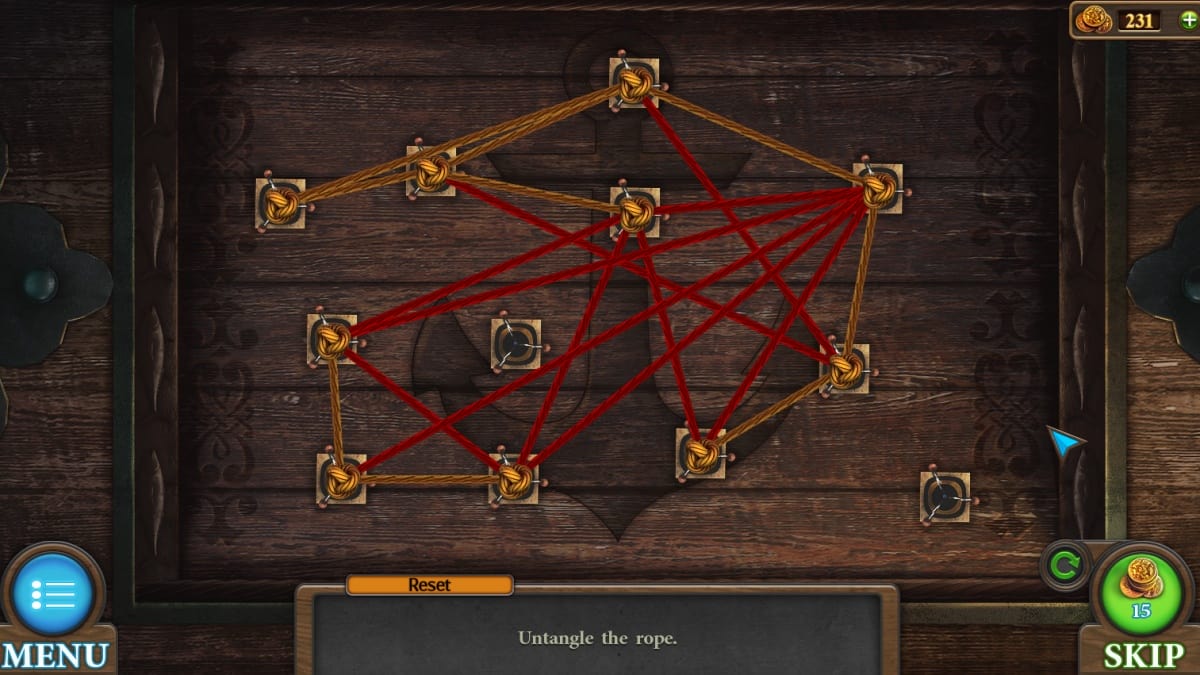
"Untangle the rope."
The ropes turn golden when not crossing over any other rope. You can move the knots between hooks on the board until all of the ropes are golden.
Your reward is a ladder.
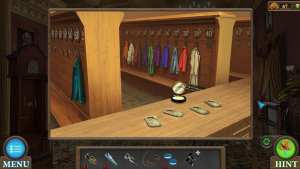
Lighting up the dark room

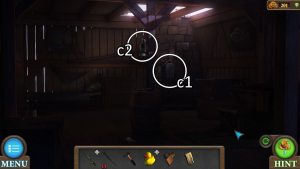
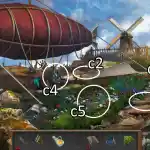
In the darkness of the unlocked room, grab the empty canister (c1). Return to the docks in the first area to siphon some gasoline from the boat's engine. Use the canister on the engine and then remove both caps, the gasoline will automatically siphon. Back in the dark room, use the gasoline canister and then the lighter on the lamp (c2).
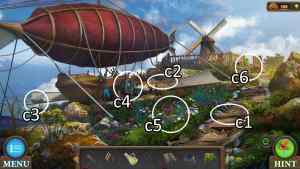
Your final room has now opened up, so you can prepare for the rest of the world.
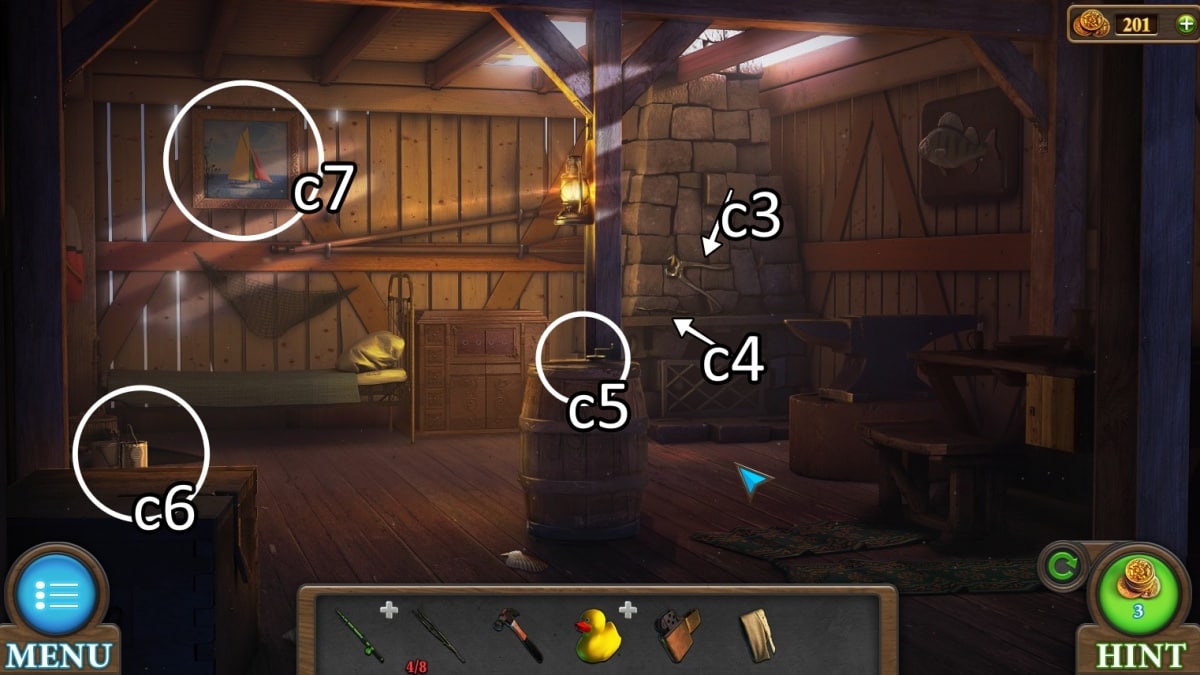
- c3. Pick up the forceps.
- c4. Another piece of brushwood.
- c5. This is the fishing line.
- c6. Zoom in to the floor here to grab the jar of resin and more brushwood.
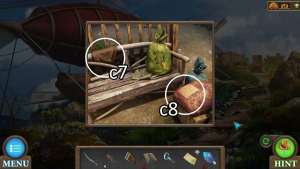
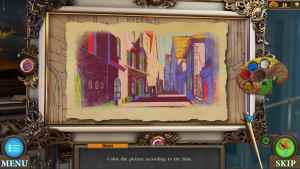
- c7. Remember the order of the colors on this ship picture. In my playthrough, it was yellow-green-red.
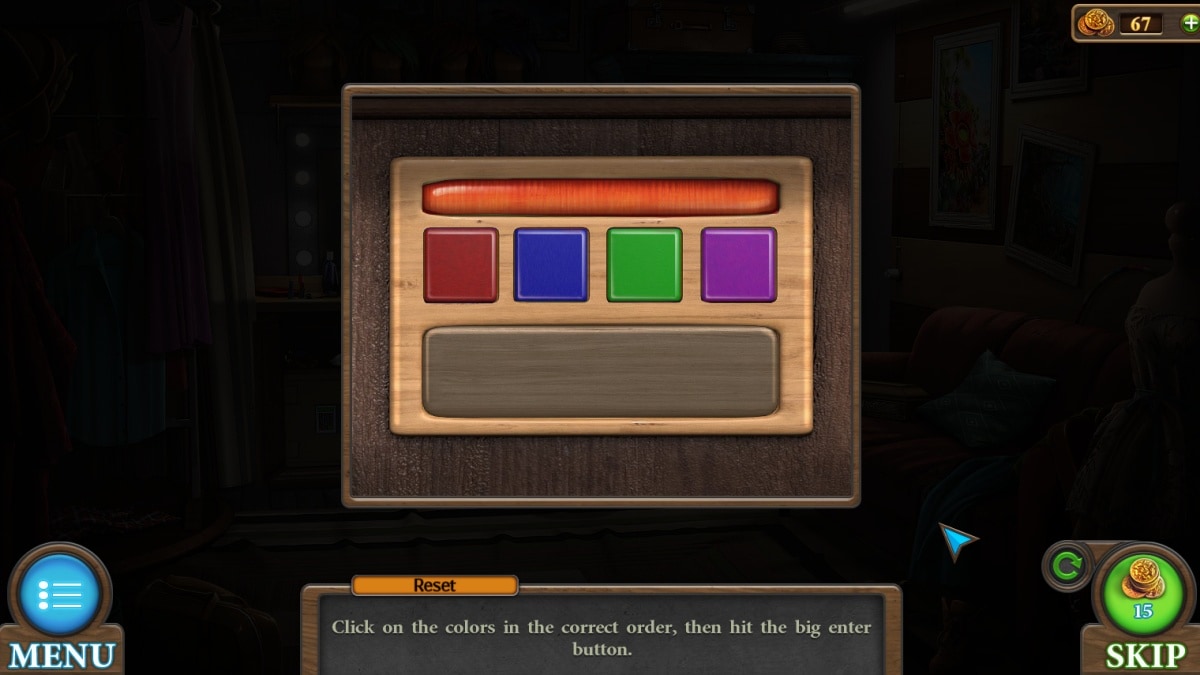
How to complete the tackle box puzzle
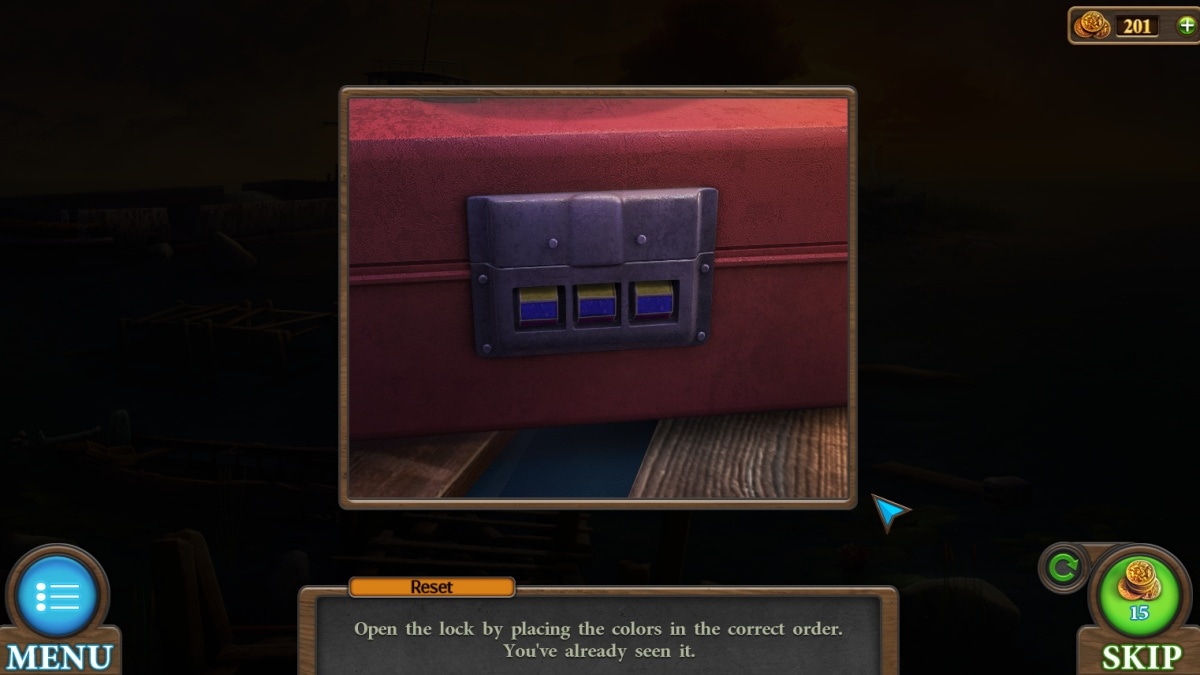
"Open the lock by placing the colors in the correct order. You've already seen it."
The color order of the ship sails is your clue for which colors to enter on the lock.
Your reward is a knife and a hook.
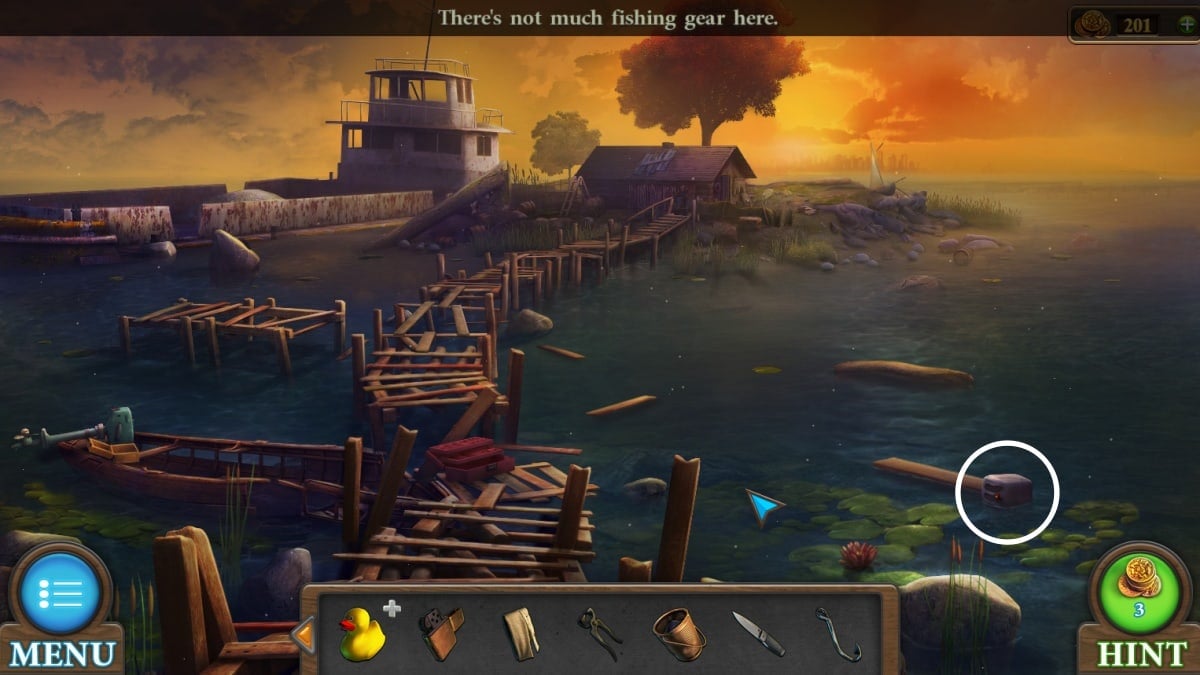
Pull up the fishing pole from your inventory. Add on the fishing line and then the hook. Use your completed fishing pole on the floating canister to pull it closer, and once you've retrieved it you can dump out a key.
While you're here, click on the rubber duck in your inventory and use your new knife to cut it in half, extracting a chip.
Unlocking the sewing machine
Just a few more steps to unlock the last pieces to escape.
- d1. Use your knife on the stitched-up portion of the bed to get another chip.
- d2. Your key will unlock the desk. Inside is a tripod and a box. This box has a puzzle inside, but you won't be able to do it just yet.
- Heading outside, you'll approach the fire pit under the tree. Set up the tripod, hang the jar of resin, and add your 8 bramblewood. Light the wood on fire with your lighter to heat the resin, and use your forceps to pull out the last chip.
- d3. Enter your chips into this table's recesses to unlock the sewing table puzzle.
How to complete the sewing machine puzzle

- "Connect the points with one continuous line."
- Click each node to draw the line between two nodes. You can go to the same node multiple times but have to use a new empty line with each move. I recommend completing smaller shapes within the pattern one at a time, just make sure your end point is a node with many exits.
- Completing this puzzle will unlock the sewing machine! Use your torn sail on the sewing machine to make it a full sail, no longer torn.
How to complete the constellation box puzzle
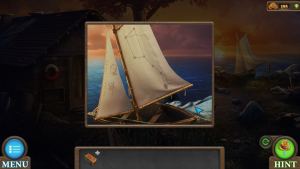
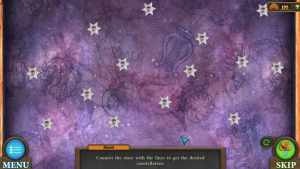
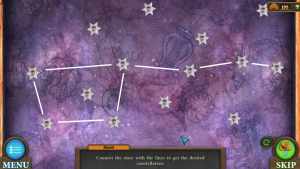
- Attach your sail to the boat, which will reveal the solution to the constellation box puzzle.
- "Connect the stars with the lines to get the desired constellation."
- Click between two stars to create a line between them. You can click the same two stars afterwards to erase the line. The solution is noted above in case you're having trouble, as the solution has a slightly more bent 'handle' than the clue.
- Completing this puzzle rewards you with the final key, which you can use to unlock the boat and sail into the exit for this world.
Tricky Doors World 3: Locked Apartment complete walkthrough guide
Welcome to the third world of Tricky Doors, the Locked Apartment. This level sees you escaping an apartment through a garage window.
Lighting up the first room
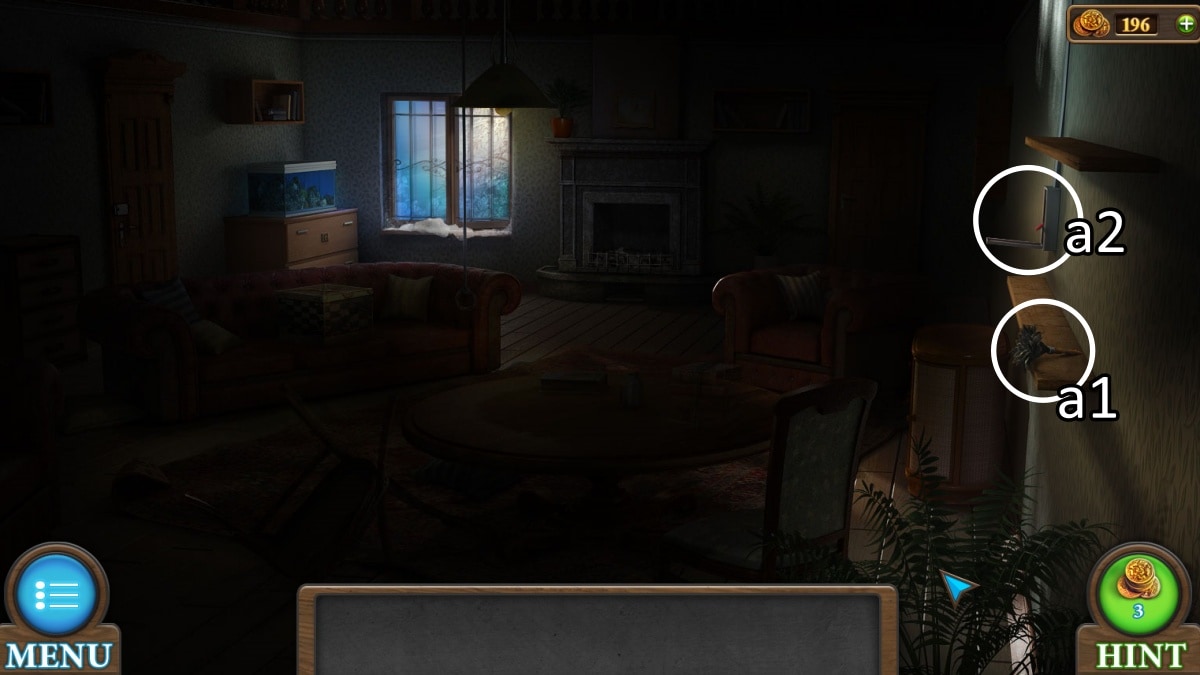
- a1. Pick up the feather duster nearby.
- a2. Immediately use it on the dusty light switch. There's a green chip (the first of five colored chips) here as well. Turn on the light.
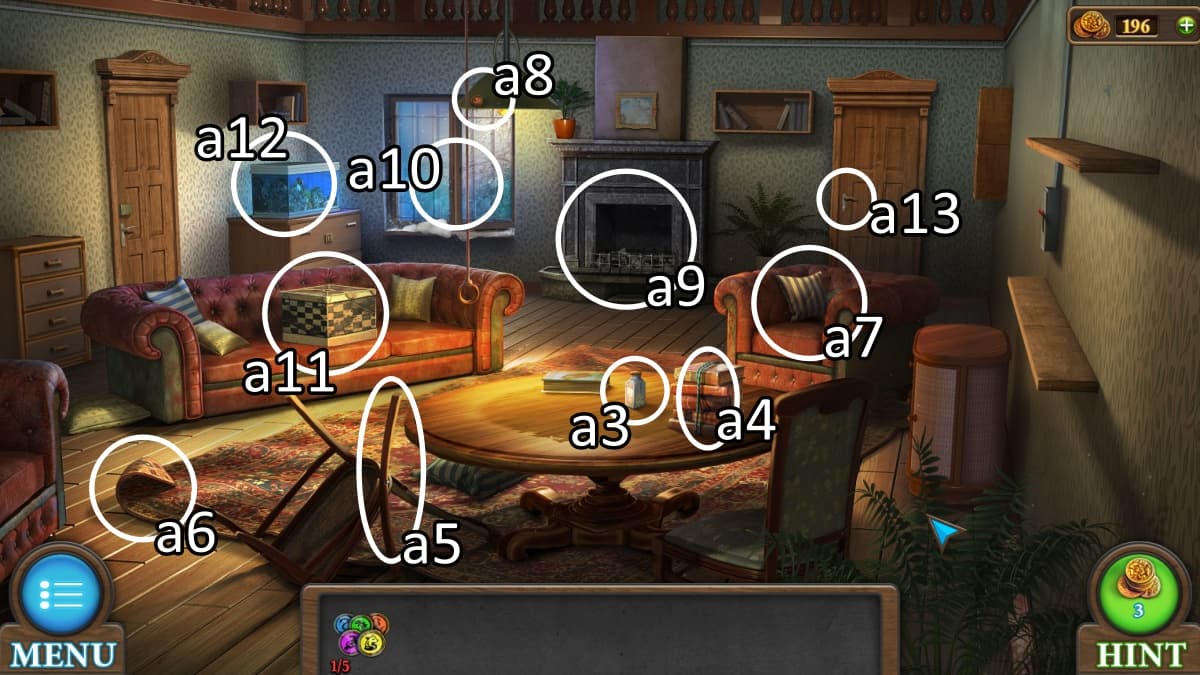
Now that the light is turned on, you have a hefty list of tasks to complete before ever leaving this first room.
- a3. Grab the sleeping pills off the table.
- a4. Take the rope off of the stack of books.
- a5. Remove the chair leg off the chair.
- a6. Fold up the corner of the rug to grab another colored chip and a match.
- a7. Another chip is perched atop a pillow.
- a8. Your fourth chip is hidden on top of the lamp.
- a9. Use your chair leg in the fireplace to gain a handle and a queen (chess piece).
- a10. You can attach the handle to the open window to close it. This melts the snow next to the window and reveals the box that the colored chips will go into.
- a11. Insert the queen into the puzzle box to unlock the chess queen puzzle, detailed below. This will gain you the final chip, which will unlock the colored chips puzzle, also detailed below.
- a12. Attach the rope to the magnet you get from the previous puzzle. Use this magnet on the fish tank to gain a key!
- a13. Use the key on this door to gain access to your second room, the kitchen.
How to complete chess queen puzzle
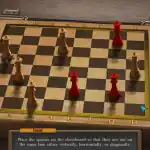
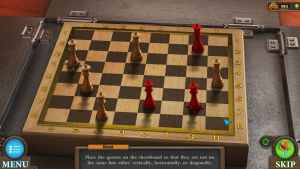
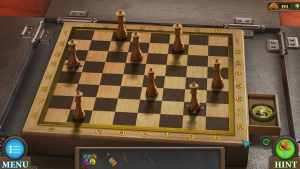
- "Place the queens on the chessboard so that they are not on the same line either vertically, horizontally or diagonally."
- Queens are red when they do not meet every requirement. Your goal is to turn all of the queens white. My solution is shown above, but your anchored queens that can't be moved may be in different positions.
- Your reward is the final colored chip.
How to complete colored chips puzzle
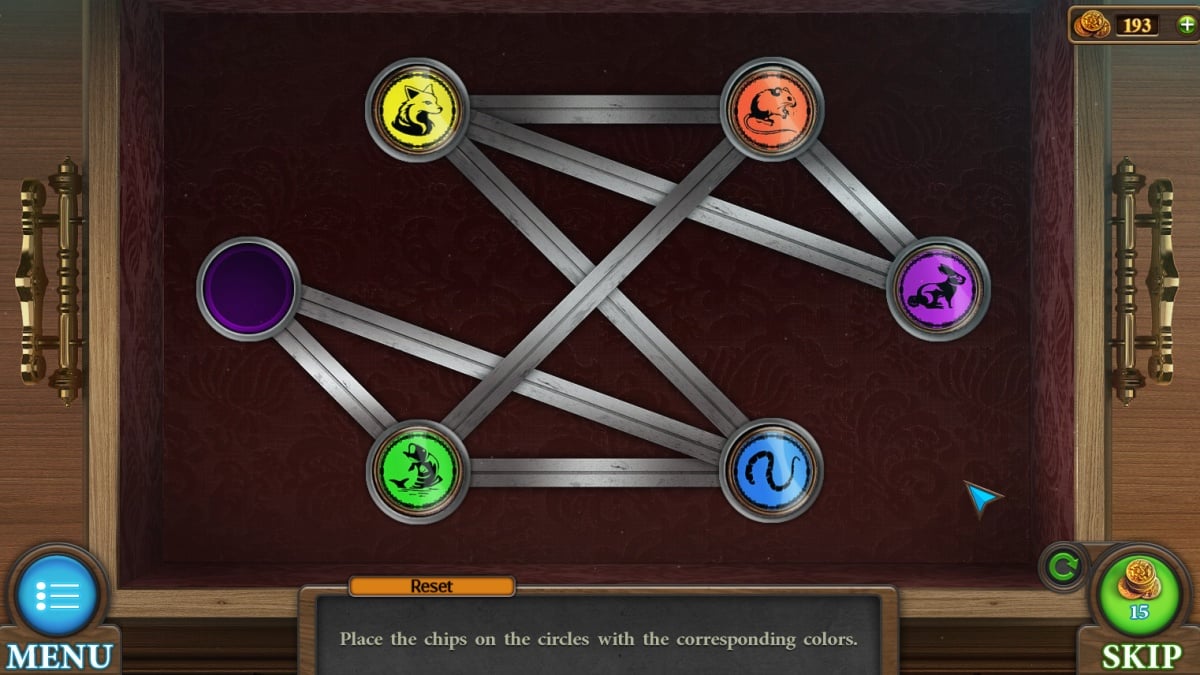
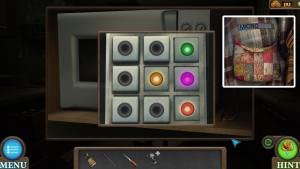
- "Place the chips on the circles with the corresponding colors."
- This is a simple matter of moving the chips along the metal bars into the empty slots until each color is where it should be. The chip will glow when it's in the right spot, but you can also see what color should go in each slot when it's uncovered.
- Your reward is a magnet.
Clearing the kitchen

In the kitchen you'll be setting up a lot of future items:
- b1. Drag the keys from the back of the chair over to the drawer to open it. Take the knife out of the drawer.
- b2. Open the sink cupboard. Pick up the rubber gloves and knock over the trash can. Once you've cleared the trash out of the can, pick up the fuse. There is a pipe puzzle under the sink that you cannot do yet.
- b3. Pick up the newspaper. Note the positions of the mug handles for later.
- b4. Open up the fridge, and then the freezer inside of it, to pick up the frozen meat.
- b5. You'll be doing more with the microwave soon, but for now you can keep the frozen meat inside.
Head back out to the living room for the next phase.
Getting into the third room

- Use your knife on the chair's pillow to find a key, which you can use on the left-side door.
- The door lock puzzle is very simple. Move the bolts up and down to pull out the four pins. I recommend doing one at a time, and starting in the middle. Once you've finished the first, the other three have plenty of room to be pulled out easily.
- Zoom in on the open door to see a broken fuse. Add your fuse to the box and then use the rubber gloves (safety first!) to switch out the fuse. Now you can head into the garage.
Inside the garage
About half of the room is cut off right now due to the dog guarding it.
- c1. Open this chest to take out a screwdriver.
- c2. Approach the laundry machine (next image).
- c3. Use the rubber gloves again to unplug the laundry machine.
- c4. Use your knife on the unplugged cord to pick up a plug with wire. Don't try this at home!
- c5. Open the laundry and click on the clothes that fall out. Pull down the pocket to get a screwdriver bit, and take note of the colors of 'wave' in microwave above the pocket. Mine showed red, green, orange, purple.
- Return to the microwave! Use your cord with plug on the end of the microwave's cord. Click it a few times to get the cords connected and plugged in. Once again, don't try this at home.
How to complete the microwave puzzle

- The microwave puzzle comes in two parts.
- First, you'll position the knobs in the same direction as the mugs.
- Second, turn on the buttons that match the colors on the microwave patch. You can click all the buttons to see the colors and unclick the ones that aren't from the patch. My solution is shown above.
- Once you've cooked the frozen meat, add the sleeping pills to the top of the steak. You can then pick up the bait item.
Exploring the rest of the garage
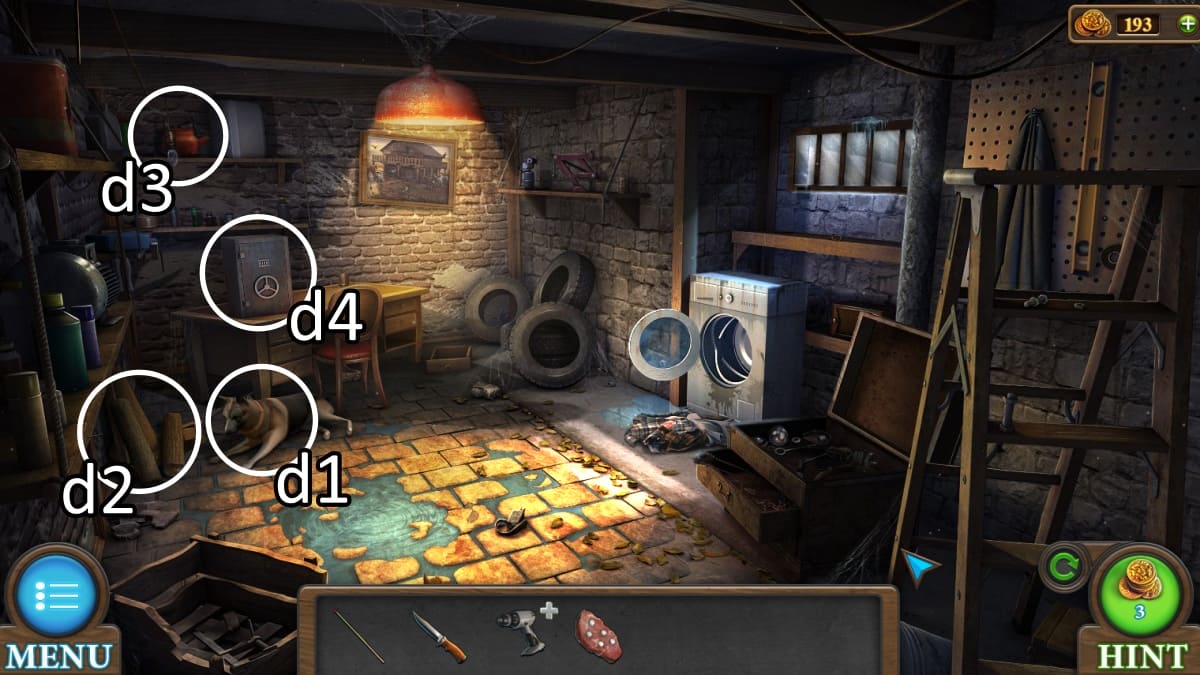
- d1. Give the bait to the dog to calm it down so you can explore freely.
- d2. Pick up wood.
- d3. Pick up the kettle.
- d4. This is the cowboy safe puzzle, detailed below, which you will now be gathering the clues for.
- Return to the fireplace. Insert the newspaper and wood, and use the match to light the fire. This clears up the painting above the fireplace. You'll be counting objects in this painting and the one near the safe for the solution.
How to complete the cowboy safe puzzle
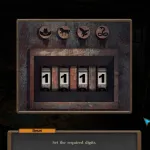
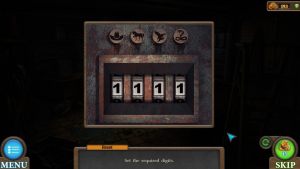
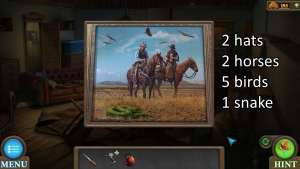
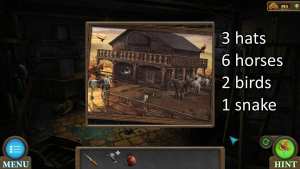
- "Set the required digits."
- Each symbol represents a number of items in the paintings around the apartment. The paintings are counted above.
- Your reward for opening the safe is a red valve and a battery. You can now add the screwdriver tip and battery to the screwdriver.
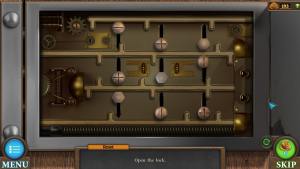
How to complete the sink pipe puzzle
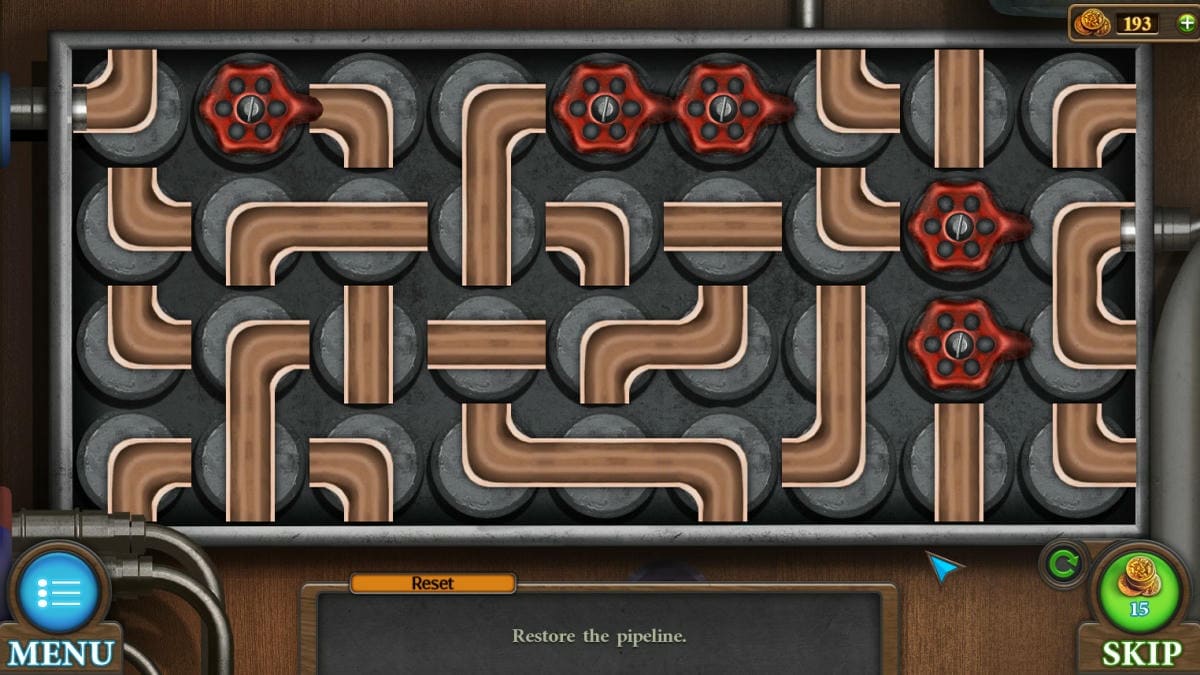
"Restore the pipeline."
To unlock the sink pipe puzzle, return to the kitchen and look under the sink. Open the panel at the back and replace the missing valve with the one you found. Click the pipe pieces to turn them and create one linked pipe. You do not need to use every piece of pipe, so long as there's one continuous pipeline from start to finish. To complete the puzzle once the connections are made, turn on all the valves.
Your reward is the water being turned back on.
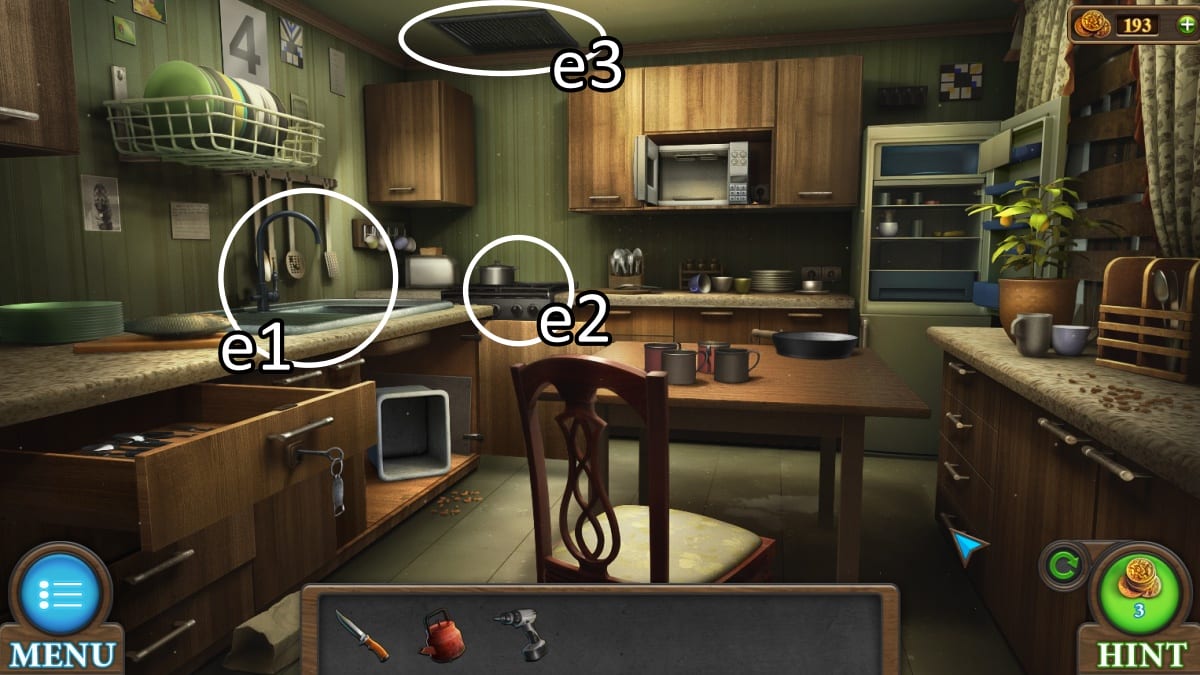
- e1. After the puzzle is complete, place your kettle into the sink and turn the water on. Collect the kettle full of water.
- e2. Click the stove to turn it on and place the kettle on top to boil it.
- e3. Use the screwdriver on the grate to get the key.
- Now you have everything you need to escape!
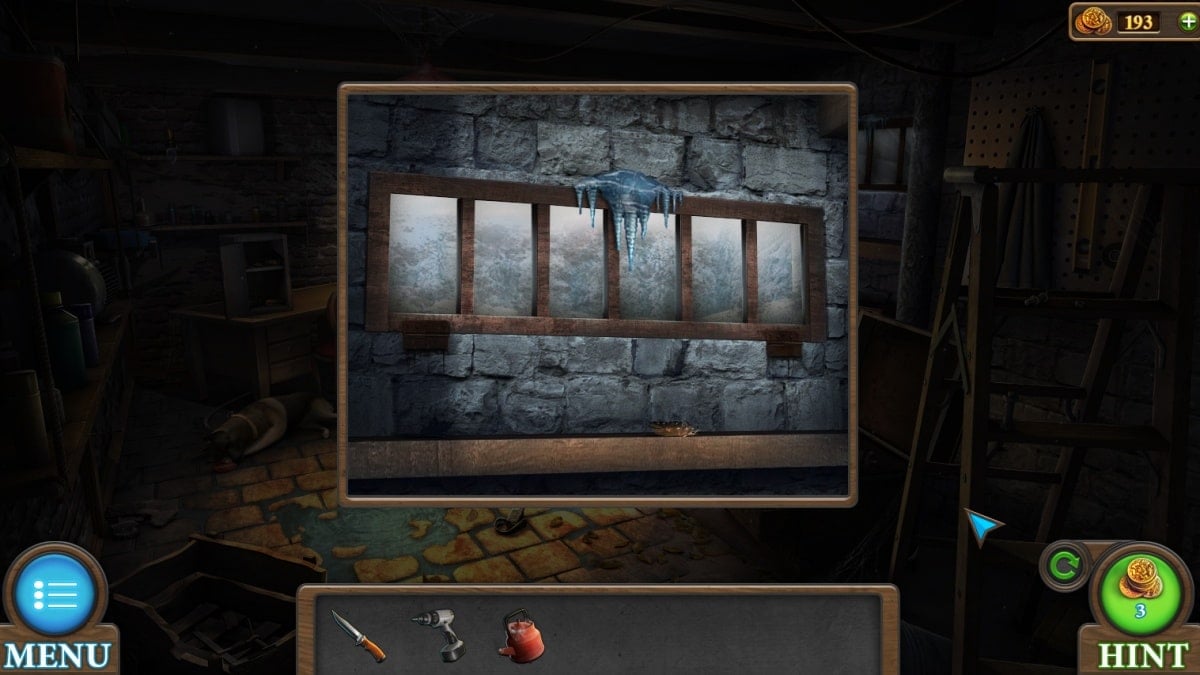
Return to the garage. Your escape is through the small window above the washing machine. In this order, use your knife to knock off the ice, the boiling water to melt the rest and the key to unlock the window and leave.
Tricky Doors World 4: Floating Islands complete walkthrough guide
Today's world is a set of floating islands once inhabited by three brothers. Your goal is to escape, as usual. Also, as usual, you'll begin by loading up your pockets!
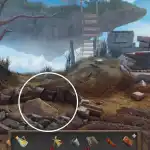
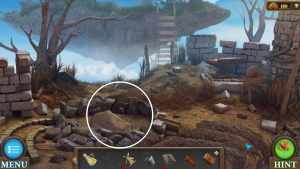
Building the first island's bridge
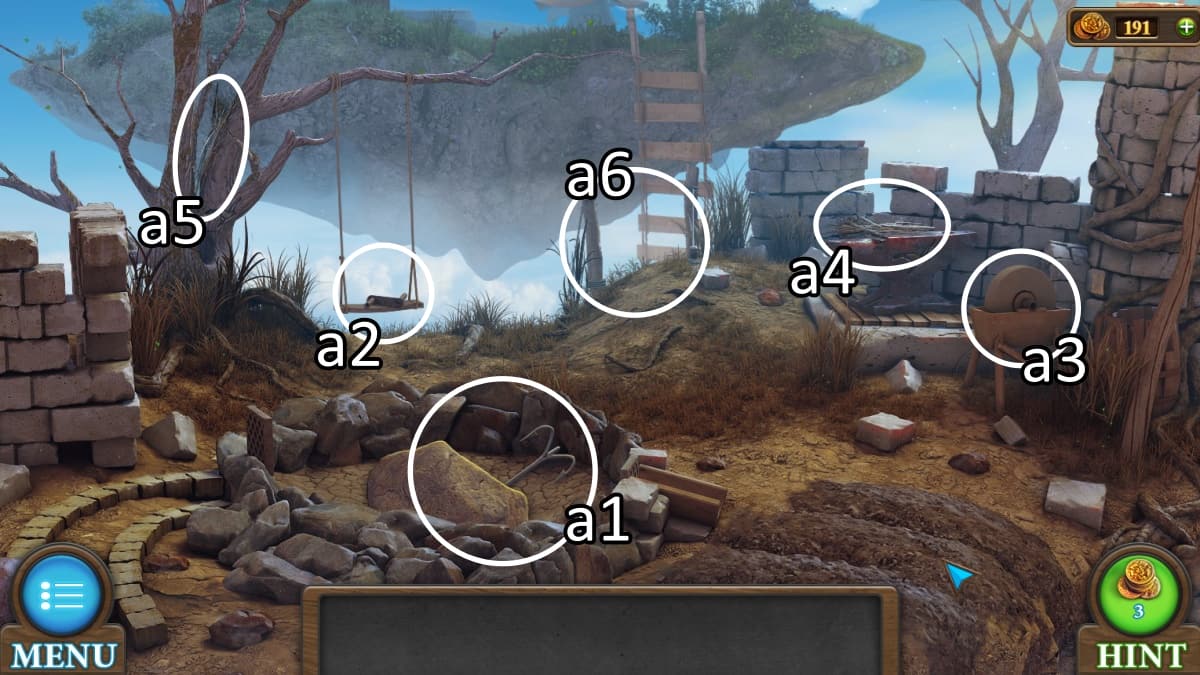
- a1. Look into the pond to pick up the hook and rusty knife.
- a2. Pick up the handle.
- a3. Attach the handle to the grinder, and then use the rusty knife on it to make it a regular knife. While you're here, you can pick up a wire and shackle on the left side. There is also a note you can read for a bit of lore and hints about where the puzzles will go.
- a2. Return to a2 to use the knife on the swing and get a rope.
- a4. Pick up the first of six brushwood.
- a5. Another brushwood.
- a6. Attach your rope to your hook. Toss it over the edge of the cliff to pick up the bridge and move to the next area.
Gathering at the baker's island

Your next area contains an oven for the baker and several other useful items.
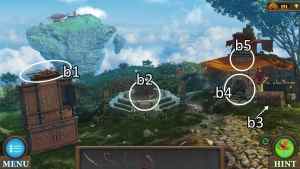
- b1. Another piece of brushwood.
- b2. Approach to pick up a set of matches
- b3. One more brushwood at the foot of the chest, and you can also use your wire on the lock of the chest to unlock the cubes and flowers puzzle, detailed below.
- b4. Get closer to the oven to pick up several items. See the next image to find everything.
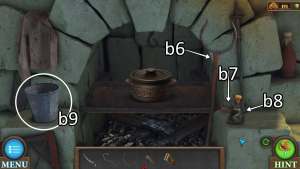
- b5. Zoom in on the fabric over the oven and use your knife on it.
- b6. Pick up the oven fork.
- b7. And the first of two halves of the mill.
- b8. And finally some oil.
- b9. Grab the bucket. Add the shackle from your inventory to the bucket.
How to complete the cubes and flowers puzzle

- "Lower the boards with characters so that the number of characters on the outside of the device matches the number of characters in the hint."
- The hint mentioned is the cube and flower total in the middle center of the screen. Use the blue arrows to raise and lower the boards. To complete this puzzle, I start by lowering all the board completely, and then raise each board by one until it gets to be too many of either the flowers or cubes, and moving on to the next board after that. You can ignore the stars and balls.
- Your reward is dynamite, a puzzle box that can't be completed yet, and another note of lore for the area.
- Return to the first area with the large rock.
Growing the beanstalk
- Place the dynamite under the rock and then use the matches to light it. Once the rock has blown up, water will fill the pool. Pluck the second half of the windmill off the surface of the water. Use your bucket on the magic water.
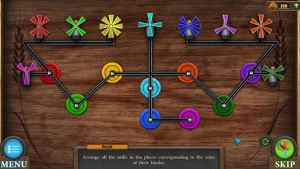
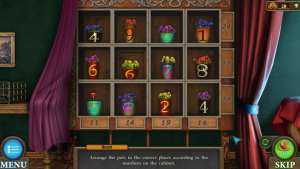
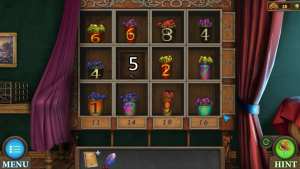
- Place the completed windmill in the appropriate recess on the puzzle box. This unlocks the windmill puzzle.
- "Arrange all the mills in the places corresponding to the color of their blades."
- Click on each windmill to move it one place. The windmills only go in one direction so I recommend starting with the pink one that goes to the very bottom and working your way up.
- The box contains a pair of beanstalk beans. Like Jack and the Beanstalk, you'll go back to the second island and plant your magic beans. Water them with the bucket, and a giant beanstalk will grow.
- While still zoomed in, you'll see a leaf at the bottom of the stalk, which you can collect with your knife.
Across the beanstalk to the third island
After following the giant beanstalk, you'll reach the third and final island of the world.
- c1. Start by grabbing a piece of brushwood.
- c2. And here is your final piece of brushwood.
- c3. Use your oven fork on the nest of eggs. This will give you the first of three crystals and a set of eggs.
- c4. Approach the skeleton. This brother is holding another note explaining what happened here. Move his other hand off of the box. This unlocks the dot bridge puzzle, detailed below.
- c5. Now that you have the bread recipe, you can use the knife on this patch of flowers.
- c6. Approach the bench, which has multiple objects to find.
- c7. Pick up the bag.
- c8. Use the knife on the bag to spill out sprouted grain and another crystal.
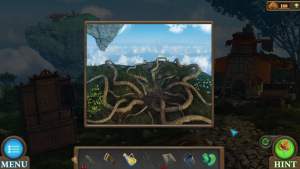
How to complete the dot bridge puzzle

- "Connect the dots of the same color to each other. On cells with a bridge, you can draw two lines (on it and under it)."
- The locations of the dots and bridges change each playthrough. If you draw a line through one that already exists, the original line will disappear, so you can work around yourself.
- Your reward is a key and a bread recipe, which you can drag items onto at any time to clear up your inventory.
Growing the flour
At this point you have all your ingredients (bucket of water, bean tree leaf, blue flower, and eggs) except for the flour. It's time to resolve that.
- On the second island, approach the wardrobe and use your key to open it up. No puzzle here, you just get the third crystal and a hammer.
- Return to the very first island, and it's time to grow your flour.
- d1. Place your grain sprouts into the ground.
- d2. Use the hammer to release the magic water onto the grains.
- d1. Return to the newly-grown grains and place down the bag item. Use the knife to fill and collect your grain bag.
- Go back to the third island. On the fallen piece of airship, use your hammer to extract the nails and a second piece of fabric.
- At the windmill, you'll apply the fabric to the empty blade, and then click it again to put it where it needs to go. Add your nails and hammer them in.
- Now you can drag the bag of grain onto the functioning mill to create flour.
How to complete the bread baking puzzle
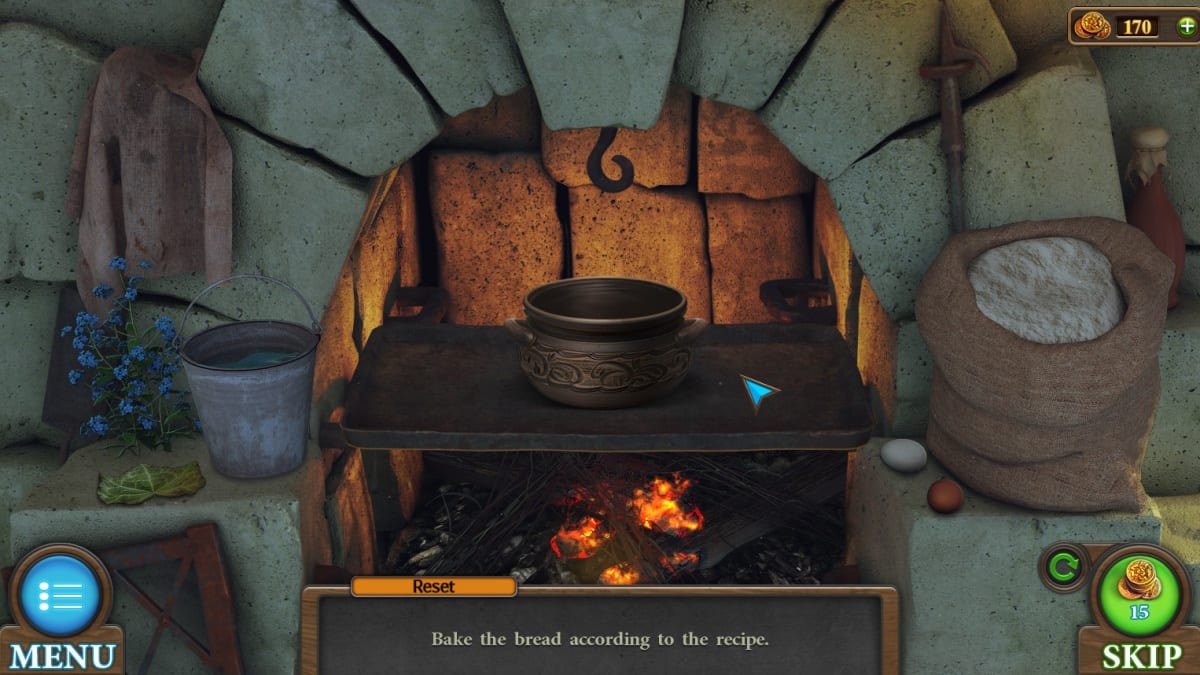
- Drag all of your ingredients onto the bread recipe to create the baking ingredients item.
- Use the pile of brushwood and the matches to heat the oven, where you'll then drag the baking ingredients.
- "Bake the bread according to the recipe."
- Choose the ingredients based on the order provided and drag them into the pot. If you need a refresher, return to the skeleton and check the recipe in his box.
- This recipe is: water, leaf, flower, eggs, flour. With that, you've baked your bread!
How to complete the bird counting puzzle
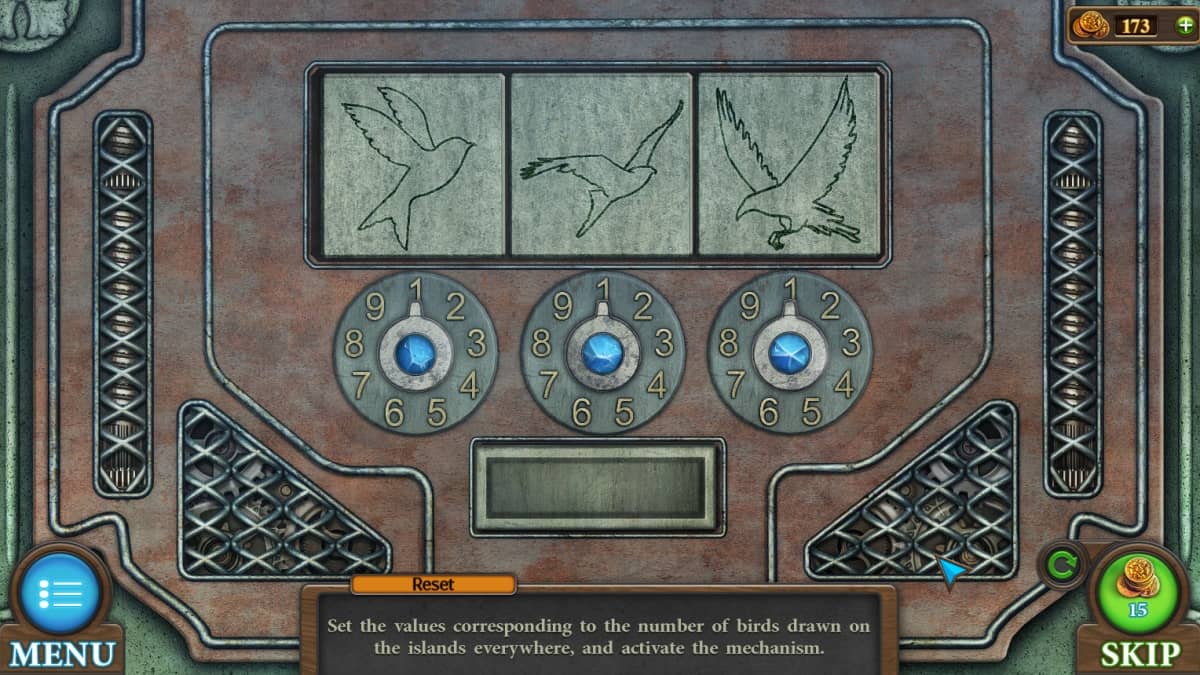
- "Set the values corresponding to the number of birds drawn on the islands everywhere, and activate the mechanism."
- Set your crystals into the mechanism in the middle of the second island and it will unlock this final puzzle. As it says, there are birds of three types hidden all over the island.
- My solution was 3-3-4, but yours may differ.
- With the altar unlocked, you can place the offering of bread in the middle and fly to safety!
Tricky Doors World 5: Amusement Park complete walkthrough guide
In one of our spookier Tricky Doors worlds, today you find yourself in an abandoned amusement park, complete with clowns and a barely-functioning ferris wheel. Your goal is to get inside and reach the exit.
- a1. Start by opening up the hot dog case and taking out the grill fork.
- a2. Then knock over the trash can and pick up the cartridges and glass cutter. Note the numbers on the top of the newspaper.
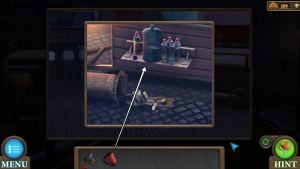
- a3. On the left side of the shooting range is a valve.
- a4. Open the fuse box to pick up the keychain.
- a5. You can use the keychain on the toolbox here to pick up a wrench and some garden shears.
- a6. Add the valve to the pipe here, and then click it again to turn off the sprinklers.
- a7. You can now approach the hose on the ground and use your garden shears to cut a piece of hose off. Immediately click the garden shears in your inventory and add the hose to them. Pick up the first of four chips while you're zoomed in.
- a4. Go back to the fuse box to use the rubber-handled shears on the sparking wires. This opens the door, but we won't be going in just yet.
- a8. Approach the ferris wheel and add your new wires to the box to unlock the ferris wheel wire puzzle!
How to complete the Ferris wheel wire puzzle
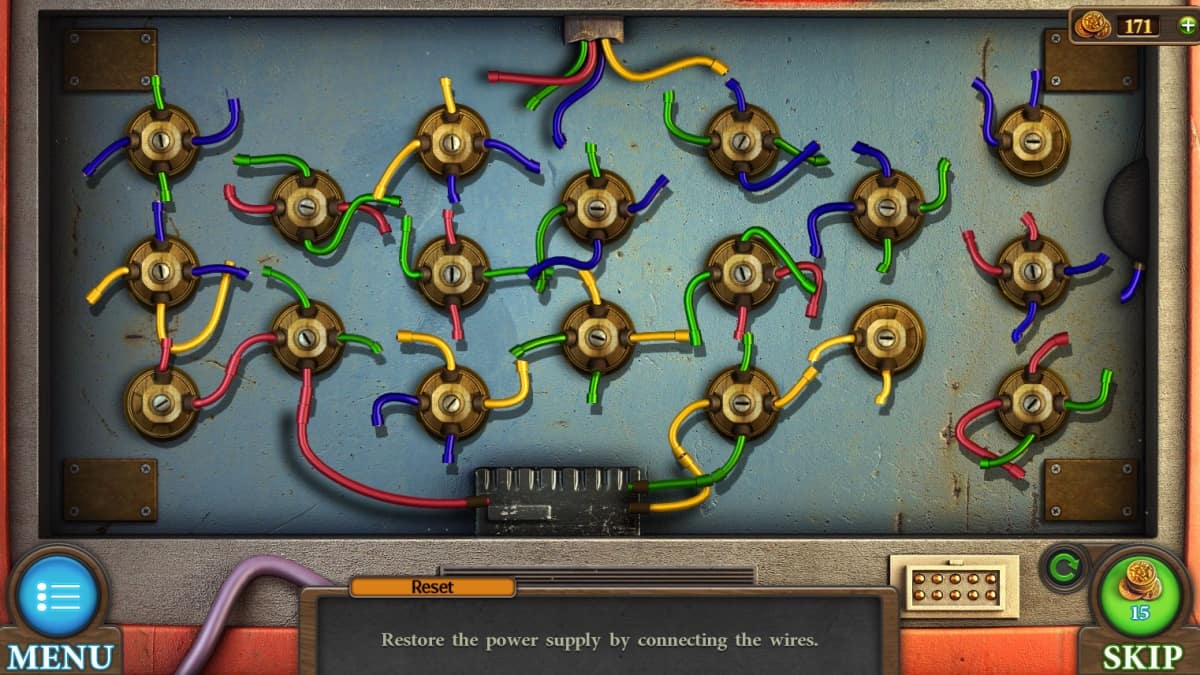
- "Restore the power supply by connecting the wires."
- This is a game of moving around all the wires so that they connect. You can click any two nodes to swap them around, but their direction stays the same. I recommend starting with the wires that are already in place, such as the group of four at the top, and finding which piece fits those. After that, connect each in a line until you're finished.
- Your reward is the Ferris wheel moving the lit car down to your level.

- Use your glass cutter on the glass of the Ferris wheel car.
- Pick up the gun and the knob from the seat. Remember that light bulb for later.
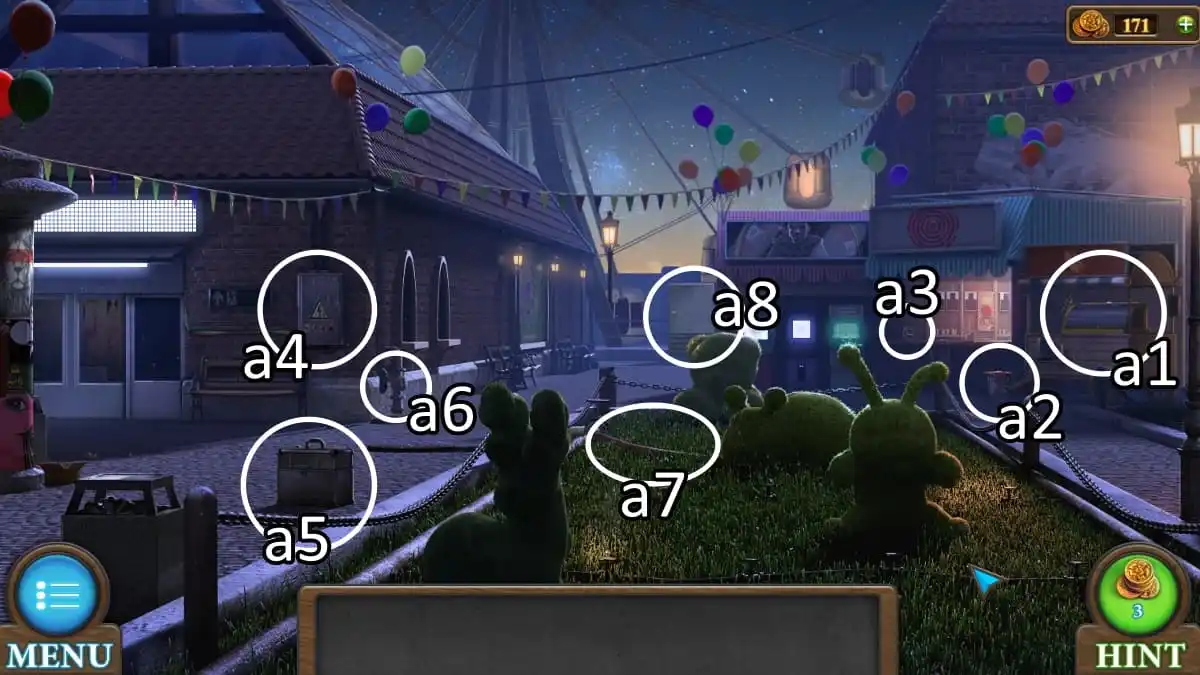
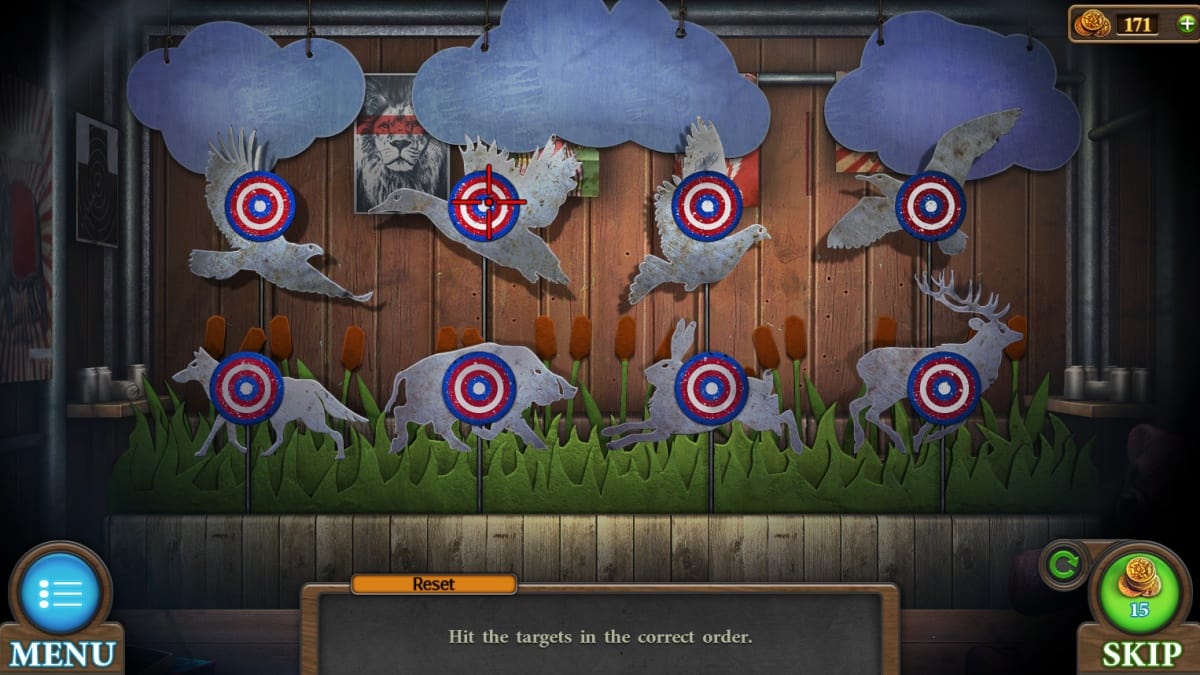
How to complete the shooting range puzzle
- Approach the shooting range. Open the gun in your inventory and insert the cartridges to unlock the shooting range puzzle.
- "Hit the targets in the correct order."
- This is a game of memory. When you shoot a target, it will either stay down if it's right, or all targets will pop back up if it's wrong. You must shoot all 8 in the correct order to complete the game.
- Yours may be different, but my order was: falcon elk wolf boar rabbit dove duck seagull.
- This grants you a key, and now you can head inside to the next room.
Disarming the second door


- c1. Move this picture to pick up a green button.
c2. Zoom in on this broken tile. Use your grill fork to pry it up and receive another chip.
c3. Go to the alarm above the next door. Use the wrench to open up the alarm. - Click the red wire to disconnect the alarm, and the green wire to allow entrance. It should look like the image above when you're done.
- From there you can use the key on the door to get in.
Lighting up the last room

- d1. Tilt this light towards you to note the lack of bulb.
- d2. Take the gloves out of this jacket pocket.
- Go back to the Ferris wheel and use the gloves to unscrew the lightbulb. Use the lightbulb on the empty light in the third room to turn on the light.

With the light on, you can start to crack this room in earnest.
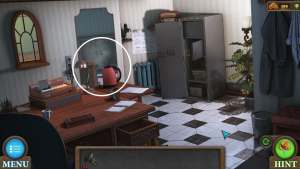
- d3. Pick up the red kettle.
- d4. There's a paperclip hidden here.
- d5. Use your paperclip to unlock this drawer, and take out a pair of tweezers.
- d6. You can crack this safe by applying the green button to the panel, and unlocking the safe button puzzle, detailed below.
- d7. The picture tucked behind the calendar is your clue for the upcoming radio puzzle. The clocks in the lobby show the time in the place pictured.
- d8. Add the knob to the radio to unlock the radio puzzle, detailed below.
How to complete the safe button puzzle

- "Click on the buttons in the correct order."
- You've already seen the solution to this puzzle, outside in the lobby. There are four colored posters which reveal the order to click the buttons.
- For me, this order was red yellow blue green.
- The safe opens, and your reward is a clown token.
How to complete the radio frequency puzzle
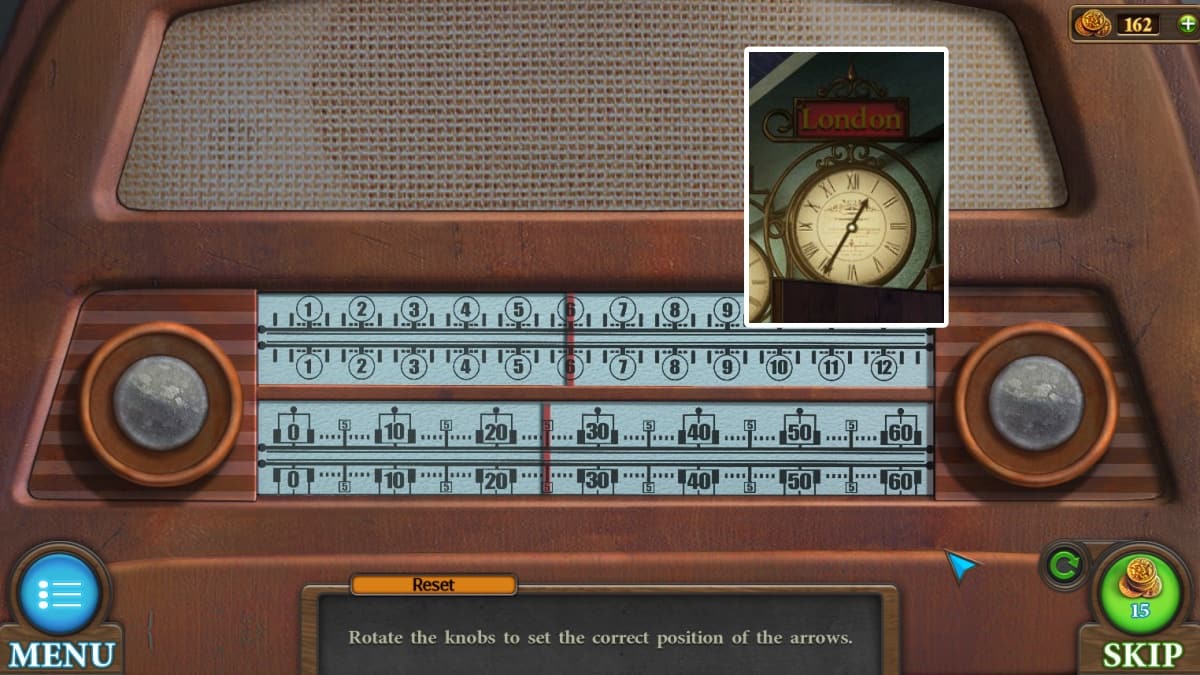
- "Rotate the knobs to set the correct position of the arrows."
- The picture of Big Ben shows that this radio should be set to London time. In London, it's currently (according to the lobby clock) 1:35. Rotate the knobs until the top line is set to 1, and the bottom is set to 35.
- Your reward is a knife.
How to complete the clown arcade mini-game
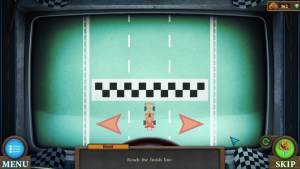
- "Reach the finish line."
- Place your clown token into the clown arcade machine. Push the red button to start the mini-game.
- This is not a puzzle but a skill test. Click the left and right arrows at the bottom of the screen to move your car in the correct direction to avoid a crash. If you need to move twice, there is a far left or far right button to move the full distance in one click.
- You have as many tries to do this as you need.
- Your reward is a cryptex, which you cannot complete yet.
- Head back inside to unlock a few more items.
- e1. Use your tweezers to extract a chip from inside this grate.
- e2. Use your knife to pry open this telephone box and take out a circuit board.
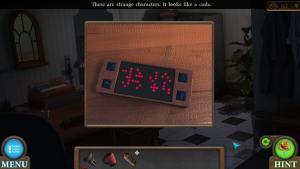
- e3. Approach this item to add the circuit board to it and connect the wires. Closing it will reveal a clock puzzle, on the next gallery image.
- This clock puzzle comes back to the newspaper from the trashcan. Enter the numbers on the headline of the newspaper to unlock this device. My solution was 52:86.
How to complete the cryptex puzzle
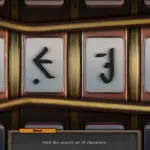
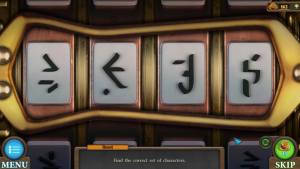
- "Find the correct set of characters."
- Your reward for entering the correct code into the digital clock is the answer to your cryptex. Open it up and enter the symbols seen in red.
- The translation from digital to brushstroke isn't exact, so if you think your symbol looks close to correct, it's the correct symbol.
- Once the cryptex unlocks, you'll be given a key.
How to complete the cash register puzzle
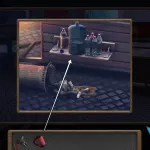
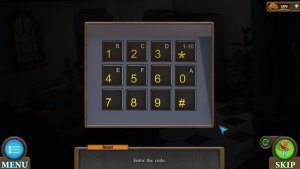
- Bring the kettle outside to the hot dog cart. Use the kettle on the open water bottle to fill it, and then return inside.
- There is a hot plate on the desk where you can boil the kettle, which reveals in the mirror the code to open the cash register.
- This will grant you the final chip, which you can use to escape the amusement park.
How to complete the light up door puzzle
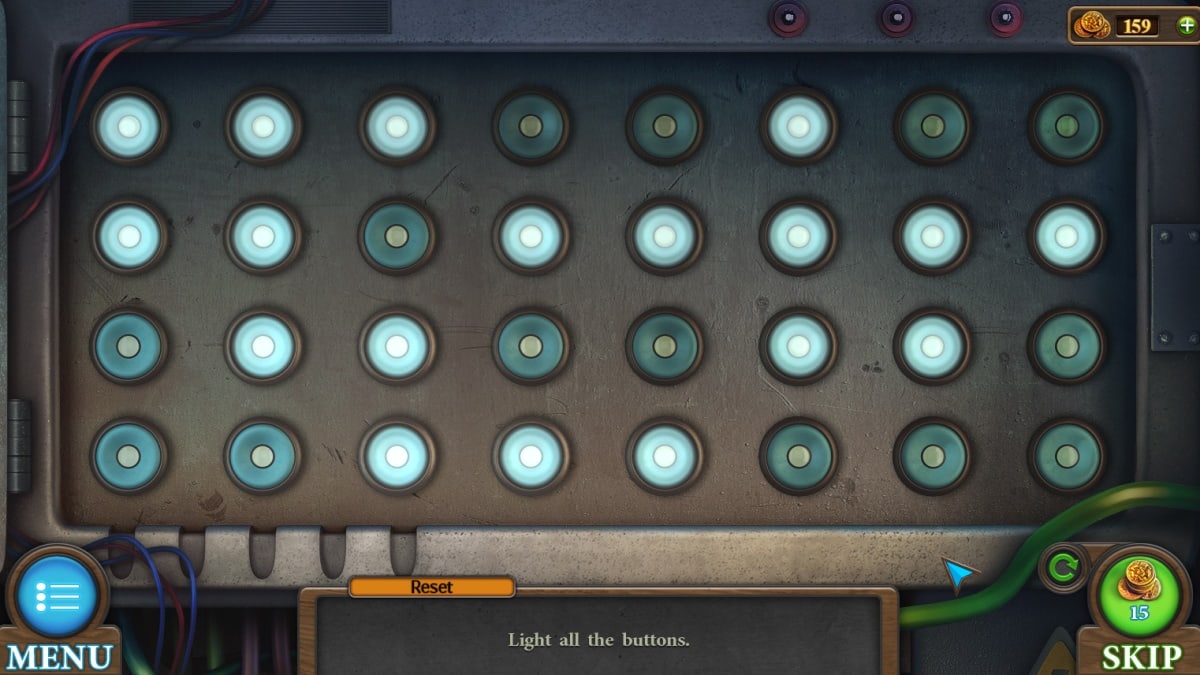
- Use your four chips on the panel next to the sliding door to the exit. This unlocks the light up door puzzle.
- "Light all the buttons."
- Every button you push will either turn on or off itself and every button in its cardinal directions: directly above, below, to the left, and to the right of it. Turn off and on the buttons until all lights are lit.
- The door to freedom unlocks. Your reward is the end of the level!
Tricky Doors World 6: Museum complete walkthrough guide
Your task today is to reach the exit of this museum, starting in the security office.
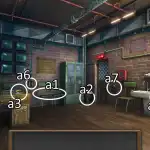
- a1. Pick up the first of 6 planks that you'll be collecting at this level.
- a2. Grab the cloth out of the trash can.
- a3. On the desk, pick up the screwdriver, paperclip, and flashlight.
- a4. Open up the locker to grab a second plank.
- a5. On the second locker, approach the lock and enter the screwdriver and paperclip to create the lockpick puzzle, detailed below.
- a6. Use the handle from the locker to turn on the CCTVs on the wall. Note the pattern they're lit in.
- a7. Approach the keypad. Click the buttons that correspond with the lit TVs and run your keycard through the lock. You can now open the door.
How to complete the lockpick puzzle

- "While lifting the pins, open the lock."
- This is a memory game. Click each tumbler to lift it up. If you've chosen the correct one in the sequence it will stay up, if you've chosen incorrectly, the whole lock will reset.
- Lift all eight tumblers in the correct order to complete the lock.
- The locker contains a handle, keycard, and hammer.
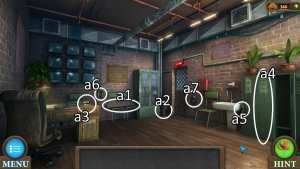
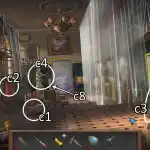
Scouring the museum display room

- b1. Pick up your third plank.
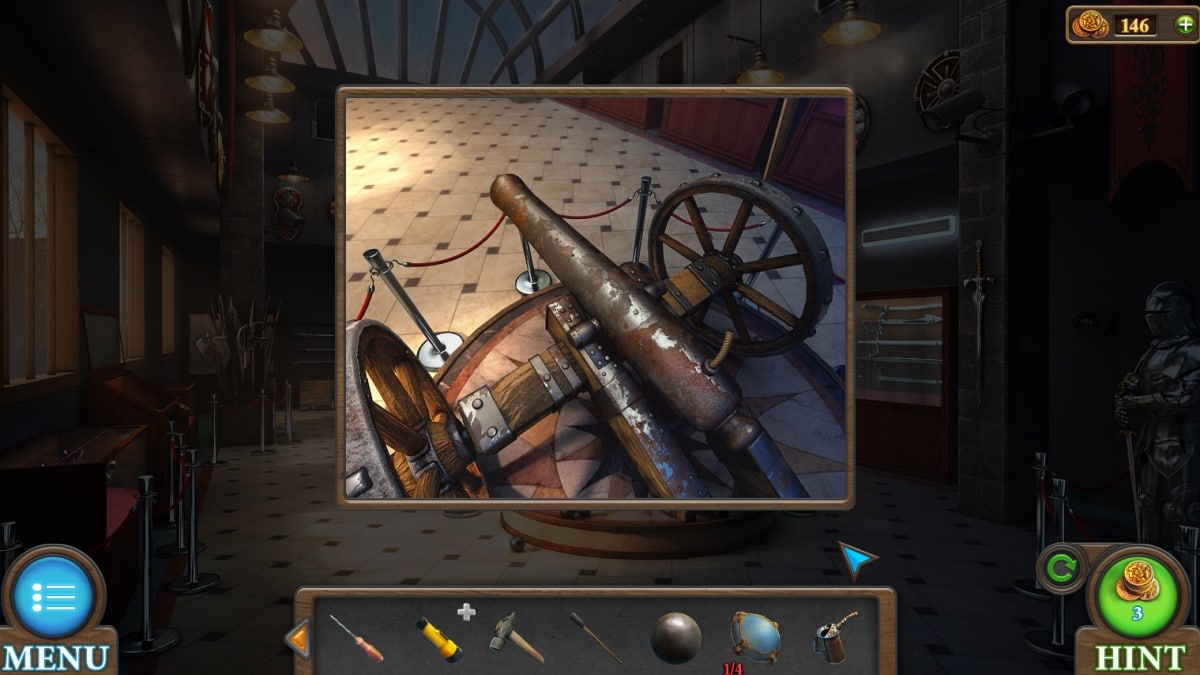
- b2. Approach the cannon. There's a carved decor item resting on top of it. You can also use your screwdriver on the top of the cannon to release and pick up the ramrod.
- b3. Grab a cannonball while you're at it.
- b4. Take a hammer to this light.
- b5. Note the radio station listed on this poster.
- b6. Note the number of weapons on display.
- b7. Grab another plank.
- Return to the first room to use the clues you've picked up.
How to complete the radio station puzzle
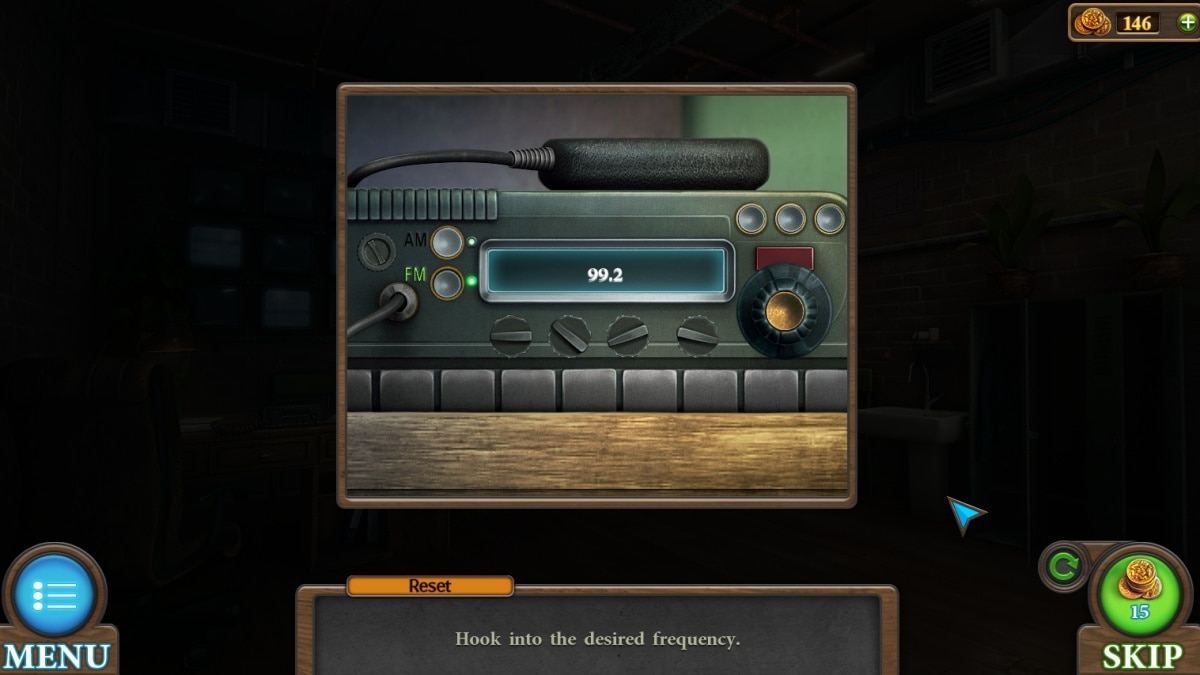
- "Hook into the desired frequency."
- The museum has an affiliate radio station, which is the one you'll want to find. It's listed on the poster in the display room.
- After tuning to 152.8 on the AM radio frequency, you receive the second piece of carved decor.
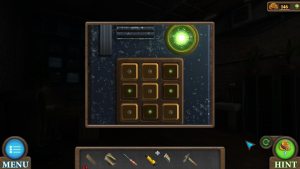
How to complete the weapons safe puzzle
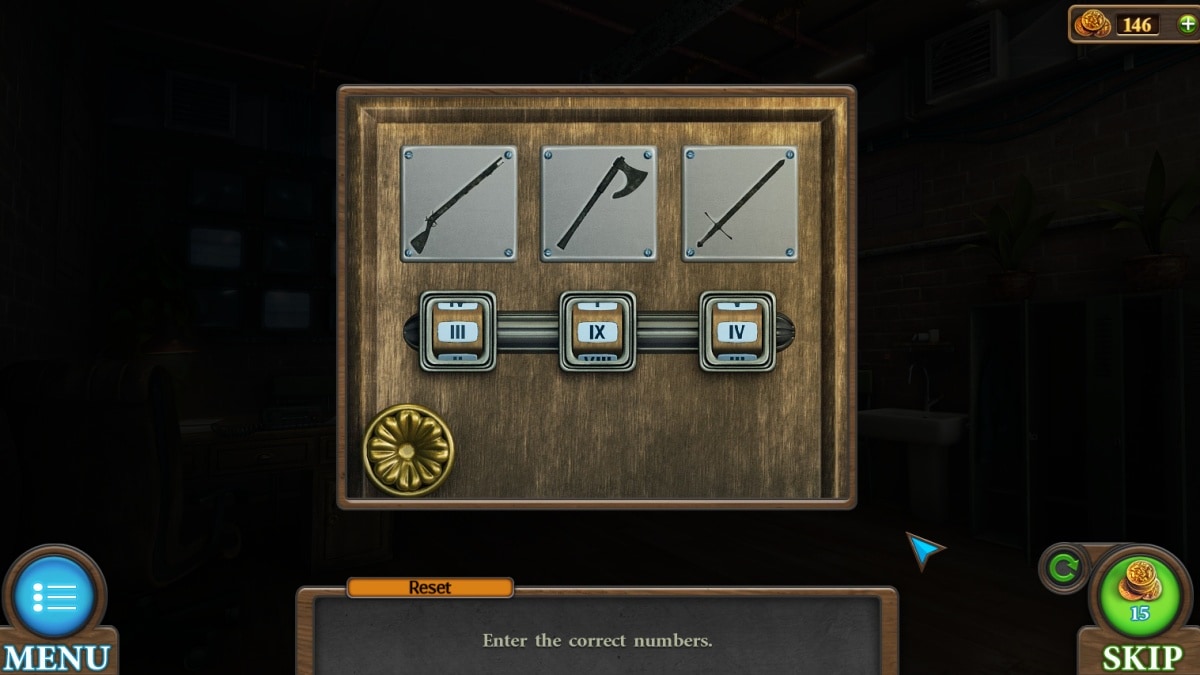
"Enter the correct numbers."
- The number of each weapon on display indicates the number to enter under each picture of that weapon.
- That's 4 guns, 2 axes, and 5 swords. This gives you one of four knobs, and gunpowder.
How to complete the action figure puzzle
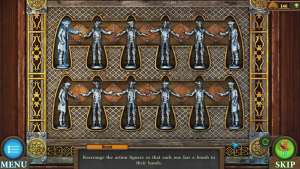
- Return to the left-side display case and insert the two pieces of carved decor. This unlocks the action figure puzzle.
- "Rearrange the action figures so that each one has a bomb in their hands."
- You can click on any two action figures to swap their places. Going from left to right, swap the statues until there is just enough room between their hands to hold a bomb, which will then appear to let you know you've done it right.
- Once all bombs are shown, the puzzle will be completed. Your reward is the oiler.
Firing the cannon
- Approach the cannon. Insert the gunpowder, then use the ramrod to tamp it down. Do the same with the cannon ball, and then the ramrod.
- Open up your ramrod, which can now be added to. Add the cloth, use the oiler, and hold the newly-created torch up to your smashed light from earlier.
- You now have a burning torch. Use your burning torch to light the cannon, and it will blast open the door to the next room!
Gathering in the gallery

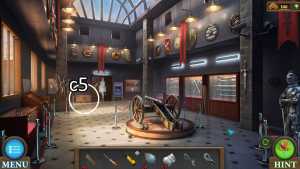
- c1. Pick up this marble head. This will be the first of three.
- c2. The zipper of this jacket is stuck. Use your oiler to unstick it, and get a key.
- c3. Pick up another plank.
- c4. Use your hammer on the fresher piece of this statue to pull out another key.
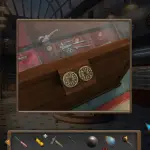
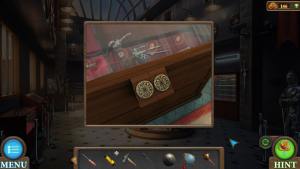
- c5. Your second key will be used on this chest next to the entry door. This chest contains another head and another knob.
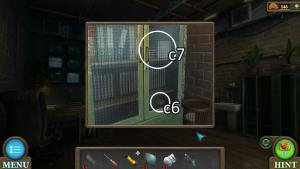
- c6. The remaining key can be used on the cabinet in the very first room. This will give you a set of batteries (which can be added to your flashlight).
- c7. At the top of the cabinet, approach the pile of tapes to unlock the cassette history puzzle, detailed below.
- c8. When you return to the room, grab the very last plank you need.
How to complete the cassette history puzzle
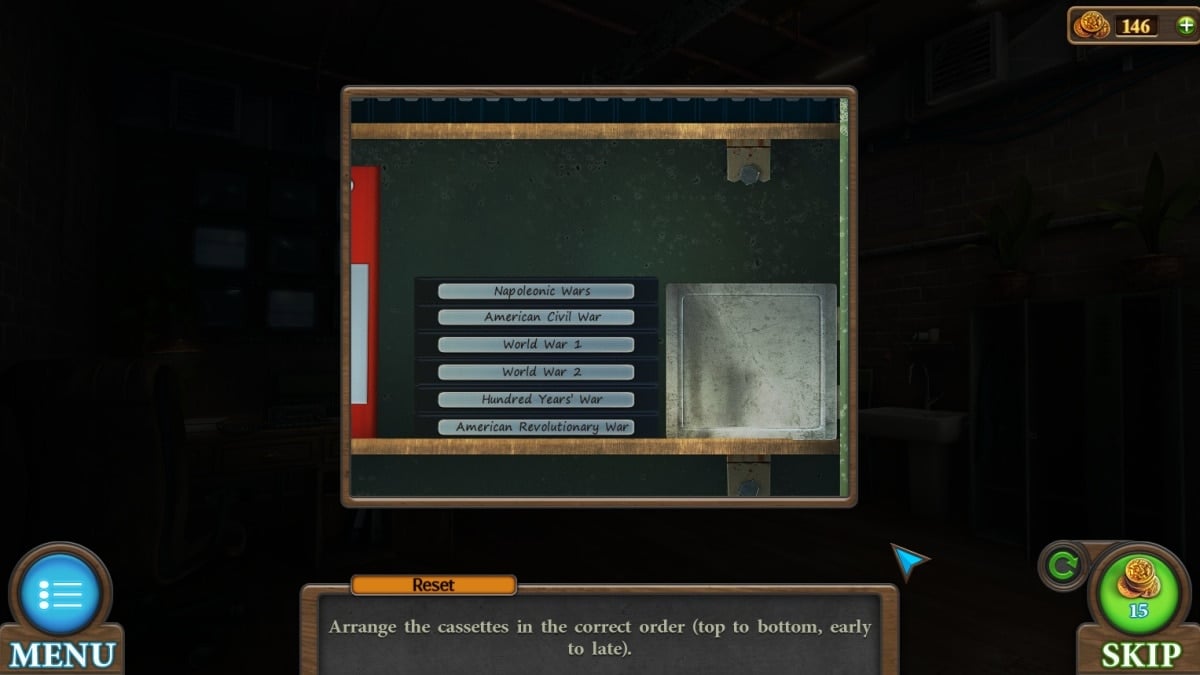
"Arrange the cassettes in the correct order (top to bottom, early to late)."
Each tape shows the name of a war. You need to order these wars from the one that started earliest in history to the most recent.
- Hundred Years' War (1337)
- American Revolutionary War (1775)
- Napoleonic Wars (1803)
- American Civil War (1861)
- World War 1 (1914)
- World War 2 (1939)
Your reward is a third knob.
How to complete the scaffolding puzzle
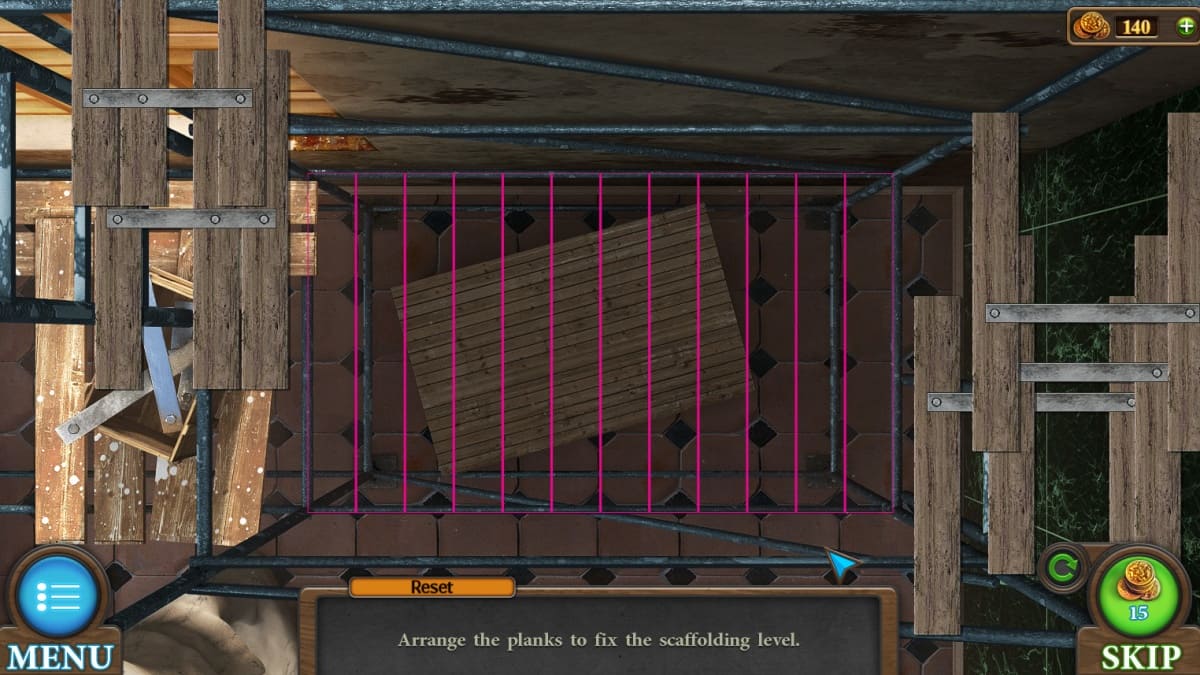
- "Arrange the planks to fix the scaffolding level."
- Apply your six planks to the empty scaffolding. This unlocks the puzzle where you'll arrange all of your planks to build three levels of scaffolding.
- On each of the three levels, drag the different-sized plank groups onto the pink areas until every line is successfully covered. Your reward is that you can now climb the scaffolding.
- Follow the zoom-in and use your screwdriver on the grate. Use your completed flashlight to light the dark recess, and take out the third statue head.
How to complete the statue arrangement puzzle
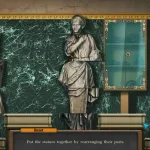
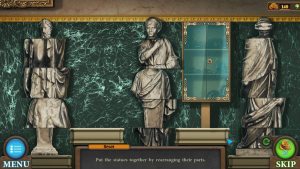
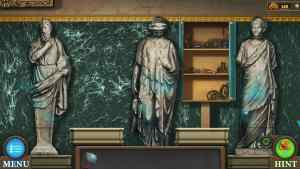
- "Put the statues together by rearranging their parts."
- In this puzzle (found behind the sheet on the right of the gallery room) you will be putting the three statues back together. Apply the heads to start the puzzle.
- You can click and drag the pieces of the statues around, with your ultimate goal to be every statue matching its base. Nothing can be balanced on top of the heads, but otherwise you can shift around the pieces as you like. I suggest focusing on one statue at a time.
- Your reward for completing these statues is a gold key.
Finding the final knob
- With your new key, you can unlock the mask case and take out the mask itself as well as a tap flywheel.
- Returning to the first room, put the sponge on the side of the sink into the basin. Apply the tap flywheel to turn on the water and make the sponge wet.
- Use your wet sponge on the dirty mask to find a four-digit code etched into it.
- This code can be used directly next to the sink, on the red box that's hiding the final knob. Insert the code off of the mask into the keypad to unlock it.
- With your fourth knob in hand, it's time to seek the exit. At the back of the gallery, use your knobs on the panel next to the door to unlock the symbol knobs puzzle.
How to complete the symbol knobs puzzle
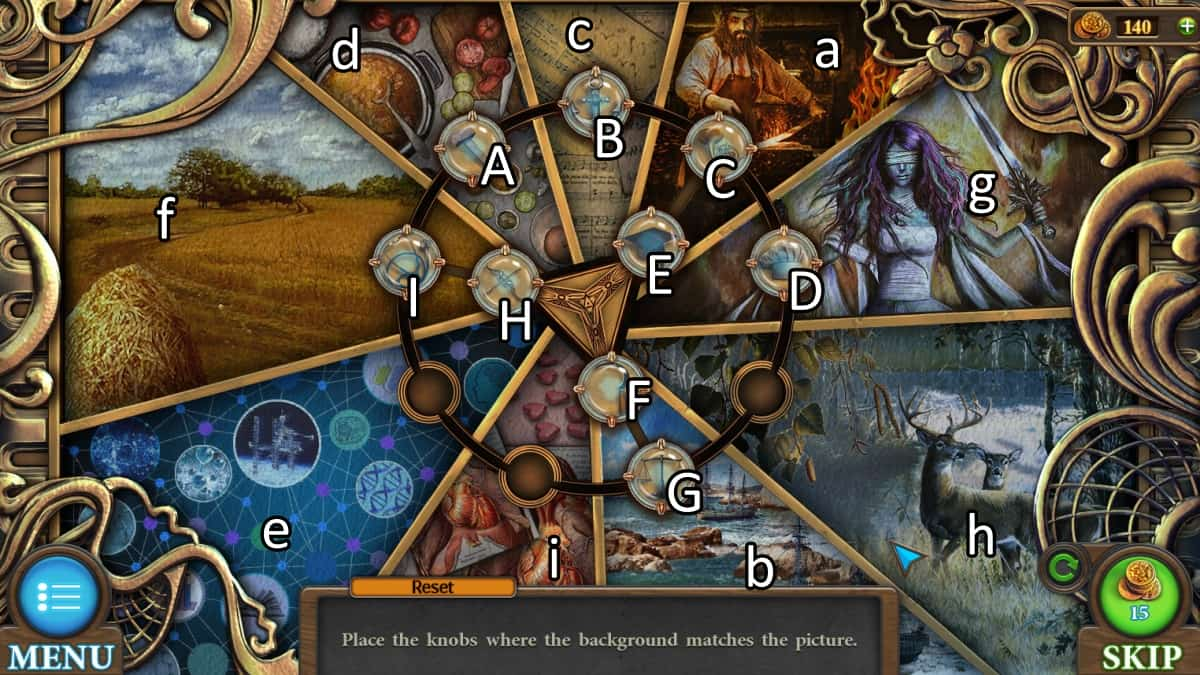
- "Place the knobs where the background matches the picture."
- Click each knob and then any empty space it can reach to slide them along the puzzle. Each knob needs to be on the background that matches its picture, as detailed in the image. You'll be putting the knobs with the capital letters onto the backgrounds with the matching lowercase letters (A to a).
- Once you've completed this puzzle, the final door will open, and you can escape the museum!
Tricky Doors World 7: Hospital complete walkthrough guide
This run-down hospital is taking care of a werewolf, so try not to get too close as you scurry around the rooms to escape.
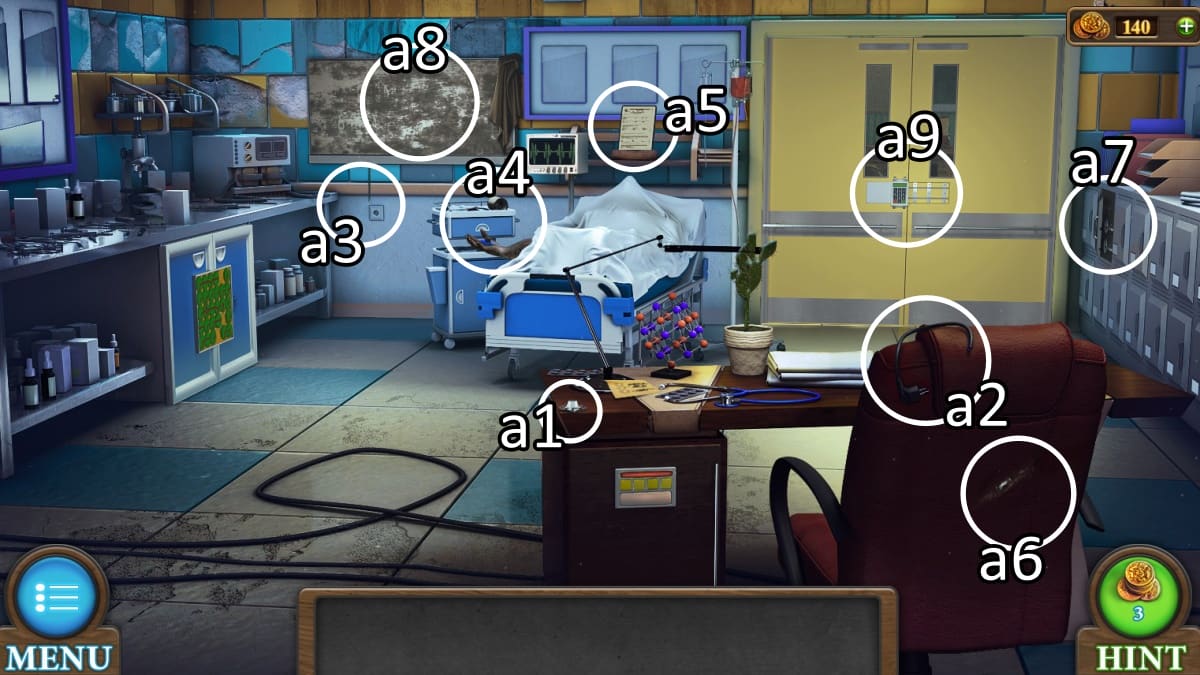
- a1. Pick up the handle on the corner of the desk.
- a2. Grab the cord from the back of the chair.
- a3. Add the plug to the hanging cord under the screen.
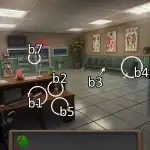
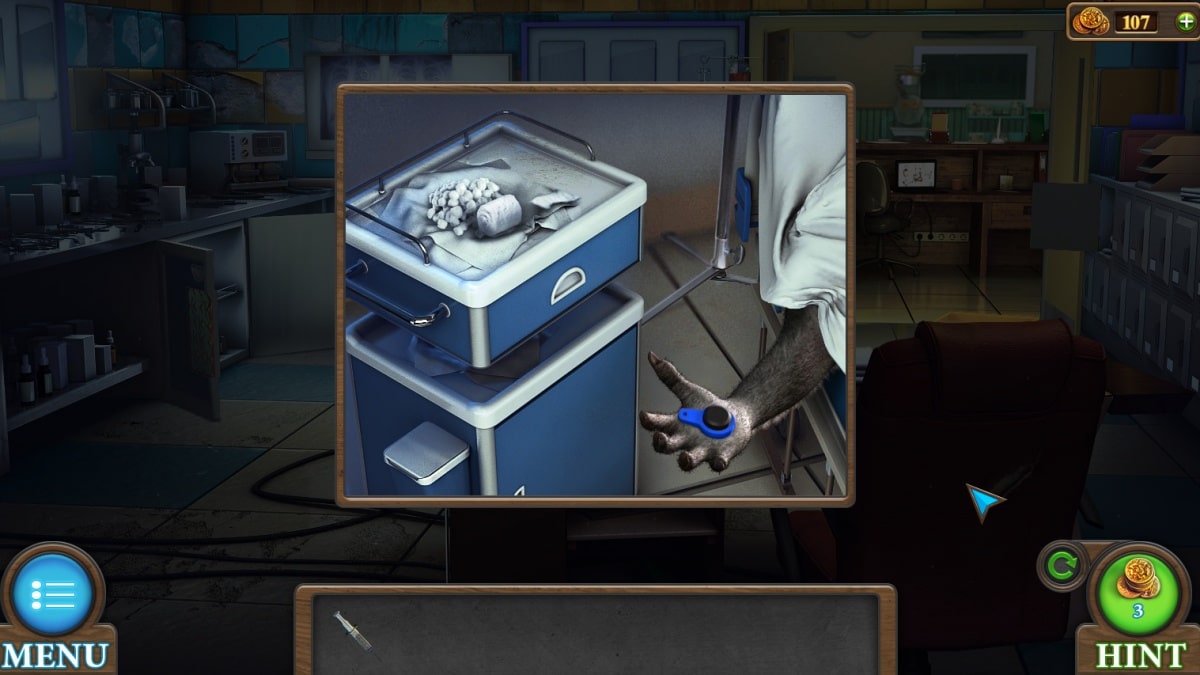
- a4. On the cart next to the hospital bed you can pick up a scalpel and bottle of ammonia. There's something important in the werewolf's hand, but the spasms make it impossible to grab.
- a5. Note the numbers on this patient chart.
- a6. Use the scalpel on the back of this chair to gain your second handle.
- a7. Apply the handles to the safe to start the safe cracking puzzle, detailed below.
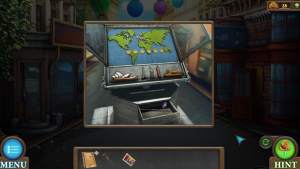
- a8. Use your ammonia on this screen and then place the x-rays to see the code to leave the room, as indicated by the number of ribs broken.
- a9. My code is 1-3-4-2. This unlocks the block key puzzle, detailed below.
How to complete the safe cracking puzzle
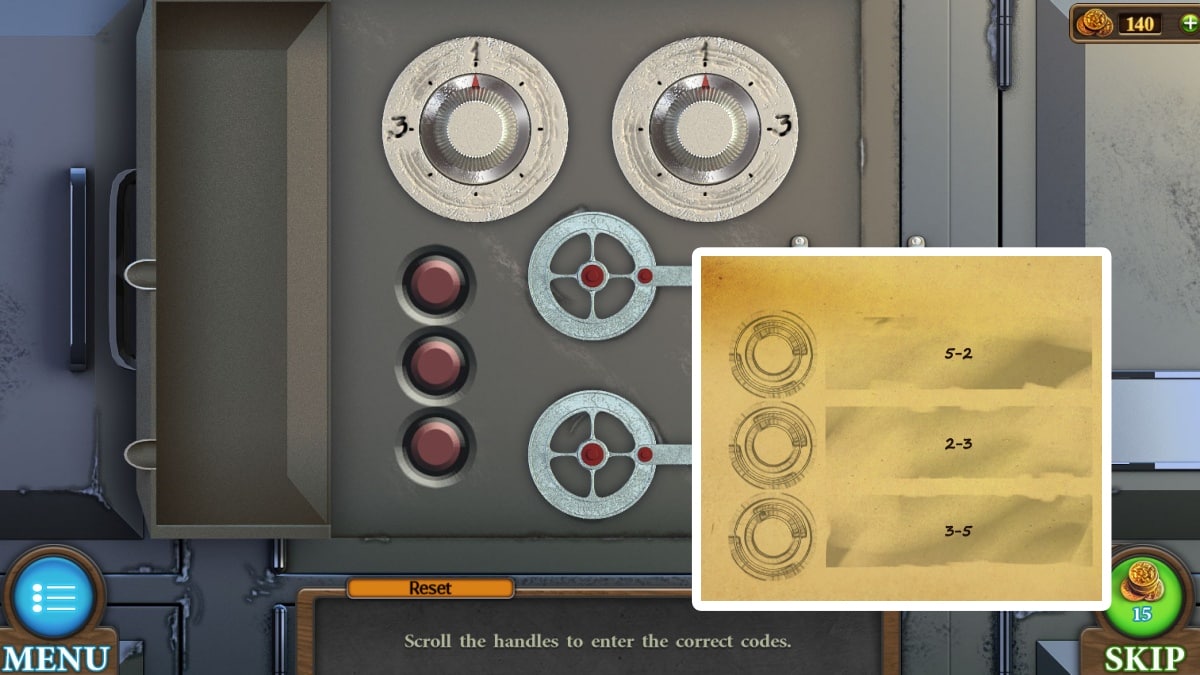
- "Scroll the handles to enter the correct codes."
- Using the post-it note on the desk as your clue, you'll be turning the two knobs to each combination in turn. The left knob turns left, and the right knob turns right.
- For each pair of numbers, you'll be turning both knobs to the associated numbers. After you've entered all three, the safe will unlock.
- Your reward is a token and a set of x-rays.
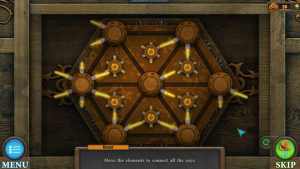
How to complete the block key puzzle
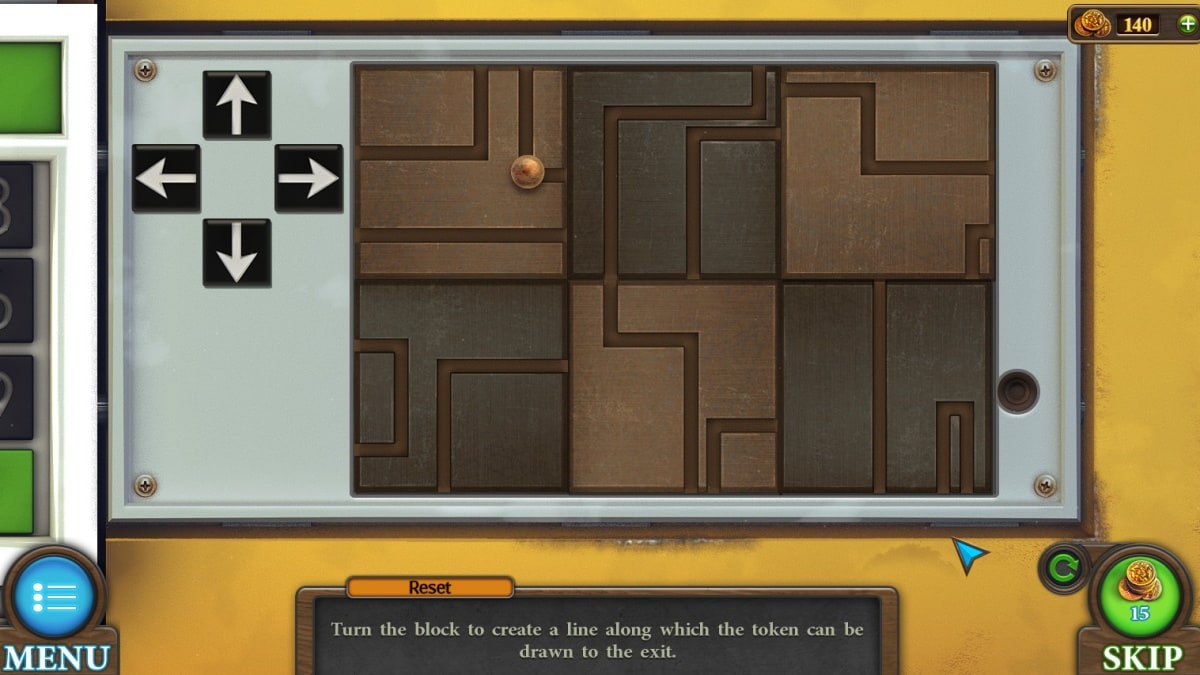
- "Turn the block to create a line along which the token can be drawn to the exit."
- Each block turns one rotation when you click on it. Your goal is to move the token from one end of the puzzle to the other, along the lines created by matching up the lines on the blocks. You move the token by using the arrow keys on the side.
- You'll have to turn each block multiple times, including the one the token is currently on, to find new paths.
- Your reward is the door opening to the second room.
How to complete the desk colors puzzle
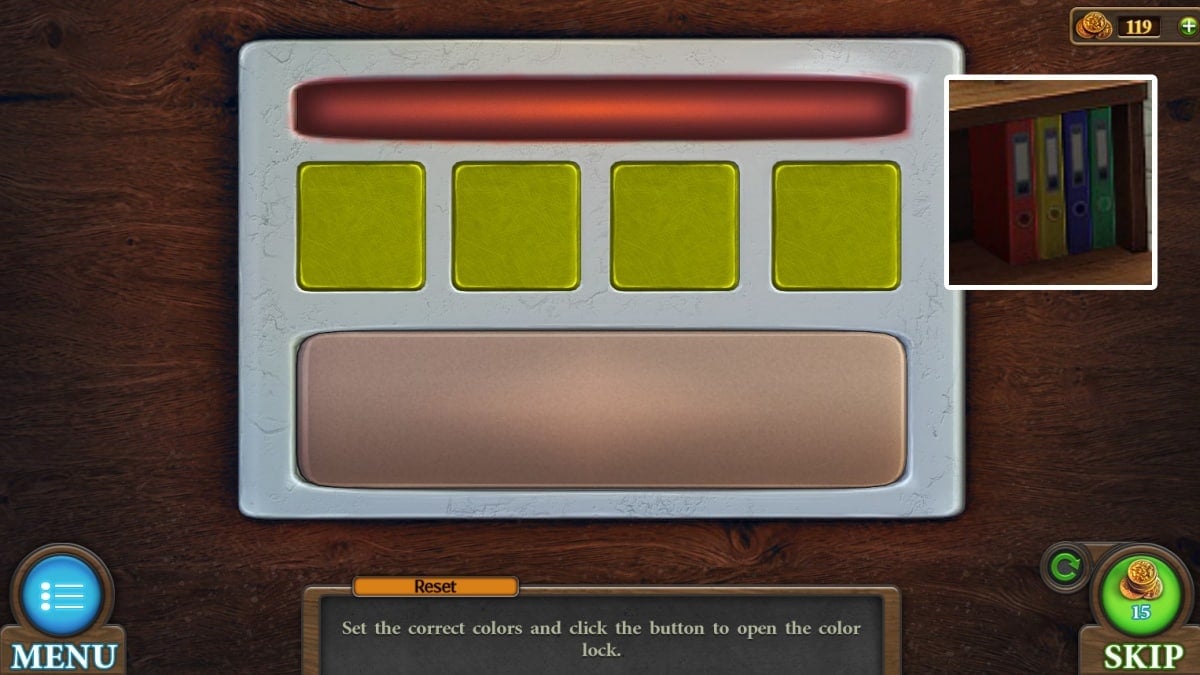
- "Set the correct colors and click the button to open the color lock."
- Once you step into the second room, you can see a set of folders on the intake desk. These folders give you the solution to the first desk's colored lock.
- For me this was red yellow blue green. Change the colors by clicking on the yellow button until it becomes the color you want, and then hit the button at the bottom to open the desk.
- Inside, your rewards are a screwdriver, glass pipe, and a piece of a card.
Exploring the second room
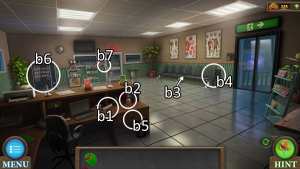
- b1. Pick up the ruler.
- b2. And the glue.
- b3. Pull out this set of chairs to gain access to the grate behind them.
- b4. Apply the screwdriver to this grate. Brush aside the leaves inside to pick up a key and a lighter.
- b5. Use the key on the desk drawer to find the sun cell puzzle, detailed below.
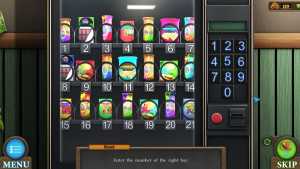
- b6. Use your coin gathered from the sun puzzle on the vending machine. Enter the number code of the snack found in the desk (11) to buy that snack. It falls with the final piece of the keycard.
- Open up the ruler in your inventory. Apply the three pieces of keycard and the glue to create a keycard. Use the keycard on the exit (b7).
How to complete the sun cell puzzle
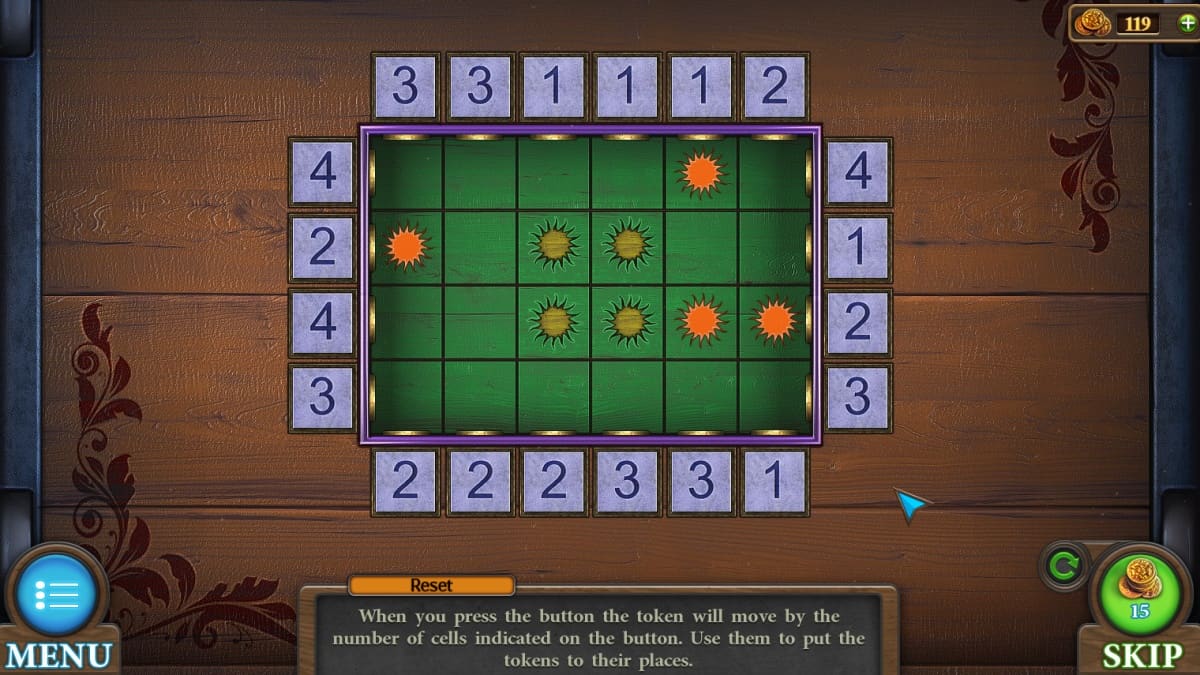
- "When you press the button the token will move by the number of cells indicated on the button. Use them to put the tokens to their places."
- Your goal in this puzzle is to push all of the suns into the recesses in the middle. The numbers on the buttons indicate how far all suns will be pushed, based on the number of cells away from the button, not based on where the suns currently are.
- Once all four suns are where they belong, you'll unlock the drawer and gain a coin, another piece of card, and a clue for the next puzzle in the form of a snack wrapper.
Laboring in the lab
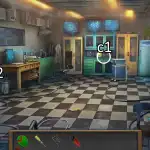
- c1. Search for the spatula on this cluttered counter.
- c2. Use the screwdriver on this red sink handle to detach the valve.
- c3. Attach the valve to the orange juice and then pour all that juice directly onto the floor. This shows a four-digit code.
- c4. Enter the orange juice code into this cabinet. You can pull a token and flash drive out of the pocket of the doctor's jacket.
- c5. Return to the first room, where you'll approach the cactus on the desk and dig into the dirt with your spatula. This gives you the final token and a heat tablet.
How to complete the token pattern puzzle
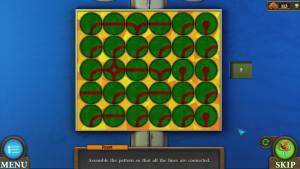
- Approach the side cupboard in this first room and insert the three missing tokens that you've found. This unlocks the token pattern puzzle.
- "Assemble the pattern so that all the lines are connected."
- Each token can be clicked to rotate it. All lines must connect to another line. There are three layers to complete.
- I recommend starting with the corners and the straight lines that can only go one way, such as along the bottom row.
- Your reward is a very small key.
Making a medicine
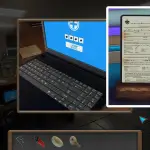

In the second room, insert the flash drive into the laptop on the desk. Now the numbers from the werewolf's patient chart finally pay off, as that is the passcode for the laptop. Click each number space until it shows the correct number and then click OK to unlock the laptop and find the medicine recipe.
Return to the cupboard you'd just unlocked in the last puzzle to pick up the green test tube, now that you know you need it.
Back in the third room, open up the fridge with your very small key. Pick up the syringe and handle, and the purple test tube.
At the science desk, pick up the red test tube.

At the centrifuge, place the handle on the machine and insert all three test tubes that you've collected. Turn on the handle and pull out the light green test tube mixture.
You now need to heat this mixture. Place the vial, the heat tablet, and the glass tubing into the lab setup. Use the lighter to heat the mixture. Once it has moved over to the second bottle, fill your syringe with medicine.
Give the werewolf the medicine by using the syringe on its arm. This releases the magnetic key for your use.
Unlocking the final passwords
Using your magnetic key on the exit reveals that there is a missing password. It indicates you need to kick over a trash can.
What follows is a series of clues to reach the exit.
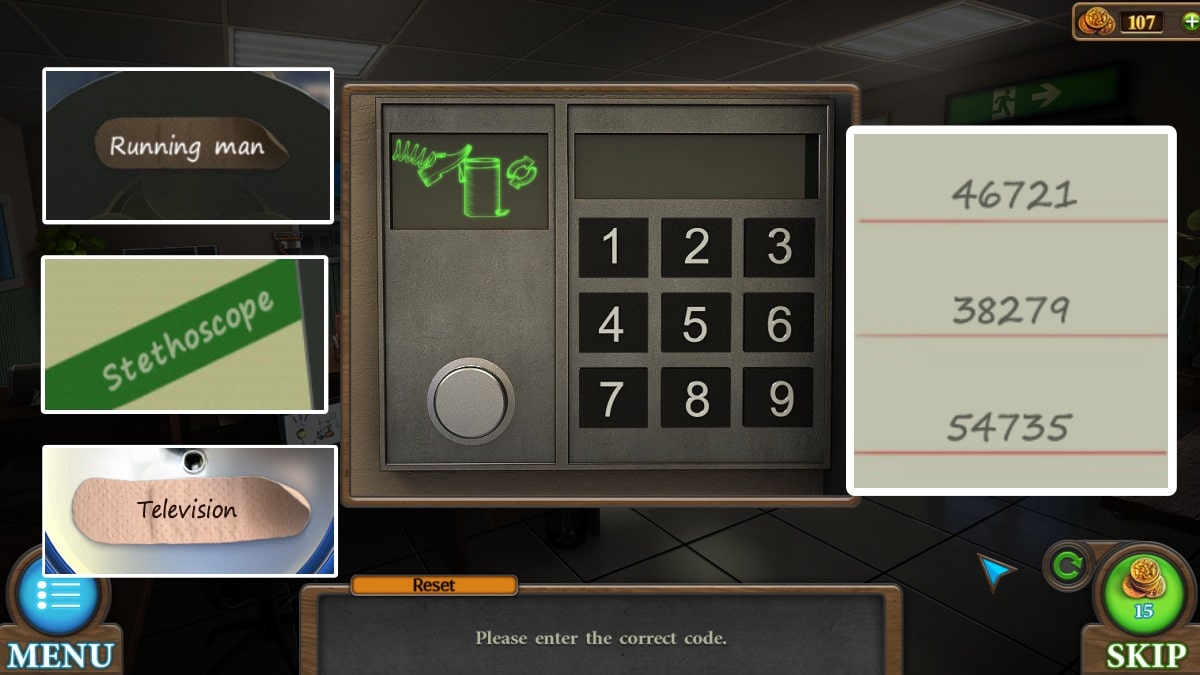
By kicking over the trash can, you discover the words 'Running man.' The running man over the exit sign has the word 'Stethoscope' on his leg. The stethoscope tells you to check the 'Television,' which in turn says 'Medical history.' The werewolf's medical history has now changed to a series of codes.
This may differ in your playthrough.
- 46721
- 38279
- 54735
Only one of these codes is the correct one, so try them until you escape the hospital.
Tricky Doors World 8: Theater complete walkthrough guide
As the level starts, you find yourself in a spacious entry room to the theater.

- a1. This is the only of the many portraits that matters. Note the numbers.
- a2. On the couch, pick up one of four tags off the cushion, and one of four planks from underneath the couch.
- a3. On the counter is a porcelain mask (one of two) and in the pocket of the blue jacket there is a handle.
- a4. Use the handle on the window. Open the window to pick up a key.
- a5. Use the key on the clock to find your second porcelain mask.
- a6. Use the porcelain masks to unlock the green chip puzzle, detailed below.
How to complete the green chip puzzle
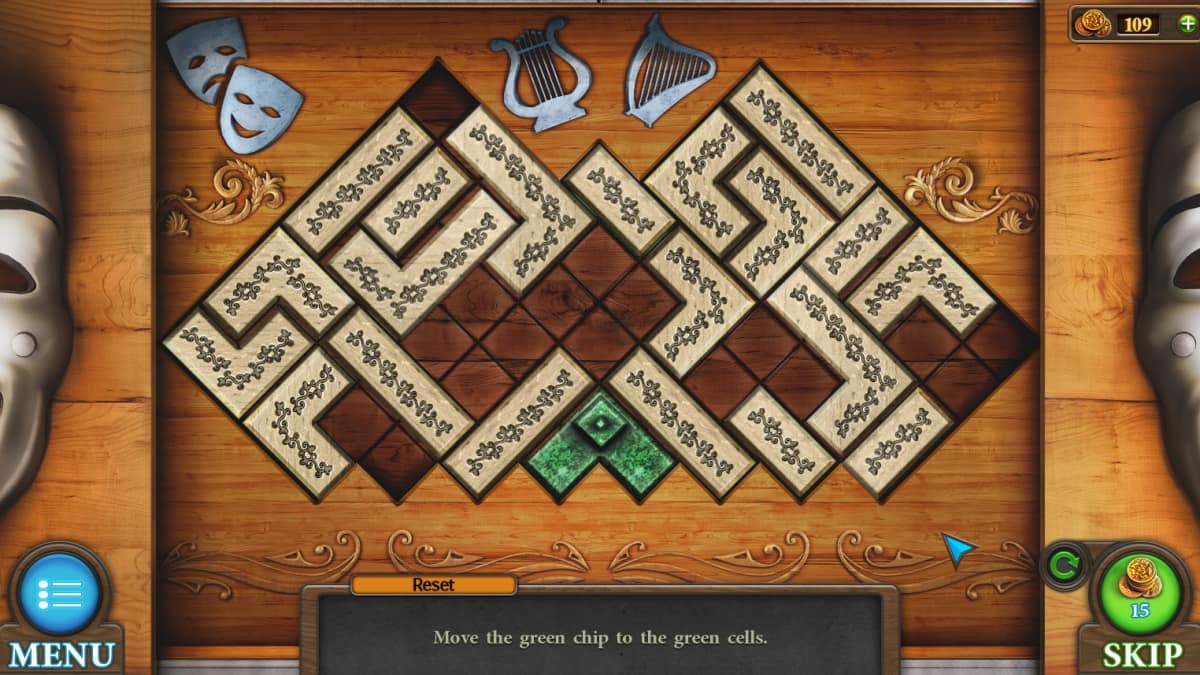
"Move the green chip to the green cells."
Your goal is to move the green block from the bottom of the puzzle to the top. You can move any of the blocks in any direction to slot them into the different areas.
When you finish this puzzle, the door to the stage will open.
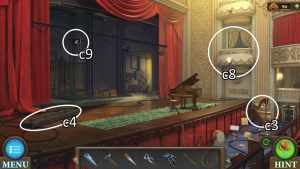
Searching the stage
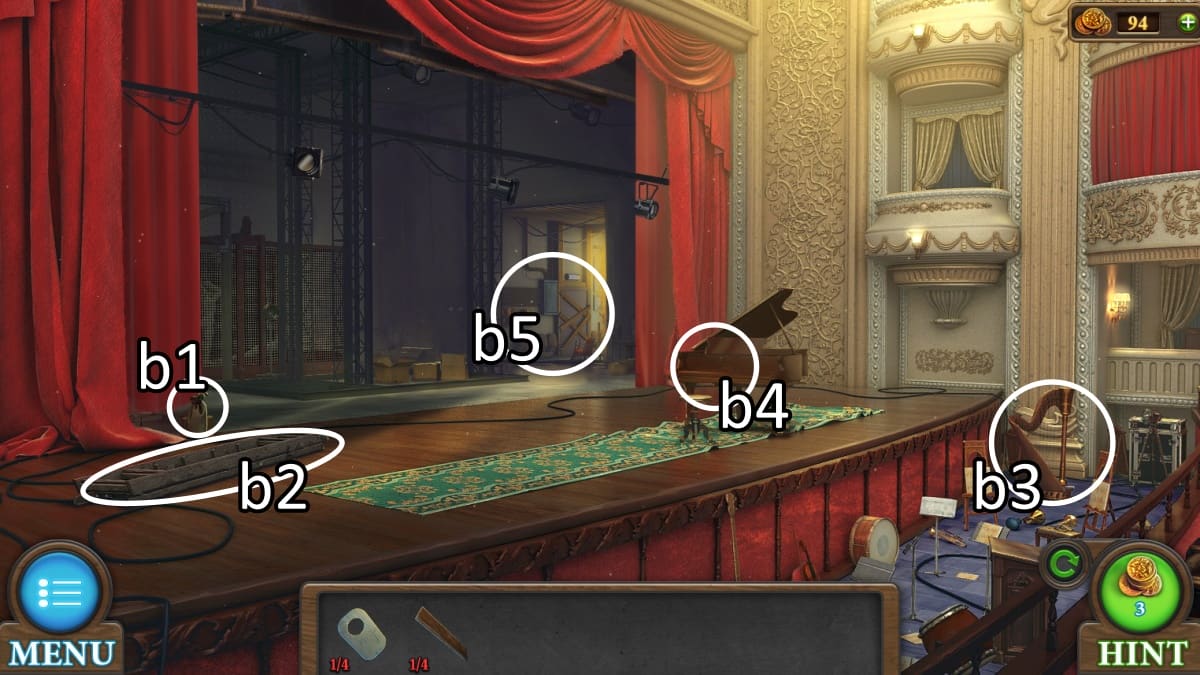
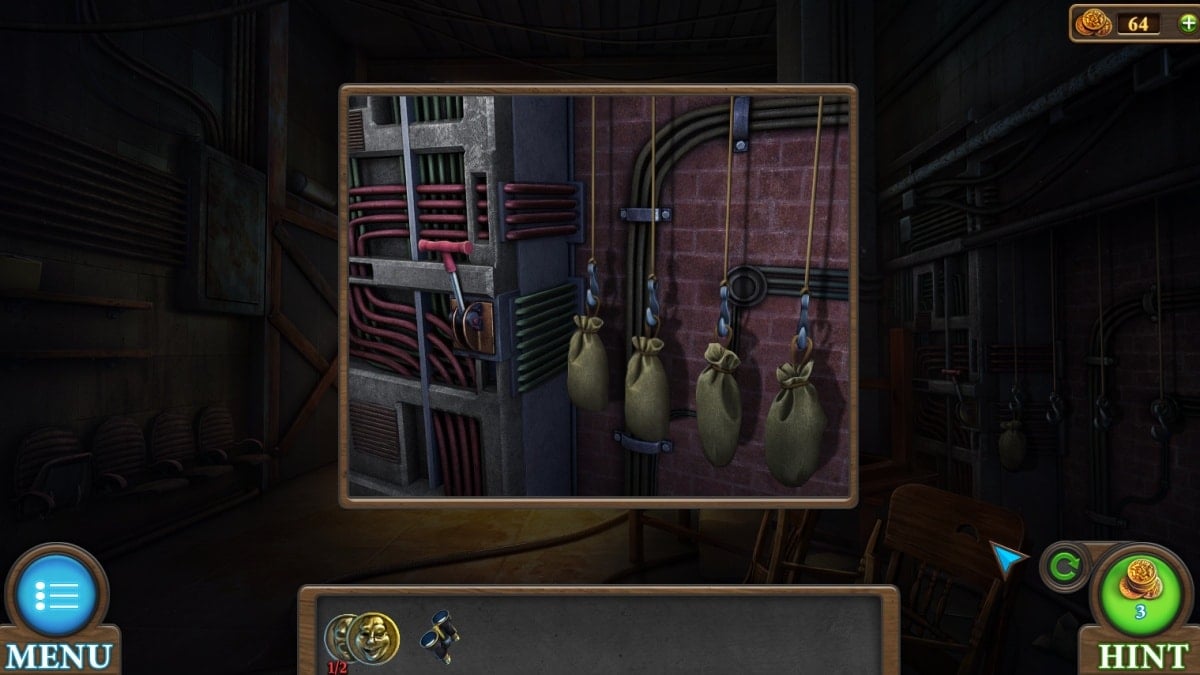
- b1. Pick up the first of three sandbags.
- b2. Approach the ladder. You can't use it yet, but there is a knife next to it that you need.
- b3. Zoom in on the harp to pick up a piano key, the first of three.
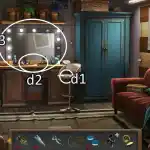
- b4. Get close to the piano to grab another tag.
- b5. Go into the backstage area.
Unlocking the dressing room
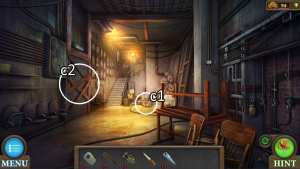
Move backstage to get to the next set of tools, and start a series of small tasks.
- c1. Walk up to this toolbox to pick up a hammer, saw, and pincers.
- c2. Use the pincers on the loose plank to gain a nail and long plank.
- c3. Use your pincers again on the harp, which will grant you a string.
- c4. Zoom in on the ladder. Lay the long plank on top of it and use the saw to create two of your four regular planks.
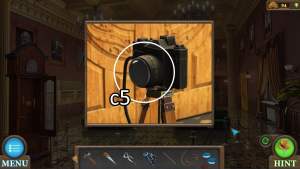
- c5. Use the knife on the camera to gain a lens.
- c6. Use the knife again on this rope to gain a rope.
- c7. Use your knife one more time on the loose hook to gain a hook. Now you can add your rope to the hook.
- c8. Use your rope and hook back on the stage to get into the presidential suite. Here you'll pick up binoculars, your last plank, and use your pincers to open up the purse. The purse has powder and another piano key.
- c4. Use your planks on the ladder, add nails, and hammer them in. Now you have a ladder.
- c9. Climb the ladder and use your hammer on the light to pull out the key.
How to complete the punch lock puzzle
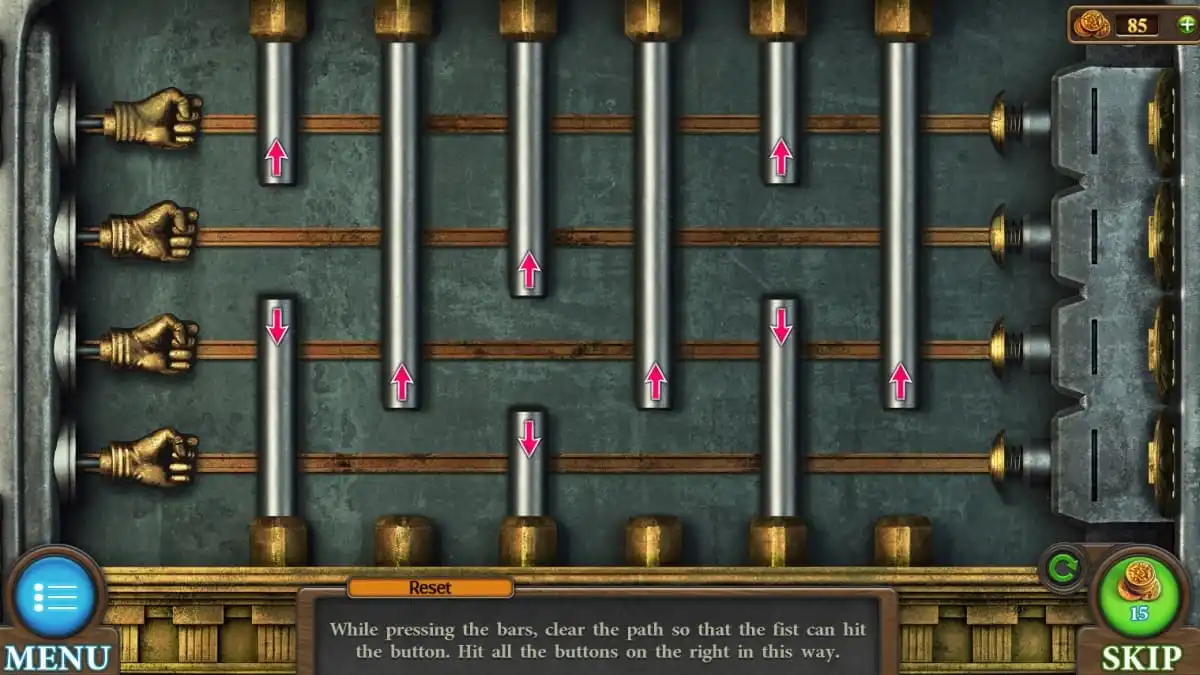
"While pressing the bars, clear the path so that the fist can hit the button. Hit all the buttons on the right in this way."
Every bar that you move up or down will move other bars at the same time. They'll flash red if it can't move, which happens when it's supposed to push another bar either too far up or down to work.
You'll need to do this four times, once for each fist.
Once you complete the lock, you'll be able to enter the dressing room.
Exploring the dressing room
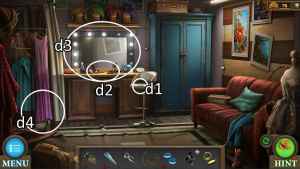
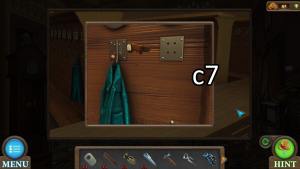
- d1. Grab a tag.
- d2. Zoom in on the makeup table to pick up a brush and tweezers.
- d3. Take note of the lights that aren't lit.
- d4. Move this dress to pick up a sandbag.
Armed with the tweezers, return to the open window in the first room. The final tag is wedged between the wood panels.
In the coat room to the right of the entry, place down your four tags. Also put down your powder, and use the brush to apply the powder to the tags. This reveals four numbers, each of which corresponds to a color of coat.
36 = blue, 35 = purple, 34 = green, 38 = red
Now you can unlock the makeup dresser drawer. Place the colors in sequential order, and enter green, purple, blue, red.
Your reward is a final piano key and a weight.
How to complete the piano keys puzzle

"Pressing the keys, highlight in green the required combination of squares on the lid."
Every key you press lights up the squares that are marked on it. If two keys would light up the same spot, they cancel each other out. Your goal for each panel is to light up the marked squares.
Your reward is an ornate key.
How to complete the grandfather clock puzzle
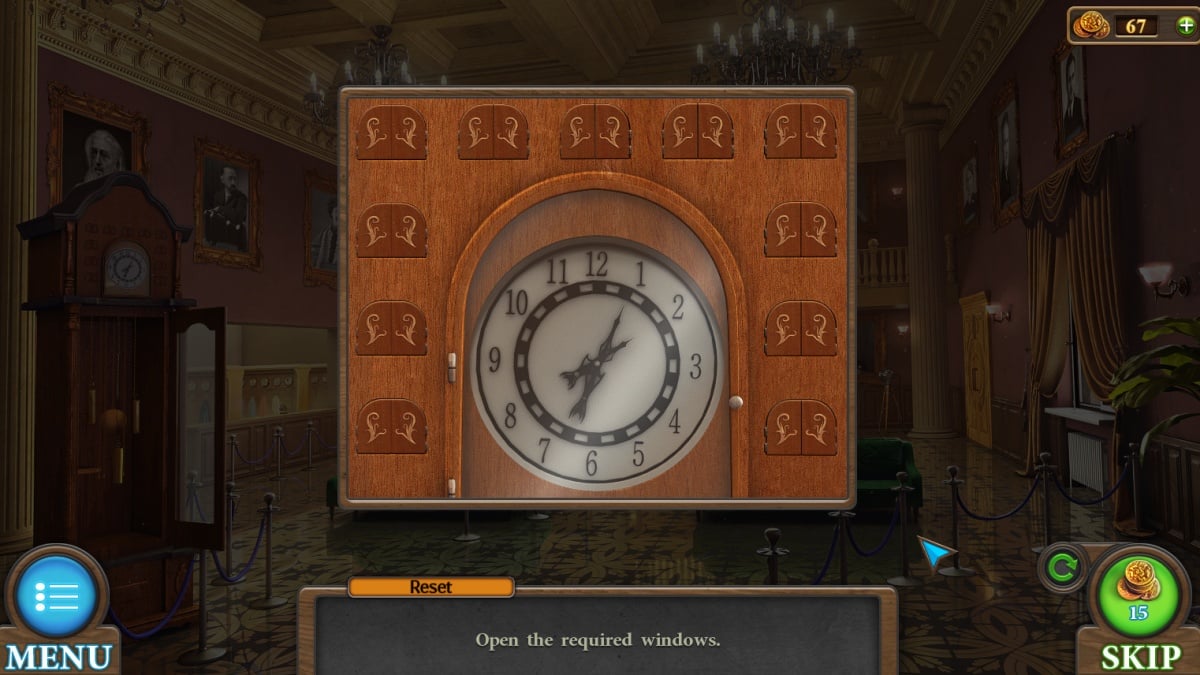
- In your inventory, add the string to the weight and use the pincers to create a clock weight.
- Add the weight into the clock, and then you can address the cuckoo windows above.
- Based on the lights that were on in the dressing room, open the appropriate windows. Keep the windows that correspond to the dim lights closed.
- Your reward is a hint for the next puzzle.
How to complete the flower box puzzle
- "Place the chips according to the hint by swapping them using the arrow buttons."
- Apply the hint from your inventory to the box so that you can see where the flowers need to be.
- Click the red circles to spin the flowers around in sets of four until they match the hint.
- Your reward is one of two metal masks and a weight.
Opening the briefcase
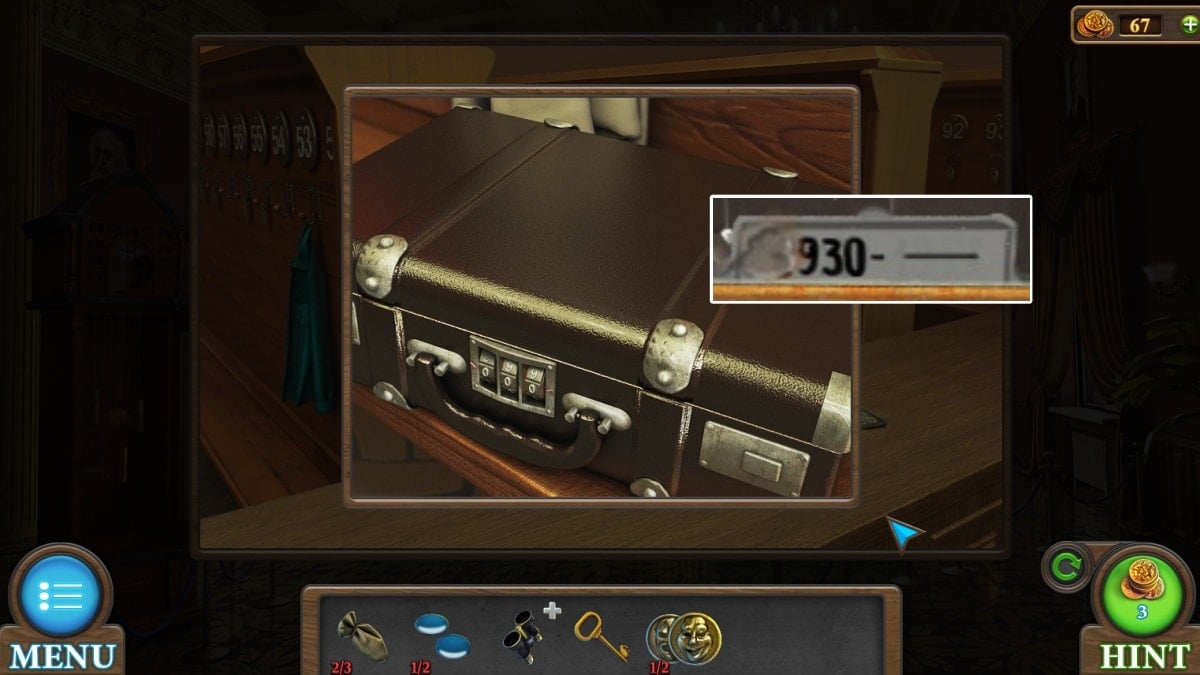
You can now add the weight to the suitcase in the first room, which becomes a combination lock.
The solution to the combination lock is on the portrait above, 930. The suitcase contains a lever.
Back in the dressing room, use your key on the blue dresser. Inside is a sandbag on the floor of the dresser, and you can open up the hanging shirt to take a second lens out of a monocle in the pocket.
Put the lenses into the binoculars to fix them.
- Add the lever and the three sandbags onto this device and pull the lever. Every time you pull a lever, you'll get a different scenery background out on the stage. Go between the two rooms, using the binoculars to search the scene backgrounds for a set of numbers.
- Not every set of numbers is the correct one. Every time you find a set of numbers, go to the safe in the dressing room and enter the code. Eventually you will find the correct code and open the safe.
- The safe contains your second mask, which you can use to unlock the final puzzle.
How to complete the colored masks puzzle
- "Arrange the masks so that emotions and colors are not repeated in each row and column."
- Click any two masks to swap them with each other. Each mask will glow green if it matches the criteria. I recommend starting by swapping the colors of the same emotions around within their column to make sure that no colors are sharing a row or column, and then you can work on the emotions by swapping same-colored emotions. This makes sure at least one criteria is already met.
- At the end of the mask puzzle, you escape the theater and can move on to the next world!
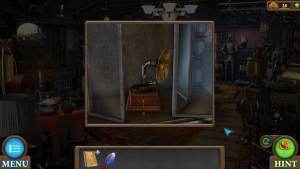
Tricky Doors World 9: Antique District complete walkthrough guide
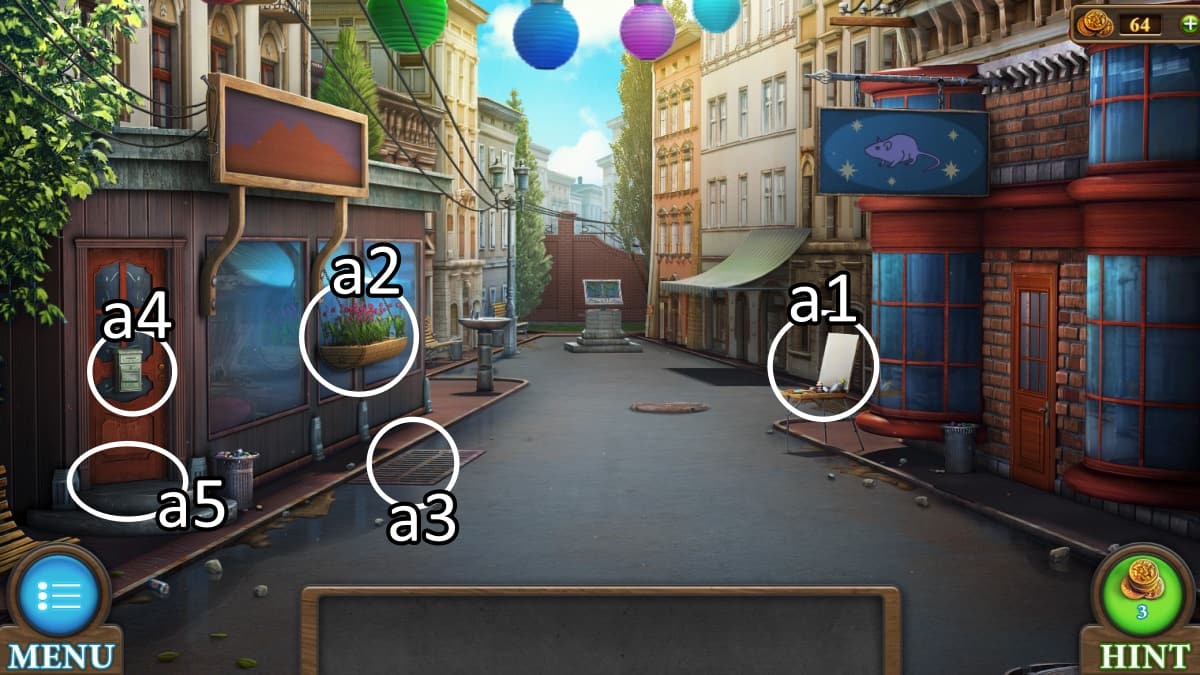
As the district street loads in, one of the first things you'll see is a sign with a big rat. Throughout this entire world you'll want to take note of how many rats you see of different colors, so start that count now. Every playthrough's rat colors are different.
- a1. Approach the easel. Pick up the painter's palette and a screwdriver.
- a2. This flower box has a handle in it. You can use your screwdriver on the screws as well to get a metal bar.
- a3. Use your metal bar on this grate to bend the bar into a hook. Use the hook a second time to dip into the grate and pull out the key.
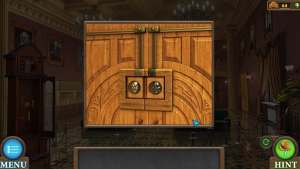
- a4. Use the key on this lockbox to unlock the centerpiece puzzle, detailed below.
- a5. Slide the newspaper underneath the door. Go back up to the door lock and shove the key out with the screwdriver. Pull out the newspaper. Use the long spiky key on the locked door and reveal the door lock puzzle, detailed below.
How to complete the centerpiece lockbox puzzle
- Pull the metal pieces of the puzzle around to make room for your centerpiece. You can pull the pieces in any direction. You'll be nudging the centerpiece through the puzzle slowly but surely, not all at once.
- The lockbox opens when you finish the puzzle. You take out a mysterious letter, an Eiffel Tower figurine, and a newspaper. There's also a door handle you can drag to the empty star.
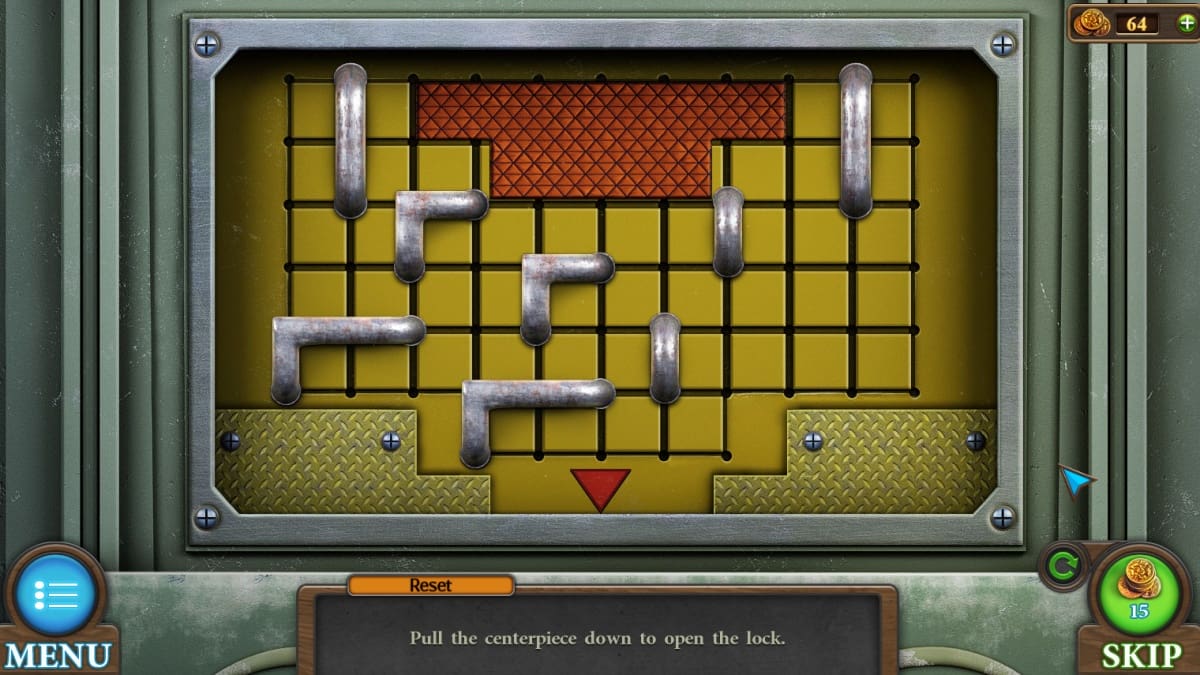
How to complete the door lock puzzle
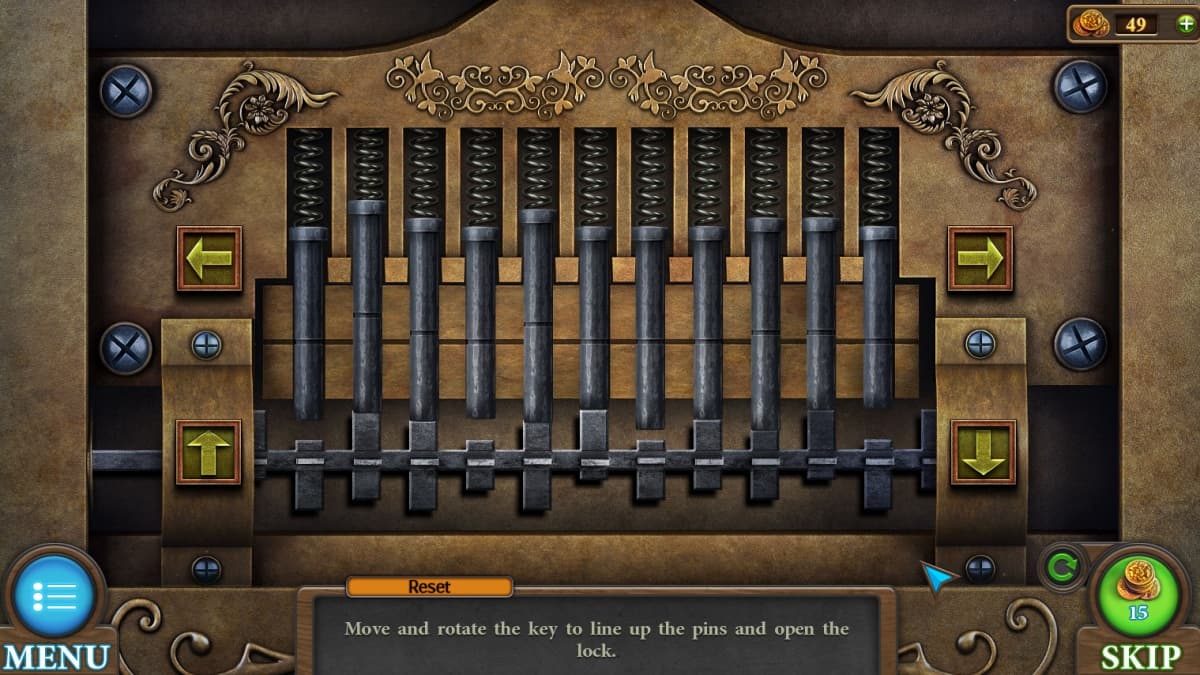
Use the yellow arrows to pull the key in and out and spin the key around until you find the right combination. You'll know it's the right combination when the notches on all the pins line up.
Inside the antique shop
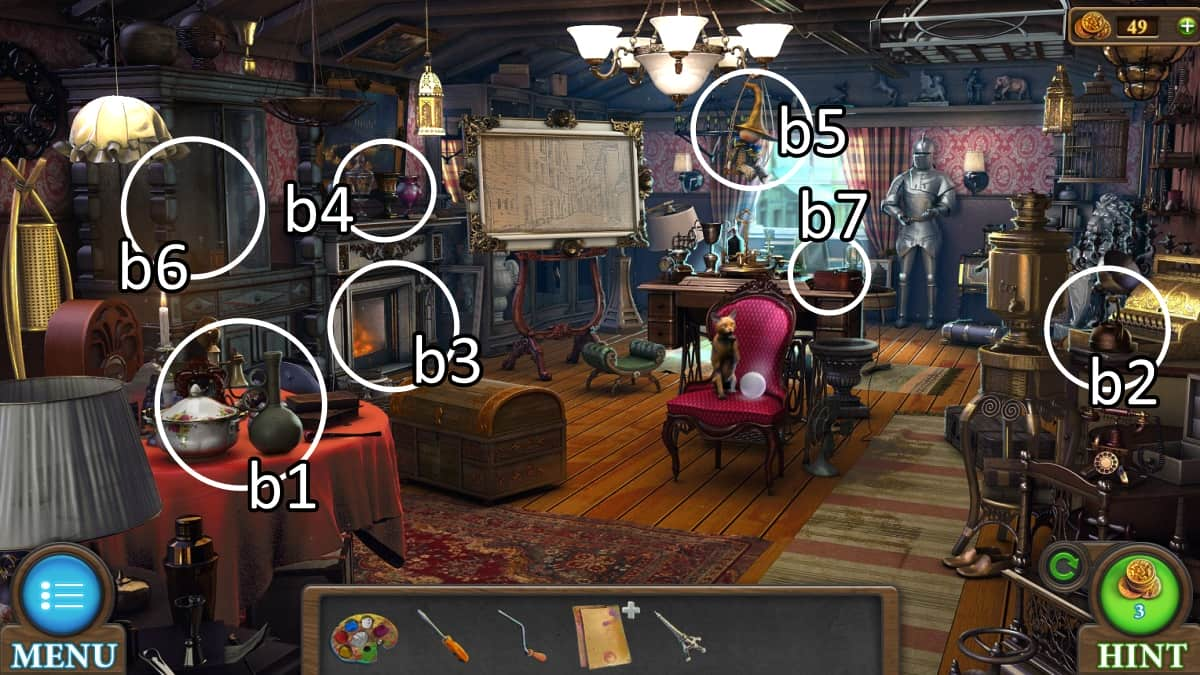
- b1. Move aside the knickknacks to pick up the sphinx.
- b2. Pick up the kettle. Use the screwdriver on the valve to pull that as well.
- b3. Grab the poker next to the fireplace and use it to brush aside the embers. You can't pick these items yet.
- b4. Knock over the middle trophy to pick up some matches.
- b5. Take off this cute clown's hat to find a loudspeaker.
- b6. Use the poker to pry open this display case. Place the loudspeaker and handle on the music player.
- b7. Shut the open cassette player to pick up the lamp behind it. You can immediately use the matches on the lamp to light it.
Down the manhole cover
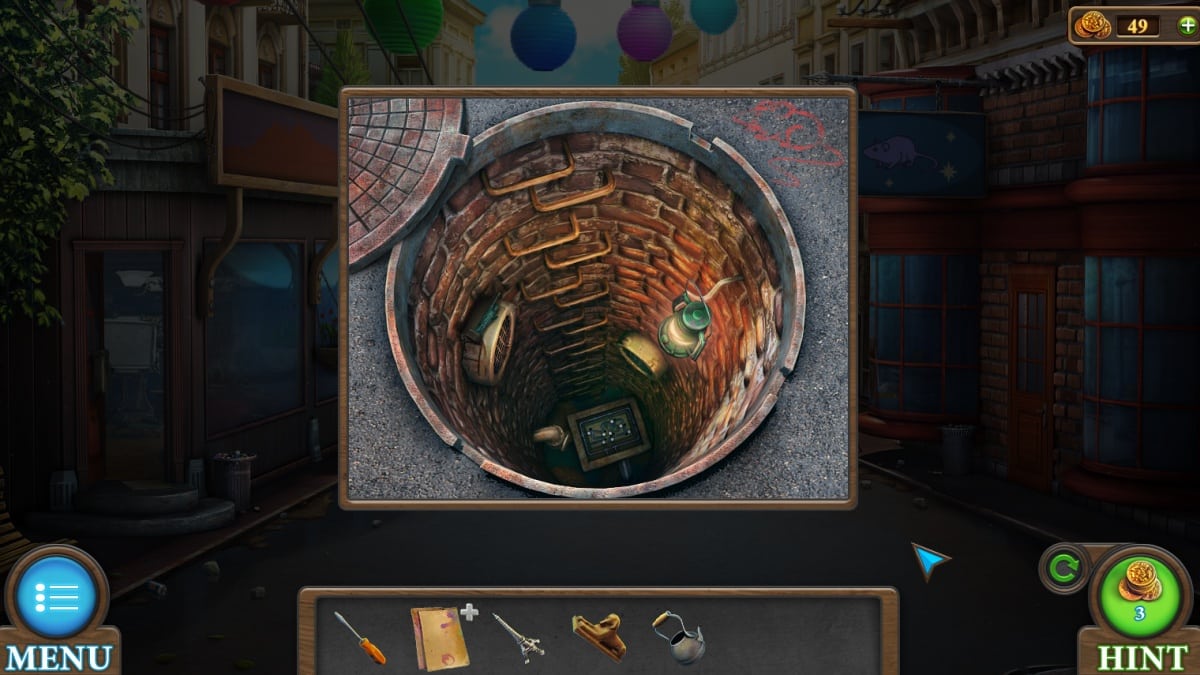
- Use your poker one last time on the manhole cover in the middle of the street. Place the lit lamp down the manhole so you can see the bottom.
- Pick up the Statue of Liberty on the left-hand side, and then go down to complete the ball and steam puzzle. You have to put the valve onto the puzzle to start it.
How to complete the ball and steam puzzle

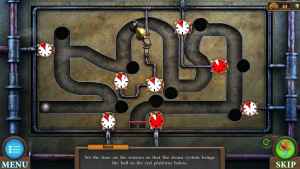
- This is a game of timing. The steam from every valve goes off when its individual timer is in the red zone. You can click each timer to change where the red zone is and click the valve to push the ball through and see how far it goes.
- Your reward is the water (including the drinking fountain) turning on.
- You can fill your kettle with water and go back to the fireplace to pour the water on the glowing hot items under the embers.
- You can now pick up the Big Ben figurine and a key.
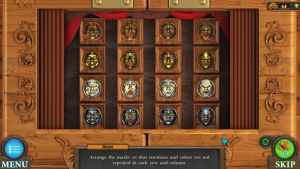
How to complete the potion chips puzzle
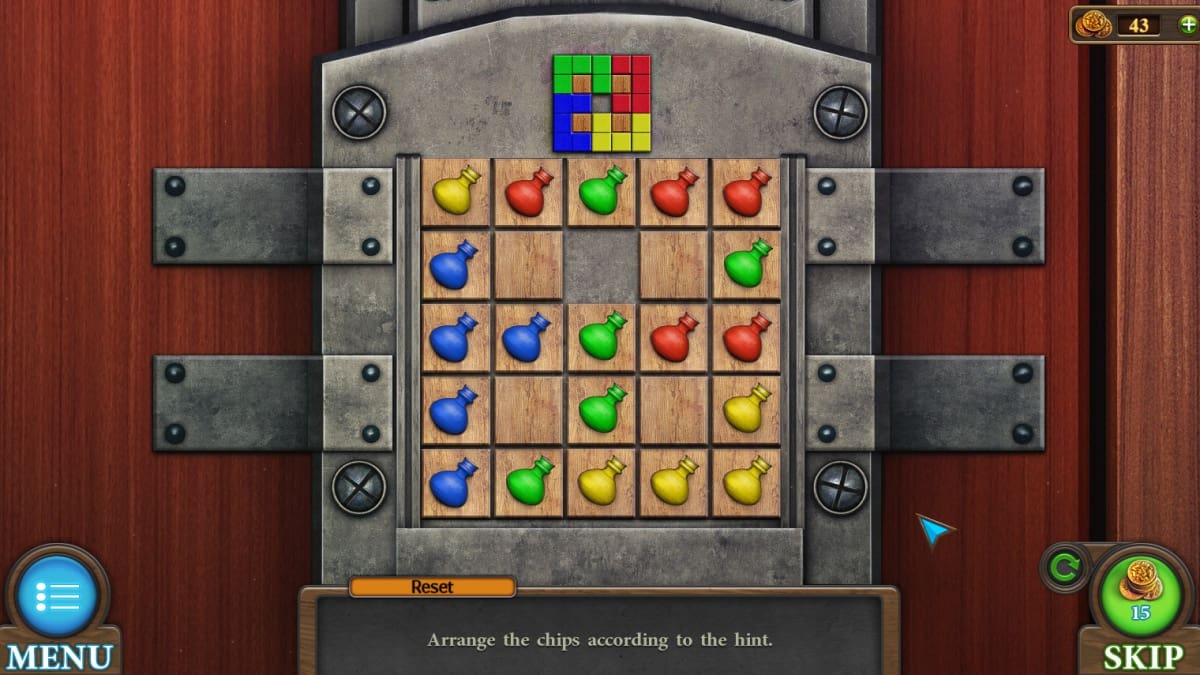
Your cooled off key goes directly into the lock of the shop that you haven't seen the inside of yet, underneath the rat sign.
This is a block moving puzzle where you need to position the colored potions in the exact arrangement of the hint above. When you finish this, you can turn the handle and step into the magic shop.
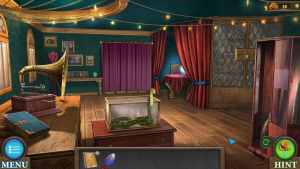
Explore the magic shop
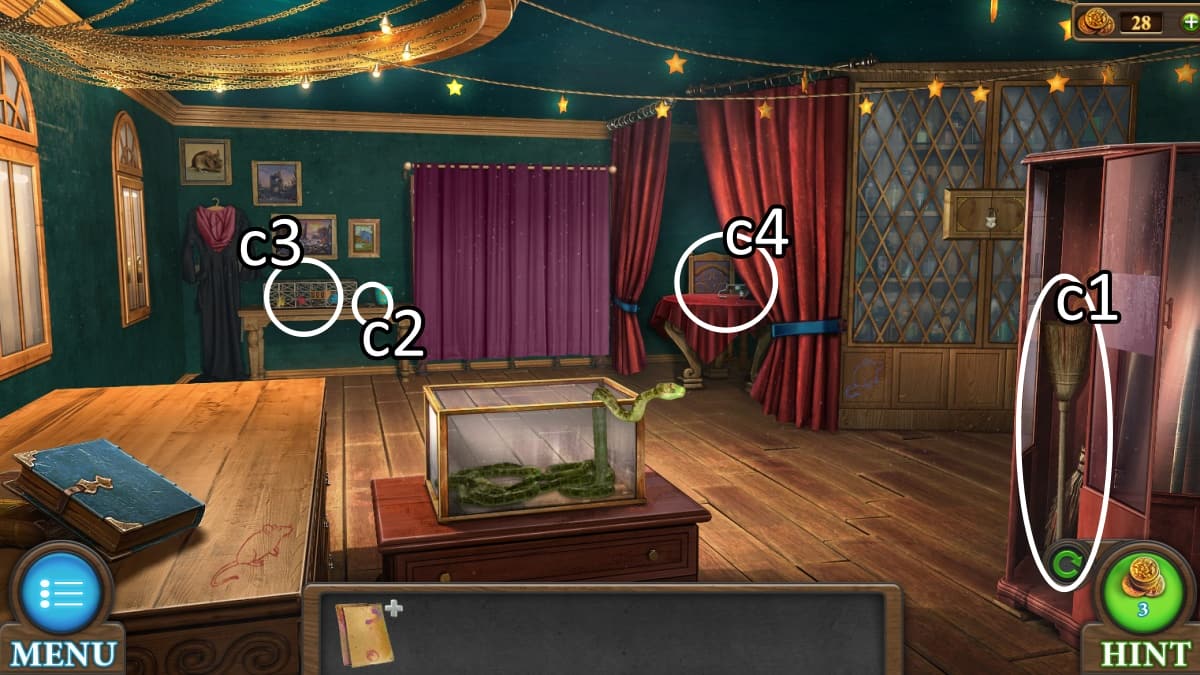
- c1. Grab a broom from the broom closet.
- c2. Next to the rat cage, pick up the paper.
- c3. Have you been counting rodents? Enter in how many of each color you found throughout the whole world. Pick up the rats as an item.
- Return to the antique shop and release the rats so that the cat starts to chase them. Now you can pick up the crystal ball.
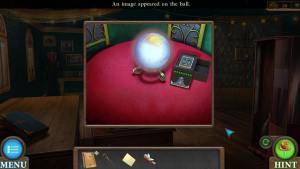
- c4. Place the crystal ball on the table to unlock the crystal ball puzzle, detailed below.
How to complete the crystal ball puzzle
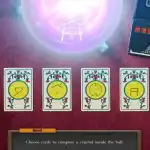
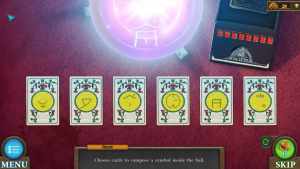
- In the crystal ball you'll see a symbol that's a combination of two cards. Click on those cards to pass that section. There are eight card combinations to complete before you can finish the puzzle.
- Your reward is the Sydney Opera House figurine. You can also place the paper over the top of the crystal ball to reveal a landscape.
Wrapping up outside
- d1. Approach the world map and place all of your figurines into the recesses. This unlocks a game where you click the buttons to move the tokens into the area of the map they can be found in. This gives you a painter's brush and the first of four rami crystals.
- d2. Use your broom to knock the key off the top of the shop's sign.
- Head back inside to the antique shop's chest.
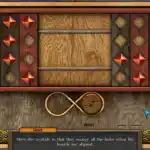
How to complete the antique chest puzzle

Click the rotating buttons to move the three elements around that button. Your goal is to make all of the yellow lights connect.
Your reward is a second crystal and a record for the record player.
Add the record and pick up the gramophone. Take it across the street to interact with the snake. Once you've played the gramophone, the snake will fall asleep.
In the snake's enclosure is a red gem, a wilted flower sprout, and the hint on how to un-wilt the flower.
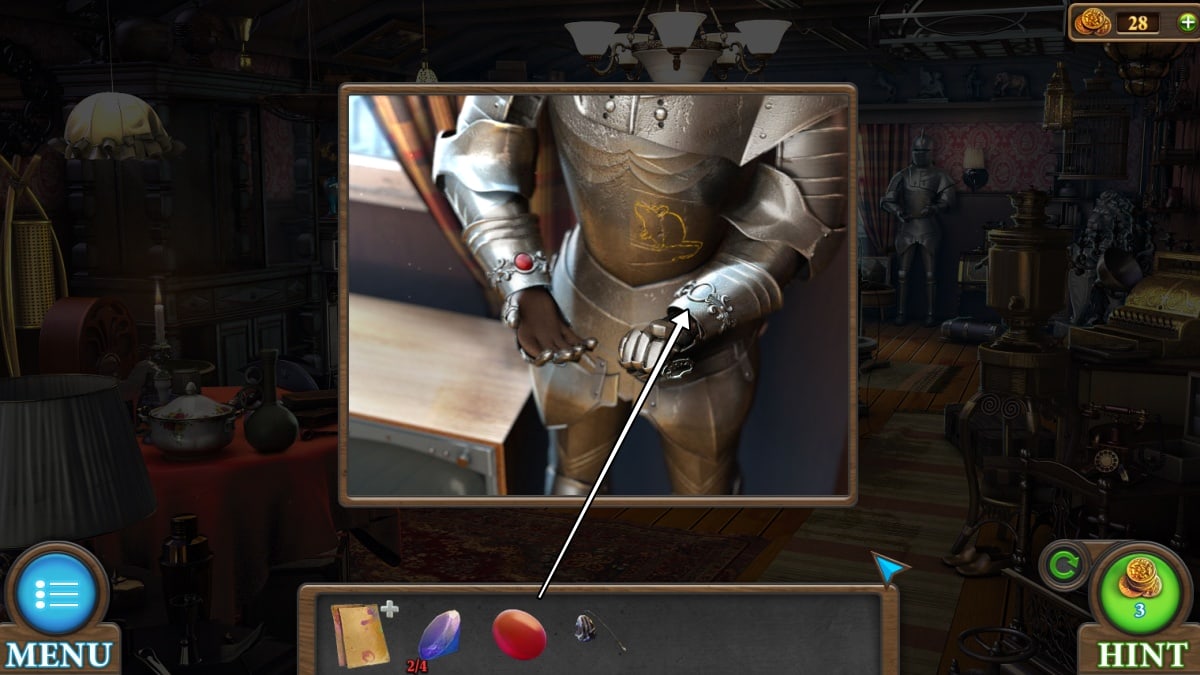
Place the red gem into the arm of the knight's suit of armor. This opens the knight's hand, which is holding another key.
How to complete the potion cabinet puzzle
Click on the arrows facing each other at the bottom to see how the two sides interface, because it isn't as straight-forward as one on top of the other. One of the boards tilts to the side. There is no penalty for checking how your current alignment is going at any time, so check frequently.
Your goal is to fill every spot with gemstones. Overlap is okay so long as no slot is left empty. Click on each gem to move it and its column partners down one (looping back up to the top as well).
Your reward is the potion cabinet opening, where you can take out another crystal and the bright blue potion you're looking for.
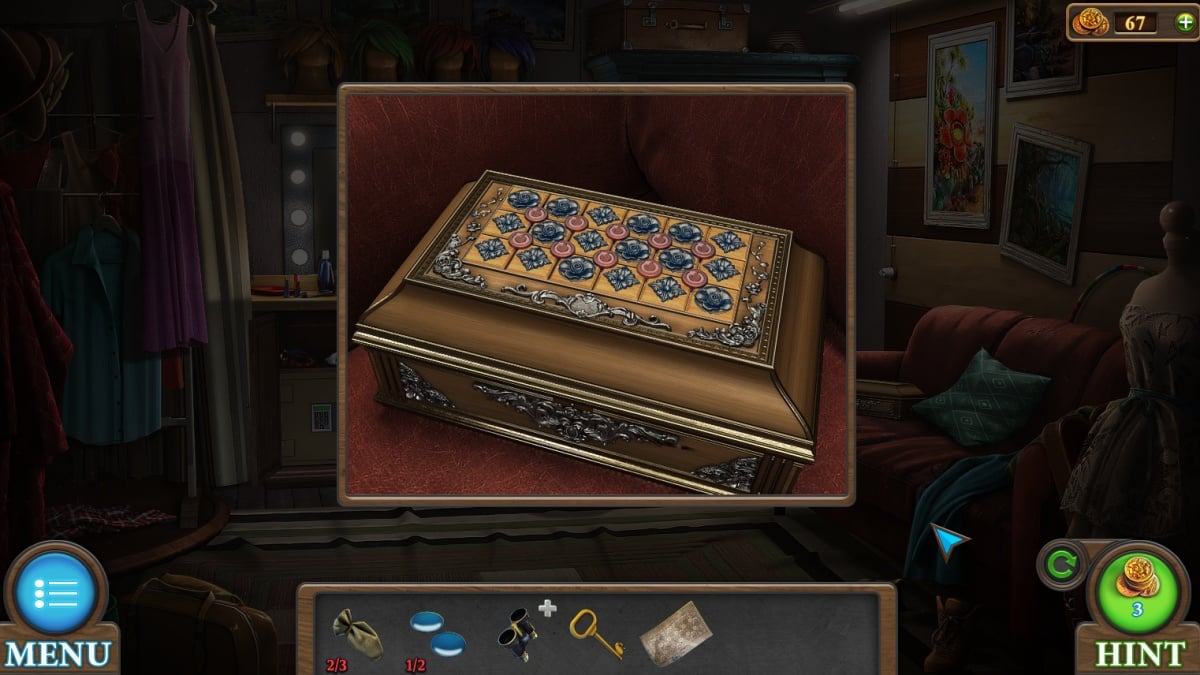
How to complete the flower pot puzzle
Next to the purple curtain, approach the flower pot labeled "5" and fill it with the wilted flower and the magic potion. This will create the magic flower item, which you can then slot into the group of flower pots behind the curtain to unlock the flower pot puzzle.
"Arrange the pots in the correct places according to the numbers on the cabinet."
Click any two pots to swap their spaces. Your goal is to make everything add up on both the rows and columns. I recommend matching up either all of the bottom numbers or all of the side numbers first, and then swapping around within that to find the ultimate answer. The numbers will glow green when they are satisfied.
At the end of the puzzle, you will get your last crystal and can return to the easel in the antique shop to paint your way out of the district.
How to complete the painting puzzle
If you haven't already, start by applying the paintbrush, painter's palette, and color hint to the painting in the corner of the antique shop. Then add in all four crystals to the corners to unlock the painting puzzle.
This puzzle is a simple paint by numbers. You can use the palette to mix two colors together by clicking them and then clicking the middle of the palette, and doing the same with the color you want to mix.
Match your colors to the hint you've been given. Some tips if you're having trouble:
- The purple that's mixed is very dark.
- The sky is light blue.
- The portions of the painting that appear white are actually a very pale red.
With the painting finished, it turns into an exit, and your time in the antique district is complete!
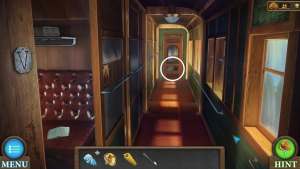
Tricky Doors World 10: Train complete walkthrough guide

In the somewhat claustrophobic first hallway of this slightly smaller world, you are tasked with escaping a train.
- a1. There are three items in this window. Clicking on it will release the curtain as a cloth item, and then you can pick up the chip hidden behind it, and the curtain rod (called a cornice as an item).
- a2. Use your cornice to tilt this light and get the second chip.
- a3. Apply your chips to this door to unlock the train chip puzzle, detailed below.
- a4. You'll be coming back out here in a moment with a spoon to remove this cover and find a key underneath. For now, head inside the room.
How to complete the train chip puzzle
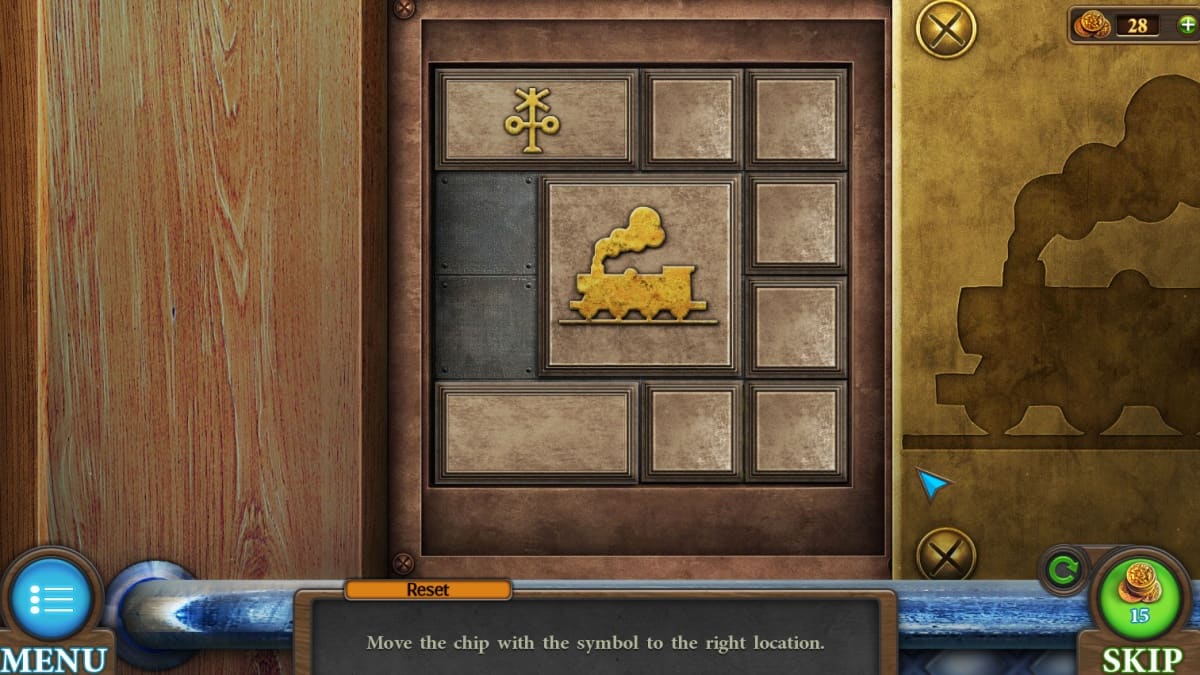
"Move the chip with the symbol to the right location."
Move the chips around the board one at a time. They can be moved in any direction. Your goal is to move the symbol chip (not the train) down to the lower right corner by getting the other chips out of the way.
I suggest slowly moving the symbol chip down one piece at a time, nudging it through the tray until it's reached the bottom.
This unlocks the train room.
Rummaging through the room
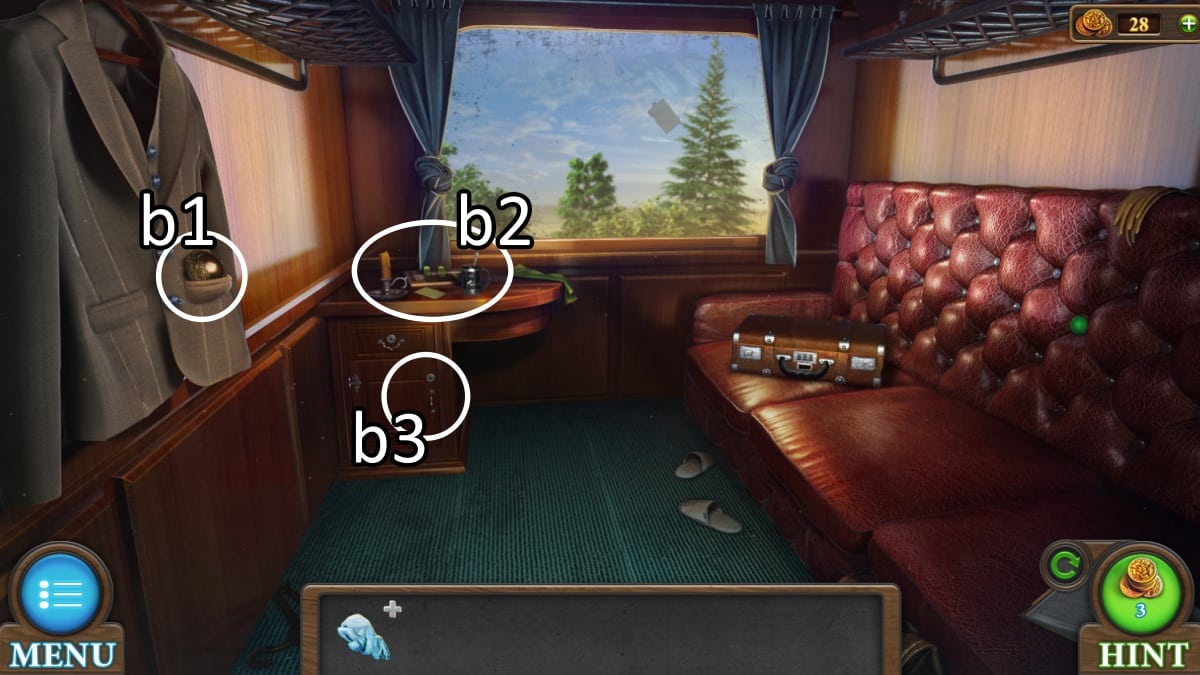
- b1. Pick the handle out of this jacket pocket.
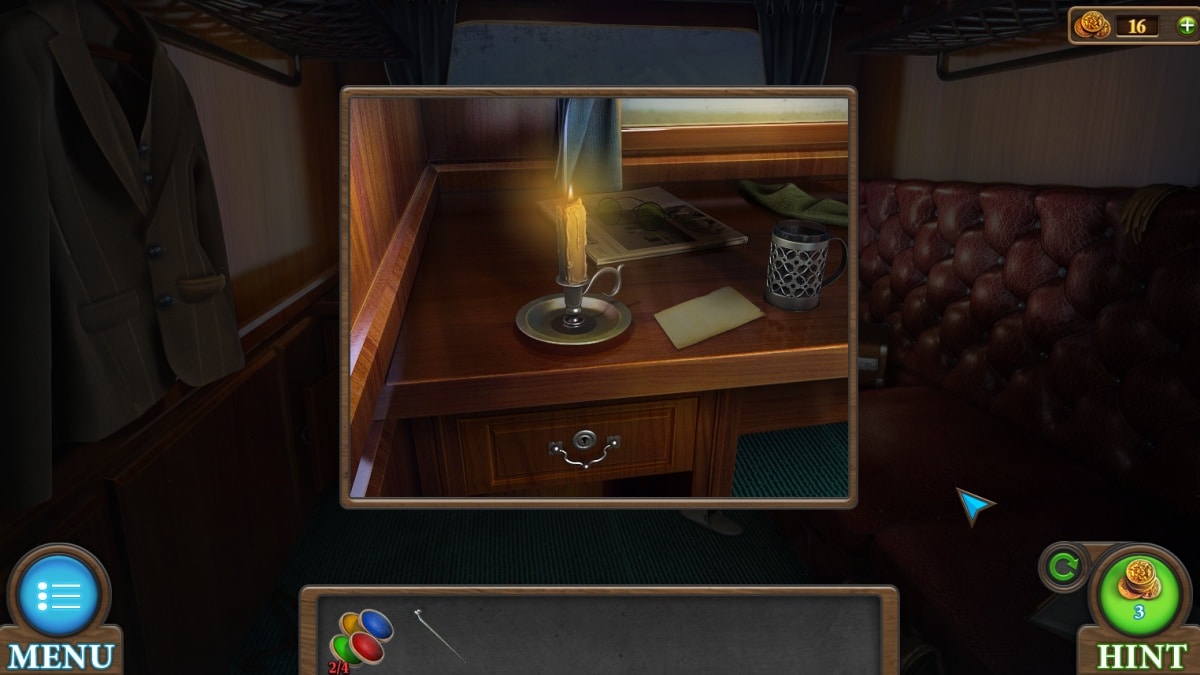
- b2. At the tabletop, you can take the candle out of its holder and the spoon out of the cup. Go back outside and use the spoon on the V placard next to the room and find a key.
- b3. Use the key on the lower lock to find the colored circles puzzle.
How to complete the colored circles puzzle
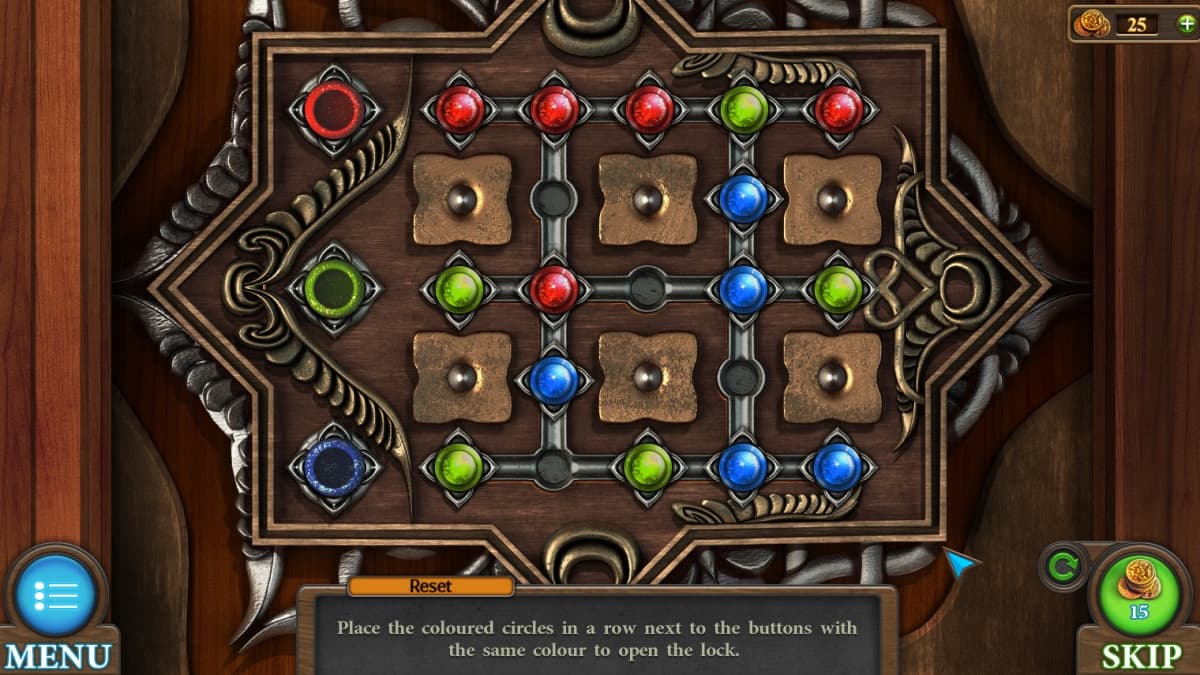
"Place the coloured circles in a row next to the buttons with the same colour to open the lock."
- Each circle can be dragged around to any open slots. Your goal is to make all the colors line up. I recommend starting with the top row and working your way down.
- Your reward is a colored button and a bottle of white rum.
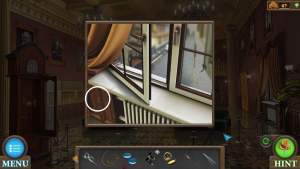
How to complete the spot the difference puzzle

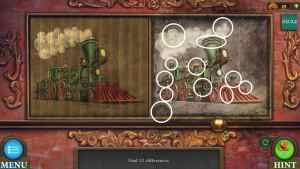
Approach the very end of the hallway. Apply your white rum to your leftover curtain, which you can then use to clean off the train picture in the wood. After that, use the handle on the empty hole and unlock the spot the difference puzzle.
"Find 12 differences."
Your goal is to click things on the right image which do not match the left image. All 12 have been circled for your ease.
This unlocks the engine room.
Prepping the engine room
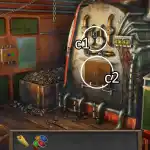
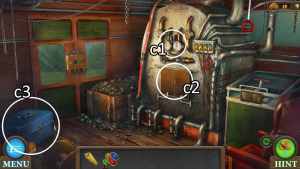
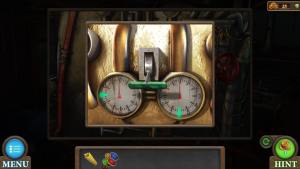
- c1. Turn these pressure gauges so that they show a 9 and 6. This is for the hint from earlier about "9:30."
- c2. Open these doors to find a fire. Use your candle on the fire to light it.
- c3. Open up this box and rummage around a bit to find a knife and a screwdriver.
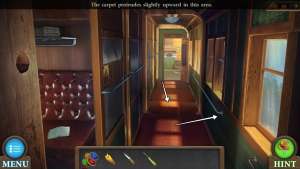
- Back in the hallway, you'll find a piece of carpet protruding upward slightly. Use the screwdriver on the loose handrail to detach it. Use the knife on the carpet to uncover a hatch.
Unlocking the briefcase
In the personal room, you can return the lit candle to its holder and burn the paper next to it to uncover a set of numbers. This is the solution to get into the briefcase on the seat.
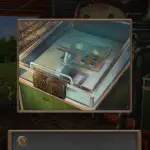
Inside the briefcase is a button and a four-way wheel brace. Use your knife on the train seat to also gain the green button.
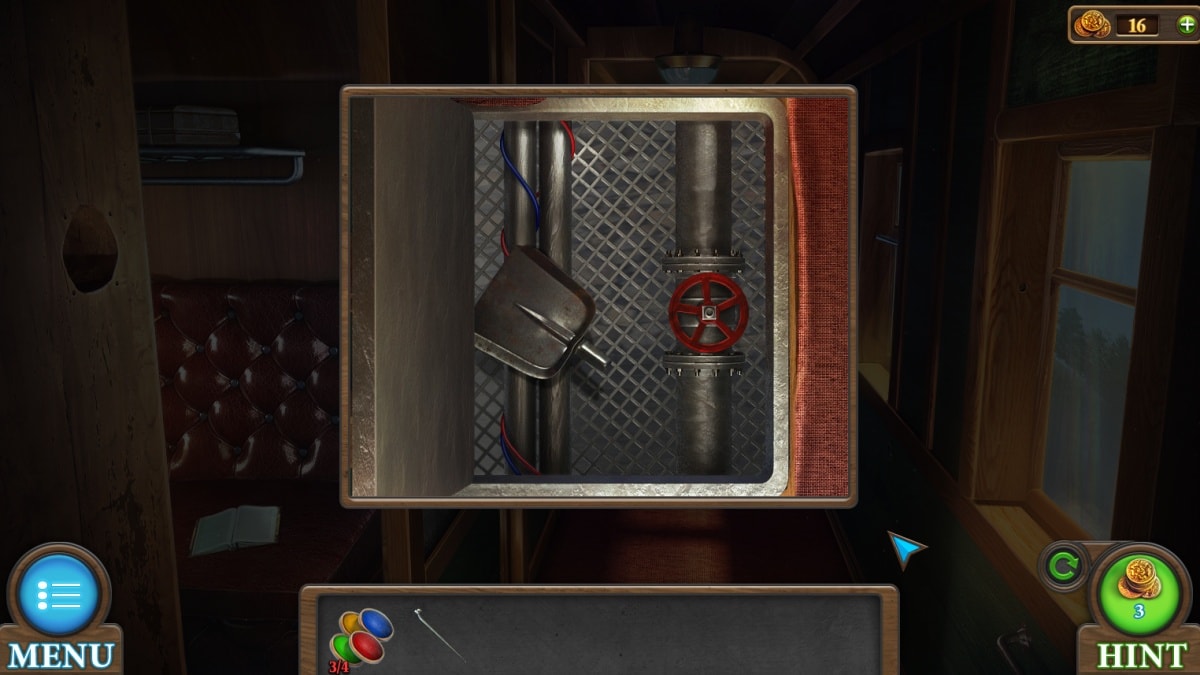
The four-way wheel brace is your solution to the floor hatch, which opens to show a shovel blade. Combine the shovel blade with the handrail to create a full shovel.
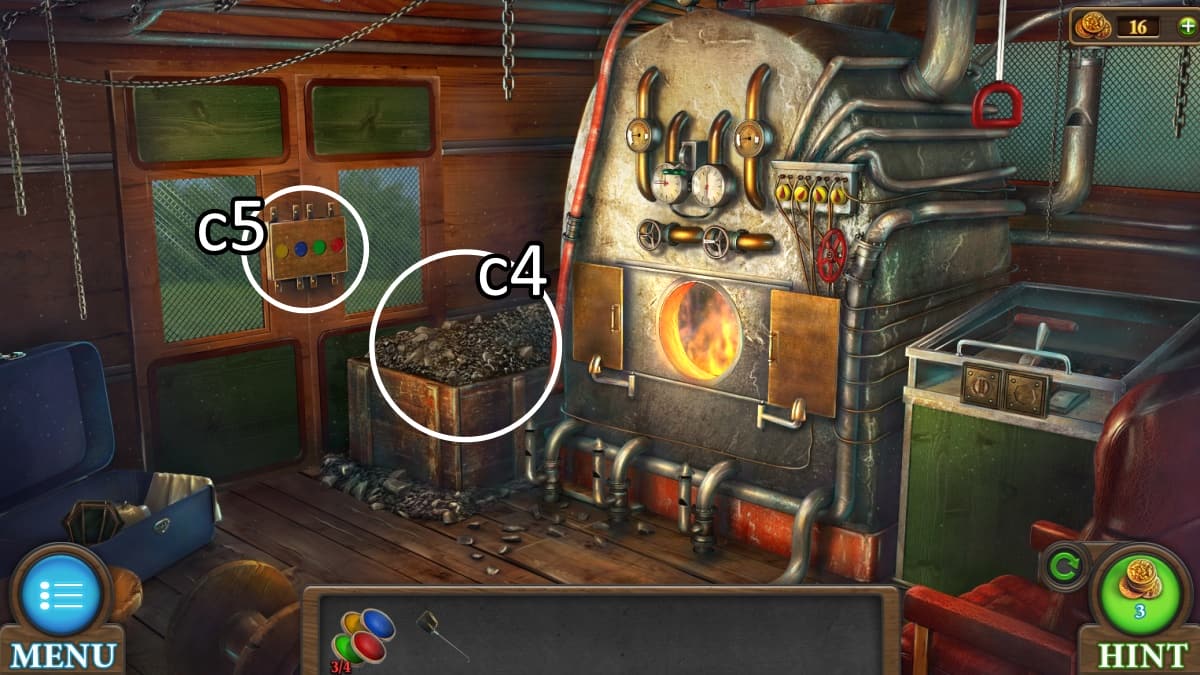
- c4. Use your new shovel on the coal to unearth the final button.
- c5. Use your buttons to unlock the chip movement puzzle.
How to complete the chip movement puzzle
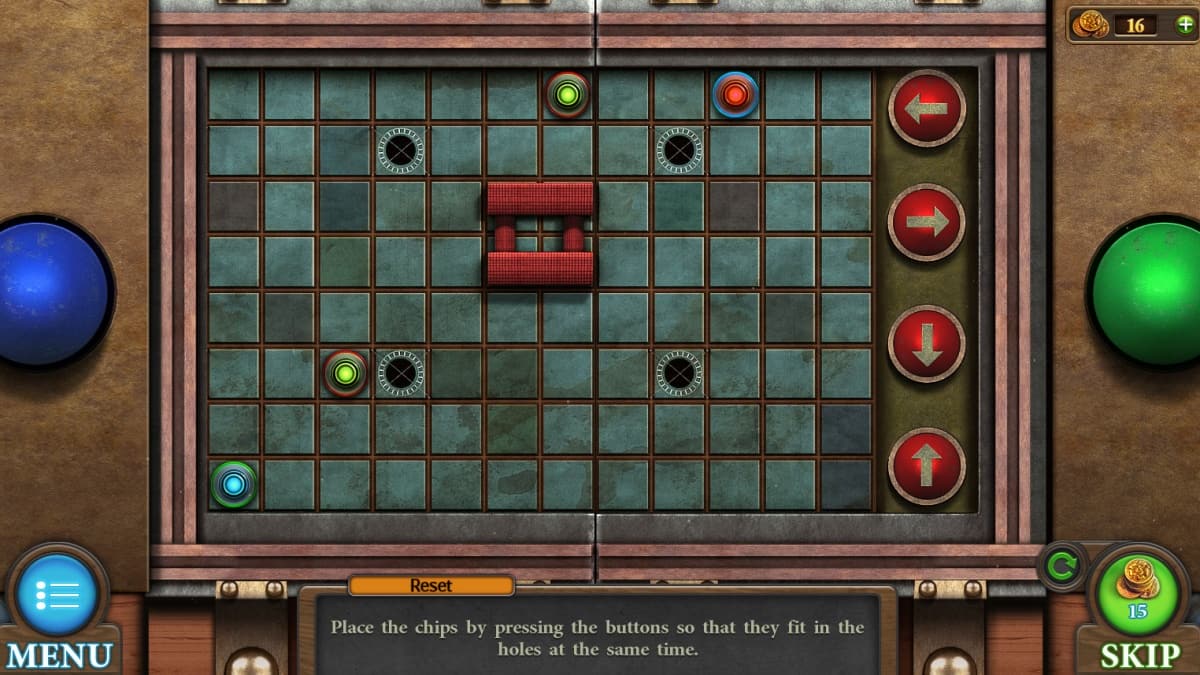
"Place the chips by pressing the buttons so that they fit in the holes at the same time."
- You move all chips together by clicking the red buttons on the side of the puzzle. Though the chips aren't an appropriate distance from each other at the start, you can use the obstacles and walls to move only certain chips.
- As an example, if two chips are at the very top of the board but the two other chips need to be one row closer to them, when you move all the chips upwards, only the ones that can still move up will change position.
- Your goal is to get all four chips into the holes on the board.
- Your reward is the door opening. When you click on the view rushing by outside, you'll lean out to pick up a key on the steps.
How to complete the button matching puzzle
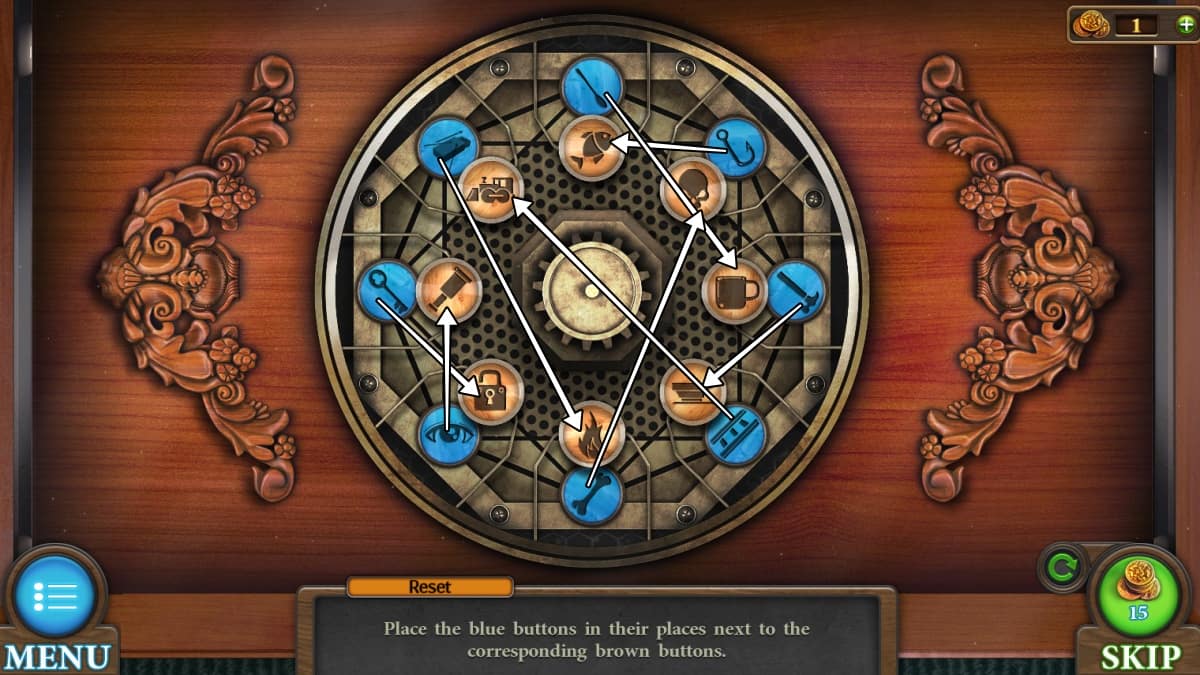
First go back to the room once more, and use your new key on the remaining locked drawer. Here you'll find the button matching puzzle.
"Place the blue buttons in their places next to the corresponding brown buttons."
- Each blue button has a brown button that it matches. By clicking any blue button, you'll rotate a different set of three in a triangle. You can use these movements to make sure that every button matches its partner.
- The blue button will light up white when it is in the correct position. The matches are also shown above.
- Your reward is a chip that unlocks the final puzzle in the engine room.
How to complete the railroad puzzle


"Assemble the railroad from start to finish of the rail."
- You'll be dragging the pieces of railroad from the right side to the left. Start from the bottom right and find the pieces that avoid the many obstacles. Every correct piece locks into place, so you can go one at a time until you've reached the end.
- Your reward is a handle that lets you slow down the train to a stop.
- With the trail no longer running, you can safely leave and complete the area!
Tricky Doors World 11: Circus complete walkthrough guide
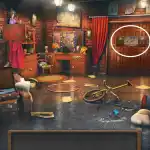
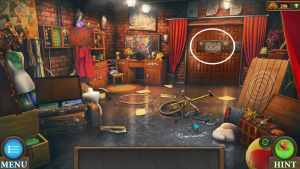
Your journey today starts in the center of a big top circus. All three rooms are open from the very start, so we'll be starting with a lot of pick-ups. Watch out for clowns!
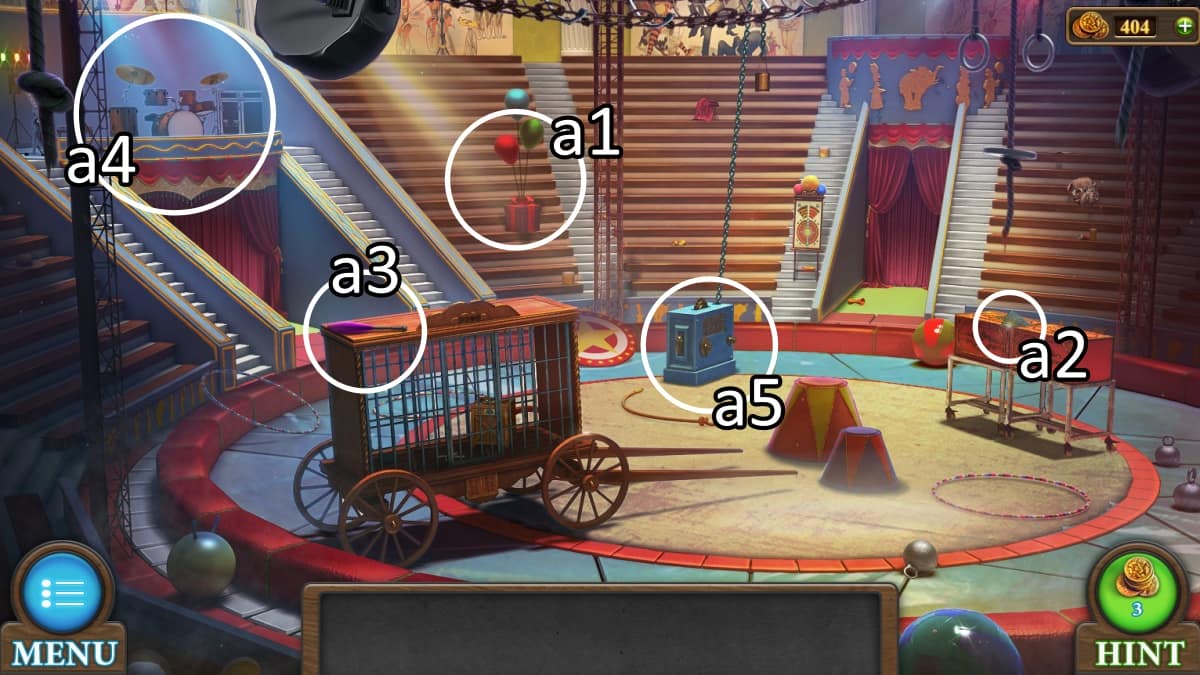
- a1. Release the balloons from the box. These won't be used for a while.
- a2. Pick up the first of two gears from the top of this box.
- a3. The first of 5 clown clubs.
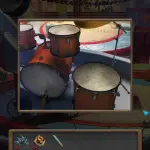
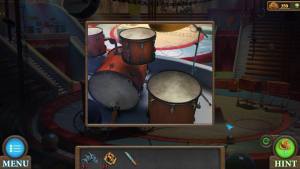
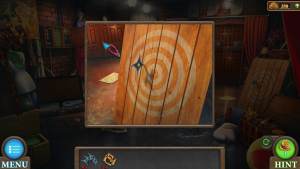
- a4. Getting close to the drum set you can find the first of five shurikens. One of the drums sounds weird, but you can't dig into it just yet.
- a5. There's a key hidden on the floor near this blue device.
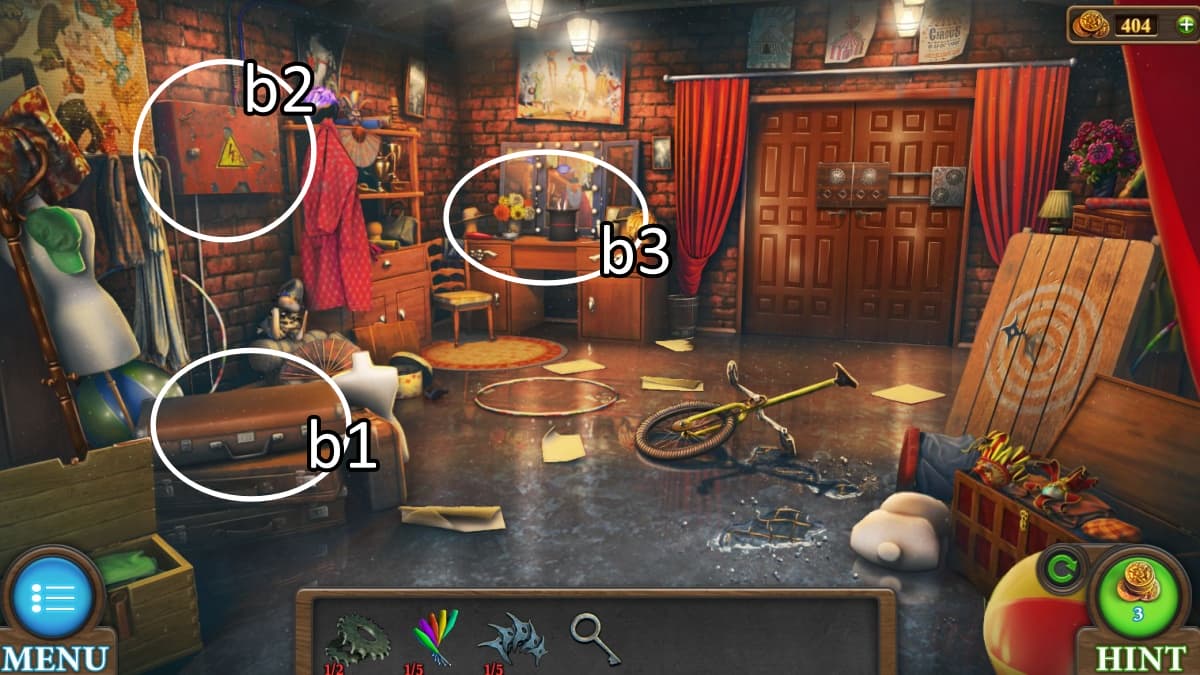
We're going into the left-side room first.
- b1. Use your key on this suitcase to unlock the key spike puzzle, detailed below.
- b2. Open this fuse box. You'll need to find some buttons.
- b3. Approach the desk and pick up the red club and a ruler.
How to complete the key spike puzzle

"Swap the elements in places so that the spikes fit into the grooves."
- The circles on the right have different grooves in the top of them. You need to load in the correct circles in order to unlock the suitcase.
- First load all the circles back into the right side and turn that element to start with the left-most piece of the key puzzle, and fill in from there.
- Your reward is a wrench and a red handle.
In the darkness
For now all you can grab is a bottle and one of two buttons.
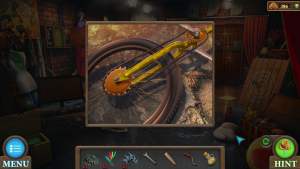
Head back to the box with a saw blade stuck in it and add your handle. Cutting open this box will get you the second button and another shuriken. Now you can return to the left room for a light up button puzzle.
How to complete the light up button puzzle
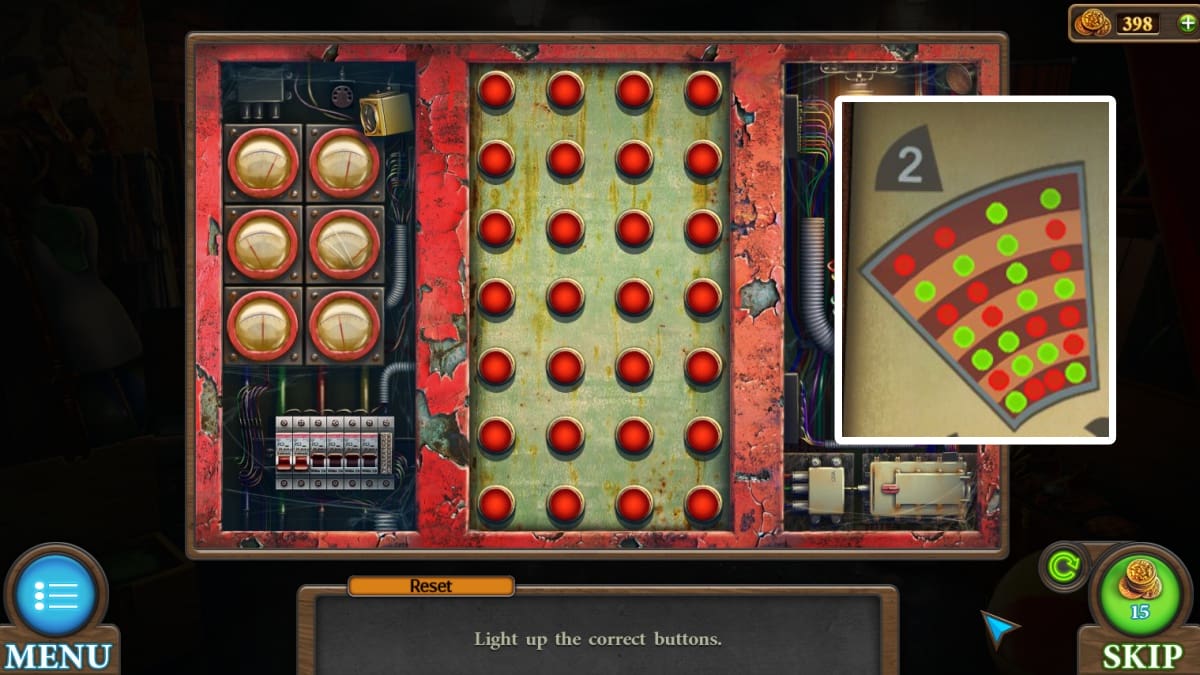
"Light up the correct buttons."
- From the presented puzzle alone it can seem impossible to know what it means by correct buttons. However, there is a seating guide out in the center room that shows you a few green dots among many red. Those green dots are your guide.
- I have included my hint, but keep in mind yours may show something different.
- Click on the red buttons to change them to green, and once you have matched your hint you will turn on the power to the dark room on the right of the circus.
Scour the dining room
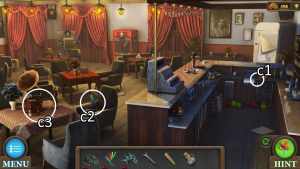
- c1. There's an additional shuriken next to the fryer. Open the fryer and fill your bottle with oil.
- c2. A third club.
- c3. Now is not the time to enjoy music. Use your wrench to steal this handle.
- Return to the dressing room unicycle. Use your oil and then wrench on the unicycle to gain a chain and the second gear.
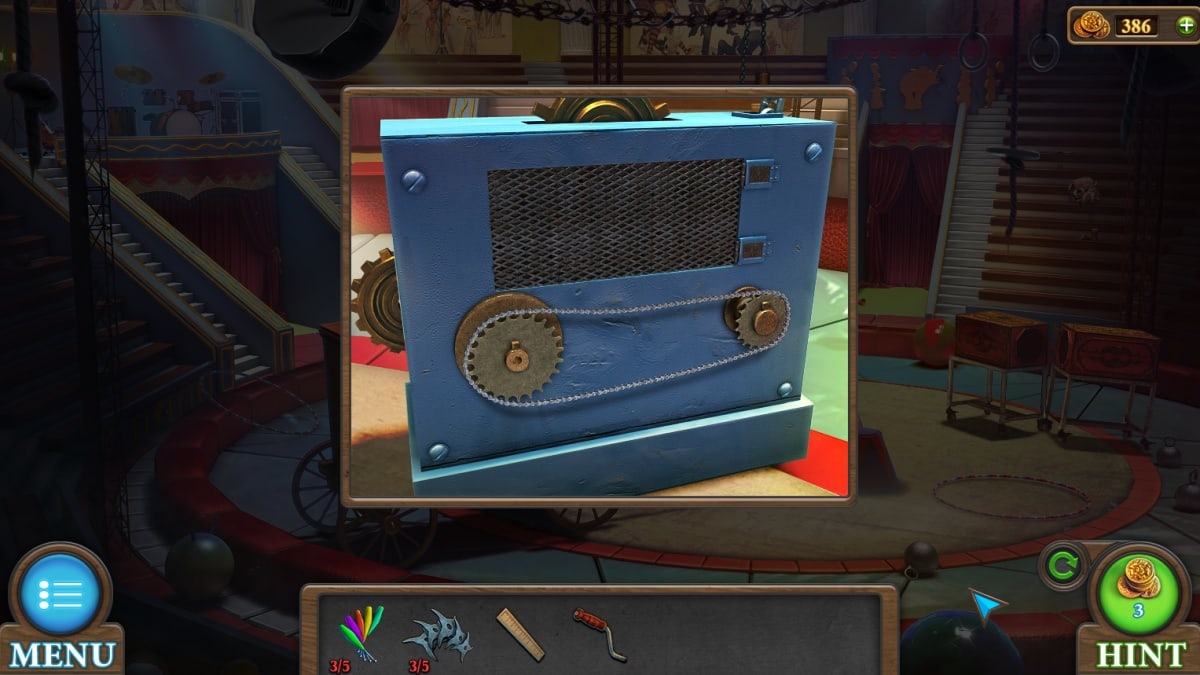
Your chain, gears, and handle will all be attached to the blue device in the middle circus tent.
This unlocks the gear puzzle.
How to complete the gear puzzle
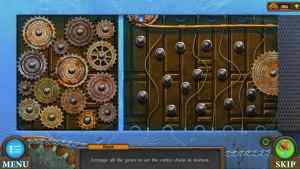
"Arrange all the gears to set the entire chain in motion."
- You must place all the gears from the left onto the mechanism on the right. You must use every gear to complete the puzzle. You'll know the gear is in a place where it works if it starts spinning, but multiple gears fit in each spot to begin with.
- The answer is shown above. Your reward is a bucket falling from the ceiling, which contains a handle and tiger token.
- The handle goes to the fridge in the dining room, which contains a green club and a carrot.
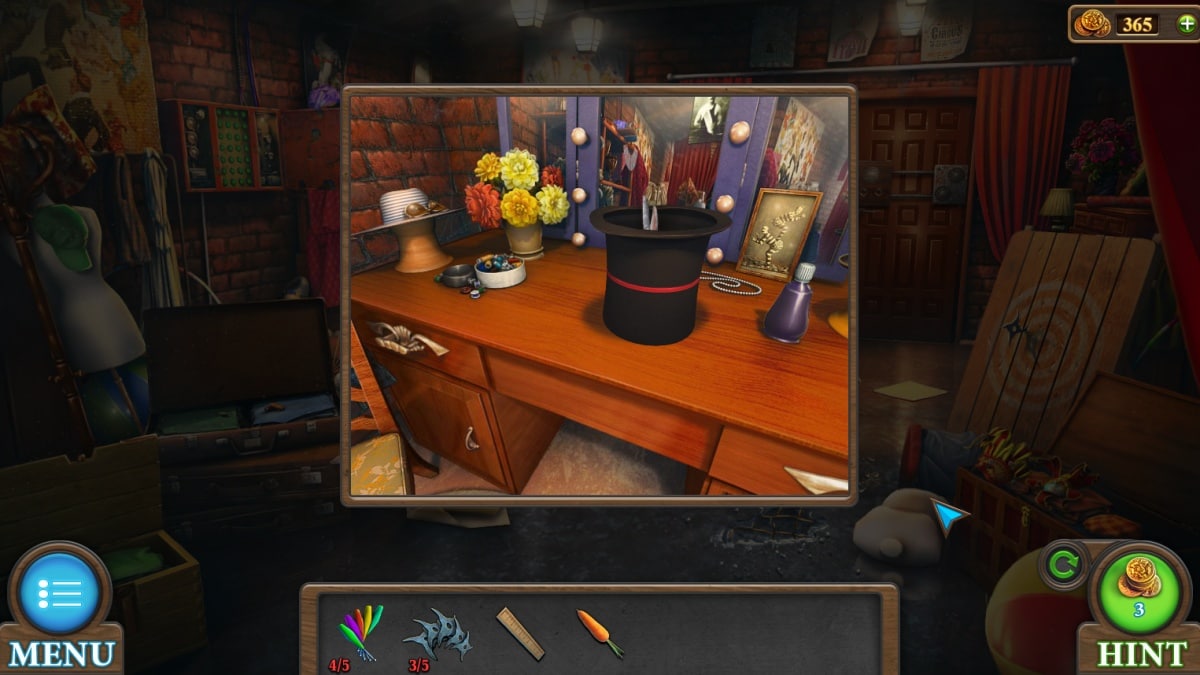
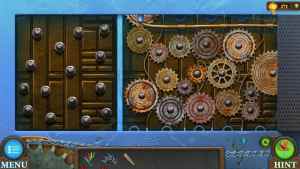
Return to the dressing room to feed your carrot to the rabbit in the magic hat. This lets you access the first of four chips and gets you a key.
How to complete the cash register puzzle
Your key goes to the cash register, which unlocks a puzzle.
"Place the tokens in the grooves of the corresponding color."
- You move an entire square of tokens at the same time with the buttons in the middle of each square. Your goal is to shuffle them around until the silver track has all the silver coins, and the gold track has all the gold coins.
- Your reward is a popcorn token!
- In addition, while the drawer is open you can see a chip under the drawer. Use your ruler on the drawer to swipe out the chip.
How to complete the popcorn puzzle

"Press both buttons in the correct sequence and the required number of times."
- Your hint for the green-red sequence is in the apples in the kitchen. Press the buttons in this order to complete the popcorn puzzle.
- Your reward is the elephant token.
How to complete the tiger cage puzzle
Back in the big top, you'll be approaching the cage in the center, and placing both your tiger and elephant symbols in the relief at the bottom. This unlocks the tiger cage puzzle.
"Arrange the chips so that the central element glows green in all five chips."
- The blue buttons along the bottom move the row of chips left and right, and the chip positioned directly above the round arrow will rotate when that button is pushed. You'll need to first turn the rightmost chip sideways so that you can push the farthest left chip over the rotation button.
- Once all five are pointed upright and in their correct positions, the puzzle is finished.
- This grants you the final clown club, and your next puzzle that you cannot finish just yet.
How to complete the clown club puzzle

- With all the clubs in hand, approach the somewhat scary clown in the dining room and hand him his missing clubs. He will put on a little show, and when he stops juggling, his clubs will be in a specific order. On the fridge, you can fold up the message on the front to see colors associated with different numbers.
- For example, in my playthrough, red was 1, yellow was 2, etc. The order of the clown's clubs is the order you insert the numbers on the box in the tiger cage.
- Your reward is a relief.
How to complete the table relief puzzle
This puzzle is harder to find than it is to complete. In the dining room, there is a table that's missing the relief you found from its lower portion. By inserting the relief, you unlock this puzzle.
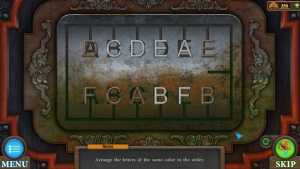
"Arrange the letters of the same color in the same order."
- This is a simple matter of filling spots that are open. Clicking on any letter will move it to the empty spot, so start with any letter, and then click the letter that belongs in the newly-empty spot. This continues until the puzzle is complete.
- Your reward is a shuriken and a knife.
Finishing your shuriken
- Go to the drum set in the big top and stab it mercilessly. You'll receive another chip and a set of pliers. The pliers can be used in the dressing room to pry the last of your shurikens from the board there.
- Remember those balloons you released very first thing? They're still hanging around up in the top of the tent, and it's time to bring them down. Apply the shurikens to the balloons, and you'll start a balloon-shooting minigame. Don't worry, even though you only collected five shurikens, you have infinite tries to get all the balloons, which is good when the physics are this floaty (no pun intended).
- Once you've hit all of the balloons, the final chip will rain from the sky and hit you in the face.
How to complete the circus chips puzzle
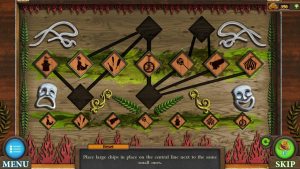
Approach the final door in the dressing room, where you'll insert your four chips.
"Place large chips in place on the central line next to the same small ones."
- As it says, match your large chips with the smaller ones. The central line mentioned is the same one that all the larger chips are currently on, meaning that the other empty spots are purely for moving things around.
- With your final puzzle finished, it's time to leave once again!
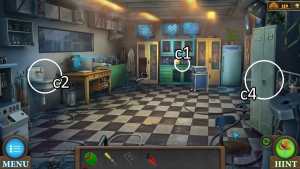
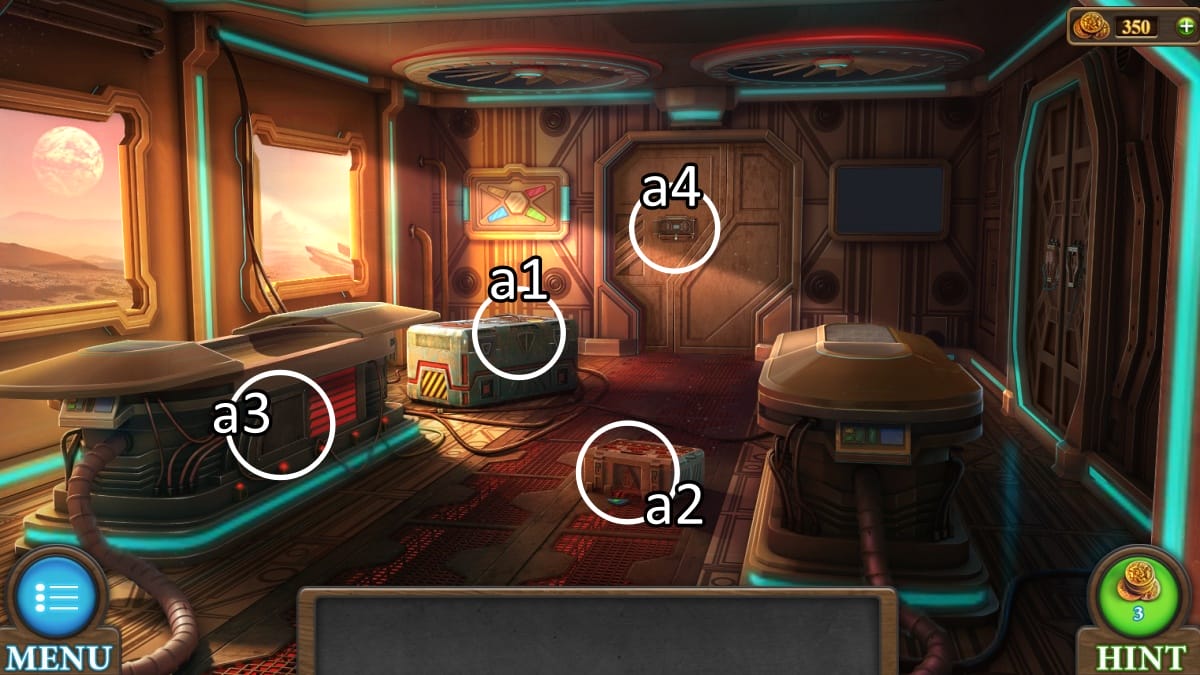
Tricky Doors World 12: Mars complete walkthrough guide
This tech-heavy world is focused on getting off the surface of Mars.
a1. Pick up the chip with tools on it. Look at the paper and take off the paperclip.
a2. First grab the green detail. There will be several items called just 'details' in the course of this world, I will try to keep them distinct. While you're close to the tool box, insert the tool chip. This unlocks the tool box puzzle, detailed below.
a3. Use your new screwdriver on this panel to open it up. There's a fuse you can use your rubber gloves to pull out.
a4. Open up this panel with your screwdriver as well. Put in the fuse and paperclip on the right side. This unlocks the beam puzzle, detailed below.
How to complete the tool box puzzle
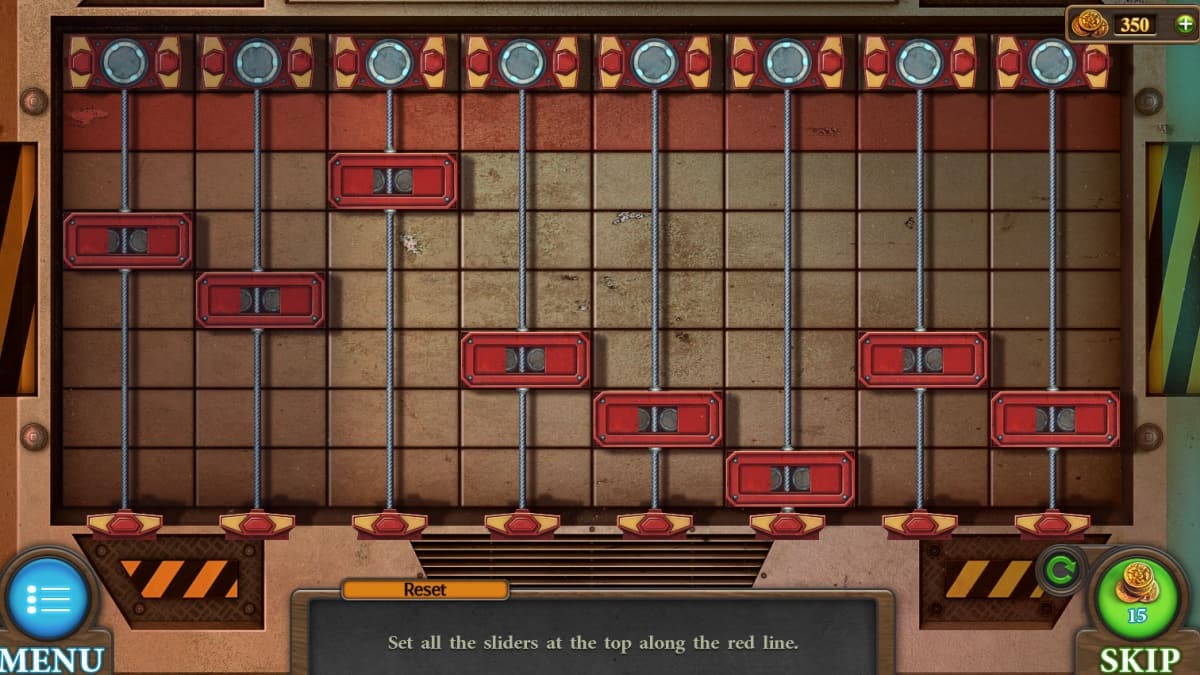
"Set all the sliders at the top along the red line."
Each slider moves other sliders along with it, and cannot move so long as it would move a different slider too far up or down.
Your rewards are rubber gloves and a screwdriver.
How to complete the beam puzzle
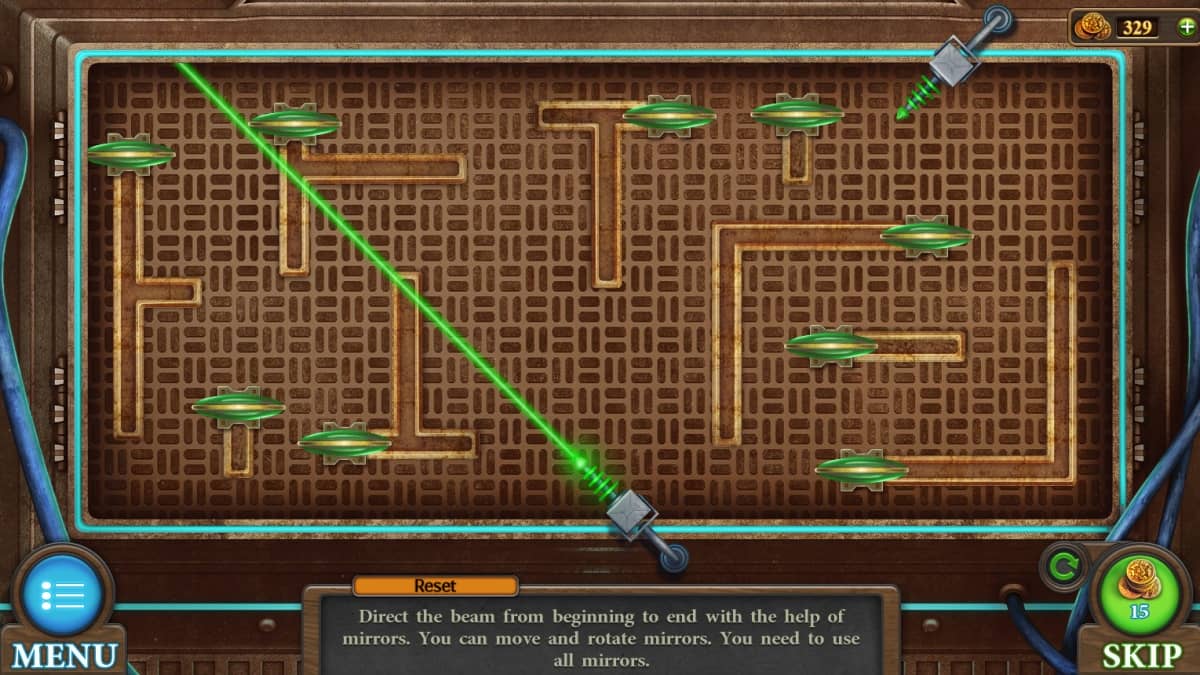
"Direct the beam from beginning to end with the help of mirrors. You can move and rotate mirrors. You need to use all the mirrors."
The instructions on this one are clear enough. There is no penalty for sending the beam in the wrong direction, so feel free to fiddle with each mirror starting with the first one the beam is pointed at.
Once all mirrors have been used, you can move to the next room.
The second room
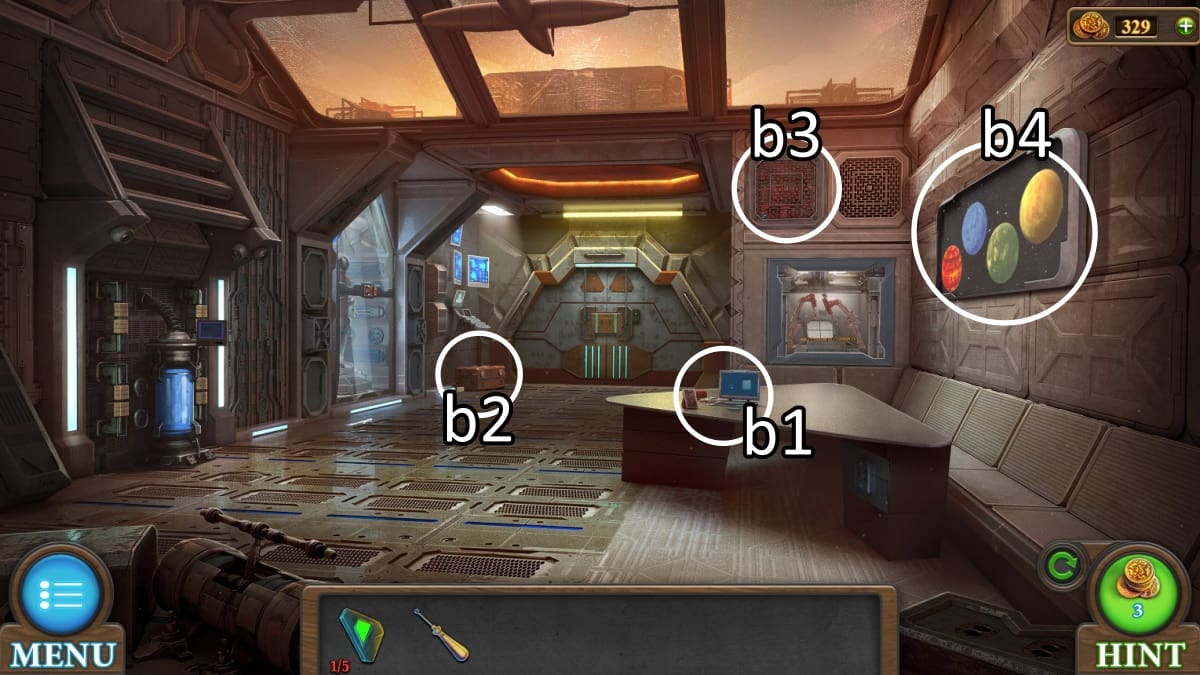
b1. There are two different 'detail' items next to the laptop, one green and one blue.
b2. A green detail is on top of the chest, and a roll of duct tape next to it.
b3. Use your screwdriver one last time to find the second blue detail.
b4. Take note of the colors of these planets.
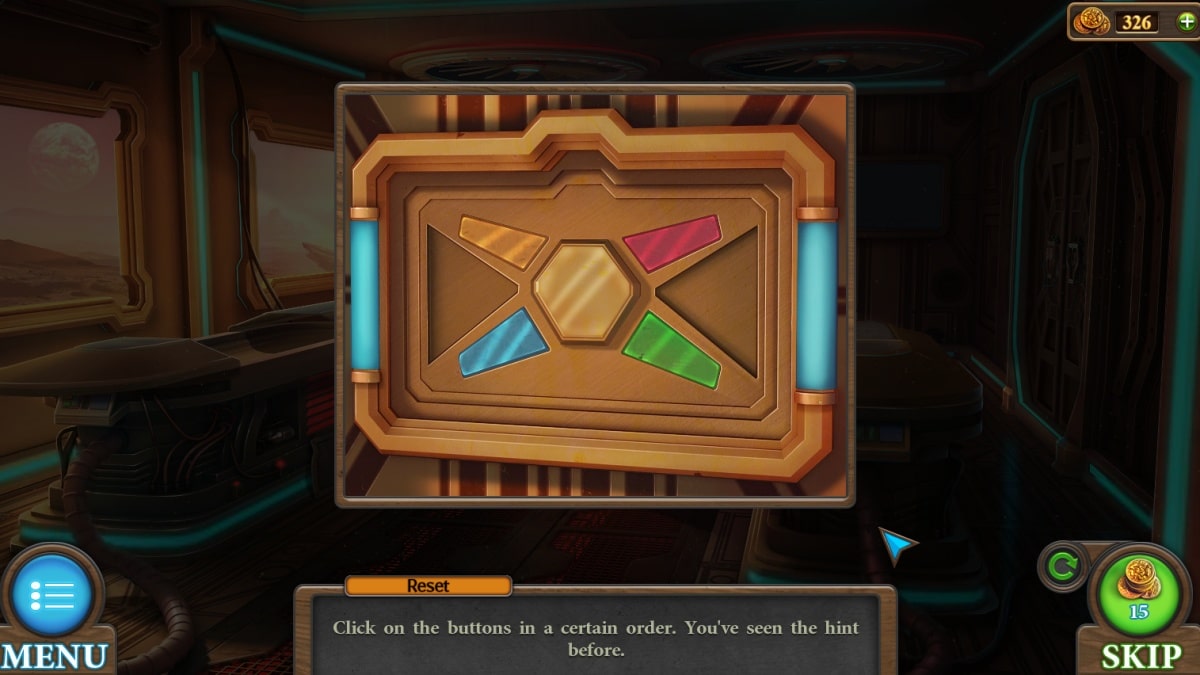
The color pattern follows the planets. Click the colors in order and then the center button to open the cupboard.
Inside is a tube and a pentagon detail.
The blue details go into the blue crate on the floor. This unlocks the stone circle puzzle.
How to complete the stone circle puzzle
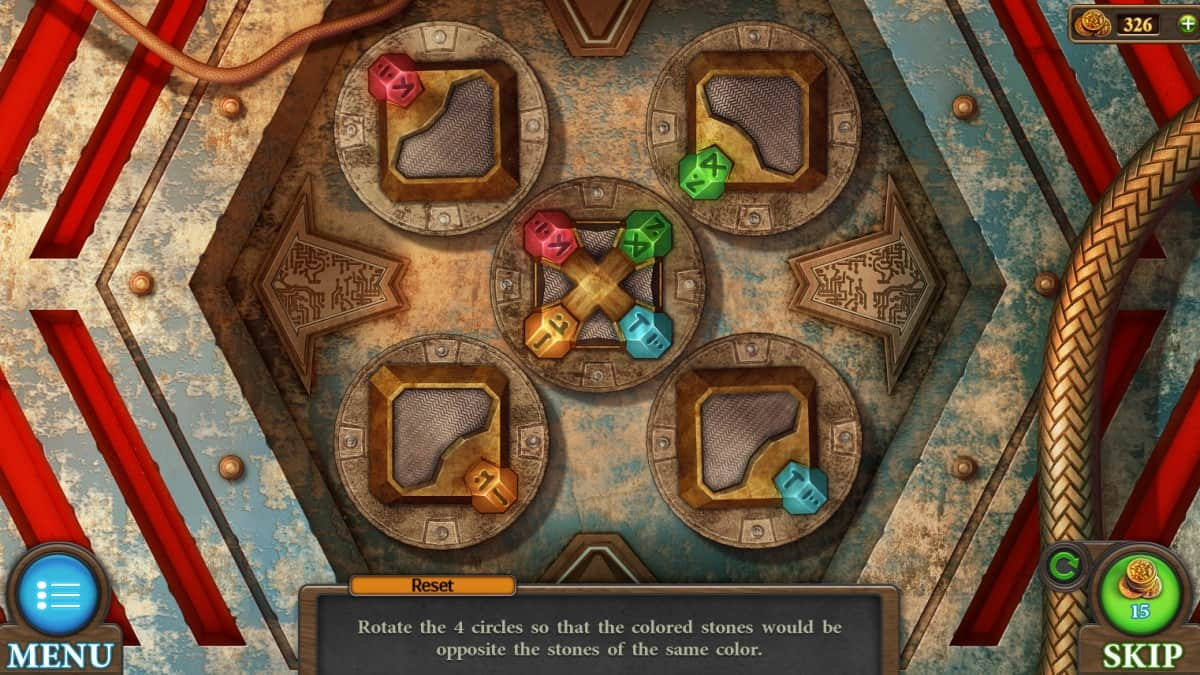
"Rotate the 4 circles so that the colored stones would be opposite the stones of the same color."
The goal is to make the colors touch, red to red, yellow to yellow, etc. Clicking each stone moves itself and some others.
Your reward is a wrench and powder.
How to complete the pentagon puzzle
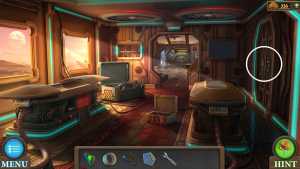
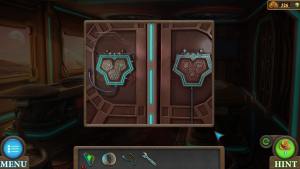
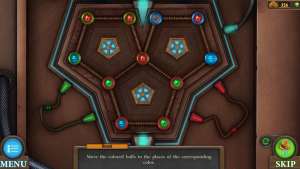
Approach the side door and insert the pentagon detail. This unlocks the pentagon puzzle.
"Move the colored balls to the places of the corresponding color."
Clicking the middle three buttons will rotate the five balls around it. Your goal is to get each ball into the holder of the same color. I recommend focusing on one color at a time and the others will fall into place without any issue.
Your rewards are a reducer on the top shelf, and a paintbrush on the bottom.
The other half of this cupboard door can be opened later, so keep it in mind.
Getting the fingerprint

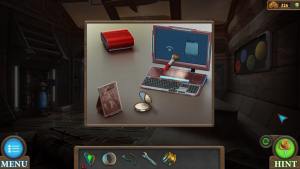
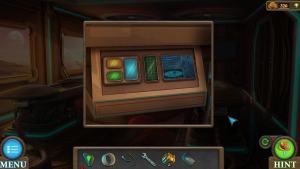
Approach the laptop. Use the powder, paintbrush, and finally duct tape to pick up the fingerprint off the laptop. Then go to the pod on the right of the first room.
Use the tape fingerprint on the fingerprint scanner of the pod. This opens the pod and grants you another green detail and an access card.
How to complete the astronaut access puzzle
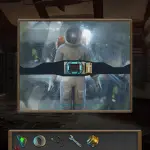
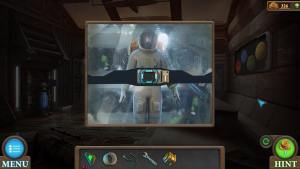
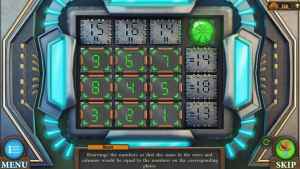
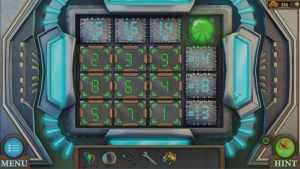
"Rearrange the numbers so that the sums in the rows and columns would be equal to the numbers on the corresponding plates."
The numbers on the edges will light up blue when you have the correct sums. I again recommend focusing on one at a time. Once you have all three rows or columns complete, you can keep those numbers in their respective rows/columns to make the other half work.
My solution is listed above. Your reward is access to the astronaut suit, and also the first of two red details on the right of the area.
Fixing up the suit
There's a tear in the front of the suit. Use your duct tape to fix it up, that'll surely work on Mars. Then turn the suit around and open it up to find one final green detail.
Back underneath one of the pods in the first room, the open panel has an oxygen tank. Use your wrench on it to collect it.
With the oxygen tank in your inventory, add the hose and reducer to it to create an oxygen balloon.
Add your oxygen balloon into the space suit and you can now pick it up to add to your inventory.
How to complete the beam puzzle
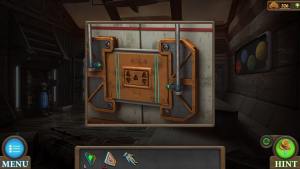
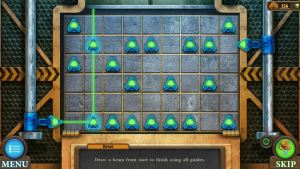
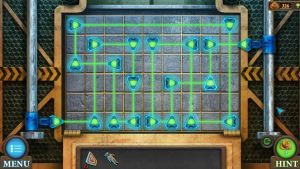
This is where you place your 5 green details that you've been collecting. This unlocks the beam puzzle.
"Draw a beam from start to finish using all guides."
Every green piece on the board can be turned by clicking on it. You cannot move these pieces, only turn them, and use that to make the beam hit every piece on the board. I've included my solution.
Your reward is access to Mars' surface, so long as you're wearing your space suit.
Exploring Mars' surface
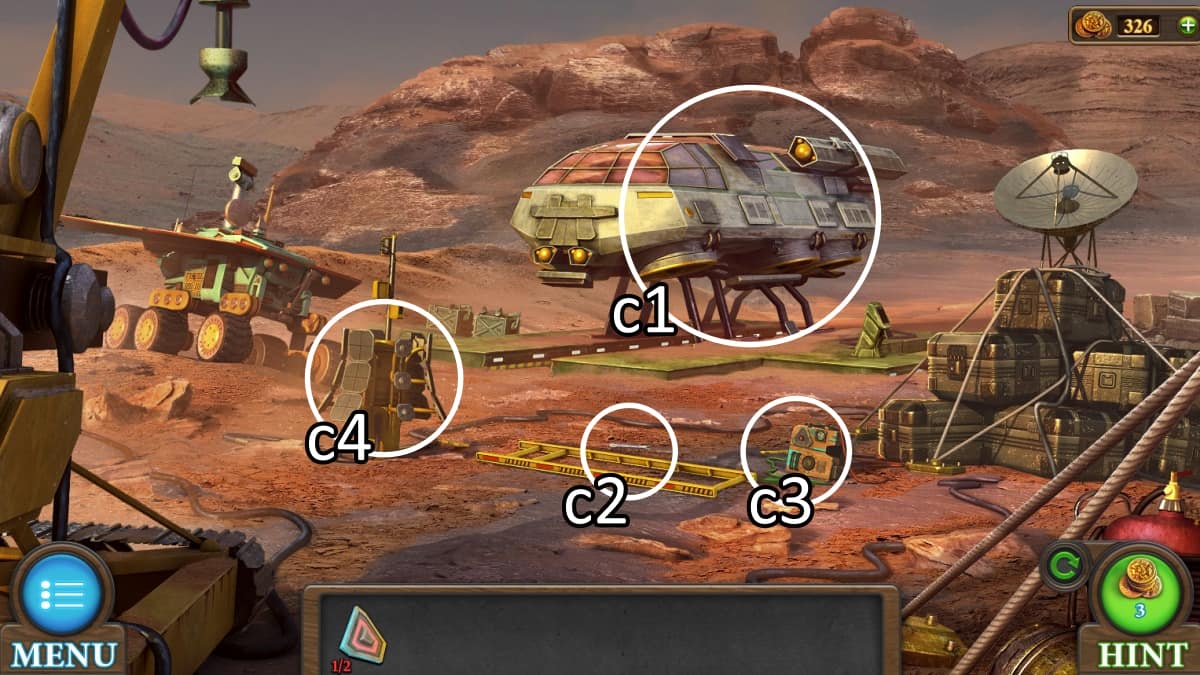
c1. Approach the ship. Click the red screens to turn them green and open the ship's door, but you can't reach it yet. Pick up the solar panel at the foot of the ship.
c2. There's a crowbar next to this unfinished ladder.
c3. Pick up the first of five ladder steps.
c4. The second red detail is at the foot here. Head back inside to make use of the red details.
How to complete the red box puzzle
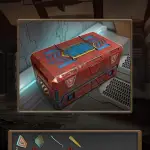
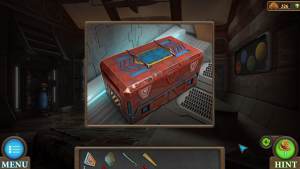

"Move the yellow chips to the holes."
This puzzle appears straight-forward at first, but can be a little tricky. You'll need to use both chips together to get one into the upper hole. Because moving a chip pushes it all the way until it's stopped by a dead end or the other chip, you have to bounce them off each other.
Once your upper chip is where it belongs, you can move the lower chip into place without any issue. Your reward is a step, a welding gun, and a solar panel.
Collecting the steps
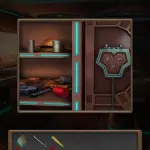
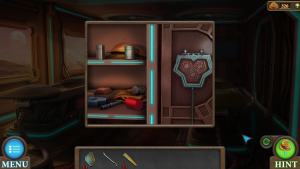
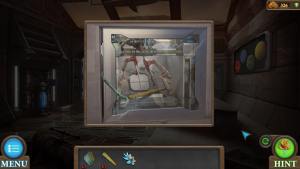
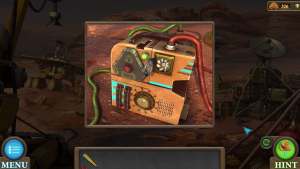
Back in the first room, your crowbar can open up the remaining cupboard door.
Your crowbar will also open up this 3D printer, where you can collect another step and the final solar panel.
With all your solar panels in hand, you'll need to put the panels onto their mount outside. Your final step is on the ground next to it.
Then you can approach the battery on the ground to put in the new fan blade and turn it on. Plug in your welding tool near the ladder.
With your steps added and your welding tool powered, you can make a ladder. Drag the welding tool onto the ladder and the ladder will be added to your inventory.
Inside the ship
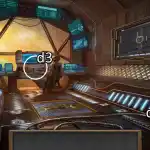
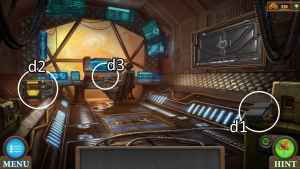
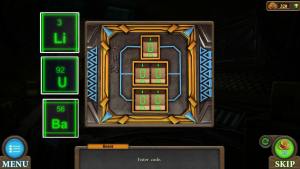
The ladder is used to enter the ship, where several new things are unlocked.
d1. Pick up this cartridge.
d2. Approach the yellow box here. The code is listed on the cover as three elements listed on the periodic table. Inside is a key and a tip.
d3. There is a gray detail on the dashboard. Remove the busted steering wheel.
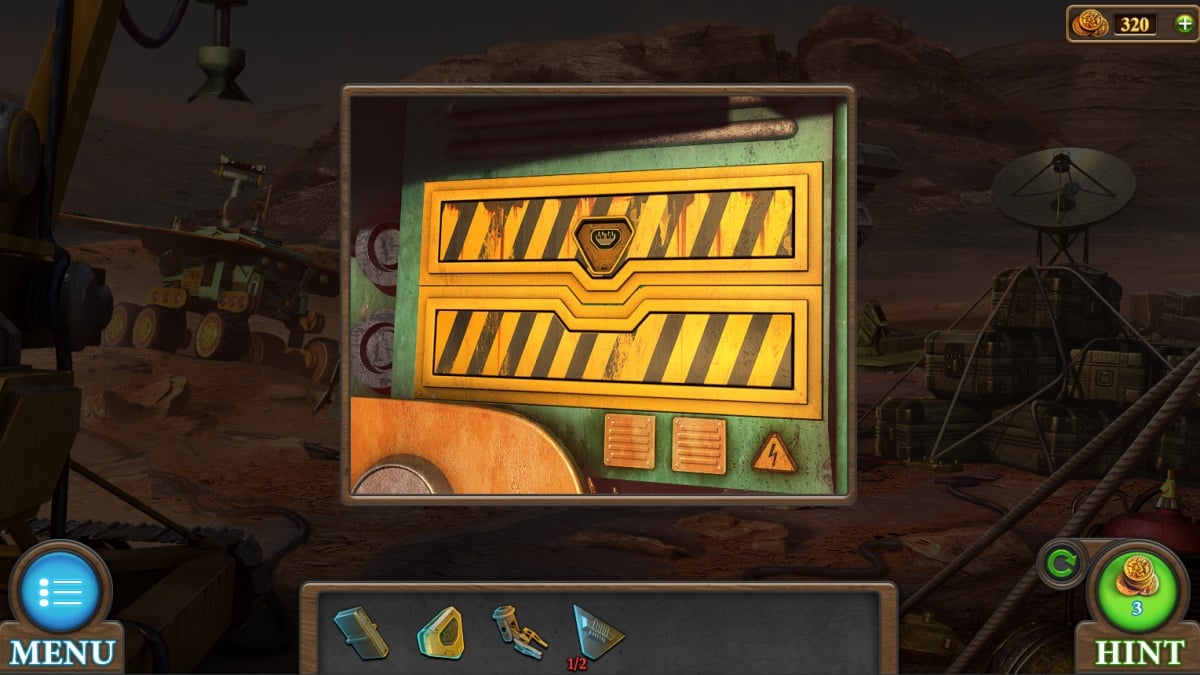
Back outside, the key goes to the rover, which unlocks the rover pattern puzzle.
How to complete the rover pattern puzzle

"Move the chips to the corresponding places according to their patterns."
There is one open spot on the board at any time. You'll be shifting the chips around the board, and any one you can slide into that empty slot will go there.
Your goal is to match the patterns on each inner and outer circle.
Your reward is a second gray detail, and you can pull out the battery on the left side.
How to complete four symbols puzzle
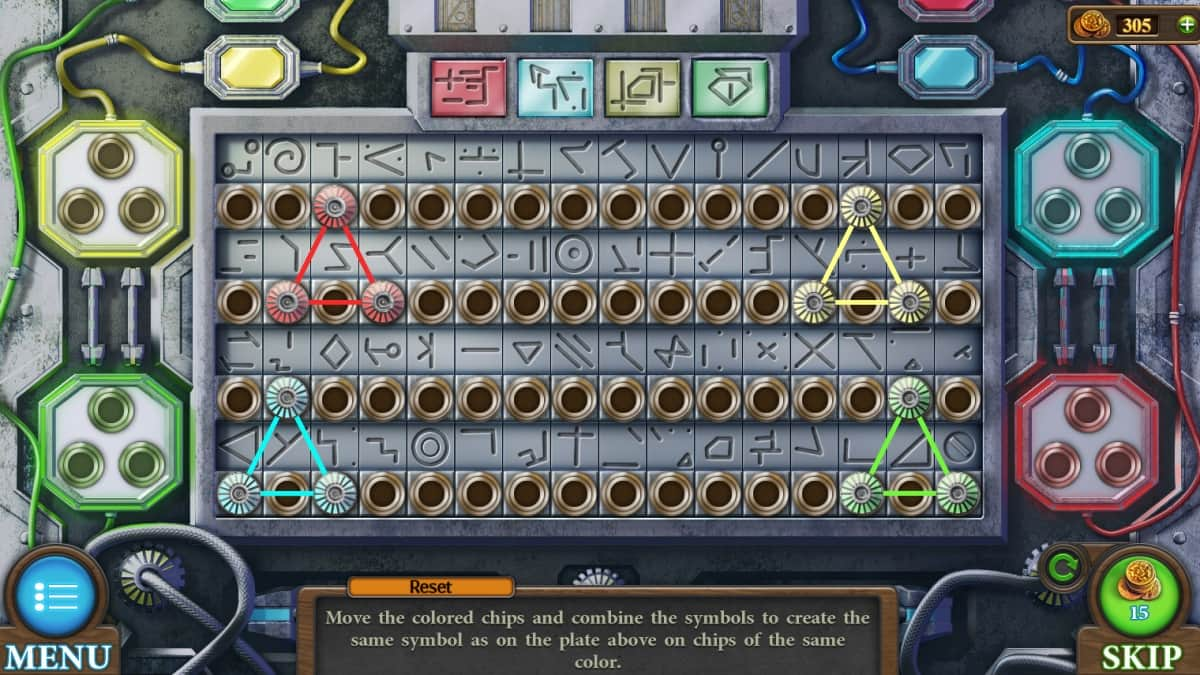
Bring your gray details inside. On the underside of the desk that holds the laptop you can insert these details to unlock the four symbols puzzle.
"Move the colored chips and combine the symbols to create the same symbol as on the plate above on chips of the same color."
The different brush strokes on all of these spaces can be combined to create the symbols above your board. This is randomized.
Your reward is a scanner and a square detail.
Use your scanner to scan the broken steering wheel in the ship.
Still inside the ship, on the left you'll find a numbers puzzle that must be activated by inserting your square detail.
How to complete the mathematics puzzle
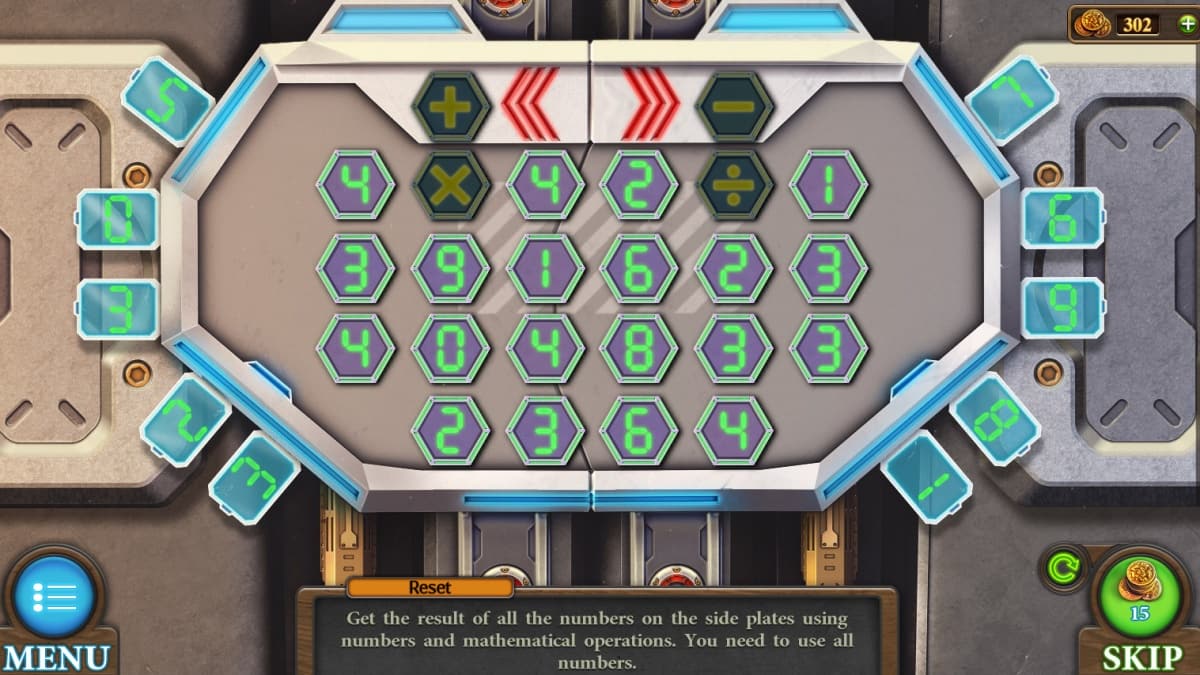
"Get the result of all numbers on the side plates using numbers and mathematical operations. You need to use all numbers."
You can use the addition, subtraction, etc. as many times as you want. I recommend noting the most common numbers you'll need to find and the most common you have available for use, and knock out the common ones first. This will lead the solutions for the remainder easier to pick out.
Your reward is a handle, which you can immediately use on the floor. There is also a set of 5 numbers you'll need next.
Inside the floor compartment is a place to put your battery and an additional cartridge.
Head back inside to the 3D printer. Put the tip and both cartridges onto the printer. Attach your scanner with data to the laptop. You'll need the password from behind the helmets in the ship to get into the laptop. My code was 13874.
Hit the print button and create a steering wheel which you can put into the ship.
How to complete the frequency puzzle

"Move the 4 sliders at the bottom so that the curved line on the screen would become straight."
Move the sliders at the bottom until you find which setting on each gives you the straightest line. Keep fiddling with these sliders until you've made a totally straight line and won your freedom from Mars.
Tricky Doors World 13: Vampire's Castle complete walkthrough guide
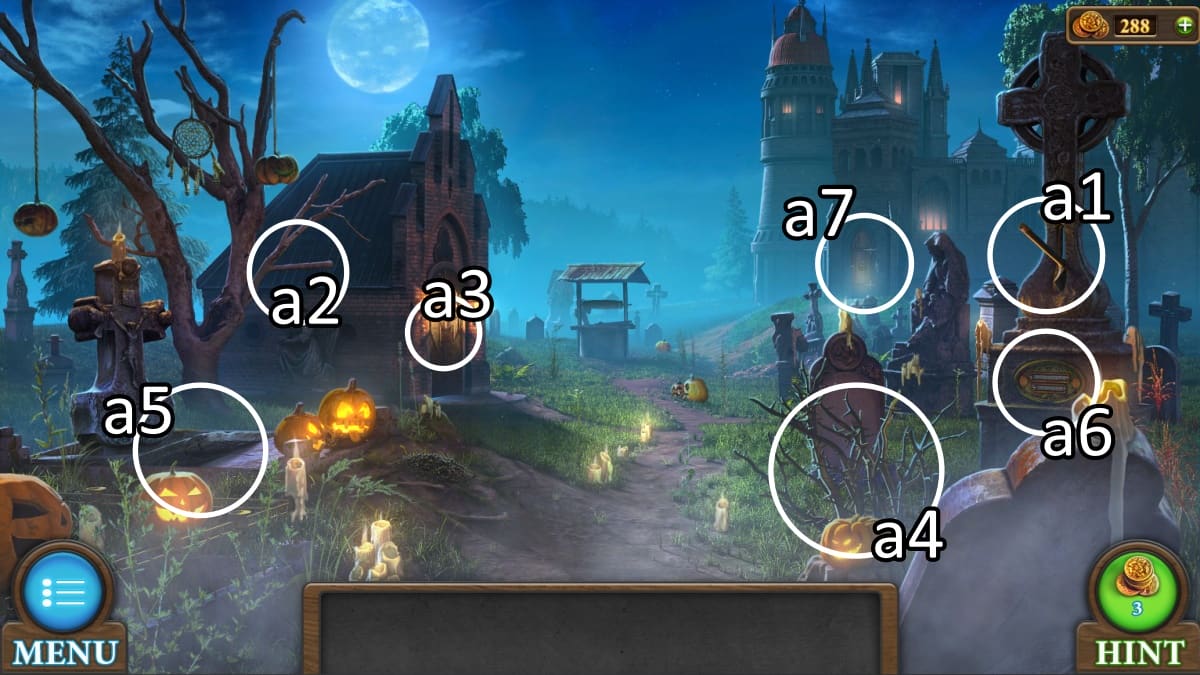
This spooky world makes its point known early on. Time to hunt a vampire!
a1. Pick up the ax from the tree.
a2. Immediately use it on the extended branch to chop yourself an aspen stake.
a3. The door has a hook hanging off of it.
a4. These thorns can be cut down to size with your ax as well, revealing one of two skull figurines and a letter explaining what to do with your aspen stake.
a5. Approach this grave and pick up the first of five bones. Pry open the broken grave to pick up a silver coin you'll also be collecting five of.
a6. Hiding next to this puzzle (which you cannot complete yet) is your second skull figurine.
a7. Insert your skulls into this door to unlock the skull door puzzle, detailed below.
How to complete the skull door puzzle
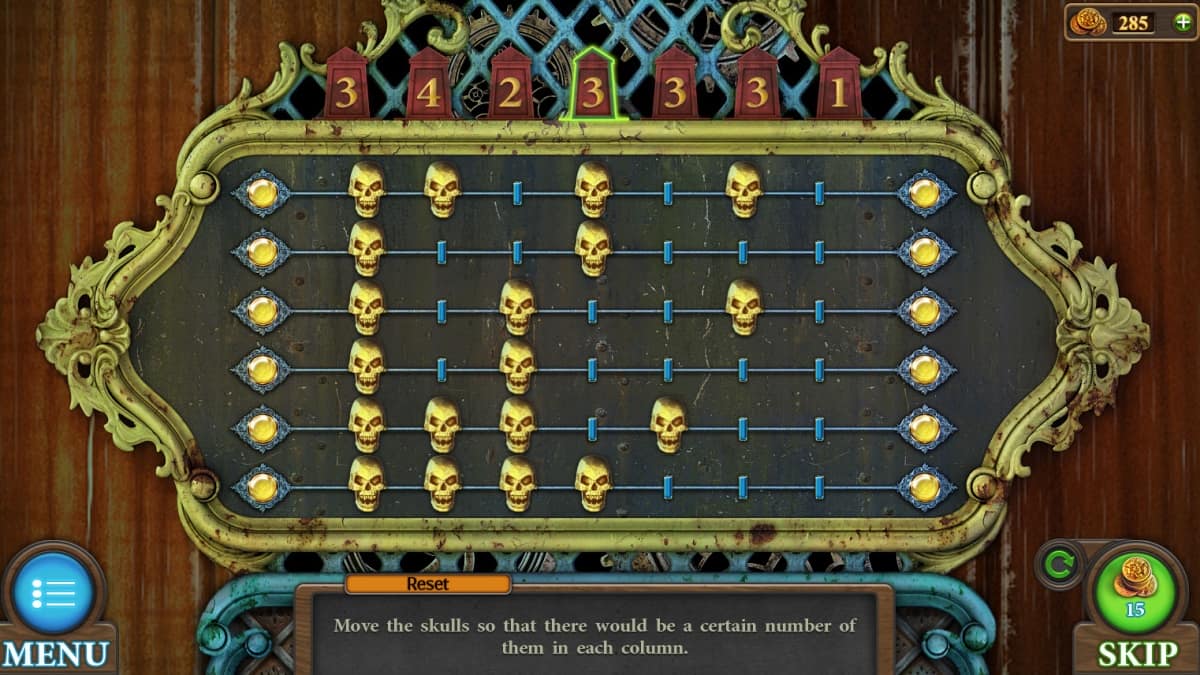
"Move the skulls so that there would be a certain number of them in each column."
You move each row of skulls all at once with the yellow buttons on each side. Your goal is to make the number of skulls in each column match the top, which means you'll need to balance the whole board at once. I recommend focusing on the rows with the most extreme numbers, like 1 and 4, and the 2s and 3s should more easily fall into place.
Your reward is access into the titular castle.
Exploring the castle
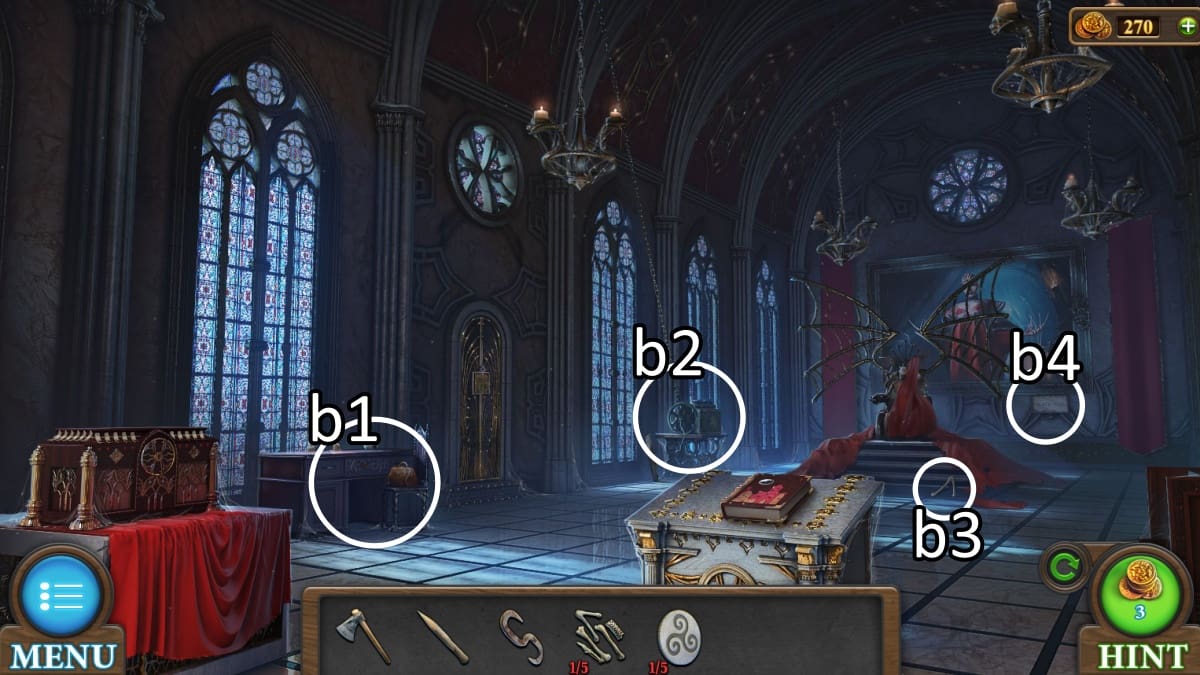
b1. Underneath the desk hides an oil dispenser, and next to it is another silver coin. Open the purse and pull out a jar of purifier and a jar of acid.
b2. A torch is leaned up against the wall behind this table.
b3. Pick up the bone.
b4. Note the name on this placard under the picture.
How to complete the grave name puzzle

"Enter the right name."
You've now seen the name that belongs on the gravestone. Click each letter until it shows correctly. The letters you'll be going through can be random but you'll eventually be able to spell out Black Rose.
Your reward is a note full of additional lore, and a red detail.
Just across the way, your red detail will go into the church door to unlock the church door puzzle.
How to complete the church door puzzle


"Move the chips to the big circles."
Your chips move as far as possible in the direction you push them. This puzzle is a simple matter of using one chip to block off a spot so that the other can reach the big circle that can't be reached alone. Afterwards your second one can slide into its standard spot.
This unlocks the church.
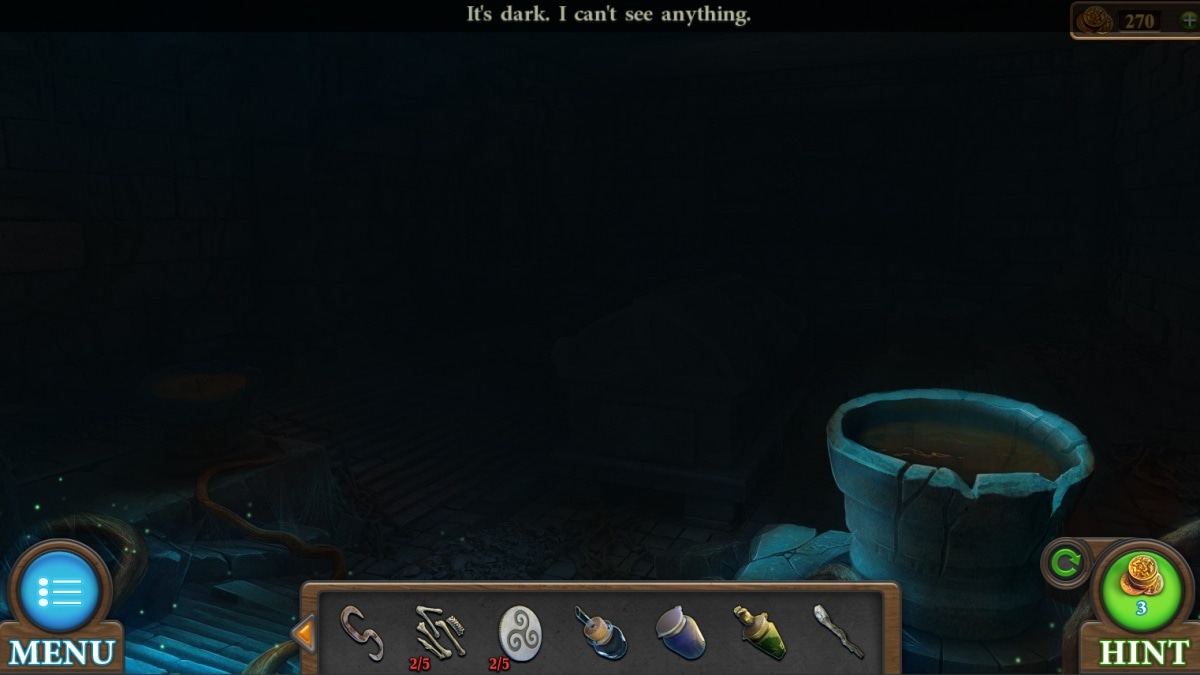
The church is extremely dark. The only thing you can see is a bucket of oil next to the entrance, which you'll dip both your torch and your oil dispenser into.
Inside the castle, your oil dispenser can now be used to de-rust the box near the center of the screen. This box contains the gear turning puzzle.
How to complete the gear turning puzzle
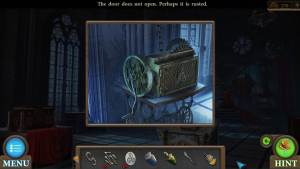
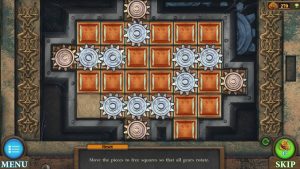
"Move the pieces to free squares so that all gears rotate."
This is a tile shuffle puzzle where you click on a tile next to an empty tile to move into the empty space. You can do this to move around the gears until all four copper gears around the edges are connected and every gear on the board is in motion!
This unlocks the ability to turn the crank on the machine.
Lighting the torch
A chandelier falls as a result of using the crank. You can light your oiled torch on the candles there. Make sure you go take off that handle from the machine now that you're done with it.
Apply your lit torch to the bucket of oil in the church to light it up and unlock your third room.
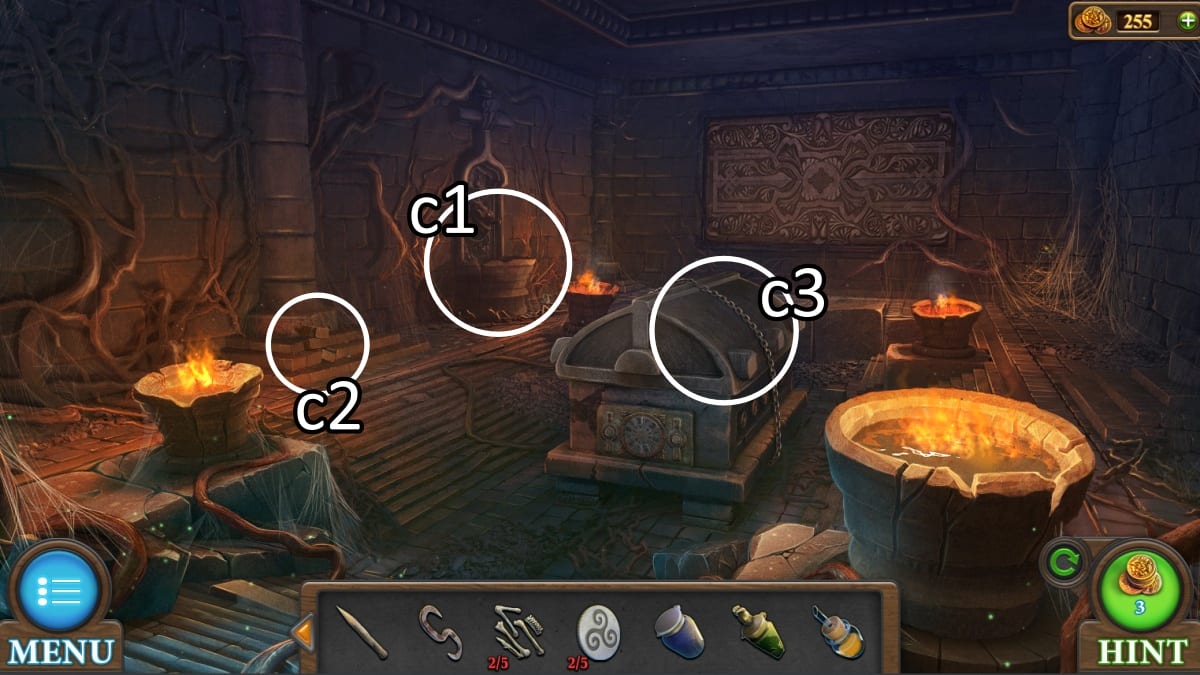
c1. You can use your purifying jar on the dirty water here. There is also a bone next to the basin.
c2. These loose stones can be pried up with your ax for another silver coin. Next to them is a magnet you can brush off and pick up.
c3. Use your acid on this chain to break it down and receive it.
You can now attach your hook and chain to the magnet. Back at the well, you can make it functional by applying the handle and magnet chain.
Turn the handle to pull up a metal box, which is rusty. Use your oil dispenser one more time on the box which allows it to open, granting you a bright red crystal.
How to complete the red crystal puzzle
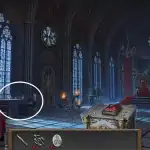
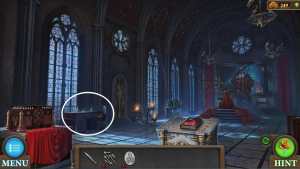
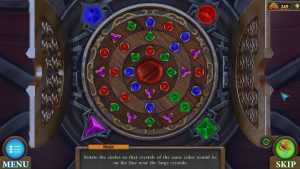
Inside the castle, approach the desk near the purse. You can use your crystal here to unlock the desk drawer's puzzle.
"Rotate the circles so that crystals of the same color would be on the line near the large crystals."
You turn each ring by clicking and dragging it. Crucially, not every gem needs to be used, you just need the four lines from the large gems to match them.
Your reward is a silver cross.
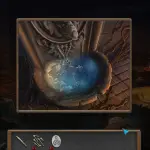
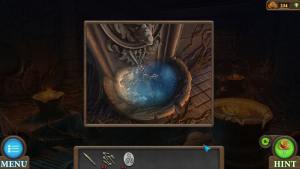
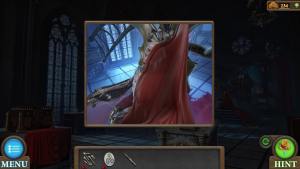
In the church, your purified water can now be blessed. Submerge your cross in the water, and then your aspen stake. Your aspen stake is now capable of slaying the vampire for good.
Once you've stabbed him, he turns to dust and you can now pick up the medallion left behind. Also, there is a bottle on the arm of his chair which you can drag to the pile of dust to gain that ingredient.
How to complete the medallion mural puzzle
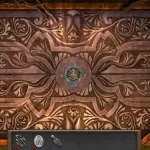
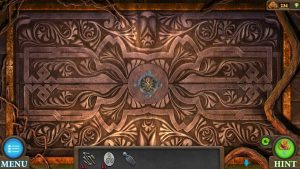
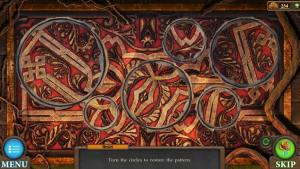
At the back of the church, there's a mural that can be unlocked with the medallion.
"Turn the circles to restore the pattern."
By clicking and dragging the cut out circles of the mural around, you can complete the patterns. I recommend lining up the white lines, which are almost all straight, providing a solid line to tell if you're on the right trail.
A secret passage opens up behind the mural!
Scouring the tower
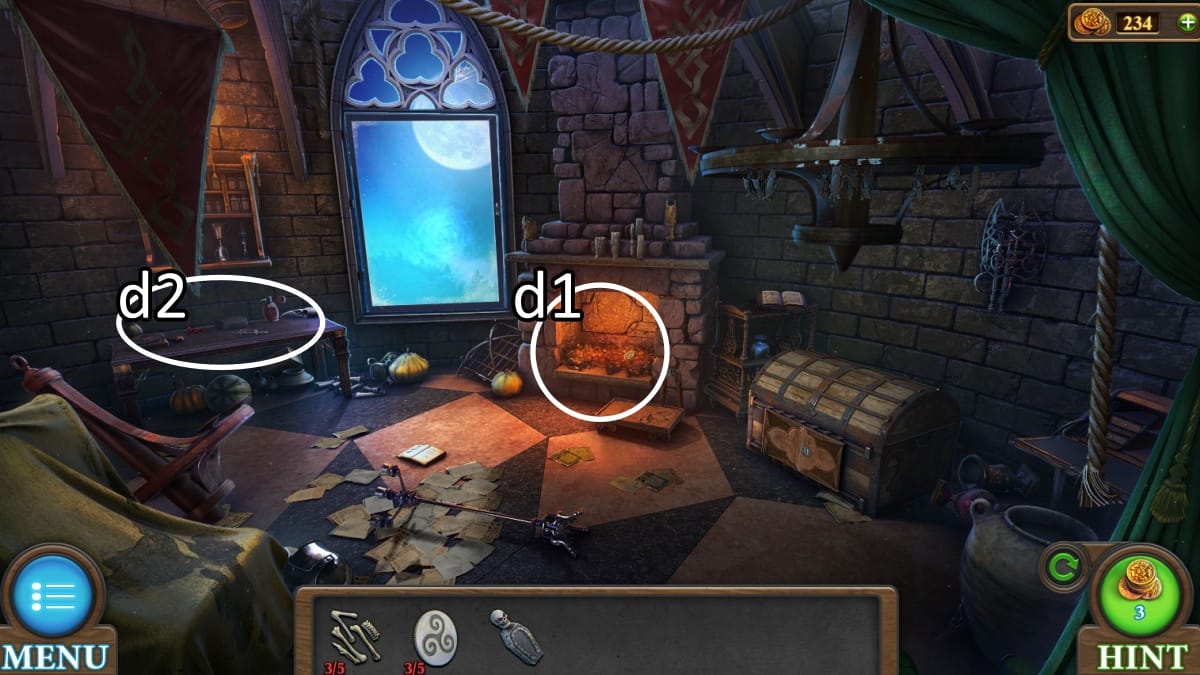
d1. Use the pincers next to the fire to pull out a button.
d2. On the table, you can pick up another button, a syringe, and a bottle of perfume.
Downstairs, you'll use the perfume bottle on the spiderweb in the corner. Arachnophobes watch out, the animation is pretty unpleasant. In return, you get a key.
The bottom of the coffin also has a puzzle that you can now access by placing the buttons into the recesses.
How to complete the coffin puzzle
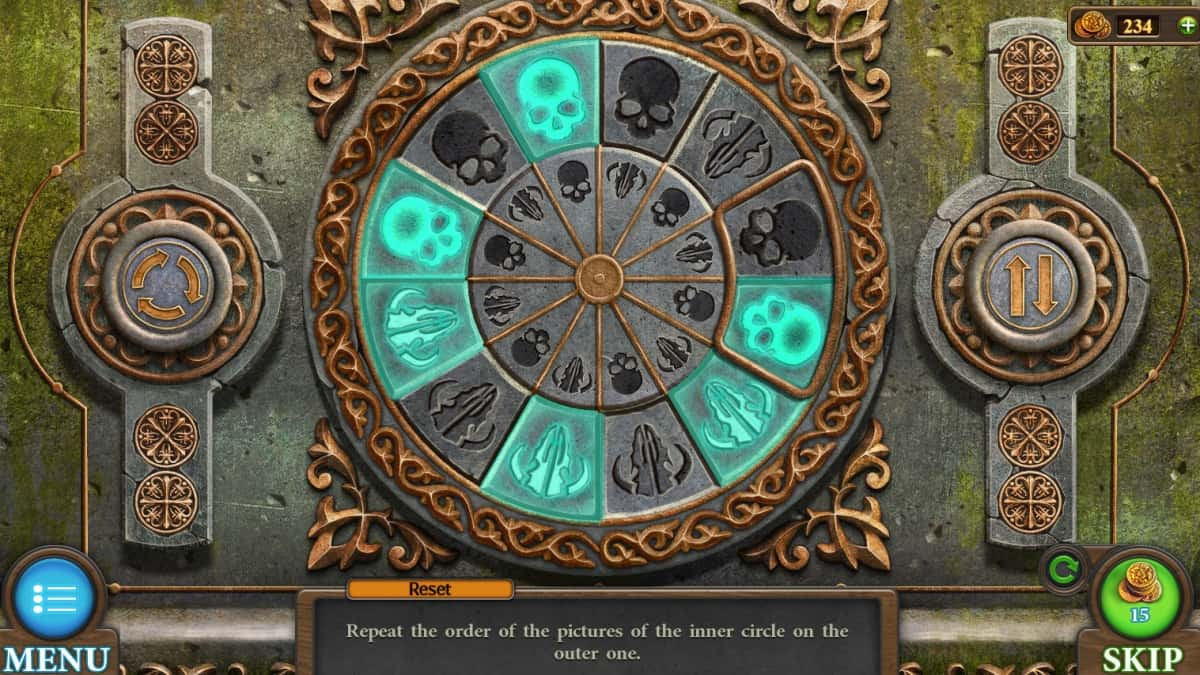
"Repeat the order of the pictures of the inner circle on the outer one."
The inner circle of symbols alternates the two types of skulls directly, one after the other. This means you can ignore the inner circle and just focus on getting your outer circle alternating as well.
You can use the two buttons you added to either make the outer circle spin, or to swap the two symbols that are currently inside the copper section of the puzzle. Any time you see two of the same symbol touching, that's an area that needs to be fixed, so focus on shifting things around like that.
Your reward is the coffin opening, which shows you a werewolf. You need werewolf blood to open a book, so use your syringe on the werewolf now.
Opening the werewolf book
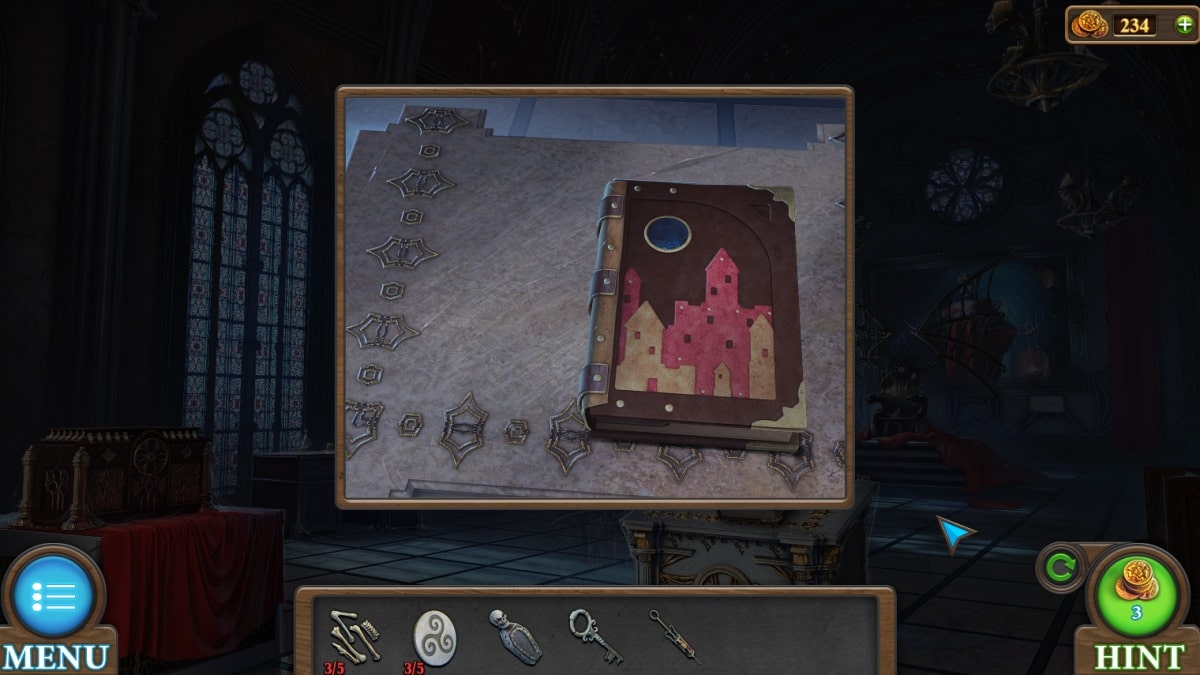
To open the werewolf book, you need that blood you've just collected. The werewolf book is inside the castle, front and center. Stab the syringe into the book to open it up. You'll get a silver coin and a detailed exlanation of what you're missing for the final key.
In full, you'll need the bones and coins you've been collecting the vampire ashes, an earthen vessel to smelt the silver in, and a mold to pour the cache key.
You already have one key, though, so let's go back up to the tower.
How to complete the tower chest puzzle
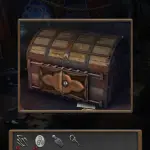
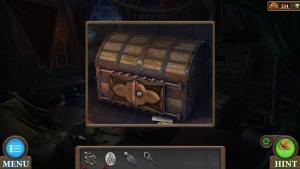
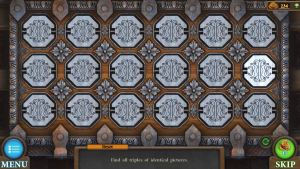
Using your key on this chest unlocks a matching game puzzle.
"Find all triples of identical pictures."
This is a game of memory with a little twist. When you uncover two tiles, you'll see what they are, and then those two tiles will switch, so you need to remember where they went to instead of where they are.
In addition, you really do need to find triples. Finding a pair does nothing. As with many of these puzzles, I recommend focusing on one triplet at a time, such as finding all the pumpkins, and then bats, etc.
Your reward for completing the puzzle is your final silver coin and a much-needed shovel.
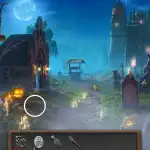
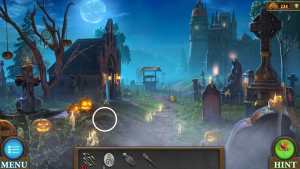
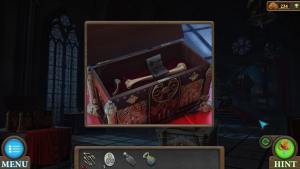
There's a freshly-dug pile of dirt here in the graveyard (big surprise). By using your shovel on it, you'll gain an earthenware jug, a key, and naturally a bone.
This golden key goes to the chest next to the castle entrance, which contains the key's mold, the final bone, and a handle for the escape window.
Congratulations! You're almost there. Return to the tower and assemble your recipe.

Pour the vampire ashes onto the fire. Toss in the bones. Put the earthenware on the board in front of the fire, insert the coins into the jug, and finally get your mold ready. Now you can use the pincers on the jug to melt the silver and make your magic key!
While you're here, go ahead and use your handle to open the window for your great escape.
How to complete the magic key puzzle
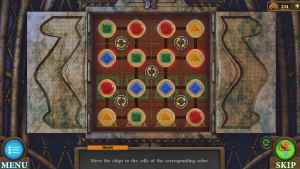
In the vampire's castle, there's an imposing door bearing a familiar symbol. Use your key on this to unlock the magic key puzzle.
"Move the chips to the cells of the corresponding colors."
There are five rotation buttons on this puzzle that allow you to move the four chips around them. This will be necessary to get all the chips where they go.
Start from the bottom and work your way up, and you'll have this puzzle complete in no time.
Your reward is the ruling staff and by now you know what to do. Use your ruling staff on the bats in the tower, and you'll be able to escape the world!
Tricky Doors World 14: Santa's House complete walkthrough guide
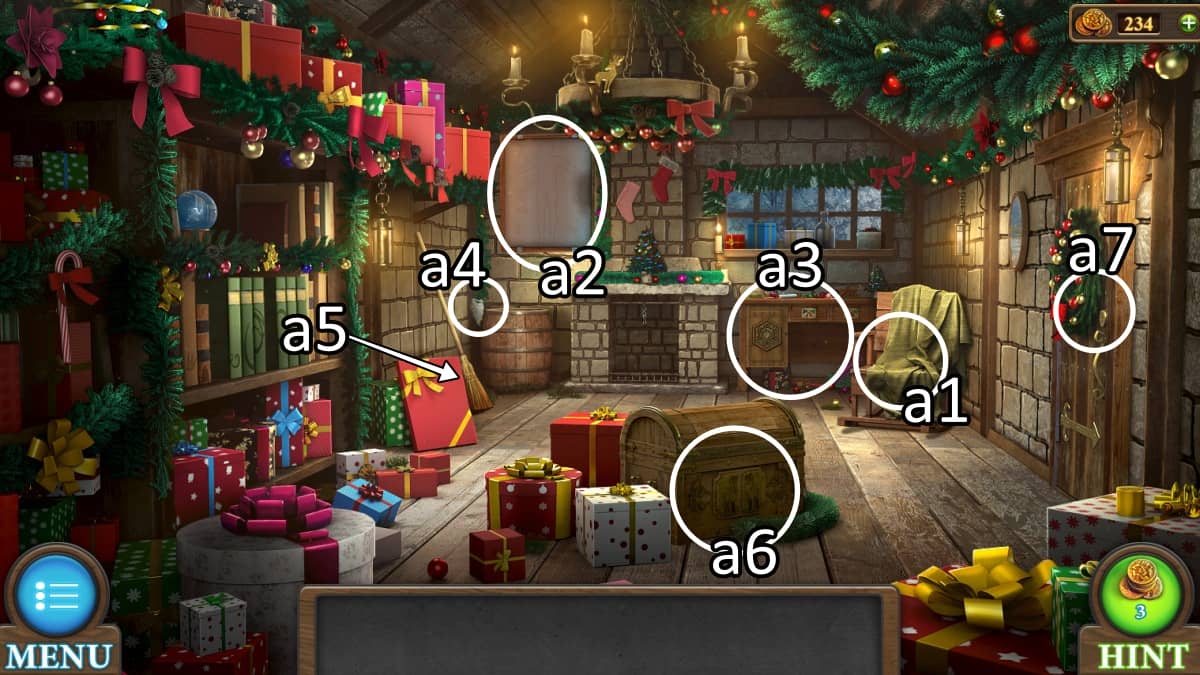
As if in direct answer to the previous spooky-themed world, today you'll find yourself playing Santa in his own home for a cheerier escape!
a1. Zoom in on this chair to move aside the blanket on top of it. There's a figurine wedged into the chair, but luckily the piece of metal also on the chair is perfect for freeing it.
a2. Take the empty picture off of the wall.
a3. Move aside the presents underneath the desk to pick up a set of matches.
a4. Go ahead and take that beard.
a5. Drag this broom towards the chandelier in the middle of the room to get the second figurine.
a6. Apply the figurines to open up this chest. This unlocks the reindeer chest puzzle, detailed below.
a7. You can use the Christmas tree key to open up this door.
How to complete the reindeer chest puzzle
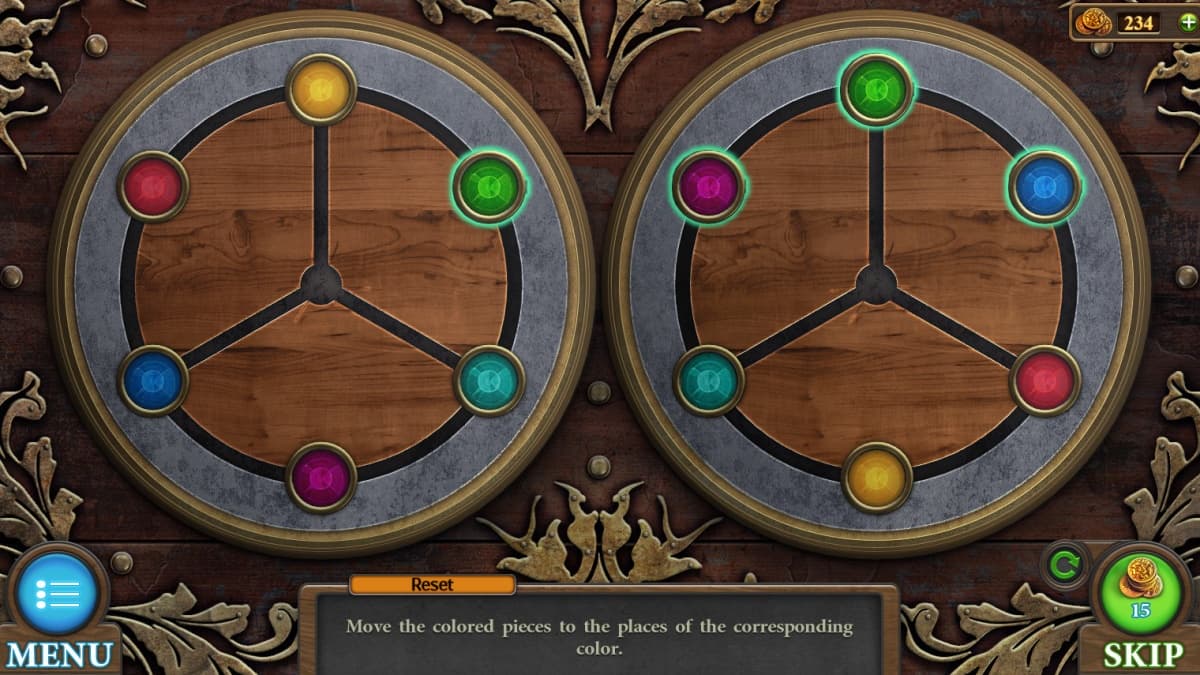
"Move the colored pieces to the places of the corresponding color."
There is one empty area to shift the pieces around. You'll need to complete both sides of the puzzle but pushing the colors around. You can see what space they're supposed to be on by moving the piece that's on a space, which is covering a ring of color to match.
You can now get into the chest. Move the present to uncover the Christmas tree key, and move it again to see the back of the chest, where four unknown symbols are hidden.
Dashing through the snow
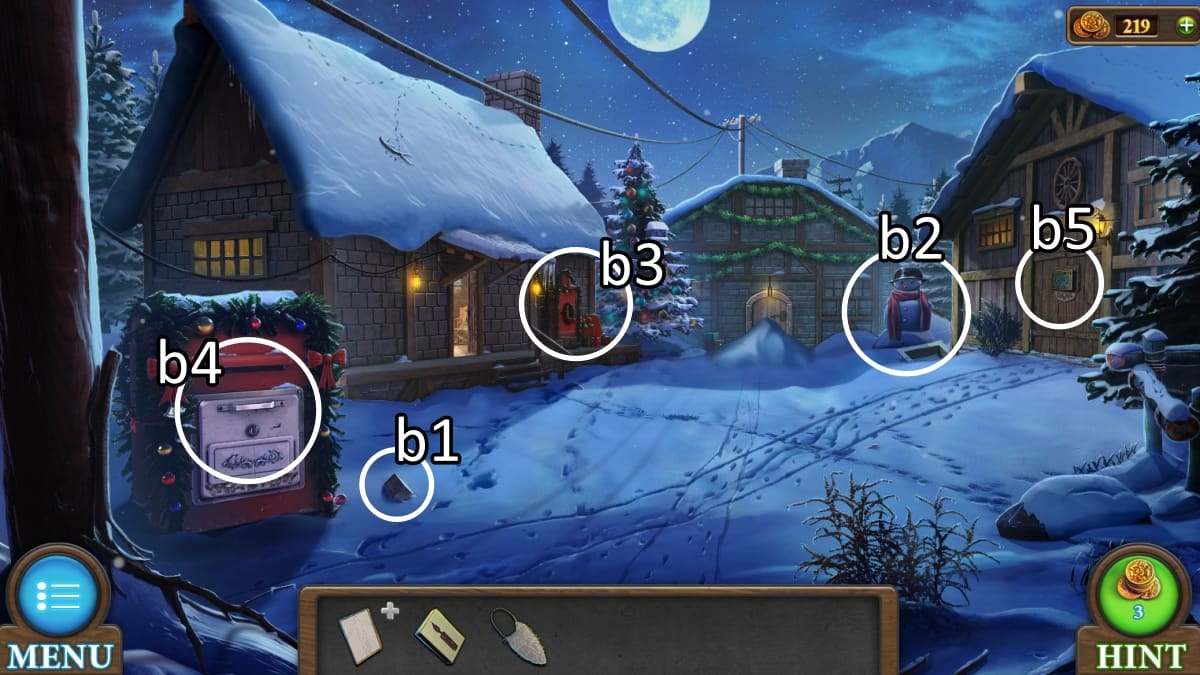
b1. The first of log of six that you'll be picking up to make firewood.
b2. Unfortunately this snowman must be dismantled. Remove its empty cauldron hat, its bulb button, and its firewood arm.
b3. There's a piece of firewood leaning up against the wall. Open up the panel to find a wire along the bottom. You'll need two bulbs to unlock this puzzle later.
b4. Lockpick Santa's mailbox with the wire. This gives you the santa's mailbox puzzle, which is detailed below.
b5. Use the tree figurine from the mailbox to open up this barn door puzzle, also below.
How to complete Santa's mailbox puzzle

"Move the chips to fill all the cells on the right part of the field."
The snowflake chips move as sets of two or three and must be slotted into the empty slots on right. Go row by row and you'll quickly have filled up all the cells.
Inside the mailbox is one of two books, and a carved tree figurine.
How to complete the barn door puzzle
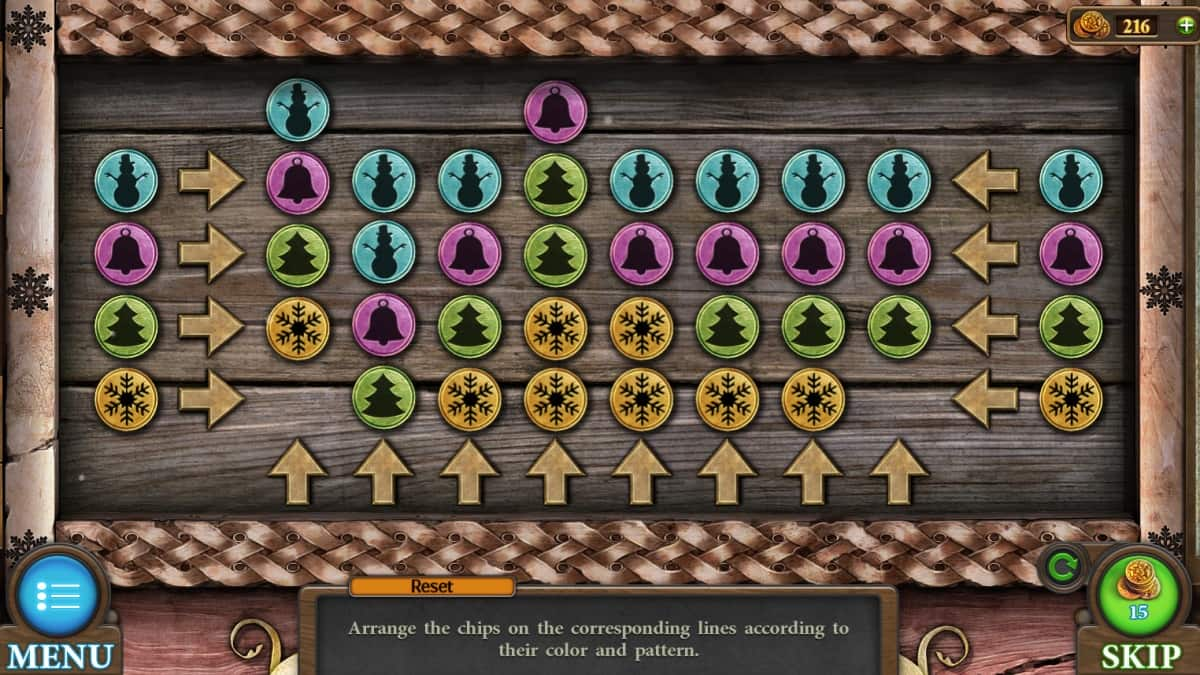
"Arrange the chips on the corresponding lines according to their color and pattern."
Going left to right, you can push the chips as far as you want, and they'll loop around to the other side. Going up and down, however, you can only move so long as there's room for the chips to go somewhere. The rows that start at five tall must be made shorter somehow before they can be maneuvered.
Your goal is to make a row each of the snowmen, bells, trees, and snowflakes.
Your reward is access to the reindeer barn.
Inside the reindeer barn
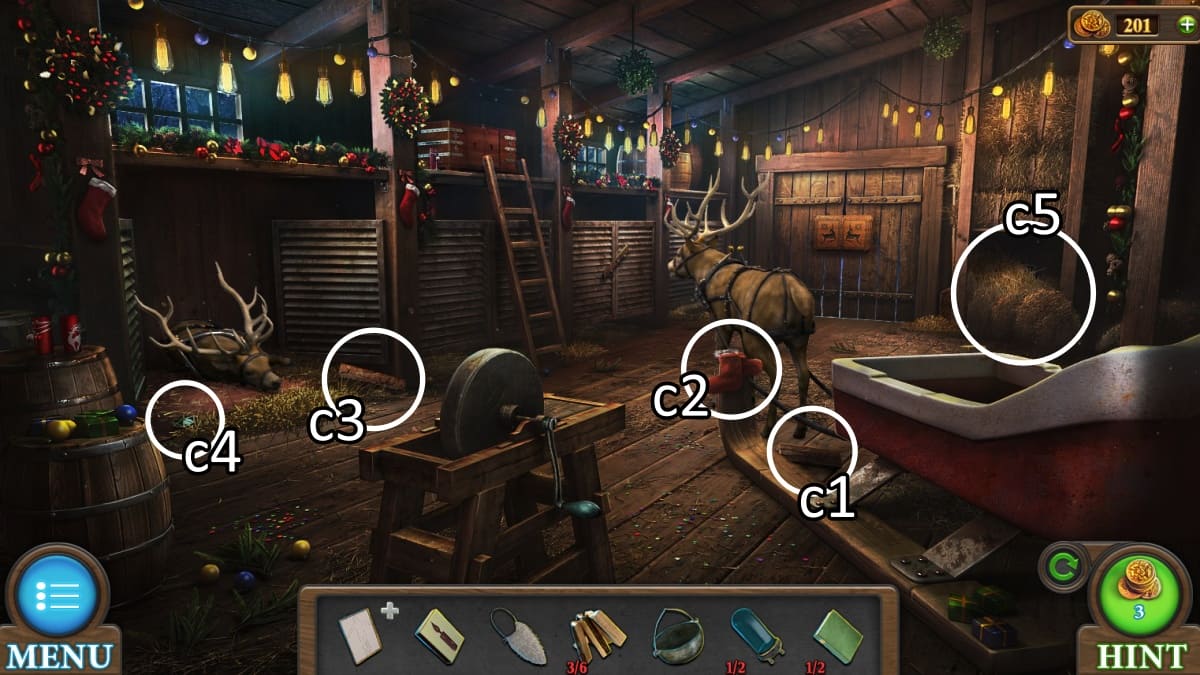
c1. Gather another piece of wood.
c2. And pick up some red boots.
c3. Another piece of firewood.
c4. Pick up a carved decor item next to the sick reindeer.
c5. In this area you can grab a shovel and some hay.
Go back inside the house to use your carved decor item on the locked desk.
How to complete the red triangles puzzle
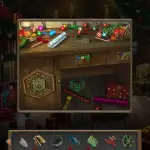
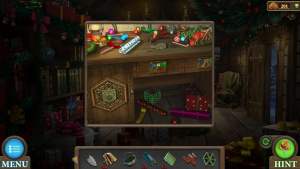
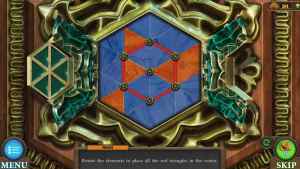
"Rotate the elements to place all the red triangles in the center."
This is a simple puzzle of rotating blocks. All of the flower details can be clicked to rotate the colors around them. Your goal is to get all the red triangles into the center. Shift the reds around until you've moved them where they belong.
Your reward is a pair of red pants and, after moving a present aside, the second book you need. This immediately leads into a puzzle on the left side of this room, where there's a set of books to complete.
How to complete Santa's books puzzle
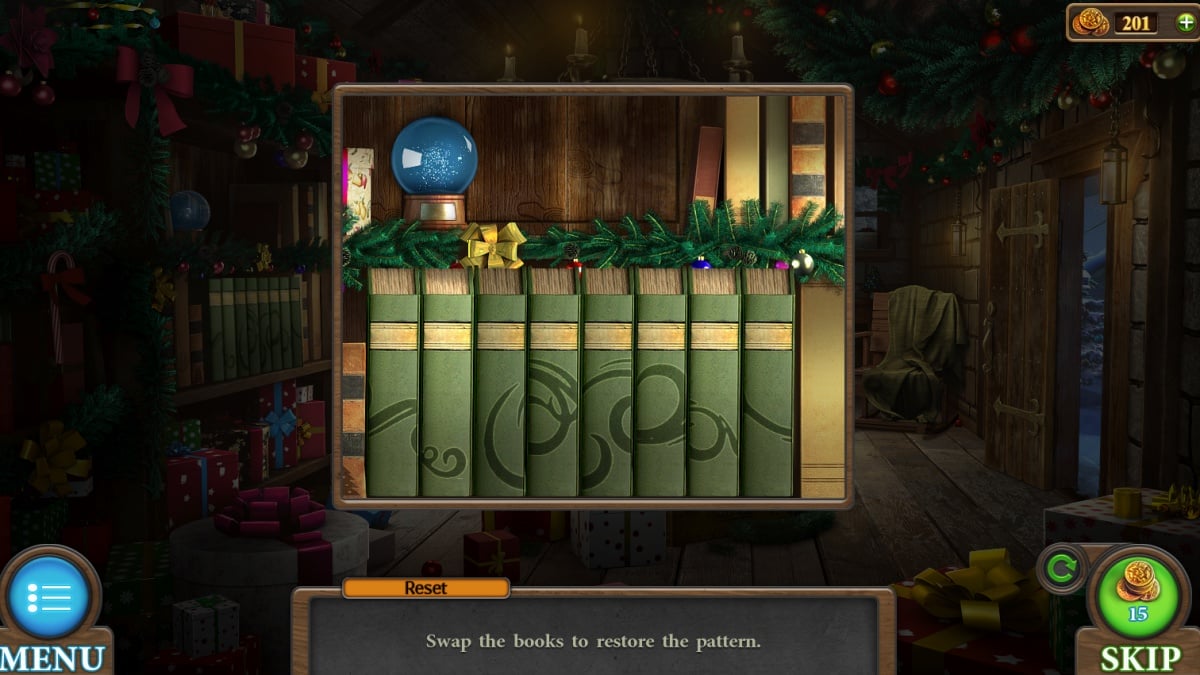
"Swap the books to restore the pattern."
You can click any two books to swap them around. There is no special trick to this, the pattern starts and ends on some clear swoops you can start from.
In return you get your second bulb, and a recipe to make medicine for that poor sick reindeer.
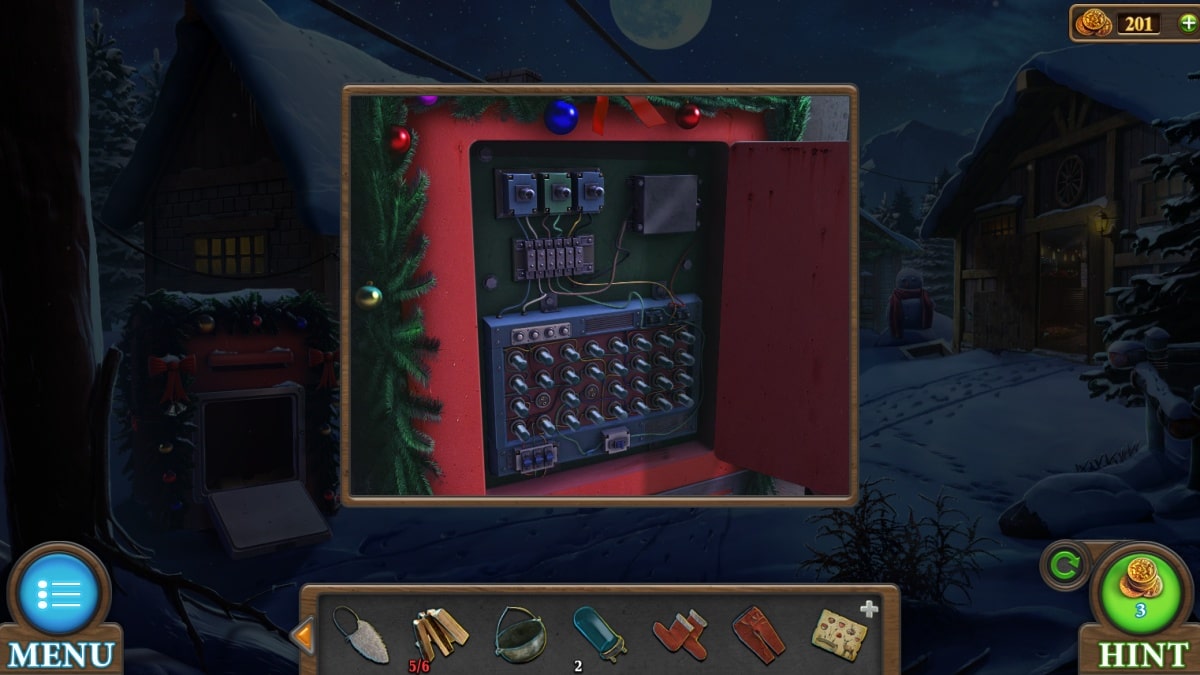
There is no puzzle to the bulbs, just insert them into the panel and the lights in the third building will turn on. Use your shovel to get the snow out of the way, and you can walk right in.
Working in the workshop
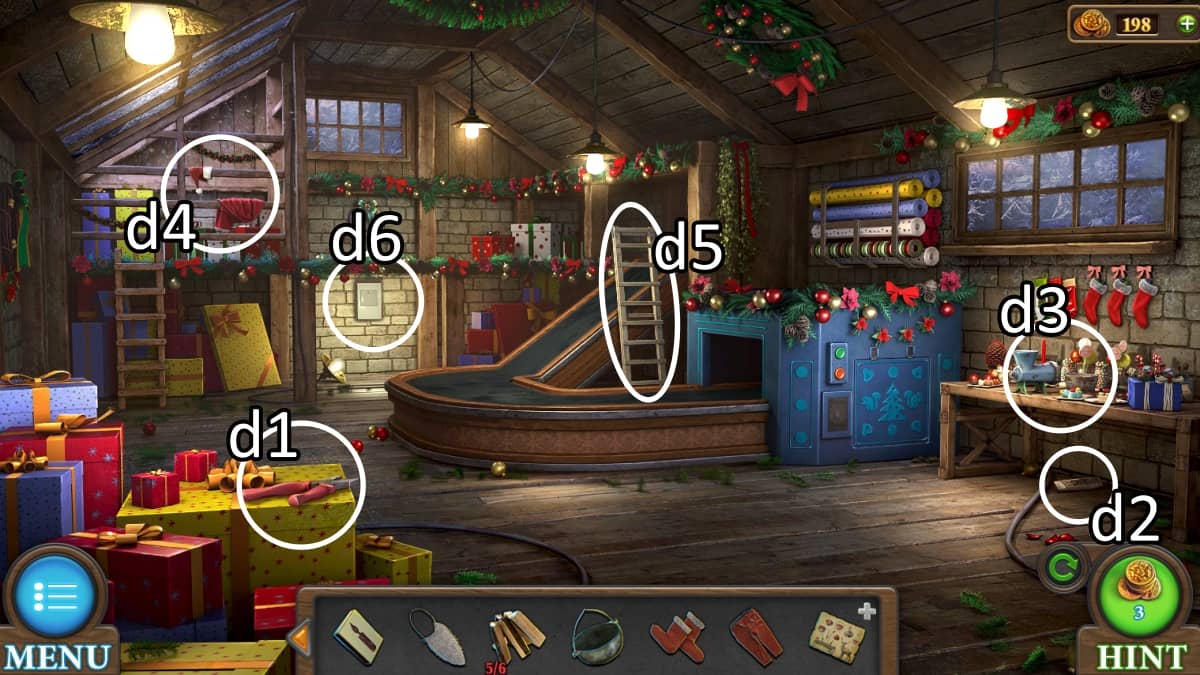
d1. Pick up some pliers.
d2. Your final piece of firewood completes the set.
d3. The table holds a coin and a brown bowl.
d4. Up in the loft, pick up your iconic hat and bag.
d5. This ladder is for you to use.
d6. You'll be getting a key soon and coming back to this area to unlock the checkers puzzle, detailed below.
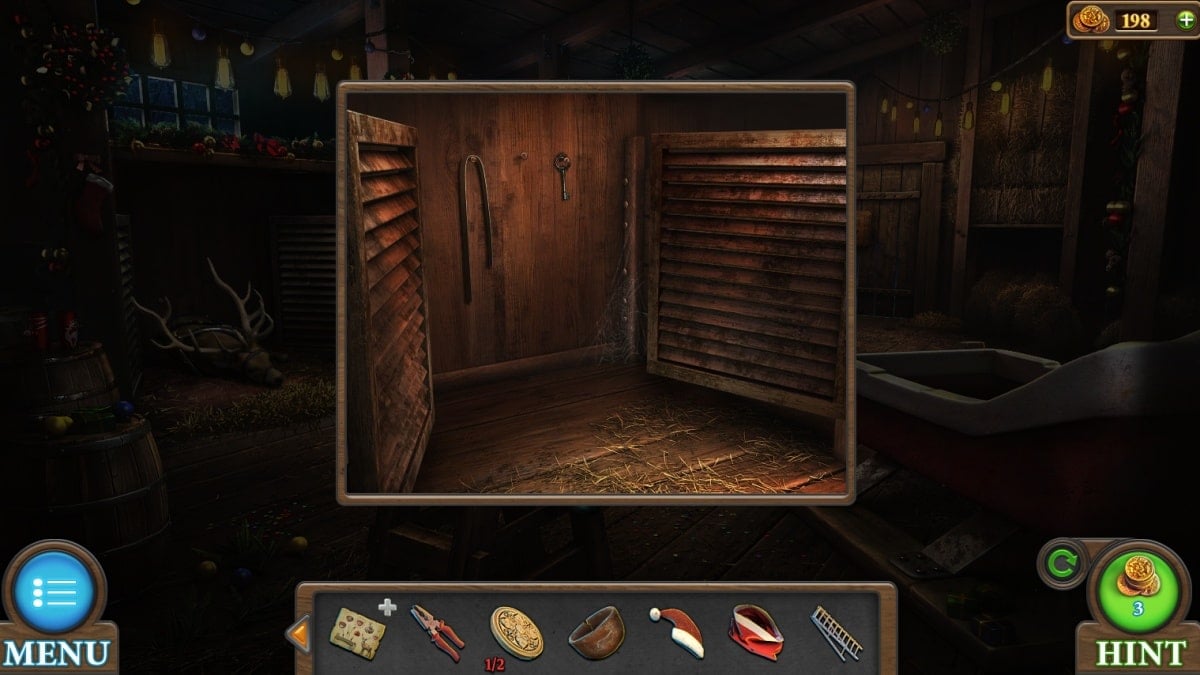
In the reindeer barn, use your pliers to remove the wood piece boarding up the stall. Inside is a harness and a key. You can also use the pliers on the grindstone in this same room to take off the handle for your own use.
You can get your cauldron brewing (and clear your busy inventory some!) by going inside to the fireplace. Insert the hay and firewood, and fill the cauldron with water from the barrel next to the fireplace. Then insert that cauldron of water and use your matches to start the fire.
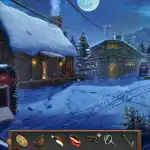
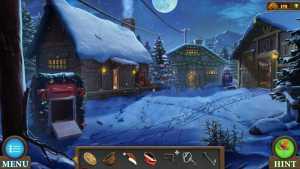
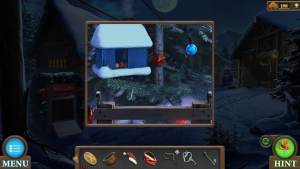
While this is brewing, you can head outside and set up your ladder next to the Christmas tree. Climbing up it, you can turn around the birdhouse to find some nuts, and note a piece of resin you need, which can't be taken off without something sharp.
How to complete the checkers puzzle
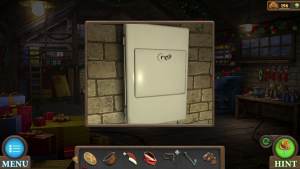
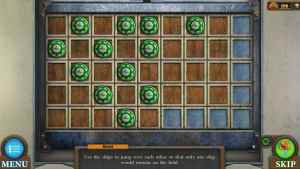
Back inside the workshop, you can use your new key on the back wall lockbox to unlock the checkers puzzle.
"Use the chips to jump over each other so that only one chip would remain on the field."
This is checkers with just one color. Any chip can jump over any other chip, but instead of being diagonal it is in any cardinal direction, up and down or left and right.
Your goal is to clear the board so there's just one chip left. I recommend starting by making the checker on the far right accessible, and using that one to clear the rest of the board.
Your reward is a second coin and a knife.
Now that you have something sharp, go back up the ladder to pry off the resin from the tree.
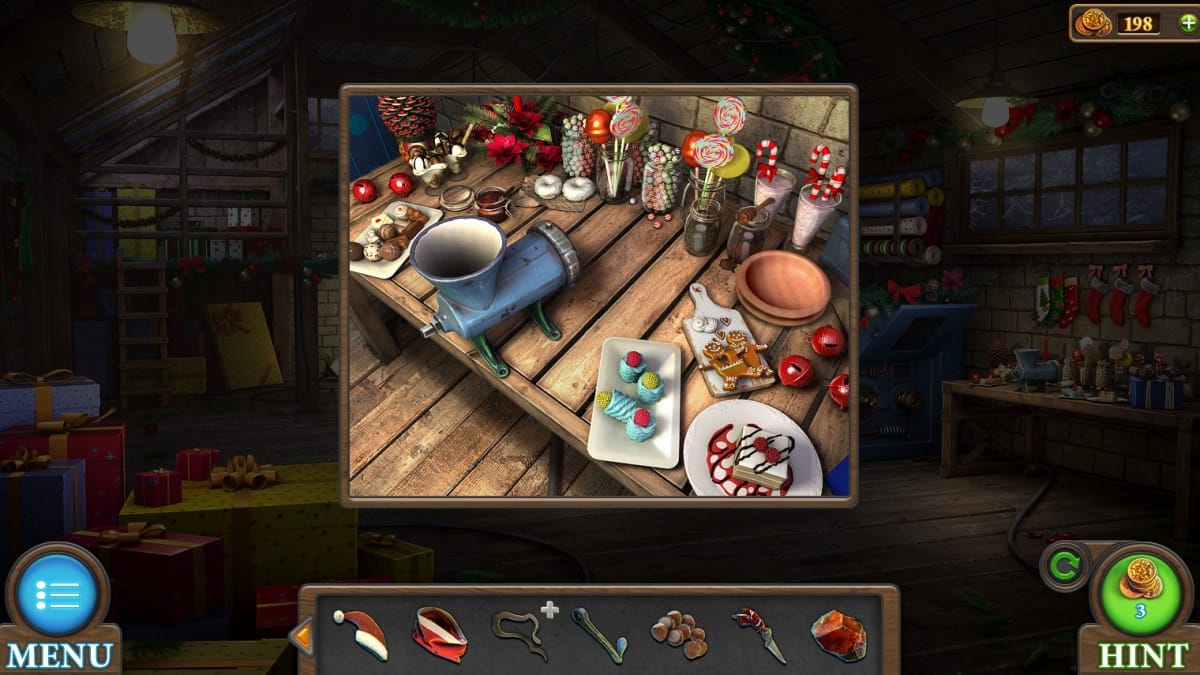
In the workshop, you can add the handle and nuts to the grinder on the table to create the ground nuts. That's two of the three ingredients down!
In the reindeer barn, head up to the hayloft to put your coins into the chest there. This unlocks the line crossing puzzle.
How to complete the line crossing puzzle
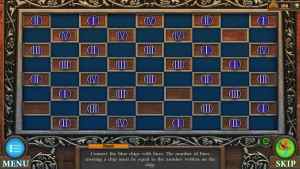
"Connect the blue chips with lines. The number of lines crossing a chip must be equal to the number written on the chip."
You draw lines by clicking and dragging between two pieces. An important detail the instructions leave out is that you can draw more than one line between the same set of chips. Because the lines are all straight (no diagonal options), there's a limited number of lines each chip on the edge can make at all, so I recommend starting with the edges and corners like a jigsaw.
Your reward is berries and thread.
Your berries can also be ground up, allowing you to start the medicine!
Cooking the medicine

Rather than add the ingredients directly to the pot, you'll be placing them onto the recipe card you got. That's the ground berries, ground nuts, and the resin. This gives you the ingredients item, which can be added to the boiling cauldron.
Use your bowl on the resulting mixture to gain some medicine. It's time to cure the reindeer.
With the medicine fed to the reindeer, you have access to the stall, where you can gain one reindeer figurine and see the hint on the stall floor. Go inside to Santa's desk to use this clue.
How to complete Santa's bow puzzle
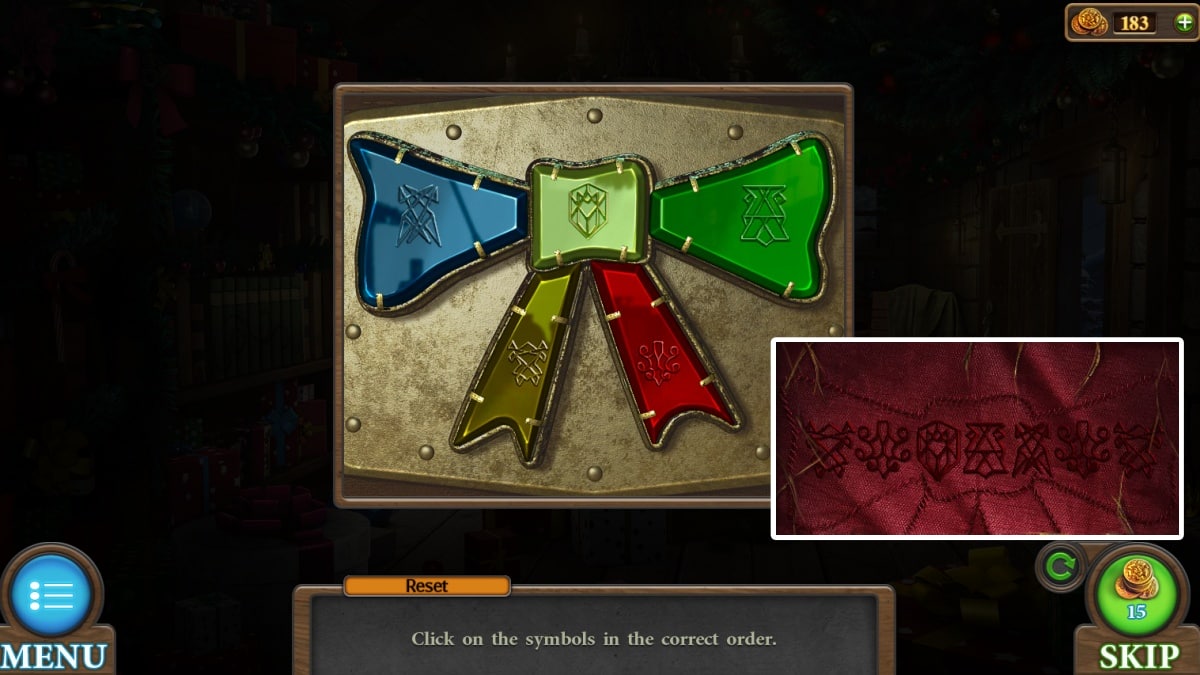
"Click the symbols in the correct order."
Follow the order shown on the floor of the reindeer's stall. Note that your order may be different than mine.
Your rewards are a second reindeer figurine, a sheave, and Santa's sweater and gloves.
Dressing the empty picture
Remember that empty picture you picked up early on? You now have everything you need to dress it up. Open up the picture in your inventory and use the various Santa clothes on it.
That's the boots, pants, jacket, hat, and beard. This gives you the painting, which can be put back where you originally found the portrait to the left of the fireplace.
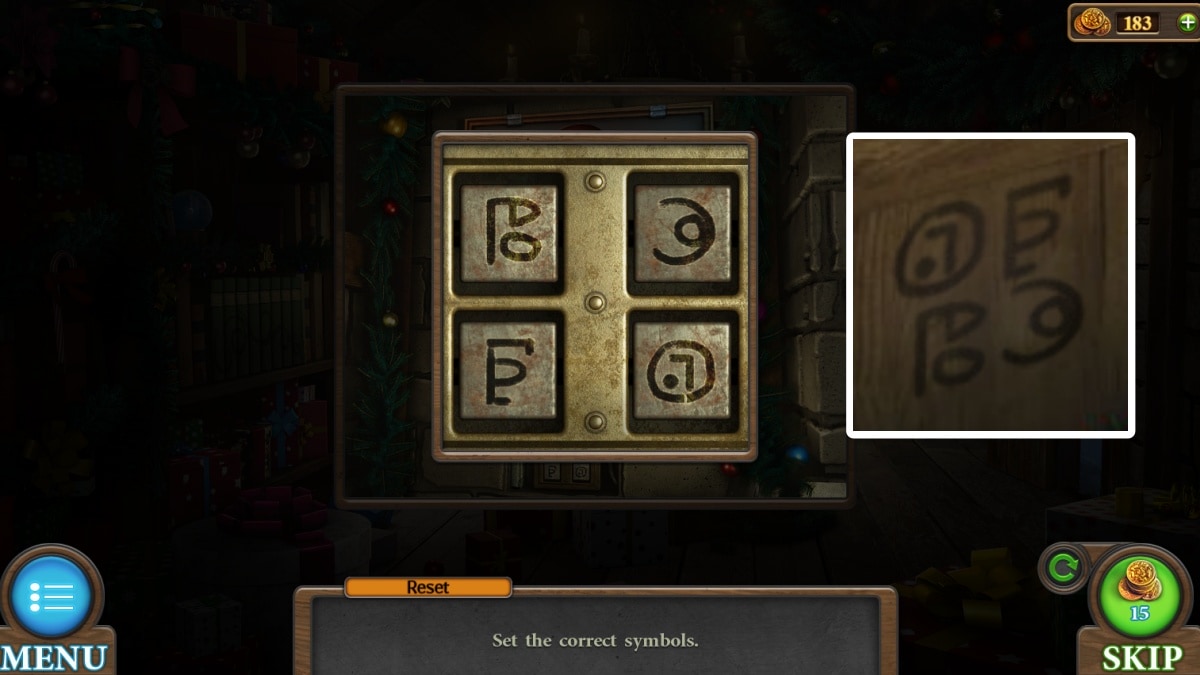
"Set the correct symbols."
Another puzzle set up in the very first room, your solution to this puzzle is on the back of the chest within the same room. Click each symbol until it matches the hint.
Your reward is a set of real Santa clothes.
In your inventory, pick up your harness and use the knife and then thread on it to create a belt.
How to complete the reindeer door puzzle
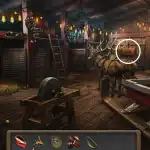
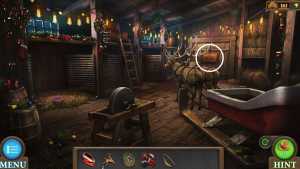
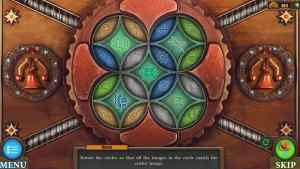
"Rotate the circles so that all the images in the circle match the center image."
There are two ways to know which symbols go where. The center images are a color that matches the ones on the rotating pieces. The pieces also have images that match the center pieces, such as the scissors having needle, thread, and a sock.
The door to the outside is now open, but you're not just leaving this time, you're delivering gifts! Place your Santa suit on the sleigh and head back to the workshop.
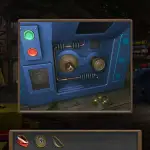

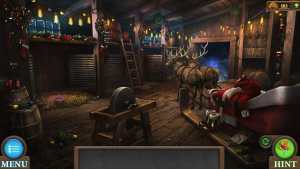
Place your sheave and belt onto the machine to make it go. The green button gives you a pile of presents to put into your bag.
Return to the sleigh and load up the presents. Now you're ready to spread Christmas cheer and complete the level!
Tricky Doors World 15: Wild West complete walkthrough guide
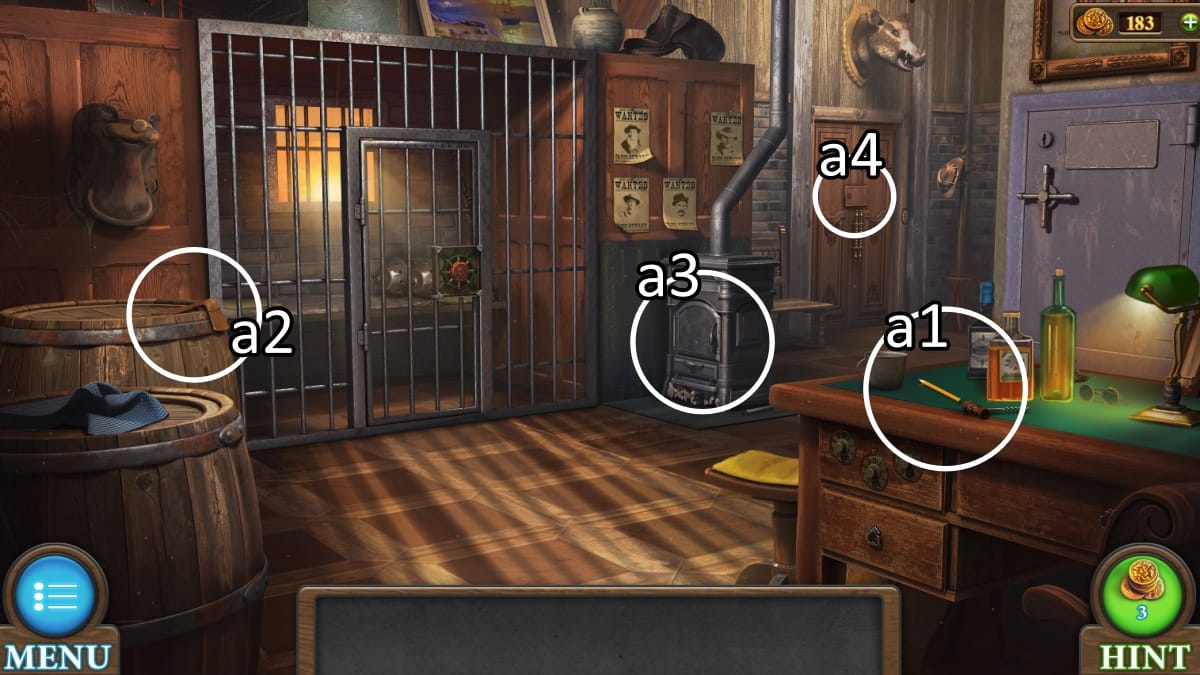
This small town isn't big enough for the one of you. Alone in the middle of the desert, you'll be seeking a way to escape.
a1. On the desk, pick up the corkscrew, pencil, and empty mug.
a2. There's a glove hanging off this barrel.
a3. A hammer lies next to the stove, and you can use your glove to open the stove.
a2. Come back to the barrel. Use your hammer and then corkscrew to open it up, and fill your empty cup with water.
a3. Pour the water onto the fire to cool down the key and let you pick it up.
a4. This key goes to the front door and unlocks the symbol building puzzle, detailed below.
How to complete the symbol building puzzle
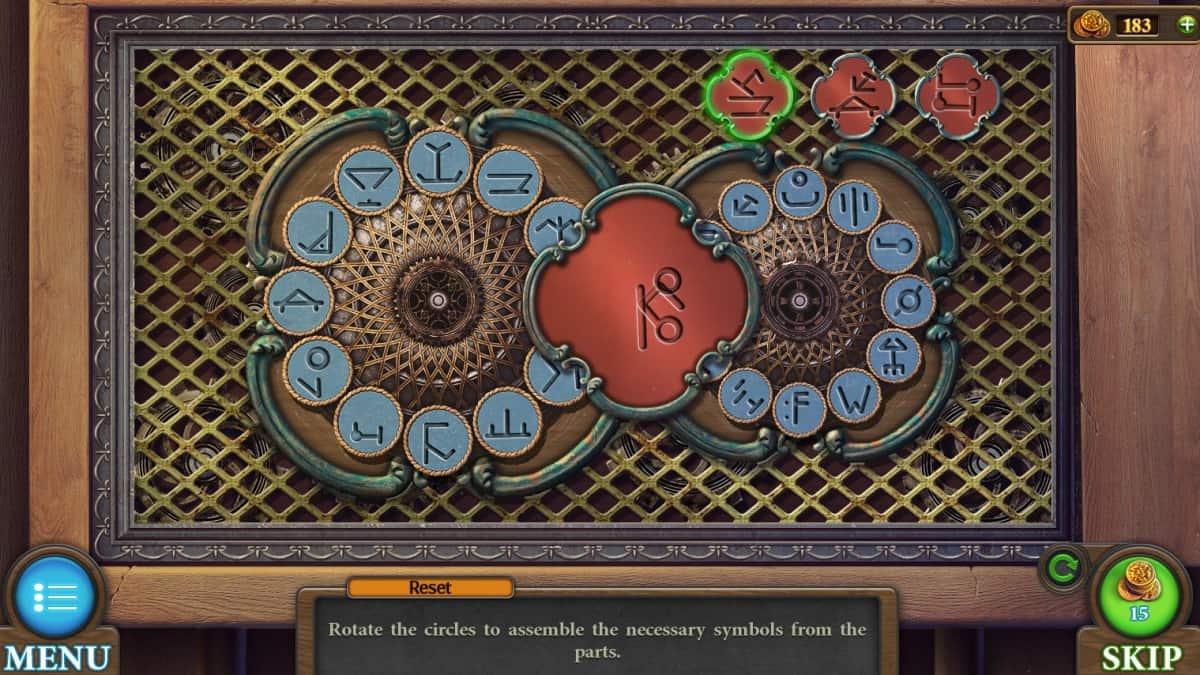
"Rotate the circles to assemble the necessary symbols from the parts."
Just click and drag on the two blue symbol circles to line up what symbols are underneath the red portion in the middle. You'll be building each of the symbols in the upper right corner using two halves.
Once you've made three symbols, the door opens and you can go outside!
Say hi to the horse
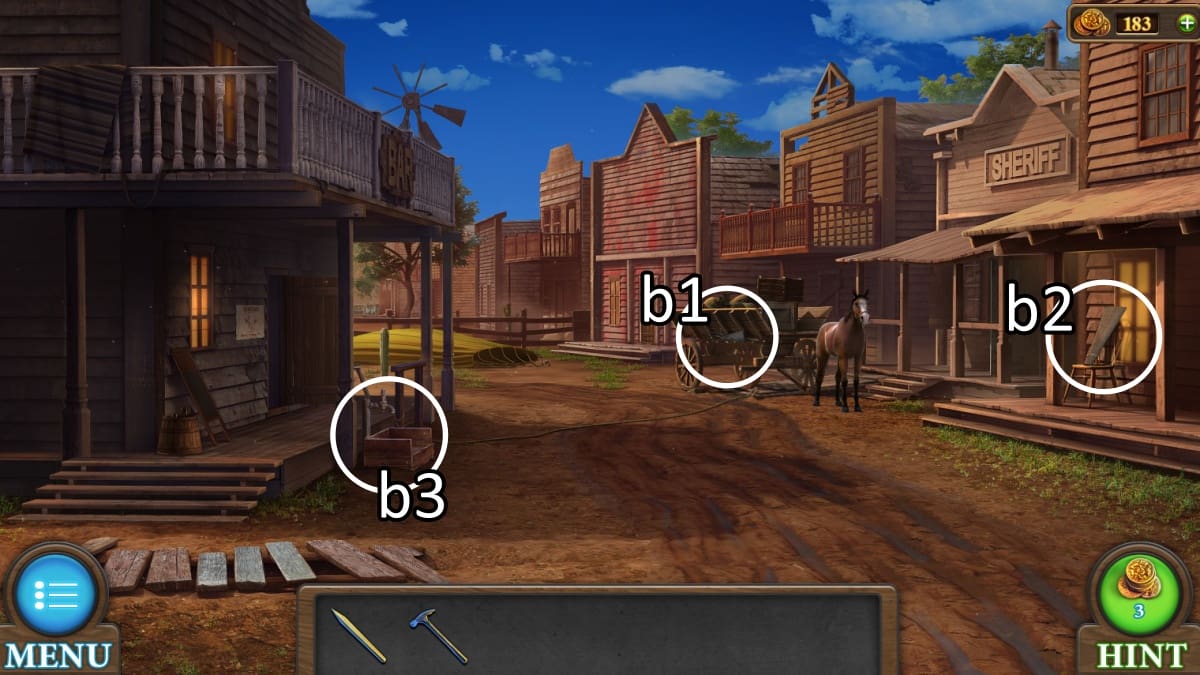
Out on the street, you'll immediately see a horse and cart, though the cart is broken. Sadly, the horse alone cannot get you out of this town.
b1. Approach the cart and pick up a pitchfork and the first of five blades.
b2. A second blade.
b3. Behind the trough is a key.
Head into the bar on the left.
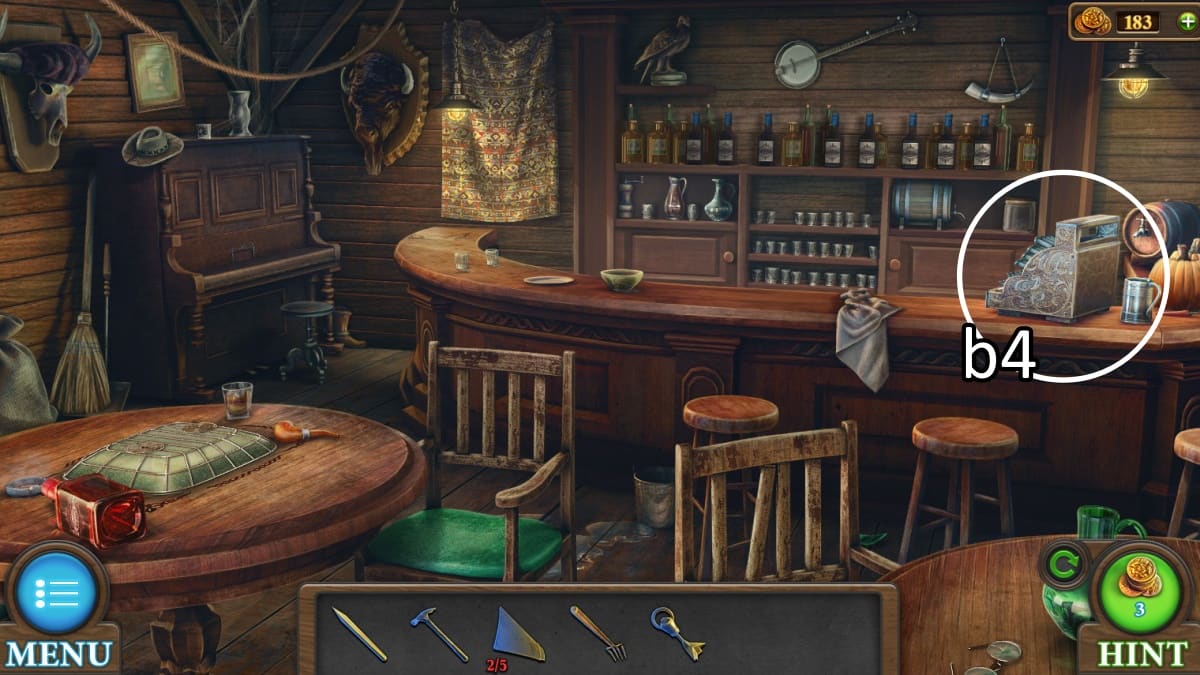
b4. The only thing you can do in here yet is pick up another key from underneath the cash register.
How to complete the vault maze
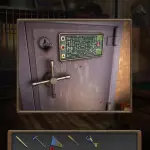
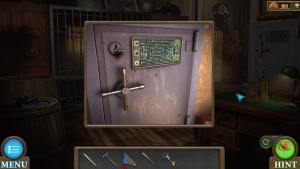
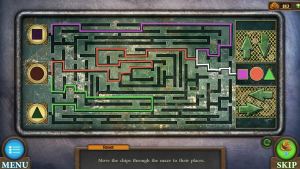
"Move the chips through the maze to their places."
You'll use the arrow buttons on the side to move one shape at a time through the maze. The solution is listed above. The green triangle will follow the entire route of the red circle before continuing onto the green line.
Your reward is the vault opening, which contains a wind water pump diagram, a piano key, and a revolver.
How to complete the safe drawer puzzle
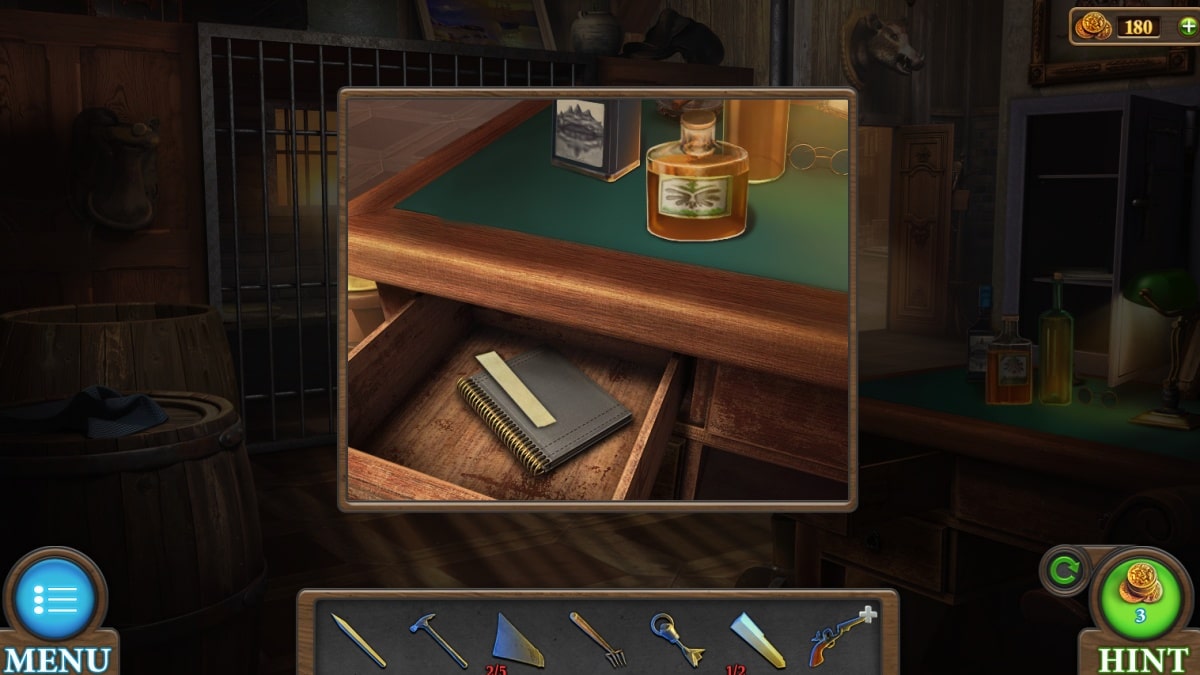
You'll now be expected to know the code to the desk drawer with the safe dials. This is a tricky one, but you do have the solution.
On the top of the desk, there's three bottle types in a certain order. Take note of this, then head back into the bar to count the number of bottles on the back shelf. For me there were 8 black bottles, 8 golden ones, and 6 red ones, and that's the order of my bottles so the solution was 8-8-6.
Your reward is a strip of paper and access to a notebook full of names.
You'll be taking the strip over to the wanted poster outside of the bar, which is covered in music notes. Apply the paper and then the pencil to the wanted poster and you'll write down the notes.
How to complete the cash register puzzle
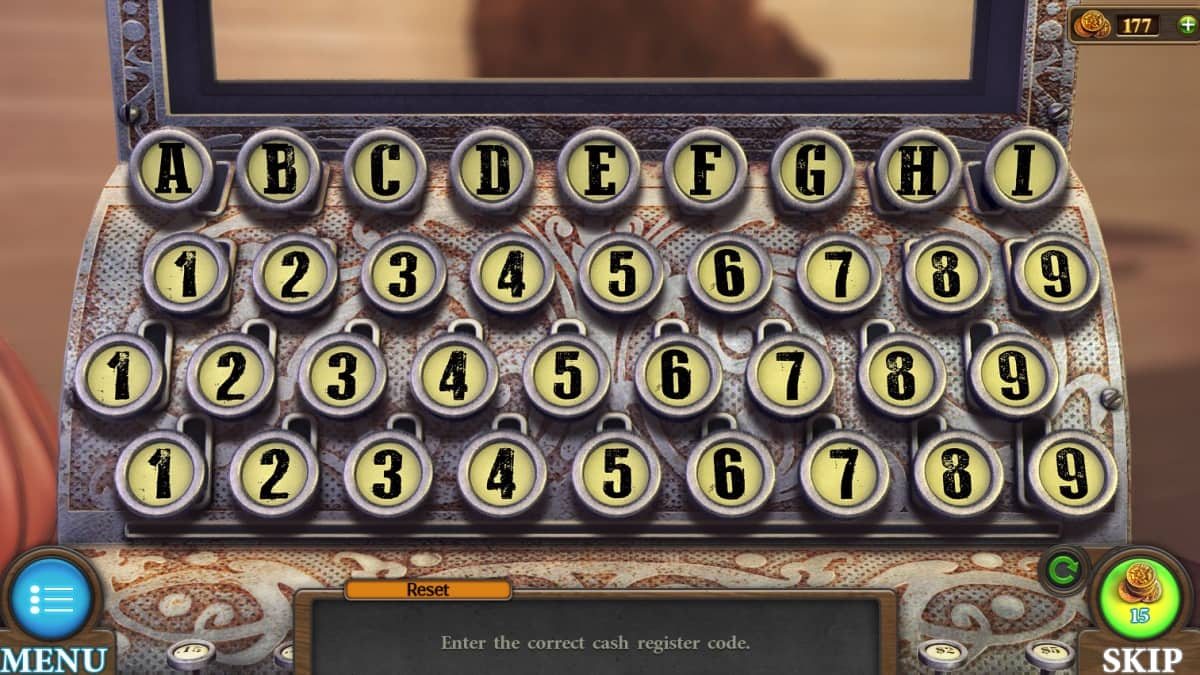
"Enter the correct cash register code."
This cash register is not set up like normal, and there are multiples of each number, but each button can only be pressed once.
This is another situation where you might not have realized you'd been given the code. The book of names has your solution, but there's no need to enter the codes next to every name.
One of them is for Benjamin King, on the wanted poster outside the bar. Note the code next to that name, for me it was FGH 744774. This is your solution.
Your reward is a cartridge and a blue arrow.
How to complete the stained glass puzzle
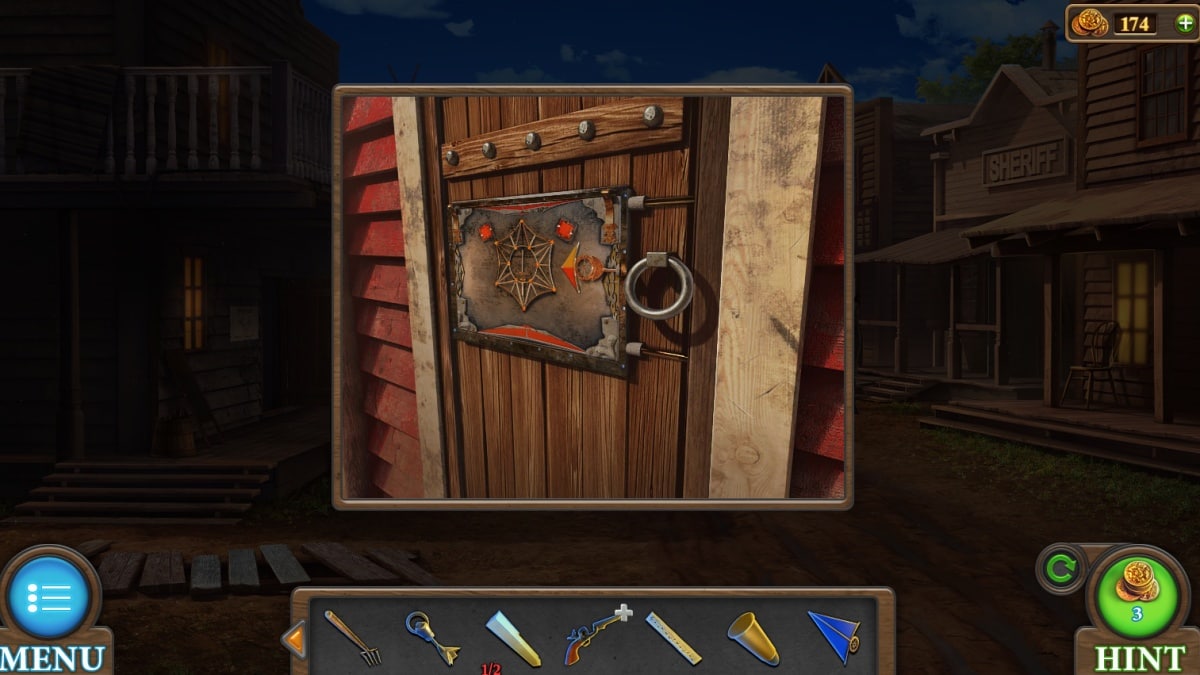
You'll be taking your arrow to the locked door back outside. This door is behind the horse and cart. Insert the blue arrow to unlock the stained glass puzzle.
"Arrange the parts of the stained glass window so that each part would be connected to other parts of the same colors."
You rotate the star design using the red arrows on top. You insert the stained glass by clicking on either the small arrow in the middle or the big arrow by the side. There are six multi-colored arrows each.
Once one of your arrow holders is empty you can then pick them out of the circle and replace them somewhere else, letting you adjust after all are placed.
Inside the barn
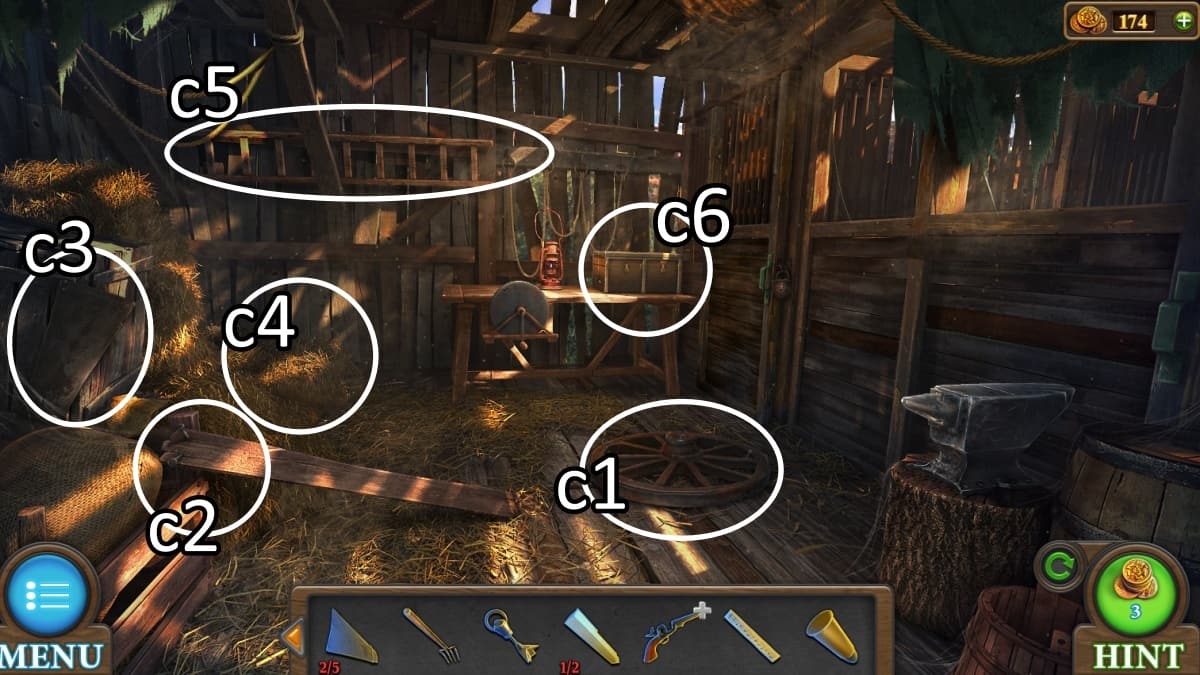
c1. Pick up the wheel for the cart outside.
c2. Use your hammer to pull out the crooked nails from this board. Then take the board as well. You can place the crooked nails on the anvil and use your hammer on them to straighten them out.
c3. A blade.
c4. Use your pitchfork on this pile of hay to uncover the second piano key and another blade.
c5. Take this ladder as well.
c6. Use your strangely-shaped key on this chest, which will unlock a puzzle.

"Put the chips in their places."
Your goal is to get the circles and semi-circles of each color onto their respective tile. You can click the silver buttons all around the board to shift the chips around. The white circle goes in the very center.
As always, I recommend starting with one color at a time, letting you narrow your focus as you push forward through the puzzle.
Your reward is the first of two chips and a valve.
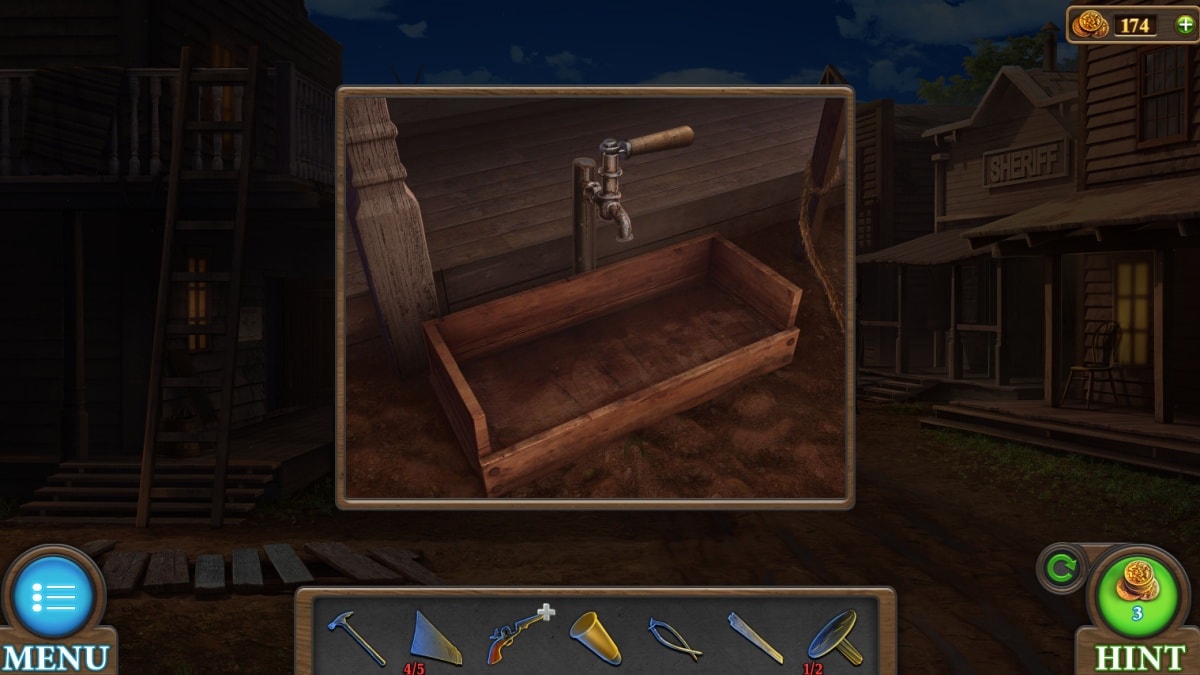
At the water trough, you can start to build it up, even though you can't yet turn on the water. Insert the valve on top, and then apply the board and straightened nails to the front.
You can also place your ladder next to the bar entrance to reach the weathervane, which is still missing the blades that you're collecting. Finally, pop the wheel onto the horse's cart.
None of these will bear fruit just yet, but you're on your way to solving a lot of things at once.
How to complete the piano key puzzle
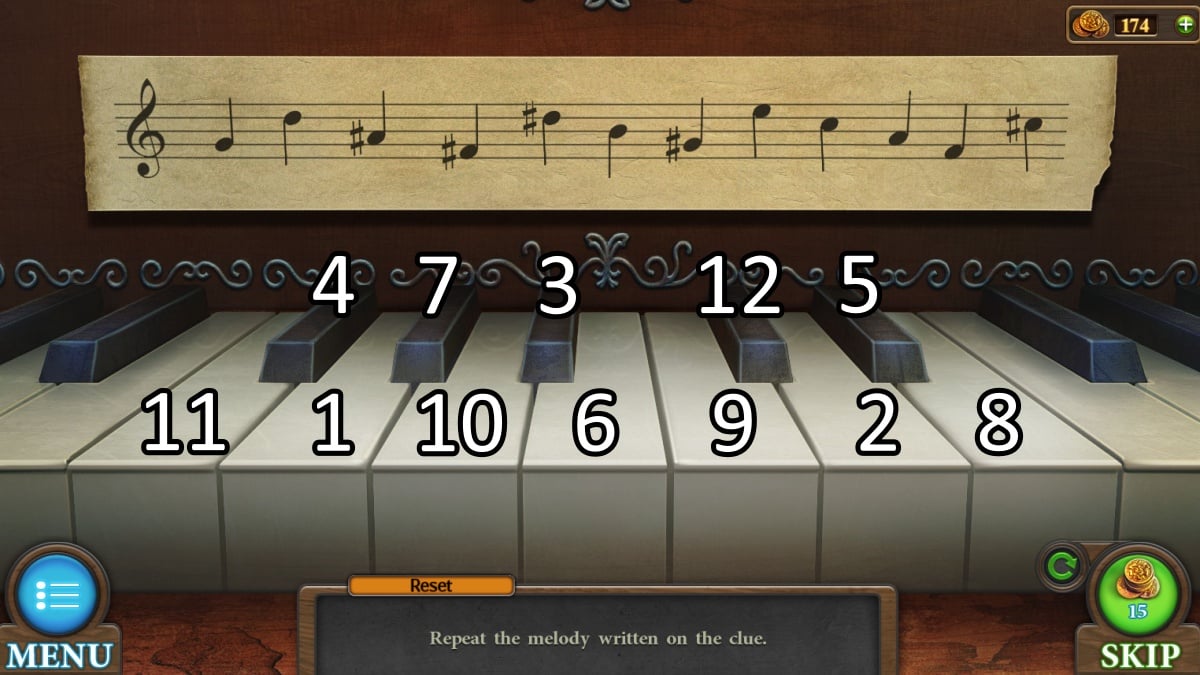
Head into the bar to put your two piano keys and the strip of paper with music notes on it onto the piano.
"Repeat the melody written on the clue."
This puzzle requires you to have outside knowledge of reading music. Fear not, I've done the learning so you don't have to. The solution is included on the graphic above.
Your reward is a cylinder. Use the revolver in your inventory to add the cylinder and the cartridge and you now have a working revolver.
Hooking up the horse
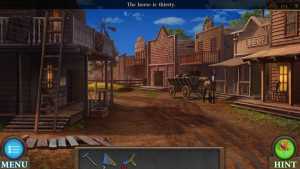
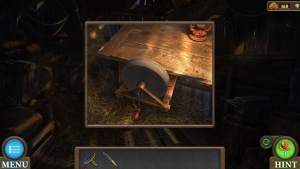
Going into the barn, there's a second lock that doesn't have a key on the right side of the area. This rusted lock can be shot with your new revolver, which opens up the barn door and gives you a harness and your final blade.
Back at the cart, use your hammer on the wooden block keeping the cart in place. The cart will move backwards, and you'll get to pick up a dull knife.
In the barn there's a grindstone you can use to sharpen the knife, and then the knife can cut the rope near the water trough.
Use your harness on the horse, and then attach the rope, and you'll get the notification that the horse is thirsty. All that work setting up the trough and weathervane is finally worth something, as you'll add your five blades to the weathervane to start it spinning.
Now you can convince the horse to move by turning on the water, which will open the trap door.
The trap door contains your second chip, a set of matches, and the balloon basket.
How to complete the card suit puzzle
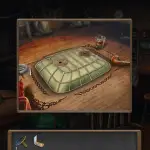
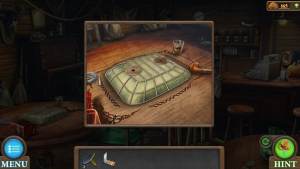
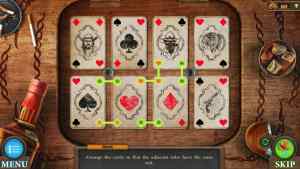
Insert the chips into this contraption on the bar table to unlock the card suit puzzle.
"Arrange the cards so that the adjacent sides have the same suits."
All eight cards must be successfully connected. You can ignore the large suits in the middle of the cards, as it's only the four corners of each that matter.
Your reward is a fuel canister and another strangely-shaped key.
How to complete the cell lock puzzle
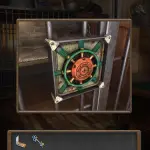
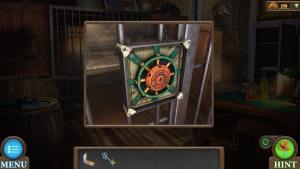
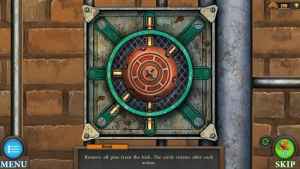
A strangely-shaped key fits a strangely-shaped lock. Back in the office you started in, the jail cell can now be opened with this key.
"Remove all pins from the lock. The circle rotates after each action."
Pull the pins in and out of the center to move the circle one rotation at a time. Your goal is to get all pins out of the center. You may need to plan putting in pins as much as taking them out.
Inside the cell is a set of burners.
Assemble the hot air balloon

Approach the air balloon and place down your basket. Open up the top to pour in the canister of fuel. Add on your burner.
Click on the basket to turn it over, and on the balloon to attach it together.
Light the burner with a match, and you can fly your way out of this small town!
Tricky Doors World 16: Aerodrome complete walkthrough guide
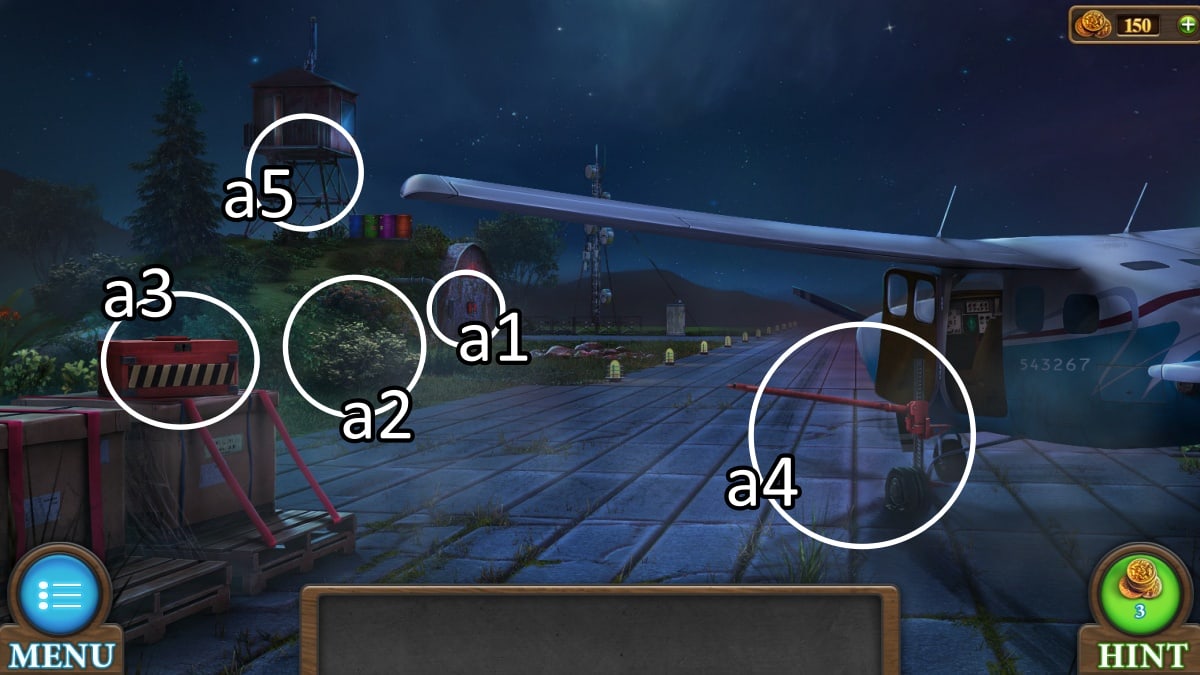
You start your trip today on an abandoned field with an airplane you'll be trying to fix up. I hope you've been playing Flight Simulator!
a1. On the left of this zoom-in, you'll find a key hanging.
a2. Brush aside the bushes until you can find an arrow. You'll be collecting four of these as well.
a3. Pick up a nut from this area, one of four. Use the key to unlock the red box puzzle, detailed below. With the knife you receive, cut the red straps on the box below the puzzle area. This grants you a cable.
a4. Jack up the plane to reveal a second arrow.
a5. Attach your hook with your cable and throw it to climb the tower.
How to complete the red box puzzle
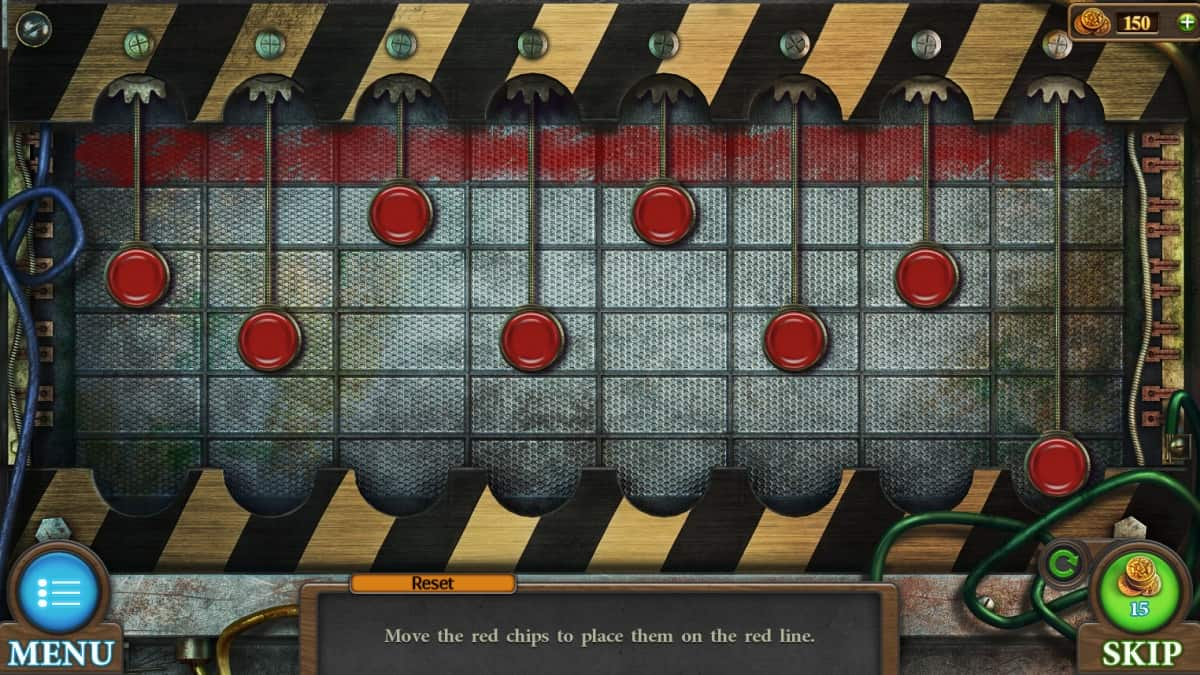
"Move the red chips to place them on the red line."
Similar to a puzzle we've seen in past worlds, when you move one chip up or down, others move with it. You can see which ones are moving even when they're stuck at the top because they'll be compressing and trying to move upward with nowhere to go. This is a good way to gauge what you need to move down to get your current chip to go up.
Continue this process until all red chips are at the top and the puzzle is complete.
Your reward is a knife and a hook.
Exploring the control tower
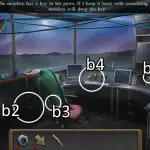
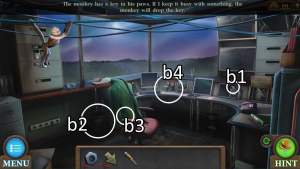
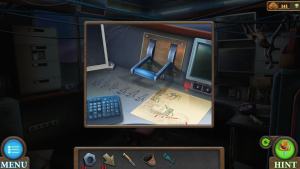
You can move the monkey, but not yet address it.
b1. There's an arrow here.
b2. Pick up this bucket.
b3. The jacket pocket has a key inside.
b4. Try turning on this blue handle. Nothing happens, but you do get a few hints on what to do to fix that. There is also a nut hiding behind the monitor here.
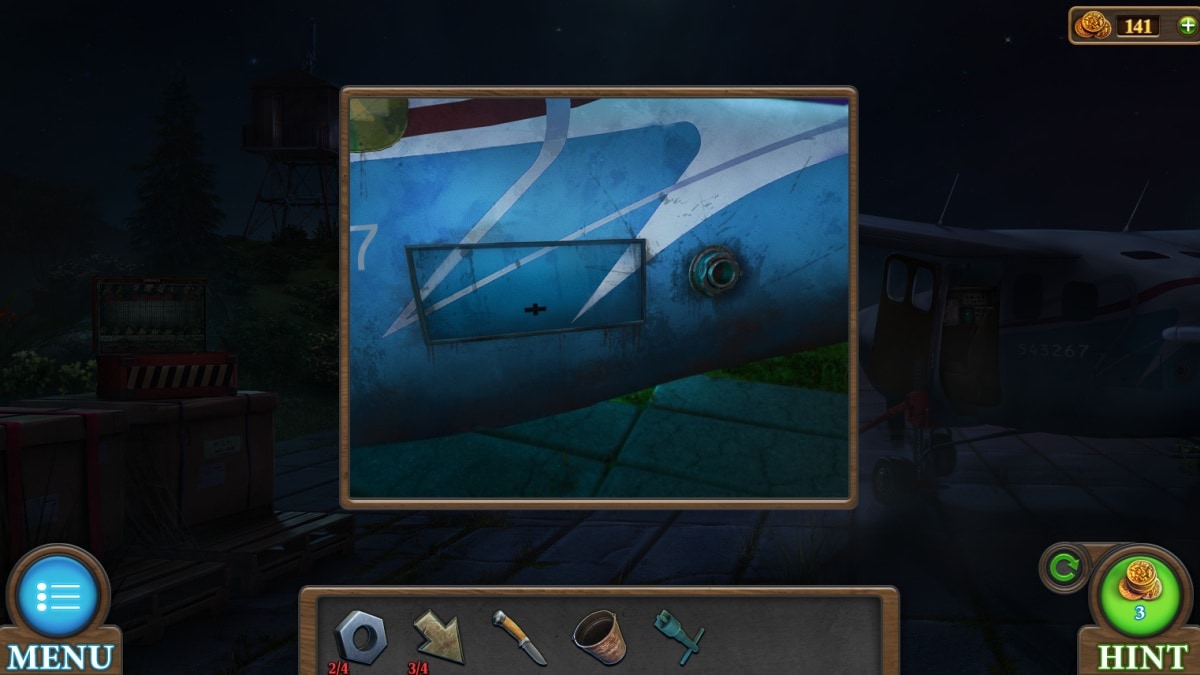
The back hatch of the plane can now be opened, which has a final arrow. You can also drag the oil funnel into the gas tank for later.
How to complete the arrows puzzle

On the far end of the runway, the garage can now be opened. Add your four arrows to unlock the arrows puzzle.
"Use the arrows to move the chip around the maze so that both chips are combined with the desired shape at the same time."
You'll use the arrows to move the bronze chips around. They both move at the same time, but if one of them can't move it will stay in place while the other moves. Your goal is to collect all of the gears, which can only be collected in tandem.
Your reward is the garage door opening.
Inside the garage

c1. Open up this electrical panel. There's a magnetic keycard and a pair of wire cutters inside, both of which have an immediate use, but first we have the electrical switches puzzle, detailed below.
c2. Take note of the painted numbers all around the room. Their colors correspond to the barrels set up outside. You'll be entering that code into this box to gain a banana and another nut.
You can now head back to the tower.
Electrical switches puzzle
"Set the correct position of the switches."
You don't need to worry about the blue switches, as only the red ones matter. The previous hint showing which direction the planes are facing (up or down) indicates which red switches should be flipped up or down themselves.
Push up the handle next to the puzzle to complete it.
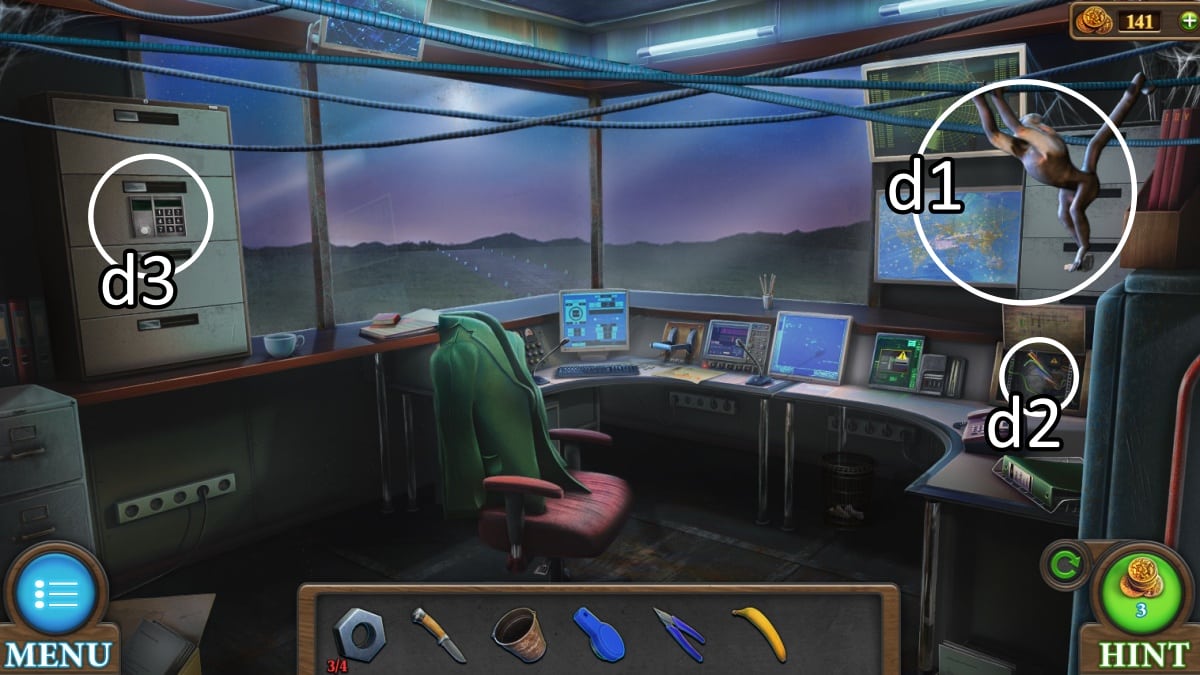
Head back into the tower now that you have some more tools.
d1. Give your banana to the monkey to receive the key it's holding.
d2. Use your wire cutter to obtain some wires.
d3. The magnetic keycard can be used on this filing cabinet. This will lead you on a short scavenger hunt.
The filing cabinet says to check the trash can, which is under the desk. On the bottom of the trash can, there's a picture of the crates down next to the plane. Go down to the crates and find a number splashed in purple. For me, this was 7.
Back in the garage, you can zoom in on the purple 7 and find the actual code. For me this was 881465.
The filing cabinet contains a hand pump and a clamp.
How to complete the truck engine puzzle
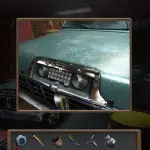
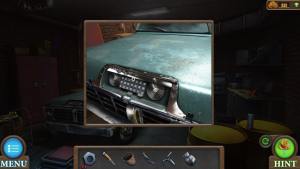
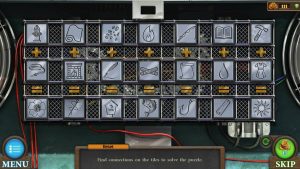
"Find connections on the tiles to solve the puzzle."
Click any two tiles to swap them around. Your goal is to create seven connections of three tiles each. Find trios that go together and then order them so two add up into the third, such as a fire hydrant and a hose making water.
Once all of them are matched, the hood of the truck will pop and you'll be able to pick up a wrench. Use your knife on the hose to collect it, and pull out the car battery.
Powering the plane

Place the battery into the open hatch of the plane to give it power. You'll need flight coordinates later.
Get back down to the wheel of the plane, where you'll use the wrench to take it off. Now you'll have the flat tire and also reveal a key.
Your key opens the red left-side locker in the garage. Inside is a keycard and pry bar.
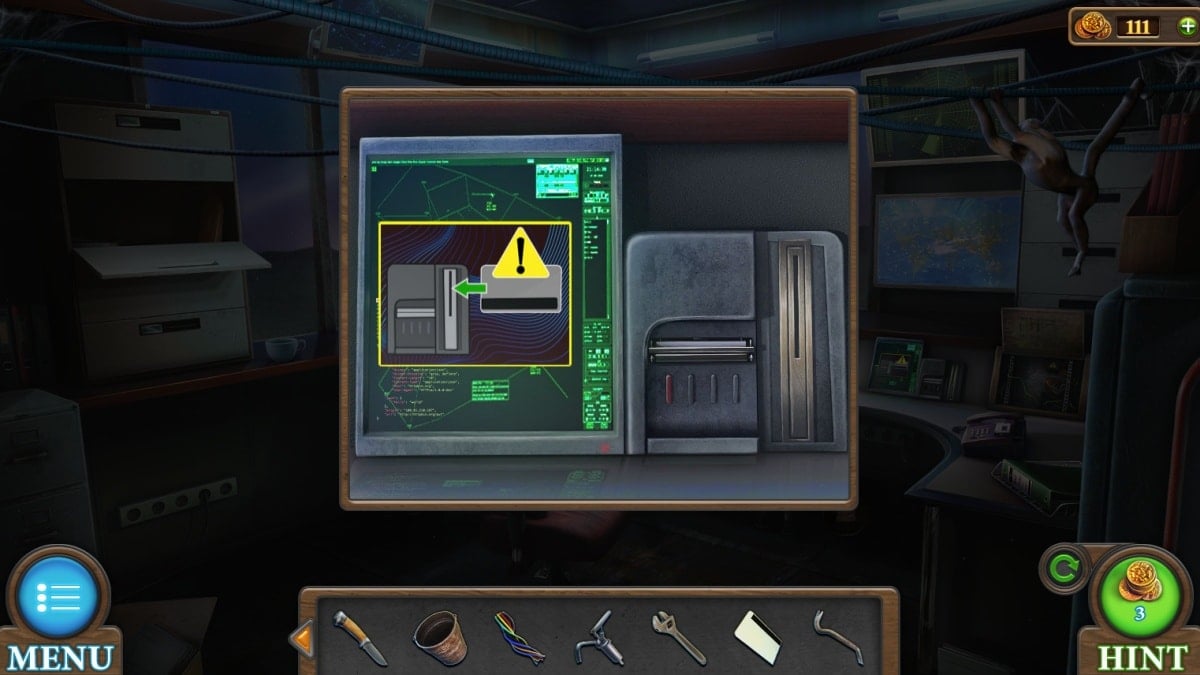
Take the keycard inside. It will ask you to enter the aircraft tail number, which is helpfully painted on the side of the plane. For me this was 543267. This nets you the coordinates!
Back in the plane, enter the correct flight coordinates.
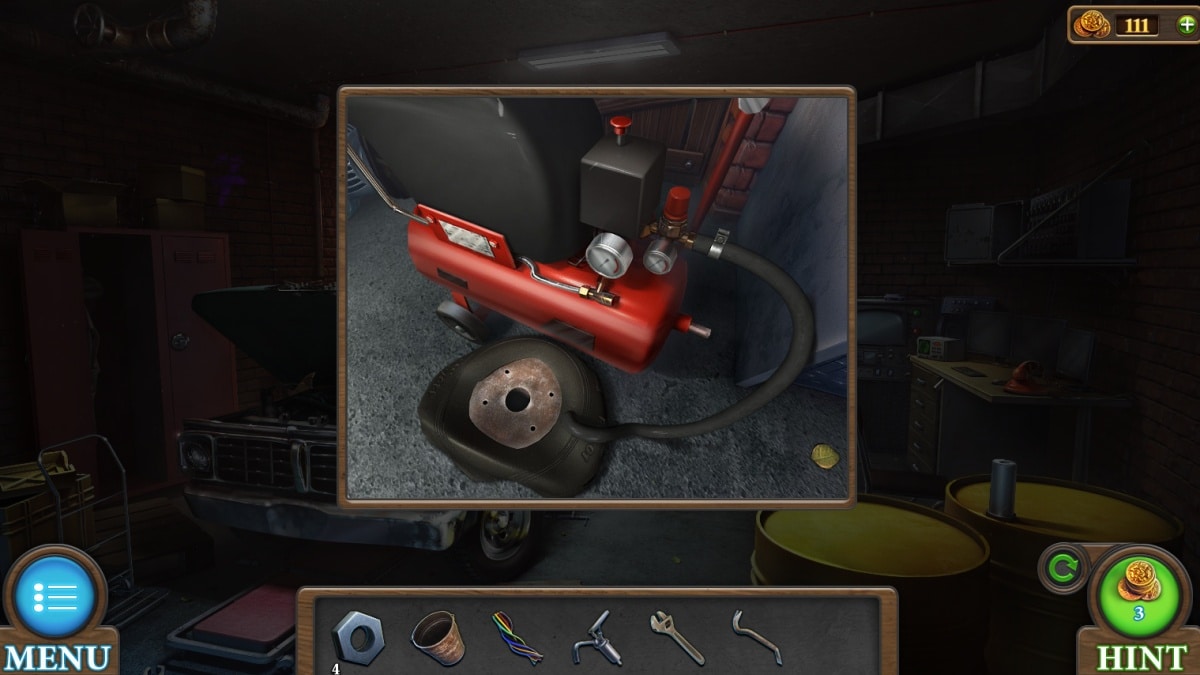
Now you'll need to fix the flat tire. In the garage, there's an air machine you can fix up with the hose, the clamp, and twisting the clamp tighter with your knife. Then you can put down the flat tire and turn on the machine with the red button. This gives you a fully-functioning wheel.
At the plane, put the wheel on, apply the four nuts, tighten with a wrench, and lower the plane off its jack.
You're almost there! You'll still need fuel and to turn on the lights of the runway for safety.
How to complete the fuse box puzzle
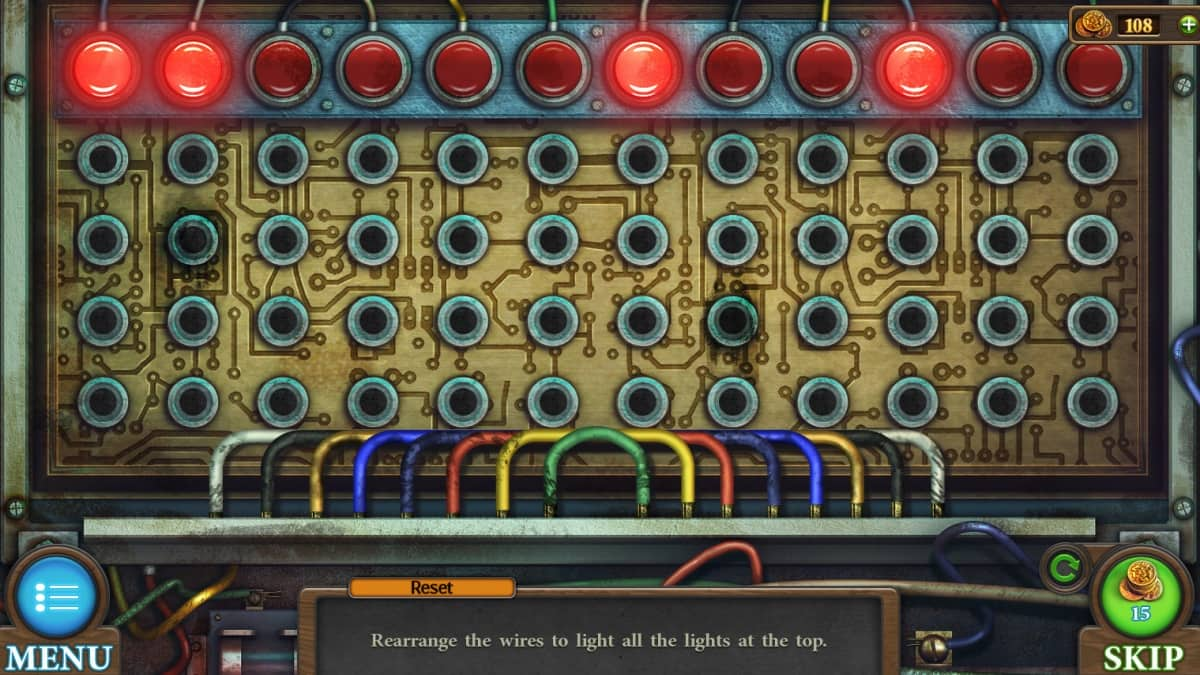
At the end of the runway is a fuse box that is shut tight. Use your pry bar to open it up, and then put in the wires to complete the circuit. This unlocks a puzzle.
"Rearrange the wires to light all the lights at the top."
This is a simple puzzle of connecting the lights that are lit to the lights that are unlit with the wires. You can use any of the four rows and even overlap wires, so long as they have different specific holes they're going into.
With that done, head up into the tower to that blue lever that hasn't done anything this whole time and push it up. We have lights!
We have liftoff!
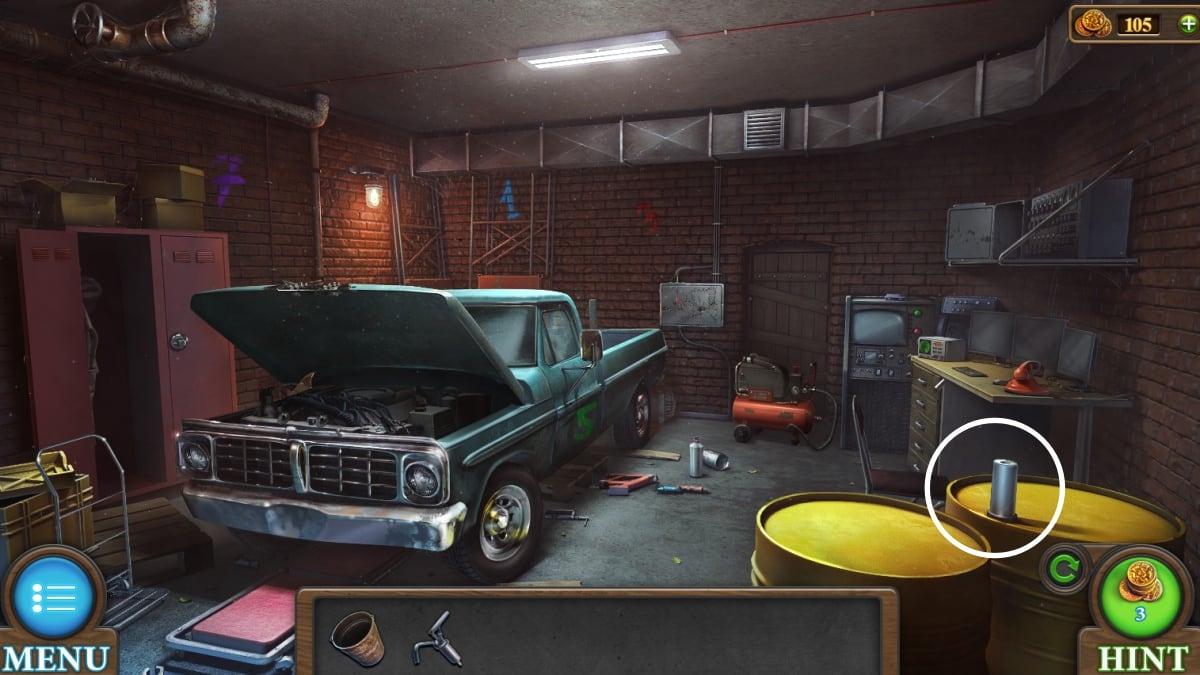
The yellow barrel on the side of the garage contains fuel. Apply the hand pump to the top of the barrel and put down your bucket. You can now fill the bucket with fuel, which will go into your plane.
The plane is ready. You've fixed the wheel, fueled up, powered the runway, and entered your coordinates. Now you can fly to freedom.
Tricky Doors World 17: Ship complete walkthrough guide
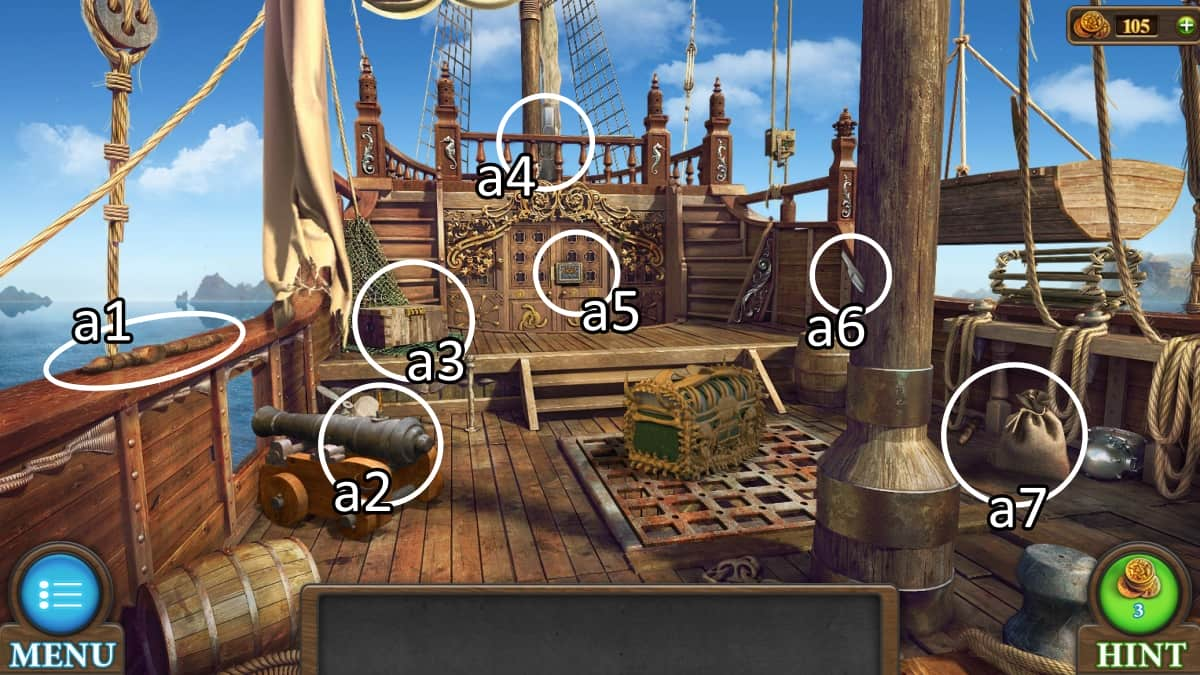
On a highly decorated ship in the middle of the ocean with no captain, your goal is to find a lifeboat and get outta dodge.
a1. I hope you enjoy collecting lots of one thing, because this is the first handle of a total twelve.
a2. There's a yellow chip behind this cannon.
a3. A handle is hiding in the net under this chest, and a strip of cloth to the left.
a4. There's a spyglass on the railing up here.
a5. Zoom in to grab a torch from its holder.
a6. Use your cloth to grab this knife from the mast.
a7. There's a second handle here, and you can use your knife on the sack to open it up and find the red chip.
With both your chips in hand, head back to a5 to plug them in for a puzzle.
How to complete the pearl placing puzzle
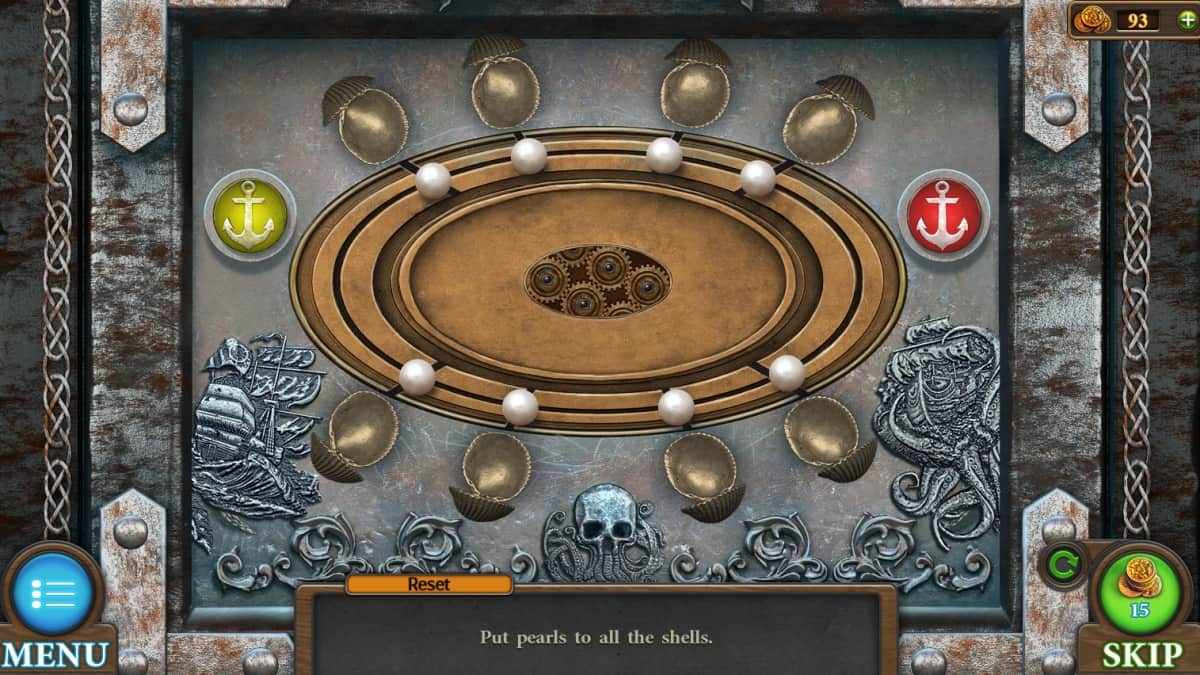
"Put pearls to all the shells."
You click a shell to have it enclose around the pearl in front of it. The trick to this puzzle is that every time you put a pearl into a shell, all the pearls move one space clockwise. You cannot move them when no shells can grab a pearl.
If you get stuck, you can actually click a closed shell to release its pearl and push all pearls forward one step as well. When you only have one pearl left, try opening the shell it will be in front of next, so that you're always closing a shell right after opening one, and eventually you will get the last pearl where it needs to go!
Success grants you access to the captain's quarters.
In the captain's quarters
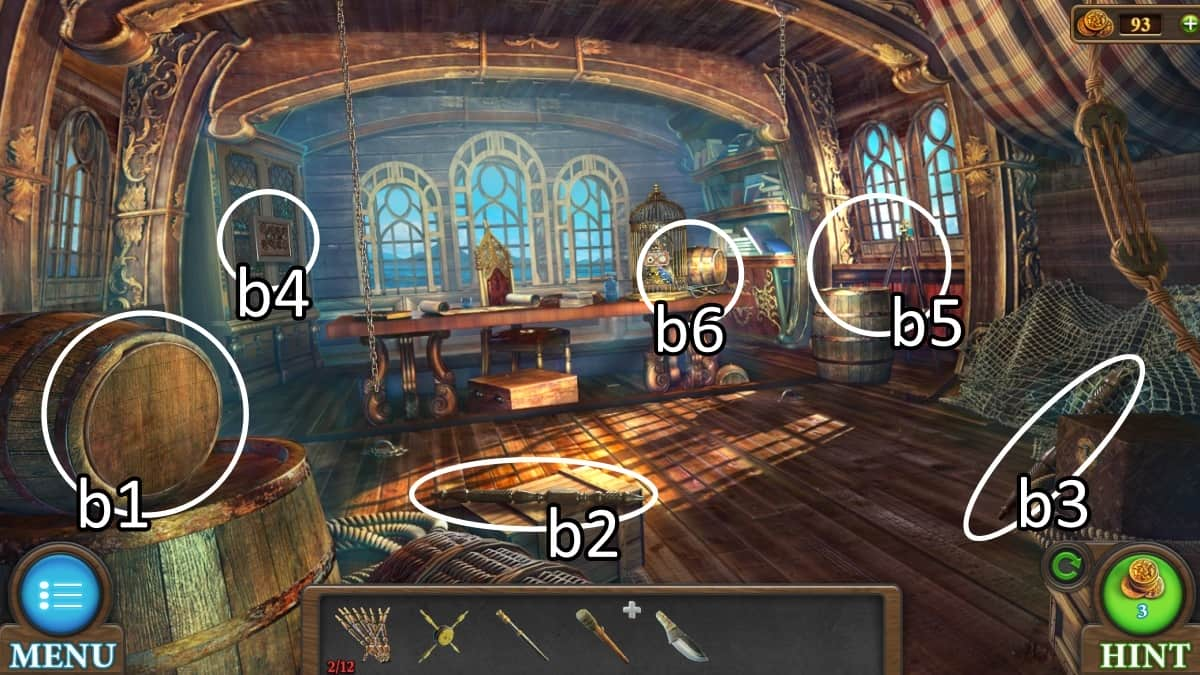
b1. Pry open this barrel with your knife to pull out a handle and pick up a scoop of gunpowder. Don't handle that bare-handed in real life!
b2. Your fourth handle is here...
b3. ...And your fifth is here!
b4. Insert your handle to this to unlock the handle decor puzzle, detailed below.
b5. Place your spyglass here. In your inventory, add your fuel to the torch, and place the torch onto the barrel to set it on fire. That's how fire works, right?
b6. Grab the hook next to this birdcage.
How to complete the handle decor puzzle

"Place the decor pieces in their places."
The three handles will rotate whatever pieces they're touching to the next space. The center will rotate four in a square and the two on the sides will only swap the two they're touching back and forth.
Your goal is to complete the decoration and make it look whole by putting the pieces where they go. The side handles can be used to 'save' tiles once you know where you want them to go.
With the cabinet open, you'll receive a handle, the first of four gears, and a bottle of fuel.
While you're here, look at the labels on the remaining bottles, and in what order. I had a banana, carrot, and bee.
How to complete the animal combination lock
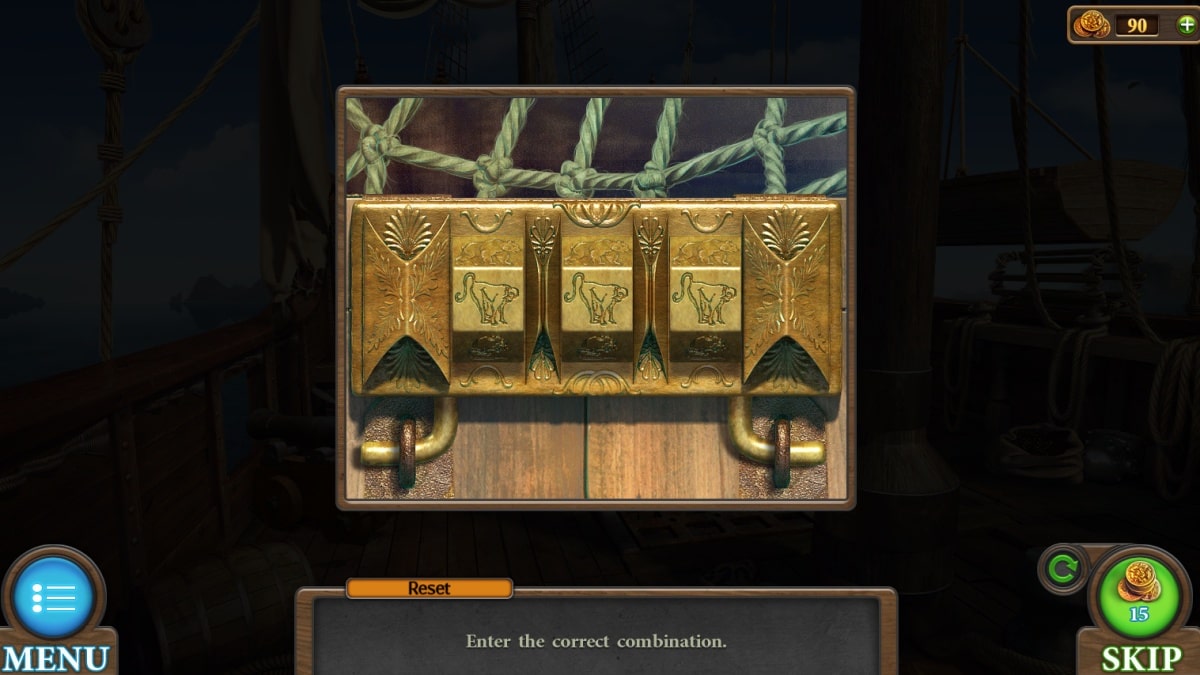
"Enter the correct combination."
The bottles on the shelf of the last puzzle are our clue for this one. Turn the combination lock to the animals that eat the food listed on the bottles.
For me, this was monkey, rabbit, and with bees representing honey, a bear.
Move aside the cloth inside the chest to pick up another handle and a fretsaw.
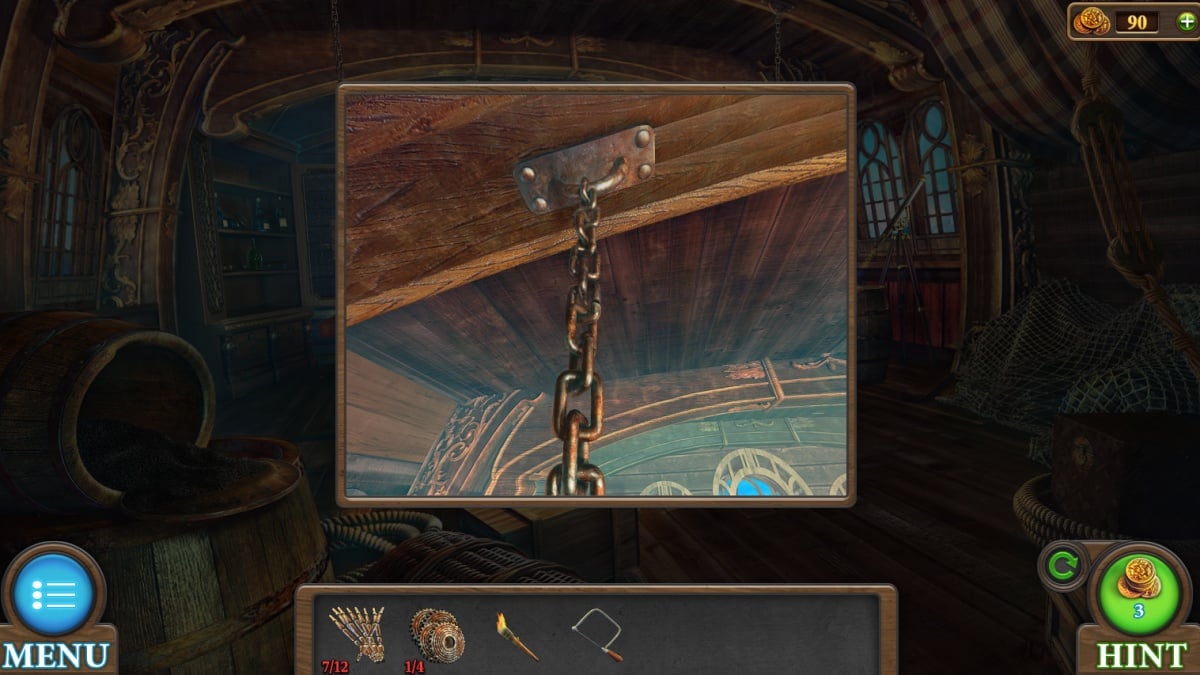
Your fretsaw can be used on this chain in the captain's quarters to gain a chain.
Take the chain outside to wrap around the green chest in the middle of the deck, and then your hook to the cannon.
Fill the front of the cannon with gunpowder, tamp it down with the ramrod next to the cannon, and then use your burning torch to light the cannon.
The strong recoil of the cannon moves both the cannon and the chest. Under the cannon is a gear and a pry bar. Under the chest is a door you can go down.
Below deck
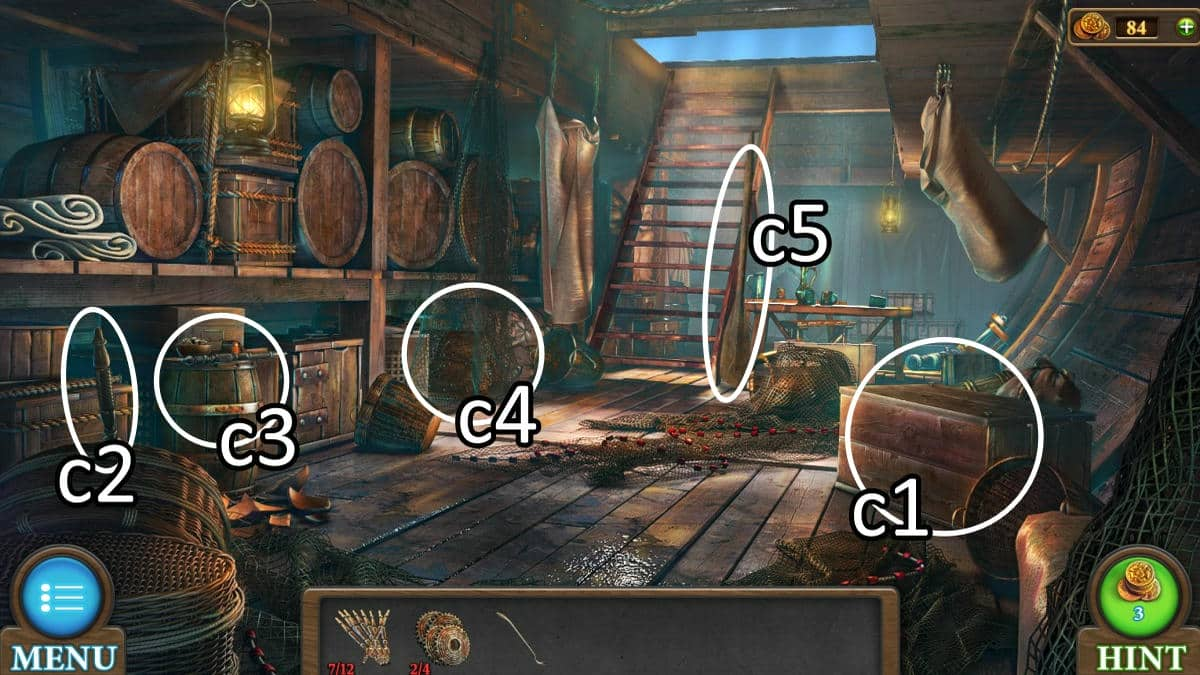
c1. Use your pry bar on this box to pry it open, picking up an empty wheel and a detail. While you're zoomed in, there's a handle on the right side.
c2. Pick up a handle.
c3. Another handle! Also, a bowl of nuts, and on the floor a pink chip.
c4. Move aside this netting to scoot out a chest. This chest has a puzzle you need a hint for.
c5. Pick up an oar off the ground.
How to complete the bird cage puzzle
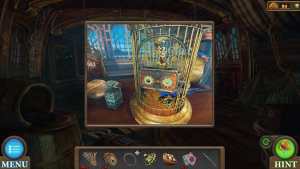

Head back up to the bird cage to start the bird cage puzzle by inserting the detail you've just found.
"Assemble circles using matching elements."
You can turn either side of the circles by clicking on the detail in the middle of their wheel. Your goal is to match up the two halves of the same circle and clicking the middle button to put them together. You'll know you're successful when but circle disappears and you're left with empty slots.
Complete all the circles to finish the puzzle and unlock the bird cage.
Give the bird your bowl of nuts to distract it. Now you can pick up a handle and the second chip.
How to complete the treasure chest puzzle
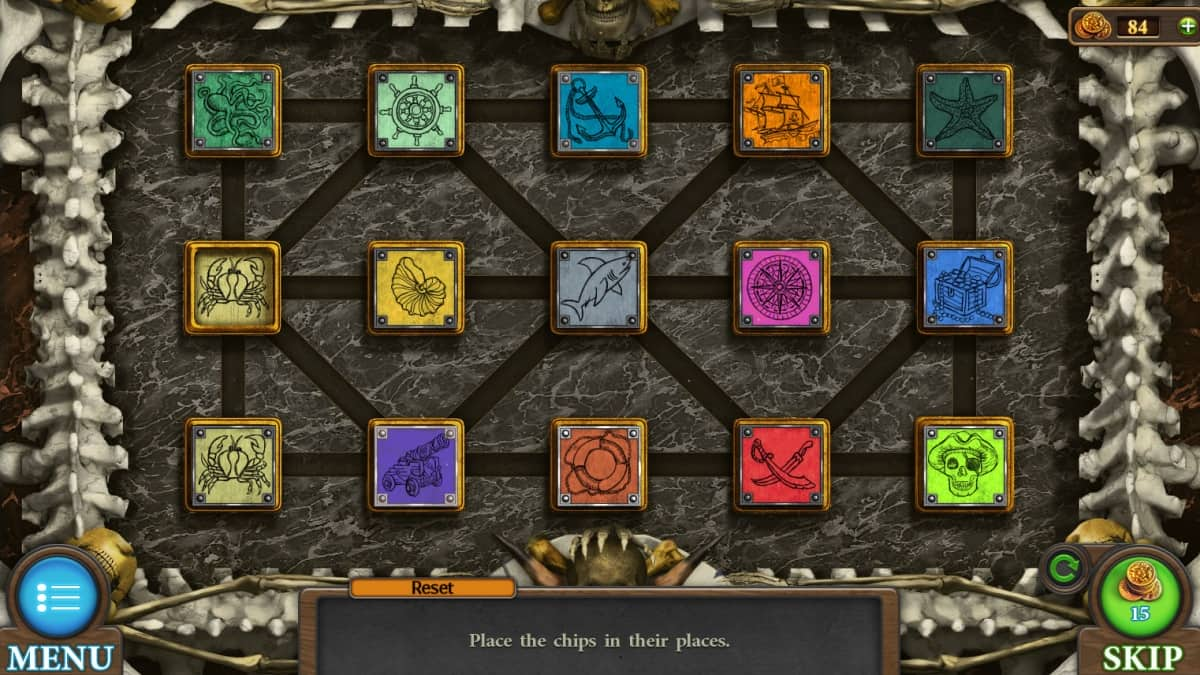
Your two chips can finally unlock that weird green chest on deck.
"Place the chips in their places."
This is another puzzle where you slide the pieces into the same color/picture space as is printed on the piece itself. There is one free slot at all times which you'll use to slide the other chips around by the paths shown.
When you finish this puzzle, you'll receive a circular detail and your last handle.
Open up the empty wheel in your inventory. Add the detail, and all twelve handles.
Steering the ship
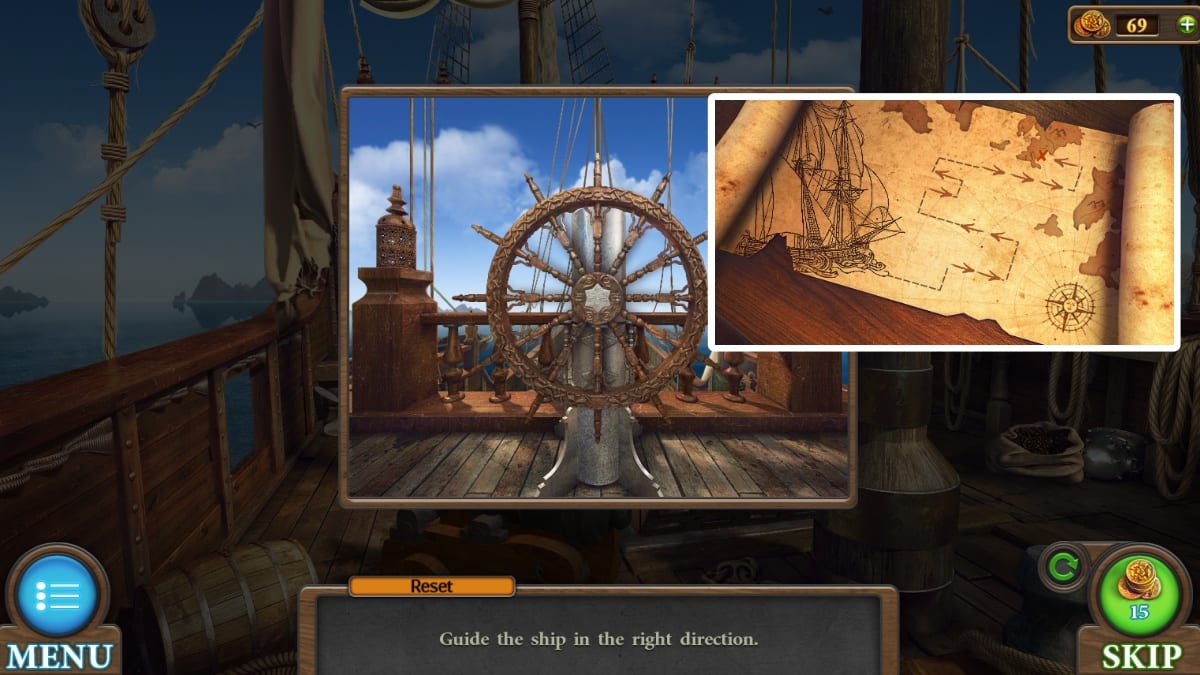
"Guide the ship in the right direction."
With your wheel added to the ship, it's now your job to choose the direction it sails in. Luckily, the captain left a helpful map on his desk.
The arrows indicate how many times you need to turn the wheel in that direction, similar to a combination safe lock. You do not need to click and drag the wheel, only click on the side you want it to turn to.
Your reward is a gear and a color drawing, which will serve as your hint for the chest below deck.
How to complete the color chest puzzle
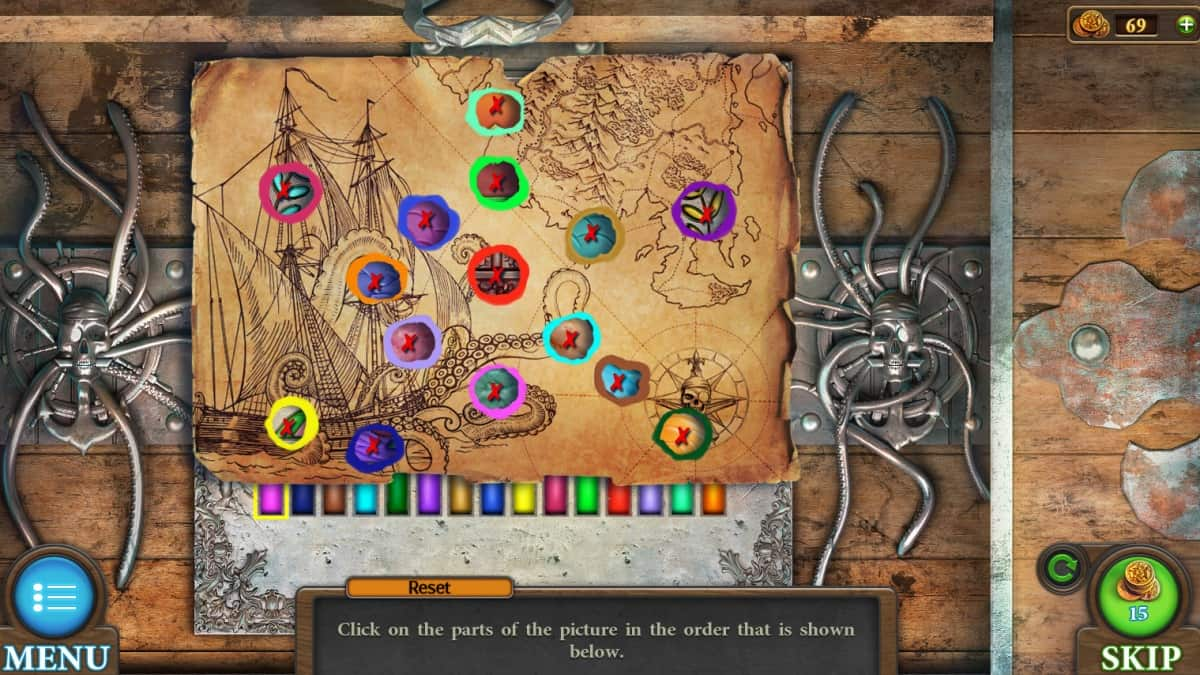
"Click on the parts of the picture in the order that is shown below."
Ignore the colors of the actual picture entirely, and depend fully on the note that you can lay over the puzzle. The colors of the circles are the x's you need to click.
Once you've clicked them all in order, you'll get your final gear.
How to complete the gear box puzzle
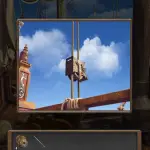
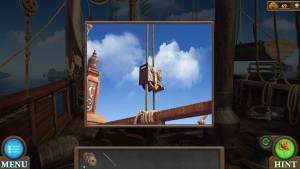
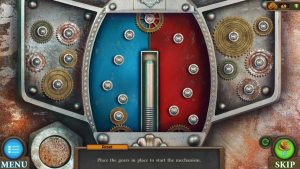
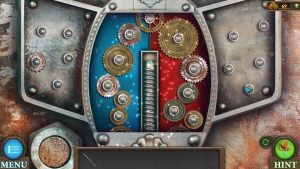
"Place the gears in place to start the mechanism."
Your four gears will go into this box next to the lifeboat. You'll know a gear fits when it starts turning, so I recommend starting from the top and working your way down. I've included my solution. There should be one leftover gear.

Your lifeboat has been lowered. Toss down the ladder, add your oar to the boat, and you'll be sailing into the horizon.
Tricky Doors World 18: Egyptian Pyramid complete walkthrough guide
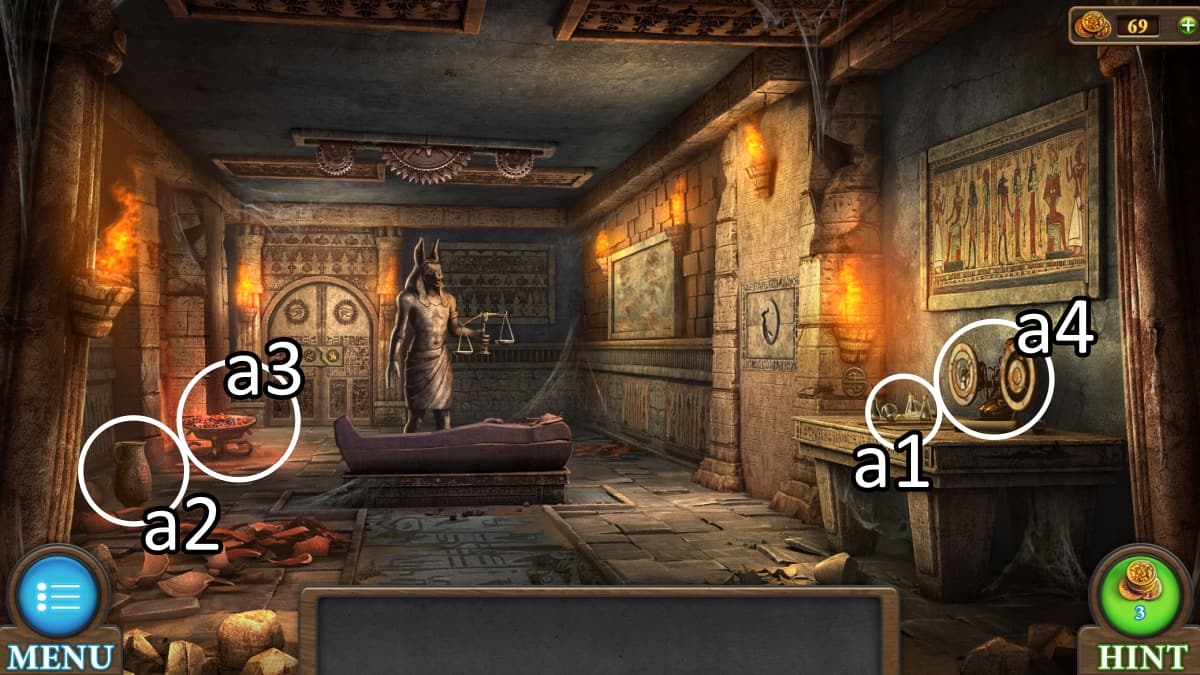
a1. Pick up a bottle of oil.
a2. A jug is on the floor.
a3. On the floor next to the brazier, there's a metal circle.
a4. Place the metal circle here to unlock the rotating circles puzzle, detailed below.
How to complete rotating circles puzzle
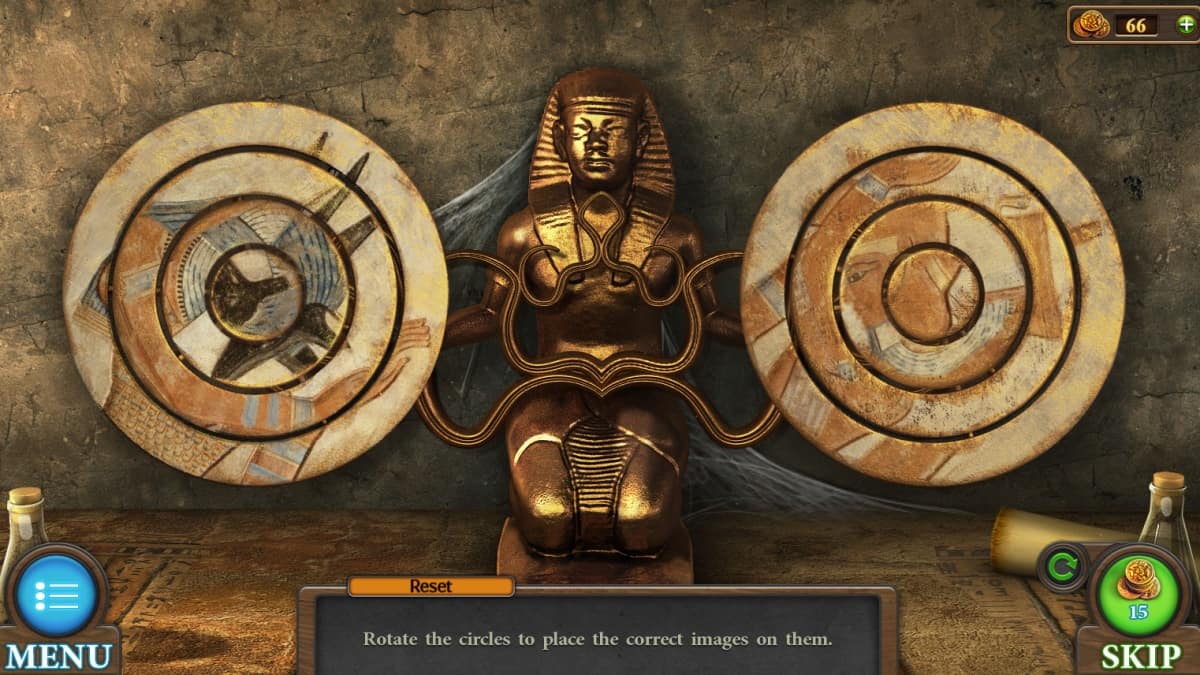
"Rotate the circles to place the correct images on them."
Every circle you rotate will rotate another circle on the opposite side. However, that same opposite circle will not rotate the first, it will rotate a different circle.
Fiddle with these eight total circles until both pictures are perfectly aligned.
Your reward is a figurine. This figurine goes into the door out.
How to complete the crypt door puzzle
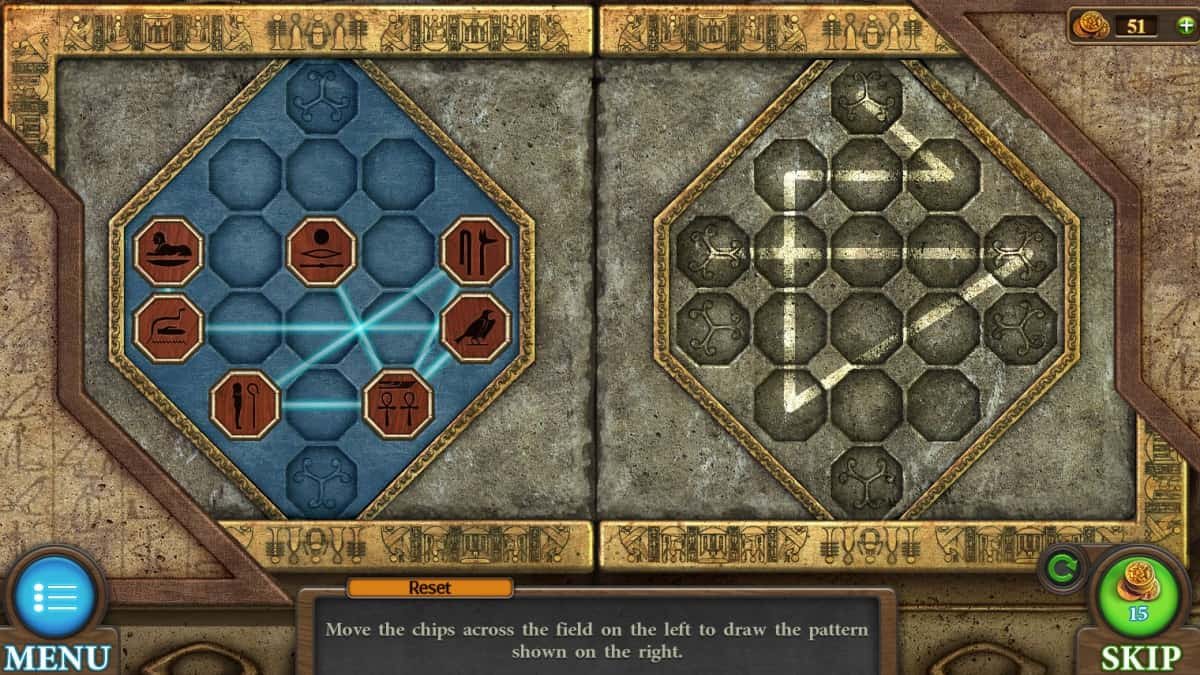
"Move the chips across the field on the left to draw the pattern shown on the right."
Your pattern will likely be different. Your goal is to make the lights match the pattern drawn on the right by moving around the chips. Most notably, you can make two lines cross over the same area if you have too many lines to make the pattern you need.
Once your lines are complete, you open up the second room.
Exploring Ra's room

b1. Pick up the stick at the foot of the statue.
b2. Grab this blue gem.
b3. Jab the stick into the rocks blocking the water flow. Grab the red gem that comes out, and put the jug into the water to fill it.
How to complete the eye math puzzle
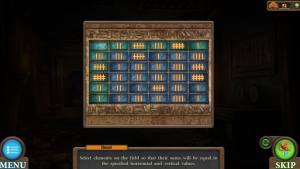
With your water, go back to the brazier and pour the water to cool off the eye figurine and pick it up. The eye then goes into this right side wall recess and unlocks the eye math puzzle.
"Select elements on the field so that their sums will be equal to the specified horizontal and vertical values."
The sums are in the teal stones. I recommend starting with the smallest numbers and filling in the gaps as you go until every row and column is complete.
Your reward is a dagger, and there is another keyhole behind this that you can't unlock yet.
Got a light?
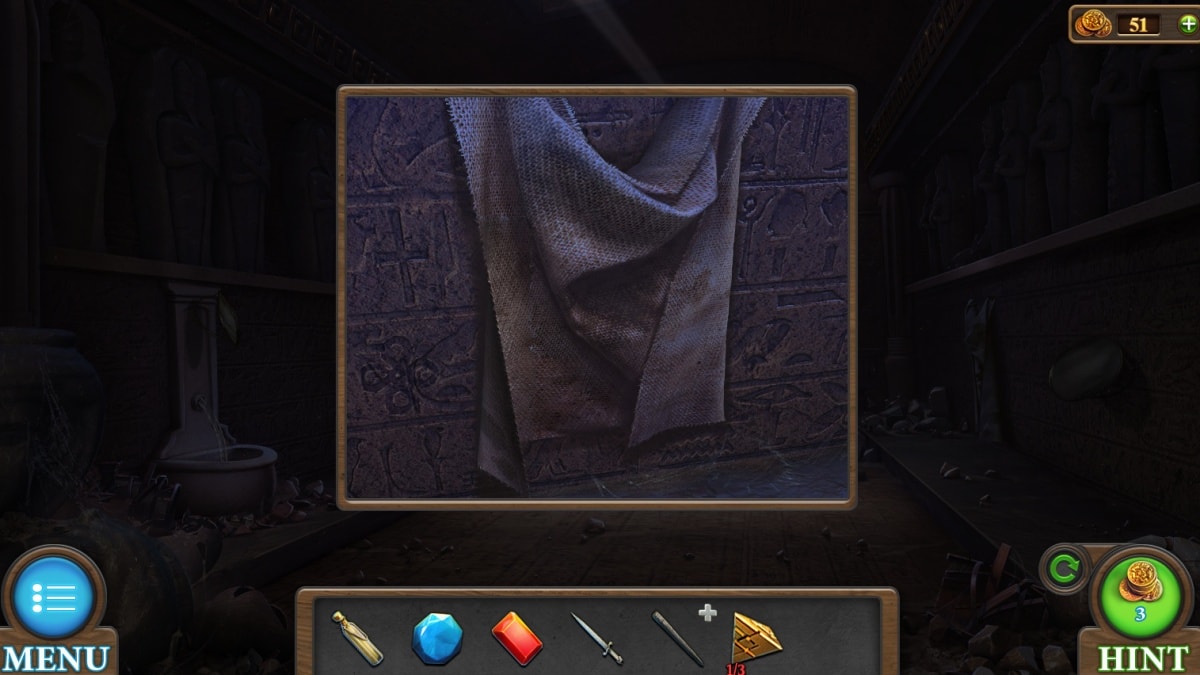
In the middle of the room, dig your stick into the sarcophagus to uncover the first of three pyramids.
Slice your knife into the cloth on the right side of the second room. Wrap your cloth around the stick, then pour on the oil. Now that you have a torch, you can hold it to one of the low fires in the first room.
Your torch lights up the third room.
How to complete the blue and red gem puzzles
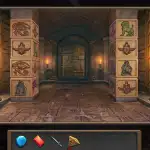
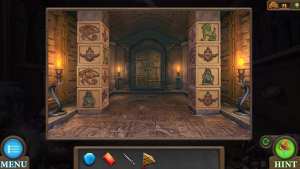
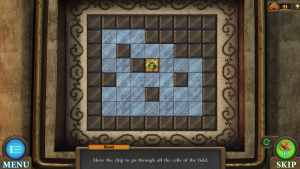
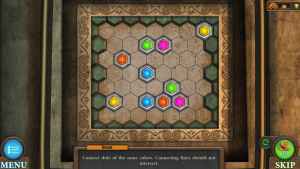
At the back of the room, you can enter your gems into the door. I entered the blue gem first.
"Move the chip to go through all the cells of the field."
The scarab slides across the puzzle until it reaches a natural stopping point. Your goal is to hit all the spaces, which will change color as you go, without overriding any of them.
This will repeat multiple times, and then you can move to the red gem puzzle.
"Connect dots of the same colors. Connecting lines should not intersect."
Draw the lines between each color gems and avoid any overlap. I recommend starting with the shortest lines, as they'll be easiest to redraw later if you need to work around them with one of the longer lines.
With both your gem puzzles done, you reach final chamber.
Bastet's chamber
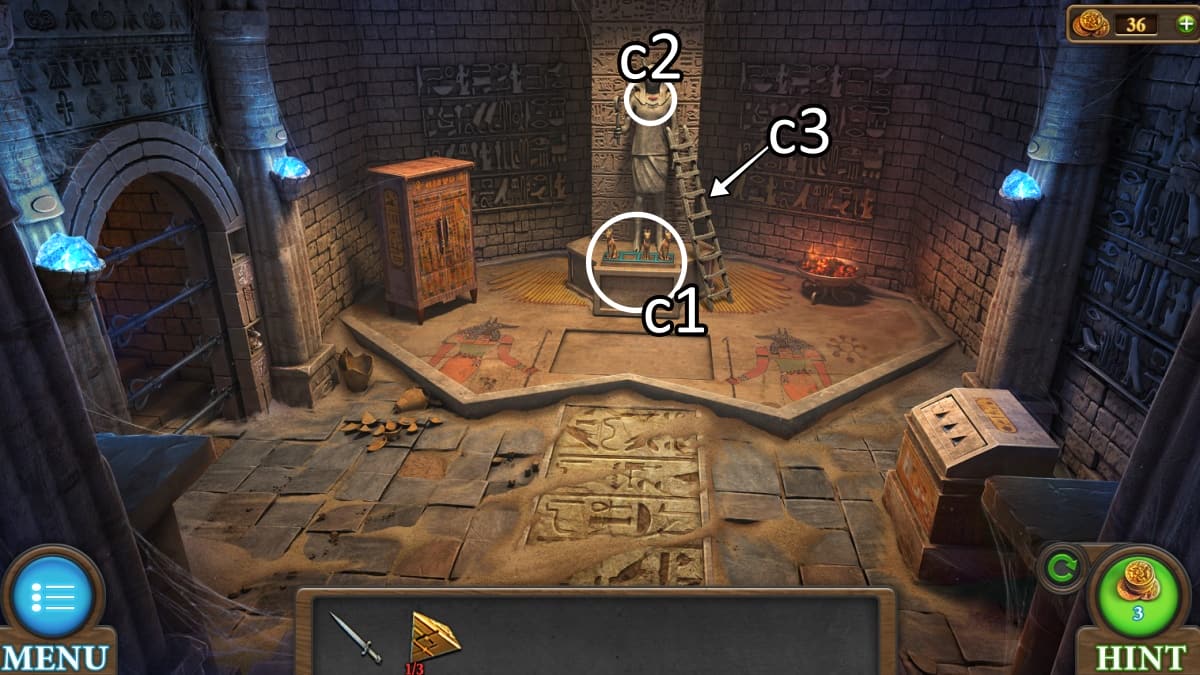
c1. There's a brush next to these cat statues.
c2. Use your dagger to pry the stone of Ra out of Bastet's chest.
c3. With the stone obtained, you can now take this ladder with you.
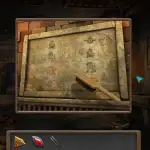

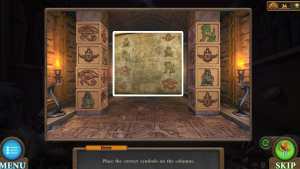
The dirty picture in the first room can be cleaned off with the brush you found. This holds the answer to how you'll be turning the columns in the hallway.
"Place the correct symbols on the columns."
This is only tricky because most of the blocks move another block at the same time. While finishing one column, you have to account for what the other column is changing, until you're able to figure out the pattern and get everything lined up.
Your reward is both a key and a key part.
The full key goes to the wardrobe in the chamber of Bastet, which contains a cat figurine and a cylinder with numbers.
Pleasing the gods
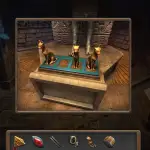
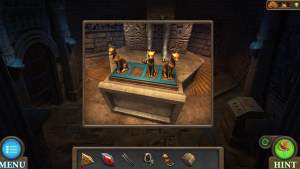
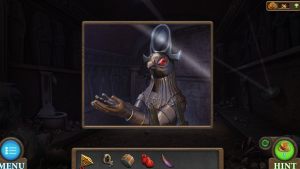
Place the cat figurine where one is missing and you'll receive a second pyramid and a heart. Hopefully not a real one.
In the second room, put down the ladder next to Ra and return his eye to him. This turns the mirror on his head. He's also carrying a feather, which you should grab now.
By tilting the mirrors on the walls to reflect Ra's sunlight, you'll unlock the mirrors puzzle.
How to complete the mirror puzzle
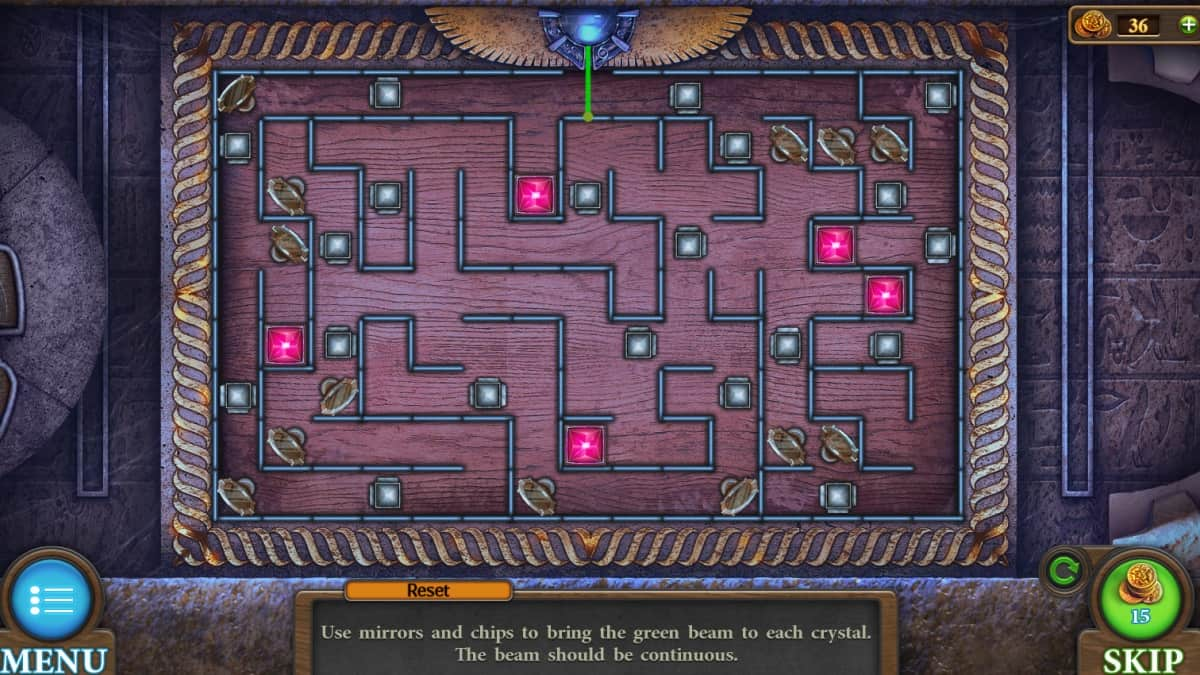
"Use mirrors and chips to bring the green beam to each crystal. The beam should be continuous."
The chips are cubes which each have an entrance and an exit for the beam to go through. You can place these freely throughout the puzzle. The mirrors are stuck in place and will bounce any green beam pointed at them. The crystals are also stuck in place.
Your reward is the final pyramid piece.
Balancing the scales
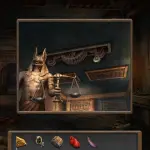
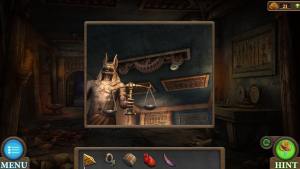
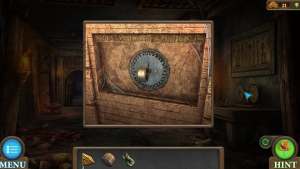
Place the heart and feather on Anubis' scales, in reference to the Egyptian story of Anubis weighing a dead person's heart against a feather to determine their eternal fate. He will grant you an Anubis idol.
Place your piece of key into the hole on the right wall. You will pull out a full key.
This full key goes into the lock under Ra's idol in the second room, which you can then pick up.
How to complete the three pyramids puzzle
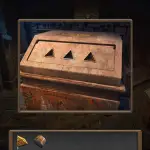
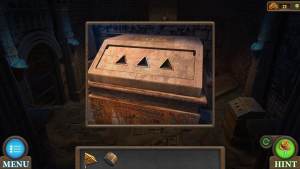
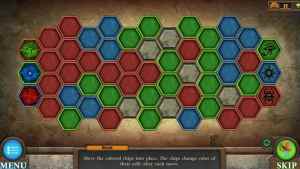
"Move the colored chips into place. The chips change color of their cells after each move."
You unlock this puzzle by placing the pyramids into the triangle recesses in Bastet's room.
Chips can only go onto the same color of their own chip, but they leave behind a different color in their wake. You can 'follow' the chips around with each other to create equal and overlapping paths as you go.
Your reward is a chest rising from the depths. Place your cylinder into this chest.
How to complete the cylinder code puzzle
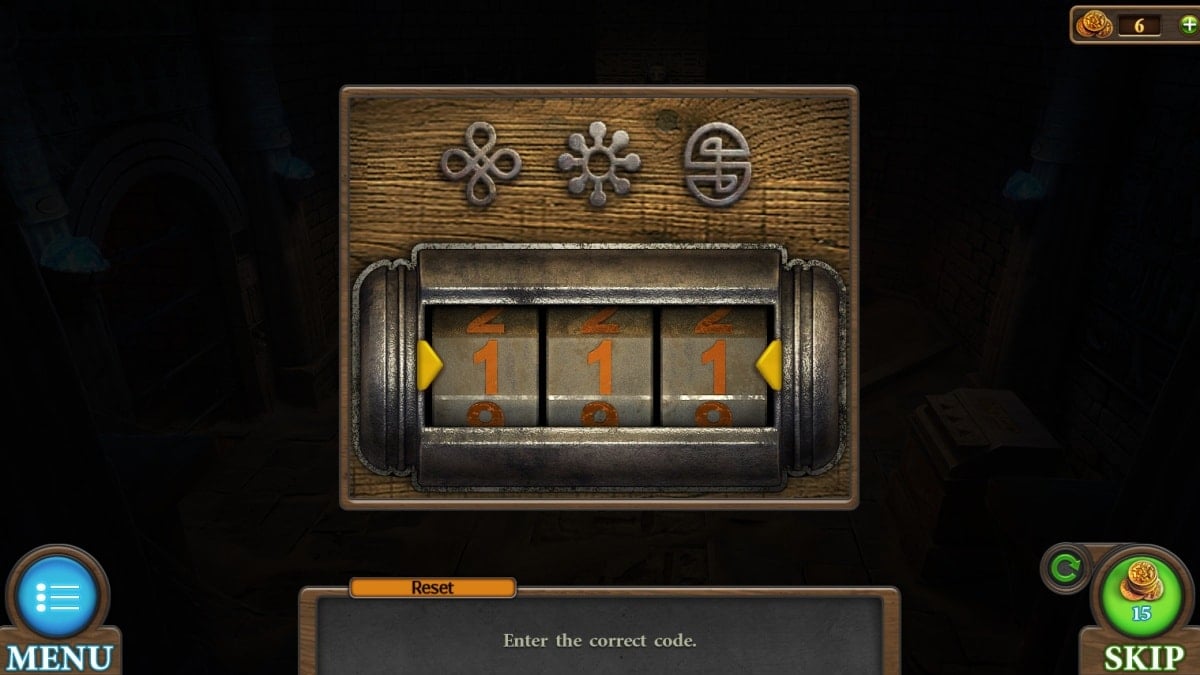
"Enter the correct code."
If you check around the whole level, you will see these images hidden around every room. Count them and enter the totals here to unlock the Bastet idol.
Place all of your idols into the recesses around the exit, and with their favor you may leave the pyramid.
Tricky Doors World 19: Mayan Pyramid complete walkthrough guide
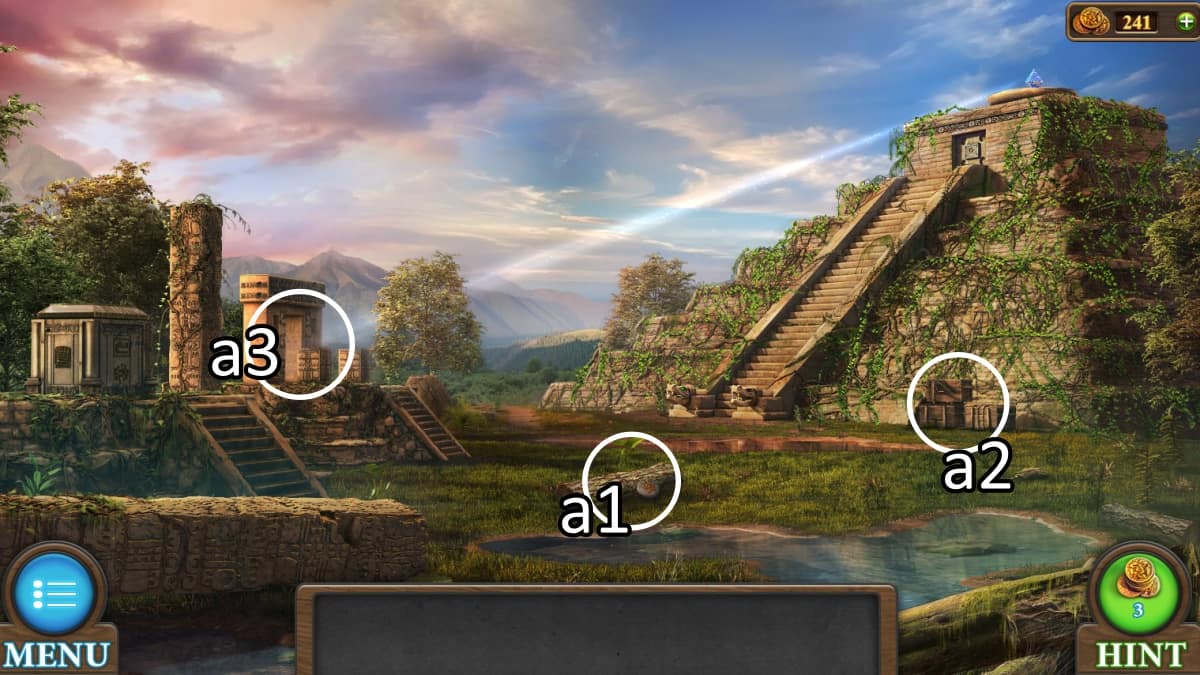
a1. Pick up a knife and your first of four stones.
a2. Use your knife on the box here to gain a rope.
a3. Get up close to the arch to pick up a second stone.
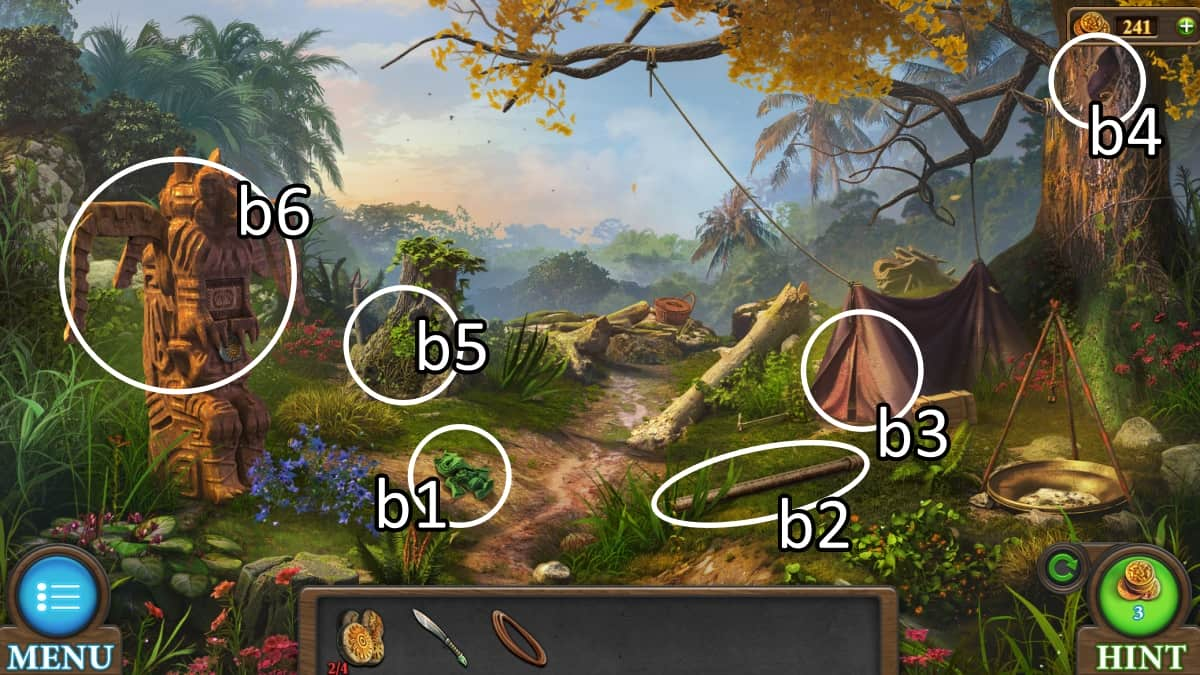
b1. Pick up the first of four jade figurines.
b2. Grab this stick.
b3. Open up the tent to find a glove, a water pouch, and a hook. Use your knife to cut off a cloth.
b4. Add the hook in your inventory to the rope, and use it to hook onto the hollow in this tree. Use your glove to get past the scorpions and pull out a piece of wood.
b5. Cut away the brush here to get an L-shaped detail.
b6. Take out the stone from this totem, and place the piece of wood into its wing to unlock the totem puzzle, detailed below.
How to complete the totem puzzle
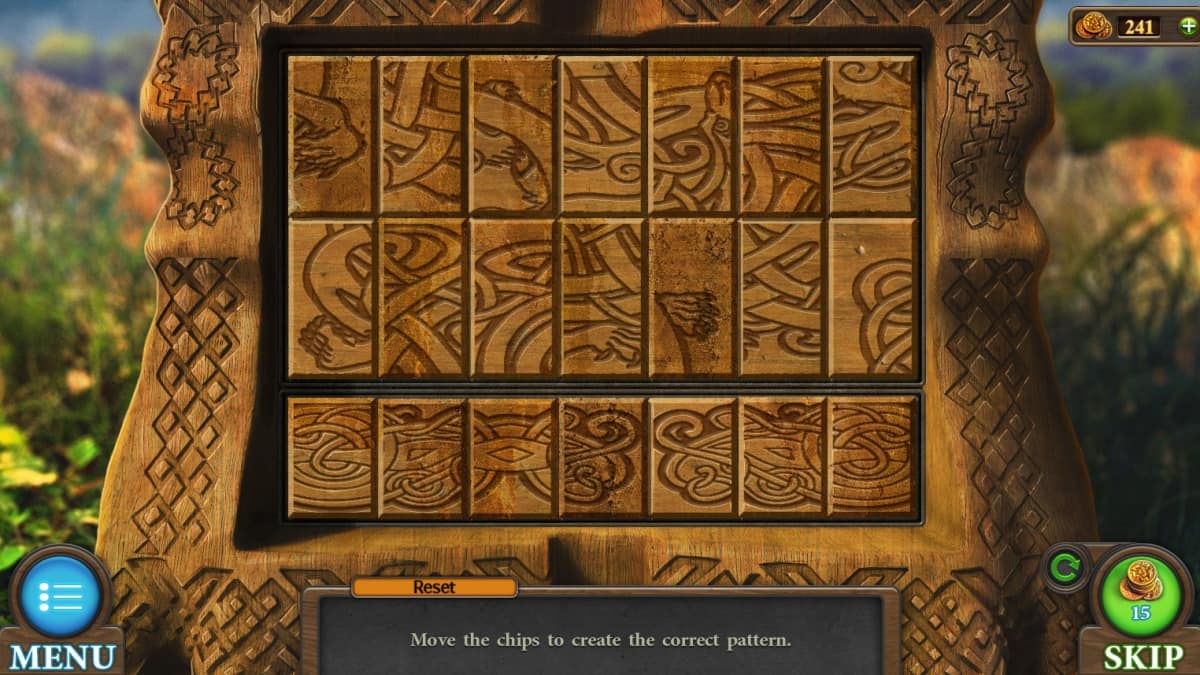
"Move the chips to create the correct pattern."
This is two puzzles in one, as the bottom row can only be moved between itself, and the upper two form one big picture together.
Click any two compatible chips to swap their places, and create a full image on both the top and bottom of the puzzle.
Your reward is the fourth stone.
How to complete pyramid door puzzle
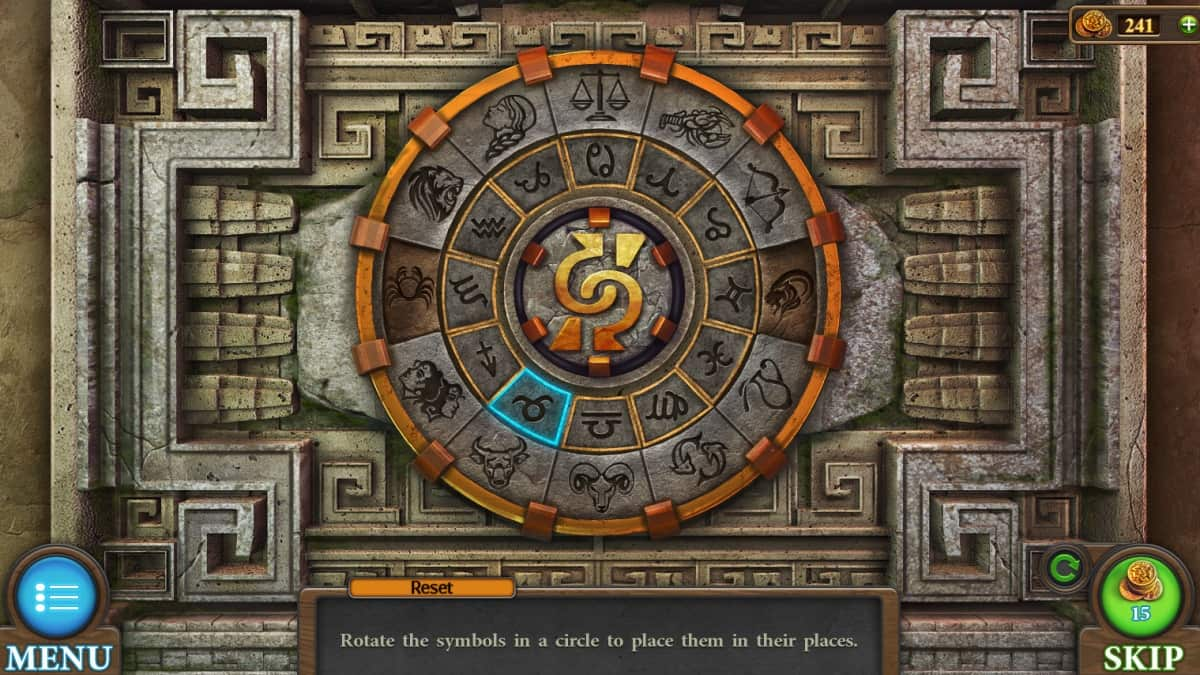
Insert the stones at the top of the steps to unlock the next puzzle.
"Rotate the symbols in a circle to place them in their places."
You'll be matching up the symbols of each zodiac sign. If you aren't sure which symbols go to which zodiac sign, looking up any horoscope can remedy that for you.
You can use the empty slots on each side to place the inner circle pieces temporarily. This is how you can change the order of the signs to match what they're meant to.
Successful completion opens up the inner pyramid.
Inside the pyramid
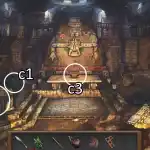
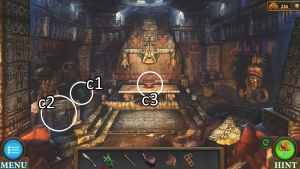
c1. A second jade figurine is inside.
c2. On the left side of this chest, there's a pair of tongs.
c3. Pick up the bowl.
Use your tongs to take away the snake's key, which goes to the chest inside the tent.
How to complete the hieroglyphs puzzle
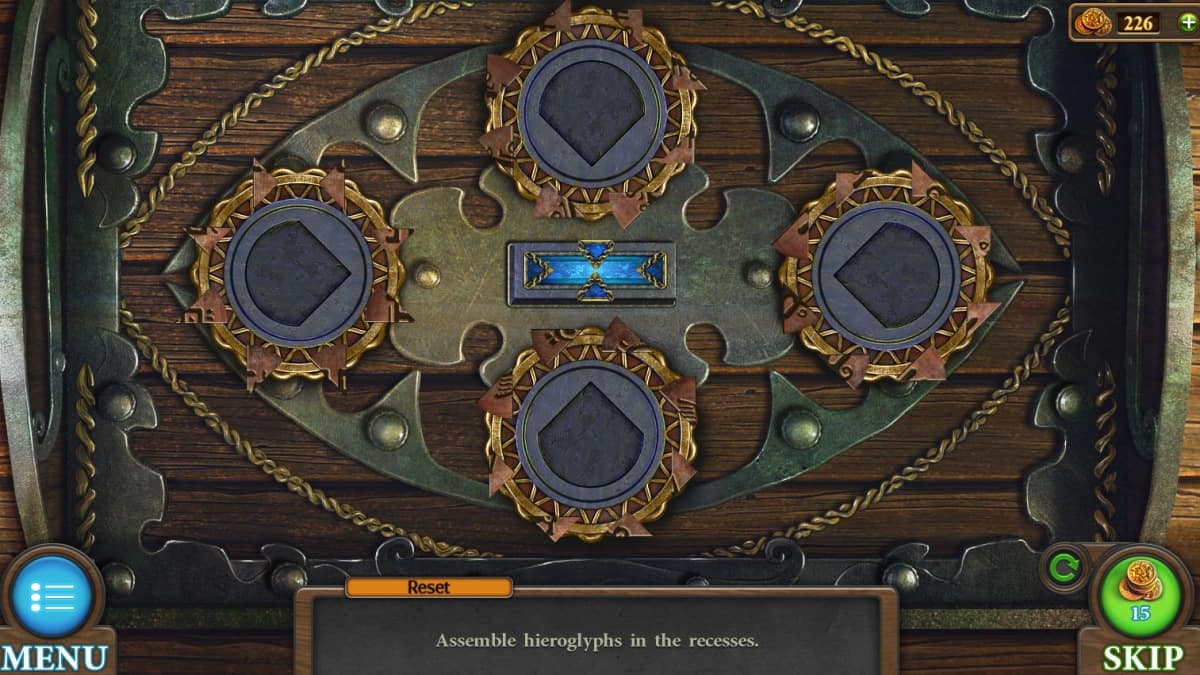
"Assemble hieroglyphs in the recesses."
Every set of heiroglyph can be handled individually. If you click the center button, you'll spin all the pieces of that set, aiming to point them inward. If you click the outer ring, the whole ring will shift clockwise. Your goal is to make the same shape from the pieces as the middle button.
You click the center button to make all the pieces go inward. I recommend for each hieroglyph that you point all the pieces inward and click the center button to get an idea of where the pointed end of the shape is, and move that over to the inner edge.
Your reward is a hammer, a square detail, matches, and a set of instructions to pay ritual to a fiery serpent.
Making a fire

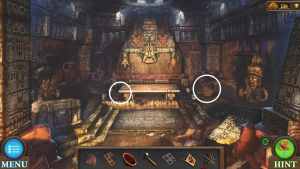
Now that you know you need a fire, you can start to gather the brushwood from around the world. The locations are circled above.
Pick up the cauldron while you're inside the pyramid as well. Approach the snake and use your knife on the resin on the tree next to it.
How to complete the crystal stencil puzzle
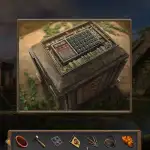

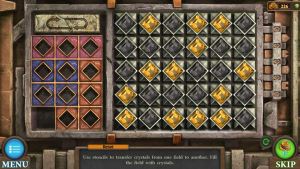
"Use stencils to transfer crystals from one field to another. Fill the field with crystals."
There are two fields of crystals. When you place a stencil of any shape onto the field, the crystals (and blank spaces) come with it over to the other field of crystals. Your goal is to make one field entirely gold, and the other entirely black.
Your reward is a cast and a pry bar.
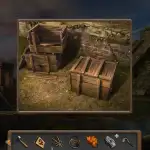
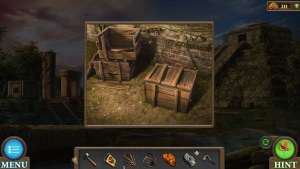
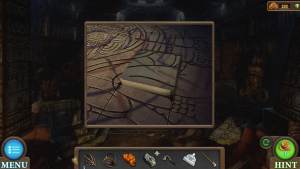
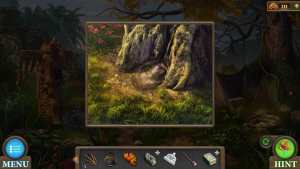
Use your pry bar on this chest to gain a plaster figurine and a shovel blade.
Apply your stick to the shovel blade. When that fails, use your knife to shave it down and create a normal shovel.
The pry bar also gets use inside on this raised area of the floor to earn a casket.
Your new shovel can be used on this mound of dirt to uncover another jade figurine and a seal.
Performing the ritual

Put down your cauldron, brushwood, and resin in this fire pit. Light the fire.
Per the instructions, you'll now use your bowl on the resin. Carry this bowl of resin inside the pyramid to pour it onto the ritual table and light it on fire.
Take note of the symbols provided.
Now we're going to create a new hand for the statue. Click on the cast in your inventory, and apply in order: cloth, plastic figurine, click to wrap, and hammer. Click to pour, and finally add water to earn a paw print.
How to complete mosaic puzzle
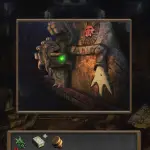
Put the paw print onto the statue to unlock the mosaic puzzle.
"Move the mosaic pieces to get them into place."
Every piece of the mosaic that you can click will have a different set of lines it will move along. Three or more pieces will move all together with every move, so your task is to set them all into place under those constraints.
All of the mosaic pieces are the correct shape as well as color, so you'll have multiple ways of knowing if you're right.
Your reward is a key, and the final jade figurine.
Pull up the casket from your inventory. Use the key, and then the seal, to open it up. This gives you an emerald.
How to complete the jade figurine puzzle
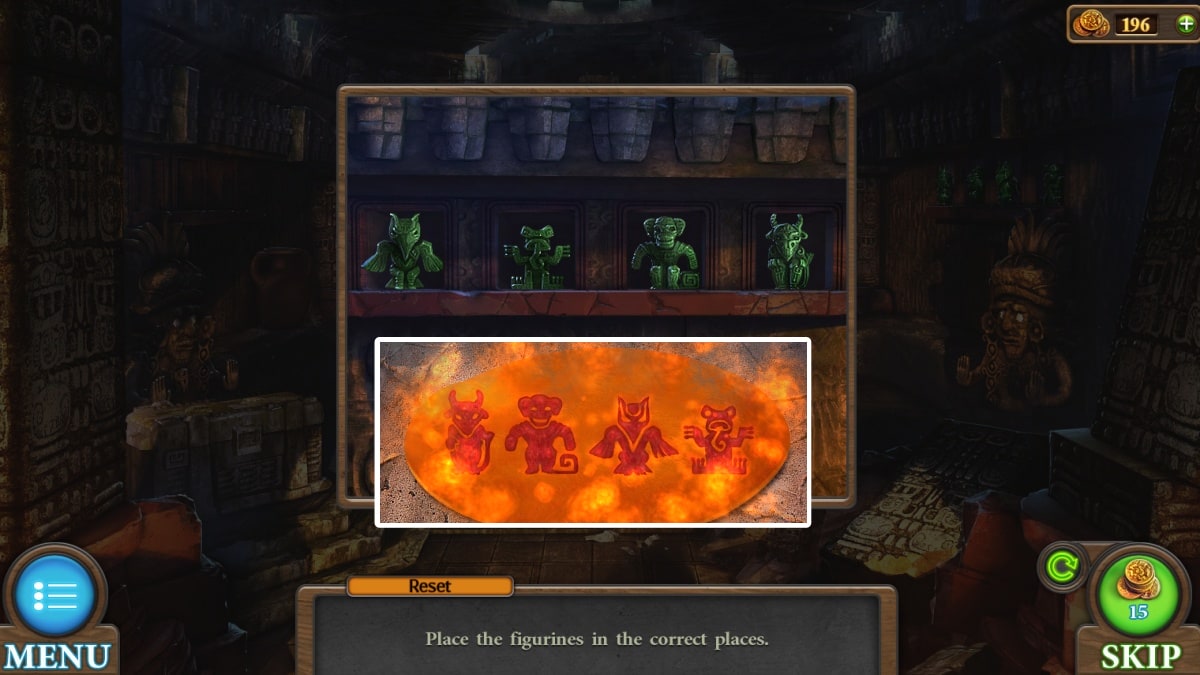
"Place the figurines in the correct places."
The fire ritual you did revealed the order of these figurines. I have included my solution, yours may be different.
This grants you one of two crystals.
Back outside, place the emerald into the eye socket of the guardian snake to unlock the snake mouth puzzle.
How to complete the snake mouth puzzle
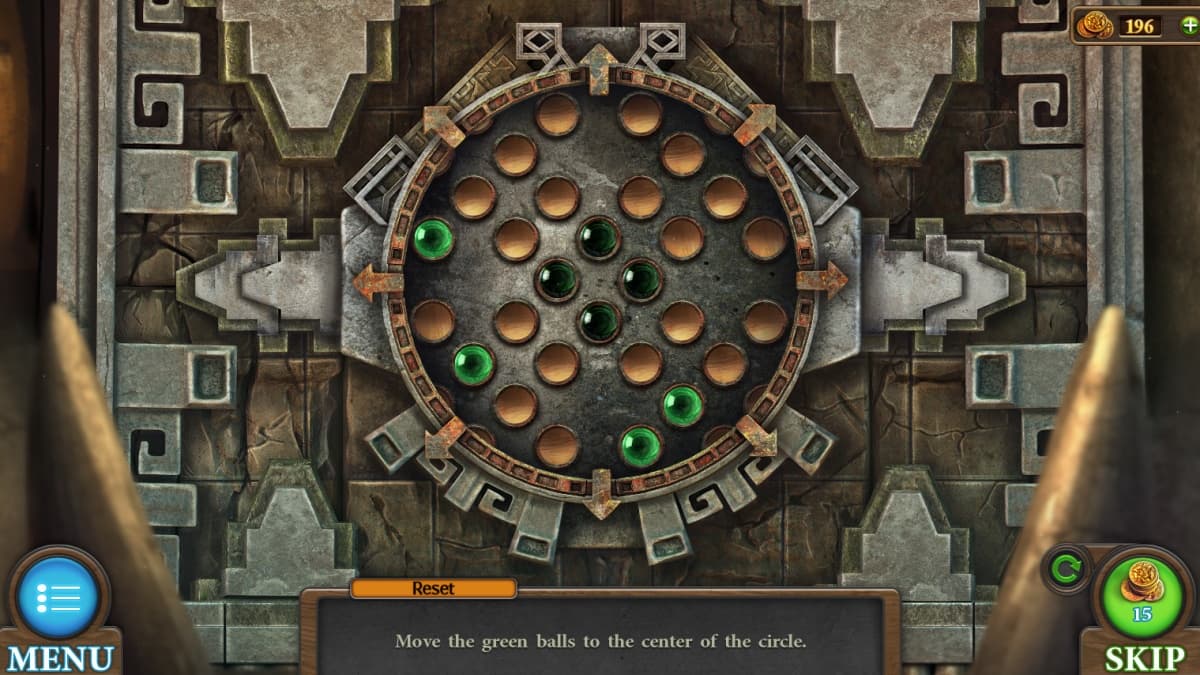
"Move the balls to the center of the circle."
The arrows around the edges of the circle move the corresponding rows of circles. Your goal is to bring the green balls into the center four spaces. You can move them up against the wall and keep pushing in that direction to shift the positions around in relation to each other.
Your reward is the figured detail.
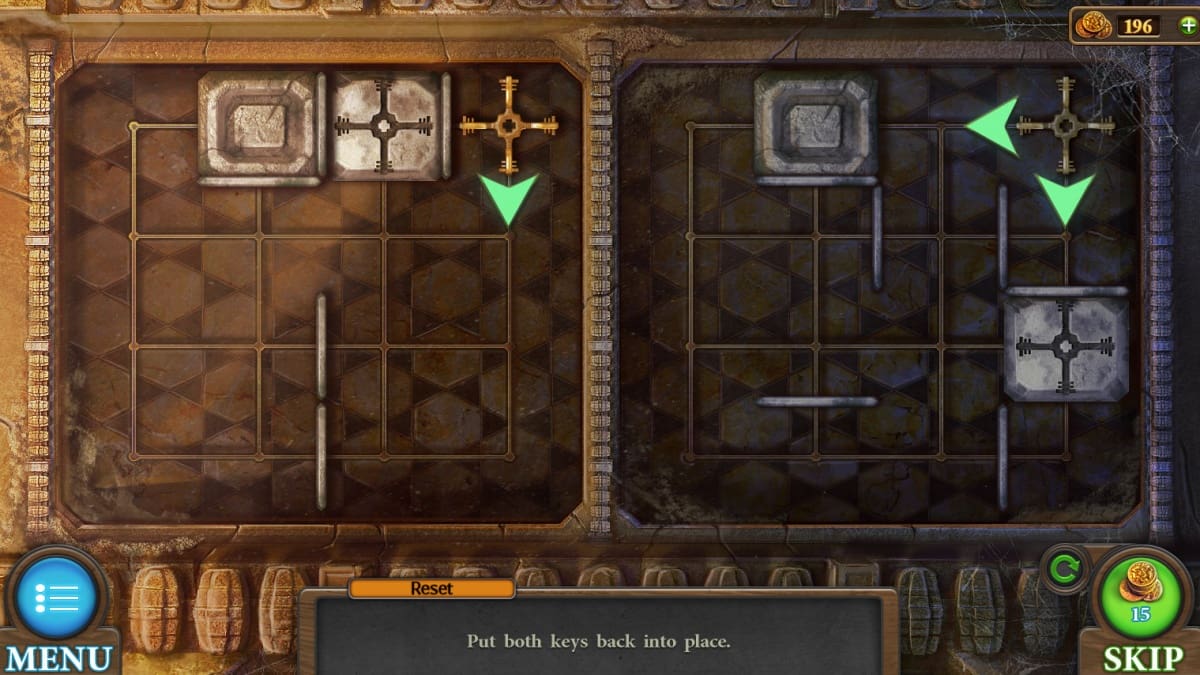
The figured detail goes into the chest on the left side of the inner pyramid.
"Put both keys back into place."
When you click the green arrow on one half of the puzzle, the other half will move at the same time. The keys will stop when up against a wall, so use this to position the keys around the board and into their gray places.
Your reward is a second crystal.
Placing the crystals

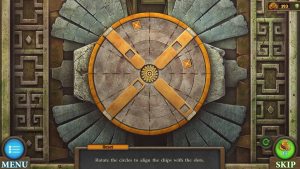
Put the crystals onto the two tables to unlock the next puzzle.
"Rotate the circles to align the chips with the slots."
Each ring moves itself and another ring. Your goal is to get the gold pieces into the slots of each ring. You move the rings by clicking and dragging.
With that, you can successfully leave!
Tricky Doors World 20: Shopping Mall complete walkthrough guide
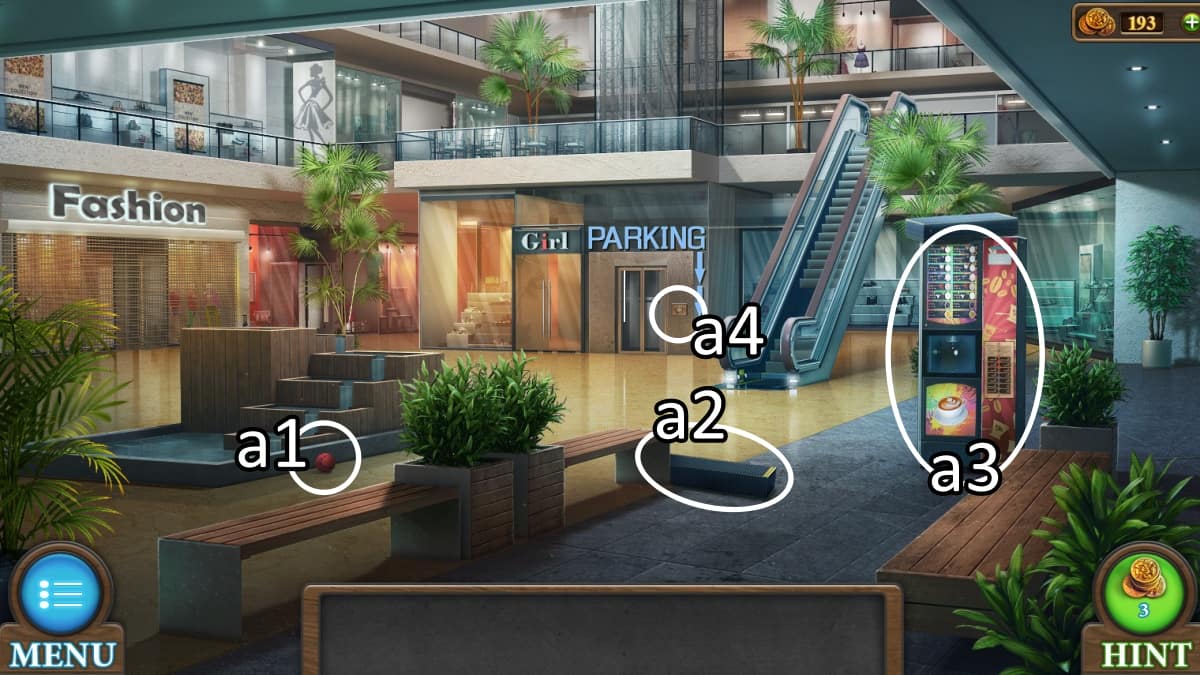
a1. Pick up this ball.
a2. Start your collection of five steps with this one.
a3. Next to the vending machine is a screwdriver. Unplug the vending machine and use the screwdriver to open the machine's panel. There's a chip inside.
a4. Open the down arrow panel to put in the chip and unlock the elevator puzzle, detailed below.
How to complete the elevator puzzle
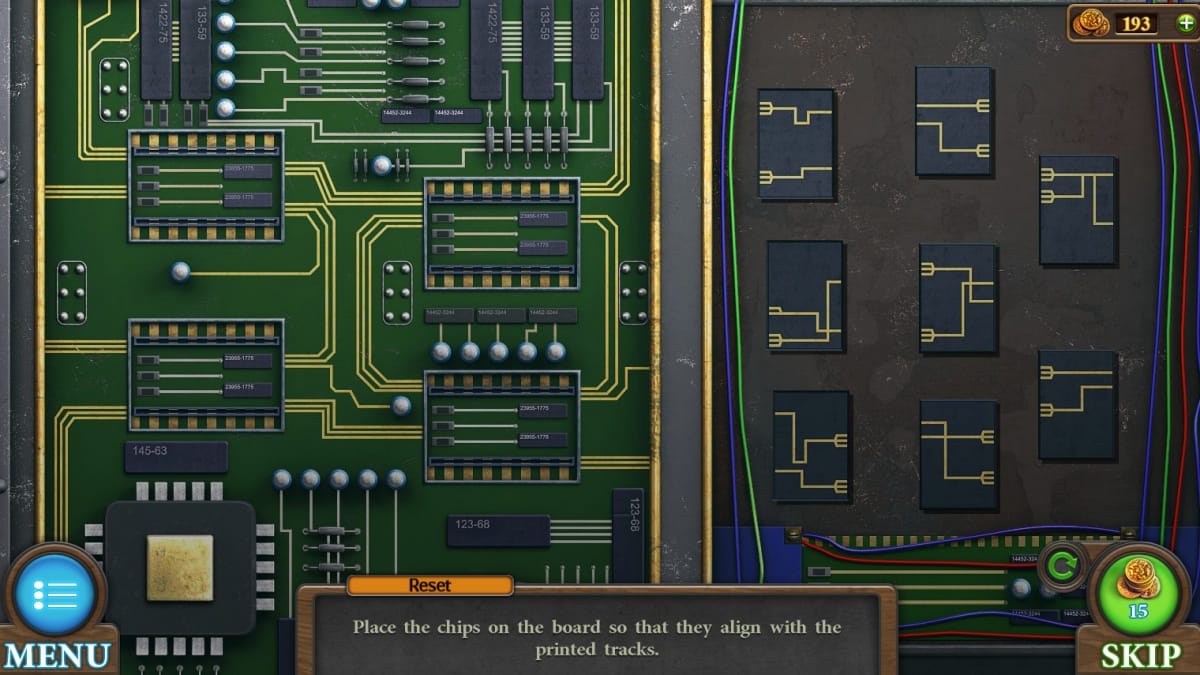
"Place the chips on the board so that they align with the printed tracks."
Click and drag the chips over to the left side board and find where they best line up. You can click chips to rotate them to try more options!
You can now go downstairs.
Exploring the garage
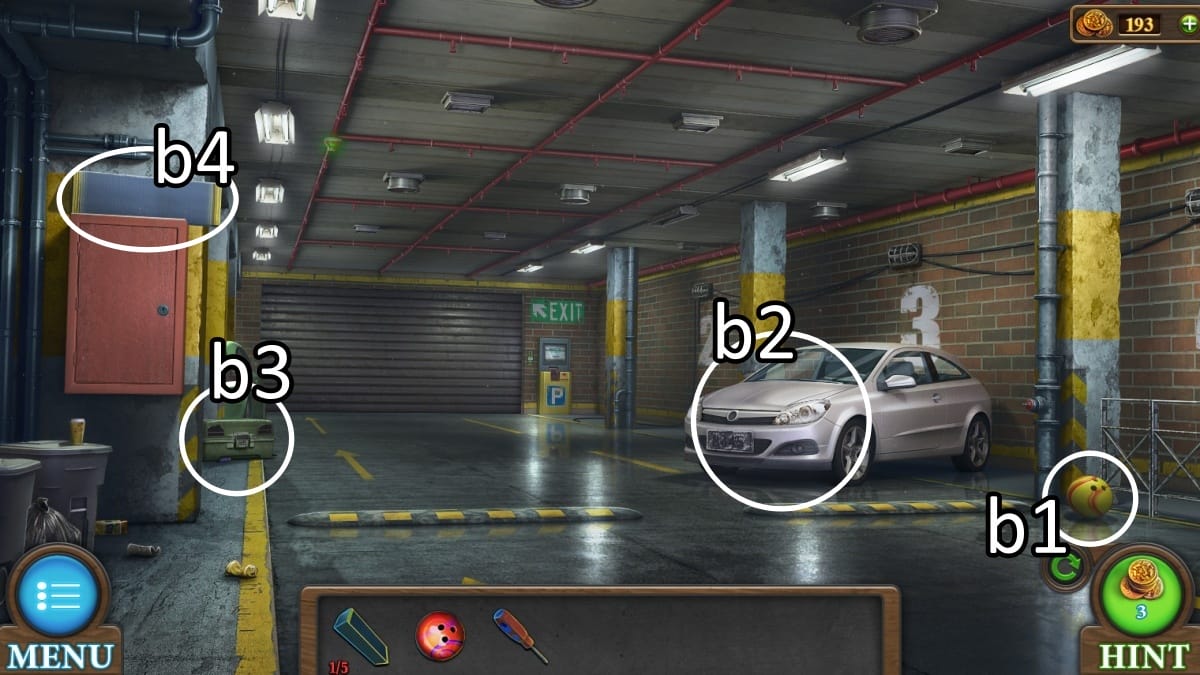
b1. Another bowling ball for your collection.
b2. Pop the hood of this car and use your screwdriver to pull out the battery.
b3. Approach the tool box. There's a magnetic key in front of it. The lock seems to think you already know the answer… See the tool box puzzle, detailed below.
b4. Don't forget this hidden step.
How to complete the tool box puzzle
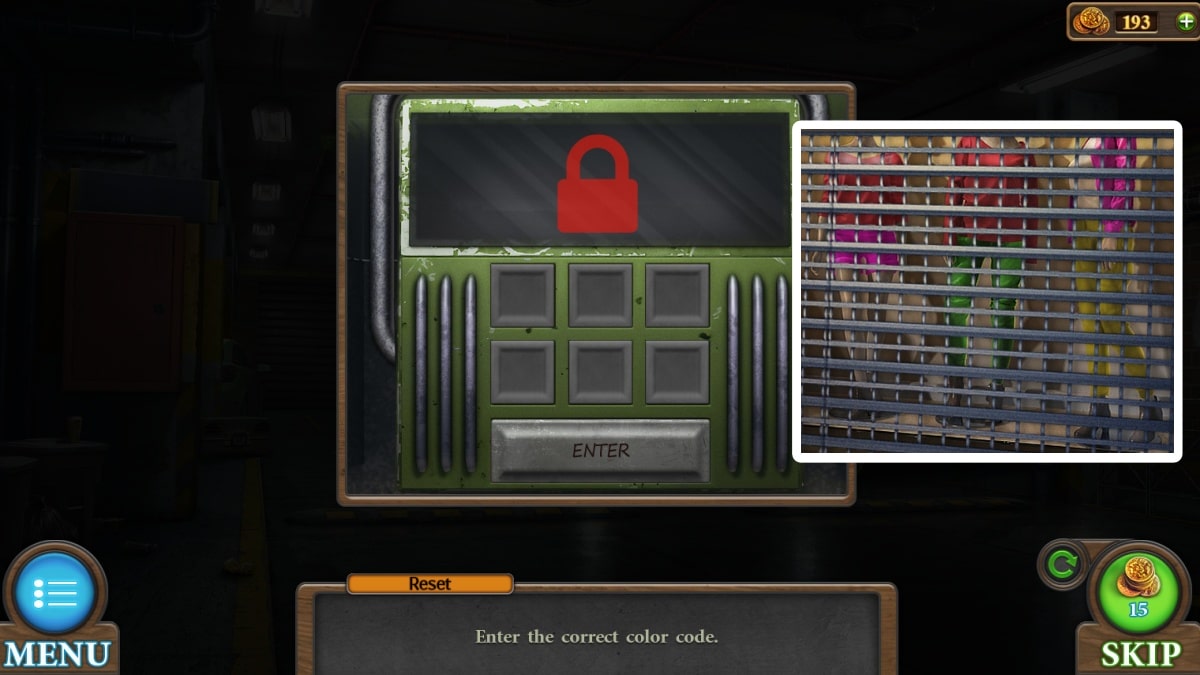
"Enter the correct color code."
Upstairs, there's a fashion store with three mannequins in brightly-colored outfits. You can open this lock by matching the colors with those outfits in order. I have provided my solution above, though yours is likely different.
Click each button until it shows up as the correct color.
Your rewards are an adjustable wrench and a sponge.
How to complete the car battery puzzle

The store called fashion has a grate in front of it, and we'd like that grate gone.
Try to use the magnetic key on the lock, and fail. Use your screwdriver on the bottom of the panel, and hook the wires up to the car battery. This unlocks the car battery puzzle, detailed below.
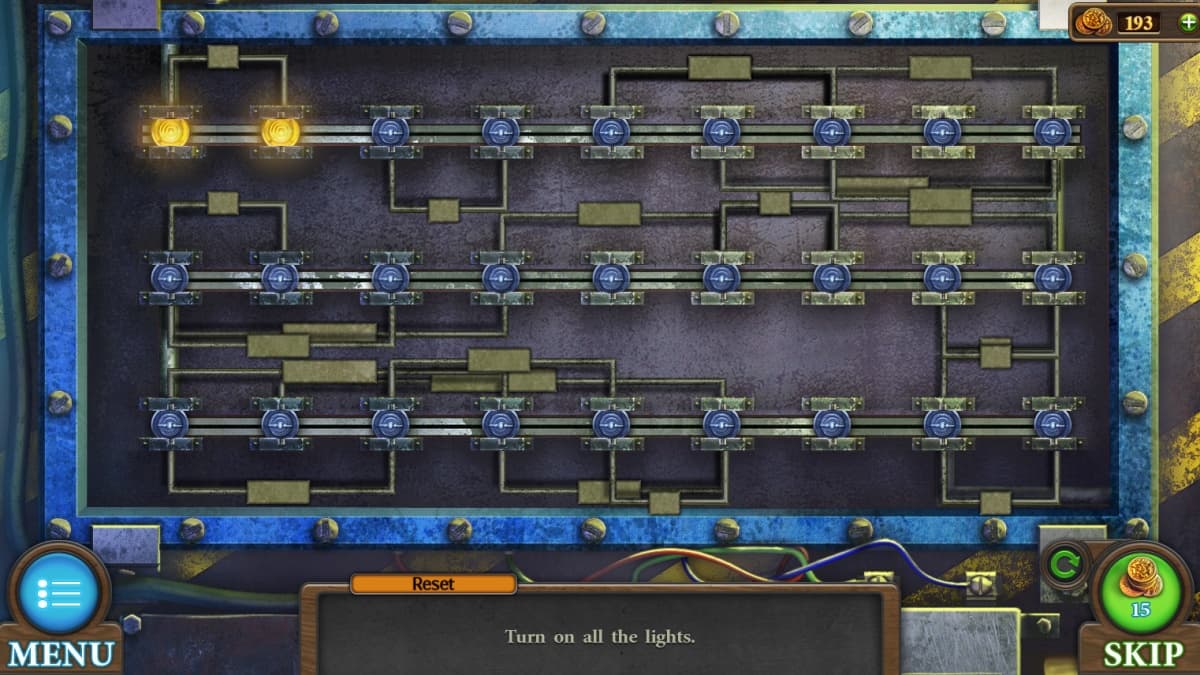
"Turn on all the lights."
You'll be connecting the lights with the metal pieces between them. Every light that's on can connect to other lights to turn them on as well, and so on until the whole board is lit up.
Your reward is that the power is now on, and you can use your magnetic key again. You now have access to the fashion store.
Inside fashion
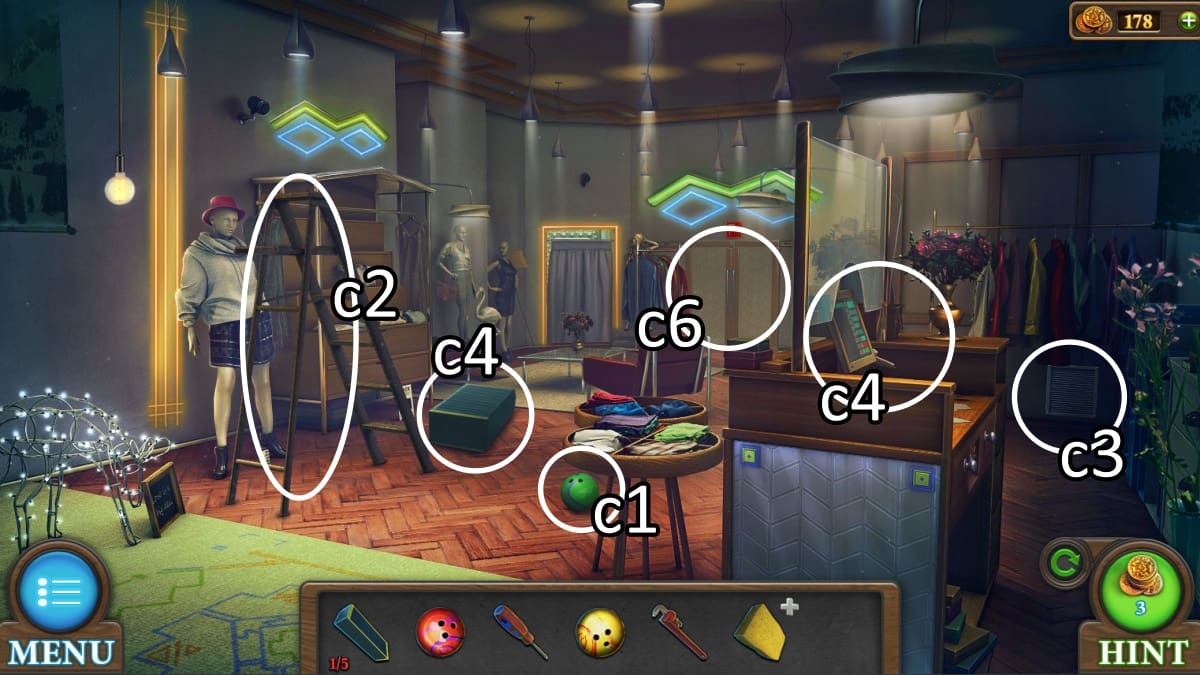
c1. Yet another bowling ball.
c2. Grab this ladder.
c3. Use your trusty screwdriver a final time to undo this panel and earn one of three blue details.
c4. Pick up another step.
c5. Pick up a ruler hidden to the left of the register. Head out to the vending machine real quick to sweep this ruler underneath it and gain a round detail.
c6. Open up the panel here to access the red safety cabinet. It requires that round detail to open, which grants access to the safety chip puzzle, detailed below.
How to complete the safety chip puzzle
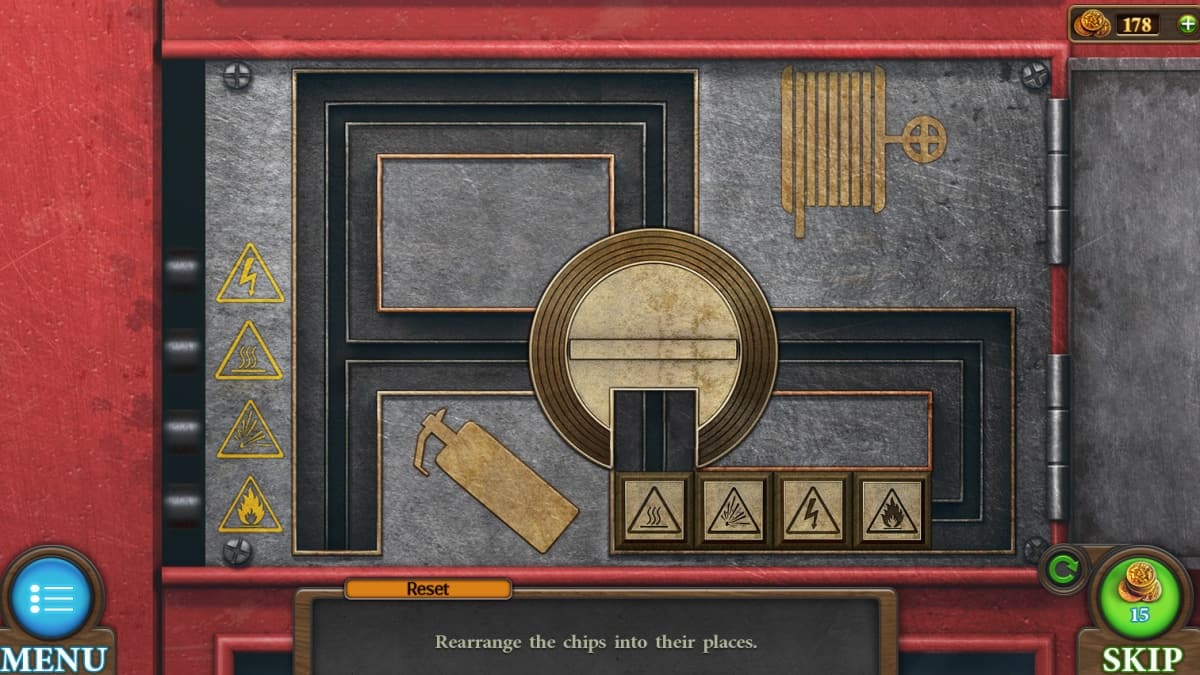
"Rearrange the chips into their places."
You can both move the chips and rotate the center by clicking and dragging. Deposit the chips you aren't ready for yet into various places around you, and put each chip to the left of the center circle in the order they go bottom to top. Note that the pieces do need to be right-side up.
Your reward is a stick and a second blue detail. Use your adjustable wrench to also get a valve.
Draining the fountain
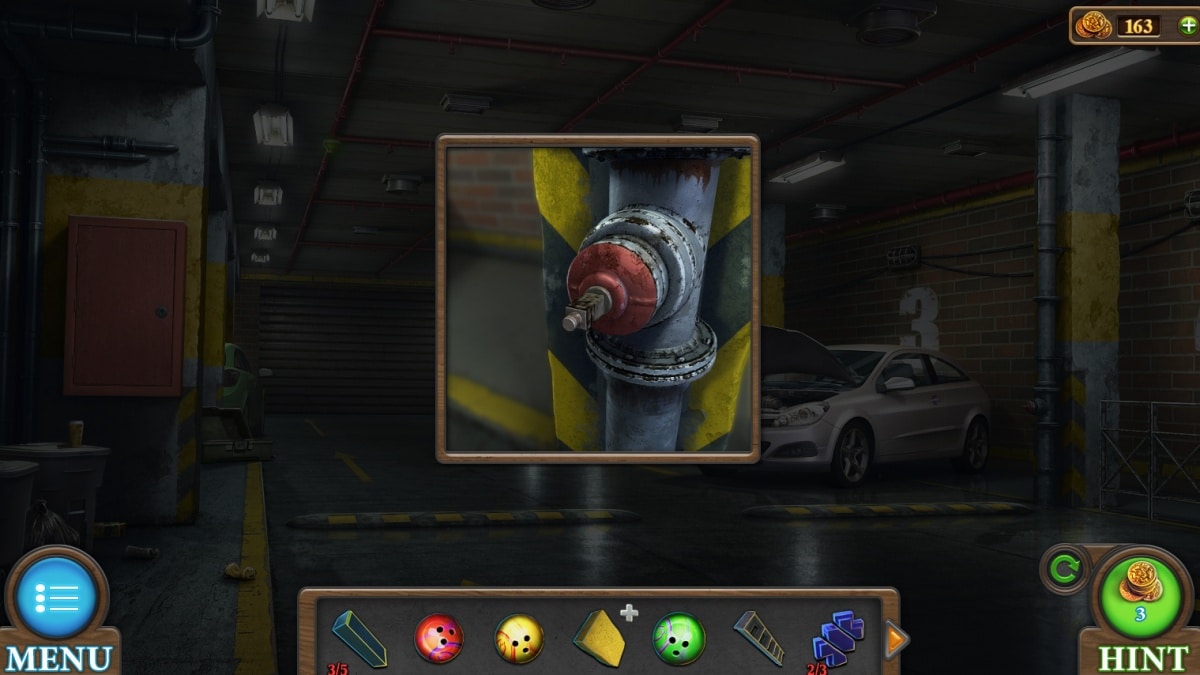
In the parking garage, put the valve here and turn it to drain the water up top.
You can pluck the step out of the fountain, and grab the last step off the vending machine if you missed it earlier.
Now with your five steps, you can apply them to the escalator! Walk on up the stairs.
The bowling alley
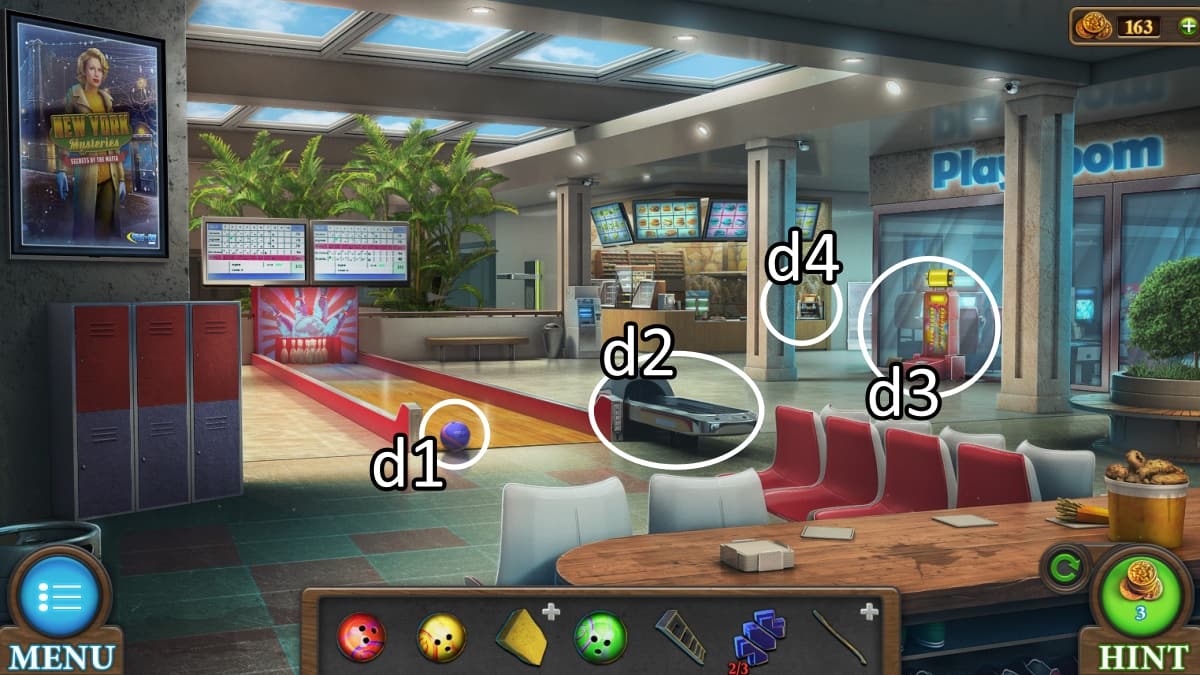
d1. One more bowling ball!
d2. Place a bowling ball on the machine. This unlocks the bowling ball puzzle, detailed below. You do this again with every bowling ball until all puzzles are complete. You currently have four, so you can do them now, or wait until you get your fifth to play them all at once.
d3. From this game, you can pick up a knife and a rag. You'll need electricity to continue.
d4. Pick up a key and an empty kettle.
How to complete the bowling ball puzzle
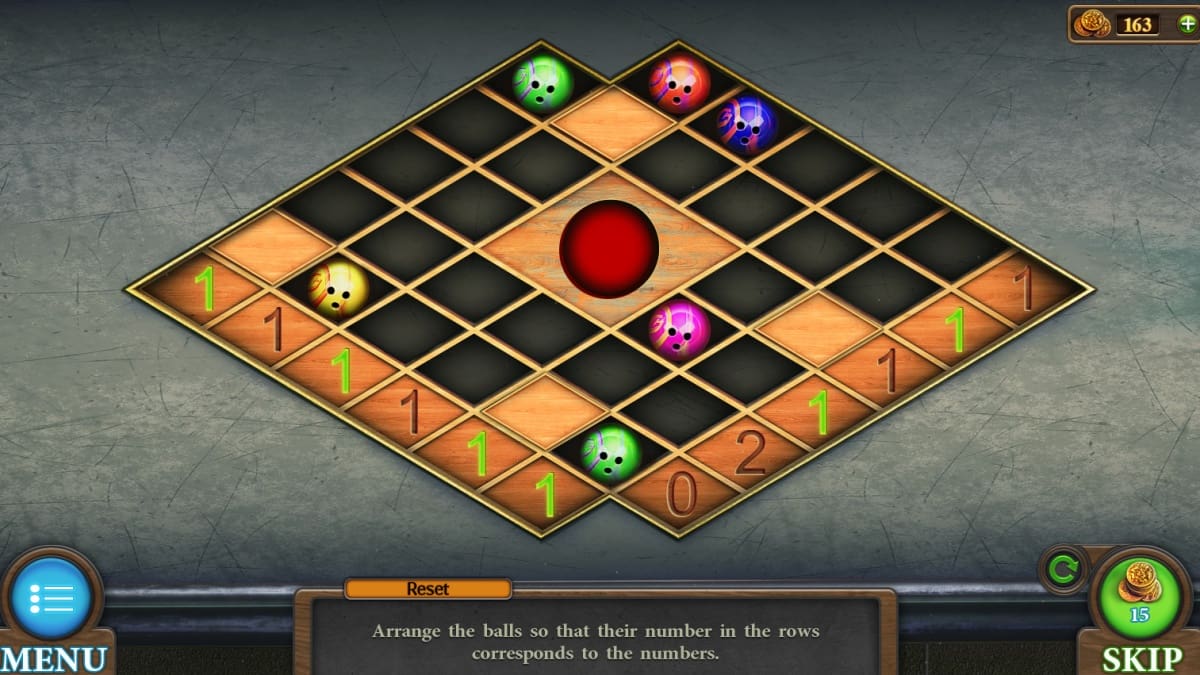
"Arrange the balls so that their numbers in the rows corresponds to the numbers."
The numbers at the edges show how many balls should be in each line and column. Start with the ones that are 0 or 1 to make sure you're not overcrowding, and distribute the rest of the balls where they belong.
This is a multi-part puzzle and requires five different bowling balls from around the map to play.
Your reward will eventually be insulating tape.
Tying up loose ends

Cut off the vending machine's wire with your knife.
Use the key in the garage to get pincers and a handle.
The pincers collect your final detail from the oil, and you can head into the fashion store to unlock the register puzzle.
How to complete the cash register puzzle
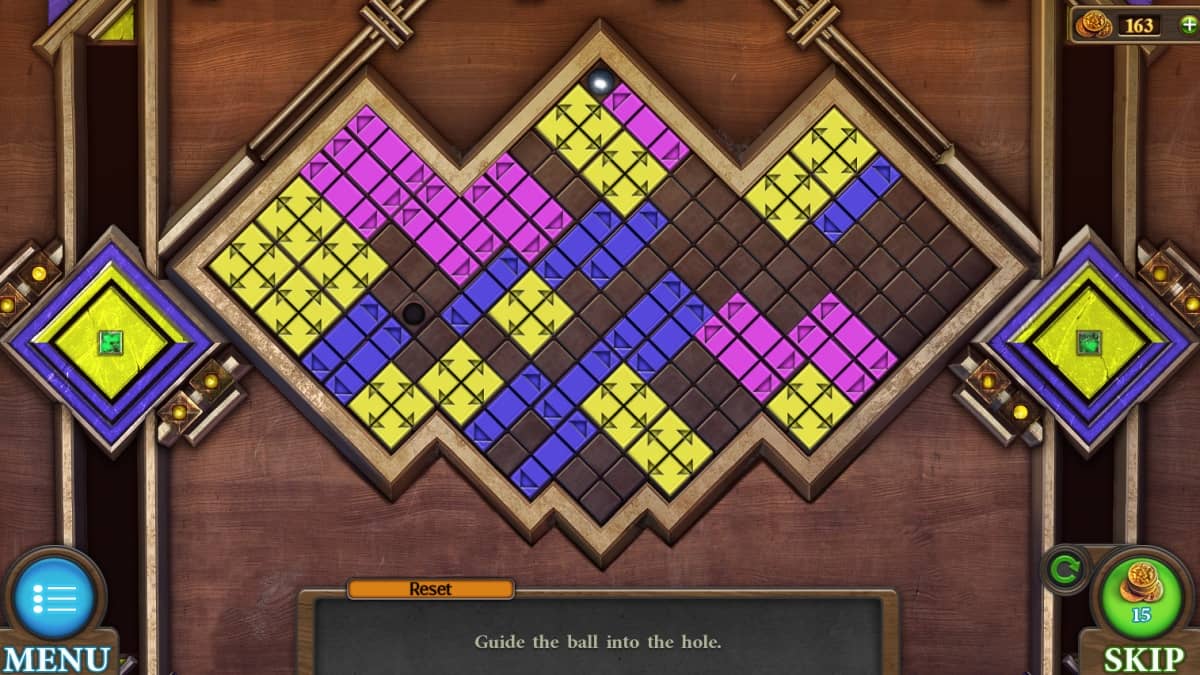
"Guide the ball into the hole."
The ball starts in the very top of the puzzle. This is a gravity puzzle, as every time you move a piece out of the way, the ball will automatically try to fall as far as it can, regardless of where you would really rather it go.
This is a tricky puzzle, but if you move slowly and carefully you can inch your way towards success.
Your rewards are the final bowling ball for the puzzle mentioned above, and the head of a hammer. You can go ahead and use your handle on the hammer immediately, paring it down to size with your knife.
Strength machine warm-up
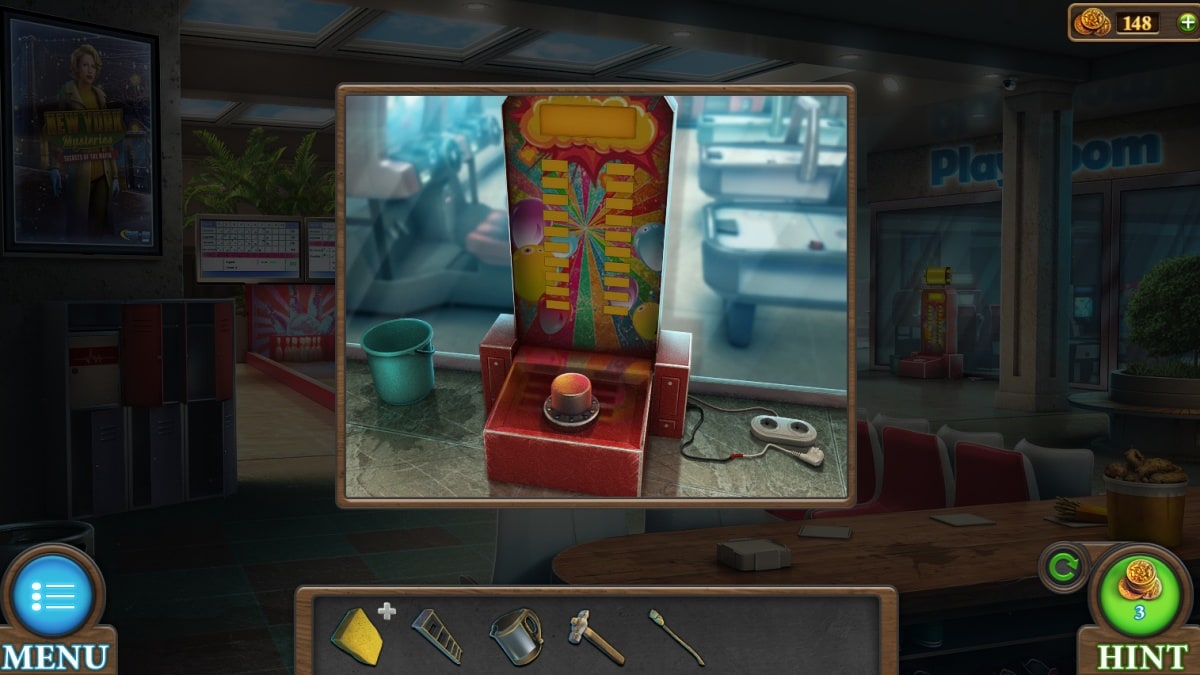
After you're done bowling, apply your plug and insulating tape to the strength machine. Hit it with your hammer to receive a key!
While you're up here, go ahead and apply the rag to your stick and dip it into oil. You know how these torches go by now, even if it's an odd place to need one.
To light your torch, go back into the fashion store and smash the light bulb with your hammer. The sparks will light your torch.
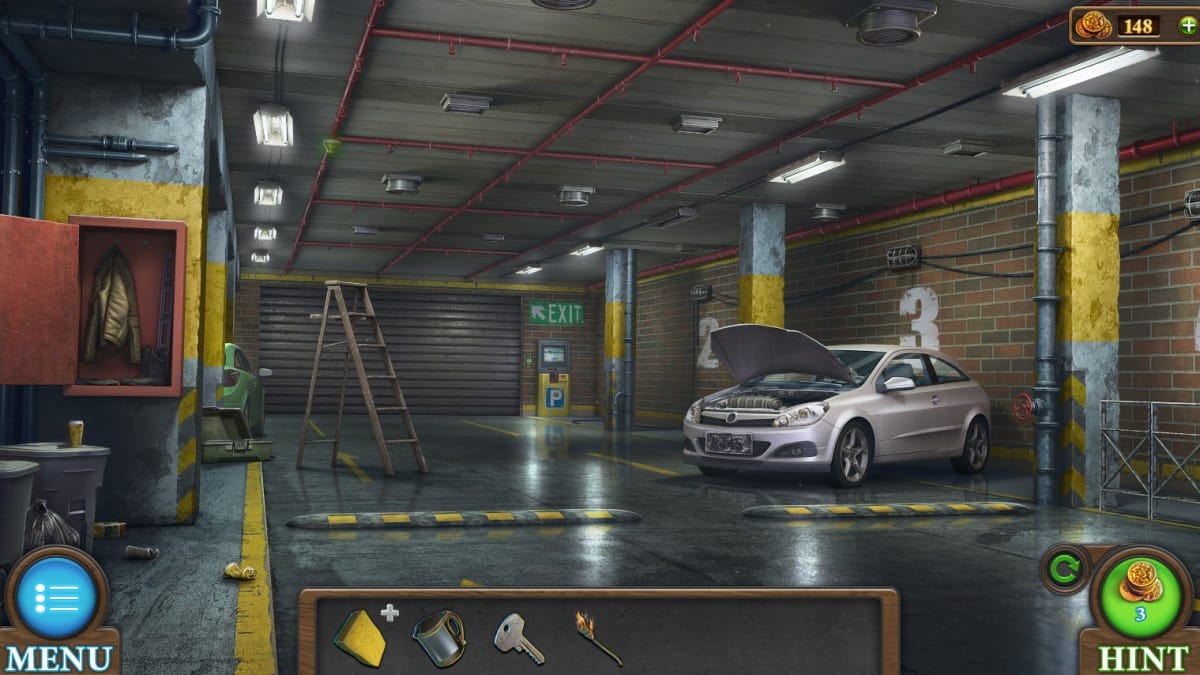
Down in the parking garage, set up your ladder to get up to some mischief. Hold up your torch to the fire alarm to set off the sprinklers, which you then use to fill up your kettle.
Put the kettle back where you found it (next to the fryer) to boil.
Down in the fashion store, you can steam up the dressing room mirror to discover a six-digit code! For me, this was 197514, but yours will likely be different.
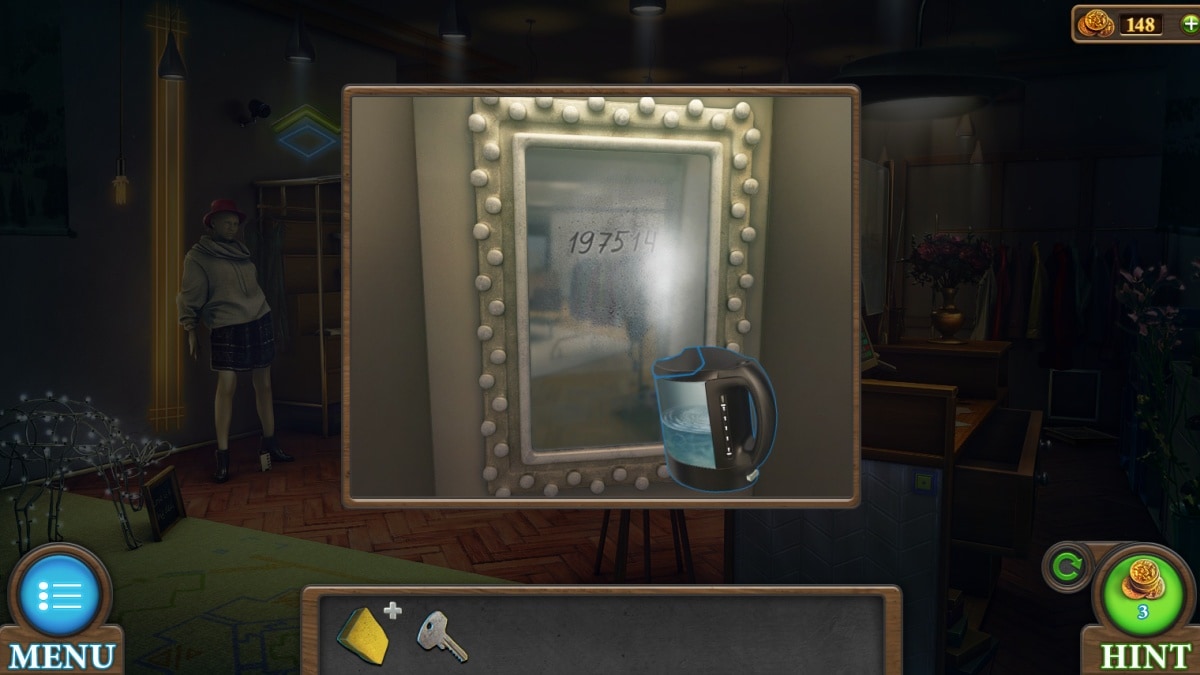
This code and your key get you into the cash register, where you pick up another key and.. 'borrow' a banknote.
Your new key goes to the first aid kit upstairs, found by opening all the lockers on the left side of the bowling alley.
How to complete the first aid kit puzzle

"Rotate the puzzle pieces to complete the picture."
Your goal is to create one complete image by combining all the tiles in the puzzle. Clicking between any set of two tiles will swap those two tiles, and you'll be swapping them around until they're where you want them to be.
For your trouble, you get a bottle of rubbing alcohol, which you can apply to your dry sponge.

You only need two things to make your final escape: The money you stole, and the license plate number of the car you're impersonating. Use your sponge to clean off the license plate of the car, and approach the (thankfully still functional) parking slip machine.
Insert the bill, type in the car's plate, and you'll receive a parking slip to enter directly to your left.
The garage opens, and you're out!
Thank you so much for playing Tricky Doors for all 20 complex and unique levels alongside us.
For more game walkthroughs, check out Botany Manor Walkthrough (All achievements) on Pro Game Guides.