
Star Savior is an anime-style turn-based idle RPG featuring a wide roster of characters known as Saviors. There are 42 characters, each with their own abilities and combat roles. However, not all perform equally in every situation. Therefore, choosing the right characters is important as it can make a huge difference in both early and late-game content. So, to help you pick the best ones, here’s a complete Star Savior Tier List ranking every one of them.
Star Savior Tier List - All Saviors Ranked
⇓ META SAVIORS ⇓

Naru

Smile

Seira

Roberta

Omega

Lydia

Luna

Lacy

Emily

Elisa

Charlotte

Bunnygirl Scarlet

Bell

Asherah Waltz of Sta

Asherah

Yoo Mina
⇓ VERY GOOD SAVIORS ⇓

Besta

Annah

Trish

Tanya

Serpang

Petra

Haydee

Frey

Dana

Bunnygirl Claire
⇓ DECENT SAVIORS ⇓

Muriel

Lugh

Lily

Kyra

Harley

Frey Noble Princess

Epindel

Bunnygirl Charlotte

Rosaria

Hilde
⇓ MID SAVIORS ⇓

Vera

Scarlet

Marcille

Clarissa

Claire
S Tier - Best Saviors in Star Savior
| Savior | Rarity | Pros & Cons |
|---|---|---|
 Asherah | SSR | + Asherah deals strong overall damage output through its passive, hard-hitting AoE Special and Ultimate skills + Has excellent self-sustain and burst with built-in speed and Crit rate buffs, which makes her good for both PvP and PvE + Excels at wave clearing and applying consistent pressure on multiple targets by stacking Chill and Nova Burst |
 Asherah Waltz of Starlight | SSR | + Provides excellent team sustain through Max-HP scaling heals and debuff cleanses + Enhances overall team tempo and survivability by boosting allies’ Action Gauge and granting supportive buffs + Asherah Waltz of Starlight deals decent damage while building Insight stacks, which allows her to deal more damage to chaos units |
 Luna | SSR | + Luna deals strong and consistent AoE damage through multiple all-enemy attacks, supported by a self-crit rate buff. + Deals heavy burst damage to enemies by inflicting Bind, which allows her to deal even more damage to enemies with all-enemy attacks + The Insight stacks help her to scale well into the late game, especially in PvP against Chaos units |
 Seira | SSR | + Seira provides strong team support by granting attack damage buffs and by boosting an ally’s Action Gauge + Provides reliable single-target crowd control and utility through speed debuffs, which further reduces enemy damage windows + Maintains steady offensive pressure by providing various offensive and defensive buffs, which are useful both in PvP and PvE |
 Elisa | SSR | + Elisa provides exceptional support with powerful single-target healing and revives that help allies quickly return to battle + Elisa enhances team survivability through Holy Blessing, which grants allies a 25% reduced damage buff, which is useful in late-game PvE + Maintains consistent utility while also dealing damage through Agitation stacks, which deal more damage to Order units. |
 Lydia | SSR | + Lydia has strong offensive scaling through her attack damage passive, which makes her stronger in late-game PvPs + Provides valuable debuffs that reduce the speed of the enemy and Effect resistance by several rounds + Becomes even more powerful in the late-game due to her Agitation stacks, which deal more damage to Order units |
 Lacy | SSR | + Lacy deals strong burst and sustained damage through attack damage scaling and bonus damage against enemies affected by Entangled Dream. + Grants self Action Gauge boosts and speed boosts, which increase her overall damage output in between turns + Has great survivability due to its passive healing that gets procked when an enemy, inflicted by Entangled Dream, attacks her |
 Bell | SSR | + Bell can snowball games by stacking attack and large Action Gauge boosts whenever allies or enemies are defeated. + Provides strong utility and control by removing enemy debuffs and also applying Silence to disrupt key enemy units in PvP + Can store Leap stacks, which allows her to deal more damage against Moon units in the late-game |
 Emily | SSR | + Emily provides strong team protection and support through barriers and defensive buffs, which makes her a solid pick in PvP + Provides excellent utility with cooldown reduction, extra turn for sustained frontline pressure + Deals decent AoE damage that scales well by stacking Chill, which is useful against Sun attribute units |
 Roberta | SSR | + Roberta deals extremely high single-target burst damage and gains massive Crit Rate bonuses, which further boost her damage output + Great unit in PvP, as she can deal more damage when she is at 50% HP, which further increases when HP is below 50% + Provides strong sustained pressure and gains survivability by removing debuffs and gaining additional Toughness Fixed damage from Nova Burst. |
 Omega | SSR | + Omega has explosive scaling through Power-Up Star stacks that enable multiple Mega Punch! Triggers, determining overall damage output + Has strong synergy with Star Attribute allies by gaining frequent Leap stacks and self-attack damage buffs + Has the best single-target finishing capability due to her Ultimate, which makes her strong in both PvP and PvE |
 Charlotte | SSR | + Charlotte provides strong single-target damage and scaling through attack damage boosts and bonus burst damage from her Ultimate + Provides team support by granting allies crit rate and attack damage buffs while gaining extra turns to maintain combat pressure + Applies valuable debuffs like attack damage reduction onto enemies and Action Gauge increases, which makes her a reliable pick for PvP |
 Bunnygirl Scarlet | SSR | + Bunnygirl Scarlet has strong single-target damage through ATK scaling and bonus damage against Burn-affected enemies. + Applies reliable Burn debuffs that deal damage over time, improving sustained DPS + Maintains steady offensive pressure with Toughness Fixed DMG boosts from Nova Burst |
 Smile | SSR | + Smile deals strong sustained damage due to its attack damage scaling and Leap stacking, which allows her to deal extra damage to Moon units + Applies useful debuffs such as guaranteed defensive reduction and Burn effects, improving overall team damage output + Maintains consistent offensive pressure through its massive AoE damage windows while also dealing single-target burst |
 Yoo Mina | SSR | + Has strong scaling while also gaining Crit Rate buffs that enhance its overall damage output + Yoo Mina maintains excellent combat pressure with critical hits and Leap stacking for maximum damage against Moon units + Provides strong AoE pressure and burst potential, which helps clear waves and wipe enemies instantly |
 Naru | SR | + Naru has a solid single-target burst, which scales even more in the late-game + Deals bonus damage against debuffed enemies, which makes her strong with any top-tier utility character + Maintains steady offensive pressure with self-attack buffs, and is especially useful for PvP |
A Tier Saviors
| Savior | Rarity | Pros & Cons |
|---|---|---|
 Bunnygirl Claire | SSR | + Bunnygirl Claire deals high single-target burst through stacking Crit Rate and attack damage buffs + Maintains strong pressure with Action Gauge boosts, self-buffing - Relies heavily on critical hits and enemy buffs for peak damage, making performance inconsistent |
 Frey | SSR | + Frey provides strong team support with Crit Rate buffs for all allies and useful AoE damage from her Ultimate + Gains powerful burst damage output through High attack damage buffs, which makes her a menace in the late-game - Requires proper support to maximize its true damage output |
 Serpang | SSR | + Provides strong team sustain with frequent Max HP-scaling heals, including single-target healing and a full-team heal through her Ultimate + Enhances team survivability by granting Skill damage Nullification and applying guaranteed attack damage to hinder enemy damage - Has limited personal damage output and relies mainly on supportive utility. |
 Tanya | SSR | + Tanya deals strong single-target burst damage, which is extremely useful for executing enemies in PvP + Provides useful team support by granting allies Crit Rate Up while boosting her own Action Gauge for added pressure - Lacks AoE damage, thus limiting her overall versatility and damage output |
 Trish | SSR | + Trish deals extremely high single-target burst with built-in Crit damage scaling, which is useful in the late-game + Maintains strong offensive pressure with Leap stacking and consistent Toughness Fixed DMG enhancements from Nova Burst. - Lacks AoE damage and meaningful team utility for PvE progression |
 Petra | SSR | + Petra deals strong single-target burst damage due to her raw attack damage, while also applying defensive reduction onto enemies that improves overall damage output. + Maintains good combat pressure with speed and mobility buffs, which maximizes damage output - Relies heavily on a proper lineup for setup and peak performance. |
 Haydee | SSR | + Haydee has strong frontline durability through DEF scaling, barriers, Guard, and consistent Toughness restoration that improves survivability + Provides useful crowd control and utility with guaranteed speed reduction during turns while also dealing decent damage - Lacks damage, which makes it inconsistent in PvP |
 Dana | SSR | + Dana provides strong damage scaling and team synergy by granting an attack damage buff to herself and the highest-attack damage ally + Maintains good AoE pressure and utility with her Ultimate’s multi-target attack and speed reduction - Has relatively limited defensive utility than most high tier choices |
 Besta | SR | + Grants strong survivability and steady damage through Max HP scaling and defensive buffs that improve frontline pressure + Provides a useful utility with guaranteed attack damage reduction, helping reduce enemy damage - Lacks AoE attacks and team support options, limiting overall versatility. |
 Annah | SR | + Annah has strong self-sustain and frontline durability through Max HP scaling heals and utility buffs for longer sustenance + Provides useful single-target control by applying attack damage reduction, which ensures sustainability during fights - Lacks AoE damage and meaningful utilities for late-game scaling |
B Tier Saviors
| Savior | Rarity | Pros & Cons |
|---|---|---|
 Rosaria | SSR | + Rosaria deals powerful burst damage with strong AoE damage output from her Ultimate + Works well with most lineups due to her overall versatile kit - Requires proper support and utility to be effective in the late-game |
 Hilde | SSR | + Hilde has strong frontline durability with Max HP scaling damage, barriers for allies, Immunity, and defensive buffs for sustenance + Provides useful AoE pressure and control through Taunt - Requires proper setup and utilization of utilities to be effective during fights |
 Bunnygirl Charlotte | SSR | + Bunnygirl Charlotte provides strong team support by granting all allies attack buffs while gaining extra turns and Action Gauge boosts for excellent combat pressure + Deals heavy burst damage to Star attribute units by stacking Ignition - There are better Assassin units available for much better PvP performance |
 Epindel | SSR | + Epindel deals strong single-target burst damage and built-in lifesteal sustain, suitable for PvP + Maintains excellent pressure and survivability with Immunity, extra turns, Speed buffs, and consistent Toughness restoration. - Can sometimes perform inconsistently in PvE due to the lack of AoE |
 Frey Noble Princess | SSR | TBA |
 Harley | SSR | + Harley provides strong team utility with defensive buffs and other useful utilities that work well with a burst damage unit. + Gains numerous Speed buffs that help close distances during turns and deal chip damage - Performance heavily depends on team synergy |
 Kyra | SSR | + Kyra deals strong single-target burst and bonus damage in Stealth mode, which gives a great advantage in PvP + Gains useful attack damage buffs that enhance her overall damage and execute potential - Lacks AoE pressure and meaningful team support, which is required for PvE progression |
 Lily | SSR | + Lily provides strong team utility with barriers for allies, attack damage reduction debuffs on enemies for better survivability, and pressure + Maintains solid AoE pressure and burst potential by providing attack damage buffs, which is useful for clearing PvE content - Relies on buffs and utility usage to remain effective during fights |
 Lugh | SSR | + Lugh provides strong single-target control by applying Freeze, which is great for disrupting enemy strategies + Maintains good pressure through speed buffs, which is useful in PvP - Lacks AoE damage and meaningful team support to be useful in PvE |
 Muriel | SSR | + Muriel deals burst damage through her high Crit damage, which is further amplified against debuffed enemies + Provides useful AoE pressure and utility by inflicting Burn and lowering the attack damage of all enemies - There are better Caster playstyle characters available |
C Tier - Worst Saviors in Star Savior
| Savior | Rarity | Pros & Cons |
|---|---|---|
 Marcille | SR | + Marcille provides solid attack buffs, which are useful for PvE clearing - Becomes replaceable as soon as you roll for better casters - Lacks AoE damage and meaningful team utility for progression |
 Vera | SR | + Vera provides reliable team sustain with heals, debuff cleansing, and full-team recovery through her Ultimate - Offers limited offensive impact due to the lack of damage buffs or strong burst damage - There are better characters available |
 Claire | SR | + Strong single-target burst with crit stacking and bonus damage against buffed enemies. - Relies heavily on critical hits and setup, making damage inconsistent. - Lacks AoE damage and meaningful team utility. |
 Scarlet | SR | + Strong AoE burst and scaling damage thanks to Seven Ball stacks, and frequent Ultimate cooldown resets - Requires significant stack buildup for peak performance, making early turns less impactful - Has limited team support and relies mostly on personal damage to contribute |
 Clarissa | SR | + Clarissa provides useful utilities by applying speed debuffs and Action Gauge reduction, helping disrupt enemy pressure - Lacks AoE damage and meaningful team support, limiting her overall versatility. - Has relatively slow impact due to longer cooldowns |
How to Reroll in Star Savior
Now that you know about all the heroes in Star Savior, it is also important to know about rerolling. By rerolling, you can obtain stronger characters right from the start, giving you a significant advantage in the early game. Below, we’ve mentioned all the steps on how to reroll in Star Savior.
- First, start the game and play the tutorial to become familiar with the game mechanics.
- Then, complete the tutorial to receive 10 free pulls.
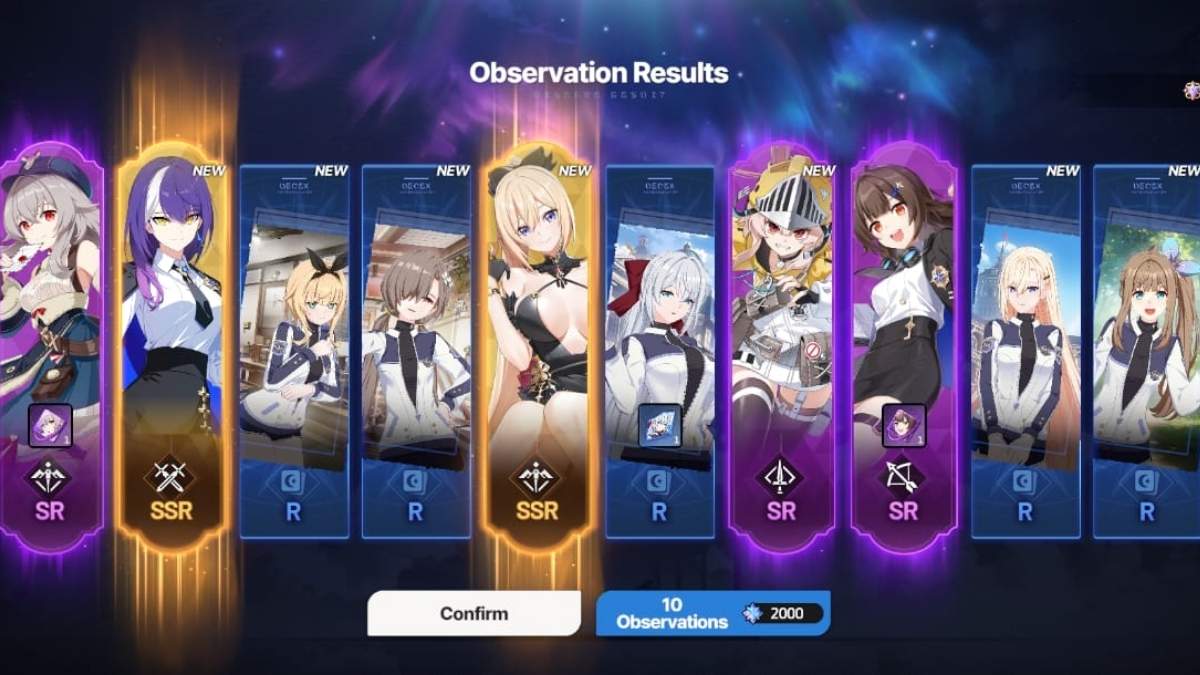
- After that, click on the Observation option on the left side of the screen.
- Use your 10 free pulls on the ‘Special Featured Savior Observation’ banner.
- If you’ve not received a top-tier character, click the four-square option at the top right of the home screen, and click the ‘Settings’ option, which is on the bottom right.
- After that, press the ‘Account Management’ option and press ‘Reset Server Account’ or ‘Log Out’ to reroll.
Make sure to log in to the game with a guest account. Don’t sync your account unless you get a top-tier character from those pulls. However, if you pull a top-tier character, sync your account with any of your social media, and you’re good to go. If you’re still unlucky, keep following the steps mentioned above.
Frequently Asked Questions (FAQs)
S-Tier characters like Asherah, Luna, Bell, Omega, and Yoo Mina are widely considered the strongest picks in Star Savior. They outclass other saviors because they excel across multiple game modes, including both PvP and PvE (story, raids, and events). They have a combination of high DPS, strong skillset, and utility, making them core units in many top-tier team compositions.
For beginners, it’s important to prioritize characters that are not only strong but also easy to use and to synergize with. Characters like Asherah, Luna, Bell, Emily, Omega, and Yoo Mina are great starting options because they provide a balance of damage, survivability, and support. These units help you clear early content smoothly, reduce the need for complex strategies, and make team-building more flexible.
Yes, rerolling is often worth considering, especially if you’re aiming for an optimal start. By rerolling, you can try to obtain an S-Tier character early from beginner summons or rewards. Starting with a powerful unit can significantly speed up your progression, making early missions, bosses, and farming much easier.
Not at all. Lower-tier characters still have value, particularly in the early stages of the game or in niche team compositions. Some can provide specific buffs, debuffs, or utility that can be useful in certain modes. However, as you progress into late-game content, these characters fall behind in terms of raw stats and skill scaling compared to higher-tier units.
For more on Game Tier Lists, check out The Seven Deadly Sins Origin Tier List or StoneAge Idle Adventure Tier List & Reroll Guide on Pro Game Guides!