Updated November 19, 2025
Added more information about the best units in the game.
Saint Seiya EX is an action-RPG based on the classic anime and manga, where you'll be collecting characters, assembling teams, and experience a retelling of the original Saint Seiya anime arcs in a streamlined and mission-based format. The game features a lot of characters from the franchise, and it can be challenging to know which ones are worth investing in, but that's why we're here to help you out with our Saint Seiya EX Character Tier List & Reroll Guide.
Best Characters Ranked - Saint Seiya EX Tier List
You have a lot of flexibility when filling the positions in your Saint Seiya EX team, but you should always focus on finding a balance between damage dealers, frontline tanks, and backline supports. Even the weaker units can be helpful to you, if for nothing else than to unlock bonuses when paired with your stronger characters. Below is our general ranking of all characters in Saint Seiya EX, based on their contribution to the team and overall performance across the different game modes.
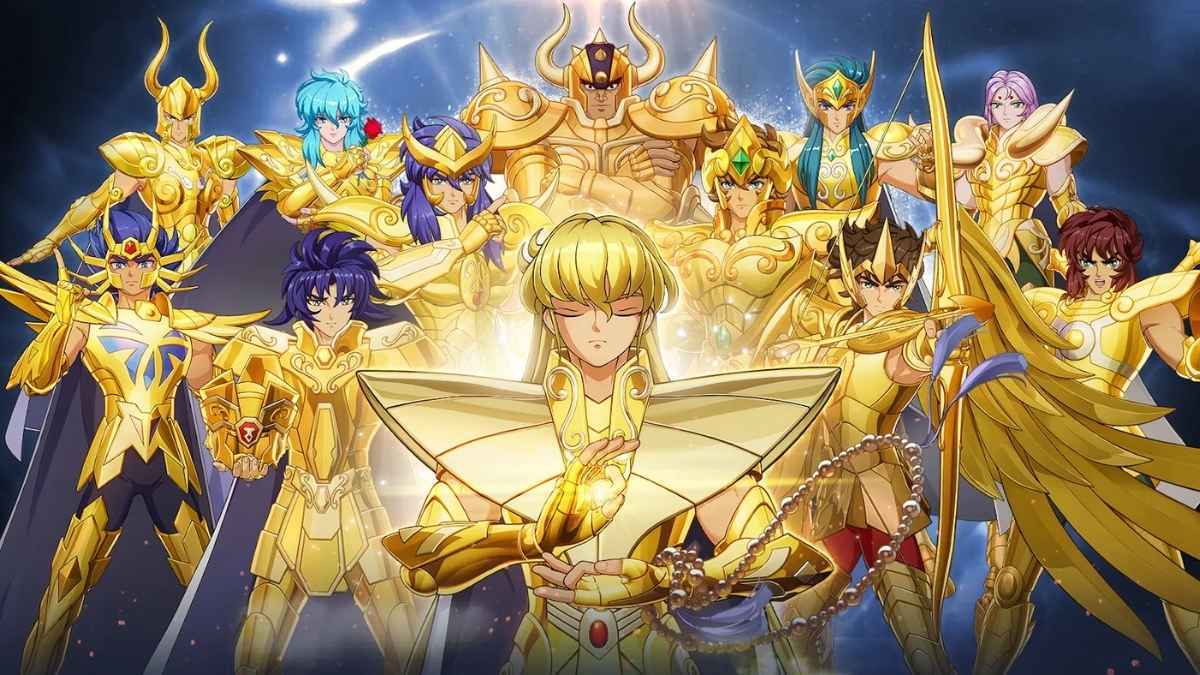
SSR units have a significant advantage in this game because it's an auto-battler, and they have higher sats and more complex skills. Keep in mind that even the R units can be upgraded until they ascend to an SSR level. However, considering that the game starts you off with a lot of SSR units, upgrading the lower-level ones isn't that worthwhile as of now. If you like a certain character that's lower on the list, though, know that you can invest in them and bring them up a tier if you want.
S Tier - The Meta Characters
These are the best characters in Saint Seiya EX that can single-handedly carry you through the early game, even without building around them, but are also an amazing target of investment for your resources. If you're looking to reroll your account so you can get the best start, these characters are the ones you should go for.
| Character | Basic Info | Details |
|---|---|---|
 Evil Saga (SSR) | Class: Mage Position: Mid Row Damage Type: Hybrid | + Evil Saga is the best damage dealer in the game right now, doing both physical and mental damage, making him effective against every enemy. + Besides damage, his skills offer great utility by stunning or banishing enemies. + After each ultimate, he enters a Frenzied state, speeding up his usage of skills. |
 Cancer Deathmask (SSR) | Class: Mage Position: Back Row Damage Type: Mental | + Cancer Deathmask is a one-man army, able to summon many undead creatures that can easily overwhelm enemies and take control of the field. + When non-Saint units die, he gains stacks of Sekishiki, which increase his attack and can be stacked indefinitely. |
 Gemini Saga (SSR) | Class: Warrior Position: Front Row Damage Type: Hybrid | + Amazing frontline unit with lots of crowd control and an ultimate that does enormous amounts of damage. + Gemini Saga has a passive that makes him almost immune to any control effects, while also increasing his damage and cleansing him of debuffs and DOT effects. + Very high rage generation, making it easy to spam his ultimate. |
 Leo Aiolia (SSR) | Class: Warrior Position: Front Row Damage Type: Physical | + Leo Aiolia has amazing self-sustain through his windows of invincibility, the barriers he creates, and the constant knock-ups he does to enemies. + If he ever goes below 40% HP, he gains an insane attack speed and a lifesteal buff, healing up while also destroying the enemies. + Great AoE damage thanks to his Lightning Chain procs. |
 Aires Mu (SSR) | Class: Supporter Position: Mid Row Damage Type: Mental | + Aires Mu is the best supporter in the game, offering great heals while also doing solid damage on top. + Every time he heals an ally, he also cleanses them, removing any DOT effects or debuffs, while also increasing their attack. + Increases the survivability of the team by debuffing the enemy attack and creating barriers that absorb damage. |
 Virgo Shaka (SSR) | Class: Mage Position: Mid Row Damage Type: Mental | + Virgo Shaka deals great damage, especially with double damage to non-Saint units. + While primarily a damage dealer, he also offers some healing to himself and allies, prioritizing debuffed ones. + Every 15 seconds, gains a shield that grants immunity to skill damage and effects. |
 Saori Kido (SR) | Class: Supporter Position: Back Row Damage Type: Mental | + Not only is she the best SR unit in the game, but you also get Saori Kido for free as a reward for playing the game. + A dedicated support with amazing healing, prioritizing those in need, and great attack buffs that target allies with the most rage. + Saori can revive one of your allies once per battle. - Doesn't do a lot of damage, but the utility she provides more than makes up for it. |
More About Saint Seiya EX
A Tier - Strong Characters
Very strong characters that either do a lot of damage or bring great utility to your team. While they might not be as flexible as the ones above, these units are a great addition to any team and shine in those built around them.
| Character | Basic Info | Details |
|---|---|---|
 Awaken Shiryu (SSR) | Class: Warrior Position: Front Row Damage Type: Physical | + Does some great damage, while also knocking the enemies up and down, making it hard for them to do anything. + His Riposte skill can do some serious work if used at the right time, blocking enemies' attacks and retaliating for massive damage. + Awaken Shiryu can defy death and unleash one last skill, making sure to take someone out with him. |
 Pope Ares (SSR) | Class: Supporter Position: Back Row Damage Type: Mental | + Pope Ares provides great crowd control by banishing enemies or applying Defect, which makes them attack their allies. + Can summon units that help you take control of the battle, while also buffing them and other allies' summons as well. + Has a Bonus with Evil Saga, the best unit in the game. |
 Taurus Aldebaran (SSR) | Class: Tank Position: Front Row Damage Type: Physical | + Taurus Aldebaran is the best tank in the game, with lots of ways to keep the enemies away from your damage dealers and supports, even his basic attack is able to knock them back. + Iaido Defense not only gives him 60% damage reduction and immunity to control effects, but also further enhances all his other skills, allowing them to do more damage and gain new effects. |
 Sagittarius Ailos (SSR) | Class: Archer Position: Back Row Damage Type: Physical | + Deals a lot of damage while staying safe all the way back, making it very hard for enemies to reach him at all. + Sagittarius Ailos has a great Bonus with Saori Kido which increases his attack and upgrades his ultimate to a stronger version with massive damage. - While his damage is amazing, he brings no other utility. |
 Pisces Aphrodite (SSR) | Class: Mage Position: Back Row Damage Type: Mental | + Inflicts Poison with most of her skills, including her basic attack, while also debuffing the enemies with increased poison damage taken from all sources, not just herself. + Pisces Aphrodite shines in longer fights against tougher enemies, with her poison doing more damage as time goes by and her Scarlet Rose skill dealing true damage based on your poison stacks. |
 Scorpio Milo (SSR) | Class: Archer Position: Back Row Damage Type: Mental | + Does great damage that scales throughout the fight, while also providing some healing. + Scorpio Milo applies Crimson Scar with his needles, which increases the damage to enemies, scaling his damage throughout the fight and fueling his other passive abilities. - Has some built-in RNG that can make him a little inconsistent from time to time. |
 Capricorn Shura (SSR) | Class: Warrior Position: Mid Row Damage Type: Physical | + Has an increased Parry chance, which would be good by itself, but every time he does parry, he launches Excalibur Flurry that deals additional damage and grants him a window of invincibility. + Capricorn Shura can Silence enemies, making them unable to use anything other than their basic attacks and passive skills. |
 Aquarius Camus (SSR) | Class: Supported Position: Mid Row Damage Type: Mental | + Aquarius Camus controls the battle by constantly applying Freeze to enemies. + Can apply mental damage reduction to allies and comes with a panic button in the form of freezing an ally in danger, making them unable to attack, but also immune to damage while healing them over time. |
 Sagittarius Seiya (SSR) | Class: Warrior Position: Back Row Damage Type: Physical | + Very flexible unit, changing the effect of his skills and passives depending on the situation, making him deal more damage or increasing his sustain as needed. + Sagittarius Seiya does increased damage against bosses. |
 Phoenix Ikki (SR) | Class: Archer Position: Mid Row Damage Type: Mental | + Phoenix Ikki can be unlocked and fully upgraded through the 7 Day Special Training mission by completing all steps. + Great maneuverability around the battlefield, with lots of ways to crowd control the enemies via stuns or knock-downs. + Can revive himself upon death, dealing damage and applying burn if he does. |
 Black Phoenix (SR) | Class: Mage Position: Mid Row Damage Type: Mental | + Black Phoenix applies Burn with most of his skills, making the enemies take continuous damage over time. + Buffs his attack for every enemy afflicted with burn, letting him scale throughout the battle, with his burns doing more work the longer the battle goes on. |
B Tier - Good Characters
These Saint Seiya EX characters are still good, but are greatly overshadowed by the ones in the higher tiers. They're great for the early game, but you'll be replacing them as you fill out your roster, with some exceptions you might want to keep around because of their bonuses with stronger characters.
| Character | Basic Info | Details |
|---|---|---|
 Ophiuchus Shaina (SR) | Class: Warrior Position: Mid Row Damage Type: Mental | + Ophiuchus Shaina can inflict Poison on the enemies, which also decreases any healing they might receive. + Has increased Dodge chance and can inflict knockdown on enemies with her skills. |
 Guilty (SR) | Class: Warrior Position: Front Row Damage Type: Physical | + His kit revolves around true damage and inflicting Burn, making him great against enemies with high defense. + Guilty has some self-healing when attacking enemies inflicted with burn. - His damage can be underwhelming against high HP enemies. |
 Eagle Marin (SR) | Class: Warrior Position: Front Row Damage Type: Physical | + Eagle Marin has a good mix of knockdown and stun effects that let her crowd control enemies. + Has very high attack speed and can dish out some great damage thanks to her Eagle Peck skill. - Unfortunately, Eagle Peck can be unreliable at low star levels. |
 Crow Jamian (SR) | Class: Mage Position: Mid Row Damage Type: Mental | + Has lots of ways to protect himself from harm while the crows he summons do damage to the enemies. + Crow Jamian can heal frontline allies, at the cost of his own HP, although that isn't that much of a downside when you realize how much Lifesteal he has. |
 Sagitta Ptolemy (SR) | Class: Archer Position: Back Row Damage Type: Physical | + Sagitta Ptolemy can turn invisible, avoiding the enemy's attention while also increasing his own damage. + Can mark enemies and reduce their Dodge chance, making it easier for your team to hit them. - Damage can feel underwhelming when Rapid Fire doesn't trigger and can't deal with summoned units. |
 Lizard Misty (SR) | Class: Supporter Position: Mid Row Damage Type: Physical | + Lizard Misty grants allies and herself Mental Defense shields that also heal those units every second, making her great against enemies with lots of mental damage. + Can push back and knock down enemies. - Her damage isn't very impressive. |
 Perseus Algol (SR) | Class: Tank Position: Front Row Damage Type: Mental | + Perseus Algol of his abilities either inflict Petrify or Bind, making the enemies unable to move, leaving them exposed to your attacks. + Pretty decent tank, especially against mental damage, with a lot of crowd control. - Damage is lackluster, even for a tank. |
 Chamaeleon June (SR) | Class: Supporter Position: Mid Row Damage Type: Physical | + A good flexible support with skills that can heal and shield allies, bind enemies, and reduce incoming damage, while also being able to dish out her own. - She can do a lot of different things, but she's not great at any particular one. |
 Cetus Moses (SR) | Class: Tank Position: Front Row Damage Type: Physical | + Every eight seconds of battle, he gets increased damage reduction that stacks and lasts until the end. + Cetus Moses has great self-sustain, and his skills can knock down enemies, making it easier to keep them away from his allies. - Pretty straightforward tank with not much special about him, other than the scaling during the battle. |
 Hound Asterion (SR) | Class: Archer Position: Back Row Damage Type: Mental | + Hound Asterion can summon Phantom Dopplegangers that can take hits for him and increase the damage of his ultimate. + Has ways of disrupting the enemies by reducing their defense and hit rate, providing both offensive and defensive utility. |
 Pegasus Seiya (R) | Class: Warrior Position: Front Row Damage Type: Physical | + You get him at the start of the game, and he’s very easy to upgrade by following the story. + Has some great bonuses, especially with Phoenix Ikki and Evil Saga. + Will be the core of your free-to-play teams. |
 Andromeda Shun (R) | Class: Supporter Position: Back Row Damage Type: Physical | + Solid early game support that both heals and buffs allied units. + Has the ability to Bind enemies, giving him further utility + The second unit you get in the game after Pegasus Seiya, with whom he has a nice bonus. |
 Cygnus Hyoga (R) | Class: Supporter Position: Mid Row Damage Type: Mental | + A mix of a tank and support, able to Freeze and Bind enemies, while also shielding allies. + Has a great bonus with Aquarius Camus that unlocks a more powerful ultimate with him. - Does terrible damage and can’t really protect himself, even though he goes into the middle of the fight. |
C Tier - Best to Skip
C-tier characters aren't worth investing in and can be easily replaced. You might use them at the very start of the game, until you get stronger characters, but that won't take you long at all, considering you get your first SSR units pretty fast.
| Character | Basic Info | Details |
|---|---|---|
 Dragon Shiryu (R) | Class: Tank Position: Front Row Damage Type: Physical | + Good low-rarity frontline unit with decent crowd control. + Has a good bonus with Pegasus Seiya, acting as the tank of your budget team. - Doesn’t bring anything unique to the table and is easily replaceable when you get higher rarity units. |
 Unicorn Jabu (R) | Class: Warrior Position: Front Row Damage Type: Physical | + Has some decent crowd control, with most of his skills knocking up enemies. + Has some nice bonuses with other R units, making him a good fit for budget teams. - He’s, unfortunately, pretty much just a worse Pegasus Seiya. |
 Bear Geki (R) | Class: Tank Position: Front Row Damage Type: Physical | + Brings nice utility, with his whole kit revolving around stunning enemies, so he can be good at stalling. - Barely does any damage, even for his class. |
 Hydra Ichi (R) | Class: Warrior Position: Front Row Damage Type: Mental | + Has a bonus with Pisces Aphrodite, making him a functional placeholder for her team. - Needs too much support for his poison to get going. - Not really needed because you get Pisces Aphrodite for free on your second day. |
 Cassios (R) | Class: Tank Position: Front Row Damage Type: Physical | + He can serve as a decent tank with lots of ways to knock up enemies and keep them away from your back row. - Doesn’t bring anything unique to the team; he’s just a wall for the enemies to climb and can be replaced with any other wall. |
 Kiki (R) | Class: Supporter Position: Back Row Damage Type: Mental | + Kiki can reduce enemy defense and increase the Crit rate of back row allies. - Lackluster heals and damage, easily replaced with other units. |
 Black Dragon (R) | Class: Tank Position: Front Row Damage Type: Physical | + He offers solid protection with crowd-control abilities and a heal, while also being able to buff himself. - Offers little to no damage, and his biggest crime is giving me hope that he works with burn teams with a name like Black Dragon, but he’s actually just a normal tank. |
 Black Andromeda (R) | Class: Archer Position: Back Row Damage Type: Physical | + Can attack multiple targets at once and apply Bleed to them. - Even though he’s a back row archer unit, two of his skill slots are wasted on defensive options for himself. |
 Black Swan (R) | Class: Supporter Position: Mid Row Damage Type: Mental | + Can Freeze enemies and apply Frigid Air to them, slowing down their attack speed. - Mostly locked down to the Dark Fighter team, seeing as others have a lot better support options. |
 Black Pegasus (R) | Class: Warrior Position: Front Row Damage Type: Physical | + He’s part of the Dark Fighter bonus along with Black Phoenix. - Not really useful outside of his designated team, |
Saint Seiya EX Reroll Guide
Like in most gacha games, getting an amazing first SSR unit can heavily impact your enjoyment, so you want to make sure you get what you're looking for. Luckily, the game features a special banner for people just starting, which you can reroll multiple times until you get the 10 pull of your dreams. Of course, even that can potentially fail, but rerolling your whole account is pretty easy, as long as you have the patience.
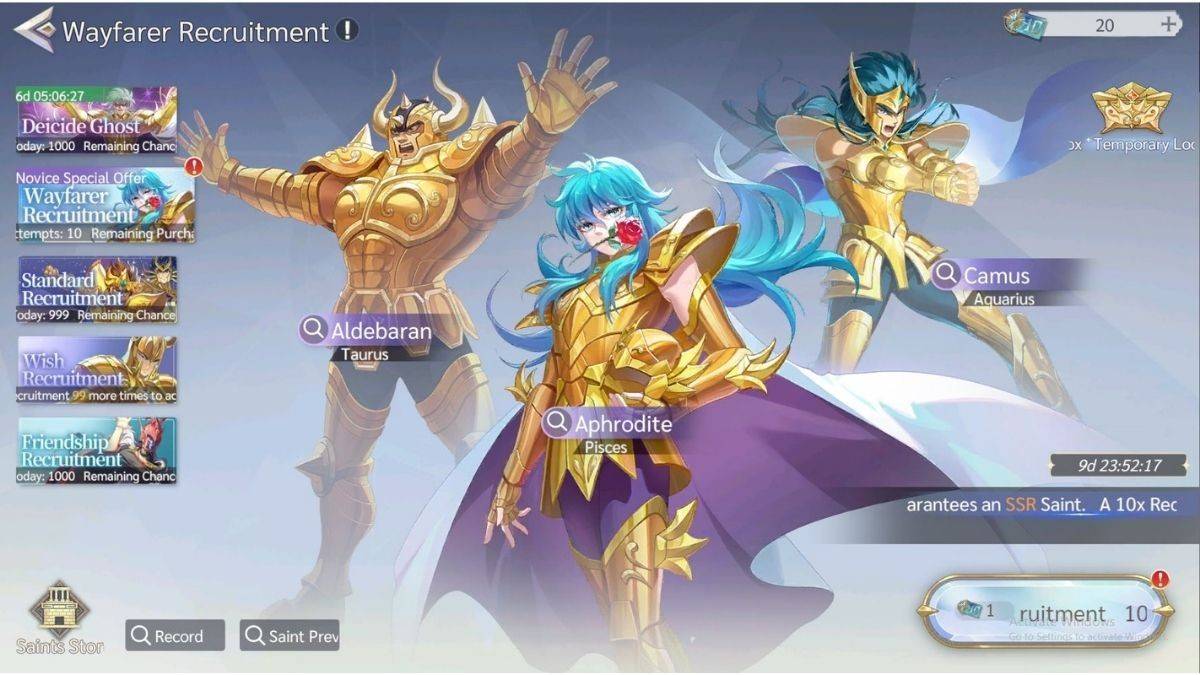
In order to obtain your first SSR, you'll need to get to the Wayfarer Recruitment banner by following these steps:
- Start the game in guest mode and don't link your email to the account yet. Only do so if you're satisfied with your pulls and you want to keep the account.
- Complete the basic tutorial and keep playing until you reach level seven, where you unlock the Recruit menu; however, the game will force you to complete some battles before you can actually access it. This will take somewhere between 10-15 minutes.
- After you regain control, check your mailbox and claim all the rewards inside, including the Wayfarer Recruit Vouchers, which you will need for the reroll banner.
- Go to the Recruit menu and to the Wayfarer Recruitment banner. Here you can spend your Wayfarer Recruit Vouchers to make 10 pulls, with each of them guaranteeing an SSR unit.
- You can keep making pulls until you find what you're looking for or until you run out of vouchers. Even if you get a character you like, keep pulling until you use them all up, because all your 10 pulls are stored in a lockbox for you to choose from when you're done.
- Once you find a 10-roll that you're satisfied with, claim it from the lockbox and enjoy! The banner won't be accessible after you claim your prize.
You should have more than enough rerolls to get what you're looking for from the Wayfarer Recruitment banner, but in case you don't, you can always log out of the game by switching servers and make another guest account to try again, deleting your old one in the process. If you don't know which unit you should try to get, pick any one from our S tier, and you'll be more than pleased.
Do I think it's worth it to restart your whole account? Not really, since all the SSR units are great and you'll be using them for a long time to come. Additionally, there is a login event bonus: you get Pisces Aphrodite on day two and an SSR selector on day seven and 14, rewarding you for logging in every day.
Saint Seiya EX Tier List FAQ
I would recommend always saving for tickets that are for the limited banner, since that's where the meta units will be released. Even if you don't like the current limited character, save your resources for the next one.
Any SSR from the S tier will be a great boon for your account. Just check the login rewards beforehand, because you will be getting Pisces Aphrodite and two SSR unit selectors with varying units inside, so plan ahead what you will be taking from there before you lock in your first 10 pulls.
Yes, each banner has its own pity system that guarantees an SSR drop after a certain number of pulls, 30 for the standard banner, and 40 for the limited one. Just be aware that pity isn't shared between banners, so try to pull optimally.
We hope our Saint Seiya EX Character Tier List & Reroll Guide helps you make the best decision for starting your journey with this game. If you're looking for more gacha game content, check out our Resonance Solstice Character Tier List and Bleach Soul Resonance Tier List & Reroll Guide.

