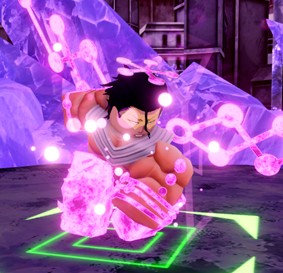
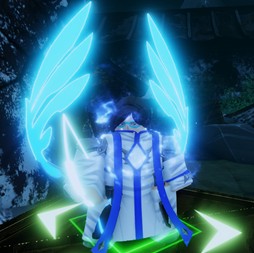
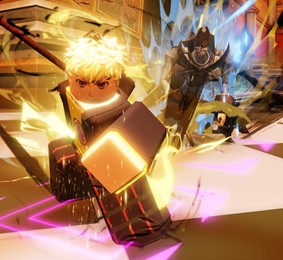
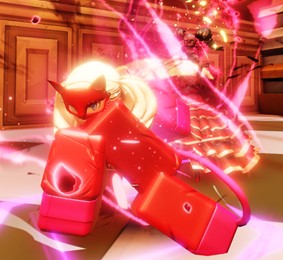
Universal Tower Defense X Tier List [UPD 3.25 META]

The strongest DPS and Support units in the Universal Tower Defense X UPD 3.25 meta.

Updated on May 27, 2026: Universal Tower Defense X Update 3.25 added 4 new One Piece units: Roger / Pirate King (Voyage), Sabo / Revolutionary Chief (Emperor), Mihawk / Strongest Swordsman (Hunter), and Garp / Marin Hero (Grand Fist). Our UTDX Update 3.25 Tier List is updated with new unit build tips and evaluations!

Recommended Videos

Looking for the best Universal Tower Defense X units to build around in Universal Tower Defense X Update 3.25? Then check out our Universal Tower Defense X Tier List! Raw damage still matters, but the meta is no longer just about which unit hits hardest. The best UTDX units now combine strong DPS with team buffs, crowd control, Hyper Armor damage, elemental coverage, trait scaling, relic synergy, and game-mode value in Infinite, Challenges, Virtual Realm, Ragnarok, and other late-game content.

UTDX UPD 3.25 Tier List - Best Universal Festival Part 2 units

Universal Tower Defense X Updates 3.0 and 3.25 have brought a total of 12 new One Piece-inspired units to the game, so there is a lot to test, compare, and rank. Since these Universal Festival Part 2 units are still fresh, I’m keeping them in their own temporary tier while I actively test their damage, utility, traits, synergies, and overall meta value.

Once the meta settles and I’ve spent enough time with each new unit to confidently judge where they belong, I’ll move them into their proper places on the main Universal Tower Defense X Tier List. For now, here’s my early evaluation of the new UTDX Update 3.25 units:

Update 3.25 Tier – One Piece Meta
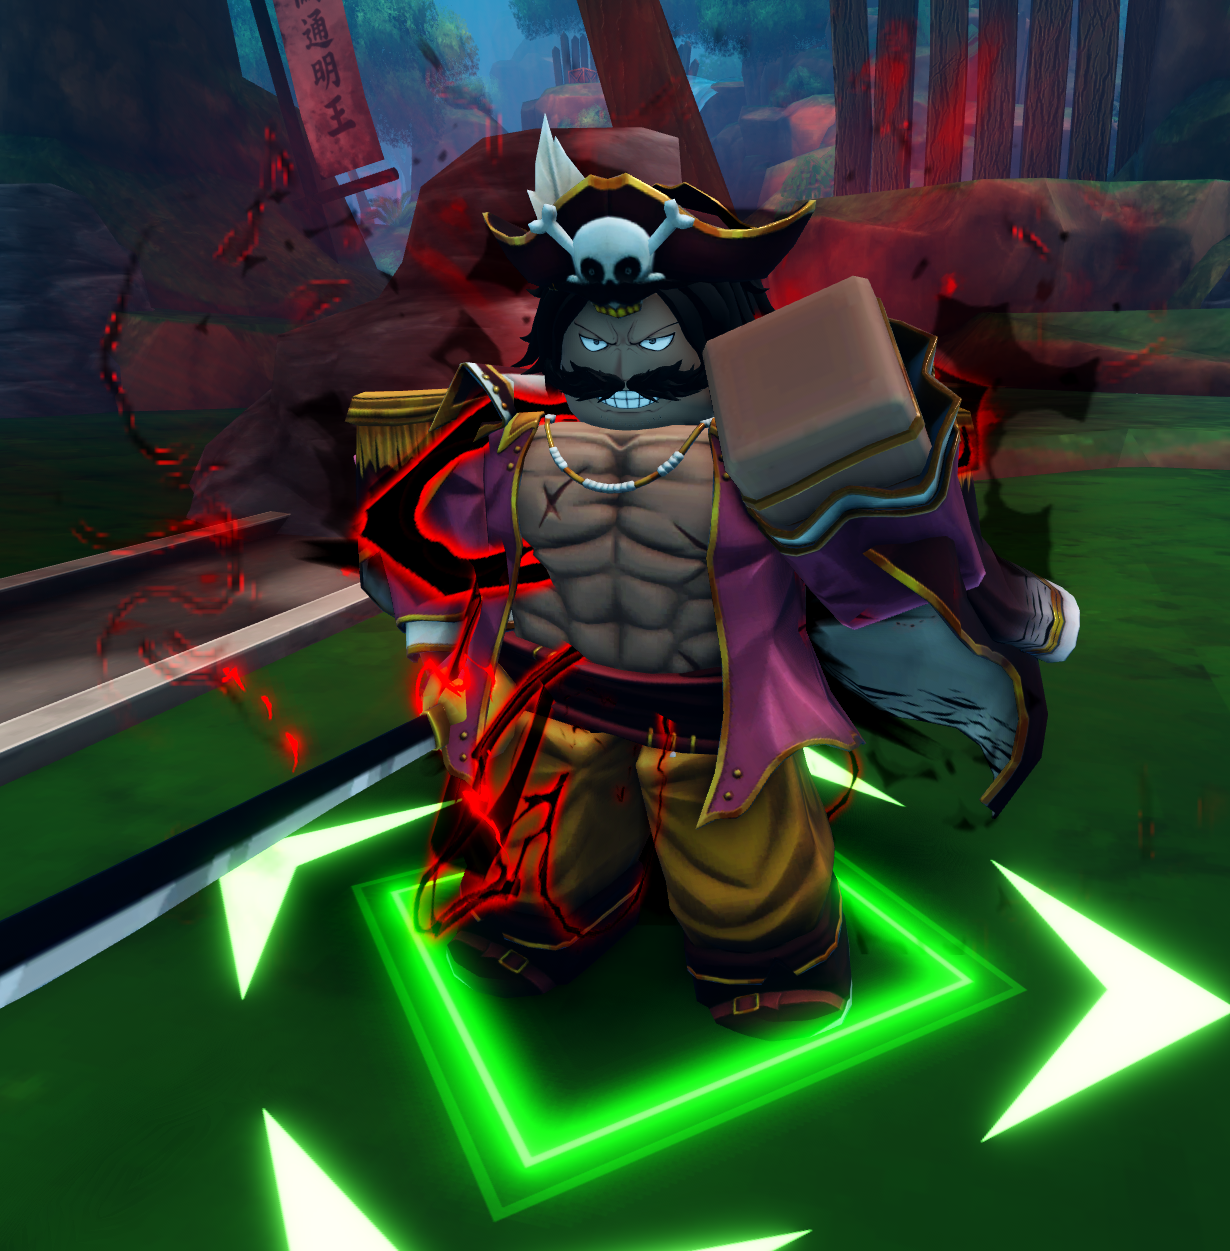
Pirate King Voyage Roger UTDX Update 3.25
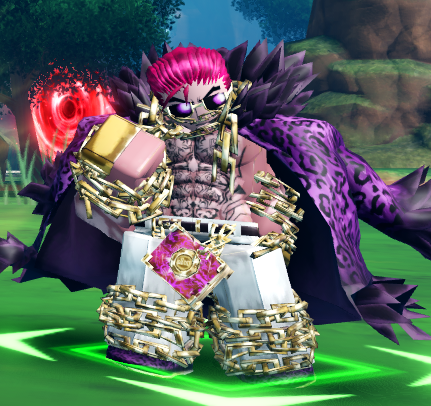
Pirate King (Voyage) / Roger
Ground Rose
Early Tier Read: S++ / premium support-carry candidate
Build Tips
Role: Premium support-carry that can Synchro Clash with Quake Warlord (Destroyer), while also bringing zero-cost placement, upgrade retention, Radiation, Yen utility, and Piece-tag auto-placement.
Best Trait: Ruler. Alternative: Eternal.
Best Relics: Full Warlord set.
Main Stats: Dmg / Dmg.
Preferred Substats: Cooldown, Crit Dmg.
Stats: All Damage.
Team: Triple Threat, Joyful Captain, Pirate King, Quake Warlord, Fastcart, Bulmo.
Unique zero-cost re-placement unit with Radiation, Yen utility, Piece-tag auto-placement, and a massive Synchro Clash with Quake Warlord.
Passives / Abilities Summary
  • Conqueror's Coating gives this unit a fixed 25% Crit Rate that cannot be increased.
  • After this unit is sold and placed again, it gains +20% Crit Damage, capped at +100%.
  • This passive does not work if the unit is sold by the owner.
  • The Spark of the Great Era gives this unit a placement cost of 0 and lets it retain all upgrades after being sold.
  • On placement, it gains Stun Immunity for 5s, follows up with Attack 3, and applies Radiation for 50% Damage over 15 ticks.
  • On placement, it also gains +100% Damage.
  • On attack, it loses -20% Damage.
  • On max upgrade, it loses -10% Damage.
  • When the Buff reaches 0% Damage, use the Active Ability to sell this unit.
  • If this unit is not sold using the Active Ability, the upgrades will be reset.
  • When this unit is sold with this passive, it auto-places the first Piece Tag unit at this unit's position.
  • The auto-placed unit gains +25% Damage.
  • Auto-place Cooldown: 30s.
  • If there are no available Piece units, this unit gains a free upgrade next placement.
  • King of the Pirates activates when this unit is stunned.
  • When stunned, it ignores the Stun, gains +65% Damage, follows up with Attack 2, and has a 10s Cooldown.
  • On attack, enemies drop +15% more Yen if they die in range.
  • Synchro Clash activates when both Quake Warlord and Pirate King are fully upgraded and within each other's range.
  • Releases a Synchro Attack, dealing 600% of the average Damage between these two units to all enemies on the map.
  • Cooldown: 300s.
Strengths
  • Extremely unique support-carry design built around free placement, upgrade retention, active selling, and re-placement value.
  • The Spark of the Great Era gives him strong tempo value because he costs 0 to place and can retain upgrades if sold properly through his active mechanic.
  • His placement cycle gives him strong burst utility through Stun Immunity, Attack 3 follow-up, Radiation, and a temporary +100% Damage boost.
  • He can auto-place a Piece Tag unit at his position and give that unit +25% Damage, which makes him a rare positioning and team-tempo support.
  • King of the Pirates gives him excellent anti-stun value by ignoring Stun, gaining damage, and triggering an Attack 2 follow-up.
  • The +15% more Yen effect gives him useful economy value if enemies die in his range.
  • Synchro Clash with Quake Warlord gives him one of the flashiest late-game payoff effects in the One Piece roster, hitting the entire map for massive averaged damage.
Weaknesses
  • His Crit Rate is fixed at 25% and cannot be increased, which limits standard Crit Rate scaling.
  • His sell-and-replace loop looks powerful, but misplaying it can reset upgrades if he is not sold through the proper Active Ability timing.
  • His damage buff decays through attacks and max upgrade penalties, so managing his active sale timing is a major part of his value.
  • Auto-placement depends on having an available Piece Tag unit, so part of his best utility is roster- and setup-dependent.
  • Synchro Clash requires both Pirate King and Quake Warlord to be fully upgraded and within each other's range, and it has a long 300s Cooldown.
Meta Evaluation

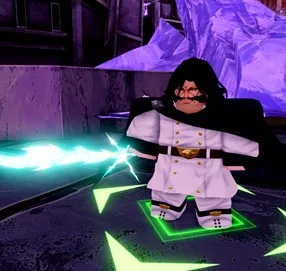
Pirate King (Voyage) / Roger looks like a premium S++ support-carry because his kit is not just about raw DPS. He brings free placement, upgrade retention, Radiation, Stun Immunity, Yen economy, Piece-tag auto-placement, and a massive Synchro Clash payoff with Quake Warlord. His ceiling should be extremely high in planned teams, especially when you can abuse his sell-and-replace loop correctly and pair him with Whitebeard for map-wide Synchro damage.

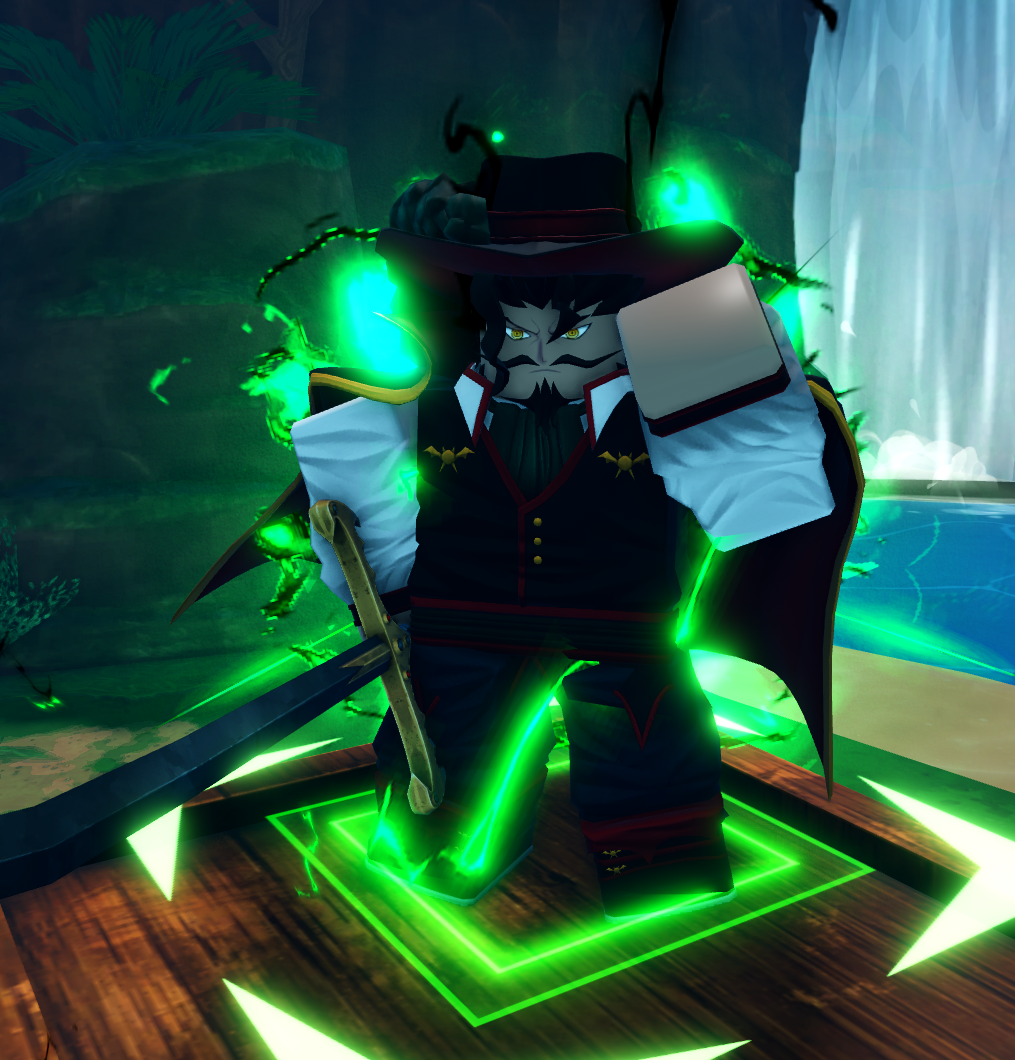
Strongest Swordsman Hunter Mihawk UTDX Update 3.25
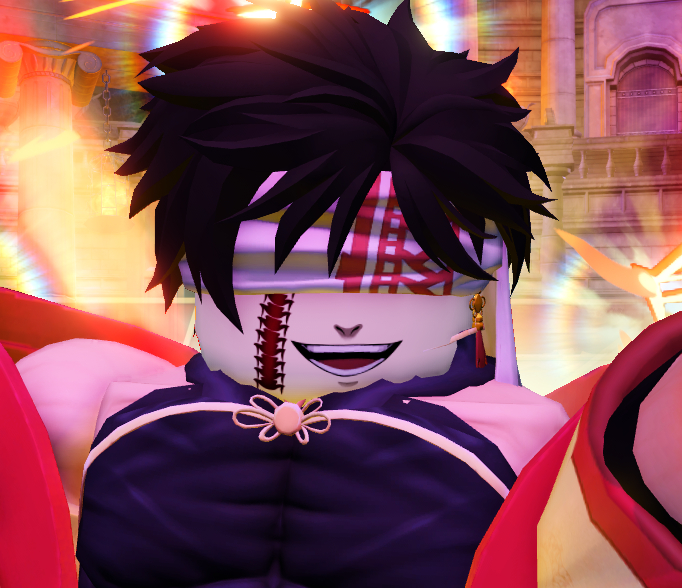
Strongest Swordsman (Hunter) / Mihawk
Hill Wind
Early Tier Read: S+ / scaling Hill DPS candidate
Build Tips
Role: DPS-focused Hill unit with strong enemy-hit scaling, anti-armor pressure, Haki unlocks, Observation Haki range value, and Sword Stance buff stacking.
Best Trait: Ruler. Alternatives: Eternal or Astral.
Best Relics: Full Warlord set.
Main Stats: Dmg / Dmg or Dmg / Crit Dmg.
Preferred Substats: Crit Dmg, Crit Rate, Cooldown, DoT.
Alternative Relics: Super Roku set + Warlord Hat.
Stats: All Damage.
Team: Triple Threat, Joyful Captain, Strongest Swordsman, Idol, Fastcart, Bulmo.
DPS-focused Wind / Hill unit with enemy-hit scaling, anti-armor damage, Haki unlocks, long-range Observation Haki pressure, and stacking Sword Stance buffs.
Passives / Abilities Summary
  • Thousand Cuts gives him 7.5% more Damage per enemy hit on attack.
  • This Buff caps at 15 enemies hit.
  • When attacking more than 1 Armored Enemy, he deals 1.65x Damage to Armored and Hyper Armored enemies.
  • Every 100 Takedowns, he unlocks either Armament Haki or Observation Haki.
  • Armament Haki gives him +35% Damage and +50% Critical Damage.
  • Observation Haki activates when no enemies are in range, switching him to Stance One, giving him +500% Range, and reducing SPA by 50%.
  • During Observation Haki, for every 1 stud further the enemy is from this unit, he deals +1% Damage per stud.
  • Attacks during Observation Haki do not count toward Sword Stances.
  • Sword Stances gives this unit three Sword Stances, starting with Stance One on placement.
  • Every other attack, he switches to the next Stance and instantly releases a Follow-up Attack.
  • When reaching Stance Two, he gains +60% Damage and +20% Critical Rate.
  • When reaching Stance Three, he gains +5% Critical Rate and +25% Critical Damage.
  • These Buffs stack up to 4 times.
Strengths
  • Strong multi-target scaling through Thousand Cuts, especially when he can hit many enemies and build toward the 15-enemy cap.
  • Excellent anti-armor profile thanks to 1.65x Damage against Armored and Hyper Armored enemies when hitting more than one Armored enemy.
  • Armament Haki gives him straightforward DPS scaling with both Damage and Critical Damage.
  • Observation Haki gives him huge reach, faster attacks, and distance-based damage scaling when enemies are outside normal range.
  • Sword Stances add strong ramping value through follow-up attacks, Damage, Critical Rate, and Critical Damage buffs that can stack up to 4 times.
Weaknesses
  • His Haki unlocks require 100 Takedowns, so his full kit may take time to come online.
  • Thousand Cuts depends on enemy density, meaning his damage ceiling is lower when he is only hitting a few targets.
  • His anti-armor bonus is conditional and requires attacking more than one Armored enemy.
  • Observation Haki attacks do not count toward Sword Stances, which may create tension between long-range pressure and stance stacking.
  • He looks more like a scaling DPS unit than an instant all-purpose carry, so placement, wave density, and uptime will matter a lot.
Meta Evaluation

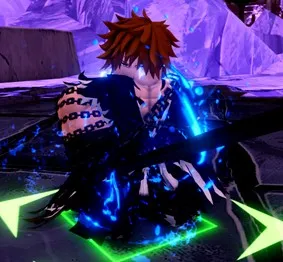
Strongest Swordsman (Hunter) / Mihawk looks like a strong scaling Hill DPS unit with excellent upside in dense waves and armored content. His kit combines enemy-hit scaling, anti-armor damage, Haki unlocks, long-range Observation Haki pressure, and Sword Stance follow-ups that stack offensive buffs over time. He should start as an S+ candidate, with room to rise if his stance cycling and Haki uptime prove consistent in longer runs.

Marin Hero Grand Fist Garp UTDX Update 3.25
Marin Hero (Grand Fist) / Garp
Ground Water
Early Tier Read: S+ / synergy DPS candidate
Build Tips
Role: Synergy DPS built around Warlord-tag scaling, Pirate King interaction, anti-armor damage, Crit Damage stacking, and boss-phase Crit Rate.
Best Trait: Ruler. Alternative: Eternal.
Best Relics: Full Warlord set.
Main Stats: Crit Dmg / Dmg.
Preferred Substats: Cooldown, Dmg.
Stats: All Damage.
Team: Triple Threat, Joyful Captain, Marine Hero, Mochi Pirate (Conqueror), Fastcart, Bulmo.
Strong anti-armor Ground / Water unit with Warlord-tag scaling, Pirate King synergy, crit scaling, and self-stun mechanics that can turn into permanent Stun Immunity.
Passives / Abilities Summary
  • Iron Fist gives him +15% Critical Rate on placement.
  • On attack, he deals 1.3x Damage to Armored and Hyper Armored enemies.
  • On Critical Hit, he gains +20% Critical Damage, capped at +100%.
  • On Critical Hit, he also applies 20% Slow for 4 seconds.
  • Hero of the Marines gives him +35% Damage for every Warlord Tag unit in range, capped at +140%.
  • Every 40 seconds, if Pirate King is in range, he Stuns Pirate King for 10 seconds.
  • Otherwise, every 40 seconds, he Stuns a random Warlord Tag unit for 5 seconds.
  • When a Boss is in range, he stops attempting to Stun units in range and gains +100% Critical Rate.
  • If Pirate King is in range, he synchronizes Pirate King’s attack with this unit’s SPA.
  • Unbreakable Will gives him +12.5% Damage, capped at +50%, when this unit gets stunned.
  • When this unit gets stunned, he also gains Stun Immunity for 15 seconds.
  • When the Damage cap is reached, Stun Immunity becomes permanent.
  • Every attack has a 5% chance for this unit to Stun itself for 10 seconds.
  • If this unit doesn’t Stun itself, the chance to Stun itself increases by 5%.
  • When this unit gets stunned, the chance resets back to 5%.
Strengths
  • Excellent anti-armor value thanks to 1.3x Damage against Armored and Hyper Armored enemies.
  • Scales heavily with nearby Warlord Tag units, reaching up to +140% Damage from Hero of the Marines.
  • Strong crit profile, especially during boss phases, where he gains +100% Critical Rate.
  • Pairs directly with Pirate King, since he can synchronize Pirate King’s attack with his own SPA.
  • Unbreakable Will turns his self-stun drawback into a scaling mechanic, eventually giving him permanent Stun Immunity once the Damage cap is reached.
  • Slow on Critical Hit gives him extra control value on top of his raw DPS and synergy tools.
Weaknesses
  • His best damage scaling depends on having multiple Warlord Tag units in range, making his ceiling team- and placement-dependent.
  • Without Pirate King, his 40-second stun can hit a random Warlord-tag unit instead, which may be awkward depending on team setup.
  • His self-stun mechanic can create downtime before Unbreakable Will reaches its permanent Stun Immunity state.
  • He looks much stronger in Pirate King / Warlord-focused teams than as a standalone plug-and-play DPS unit.
Meta Evaluation

Marin Hero (Grand Fist) / Garp looks like a powerful synergy-based DPS unit built around Warlord-tag teams and Pirate King interaction. His anti-armor damage, Crit Rate scaling, Critical Damage stacking, and boss-phase bonuses give him strong carry potential, while his ability to synchronize Pirate King’s attack with his own SPA makes him especially important in Roger-centered setups. He should be tested as an S+ candidate for now, with room to rise if Pirate King synergy proves strong enough in endgame runs.

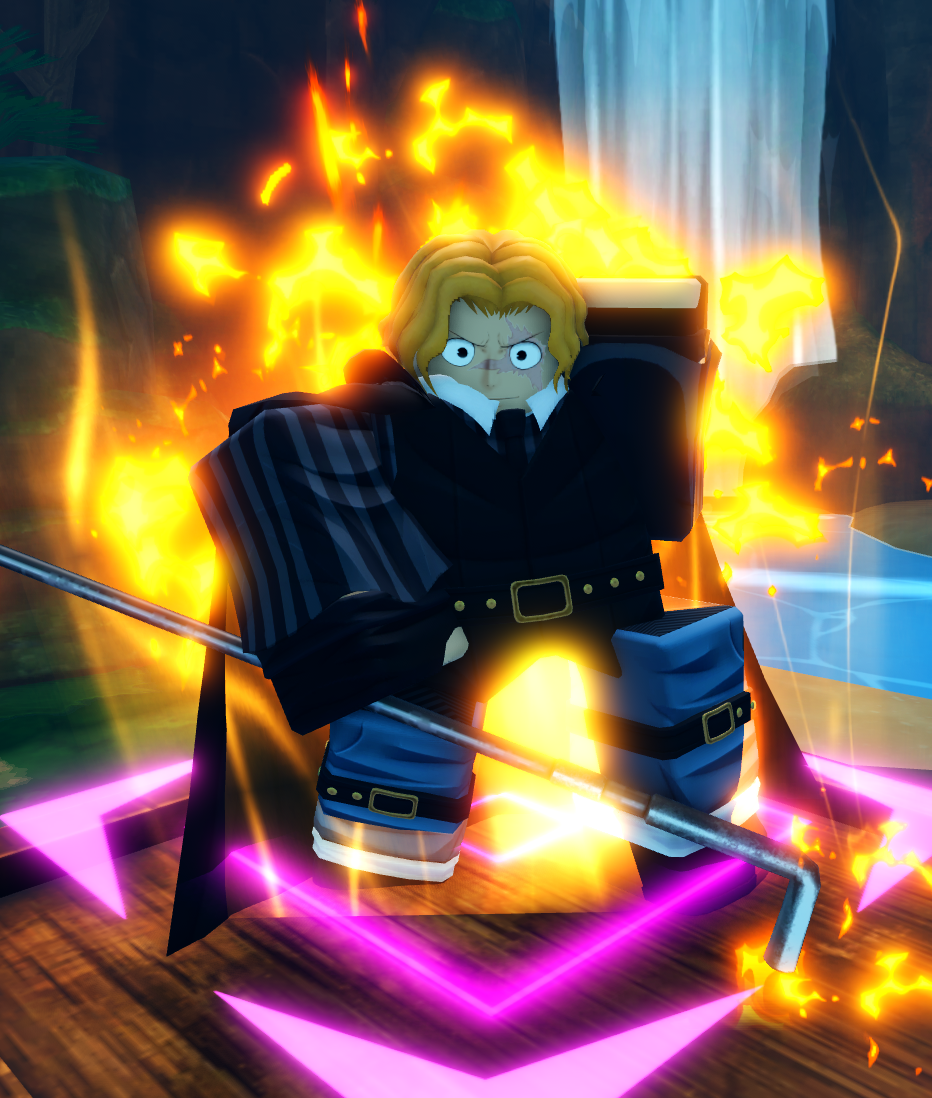
Revolutionary Chief Emperor Sabo UTDX Update 3.25
Revolutionary Chief (Emperor) / Sabo
Hill Fire
Early Tier Read: S / DoT support-DPS candidate
Build Tips
Role: Good DoT Hill unit that can Synchro Drive with Spade (Donut).
Best Trait: Ruler. Alternatives: Astral or Eternal.
Best Relics: Warlord set + Spirit Armor Accessory (Dmg / Crit Rate / Elemental Dmg or Crit Dmg / Crit Rate / Elemental Dmg).
Alternatives: Reanimated or Super Roku sets with Warlord or Shadow Reaper accessories.
Substats: Crit Rate, Crit Dmg, Dmg, DoT, Range. Aim for high Crit Rate substats.
Stats: All Damage.
Team: Triple Threat, Prodigy Mage / Joyful Captain, Spade, Sabo, Idol, Bulmo.
Strong Fire / Hill DoT unit with boss-wave scaling, ally DoT support, anti-armor utility, and marked-target burst.
Passives / Abilities Summary
  • Flame Emperor gives him scaling DoT value as the match progresses and extra DoT pressure during boss waves.
  • For every passed wave, he gains +10% DoT, capped at 75%.
  • When a Boss is spawned, he gains +25% DoT.
  • When a Boss enters range, he gives +20% DoT to all allies in range.
  • Dragon Claw gives him anti-armor utility and marked-target burst damage.
  • When hitting an Armored or Hyper Armored enemy, he marks the enemy.
  • If the enemy has lost its Armor, he applies Burn for 10% Damage over 3 ticks.
  • When hitting a marked enemy, he deals 1.5x Damage.
  • After hitting a marked enemy, he removes the mark from the enemy.
Strengths
  • Strong scaling DoT profile thanks to +10% DoT per passed wave, which makes him better the longer the run goes.
  • Boss waves give him extra value, since he gains +25% DoT when a Boss spawns and also gives nearby allies +20% DoT when a Boss enters range.
  • Useful in DoT-heavy teams because he does not only scale his own DoT, but can also boost allied DoT output during boss phases.
  • Dragon Claw gives him a clear niche against Armored and Hyper Armored enemies by marking them and enabling boosted damage once the mark is triggered.
  • Burn application adds another layer of Fire / DoT pressure after enemies lose their Armor.
  • The Spade (Donut) synergy gives him another reason to be tested in dedicated Piece-tag / DoT setups.
Weaknesses
  • His early-game value may be lower because Flame Emperor needs passed waves to build toward its 75% DoT cap.
  • A big part of his peak value is tied to Boss spawns and Bosses entering range, so his impact may vary depending on the stage and wave structure.
  • Dragon Claw is strongest against Armored or Hyper Armored enemies, making part of his kit more matchup-dependent than universal DPS units.
  • His listed base range and cooldown are not especially flashy, so he will likely rely on scaling, relics, traits, and team synergy to reach his best performance.
Meta Evaluation

Revolutionary Chief (Emperor) / Sabo looks like a strong Fire / Hill DoT support-DPS unit rather than a pure carry. His biggest value comes from long-run DoT scaling, boss-wave DoT boosts, and the ability to increase allied DoT output when a Boss enters range. He should be especially useful in DoT-focused teams and against armored content, while the Spade synergy gives him extra team-building value in dedicated setups.

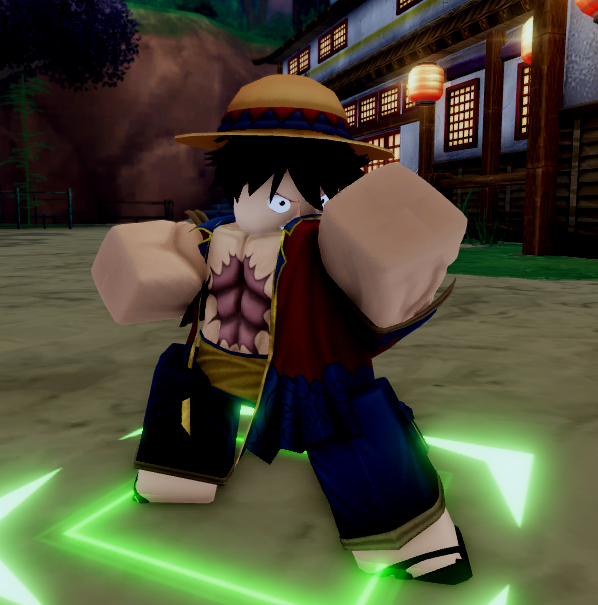
Joyful Captain Luffy UTDX Update 3
Joyful Captain / Luffy
Hybrid Fire
Early Tier Read: S++ / utility-carry candidate
Build Tips
Role: Universal (extremely hard to pull) unit with 3 upgrade paths. Top path has incredible Full AOE DPS, middle path is insane support with damage amps and knockback, while bottom path is the weakest of the three but can still deal solid DPS.
Important Note: Luffy is very element-dependent, dealing 2.5x damage with elemental advantage and 5x less damage with disadvantage.
Best Trait: Ruler. Alternative: Duelist for Infinite.
Best Relics: Warlord set + Shadow Reaper Mask for Bounceman / Warlord for G5.
Main Stats: Dmg / Crit Rate / Elemental Dmg (without Fern); Crit Dmg / Dmg / Elemental Dmg (with Fern buff).
Alternatives: Sorcerer Hunter, Super Roku, or Bio-Android set with Reaper Mask.
Substats: Crit Rate, Crit Dmg, Dmg, Cooldown.
Team: Triple Threat, Joyful Captain, Fern / Ace, Idol, Fastcart, Bulmo.
Extremely flexible unit with three upgrade paths, strong utility, path-specific scaling, and elite long-run potential.
Passives / Abilities Summary
  • Joyful Captain is a complex unit with three upgrade paths. You choose one main path at the start of the match, fully upgrade that path, and can then take two additional upgrades from a second path.
  • You cannot go beyond one maxed path plus two upgrades from a second path, so his final build depends heavily on which path you choose first.
Snakeman Path
  • Snakeman makes this unit’s attack chain to enemies within 8 studs until the attack length exceeds 40 studs.
  • When running out of enemies to chain, the arm retracts and deals 100% Damage.
  • For every 5 enemies hit, this unit gains +1 Follow-up for the next 3 attacks.
  • This unit can have a maximum of 2 active Follow-ups.
  • If this unit’s attack only hits one enemy, it deals 180% Damage.
  • Boomerang gives +10% Damage for every enemy hit by the previous attack, capped at +50%.
  • Observation dodges any attempted Stun up to 6 times, gains 1 dodge every 15 seconds, and starts at 0 dodges.
  • Conqueror unleashes a wave of energy every 30s that stuns non-boss enemies in range for 2s.
Kong Gun Path
  • Bounceman gives this unit +25% Hyper Armor Damage.
  • Charge lets you use the Active Ability to set a custom SPA for this unit’s attack.
  • Every second this unit is not performing an attack, it gains an equal amount of Charge to this unit’s SPA.
  • For every Charge, this unit gains +25% Damage, +50% Range, and +2 Stud Knockback.
  • The knockbacks can only be applied once per enemy.
  • These effects can stack up to 10 times.
  • Conqueror unleashes a wave of energy every 30s that stuns non-boss enemies in range for 2s.
  • Armament deals 1.75x Damage to Armored and Hyper Armored enemies.
Joyboy Path
  • Goofing Around randomly switches between 3 Attack variants and cannot use the same variant twice in a row.
  • It picks a random number between 25-75.
  • Based on the random value, it boosts AOE size and Damage.
  • Variant 1: Circle AOE, 100% Damage, and +25% True Damage for the duration of this attack.
  • Variant 2: Circle AOE, 100% Damage, and deals 15% Damage to enemies in rubber area.
  • Variant 3: Full AOE, 85% Damage.
  • Variant 4: Circle AOE, 120% Damage.
  • When all 4 Variants are used, it knocks all enemies in Range back by 15 studs.
  • Observation dodges any attempted Stun up to 6 times, gains 1 dodge every 15 seconds, and starts at 0 dodges.
  • Conqueror unleashes a wave of energy every 30s that stuns non-boss enemies in range for 2s.
  • Rubber Control leaves behind a bouncy area where this unit attacked for 15 seconds.
  • Enemies in bouncy areas take 1.5x DoT for 10 seconds.
  • Every second enemies spend in bouncy areas, they take +5% Damage from all sources, up to +30% for 15 seconds.
  • Maximum amount of bouncy areas: 2.
  • This passive does not trigger for Variant 3 of Goofing Around.
Etherealization Bonuses
  • Ethereal Level 1: “Observation” Dodge Cap increased to 6.
  • Ethereal Level 2: “Armament” Damage increased to 1.75x.
  • Ethereal Level 3: “Rubber Control” Area Duration increased to 15s.
  • Ethereal Level 4: “Charge” Damage gain increased to +15% per second.
  • Ethereal Level 5: “Snakeman” Attack chain length increased to 40 studs.
  • Ethereal Level 6: “Goofing Around” random Buff range increased by 25%.
Strengths
  • One of the most flexible Update 3.0 units because his three-path system lets him lean into chaining, charge-based burst, anti-armor damage, or rubber-area utility.
  • Snakeman gives him strong multi-target chaining and follow-up generation, while also giving him better single-target damage when only one enemy is hit.
  • Bounceman gives him strong Hyper Armor pressure, manual SPA control, charge-based Damage and Range scaling, and repeat knockback value.
  • Joyboy adds random attack variants, True Damage, bouncy area DoT amplification, enemy damage-taken scaling, and large knockback after all variants are used.
  • Observation and Conqueror give him useful defensive and crowd-control utility across multiple paths.
Weaknesses
  • His path system makes him more complicated than standard units, since choosing the wrong main path can lock you out of other tools for the rest of the match.
  • Because you can only max one path and take two upgrades from a second path, he may require more planning than plug-and-play DPS units.
  • Goofing Around has random attack behavior, so some of his Joyboy value may be less predictable than direct DPS units.
  • His final ranking depends heavily on which path proves strongest in real runs and how well his hybrid path combinations perform in longer content.
Meta Evaluation

Joyful Captain / Luffy looks like one of the most important Update 3.0 units because he is not just a DPS unit, but a flexible path-based unit. His Snakeman path gives chaining and follow-up value, Bounceman gives charge scaling and anti-Hyper Armor pressure, while Joyboy adds rubber-area utility, random AOE variants, True Damage, and damage amplification. He should be treated as an S++ candidate until full path testing settles which upgrade route is best.

Gluttonous Warlord Big Mom UTDX Update 3
Gluttonous Warlord (Despair) / Big Mom
Hill Rose
Early Tier Read: S++ / top-tier candidate
Build Tips
Role: Secret summoner Hill unit that uses DoTs, summons, and follow-ups to reach big DPS numbers.
Best Trait: Ruler. Alternatives: Sacred or Astral.
Best Relics: Warlord set + Monarch Cape (Dmg / Crit Rate / Elemental Dmg).
Alternatives: Monarch set, Sorcerer Hunter, or Bio-Android set with Warlord Hat, Shadow Reaper, or Reaper Mask.
Must-Have Substats: Crit Dmg, Crit Rate, Dmg. Good extras: DoT and Cooldown.
Stats: All Damage.
Team: Triple Threat, Gluttonous Warlord, Joyful Captain, Idol, Fastcart, Bulmo.
Likely strongest if her Ghost scaling and Black Burn uptime perform well in real runs.
Passives / Abilities Summary
  • Your Fear is now my Strength stuns units in range every 12 seconds for 3 seconds. For each stunned unit, she gains +2.5% Damage and +1% Range for 10 seconds, extended to 20 seconds at Etherealization 2.
  • Soul Harvest summons a Gluttonous Ghost with 10% Health on takedowns within range, up to 10 Ghosts at a time, while also stacking +1% Damage up to a +25% cap.
  • Ethereal Life Force lets her summon a Giant Gluttonous Ghost when a Boss is active. The Ghost has 250% of this unit’s Damage as Health, spawns at the start of the path, and can be used once per match.
  • Special Companions spawns Flame Cloud and Lightning Cloud on final upgrade. Flame Cloud adds follow-up Burn damage, while Lightning Cloud adds follow-up Electrified damage.
  • Eternal Despair makes dying Ghosts apply Black Burn, trigger a follow-up attack, and scale harder at higher Etherealization. At Etherealization 4, applying Stun also applies Black Burn.
Strengths
  • Extremely loaded kit with stun, Black Burn, Burn, Electrified, summon pressure, range scaling, and damage stacking all packed into one unit.
  • Ghost summons give her extra map presence and make her more than a standard Hill DPS unit, especially if they consistently body-block, pressure, or trigger death effects.
  • Her stun-to-Black Burn interaction at Etherealization 4 looks especially strong because it turns her control cycle into extra DoT pressure.
  • The boss-only Giant Gluttonous Ghost gives her a dedicated high-value tool for late waves and boss phases.
Weaknesses
  • Her full value depends heavily on how reliably Ghost summons spawn, survive, die, and trigger their follow-up effects during real matches.
  • Several major effects are tied to Etherealization breakpoints, so her base version may feel noticeably weaker than her fully invested version.
  • Summon-heavy units can be harder to judge, because practical pathing, timing, and enemy density matter a lot.
Meta Evaluation

Gluttonous Warlord (Despair) looks like the most overloaded Update 3.0 unit so far. Her kit has everything a top-meta unit wants: automatic control, summon scaling, DoT layering, boss utility, and self-scaling damage. Until my full testing is complete, IMHO she should sit at the top of our Update 3.0 Tier as the strongest S++ candidate.

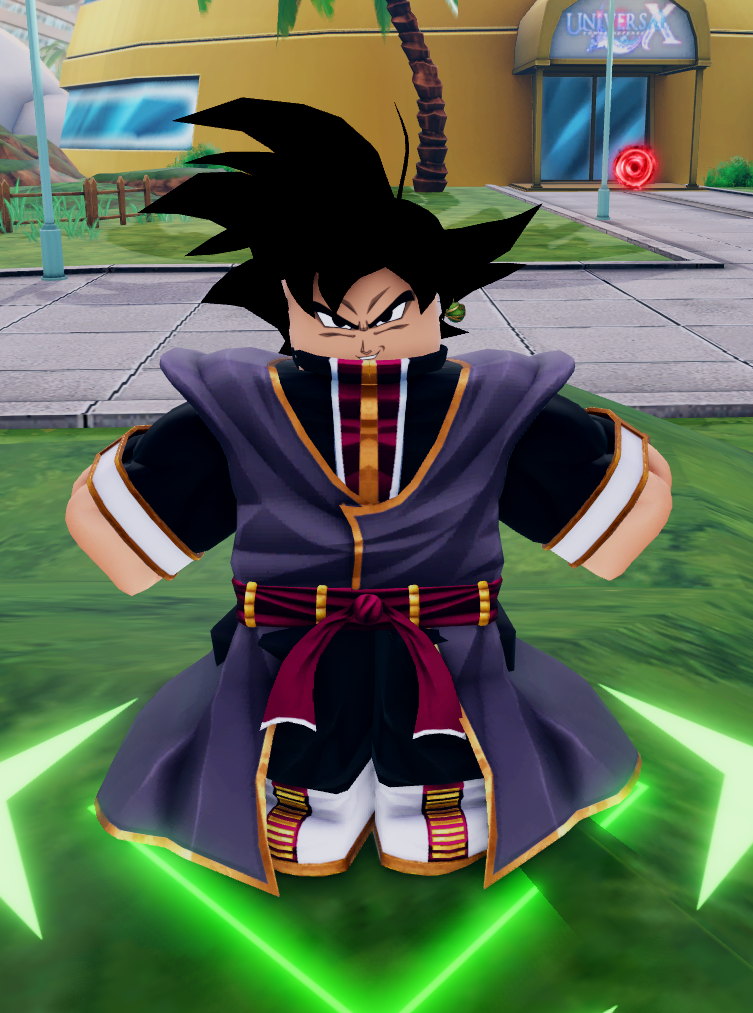
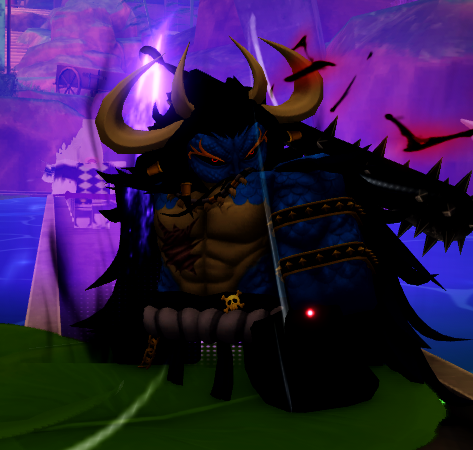
Dragon Warlord Kaido UTDX Update 3
Dragon Warlord (Rage) / Kaido
Ground Fire
Early Tier Read: S++ / S+ candidate
Build Tips
Role: Secret DPS unit with strong numbers, Hybrid Form on Upgrade 3, decent crowd control, and enemy-following attacks that make him an excellent macro unit.
Best Trait: Ruler. Alternative: Duelist.
Best Relics: Warlord set + Shadow Reaper Necklace (Crit Dmg / Dmg / Elemental Dmg with Fern or Crit buffers; Dmg / Crit Rate / Elemental Dmg without Crit buffers).
Alternatives: Sorcerer Hunter, Super Roku, or Bio-Android set with Shadow Reaper or Reaper Mask.
Substats: Crit Rate, Crit Dmg, Dmg, Cooldown, DoT.
Stats: All Damage.
Team: Triple Threat, Dragon Warlord, Prodigy Mage, Idol, Fastcart / Joyful Captain (Joyful Captain if >15 waves), Bulmo.
Huge ceiling, but likely more timing- and form-dependent than Gluttonous Warlord.
Passives / Abilities Summary
  • Dragon Rage gives him a Rage bar up to 100, or 150 at Etherealization 4. He gains +1% Rage every second, every takedown, and every attack.
  • For every 2% Rage, he gains +1% Damage and +1% Range, giving him strong natural ramping during longer waves.
  • At 65+ Rage, he enters Hybrid Form, gaining +20% DoT and +20% True Damage. At Etherealization 2, those increase to +35% DoT and +30% True Damage.
  • At 100+ Rage, he can enter Dragon Form, letting you manually attack and control the Dragon for 60 seconds, or 90 seconds at Etherealization 6.
  • Dragon Assault moves him to the last enemy he attacked every other attack and launches full AOE follow-ups. Hybrid Form increases follow-up damage and adds a 25% Slow for 5 seconds.
  • Dragon Breath applies Burn on attack, while Hybrid Form also adds a 1-second Stun.
  • Conqueror of Lighting triggers Dragon Assault when enemies enter half his range, applies Stun and Electrified, and converts Burn applied to Electrified enemies into instant bonus damage.
Strengths
  • Very strong ramping profile thanks to Rage-based Damage and Range scaling.
  • Hybrid Form gives him a powerful mix of DoT, True Damage, Slow, Stun, Burn, and follow-up attacks.
  • Boss-tracking and enemy-position movement effects could make him excellent against priority targets and leaks.
  • Dragon Form gives him a unique active playstyle with manual control, potentially letting skilled players squeeze out extra value.
Weaknesses
  • His power is heavily tied to Rage thresholds, so he may need time before reaching his best form.
  • Manual Dragon Form control could be very strong, but it may also make him less convenient than passive, place-and-forget meta units.
  • If Rage drains too quickly or Dragon Form uptime is awkward in practice, his ceiling may be less consistent than it looks on paper.
Meta Evaluation

Dragon Warlord (Rage) looks like a high-skill, high-ceiling carry with excellent scaling and strong status coverage. His mix of Burn, Electrified, Slow, Stun, True Damage, and full AOE follow-ups gives him serious S++ potential, but he needs practical testing to see how smooth his Rage cycle and Dragon Form actually feel.

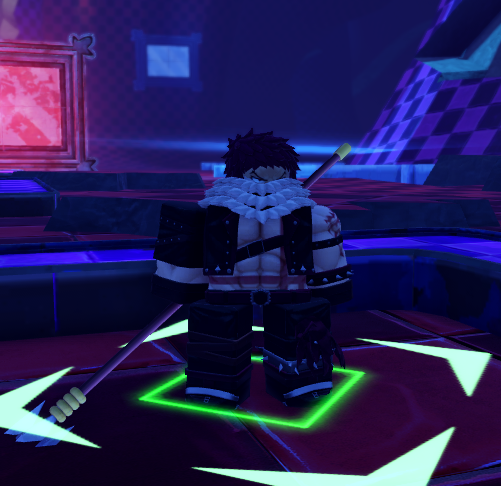
Mochi Pirate KATAKURI UTDX Update 3
Mochi Pirate (Conqueror) / Katakuri
Ground Fire
Early Tier Read: S+ / specialist candidate
Build Tips
Role: Secret unit built around big guaranteed Crit hits, strong DPS, and useful crowd control through Time Snail.
Best Trait: Ruler. Alternatives: Sacred or Fission for support.
Best Relics: Warlord set + Shadow Reaper Necklace (Crit Dmg / Dmg / Elemental Dmg).
Alternatives: Sorcerer Hunter, Super Roku, or Bio-Android set with Shadow Reaper or Reaper Mask.
Important Substats: Crit Dmg, Dmg, Cooldown. Good extras: Crit Rate and Range.
Stats: All Damage.
Team: Triple Threat, Joyful Captain, Mochi Pirate, Miku, Fastcart / Dragon Warlord (DW if 15 > waves), Bulmo.
Likely strongest in crit-focused setups and against enemies that remain inside dough zones.
Passives / Abilities Summary
  • Flowing Mochi applies Time Snail on attack and leaves a trail of liquid dough behind enemies for 8 seconds.
  • While enemies are affected by the dough, they take guaranteed Crits from this unit.
  • Evercrush Dough applies up to 3 stacks per enemy on attack or when applying a status effect.
  • At full stacks, the next attack deals +250% Damage.
Strengths
  • Guaranteed crits against dough-affected enemies could make him scale extremely well with Crit Damage builds.
  • Time Snail gives him valuable utility instead of being purely damage-focused.
  • The 3-stack Evercrush Dough payoff gives him strong burst windows, especially if attacks and status applications stack quickly.
  • His kit looks simple but efficient, which can be a major advantage if his uptime is consistent.
Weaknesses
  • His value depends on how reliably enemies remain affected by the dough trail.
  • Compared to Gluttonous Warlord and Dragon Warlord, his current kit looks more focused and less overloaded.
Meta Evaluation

Mochi Pirate (Conqueror) looks like a strong specialist DPS with built-in Time Snail, guaranteed crit windows, and a heavy burst trigger at full stacks. He should be placed below Gluttonous Warlord and Dragon Warlord for now, mostly because his visible kit is narrower and one part of the passive text is still missing.

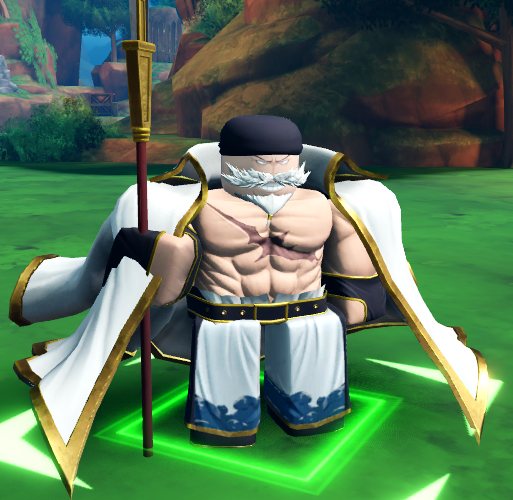
Quake Warlord Whitebeard UTDX Update 3
Quake Warlord (Destroyer) / Whitebeard
Ground Water
Early Tier Read: S++ / elite support-DPS and Synchro candidate
Build Tips
Build tips coming soon.
Massive map-wide control, permanent damage amp, strong stun synergy, Piece-tag support, and now a huge Synchro Clash payoff with Pirate King.
Passives / Abilities Summary
  • Power To Destroy The World deals 350% Damage to all enemies on the map, applies Quake Stun for 15 seconds, and makes enemies hit take +50% Damage until death. Quake Stun is a separate affliction, meaning it can stack with regular Stun. This is a one-time use ability.
  • My Sons gives him bonus damage when allied units are debuffed. If a Piece Tag unit is debuffed, he gains +50% Damage for 30 seconds. If any other unit is debuffed, he gains +30% Damage for 20 seconds. At Etherealization 4, both buffs are increased by 20%.
  • When Spade is in range, Quake Warlord gains +40% Damage to Spade, giving him a specific synergy bonus with that unit.
  • Conqueror's Clash gives him +10% Crit Rate for every Follow-up Attack, capped at +40%. At Etherealization 6, this becomes +20% Crit Rate per Follow-up Attack.
  • When a Boss enters range, he follows up with Attack 3, deals +100% Critical Damage, and applies Stun for 4 seconds. On Crit, he also applies a 40% Slow for 5 seconds.
  • The Strongest Man applies Stun for 3 seconds on every attack. If he attacks an already stunned enemy, he deals +40% Damage and stores 30% Damage for 5 attacks, up to 150% Damage. At Etherealization 2, this increases to 50% stored Damage, up to 250%.
  • When 5 attacks have been stored, he performs an Attack 2 Follow-up for the stored Damage amount.
  • Synchro Clash triggers when both Quake Warlord and Pirate King are fully upgraded and within each other's range.
  • The Synchro Attack deals 600% of the average Damage between Quake Warlord and Pirate King to all enemies on the map.
  • Synchro Clash Cooldown: 300s.
Strengths
  • Power To Destroy The World is an absurd panic button and boss-wave setup tool, combining map-wide damage, long Quake Stun, and a permanent +50% damage taken debuff on everything hit.
  • The fact that Quake Stun stacks with regular Stun is huge, because it lets him layer control instead of simply overlapping with what other stun units already provide.
  • His regular attacks are loaded with control value thanks to constant Stun, boss-triggered follow-ups, Crit Rate stacking, Slow on Crit, and stored-damage follow-up bursts.
  • He looks especially strong in Piece-tag teams, where My Sons can turn allied debuffs into large damage buffs for him.
  • His kit has both support and carry value: he amplifies enemy damage taken, controls waves, pressures bosses, and ramps his own burst through stored damage.
  • The new Synchro Clash with Pirate King gives him a massive extra late-game payoff, turning the Whitebeard / Roger pairing into one of the most important Update 3.25 synergies.
Weaknesses
  • His strongest ability is a one-time use, so wasting it on the wrong wave could heavily reduce his overall value.
  • Part of his best damage profile depends on enemies already being stunned, which means he may perform better with strong stun uptime or in longer fights where his own Stun loop gets going.
  • The My Sons passive is strongest in Piece-tag setups, so his full ceiling may be more team-dependent than a pure plug-and-play DPS unit.
  • The Synchro Clash payoff requires both him and Pirate King to be fully upgraded and positioned within each other's range, so it adds another team-building and placement requirement.
  • The Synchro Attack has a long 300s Cooldown, so timing will matter a lot in hard content.
Meta Evaluation

Quake Warlord (Destroyer) was already one of the most valuable Update 3.0 units because of his map-wide damage, long-duration control, permanent damage amplification, regular Stun uptime, boss pressure, and team-scaling buffs. With Pirate King (Voyage) added, his value rises even more because Synchro Clash gives the Whitebeard / Roger pairing a huge map-wide burst option. He remains an S++ candidate, and teams that can fit both him and Pirate King now have a very strong late-game synergy to build around.

Sharpshooter King Usopp UTDX Update 3
Sharpshooter King (Trapper) / Usopp
Hybrid Wind
Early Tier Read: S+ / specialist trap-control candidate
Build Tips
Role: Hybrid trap-control unit built around off-range follow-ups, path traps, Burn, Bleed, Stun, and boss damage amplification.
Best Trait: Ruler. Alternatives: Astral or Sacred if you want more utility value.
Best Relics: Warlord set + Shadow Reaper / Reaper Mask (Dmg / Crit Rate / Elemental Dmg).
Alternatives: Sorcerer Hunter, Super Roku, or Bio-Android set with Warlord Hat, Shadow Reaper, or Reaper Mask.
Substats: Dmg, Crit Rate, Crit Dmg, Cooldown, DoT, Range.
Stats: All Damage.
Team: Triple Threat, Joyful Captain, Sharpshooter King, Idol, Fastcart / Prodigy Mage, Bulmo.
He should scale best in longer runs where traps stay active, Follow-up Attacks stack damage, and his boss damage-taken debuff has time to matter.
Strongest if his trap cap, bonus damage, and off-range follow-ups stay consistent in real runs.
Passives / Abilities Summary
  • READY, AIM FIRE! activates when no enemies are in range. He gains +1,000% Range, releases a Follow-up Attack for 100% Damage, and applies Burn for 35% Damage over 6 ticks.
  • At Etherealization 2, the Follow-up Attack from READY, AIM FIRE! deals 135% Damage instead.
  • For every Follow-up Attack, he gains +5% Damage, capped at +30%. The effect has a 45-second Cooldown, reduced to 30 seconds at Etherealization 4.
  • Pop Green Traps activates when no enemies are in range. Instead of attacking, he plants traps on the path within range. He can place up to 3 traps at a time, increased to 6 traps at Etherealization 6.
  • Pop Green: Fly Eater deals 150% Damage to the enemy that steps on the trap.
  • Pop Green: Bamboo deals 100% Damage, applies Bleed for 25% Damage over 5 ticks, and applies Stun for 2 seconds.
  • Pop Green: Vines deals 125% Damage to the enemy that steps on the trap and 25% Damage to enemies within 25 studs of the trap.
  • Trap and Go gives him +10% Damage per active trap. When the trap cap is reached and an enemy enters range, he performs a Follow-up Attack for 15% Damage. Enemies hit take +20% Damage until they die, or +40% Damage until death if the enemy is a Boss.
Strengths
  • Very unique trap-based kit that lets him keep contributing even when enemies are not currently inside his normal attack range.
  • READY, AIM FIRE! gives him massive temporary reach, Burn application, follow-up damage, and stacking personal damage from repeated follow-ups.
  • His traps cover multiple roles: Fly Eater is pure burst, Bamboo adds Bleed and Stun, and Vines adds splash damage around the trap.
  • Trap and Go gives him strong scaling with active traps, especially at Etherealization 6 when the trap cap increases to 6.
  • The permanent damage-taken effect from Trap and Go is especially valuable against bosses, where the bonus increases to +40% Damage until death.
Weaknesses
  • His kit depends heavily on trap placement behavior, enemy pathing, and whether traps are triggered consistently before waves move past key areas.
  • Several effects activate when no enemies are in range, so his best value may require careful placement rather than simply putting him where he constantly attacks.
  • He may be less straightforward than standard DPS units because his damage is split between attacks, follow-ups, traps, DoTs, and debuff setup.
  • His full ceiling appears much better at higher Etherealization, especially because Etherealization 6 doubles his trap cap from 3 to 6.
Meta Evaluation

Sharpshooter King (Trapper) looks like a strong specialist unit rather than a simple raw DPS carry. His trap system gives him excellent utility, especially through Stun, Bleed, Burn, splash damage, and boss damage amplification. He probably belongs below the most overloaded Update 3.0 units for now, but if trap uptime is reliable and his damage-taken debuffs stack well with top carries, he could become a very valuable S+ support-DPS pick.

Triple Threat Zoro UTDX Update 3
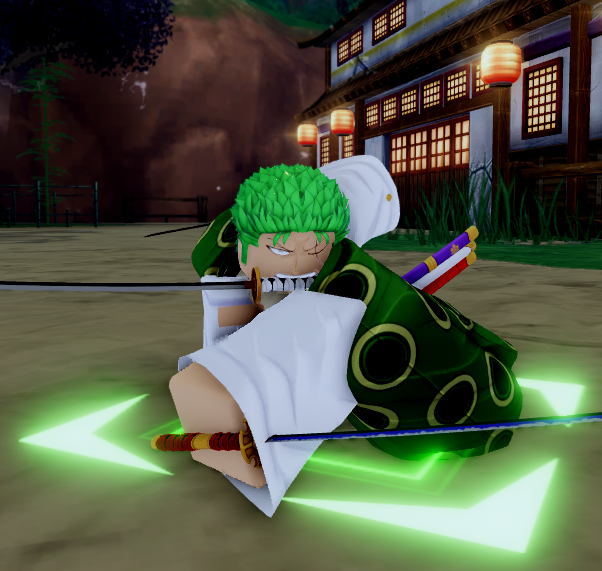
Triple Threat (Unrivaled) / Zoro
Ground Wind
Early Tier Read: S+ / boss-killer candidate
Build Tips
Role: Unrivaled unit with leader buffs and strong DoT pressure.
Best Trait: Ruler. Alternative: Astral.
Best Relics: Warlord set + Biju Energy (Crit Dmg / Dmg / Elemental Dmg).
Alternatives: Sorcerer Hunter, Super Roku, or Bio-Android set with Warlord Hat, Shadow Reaper, or Reaper Mask.
Substats: Crit Dmg, Dmg, Crit Rate, Cooldown, DoT.
Stats: All Damage.
Team: Triple Threat, Joyful Captain, Mochi Pirate, Idol, Prodigy Mage, Bulmo.
Strong boss pressure, Haki-based burst windows, Critical Bleed follow-ups, and Piece-tag stun protection.
Passives / Abilities Summary
  • Nothing Happened reduces Stun by 50% when a unit in range is stunned. If the unit has the Piece Tag, Triple Threat receives the Stun instead, reduced by 75%.
  • King of Heck is an active power state. While active, he loses 10 Haki per attack, roughly 3%, and gains +50% Damage and +100% Crit Damage.
  • When Haki reaches below 10, King of Heck automatically disables, stuns this unit for 10 seconds, and disables Pirate Hunter for 30 seconds.
  • Pirate Hunter activates when a Boss is in range. This unit can only target the Boss and has its AOE size halved, but gains +50% Damage, 75% Hyper Armor Damage, and +50% Crit Rate until the Boss is no longer in range.
  • Color of Armaments gives this unit a Haki Charge. He gains +1 Haki per Bleed tick, but cannot gain Haki while King of Heck is active.
  • Brutal Slashes applies Critical Bleed for 85% Damage over 7 seconds on attack. Hitting enemies with Critical Bleed triggers a Follow-up Attack for 75% Damage.
Strengths
  • Looks like one of the best boss-focused Update 3.0 units thanks to Pirate Hunter, which gives him Damage, Hyper Armor Damage, and Crit Rate when a Boss enters range.
  • King of Heck gives him a huge burst window with +50% Damage and +100% Crit Damage, making him much scarier when Haki is managed properly.
  • Brutal Slashes gives him steady Critical Bleed pressure, and that Bleed also feeds his Haki through Color of Armaments.
  • Nothing Happened gives him rare team-protection utility, especially for Piece-tag units, by absorbing and reducing Stun effects.
  • The kit has a strong internal loop: Bleed helps restore Haki, Haki fuels King of Heck, and King of Heck turns him into a much stronger burst DPS unit.
Weaknesses
  • His best damage state is resource-based, so poor Haki management can lead to downtime, self-stun, and losing access to Pirate Hunter for 30 seconds.
  • Pirate Hunter forces him to only target the Boss and halves his AOE size, which can make him worse at general wave clearing during boss phases.
  • He depends on Bleed ticks to recharge Haki, so his uptime may vary depending on enemy density, Bleed uptime, and whether enemies survive long enough.
  • He looks more specialized than universally overloaded units like Gluttonous Warlord or Dragon Warlord.
Meta Evaluation

Triple Threat (Unrivaled) looks like a strong boss-killing specialist with excellent burst potential, especially when King of Heck and Pirate Hunter overlap cleanly. His Critical Bleed and Haki loop give him a real scaling identity, while Nothing Happened adds useful Piece-tag protection. He should probably sit in the S+ range for now, with S++ potential if his Haki uptime and boss damage perform consistently in real runs.

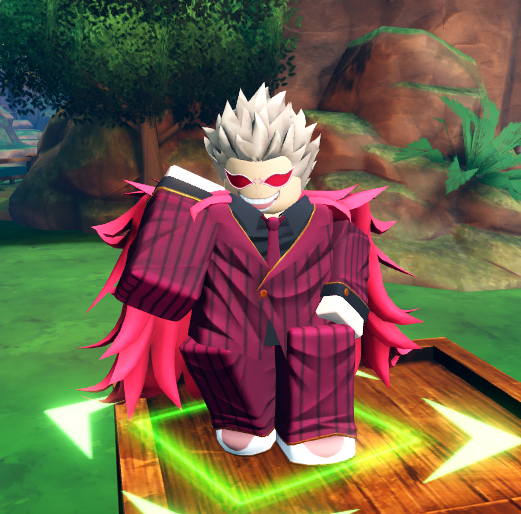
String Warlord Doflamingo UTDX Update 3
String Warlord (Joker) / Doflamingo
Ground Rose
Early Tier Read: S+ / control-DPS candidate
Build Tips
Build tips coming soon.
Strong clone uptime, Birdcage control, Bleed/Slow utility, and String-stack burst scaling.
Passives / Abilities Summary
  • String Clone gives every attack a 25% chance to spawn a String Clone. If 3 attacks fail to spawn one, the 4th attack is guaranteed.
  • The String Clone has 75% Damage, 1.25x SPA, and 100% Range. It lasts for 2 attacks.
  • If this unit receives a negative effect while the clone is active, the clone takes it and disappears.
  • Birdcage opens a Birdcage with 100% of this unit’s Range for 60 seconds. Every 10 seconds, it triggers either String Swipe or String Stun.
  • String Swipe deals 45% Damage to all enemies in range.
  • String Stun stuns all enemies for 2.5 seconds, applies Bleed for 20% Damage over 4 ticks, and applies 15% Slow for 4 seconds.
  • When the Birdcage closes, it explodes for 125% Damage, or 250% Damage on Etherealization 6. Birdcage has a 120-second Global Cooldown.
  • Off-White gives 1 String stack on attack or kill. Each String stack grants +3% Damage, or +6% Damage at the upgraded value shown.
  • At 10 stacks, or 7 stacks on Etherealization 4, he consumes all strings and fires 2 String Worms at random enemies.
  • Each String Worm deals 50% Damage, with an upgraded value shown of 80% Damage.
Strengths
  • String Clone gives him consistent extra pressure, and the guaranteed 4th-attack spawn prevents terrible RNG streaks.
  • The clone can also absorb a negative effect and disappear, giving String Warlord a useful layer of debuff protection.
  • Birdcage is a strong control tool because it lasts 60 seconds and repeatedly triggers damage, Stun, Bleed, and Slow effects.
  • String Stun gives him useful crowd control and DoT utility, while the Birdcage explosion adds a strong closing burst, especially at Etherealization 6.
  • Off-White gives him steady self-scaling through String stacks and periodic String Worm burst damage.
Weaknesses
  • His biggest control tool has a 120-second Global Cooldown, so mistiming Birdcage can hurt his impact across a run.
  • String Clone only lasts for 2 attacks, meaning its value depends on how often it spawns and how quickly it gets removed by negative effects.
  • Some of his burst is fired at random enemies through String Worms, which may be less reliable against specific priority targets.
  • He looks strong, but not as immediately overloaded as the top Update 3.0 S++ candidates.
Meta Evaluation

String Warlord (Joker) looks like a strong control-DPS unit with good self-scaling, clone pressure, and a high-value Birdcage active. His kit is especially appealing because it mixes damage, Stun, Bleed, Slow, debuff protection, and periodic burst instead of relying on one mechanic. He should land around S+ for now, with room to rise if Birdcage uptime and String Clone value prove consistent in harder content.

Universal Tower Defense X Unit Tier List

Before jumping into the UTDX units tier list, keep in mind that this ranking assumes late-game investment: fully evolved units where applicable, full Etherealization bonuses, top-tier Traits, and properly matched relics. A Mythic unit with the wrong trait and weak relics can feel much worse than a slightly lower-ranked unit with the right setup.

Also, this Universal Tower Defense X tier list is focused mostly on late-game value. Early Story progression is much more forgiving, while Infinite, Challenges, Virtual Realm, Ragnarok, and other harder modes reward units that bring scaling, CC, armor breaking, team buffs, boss damage, or strong economy.

Universal Tower Defense X DPS Tier List

Ground
Hybrid/Hill
3.25
Triple Threat (Unrivaled) / Zoro game image

Triple Threat (Unrivaled) / Zoro

GROUNDWIND
String Warlord (Joker) / Doflamingo game image

String Warlord (Joker) / Doflamingo

GROUND
Quake Warlord (Destroyer) / Whitebeard game image

Quake Warlord (Destroyer) / Whitebeard

GROUNDWATER
Mochi Pirate (Conqueror) / Katakuri game image

Mochi Pirate (Conqueror) / Katakuri

GROUNDFIRE
Dragon Warlord (Rage) / Kaido game image

Dragon Warlord (Rage) / Kaido

GROUNDFIRE
Pirate King (Voyage) / Roger game image

Pirate King (Voyage) / Roger

GROUNDROSE
Marin Hero (Grand Fist) / Garp game image

Marin Hero (Grand Fist) / Garp

GROUNDWATER
Sharpshooter King (Trapper) / Usopp game image

Sharpshooter King (Trapper) / Usopp

HYBRIDWIND
Joyful Captain / Luffy game image

Joyful Captain / Luffy

HYBRIDFIRE
Gluttonous Warlord (Despair) / Big Mom game image

Gluttonous Warlord (Despair) / Big Mom

HILLROSE
Revolutionary (Chief Emperor) / Sabo game image

Revolutionary (Chief Emperor) / Sabo

HILLFIRE
Strongest Swordsman (Hunter) / Mihawk game image

Strongest Swordsman (Hunter) / Mihawk

HILLWIND
S++
First Emperor (Greatest) game image

First Emperor (Greatest)

GROUNDROSE
King Sailor (Unrivaled) game image

King Sailor (Unrivaled)

GROUNDWATER
Ancient Shinobi (Reawakened) game image

Ancient Shinobi (Reawakened)

GROUNDWATER
Nutaru (Beast) game image

Nutaru (Beast)

WINDGROUND
Alpha Devil (Omega) game image

Alpha Devil (Omega)

GROUNDICE
Devil Hunter (Mercenary) game image

Devil Hunter (Mercenary)

GROUNDFIRE
The Strongest of Today game image

The Strongest of Today

GROUNDLIGHT
Ant King (Savage) game image

Ant King (Savage)

HYBRIDDARK
Crow Shinobi (Reanimated) game image

Crow Shinobi (Reanimated)

FIREHILL
Ancient Mage (Slayer) game image

Ancient Mage (Slayer)

HYBRIDLIGHT
The Strongest in History game image

The Strongest in History

HYBRIDDARK
Phantom Captain (Carrier) game image

Phantom Captain (Carrier)

HYBRIDLIGHT
Jangluu (Eclipse) game image

Jangluu (Eclipse)

HILLICE
Migumen (Finale) game image

Migumen (Finale)

HYBRIDFIRE
Sharpshooter (Precision) game image

Sharpshooter (Precision)

HILLFIRE
S+
Underworld God (Death) game image

Underworld God (Death)

GROUNDWIND
Enlightened God (Holy) game image

Enlightened God (Holy)

GROUNDLIGHT
First Human (Father) game image

First Human (Father)

GROUNDROSE
Tai Yang game image

Tai Yang

GROUNDFIRE
Dragon Slayer (Hero) game image

Dragon Slayer (Hero)

GROUNDFIRE
Mimicry Sorcerer (Cursed Love) game image

Mimicry Sorcerer (Cursed Love)

GROUNDROSE
Mighty Roach (Cursed) game image

Mighty Roach (Cursed)

GROUNDWIND
Jane Juliet (Larper) game image

Jane Juliet (Larper)

GROUNDWATER
Shadow Knight (Risen) game image

Shadow Knight (Risen)

GROUNDWIND
Gambler Sorcerer (Jackpot) game image

Gambler Sorcerer (Jackpot)

GROUNDWIND
Judgment Sorcerer (Domain) game image

Judgment Sorcerer (Domain)

GROUNDLIGHT
Water God (Primordial) game image

Water God (Primordial)

WATERHYBRID
Jinoo (Shadow Monarch) game image

Jinoo (Shadow Monarch)

DARKHYBRID
Judas (Darkness) game image

Judas (Darkness)

HILLDARK
Ichiko (Rage) game image

Ichiko (Rage)

HYBRIDDARK
S
Ja'frey (Lightning Assassin) game image

Ja'frey (Lightning Assassin)

GROUNDDARK
Berserker (Enraged) game image

Berserker (Enraged)

GROUNDLIGHT
The Drink (Survivor) game image

The Drink (Survivor)

GROUNDFIRE
Grommjaw (Panther) game image

Grommjaw (Panther)

GROUNDWATER
Dragon Guy (Silverite) game image

Dragon Guy (Silverite)

GROUNDICE
Bio-Android (Imperfect) game image

Bio-Android (Imperfect)

GROUNDWIND
Koyote (Number One) game image

Koyote (Number One)

HYBRIDICE
Ultiorra (Oblivion) game image

Ultiorra (Oblivion)

HILLDARK
Spade (Donut) game image

Spade (Donut)

HILLFIRE
Rohan & Robot 16 (Limit Breaker) game image

Rohan & Robot 16 (Limit Breaker)

HYBRIDLIGHT
A
Kriatu (Cheater) game image

Kriatu (Cheater)

GROUNDICE
Fallen Prince (Ruthless) game image

Fallen Prince (Ruthless)

GROUNDWATER
Robot 17 & 18 (Fighterz) game image

Robot 17 & 18 (Fighterz)

GROUNDROSE
Lord of Flies (Tempered) game image

Lord of Flies (Tempered)

RAGNAROKHILLDARK
Cyborg (Fearless) game image

Cyborg (Fearless)

HILLFIRE
Psycho (100%) game image

Psycho (100%)

HYBRIDFIREROSE
Super Roku (Enraged) game image

Super Roku (Enraged)

HILLLIGHT
B
Footballer (Ego) game image

Footballer (Ego)

GROUNDFIRE
Ruka game image

Ruka

GROUNDICE
Gen game image

Gen

GROUNDFIRE
Masked Ninja game image

Masked Ninja

GROUNDFIRE
Shakumira game image

Shakumira

HYBRIDDARK
Pebble game image

Pebble

HYBRIDROSE
Greybeard game image

Greybeard

HYBRIDDARK
Nejo game image

Nejo

HYBRIDWIND
Nellee Primal game image

Nellee Primal

HYBRIDROSE
C
Laffy game image

Laffy

GROUNDFIRE
Garu game image

Garu

GROUNDWATER
Roku game image

Roku

GROUNDFIRE
Ranji game image

Ranji

GROUNDWIND
Nutaru (Kid) game image

Nutaru (Kid)

GROUNDWIND

Universal Tower Defense X UPD 3.25 Meta Explained

The current UTDX meta has changed in a pretty big way. Units are no longer judged purely by how much damage they can pump out, because the game now pushes them into more defined roles. Instead of looking at every unit as a basic DPS carry, it’s much more important to understand whether they work best as Raw DPS, Specialists, Utility, or Support units.

Raw DPS units are your primary damage dealers and wave-clearing carries. Specialists are more situational, usually bringing value through things like armor breaking, boss pressure, or specific game-mode strengths. Utility units help control enemies or weaken them with debuffs, while Support units focus on boosting your team, improving your economy, or making your strongest units even better. In other words, team-building matters more than ever.

That is why some units rank higher than their damage alone would suggest. A unit that slows, stuns, applies DoT, increases affliction time, buffs crit stats, reduces upgrade costs, or helps against armored enemies can be more valuable than a unit with better sheet DPS but no useful team utility.

S++ Tier: The Absolute Meta (OP)

S++ Tier is reserved for units that can anchor an endgame team by themselves or provide such strong scaling and utility that the entire team benefits from building around them. With the current UTDX 3.0 meta, that means top carries and high-impact specialists are valued more than simple sheet DPS.

S++ Tier // The OP Meta Units
The Strongest of Today
Light Ground Trait: Ruler
Build Tips
Best Relics: Sorcerer Hunter set + Strongest Sorcerer's Glasses (Crit Dmg / Dmg / Elemental Dmg).
Alternative: Super Roku set + Shadow Reaper Necklace (Crit Dmg / Dmg / Elemental Dmg).
Substats: Dmg, Crit Dmg, Cooldown.
Stats: All Damage.
Team: Leader Gojo, any Hybrid, any two flex units, plus two farms.
He does not need a specific synergy shell; he fits almost any serious team.
Pros
  • Limitless Sorcerer is absurd utility value on its own, automatically slowing enemies as they enter range and making them take +25% damage while they stay inside it.
  • Domain Expansion is one of the most oppressive control tools in the game, inflicting a massive 30-second Timestop in range, converting it into bonus damage taken, and snowballing his own damage through kills while it lasts.
  • Infinite Purple gives him reliable map-wide burst, dealing 300% damage to all enemies, and Six Eyes adds elite anti-CC value by nullifying debuffs and turning failed debuff attempts into stun-enabled counterpressure.
  • Show-off and Cursed Pinball make him even nastier in practice, since his fixed 50% crit rate constantly threatens extra Timestop uptime while non-Hyper Armor enemies get pulled, crit, and controlled around his range.
Cons
  • He only has one placement and costs 79,000 total to max, so bad positioning hurts much more than it does on multi-placement carries.
  • Part of his craziest value is tied to long cooldown abilities, especially Domain Expansion, so he feels most broken in runs where he can farm kills and reset cooldowns through Six Eyes.
The Strongest in History
Dark Ground Trait: Ruler
Build Tips
Best Relics: Monarch set + Junior Ninja Headband (Dmg / Dmg / Elemental Dmg).
Alternative: Monarch set + Sorcerer Hunter Spirit (Dmg / Dmg / Elemental Dmg).
Substats: Cooldown on Relics; Dmg/Cooldown on accessories.
Stats: All Damage.
Tested Team: Leader Sinbad, Sukuna, Buddha, Fern, Bulma, Miku.
Raw damage is the simpler, easier-to-use setup.
Pros
  • Domain Expansion is completely insane for a DPS unit, giving him +1000% range, constant half-second damage pulses, slow, permanent damage amp on enemies hit, and a huge boss-only Fire Arrow follow-up at the end.
  • The Shadows gives him monstrous scaling over time, permanently marking enemies and turning those marks into bigger damage-taken debuffs, slow, double summon access, and at Etherealization 4 even extra stun utility once thresholds are lowered.
  • Shadow Emerge turns marked enemies into free value, adding follow-up attacks with Bleed while also ramping his own damage up to a +50% cap.
  • Ten Umbra is overloaded even by S++ standards: adaptive immunity, summon-based afflictions and buffs, copied stats, and extra cone slashes from Adaptive Curse make him feel like multiple units packed into one slot.
Cons
  • His total cost of 117,500 is outrageous, so he is one of the greediest investments in the entire meta and needs strong economy support to come online comfortably.
  • His full ceiling takes setup, because a lot of his nastiest scaling depends on building marked enemies, getting follow-ups rolling, and timing Domain Expansion so it does not get wasted or interrupted.
Devil Hunter Mercenary
Devil Hunter (Mercenary)
Fire Ground Trait: Astral
Build Tips
Best Relics: Reanimated set + Spirit Armor or Shadow Reaper accessory (DoT / Dmg / Elemental Dmg).
Alternative: Bio-Android set + Biju accessory (Dmg / Dmg / Elemental Dmg); weaker without Bleed/DoT support.
Substats: DoT, Cooldown, Crit Rate, Crit Dmg, Dmg.
Stats: All Damage.
Bleed Team: King Sailor, Alpha Devil, Devil Hunter, Idol, Ant King or Fission Prodigy's Mage, Bulmo.
Non-Bleed Team: King Sailor, Ancient Mage or Gojo, Devil Hunter, Idol, Fission Prodigy's Mage, Bulmo.
Pros
  • Freestyle gives him nasty snowball potential in long engagements, ramping his damage through style ranks all the way from D to SSS as long as he keeps attacking.
  • Supada’s Power gives him a reliable transformation cycle, and once Demon Awakened kicks in he gains a huge +50% Damage, with Etherealization 4 making the Awakening fill much faster.
  • Demonic Arsenal makes him far more than a basic DPS unit: Twin Guns speeds up his pressure, Demoncycle can chain stuns based on DoTs, Devil Sword converts Bleed into Burn, and Fancy Hat turns spare Yen into massive burst damage.
  • With three placements and a very manageable total cost of 67,000, he brings both carry damage and utility synergy, especially in DoT-heavy teams that can feed his weapon effects.
Cons
  • A lot of his ceiling depends on maintaining constant uptime, since Freestyle resets if he stops attacking for too long, which makes short paths or bad placement much more punishing.
  • Fancy Hat is powerful but economy-dependent, so if your team cannot comfortably sustain the Yen drain, that weapon mode becomes much less reliable than it looks on paper.
Alpha Devil Omega
Alpha Devil (Omega)
Ice Ground Trait: Ruler Trait: Duelist
Build Tips
Best Relics: Super Roku set + Shadow Reaper accessory (Dmg / Dmg / Elemental Dmg), especially for Duelist builds.
Alternative: Bio-Android set + Biju accessory (Dmg / Dmg / Elemental Dmg).
Substats: DoT, Cooldown, Crit Rate, Crit Dmg.
Stats: All Damage.
Team: King Sailor, Alpha Devil, Devil Hunter, Prodigy Mage, Idol, Bulmo.
Both relic routes work; the better one depends mostly on team composition and trait setup.
Pros
  • Show me your motivation gives him excellent passive pressure, spawning phantom swords on crit that keep dealing damage over time at the target location, and at Etherealization 6 he can maintain two of them at once.
  • Supada’s Power gives him the same terrifying Demon Awakened spike as Devil Hunter, adding +50% Damage, while Etherealization 4 makes Motivation build much faster.
  • Demonic Arsenal is absurdly flexible: Katana punishes stunned enemies with Timestop and bonus damage, Phantom Sword adds Bleed to afflicted targets, Demonic Gauntlets turn him into a close-range shredder, and Mirage Barrage gives him ridiculous map reach.
  • Mirage Barrage in particular is what pushes him into true S++ territory, since the huge range boost lets him pressure enemies from absurd distances, especially once Etherealization 2 softens the damage penalty.
Cons
  • He really wants setup to hit his full value, because some of his best effects depend on enemies already being stunned or afflicted before the weapon swap pays off.
  • His strongest modes each come with tradeoffs, whether that is range loss on Demonic Gauntlets or the heavy damage reduction on Mirage Barrage, so he is more demanding than a straightforward place-and-forget carry.
King Sailor Unrivaled
King Sailor (Unrivaled)
Water Ground Trait: Ruler
Build Tips
General Build: Sorcerer Hunter shirt/pants + Reaper Necklace (Crit Dmg / Dmg / Elemental Dmg).
Synergy Build: Bio-Android or Super Roku shirt/pants + Shadow Reaper Mask (Crit Dmg / Dmg / Elemental Dmg).
Substats: Dmg, Crit Rate, Crit Dmg.
Stats: All Damage for DPS.
Sorcerer Team: Leader King Sailor, Water God, Hybrid DPS such as Ancient Mage, Virtual Idol, plus farms.
Roku/Bio Team: Leader King Sailor, Alpha Devil, Devil Hunter, Fission Prodigy Mage, Virtual Idol, Bulmo.
Pros
  • Manipulator of Fate and Unrivaled Mark make him a ridiculous team amplifier, giving massive tag- and element-based buffs instead of just bringing his own damage.
  • Baal’s Lightning gives him free chain pressure after every attack, letting him spread extra damage and set up Rukh’s Judgement buffs against enemies recently hit by chain lightning.
  • Wits Of A King gives him valuable debuff resilience, while King of his People and Rukh’s Judgement add even more crit scaling when allies are positioned around him properly.
  • With two placements, solid range, and late Etherealization upgrades that improve both chain damage and crit buffs, he scales extremely well in stacked late-game teams.
Cons
  • A lot of his ceiling is composition-dependent, since his biggest value comes from sharing tags, supporting Water units, and playing in optimized late-game rosters instead of random mixed teams.
  • His total cost of 91,800 is steep for a utility-first unit, so if your comp cannot fully exploit Unrivaled Mark and Manipulator of Fate, he can feel less efficient than a simpler plug-and-play carry.
Ancient Shinobi Reawakened
Ancient Shinobi (Reawakened)
Water Ground Trait: Ruler
Build Tips
Best Relics: Rebellious Shinobi set + Reanimated Ninja accessory (Dmg / Dmg / Elemental Dmg).
Alternative: Reanimated Ninja set + Bloodline accessory (DoT / Dmg / Elemental Dmg).
Substats: Dmg, Cooldown, DoT, Range.
Stats: All Damage.
Team: Ancient Shinobi, Nutaru, Virtual Idol, Fission Prodigy's Mage or Ancient Mage, Bulmo, plus one flex DPS/support.
Reanimation makes positioning matter a lot; commit only when you are ready to use him as the main carry.
Pros
  • His kit is absolutely overloaded: The Wisest gives him ramping damage, Ancient Techniques of Old layers confusion, Burn, and bonus damage taken, and Weapon Proficiency cycles through multiple utility-heavy attack patterns with extra range, Bleed, and attack speed manipulation.
  • Reanimation is the kind of passive that turns strong units into meta monsters, sacrificing extra placements to turn him into a single-placement supercarry with a gigantic re-place damage bonus that reaches +200% at Etherealization 6.
  • Samurai Technique gives him an extra late-game damage spike at final upgrade, while Weapon Proficiency also grants stun immunity, making him much harder to disrupt than standard carries.
  • With three placements before Reanimation, strong status coverage, and huge scaling once fully invested, he offers both early map presence and absurd late-game payoff.
Cons
  • He is a very demanding unit to optimize because his best value is tied to cycling effects, final-upgrade abilities, and smart use of Reanimation instead of just placing and forgetting him.
  • His maxed cost of 96,450 is high, and once you commit to Reanimation, bad repositioning or selling him is heavily punished because the bonus resets if he is sold or deleted.
Crow Shinobi Reanimated
Crow Shinobi (Reanimated)
Fire Hill Trait: Eternal
Build Tips
Best Relics: Reanimated Ninja set + Reanimated Ninja accessory (DoT / Dmg / Elemental Dmg).
Alternative: Hokage or Berserk Shinigami set + Shadow Reaper accessory (DoT / Dmg / Elemental Dmg).
Substats: DoT, Cooldown, Dmg, Range.
Stats: All Damage.
Team: Crow Shinobi, Ancient Shinobi or Nutaru, Virtual Idol, Fission Prodigy's Mage, Bulmo, plus one flex DPS.
He scales best when enemies live long enough for Black Burn and Time Snail to tick.
Pros
  • Amaterasu is the big reason he belongs here: Black Burn deals massive damage over time, reapplies pressure on every hit, and once enemies already have Black Burn, he starts applying Time Snail instead for even more DoT and affliction scaling plus movement slow.
  • Moon God: Counter Crash gives him a huge burst tool that also removes all modifiers from enemies hit, which is nasty utility in harder content where enemy buffs or protections matter.
  • Elusive Crow Distraction and Flame Sealing Technique give him extra control on top of his damage, adding repeated confusion and kill-based stun chains around Black Burned enemies.
  • For only 68,450 total cost, he brings the kind of affliction pressure, control, and execute value that many more expensive units would love to have.
Cons
  • A good chunk of his strength comes from enemies living long enough to get full Black Burn and Time Snail value, so he is less explosive in short or overkilled waves where targets die too fast.
  • He is stronger as a status-heavy DPS than as a pure frontloaded nuker, which means players looking only at raw on-hit damage can underestimate how much of his value is tied to DoT uptime and team follow-up.
Nutaru Beast
Nutaru (Beast)
Wind Ground Trait: Ruler
Build Tips
Best Relics: Biju set + Biju accessory (Dmg / Dmg / Elemental Dmg).
Alternative: Rebellious Shinobi set + Bloodline accessory (Crit Dmg / Dmg / Elemental Dmg).
Substats: Dmg, Crit Rate, Crit Dmg, Cooldown.
Stats: All Damage.
Team: Nutaru, Ancient Shinobi, Virtual Idol, Fission Prodigy's Mage or Ancient Mage, Bulmo, plus one farm/flex slot.
Biju is ideal because Beast Mode is meter-driven; prioritize uptime before chasing pure sheet DPS.
Pros
  • Beast Mode turns him into a real monster, adding big damage, Crit Rate, and Crit Damage boosts while also unlocking a stronger attack cycle that gains another +50% damage after a full Beast attack chain.
  • Shadow Clone gives him outstanding scaling because the clones inherit a huge chunk of his damage, increase his pressure on the map, and even reward him with extra damage when they disappear.
  • Summoning Jutsu gives him another layer of value by adding Boss Frog or Kitsunox support, which becomes even scarier at higher Etherealization levels.
  • His Synchro Drive options are absurdly strong, especially with Ancient Shinobi (Reawakened), where he gains Hyper Armor damage, range and attack speed support for allies, plus reliable stun or confusion application. That alone gives him both carry and synergy value at the very top end.
Cons
  • He needs time to ramp through Chakra Control before Beast Mode kicks in, so part of his best performance is delayed instead of available instantly on placement.
  • His absolute peak value is tied to Beast Mode uptime, clone management, and especially Synchro Drive pairings, which makes him much stronger in optimized late-game comps than in casual or incomplete setups.
Ant King Savage
Ant King (Savage)
Dark Ground Trait: Ruler
Build Tips
Best Relics: Monarch set + Hunter Spirit accessory (DoT / Dmg / Elemental Dmg or Dmg / Dmg / Elemental Dmg).
Alternative: Sorcerer Hunter or Reanimated set with similar main stats; Reanimated or Monarch accessory if needed.
Substats: Cooldown, DoT, Dmg, Range.
Stats: All Damage.
Team: Leader Jinoo, Ant King, Shadow Knight, Ancient Mage, plus Bulma and Idol/farm support.
Pros
  • Predatory Gluttony gives him nasty snowball potential, stacking +1% damage per kill up to +30%, instantly capping on boss kills, and reaching +50% at Etherealization 6.
  • Paralyzing Venom adds both damage and control on every attack, applying Radiation over 6 ticks plus a Slow debuff, which gets even stronger at Etherealization 2.
  • Monarch’s Devotion gives him strong synergy value when Jinoo is nearby, boosting his own damage and range, and at Etherealization 4 he also buffs all allied units in range.
  • His late-game profile is absurd for a 2-placement DPS carry: Full AoE on later upgrades, a manageable max SPA of 8, and a total cost of 63,000 for a unit that can hard-carry waves while scaling mid-match.
Cons
  • He really wants consistent kills to keep Predatory Gluttony rolling, so on crowded co-op setups or on maps where other carries steal takedowns, part of his ceiling can be harder to maintain.
  • A chunk of his best team utility is tied to having Jinoo in range, which makes his full value somewhat composition-dependent instead of being completely plug-and-play.
First Emperor Greatest
First Emperor (Greatest)
Rose Ground Trait: Ruler
Build Tips
Best Relics: Monarch set + Monarch accessory (Dmg / Dmg / Elemental Dmg).
Alternative: Sorcerer Hunter set + Strongest Sorcerer's Glasses (Crit Dmg / Dmg / Elemental Dmg).
Substats: Cooldown, Dmg, Range, Buff Potency.
Stats: All Damage, or Damage with some SPA if you want smoother art-swapping uptime.
Team: First Emperor, Virtual Idol, Ancient Mage or Gojo, King Sailor or Alpha Devil, Bulmo, plus one farm/flex unit.
His ceiling comes from timing Demonic Art Swap so the whole team attacks at the right moment.
Pros
  • Probably the most flexible specialist in the current meta; Demonic Art Swap lets him change roles instead of being locked into one damage pattern.
  • Guidance of the Original Monarch is absurd for stacked setups, making every unit in his range attack whenever he switches Demonic Arts.
  • His Demon Arts cover almost every important late-game need: Blade for burst damage, Axe for slow/confusion, Crossbow for huge range and stun, Spear for Bleed, and Armor for path control.
  • At Etherealization 6, units triggered by his swap also gain 15% of First Emperor's damage for 10 seconds, turning him into both a carry and a team amplifier.
Cons
  • He only has one placement and costs 89,500 total to max, so bad positioning or poor economy support hurts him more than most other units.
  • His best value comes from active swapping and smart timing, meaning he is much more demanding than simple place-and-forget DPS units.
Ancient Mage Slayer
Ancient Mage (Slayer)
Light Hybrid Trait: Ruler
Build Tips
Best Relics: Sorcerer Hunter shirt/pants + Sorcerer Hunter accessory (Dmg / Dmg / Elemental Dmg) if you are not using Virtual Idol.
Alternative: Bio-Android or Super Roku shirt/pants, with Shadow Reaper/Bloodline accessory when paired with Virtual Idol.
Substats: Cooldown and Range; take Crit Rate/Crit Dmg mainly when not using Sorcerer Hunter Spirit.
Stats: All Damage for DPS, or 69 Damage / 30 SPA for better shield breaking.
Team: Ancient Mage, Virtual Idol, any two flex units, plus two farms.
Very flexible; she slots cleanly into most serious teams.
Pros
  • Battle Adaptation makes her one of the most flexible units in the tier, letting her swap between DPS, Utility, Support, and Specialist modes depending on what the run actually needs.
  • Millennia Old Experience is excellent baseline value, applying a team-wide damage amp and Wind Shear on every attack, while Specialist mode converts that pressure into even nastier DoT and True Damage value.
  • Support mode is especially strong in stacked comps, giving units in range Crit Damage, Crit Rate, Effect Res, and even a follow-up attack when buffed allies attack.
  • The Last Great Mage gives her anti-stun value, and at Etherealization 4 the stun immunity becomes always active, making her much more reliable in hard content than most utility hybrids.
Cons
  • She only has one placement, so a lot of her value comes down to smart mode switching and positioning instead of brute-forcing a map with multiple copies.
  • Support mode stops her from attacking entirely, which means bad timing can cost you a lot of personal DPS if you swap forms at the wrong moment.
Phantom Captain
Phantom Captain (Carrier)
Light Hybrid Trait: Ruler
Build Tips
Best Relics: Monarch set + Monarch accessory (Dmg / Dmg / Elemental Dmg).
Alternative: Bio-Android set + Sun God accessory (Crit Dmg / Dmg / Elemental Dmg).
Substats: Dmg, Crit Rate, Crit Dmg, Cooldown.
Stats: All Damage.
Team: Phantom Captain, Virtual Idol, Ancient Mage or Gojo, King Sailor or First Emperor, Bulmo, plus one farm/flex unit.
Monarch fits her plane-spawning loop perfectly; the more consistent her plane uptime, the better she performs.
Pros
  • Unlike standard units, her planes track enemies independently, making her essentially immune to range limitations once deployed.
  • The Blessed Enterprise grants planes +30% Crit and +50% Damage for their first 10 seconds, allowing for massive burst if you time the spawn right.
  • Etherealization 6 increases plane fuel duration by 50%, which drastically improves her DPS consistency and uptime.
Cons
  • The plane spawn count is based on RNG (2 or 3), making her DPS output slightly inconsistent without Etherealization 2.
  • High placement cost ($2500) makes her difficult to use in the early game.
Migumen Finale
Migumen (Finale)
Fire Hybrid Trait: Ruler
Build Tips
Best Relics: Hokage set + Laughing Captain accessory (DoT / Dmg / Elemental Dmg).
Alternative: Berserk Shinigami set + Sorcerer Hunter accessory (Dmg / Dmg / Elemental Dmg).
Substats: Dmg, DoT, Cooldown, Range.
Stats: All Damage.
Team: Migumen, Virtual Idol, Fission Prodigy's Mage, King Sailor or Ancient Mage, Bulmo, plus one farm/flex unit.
Use Pure Destruction as a planned nuke, not a panic button; the post-cast stun is brutal if timed badly.
Pros
  • Deals True Damage passively, allowing her to completely ignore damage reduction on armored waves.
  • Pure Destruction deals 1000% damage at Eth 6, which is currently one of the highest single-instance damage spikes in the game.
  • The One Trick Pony passive ramps up her SPA and damage rapidly, turning her into a machine gun if she stays active.
Cons
  • Using her main ability stuns her for 60 seconds and makes her unsellable, so you risk losing a unit slot if you mistime it.
  • Her burn passive makes enemies move 10% faster, which can cause leaks if you don't have heavy crowd control.
Sharpshooter Precision
Sharpshooter (Precision)
Fire Hill Trait: Ruler
Build Tips
Best Relics: Ex Captain set + Laughing Captain accessory (Crit Dmg / Dmg / Elemental Dmg).
Alternative: Berserk Shinigami set + Bio-Android accessory (Crit Dmg / Dmg / Elemental Dmg).
Substats: Crit Rate, Crit Dmg, Dmg, Cooldown.
Stats: All Damage.
Team: Sharpshooter, Devil Hunter or Migumen, Alpha Devil or King Sailor, Virtual Idol, Bulmo, plus one farm/flex unit.
Keep her placed where Normal Range still matters; Sniper Range is great coverage, but Normal Range is her burst state.
Pros
  • The only unit with true Infinite Range (Sniper Mode), allowing her to snipe leaks or priority targets anywhere on the map when her main range is clear.
  • Precision Shot is a premier boss-killing tool, marking the highest HP enemy to take +15% damage from all sources.
  • A Goddess Blessing passively buffs nearby Fire units by 10%, synergizing perfectly with heavy hitters like Migumen.
Cons
  • She cannot use her powerful "Combat Grenade" passive while in Sniper Mode, reducing her crowd control when no enemies are nearby.
  • High cooldown (160s) on her Precision Shot means you must time it carefully for boss waves.
Jangluu Eclipse
Jangluu (Eclipse)
Ice Hill Trait: Eternal
Build Tips
Best Relics: Ex Captain set + Sun God accessory (Crit Dmg / Dmg / Elemental Dmg).
Alternative: Great Mage set + Ex Captain accessory (Crit Dmg / Dmg / Elemental Dmg).
Substats: Crit Rate, Crit Dmg, Dmg, Cooldown.
Stats: All Damage.
Team: Jangluu, Virtual Idol, Ancient Mage or Gojo, King Sailor or First Emperor, Bulmo, plus one farm/flex unit.
She wants crit consistency above all else, because crits feed Syzygy and Syzygy keeps Lunar Eclipse rolling.
Pros
  • Applies a Freeze that acts as a vulnerability debuff, making enemies take up to 20% more damage from all sources (Eth 4).
  • Every hit in her Lunar Eclipse state permanently increases her Crit Damage (up to 50%), allowing for infinite scaling in long matches.
  • Very cheap placement cost (1200) for a unit that provides global damage amplification.
Cons
  • Her freeze does not actually stun enemies, so she cannot be relied upon for primary crowd control.
  • Takes significant time to build Syzygy stacks to enter her powerful Eclipse state.

S+ Tier DPS Units

These units are among the best in the game. They possess game-breaking mechanics like True Damage, infinite summoning, or massive team-wide buffs. It comes as no surprise that many of the new units end up here.

S+ Tier
Jinoo Shadow Monarch
Jinoo (Shadow Monarch)
Dark Ground Trait: Ruler
Build Tips
Best Relics: Monarch full set (Dmg / Dmg / Elemental Dmg).
Alternative: Super Roku or Bio-Android set with Biju or Shadow Reaper accessory.
Substats: Cooldown, Range, Crit Rate, Crit Dmg.
Stats: All Damage.
Team: Leader Jinoo, Ant King, Shadow Knight, Ancient Mage, Idol, Bulmo.
Ancient Mage is mainly there for Hybrid shield breaking; swap to Miku or another support when shields are less important.
Pros
  • The System gives him one of the best long-match scaling kits in this tier, with XP from attacks and takedowns, up to +100% Damage, -20% SPA, and extra Hyper Armor damage at higher levels.
  • Shadow Monarch makes him much more than a normal DPS unit, letting him spend Mana to summon Soldiers, Bear, Dragon, Knight, and Ant King for extra lane control, air coverage, stun, and bleed pressure.
  • Strongest Hunter gives excellent team value to Leveling-tag units, especially Shadow Knight, while also reducing their cost and turning Jinoo into a core comp enabler instead of a selfish carry.
  • His ceiling becomes absurd once he reaches Level 80-100, since the stronger summons give him extra stun, bleed, tanking, anti-air utility, and sustained damage outside his own attack cycle.
Cons
  • He is expensive and needs time to level, build Mana, and unlock his full summon arsenal, so his best value is heavily tied to longer stages and early placement.
  • Some upgrades have awkward stat dips and his strongest tools require active summon management, which makes him less plug-and-play than simpler S+ DPS carries.
Judas Darkness
Judas (Darkness)
Dark Hill Trait: Ruler
Build Tips
Best Relics: Strongest Sorcerer set + Strongest Sorcerer accessory (Dmg / Cooldown / Elemental Dmg).
Alternative: Sorcerer Hunter or Shadow Reaper accessory for more raw damage/uptime.
Substats: Cooldown, Range, Dmg, Crit Dmg.
Stats: All Damage.
Team: Domain/control shell with one main carry, one Hybrid shield breaker, Idol, and Bulmo.
Place him away from your main DPS cluster when using Dark Aura so the temporary ally damage reduction does not grief your burst windows.
Pros
  • Excellent high-end Hill unit with Circle into Full AOE, huge final range, and a kit built around layered control rather than only raw damage.
  • Frozen Master gives constant trap value, adding extra damage and Slow wherever he attacks, which makes him great for softening and controlling packed waves.
  • Chaos Controller can apply multiple random status ailments to every enemy in range, giving him access to Bleed, Burn, Radiation, Slow, Stun, Timestop, Freeze, Confusion, Wind Shear, and Time Snail utility.
  • Dark Aura gives him massive burst windows on his next attacks, and Corruption adds automatic Stun into Slow when enemies enter his range.
Cons
  • Dark Aura temporarily lowers nearby units' damage, so poor placement can sabotage your own DPS during important waves.
  • His active has a long cooldown and random ailment selection, meaning his strongest utility can be inconsistent when you need one specific effect.
Mimicry Sorcerer Cursed Love
Mimicry Sorcerer (Cursed Love)
Rose Ground Trait: Ruler
Build Tips
Best Relics: Sorcerer Hunter set + Shadow Reaper accessory (Dmg / Dmg / Elemental Dmg).
Alternative: Strongest Sorcerer set if you want more value from copied control/passive utility.
Substats: Dmg, Cooldown, Range, Crit Dmg.
Stats: All Damage.
Team: Pair with Jane Juliet, then add one top carry, one Hybrid/shield answer, Idol, and Bulmo.
His build changes depending on the copied passive, but damage and cooldown are the safest universal priorities.
Pros
  • Mimicry is fantastic flexibility, letting him copy different Sorcerer passives depending on what the run needs: Bleed, Slow, Crit scaling, follow-ups, range/damage, or anti-debuff value.
  • Super Speaking gives immediate first-hit control, and at Etherealization 2 it can turn that opener into Confusion instead of a basic Stun.
  • Cursed Protector effectively adds a second damage source through Cursed Lover, which copies his Damage and Range with a fixed SPA and becomes much better when summoned on placement at Etherealization 4.
  • His Synchro Clash with Jane Juliet gives him a major team-building payoff, adding a huge burst attack when both units are fully upgraded and properly positioned.
Cons
  • His best performance depends on knowing which copied passive to use and when, so he is more demanding than a simple place-and-upgrade DPS unit.
  • Part of his ceiling is locked behind Cursed Lover timing, Etherealization 4, and Jane Juliet synergy, which makes his top-end value more setup-dependent.
Shadow Knight Risen
Shadow Knight (Risen)
Wind Ground Trait: Ruler
Build Tips
Best Relics: Sorcerer Hunter set + Sorcerer Hunter Spirit (Dmg / Dmg / Elemental Dmg).
Alternative: Monarch set + Monarch Cape (Dmg / Dmg / Elemental Dmg).
Substats: Cooldown and Range first, then Dmg.
Stats: All Damage.
Team: Leader Jinoo, Ant King, Shadow Knight, Ancient Mage, plus two farms.
He is strongest as part of the Jinoo shadow package, where free placement/upgrading and follow-ups push him much higher.
Pros
  • Very strong partner unit for Jinoo, since My Liege can place him for free, mirror Jinoo's upgrade level, and add follow-up attacks whenever Jinoo attacks.
  • Undying Knight gives reliable Stun on attack, then rewards him for hitting stunned enemies with stacking Damage and a large cap-break hit once the stack resets.
  • His AoE improves from Circle to Line to Full AOE, giving him much better wave coverage as he upgrades instead of staying locked into a narrow damage pattern.
  • Commander of Shadows adds real summon support, buffing Jinoo's summoned units' Health and helping the Shadow package stay alive longer during heavy waves.
Cons
  • He is clearly at his best when paired with Jinoo; without that package, he loses a lot of his free placement, free upgrading, follow-up, and summon-support value.
  • His damage scaling wants stunned enemies and time to build/reset, so he performs worse when enemies die before he can cycle his passive properly.
Jane Juliet Larper
Jane Juliet (Larper)
Water Ground Trait: Ruler
Build Tips
Best Relics: Sorcerer Hunter set + Shadow Reaper accessory (Crit Dmg / Dmg / Elemental Dmg).
Alternative: Sorcerer Hunter set + Sorcerer Hunter Spirit (Dmg / Dmg / Elemental Dmg).
Substats: Crit Rate on top/bottom; Dmg or Crit Rate on accessory. For damage build, use Cooldown top/bottom and Dmg accessory.
Stats: All Damage.
Team: Pair with Mimicry Sorcerer, then add one top carry, one flex utility, Idol, and Bulmo.
Crit build is preferred, but the safer damage setup is easier if you do not have clean Crit Rate rolls.
Pros
  • A Satisfying Dessert links him to another non-buff, non-farm unit, letting both units scale Damage through kills up to a strong cap.
  • Curse Energy Discharge gives him excellent attack density, adding three Line AOE follow-ups every attack and potentially a fourth 100% follow-up if he avoids overheating.
  • His Synchro Clash with Mimicry Sorcerer gives both units a huge burst option, making him a very attractive pick in Sorcerer-focused S+ comps.
  • At Etherealization 4 and 6, his overheat problem gets easier to manage and his third follow-up becomes stronger, pushing his sustained DPS much higher.
Cons
  • The random link can be awkward if it attaches to the wrong unit, and he needs kills to reach the full shared Damage cap.
  • His overheat chance can stun him for 5 seconds, which hurts consistency until Etherealization 4 lowers the risk.
Judgment Sorcerer Domain
Judgment Sorcerer (Domain)
Light Ground Trait: Ruler
Build Tips
Best Relics: Strongest Sorcerer set + Strongest Sorcerer accessory (Dmg / Cooldown / Elemental Dmg).
Alternative: Sorcerer Hunter set + Sorcerer Hunter Spirit for a simpler raw DPS build.
Substats: Dmg, Cooldown, Range, Crit Dmg.
Stats: All Damage.
Team: Domain-heavy Sorcerer shell with Gojo/Judas/Mimicry-style control, Idol, and Bulmo.
Crit Rate matters less once Confession/Execution Sword is active, so lean into damage, cooldown, and crit damage instead.
Pros
  • Talent Rivaling the Honored One gives him excellent wave-based scaling, stacking Damage and Range every wave before eventually adding debuff and Stun ignore.
  • Domain Expansion gives him three strong modes: enemy control through Silence, team damage amplification through Denial, and personal burst through Confession.
  • Execution Sword turns him into a dangerous crit-based finisher, adding high Crit Rate, huge Crit Damage, and extra Damage stacking against enemies that survive his hits.
  • Three placements and a relatively low total cost make him easier to fit into teams than many other premium S+ units.
Cons
  • His passive scaling is wave-gated, so he is not instantly at full power and can feel slower in short stages.
  • His best burst is tied to Domain timing, and without active Confession windows he is more of a scaling utility DPS than a constant top-damage carry.
Gambler Sorcerer Jackpot
Gambler Sorcerer (Jackpot)
Wind Ground Trait: Ruler
Build Tips
Best Relics: Bio-Android set + Shadow Reaper or Biju accessory (Crit Dmg / Dmg / Elemental Dmg).
Alternative: Strongest Sorcerer or Super Roku-style damage setup if the rolls are better.
Substats: Dmg, Crit Dmg, Cooldown, Range.
Stats: All Damage.
Team: Main DPS plus control/support core, Idol, and Bulmo; he does not need a strict synergy shell.
Avoid building Crit Rate on him, since GAMBLING prevents him from gaining Crit Rate from relics, traits, or buffs.
Pros
  • GAMBLING! gives him a unique crit engine, gaining Crit Rate and multiplicative Crit Damage after missed crits before resetting on a successful crit.
  • Probability Reset adds strong wave clear to his crit playstyle by releasing a full-AOE follow-up after enough critical strikes.
  • Domain Expansion can give Stun Immunity, +50% Crit Damage, or a Jackpot state that grants both buffs and doubles his GAMBLING progression.
  • Etherealization heavily improves his consistency, especially once his crit-damage scaling is doubled and the jackpot roll pool becomes more favorable.
Cons
  • He cannot gain Crit Rate from relics, traits, or buffs, so he ignores a lot of normal crit-support tools and must rely on his own passive cycle.
  • His Domain still has RNG attached, meaning his strongest windows are less predictable than most traditional S+ DPS units.
Mighty Roach Cursed
Mighty Roach (Cursed)
Wind Ground Trait: Ruler
Build Tips
Best Relics: Strongest Sorcerer set + Shadow Reaper accessory (Dmg / Cooldown / Elemental Dmg).
Alternative: Bio-Android set for a cleaner raw damage setup.
Substats: Cooldown, Range, Dmg, Crit Dmg.
Stats: All Damage.
Team: Domain-heavy team with Gojo/Sukuna/Judgment/Judas-style units, plus Idol and Bulmo.
He gains major value while any Domain is active, so do not treat him as a fully standalone carry.
Pros
  • Curse Roaches gives him constant field pressure by spawning Roach Swarms and Roach Traps that add extra damage, explosions, and Slow without relying only on his main attack.
  • Festering Life Sword gives him a strong burst cycle after enough takedowns, planting cursed insects that explode for additional damage after a short delay.
  • Swarm Attack punishes enemies entering his range with an AOE follow-up, Slow, and a +20% damage-taken effect that lasts until they die.
  • Domain Penetration gives him excellent synergy with Domain-heavy teams, since he gains a large damage boost whenever any domain is active.
Cons
  • His kit is extremely busy and delayed, so some of his damage depends on spawned roaches, traps, insects, and enemy pathing rather than clean direct hits.
  • Only one placement and modest range make positioning very important, especially before Etherealization 6 expands Swarm Attack to his full range.
Dragon Slayer Hero
Dragon Slayer (Hero)
Fire Ground Trait: Ruler
Build Tips
Best Relics: Reanimated set + Shadow Reaper or Biju accessory (Dmg / Dmg / Elemental Dmg).
Alternative: Bio-Android set if you want simpler boss DPS without leaning as hard into DoT teams.
Substats: Dmg, Cooldown, Crit Rate, Crit Dmg, Range.
Stats: All Damage.
Team: Pair with DoT applicators such as Water God, Underworld God, Devil Hunter, or other Burn/Bleed/Radiation units, plus farms.
His ceiling jumps in DoT-heavy teams because Slayer Of Foes adds follow-up attacks against afflicted enemies.
Pros
  • He is an extremely efficient boss killer for his cost, with Slayer Of Foes giving built-in boss damage and even more punishment against stunned bosses.
  • Lightspeed Reflexes gives him immediate frontloaded damage whenever enemies enter range, which is excellent for clipping fast waves and adding free value before his regular attacks even start.
  • His follow-up mechanic is very strong in DoT-heavy teams, since attacking enemies affected by a DoT triggers extra attacks, and at Etherealization 6 he can follow up for each DoT instead of just once.
  • Superhuman Resilience also gives him sneaky anti-CC value, reducing stun time and rewarding him with guaranteed crit pressure after being stunned.
Cons
  • He reaches his true ceiling in comps that can consistently provide DoTs and boss stuns, so part of his best value is team-dependent rather than fully self-contained.
  • His range stays fairly modest, and despite the solid Circle AOE, he is much more of a focused boss shredder than a giant map-wide carry.
Underworld God Death
Underworld God (Death)
Wind Ground Trait: Ruler
Build Tips
Best Relics: Reanimated set + Shadow Reaper accessory (Dmg / Dmg / Elemental Dmg).
Alternative: Great Mage or Bio-Android set if you need more general damage/range instead of DoT value.
Substats: Dmg, Cooldown, Range, DoT, Hyper Armor Dmg.
Stats: All Damage.
Team: Ragnarok shell with King Sailor, Water God, Enlightened God, Idol, and Bulmo.
Wind Shear scaling and armor pressure are the point, so he loves maps where enemies stay alive long enough to stack value.
Pros
  • Underworld Ruler gives him excellent scaling, applying Wind Shear and gaining +2.5% Damage per affected enemy, up to a 50% cap.
  • Once capped, he adds a 3-second Stun to attacked enemies, giving him real crowd-control value instead of being just another damage scaler.
  • Very strong into armored waves thanks to Sibling Combined Weapon, with +60% Hyper Armor Damage and a first-hit follow-up against armored enemies.
Cons
  • His best value comes from ramping Wind Shear across multiple enemies, so he is weaker when enemies die too quickly or when he cannot build stacks.
  • At only two placements, bad positioning hurts him more than it does most multi-placement DPS units.
Tai Yang
Tai Yang
Fire Ground
Build Tips
Best Relics: Reanimated set + Biju or Shadow Reaper accessory (DoT / Dmg / Elemental Dmg).
Alternative: Bio-Android set for a more straightforward Fire DPS setup.
Substats: DoT, Dmg, Cooldown, Range.
Stats: All Damage.
Team: Run him with a Fire unit that can trigger Blessing of the Sun God, then add control/support, Idol, and Bulmo.
He needs more manual attention than most units, so use him when you can actively aim Solar Flares instead of playing fully AFK.
Pros
  • Solar Flares makes him one of the most unusual Fire specialists, manually striking a selected position with a fixed SPA instead of playing like a normal range-based unit.
  • The Blinding Might of the Sun stacks Burn ticks and then converts that pressure into Confuse and Stun, giving Fire teams rare control utility.
  • Blessing of the Sun God lets him place alongside a Fire unit once per match, making him a strong bonus pick in dedicated Fire comps.
Cons
  • Manual targeting means he needs more attention than standard DPS units, especially on maps with multiple lanes or fast waves.
  • His value is much higher in Fire-heavy teams; outside that setup, he loses a lot of his best synergy.
First Human Father
First Human (Father)
Rose Ground Trait: Ruler
Build Tips
Best Relics: Bio-Android set + Biju or Shadow Reaper accessory (Dmg / Dmg / Elemental Dmg).
Alternative: Great Mage set if you are building around type advantage and replicated-element value.
Substats: Dmg, Cooldown, Range, Crit Dmg.
Stats: All Damage.
Team: Place near your strongest elemental units so Creation of God copies high-value attacks, then add Idol and Bulmo.
His build is less about one relic gimmick and more about positioning him beside the right units.
Pros
  • Creation of God gives him excellent team-based scaling, letting him copy attacks from nearby units as a 100% damage follow-up.
  • Father of Humanity makes him extremely flexible, changing his attack effect based on the replicated element, including Slow/Stun, Bleed, Timestop, vulnerability, or Hybrid access.
  • God's Gift gives him major anti-stun value, and even when he does get stunned, nearby units gain a strong Attack Speed buff.
Cons
  • He is heavily dependent on the units placed around him, so poor team composition or sloppy placement can make his copied attacks much weaker.
  • His stun punishment is long when God's Gift fails, even though it does provide a temporary team buff.
Enlightened God Holy
Enlightened God (Holy)
Light Ground Trait: Eternal
Build Tips
Best Relics: Great Mage or Bio-Android set + Buff Potency/Elemental accessory (Dmg / Cooldown / Buff Potency).
Alternative: Reanimated set if you are leaning into Cycle of Wrath and Burn/Bleed scaling.
Substats: Buff Potency, Cooldown, Range, Dmg.
Stats: Damage, with some Range only if you need wider aura coverage.
Team: Ragnarok core with King Sailor, Water God, Underworld God, Idol, and Bulmo.
Keep him where Enlighten Will covers your important units; his aura is often as valuable as his personal damage.
Pros
  • Enlighten Will is premium team support, giving nearby units Damage, Attack Speed, and Range that scales over time up to +20%.
  • Star of the Realms gives him three distinct stances, letting him swap between high-health enemy damage, defensive buff reversal, and Burn/Bleed scaling.
  • Cycle of Wrath turns him into a strong boss and wave pressure unit, doubling Burn/Bleed damage against bosses while stacking Damage and Elemental Damage from afflicted enemies.
Cons
  • He needs kills to build Emotion and access stance swapping, so his full kit takes time and proper setup to come online.
  • Shield of Fear stops his attacking entirely, which makes stance timing important if you do not want to lose damage during key waves.
Water God Primordial
Water God (Primordial)
Water Ground Trait: Eternal
Build Tips
Best Relics: Hunter set + Junior Ninja Headband (Dmg or Crit Dmg / Dmg / Elemental Dmg).
Alternative: Super Roku or Bio-Android set with Shadow Reaper/Reaper accessory.
Substats: Dmg, Cooldown, Crit Rate, Crit Dmg, Range.
Stats: All Damage.
Team: King Sailor, Water God, Underworld God, Enlightened God, Idol, Bulmo.
His best teams keep enemies in range long enough for Time Snail, DoT extension, and double attacks to snowball.
Pros
  • One of the strongest all-around Ragnarok carries because he combines DPS, control, DoT support, and team-friendly affliction value instead of being just a raw damage unit.
  • God Of The Seas increases DoT and affliction duration, then ramps his Crit Rate by 5% after each attack until he reaches the cap and starts double-attacking.
  • Time Snail is huge utility: enemies hit by Water God are slowed, suffer longer DoT duration, and each afflicted enemy in range buffs his damage by 5%, up to +50%.
  • Primordial Wave gives him reliable lane-wide burst, dealing 200% damage to all enemies on the path every 60 seconds.
Cons
  • He needs enemies to stay in range and get afflicted before his full damage engine turns on, so he is strongest on longer paths and maps with good stall/control support.
  • His later upgrades push SPA as high as 9, so he depends heavily on traits, relics, and placement value to feel as broken as his kit looks on paper.
Ichiko Rage
Ichiko (Rage)
Dark Hybrid Trait: Ruler
Build Tips
Best Relics: Reaper or Shadow Reaper set + Shadow Reaper accessory (Crit Dmg / Dmg / Elemental Dmg).
Alternative: Super Roku or Bio-Android set for simpler crit/damage scaling.
Substats: Dmg, Crit Rate, Crit Dmg, Cooldown, Range.
Stats: All Damage.
Team: Give him early kill access, then support him with control, DoT/stun units, Idol, and Bulmo.
Place him early; Unstoppable Rage and Beast of Battle both reward letting him stack instead of dropping him late.
Pros
  • A snowball monster that scales heavily into the late game; Unstoppable Rage grants permanent damage per kill (up to 40%), and Beast of Battle stacks Crit Chance.
  • Provides reliable crowd control with Screech, which deals 125% damage in an AoE and stuns enemies for 5 seconds.
  • Specifically counters stun-heavy enemies; if stunned, Collapse of Charge triggers an AoE burst and reflects the stun back onto enemies.
Cons
  • Requires a high volume of kills to reach his full potential, making him less effective if placed late when other units are stealing kills.
  • Beast of Battle stops his regeneration for 2 seconds on Crit, leaving him vulnerable to chip damage.

S Tier DPS Units

These are among the best meta units in Universal Tower Defense X UPD 3.0 for pure DPS and damage output, almost as good as S+ Tier units. They are not as powerful as the two tiers above, but they are more than good enough to be included in any teamcomp if you lack some of the top-tier units.

S Tier
Jafrey Lightning Assasin UTDX Jafar
Ja'frey (Lightning Assasin)
Dark Ground Trait: Eternal
Pros
  • Royal Lightning gives him reliable built-in control, stunning enemies every third attack and becoming even safer at Etherealization 4.
  • Flowing Current turns those stuns into extra lane damage, punishing enemies that pass near a target stunned by Royal Lightning.
  • Very efficient for his cost, with four placements, fast early SPA, and a Circle-to-Line AoE path that makes him easy to fit into Dark/Ground setups.
Cons
  • His raw attack numbers are not high enough to compete with the upper tiers as a pure carry, so most of his value comes from control and secondary damage.
  • The best parts of his kit depend on Royal Lightning timing and enemy pathing, meaning Flowing Current is much weaker when enemies are spaced out.
Berserker Enraged UTDX Kenpachi Zaraki Bleach
Berserker (Enraged)
Light Ground Trait: Ruler
Pros
  • The Cut Through EVERYTHING!!! passive ignores up to 70% of elemental restrictions on armor (Eth 6), making him the hard counter to Hyper Armor.
  • At Etherealization 2, breaking armor grants him Range and Damage buffs, allowing him to snowball his stats during heavy armored waves.
Cons
  • Suffers from a very short base range (20), forcing you to place him dangerously close to the track.
  • DPS drops significantly against non-armored enemies compared to other S+ options.
Koyote Number One UTDX Coyote Starrk Bleach
Koyote (Number One)
Ice Hybrid Trait: Ruler
Pros
  • Los Lobos offers consistent lane pressure and extra DPS by spawning up to 7 Spirit Wolves (at Eth 2) that fight alongside him.
  • Cero Metra is a devastating ultimate ability that deals a massive 500% damage burst, perfect for nuking high-health bosses.
  • Scales quickly at Etherealization 6, where wolf spawns have a chance to double his Spirit Energy gain, cycling his ultimate faster.
Cons
  • Using his ultimate stuns him for a massive 30 seconds, leaving him completely vulnerable and halting his DPS output for a long duration.
  • Requires ramp-up time to collect enough Soul Energy from his wolves before he can use his main nuke.
Dragon Guy Silverite UTDX Ragna Ragna Crimson
Dragon Guy (Silverite)
Ice Ground Trait: Ruler
Pros
  • Functions as an incredible "tactical nuke" via Silverine Battle Trance, which grants +120% Damage and transforms him into a Hybrid unit for 2 minutes.
  • Excellent synergy between his abilities; the passive Frostborne slows enemies by 30% after freezing, and his Shatter! ability deals massive damage based on remaining freeze time.
  • When overwhelmed, his Are You Scared Of Me? ability acts as a "Get Out of Jail Free" card, removing all stuns and dealing 35% damage instantly.
Cons
  • He is a disposable asset; after his Silverine Battle Trance expires, he stops attacking and eventually deletes himself, forcing you to reinvest cash.
  • Requires careful management of the "Fury" meter to time his transformation correctly.
Grommjaw Panther Universal Tower Defense X
Grommjaw (Panther)
Water Ground Trait: Ruler
Pros
  • One of the best support DPS units due to Enhanced Hierro, which applies a debuff causing enemies to take 20% more damage from all sources until they die.
  • Soul Panther applies a "Panther Mark" that adds damage vulnerability and explodes for AoE damage when it expires, great for clearing groups.
  • At Etherealization 6, his bleed damage ramps up significantly to 50% of total damage, making him a menace against high-HP targets.
Cons
  • His DPS fluctuates due to the Unchained Frenzy mechanic, meaning he isn't always dealing peak damage.
  • Relies on the "Spirit Bar" charging up, which takes time or multiple waves to activate his transformation.
utdx spade donut
Spade (Donut)
Fire Hill Trait: Astral
Pros
  • Fills a unique niche with Fire Fruit’s Power, allowing his Burn effect to completely bypass status immunities on Armored and Hyper Armored enemies.
  • Self-buffs naturally over time; A Flaming Heart! increases his Damage and Range by up to 30% (60% at Eth 4) just by doing his job.
  • Etherealization 6 is a massive power spike, changing his burn damage to equal 100% of his unit damage, melting tanky waves.
Cons
  • Has very low base stats (100 Attack), meaning he relies almost entirely on his DoT effects rather than raw upfront damage.
  • Needs time to ramp up his range and damage buffs via applying burns.
Ultiorra Oblivion Universal Tower Defense
Ultiorra (Oblivion)
Dark Hill Trait: Eternal
Pros
  • Spirit Energy makes him one of the most resilient units; he automatically resurrects at 100% meter, effectively giving him a second life with buffed stats.
  • Excellent leak protection via No Collateral Damage, which grants a massive +30 Range and SPA buff when an enemy escapes his range.
  • Once transformed, he becomes a burst DPS monster with Relampago, dealing 300% (400% at Eth 6) damage.
Cons
  • Unpredictable Despair has strong effects (Stun/Confuse), but the low 10% trigger chance makes it unreliable for consistent defense.
  • He is relatively weak until he attacks enough to fill his meter and trigger his transformation.
Bio Android Imperfect Universal Tower Defense X UTDX
Bio-Android (Imperfect)
Wind Ground Trait: Ruler
Pros
  • Infinite early-game scaling via Striving for Perfection, which grants +1% Damage per kill (up to 50%) while in his Imperfect state.
  • Annihilation of an Inferior Being provides heavy crowd control with a 5s (8s at Eth 6) stun on a line attack.
  • Unique evolution mechanic; summoning "Robot 17" allows him to evolve into a much stronger state mid-match.
Cons
  • He is level-capped at Upgrade 4 until the boss is defeated; failure to kill Robot 17 permanently stunts his potential.
  • Relies on a low 5% RNG chance to trigger the Truly Ruthless follow-up.
Rohan Robot 16 Limit Breaker Universal Tower Defense X
Rohan & Robot 16 (Limit Breaker)
Light Hybrid Trait: Ruler
Pros
  • Hidden Potential fills a Rage Bar for permanent buffs like +5% SPA and Stun Immunity.
  • Father-Son Energy Wave deals 450% Damage with guaranteed critical hits, decimating large groups.
  • Excellent consistency with Red Combo, chaining attacks up to 5 times.
Cons
  • Gentle Fighter reduces initial damage by 40%, forcing a slow start.
  • Using Android Bomb permanently loses his "A-16" passives for the rest of the match.
The Drink Survivor Universal Tower Defense X
The Drink (Survivor)
Fire Ground Trait: Ruler
Pros
  • Limit Breaker deals 20% extra damage to Max HP enemies, perfect for softening rush waves.
  • Combat Awareness provides massive buffs (+20% Dmg/Range) when 12+ enemies are in range.
Cons
  • Buffs are unstable and drop off as soon as enemies leave his range.
  • Less effective against Bosses as Limit Breaker's bonus doesn't apply to them.

A Tier DPS Units

Next on our Universal Tower Defense X tier list are A-Tier DPS units. They’re still quite strong and make excellent picks for any early to mid-game team comp, especially if you’re missing S, S+, and S++ units. These units offer more than enough power to clear even late-game challenges, and you can comfortably slot them into your teams - particularly if you enjoy their unique passives and playstyle. Slot them in and have fun, knowing they won’t underperform.

A Tier
Kriatu Cheater UTDX
Kriatu (Cheater)
Ice Ground Trait: Ruler
Pros
  • Extremely versatile due to the Cheater passive; the "Fortune" path can theoretically scale damage up to 2000% based on your saved Yen.
  • Dual Wielder! ensures consistently high DPS through frequent follow-up attacks and high base Critical Rate.
  • The "Emperor" path offers massive raw stats (+400% Damage) and debuff nullification, making him a stable carry option.
Cons
  • Has a complex playstyle; maximizing the "Virtual Realm Path" buffs requires specific conditions (like hoarding Yen) that may conflict with upgrading other units.
Cyborg Fearless UTDX
Cyborg (Fearless)
Fire Hill Trait: Wizard
Pros
  • Excellent economy saver; Fearless Cyborg grants free upgrades and permanent damage stacks every cycle, allowing you to focus funds elsewhere.
  • The Strongest’s Disciple ramps up damage significantly (up to +40%) against burning enemies, making him a great boss killer if paired with other Fire units.
Cons
  • The Fearless Cyborg passive is a double-edged sword; he stuns himself and stops attacking for an entire wave every 5 waves, which can be fatal if timed poorly.
  • Requires a long match duration to maximize his damage stacks and free upgrades.
Psycho 100% UTDX Meta
Psycho (100%)
Rose Hybrid Trait: Ruler
Pros
  • Pressure provides a valuable slowing aura for enemies that get too close (within 30% of range), acting as a last line of defense.
  • Psychic Manipulation synergizes well with other crowd control units, dealing bonus damage to "Confused" targets.
  • At Etherealization 6, the slow from Pressure lingers for 2 seconds after enemies leave range, improving his utility.
Cons
  • Extremely short base range (15), meaning enemies must be dangerously close for his passive slow to trigger.
Lord of Flies Tempered
Lord of Flies (Tempered)
Dark Hill Trait: Eternal Trait: Ruler
Pros
  • Resonance Manipulation gives him excellent delayed burst, stacking Resonance on every attack and detonating it for heavy damage after 20 seconds.
  • Gates of Hell adds rare team utility by granting Stun Immunity to Lord of Flies and up to five more units, while also giving him a strong damage buff based on how many units receive it.
  • Chaos Explosion is a huge full AoE nuke, jumping to 500% damage at Etherealization 6 and instantly adding more Resonance stacks for faster detonation setups.
Cons
  • His best damage is delayed, so he is weaker into quick leaks or enemies that die before Resonance can fully detonate.
  • Chaos Explosion has a massive 300-second cooldown and lowers his damage by 20% for 60 seconds after use, making bad timing very punishing.
  • Gates of Hell needs a high Resonance-stack detonation before it activates, so his support value is less immediate than simpler buff units.
Robot 17 & 18 Fighterz UTDX
Robot 17 & 18 (Fighterz)
Fire Hybrid Trait: Ruler
Pros
  • Cybernetic Enhancements gives Robot 17 & 18 excellent long-match scaling, adding +10% Damage every 5 waves and capping at +125% with Etherealization 4.
  • Energy Sense gives them huge effective coverage, so they can pressure enemies far beyond normal range while still keeping two placements.
  • Robo-Dance adds strong burst potential, especially at Etherealization 6 where its attack speed is increased by 15%.
Cons
  • Energy Sense has a damage penalty against enemies outside their base range, so the huge range is not “free” full-power DPS.
  • Their scaling takes time, meaning they are much better in longer modes than short fights or early waves.
  • Expensive upgrades and split 17/18 stat paths make them more demanding to build around than simpler plug-and-play DPS units.
Super Roku Enraged UTDX
Super Roku (Enraged)
Light Hill Trait: Ruler
Pros
  • Insane mobility with Instant Transmission; you can teleport him anywhere in his range to catch leaks and snag a 30-50% damage buff for 15s.
  • He’s a late-game monster, because after every 5 attacks he stacks damage up to +25%, and once he's capped, he gets a permanent +10% Crit Rate.
  • Total control over the track thanks to a massive 100% damage line-stun and a teleporting follow-up attack that procs every time he hits the same enemy twice.
Cons
  • The -50% damage penalty at the start is brutal; he feels like a wet noodle until you get enough hits in to ramp up his stacks.
  • The active beam has a massive 120s cooldown, so if you whiff the timing on a boss, you're stuck waiting forever to use it again.
Fallen Prince Ruthless UTDX
Fallen Prince (Ruthless)
Water Ground Trait: Ruler
Pros
  • Awakened Brutality gives him strong crit scaling from kills, with the cap going up to 45% at Etherealization 2, so he ramps well once waves start feeding him takedowns.
  • Saiyan Beyond Legend makes him especially valuable into Hyper Armor-heavy content, with Hyper Armor damage increasing further at Etherealization 4.
  • Solid late-upgrade profile: his range climbs to 45, SPA reaches 8, and his AoE becomes Line at Upgrade 7, giving him much better lane coverage later on.
Cons
  • He needs kills to fully activate his crit scaling, so he can feel weaker if stronger carries are stealing all the takedowns.
  • His best value is tied to Hyper Armor matchups; against regular waves, he is more of a strong DPS than a unique must-have counter.
  • He takes a while and a decent Yen investment to reach his better form, especially since his Line AoE only comes online at Upgrade 7.

B Tier DPS Units

Most of the units in our Universal Tower Defense X Unit tier list’s B-Tier are Legendary units, which are not bad per se, but are simply heavily outclassed by Mythic and Secret units. Many of these have very fun passives and will carry you through early- and mid-game challenges, but you’ll want to slowly replace them with Mythic and Secret units as you progress through the game. However, keep in mind that some of them have Evo versions, which can be real powerhouses.

B Tier
Footballer Ego
Footballer (Ego)
Fire Ground Trait: Ruler
Pros
  • Excellent at cleaning up weakened waves; his Opportunist passive boosts damage by up to 75% of the enemy's missing HP at Eth 2.
  • Functions as a support buffer; Visionary buffs the strongest nearby units if he fails to secure a kill, helping your main carries.
  • Gains utility at Etherealization 4, where he begins stunning enemies that are below 60% HP.
Cons
  • His DPS is conditional; he deals significantly less damage to full HP enemies.
Nelle Primal
Nelle (Primal)
Rose Hybrid Trait: Ruler
Pros
  • Offers specific synergy for Ichiko users via Baby Cheerleader, buffing Ichiko's damage and aggro pull.
  • Raging Persistence makes her a solid boss killer in Adult Form, as damage ramps up with consecutive hits on the same target.
Cons
  • Requires annoying micromanagement; she reverts to a useless "Baby Form" when her meter depletes and cannot attack until charged.
  • Her damage degrades over time in Adult Form due to Growth Spurt reducing damage per attack.
Ruka
Ruka
Ice Ground Trait: Ruler
Pros
  • Great synergy unit for Ice teams; Arctic Freeze! grants a 20% (up to 25%) damage modifier against Frozen enemies.
  • Becomes a Hybrid unit at Etherealization 6, greatly expanding her usability against air units.
Cons
  • Her damage potential is entirely reliant on enemies being frozen; she is much weaker if not paired with a freezer like Jangluu.
Pebble
Pebble
Rose Hybrid Trait: Artificer
Pros
  • Hurricane of the Leaf! rewards you for using knockback, stacking up to 50% Attack at Eth 2.
  • At Etherealization 6, he gains a powerful support utility where knocked-back enemies take 10% more damage from all sources.
  • Extremely cheap to place ($400).
Cons
  • Knockback can be detrimental if not managed correctly, sometimes pushing enemies out of your main DPS units' range.
Gen
Gen
Fire Ground Trait: Eternal
Pros
  • Unique scaling mechanic via Shinso!, where he gains 1% Attack for every point of Range he has. This makes him scale incredibly well with range buffs (like Masked Ninja).
Cons
  • Suffers from a very high SPA (8), making his attacks slow and punishing if they miss.
  • Requires heavy investment in Range buffs to deal competitive damage.
Greybeard
Greybeard
Dark Hybrid Trait: Ruler
Pros
  • Specialized tank buster; Liberation! deals +65% damage to Armored enemies, making him a budget solution for heavy waves.
  • Etherealization 6 grants him infinite scaling, gaining Attack and Range for every kill (capped at 50%).
Cons
  • Very short base range (15) limits his placement options.
  • High SPA (8) means he struggles against swarms of fast enemies.
Nejo
Nejo
Wind Hybrid Trait: Ruler
Pros
  • A solid support unit for Crit-based teams; Eye’s Of The Hyuga provides a passive +5% (up to 7%) Crit Chance aura to nearby allies.
  • Gains utility at Eth 6 by applying Knockback, adding a layer of crowd control.
Cons
  • Short aura range (15 base) forces you to cluster your units tightly around him.
Masked Ninja
Masked Ninja
Fire Ground Trait: Eternal
Pros
  • The essential support for "Team 7" units (Sasku, Pebble, etc.); Leader Of Team 7! buffs their Range and Attack by 12-15%.
  • Cheap placement ($300) makes him an easy buff to deploy early.
Cons
  • Extremely niche; he is practically useless if you are not running a specific Team 7 composition.

C Tier DPS Units

Finally, to wrap things up in our Universal Tower Defense X tier list of DPS units, we have the C-Tier. These are Rare units that are objectively weak and will only serve you for the first round or two, until you start unlocking Epic and Legendary units. Unfortunately for the popular anime characters in this tier, they’ll mostly serve as fodder to feed your stronger units via fusing in order to level them up faster. That’s their purpose, and, in most anime tower defense games, their destiny.

C Tier
Laffy
Laffy
Fire Ground
Pros
  • I will be the Pirate King! offers decent early-game range scaling if you commit to a full Pirate team.
Cons
  • Extremely low base Attack (9) makes him obsolete after the first few waves.
  • Forcing a "Pirate Crew" team just to buff a C-tier unit is a waste of slots.
Gaaru
Gaaru
Water Ground
Pros
  • Impenetrable Sand! grants immunity to stun, which is technically unique for a starter unit.
Cons
  • Pitiful base range (12) forces you to place him in dangerous spots.
  • Deals negligible damage compared to any other Water unit in the game.
Roku
Roku
Fire Ground
Pros
  • Heat of the Battle allows for small damage ramping within a single wave.
Cons
  • The damage buff resets every wave, preventing any meaningful long-term scaling.
  • Base stats are simply too low to handle anything beyond the tutorial stages.
Nutaru Kid
Nutaru Kid
Wind Ground
Pros
  • Has a built-in crit mechanic via My Ninja Way!, which is rare for a unit of this rarity.
Cons
  • Crit chance is low (15%) and unreliable for consistent DPS.
  • Requires "Sasku" to be in range at Eth 6 to be remotely viable, wasting two unit slots for mediocre damage.
Ranji
Ranji
Wind Ground
Pros
  • Possesses the highest base attack (18) among the starter rare units.
Cons
  • High SPA (8) means he attacks painfully slowly, leaking fast enemies easily.
  • Has zero passives to help him scale or provide utility to the team.
  • Strictly a placeholder unit until you pull literally anything else.

And with that, the DPS part of this Universal Tower Defense X Tier List is completed. Now, let's jump to the UTD Tier List support tier list.


Universal Tower Defense X Support Units Tier List

S
Love Goddess game image

Love Goddess

ROSEGROUND
Prodigy Mage (Apprentice) game image

Prodigy Mage (Apprentice)

ROSEHILL
Karbonoto (Sage) game image

Karbonoto (Sage)

ROSEGROUND
Sasku (Great War) game image

Sasku (Great War)

GROUNDDARK
Virtual Idol (Superstar) game image

Virtual Idol (Superstar)

GROUNDLIGHT
Bambee (Blitz) game image

Bambee (Blitz)

HYBRIDDARK
Bulmo game image

Bulmo

GROUNDROSE
Ice Empress (Frost) game image

Ice Empress (Frost)

HYBRIDICE
A
Shunks (Conqueror) game image

Shunks (Conqueror)

HYBRIDROSE
Lulu game image

Lulu

HYBRIDDARK
Admiral (Magma) game image

Admiral (Magma)

HYBRIDFIRE
Fastcart game image

Fastcart

GROUNDWIND
Scarlet Maid (World) game image

Scarlet Maid (World)

HYBRIDLIGHT
Rule (ROOM) game image

Rule (ROOM)

GROUNDWATER
B
Ruka game image

Ruka

GROUNDICE
Zorus game image

Zorus

HYBRIDDARK
Tierabel (Hydro) game image

Tierabel (Hydro)

HILLWATER
Shakumira Evo game image

Shakumira Evo

HYBRIDDARK
C
Namo game image

Namo

GROUNDWATER
Orahemi game image

Orahemi

HILLROSE

S Tier Support Units

These are the meta-defining support units, the ones you absolutely must have in your team comps if your goal is to min-max everything and run only the strongest and most OP units currently available in the 3.0 UTDX meta. Each of these units provides powerful support abilities, such as buffing, debuffing, crowd control (CC), and more, earning them the top tier of our Universal Tower Defense X Tier List.

Support S Tier
Prodigy Mage Apprentice UTDX Fern
Prodigy Mage (Apprentice)
Rose Hill Trait: Fission
Pros
  • Party’s Tactician gives her real support flexibility, letting her buff either Hill or Ground allies depending on the comp, with strong offensive payoffs like shared Attack Speed or Crit Rate.
  • Battle Dominant gives her useful baseline control by applying Slow on every attack, and at Etherealization 4 she starts converting that pressure into a reliable stun loop against slowed enemies.
  • Travel Buddies gives her extra synergy value in themed teams, especially next to Ancient Mage or Dragon Slayer, and Etherealization 2 pushes those buffs even higher.
  • She is also relatively cheap for a high-end support, which makes her much easier to slot into comps without ruining your early economy.
Cons
  • A good chunk of her value is pairing-dependent, so she feels much better in coordinated setups than in random mixed comps.
  • She is more of an enabler and control piece than a true carry, so she still needs strong nearby units to convert her buffs and slows into real wave-clearing value.
Karbonoto Sage UTDX Kabuto
Karbonoto (Sage)
Rose Ground Trait: Eternal
Pros
  • Impure Resurrection is one of the most unique support tools in the game, letting him reanimate other units and effectively build an entire enhanced core around them.
  • DNA Absorption and Corpse Control give his reanimated units serious scaling, turning him from a gimmick enabler into a legitimate team amplifier for specialized setups.
  • Inorganic Animation adds strong follow-up pressure and Hyper Armor damage whenever he attacks alongside reanimated units, with even more payoff when Corpse Control is active.
  • At high investment, he can create very oppressive support frameworks for slower, heavier carries that do not mind his reanimation rules.
Cons
  • He is extremely setup-dependent, since his best value only appears once you commit to reanimated units and build around them deliberately.
  • Impure Resurrection comes with real drawbacks, especially forcing average SPA and making reanimated units unsellable, so bad targets or bad timing can lock you into awkward boards.
Sasku Great War UTDX Sasuke
Sasku (Great War)
Dark Ground Trait: Ruler
Pros
  • He brings a ridiculous amount of utility into one slot: stuns, slows, Hatred damage amp, Black Burn, boss burst, repositioning, and even dodge-based survivability through Uchiha Bloodline.
  • Pure Hatred is especially valuable for support play, since it increases damage taken whenever enemies enter or leave his range, making him great for helping stacked DPS setups delete priority targets faster.
  • Rinnegan gives him excellent toolbox value, with Almighty Push for lane control, Almighty Pull for mass stun utility, and Amenatejikara for repositioning plus a crit spike.
  • Dimensional Warp makes him even more useful in late-game runs by punishing weakened enemies and bosses automatically, adding both cleanup and affliction pressure.
Cons
  • He is a very active unit to optimize, since a lot of his power comes from managing ability timing and positioning rather than just dropping him and forgetting him.
  • Even though he provides plenty of utility, he is not as universally plug-and-play as simpler support units, because some of his best value comes from stun chains, Bloodline synergy, and properly timed ability use.
Bulmo UTDX Bulma Dragon Ball
Bulmo
Rose Ground Trait: Fortunate
Pros
  • Bulmo is the undisputed queen of farming; Smart Investment and Growing Technology allow her income to scale exponentially, funding expensive units far earlier.
  • Come forth, Shenlong! offers a lot of flexibility, granting a massive one-time choice of +30,000 Yen, +15% Global Damage, or +15% Global Crit Chance.
Cons
  • Gathering Wish Balls for her ultimate ability is RNG-dependent (5% base chance), forcing you to place units near her to maximize the odds.
Love Goddess Aphrodite UTDX
Love Goddess
Rose Ground Trait: Ruler
Pros
  • One of the best late-game economy supports; Spreading Love reduces upgrade costs for units in her range, which is huge when you are building around expensive carries.
  • The discount scales harder as you commit around her, gaining extra cost reduction per unit in range and per upgrade.
  • Soulmate lets you select one nearby unit and give it a major crit package: +20% Crit Rate and +50% Crit Damage.
Cons
  • She is pure support with no real damage output, so she needs to be paired with a strong carry to justify the team slot.
  • Her value depends heavily on positioning; Soulmate does nothing if you fail to select a unit in range within the activation window.
Ice Empress Frost UTDX Esdeath Akame Ga Kill
Ice Empress (Frost)
Ice Hybrid Trait: Ruler
Pros
  • The ultimate Ice support; Queen Of Ice grants a flat +20% Damage to all Ice allies in range, making her mandatory for Ice mono-teams.
  • Provides immense crowd control coverage; Icy Pressure passively freezes enemies entering her range, and Frost Dominion is a full map AoE freeze.
  • FrostBite Execution offers unique utility by instantly deleting non-boss enemies under 20% HP, cleaning up leaks effortlessly.
Cons
  • Her DPS scaling relies on the Frostbourne Commander passive, which resets every time she reaches the cap, creating inconsistent damage valleys.
Bambee Blitz UTDX Bambietta Bleach
Bambee (Blitz)
Dark Hybrid Trait: Ruler
Pros
  • Element Bombing makes her a universal fit for any team, adapting her status effects (Slow, Stun, Burn, etc.) based on your team's most used element.
  • Excellent at extending debuff durations; Kakyuretsuen doubles the duration of applied afflictions, which is massive for Stun or Freeze heavy compositions.
  • At Etherealization 6, she essentially functions as a global buffer, increasing damage from all sources by 25%.
Cons
  • Since her status effect depends on your team composition, she requires careful team building to ensure you get the specific debuff you need.
Virtual Idol Superstar UTDX Miku Vocaloid
Virtual Idol (Superstar)
Light Ground Trait: Ruler
Pros
  • A dedicated pure support unit; Hiding In Your WiFi! allows you to toggle between boosting ally Damage (up to 15%) or Range.
  • Enamouring Music provides a burst window where these buffs are magnified by up to 40% (at Eth 6), perfect for wave spikes or boss phases.
  • Unique economy support at Etherealization 2, reducing upgrade costs for nearby units, which can save thousands of Yen in the long run.
Cons
  • She deals literally zero damage (0 ATK), meaning she takes up a slot purely for buffs and cannot defend herself against leaks.

A Tier Support Units

Don’t let the A-tier ranking confuse you. Most of these units are quite strong and useful, and you won’t make a mistake by including them in your team comps, especially if you enjoy their playstyle. It's just that they’re simply outclassed by S-tier units, which currently define the meta.

Support A Tier
Scarlet Maid World
Scarlet Maid (World)
Light Hybrid Trait: Sacred
Pros
  • Luna Clock provides a unique "high risk, high reward" mechanic, increasing damage enemies take by 30%, which is excellent for bursting bosses.
  • Otherworldly Maid reduces cooldowns based on Royalty allies, making her synergize well with specific team comps.
  • Offers a variety of CC including Stuns (Time Paradox) and Slows (Special Stopwatch) depending on her cycle.
Cons
  • Luna Clock speeds up enemies by 30%, which can instantly cause game-ending leaks if your team lacks the DPS to kill them during the vulnerability window.
  • Complex "Time Gauge" mechanics require attention to know which ability will trigger next.
Rule ROOM
Rule (ROOM)
Water Ground Trait: Ruler
Pros
  • ROOM! adapts to the situation; against Bosses, it switches to "K-ROOM," locking onto the strongest enemy and stunning them, making him an excellent boss killer.
  • Shambles offers unique utility by teleporting enemies backward based on range, effectively buying your defenses more time.
  • At Etherealization 2, his K-ROOM stuns also apply a 25% slow, significantly crippling high-HP targets.
Cons
  • His attack behavior changes drastically depending on whether a boss is present, which can sometimes reduce his wave-clearing efficiency when you need AoE.
Shunks Conqueror
Shunks (Conqueror)
Rose Hybrid Trait: Ruler
Pros
  • Captain’s Foresight provides a massive team-wide 20% Attack boost when killing a boss, perfect for pushing damage during critical phases.
  • Relentless Conquorer’s Aura rewards long-range placement by increasing stun duration (up to 100%) based on distance.
  • He possesses excellent self-preservation with Unbreakable Assault, granting stun immunity while attacking.
Cons
  • The damage buff from Captain's Foresight does not stack with multiple Shunks and does not affect the unit itself.
Lulu
Lulu
Dark Hybrid Trait: Ruler
Pros
  • Gehas provides unique crowd control by issuing orders like "Retreat!" (enemy walks back) or "Stand Still!" (stun), offering versatile lane management.
  • Absolute Control! acts as a global panic button, activating his current order on every enemy on the map.
  • Reduces cooldowns significantly at higher Etherealization levels (Eth 2 and Eth 6), allowing for more frequent command usage.
Cons
  • He deals 0 Attack Damage normally; his only damage comes from the specific Beam! active, making him a pure support slot.
  • Requires high micro-management to switch orders effectively.
Admiral Magma
Admiral (Magma)
Fire Hybrid Trait: Wizard
Pros
  • Lava Puddle EX creates dangerous zones that confuse and burn enemies, providing excellent area denial and crowd control.
  • Donut Maker rewards focusing down targets; if an enemy is already in a magma pool, he deals 50% bonus damage instead of creating a new one.
  • At Etherealization 6, enemies in his lava puddles take 10% more damage from all sources, adding a layer of team support.
Cons
  • His utility relies on enemies walking into specific spots; fast or flying enemies might bypass his puddles before the damage ticks up.
Fastcart
Fastcart
Wind Ground Trait: Fortunate
Pros
  • A dedicated economy unit; Thriving Business! reduces his own upgrade costs based on other units placed, letting you ramp up income cheaper.
  • At Etherealization 2, he generates 5% more income if placed away from damage units, encouraging strategic positioning.
  • Etherealization 6 allows for income scaling based on the number of other Fastcarts in range, creating a snowball effect for cash generation.
Cons
  • He has absolutely no attack capability, taking up a unit slot purely for money.
  • Positioning is restrictive if you want to maximize the Eth 2 bonus (must be away from damage units).

B Tier Support Units

These aren’t bad units per se, and in fact, some of them have a lot of potential, but they’re simply not that good in their current form, especially compared to other, more powerful and far more useful A- and S-tier support units. That doesn’t mean you shouldn’t try them out and see if you find them fun to play.

Support B Tier
Tierabel Hydro
Tierabel (Hydro)
Water Hill Trait: Eternal
Pros
  • Creates a powerful synergy loop with Nelle via Luzy Abismo, granting Attack Speed to herself and Damage to Nelle.
  • Spirit Energy provides a solid 12.5% Damage buff (Eth 4) to other Water units, reinforcing mono-water teams.
  • The Unforgiving Tides provides consistent slowing (25% at Eth 6) to control enemy pacing.
Cons
  • To unlock her full potential, you are forced to run Nelle, restricting your team building options.
  • Her Raging Seas ability requires a kill count to activate, which is difficult for a support unit to stack efficiently.
Zorus
Zorus
Dark Hybrid Trait: Ruler
Pros
  • Traps Magic offers versatile utility, allowing you to choose between Stun, Radiation, or Confusion based on the situation.
  • At Etherealization 6, the trap limit increases by 2, allowing for better map coverage.
  • Very cheap placement cost (500), making him an easy early-game utility pick.
Cons
  • Traps are single-use/contact-based, meaning they can be wasted on weak fodder enemies instead of priority targets.
  • Low base stats mean he offers negligible damage output on his own.
Shakumira Evo
Shakumira Evo
Dark Hybrid Trait: Artificer
Pros
  • Shadow Possession Jutsu! allows for significant range scaling, gaining range per slowed enemy (capped at 25% at Eth 2).
  • Etherealization 6 unlocks Complete Shadow Possession!, giving him a higher utility ceiling in the late game.
Cons
  • His passive is entirely dependent on slowing enemies; without a dedicated slower on the team, his range buff is nonexistent.
Ruka
Ruka
Ice Ground Trait: Ruler
Pros
  • A staple support for Ice teams; Arctic Freeze! deals 20-25% more damage to Frozen enemies, helping clear waves faster.
  • Becomes a Hybrid unit at Etherealization 6, allowing her to target air units and apply her bonus damage more reliably.
Cons
  • She is purely conditional; if enemies aren't frozen, she loses her primary damage multiplier.

C Tier Support Units

Weak but ok-ish early game units, which you can test just for fun, but you should generally ignore them. They are meant to be fused and nothing much else, rightfully earning the lowest rank in our Universal Tower Defense Tier List.

Support C Rank // The Starters
Namo
Namo
Water Ground Trait: Ruler
Pros
  • Pirate Bounty! is an accessible way to generate early economy, granting 3x Yen when a tagged enemy dies.
  • Very fast attack speed (3 SPA) allows her to quickly tag multiple incoming enemies to set up the bounty payout.
Cons
  • The bounty effect has a 10-second cooldown, drastically limiting the total extra cash she can produce compared to farm units.
  • Extremely low base damage (8) means she contributes almost nothing to actual defense.
Orehami
Orehami
Rose Hill Trait: Ruler
Pros
  • I’ll shield you! can save a critical unit from being stunned, which is a rare utility for a C-tier unit.
  • Extremely cheap to place ($200), allowing you to drop her down as a disposable shield if needed.
Cons
  • The shield is single-target and has a long 20-second cooldown, making it ineffective against enemies that spam AoE stuns.
  • Requires max upgrades to even unlock her passive, which is a poor investment for the minimal utility she provides.

RELATED: Universal Tower Defense Passives List – Mythic, Evo, Secret

Universal Tower Defense X Tier List Ranking & Evaluation Method

This Universal Tower Defense X tier list is not ranked by sheet DPS alone. The current meta is much more role-driven, which means a unit can rank highly because it carries damage, enables a team, solves a mode-specific problem, or scales better than other options once traits, relics, and Etherealization are factored in.

  • Role and mode fit - Some units are amazing in Infinite, Ragnarok, or Virtual Realm but less impressive in short Story or quick farming runs. We rank units based on where they actually win games, not just how flashy they look on paper.
  • Damage profile and uptime - Burst, sustained DPS, summon damage, line nukes, DoT pressure, follow-up attacks, and whether a unit stays active consistently all matter more than one raw attack number.
  • Utility and affliction synergy - Slow, Stun, Freeze, Time Snail, Bleed, Radiation, Wind Shear, cost reduction, follow-up attacks, and debuffs that increase team damage can easily make a unit more valuable than a selfish carry.
  • Element, armor, and Hyper Armor pressure - Certain units jump in value when they match effective elements well, ignore resistances, or help break armor and Hyper Armor in harder content.
  • Economy and team support - Farm units, buffers, and upgrade-cost reducers are ranked with real respect because strong late-game teams often do not come online without them.
  • Traits - Traits in Universal Tower Defense X can completely change a unit. Ruler, Eternal, Sacred, Astral, Wizard, Duelist, and Fortunate all push certain units much higher than their default versions.
  • Relics and set bonuses - Relics in Universal Tower Defense X are a huge part of the endgame. The right set bonus, main stats, and accessory can turn a good unit into a meta unit.
  • Etherealization and evolution breakpoints - Many units are ranked around what they become after important Etherealization unlocks, evolution passives, or late upgrades, not just how they feel at base.
  • Cost, placements, and ease of use - Expensive one-placement units need to justify their cost, while easier multi-placement units with flexible use cases often rank better for most players.

How to Unlock and Evolve Every UTDX Unit

Use this Universal Tower Defense X unit unlock and evolution table to check where each unit comes from and what materials you need for every listed evolution stage.

UTDX Unlock and Evolution Table
Rarity / Unit How to Unlock Evolution Requirements
Rarity TBAUPD 2.75
Alpha Devil
Obtainable via the Devil Within event
Alpha Devil Alpha Devil (Omega) 0 takedowns
Frozen Fragment: 8Universal Fragment: 3Ocean Fragment: 10Alpha Devil’s Sword: 1 | Buy in [The Devil Within] Event shop
Rarity TBAUPD 2.75
Devil Hunter
Obtainable via the Devil Within event
Devil Hunter Devil Hunter (Mercenary) 0 takedowns
Petal Fragment: 8Devil Hunter’s Sword: 1 | Buy in the [The Devil Within] Event ShopUniversal Fragment: 3Burning Fragment: 10
Rarity TBAUPD 2.5
Cursed Vessel
Obtainable via Universal Tears
Cursed Vessel Cursed Vessel (Shrine) 0 takedowns
Universal Fragment: 3Cursed Finger: 15 | Drop from The Strongest of All time Stage Universal RiftPhantom Fragment: 6Burning Fragment: 10
Cursed Vessel (Shrine) The Strongest in History 0 takedowns
Cursed Finger: 19 | Drop in The Strongest of All Time Stage Universal RiftBoundless Orb: 1 | Drop in Universal RiftBurning Fragment: 12Phantom Fragment: 15Universal Fragment: 5
Rarity TBAUPD 2.5
Infinity Sorcerer
Obtainable via Universal Tears
Infinity Sorcerer Infinity Sorcerer (Void) 0 takedowns
Holy Fragment: 6Universal Fragment: 3Six Eyes: 6 | Drop from Universal Rift Judas Judas StageOcean Fragment: 10
Infinity Sorcerer (Void) The Strongest of Today 0 takedowns
Prison Box: 3 | Drop in Judas Judas Stage Universal RiftUniversal Fragment: 5Boundless Orb: 1 | Drop in Universal RiftHoly Fragment: 15Ocean Fragment: 12Blue Eye: 6 | Drop in Judas Judas Stage Universal Rift
Rarity TBAUPD 2.5
Mimicry Sorcerer
Obtainable via the Sorcerer Village legend stage
Mimicry Sorcerer Mimicry Sorcerer (Cursed Love) 0 takedowns
Petal Fragment: 10Universal Fragment: 3Love Ring: 1 | Drop From Stage 3 of Sorceres Game Legend StagesPhantom Fragment: 8
Rarity TBAUPD 2.5
Judgment Sorcerer
Obtainable via banner
Judgment Sorcerer Judgment Sorcerer (Domain) 0 takedowns
Sky Fragment: 8Universal Fragment: 3Judge Gavel: 1 | Drop in Stage 1 of Sorcerers Game Legend StagesHoly Fragment: 10
Rarity TBAUPD 2.5
Shadow Knight
Obtainable via Crimson Throne Chamber raid
Shadow Knight Shadow Knight (Risen) 0 takedowns
Universal Fragment: 4Burning Fragment: 8Sky Fragment: 10Shadow Knight Sword: 1Phantom Fragment: 5
Rarity TBAUPD 2.5
Jane Juliet
Obtainable via banner
Jane Juliet Jane Juliet (Larper) 0 takedowns
Petal Fragment: 4Universal Fragment: 3Delicious Cake: 1 | Drop in Stage 3 Of Sorcerer Games Legend StagesBurning Fragment: 5Phantom Fragment: 6
Rarity TBAUPD 2.5
Gambler Sorcerer
Obtainable via banner
Gambler Sorcerer Gambler Sorcerer (Jackpot) 0 takedowns
Sky fragment: 10Universal fragment: 3Ocean Fragment: 8Roullete Wheel: 1 | Drop from Stage 2 of Sorceres Game Legend Stages
Rarity TBAUPD 2.5
Mighty Roach
Obtainable via the Virtual Realm shop
Mighty Roach Mighty Roach (Cursed) 0 takedowns
Petal Fragment: 5Universal Fragment: 3Sky Fragment: 10Festing Life Sword: 1 | Buyable in Virtual ShopPhantom Fragment: 5
Secret
Ant King
Obtainable via World Raid
Ant King Ant King (Savage) 0 takedowns
Ant Mandibles 1Ocean Fragment: 8Burning Fragment: 10Phantom Fragment: 10Universal Fragment: 4
Secret
Nutaru (Sage)
Obtainable via Kitsunox Struggle Portal
Nutaru (Sage) Nutaru (Beast) 0 takedowns
Village Ramen: 25Universal Fragment: 3Beast Seal: 1 | Drops from Tier IV Of Kitsunox Struggle (Ultra Bosses)Sky Fragment: 6Ocean Fragment: 6Petal Fragment: 10Chakra Essence: 10
Secret
Ancient Shinobi
Obtainable via Shinobi Alliance
Ancient Shinobi Ancient Shinobi (Reawakened) 0 takedowns
Village Ramen: 30Universal Fragment: 3Chakra Essence: 20 | Drop from Tier III of Kitsunox Struggle (Ultra Bosses)Gonbai: 1Ocean Fragment: 10Phantom Fragment: 4Burning Fragment: 8
Secret
Crow Shinobi
Obtainable via the Shinobi World War legend stage
Crow Shinobi Crow Shinobi (Reanimated) 0 takedowns
Kunai : 15 | Drop From Tier II of Kitsunox Struggle (Ultra Bosses)Left Special Eye : 1 | Drop From Stage 3 of Shinobi World War (Legend Stages)Right Special Eye: 1 | Drop From Stage 3 of Shinobi World War (Legend Stages)Universal Fragment: 2Phantom Fragment: 3Burning Fragment: 10
Secret
Sasku (War)
Obtainable by evolving from Sasku (Storm), or the Shinobi Battlefield raid
Unlock EVO requirements via Sasku (Storm): 0 takedowns
Universal Fragment: 3Cursed Sword : 1 | Craft with 1 Petal fragment | 1 Cursed Mark | 1 Burning FragmentCursed Mark: 2 | Drops From Stages 1 of Ninja Forest (Legend Stages)Phantom Fragment: 6Burning Fragment : 10
Sasku (War) Sasku (Great War) 0 takedowns
Universal Fragment: 3Spirited Cage [Ribcage] : 1 | Drop from Stages 5 and Shinobi Battlefield of Shinobi Battlefield (Raids)Phantom Fragment: 6Burning Fragment : 10
Secret
Ancient Mage
Obtainable via the Beyond Fantasy legend stage 3
Ancient Mage Ancient Mage (Slayer) 0 takedowns
Great Mage Staff: 1 | Drop from Stages 3 of Beyond Fantasy (Legend Stages)Universal Fragment: 3Ocean Fragment: 6Burning Fragment: 6Holy Fragment: 3
Secret
First Emperor
Obtainable via the Ragnarok Event game mode
First Emperor First Emperor (Greatest) 5.5K takedowns
Petal Fragment: 8Universal Fragment: 3Holy Fragment: 2Sky Fragment: 5Emperor’s Blindfold: 1
Secret
Water God
Obtainable via evolving Step Up Banner
Water God Water God (Primordial) 5.5K takedowns
Water Trident: 1Universal Fragment: 3Water Fragment: 8Holy Fragment: 5
Secret
First Human
Obtainable via Olympus Judgement Challenge
First Human First Human (Father) 5,5K takedowns
Holy fragment: 5Brass Knuckle: 1Universal Fragment: 3Petal Fragment: 8
Secret
Bio-Android
Obtainable via Key’s
Bio-Android Bio-Android (Imperfect) 5.5k takedowns
Bio-Android Egg: 1 | To Obtain 1 Need To do the Perfect Arena Portal Tier 3 or 4Universal fragment: 3Crimson Enblem: 1 | To Obtain Need To do Perfect Arena Portal Tier 3 or 4Sky Fragment: 8Phantom Fragment: 5Zen Bean: 50 | To Obtain These Need To do the Perfect Arena Portal Tier 1 or 4
Secret
Ichiko
Obtainable via the Top of Hueco Castle Raid
Ichiko Ichiko (Rage) 7.5K takedowns
Burning fragment : 6Universal Fragment: 3Holy Fragment: 3Hollow Essence: 1 | Obtain from Raid ShopPhantom Fragment: 6
Secret
Phantom Captain
Obtainable via Step Up Banner
Phantom Captain Phantom Captain (Carrier) 5.5K takedowns
Sky Fragment: 6Universal Fragment: 3Holy Fragment: 6Captain Hat: 1 | To Craft 1 Needed: 2 Holy Fragments | 1 Universal Fragment | 3 Ocean Fragments | 5 Sky Fragments
Secret
Dragon Guy
Obtainable via banner
Dragon Guy Dragon Guy (Silverite) 7.5K takedowns
Universal Fragment: 3Silverite Sword: 1 | To Craft 1 Needed: 6 Frozen Fragments | 3 Sky Fragments | 3 Burning Fragments
Secret
Jinoo
Obtainable via banner
Jinoo Jinoo (Monarch) 7.5K takedowns
Universal Fragment: 2Shadow Token: 1 - To Craft 1 Needed : 4 Phantom FragmentsDemon’s King Dagger: 2 - To Craft 2 Needed : 6 Burning Fragments | 4 Holy Fragments | 2 Sky Fragments
Jinoo (Monarch) Jinoo, Shadow Monarch 0 takedowns
Demon King’s Dagger: 2 | Craftable in CraftingUniversal Fragment: 5Boundless Orb: 1 | Drop In Universal RiftBurning Fragment: 10Ant King Egg: 1Shadow Knight Sword: 1Phantom Fragment: 10Shadow Token: 5 | Craftable from Crafting
Secret
Lulu
Obtainable via Quest Line
No evolution.
Exclusive
Love Goddess
Obtainable via Valentine’s 26 Capsule
No evolution.
Exclusive
Tai Yang
Obtainable via Faction Event Rewards
No evolution.
Exclusive
Judas
Obtainable via Level 50 in Battpepass Season 2
Judas Judas (Darkness) 4.5K takedowns
Petal fragment: 3Universal Fragment: 2Phantom fragment: 8Green Keyfish: 1
Exclusive
Ja'frey
Obtainable via Level 25 In Battlepass Season 2
Ja'frey Ja'frey (Lightning Assasin) 4.5K takedowns
Universal Fragment: 2Ocean Fragment: 5Holy fragment: 2Sky Fragment: 5Magical Scepter: 1
Exclusive
Jangluu
Obtainable via Winter Capsule from the Winter Event Shop
Jangluu Jangluu (Eclipse) 6.2K takedowns
Holy fragment : 4Universal Fragment: 2Frozen Fragment: 6Mystical Blindfold: 1 | Obtain From Winter Shop for 30K
Exclusive
Migumen
Obtainable via New Years Capsule from the Winter Event Shop
Migumen Migumen (Finale) 4.5K takedowns
Burning fragment : 8Universal Fragment: 2Petal Fragment: 6Explosion Staff: 1 | Obtain From Winter Shop for 30K
Exclusive
Bambee
Obtainable via New Years Capsule from the Winter Event Shop
Bambee Bambee (Blitz) 6.2K takedowns
Phantom Fragment : 6Universal Fragment: 2Burning Fragment: 3Bambee’s Baton: 1 | Obtain From Winter Shop for 30K
Exclusive
Ice Empress
Obtainable via Winter Capsule from Winter Event Shop
Ice Empress Ice Empress (Frost) 6.2K takedowns
Holy fragment : 3Universal Fragment: 2Frozen Fragment: 6Sky Fragment: 5Death Rapier: 1 | Obtain From Winter Shop for 30K
Exclusive
Grommjaw
Obtainable via Raid Shop for 450 tokens
Grommjaw Grommjaw (Panther) 6.2K takedowns
Petal fragment : 8Universal Fragment: 2Ocean Fragment: 6Hollow Skull Jaw: 1 | Obtain From Raid Shop
Exclusive
Rule
Obtainable via Battlepass Tier 50
Rule Rule (ROOM) 6.2K takedowns
Holy fragment : 2Universal Fragment: 2Ocean Fragment: 6Heart Fruit: 1
Exclusive
Footballer
Obtainable via Battlepass Tier 25
Footballer Footballer (Ego) 6.2K takedowns
Petal fragment : 4Universal Fragment: 2Sky Fragment: 6Champion Football: 1
Exclusive
Scarlet Maid
Obtainable via Virtual Realm
Scarlet Maid Scarlet Maid (World) 6.2K takedowns
Holy fragment : 6Universal Fragment: 3Maid Knife: 1 | Obtain From Virtual Shop
Exclusive
Ronin Obito
Obtainable via Day 7 of release claim / 60 hours in pre-release afk chamber
No evolution.
Mythic
King Sailor
Obtainable via Special banner & Selection banner
King Sailor King Sailor (Vessel) 0 takedowns
Petal Fragment: 4Universal Fragment: 2Ocean Fragment: 10Sword of the Seven Seas: 1 | To craft needed 4 Sky Fragments | 2 Universal Fragments | 12 Ocean Fragments | 4 Petal FragmentsSky Fragment: 4
King Sailor (Vessel) King Sailor (Unrivaled) 0 takedowns
Universal Fragment 1: 1 | Buy in Revived Shinobi Boss ShopUniversal Fragment 2: 1 | Buy in Inner Beast Ultra Boss ShopUniversal Fragment 3 1 | Drop From Shinobi World War Legend Stage Act 3Universal Fragment 4: 1 | Buy in Shinobi Battlefield Raid Shop
Mythic
Karbonoto
Obtainable via summoning
Karbonoto Karbonoto (Sage) 0 takedowns
Village Ramen: 20Universal Fragment: 3Chakra Essence:12 | Drop From Tier IIII of Kitsunox Struggle (Ultra Bosses)Burning Fragment: 6Petal Fragment: 8White Snake: 1Phantom Fragment: 2
Mythic
Prodigy Mage
Obtainable via summoning
Prodigy Mage Prodigy Mage (Apprentice) 0 takedowns
Mage Staff: 1 | Drop from Stages 2 of Beyond Fantasy (Legend Stages)Universal Fragment: 2Phantom Fragment: 4Petal Fragment: 6
Mythic
Dragon Slayer
Obtainable via summoning
Dragon Slayer Dragon Slayer (Hero) 0 takedowns
Petal Fragment: 6Slayers Axe: 1 | Drop From Beyond Fantasy (Legend Stages)Universal Fragment: 2Burning Fragment: 8
Mythic
Enlightened God
Obtainable via the Step Up Banner
Enlightened God Enlightened God (Holy) 3.5K takedowns
Light Staff: 1Universal Fragment: 2Phantom Fragment: 4Holy fragment: 7
Mythic
Underworld God
Obtainable via the step up banner
Underworld God Underworld God (Death) 3.5K takedowns
Sky fragment: 8Universal Fragment: 2Phantom Fragment: 5Underworld Spear: 1
Mythic
Lord of Flies
Obtainable via the step up banner
Lord of Flies Lord of Flies (Tempered) 3.5K takedowns
Holy Fragment: 4Dark Cane: 1Phantom Fragment: 7Universal Fragment: 2
Mythic
The Drink
Obtainable via summoning on the banner
The Drink The Drink (Survivor) 3.5K takedowns
Universal Fragment: 2The Drink’s Sword: 1 | To get 1 Need to do Legends Stage 1 of DBZ or Buy from Perfect Cell Ultra Boss ShopHoly Fragment: 3Saiyan Fragment: 15 | To Get These Need to do Perfect Arena Portal Tier 2 or 4Ocean Fragment: 8Zen Bean: 25 | To Get These Need to do Perfect Arena Portal Tier 1 Or 4
Mythic
Robot 17 & 18
Obtainable via summoning on the banner
Robot 17 & 18 Robot 17 & 18 (Fighterz) 3.5K takedowns
Universal Fragment: 2Robot 18 Jacket: 1 | To Get 1 Buy From Ultra Boss Perfect Cell ShopSky fragment: 6Crimson Enblem: 2 | To Get 2 Need to do Perfect Arena Portal Tier 3 or 4Robot 17 Scarf: 1 | To Get 1 Buy From Ultra Boss Perfect Cell ShopPhantom Fragment: 4Zen Bean: 25 | To Get These Need to do Perfect Key Portal
Mythic
Rohan & Robot 16
Obtainable via summoning on the banner
Rohan & Robot 16 Rohan & Robot 16 (Limit Breaker) 3.5K takedowns
Universal Fragment: 2Sky Fragment: 5Robot 16’s Head: 1 | To get 1 Needed to buy from Ultra Boss Perfect Cell Shop Or Legend Stage 2 of DBZHoly Fragment: 3Saiyan Fragment: 15 | To get These Need to do Perfect Arena Portal Tier 2 or 4Phantom Fragment: 3
Mythic
Fallen Prince
Obtainable via summoning on the banner
Fallen Prince Fallen Prince (Ruthless) 3.5K takedowns
Princes’s Armor: 1 | To get 1 Buy from Ultra boss Perfect Cell Shop.Universal Fragment: 2Sky fragment: 8Saiyan Fragment: 15 | To get These Need to do Perfect Arena Portal Tier 2 or 4Holy Fragment: 5Zen Bean: 25 | To get These Need to do Perfect Arena Portal Tier 1 or 4
Mythic
Super Roku
Obtainable via summoning on the banner
Super Roku Super Roku (Enraged) 3.5K takedowns
Roku’s Staff: 1 | To Obtain 1 Need to Buy From Ultra Boss Perfect Cell ShopUniversal Fragment: 2Petal Fragment: 4Holy fragment: 2Saiyan Fragment: 15 | To get These Need to do Perfect Arena Portal Tier 2 or 4Sky Fragment: 8Zen Bean: 25 | To get These Need to do Perfect Arena Portal Tier 1 or 4
Mythic
Sharpshooter
Obtainable via Step Up Banner
Sharpshooter Sharpshooter (Precision) 3.5K takedowns
Burning fragment: 5Holy Fragment: 2Phantom fragment: 4Universal Fragment: 2Sniper Glasses: 1 | To Craft 1 Needed: 1 Universal Fragment | 2 Phantom Fragments | 4 Burning Fragments
Mythic
Tierabel
Obtainable via summoning on the standard banner
Tierabel Tierabel (Hydro) 5K takedowns
Holy fragment : 5Universal Fragment: 2Burning Fragment: 8Shark Blade: 1 | Obtain From Raid Shop
Mythic
Ultiorra
Obtainable via summoning on the banner
Ultiorra Ultiorra (Oblivion) 5K takedowns
Petal fragment : 3Universal Fragment: 2Phantom Fragment: 8Spear Of Lightning: 1 | Obtain from Raid Shop
Mythic
Nellee
Obtainable via summoning on the banner
Nellee Nelle (Primal) 5K takedowns
Petal fragment : 6Universal Fragment: 2Frozen Fragment: 4Skull Cap: 1 | Obtain From Raid Shop
Mythic
Koyote
Obtainable via summoning on the banner
Koyote Koyote (Number One) 5K takedowns
Holy fragment : 2Universal Fragment: 2Frozen Fragment: 6Spirit Pistols: 1 | Obtain From Raid Shop
Mythic
Sasku
Obtainable via banner
Sasku Sasku (Chakra) 5K takedowns
Phantom Fragment : 4Universal Fragment: 2Cursed Sword: 1 | To Craft Needed: 1 Burning Fragment | 1 Curse Mark | 1 Petal FragmentCurse Markl: 2
Mythic
Berserker
Obtainable via banner
Berserker Berserker (Enraged) 5K takedowns
Holy Fragment : 4Universal Fragment: 2Sealed Eyepatch: 1Phantom Fragment: 2
Mythic
Spade
Obtainable via banner
Spade Spade (Donut) 5K takedowns
Burning Fragment : 6Universal Fragment: 2Spade Hat: 1Ocean Fragment: 3
Mythic
Shunks
Obtainable via banner
Shunks Shunks (Conqueror) 5K takedowns
Petal fragment : 6Universal Fragment: 2Ocean Fragment: 3Saber: 1
Mythic
Kriatu
Obtainable via summoning on the standard banner
Kriatu Kriatu (Cheater) 5K takedowns
Frozen Fragment : 6Universal Fragment: 2Shadow Token: 1 | To Craft 1 Needed: 4 Phantom FragmentsHand Blades: 2
Mythic
Cyborg Disciple
Obtainable via summoning on the standard banner
Cyborg Disciple Cyborg (Fearless) 5K takedowns
Burning fragment : 6Universal Fragment: 2Frozen Fragment: 4Core: 1
Mythic
Virtual Idol
Obtainable via summoning on the standard banner
Virtual Idol Virtual Idol (Superstar) TBA
TBA
Mythic
Mob
Obtainable via banner
Mob Psycho (100%) 5K takedowns
Petal fragment : 6Universal Fragment: 2Sky Fragment: 3Flower Bouquet: 1 - To Craft 1 Needed : 2 Ocena Fragment | 4 Petal Fragments | 2 Phantom Fragments
Legendary
Bulmo
Obtainable via summoning on the banner
No evolution.
Legendary
Greybeard
Obtainable via summoning on the standard banner
No evolution.
Legendary
Gen
Obtainable via summoning on the standard banner
No evolution.
Legendary
Shakumira
Obtainable via summoning on the standard banner
Shakumira Shakumira Evo 2.5K takedowns
Hand Blades: 1Universal Fragment: 3Sky Fragment: 6Dagger Bomb: 1
Legendary
Ruka
Obtainable via summoning on the standard banner
No evolution.
Legendary
Pebble
Obtainable via summoning on the standard banner
No evolution.
Legendary
Zora
Obtainable via summoning on the standard banner
No evolution.
Legendary
Admiral
Obtainable via banner
Admiral Admiral (Magma) 5K takedowns
Ocean fragment : 4Universal Fragment: 3Burning Fragment: 6Magma Fruit: 1
Epic
Fire Foot Cook
Obtainable through summoning
No evolution.
Epic
Nejo
Obtainable via summoning
No evolution.
Epic
Fastcart
Obtainable through summoning
No evolution.
Epic
Triple Threat
Obtainable via summoning
No evolution.
Epic
Masked Ninja
Obtainable via summoning
No evolution.
Rare
Orahemi
Obtainable via summoning
No evolution.
Rare
Gaaru
Obtainable from summoning
No evolution.
Rare
Laffy
Obtainable from summoning
No evolution.
Rare
Namo
Obtainable from summoning
No evolution.
Rare
Nutaru (Kid)
Obtainable from summoning
No evolution.
Rare
Goku
Obtainable from summoning
No evolution.
Rare
Ranji
Obtainable via summoning on the standard banner
No evolution.

How to Build Stronger Units in Universal Tower Defense X

If you want to get more value out of this UTDX units tier list, treat the rankings as the starting point, not the entire answer. In late-game content, a properly built unit with the right trait, relic setup, Etherealization unlocks, and mode synergy will usually outperform a badly built unit that only looks stronger on rarity alone.

Best Universal Tower Defense X Traits by Role

The best trait in UTDX depends on what the unit is supposed to do. Ruler is the premium carry trait, but placement limits, wave scaling, DoT stacking, boss damage, relic scaling, and farm-only income all matter when choosing the right trait for each role.

Role Best traits Reasoning
Main Carry DPS Top damage
Ruler Eternal Sacred Fission

Ruler is the strongest pure carry trait when the unit is worth the 1-placement limit. Eternal is excellent in long-wave modes because it keeps gaining damage and range over time. Sacred is the safest all-rounder thanks to damage, range, SPA, and cost value, while Fission is a strong DPS/status option because it adds Radiation DoT on top of damage, range, and SPA value.

DoT / Affliction / Control Units Status setups
Astral Wizard Fission Eternal

Astral is the premium affliction trait because it extends affliction duration, lowers SPA, adds range, and lets DoTs stack. Wizard is excellent on DoT-heavy kits thanks to extra DoT damage, SPA, and range. Fission is valuable when you want extra Radiation pressure, while Eternal is still great if the unit benefits from long-wave scaling.

Boss / Armor / Hyper Armor Pressure Boss killing
Duelist Ruler Sacred Eternal

Duelist is the dedicated boss trait because it gives boss damage, crit rate, and range. Ruler can still outperform it on elite one-placement carries with massive base damage. Sacred is the safer generalist option, while Eternal becomes better in longer stages where its wave-based scaling has time to cap out.

Utility / Support Units Team value
Sacred Eternal Artificer Astral

Support units usually value uptime, range, cost efficiency, and relic scaling more than pure greed. Sacred keeps supports efficient, Eternal helps in long content, and Artificer improves stats gained from relics. On support units built around status effects, Astral can be better because it extends afflictions and enables DoT stacking.

Farm / Economy Units Income
Fortunate

Fortunate is the default farm trait because it is farm-only and increases income by 20%. That makes it the best trait for economy units such as Bulmo or Fastcart, where the goal is to reach expensive upgrades and late-game carries faster.

Early / Budget Traits Before mythics
Lightspeed Lethal Deadeye Agile / Precise / Enhanced

Before you hit the best Mythic traits, Lightspeed is strong for faster attacks, Lethal helps crit and finishing damage, and Deadeye gives easy range value. Agile, Precise, and Enhanced are simple fallback traits for SPA, range, or damage until you can reroll into stronger late-game options.

Quick rule: Use Ruler on elite one-placement carries, Eternal for long-wave scaling, Sacred when you want the safest universal trait, Astral/Wizard/Fission for DoT or status-heavy kits, Duelist for bosses, Artificer for relic-scaling support, and Fortunate only on farm units.

Best Late-Game Progression Path

  • Spend Gems smartly instead of blind pulling. Banner odds are brutal, so focus on banners that can realistically improve your current team rather than chasing every flashy unit.
  • Secure your core roles first. One or two carries, one economy unit, and at least one real support or control unit will help more than owning several expensive DPS pieces with no synergy.
  • Farm evolution materials before overinvesting in rerolls. A strong evolved unit with a decent trait is often more valuable than an unfinished unit with expensive rerolls.
  • Match relics to the unit’s actual job. Some units want more range and cooldown, some want crit and raw damage, while support pieces often care more about buff potency, utility, or family set bonuses.
  • Push key Etherealization breakpoints. Many late-game units spike at Eth 2, Eth 4, or Eth 6, so check whether a unit becomes much better once an important passive is upgraded.
  • Use transfer systems when possible. Stat Transfer, Shiny Converter, and shard-based systems help you salvage value instead of rebuilding units from scratch every time the meta shifts.

Best Universal Tower Defense X Units by Role

The best UTDX unit depends on what your team is missing. Some units are pure carries, while others win runs through slows, Timestop, debuffs, summons, buffs, cost reduction, or economy.

Role Best units Why they matter
Best overall units Top meta
The Strongest of Today Water God (Primordial) First Emperor (Greatest)

These are the safest all-around picks because they combine damage with fight-winning utility. The Strongest of Today brings slow, Timestop, global burst, and damage amp value; Water God adds Time Snail, DoT/affliction support, and crit scaling; First Emperor covers multiple jobs through Demonic Art Swap.

Best specialist units Flexible utility
First Emperor (Greatest) The Strongest in History Jinoo, Shadow Monarch Mighty Roach (Cursed)

Specialist units are valuable because they solve problems that raw DPS cannot. First Emperor brings damage, slow, stun, bleed, path control, and ally follow-up attacks; The Strongest in History adds debuffs, summons, and heavy range control; Jinoo scales through Shadow summons; Mighty Roach gives domain-based damage and roach trap utility.

Best ground DPS carries Damage core
Alpha Devil (Omega) Devil Hunter (Mercenary) Ancient Shinobi (Reawakened) Nutaru (Beast) Ant King (Savage)

These are the units you build around when you need enemies deleted. Alpha Devil is the more flexible DMC carry, Devil Hunter rewards DoT/status setups, Ancient Shinobi scales through weapon cycling and re-placement value, Nutaru spikes through Beast Mode and summons, and Ant King snowballs through kills, true damage, Radiation, and slow.

Best hybrid / Hill carries Coverage
Phantom Captain (Carrier) Crow Shinobi (Reanimated) Ichiko (Rage) Migumen (Finale)

These picks help when standard ground carries are not enough. Phantom Captain is a true Hybrid-style carry with plane-based AoE value, Crow Shinobi is a Hill DPS with Black Burn, Confuse, Time Snail, and meteor utility, while Ichiko and Migumen gain strong late-game value once their evolved kits open up better coverage and scaling.

Best support units Buffs & control
Virtual Idol (Superstar) Love Goddess Ice Empress (Frost) Bambee (Blitz)

These units make your whole team better. Virtual Idol buffs damage or range and can reduce upgrade costs through Etherealization, Love Goddess provides upgrade-cost support and a powerful Soulmate crit buff, Ice Empress brings Freeze control and Ice-unit support, and Bambee adds team-element-based status effects.

Best farm / economy units Yen engine
Bulmo Fastcart

Economy units let expensive late-game teams come online faster. Bulmo generates money every wave and can trigger strong wish-based team benefits, while Fastcart is a simpler early economy option that produces income and scales through upgrade-cost reduction interactions.

Note: This table focuses on final/evolved unit value where applicable. Rankings can shift depending on traits, relics, Etherealization level, team tags, enemy elements, and whether you need boss damage, crowd control, farming, or hybrid/Hill coverage.

A simple late-game team comp usually consists of one main carry, one secondary carry or specialist, one support/buffer, one control or debuff unit, and one farm/economy slot. That is why units like Water God (Primordial), First Emperor (Greatest), Virtual Idol, Love Goddess, Bulmo, Ice Empress (Frost), and Bambee (Blitz) keep showing up across serious builds. If you want to optimize even further, check our UTDX Trait tier list and Relic guide.

UTDX Update 3.25 Universal Festival Part 2 Patch Notes

The new UTDX update is called Update 3.0 Part 1.5: Clash of Wills 2 of Universal Tower Defense X, and here are the patch nots:

  • Admiral Defense Gamemode
    • Hunt or be hunted. You have 6 minutes to defeat the Navy Admirals inside of this new 6 player gamemode! Obtain the new Pirate King unit, the new Limited Stock Shiny Pirate King unit, its evo item and the usual currency drops.
  • Marine Hero Trial
  • Pirate Ascension Event Quests
  • 4 NEW Units + 1 Synchro Drive + 1 Synchro Clash
    • Pirate King - obtained from Admiral Defense Gamemode
    • Marine Hero - obtained from Marine Hero Trials
    • Revolutionary Chief - obtained from new Banner
    • Strongest Swordsman - obtained from new Banner
    • New Synchro Drive Unit: Revolutionary Chief (Spade) - from Synchro Driving Revolutionary Chief (Emperor) and Spade (Donut)
    • New Synchro Clash: Conquerors Clash - Synchro Clash between Pirate King (Voyage) and Quake Warlord (Destroyer)
  • Small QoLs:
    • Add Unit from Profile
    • Item Quantity Owned
    • Macro Keybinding
    • New tag: The new tag coming with this update is Blazing. Most fire-related units will have this new tag.
  • New Pirate Ascension Quests
    • New Evolution Quests added on the previous’ update Ascension Quests, evolve the Update 3.25 units for Pirate Ascension Coins, exchange these for special rewards inside of the Event Shop!
  • New Marine Hero Trial
    • Interact with the Marine Hero NPC in the lobby to see the new quests! Completing these quests will award you with the new Marine Hero unit and its evo item!
  • New Codes and Bundles
    • King of the Pirates Bundle - R$799
      • 300 Trait Rerolls
      • 15,000 Gems
      • 150,000 Universal Gems Season 1
    • 3.0Part1.5! CODE
      • 50 Trait Rerolls
      • 50 Relic Rerolls
      • 5,000 Gems
      • 50,000 Gold
    • PirateKing! CODE (Level 30 Requirement)

Universal Tower Defense X Units Tier List FAQ

What is the best unit in Universal Tower Defense X right now?

Water God (Primordial), Devil Hunter (Mercenary), Alpha Devil (Omega), First Emperor (Greatest), King Sailor (Unrivaled), Ancient Shinobi (Reawakened), Crow Shinobi (Reanimated), Nutaru (Beast), and Ant King (Savage) are among the strongest high-end units right now. The best pick depends on the mode, your relics, your traits, and whether your team needs raw damage, DoT pressure, CC, utility, or boss damage.

Are the new DMC units good in Universal Tower Defense X?

Yes, the new DMC units are very strong, especially their evolved forms. Devil Hunter (Mercenary) is a powerful Astral-based DPS unit with Burn, DoT synergy, Style scaling, Awakening, and DoT-based Stun. Alpha Devil (Omega) is a flexible Ruler/Duelist-style DPS unit with crit-triggered phantom swords, Timestop interaction, Bleed, weapon swapping, and a strong Demon Awakened mode.

Is Devil Hunter (Mercenary) good in UTDX?

Yes. Devil Hunter (Mercenary) is one of the strongest new DMC Update 2.75 units because he scales during constant combat, gains damage through Style ranks, enters a Demon Awakened mode, and has multiple weapon effects. His Astral trait is especially valuable because it lets DoTs stack, making him excellent in affliction-heavy teams.

Is Alpha Devil (Omega) good in UTDX?

Yes. Alpha Devil (Omega) is a top-tier flexible DPS unit. His kit gives him crit-based phantom sword damage, a Motivation meter that boosts him in Demon Awakened mode, and several weapon modes for different situations. Katana helps against stunned/Timestopped enemies, Phantom Sword adds Bleed pressure, Demonic Gauntlets boost damage, and Mirage Barrage gives him huge range with continuous attacks.

Which is better: Devil Hunter (Mercenary) or Alpha Devil (Omega)?

Devil Hunter (Mercenary) is better for DoT/status teams, especially when you can keep enemies afflicted and let Astral stacking do its work. Alpha Devil (Omega) is better if you want flexible weapon modes, crit pressure, Timestop synergy, and a unit that can adjust between damage, range, Bleed, and burst setups. Both are strong enough to be serious late-game picks.

What is the best Ragnarok unit in Universal Tower Defense X?

Water God (Primordial) and First Emperor (Greatest) are still two of the safest Ragnarok-focused answers. Water God is valuable because of his utility, Time Snail, and affliction support, while First Emperor remains one of the best specialists because he can adapt between multiple effects through Demonic Art Swap.

Is First Emperor still good in Universal Tower Defense X?

Yes. First Emperor (Greatest) is still one of the best specialist units because he offers flexible answers instead of only raw damage. His kit can help with slow, stun, bleed, path control, damage, and team follow-up pressure, which makes him useful in more situations than a standard DPS-only unit.

What is the best support unit in Universal Tower Defense X?

Virtual Idol is still one of the best pure support units, while Love Goddess remains excellent for expensive late-game teams thanks to upgrade-cost reduction and Soulmate crit buffs. Bulmo is still one of the most important economy supports, and units like Ice Empress (Frost) and Bambee (Blitz) remain valuable because CC and team utility matter a lot in the current meta.

What is the best farm unit in Universal Tower Defense X?

Bulmo is still the best overall farm/economy unit, while Fastcart remains a useful budget option. Farm units are important because many of the strongest late-game carries, including newer evolved units, are expensive to place and upgrade. Fortunate is still the main trait you want on farm units.

What are the best traits in Universal Tower Defense X?

Ruler, Astral, Eternal, Sacred, Wizard, Duelist, Fission, and Fortunate are the most important traits to understand. Ruler is amazing for many premium carries, Astral is huge for DoT-based units because it lets DoTs stack, Eternal is excellent in long modes, Wizard helps affliction units, Duelist is strong for boss damage, Fission adds Radiation, and Fortunate is the default farm trait.

What is the best team comp in Universal Tower Defense X?

A strong late-game team usually includes one main DPS carry, one secondary carry or specialist, one support/buffer, one CC or debuff unit, and one farm/economy unit. In the current meta, you should also think about DoT stacking, elemental coverage, relic sets, trait synergy, boss damage, and whether the mode rewards raw burst, long-run scaling, or utility.

Is Ant King worth farming in Universal Tower Defense X?

Yes. Ant King is worth farming if you can contribute meaningful damage in the World Raid. The raid can drop Ant King, his evolution item, the Flying Red Ant Mount, and Yen Crates. Your rewards improve based on boss damage contribution, so stronger teams have much better farming value.

Before we say goodbye, for more UTDX code drops, bookmark our dedicated Universal Tower Defense X codes guide. And if Gems are your main bottleneck, read our best ways to get Gems fast in UTDX guide as well.


Follow us on Twitter and Facebook to get updates on your favorite games!

About the Author

Nikola Savic

Senior Staff Writer

Nikola is a Senior Staff Writer at Pro Game Guides with over 14 years of experience in gaming and esports journalism. A former editor-in-chief of the Serbian gaming publication Play!Zine and the RUR Esports portal, he has covered games professionally since 2012 across both Serbian and international media (senior editor at GINX Esports and GosuNoob). At PGG, he focuses on Roblox guides and tier lists, with particular depth in anime-inspired action RPGs and horror experiences like Paradox. Having been gaming since the early ’90s, he is a longtime PC gamer, and he brings an RPG and strategy game mindset to evaluating builds, meta picks, and game mechanics.

Topics covered: Roblox, RPG, Horror, Strategy, Arc Raiders

Find Nikola Savic on: Twitter

Forgot password
Enter the email address you used when you joined and we'll send you instructions to reset your password.
If you used Apple or Google to create your account, this process will create a password for your existing account.
This site is protected by reCAPTCHA and the Google Privacy Policy and Terms of Service apply.
Reset password instructions sent. If you have an account with us, you will receive an email within a few minutes.
Something went wrong. Try again or contact support if the problem persists.