
The Halloween event in Royale High is a huge occasion for fans, and 2023 is no exception! There are more than 30 chests packed with goodies stashed in secret locations for players to find.
The Royale High Halloween Chests are spread across the Wickery Cliffs and Blackwood Caverns regions. We suggest you turn down the graphics in Settings as you’ll be able to see better in these dark, spooky areas. And it's well worth the hunt, as they're full of Halloween items and Candy!
All 2023 Royale High Halloween Chest Locations
I’ve broken the chest locations down into areas, so you can use the table of contents below to go to the area where you think you may have missed something. Some of the chests in the cavern maze can be pretty tough to find, but I got them all with some persistence.
Mt. Blackwood Caverns (outside) Halloween Chest locations (4 Chests)
Chest 1: Bat Earrings
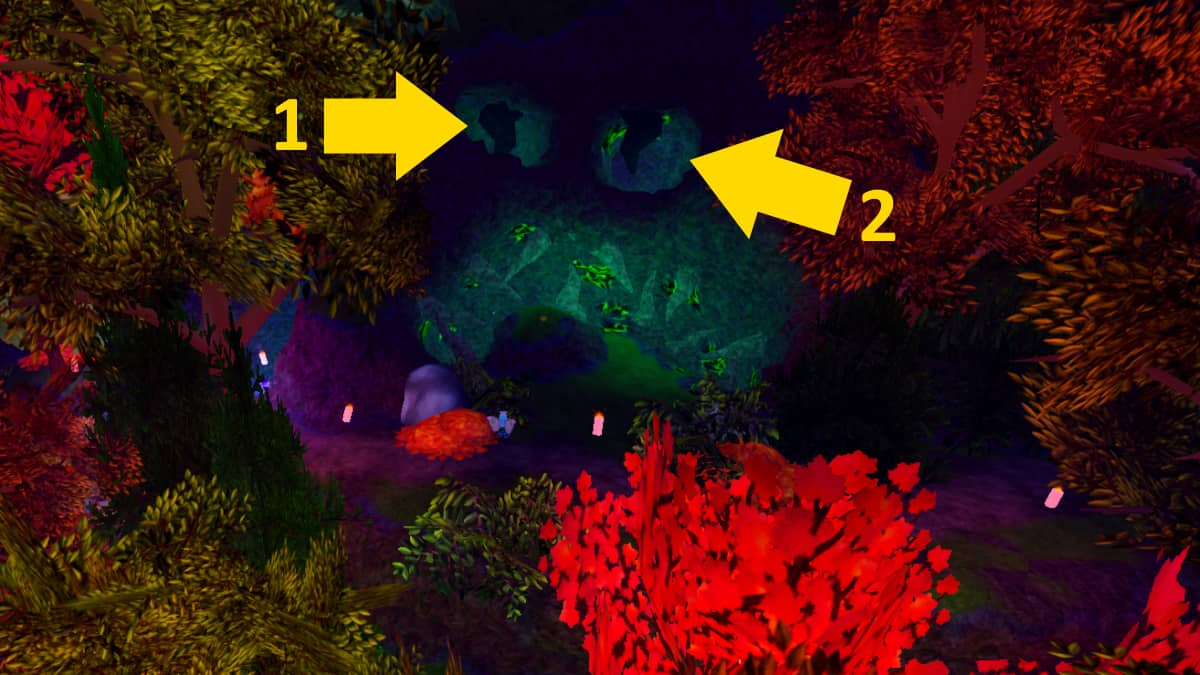
From the spawn point in Wickery Cliffs, head under the Wickery Cliffs sign and turn off the path when you see the Blackwood Caverns sign on the left (before the first house). You’re looking for a path leading up the hill obscured by bushes, not the one further past it that goes to the cave entrance. Keep bearing right and you’ll go up and up and over a bridge. Just past it, you’ll see some spooky-looking rocks on your left. Climb up them and into the first cave (1, pictured above) to find the chest.
Related: Best Gothic Outfits in Royale High
Chest 2: Cute Kitty Ears
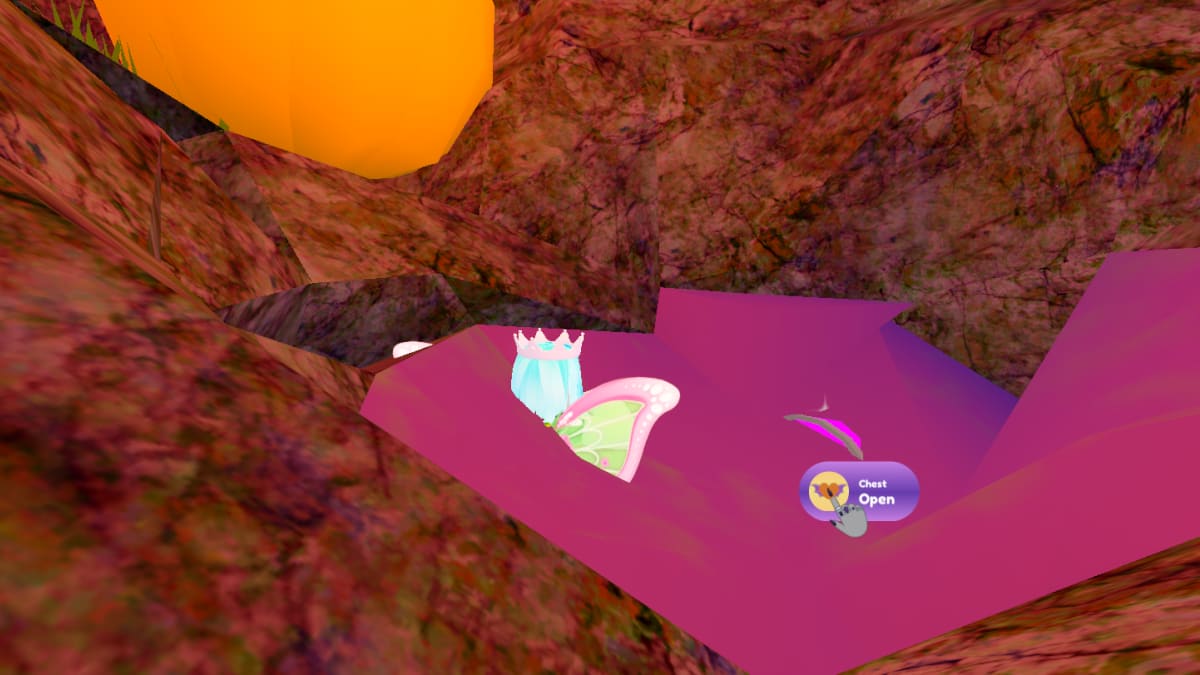
Exit the cave above and head into the next one (2, pictured above), dropping down the hole until you reach the bottom. Look left of the spider web and cable exits and take the left path. Follow it until you see a big pumpkin and run past that too. Keep following the path until it gets very orange and you can go left or right. Go left and follow it again until you see a large rock. The chest is just left of the rock.

Chest 3: 250 Candy, Spinning Web Boppers
Head back down the hill and follow the small flat path—left of the one you took to go up the hill—until you see the Caverns entrance on your right. Instead of going in, jump off the bridge to your left and follow the water down. When you get to a tiny island in the stream, climb up to your right into a small cave and find the chest.
Chest 4: Bat Tophat
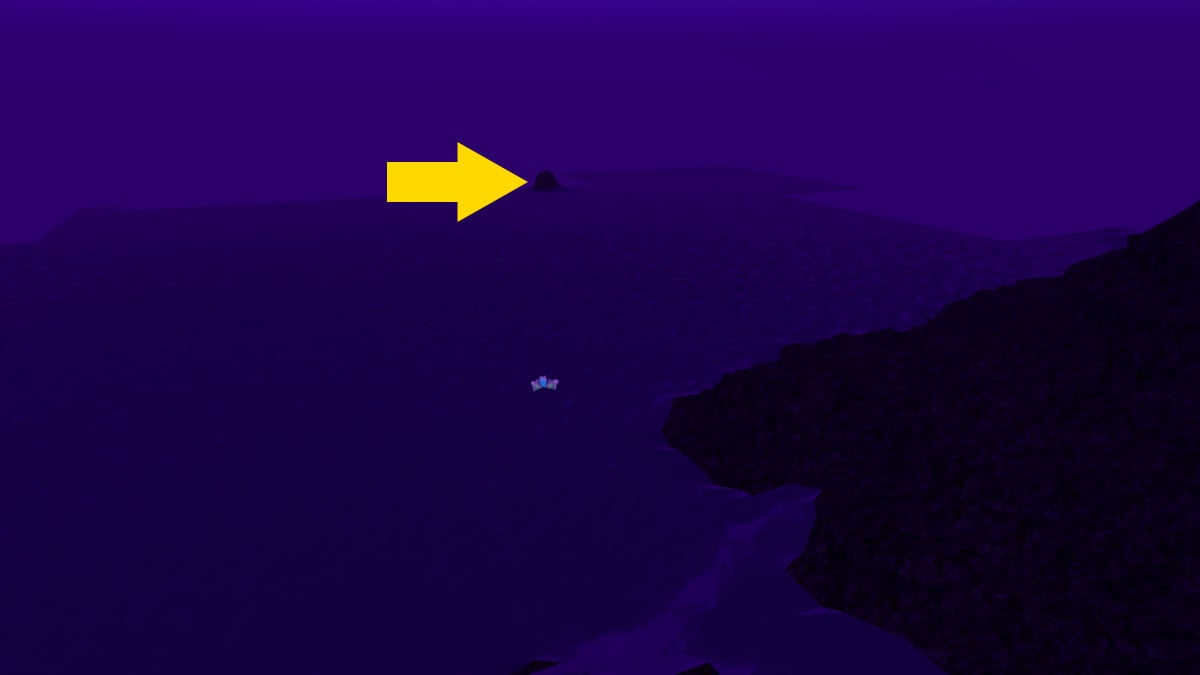
Go back out of the cave to the tiny island and follow the stream down until it reaches the sea. Once at the sea, swim out to sea at a slightly right angle and you’ll almost immediately see a large rock in the water. Swim out to it. Once there, swim down from the rock and you can’t miss the chest.
Blackwood Manor Halloween Chest locations (2 Chests)
Chest 1: Spider Friend
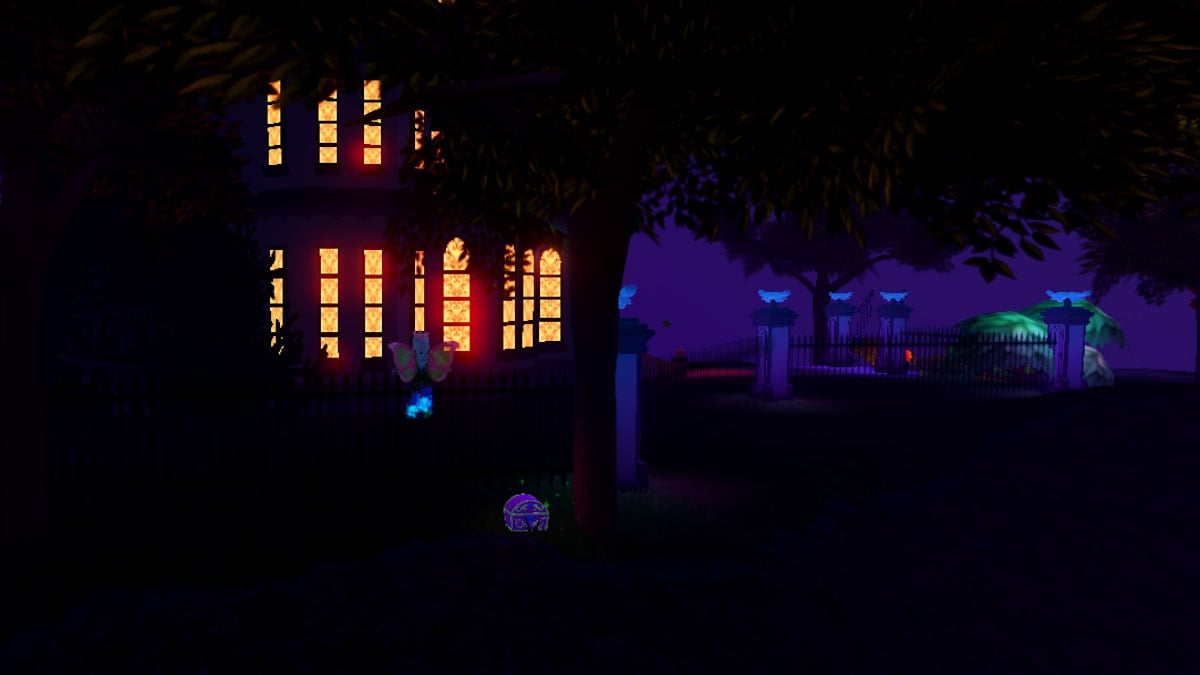
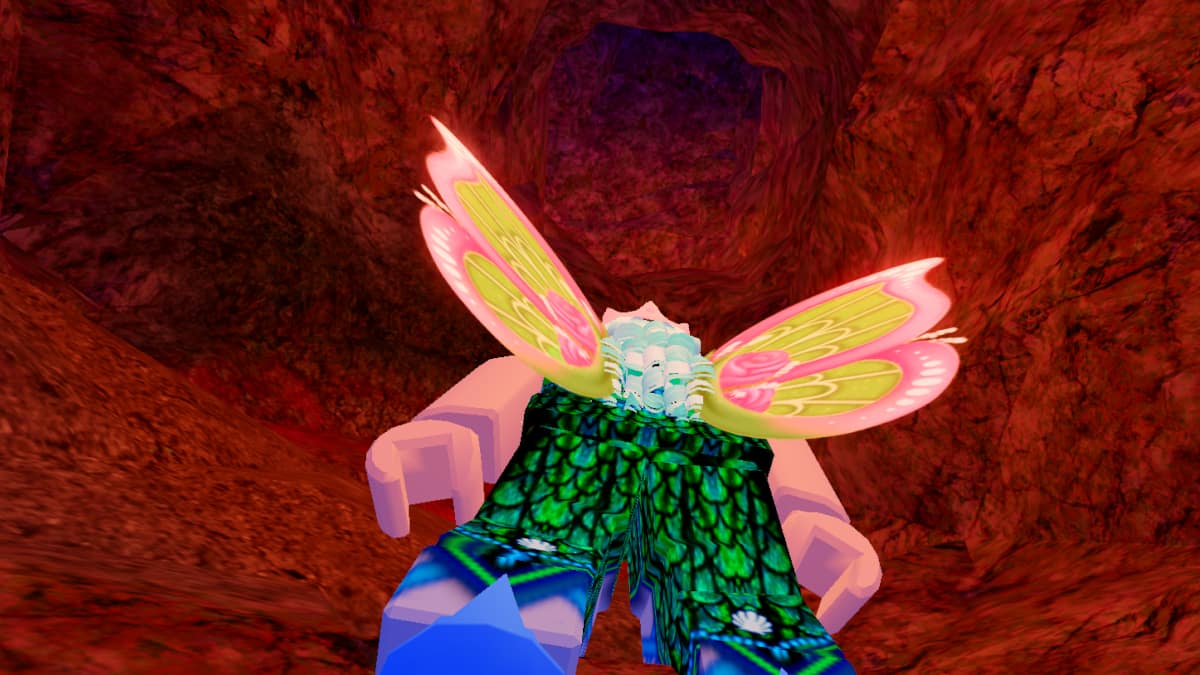
To get to Blackwood Manor, leave the Wickery Hills spawn point and exit the town square under the Wickery Cliffs sign. Keep following the road all through the houses and outside and stay on the long road until you reach the gates. Fly around the building to the left and you’ll find a chest just outside the fence.
Chest 2: 1,337 Candy
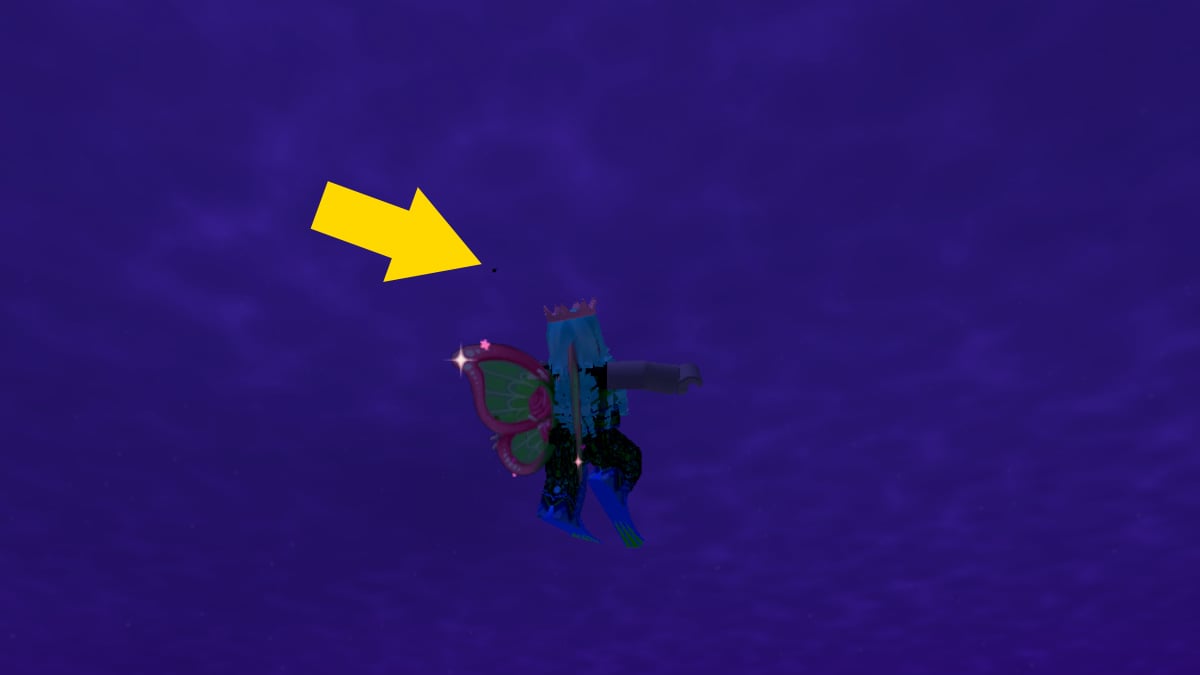
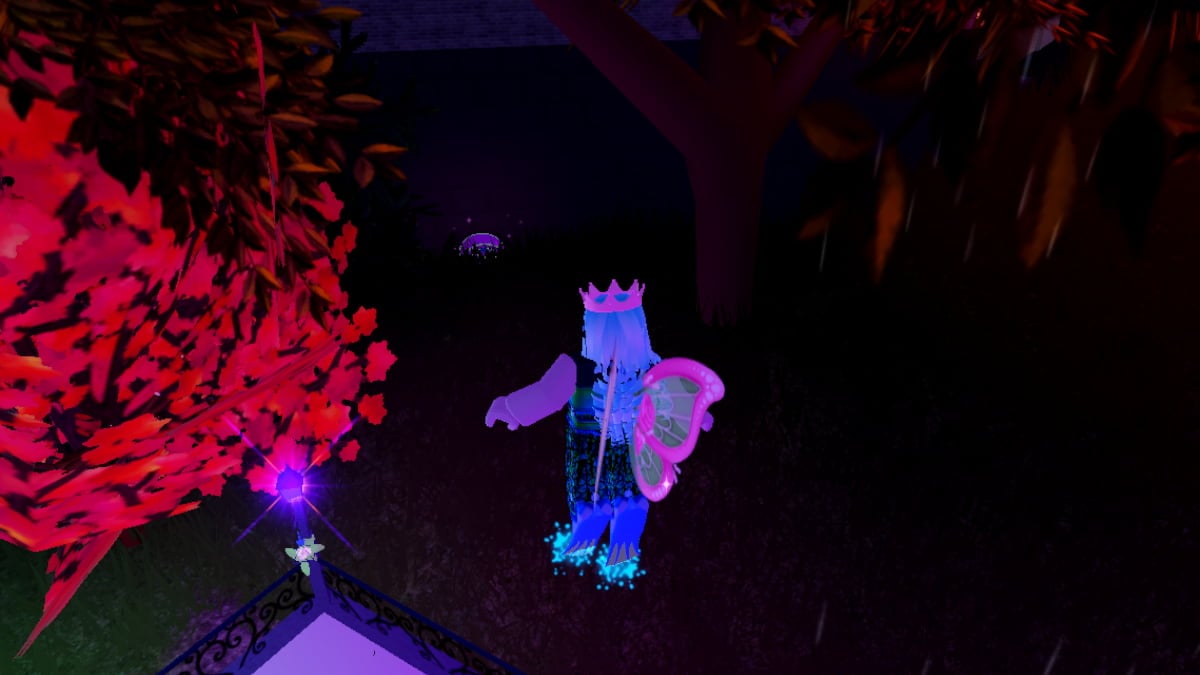
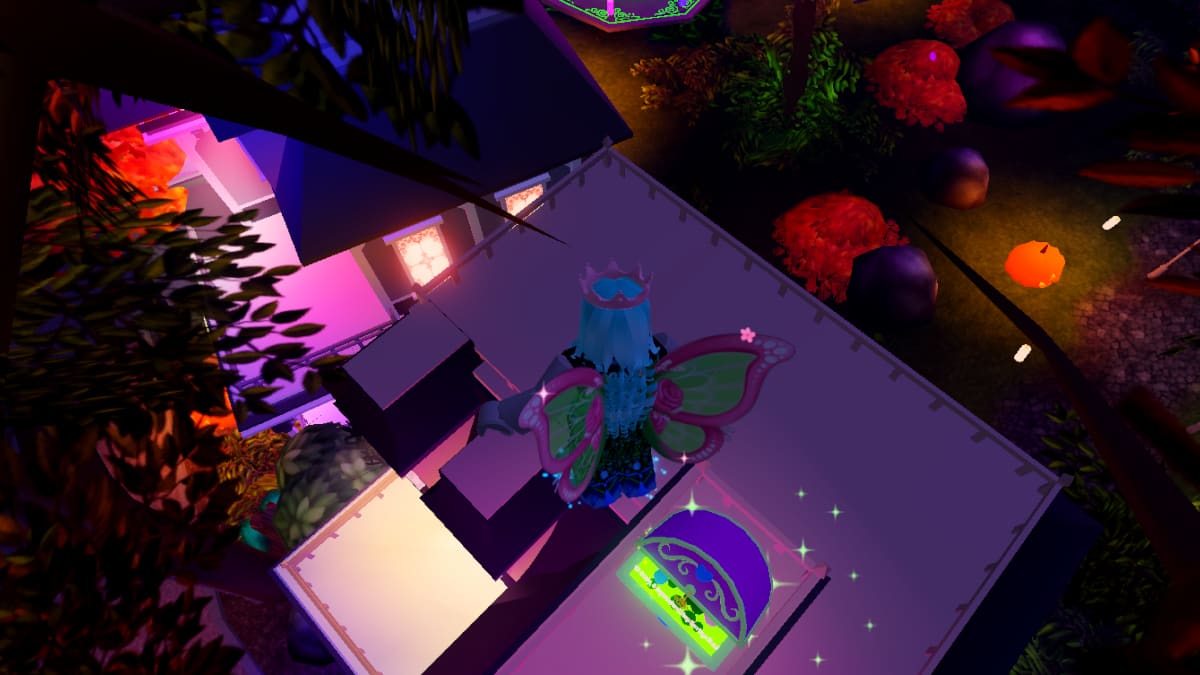
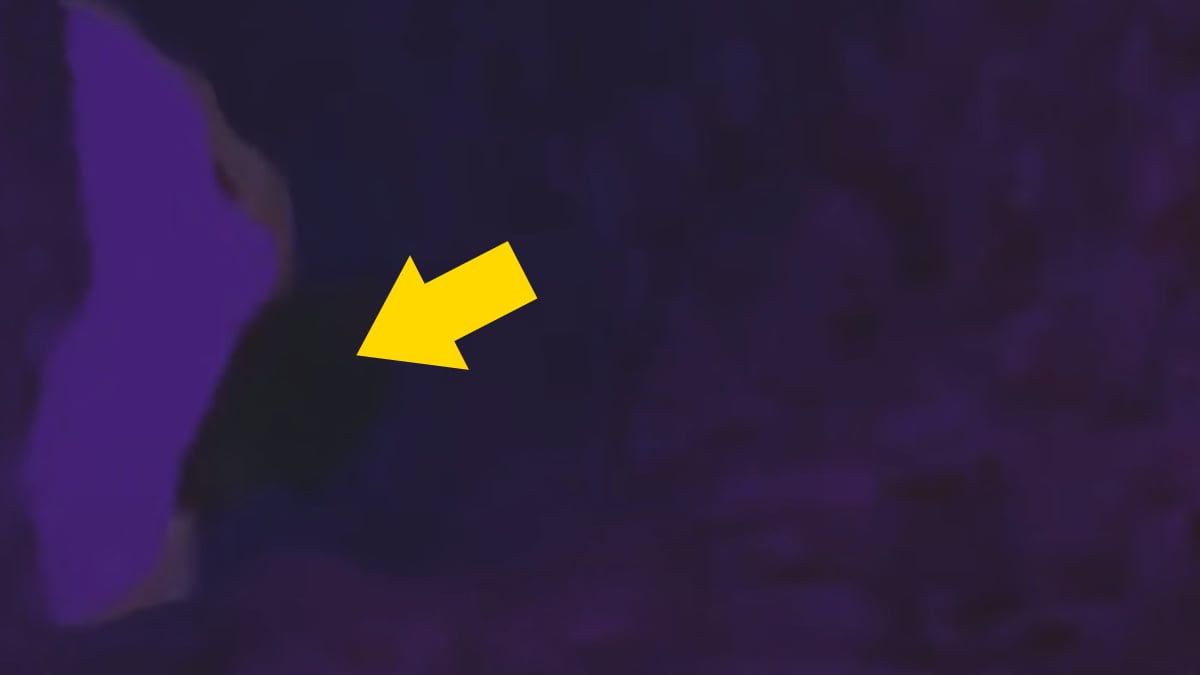
For this one, stand outside the manor and look up when the sky is purple. You’ll see a black dot high in the sky (see above), which is a floating rock with a chest! It may take up to five minutes to fly up there, especially as you’ll have to stop when the sky clears and wait for it to go purple again. Once you get it, drop off the platform to land back in the spawn area in Wickery Cliffs.
Wickery Hills Halloween Chest locations (5 Chests)
Chest 1: 123 Candy
As you land in Wickery Hills, turn around and run into the train station. Once inside, turn left and go past the end of the platform. Look a little to your left just past the tree and you’ll see a chest by the wall (it’s well-hidden, so it's easier to spot it if you fly up).
Chest 2: 100 Candy, Glowing Pumpkin Wand
Now turn right and run along the tracks until you reach a tunnel. This is a false wall, so walk through it to find a chest on the other side.
Chest 3: 100 Candy, Vampire’s Hier Crown
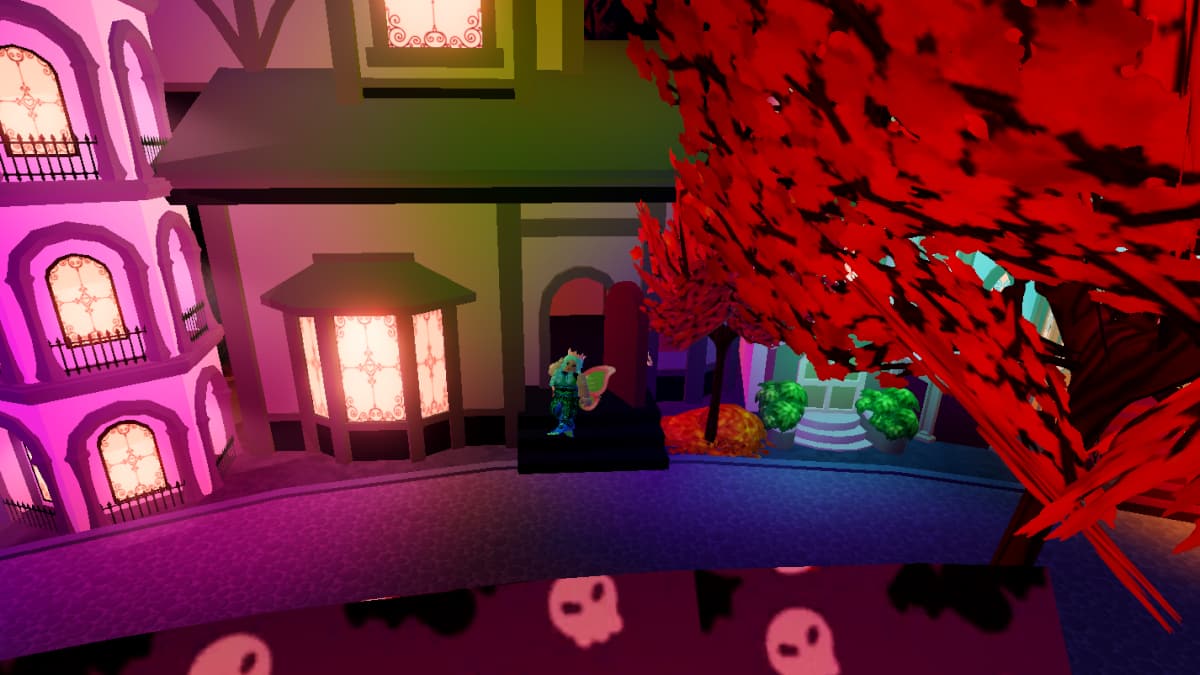
Back in the town square, walk in front of the houses to the left of the station entrance until a door opens. Go inside, fly up, and you’ll find the chest on a high ledge.
Chest 4: 333 Candy
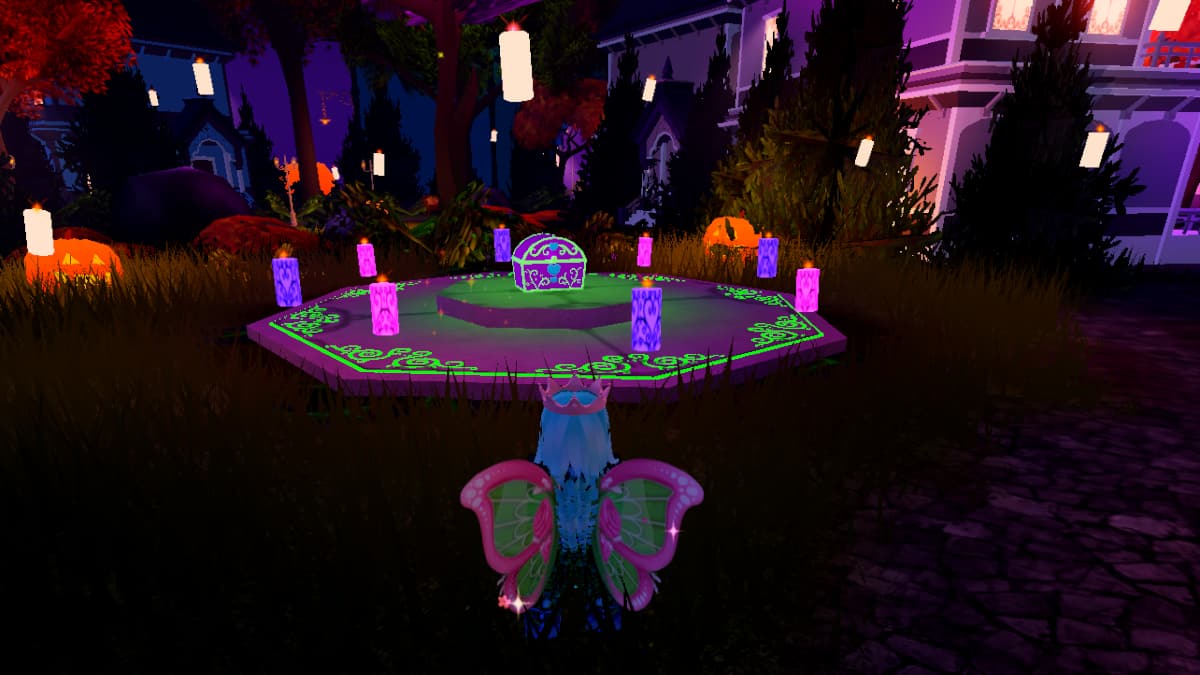
Exit the town square under the Wickery Cliffs sign and follow the path until you pass the first house on the right. Turn down the path here and you’ll see a chest on your left on a stone circle lit with candles.
Chest 5: 50 Candy, Supernatural Hoop Earrings
If you’re at chest four above, simply fly up and find the next chest on the roof of the nearby purple house.
Mt. Blackwood Caverns (inside) Halloween Chest locations (22 Chests)
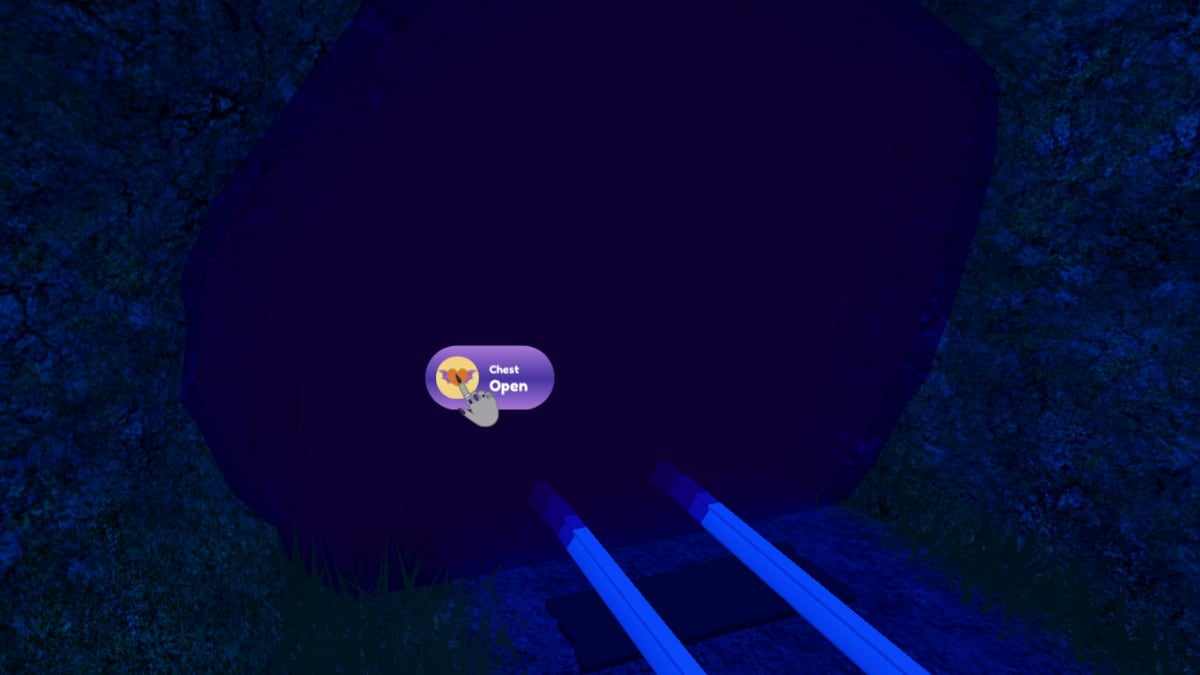
Inside Blackwood Caverns, you will be chased by a ghost that forces you to respawn in the town. However, the ghost will never get you if a chest is open and you can see the prize listed. This allows you to take breaks and plan your next move.
Related: Royale High Element Quiz – Which Royale High Element Are You?
Chest 1: 500 Candy, Kawaii Demon Horns
Go into the entrance and take the far-right tunnel (right of the pumpkin), which drops you down a hole. When you land, take the next drop (to your left) that heads towards some green rock patterns. At the bottom, you’ll find a small pool with a pumpkin next to it. Stand by the pumpkin, walk into the water, and you’ll soon see the chest in a cave at the bottom of the pool.
Chests 2-5
Chest 2: 123 Candy, My Dolly

Back at the entrance, head inside and take the left tunnel that leads into the green glow. Follow it as straight as you can until you see a pumpkin on your left. Turn left at the pumpkin (towards more glowing green rocks) and then left again, keeping left as you pass a candle and then a crystal (still keeping left). At this point, the cave will turn red. When you see a large pumpkin, stand with it on your right and go down the path left of it. After passing some cobwebs, head down the hole and keep following the path. Eventually, you’ll see another pumpkin next to a pool; the chest is inside the pool.
Chest 3: 150 Candy, Skull Crown
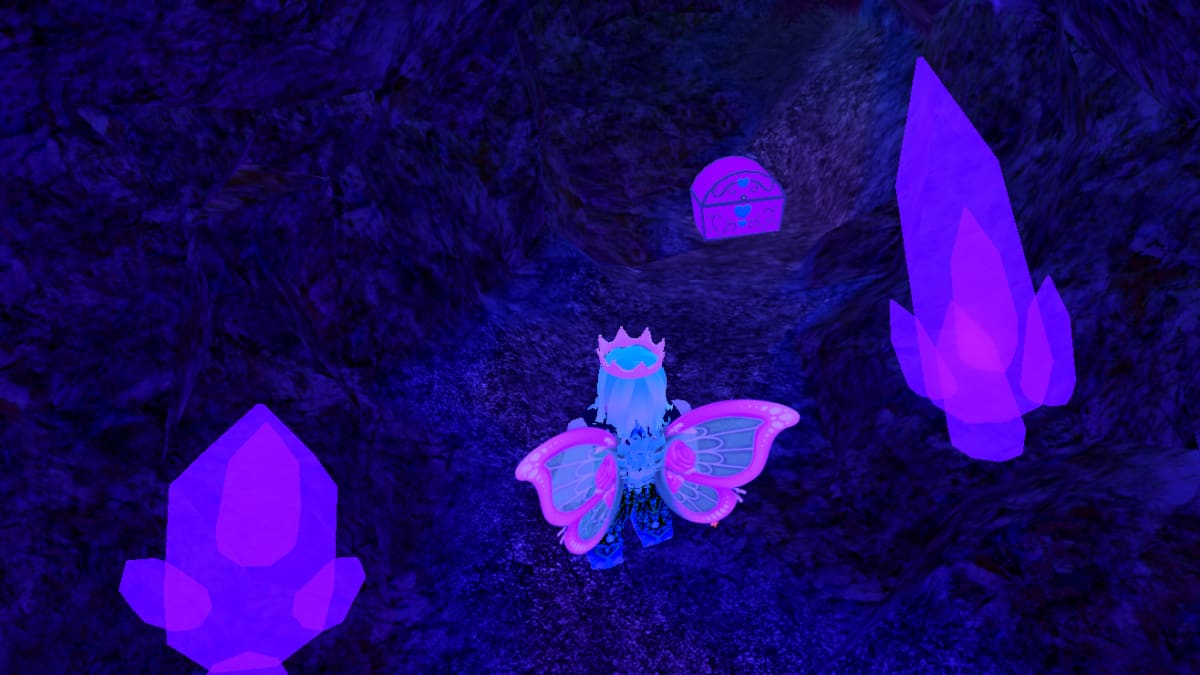
From Chest 2 above, move forward past the crystal on the other side of the pool with the pumpkin and take the right path. Keep moving until you reach the first junction (there’s a green candle here) and go right again to what looks like a dead end. Look up and to your left and head towards the pink glow. Follow this path until you get to two pink crystals, where you'll find the chest to the right of them.
Chest 4: Classic Ghost costume
From Chest 3 above, go back past the pink crystals and to the right (not the way you came in), up a path. Keep going until you see a green crystal; go left of it, until you see a hole on your left just past a green glowing wall. Move to the back of this hole, as you need to drop down onto a ledge. Adjust your camera angle until you can see the ledge. The only way out from here is to reset.
Chest 5: 500 Candy, Graveyard Lurker Collar
From Chest 2 above, go left of the blue crystal by the pool and past the green crystals (avoiding the holes) to where you’ll see a pumpkin down to your left. There’s a sneaky little path to the left here, to the left of the hole down to the pumpkin. Walk down it, left at the blue candle, and past another pumpkin. At the fork, turn right to the candle and then left past the pumpkin. There’s a steep hole above you that you need to jump right to the top of. Near the top, you’ll find the chest.
Chests 6-10
Chest 6: 150 Candy, Witch’s Little Pet Staff

From the entrance, take the left tunnel once more and follow it until you see the pumpkin on your left. Go left here, follow the path until you see a bright candle, and go left again. When you see a purple crystal go left again until you see the big pumpkin. There is a tunnel to your right just before you get to it, so go down it.
Turn left at the glowing wall and walk to the next candle, then go left again. The next junction sees you going down the right towards the green glow, then right again just afterward at the green glow. You’ll drop down at an orangey candle just after this. Turn around after you drop and you’ll see a blue candle. Walk over to it and the chest is just behind it.
Chest 7: 300 Candy, Kawaii Reaper

From Chest 6, move forward past it and away from the blue candle, turning right (towards a slight green glow) when you hit a wall. Turn left and uphill when you see the candle, bearing a little left until you see a black and green candle. Go left here and around the hole, keeping left, until you see another blue candle. Drop down the orange hole here, then jump up towards the orange candle. Once at the first orange candle, jump up a little more and keep scanning downwards. You’ll see a pumpkin below you after a few jumps. Drop down to it and the chesty is just there.
Chest 8: 2,000 Candy, Steampunk Aerotechnic Wings

From the pumpkin at Chest 7, look up and keep jumping until you get to another orange candle above it. Once you’re below the candle, turn and jump to the ledge opposite it. Take the right tunnel here until you see a blue candle, then go right again and into the hole. Keep going down until you go into an orange area with a pumpkin in a small pool of pink water. From here take the left fork and then turn right when you see a floating candle.
Keep going until you see a patch of green on the wall to your right. Turn left (towards a blue candle) and then drop down, going left when you see some pumpkins in the distance. Keep going past the small pumpkins until you see a large one. Turn right here, then go left just past the purple crystal, then straight ahead through a false wall. This is the chest at the end of the maze! But it’s not over yet…
Chest 9: 200 Candy, Studded Rose Garters

Head back out of the cavern the way you came in and back past the pumpkin (on your right) until you see some glowing green stones on the ground. Look up to see a tunnel leading up, and take it (by jumping). Once it gets dark, scan around as you jump up until you see a tunnel leading off. Head into it, drop a little to your left, to where you’ll see a candle. Walk past it left and down to a chest.
Chest 10: 100 Candy, Pretty Kitty Tail
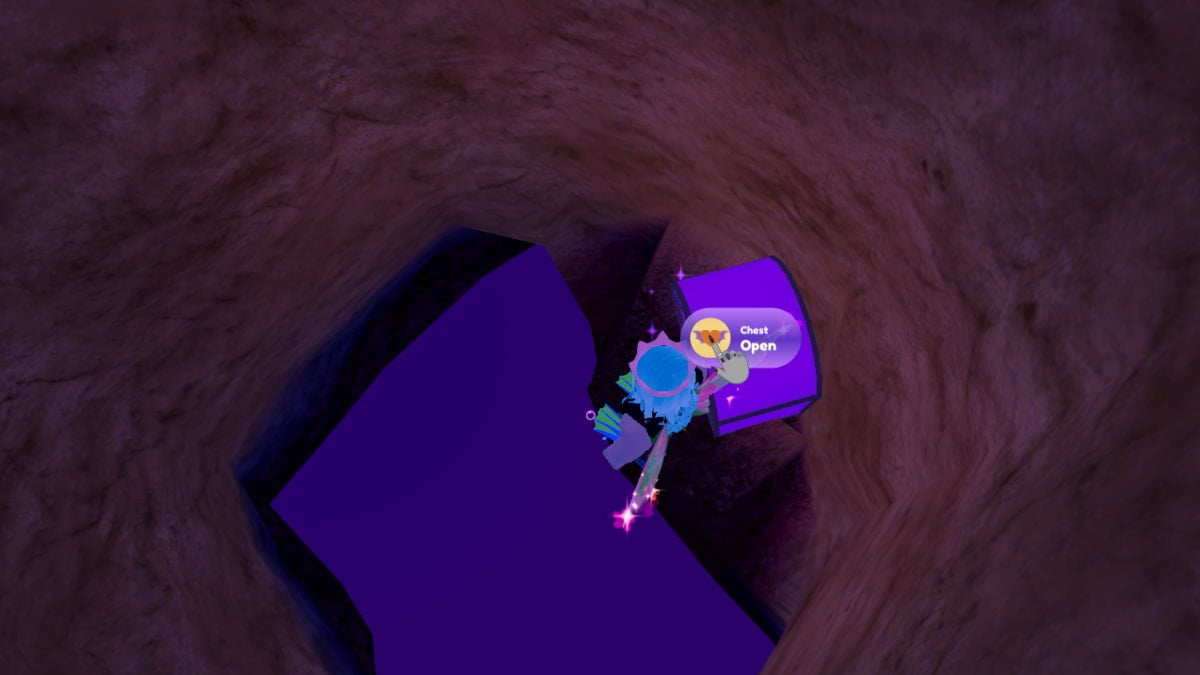
Jump back out from where you got Chest 9 and then go left, then up the middle one of the three orange-glowing tunnels. Just after a pumpkin on your left, avoid the hole and keep heading up past the black candle. Take the hole down just after this and keep walking until you find another hole. This one is probably the hardest to get to. Drop down and you’ll hopefully hit a ledge. From there, you need to jump and land on the small grass ledge below you (super hard to see, above). If you do, there is a false wall on it with a chest inside.
Related: Royale High Halo Answers 2023 – Halloween Dark Fairy Halo
Chests 11-13
Chest 11: Jack-o-Lantern Boppers

Back at the entrance to the caverns, take the left tunnel until you get to the pumpkin, go left, stay left past the candle and the crystal, and run past the pumpkin (with it on your right). Keep veering left past a candle and a cobweb, between two crystals, then down a steep hill. Go past the big pumpkin and left, then left again at the big blue crystal.
Go past two green crystals and then turn right when you see the pumpkin to your left. You’ll immediately be at another junction, so go left towards the purple glow. Go past some purple candles and follow the path left after going under some pumpkin lights. Move past some more crystals towards an orange light, past a pumpkin, and down to a candle. Turn right to a wall, right again, and along until you get to a blue crystal. Look right here and you’ll see the chest in a pumpkin’s mouth.
Chest 12: Sparkling Crow Crown

Go back from Chest 11 to the blue crystal, right to the pumpkin, then right again to a candle, and then left. Go right at the next fork, staying right as you move downwards to another candle. Go left at it and down, and you’ll see the chest on your left.
Chest 13: 150 Candy, Playful Kitty Paws

From Chest 12, go right past the candle, right again, and straight down until you get to the pumpkin you can see in the distance. When you get to it, go left to the next chest.
Chests 14-19
Chest 14: 100 candy, Sparkly Body Chain

Follow the instructions above to get to Chest 6 then towards Chest 7, jumping up to the orange candle above once more and jumping across the chasm from there as if you were going to Chest 8. However, this time once on the other side, take the left tunnel. Turn right at the next junction toward the orange glow, and go right at the green wall, then right to the blue crystal. Don’t fall here, as you want the second hole (with the green crystal in it). Go right when you get to it, past a blue candle, then left and down to the next chest.
Chest 15: Nomnom Chocolate Bar

From Chest 14 go back up the hill and past the candle, ignoring the left turn on your way and instead moving forward towards another orange glow. Turn left at the pumpkin and past the pink candle to a hole. Drop down it for the next chest. Note you can find a little path that leads up and out of this hole.
Chest 16: 200 Candy, Nightmare Cavern Lantern

Once you’re out of the Chest 15 hole, run forward until you see a pumpkin on your left and turn a little to the right down a passage towards a candle. Look right just before you get to the candle to see a blue one. When you get to it go right toward an orange glow. You’ll get to a pumpkin at a junction at which you want to go right (next to it), passing the hole here until you get to a candle. Drop into the hole just before the candle and follow the path to a blue candle. There’s a false ceiling above it hiding the next chest.
Chest 17: 300 Candy, Ruffle Collar

From Chest 16, drop through to the blue candle underneath the false ceiling and scan the ground around you for a tunnel down to another blue candle. Drop down to it for your next chest.
Chest 18: 100 Candy

From Chest 17, walk left of the blue crystal by it and past two more crystals, then left towards a pumpkin. When you get to it turn right and go past a blue candle. When you see an orange glow on your right head down that tunnel to find the chest in a pink pool.
Chest 19: 100 Candy

Follow the same instructions as if heading to Chest 6 once more. Turn right at the orange pumpkin as usual, and left at the green wall, but after this take the far left turn towards the pumpkin lanterns. Just before you get to them, turn right and avoid both holes you come to, jumping up and through a false ceiling instead. Once up, look around and you’ll see a pumpkin dead end. The chest is behind the pumpkin.
Chests 20-22
Chest 20: 75 Candy, Spider’s Masterpiece Purse

From the Caverns entrance, take the central tunnel that’s straight ahead (left of the pumpkin), into the hole, and straight ahead to the blue crystal. Go left where you face the crystal, then sharp right when you a big stone bathed in a pink glow. Go right again immediately towards the pumpkin lights, left at the blue candle (avoiding the drop), then left towards a glowing spiderweb. Be careful when you see a blue candle as the next chest is just past it but there is a false floor here too.
Chest 21: 75 Candy, Kitty Buns

From where you got Chest 20, walk carefully into the false floor until you drop a little way through. There is another chest on the ledge you’ve just dropped onto.
Chest 22: 100 Candy, Abnormally Large And Very Pokey Fork

Head as if going to Chest 20 above, but edge right around the hole next to the blue candle this time, then go left when get to the blue crystal. Keep going until you see a candle. Turn around on the spot in front of it to see a red crystal up and behind you. Climb up to that tunnel. Go past the red crystal and through a false wall. There is some green glowing rock just the other side. Look up and left here, going up to find the chest in a spider web on your left.
For more on Roblox Royale High check out Best Roblox Emo Outfits and Best Royale High halo designs – Roblox Royale High halo design tier list here at Pro Game Guides!
Related Posts: