
I've enjoyed the original game, but I'm super excited that we get new content with the DLC. If you are struggling to get through a level, check out our full Talos Principle 2: Road to Elysium walkthrough.
All Talos Principle 2: Road to Elysium levels guide
The Talos Principle 2 Road to Elysium DLC contains three episodes: Orpheus Ascending, Isle of the Blessed, and Into the Abyss. Each chapter has plenty of puzzles and secrets to solve, and we'll help you with them in this full guide.
Orpheus Ascending
In the Orpheus Ascending episode, your goal is to collect all fragments of Sarabhai and bring them back to life.
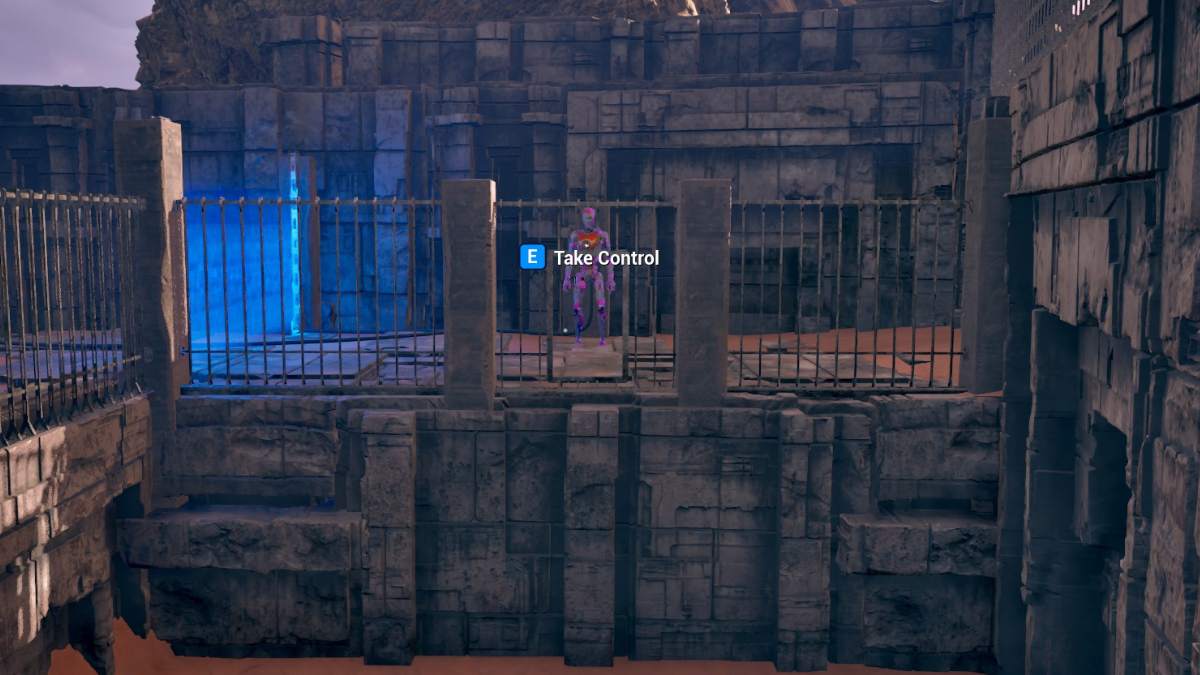
Yield Puzzle (1)


Head through the barrier and into the area of the puzzle. You'll see an Inverter that you will use to open up the blue barrier and get the Sarabhai fragment. You need to clear a path for the blue laser to get to the Blue receiver. In order to do so, you have to:
- Pick up the Inverter.
- Connect it to the red laser Emitter on the left.
- Connect it to the Red receiver.
- Connect it to the Blue receiver to unlock the gate.
Crossing the River Puzzle (2)


To solve the Crossing the River Puzzle in the Orpheus Ascending DLC, you'll have to use the two connectors to get the laser to the blue Receiver.
- Pick up the Connector on the laser Emitter side.
- Connect it to the Emitter.
- Connect it to the second red Receiver (1) on the right.
- Connect it to the third red Receiver (2) on the left.
- Connect it to the blue Receiver (3) next to the gate.


Using the first Connector like this intersects with all of the lasers and gives you a clear path to the second Connector.
- Connect the two Connectors, then head over to the other side.
- Pick up the second Connector on the blue Receiver side (while keeping all of its current connections).
- Connect it to the blue Receiver, and you'll complete the puzzle.
Sequence Puzzle (3)


In the Sequence Puzzle area, you'll find an Accumulator and a Connector, which you can use to find the solution. This one might seem complicated because of the two different colored lasers, but it's actually quite simple.
- First, grab the Connector and connect it with the red Emitter. Don't worry about the fact that it can't get through the barrier just yet.
- Now connect the Connector to the red Receiver (1) on the wall next to the gate as well as to the Accumulator (2).
- Step on the pressure plate to have the red Emitter charge the Accumulator with the red laser.
- Pick up the Accumulator and connect it to the red Receiver to charge and unlock the gate.
Vastness Puzzle (4)


There are two Connectors in the Vastness puzzle, which you will use to solve it. One of them is behind a blue barrier, so you have to unlock it first.
- Pick up the first Connector (2) and connect it to the red Emitter (2), then connect it to the red Receiver (3) on the wall to the left. This will unlock the second Connector (4).
- Take it and connect it to the red Emitter and the red Receiver through the window in the other room. This will unlock the second blue gate.
- Grab the first Connector and take it to the second room.
- Connect it to the blue Emitter (which is locked behind a blue barrier), to the blue Receiver, and the red Receiver to the left (the one that unlocked the second Connector).
- Place the Connector on the pressure plate to unlock the laser and complete the puzzle.
Chain Puzzle (5)


The Chain puzzle in the Talos Principle Orpheus Ascending DLC is pretty simple. All you have to know is where to hit with the laser.
- Flip the Switch to pop up the puzzle
- Pick up the Connector and connect it to the blue Emitter.
- Once you do, connect it to the fourth blue Receiver.
Equilibrium Puzzle (6)


it's just as the name of the puzzle says: you need to establish an equilibrium between the blue and red laser. There are two Connectors and two Accumulators which you need to use. There needs to be the same exact number of points that a laser goes through on both sides.
On the red side, there are already four immovable connectors. However, on the blue side, there are only two. That means that the two Connectors you can move are both going to go on the blue side
- Pick up the red Accumulator and connect it to the first point on the right.
- Connect the two Connectors in a line to the left.
- Take the blue Accumulator, attach it to the last Connector in the line, and open the gate.
Domino Effect Puzzle (7)


For this puzzle, it's important to figure out which Receivers to hit exactly. There are four Connectors for each of the four sections.
- Click on the Switch to bring up the puzzle.
- For the first red section, connect the Connector to the red Emitter and the first red Receiver.
- For the first blue section, connect the Connector to the blue Emitter and the third blue Receiver.
- For the second red section, connect the Connector to the red Emitter and the fourth red Receiver.
- For the second blue section, connect the Connector to the blue Emitter and the third blue Receiver.
Concatenation Puzzle (8)


For the Concatenation puzzle, you will follow a similar train of thought as in the Equilibrium puzzle. There are two connectors locked behind a purple barrier, and one isn't. First, let's take care of the red side.
- Go through the purple barrier and take one of the two Connectors.
- Connect it to the red Emitter and then to the first immovable point to activate the red Receivers.


The red side is simple, but the blue side gets more complicated.
- First, take the second Connector in the red area close to the purple barrier where you can see the blue laser Emitter and connect them.
- Go back to the other room and take the one Connector there.
- Attach it to the red area Connector before connecting it to the blue immovable point (don't connect it directly to the blue Receiver, as it won't work).
- Once you've connected everything, place the Connector on the pressure plate to open the blue Emitter.
Causation Nexus Puzzle (9)


If you're like me and get confused about how to get the Hexahedron that is way up in the air with no other items, don't worry. It's easy to forget that 1k can also block lasers with his body.
The blue and red lasers intersect, with only one making it through. The two pressure plates only open the gates to help the lasers reach their respective Receivers. With all of that information in mind, let's begin.
- First, step on the pressure plate to drop the Hexahedron one platform down.
- After it drops, block the red laser to the right. Now, the blue laser is active, which means you can head on over to the other pressure plate. This will let the blue laser reach the blue Receiver, and the Hexahedron will drop once more.
- Go to the other side and block the blue laser. Once the red laser makes it through, step on the pressure plate on that side for the third Hexahedron drop.
- This is the final one. Just like before, block the red laser and step on the pressure plate.
The cube is now on the ground. Use it as a step to reach the fragment.
Incarnation Puzzle (10)


The tenth puzzle of the DLC utilizes the same strategy as the one before, using 1k's body to switch the lasers in different directions.
- Head to the blue laser in the middle area and block it. This will allow the red laser to hit the red Receiver and open the blue gate.
- There will now be a red laser opposite the blue laser you just blocked. You should block the red laser now to open the second blue gate.
- Now, head through the first barrier and block that red laser. The blue barrier will close up again, effectively trapping the red laser.
- Go to the red Emitter and block the laser coming out of it. This will open the blue gate towards the shard.
- To get back, block the blue laser so that the red laser hits the red Receiver once again.
Breakthrough Puzzle (11)


In order to activate the Receiver at the end, you will need to clear the path with the two Inverters.
- Connect both Inverters to the blue Emitter individually.
- Connect it to the green Receiver (2) on the right, along with the red Receiver (2) next to the gate.
- Take the second converter and connect it to the green Receiver (3) on the left and the red Receiver (2) next to the gate.
Switchboard Puzzle (12)


Seeing the Switchboard puzzle can be very overwhelming for the first time, but it's all about simple laser placements (no need to overcomplicate it). There are two Connectors that will help you reach the solution.
- Take one Connector and attach it to the blue Emitter.
- Connect it to the third point (from left to right) in the bottom row.
- Now put that down, grab the other Connector, and attach it to the red Emitter.
- Connect it to the first point in the second row.
- Take the first Connector again and connect it to the second point in the second row along with the third point in the first row. This will activate all Receivers and solve the puzzle.
Extension Puzzle (13)


This one is similar to the Equilibrium puzzle, where you have to get the exact number of points for each laser. The red laser has six points, while the blue only has two. That means you have to add all three available Connectors to the blue side.
- To unlock the two Connectors, grab the one outside and place it on the pressure plate.
- Connect the red Emitter and the red Receiver through it.
- Take the two Connectors out of the room and leave the third one on the pressure plate.
- Connect the three Connectors in a line, and then connect the last one to the blue Emitter on the wall.
Data Stream Puzzle (14)


Similar to the Domino Effect puzzle, here you have to figure out which Receivers to hit in the row.
- For the first red section, connect the Connector with the red Emitter and the first red Receiver.
- For the first blue section, connect the Connector with the blue Emitter and the third blue Receiver.
- For the second red section, connect the Connector with the first red Connector and the third red Receiver (if you connect it directly to the red Emitter, then the two blue Receivers on each side will shut down; that's why you have to dilute it through the other Connector).
- For the second blue section, connect the Connector with the blue Emitter and the second blue Receiver.
Flow Control Puzzle (15)


Much like the name of the puzzle suggests, you are supposed to control the flow of the lasers with the six Hexahedrons.
- Take two Hexahedrons and place them on each side of the blue laser at the start. This will activate the blue Receiver.
- Head to the right. Place a Hexahedron on the nearest green laser coming from the top, then place another one to block the closest laser to the green Receiver. This will activate it.
- Move over to the left now. Block the closest green laser with a Hexadron. Go to the green laser coming from the ceiling closest to the red Receiver and block it. This will activate it and solve the puzzle.
Propagation Cancelation Puzzle (16)


The point of this puzzle is to cancel out some of the lasers with different colors. It seems a bit overwhelming, but it is quite simple.
- Connect the green Emitter and the second notch from the green Receiver to activate it.
- Connect the blue Emitter and the first notch from the blue Receiver to activate it.
- Take the same Connector and connect the blue Emitter to the fourth notch from the red Receiver to activate it.
Heart of Annubis Puzzle


Once you get all of the fragments from the blue puzzles, you'll activate the Heart of Annubis puzzle. You can see it as a yellow marker on your map, but it's located at the crossroads that lead to all of the different puzzles. Step into the purple beam and climb up the stairs to reach the puzzle.
Your goal is to activate all Receivers on the walls (two of each color) of the heart of Annubis. There are two Connectors that you will use to achieve this. There are also only red and green Emitters for this puzzle.
- First, take one Connector and attach it to the green Emitter.
- In order to turn on both green Receivers, connect to the point between them and the one point to the right of it.
- To activate the bottom blue Receiver (as well as set up half of the activation for the top blue Receiver), use the green laser to connect to the two points in the row next to them.
- To activate the red Receivers, connect the red Emitter to the three points in a row above the bottom red Receiver.
- To activate the top blue Receiver, use the red laser to connect to the right point.
Once you have it complete, head into the purple beam again to reach the last fragment of Sarabhai. However, once you are back down, there are three additional (optional) yellow puzzles you can complete to find more fragments.
Hysterisis Yellow Puzzle


The first yellow puzzle you'll encounter is Hysterisis. There are two Connectors and two Receivers, along with a pole in the middle that keeps moving. You have to use this to switch which laser and receiver are active.
- Connect the blue Emitter and Receiver, then connect it to the red Receiver as well. Put the Connector in the corner farther from the entrance.
- Connect the red Emitter and Receiver, then connect it to the blue Receiver as well. Put the Connector in the corner closer to the entrance.
As the pole moves, it will keep disrupting each of the lasers. All you have to do is wait for the switch in front of both blue walls, and you'll find the fragment.
Clockwork Yellow Puzzle


When it comes to the Clockwork puzzle, you will need to set it up so that each blue barrier goes down one by one in a clockwork direction. This can happen when all three color laser beams cross. The timing of it also won't allow for the fans to power up, so you can easily pass through.
- Connect one Connector to the blue Emitter and Receiver along with the green Receiver.
- Connect one Connector to the red Emitter and Receiver along with the blue Receiver.
- Connect one Connector to the green Emitter and Receiver along with the red Receiver.
Step by Step Yellow Puzzle


The final yellow puzzle of the Orpheus Ascending Talos Principle 2 DLC is the Step by Step puzzle. You'll employ the body block mechanic here.
- Connect the left Connector to the blue Emitter (1) and Receiver (2) along with the right point (3) and red Receiver (4).
- Connect the right Connector to the red Emitter (5) and Receiver (6) along with the left point (7) and blue Receiver (8).
- Click on both Switches to lift up the gates.
- Stand in front of the blue Emitter to block the laser and let the red laser hit the point.
- Step on the pressure plate and wait until the red laser activates the first left red Receiver.
- Stand in front of the red Emitter to block the laser and let the blue laser hit the point.
- Step on the pressure plate and wait until the blue laser activates the first right blue Receiver.
- Repeat this two more times and climb up the stairs to reach the right fragment.
Once you have collected it, head back outside and select to go back to the real world, thus completing the Orpheus Ascending episode of the Road to Elysium Talos Principle 2 DLC.
Isle of the Blessed - Green Island
The Man Behind the Curtain Puzzle (1)


There are a lot of blue gates blocking your way in this puzzle, but that's where the Activator and Jammer come in.
- Take the Activator and connect it to the Emitter.
- Pick it back up (while keeping all of the connections) and take it to the blue gate with a Connector locked behind it. This will drop the gate, and you'll be able to grab it.
- Connect the Connector to the Emitter.
- Connect the Activator with the Connector and place it next to the gate with a Jammer locked behind it. Take it out.
- Use the Jammer to disable the right blue gate.
- Place the Activator in the perfect position so that it can disable both blue gates in its range.
- Take the Jammer with you and jam the last blue gate to reach the Progress Wheel
The Snatchback Maneuver Puzzle (2)


We are starting off strong in the Isle of the Blessed first puzzle. There are
- Grab the Driller and make a hole in the right golden wall.
- Take the Inverter through the hole and put it outside.
- Go to the room with the red Receiver and grab a Connector from the left.
- Connect the Connector with the red Emitter and red Receiver.
- With this section done, take the Driller and make a hole in the left golden wall.
- Connect the Inverter to the Connector and to the blue Receiver through the hole (make sure to place it as close to the hole as possible)
- Go through the first gate and grab the Inverter. This will deactivate the second blue gate, and you can reach the Progress Wheel.
The Loop Puzzle (3)


- Grab the Accumulator and head all the way to the right. You'll see a Teleporter through the bars in the wall.
- Make sure to teleport with the Accumulator.
- Move the Teleporter on the pressure plate.
- Pick up the Accumulator and charge it with the red Emitter before connecting it to the red Receiver.


You may have just brought the Accumulator in, but now you have to figure out how to get it back outside. Lucky for you, we have it all written out.
- First, place the Accumulator on the pressure plate. This will hold the gate open while you take the Teleporter to the other side of the bars.
- Pick up the charged Accumulator and teleport to the other side.
- Connect the Accumulator to all three red Receivers. Put the Teleporter back inside.
- Pick up the Accumulator while keeping the connections and head to the grate to teleport.
- Now, you can place the Accumulator through the small door in the grate and it will still be connected to the red Receiver.
- Climb over the wall with the ladder and head over to interact with the Progress Wheel.
The Turnabout Puzzle (4)


- Connect the Connector to the red Emitter and the moving platform. Step on the pressure plate to get it moving. Once the platform reaches the far wall, pick up the Connector so that it loses power.
- Get to the other side and connect the Connector with the bottom red Receiver and the red Emitter. You can now pick up the Hexahedron.


Now that you have the Hexahedron, it's time to get the Inverter (which you can find in the corner) to the other side.
- Connect the red Emitter with the top red Receiver to open the blue gate.
- Grab the Inverter and take it to the other side, placing it on the moving platform.
- Connect the Connector to the platform and red Emitter again.
- Once it stops moving, grab the Inverter and connect it to the red Emitter before placing it back onto the moving platform.
- Take the Hexahedron and place it on the pressure plate.
- After you do, grab the Connector and connect it to the Inverter.
- After you do, take it to the corner where you found it first and connect it to the blue Receiver in the other room. Place it on the Hexahedron so that the laser beam can reach across the fences.
The Theodorian Knot Puzzle (5)


The Jammer is the big key in the Theodorian Knot puzzle for the Talos Principle 2 DLC.
- Grab the Jammer and take it to the left. Through the window, jam the blue gate right across from you so that you can take the RGB Converter.
- Take the RGB Converter and place it on the single pressure plate.
- Go back to move the Jammer further to the left, jamming the fan so that you can go through.
- Take off the fan from the wall and place it on the pressure plate instead of the Hexahedron.
- Bring the Hexahedron to the middle area and place it on the left pressure plate (where there are two).
- Pick up the RGB Converter and place it on the right pressure plate, opening the gate.


This part is the trickiest in the Theodorian Knot puzzle. You have to make sure that your lasers don't interact with each other.
- Take the Jammer again, only this time, bring it to the right side. You'll see a blue gate to the right that you need to jam.
- Go inside and grab the Connector, which you will connect to the red Emitter. Once you do, connect it to the RGB Converter as well.
- Now grab the RGB Converter and connect it to the blue Emitter, as well as the green Receiver. Place it on the Hexahedron so that the lasers won't cross, and you've solved the puzzle.
The Binary Paradox Puzzle (6)


- Grab the Driller and place it on the pressure plate, facing the golden wall so that you can open up a hole.
- Now, take the Connector and connect it to the red Emitter (which you unlocked with the pressure plate) and the red Receiver through the hole. Head over there to find another Connector.
- Bring the second Connector over and connect it to the red Receiver around the corner. Connect the two Connectors to the red Emitter.
- Take the unlocked Hexahedron and put it in place of the second Driller. Take it to the other golden wall and make a hole. You'll see the blue Emitter through it.
- Go grab one of the Connectors and connect the blue Emitter to the blue Receiver.
- Once you do, grab the other Connector and connect it through the top hole to the red Emitter and the red Receiver (just make sure to position it carefully so that the lasers don't overlap).
The Cutoff Quandry Puzzle (7)


This puzzle is separated into two sections, but luckily you have a body in each of them that you can go between.
- First, take the Jammer and jam the fan through the window in the left corner.
- After you do that, connect the Connector to the Emitter up top and to the Connector on the other side of the wall.
- Take control of the other body so that you can move on the other side.
- Use the Driller to make a hole in the lower golden wall.
- Take the Hexahedron and place it on the fan. Now, you can connect the Connector to the Emitter and place it on the Hexahedron (you can't place it directly onto the fan).


You'll be doing a lot of back-and-forth in this section. Take it slow so you don't get confused (like I do).
- Teleport to the other body.
- Remove the Jammer, and the Hexahedron and Connector will fly high in the air.
- Go back to the other body and move the Driller to the right so that it's now making a hole in the higher golden wall.
- Grab the platform from the floor, jump onto the fan, and pick up both the Hexahedron and the Connector.
- Go to the hole and switch to the other body. From the other side, you can now grab the Hexahedron (the Connector will drop to the platform now).
- Jam the other fan on the side where the Jammer is and place the Hexahedron on top of it. Pick up the Connector and place it on top of it, too. After that, remove the Jammer, and they will both fly in the air.
- Head back to the other body that is still holding the platform and second Connector.
- Get onto the fan, and the body will go up in the air, unlocking the Progress Wheel. Go back to the other body and touch it.
The Mechanical Gyre Puzzle (8)


- Click on the Switch to get the wall with the small window. Look through it to connect the Inverter to the blue Emitter and the red Receiver. This will lower the bars, and you can go to the other room.
- Grab the Connector and take it back outside to replace the Inverter.
- Take the Inverter into the unlocked room and connect the blue Emitter to the red Receiver, unlocking another blue gate.
- Switch the wall to the blue gate with the two Receivers. Point the Jammer at it so that you can go through it.


- Go through the wall and take the Connector to bring it all the way into the rooms, where you will find a single red Receiver. There is a Driller locked behind it, which you should grab.
- Move the Inverter so that it hits the Connector and the red Emitter, then take out the Driller to the first area.
- Press the Switch again until you spin a golden wall. Make a hole in it with the Driller.
- Through the hole, connect the Connector with the red Receivers to hold both the first and the second blue gate open.
- Connect the Inverter to the Connector and then connect it to the blue Receiver.
- Now, use the Switch again until you get to the wall with the blue gate and two Receivers.
- Connect both the Connector and the Inverter to the blue Emitter and with their Receivers.
- Once the gate is down, take the Jammer and bring it to the gate that is blocking the Progress wheel. Jam it, and you'll solve the puzzle.
Auxiliary Factor (Lost Puzzle)


- First, grab the Connector and attach it to the blue Emitter and blue Receiver to open the gate.
- Bring both RGB Converters to the first area.
- Connect one RGB Converter to the blue Emitter, then connect it to the red Emitter.
- Connect the second RGB Converter to the red Emitter and to the blue Receiver.
- Connect the RGB Converters together, and you will get a blue laser that will keep the blue gate open.
- Since you don't need it outside anymore, take the Connector inside and attach it to the red Emitter. Put it next to the window so that you can see what needs connecting later.


- Take the first RGB Converter and connect it to the blue Receiver, the red Emitter, and the Converter.
- Take the second RGB Converter and connect it to the blue Emitter, the red Emitter, the Connector, and the first RGB Converter.
- Go and pick up the Connector without keeping the connections. Instead, just connect it to the second RGB Connector and to the green Receiver.
Isle of the Blessed - Red Puzzles
When you're done exploring the Green area, head to the red section of the Isle of the Blessed DLC episode.
The Missing Element Puzzle (1)


- Take the Accumulator and put it next to the blue gate, but more towards the right frame. This way, when you activate the Accumulator, both the first and the second blue gate will go down.
- Step on the pressure plate to activate the Accumulator.
- Now, go inside and pick up the Hexahedron.
- Put the Hexahedron on the fan, then put the Accumulator on top of it. Once you step on the pressure plate again, both will fly up and dispel the blue gate above, which is holding the Connector (it will fall down now).
- For the last step, place the Accumulator near the blue gate that is hiding the Progress Wheel.
- After you do, take the Connector, connect it to the blue Emitter and Accumulator, and then place it on the pressure plate. Interact with the wheel to solve the puzzle.
The Laser Circus Puzzle (2)


- Take the Hexahedron and put it on the pressure plate to get the RGB Converter.
- After you take it out, put the Hexahedron on the pressure plate in front of the red Emitter.
- Now, connect the RGB Converter to the red Emitter (1), blue Emitter (2), and green Receiver (3) to open the gate, then take out the second RGB Converter.
- Connect the second RGB Converter to the first and to the blue Emitter to get the red laser. Use it to open the red Receiver to the right and get the third RGB Converter.
- Connect the third RGB Converter to the first two and get the blue light that is needed to open the blue Receiver. Grab a fan from behind it, which you should put on the pressure plate instead of the Hexahedron.
- Pick up the second RGB Converter and connect it to the red Emitter and the first RGB Converter. You'll get a blue laser.
- Now, when you connect the third RGB Converter to the other two, it will give you a red laser, which is perfect for opening up the last red receiver and gate.
The Bilateral Challenge Puzzle (3)


- Grab the Connector that is on the corner, then go back and swap bodies.
- Put the second body on the pressure plate to open the grate.
- Now, connect the Connector to the red Emitter and place it on the pressure plate.
- Jump into the fan to knock off the Hexahedron and the second Connector. While in the air, swap to your other body.
- Bring it to the area and pick up the Connector. Once you do, go into the fan again and connect the Connector to the first Connector and red Receiver.
- Don't drop it! Instead, swap to the body on the ground still.
- Take the Hexahedron and put it in the fan so that the other body is now standing on top of it. Swap to that body again.
- Place the Connector on the Hexahedron below you, then go to the now unlocked Pressure Wheel.
The Euclidian Palette Puzzle (4)


- Pick up the Gravshifter and point it at the black wall to the left. This will move the RGB Converter to it through the gravity beam. Do it one more time and transfer the Converter all the way to the left.
- Take the Connector and connect it to the green Receiver and the RGB Converter to make a blue laser.
- Now, take the second Connector and connect it to the RGB Converter, the blue Emitter (1) behind the gate, and both blue Receivers (2,3). The gate will now open up, so you don't need the Converter anymore for the blue laser.
- Once you do, use the Gravshifter to move the RGB Converter back to its original black wall.
- Connect the first Connector to it and to the red Receiver to complete the puzzle.
The Perpendicular Procedure Puzzle (5)


If you looked at this puzzle and tried to figure out how you're going to reach anything, don't worry. You can climb on the walls in this one.
- Jump onto the wall to the left and grab the Connector. Connect it to the blue Emitter, then jump back off.
- Head to the other wall and jump on until you can connect the Connector with the blue Receiver. This will open the blue gate for you.
- Go through it and pick up the Driller. Once you do, head back to the area with the blue Receiver and place the Driller pointing at the golden wall.
- Pick up the Hexahedron from the other area and place it on the pressure plate through the hole.
- Now take the Driller and place it on the other pressure plate facing the golden wall.
- Take the Connector and place it close to the hole so that you can grab it from the other side.
- Pick it up through the hole and connect it to the red Emitter and to the red Receiver across the way.
- Grab the Hexahedron and jump down from the wall. Put it on the pressure plate, wait for the Receiver to load, and you'll unlock the Progress wheel.
The Celestial Beacon Puzzle (6)
- Jam the first blue gate and go through.
- Pick up the Inverter and swap it for the Hexahedron. Once you have the Hexahedron, take it to the fence on the side where the Jammer is.
- Grab the Jammer, climb the Hexahedron, and place it on the other side of the fence. Don't worry, you're not stuck since there is a ladder to your right.
- Jam the same gate again, then go grab the Hexahedron and swap it for the Inverter.
- Connect the Inverter to the blue Emitter and the signal point in the other room. Make sure to keep the connection above the fence. That way, when the blue gate closes, you will still have these powered.
Now, there's going to be a bit of back and forth to get the Jammer where you need it.
- Take the Connector and have it power the red Receiver.
- Pick up the Jammer and take it to the other room. However, immediately turn around and jam the same gate. This way, you can bring the Connector back.
- Take the Jammer and jam the next wall. After you do, bring the Connector through and attach it to the red Receiver.
- The final step is to bring the Jammer through again and jam the last blue gate.
The Misalignment Syndrome Puzzle (7)


- Head into the room all the way at the back and place the Connector on the pressure plate. This will open up a blue gate, allowing you to make a hole through it with the Driller.
- Take the fan and put it through the hole. After you do, go back to the room, and replace the Connector with the fan, and then place the Connector through the hole to the other side.
- Connect the Connector to the green Emitter and Receiver.
- Take the Driller and make a hole in the wall between them, then place the Connector inside while keeping the connections.
- Bring out the Hexahedron and the other Driller immediately, then pick up the Connector through the hole as well.


- Now replace the fan with one of the Drillers and bring the fan back out again.
- Replace the fan back where it was, then place the Hexahedron on top of it.
- Connect the Connector to the green Emitter and the green Receiver up top before placing it on the Hexahedron.
- The tricky part is that you need to point the Driller towards the top golden wall. After you do, go to the room and point the other Driller toward the green Receiver, which will unlock the gate.
The Riddle of the Citadel Puzzle (8)


- Head through the purple wall and jump on the fan. This will bring you to the Inverter, which you should bring back down.
- Connect the Inverter to the blue Emitter and red Receiver before placing it on the pressure plate. Now, you can grab the Connector from the room.
- Connect it to the Inverter and then to the red Receiver up top. Move the Inverter so that it is in line with the Connector, then step on the pressure plate. This will activate the fan and knock over the Hexahedron.


- Pick up the Hexahedron and place it on the left side of the rising platform. Connect the Inverter to the red Emitter (1), blue Receiver up top (2), and the Connector (3), then place it on the Hexahedron.
- Connect the Connector to the blue Receiver up top, and the platform will come down.
- Now that it's down, the Inverter will be working to hold it there so you can pick up the Connector.
- Take the Connector and attach it to the blue Receiver to the right, then put it on the platform. Grab the Hexahedron, place it on the platform as well, then place the Connector on top of it.
- Pick up the Inverter and connect it to the red Emitter and the Connector. This will charge the blue Receiver, and you'll reach the Progress wheel.
The Phantom Tunnel (Lost Puzzle)


- Take the Driller and make a hole in the golden wall, then take the Connector and put it through to the other side.
- Connect the Connector to the red Receiver and Emitter through the purple wall.
- Pick up the Driller and point it at the golden wall behind the second Connector through the window.
- Run all the way around, pick up the second Connector through the hole, connect it to the blue Receiver, and then put it back through the hole.
- Connect the two Connectors together, then attach the first one to the blue Receiver.
- Grab the Driller in the new room and place it on the pressure plate, facing the golden wall in the direction of the second Connector.
- Pick up the first Connector and connect it to the red Emitter (1), red Receiver (2), and second Connector (3).
- Now go all the way around again and pick up the second Connector. All you have to do is attach it to the first Connector and red Receiver, and you've solved the lost puzzle.
Isle of the Blessed - Blue Puzzles
After the green and red, it's time for you and Yaqut to complete the blue island and its puzzles.
The Smoothie Solution Puzzle (1)


- Connect one RGB Converter to the blue Emitter and red Emitter.
- Once you get the green laser, connect the second RGB Converter to the first and to the red Emitter to get the blue laser, which you should attach to the blue Receiver.
- Pick up the RGB Converter with the green laser and connect it to the green Receiver. You'll find the third RGB Converter inside, so take it out.
- Disconnect the first RGB Converter and the green Receiver. Instead, connect the third RGB Converter to the first (green) RGB Converter along with the blue Emitter. Now you'll get the red laser, which you should attach to the red Receiver.
- Inside, you'll find the fourth and final RGB Converter. Connect it to the green RGB Converter and the red RGB Converter, and you'll get the blue laser perfect for the last blue Receiver.
The Ballet of Bots Puzzle (2)


- Take control of the first body through the window as you enter.
- Look to the left and take control of the second body through the window.
- Move to the X on the floor and go back to the first body.
- Take the second body and move it to the farther X block, then take control of the first body again.
- Take the third body, move it to the pressure plate, transfer to the second body, and head immediately to the first body to complete the puzzle.
The Closing Conundrum Puzzle (3)


- Connect the Inverter to the red Emitter and then to the blue Receiver.
- Pick up the Driller and place it on the other side of the wall facing the red Emitter.
- Grab the Connector and attach it to the red Emitter and Receiver.
- Connect the Inverter with the blue Receiver (1) on the other side and put it through the hole. Now connect the Inverter to the Connector (2) and the third blue Receiver (3).
- The blue gate is now open, so pick up the Driller, take it to the other room, and place it on the pressure plate to complete the puzzle
The Big Hassle Puzzle (4)


- Take the red Activator and connect it to the red Emitter before putting it in front of the blue gate to the right.
- After the gate opens, grab the Connector and bring it to the previous room. Connect it to the red Emitter before placing it in line of sight down the hall.
- Take the red Activator and connect it to the Connector to deactivate a blue gate. Make sure also to connect it to the red Emitter so that you can freely use the Connector again.
- Take the blue Activator and bring it out while you take the Connector inside and attach it to the blue Emitter. Put it down so that you can see it through the window.
- Put the red Activator back next to the blue gate to deactivate it.
- Connect the blue Activator to the Connector and place it so that a little bit touches the blue gate and stays deactivated.
- Place the red Activator around the corner as close to the second blue gate as you can get to complete the puzzle.
The Intruder Puzzle (5)


- First, take the Connector and put it on the pressure plate.
- After you unlock the gate, grab the Hexahedron and replace the Connector with it.
- Connect the Connector to the red Receiver and Emitter, and then put it on the pressure plate. This will open a blue gate where you will find the Gravshifter.
- Take the Gravshifter and create a gravity beam above the blue gate. This will allow you to pick up the Hexahedron and jump into the gravity beam so that you can get across the blue gate.
- Put the Hexahedron on the fan. Replace the Connector with the Gravshifter on the pressure plate.
- Take the Connector and connect it to the blue Receiver and Emitter. Once you do, place it on top of the Hexahedron.


- Pick up the Gravshifter and jump onto the wall and across the gate to bring the Gravshifter to the next area.
- Create a gravity beam at the black wall.
- Step on the pressure plate to bring the Hexahedron and Connector into the air. This will, however, close the gate on the gravity beam.
- You have to step off the pressure plate in order for the gravity beam to pick up the Hexahedron. This will unlock the progress wheel.
The Trident Enigma (6)


- Take the Activator and connect it to the red Emitter in between the two blue gates.
- Now, grab the Hexahedron and take it to the pressure plate in the middle room.
- Take the Activator and then place it in the middle room in between the two blue gates.
- Grab the Inverter and connect it to the red Emitter and blue Receiver. Now, take the Hexahedron and take it to the newly opened room, where you can grab the Connector.
- Bring the Connector, Inverter, and the Hexahedron to the first room. Place the Hexahedron on the pressure plate.


- Put the Activator between the first two blue gates after connecting it to the red Emitter.
- Connect the Connector to the red Emitter and the red Receiver.
- Take the Hexahedrone and put it next to the platform.
- Grab the Inverter and connect it to the red Connector and to the blue Receiver.
- Jump onto the Hexahedron and go to the next area where you will find a Jammer.
- Take the Jammer and jam every single gate on your way back to the main room, then Jam the big blue gate. Make sure to place it on the pressure plate.


- Bring out the Hexahedron, Connector and Inverter back into the first room.
- Put the Hexahedron next to the platform.
- Connect the Connector to the red Emitter and the red Receiver.
- Pick up the Activator connected to the red Connector.
- Climb up the Hexahedron and put it next to the blue gate at the end.
- Now, take the Inverter and connect it to the red Receiver and the blue Emitter to complete the puzzle.
The Twist and the Turn Puzzle (7)


- To open the first blue gate, connect the Connector with the blue Receiver and Emitter
- In the next room, connect the Connector to the red Receiver and Emitter.
- In the final room, connect the Connector to the green Receiver and Emitter.
- This will unlock the final (fourth) Connector.
- In the third room with the green laser, disconnect the Connector from the Receiver and Emitter. This way, you can take the fourth Connector all the way back to the first room.
- Connect the fourth Connector to the blue Emitter and Receiver and put it all the way to the left next to the blue gate.
- After you do that, go all the way back and connect the green Emitter to the Receiver again through its Connector.
- Go to the first room again and reconnect the first Connector, blue Emitter, and Receiver.
- Now, take the fourth Connector and attach it to the red Connector and the red receiver in the room with the blue laser, This will unlock all doors for you.
The High Road Puzzle (8)


- Take the Gravshifter and place it on the pressure plate, then grab the Hexahedron from the now unlocked room and put it on the pressure plate instead.
- Go inside and swap the Gravshifter with the Connector.
- Connect the blue Emitter and Receiver and place the Connector on the pressure plate.
- Take the Hexahedron into the new room on the far left and place it on the black panel.
- Pick up the Connector and swap it with the Gravshifter.
- Lift up the Hexahedron with the gravity beam and then move it to the right.
- Now place the Gravshifter back on the pressure plate.


- Head into the last room on the right to pick up the second Gravshifter and take it to the room with the first Gravshifter.
- First, place a vertical gravity beam and then place a horizontal gravity beam so that the Hexahedron can come right above you.
- Repeat this process so that the Hexahedron goes to a pressure plate to the right, which will unlock the blue gate in front of you.
- Take one of the Gravshifters and swap it with an Inverter. Take the second Gravshifter and swap it for the Connector.


- Connect the Connector to the blue Emitter and Receiver.
- Connect the Inverter to the blue Emitter and red Receiver, then place it on the black panel in the room to the far left.
- Pick up the Connector and swap it for the Gravshifter.
- Use the gravity beam to lift up the Inverter to the black panel on the ceiling, which will unlock a blue gate.
- Now, use the gravity beam to take the Hexahedron back to the final pressure plate. Put the Gravshifter on the pressure plate near you, and then go to the progress wheel.
The Helping Hand (Lost Puzzle)


- First, take control of the body to the right and step on the pressure plate to open the blue gate, then go back to your first body.
- Pick up the fan and bring it in to place it on the pressure plate.
- Take control of your second body again to put it on the pressure plate and place it properly.
- Now you have two bodies you can work with. Take both into the middle area.
- Go into a room to the left, pick up the Connector, and then stand on the fan.
- Then, take control of your other body to come into the same room and step on the pressure plate. This way, you'll now have a Connector outside.
- Take control of the body with the Connector and connect the blue Emitter and blue Receivers. This will unlock a Hexahedron.


- Pick it up, take it to the room with the fan, and replace it. Put the fan back in its place.
- Use one of the bodies to climb to the platform with the fan.
- Switch to the other body, pick up the fan, and place it again instead of the Hexahedron.
- Pick up the Connector and then jump on the Hexahedron with it. Swap to your body on the platform. Lean down and take the Connector.
- Connect the blue Emitter and the blue Receiver


- Take control over your lower body again.
- Pick up the Hexahedron, swap it for the fan again, and place it in the new area.
- Stay there and swap to your other body.
- Now, pick up the Connector and connect it to the red Emitter and Receiver.
- Since the gate is closed, you now have to take control of your other body and then jump onto the fan. This will take you to the progress wheel.
Into the Abyss
The beach episode of Talos Principle was fun, but Into the Abyss is as it sounds, a harrowing exploration of Athena's memories.
Unexpected Outcomes Puzzle (1)


- Make a hole in the golden wall to the right with the Driller.
- After you do that, take the Inverter and connect it to the blue Emitter and right red Receivers.
- Pick up the Connector from inside the right room and connect it to the blue Emitter.
- Now connect it to all three red Receivers, as well as to the blue Emitter.
- Connect the Connector to both the blue and the red receiver, then take it inside the room and place it in front of the golden wall.
- Pick up the Driller, go around next to the blue gate, and make a hole in the wall.
The Other Puzzle (2)


- First, connect one Inverter to the blue Emitter and then connect it to the first blue Receiver (1), the first red Receiver (2), the second Inverter (3), and the second red Receiver (4).
- Now, take the second Inverter and connect it to the first red Receiver (5), the second blue Receiver (6), and the second red Receiver (6).
- Go around, and you'll find a Connector that you should connect to the blue Emitter through the window.
- Take the first Inverter and connect it to the Connector.
- Now, take the first Inverter, disconnect it from the blue Emitter, and instead connect to the Connector.
- Pick up the Connector, connect it to the blue Emitter again, and then the second Inverter. This will open the gate.
Oscillation Puzzle (3)


- Take the first Connector and connect it to the red Emitter, blue Emitter, and blue Receiver.
- Take the second Connector and connect it to the red Emitter and red Receiver. Place it down when the laser to the blue Receiver is broken up, then run and wait for the gates to switch.
Alternation Puzzle (4)


- Pick up the first Connector and connect it to the red Emitter, the red Receiver to the left, and the blue Emitter.
- Take the second Connector and connect it to the first Connector, the blue Emitter, the red Receiver to the right, and both blue Receivers. This will alternate the gates so that you can pass through.
Tritogenia Puzzle (5)


- Connect the first Connector to the red Emitter, red Receiver, blue Emitter, and blue Receiver.
- Connect the second Connector to the red Emitter, green Emitter, and green Receiver. Make sure you place it so that both beams coming from the red Emitter go over the fence to the right.
- Click the right Switch to lift the fence all the way up, then switch it off.
- Click the left Switch, then run and click the right Switch on as well.
- Go into the hallway and wait for the gates to open interchangeably (you might need to rush through some since they don't stay open for long).
Voyager Puzzle (6)


- Head forward and pick up the Connector (while keeping the connections) and attach it to the second red Receiver as well.
- Take the fan and place it on the pressure plate where the Hexahedron is so you can pick it up.
- Bring the Hexahedron to where the fan was and put it on the pressure plate. You can bring back the fan as well.
- Step on the fan and jump across.
- Place the Driller on the pressure plate to leave the new room.
- Go around to pick up the Hexahedron and put it on the pressure plate instead of the driller.
- Point the Driller at the golden wall outside so that you can pick up the Hexahedron back to your side.


- Take the Hexahedron back to the fan again.
- Put the driller against the golden wall and then place the Connector right in front of the hole. Now you can pick it up through the hole.
- Move the Driller to make a different hole to the left and put the Connector through it. Make sure not to step on the fan because you will get launched with no way to get out and have to restart the puzzle (talking from experience).
- Pick up the Driller and jump on the fan. Put the Connector on the pressure plate and take the Driller back outside to make another hole.
- Pick up the Connector through it.
- Now, connect the blue Emitter with the blue Receiver. Use the Driller and make a hole so that you can unlock the progress wheel.
Stylite Puzzle (7)


- Pick up the Connector and connect it to the red Receiver and red Emitter. Now, take control of the other body.
- Step on the pressure plate with it, then go back to your first body.
- Move the Connector so that you activate the fan. Jump on it to go into the second area.
- Fall down, take the Connector, and place it on the pressure plate so that you open the blue gate.
- Detach the fan and place it on the pressure plate instead of your body.
- Connect the second connector to the red Emitter.
- Connect the first Connector to the second Connector, then place it on the pressure plate instead of the fan. Place the fan back in its place.


- Now, take one body, jump onto the fan, and go to the platform. Stand on the ledge.
- Detach the fan and place it on the pressure plate while you connect the Connector to the red inverter.
- Now, take the fan and hand it over to your body. Leave your body on the pressure plate and go up onto the fan. You'll fly up to the Progress wheel.
Metaphora Puzzle (8)


- Connect the first RGB Converter with the red and blue Emitter.
- Connect the second RGB Converter with the green RGB converter and the red Emitter, then connect it to the blue Receiver.
- Connect the third RGB Converter with the blue RGB Converter and the green RGB Converter before connecting it to the red Receiver.
- Now, pick up the Inverter, connect it to the blue Emitter and to the red Receiver.
- Take one of the RGB converters that you're now using anymore and put it In the other room.
- Connect that RGB converter to the blue Emitter and the red Inverter. Now connect the blue Converter with the new Green converter.
- The old one is now useless, so you can take it into the room, as well.
- Pick up both of the RGB Converters in the room and put them on the pressure plate to solve the puzzle.
Color Theory Puzzle (9)


- Pick up the Inverter and connect it to the blue Emitter and red Receiver.
- Go inside, grab one of the Connectors and attach it to the red Emitter. Take it all the way to the first blue gate (just make sure it is still connected).
- Now take the second Connector, attach it to the first and then to the red Receiver instead of the Inverter, which you can now pick up.
- Grab the Connector that is not on the other side of the blue gate as well and bring it to the room with the Emitters.
- Connect the Connector to the red Emitter and all red Receivers.
- Connect the Inverter to the Connector and then to the blue Receiver. Make sure to place them both close to the blue gate.
- In the new room you'll find an RGB Converter. Connect it to the blue and red Emitter, then to the green Receiver.


- Take the second RGB Converter and Inverter into the new room. Connect the Inverter (1) to the red Emitter (2), then connect the RGB Converter (3) to the red Emitter (2) and to the Inverter (1) to get the green laser and link it with the green Receiver.
- Now bring over the first RGB Converter (4), link it to the Inverter (1) to get a blue laser as well, but keep it outside of the blue gate so that you can grab it.
- Grab both Converters and take it to the last room. Connect the first RGB Converter to the blue and red Emitter.
- After you do, take the second RGB Converter and connect it to the first RGB Converter, the red Emitter and both blue Receivers to unlock the third RGB Converter.
- Take the third RGB Converter, link it with the first and second RGB Converters as well as to the red Receiver to open the gate.
Metathesis Puzzle (10)


- Take the first RGB Converter (1) and connect it to the red and blue Emitter and then to the green Receiver.
- Take the second RGB converter and connect it to the first, the red Emitter as well as both blue Receivers.
- Take the third RGB Converter and connect it to the first and second as well as the red Receiver.


- Now, get rid of any excess connections.
- Connect the first Converter (1) to the red and blue Emitter and put it in the middle.
- Connect the second RGB Converter (2) to the first, the blue Emitter and to the red Receiver.
- Connect the third RGB Converter (3) to the first, the red emitter, and to the blue Receiver.
- Connect the fourth RGB converter (4) to the red and blue Emitter as well as the third and second converter.
- Now pick up the first RGB Converter (1) and connect it to all four Receivers.
- Move the fourth RGB Converter (4) to the other room. Now, take the first one (1), and you should be able to move both through the gate.
- Place both RGB Converters on the pressure plates and use the progress for you.
The Ring Puzzle (11)


- Take the right Connector and put it on the wheel, then step on the left pressure plate to move it to the other Connector.
- Link one of the Connectors to the Inverter across the way, then connect the second Connector to the red Emitter and first Connector. Go back outside and step on the right pressure plate until the laser activates the Inverter.
- Now, take the fan and place it on the pressure plate.
- Then go back outside and step on the right pressure plate to circle the Connectors around.
- Take one of the Connectors and put it on the pressure plate instead of the fan which you will put on the wheel.
- Move the fan to the area with the fan activator. Jump on top of it to get to the new area.


- Take the RGB converter and put it on the pressure plate, then go back to the fan and put it back on the wheel.
- Move it to the left so that you can replace the RGB converter with with it.
- Now, connect the Inverter to both blue Receivers, then take the Connector and link it to the Inverter. You can now remove the second Connector off the pressure plate.
- Instead connect the Connector to the Inverter so you have a red and blue laser.
- Link the RGB Converter with them and with Green receiver.


- Now go inside the new area and place the Inverter on the wheel. Move it towards the connectors.
- Take the second (blue) Connector and place it on the pressure plate.
- Take the first Connector and link it to the red Emitter, while you take the Inverter and link it to the blue Receiver and the Connector.
- Put both on the wheel and move them to the left. Take the inverter from the room as well.


- Final step, take both the Inverters and the Connector off the wheel.
- Grab the RGB Converter and bring it to the same area.
- You need to match the distance between the Inverters and the RGB Converter to the distance of the holes in the fence. It might take a few tries to get it right.
- Connect the Connector to the red Emitter and the first Inverter and leave it off the wheel.
- Link the first Inverter to the blue Receiver and the second Inverter.
- Link the second Inverter to the red Receiver and place it on the wheel slightly off the position of the other one.
- Link the RGB Converter to the first and second Inverter and then to the green Receiver.
- All you have to do is teleport to the wheel to be done.
Tidal Lock Puzzle (12)


- Connect red Emitter to the red Eeceiver on the side of the sphere.
- Move it until the sphere is right behind your original position with the Gravshifter right behind the fan.
- Connect the Connector to the red Receiver on the fan to drop the Gravshifter. Use it to create a beam on the bottom of the sphere.
- Use the Connector again to connect the red Emitter and the red Receiver on the sphere to circle it around so that it can pick up a fan.
- Go into the Grav beam and take the fan, then place it in the middle.
- Shift the sphere with the Connector until it's right above the first pillar, then use the gravity the Gravshifter to connect the two spheres.
- Place the Connector on the pressure plate, activating the fan. Jump onto the fan and onto the first sphere.
- Go through the Grav beam to the second sphere where you will find an Inverter. Use it to connect the red Emitter and the blue Receiver on the side of the second sphere so you can move it until it's in the correct area above the second pillar.
- Use the Gravshifter so that you can get into the beam and get to the pressure wheel.
Here and There Puzzle (13)


- Pick up the Hexahedron and put it on the pressure plate, then grab the Inverter and link it to the blue Emitter and the other Inverter. This will open the gate.
- Now pick up the second Inverter and connect it to the first Inverter through the window and to the blue Receiver. Now, you can take the connector.
- Connect it to the first Inverter and place it right outside of the window.
- Take the second Inverter and connect it to the Connector, the blue Receiver in the room as well as the blue receiver in the room behind it.
- Take the first Hexahedron off the pressure plate and put the first Inverter onto it.
- Bring the hexahedron over to the other pressure plate.
- Take the second Hexahedron and place it in sight of the first Inverter and the red Receiver.
- Pick up the Connector, connect it to the Inverter and the red Receiver, then place it on the Hexahedron. This will open the gate.
Reversion Puzzle (14)


- Take the first Inverter and put it on the pressure plate.
- Take the second Inverter and connect it to the blue Emitter and the red Receiver.
- Pick up the first Inverter and connect it to the red emitter and to the second Inverter, then step on the pressure plate.
- Now put the first Inverter back on the pressure plate, and you go to the room you just unlock to grab the third Inverter.
- Connect the second Inverter to the blue Emitter, the first Inverter, and the blue Receiver.
- Connect the third Inverter to the second inverter, and take it to the other room, where you can connect it to the blue Receiver to complete the puzzle.
The Narrow Path (15)


- First, take the connector and link it to the Emitter and Receiver.
- Grab the second Connector from the other room and swap it for the first RGB Converter.
- Connect the RGB Converter to the blue Emitter, and the red Emitter, as well as to the green Receiver in the other room, then pick up the first Connector.
- Swap it for the second RGB Converter which you should connect to the blue Emitter, the green RGB Converter, as well as to the red Receiver.
- In the new room, pick up the third Connector. Swap that one for the third RGB Converter.
- Connect it to the first and second RGB Converter as well as to the blue Receiver on the other side of the room, You'll find the Accumulator here.
- Charge it with the green laser and connect it to the green Receiver.
- Take the third RGB Converter and connect it to both blue Receivers and to the green Accumulator.
- Pick up one of the Converters and swap it for a Connector which you should connect to the red Emitter and red Receiver.
- Swap out the second RGB Converter to for another Connector, which you should connect to the first, the third RGB Converter, and to the red Receiver.
Fragile Balance Puzzle (16)


- Take the first Inverter and connect it to the blue Emitter and to the four red Receivers in the room.
- Take the second Inverter and connect it to the first inverter and to the two blue Receivers in the room before placing it on top of a pedestal.
- After you do that, take the third Inverter and connect it to the first inverter and to the two blue Receivers (replacing the second one). Put it on the second pedestal.
- Now, pick up the second Inverter and connect it to the blue Emitter and all four red Receivers in the room, and to the third Inverter, replacing the first Inverter.
- Pick up the first Inverter and put it on the pressure plate, then do the same with the second and the third.
Consequences Puzzle (17)


- Take the Connector and connect it to the blue Receiver and blue Emitter.
- Grab the Jammer and jam the blue gate behind the Connector. This will open the red Emitter and a second Connector, which you should bring out.
- Pick up the Jammer and deactivate it.
- Now, connect the first Connector to the blue Emitter, blue Receiver, and red Emitter.
- Connect the second Connector to the red Emitter and the red Receiver through the window.
- Now jam the gate again so you can get to the end of the puzzle.
Radiating Choice Puzzle (18)


- Connect the first Connector to the blue Emitter and blue Receiver.
- Grab the second Connector, connect it to the blue Emitter, and place it in front of the fence.
- Pick up the first Connector (with connections) and connect it to the red Emitter and the red Receiver so that it intersects the second Connector.
- Pick up the second Connector, link it to the red Emitter, and put it all the way to the right so that it intersects the first Connector laser. The gate will go down, and you can turn on the switch.
- Grab the second Connector again and connect it to the blue Emitter, placing it so that it intersects with the first Connector again.
Trinal Puzzle (19)


- Pick up the first Connector and put it on the pressure plate where the blue laser is.
- Grab the second Connector and connect it to the blue Emitter before putting it on the pressure plate.
- Pick up the first Connector again and put it on the pressure plate where the green laser is.
- Grab the third Connector and connect it to both the green Receiver and the green Emitter, and then put it on the pressure plate.
- Now, link the first Connector to the second (blue) Connector and to the blue receiver In the new area.

- Take control of the second body so you can turn on the switch.
- Once you do, go across the room and take control of the third body so you can turn on the second switch. Now you have two extra bodies available.
- Pick up the fan and put it on one of the pressure plates while you stand on the other one.
- Take control of your second body so you can grab the Connector.
- Now, put the fan on the fan activator to the right, pick up the Connector and then jump on it. Drop the Connector through the hole in the fence.
- Teleport to your other body on the lower ground, detach the fan and approach the ledge with it.
- Teleport to your body on the ledge and pick up the fan, before passing it through the fence as well, then take control of your first body.


- Pick up the fourth Connector and the fan and bring it out to the open area. Put the fan on the pressure plate so that you can take out the other two Connectors as well, then do the same with the blue laser Connector.
- Once you have grabbed them all, put the fan in the middle.
- Step onto the fan to get on a platform with two more Connectors.
- Connect the first one to the green Emitter and the green Receiver, then take the second one and connect it to the blue Emitter and the blue Receiver.
- Jump back down, pick up one Connector, and go back up. Connect it to the red Emitter and the red Receiver.


- From up high, take control of your body to the right and jump down to put it on the pressure plate. Take control of your other body and to the same.
- Look up to teleport to the body on the platform and then jump down.
- Grab one Connector and put it on the pressure plate to keep the blue gate open.
- Now, grab the second Connector and put it on one pressure plate instead of your body. Do the same with the other.


- Take control of one body and step on the pressure plate in front of the blue gate, then take control of another one and pick up the Connector to take it up high.
- Teleport to your third body that's not doing anything, detach the fan and put it in where it was behind the red Receiver.
- Take one of the bodies and jump onto the ledge by using the fan. Head to the left and step on the pressure plate.
- Then teleport to the body back up top and right back down to the other body. Go to the fan so you can reach the ledge and head right to step on the second pressure plate.
- Now connect the three connectors to the blue, red, and blue Emitters and their respective Receivers. Just make sure that the lasers don't overlap.
- Once you have opened the gate, jump down and go down the stairs to solve the puzzle.
Interception Puzzle (20)


- Pick up the first Connector and link it to the blue Emitter and the blue Receiver.
- Pick up the second Connector and connect it to the blue Emitter, red Emitter, and blue Receiver. Place it in front of the window.
- Take the first Connector again and connect it to the red Emitter and the red Receiver through the window.
- Lift up the second Connector, and the puzzle is complete.
Hierarchy Puzzle (21)


- Pick up the first RGB Converter and connect it to the red Emitter, blue Emitter, and both green Receivers.
- Pick up the second RGB converter and connect it to the red Emitter, blue Emitter, blue Receiver, and green Emitter.
- Now, pick up that RGB Converter again, connect it to the first RGB Converter, red Receiver, red Emitter, blue Receiver, and green Receiver.
Leviathan Puzzle (22)


- Pick up the first Connector and link it to the red Emitter and red Receiver.
- Bring the Driller inside the now-opened room and create a hole in the golden wall to the right.
- Take the second Connector and connect it to the red Receiver inside the room.
- Move the first Connector so that you can see the second one through the hole and connect them.
- Go back inside and pick up the first Connector through the hole. Link it to the red Emitter and the red Receiver on the far wall.
- Take the second Connector and connect it to the blue Emitter and blue Receiver.


- Now, grab the Driller and take it into the new area.
- Head to a wall on the left and make a hole which you can pick up an RGB Converter through.
- Pick up the Driller again and make the hole to the red Emitter again.
- Take the second Connector and connect it to the green Receiver.
- Now take the RGB Converter and link it to the red Connector, blue Emitter, and green Connector. This will unlock an Accumulator.


- Charge the Accumulator with the red laser.
- Pick up the first Connector and link it to the blue Emitter.
- Grab the third Connector and attach it to the first Connector and blue Receiver to lower the platform.
- Take the RGB Converter and connect it to the Accumulator, green Receiver, and red Receiver, then put it on the platform next to the blue Receiver.
- Pick up the Accumulator and block the blue laser with your body so that the platform goes up. Attach it to the two red Receivers up top and pick up the RGB Converter again.
- Connect the RGB Converter to the Accumulator, the green Receiver, and blue Connector.
- Pick up the other Connector and wait for the door to open.
One-Way Link Puzzle (23)


- Turn on the switch and connect the Connector to the blue Emitter and blue Receiver. This will drop the Inverter.
- Make sure that the red laser is open first, then take the Connector and link it to the right red node, the left blue node, and the Inverter up top.
- Connect the second Connector to the right red node, the blue Receiver, and the Inverter up top.
- Head through the purple wall in the back right corner and fly up with the help of the fan.
- Once you are up, activate the switch to power the blue gate and solve the puzzle.
Halls of Power Puzzle (24)


- Take the first Inverter (1) and connect it to the blue Emitter and the red Receiver through the window.
- Take the second Inverter (2), connect it to the first Inverter, and to the two blue Receivers through the middle window.
- Take the third Inverter (3), connect it to the second Inverter, and to the two red Receivers through the window.
- Now go all the way around to pick up a Connector. Bring it to the room with the Receivers.
- Connect it to the blue Emitter and through the window.


- Now pick up the first Inverter (1) without connections and reattach it to the Connector and the red Receiver.
- After you do, pick up the second Inverter (without Connections) and reattach it to the first Inverter, the left blue Receiver, and the red Receiver right behind the blue one.
- Finally, pick up the third Inverter (with no connections) and reattach it to the second Inverter, left red Receiver and blue Receiver right behind it.
- For the final part, pick up the Connector again and connect it to the blue Emitter, blue Receiver, and second Inverter through the window to the right, which will open the last blue gate.
If you are interested in more puzzle games with a deeply philosophical story, check out How to get through the flipped rooms and solve the furnace puzzle in INDIKA on Pro Game Guides.