


Our Aniimo beginner’s guide covers how to get started, catch creatures more efficiently, build a reliable team, and spend your resources sensibly. You don’t need a perfect roster to make progress. You need a few useful companions and a proper understanding of what they actually do. Read on to learn what you need to know before you make some mistakes.
What to Do First in Aniimo
Your first few hours in Aniimo can disappear into a suspiciously familiar routine: spot something cute, chase it halfway across the map, and forget why you left town. Perfectly understandable. However, a little direction goes a long way when your new collection also handles combat, exploration, and keeping things running at home.
To kick things off in this Aniimo beginner’s guide, let's do a quick TL; DR. If you want a straightforward starting plan, these are teh priority steps you should follow by the book:
- Check your account linking and server before committing to a character. This matters especially if you play across platforms or want to join friends.
- Follow the Journey and introductory tasks. Get access to your collection, catching, training, and other core systems before committing to a long farming detour.
- Practice Twining, dodging, switching, and throwing Aniipods. Learn the controls somewhere that isn’t actively trying to flatten you.
- Catch for useful abilities and different combat roles. A new movement option or dependable breaker can help more than another similar attacker.
- Activate nearby travel points and collect Lumin Amber. Make future journeys easier while progressing through each area.
- Invest in a small combat core. Keep your main damage dealer effective, then support it with Break and healing, protection, or energy recovery.
- Set up Homeland production when it becomes available. Start useful crafting and hatching processes before heading back out.
- Check your available rewards. Look through event pages, check-ins, mail, and completed progression tasks for anything you can claim.
Understand the Core Gameplay Loop
Aniimo combines creature collecting with real-time action combat and open-world exploration. You play as a Pathfinder exploring Idyll, finding Aniimo, learning about their habitats, and building a collection that opens up more ways to fight and travel.
The basic loop is to explore, catch, improve your team, and use its abilities to tackle new areas and challenges. Story quests introduce systems and move your adventure forward, while species research, puzzles, bosses, and gathering give those trips additional value.
If you’re coming from Pokémon, collecting creatures, considering elemental matchups, and following evolution lines will feel familiar. The big adjustment is that positioning, dodging, resource management, and the creature you directly control all matter during a fight. Nobody politely waits for you to choose a move.
RELATED: Aniimo vs Palworld vs Pokemon – Similarities & Differences Explained
Check Account Linking Before You Start
Use the same Aniimo Pass and regional server when playing across platforms. Progress on different servers is separate, so coordinate with friends before settling in.
Console players should pay particular attention to the initial account-linking prompt. If you already have an Aniimo account, follow the existing-account linking process at first login rather than rushing through it. This is one opening screen worth reading properly. The official account notice explains the platform-specific linking rules.
Follow the Story Until the Essentials Are Open
The opening Journey and tutorial tasks provide a useful path through Aniimo’s core systems. Prioritize them while you’re still unlocking basic functions, then explore more freely once you understand how the pieces fit together.
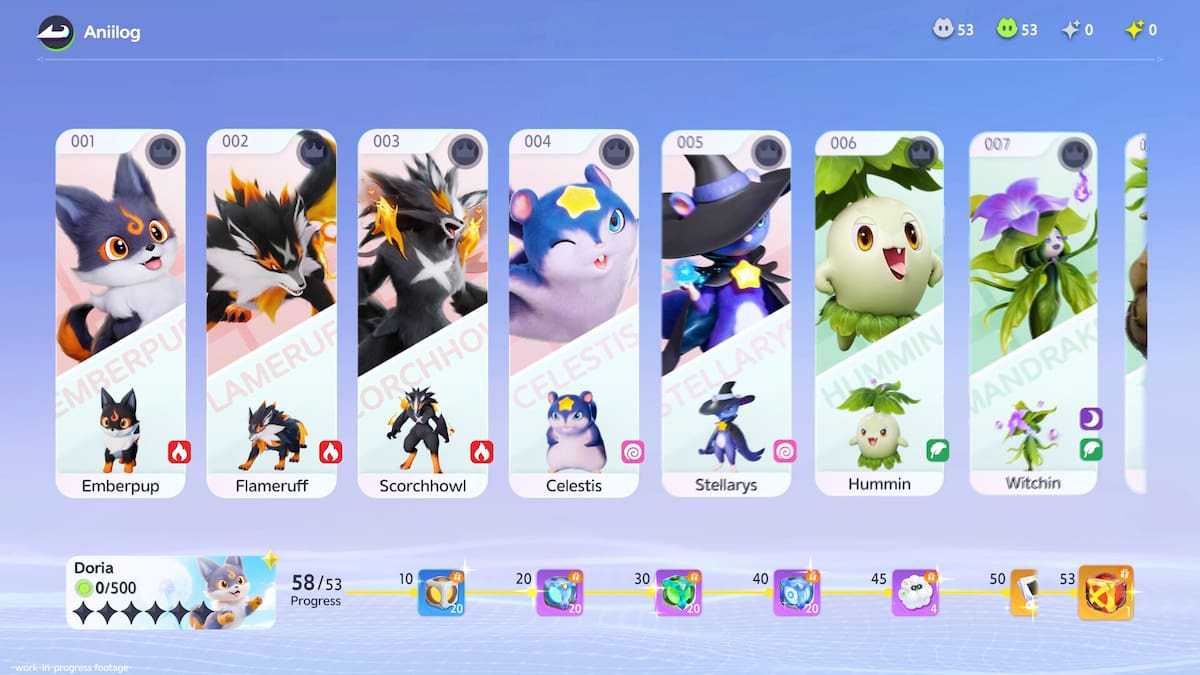
Pay attention to the Aniilog, your creature index and research reference. Use it to investigate species, check the information you’ve uncovered, and look into evolution routes. Catching something is the beginning of understanding it.
When progression slows down, read the next objective before deciding you need more levels. You may need to complete a species task, advance a quest, or unlock another system. Grinding the same nearby enemies won’t solve a requirement you haven’t checked.
Learn Aniimo Twining Early
Twining lets you directly control an Aniimo, using its combat kit, movement, and special interactions. Command Mode handles directing your companions; Twine Mode puts you in the creature’s body. It’s central to both combat and exploration.
Try each new companion somewhere safe. Check its basic attacks, active skills, energy recovery, and traversal action. A quick test tells you much more than a glance at its attack stat.
Outside combat, different Aniimo provide abilities such as flying, swimming, diving, tunneling, or interacting with environmental puzzles. Some also change how you perceive or approach the world. When an obstacle looks impossible as a human, consider which companion could help.
Build up a collection of movement tools alongside your combat team. Keep useful traversal specialists even when they aren’t your strongest fighters. An Aniimo that gets you across the map or into a hidden area has already earned its place in your collection.
RELATED: Aniimo Codes
Aniimo Combat Basics: Break, Energy, and Timing
An Aniimo beginner’s guide wouldn't be complete without explaining combat basics. Aniimo combat becomes much easier once you stop treating every available skill as a button you need to press immediately. Let's do a quick dive into the core concepts you'll need to master.
Use Break to Create Openings
Break pressures an enemy’s poise and creates an opening when its resistance gives way. A reliable breaker helps your damage dealer get more work done while the enemy is vulnerable.
Against tougher opponents, work toward that opening and line up your stronger attacks to take advantage of it. Keep watching the enemy’s animations: getting hit while forcing one more attack can cost more than that attack was worth. Break also helps with catching, giving a good breaker value well beyond boss fights.
Manage Your EP
EP in Aniimo means Energy Points, the resource spent on active skills. If you repeatedly run dry, check how your Aniimo restores energy and which actions its kit wants you to use between expensive attacks.
Basic attacks, zero-cost actions, recovery skills, and team effects can all matter, depending on the creature. Read the skill descriptions rather than assuming every Aniimo uses the same rotation. REGEN relates to energy recovery; don’t automatically read it as passive healing. A creature that keeps your skills available and one that restores your health solve different problems.
Dodge Before Committing to a Long Attack
Learn a tougher enemy’s attack pattern before unloading your whole kit. Give yourself room to react, dodge the dangerous move, and attack during its recovery.
If a fight keeps going badly, ask what actually caused it. Were you underleveled, out of EP, using an awkward elemental matchup, or standing in the same attack for the fourth time? Only one of those is solved by buying more experience.
Build a Balanced Team
Next in my Aniimo beginner’s guide is team building. While you can experiment as much as you want (and have fun while doing it), building a versatile, well-balanced team that covers all your bases is essential if you want smoother runs and to win more often than you lose. For your four-slot field team, start with this basic setup:
| Team Role | What you want |
|---|---|
| Main damage dealer | Reliable damage and a moveset you enjoy controlling |
| Breaker | Consistent Break pressure to create openings and help captures |
| Sustain or energy support | Healing, shields, damage reduction, or EP recovery that addresses your team’s weakness |
| Flexible slot | Another element, useful control, extra support, or a traversal ability for your current route |
These are the basics. However, keep in mind that these are functions to cover, not rigid rules about role labels. One Aniimo may handle several jobs, freeing another slot for something else. Read traits alongside active skills. A support effect might benefit particular elements, require a specific trigger, or suit a different attacker. A buff is only useful if your team can actually use it.
Avoid leveling every new catch equally. Keep your main attacker able to clear current encounters, then bring the rest of your core up enough to do their jobs reliably. You can experiment without funding an entire wildlife reserve.
Check Aniimo Elements and Forms
Aniimo has nine elements: Fire, Water, Grass, Lightning, Ice, Earth, Wind, Light, and Dark. Use the in-game matchup information when facing unfamiliar opponents instead of importing another game’s type chart from memory.
Check the specific form and the species name. Different forms can change an Aniimo’s element and abilities, which affects both your team coverage and the attacks it handles well. For general exploration, some elemental variety gives you options. More specialized teams make sense when you understand their shared traits and know which encounter you’re building for.
How to Catch Aniimo More Efficiently
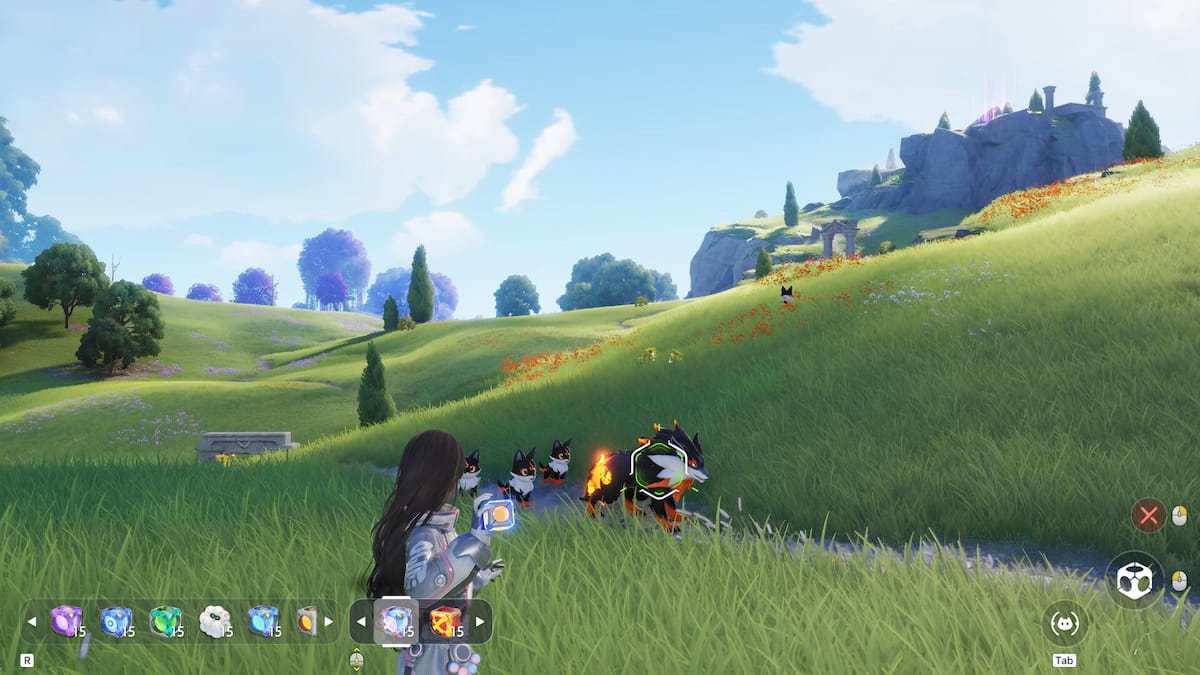
It’s a guide about a monster-catching game, right? That means it’s time for my Aniimo beginner’s guide to tackle the most iconic aspect of the genre: catching monsters. Good catching starts before you throw anything. Observe your target, choose your approach, and give yourself a clean opportunity. Use this routine:
- Check your surroundings - Notice nearby enemies, obstacles, and whether the target is moving or resting.
- Approach carefully - Stealth and sleeping targets can improve your chances.
- Use the tools the encounter allows - Traps and environmental interactions can help you control the situation.
- Apply Break when fighting is necessary - It improves your capture prospects as well as creating openings.
- Choose an appropriate Aniipod and aim carefully - A better pod still needs a sensible throw.
Higher-tier Aniipods and capture-enhancing Researcher skills also improve your options. Don’t assume a missed throw is automatically refunded. Aim at manageable distances while learning, and read any recovery upgrade’s conditions before relying on it.
Keep ordinary pods stocked for routine catches and reserve valuable ones for targets that justify the expense. Specialized items also have different uses: Tumbler is useful for group captures, while a Legendary Aniipod belongs to a dedicated Legendary encounter. They aren’t simply interchangeable upgrades.
If you’re running short, check quest and exploration rewards, shops, and your Aniipod Maker at Home. A repeatable supply is much more useful than a backpack full of materials you never turn into anything.
Explore the Habitat
A location is just the beginning of understanding your catch, and my Aniimo beginner’s guide is here to help you understand that better.
Factors like the time of day, weather, local happenings, and the unique population can greatly influence the Aniimo or forms you find. If you can't spot a creature where you anticipated, consider these conditions before retracing your steps. Don’t forget to consult the Aniilog information and any related quest or ecosystem guidance for helpful insights. Happy exploring!
As you travel, activate Blooms and other fast-travel points, collect nearby Lumin Amber, and investigate manageable puzzles. Lumin Amber feeds regional Branch progression, so return to the relevant Branch to check your unlocks and rewards. It isn’t just another material to leave forgotten in your inventory. Mark obstacles you can’t solve yet and return with a different traversal ability. You don’t need to clear every corner of a region on your first visit.

Understand Aniimo Evolution Before Spending Materials
Evolution in Aniimo isn’t governed by one universal level requirement. Different evo routes can involve species-specific tasks, skills, encounters, or quest progress, along with any required materials. Check the destination and its requirements in the Aniilog before committing. Branching evolutions can lead to different combat roles, so choose according to what your team needs.
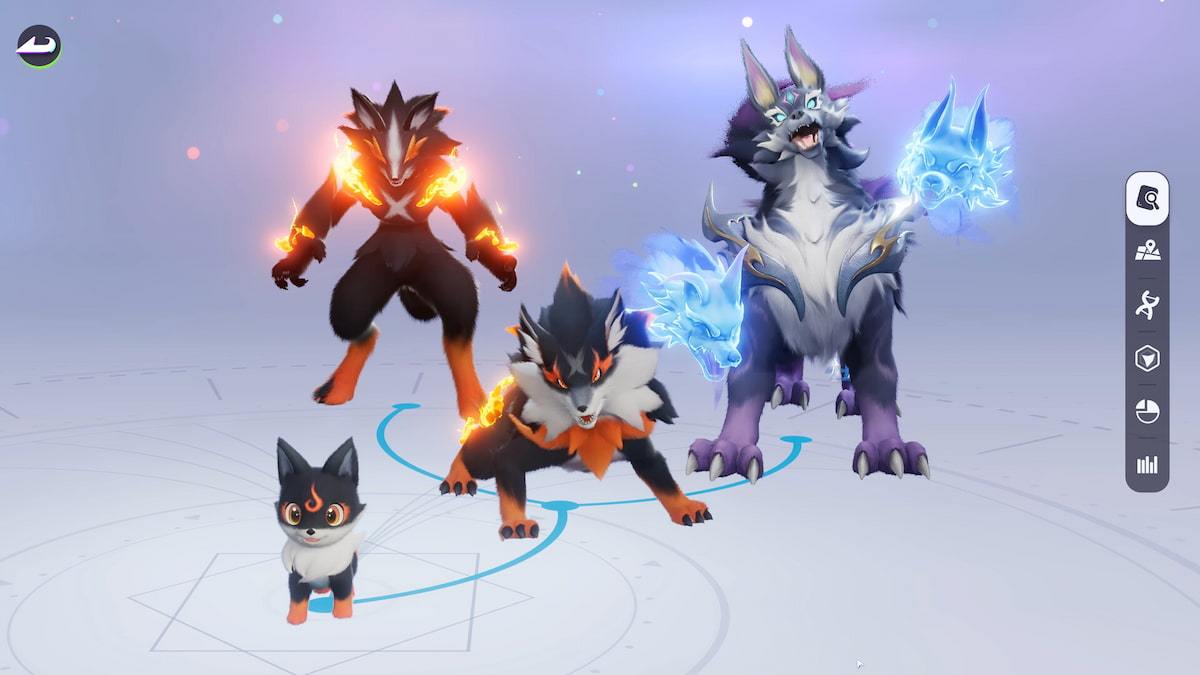
For example, the Emberpup line leads through Flameruff toward Scorchhowl or Inferlupa. Treat those as different options to investigate rather than assuming every stage belongs to one straight progression path. Be especially careful with a rare form or valuable individual. Read what the evolution changes, what it consumes, and what happens to the properties you care about. Don’t assume a branch is reversible.
Also distinguish permanent evolution from combat transformations. Helion’s Soleon form and Lunara’s Fennelun form are tied to their combat kits; they aren’t ordinary permanent evolutions you unlock by repeatedly feeding experience.
Upgrade a Useful Team Before Chasing Perfect Rolls
When evaluating a catch, ask two questions: does this species and form help your team, and how good is this particular individual? Potential and traits help answer the second question. They don’t replace the first. A useful, imperfect companion can help you clear quests and reach better opportunities. Don’t put your entire adventure on hold because its appraisal isn’t the highest possible grade.
Start with levels and the skills your core actually uses. Work on Resonance, a separate growth system, as progression permits, and read the requirements whenever you reach a training limit. Capability improvements also depend on your Aniimo’s progression.
You can reset Capability Awakening below level 60 and get your training items back, and Capafruit effects transfer through inheritance. That gives you some room to experiment, but it doesn’t mean every upgrade or consumable is refundable. Check the relevant screen before spending. The developer’s training notes confirm these rules.
Choose carried items that support your actual kit. When damage feels low, review your skills, energy use, matchup, and item effects before assuming the solution is another expensive upgrade.
Important Aniimo Resources and What to Prioritize
You don’t need to memorize the entire wallet. Start by recognizing the resources that affect your immediate progression:
| Resource | Main purpose | Beginner priority |
|---|---|---|
| Lumin Amber | Regional Branch progression | Collect it along your route and check the associated Branch rewards |
| Experience Gems | Direct Aniimo leveling | Focus on your active core and useful new replacements |
| Astranite | Resonance progression | Check which grade your chosen Aniimo needs before spending |
| Home Coin | Home economy and development | Favor useful production and facility needs early |
| Crops, wood, ore, and other materials | Crafting and Home production | Keep supplies needed for recipes and your next upgrade |
| Legendary tokens | Crafting your personal Legendary Aniipod | Progress through the associated exploration and story objectives |
| Capafruit and Legendary Star Dust | Advanced training and optimization | Check their exact use before committing valuable supplies |
| Glimmer | Shop purchases | Compare what you can buy before spending your starting balance |
Spend renewable supplies when they solve a real progression problem and help you move forward. Saving every Experience Gem while your team struggles through basic encounters is just another way to waste time. For expensive purchases or rare materials, have a specific purpose in mind.
Get Aniimo Homeland Working Early, ASAP
For me personally, one of the most important goals of this Aniimo beginner’s guide is to explain Homelands properly.
Homeland supports your adventure through crafting, farming, food, and other production systems. Explore it when it unlocks and get useful processes running before heading back into the world.
Check each Aniimo’s Home abilities when assigning work. Combat strength doesn’t automatically make it suitable for every job, so keep useful workers when sorting duplicates.
Build around your current needs. If catching supplies keep running out, prioritize the Aniipod production chain. If an upgrade requires processed materials, start making them before you need the finished stack.
When production stalls, check its inputs, worker assignment, storage, and facility requirements. Adding another machine won’t fix a missing ingredient.
Keep hatching, crafting, and RV activities moving as they become available. Improve the facilities that support your next goal, then decorate to your heart’s content. The elaborate garden can wait until you’ve worked out why nothing is getting made.
The Beginner Mistakes To Avoid
For the final section of this Aniimo beginner’s guide, let's take a quick look at things you should absolutely try your best to avoid if you don't want to make your life more complicated than it needs to be:
- Building four similar attackers. Give your team ways to create openings, recover, and handle different situations.
- Ignoring how a kit restores EP. An expensive skill rotation needs a way to keep functioning.
- Throwing valuable pods without preparing the catch. Improve the opportunity before improving the equipment.
- Farming a habitat under the wrong conditions. Check time, weather, and the form you’re actually hunting.
- Evolving without reading the branch. Make sure the destination does the job you want.
- Discarding every duplicate immediately. Compare individual quality, forms, and Home usefulness first.
- Spreading upgrades across the whole collection. Maintain a reliable core while trying alternatives gradually.
- Leaving Home production idle. Queue the supplies your next trip or upgrade will need.
- Chasing Perfect before unlocking the basics. Better access and a functioning team create more opportunities to improve your roster.
And that's about it, basically. It's time to end my Aniimo beginner’s guide; it's already waaay too long. Let's quickly repeat the core principles: At the end of your first few sessions, aim to have a team you understand, a dependable supply of Aniipods, useful travel points activated, and a clear next objective.
That’s a strong foundation for hunting rare forms, tackling harder battles, or getting completely distracted by another creature on the way to a quest. At least this time you’ll have brought enough pods. Thanks for reading, and while I still have your attention, be sure to check out our other Aniimo guides, tier lists, walkthroughs, and other useful content.


