
There are a grand total of 69 different shells in Another Crab's Treasure. If you want to collect them all, it will take basically the entire game to get them all.
Where to find all shells in Another Crab's Treasure - All locations
If you are still stuck on where to find all 69 shells, I have included maps below of each location where you can find that specific shell. Many of these, like the Soda Can, have many locations, so there are other places you can find them as well. Others will be dropped from specific bosses or might have to be purchased from inside the shell store in town.
1. Home
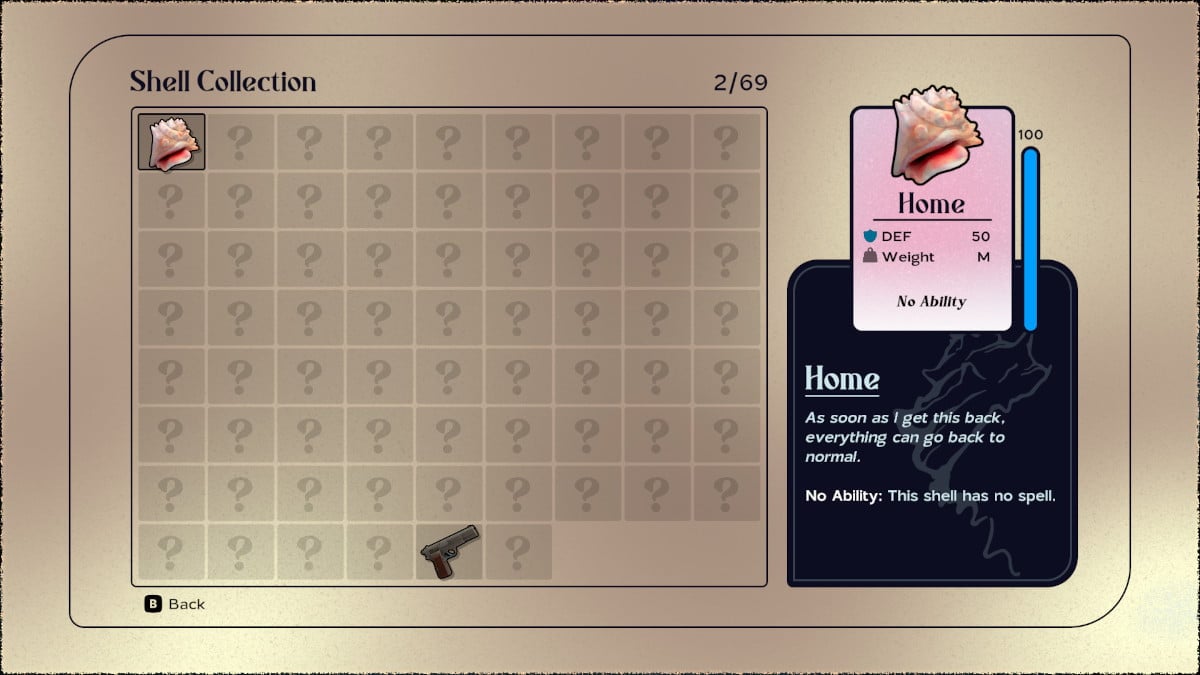
This is your shell, the whole point of this adventure. You have it at the beginning of the game, and then you lose it to a loan shark. You regain your Home shell by completing the game.
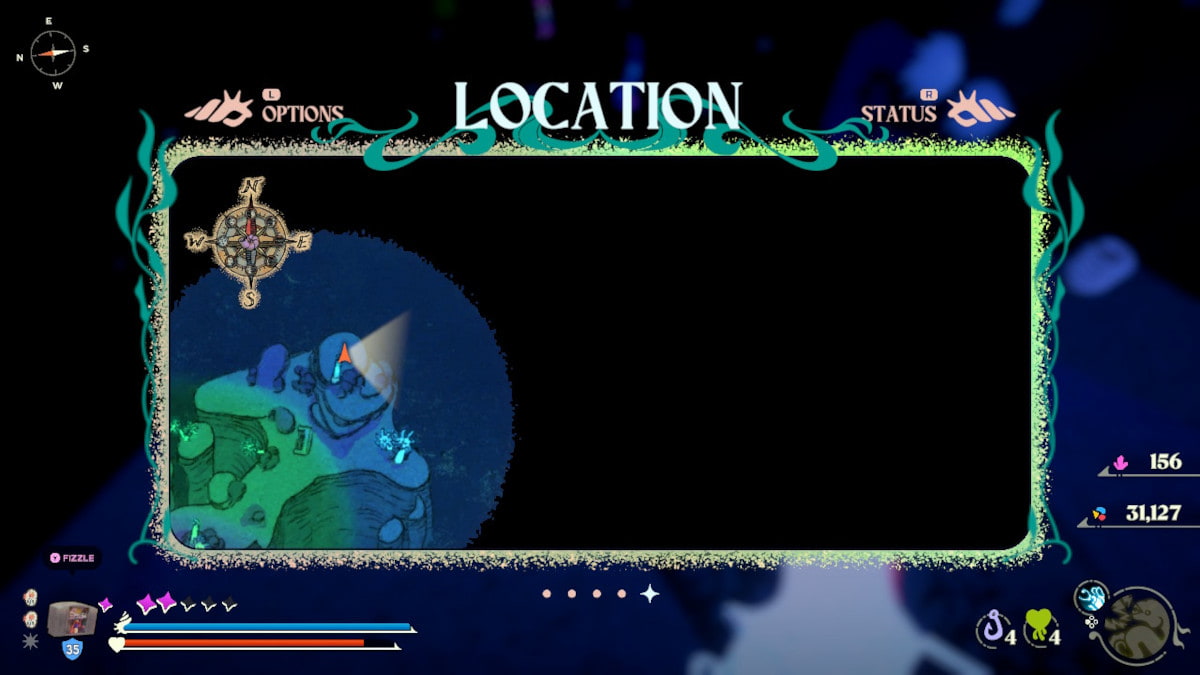
2. Soda Can
Soda cans are strewn all over the place in Another Crab's Treasure, but the first place you can find them is in Nephro's arena, all over the ground and in the vending machine.
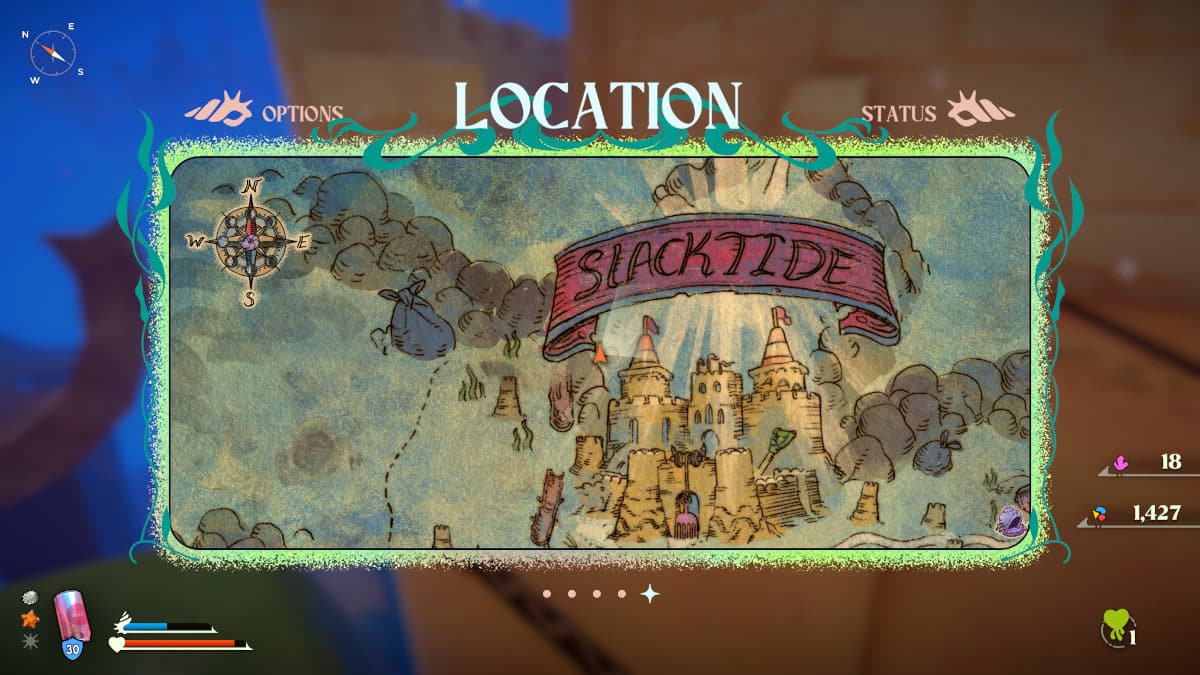
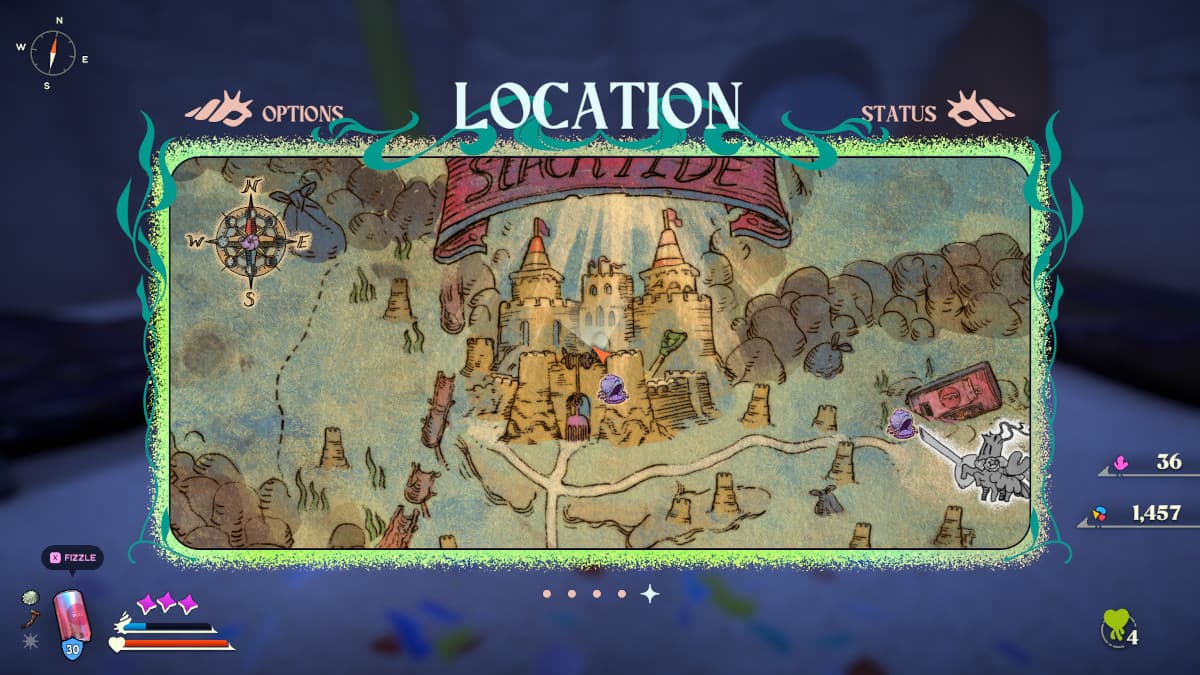
3. Bottle Cap
There is a Bottle Cap on the top of Slacktide's castle, on one of the carboard balconies you need to pass through. This is another lightweight shell with lower defense.
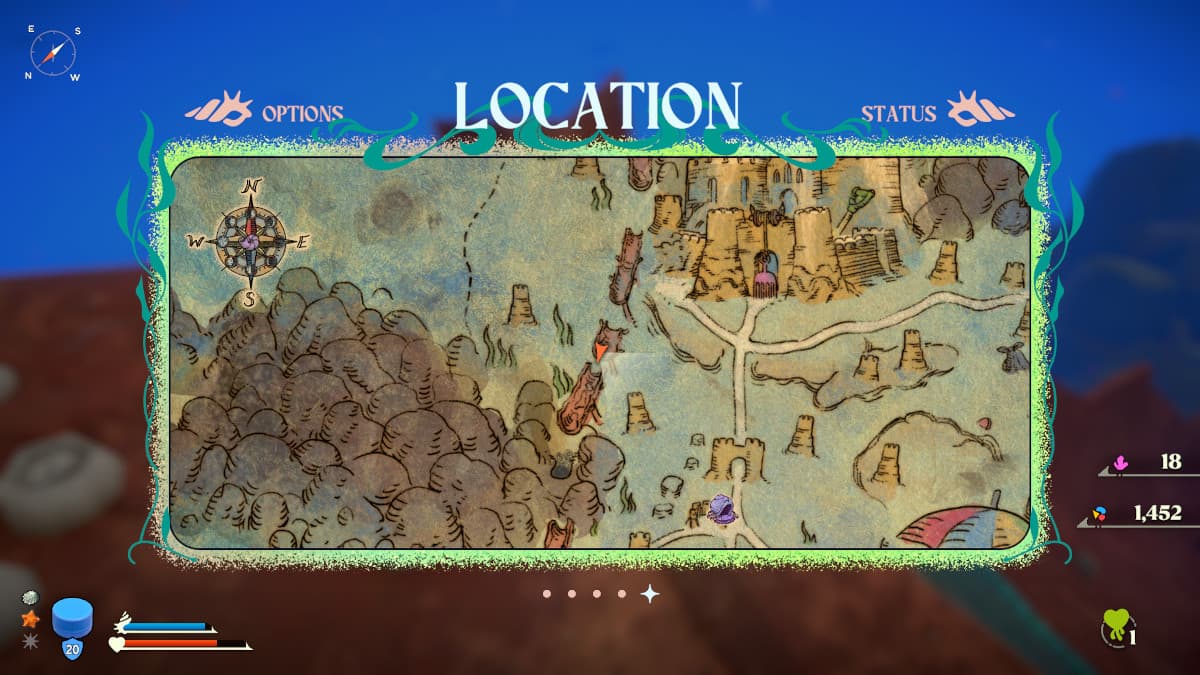
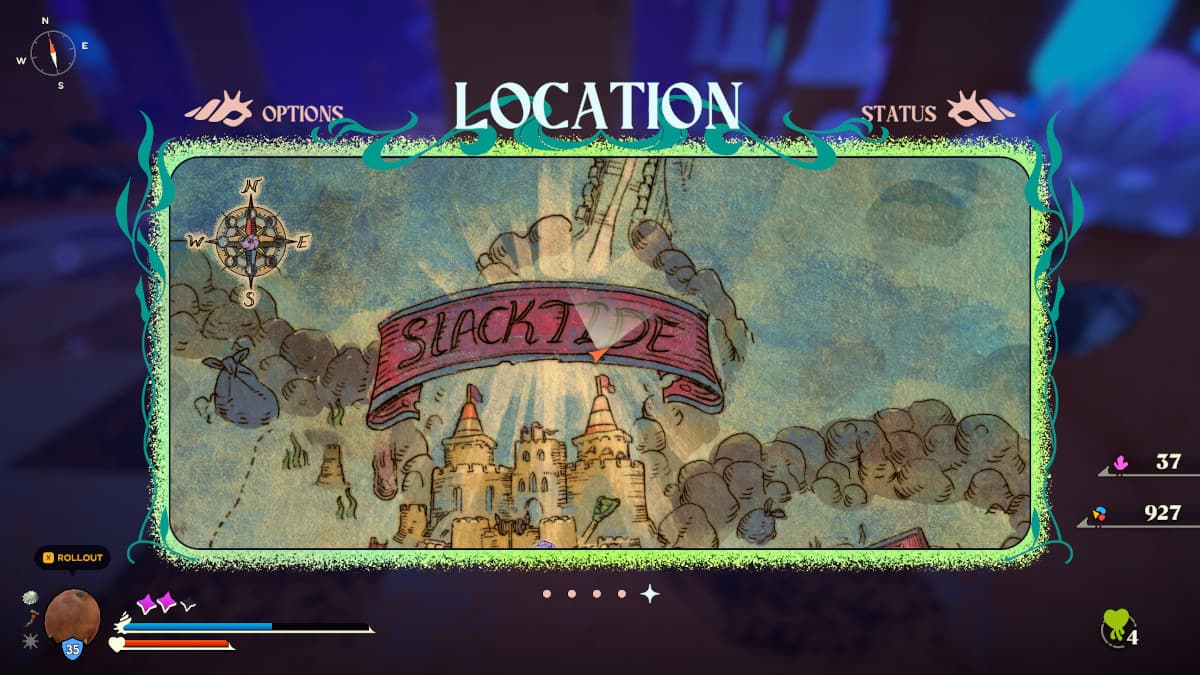
4. Tin Can
In the area heading out of Slacktide Castle, you can find a Tin Can shell on the rusty aqueducts. This can have a much higher defense than anything you've seen in the game yet, and it is only medium in weight, which makes it a great swap for whatever you are using in the early game.
Related: How to find all three cereal treasure map pieces in Another Crab’s Treasure
5. Shot Glass
Once you are in the Moon Caves, you can find the first Shot Glass Shell near the first shortcut. There will be a crab wielding a Q-Tip nearby. There are several other shot glasses in the area as well.

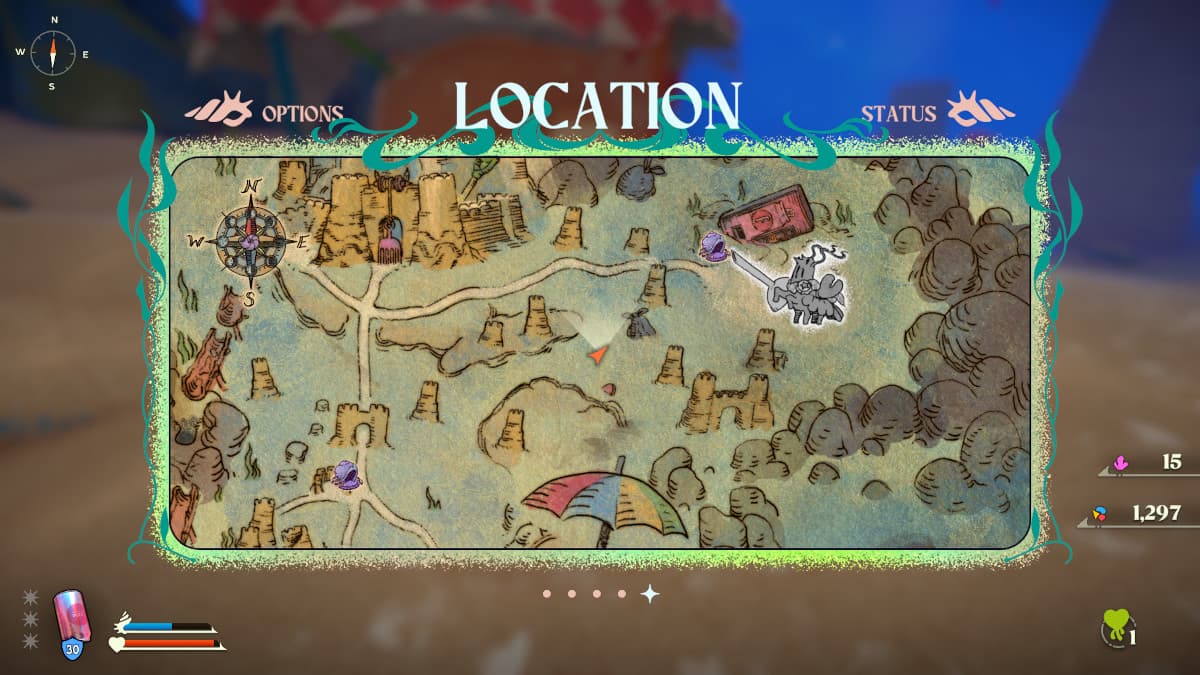
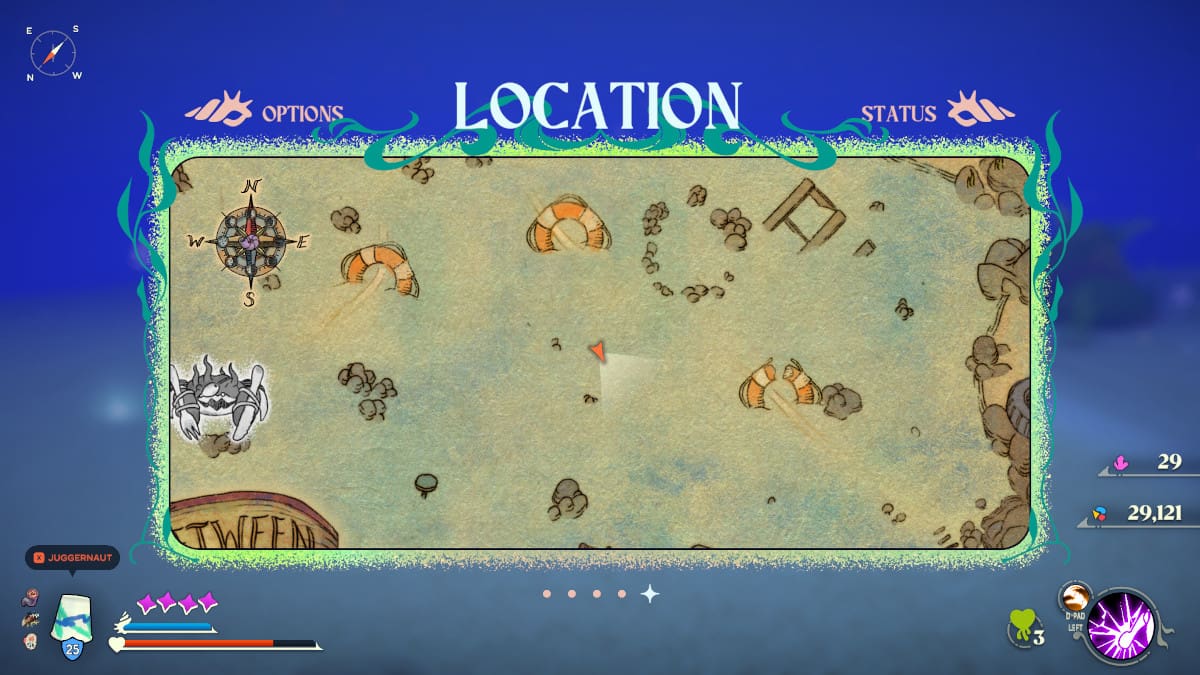
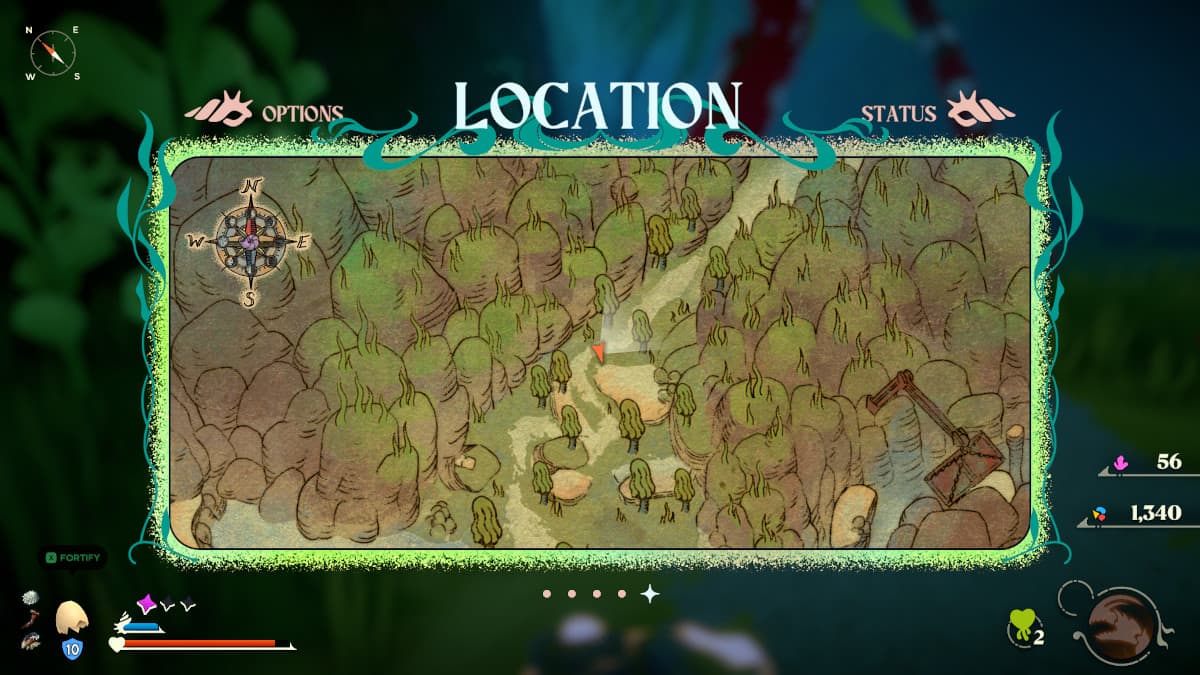
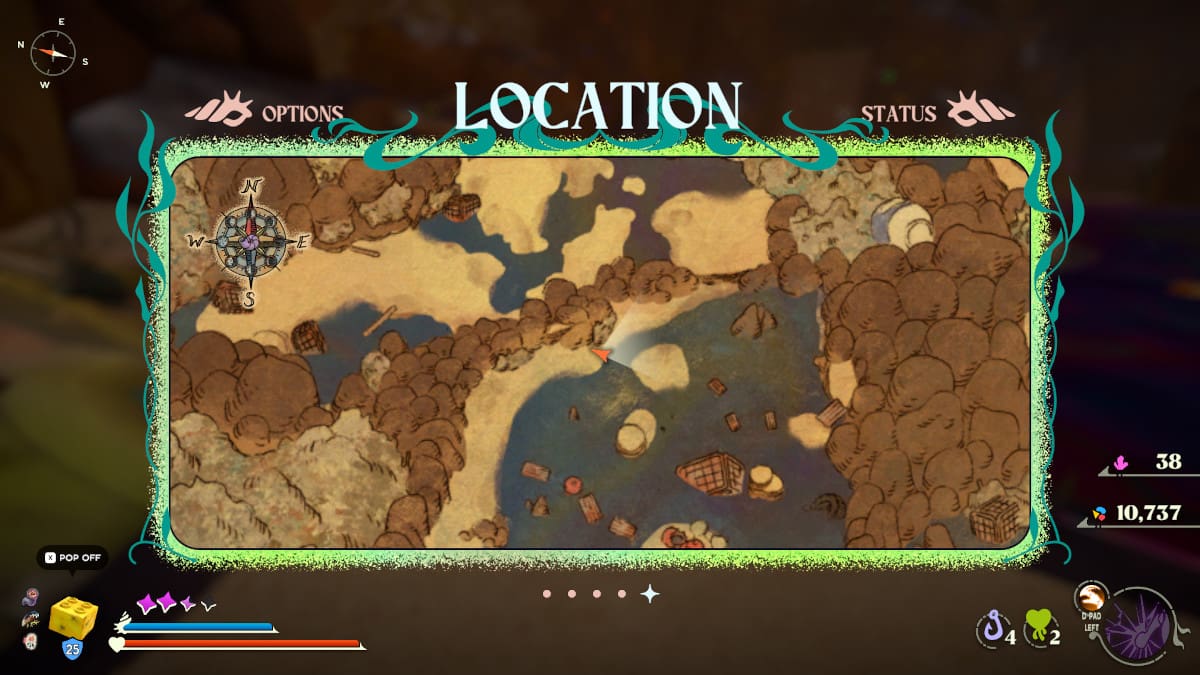
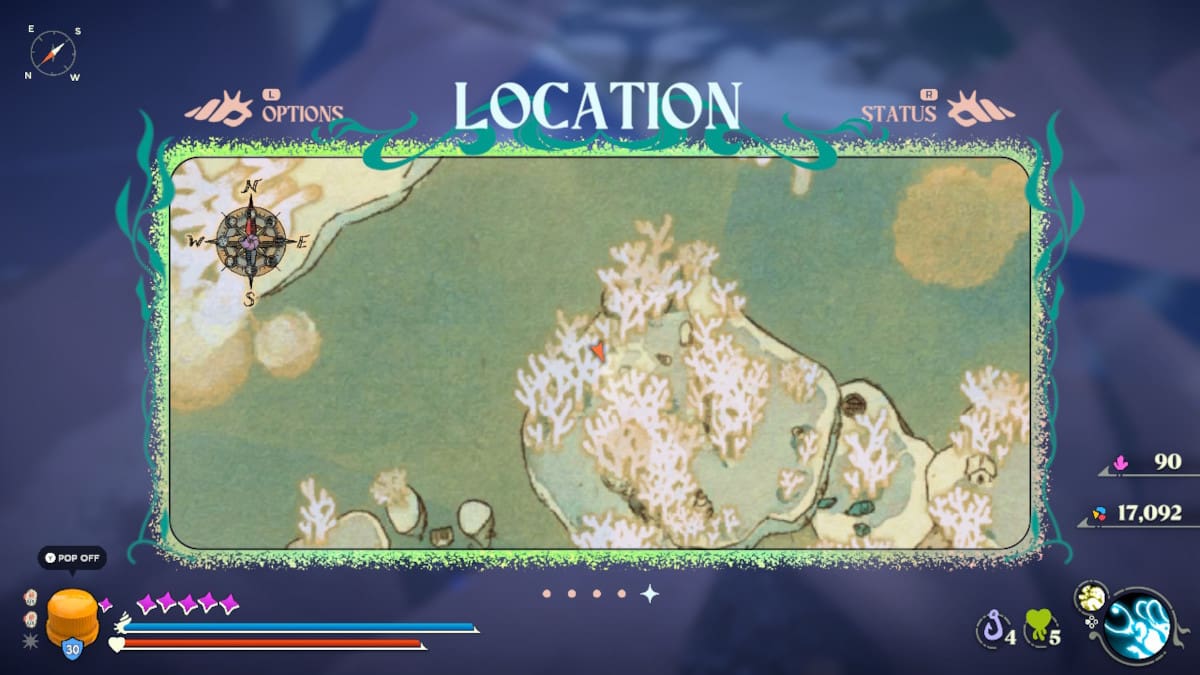
6. Banana Peel
The Banana Peel appears west of the Nephro fight, in the sand. This is a lighter weight shell with less defense than the others. The Munch Umami power is pretty helpful in this area.
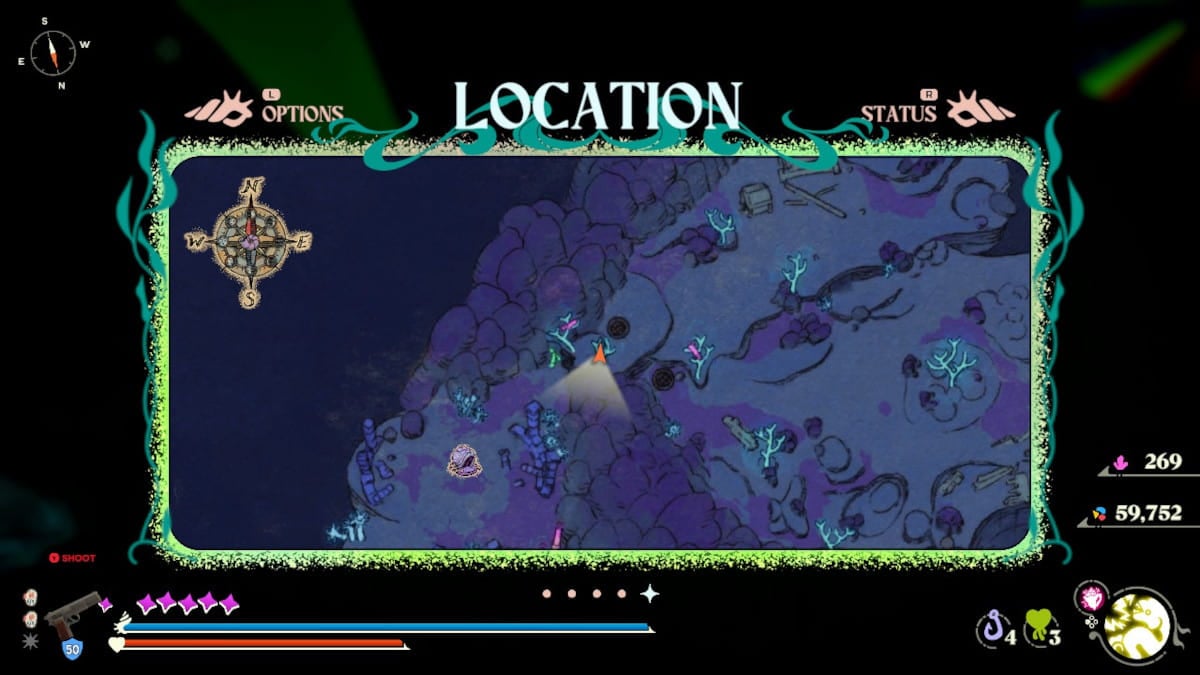
7. Party Hat
This shell is located on a rock with a hair-comb-wielding crab in the Moon Caves. This is the first shell I found that had a bonus on it; the Party Hat gives you additional MSG, which is a little wave icon on its stats.

8. Coconut
You can find the coconut in the courtyard of Fort Slacktide? where there are two lobster knights; this can be found only after claiming the pearl.
9. Teacup
The first teacup shell I found was in Dushess Magistra's arena where you fight her after returning with the Pearl. There are several on the floor located around the fighting area.
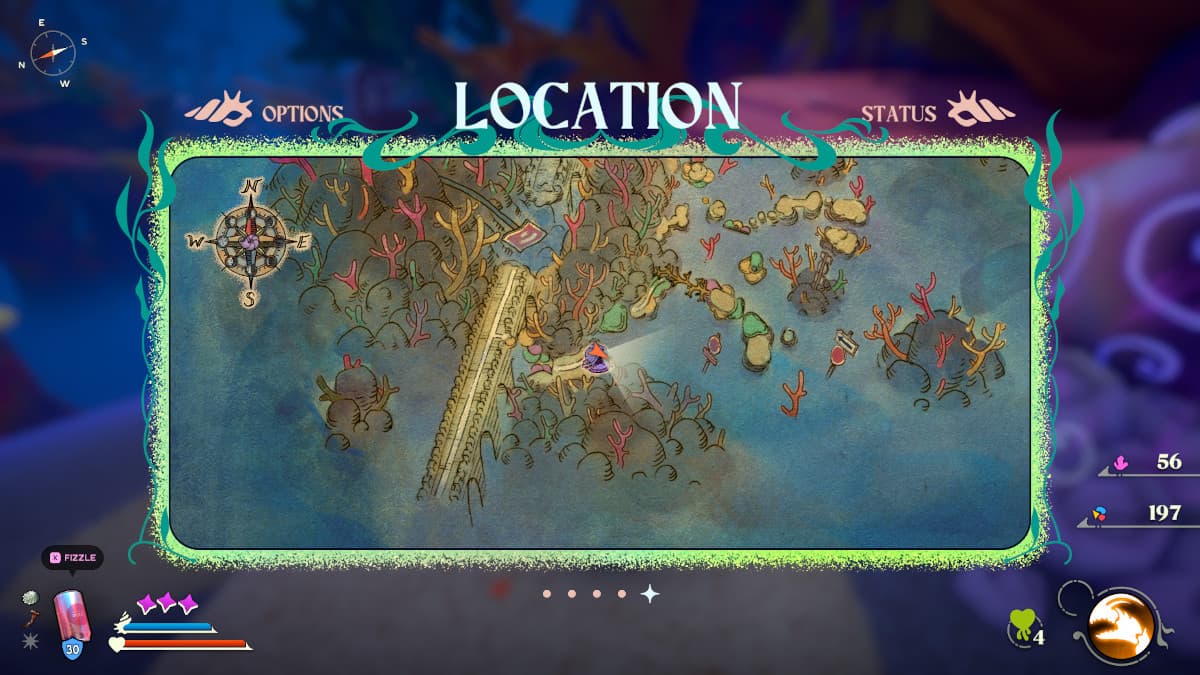
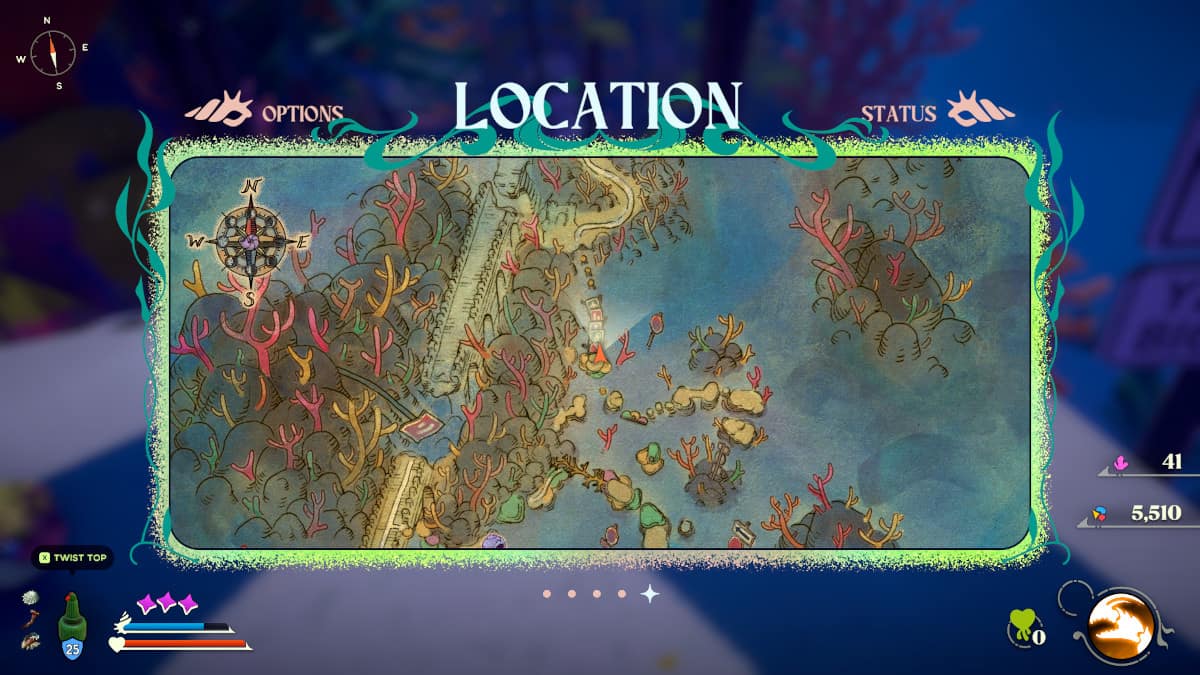
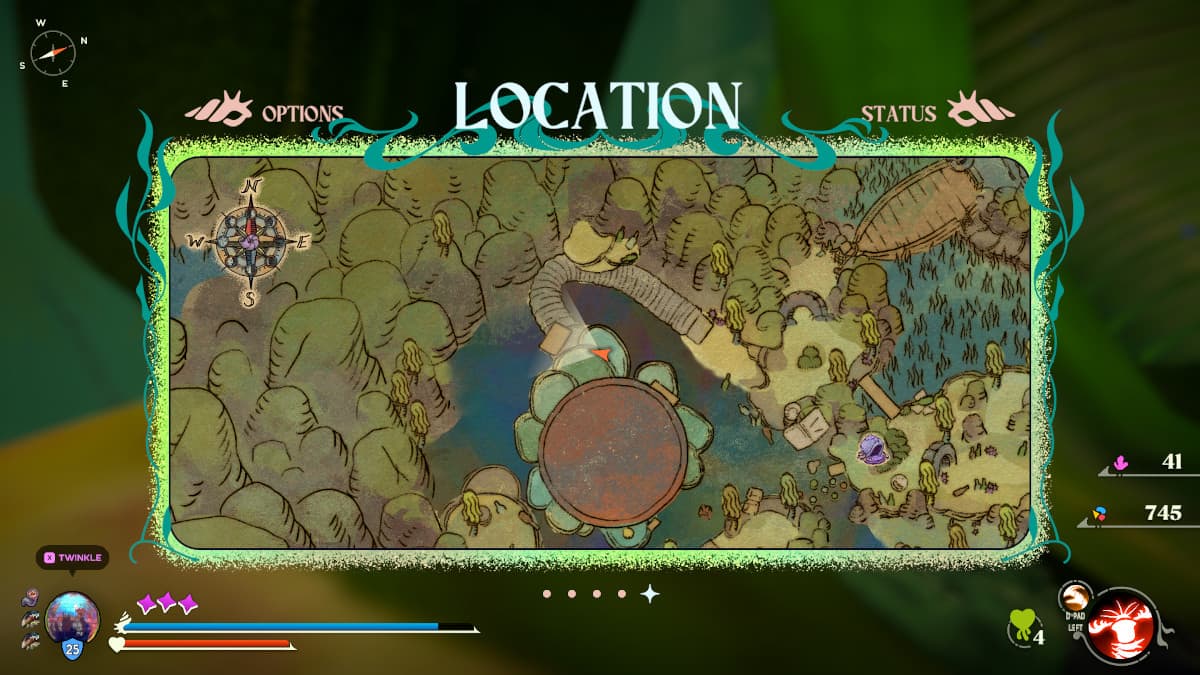
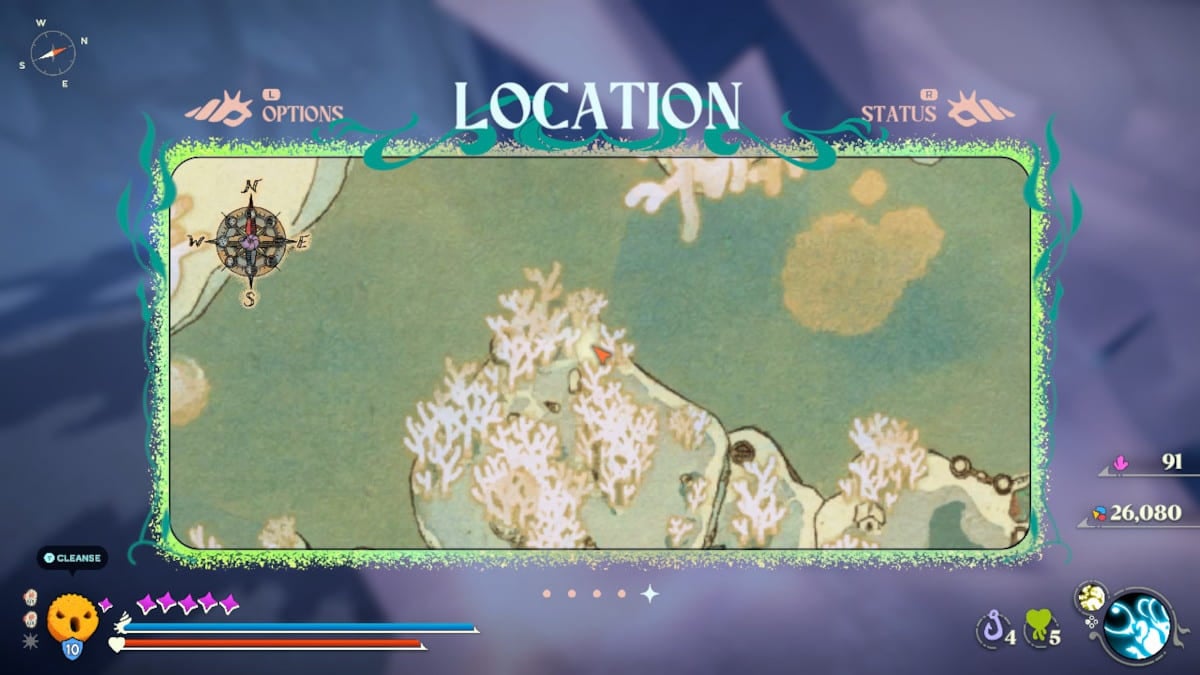
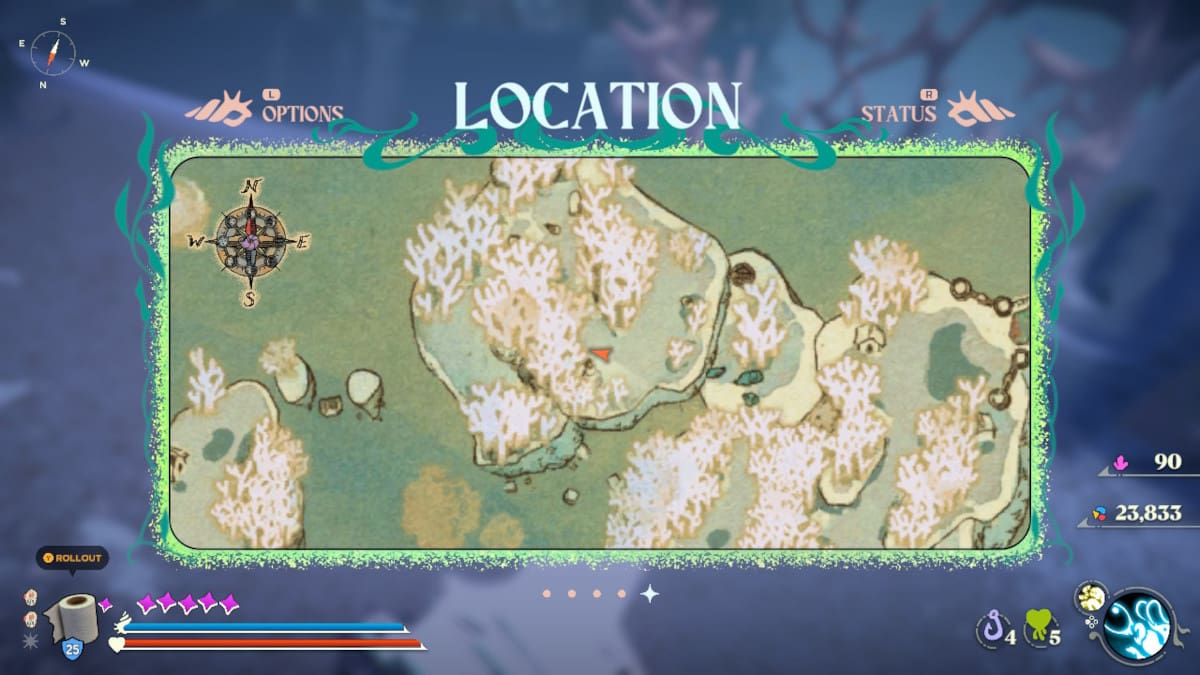
10. Sauce Nozzle
The first time you can find one of these is on the road to the Big City. It is located next to the Moon Snail Shell, which is this game's version of a bonfire or save point, in Reef's Edge.
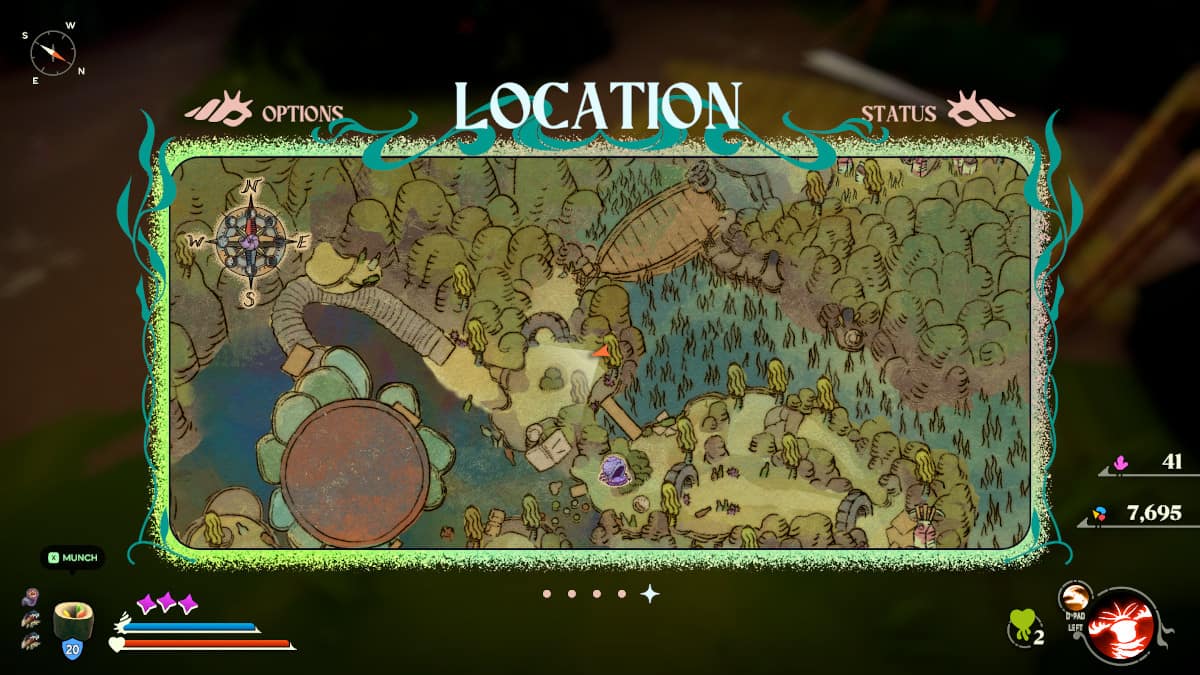
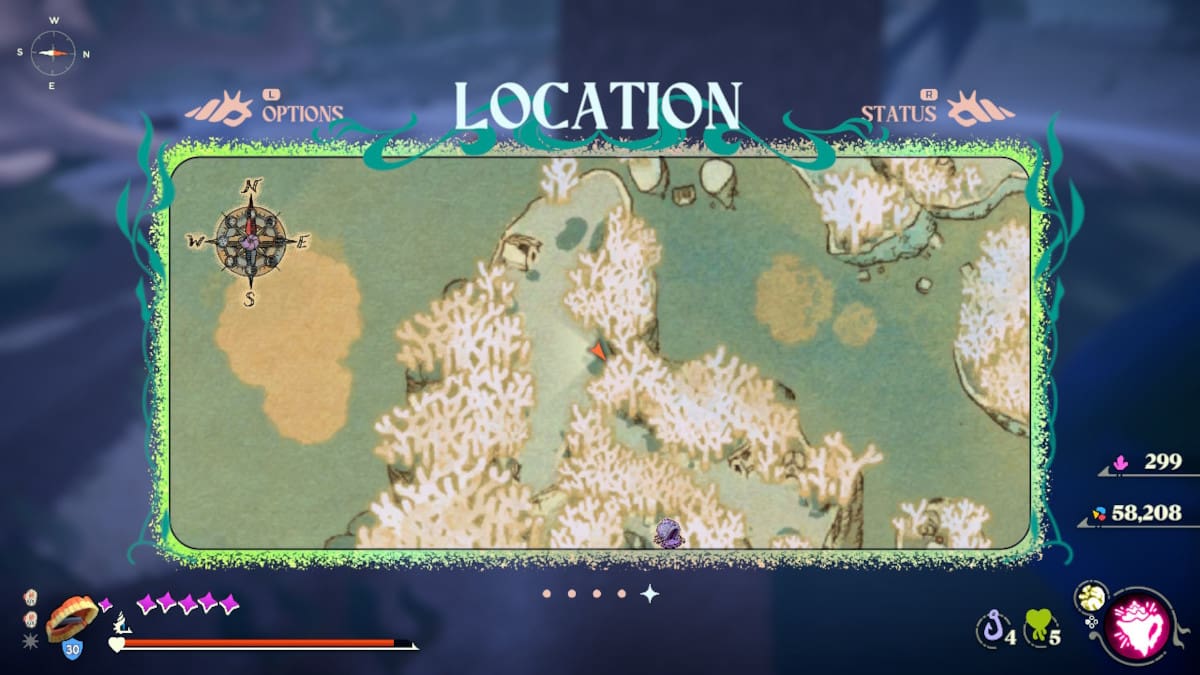
11. Thimble
This one is found along the route to get to the Big City; it can be found after killing crabs in Reef's End. It's in a couple of other places, but this was the first one I found.

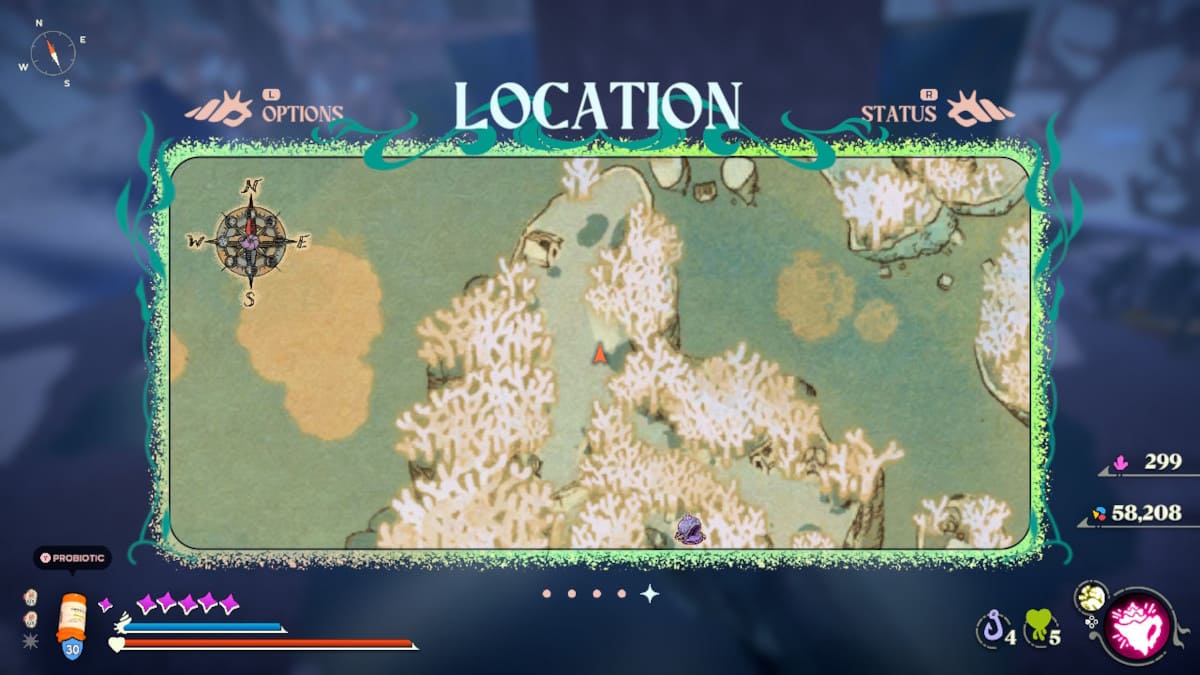
12. Bebop Cup
This classic paper cup design is dropped after killing the boss of Sands Between, Pagurus, and The Ravenous. He will be wandering about in this location, chasing down any intruder to take them out.
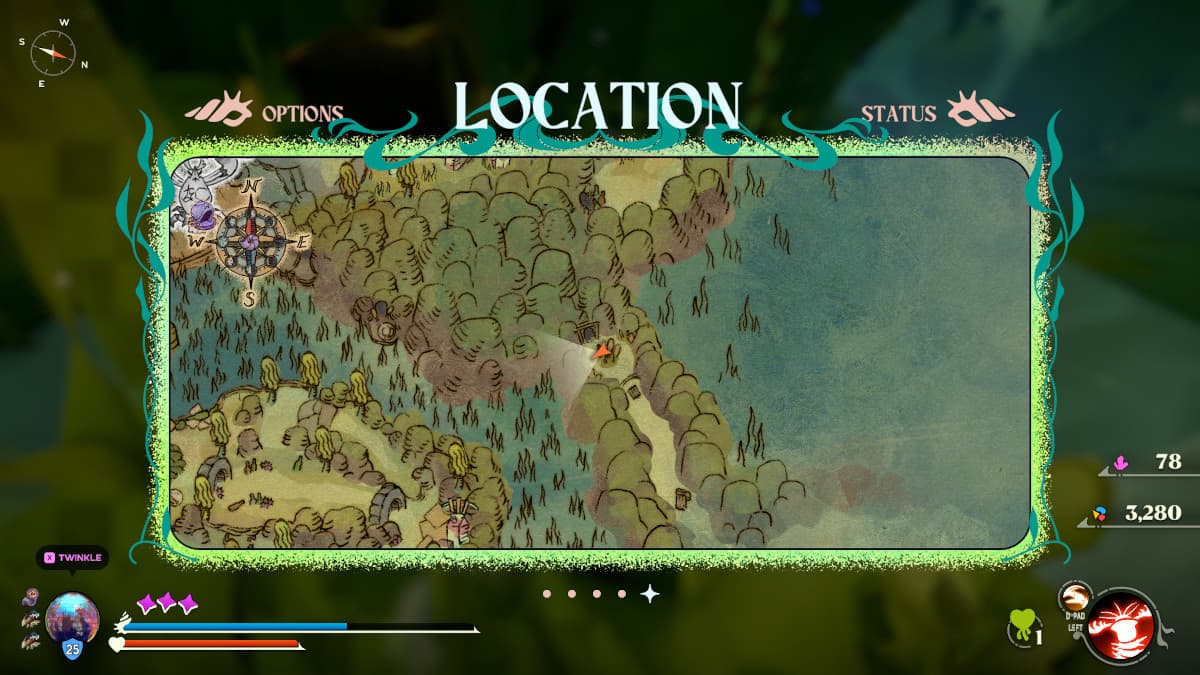
13. Tennis Ball
A Tennis Ball can be found at the top of the ramp made of street signs in Reef's End where the NPC talks to you about speed. This will be used to roll down the ramp, so you really can't miss this one.
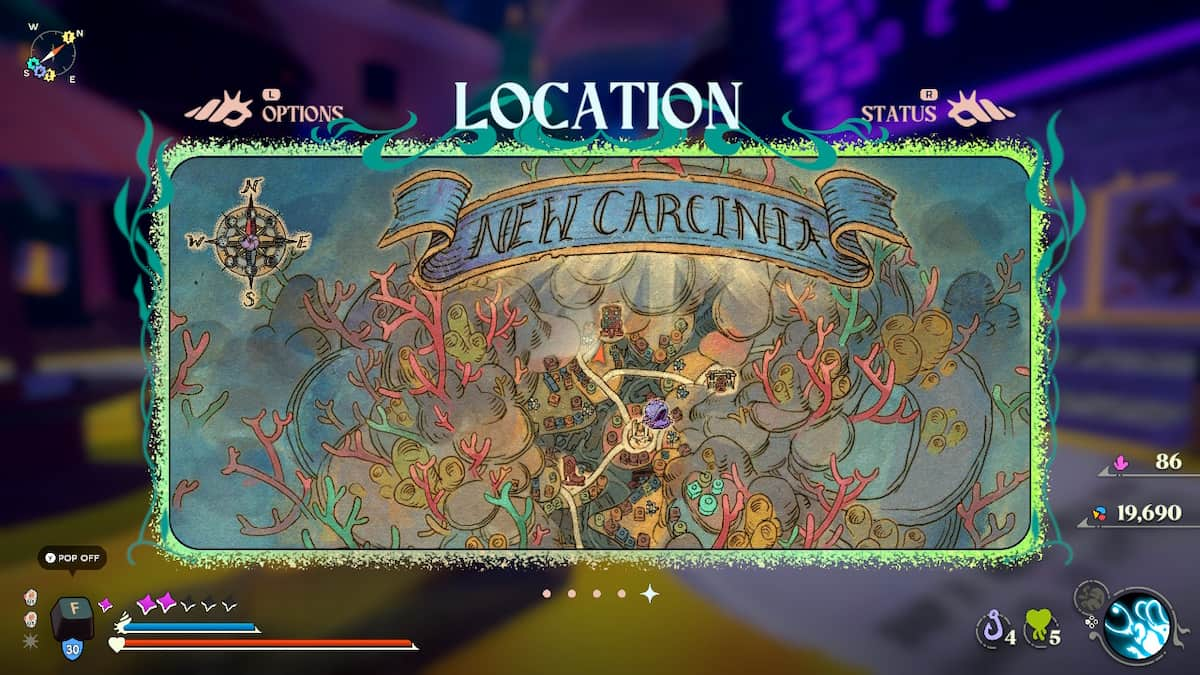
14. F
There appears to only be one of these in the whole game. It can be found in New Carcinia, one the sign for the Shellfish Desires. Look up at the sign and use the grappling hook in order to pull it down.
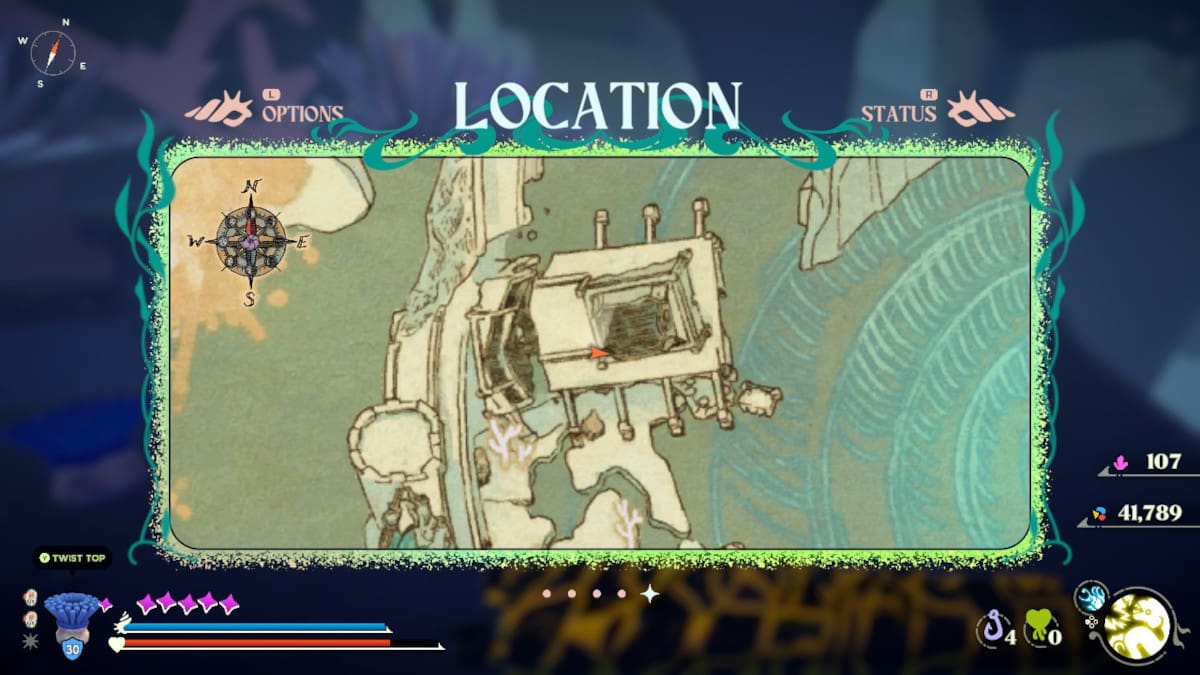
15. Mason Jar
The Mason Jar shell has the same Umami power as the shot glass; it creates spikes around you whenever you block with it. You can find one on a tall pillar that you have to grapple to near the Expired Knoll Moon Snail Shell.
16. Salt Shaker
The Salt Shaker has the same Shards Umami power as the Shot Glass and Mason Jar shells. You can find it near the Upper Swamp Moon Snail Shell in Flotsam Vale.
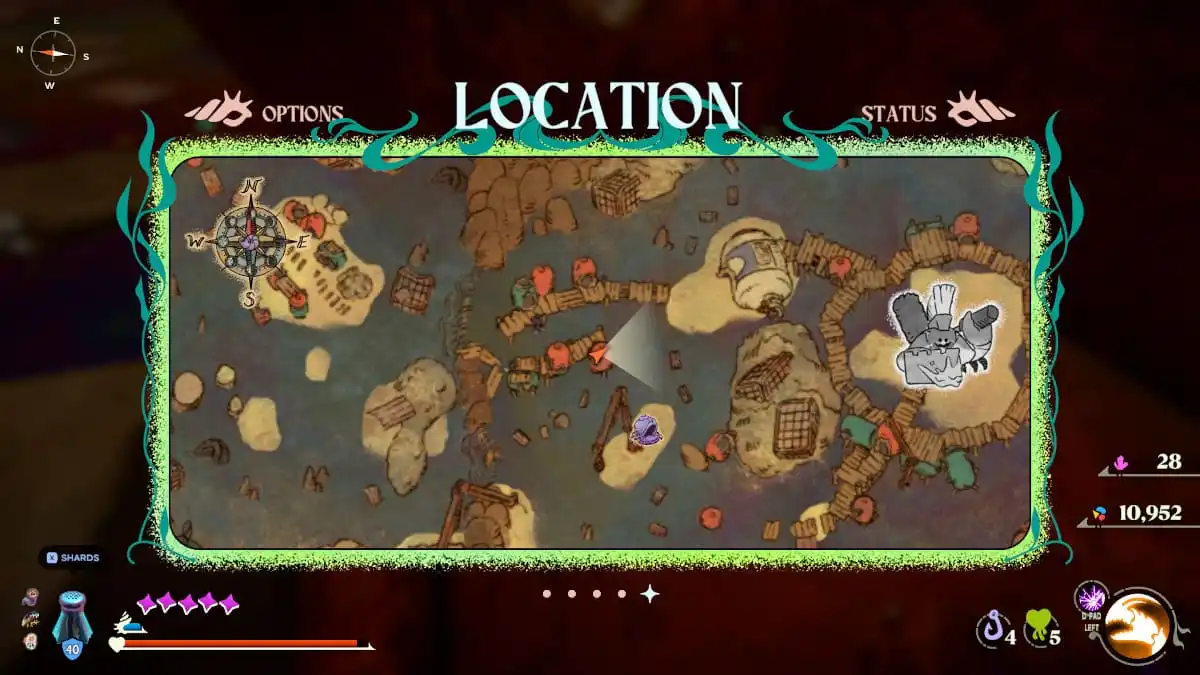
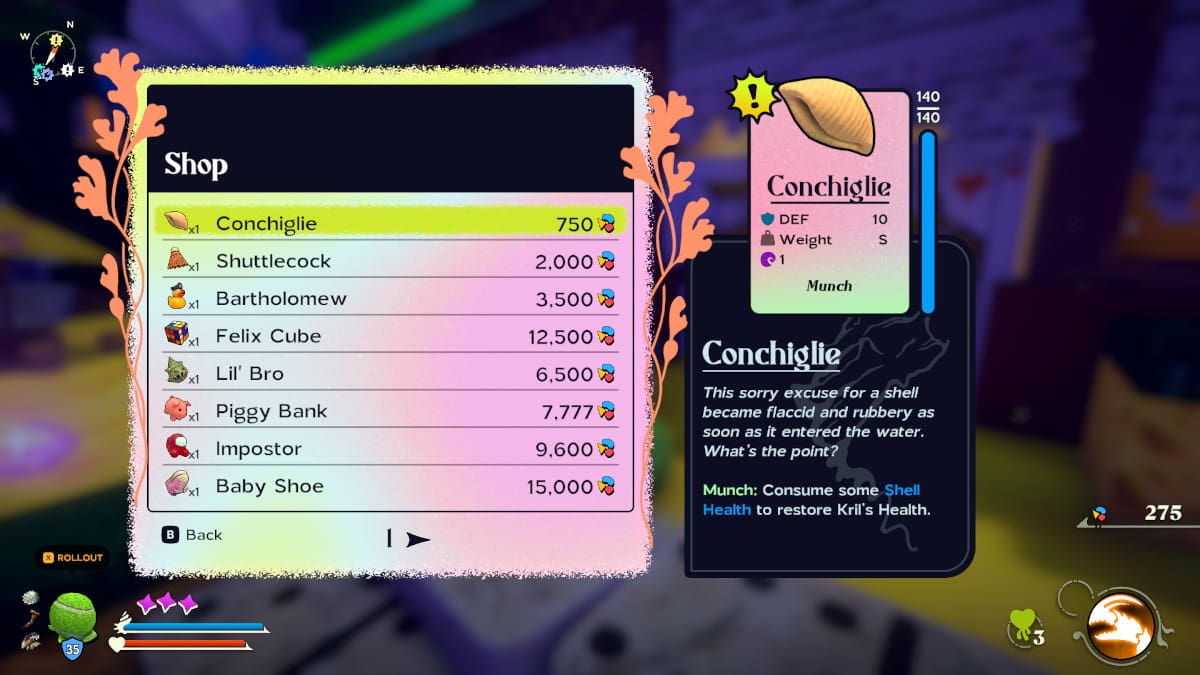
17. Conchiglie
The Conchiglie is on sale in New Carcinia, and you can purchase it for 750 microplastics. Just head to the Shellfish Desires to pick one up for yourself.
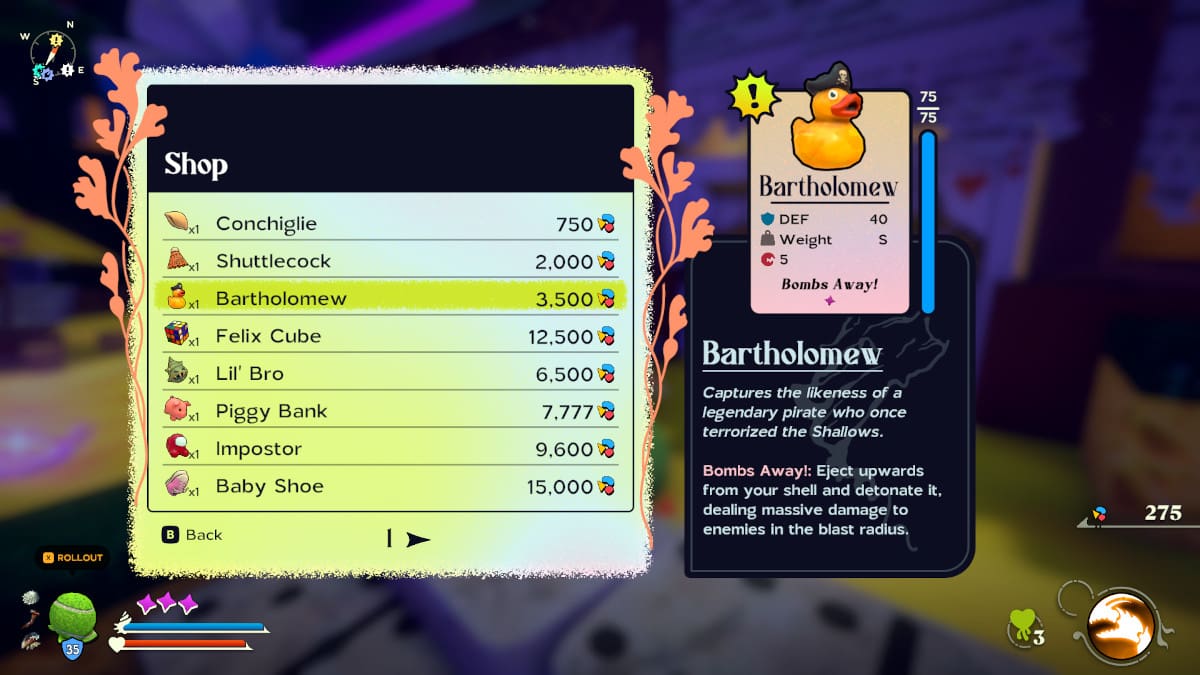
18. Bartholomew
Number 18 on the list of all 69 shells is Bartholomew, a Rubber Duck look-alike, but he has a pirate hat. In order to get him, you'll need 3,500 microplastics, and then you can buy him at the Shellfish Desires in New Carcinia.
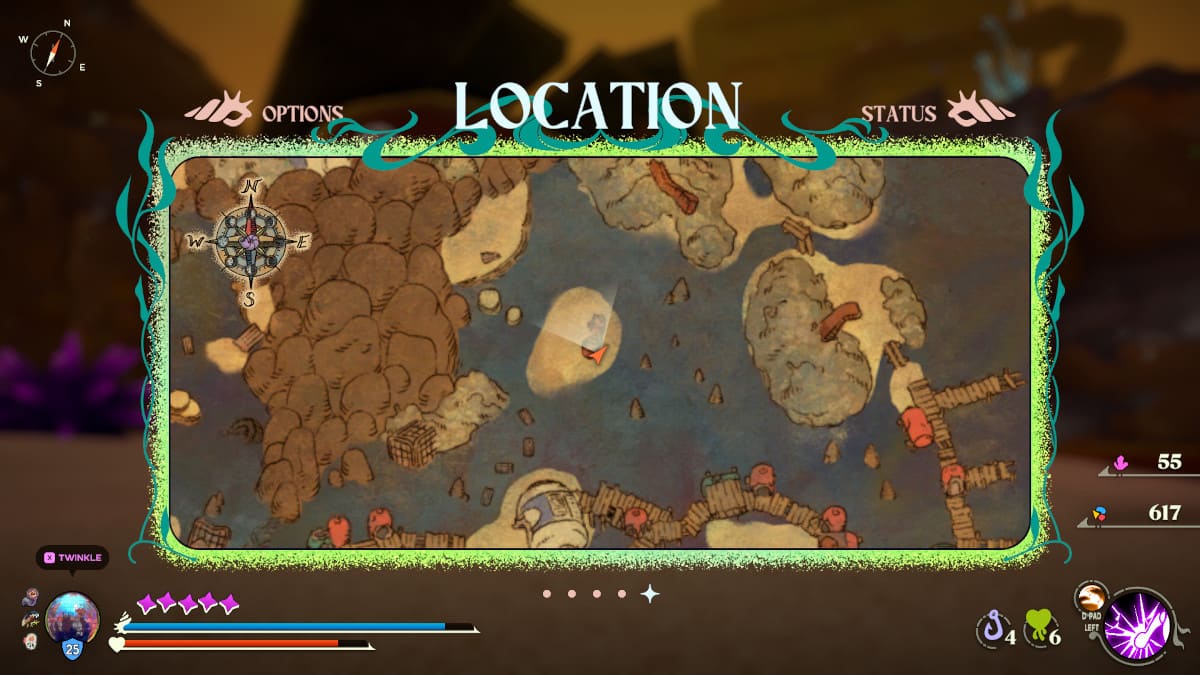
19. Disco Ball
There is a crab rave going on, and if you speak to the NPC in this location, he tells you the music never stops. Float over to the platform where all the crabs are dancing, and kill them all. One of these crabs will have a Disco Ball on its head.
20. Baby Shoe
The Baby Shoe is Another Chance shell, and it can only be found at the Shellfish Desires in New Carcinia. It will cost a pretty penny; this one goes for 15,000 microplastics.

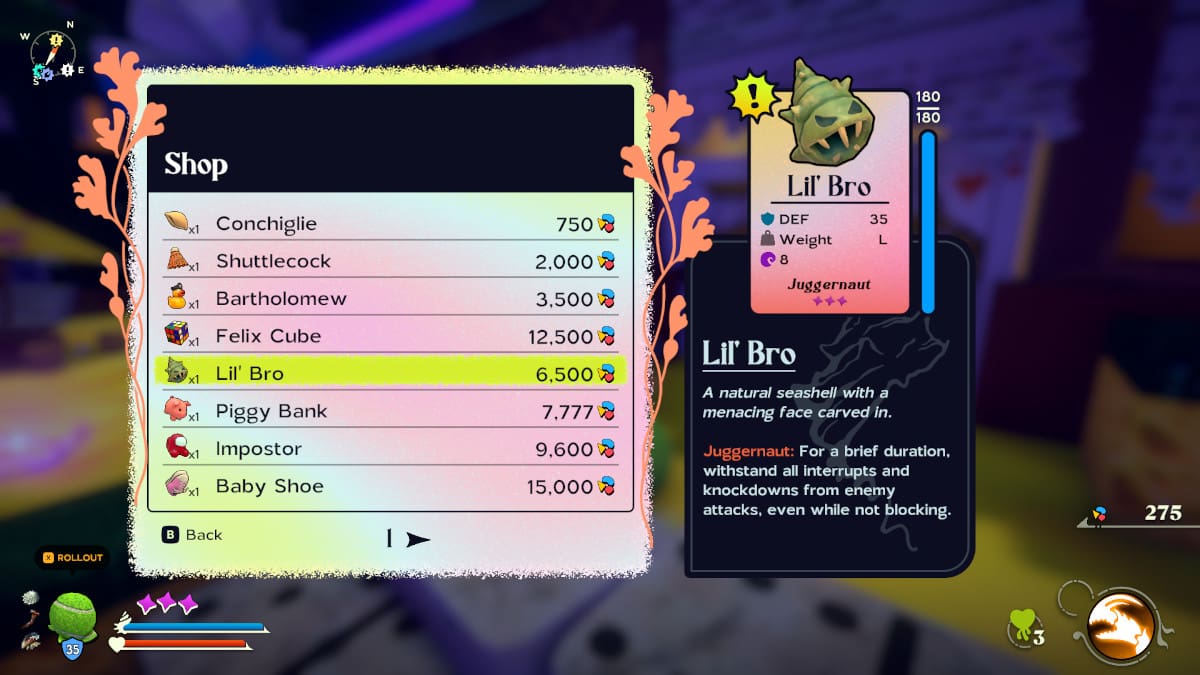
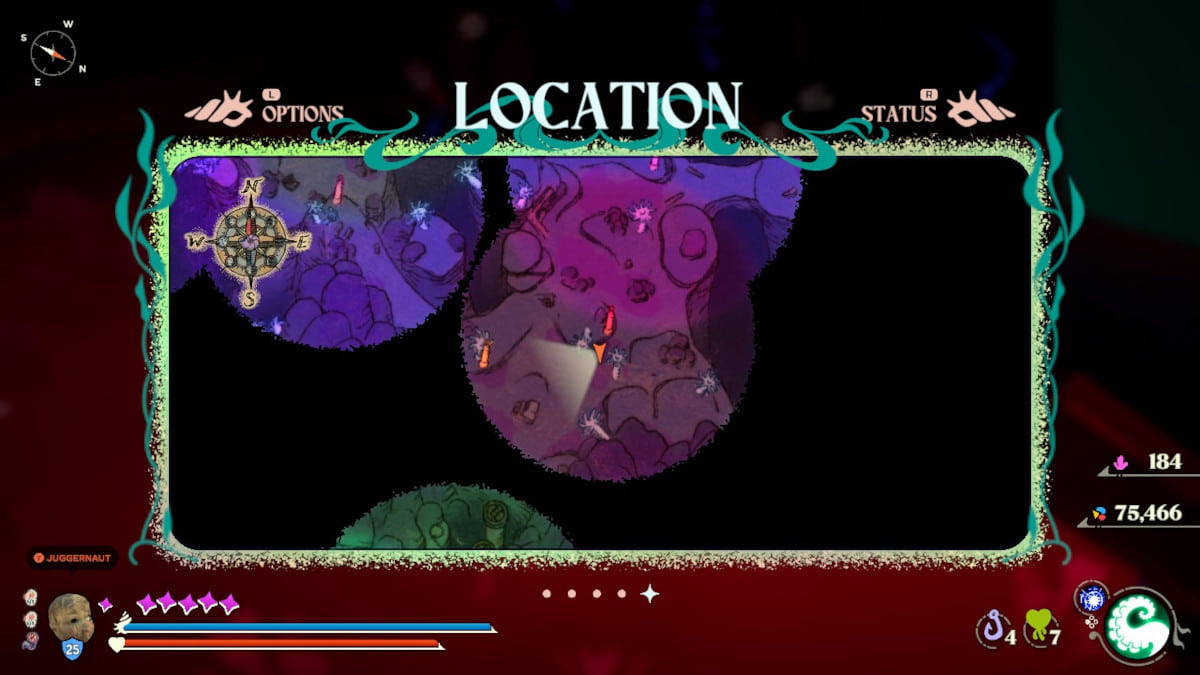
21. Lil' Bro
Lil' Bro is another shell that can only be purchased. You'll have to head to New Carcinia and go to the Shellfish Desires to pick this shell up for yourself.
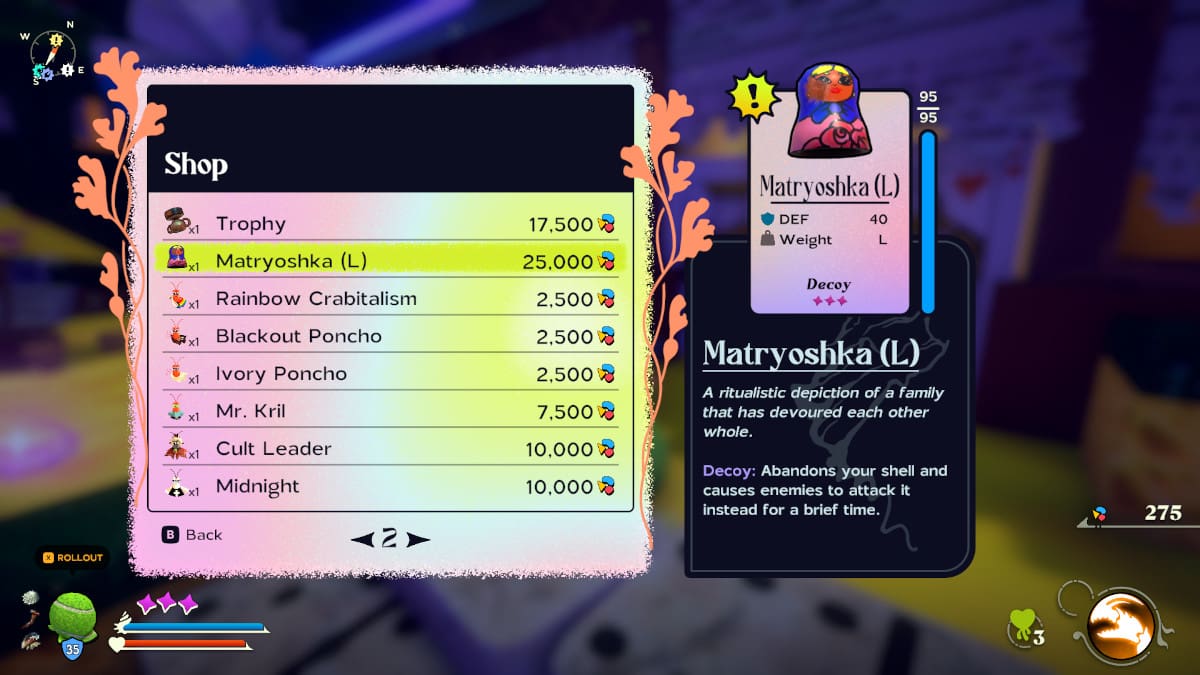
22. Matryoshka (L)
There are three different sizes of Matryoshka shells: large, medium, and small. The medium and small ones are found inside of the big one, which needs to be purchased with microplastics in New Carcinia. It'll run you a staggering 25,000, but you get three shells in one.
23. Matryoshka (M)
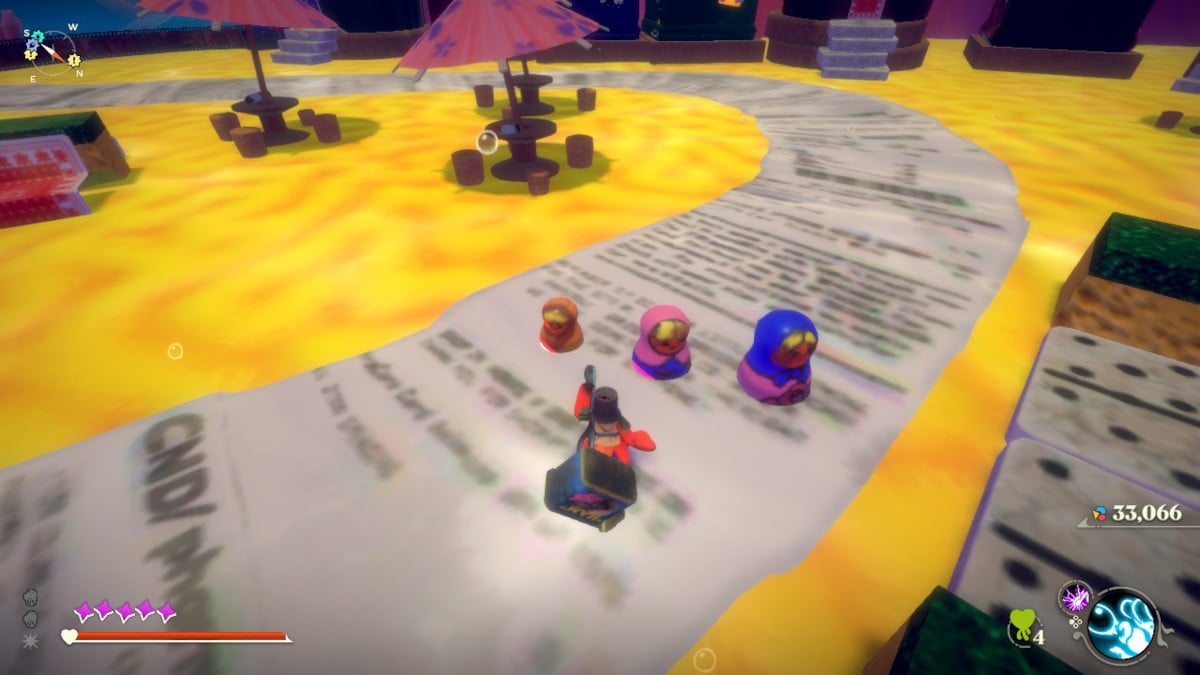
The medium Matryoshka is located inside of the large Matryoshka; you need to use the Decoy Umami power of the large one to get the smaller version of it. Each time you use it, your doll shell will get a little bit smaller, which means the next shell is found the same way.
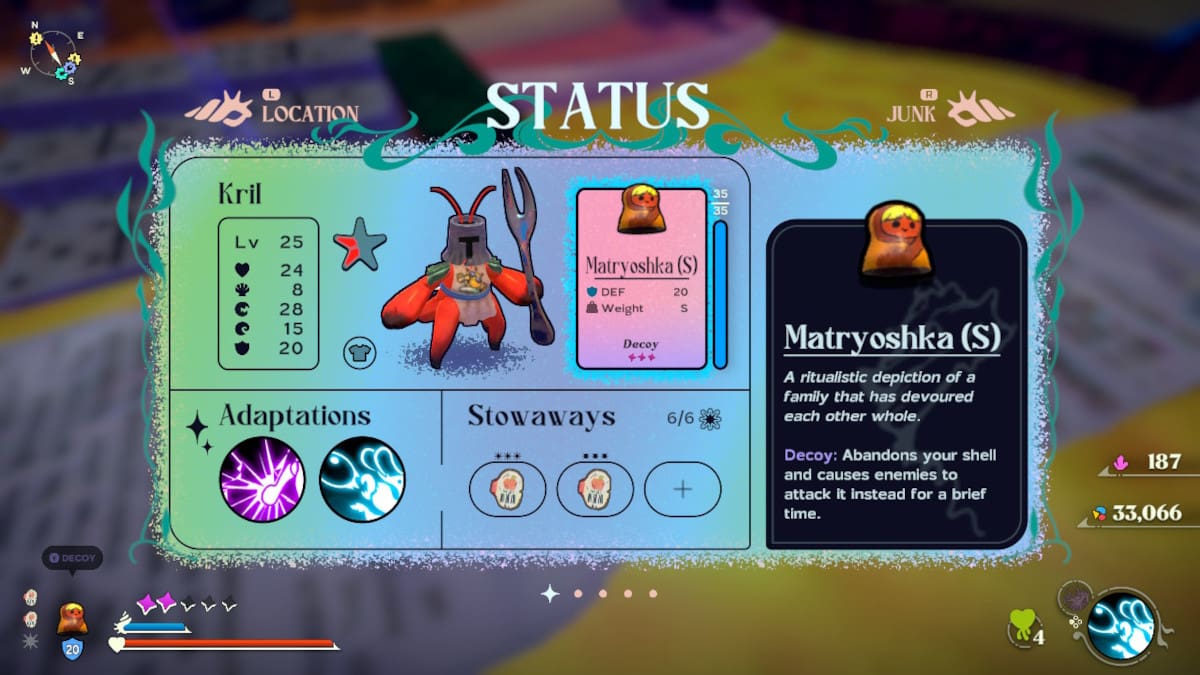
24. Matryoshka (S)
The small Matryoshka shell is found inside the medium Matryoshka shell, which is found inside of the large one. In order to get the smallest one, you need to use the Decoy Umami power of the large one and then use the Decoy power of the medium one.
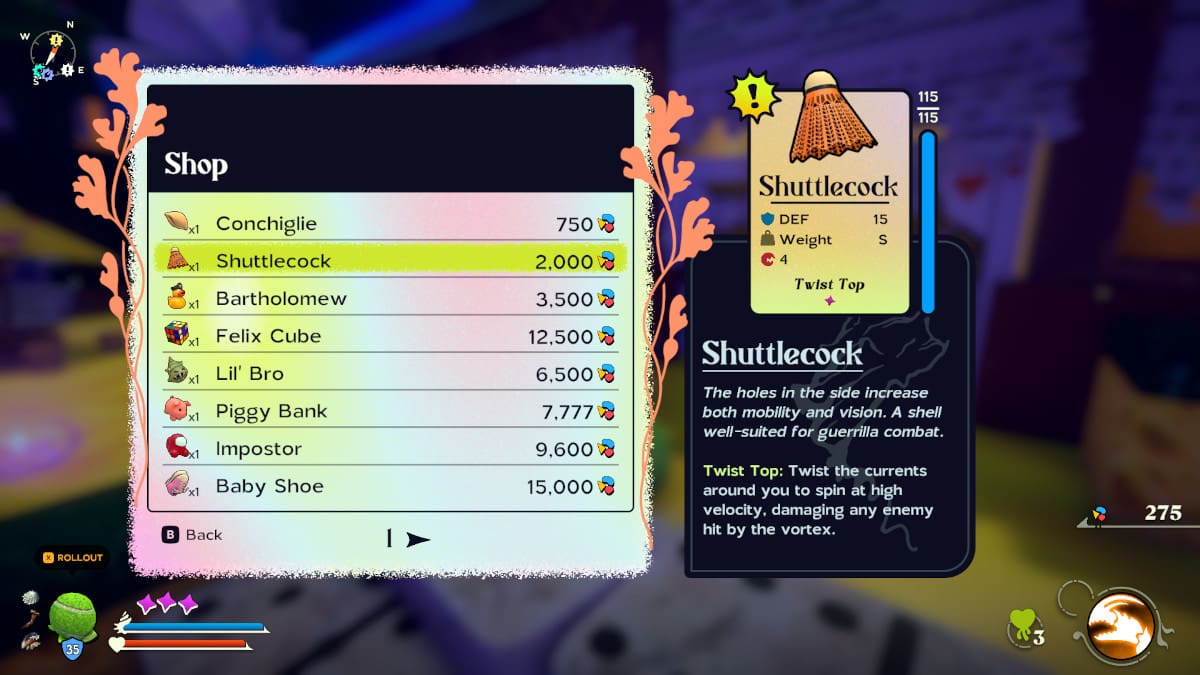
25. Shuttlecock
The Shuttlecock is a Twist Top shell that also needs to be purchased. If you head to the Shellfish Desires in New Carcinia, you will be able to pick this shell up for just 2,000 microplastics.
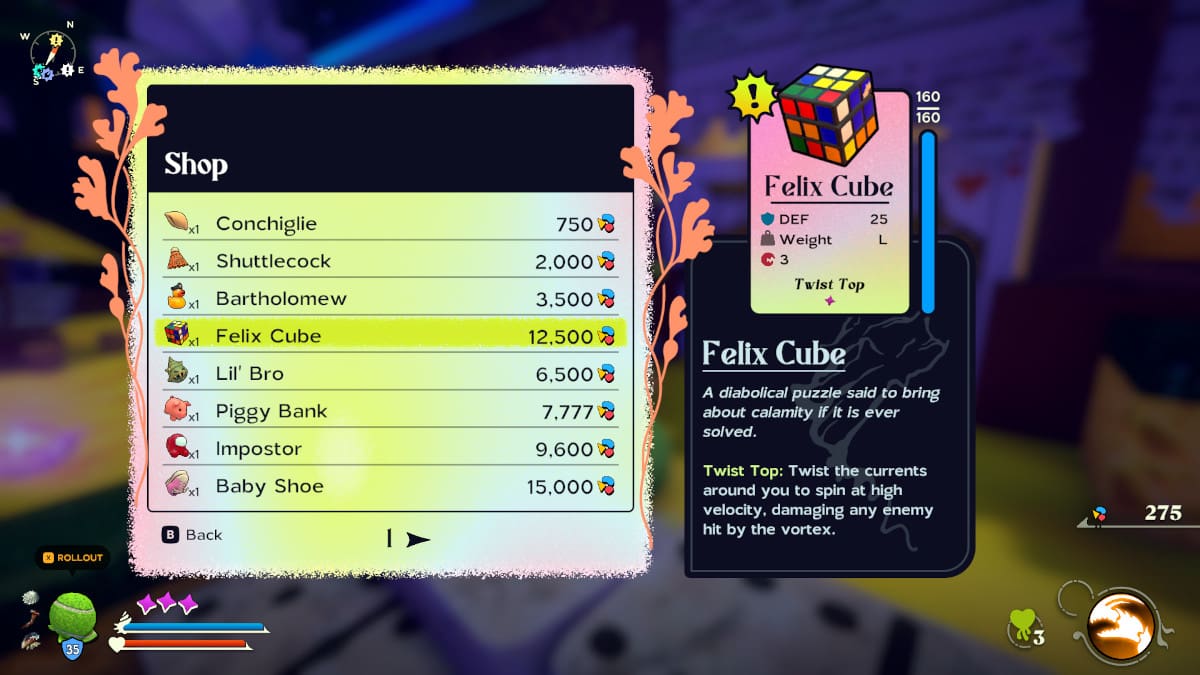
26. Felix Cube
The Felix Cube, which is totally not a trademarked Rubric Cube, is also only located in the shop inside of the big city of New Carcinia. It is a L weight shell that will run you 12,500 microplastics.
27. Piggy Bank
In order to get the three-star Piggy Bank shell to round out your collection, you'll need to gather 7,777 microplastics to pay for it. It will be in the Shellfish Desires in New Carcinia.

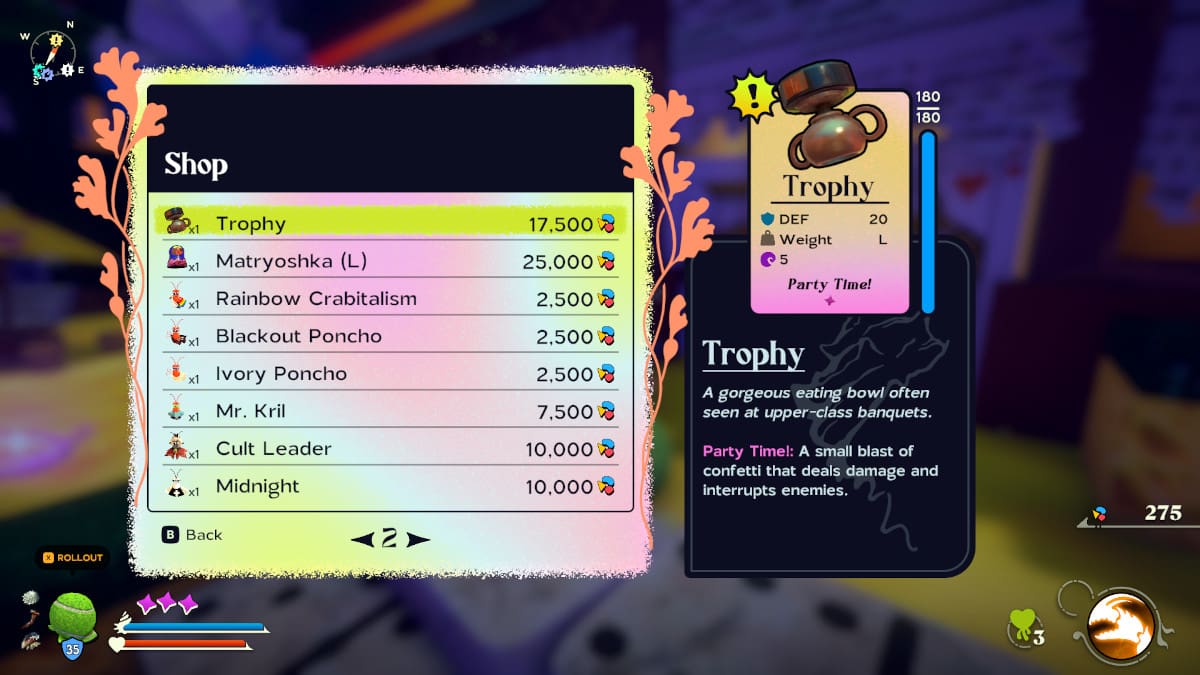
28. Trophy
The Trophy shell is a Party Time! shell that needs to be purchased in the big city. While you are walking down the CND receipt roads, you can find the Trophy shell at the Shellfish Desires for 17,500 microplastics.
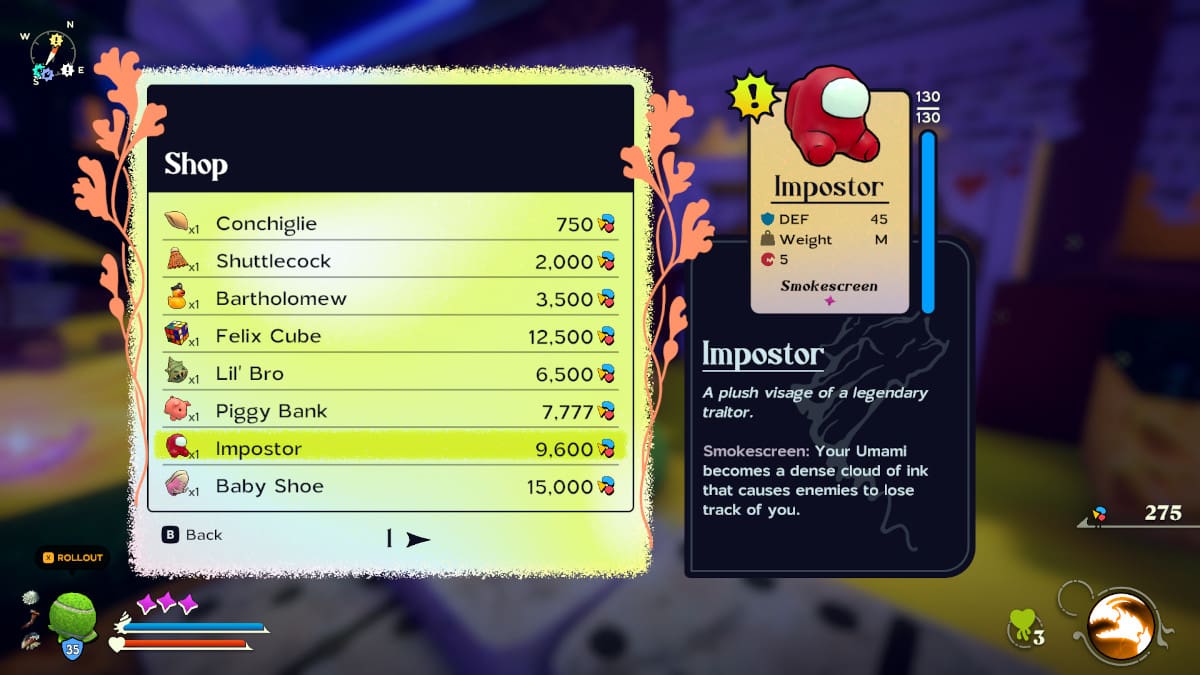
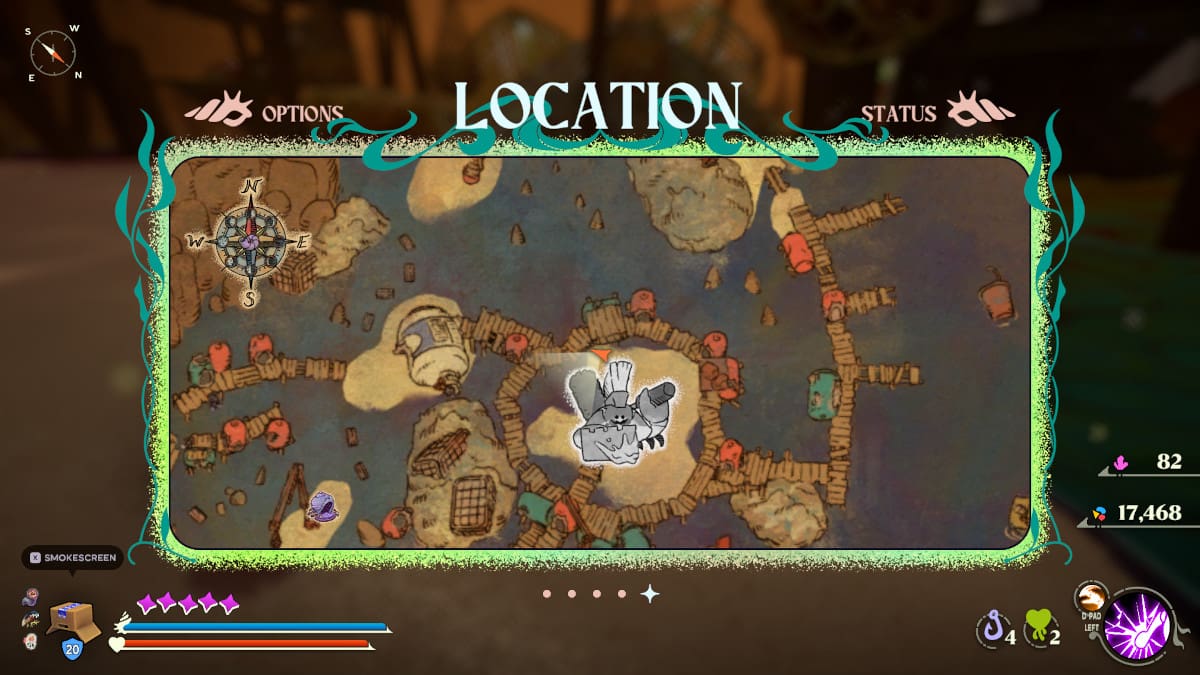
29. Imposter
The Imposter shell is a Smokescreen shell based on Among Us. You can find this adorable murderer inside New Carcinia, for sale at the Shellfish Desires. It will cost you 9,600 microplastics to pick him up.
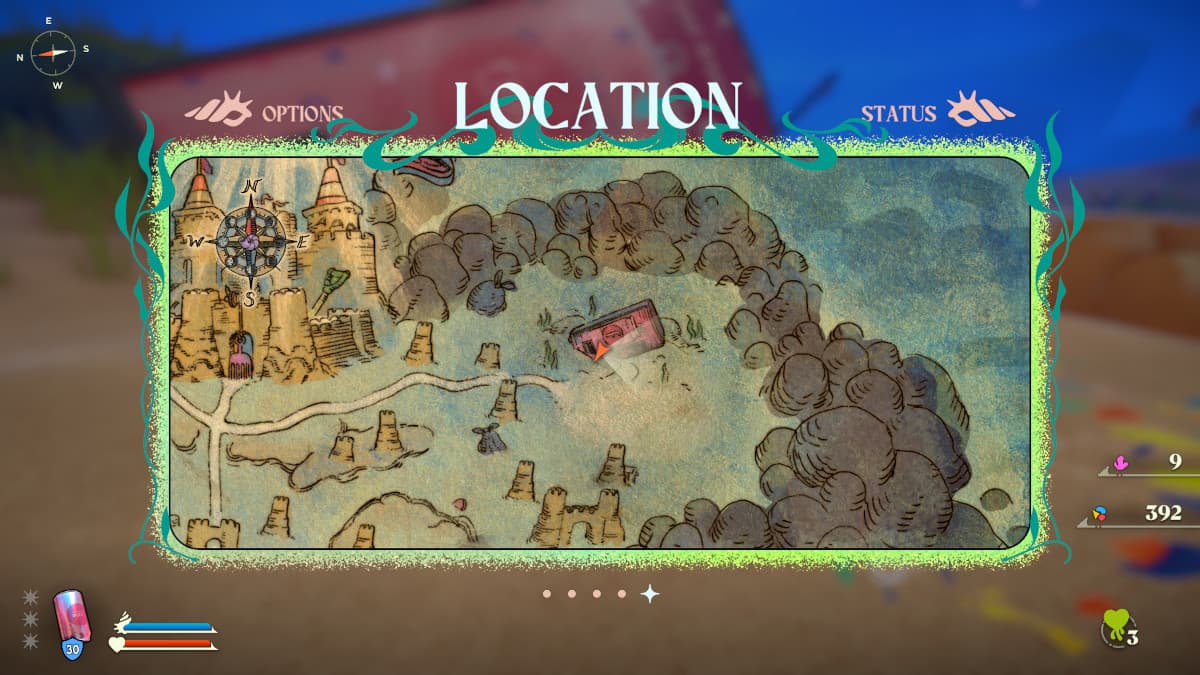
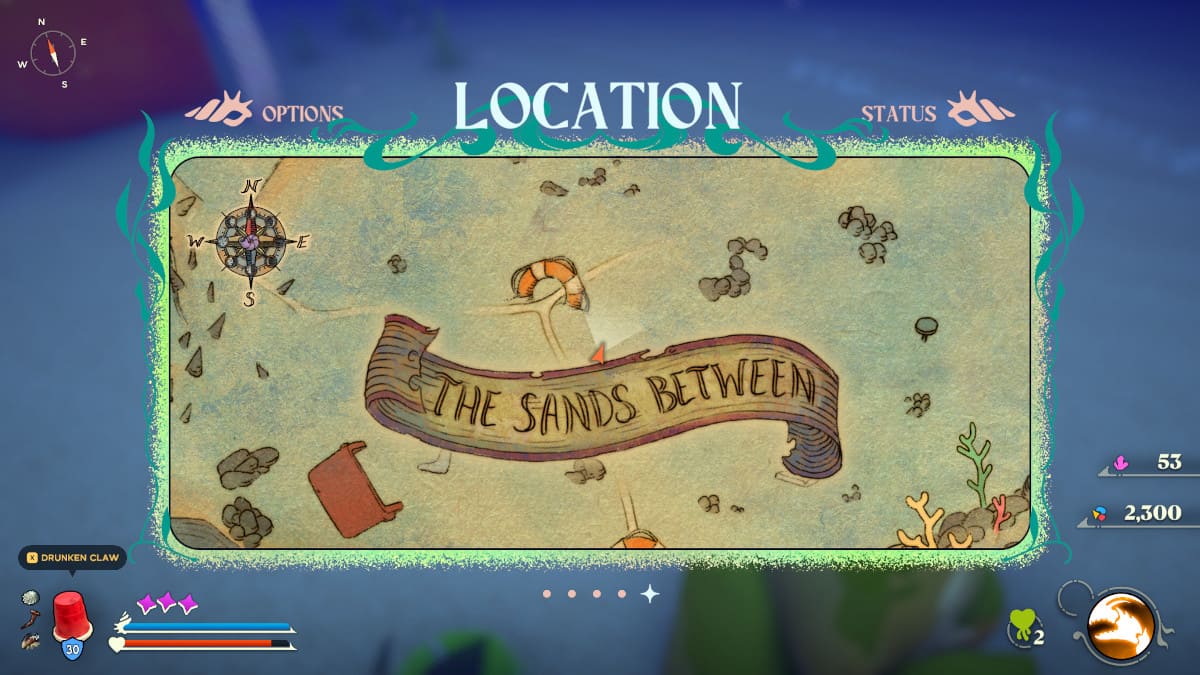
30. Lil' Red Cup
This Solo cup look-a-like can be found lying around on the ground in the Sands Between. This is the first location where I found one of these shells.
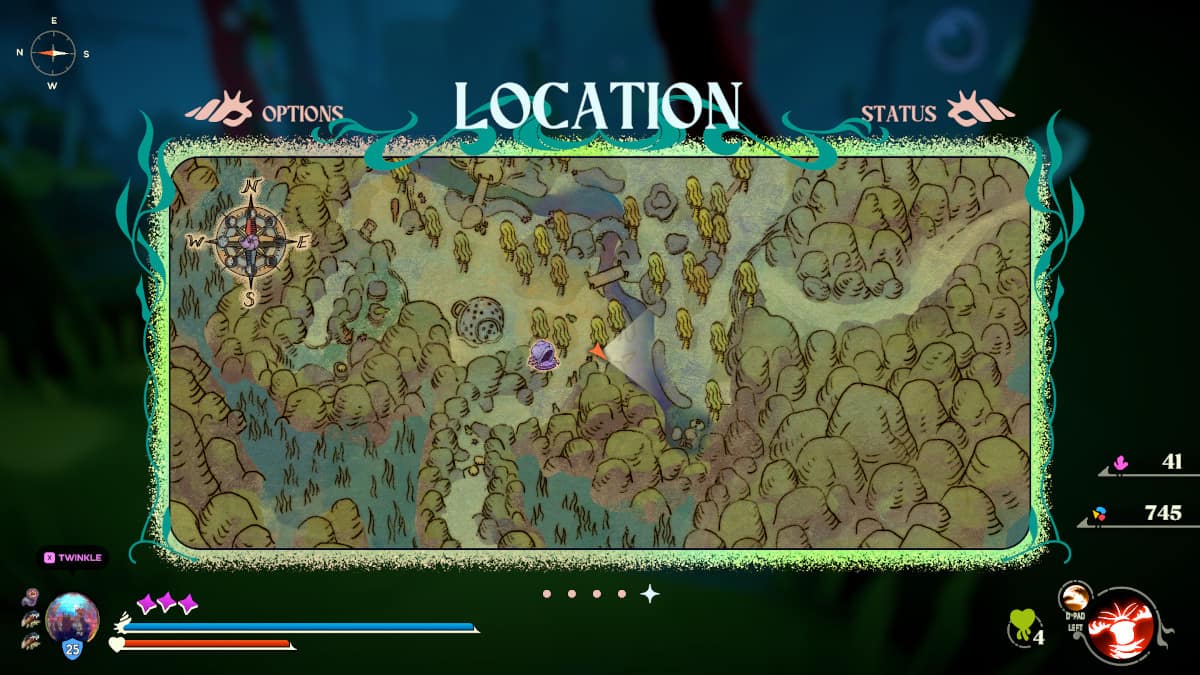
31. Wafer Cone
There are tons of these located all over the Expired Grove, but this is one place where you will always find a Wafer Cone. Head east from the fast-travel spot below in order to find one of these ice cream cone shells.
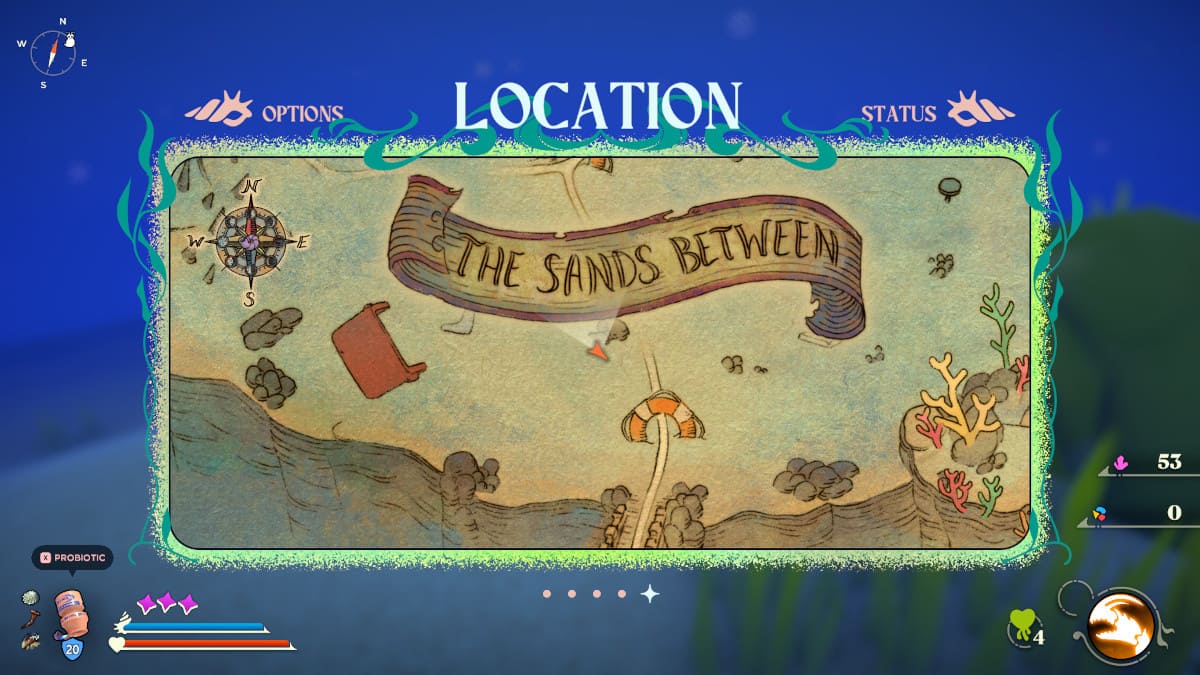
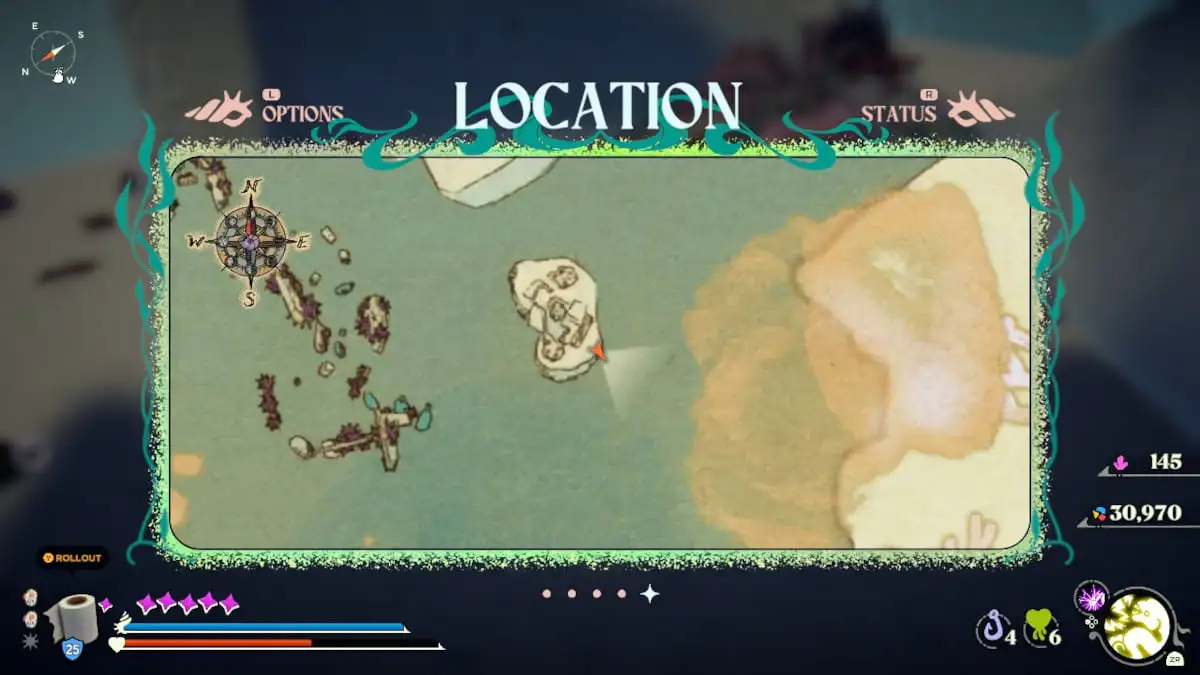
32. Yoccult
This yogurt cup-shaped shell is found in the Sands Between, but watch out for the boss wandering around this area while you are looking; Pagurus, The Ravenous will attack from almost anywhere in this area.
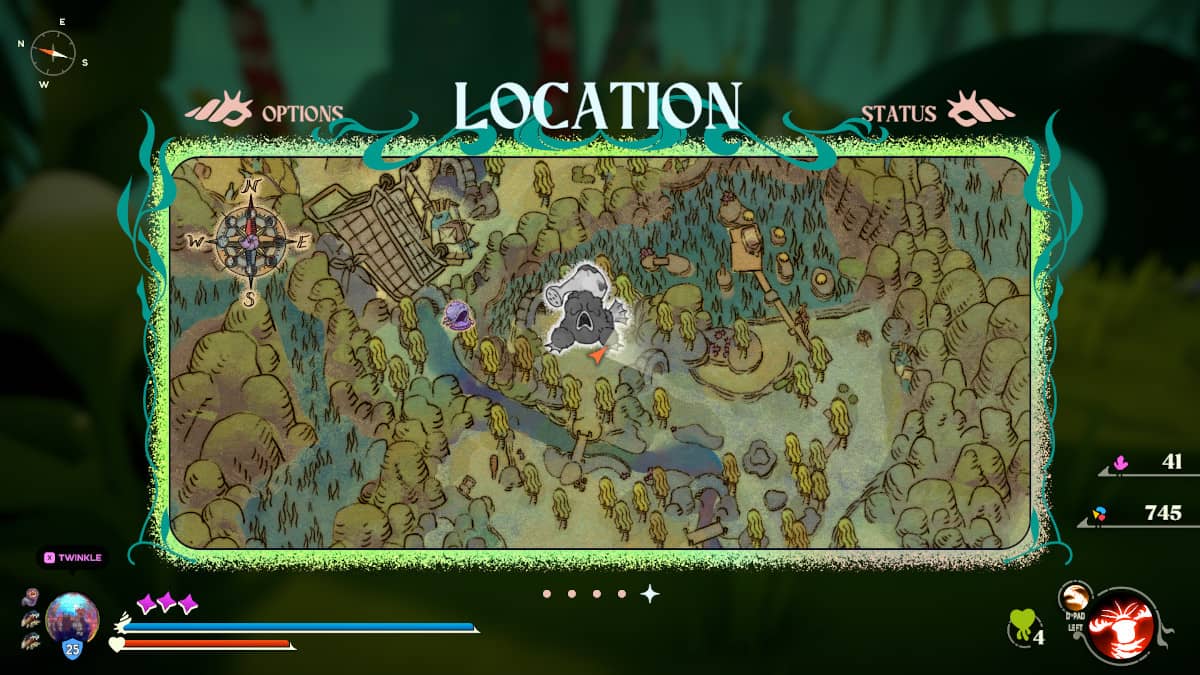
33. Coffee Pod
In the same location as the Wafer Cone shell, you can also find the Coffee Pod shell. It is located in the Expired Grove; I found one near the boss arena in this area.
34. Egg Shell
If you fast travel to the Expired Knoll Moon Snail Shell in the Sands Between, you can find some Egg Shell shells around this area. Swap out your current shell for the Egg Shell to get it to count toward your shell completion achievement.
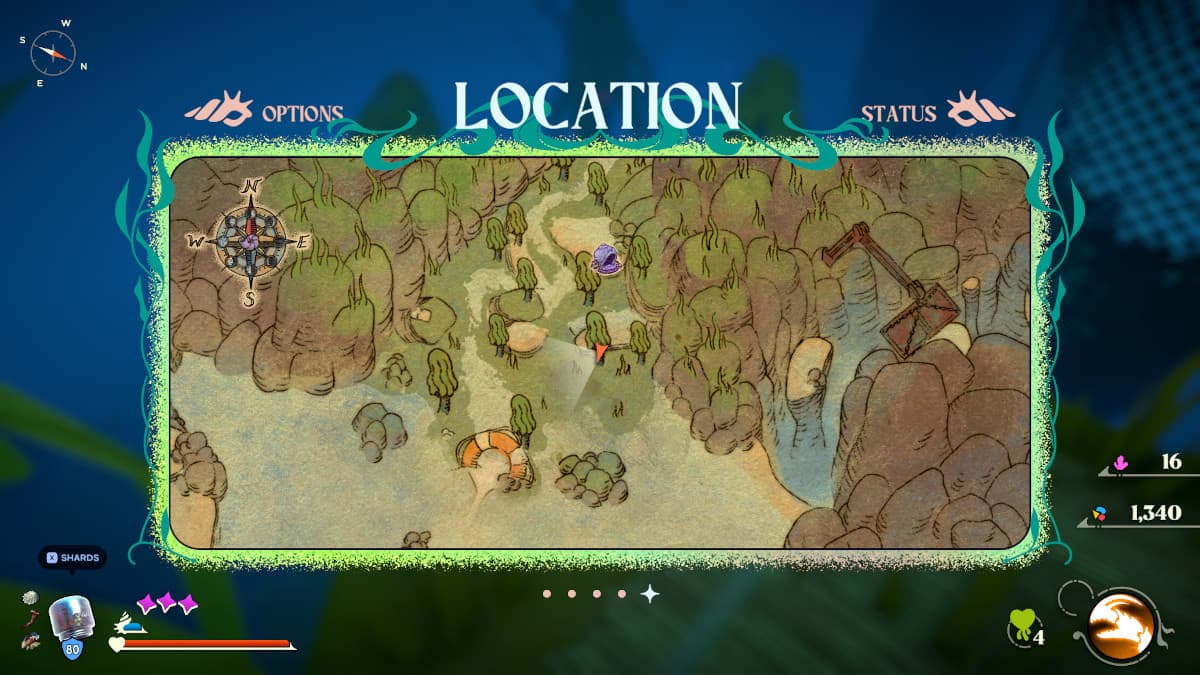
35. Coffee Mug
Coffee Mug shells can be found near a giant tube west of the Moon Snail Shell here in Expired Grove. You'll find it after fighting a large crab enemy with a hammer.
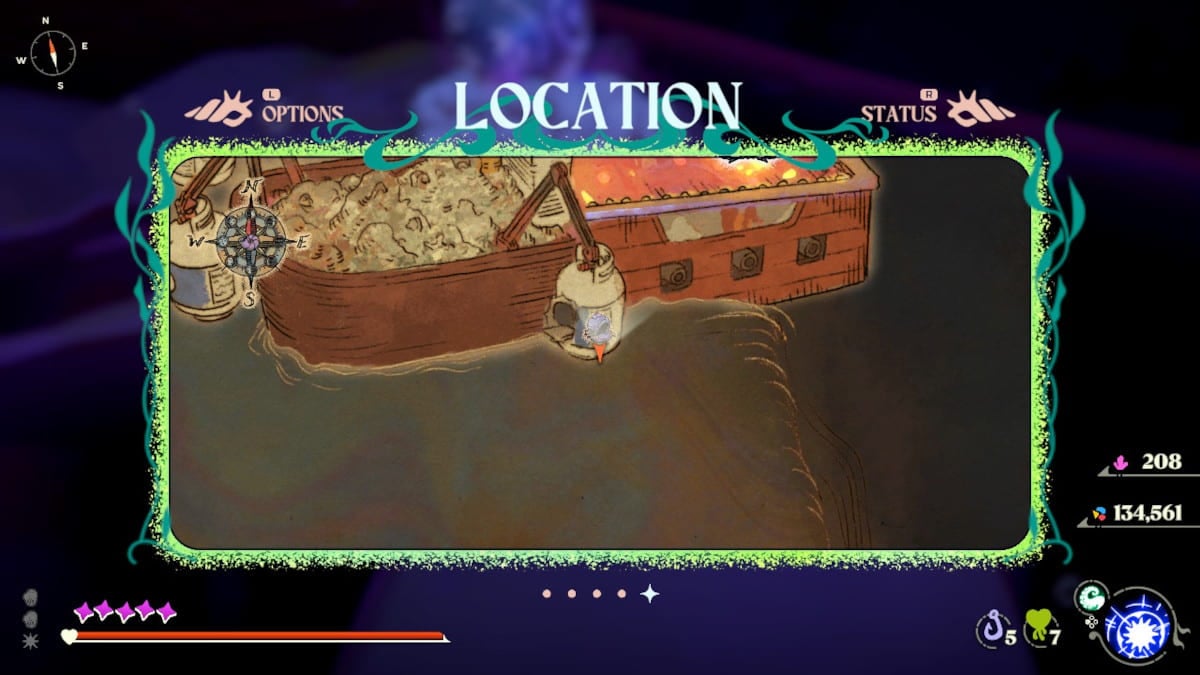
36. Cascadia Roll
Cascadia Roll shells can be found north of the Moon Snail Shell here in Expired Grove. While there are some on the ground here, the easiest place to find them is the sushi boat boss arena to the north.
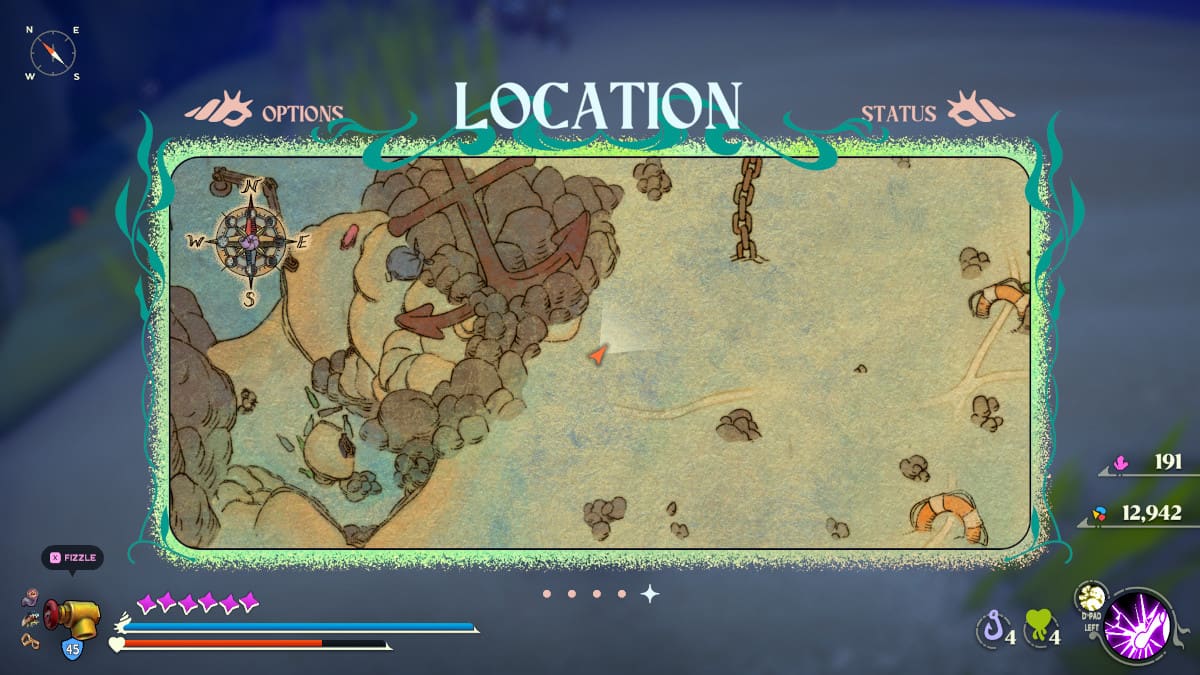
37. Ham Tin
I found the Ham Tin shell hidden inside of a clam. It was located in a side room in the caves after the Village Entrance Moon Snail Shell. You will need to grapple up to this location to get it for yourself.
38. Skull
In the Curdled Village, at the top of the hill, you can find a sniper crab enemy that will drop the Skull shell when killed. It is just past the sushi boss boss arena and west of the Moon Snail Shell in this area.

39. Crab Husk
Immediately in front of the boss arena in the Curdled Village area, you can find a Crab Husk shell. Head north, then east from the previous shell location to find this very creepy shell to wear.

40. Legal Brick
In this area, you can find some crabs that have corkscrews as weapons. They will drop these totally-not-LEGO bricks for you to pick up.
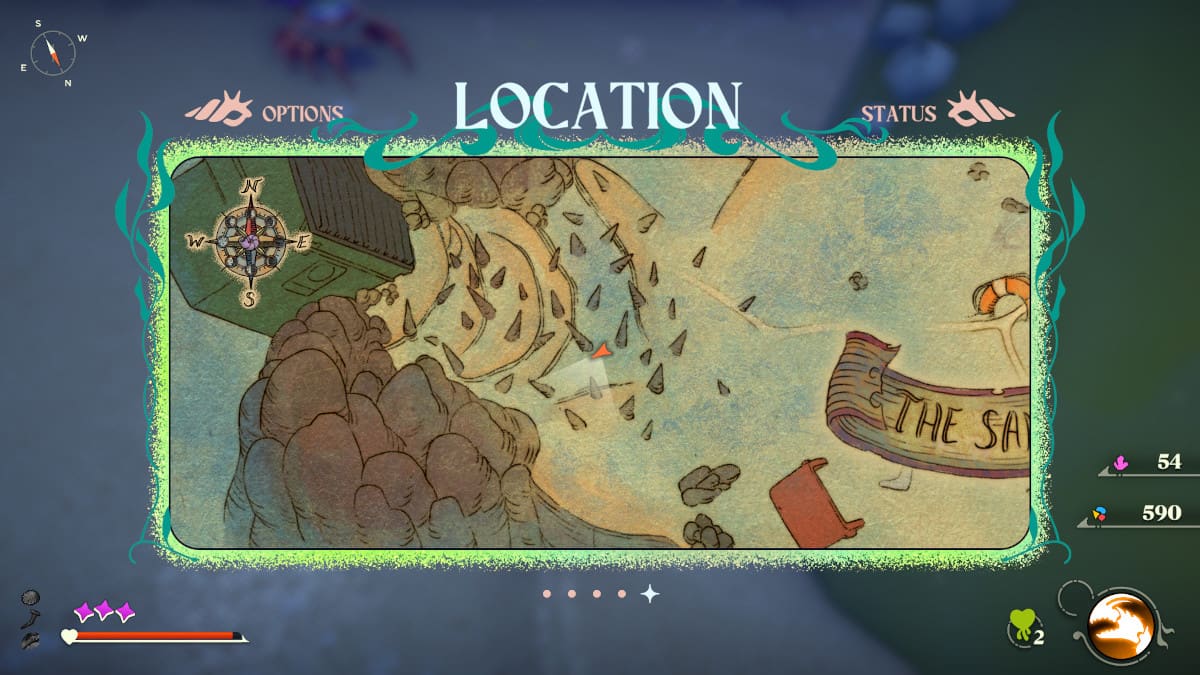
41. Spring
Close to the dumpster in the Sands Between's western edges, to the east of the Bobbit cliffs where you can get the Bobbit Trap Adaptation, there will be some Spring shells on the ground. Watch out for the Xs on the ground, as they hide Bobbit enemies that will grab you.
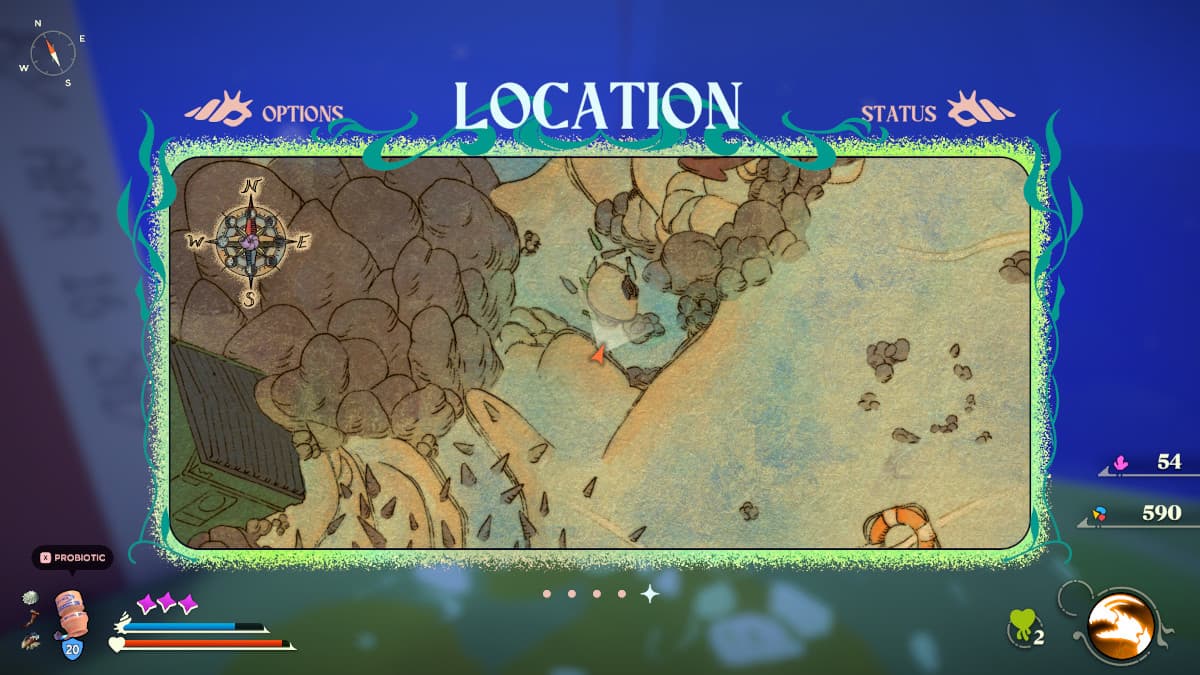
42. Shotgun Shell
While there are several locations to find Shotgun Shell shells, I found this one left behind after I killed a shrimp in this area of Flotsam Vale.
43. Rubber Duck
T

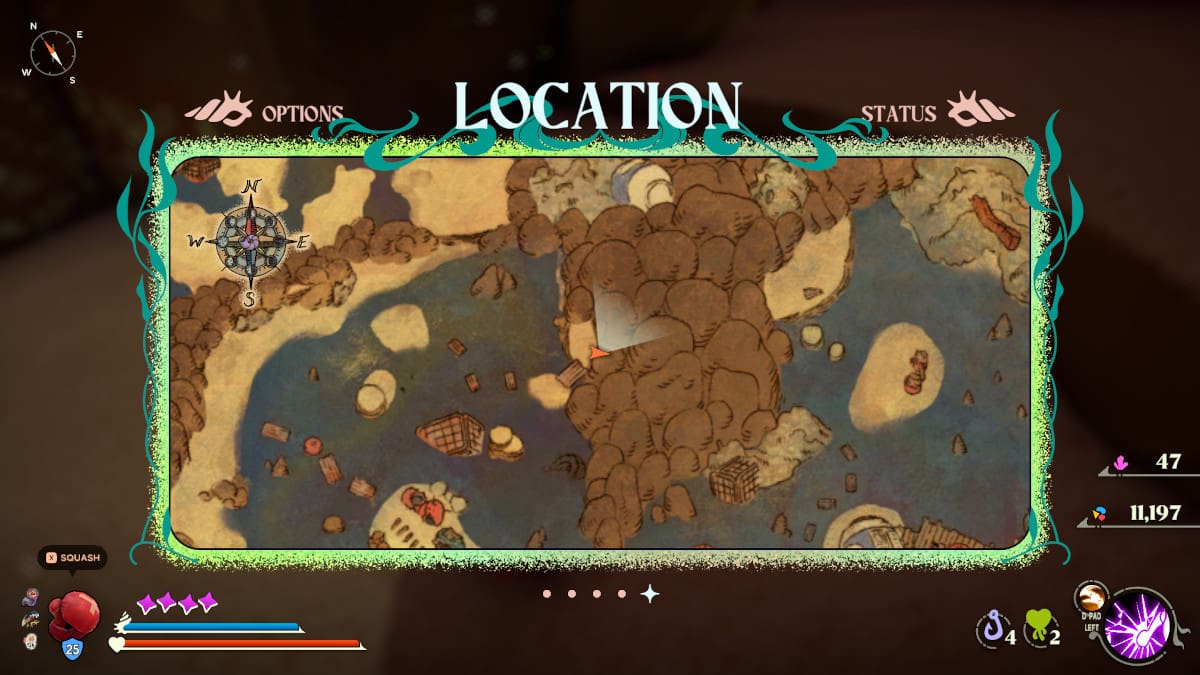
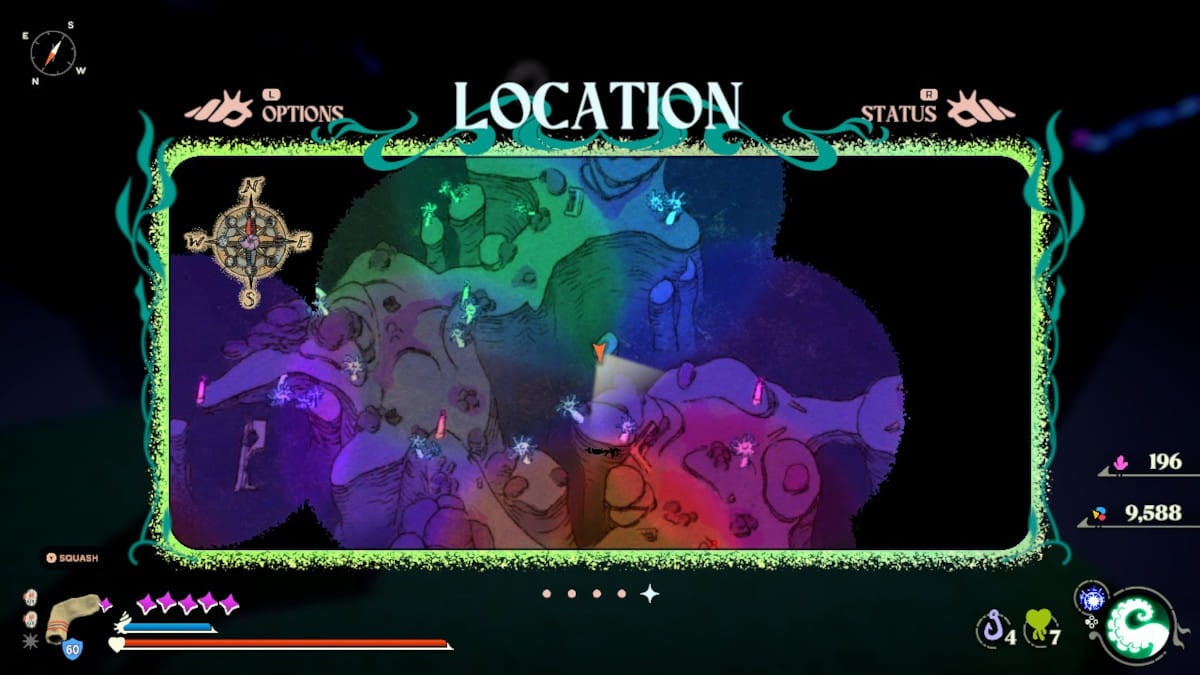
44. Boxing Glove
In the sea of poisoned gunk that cuts through Flotsam Vale, there are a couple of islands of solid land. There are LEGAL Brick shells and a Boxing Glove shell to find in these locations.
45. Cardboard Box
I found the Carboard Box shell right outside the boss area in Flotsam Vale; it was in the platforms above the area just past the propane tank.
46. Tissue Box
On an island north of the boss arena, there is an island in the poisoned lake there. There is a hermit crab inside that you have to kill in order to claim this Cleansing shell.
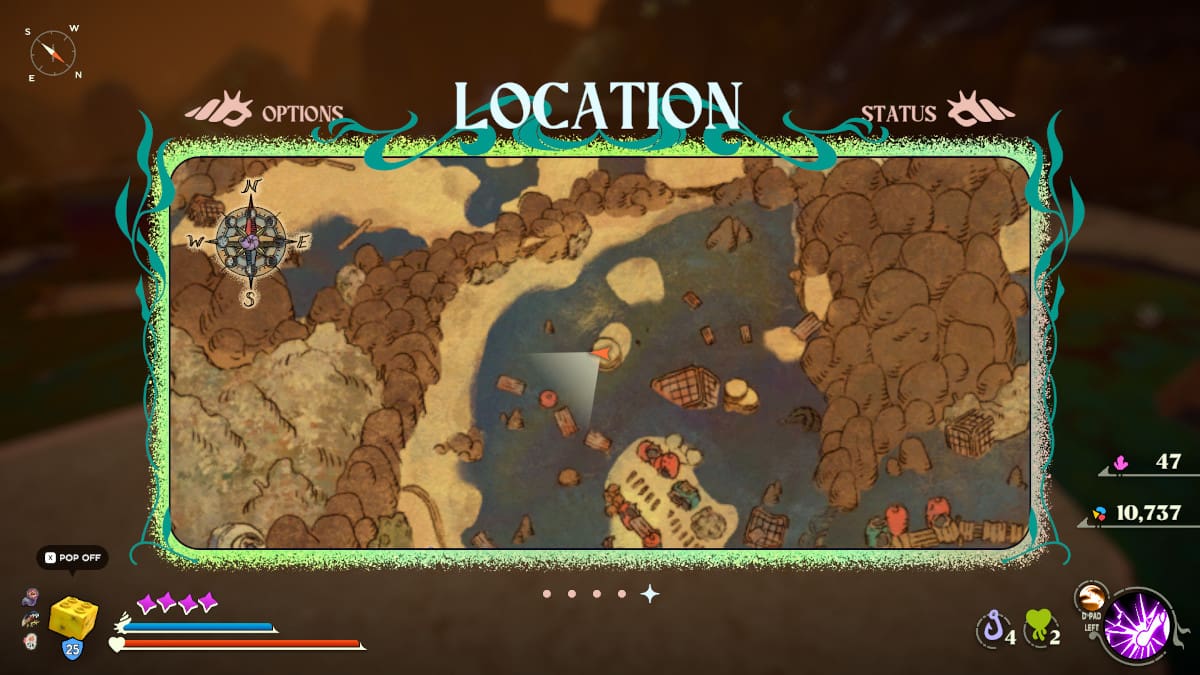
47. Valve
There is a hermit crab on the western edge of the Sands Between has this shell; you'll need to kill him as well as all of followers. This enemy group only seems to appear after the boss of Sands Between is dead.
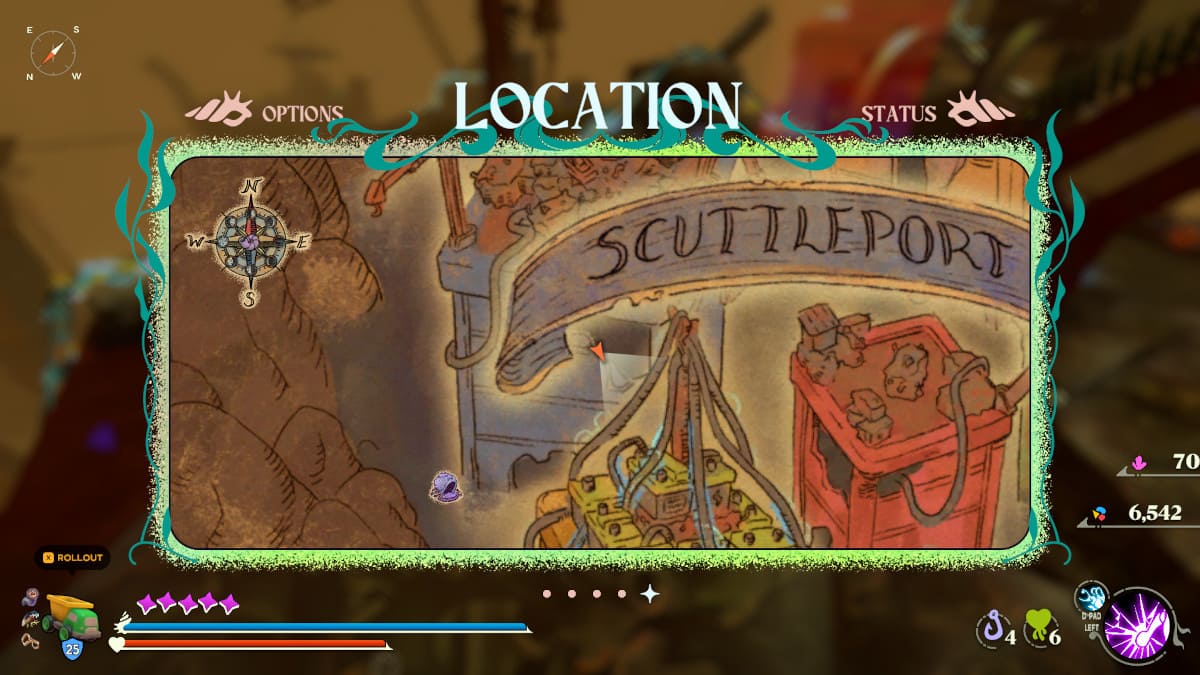
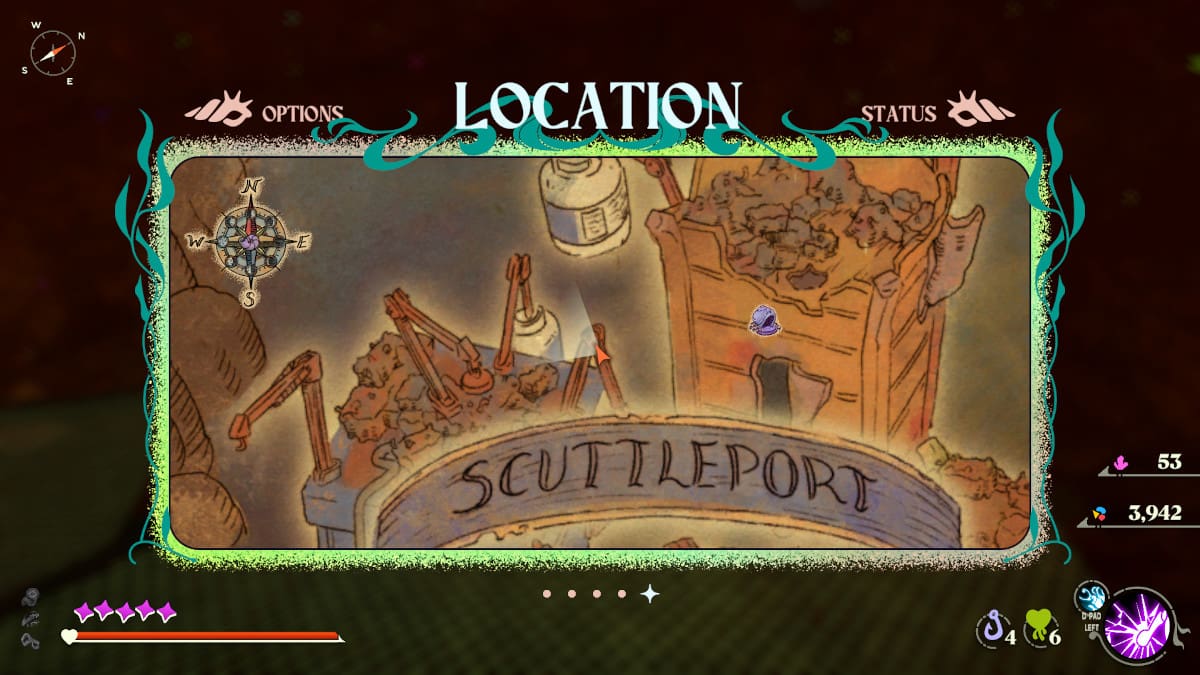
48. Dumptruck
You can find a Dumptruck shell on top of a pile of scrap at the pinnacle of a tower in Scuttleport. You need to ride a magnet to reach it.
49. Ink Cartridge
The Ink Cartridge can be found on the ground while progressing through Scuttleport, shortly after lowering the giant propane tank.
50. Gacha Capsule
You can find a Gacha Capsule in the Mouth of the Drain. It will still be there even after the cutscene, so don't worry if you missed it the first time. Just head through the Moon Snail Shell here and look on the island you fast travel to.
51. Lightbulb
In the beginning of the Unfathom area, you can find lightbulbs all over the place. This particular Lightbulb is very close to a shortcut door.
52. Mouse
There are a large number of Mouse shells to be found in this area of the Unfathom, near the Hermit's Plateau Moon Snail Shell fast travel point. I found my first Mouse shell here.
53. Going Under 64
In the Unfathom, in the darkened areas, you have to climb this mountain to find this N64 cartridge. It's pretty dark down here, so it can be pretty challenging to see very far away.
54. Sock
The Sock shell is on a platform in the Unfathom. You'll need to head west from the Moon Snail Shell, then climb up the hill to the south of this little platform. That will allow you to jump or grapple across to the Sock shell.
Related: Where to find the Dark Souls outfit in Another Crab’s Treasure (Map)
55. Doll’s Head
There are three enemy hermit crabs in this area that are wearing Doll's Head shell near the Hermit's Plateau Moon Snail Shell. It's near the red-orange glow stick in this area.
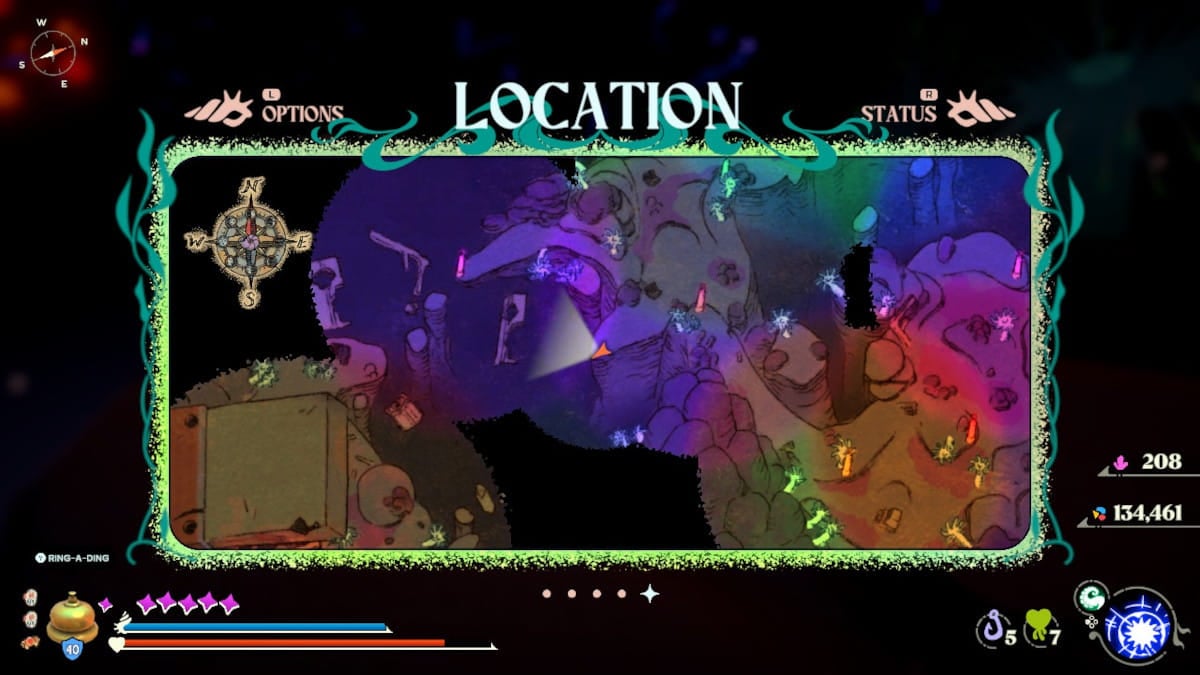
56. Service Bell
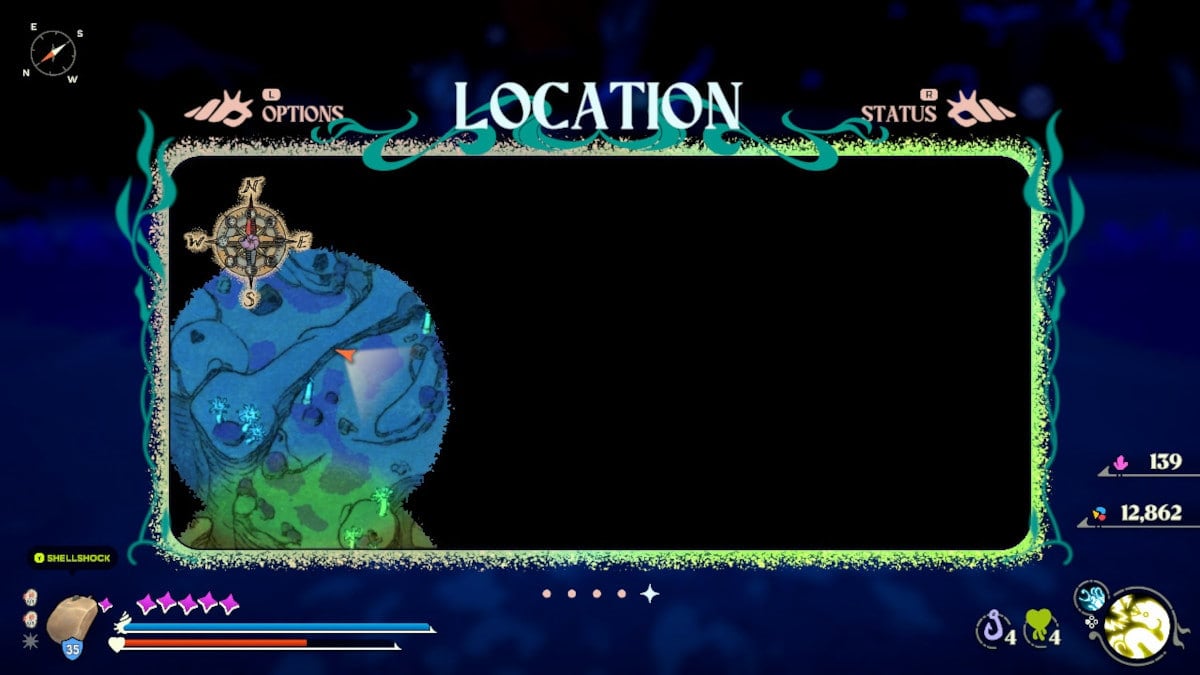
West of the area with the Doll's Head shells, near the purple glow stick here, you can find a promontory overlooking a death plane. This Bell seems to be the only one of its kind in the game, and this is the location you can find it.
57. Party Popper
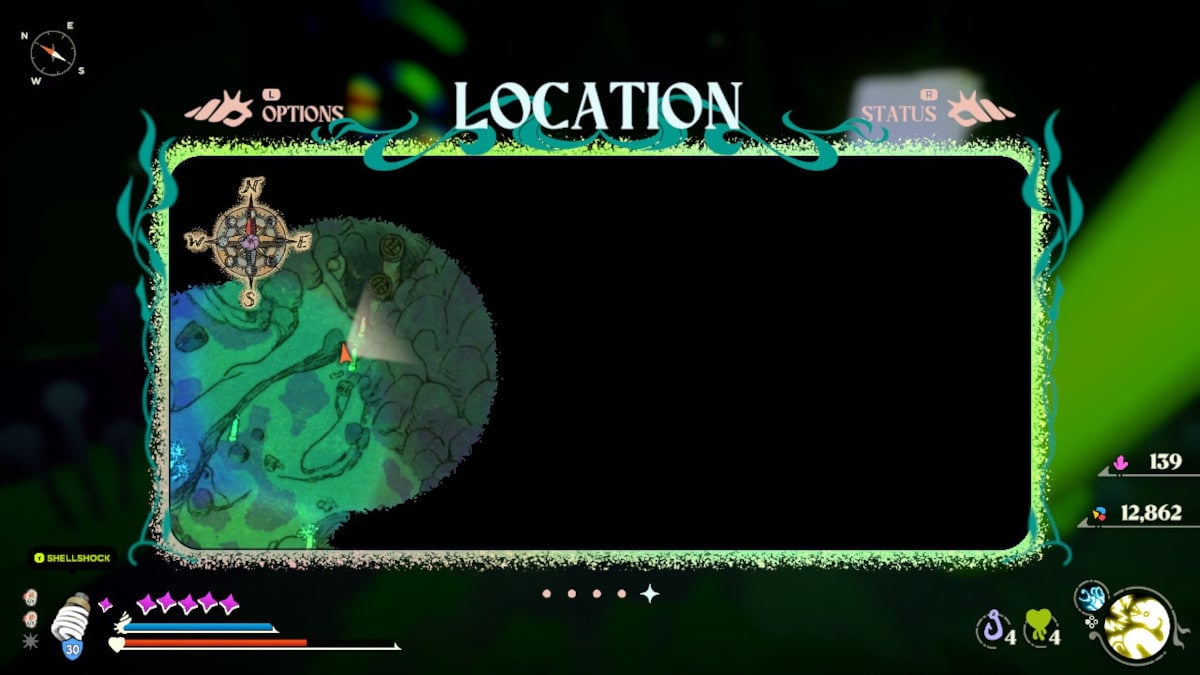
North of the Hermit's Plateau Moon Snail Shell, you can find them along this road. There are also a bunch of these shells in the arena where you fight Inkerton.
58. Scrub Aggie
These scrubby sponges can be found in the Bleached Glade area. There are a ton of these squishy shells around, but this is the first location I found one.
59. Dentures
These mouth-like shells are littering the ground in this area of the Bleached Glade. You can't get rid of the Dentures unless you die or get the shell broken; they are actually traps.
60. Pill Bottle
There are a ton of Pill Bottles in this area of the Bleached Glade on the road. You can find them right next to the first Denture shell traps. These are upgraded versions of the Yoccult shells you can find in the earlier parts of the game.
61. Detergent Cap
There are a ton of Detergent Caps littered around the Bleached Grove and the city as well. You should be able to find one pretty easy if you have reached this area.
62. UltraSoft
This roll of toilet paper is hanging on a tree on the Bleached Grove. You can pull it down using your grappling hook; there should be a large amount of these shells, but this is the first location I found one.
63. Champagne Flute
You can find this one on the ground a little east of the Fragmented Viaduct Moon Snail Shell in this area. There are several of these on the ground in this location.

64. Dish Scrubber
After your cross over the Fragmented Viaduct and into the Bleached City, you will start to find an elite version of the seahorse enemies from earlier. They will all be wearing these shells, so you just need to kill one to get it.
65. Snow Globe
You should be able to pick one up either shortly before the Lookout Tower or on the way to find the Knight's Helmet; there are several crabs near the elevator that are wearing Snow Globes.

66. Knight's Helmet
There is only one Knight's Helmet in Another Crab's Treasure. You can find it in the Bleached Glade. First you need to ride the elevator up, then take the path to the left through a hole in the wall. You'll need to then do a very difficult jumping puzzle to get to this location.
67. Snail Sanctum
This is one of the eight Adaptations, and you get this by killing Petroch in the Unfathom. Head to the Moon Snail shell called Hermit's Plateau in the Unfathom. He's one of the story bosses, so you can't miss him. Once he's dead, you will get this power. You just need to use it once to have this shell.
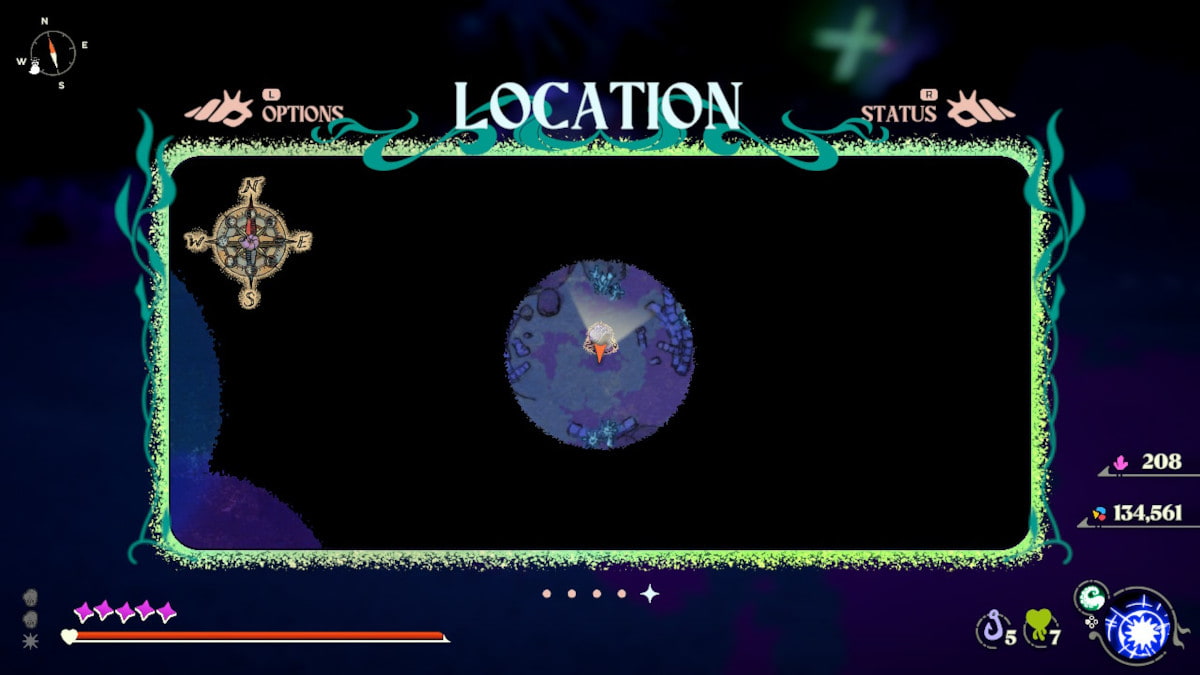
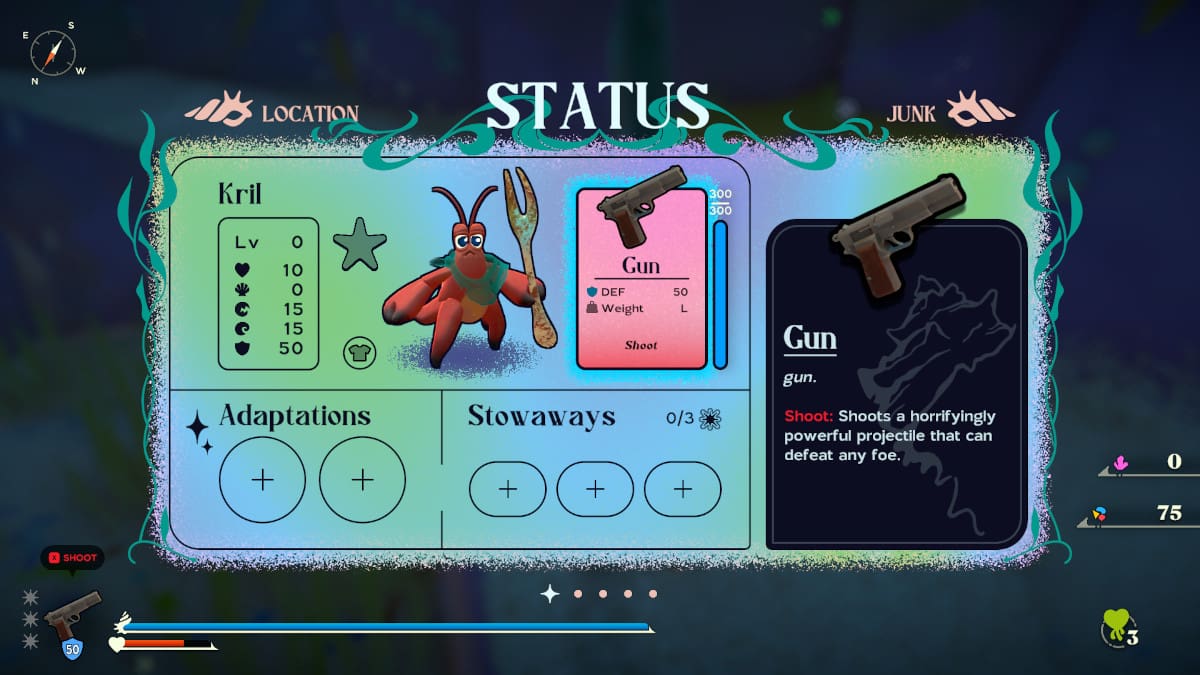
68. Gun
The very first shell you can get in Another Crab's Treasure is the gun. This is an accessibility feature; in order to get it, you need to head into the settings menu and choose Assist Mode. The last item in this submenu will be "Give Kril a Gun." This is also needed to get the achievement for shooting a crab with a gun.
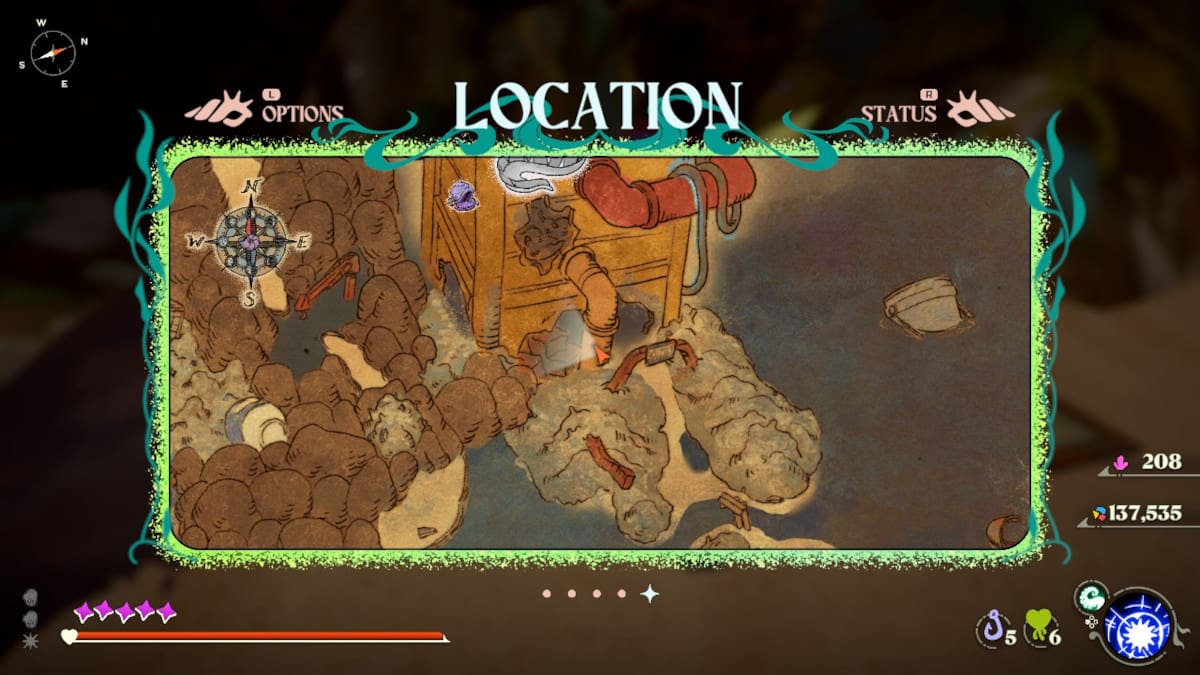
69. Plug Fuse
You need this shell to progress through the story when you find it to get into Scuttleport. It will be inside the pipe that was previously blocked by a tennis ball.
How to complete Shell Seeker in Another Crab's Treasure
There is an achievement in Another Crab's Treasure for trying on every single shell you can get, called Shell Seeker. If you are hoping to 100% this challenging Souls-like game, you will need to grab one of every shell.
Here is a complete list in order of every shell in the game along with its stats.
| Shell Name | Defense | Weight | Other | Umami Power |
|---|---|---|---|---|
| Home | 50 | M | - | - |
| Soda Can | 30 | M | - | Fizzle: Releases pressurized air to push away enemies in a cone. |
| Bottle Cap | 20 | S | - | Pop Off: A surprise strike from your shell that launches the enemy in front of you. |
| Tin Can | 40 | M | +1 Res | Shellshock: Transmute your Umami into a bolt of lightning, electrifying your shell. |
| Shot Glass | 70 | S | +1 Attack | Shards: Summons retaliatory glass shards that last for as long as you continue to block. |
| Banana Peel | 10 | S | - | Munch: Consume some shell health to restore Krill's health. |
| Party Hat | 20 | S | +2 MSG | Party Time!: A small blast of confetti that deal damage and interrupts enemies. |
| Coconut | 35 | L | - | Rollout: Roll forward at high speed to cover long distances quickly or smack into your enemies. |
| Teacup | 40 | S | - | Morning Buzz: A jolt from a warm beverage that increases attack speed for a short duration. |
| Sauce Nozzle | 25 | S | - | Twist Top: Twist the currents around you to spin at high velocity, damaging any enemy hit by the vortex. |
| Thimble | 40 | M | +1 Res | Fortify: Grants your shell invincibility from the next three hits it blocks. |
| Bebop Cup | 25 | S | +3 MSG | Juggernaut: For a brief duration, withstand all interrupts and knockdowns from enemy attacks, even when not blocking. |
| Tennis Ball | 35 | M | - | Rollout: Roll forward at high speed to cover long distances quickly or smack into your enemies. |
| F | 30 | S | +2 Attack | Pop Off: A surprise strike from your shell that launches the enemy in front of you. |
| Mason Jar | 80 | M | +3 MSG | Shards: Summons retaliatory glass shards that last for as long as you continue to block. |
| Salt Shaker | 40 | M | +3 MSG +3 Attack | Shards: Summons retaliatory glass shards that last for as long as you continue to block. |
| Conchiglie | 10 | S | +1 MSG | Munch: Consume some shell health to restore Krill's health. |
| Bartholomew | 40 | S | +5 Attack | Bombs Away!: Eject upwards from your shell and detonate it, dealing massive damage to enemies in the blast radius. |
| Disco Ball | 25 | M | +5 MSG | Twinkle: Summon a slow-moving, damaging projectile of pure Umami. |
| Baby Shoe | 15 | L | +5 Attack | Another Chance: Activate to receive another chance at life as long as the shell remains equipped upon death. |
| Lil' Bro | 35 | L | +8 MSG | Juggernaut: For a brief duration, withstand all interrupts and knockdowns from enemy attacks, even when not blocking. |
| Matryoshka (L) | 40 | L | - | Decoy: Abandons your shell and causes enemies to attack it instead for a brief time. |
| Matryoshka (M) | 30 | M | - | Decoy: Abandons your shell and causes enemies to attack it instead for a brief time. |
| Matryoshka (S) | 20 | S | - | Decoy: Abandons your shell and causes enemies to attack it instead for a brief time. |
| Shuttlecock | 15 | S | +4 Attack | Twist Top: Twist the currents around you to spin at high velocity, damaging any enemy hit by the vortex. |
| Felix Cube | 25 | L | +3 Attack | Twist Top: Twist the currents around you to spin at high velocity, damaging any enemy hit by the vortex. |
| Piggy Bank | 40 | L | +3 MSG | Decoy: Abandons your shell and causes enemies to attack it instead for a brief time. |
| Trophy | 20 | L | +5 MSG | Party Time!: A small blast of confetti that deal damage and interrupts enemies. |
| Imposter | 45 | M | +5 Attack | Smokescreen: Your Umami becomes a dense cloud of ink that cause enemies to lose track of you. |
| Lil's Red Cup | 30 | S | - | Drunken Claw: A risky technique that increases ATK for a brief time, but worsens your dodge roll and dulls your senses. |
| Wafer Cone | 25 | M | - | Freeze: Freeze the water around you, slowing down your enemies. |
| Yoccult | 20 | M | - | Probiotic: Infuse your body with healthy nutrients, restoring health over time. |
| Coffee Pod | 25 | S | - | Morning Buzz: A jolt from a warm beverage that increases attack speed for a short duration. |
| Egg Shell | 10 | S | +10 MSG | Fortify: Grants your shell invincibility from the next three hits it blocks. |
| Coffee Mug | 30 | M | - | Morning Buzz: A jolt from a warm beverage that increases attack speed for a short duration. |
| Cascadia Roll | 20 | S | +3 MSG | Munch: Consume some shell health to restore Krill's health. |
| Ham Tin | 35 | L | - | Pop Off: A surprise strike from your shell that launches the enemy in front of you. |
| Skull | 25 | L | +5 Attack +5 MSG | Another Chance: Activate to receive another chance at life as long as the shell remains equipped upon death. |
| Crab Husk | 30 | S | +2 MSG | Decoy: Abandons your shell and causes enemies to attack it instead for a brief time. |
| LEGAL Brick | 25 | S | - | Pop Off: A surprise strike from your shell that launches the enemy in front of you. |
| Spring | 25 | M | - | Pop Off: A surprise strike from your shell that launches the enemy in front of you. |
| Shotgun Shell | 40 | S | +3 MSG | Bombs Away!: Eject upwards from your shell and detonate it, dealing massive damage to enemies in the blast radius. |
| Rubber Duck | 35 | S | +2 MSG | Decoy: Abandons your shell and causes enemies to attack it instead for a brief time. |
| Boxing Glove | 25 | L | +5 Attack | Squash: Leap into the air, dealing heavy damage to any enemies beneath as you slam back down. |
| Cardboard Box | 20 | L | - | Smokescreen: Your Umami becomes a dense cloud of ink that cause enemies to lose track of you. |
| Tissue Box | 25 | M | +3 Res | Cleanse: Scrubs away all negative status effects and heals you slightly. |
| Valve | 45 | L | +10 Res | Fizzle: Releases pressurized air to push away enemies in a cone. |
| Dumptruck | 25 | L | - | Rollout: Roll forward at high speed to cover long distances quickly or smack into your enemies. |
| Ink Cartridge | 25 | S | +3 MSG | Smokescreen: Your Umami becomes a dense cloud of ink that cause enemies to lose track of you. |
| Gacha Capsule | 25 | S | - | Rollout: Roll forward at high speed to cover long distances quickly or smack into your enemies. |
| Lightbulb | 30 | M | - | Shellshock: Transmute your Umami into a bolt of lightning, electrifying your shell. |
| Mouse | 35 | L | - | Shellshock: Transmute your Umami into a bolt of lightning, electrifying your shell. |
| Going Under 64 | 35 | S | +5 Attack | Fizzle: Releases pressurized air to push enemies away in a cone. |
| Sock | 60 | M | +3 Res | Squash: Leap in to the air, dealing heavy damage to any enemies beneath you as you slam back down. |
| Doll's Head | 25 | L | +6 Attack | Juggernaut: For a brief duration, withstand all interrupts and knockdowns from enemy attacks, even while not blocking. |
| Service Bell | 40 | S | +2 MSG | Ring-a-Ding: Let out a piercing sound to interrupt enemies in a large radius. |
| Party Popper | 25 | S | +3 MSG | Party Time!: A small blast of confetti that deals damage and interrupts enemies. |
| Scrub Aggie | 10 | S | +2 Attack | Cleanse: Scrubs away all negative status effects and heals you slightly. |
| Dentures | 30 | L | - | - |
| Pill Bottle | 30 | S | - | Probiotic: Infuse your body with healthy nutrients, restoring health over time. |
| Detergent Cup | 30 | L | +4 Attack | Pop Off: A surprise strike from your shell that launches the enemy in front of you. |
| UltraSoft | 25 | M | - | Rollout: Roll forward at high speed to cover long distances quickly or smack into your enemies. |
| Champagne Flute | 90 | M | +4 Attack +4 MSG | Ring-a-Ding: Let out a piercing sound to interrupt enemies in a large radius. |
| Dish Scrubber | 30 | M | - | Twist Top: Twist the currents around you to spin a high velocity, damaging any enemy hit by the vortex. |
| Snow Globe | 40 | L | +4 MSG | Freeze: Freeze the water around you, slowing down your enemies. |
| Knight's Helm | 70 | L | - | Juggernaut: For a brief duration, withstand all interrupts and knockdowns from enemy attacks, even while not blocking. |
| Snail Sanctum | - | - | - | - |
| Gun | 50 | L | - | Shoot: Shoots a horrifyingly powerful projectile that can defeat any foe. |
| Plug Fuse | 30 | M | +5 Res | Shellshock: Transmute your Umami into a bolt of lightning, electrifying your shell. |
Most shells have multiple locations; if this is the case, I have only included a map of the first place you can find it along your route to get your Home shell back above.
For more Another Crab's Treasure, check out All trophies and achievements in Another Crab’s Treasure on Pro Game Guides.