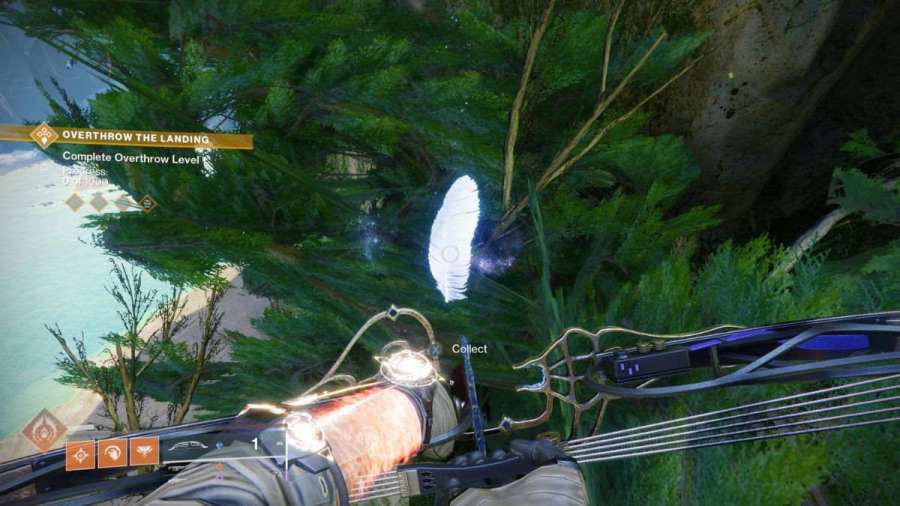
There are 55 feathers for you to collect in Destiny 2, but only 49 are available. By now, you've probably found several feathers while traveling, but it's challenging to find all of them. Here are All Feather Locations in Pale Heart in Destiny 2.
Recommended Videos
All Feather Locations in Destiny 2 The Final Shape
Most feather locations in the Pale Hearth world are challenging to find. But if you follow this guide and use one of Destiny 2 sniper rifles like Still Hunt Exotic as a spyglass, you'll locate all feathers you need to make the Flock Together achievement much more straightforward.
The Lost City Feather Locations in Destiny 2
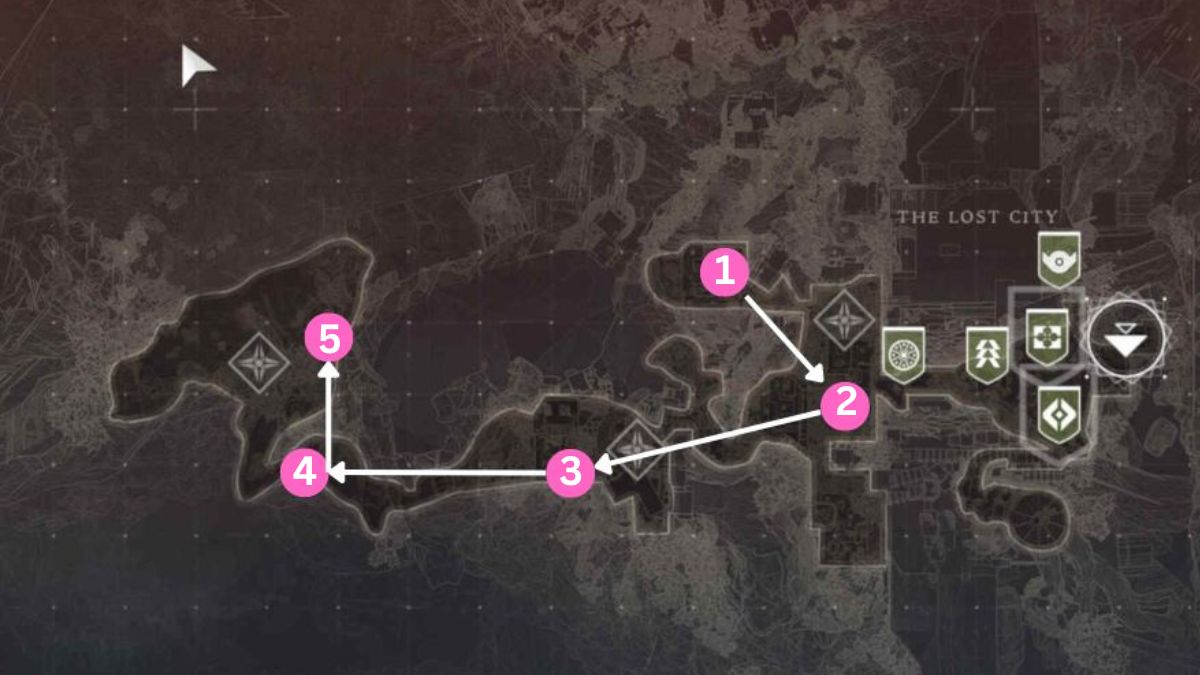
- From the starting point, head right and jump on the building rooftops. Make your way until you find a red-and-white building with huge branches sticking out. Jump on the roof, and on one of the branches, you'll find a feather.
- There's another feather close to the monument. Look for a building with a fern and an air conditioner. On top of the AC, you'll find a feather.
- Head to the outskirts of the Lost City. Try to be as close to the edge of the map as possible until you notice the cliffs with trees growing on their edges. Climb at the top of the canopy and look for a feather.
- Now that you're so close, it would be a shame not to visit the beach. Follow the path to the beach until you notice a giant tree root. Inspect the root to locate a feather.
- At the beach, look for a huge tree near the cliffs. You'll notice a feather near the tree, in one of the platforms inside the rocks.
The Landing Feather Locations in Destiny 2

- Look for the blue building close to the Landing fast travel point. Feather is located on the lower roof above creepers.
- Below the previous location, to the south, you'll see rocks. On the left side of the waterfall, you'll see a feather.
- Head to the center of the map and look for the cave entrance. Enter the cave and search for a hole. If you look closely, you'll notice a feather in the corner.
- The next closest feather is located in a cave in the southern part of the Landing (as shown on the map above). Enter the cave and look for an elevation with a feather on top.
- Head north from the cave until you find a bridge. You'll find a feather on the tree root below the bridge. Be careful when jumping, as there's a chasm below.
- From the bridge, head to the northeast. You'll see huge branches, with one of the bigger ones holding a feather.
- When you reach a small bridge with beautiful blue patterns, find a lookout point with an ocean view. Look down, and you'll see a feather stuck in the branches.
- Head to the northwestern part of the map until you see the ocean. Look for a balcony and enter the room to find a feather.
The Refraction Feather Locations in Destiny 2

- Look for the blue crystals hanging on the cave ceiling. Climb, and you'll see a feather on top of one of the crystals.
- While in the center of the Refraction, look for rocks with purple flowers. You'll easily spot a feather on one of the rocks. While you're here, look around the area, as these feathers in the Refraction are easy to spot.
- Head straight from the previous rock and climb a tree to find another feather resting on a canopy.
- Head south and look up as a feather is located on a tree.
- Continue south until you see a rocky area. You'll notice a feather at the top of the rocks.
The Blooming Feather Locations in Destiny 2
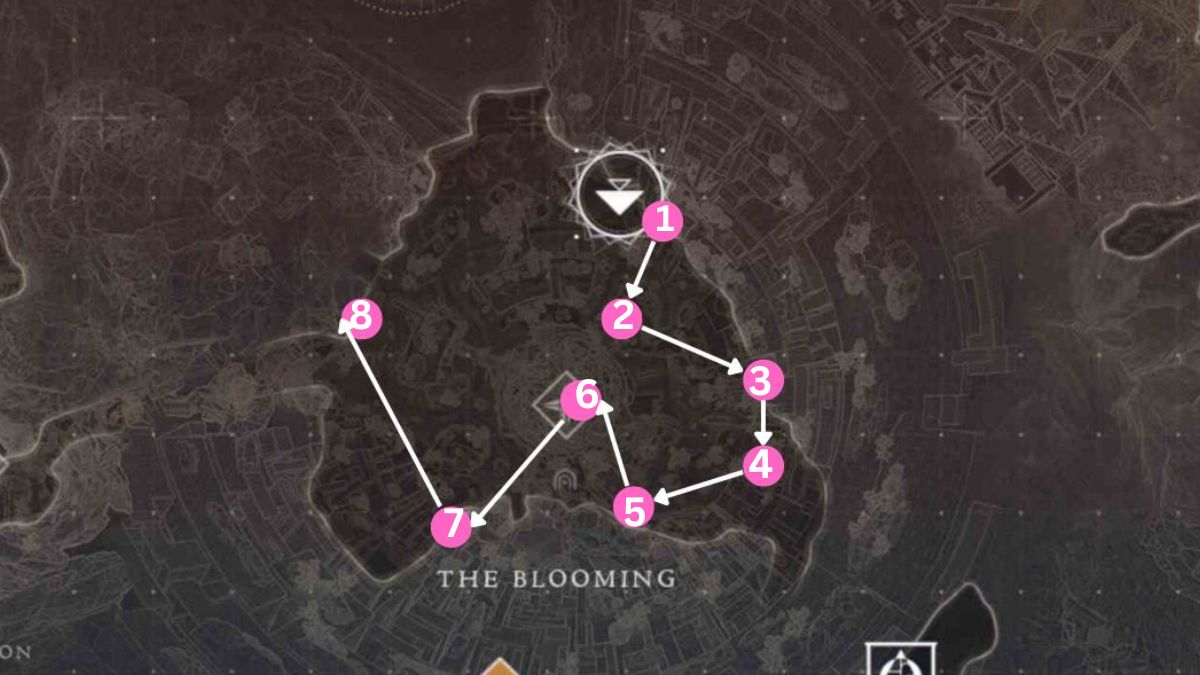
- Start your collection from the Blooming area with a feather near the fast travel point. Look up, and you'll see a familiar glow on rocks.
- Near the center of the Blooming area, concentrate on trees. You'll find a feather in one of the less accessible branches.
- Travel through the rocky corridors, and as soon as you go through them, look up. You see a feather on top of the "gate."
- In the desolate area, look for three pillars covered in withered moss. Using the other rocks as steps, reach the tallest one with a feather.
- Head towards the rocks and locate a dead tree. Climb on it and use it to reach higher platforms. Move up until you see a feather on the rocks.
- In the center of the Blooming, you'll find a feather on a withered tree near the rocks.
- On the south, in an area covered in moss, look for a door-shaped passage under the rock. With the passage behind you, look at the rocks ahead. On one of them is a feather.
- Head north until you reach the cliff. Just look up, and you won't miss the last feather in the Blooming area.
The Seclusion Feather Locations in Destiny 2
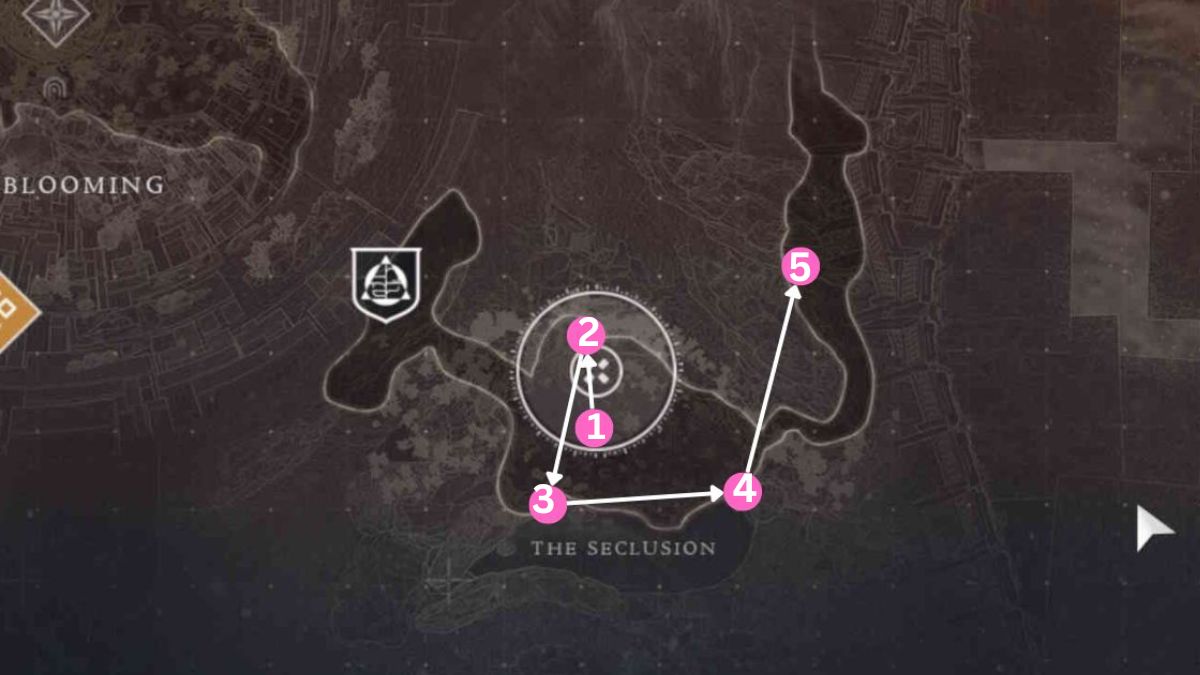
- The first feather in the Seclusion is located near the entrance to the area, on an old tree trunk.
- Head north and look for a feather on top of the rocks near some trees.
- Travel south until you reach not-so-good-looking water. On a rock rising above it is your next feather.
- Head east, along the water, until you find a cave entrance. Here, you'll see another feather.
- Enter the cave and keep your left. Reach higher ground until you notice a feather.
The Divide Feather Locations in Destiny 2
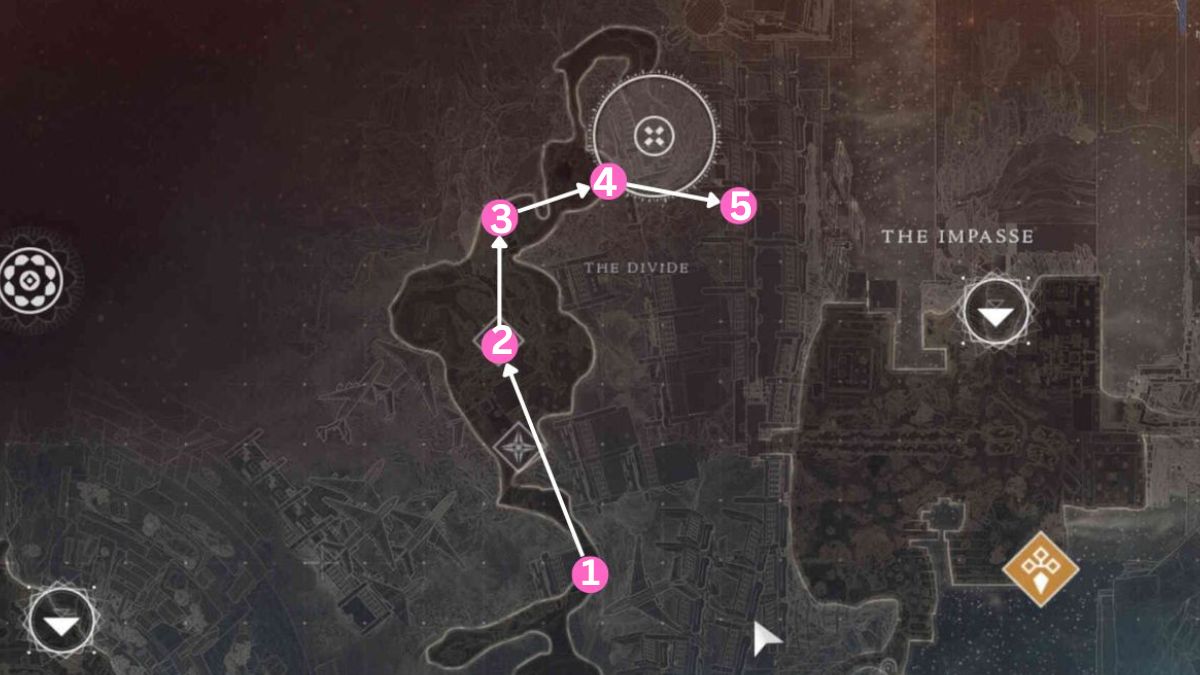
- Look for an especially steep-looking ice-covered hill in this location, as shown on the map. You must climb it as the feather is on its top.
- Find a location with multiple platforms forming a stairway. Jump from one to another until you reach the top. There's a corridor to the right. Pass through it, and on the right side, you'll see a platform with a feather.
- Get down, and from the corridor, continue straight. Follow the road until you see a structure to the right. Here, you'll find another feather.
- Get inside the ice-covered building and follow the path until you see the Shrieker unit on a bridge. From the middle of the bridge, turn right and move straight until you reach the end of the corridor. Jump on the platform to your left to get to the pipes above. Look up, and you'll see a platform with a feather.
- Head through the ice cave. Now that you're out, turn left and move forward. After you jump across what looks like a windy waterfall, you'll see a pack of enemies around a pillar. You don't need to approach them, as the feather is on a platform below them.
The Impasse Feather Locations in Destiny 2
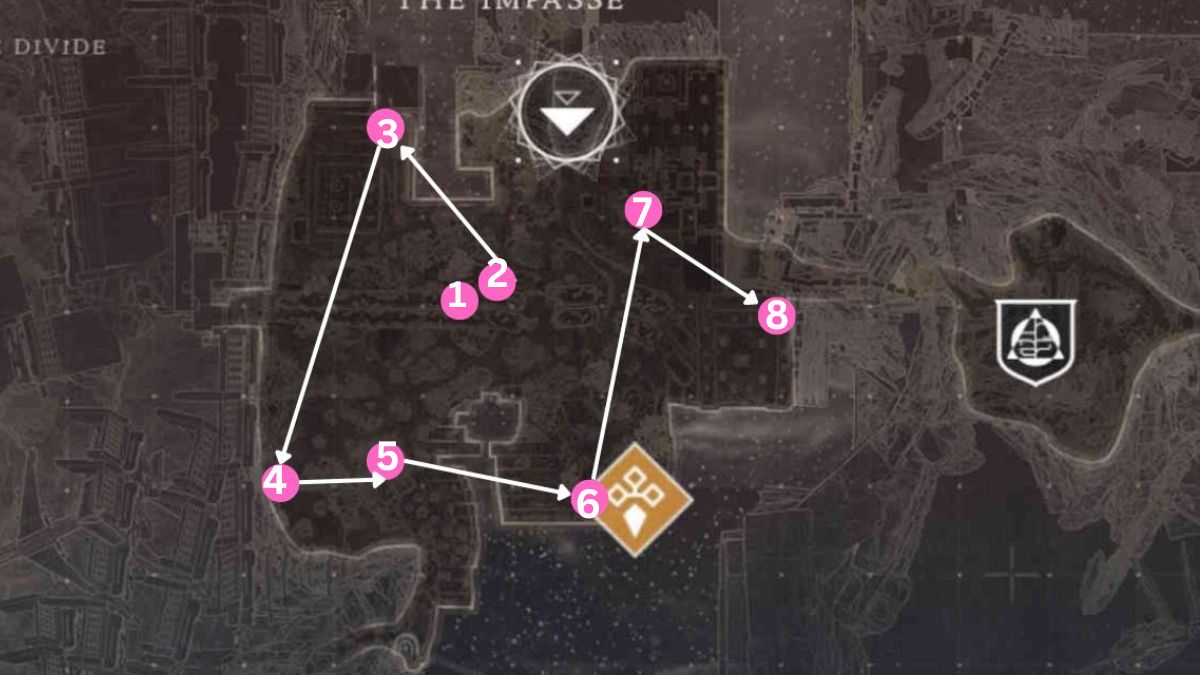
- In the center of the area, you'll see a freeway full of old cars. Above them is a lamppost with a feather on top.
- On the exact location below the freeway, you'll see a feather sitting on top of the hand sculpture.
- Continue south until you reach the concrete wall. On the right side, you'll see sharp rocks with a feather on top.
- Head towards a building with rusted "windows." With a building to your right, jump across the stones until the very end of the road. If there's a sphere at the end, just head toward it, as the feather is located on the platform above.
- Not far from the building with rusted "windows," you notice huge rocks with a feather on top.
- With the rusted building behind you, head straight until you find a skull-looking hollow tree. You'll find a feather on top of it.
- Head towards the white fortress with giant faces. On top of the huge pillar, next you'll see a feather.
- While you're on the pillar, with a white building behind you, look to your left. You'll see a temple with a gigantic hand sculpture. Next to the hand is the last feather in the Impasse.
The Transgression Feather Locations in Destiny 2
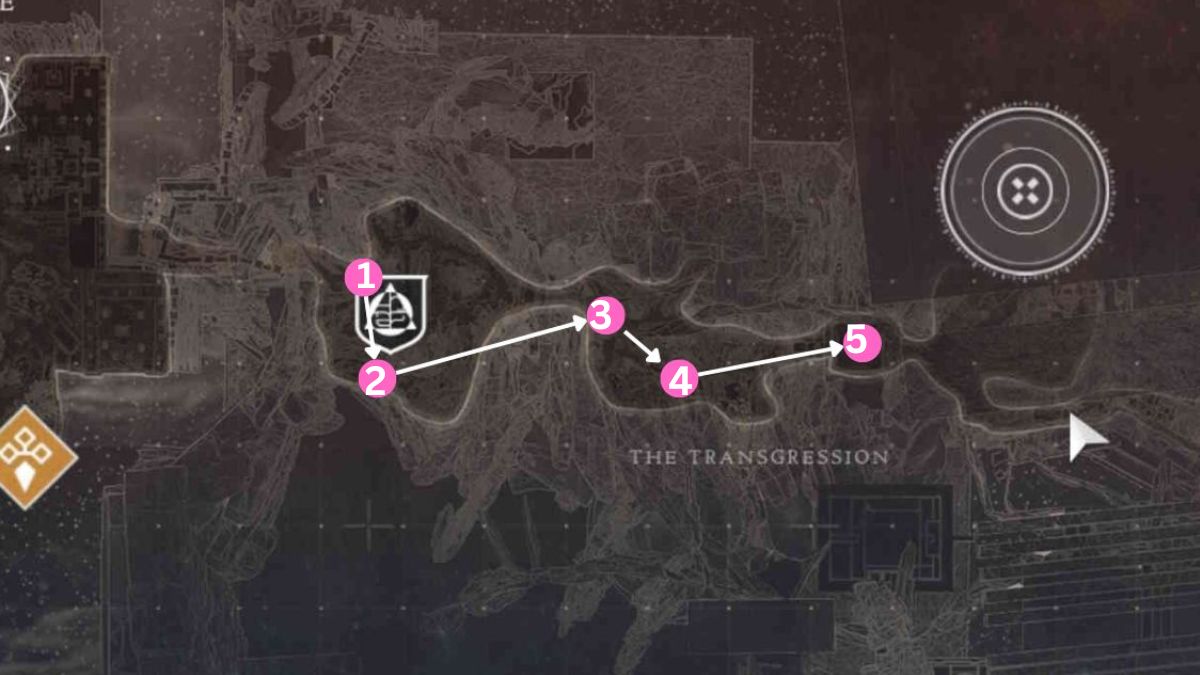
- Walk through the temple corridor in the Impasse (where you picked up the last feather). Follow the path until you reach the old tree and the cliff. Look down and notice a feather on top of the rock.
- Turn right and head straight. You'll see a feather at the top of the floating rocks.
- Head to the eastern part of the Impasse. After you exit the corridor, turn right. You'll find a feather on a branch.
- While on the branch, look to your left, and you'll see another feather on top of the enormous hand.
- Travel further east, enter the building, and follow the path until you reach the hall with hands coming out of the ceiling. The last feather is on top of the pillar.
For more Destiny 2 guides, check out How to get Prismatic Fragments in Destiny 2 on Pro Game Guides.