Our Destiny 2 Lumina Quest Steps Guide
will walk you through everything we currently know about this Exotic Hand Cannon. We've got a full look at all of the quest steps, and will be featuring a list of the perks the weapon features.
Lumina Perks
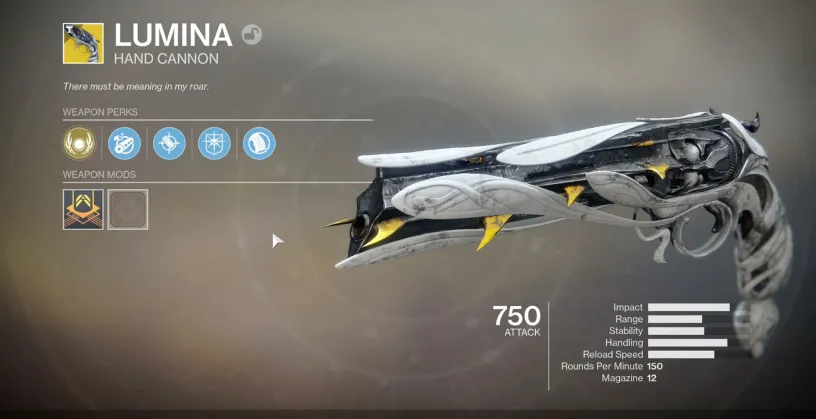
- Noble Rounds (Intrinsic): Kills with this weapon leave behind Remnants. Absorbing a Remnant converts your next hipfired shot into an ally-seeking Noble Round and partially refills the magazine.
- Blessing of the Sky (Trait): Using a Noble Round on an ally heals them and grants both you and them a weapon damage bonus for a short duration.
Lumina Quest Steps Guide
All of the Lumina Quest Steps and some tips/tricks on how-to complete them can be found below!
Step 1: Find the Location of the Original Thorn
We'll need to return to where we first found the Thorn. You will need to head to Trostland at the EDZ. North of Trostland is the Salt Mines, make your way to the mine and you will find the Transmat.
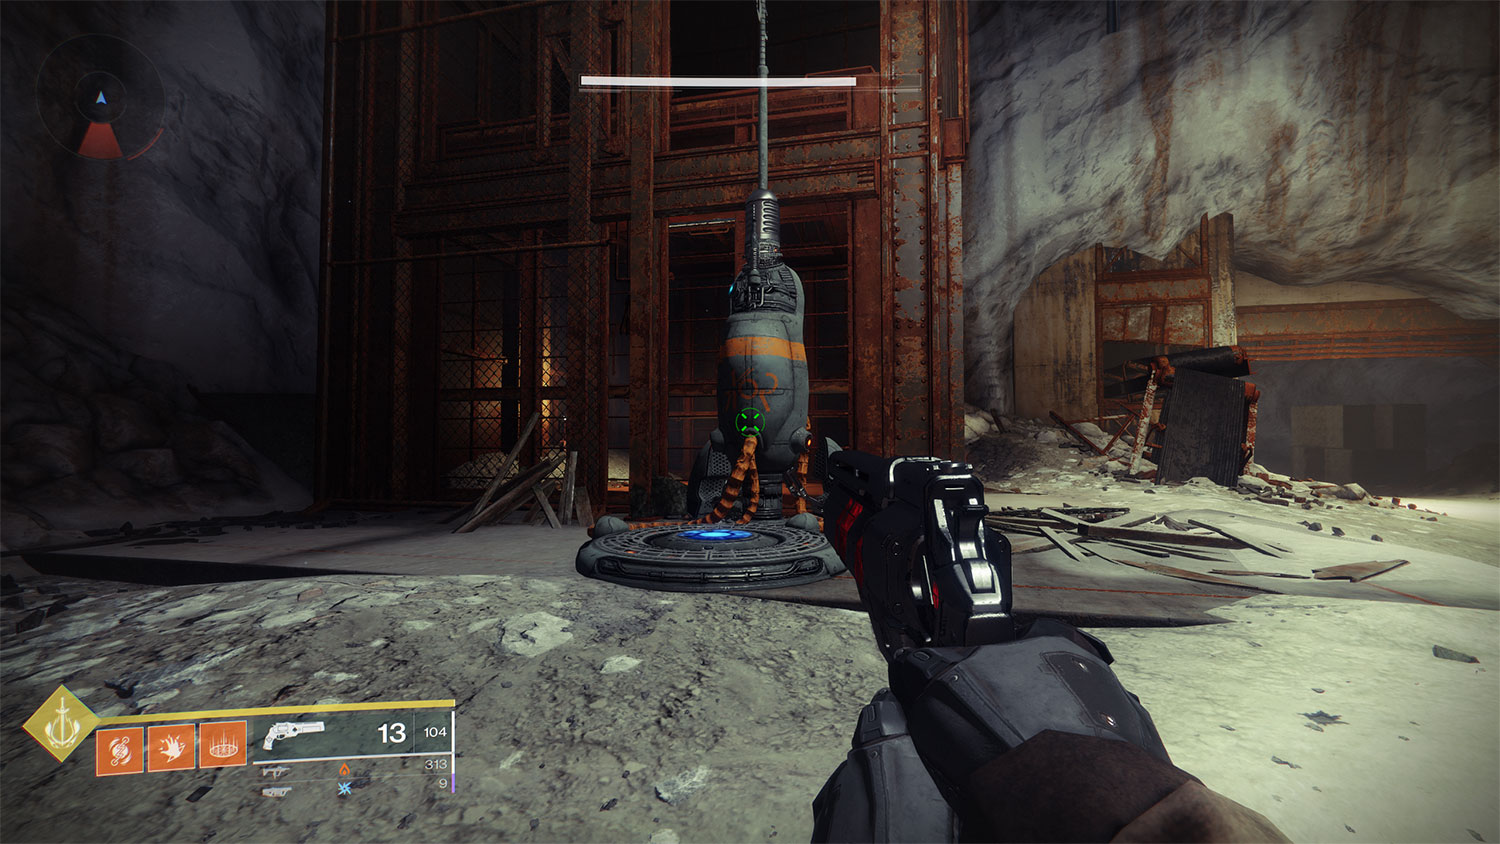
Use the Transmat, and you will teleport to a new location. Move forward here until you see the purple barrier and a guard rail on the left.

Move along the guard rail forward until you see a little alcove you can jump up into.
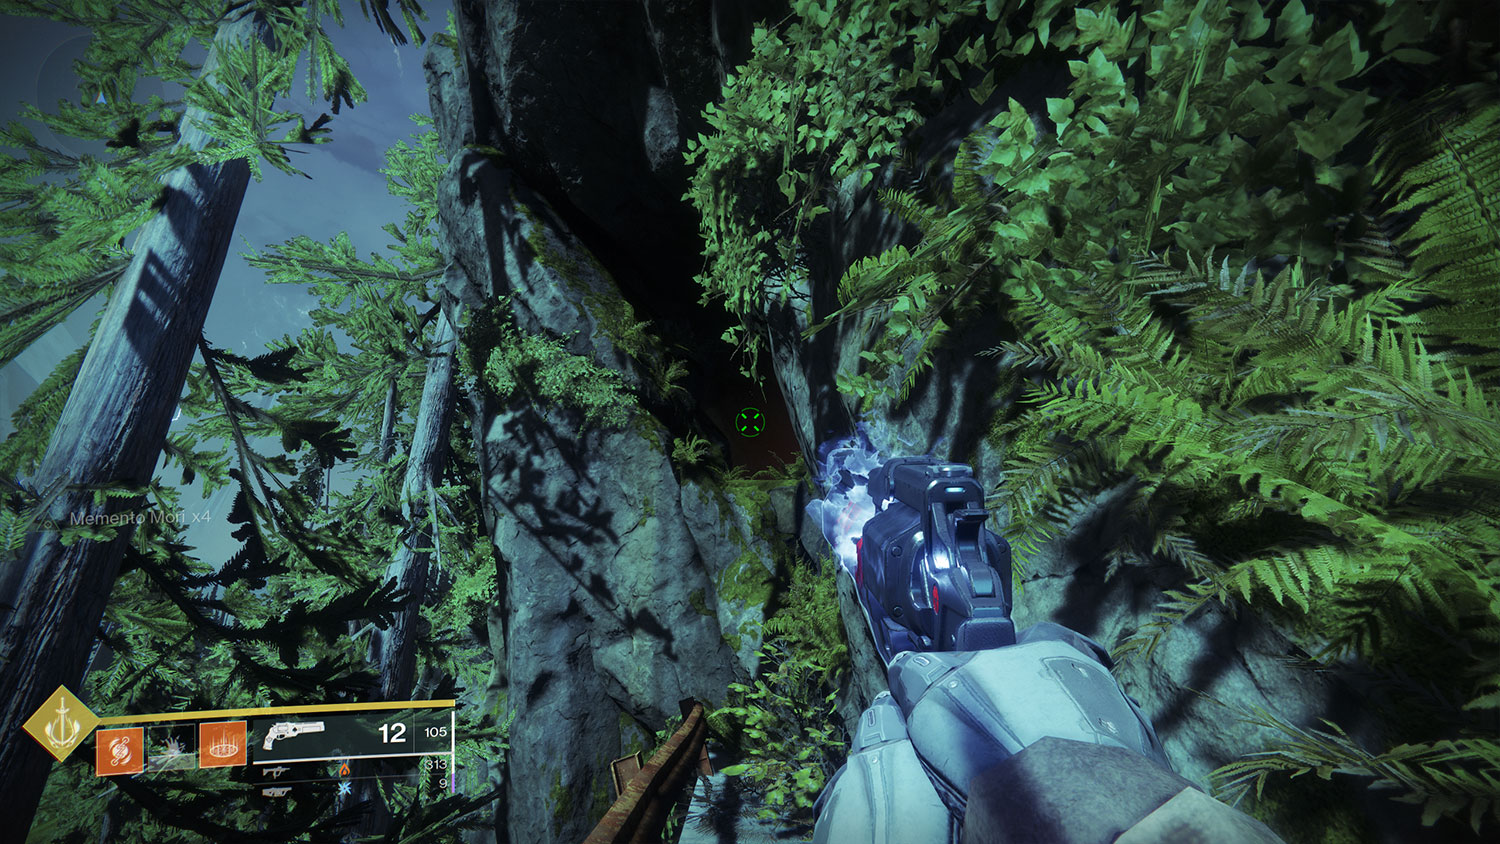
Head to the back of this area all the way and you'll find a chest with the "A Fateful Gift" Quest Step!
Step 2: A Fateful Gift
You've discovered a letter in the ruined campsite where you found your mangled Thorn. The sender purports to be the legendary Shin Malphur, a supposed do-gooder with a complex approach to doing good. He claims he's entrusting you with the original Thorn, a hateful weapon capable of permanently killing Guardians. The gun is hidden away somewhere, and to find it, you'll have to used an enclosed system positioning device to track it down. Your Ghost observes that the signal changes once an hour, on the hour, so you'll have to be quick.
Identify the location of the original Thorn using your system positioning device.
This appears to be random, depending on when you look at your System Positioning Device. If you read the text, it looks like the signal changes every hour. We're compiling the locations we know of down below!
Alton Dynamo Chest Location
This one's a bit more complicated, so I'll leave this video with the location:
The Tangled Shore High Plains Chest Location
Here's a video that takes you to the location:
Nessus Chest Location
The location you are looking for is in the middle of The Tangle.

Here's what the entrance looks like:
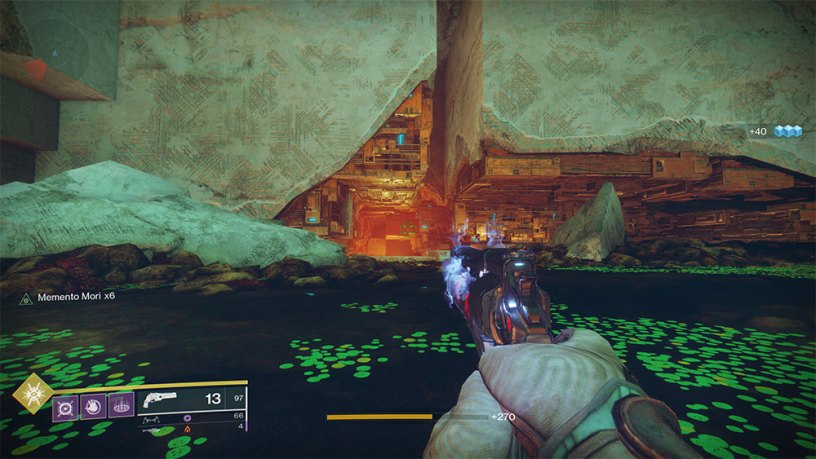
Keep going forward in this area until you come to the following room. You will want to jump over the gap, and head on the right side if you are facing this direction. Down on the side will be a platform area with some orange lightning.
Once you drop down, you should see the following pathway.
The chest will be right at this location:
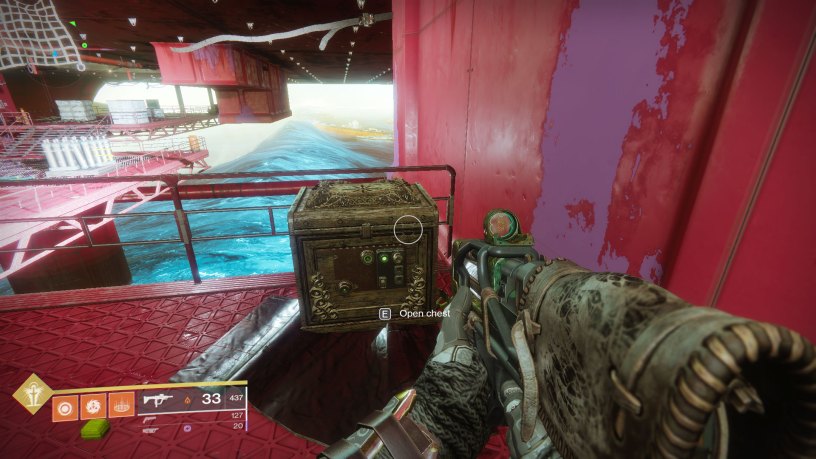
Sinking Docks Chest Location
If you're looking for the Sinking Docks location, head over to Titan and you'll find it west of Siren's Watch.
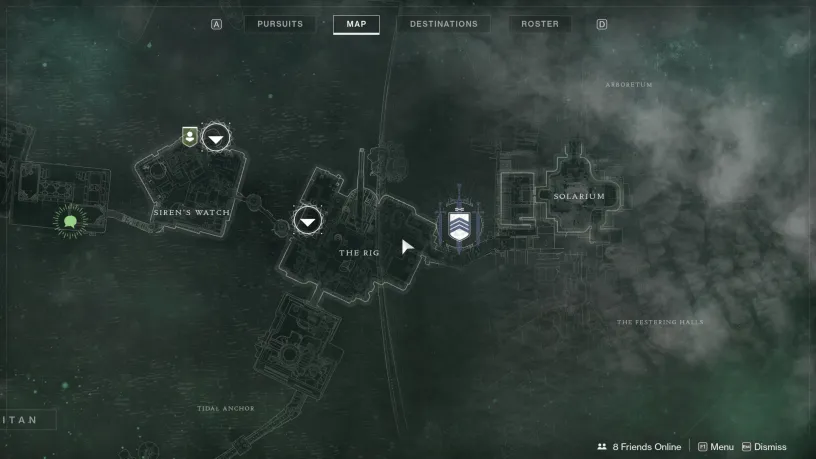
Here's where it is in-game, credit to TheRealTetrabyte on Reddit.
Mercury Lighthouse Chest Location
You will need to participate in the Vex Crossroads Public Event on Mercury to get this one. It's up on top of one of the lighthouses, the one on the east side. You'll need to jump on the floating platforms to get up to the top. Here's an image of the location below, credit to TooBoo4U on Reddit.

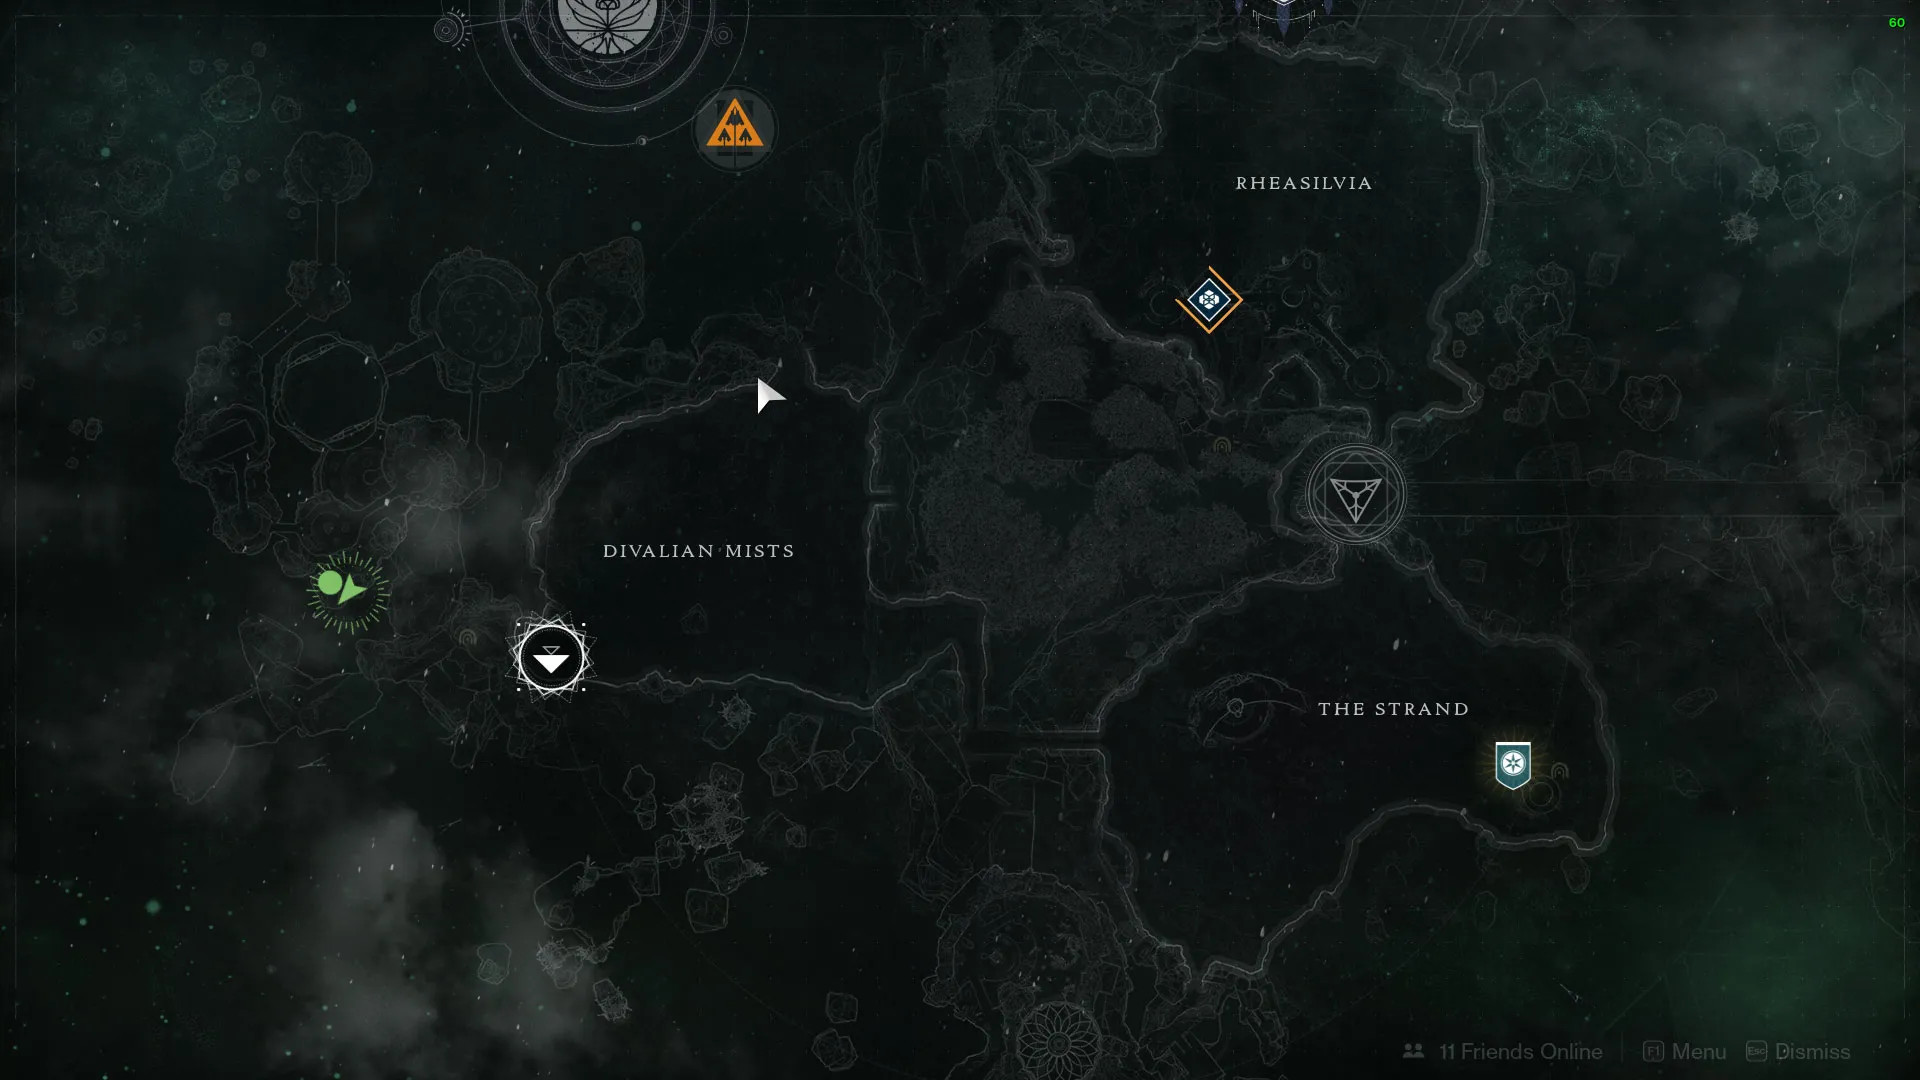
Spine of Keres Chest Location
The chest is far west at the Dreaming City. You'll have to go north through the Divalian Mists through the open gap. Then make your way across the broken terrain to the spot indicated on the map below. Credit to EndoNova on Reddit for the images.
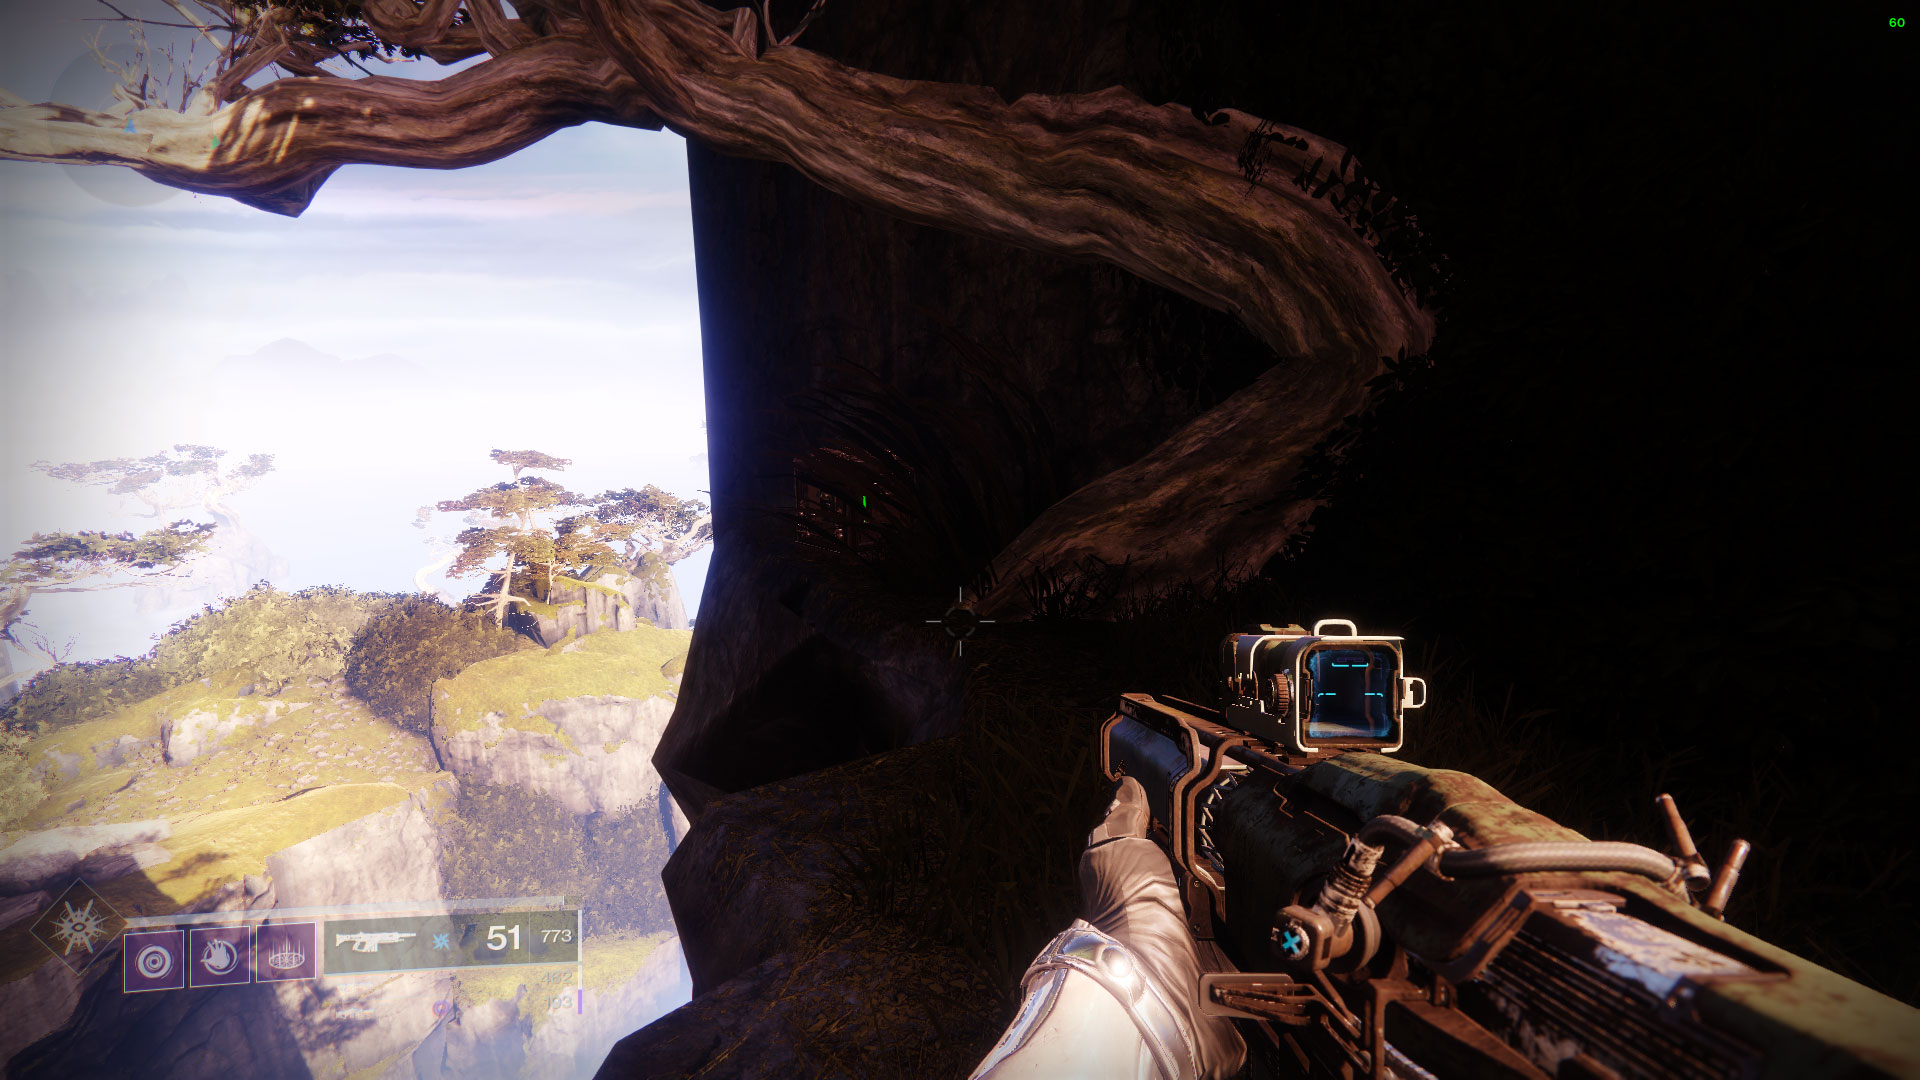
The exact spot can be found via the map below!
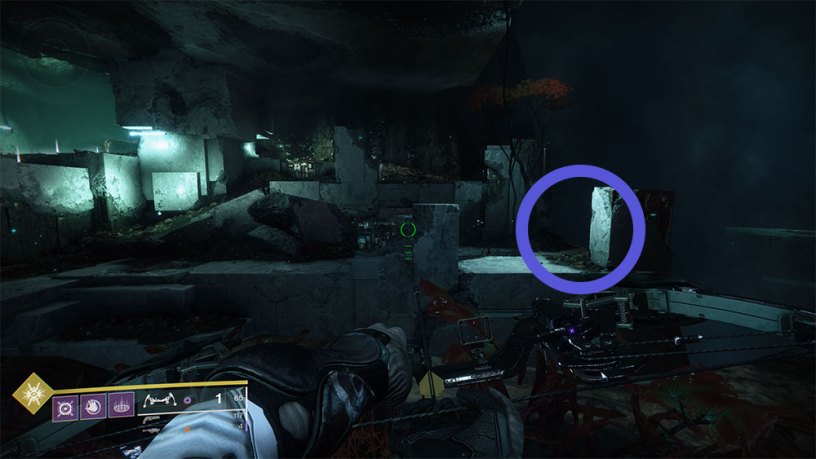
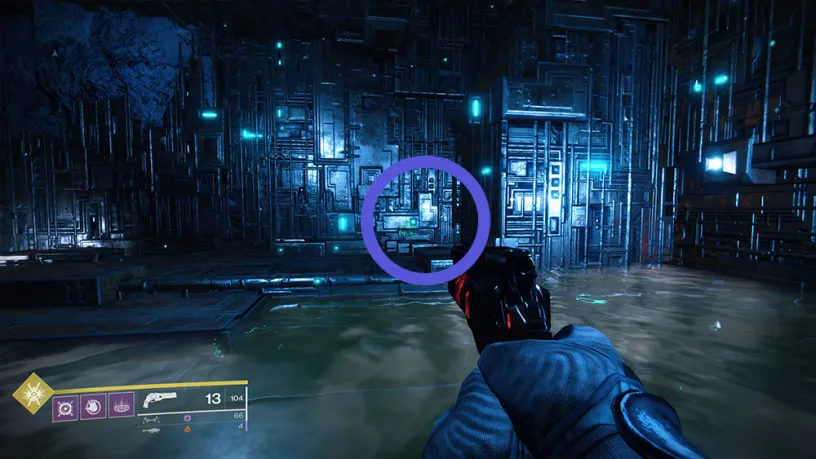
Io Excavation Site Chest Location
Head on over to Io and go to the Giant's Scar Landing Zone. Then head to this area that's on the eastern cliffs:
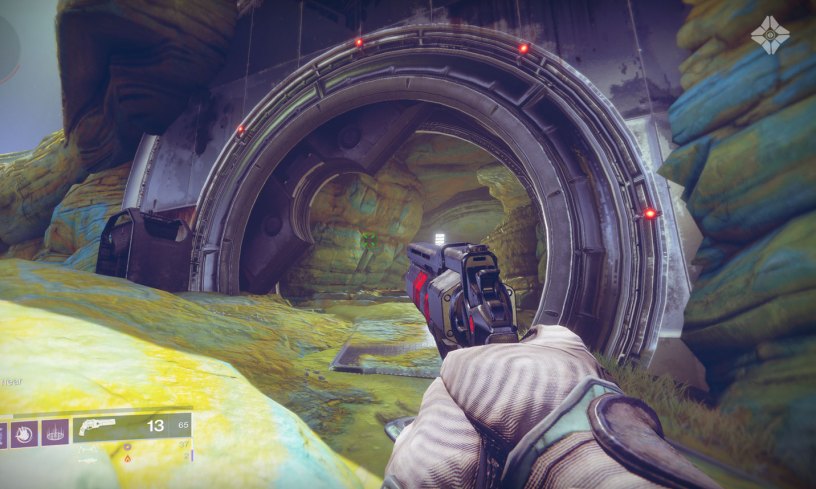
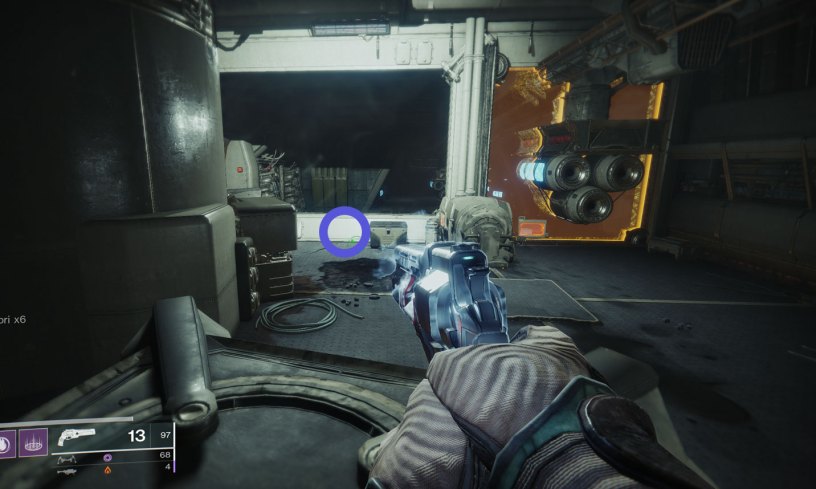
You'll need to go in pretty deep and either kill all the monsters, or skip them and try to survive. Find this room, and you'll see the chests where the purple circle is:
Shaft 13 Chest Location
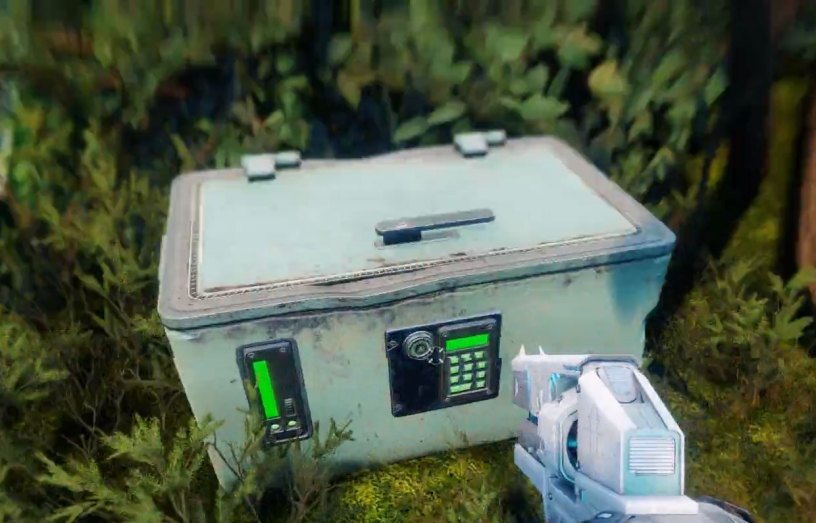
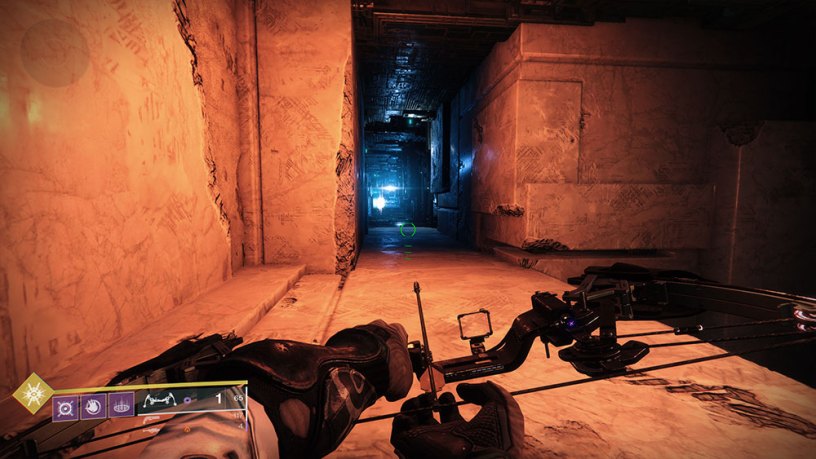
Check your System Positioning Device, mine said to head to Shaft 13 in the European Dead Zone. Use The Sludge Landing Zone on your map, Shaft 13 is a Lost Sector that is just south of where you end up in The Sludge!
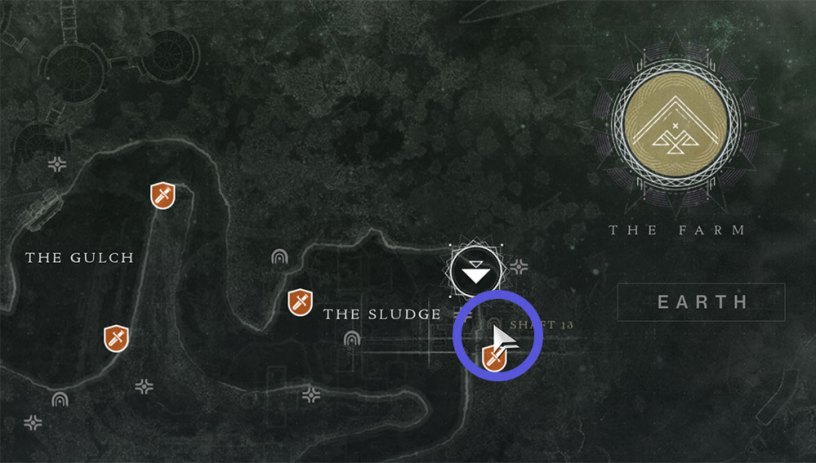
Here's a look at the entrance to Shaft 13:

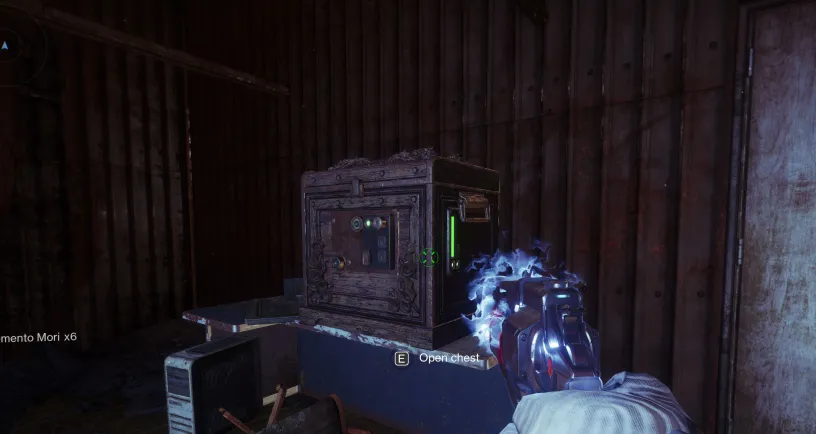
Head into Shaft 13 and go upwards on the scaffolding. Follow the open doors, and you will eventually come to an open door with a room that has the following chest. You do NOT need to complete the Lost Sector, and if you come across enemies you've gone too far!
Step 3: Bearer of Evils Past
You are the new owner of Dredgen Yor's original Thorn. Merely holding the gun makes you nauseous—not out of moral principles, necessarily, but instead a very physical effect which reminds you of losing your Light during the Red War. You don't know what to do with this… thing. You have no intention of firing it. If nothing else, you believe you need to neutralize it.
Neutralize the Thorn's intrinsic Darkness with the strength of your Light.
For this step you are going to need to generate 250 Orbs of Light! One of the best ways to generate Orbs of Light is using Masterwork weapons in Blind Well (Blind Well is also part of the next quest step). If you have a better method, let me know in the comments! If you are in a team, you should get credit for the Orbs they are generating as well.
Step 4: Rose Revealed
The searing power of your Light burns away the sickness that consumed Dredgen Yor's Thorn, revealing the weapon that it used to be: Rose. You contemplate the weapon for a long time before resolving on a course of action. If Thorn symbolized twisted intention and malice unchecked, then you will make a gun that symbolizes something greater: the courage to choose the right path, even when it is unpopular or unsafe. But to do that, you'll need to begin your second adventure in gunsmithing.
Restore Rose's perks to prepare the gun for its future transformation.
You'll now receive the Rose Hand Cannon once you've generated those 250 Orbs. You'll now need to complete three different quest steps to unlock Rose's perks:
- Band Together: Complete a Nightfall strike with a score of 50,000 or higher.
- Complete the Nightfall
- Defend the Light: Defeat multiple enemy combatants in a row without reloading your weapon.
- Streaks 100 - You'll get credit for how many enemies you kill before you reload again after your first kill.
- Face the Hordes: Complete encounters at the Blind Well, at any of the Black Armory forges, or in Escalation Protocol.
- Complete 35 Encounters
It doesn't appear you need to have Rose equipped for any of these challenges. Use the Huckleberry if you have it for the reload quest. It gains ammo as you get kills, so it doesn't count as being reloaded. Black Armory forges appear to be the preferred way to complete the Face the Hordes challenge. You have to complete the Nightfall in Band Together, don't leave once you hit 50,000 points!!!
Step 5: Fireteam Leader
Your project is going well. The gun is more than mechanically sound; it has synergized with your Light. But unlike your quest to restore your Thorn, there are no mentors here. This is you, forging a new path, following your intuition in search of a strong symbol of hope. If there's one thing you've learned since the Red Legion invaded, it is that single Guardians fall alone. Fireteams of like-minded individuals persevere.
Complete activities throughout the solar system with Rose equipped. Fighting in a fireteam with other Rose wielders grants the most efficient progress.
It appears you should be able to kind of do what you want throughout the game. If you got some bounties to complete or quests you want to do, they should count towards the percentage you need to complete. Ideally, you'll find some people that are working on this step as well, so you can earn additional progress.
If you want to farm this one up quickly, try doing quick Strikes. Lake of Shadows is a pretty fast one, it can be found south east of Trostland at the EDZ on your map! Just run through the level and try to avoid having to fight any enemies along the way as much as you can.
Step 6: Strength in Numbers
Your philosophy about this gun has crystallized. If Thorn was a weapon of selfishness, then the gun you make will be one of selflessness. If it's a coordinated fireteam that saved the City from Ghaul, then the gun you make will support fireteams. The Light is about standing united in service of a hopeful future.
Defeat Guardians with Hand Cannons as a team, generate Orbs of Light for fellow Guardians, and defeat Invaders in Gambit before they have killed any of your teammates.
You have to generate 35 Orbs of Light, gain up to 100% Guardian kills with a Hand Cannon, and then defeat Invaders before they have killed any of your teammates.
- For the Gambit part of the challenge, you just need to defeat the Invader once prior to them killing any of your teammates. It appears you'll need to do it within 10 seconds of them invading your side of the map.
- For the Guardian kills, you don't have to do it in Gambit. You can do it in the Crucible, and you don't need to use the Rose hand cannon.
- You don't need to generate Orbs of Light in PvP, you can do this anywhere you find easiest. Probably just do the same thing you did previously to generate them.
Step 7: Bloom
You feel ready to complete your project, and you have a suitably poetic scheme to do it: You plan to reclaim lost Light from the Hive. Using the strength of your own abilities, you'll redirect it into the gun and, with any luck, it will bloom into something greater.
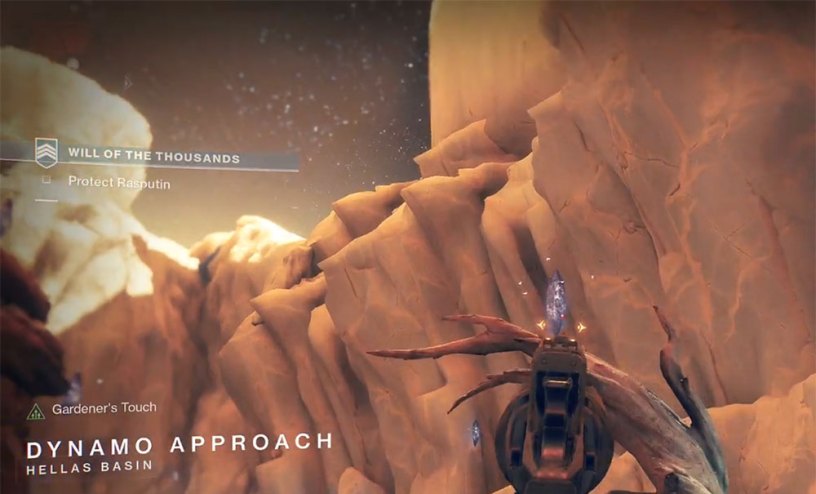
Enter strike "Will of the Thousands" with Rose equipped to reclaim lost Light from Hive crystals and defeat Xol. Objectives must be completed in a single run through the activity; progress is not saved across multiple attempts.
You'll need to reclaim the light from 11 different crystals you find within the Will of the Thousands strike. Once you've completed that, you will need to kill Xol and complete the strike. This should be the last step of the quest, and you should receive Lumina once it is complete!
The crystals are really easy to find, you'll see them floating in the air when you find enemies. You need to destroy the crystals with Rose. Once you've finished the crystals, just kill Xol and Rose will be consumed and give you Lumina!