I'm notorious as a writer for excessive preamble, but not today. You wanna know how to get
through Salvation's Edge in Destiny 2? We've got you covered.
How to Start Salvation's Edge in Destiny 2
First and foremost, make sure you've completed both The Final Shape Campaign and The Wild Card Quest which you can do afterwards. Suggested Power Level for this activity is 1945, which you'll likely exceed in the process of doing the campaign. You'll locate the raid node in the Destinations menu and in the Pale Heart area off to the far right.
First you'll need to actually get into the Raid space, and as with most raids, this usually involves a bit of platforming and some ad clearing. When you land, run directly ahead until you reach a bridge. Move along it, and eventually you'll see two openings in the wall to your right. Jump into the top one and follow the white lit path until you reach the first encounter. (You might need to crouch through some sections; these are lit in red instead.)
The Substratum Encounter Walkthrough - Destiny 2
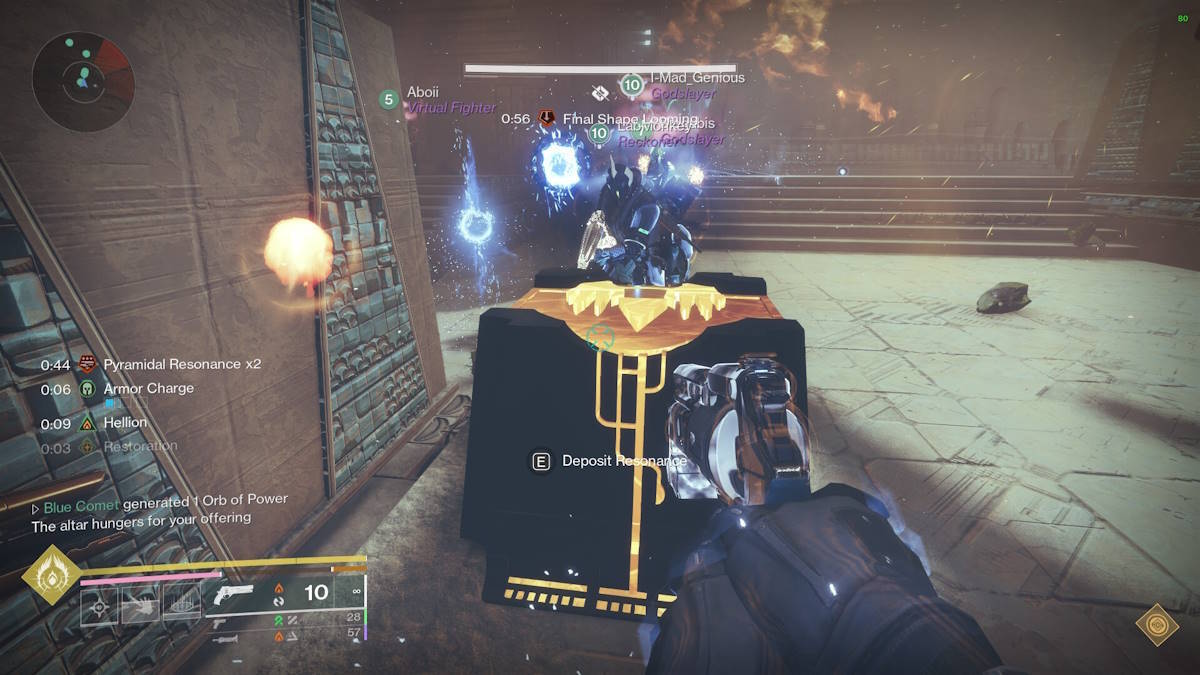
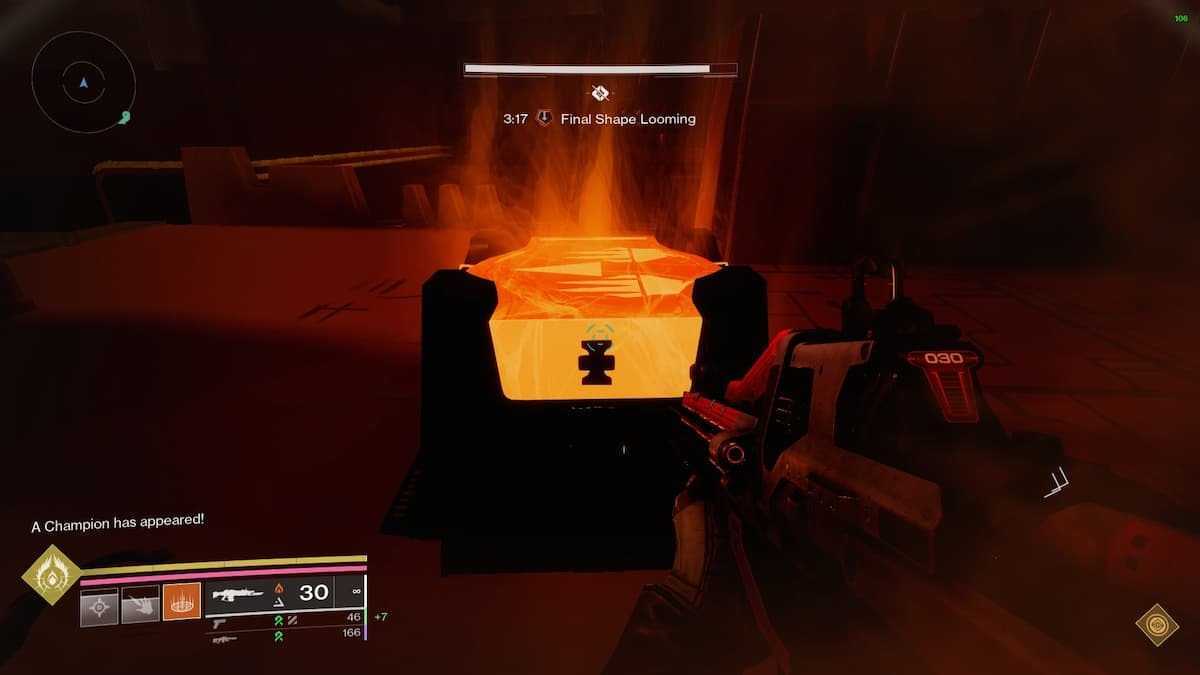
When you enter the encounter room, you'll be met with something called the 'Resonant Altar', and a 'Pyramidal Resonance' shard. Picking up the Shard and depositing it into the Altar will begin the encounter. When you begin you will all receive the 'Final Shape Looming' timer, which is your wipe timer. It starts at four minutes and 15 seconds, but can be earned back as the encounter continues.
Two rooms on either side of the encounter arena will open up, and you'll need to split into two teams of three, and enter one room each. Your aim in the rooms is to kill a chain of enemies to continue the encounter. This starts with both teams needing to kill Vex Minotaurs which will spawn Vex Hydras (Keepers of the Monolith). Killing the Hydras opens up more rooms around the perimeter, which you'll need to search in order to find Overload Champions (Devotees of the Witness). Killing them will spawn a Tormentor (Threshold Sentinel) back in the center of the encounter arena. (You'll know it's spawned when you get the notification 'You are being beckoned back to the center'.)
All players need to return to the center and kill the Tormentor. Repeat this same loop one more time to properly move on with the encounter. There will be glowing plates in the rooms in which you killed the Overload Champions, but ignore them until you've killed the two Tormentors.
After all this is done, you'll be ready for the second phase. Split into three teams of two, with two staying in the center of the arena, and the other two heading for the two sides again. The two teams in the side rooms will need to split up further, with one going back to the glowing plate in the room you killed the Overload Champion and the other going to the Resonance Conductor Pillar, which should now be glowing.
This next part requires serious co-ordination between you and your partner. One of you will step onto the first glowing plate, which will cause a pulse to begin to travel to the pillar, along the floor. (Like electricity in a wire.) When this pulse reaches the pillar, a circle will briefly appear on the plate. Step on the circle to spawn a Pyramidal Resonance Shard, and send the pulse back to the first plate, in which your partner will need to also step on. Both side teams can perform this a total of three times, to get the maximum amount of pyramidal resonance (which is nine). One shard will spawn in each of your side rooms, and one will spawn in the center where the other two players are. Each player should aim to get three shards (one more than that will kill you).
In order to close a chain you'll need to shoot at the pillar whilst the pulse moves between rooms. Doing this will prevent you from getting the failure mechanic of a Subjugator spawn. Doing this will also despawn any currently spawned shards, so only do this when you're ready to wrap up.
Closing both pillars will spawn another Subjugator back in the center room, which all players will need to return to so that they can kill it. Once it's dead, the Resonant Altar you saw earlier will return, and you'll all need to deposit your pyramidal resonance. Doing so increases your wipe timer by 20 seconds, which is why it's important to get as much as possible.
Once you've done that, the Altar will despawn, and you'll need to repeat this entire process. Repeat three times to complete the encounter. Once you're done, collect your spoils, and move on. You'll need to head up some stairs and take a big red elevator and do some platforming to progress to the next encounter.
The Dissipation Encounter Walkthrough - Destiny 2
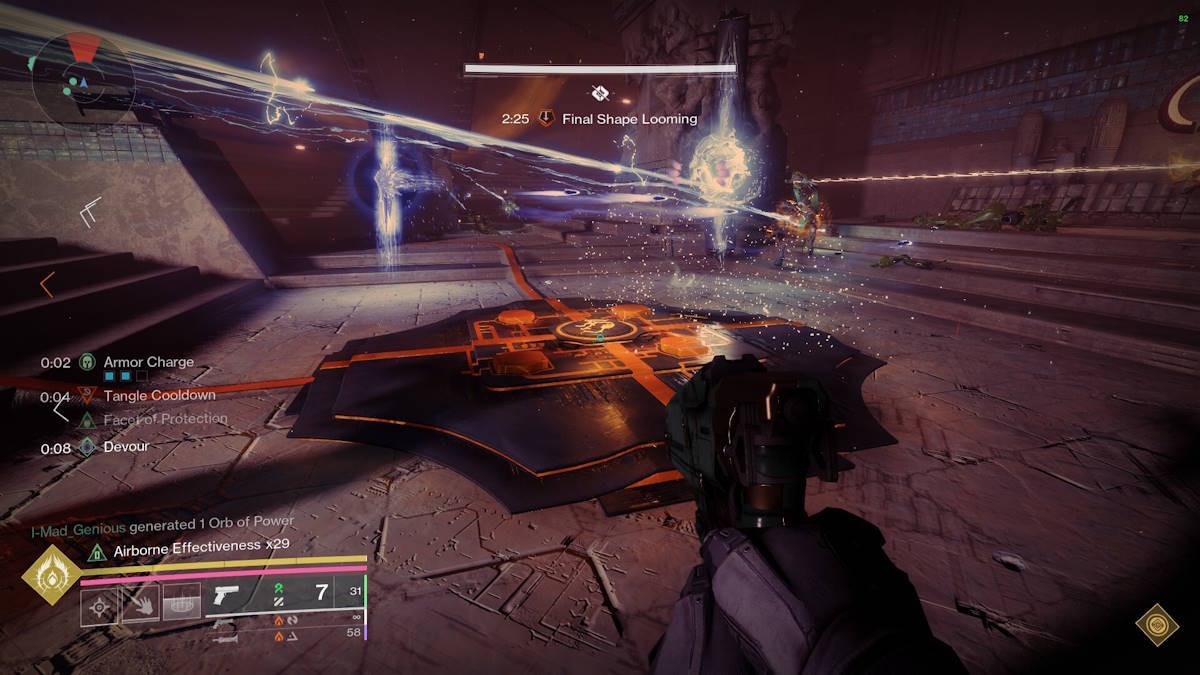
This next arena consists of a large open space and three pillars. These pillars will each have plates nearby, and you'll need to split up into pairs and head to one pillar per pair. This encounter will also have the Final Shape Looms debuff, so time is of the essence again. To begin the encounter, shoot the Blight in the center of the large open space.
Each team will have to kill three orange health bar enemies, with one showing up as a Hive Wizard (pictured below), one showing up as a Cabal Phalanx, and the other showing up as a Hive Ogre. Once all three of the orange health bar enemies are dead, one person on each pillar will receive the Call for Reckoning buff, and all three need to head to the center.
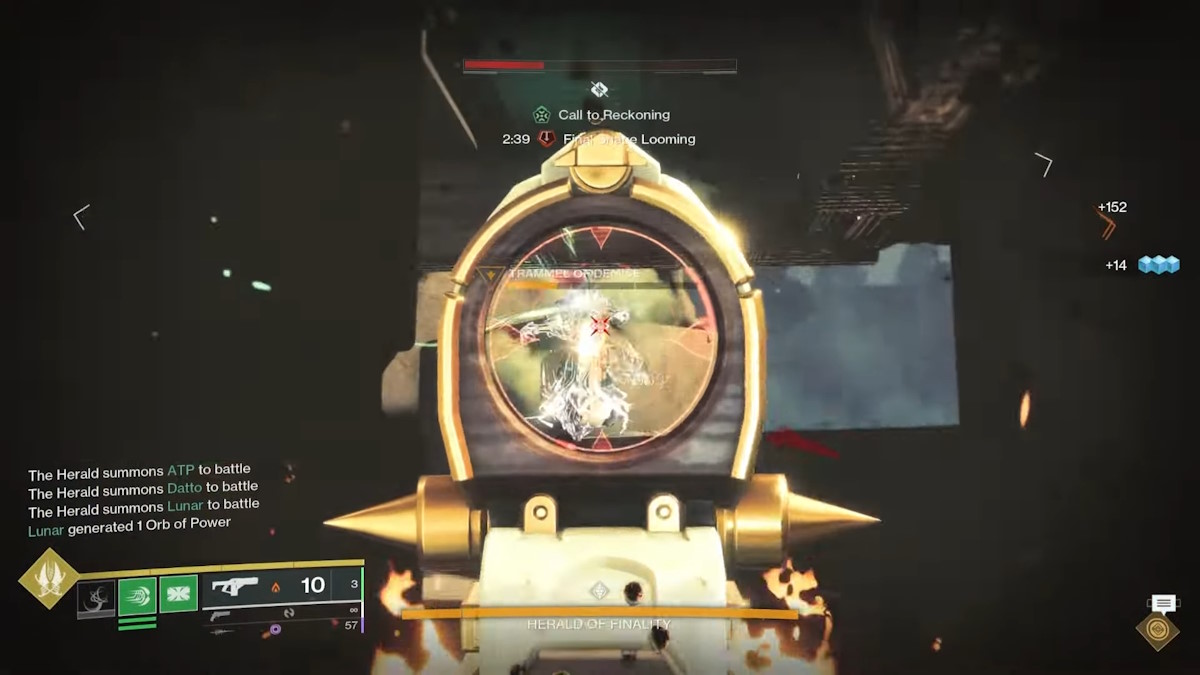
The boss you're here to kill will be roaming around this area, and the three in the center will need to shoot him in the head to progress. Doing so will cause Blights to spawn around the boss, and cause one smaller one to appear above his head. Ignore the smaller one, and focus on the other three. Everyone will need to take all the blights (which can spawn around the arena) out, and when they're gone, the three in the center need to keep shooting the boss in the head. Once you've done enough damage, the Call for Reckoning buff will become the Stolen Favor buff.
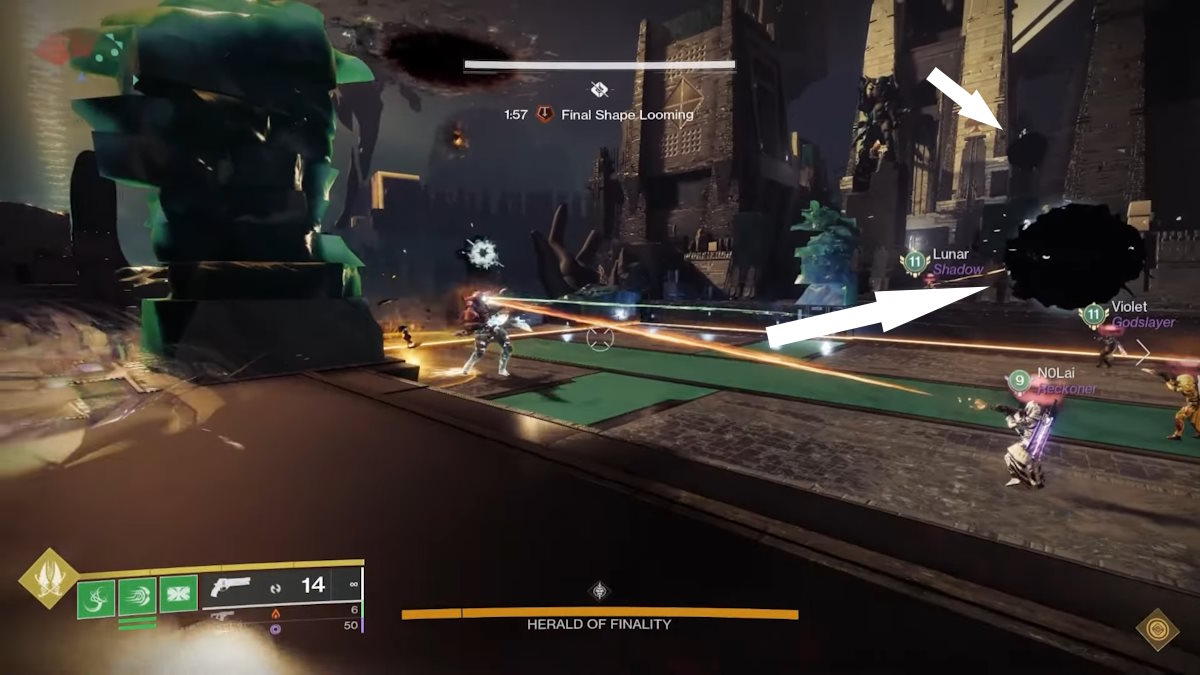
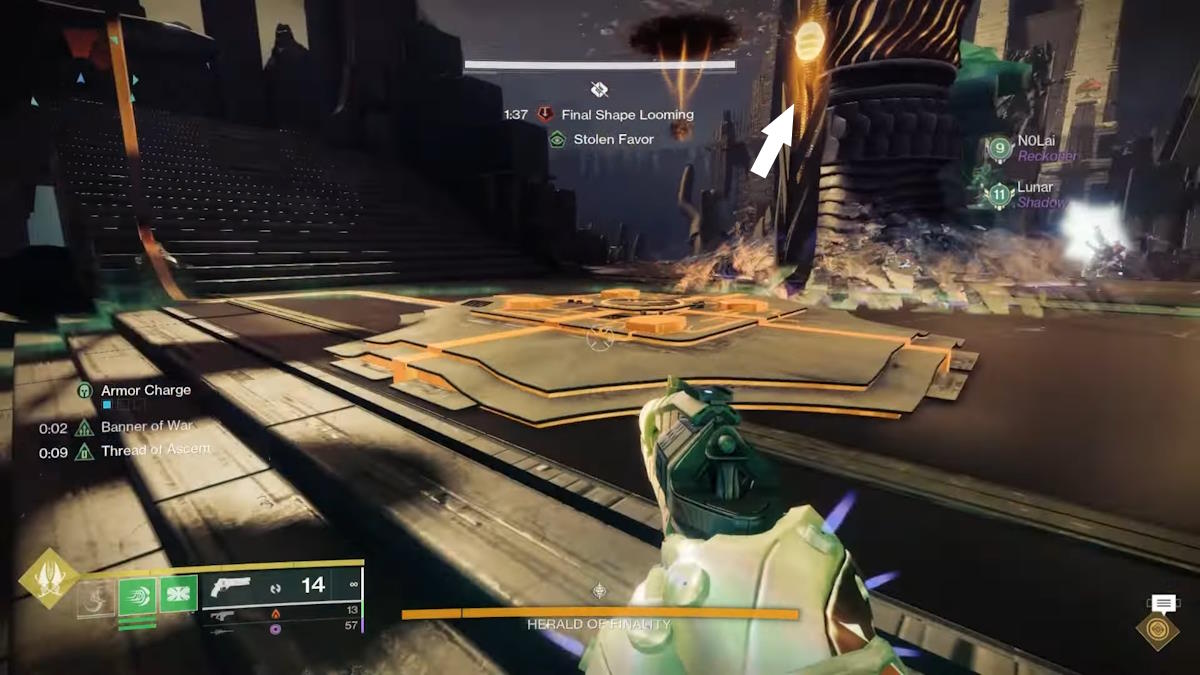
This buff will allow all carriers of it to see symbols on the pillars (pictured below), each one correlating with a type of resonance. (The Pyramidal Resonance from earlier returns, but is joined by Spherical Resonance.) All carriers must return to their respective pillars, and note which symbol appears. It will either be a Pyramid, or a Sphere.
Your Pillars will open, same as the ones in the first encounter, and you'll need to do the pulse bouncing again. This time however, you'll generate two different kinds of resonance. The player on the plate closest to the Pillar should get the resonance that matches the symbol on their pillar. The other player should collect the opposite. Once again, when you're both full (no more than 3 again), shoot the pillar to close the loop. Remember to do this when the pulse is travelling between plates.
Please note that in order to close the pillar, you must be carrying the matching resonance type (i.e. - If the pillar is marked with a Sphere, the person carrying Spherical Resonance has to be the one to shoot it). Another point of note is that failing will cause another enemy to spawn, and will cause the shapes on the pillars to shuffle. And finally, the resonance you carry is determined by which resonance you last picked up. For example, if you were to pick up two Pyramidal Resonance charges, and then one Spherical Resonance, you would end up with three Spherical Resonance charges. All of these notes will carry over into the third encounter, so keep them in mind.
When everyone is done, all players should return to the center and run for the resonance deposit box like in the first encounter. (Which will refresh your wipe timer too.) Once all players have deposited their stacks, begin dealing damage to the boss. This is your damage phase, so it's important to do everything you can to ensure you deal as much damage as possible before he becomes invulnerable and you begin the loop again.
After the boss reaches a health threshold, he will enter a new state known as 'Last Stand', and more enemies will spawn in the arena. You will not reset the loop this time, his damage phase will be extended, and you must kill him before you run out of time.
Once he's dead, collect your spoils, and continue on. You'll have some more platforming, elevators and walking to do, and eventually you'll come across a barrier guarded by a Tormentor. Killing him will remove the barrier, and you can continue. Note that this section between encounters is long, and absolutely massive, but remains relatively straight forward and mostly consists of lengthy platforming sections. You'll have to climb a large monolith, and you should be wary of traps along the way.
The Repository Encounter Walkthrough - Destiny 2
This encounter effectively combines everything from the previous two together, so there'll be some sections in which I only briefly glance over those mechanics for the sake of brevity. Mainly, these mechanics are Resonance, Resonance Conductor Pillars, Plates and Stolen Favor. If you're unfamiliar with any of these, please refer to earlier sections of this guide. This encounter is relatively straight forward once you're familiar with these concepts, and simply repeats three times for three rooms. Once again you'll have the wipe timer, and depositing resonance is once again the way to increase it.

When you enter the encounter room, there will be three sets of plates on the left, in the top center, and on the right. Each set of plates will have a Tormentor, so kill them all to unlock all of the plates. Any player that lands the final blow on a Tormentor will receive the Stolen Favor buff. They will then be able to see the symbols on the pillars, and can inform the team of which resonances correspond to which pillars. There will be three types of resonances to generate here, Spherical, Pyramidal, and Hexahedral.
As mentioned prior, this encounter effectively acts as an extended version of the previous two encounters. Your team will need to generate resonance, close the pillars, deposit resonance, and then deal with a final wave of enemies before moving on to the next room. Repeat this process in three rooms total, and the encounter will be complete.
It should be noted that whilst the mechanics may not change, the layouts of the rooms absolutely do. They can become quite complex, and this means that you must double check the layouts of the plates, and be sure what plates generate each type of resonance.
The Verity Encounter Walkthrough - Destiny 2
I won't sugar coat it: this encounter is a lot. In some sections I will be giving examples to more easily explain the mechanics.
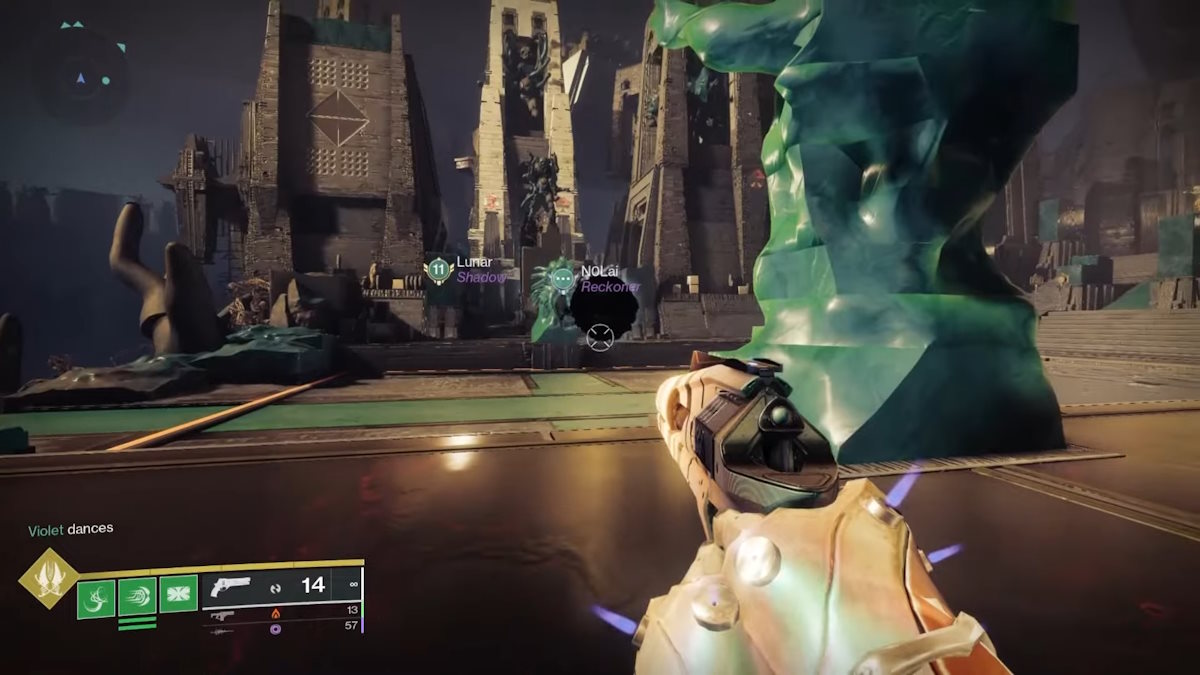
Upon entering the encounter area, you'll see six statues in a half circle formation. Each one will have the same appearance as one of the Guardians in your fireteam. Because of how important this will be later, you should make sure everyone has a unique and easily identifiable piece of armor on. In addition to this, ensure each player has a unique Ghost shell, as this will be all but required for a later mechanic. It's best here to assign each statue and their respective Guardian a number going from 1 to 6, from left to right around the half circle of statues.
Shortly after entering, three players will be teleported at random to rooms by themselves. I'll be breaking down their instructions first.
The Solo Players
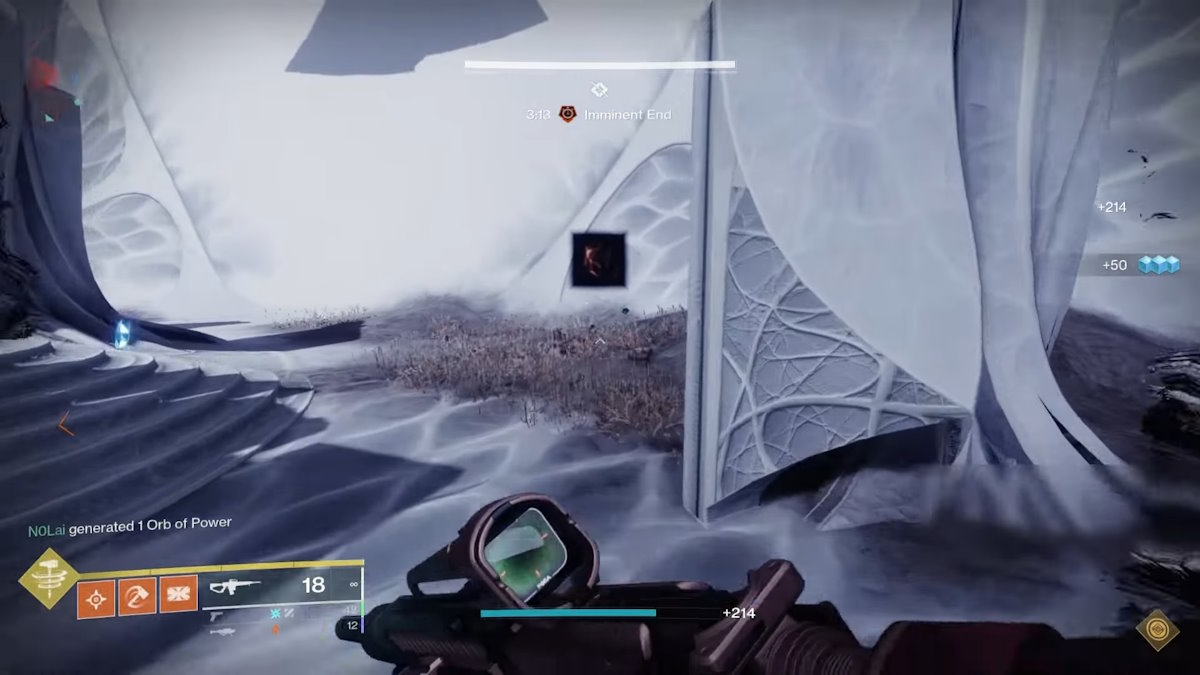
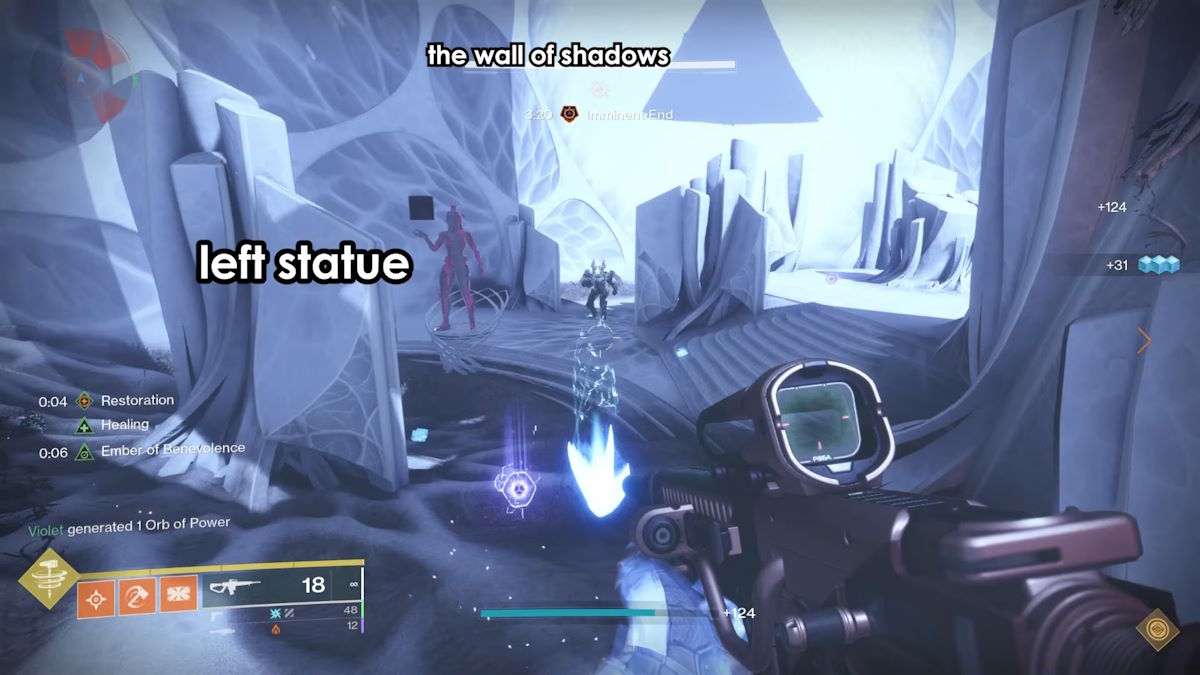
The players who get teleported to their own rooms will be met with a room filled with three statues, one of themselves and two of the other two teleported players, and a back wall which will display two distinct shapes. The back wall will switch between these two shapes every few moments. The image below shows a statue in the room, as well as the shadows on the back wall for reference.
Each of the statues in the room will be holding a shape, either being a square, circle, or triangle. Your first step should be to type out or communicate the shapes on the statues going from left to right. Only one player needs to do this, as the statues themselves will remain the same between the solo rooms. Then, you must return to your statue in the room, and note which shape it is holding. Then, look to the wall with the two shifting shapes and note what shapes they are. Your aim will be to send the shape that you are NOT holding to one of your teammates who is holding that shape. For example, if your statue is holding a circle, and the shapes on the wall are switching from circle to triangle, you will need to send the triangle to the teammate whose statue is holding a triangle.
To do this, you must kill Hive Knights that spawn in your arena, and upon death they will drop a 'Splinter' (which will take the form of a shape, pictured below) which can be picked up. Please note that these Knights can drop both of the shapes that are displaying on the back wall, so be sure to double check what it drops upon death before rushing to pick it up. When you've collected the correct shape, you'll need to take it to the statue that is also holding that shape. Deposit the shape, and wait for your teammates to do it on their end.
When you've done this correctly, you'll note that the back wall stays the same shape. It will still perform an animation of sorts, but it will always end up as the same shape. Now, more Knights will spawn, and they will now only drop the shape displayed on the back wall. You'll need to kill two Knights, collect both of their shapes, and give one to each of the statues that belong to your friends. They will need to do the same, and by the end, the shapes on the back wall should be unique to the one your Guardian is holding.
So, here's an example to try and help ease this explanation.
You enter your room, and locate your Guardian. Your Guardian is holding a Square, and the shapes on the back wall are moving between Square and Circle. You will need to kill Knights until one of them drops a circle, and then take that circle to the statue that is also holding a circle. Once you've all completed this step, your back wall should now show only a square. Now you'll need to kill more Knights to collect two more squares, and you'll need to deliver these to the statues belonging to your friends. Once this is all done, your Guardian will still be holding a square, and the shapes on the back wall will be shifting between circle and triangle.
The Death and Resurrection Mechanic
Now, as if this wasn't enough, the encounter adds an additional layer of complexity. At some point during this process, the Witness will kill all three of the solo Guardians.
This will cause their Ghosts to spawn back in the main room with the other three players. These players must escort each Ghost back to their respective Guardian. This is why it's important to note which Ghost belongs to which Guardian and why having unique Ghosts is basically a requirement. And to make matters even worse, the three dead Guardian statues will be invisible. This is why it's important to give each player a number to correspond to the position of their statue. The three dead players will be able to see one missing statue each as they spectate in death, so they'll be able to call out the positions of the players if there's any confusion, and this is why it's important for every player to be able to easily identify the other Guardians by ensuring they have a piece of unique and identifiable armor on. Taking the Ghost to the wrong player will kill the player carrying the Ghost instantly.
Here's another example, albeit highly simplified and unlikely to be this clean cut in raid.
Statues 2, 4 and 6 are missing. Player 2 can see the statue of Player 4, Player 4 can see the statue of Player 6, and Player 6 can see the statue of Player 2. Player 2 says 'I can see Player 4, they had the Trials of Osiris Ghost, that's PGGWriter4'. Player 2 can then direct the player carrying that Ghost to the statue they need to go to. The live player needs to deposit the Ghost in the correct statue, which will resurrect that player and they'll go back to their solo room.
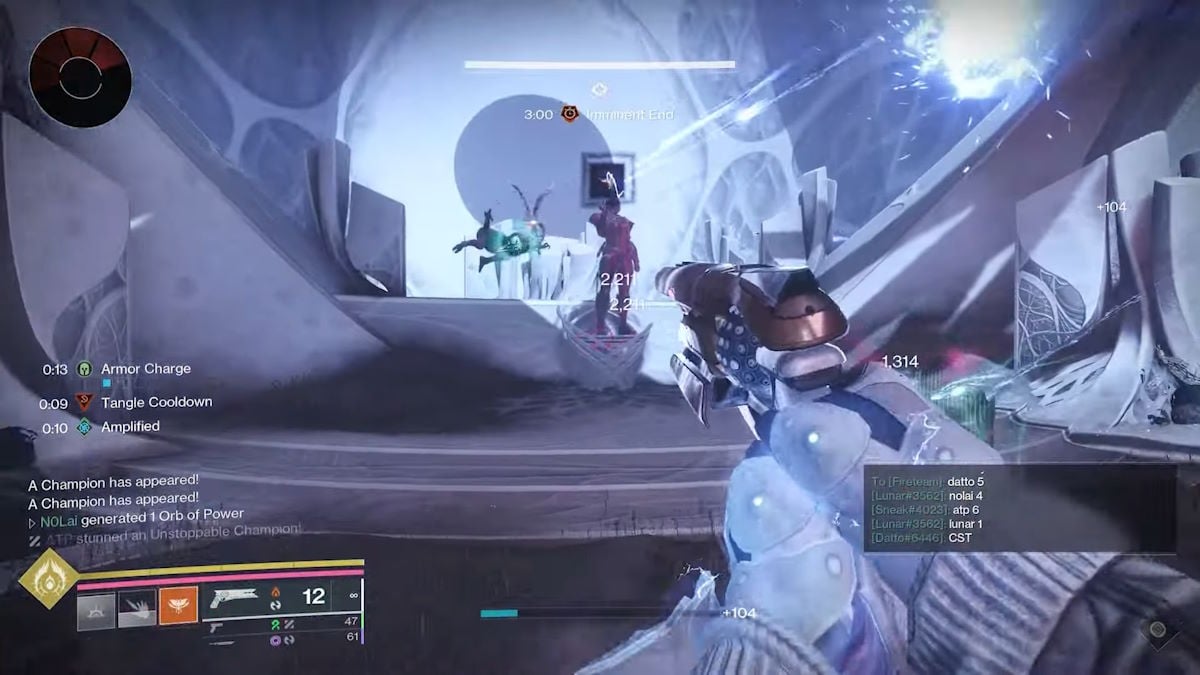
One thing that helps in this situation is that the three solo players will have some advanced warning on when they're going to die, based on an effect that will begin to show on their HUD. This gives you all some time to co-ordinate before death. An example of this HUD element is shown in the clip below from Datto.
When you return, you must continue the mechanics as described earlier. You'll know you're done when your statue is the only one holding a shape, and the shapes on the back wall are both unique and different to the one your statue is holding. Before continuing, kill both Knights again, and grab the two shapes that drop from them. These two shapes will combine into a new shape, with one example being that a circle and a triangle will become a cone, though this doesn't much matter as it's simply the sign to know you're able to leave once the outside players are done. Once you and the other solo players, and the three external players (which will be discussed next) are done, you'll be able to walk through the broken glass wall at the back of your room to rejoin everyone.
The Group Players
Whereas the solo players will be dealing with 2D shapes, the three players in the center will be dealing with 3D shapes. There will be three statues correlating to the three solo players, and each one will be holding a random 3D shape. These 3D shapes are comprised of combinations of 2D shapes, and I'll list them below.
- Sphere = Circle + Circle
- Cube = Square + Square
- Pyramid = Triangle + Triangle
- Cylinder = Circle + Square
- Prism = Square + Triangle
- Cone = Circle + Triangle
Now, this is where the callouts mentioned earlier come into play, and why it's important the solo players give their shape callouts going from left to right. When you're outside you'll have to rearrange the shapes to exclude those called out in the rooms. You need to do this whilst also ensuring the statues don't contain two of the same shape. This means that Spheres, Cubes and Pyramids are invalid. Ultimately you'll want each of the statues to be holding either a Cylinder, Prism, or Cone.
So for example, let's say the solo players call out Triangle on the left, Square in the middle, and Circle on the right. If the left statue outside is holding a Prism, which is a Triangle and Square, then the outside players will need to extract the triangle from that left statue by replacing it with a different shape. In this example, you would trade out the Triangle for a Circle, leaving the left statue with Square and Circle. The same goes for the other two statues, where middle cannot have a Square, and right cannot have a Circle.
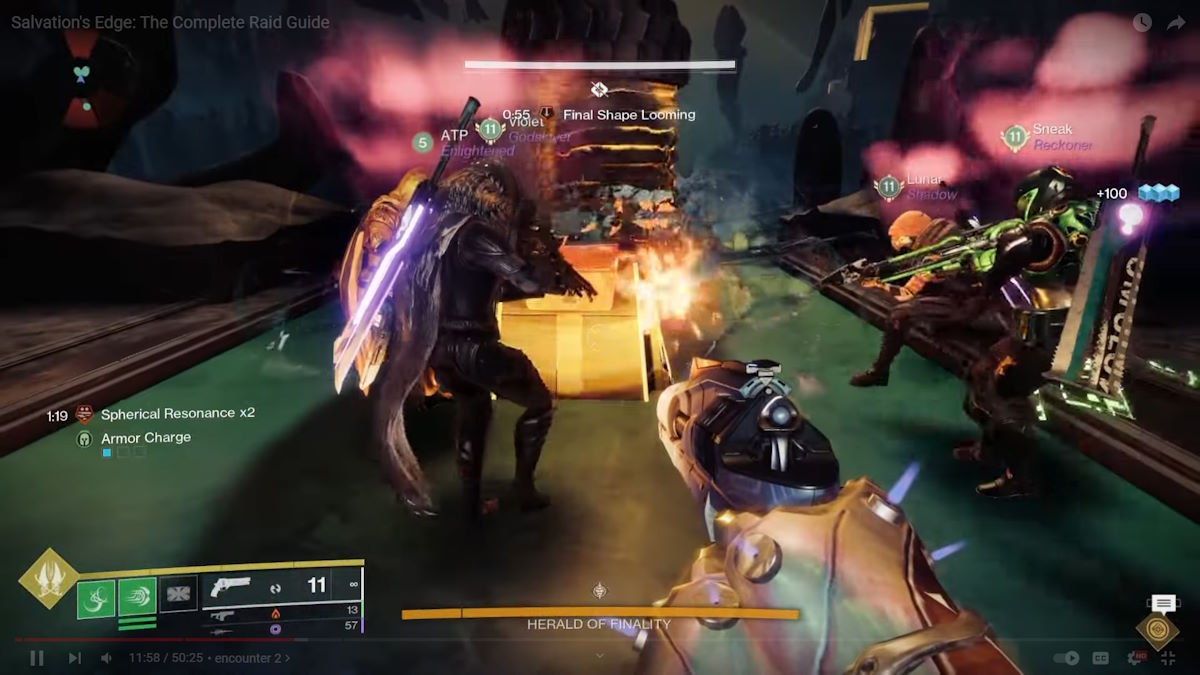
Doing all this involves the 'Dissection' mechanic. Dissection comprises of killing Knights that drop 2D shapes, similar to solo players. However, in the group area, the Knights (pictured below) here will drop their shapes depending on where they spawn. There are three spawn areas in total, with one on the left, one in the middle, and one on the right. The left Knight drops a circle, the middle Knight a triangle, and the right Knight a square.
You begin the dissection process by picking up a shape that you want to remove from a 3D shape that has that same shape as part of its design. So for example, if you wanted to remove a square from a Prism, you'd need to pick up a square from the Knight who spawns on the right side, and take it to that Prism. Then, you'll grab a different shape from a different Knight, and take that 2D shape to another 3D shape that also has it as part of it's design. This will then swap those shapes with one another.
However, this works on a trading mechanic as opposed to simple disposal, meaning that once you have removed a 2D shape from a 3D shape, you'll need to take that 2D shape to a different 3D shape that requires it as part of its solution.
Okay, so let's give one final example to really put the nail in this Pythagorean coffin.
The solo players call out TCS. That means in their rooms, the left statue holds a triangle, the middle a circle, and the right a square. In the outside room, the three players have to make sure the left statue does NOT contain a triangle, the middle a circle, or the right a square. Meaning their final combination of 3D shapes would be Cylinder, Prism, and finally Cone, going from left to right.
And here's the ever brilliant Datto explaining it, if that's your preferred method.
And yet, somehow, this encounter is still not over.
The Death and Resurrection Mechanic (But Worse)
Once all players are joined back together, return to the half circle of statues and spread out. Unstoppable Ogres will spawn, so make them dead as quickly as possible. Now, once again, players will die. Only this time, it will be five players as opposed to the earlier three, meaning one player will have to do the same mechanic as earlier to bring everyone back.
Again, they'll have to take a players Ghost to that players statue, and deposit to bring them back. Each of the dead players will be able to see one of the other players statues whilst they spectate, so use this to direct accordingly.
Please bear in mind that you will have only one minute to do this section before you wipe, and have to repeat the entire process from square 1. Speaking of which, completing this mechanic requires you to repeat this horrible song and dance three times.
The completion goal is to rescue a total of 24 Guardians, with three solo player deaths early on, and the further five after completing the puzzle once, that's 8 per run. When you're done, dry your eyes from the stress tears, and get ready to move on to the final encounter.
To move on, find the double helix near the outside player area, which will now act as an elevator. Then follow a typical platforming travel section as you move towards The Zenith.
The Zenith Encounter Walkthrough
This is it, the final encounter.
The arena here is quite large, with a platform in the middle and two raised sections on either side. Ideally you're going to want to split your group into two teams of three here, with one focused on clearing enemies, and the other focused on doing the mechanics. Of the ones doing those mechanics, it's best to assign one mechanic to each player to reduce confusion later on. The core principle to activating the damage phase in this fight is to use the attacks the Witness throws at you to gain the Glyphbreaker buff.
The Witness has three attacks he'll throw out in the duration of this section. The first is the hand floating above, which will periodically summon orange triangular zones which damage and kill you if you're in them for too long. The second is the hand coming up from the ground, which will periodically shoot projectiles into an orange circular area. The third is the hand off to the sides, which will periodically blast large beams across the arena in areas marked by an orange rectangle. An example of the circular area is shown below.
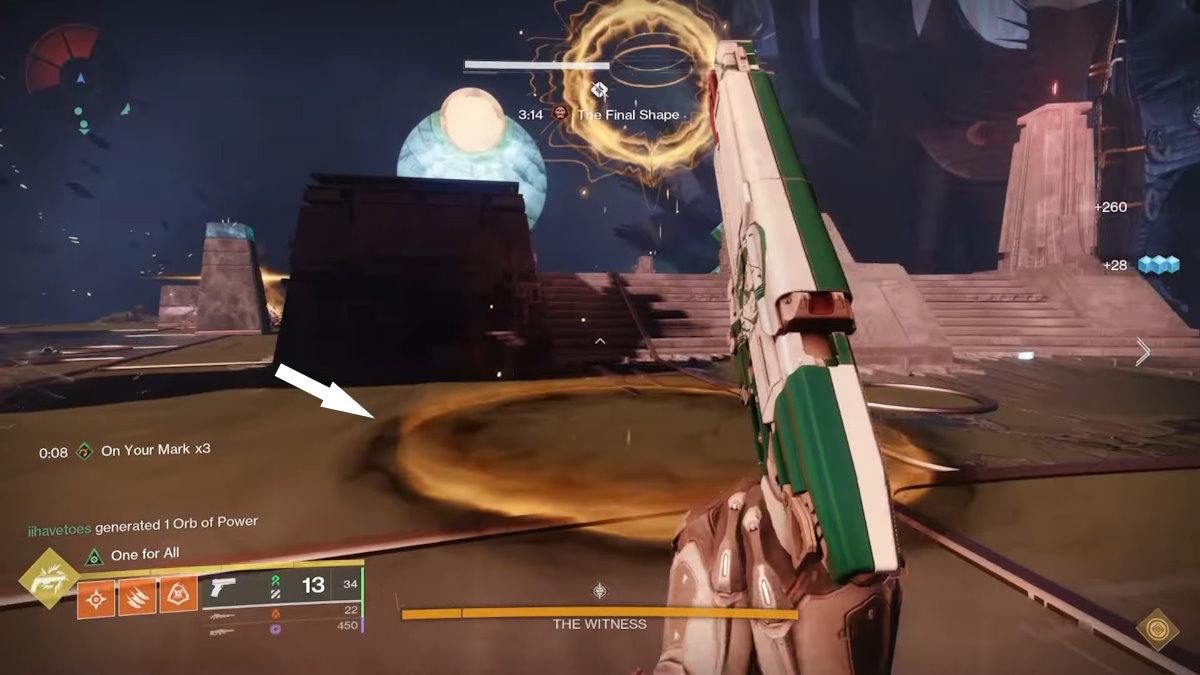
Stepping into each of these zones provides you with a different resonance buff like the first three encounters. In order to gain the resonance buffs, you must step into the areas in which the attacks will hit for long enough to gain the buff, whilst not staying in long enough to die. The Triangle zones will give you Pyramidal Resonance, the Circular zones will give you Spherical Resonance, and the Rectangular zones will give you Hexahedral Resonance.
Now, in order to gain the Glyphbreaker buff, you'll need to use this resonance to damage the hands related to certain attacks. When these attacks activate, you'll note that each arm/hand has a colored band along with a shape somewhere on it. You need specific resonances to damage specific colored hands, with those being Spherical for Yellow, Pyramidal for Green, and Hexahedral for Red. An example of one of these bands is shown below.
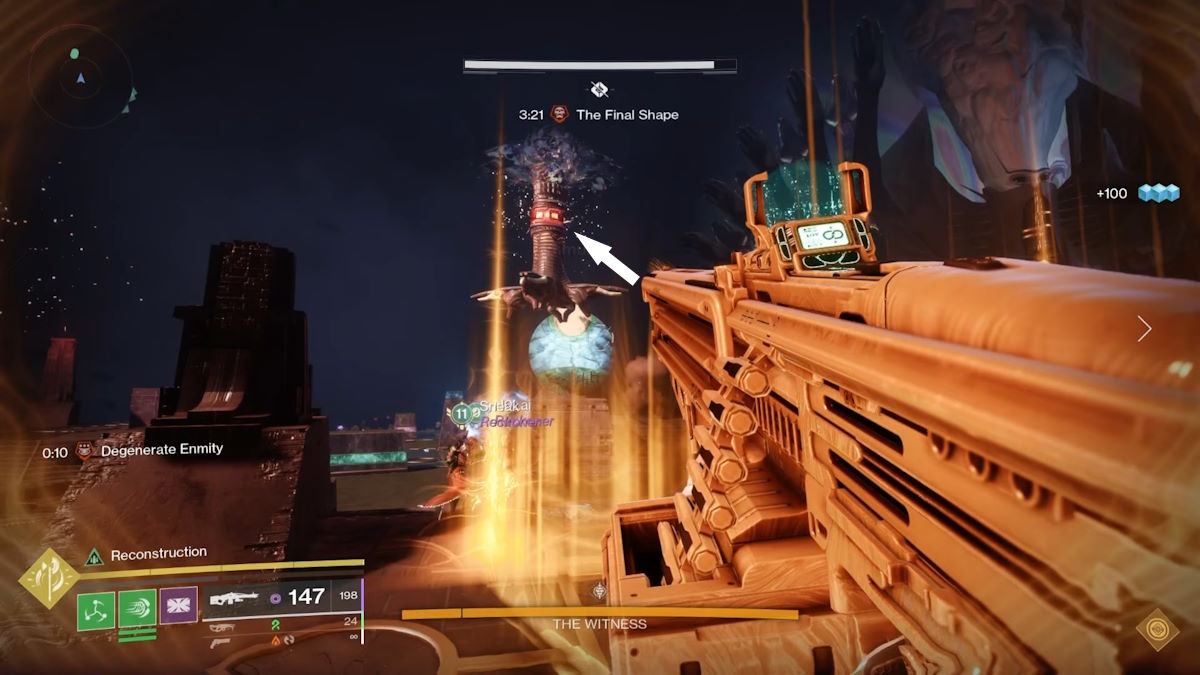
Now of course, it isn't quite that simple, as in order to damage the bands with the buff, you'll need to step into the attack area of the hand you're trying to damage for long enough to make the shot, but not long enough that your resonance type is swapped for another.
So let's give an example of how this might play out.
You're given the task of taking out the yellow band. This means that you'll need to locate the arm which has that band before continuing. Let's say for this example that it's the hand coming up from the ground. That means you need to get Spherical Resonance, which means you'll need to locate hand which shoots projectiles into a circular area. Step into the area for long enough to get the Spherical Resonance buff, and then step out. Now you'll need to return to the hand coming up from the ground, and step into it's area of effect. Step in, give it a good few shots, and back out before you accidentally swap your Resonance buff.
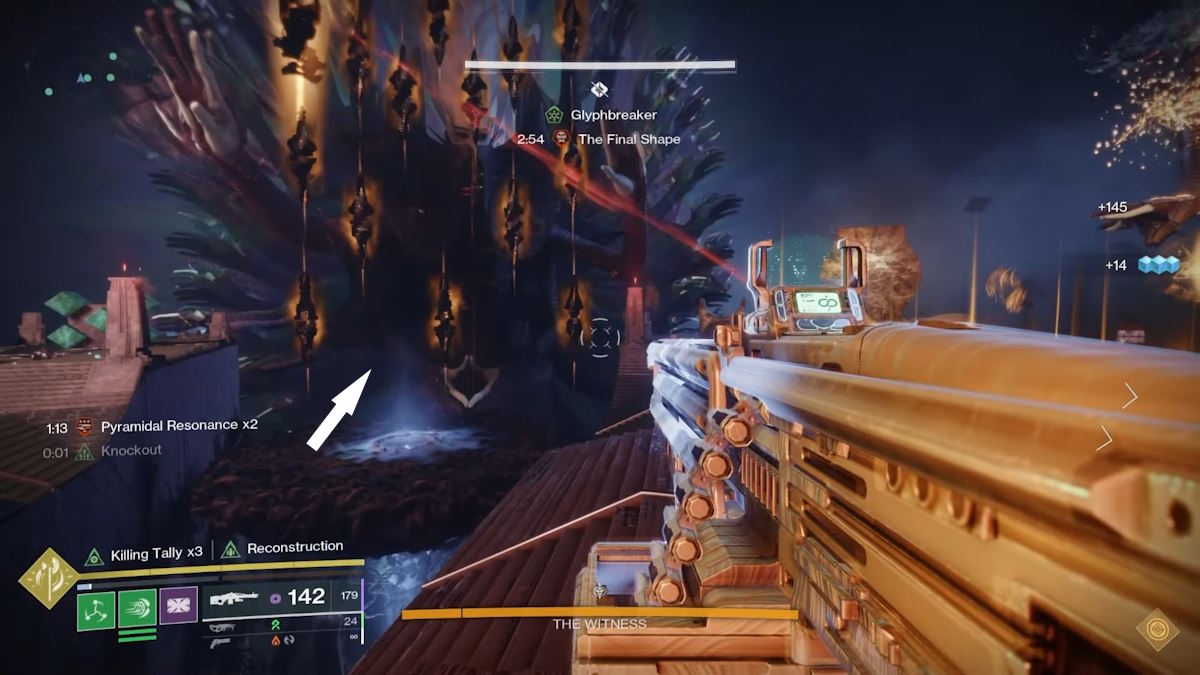
The bands only need a few well placed shots to break, so make sure you're quick. Once you've gotten your Glyphbreaker buff, go to the middle platform with a circle of light on it, and take aim at one of the large circular areas on the chest of the Witness. Ideally you want to do this at around the same time as your two teammates, as breaking each Glyph will spawn a Subjugator enemy on either side of the arena, but only a maximum of two can spawn at a time, so getting all the Glyphs shot before fighting them will be best here.
Now of course, breaking all six Glyphs is what activates the damage phase, but of course there's one more nasty mechanic to consider before you can get there.
The Witness Tests You Mechanic
This is a doozy, but thankfully it's quick. It is however a wipe mechanic, so don't get sloppy here. At random during the initial Glyphbreaker gaining phase, specifically immediately after breaking one of the bands, you'll receive the notification 'The Witness Tests You'. Here you'll need to note right away which of the bands was last broken, as this will determine what pattern you need to input into the pillars that have now spawned in front of the Witness.
If you last broke the hand that did the circular area attack, you'll need to make the 'Triangle' shape. If you last broke the hand that did the rectangular area attack, you'll need to make the 'Square' shape. And if you last broke the hand that did the triangular area attack, you'll need to make the 'Circular' shape.
You'll need to shoot all the pillars that are NOT in the shape, leaving the ones that are. So for example, if you're lucky enough to get Square, you'll shoot all but the four corner pillars.
Thankfully for us all, X (Formerly Twitter) user @MacticsG1 made this... helpful little diagram.
Once this is done, proceed until you're ready for the damage phase.
The Damage Phase and Final Stand
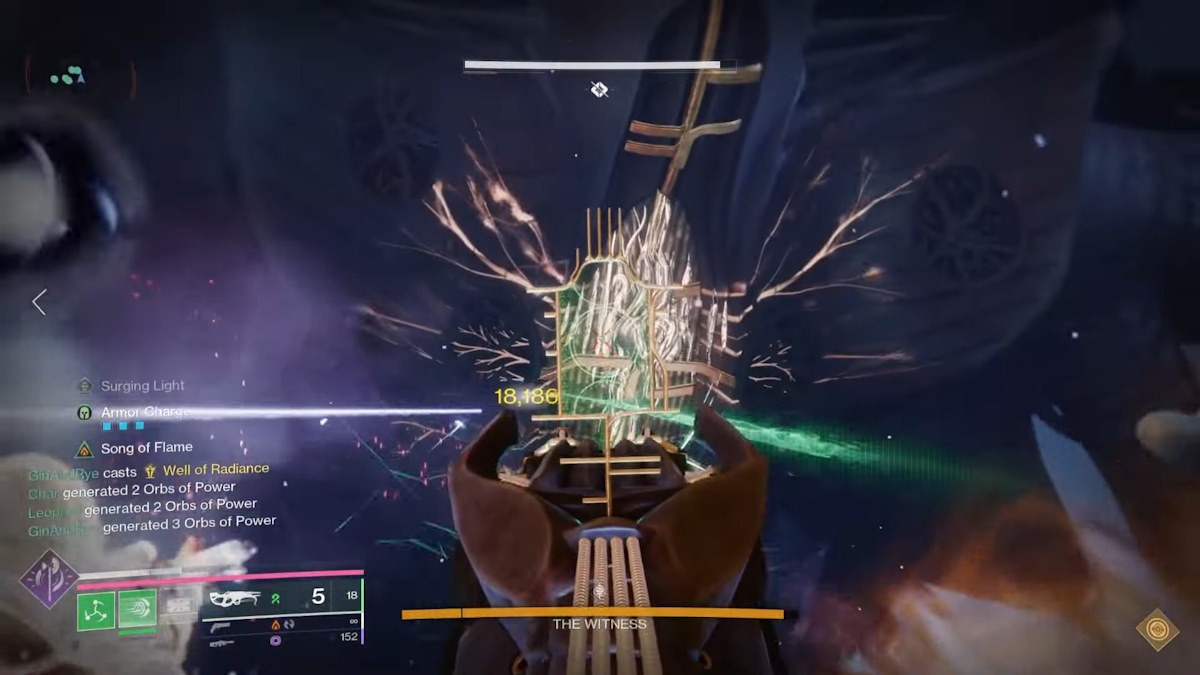
And mercifully, the damage phase is relatively simple compared to some of the nightmares prior. The Witness has a big glowing crit spot right in the middle of his chest, so aim for that. A Well of Radiance Warlock is suggested as it would be with any damage phase in a raid boss.
The difficulty here comes from the fact that the Witness will fight back. He has several attacks he can throw out, so the aim is to make sure you're keeping watch of your surroundings during the damage phase. He can attack from the front, the sides, and behind you, so you'll have to be constantly aware. The attacks from the front can be jumped over, and the others simply have to be moved away from. The areas will be marked so you know where to go.
Much like the Dissipation encounter, this one also has a final stand mechanic. This is activated when the Witness reaches a threshold in his health bar, and is make or break for your team. If you don't kill him before this final timer runs out, you will wipe and have to do the entire encounter from scratch. His attacks during this section will be much, much faster, so you'll all have to make sure you're constantly moving around the platform and keeping an eye on his attacks.
When his health bar reaches zero, congratulations, you've successfully completed Salvation's Edge. Collect your reward from the big chest in the middle, and have a little stress cry, you've earned it.
Salvation's Edge Exotic Rewards & Loot Table
Here's a quick breakdown of all potential weapon drops from the various encounters in the raid, so you know what to keep your fingers crossed for.
| Kinetic Weapons | Energy Weapons | Power Weapons |
|---|---|---|
| Critical Anomaly (Sniper Rifle) | Non-Denouement (Bow) | Summum Bonum (Sword) |
| Imminence (Submachine Gun) | Forthcoming Deviance (Glaive) | |
| Euphony (Exotic Linear Fusion Rifle) | Nullify (Pulse Rifle) |
If you've found this guide helpful, and by God I really hope you have, then check out some of our other Destiny 2 pieces, such as our breakdown on the Best Prismatic Thundercrash Build, or our guide on How to Complete Dual Destiny Exotic Class Item Quest. Whatever you need, we've got you covered here at Pro Game Guides.