Heartworm is a retro-style horror action-adventure game that follows Sam, a girl unable to move on from her beloved grandfather's death, on her journey to contact and see what lies on the other side. As you navigate the world as Sam, you'll encounter many hard-to-solve puzzles and mysteries, as well as dangerous enemies. To help you with all that, here is our complete Heartworm walkthrough guide.
Heartworm Controls, Basics Tips, and Recommended Settings
Before we jump into the walkthrough, we'll give you some basic tips on how to play Heartworm. If you already know how to play or don't feel like you need to go through this section, just scroll down to the walkthrough part below.
Controls
Action
PC
PlayStation
Xbox
Movement & Menu Navigation
W | A | S | D
D-Pad | Left Stick
D-Pad | Left Stick
Interact
LMB
✖
A
Cancel / Back
ESCAPE
〇
B
Run
SHIFT
☐
X
Aim (Hold)
RMB
L1
LB
Flash / Shoot (While Aiming)
F
R1
RB
Toggle Aim Mode (While Aiming)
O
R3
R3
Map
M
Access From Inventory
Access From Inventory
Inventory
TAB
🛆
Y
Basic Tips & Tricks
Journal entry in front of the Abandoned House - Screenshot by Pro Game Guides
You can interact with virtually anything in the Heartworm world. Just approach it and hit the Interact button.
You'll need to use items from your inventory at some spots in the game. Select an item in your inventory and then choose Use to do that.
Press Shoot while not aiming to trigger the flash of your camera without expending ammo.
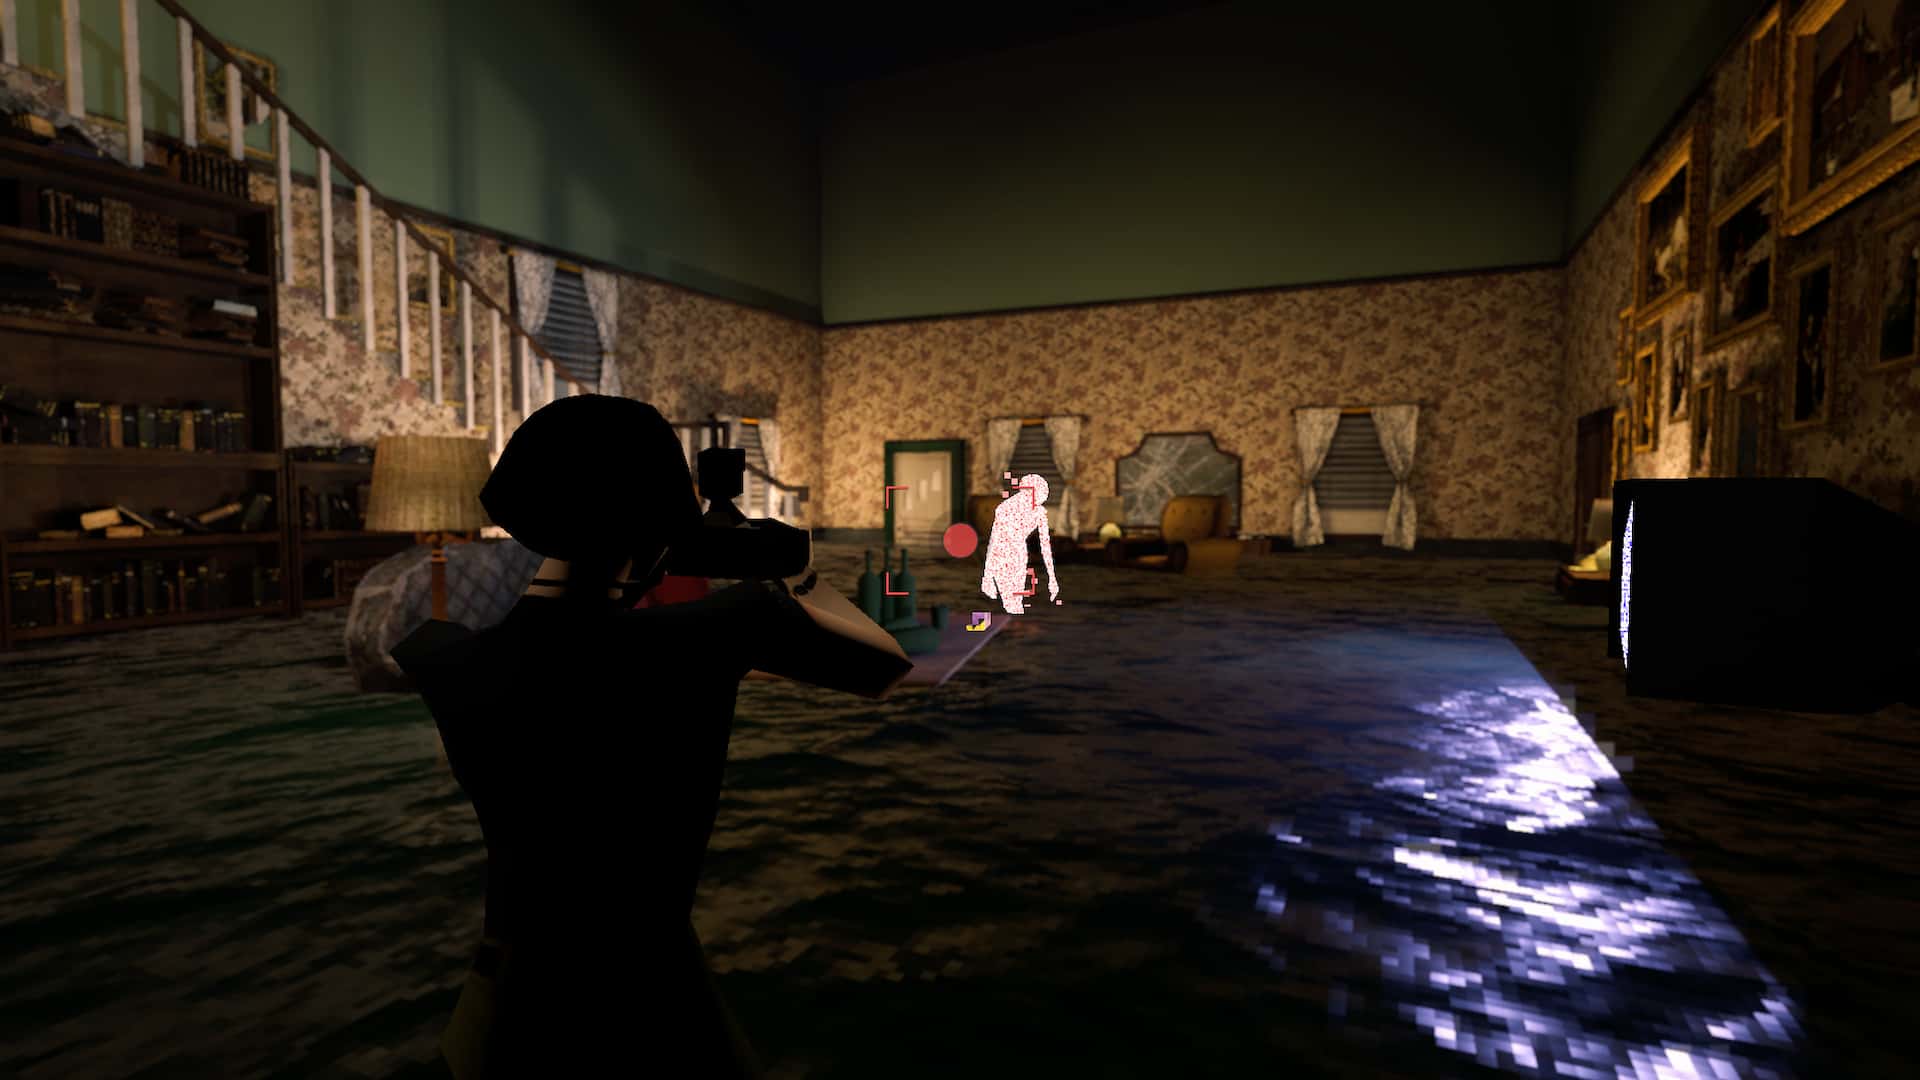
While aiming, the reticle will turn red when you're going to hit an enemy.
If you're fighting multiple enemies, pull them together so you can take a picture of all of them at once and deal damage to every one of them.
Reload your cameraby combining it with film in your inventory or by shooting while out of film.
Many items are hidden in corners, the environment, and other places. Keep an eye out for them!
Open the map (from your inventory) to see where you are right now.
Use camera mods to enhance your camera's abilities.
Conserve film and don't fight every enemy you encounter. You might need the resources later.
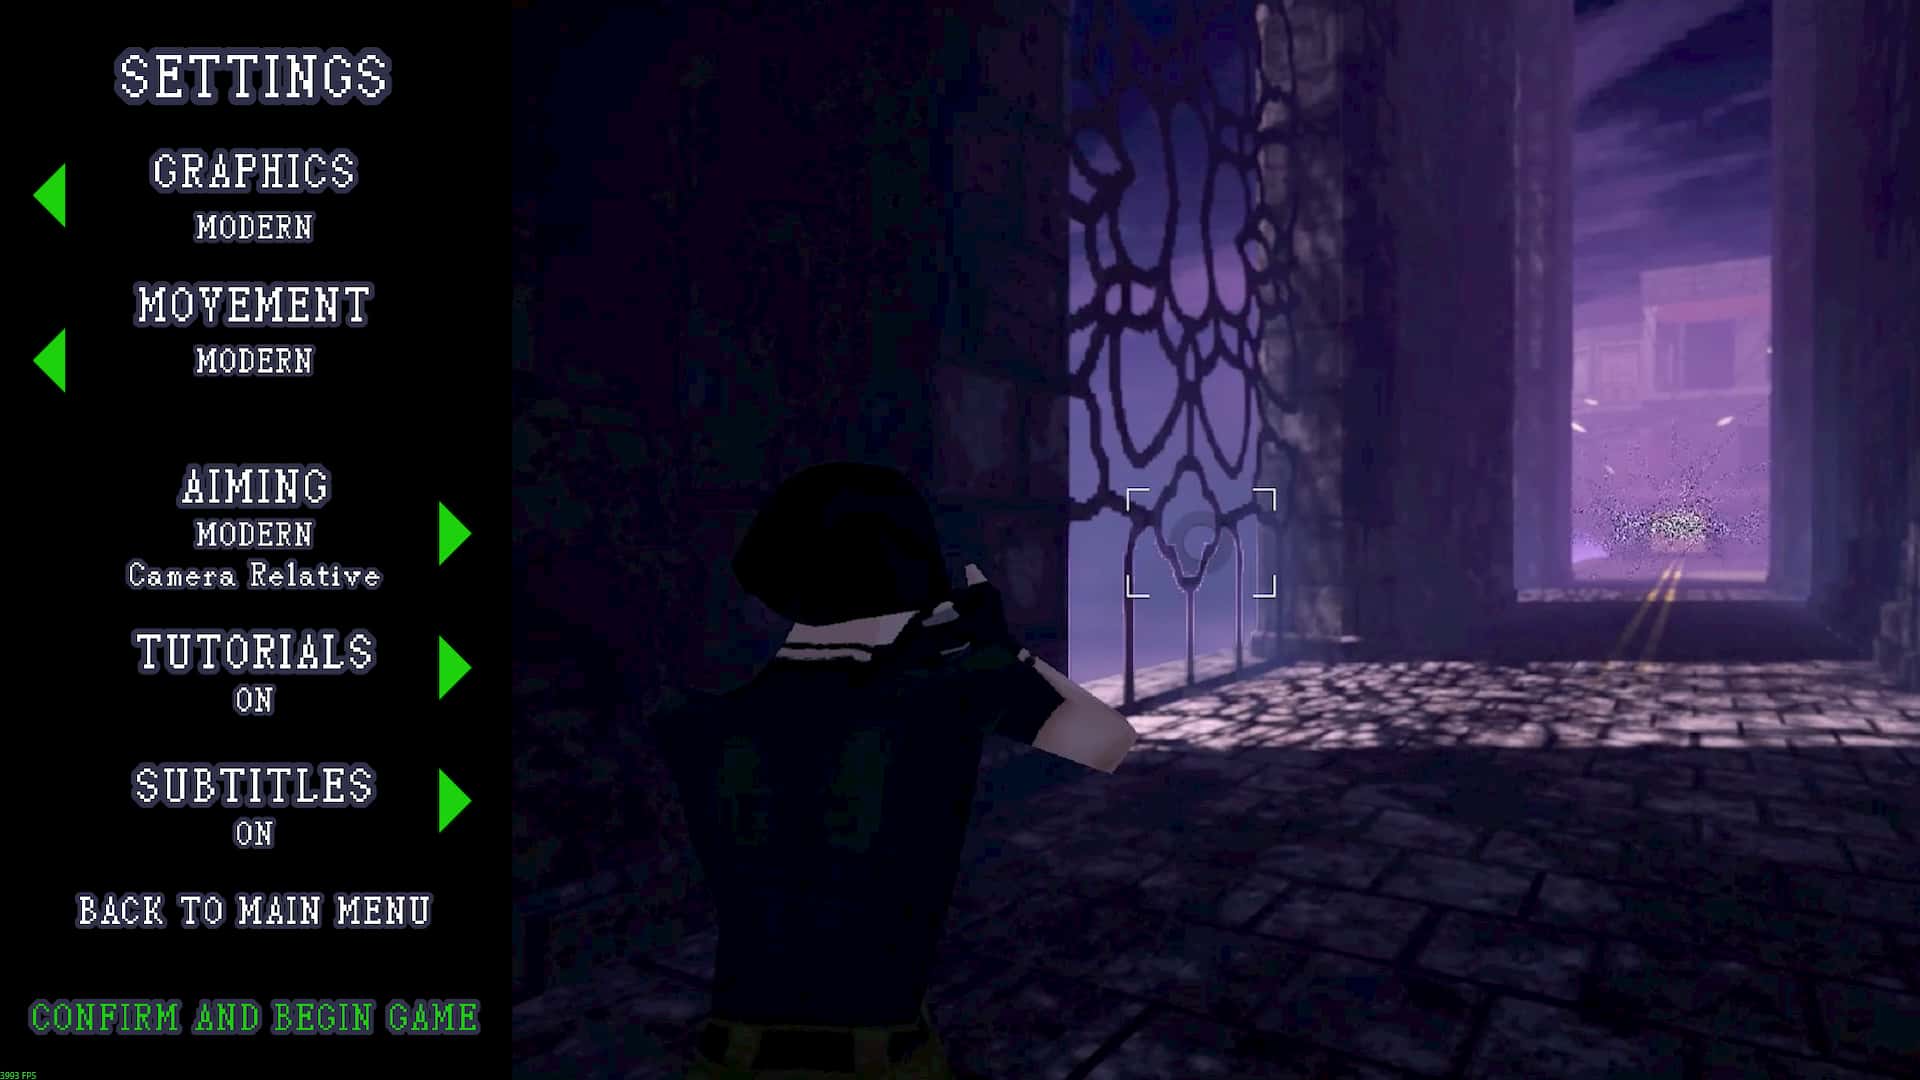
Recommended Gameplay Settings
Best gameplay settings - Screenshot by Pro Game Guides
Graphics: Modern
Movement: Modern
Aiming: Modern
Tutorials: On
Subtitles: On
Skip Doors: On (in-game options)
SPOILERS AHEAD: The walkthrough contains some spoilers and also focuses on completing the game rather than telling you every bit of Heartworm lore. If you want to learn more about the characters, locations, and entities in the game, make sure to read all the diaries and books spread around the world.
Heartworm Main Route Walkthrough Guide
Abandoned House
After the beginning cutscene ends, approach the car and interact to get the camera off the roof of the car. Then, equip the camera in your inventory and combine it withfilm.
Go past the barricade in front of the car and head up the mountain road.
Abandoned House entrance - Screenshot by Pro Game Guides
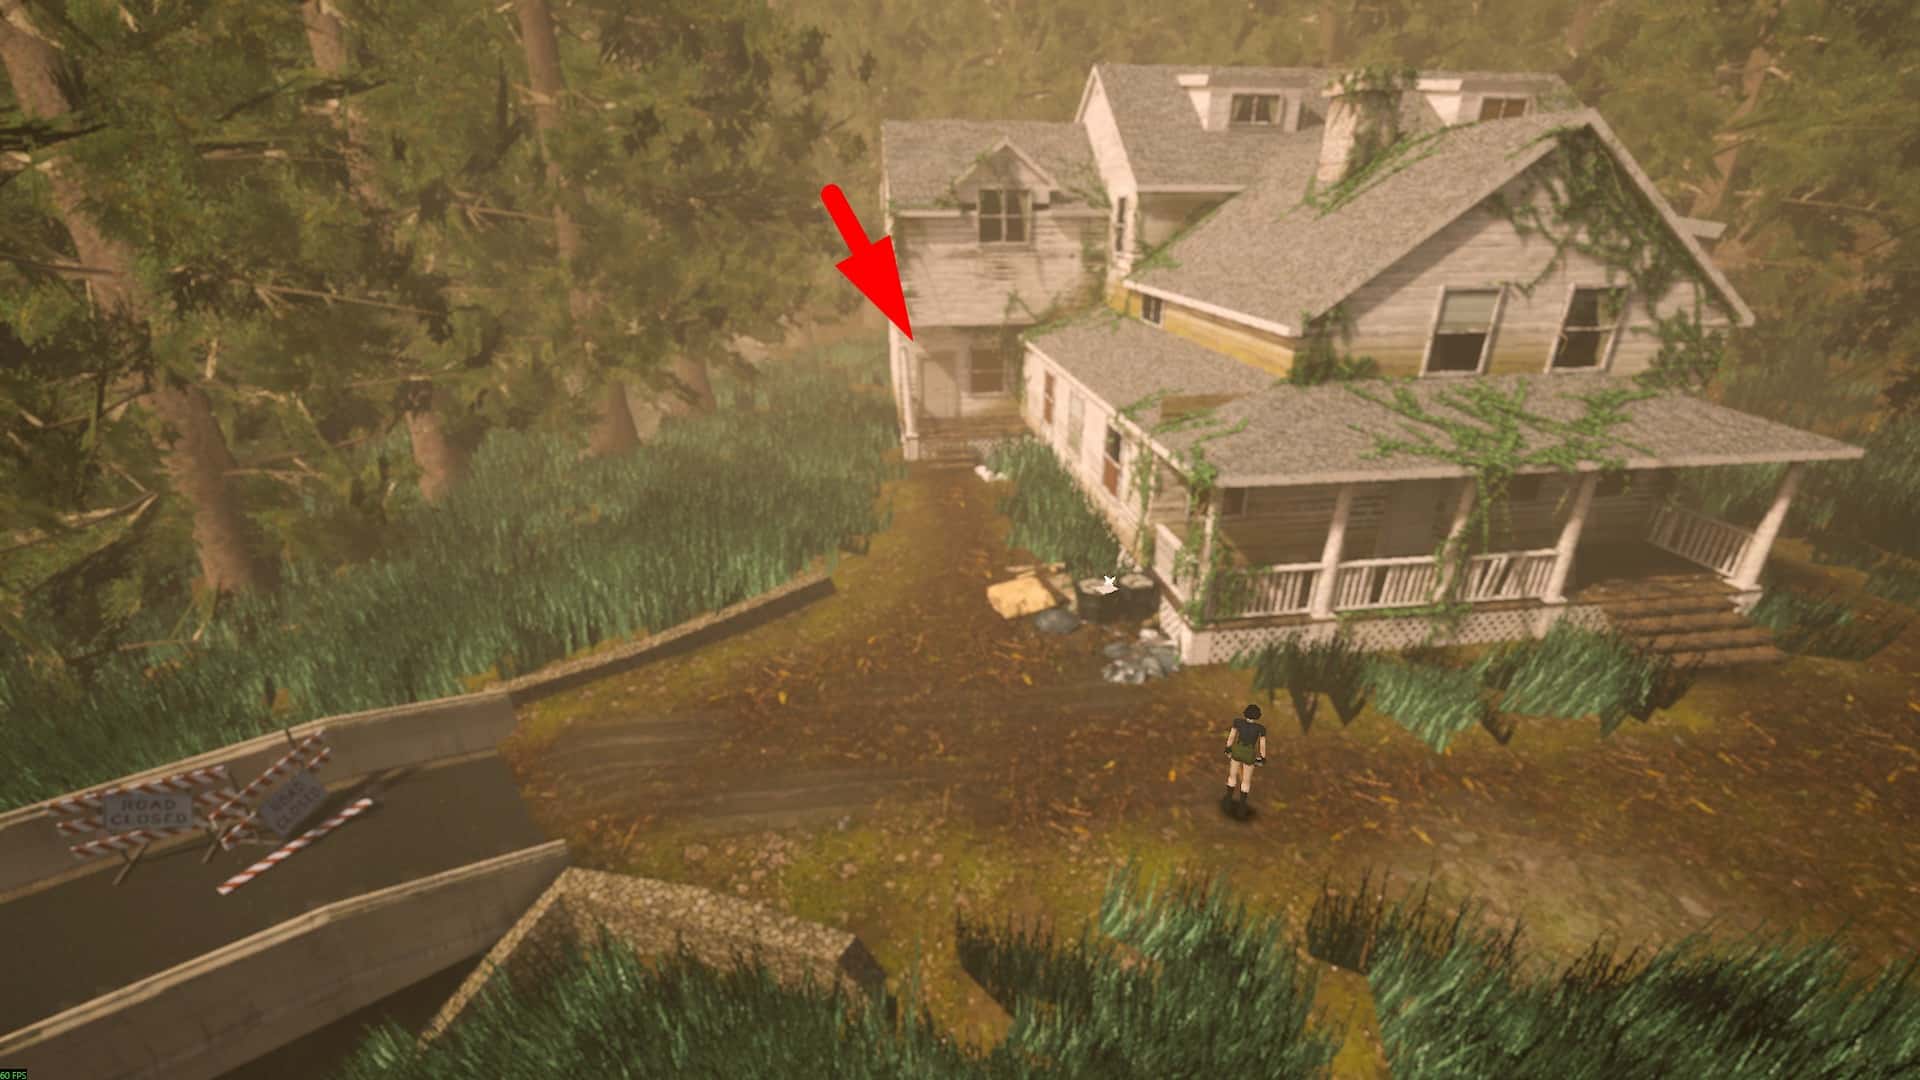
Enter the abandoned house through the side door on the left.
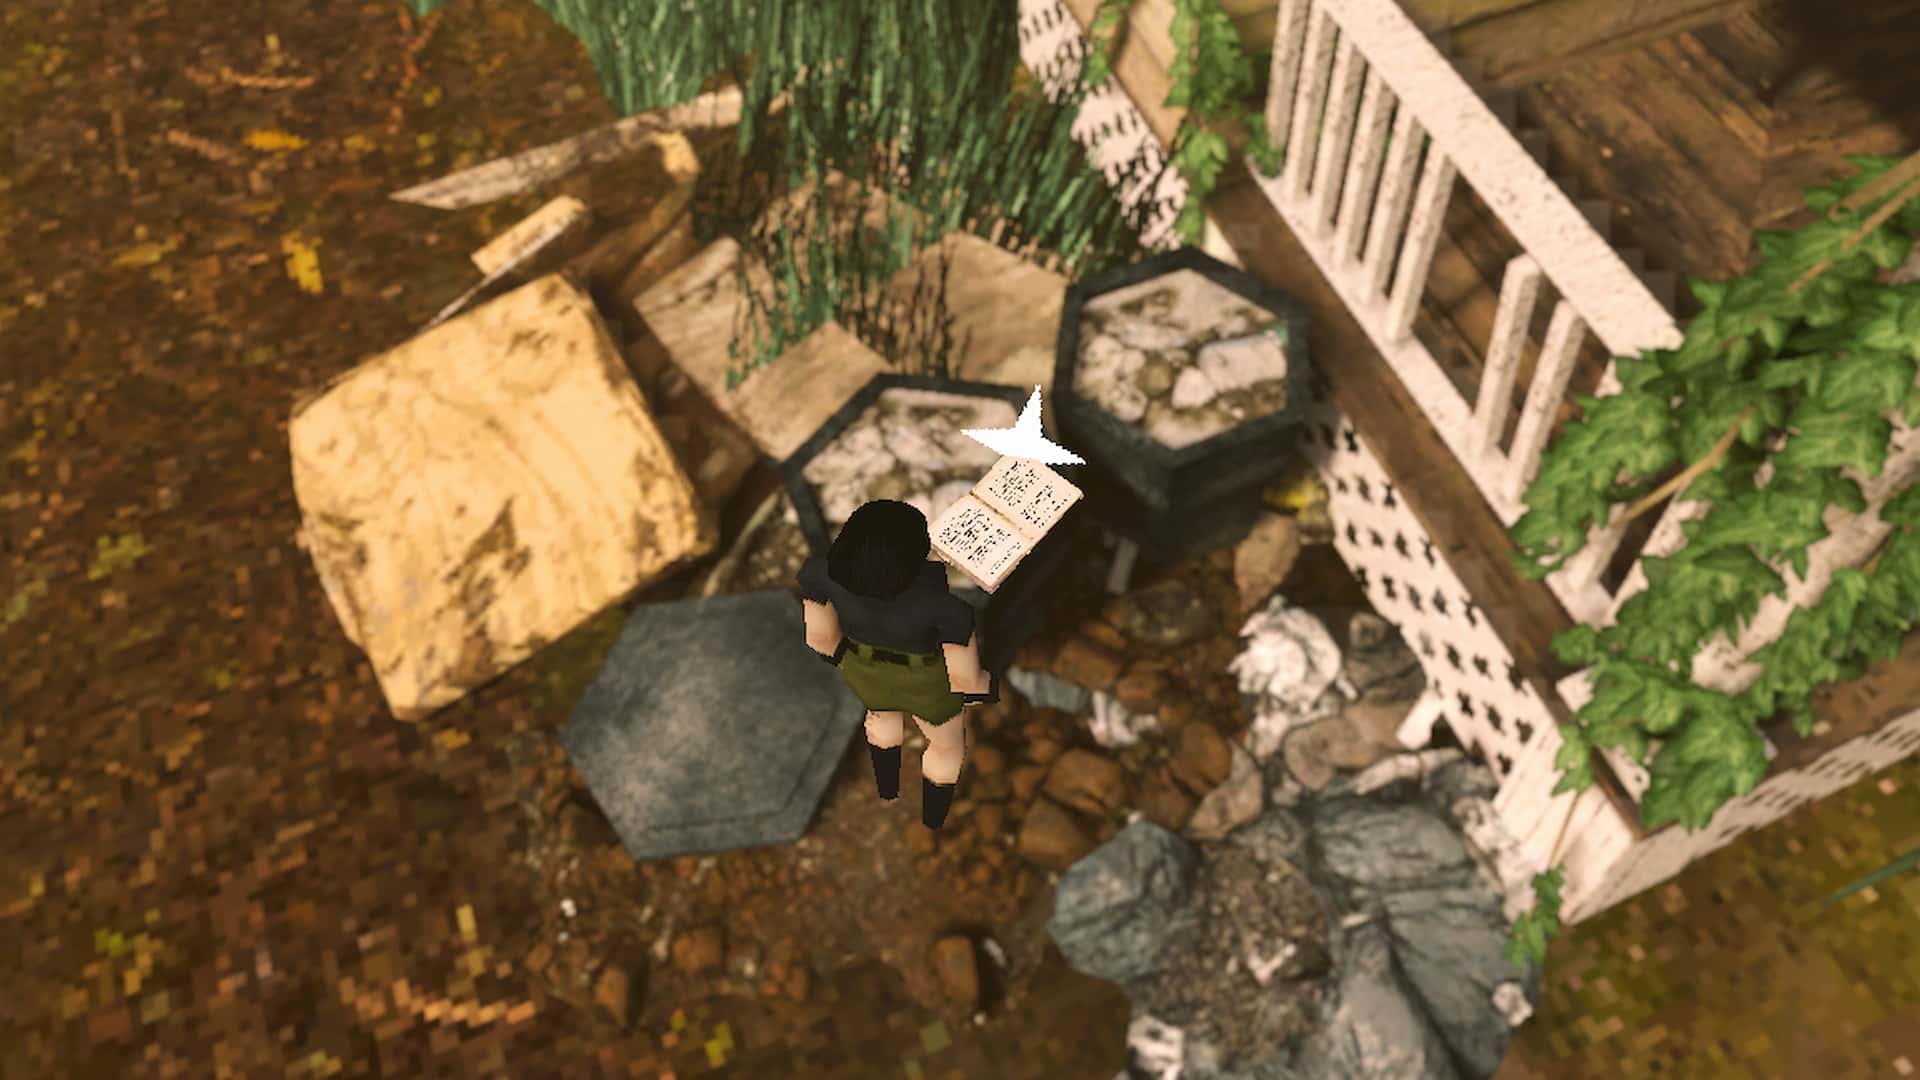
There is a diary entry next to the house, towards the left side door.
The house is dark. You can illuminate the area by triggering the flash while the camera is equipped by pressing F / R1 / RB (doesn't consume film if you're not aiming).
There is a door with a lock in the foyer of the house. Remember its location.
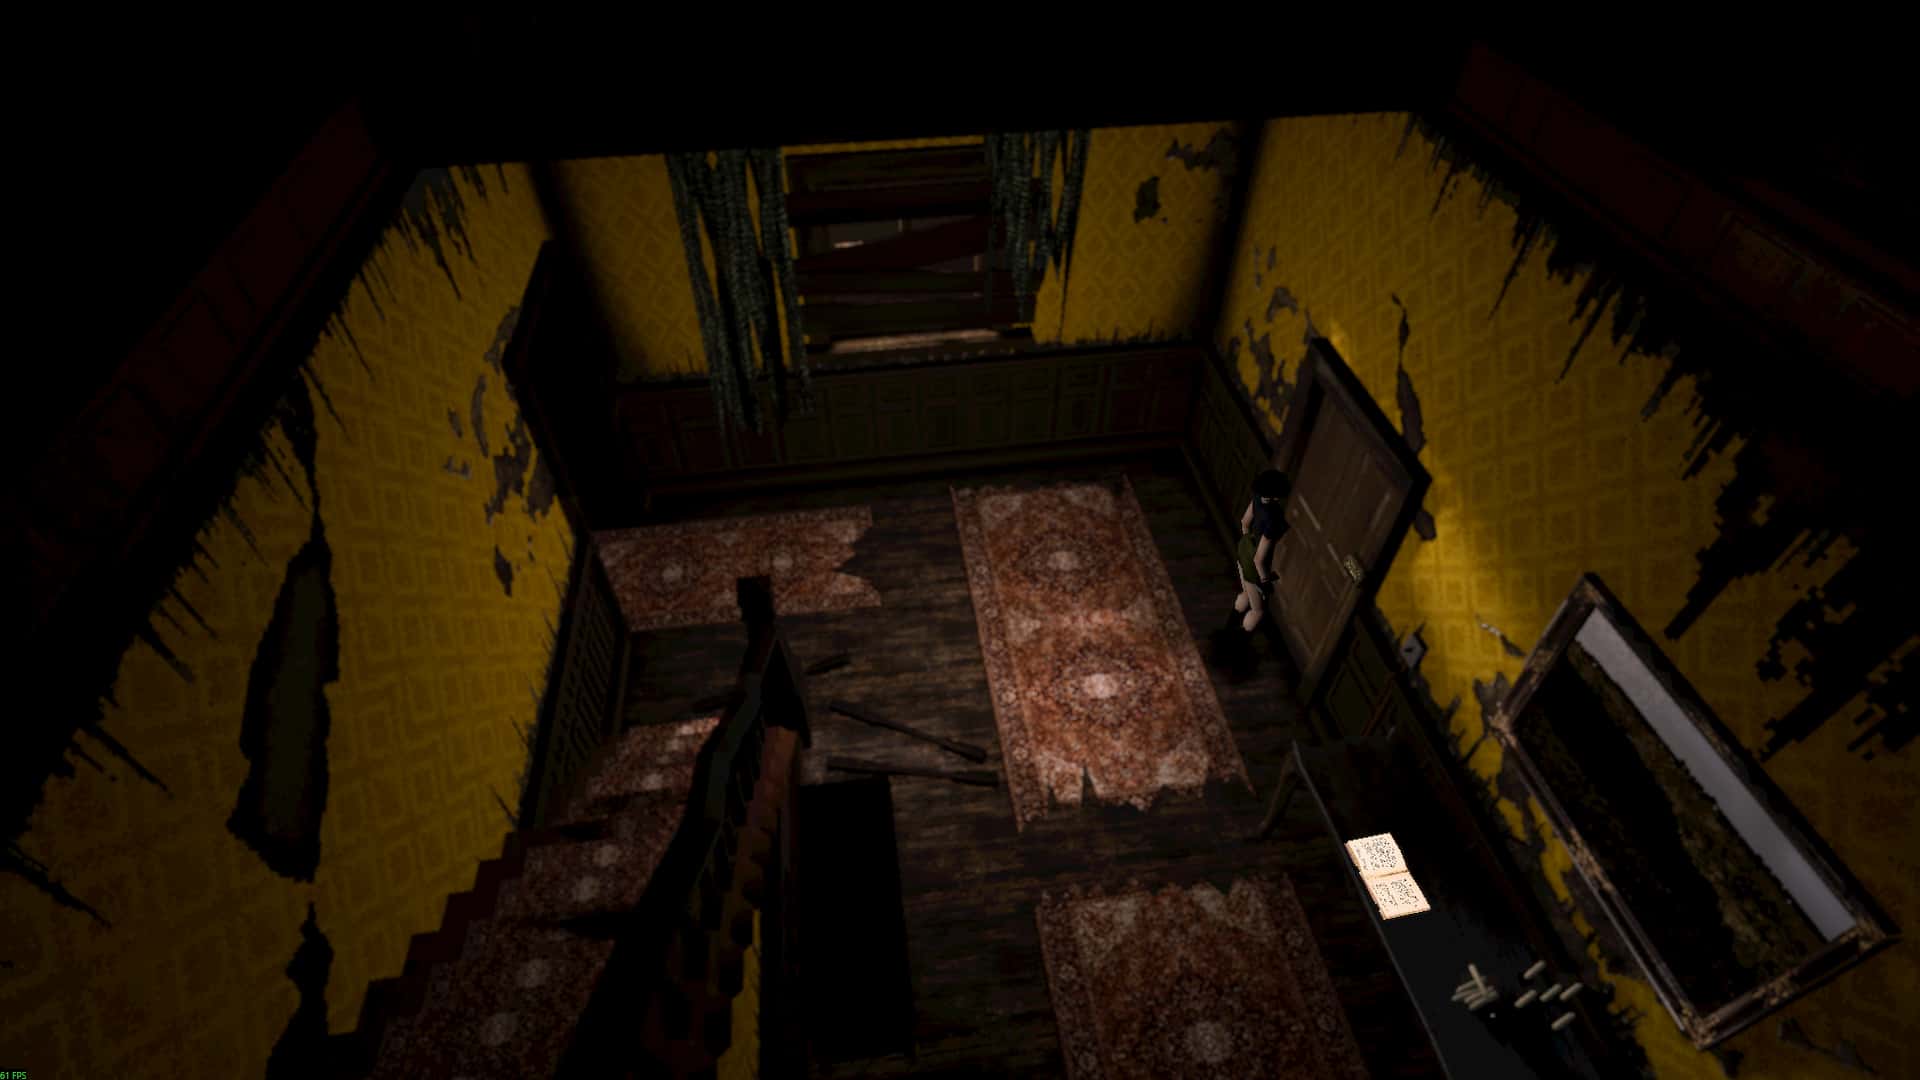
There is another diary entry in the foyer.
Safe Room - Screenshot by Pro Game Guides
There are two doors at the end of the main hall (foyer). Enter the door on the left to find the safe room.
Interact with the PC to save the game.
Interact with the chest to store items. You can store the cigars as you won't need them.
There is a possum on top of the bookshelves that you can kill by taking a picture of it. These are needed for a hidden achievement.
Exit the safe room and go through the door at the end of the hall leading to the family room.
There is a diary entry on a chair in the big room across from the door.
From here, head to the dining room through the door next to the kitchen (between the kitchen and the door from which you entered the room).
Collect the Antiseptic and the Bandages in the room. You can combine them into a First Aid Kit.
Head through the open door at the end of the room to find a staircase.
There is an Antiseptic in the bathroom (second door below the stairs).
There is a diary entry in the small study (first door below the stairs).
Climb the stairs and go to the bedroom furthest away from the stairs on the balcony.
On the bed, you can read the poem that mentions the time "12:15" that you need to remember.
Enter the door in the middle of the balcony to find another corridor.
The room closest to the rubble has another diary entry.
Attic Key location in the Master Bedroom - Screenshot by Pro Game Guides
Go to the room at the end of the corridor (Master Bedroom) and pick up the Attic Key at the far side of the bed.
Combine a First Aid Kit if you have no inventory space to pick up the key.
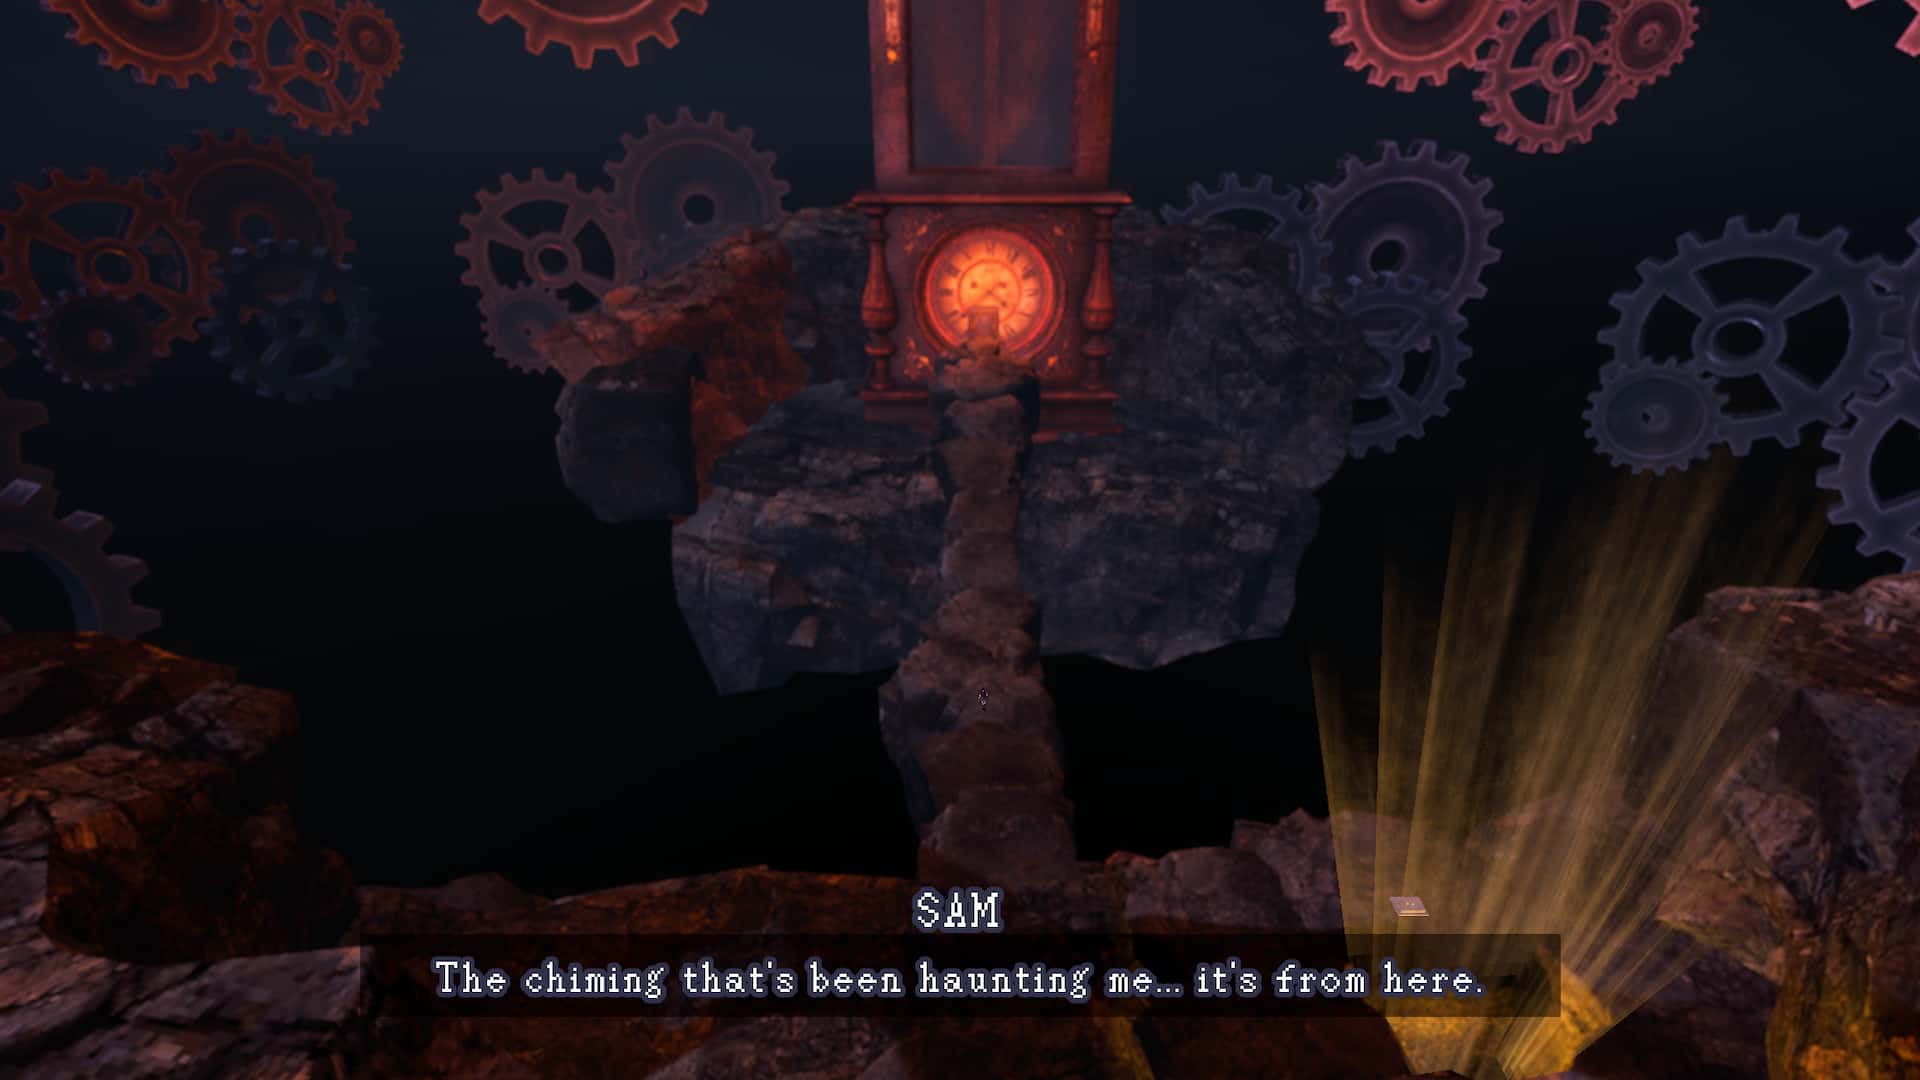
Go back to the balcony and head through the open door closest to the stairs. There is a grandfather clock that you need toset so it reads 12:15.
Enter the newly revealed door behind the bookshelves and travel to the end to grab the first Emblem Piece.
The door opposite the clock leads back to the foyer where the safe room is. If your inventory is full (6 items max), go and store some items so you can pick up the Emblem Piece.
There is also a painting with the name "ROSE" behind the Emblem. This is a clue to the locked door back in the foyer.
Go back and exit the clock closet, and then go through the door opposite the clock, and then downstairs to reach the foyer again.
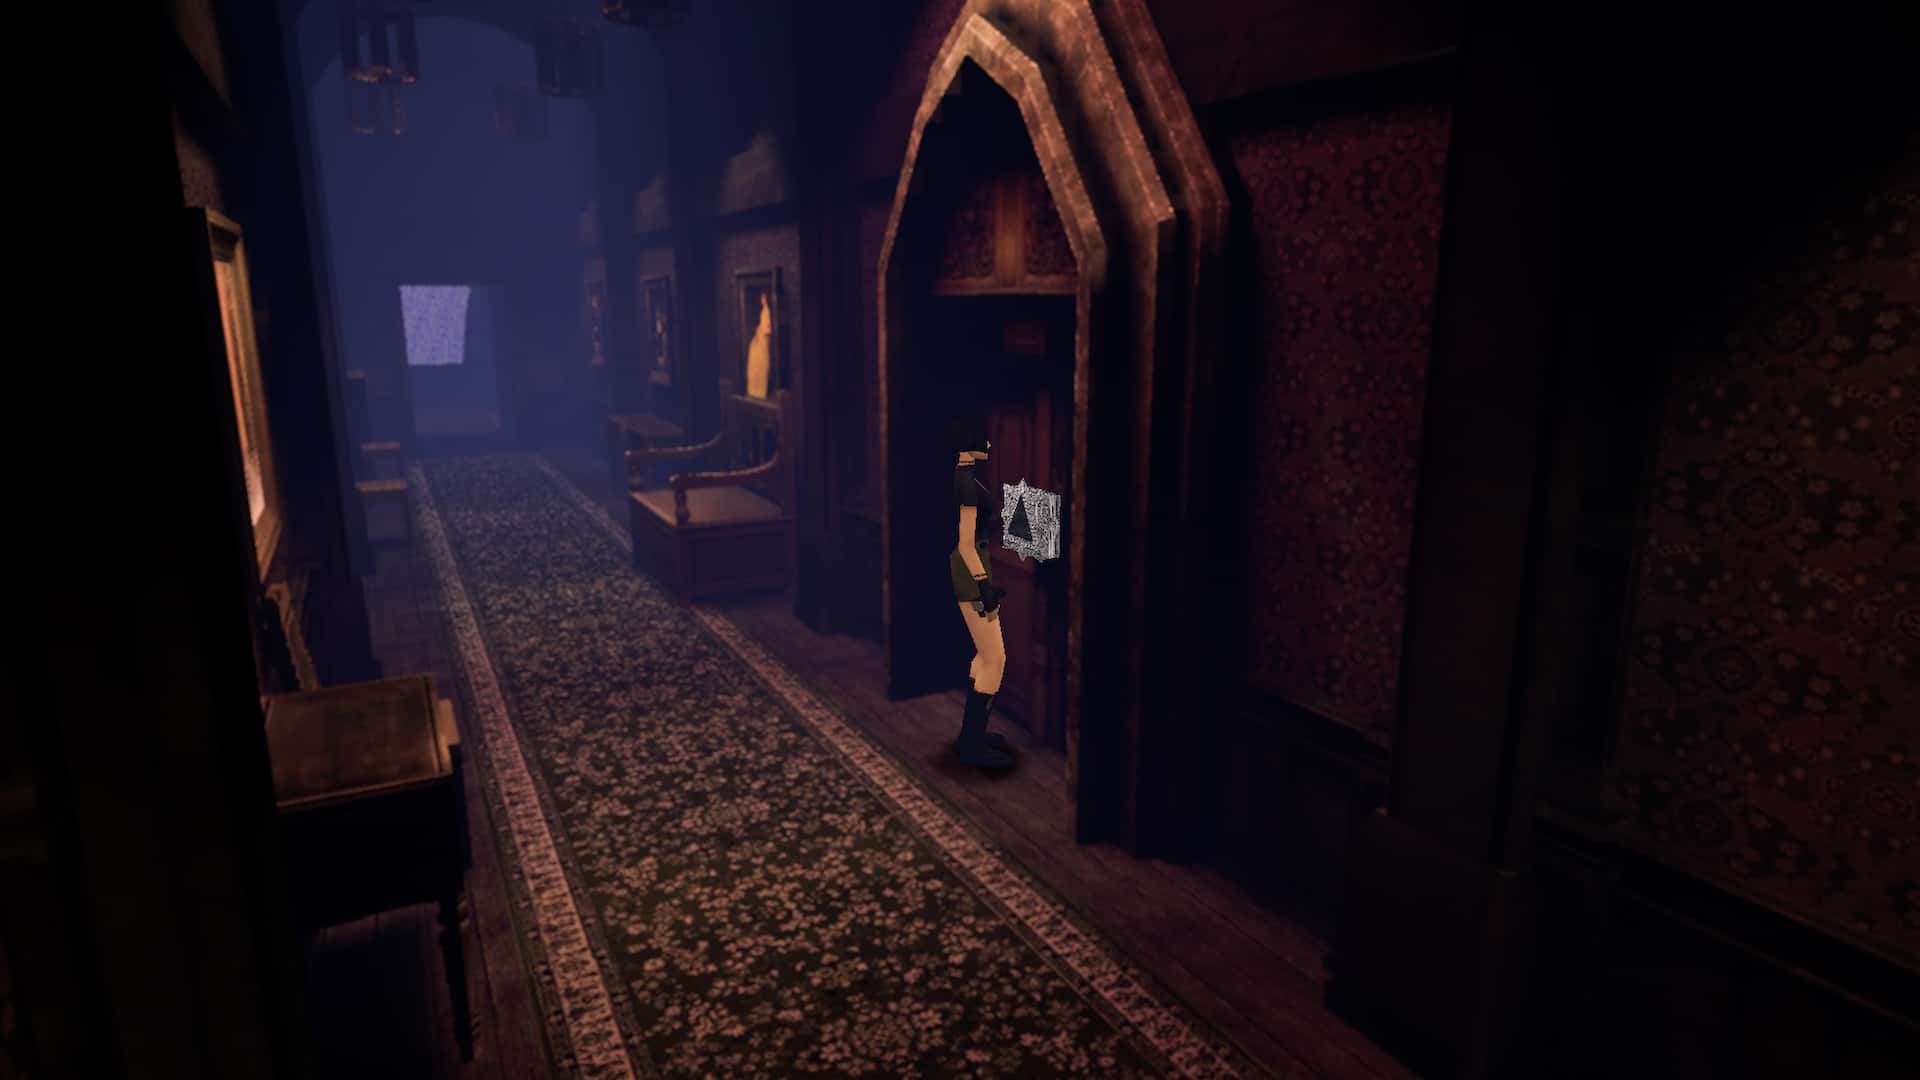
Locked door in the foyer - Screenshot by Pro Game Guides
Interact with the door with the lock and input "ROSE" to unlock it.
Go through the door and downstairs into the basement. Make your way through the basement by pushing the shelves to find the second Emblem Piece.
There is another diary entry next to the second Emblem Piece.
Track back to exit the basement and then combine the two Emblem Pieces in your inventory to get the Heart Emblem.
Go up the stairs in the foyer and then right. Enter the door at the end of the balcony.
Climb up the stairs and unlock the Attic door using the Attic Key (you can discard it after).
Heart Emblem door - Screenshot by Pro Game Guides
Enter the attic and go toward the door at the end. Use the Heart Emblem from your inventory to unlock it.
There is a scribbled note on the left, just after you enter the attic.
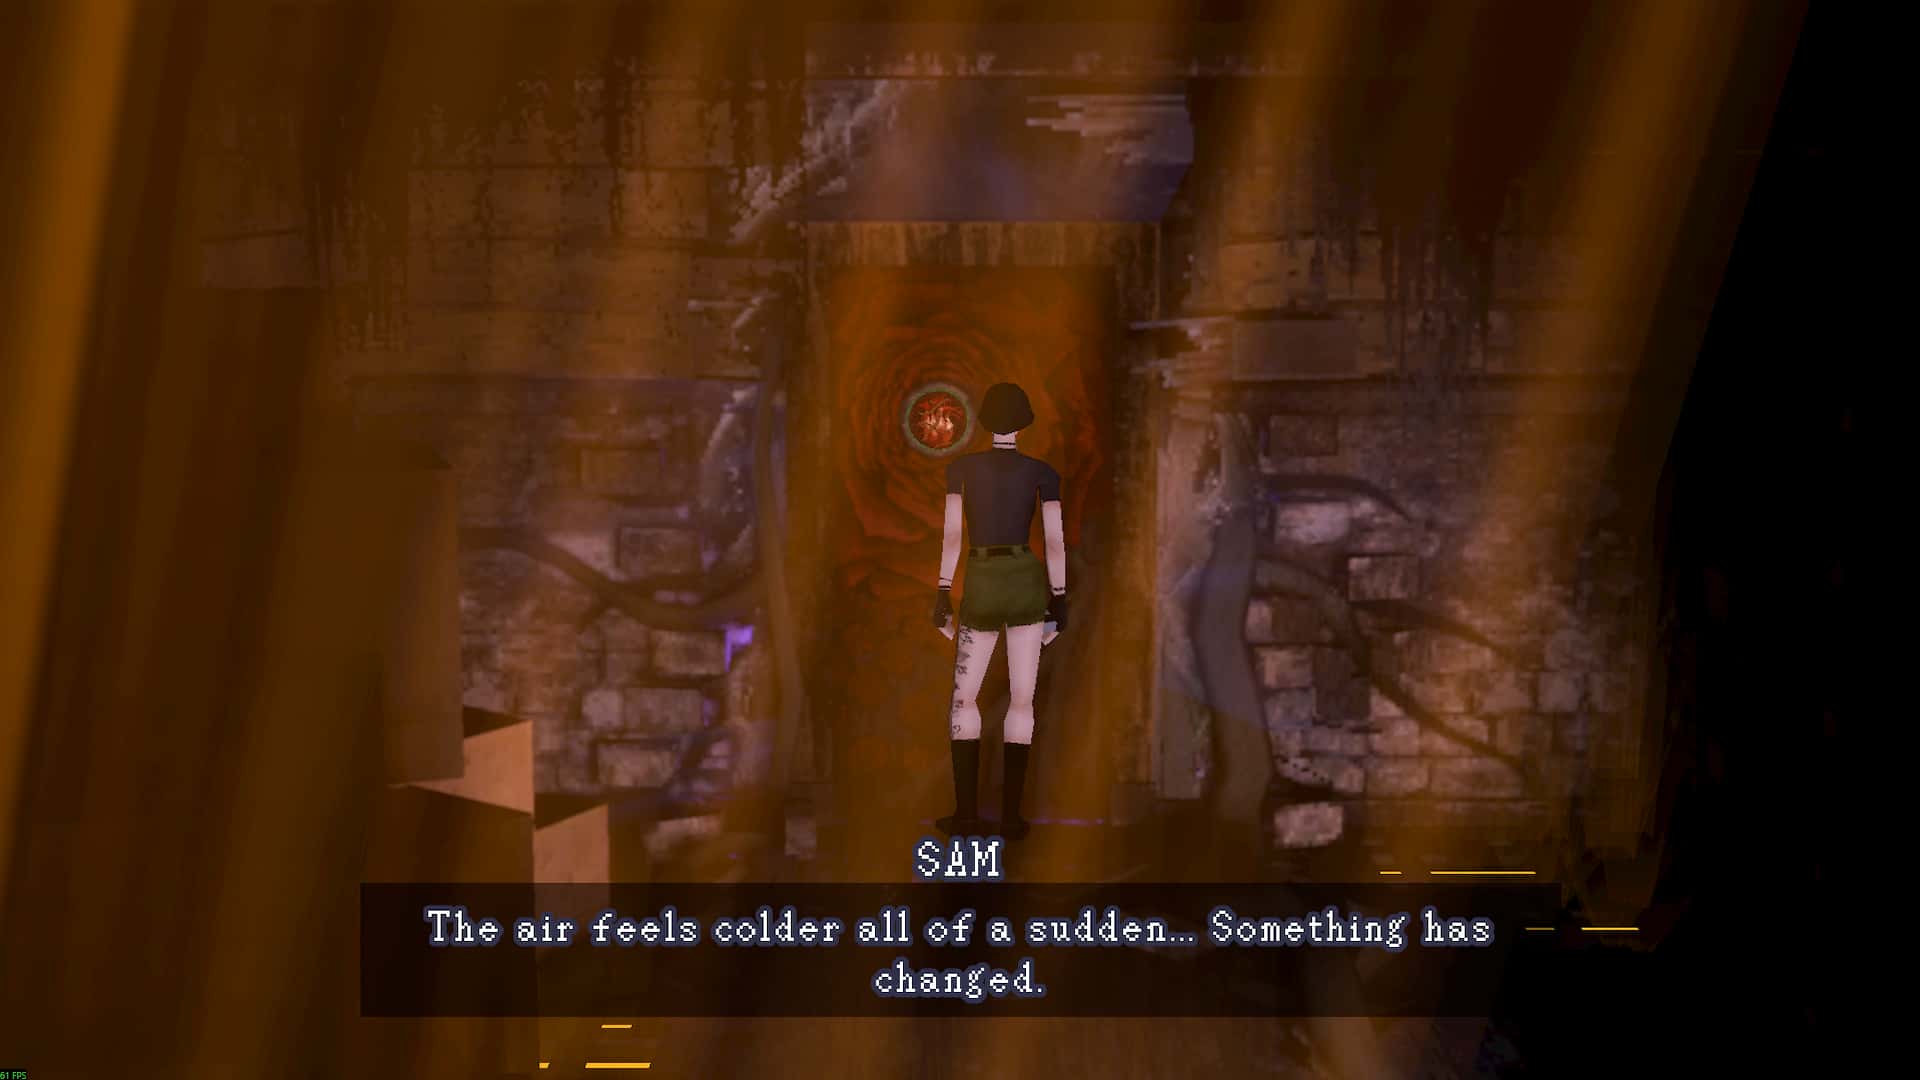
IMPORTANT: Once you go through this door, you won't be able to return to the Abandoned House. Finish all exploration before you move forward.
Once through the door, go down the stairs and keep going until you reach the door at the end. Interact with it to find it locked.
Turn around and now head back up the stairs. Once you're close to the top, you'll be attacked by the Tape Keeper.
Turn around immediately and then run back downstairs to the door and interact with it to escape.
If you get caught, you'll still be teleported to the same place but with a different cutscene.
Archive
Photo Machine in the Archive - Screenshot by Pro Game Guides
Once the cutscene ends, run forward to the main archiveroom with the giant book. Directly behind the giant book will be a save station (PC) and the item storage chest.
IMPORTANT (SPOILER): To the left of the book, and to the left of the open hallway, is a machine you can interact with. As you play Heartworm, you will need to capture photos to put in this machine. How many photos you put in will affect the ending you receive:
0 Photos: Bad Ending (Stays)
1-2 Photos: Good Ending (Leaves)
3 Photos: Good Ending + Bonus Scene (Leaves+)
When you are ready, head down the hallway to the left. You will come to a static barrier that you can destroy by aiming and taking a picture of it.
Interact with the red static at the end of the hall to enter the Neighborhood.
Neighborhood
Blue Static Ghost - Screenshot by Pro Game Guidess
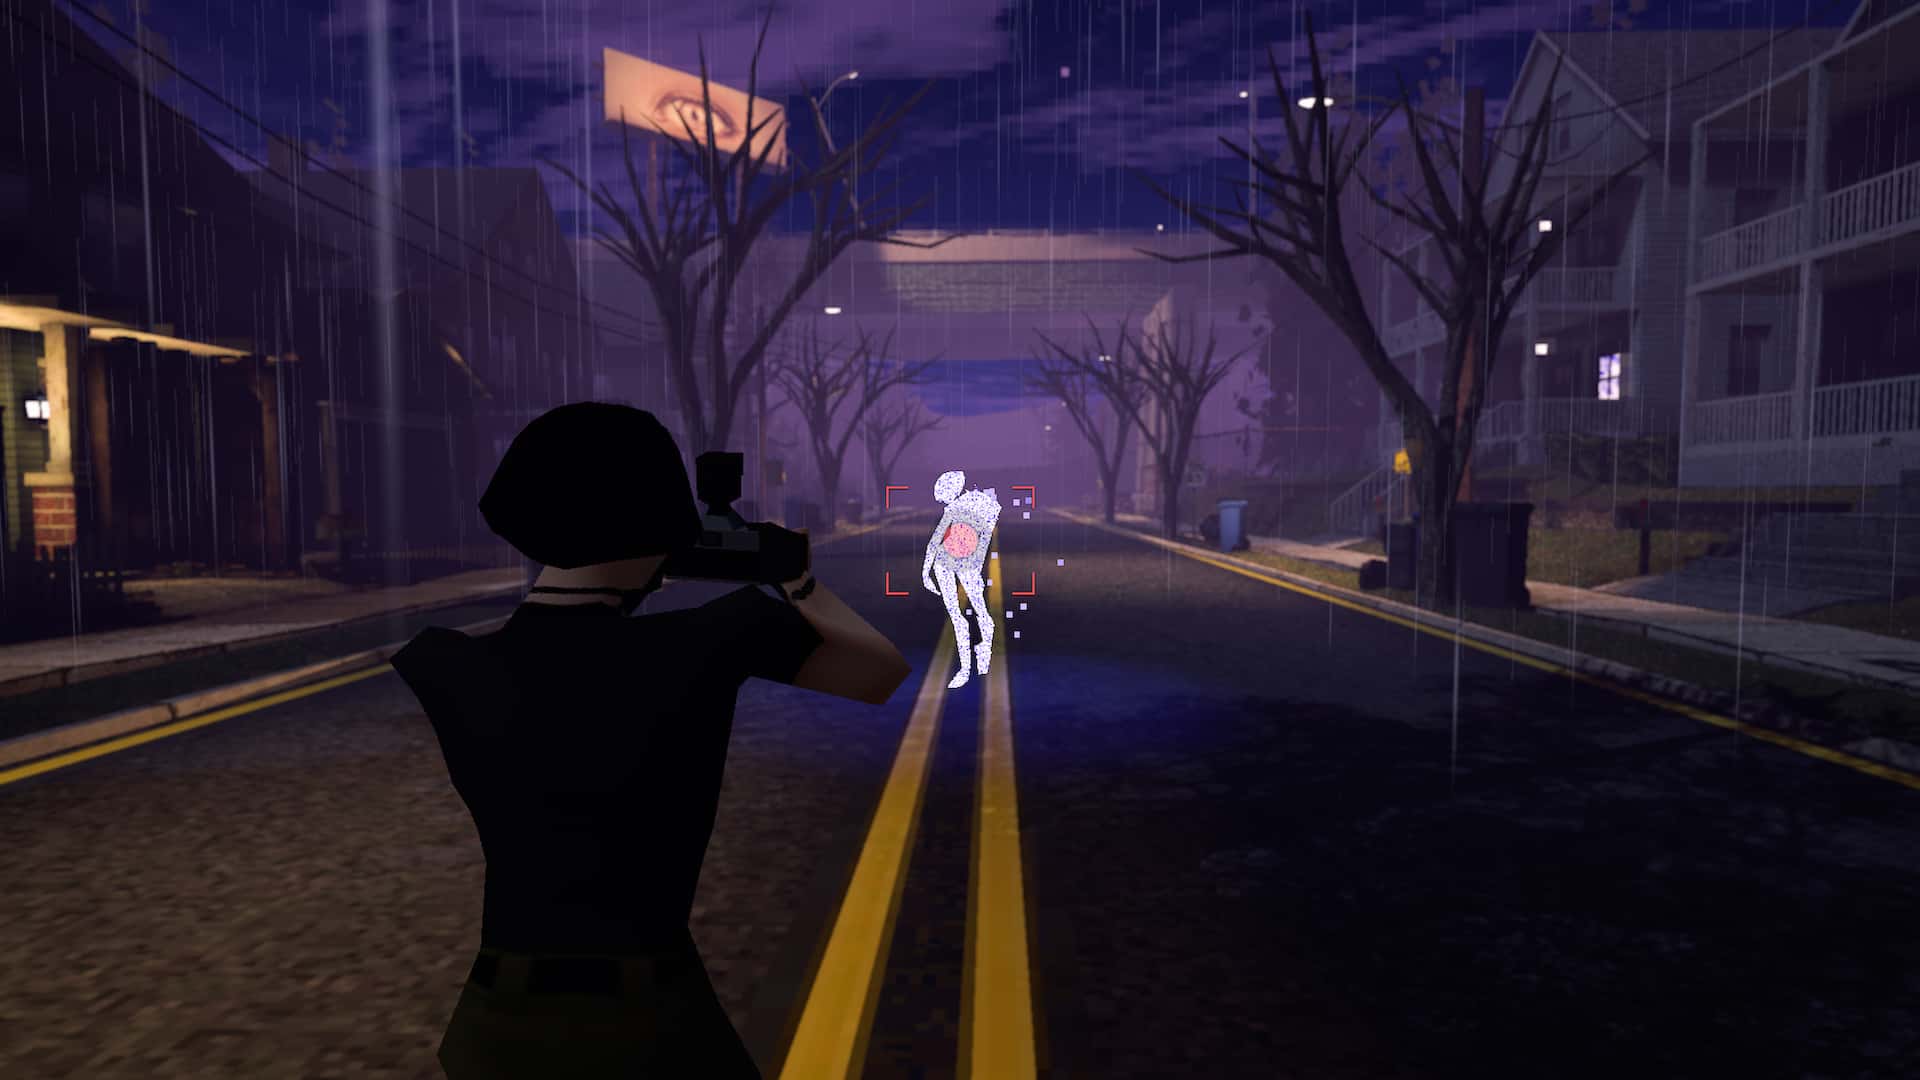
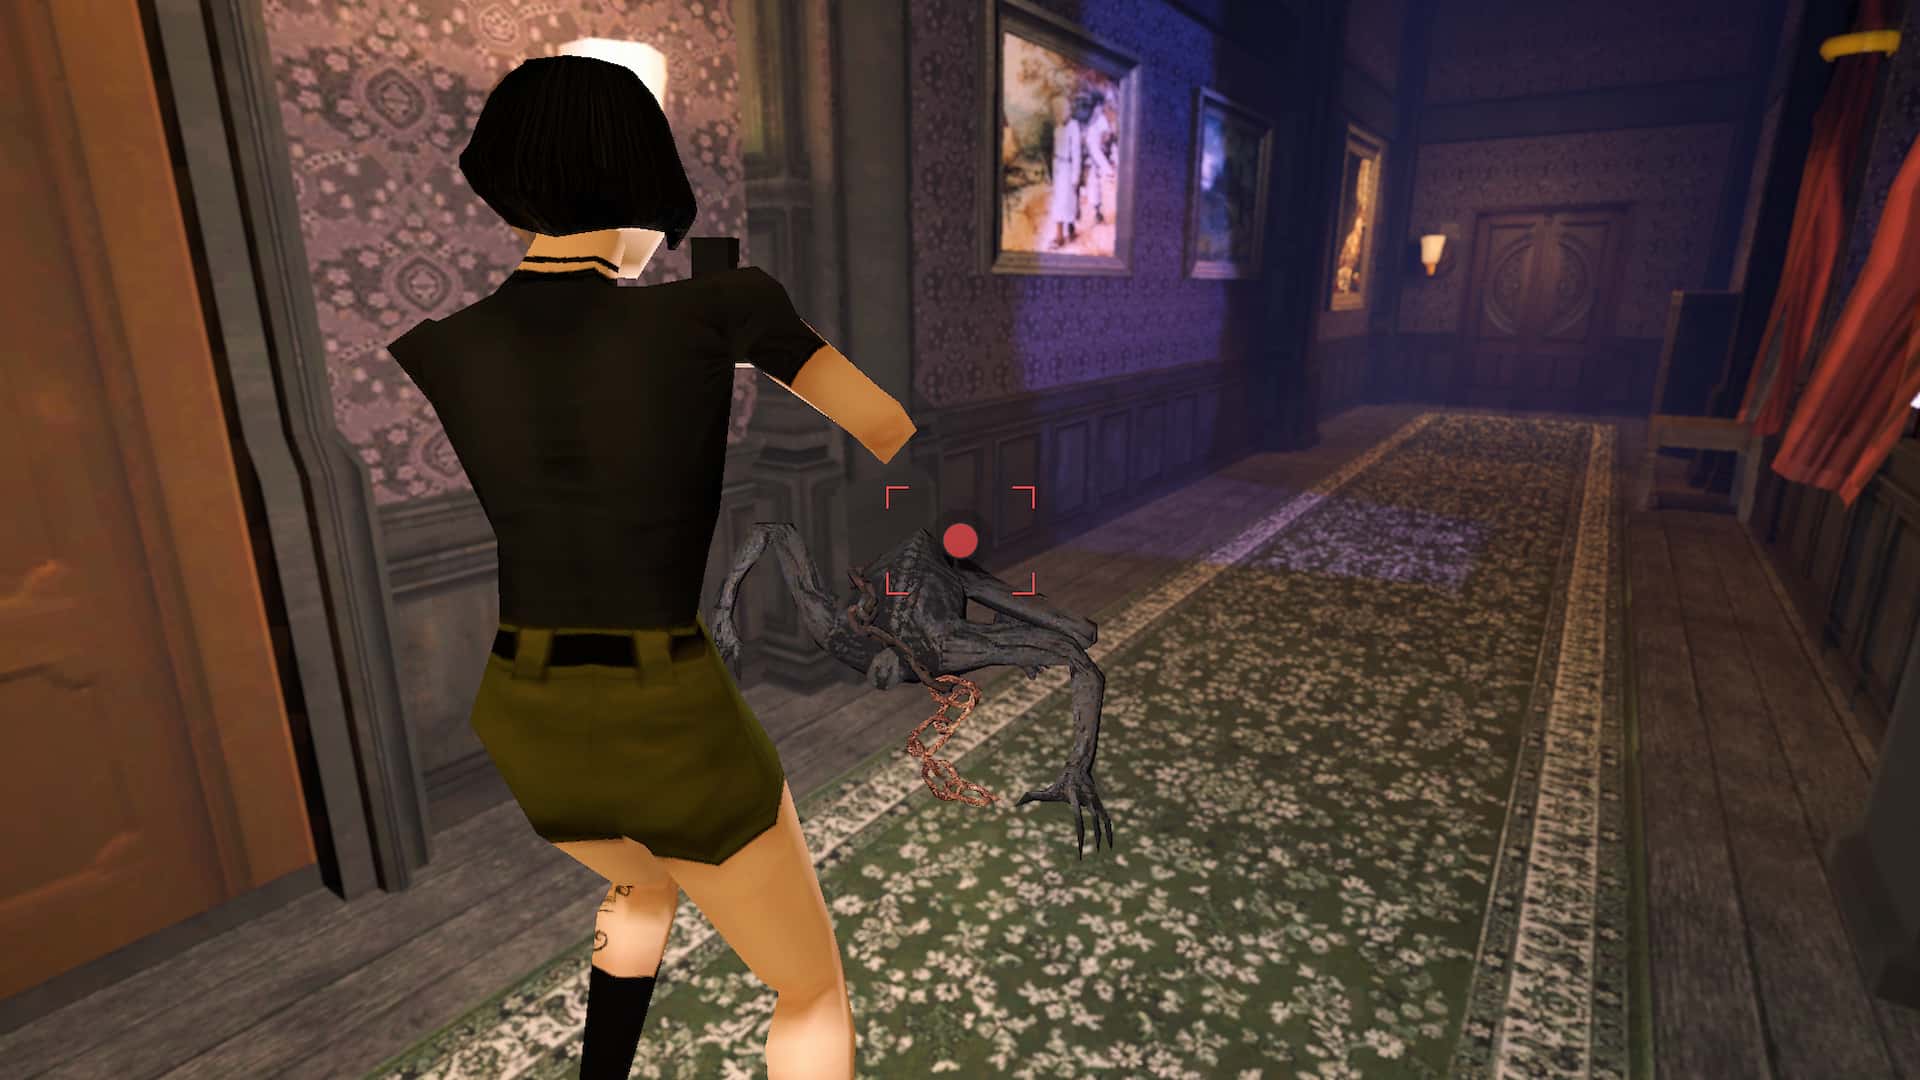
BLUE ENEMIES: The Blue Static Ghosts are Heartworm's basic enemy. They have the ability to shoot a wall of static, which won't hurt Sam, but will reduce her movement speed. If you get too close, they'll attack you. You can dodge most of ghost attacks by just running around them (their attack animations are very slow).
After the cutscene ends, you can either fight the enemy (take pictures of it) or just run away.
Neighborhood Safe Room location - Screenshot by Pro Game Guides
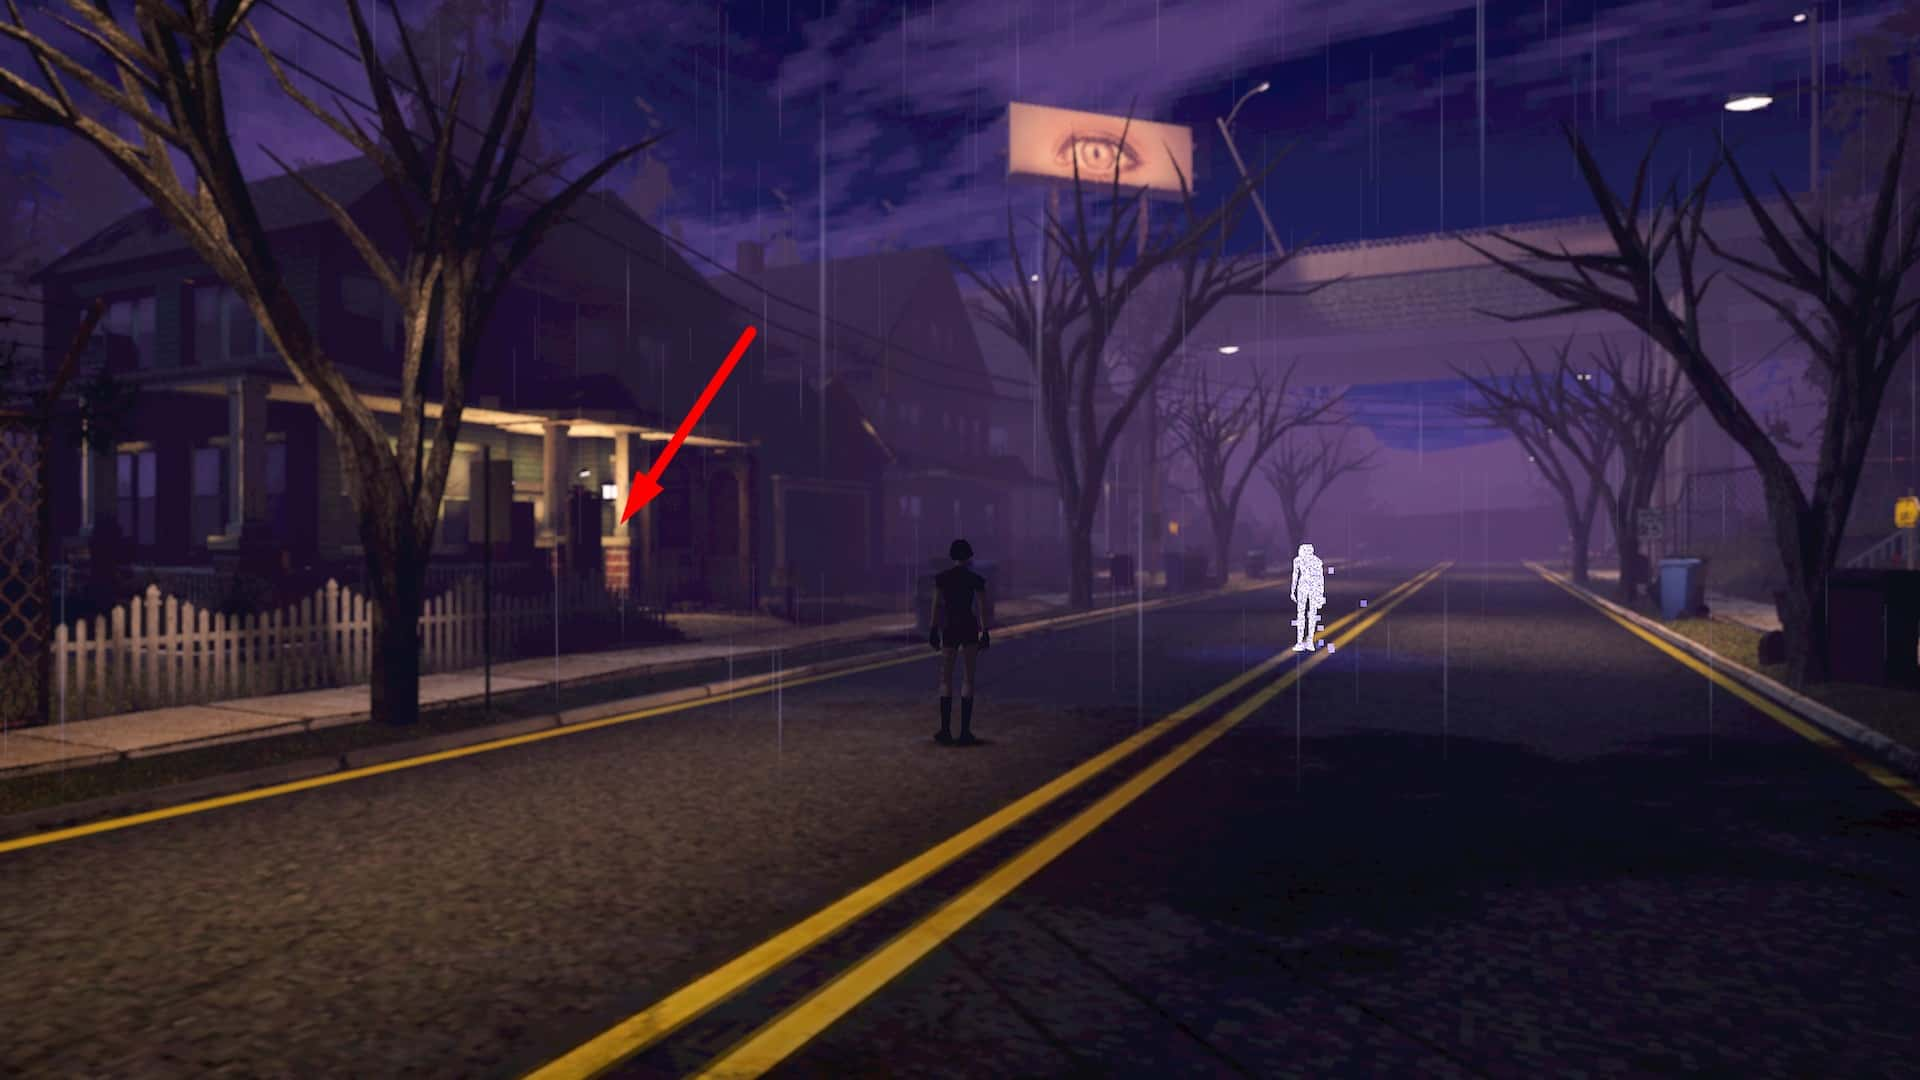
Head left and enter the first house on the left, further down the street. It's a Safe Room, and you can save the game there.
Exit the Safe Room and go in the opposite direction (right) down the street.
There is a 12-pack of Film inside the phone booth in front of the Corner Store.
There is a possum towards the garage that you can take a picture of.
Enter the Corner Store and pick up the House Key from the counter at the far corner of the store. Make sure to dodge the enemies around the store.
There is another 12-pack of Film on one of the shelves in the middle of the store.
There is an Antiseptic on top of one of the fridges inside the store.
Old House in the Neighborhood - Screenshot by Pro Game Guides
Head back to where you started and use the House Key to unlock the door to the Old House. This is the one that Sam will comment that used to belong to her grandparents when she approaches it; it has the red glow to the right and a garage in the back.
There is a journal entry on the table in the living room.
Head through the door in the back of the living room, and then follow the hallway to get to Sam’s Bedroom.
Note the missing baseball bat on the wall.
There is a possum that you can take a picture of next to the bed.
There is a guide to chess that you can check out on the bed.
Interact with the chessboard on the table to start the puzzle. The solution is to move the Bishop on E3 to G5. Completing this puzzle will get you the Burst Fire Mod, which, when combined with the camera, allows you to take three pictures at once.
If you need to try again, just leave the room and then re-enter it.
The Burst Fire Mod increases your damage by a lot while the ammo usage stays at 1.
Head back outside and go left and around the house towards the garage. Use the House Key to unlock the door to the garage.
You can throw away the House Key at this point.
There is a journal entry on the table inside the garage.
Push the middle shelf out of the way to find a fuse box. Flip the first, third, and fifth switch to the right to activate the whole panel. After that, a set of stairs will appear leading upstairs.
Go upstairs and pick up the camera bag on the floor. Use the camera bag in your inventory to increase your maximum inventory slots to 8.
Take note of the train set in the back. There is a missing piece you'll need to place there.
Baseball field in the Neighborhood - Screenshot by Pro Game Guides
Leave the garage. Then, go back towards the Corner Store, then turn right and head to the end of the street to go to the Baseball Field.
Grab the Baseball Bat from the bleachers on the left.
Enter the field in the middle and run to 1st base, then 2nd, then 3rd, and then land on the home plate (right → left). Plates will activate each time, and it will lift the cage in the middle, revealing a candle.
Red Static Ghost - Screenshot by Pro Game Guidess
RED ENEMIES: This will likely mark your first encounter with Red Static Ghosts in Heartworm. While they can’t slow Sam down, they can turn invisible for brief periods of time, during which they are invulnerable, and can still attack you.
Use the lighter from your inventory while next to the candle to light it. This is one of the three candles you'll need to light to unlock the Funeral Parlor.
Exit the Baseball Field and go past the Corner Store and towards the house at the corner. Sam will note this is the house where her friend Sally lived. Enter the flooded house.
There is a First Aid Kit under the tree in the yard.
There is a 12-pack of Film at the table in the middle of the house.
Go upstairs and through the wall. Continue through the hallway and enter the room at the end of it, and then light the candle inside the bathroom. This is another Funeral Parlor candle.
Exit the flooded house and head back to Sam’s Room. Use the Baseball Bat next to the plaque to get the Model Train.
Exit the house and now head back to the garage. Use the Model Train on the train set upstairs to get the Padlock Key.
Shoo the static barrier to get the Garden Photo - Screenshot by Pro Game Guides
Exit the garage and go directly to the right, behind the Old House. Interact with the red-glowing fence to use the Padlock Key and enter the Garden.
Shoot the static barrier and pick up the photo off the bench. That is the Garden Photo, one of the three you will need to get a good ending in Heartworm.
You can store the photo in the item storage in the safe room, so it doesn't take up your inventory space.
Head back to the road, and go to the unexplored end of the street, towards the overpass, and go to the last house on the right (with the gravestones right next to it). Interact with the static window/door to enter it.
There is a slope just after the overpass leading to a gate. There is a journal entry next to the gate door.
Go to the end of the hallway and interact with the door to enter the Snowy Street.
Across from where you come out is a Funeral Parlor with three candles in the window. The note next to them will make it clear that your goal is to find and light three candles in the Neighborhood to unlock the door.
If you followed all the steps, only one candle will remain to be lit now.
Next to the snow piles to the right of the Funeral Parlor, there is a light pole with a First Aid Kit next to it.
Apartment door on the Snowy Street - Screenshot by Pro Game Guides
Go to the end of Snowy Street and turn right into an alleyway, go up the stairs, and enter the Apartment.
Make your way through the Apartment until you get to the other side of the chasm. At the end is a candle, which you'll need to light with your lighter. This is the last Funeral Parlor candle you'll need to light.
This is the last time you'll need the lighter in Heartworm, so you can safely store it now.
There is a Bandage inside the bathroom that's connected to the living room.
There is a possum you can take a picture of in the bathroom at the end of the long hallway.
After you've lit the candle, exit the Apartment, and then go to the Funeral Parlor at the start of Snowy Street.
There is a journal entry on the table next to the door.
Go through the door on the left and continue towards the casket on the ledge. Interact with the open casket to enter Downtown.
There is a journal entry on the table next to the metal gate.
Exit to the street and continue down the road.
On the left, after the first turn, you'll see a wooden fence. There is a First Aid Kit behind it.
There is a run-down store in the corner on the right side of the street. It's a safe room entrance.
Lit-up alleyway entrance - Screenshot by Pro Game Guides
Toward the end of the street, you'll see a lit-up alleyway. Go through the alleyway until you find a garage door with a red light above it. Interact with the door to enter the Warehouse.
Climb the stairs in the back and head across the walkway until you find a door. Interact with it to unlock it, giving you a shortcut to Main Street and the Safe House.
Go down the warehouse and enter the shelves. Some boxes will fall behind you, and after you make your way further, a monster will spawn in and start chasing you. Just continue going through the shelves until you reach the end. More boxes will fall, and they will block the monster.
Unlike the first chase, if you get caught here, you will die.
Go to the right and head all the way to the end to find a Crowbar in a caged-off area.
Then, go back towards where you entered the warehouse and use the Crowbar on the wooden planks to remove them.
Leave the Warehouse and head back down the alleyway. Go right after the exit to reach the bus at the end of Main Street.
IMPORTANT: This is your last chance to explore The Neighborhood. If there’s any exploring you want to do, now is the time.
Use the Crowbar next to the bus door to open it. Once you do so, interact with the door and a cutscene will play, leading to the Heartworm's first boss fight.
Before you go, save the game and equip the Burst Fire Mod and bring all the Film and healing you can. You'll need it for the boss fight.
Spider Boss
Spider is the first boss you fight in Heartworm - Screenshot by Pro Game Guides
You can defeat the Spider by taking pictures of it, like any other enemy. It takes around 40 pictures to kill it (25-30 with the Burst Fire Mod).
The lower the Spider's health is, the more static will appear around it.
Collect the resources around the arena to aid you in the fight.
There is a 12-pack of Film on one of the cars in the middle.
There is another 12-pack of Film on the edge of the arena.
There is one more 12-pack of Film in one of the corners of the arena.
There is a First Aid Kit next to a light pole on the side.
The Spider has two basic attacks: it will either lunge at you or turn around and spray web at her. Both of them can be avoided by moving, though the web doesn’t do very much damage.
The Spider will occasionally make some distance between it and Sam, then charge her. If you take a picture during the charge animation, it will interrupt the attack.
Sometimes the Spider will climb up and spawn small spiders. They will run up to you, stop, shake for a few moments, and then explode. The best way to deal with them is to just run in the opposite direction from which they are coming at you.
With the Burst Fire Mod, your photos will stagger the Spider for a moment, allowing you to chain several photos each time. Use this to maximize your damage.
Archive
Use the Neighborhood Page at the tome in the middle to reach the Wilderness - Screenshot by Pro Game Guides
After you've defeated the Spider, a cutscene will play and you'll receive the Neighborhood Page. Then, you'll be teleported back to the Archive.
If you got the Garden Photo, you can use it next to the machine to advance the good ending. Also, you can save it till the end and use it just before the last boss. It doesn't matter.
Use the Neighborhood Page at the tome in the middle of the room to unlock the center gate.
Go through that gate and head to the end of the hallway. Go through the door to get to the Wilderness.
Wilderness
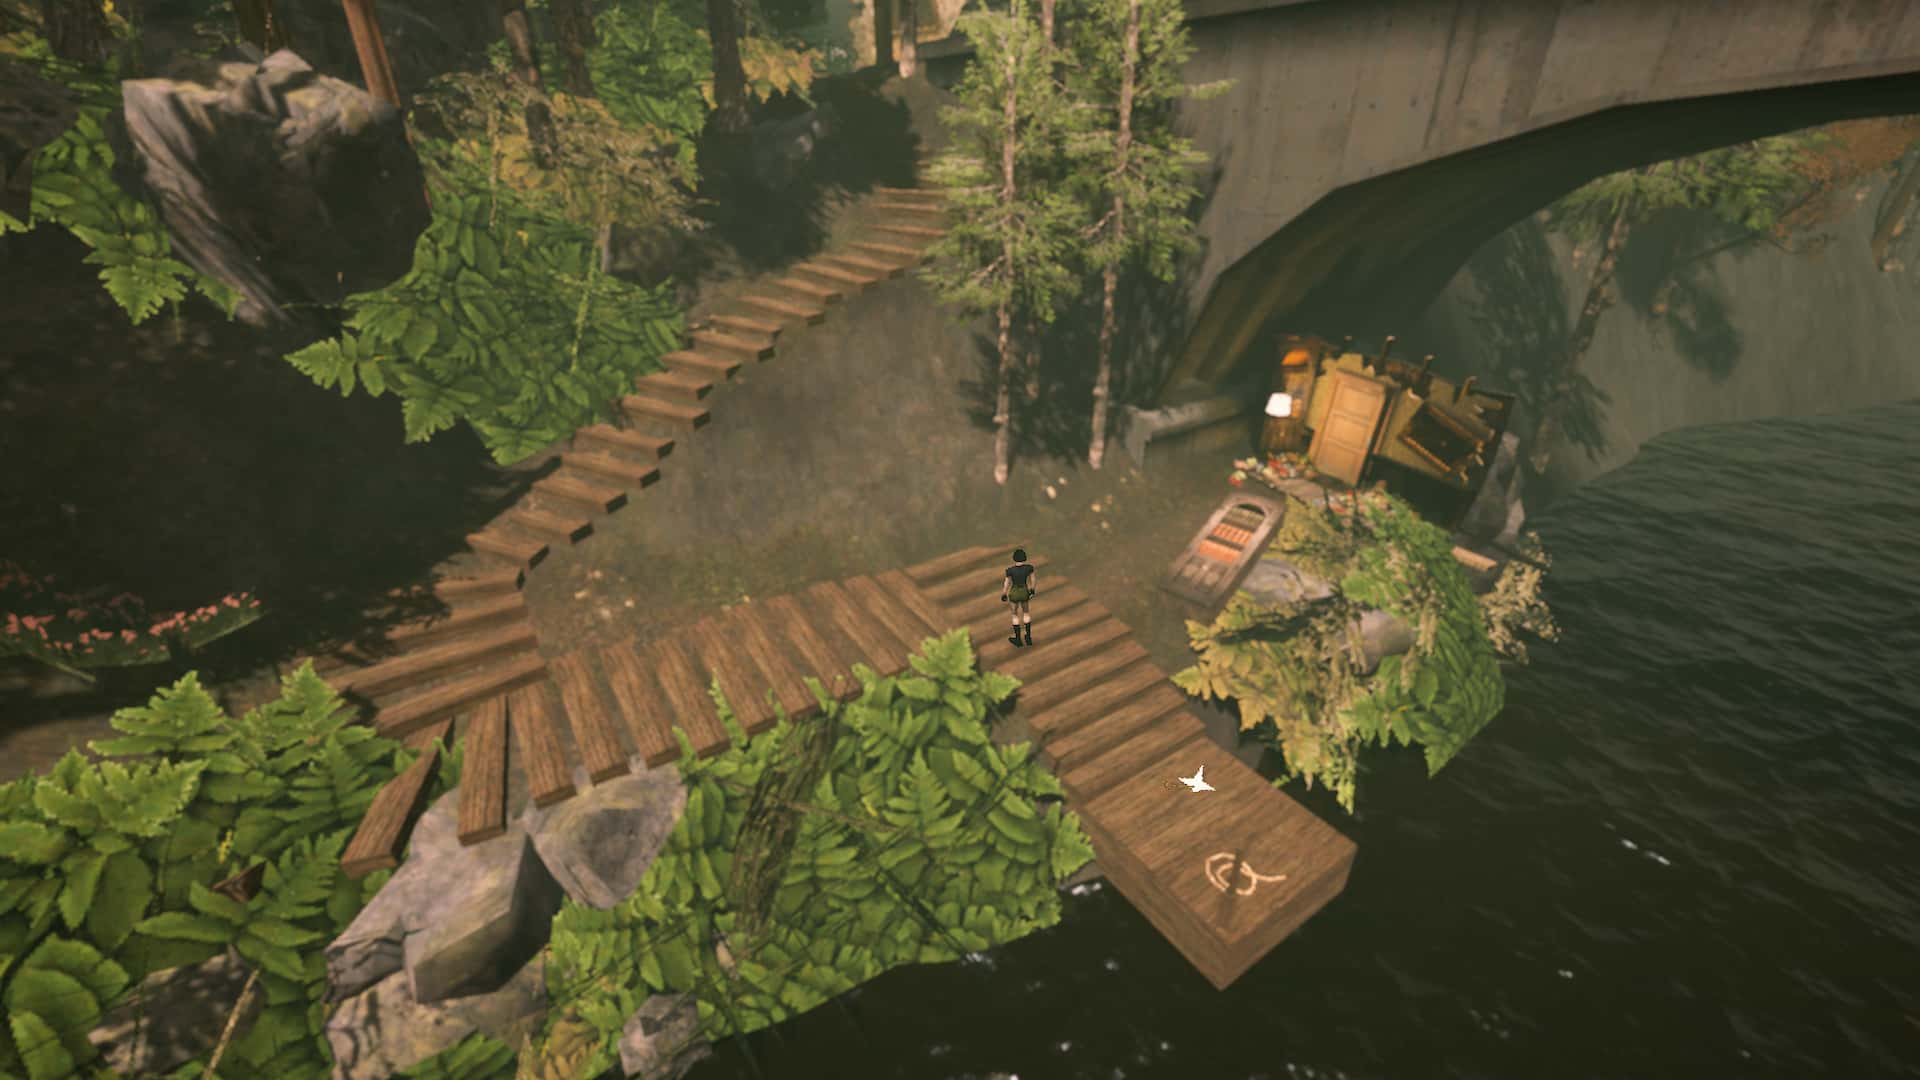
Watermill key is underneath the bridge - Screenshot by Pro Game Guides
After the cutscene, go down the path until you get to the bridge.
There is a journal entry right at the start of the path downhill.
Follow the wooden stairs below the bridge to grab the Watermill Key on the dock.
There is a Safe Room door down here as well.
Head back up and across the bridge. Follow the road all the way to the end and you'll reach the Heart.
Around the Wilderness are three information boards describing constellations you can see in the sky, as well as the meaning behind them. Note these boards.
There is a Cassiopeia board on the road towards the Heart.
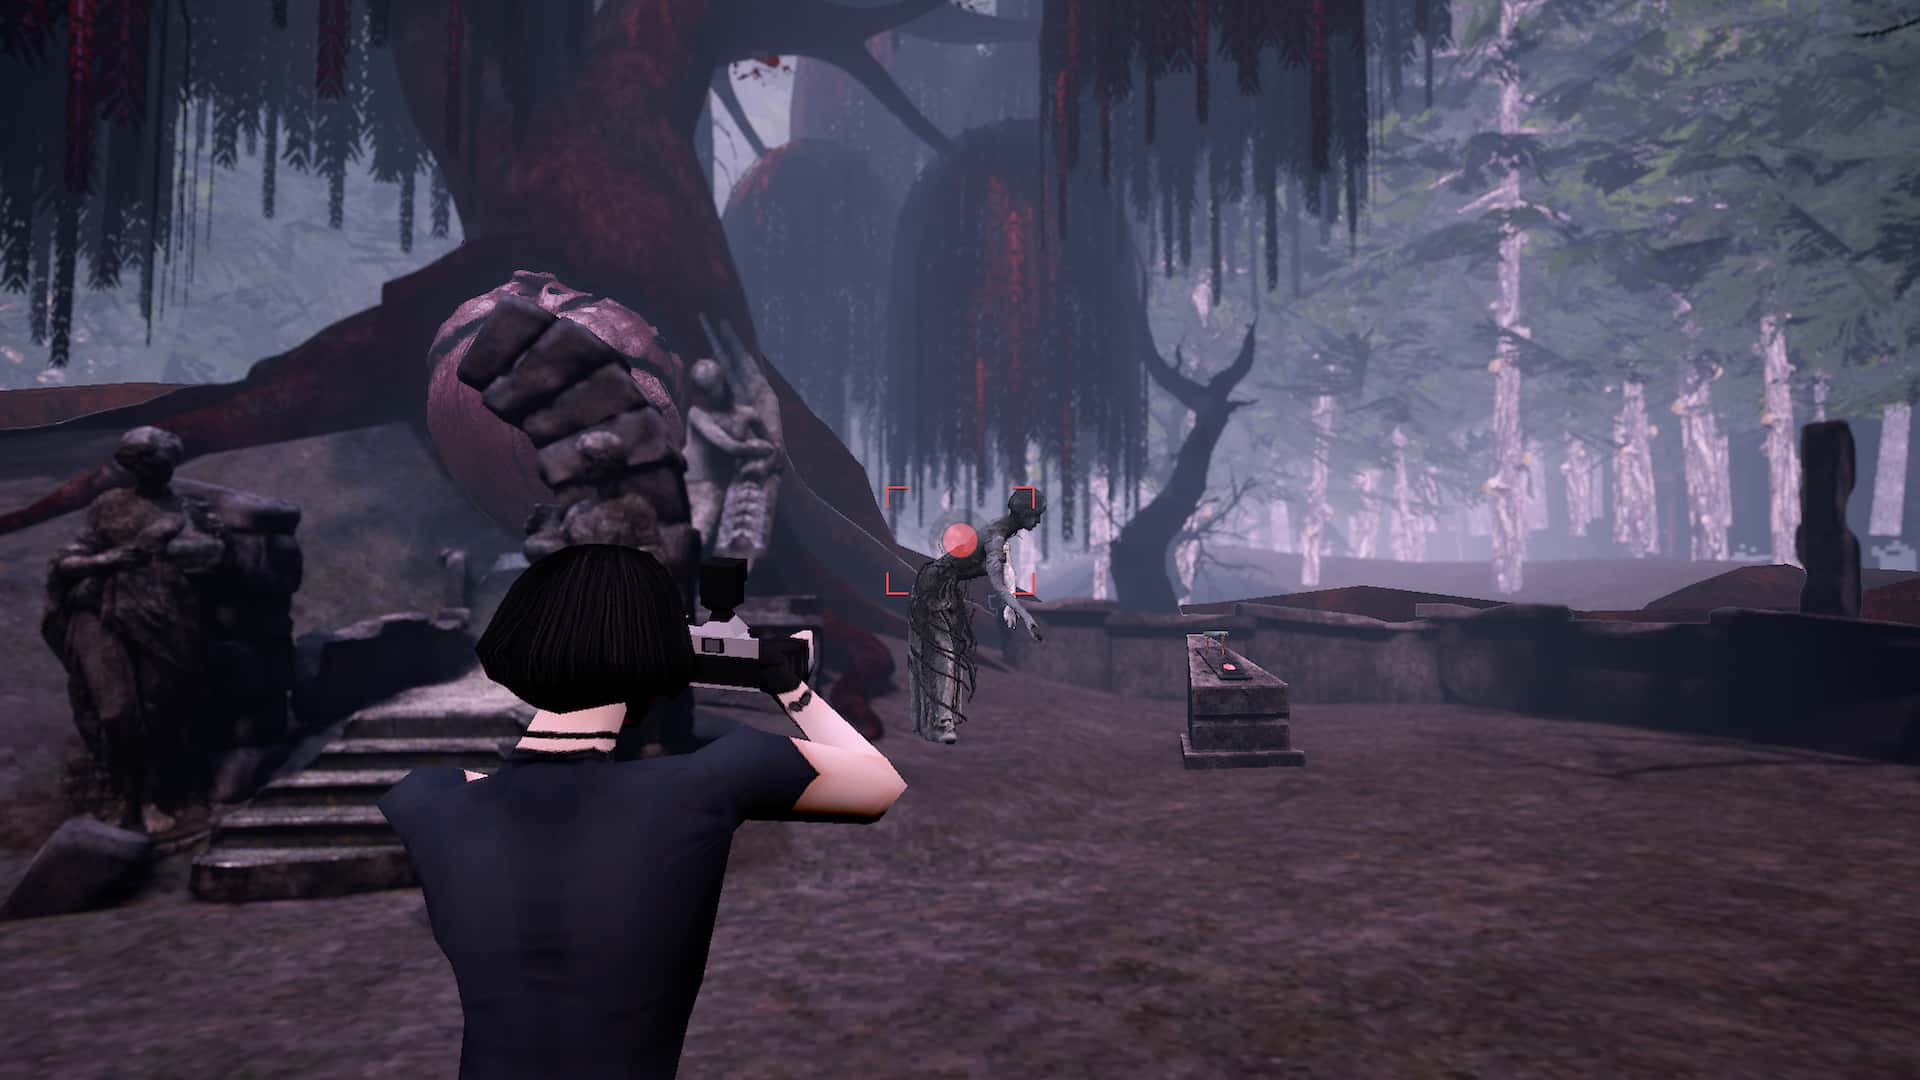
Statue enemy - Screenshot by Pro Game Guides
STATUE ENEMIES: These will attack you as you get close. They'll create an arena, forcing you to fight them until you defeat them. Statues have a ranged attack that you can easily avoid just by circling around. Once they've used it, you can just make some distance and shoot away.
Once inside the Heart, you'll notice the roots going away from the tree. At the ends of the roots, there are switches you'll need to activate. There is a switch (1) is next to the tree, with a Statue Enemy right next to it. Approach the switch and activate it.
There are 7 switches in total, and they're needed for a later puzzle.
Head back into The Wilderness and follow the path to the right of the Heart. Enter the door at the end to get back to the area entrance.
There is a machine that requires a hexagonal item to activate on the path. Note its location.
There is a journal entry and a 12-pack of Film next to the door.
Once you're back at the bridge, turn left and towards the ruined piece of a house at the end of the road. There is a "Welcome to Devil's Den" sign on top of rubble. Enter the door to reach the Parking Lot.
Second switch is in the Parking Lot - Screenshot by Pro Game Guides
Go through the parking lot, and you'll find a switch (2) next to the area exit. Activate it, and you can then move past it and to the next area, which is the Watermill.
There is an information board for the Cetus constellation close to the area entrance.
There is a bandage in the top left corner of the Parking Lot.
Dog enemies - Screenshot by Pro Game Guidess
DOG ENEMIES: The dogs will lunge at you if you get too close. Their pathing is fairly telegraphed and you can dodge them fairly easily. If one attacks you, they will continue to chase you until you change scenes/defeat them.
Use the Watermill Key to enter the mill and note the piano in the corner and the poem on the table. The poem holds the piano key sequence: the beginning of each line is a note on the piano. Solution to the piano puzzle is C-D-D#-G-F-D-D#-F. After you've input it, a hidden cave behind the waterfall will be revealed.
There is a possum you can take a photo of inside the mill.
There is a 12-pack of Film on the wooden balcony around the mill.
There is an Antiseptic in the bushes by the river to the right of the mill. There is a dog patroling that area.
Go across the water and continue forward and then right into the small forest area. There is a switch (3) in the corner of the small forest. Activate it.
Then, go back across the water and into the waterfall cave. Make your way through the cave, and at the end, there is another switch (4) next to the ladder. Activate it.
The statue inside the cave won't attack you.
Bolt Cutters are in the underground cave - Screenshot by Pro Game Guides
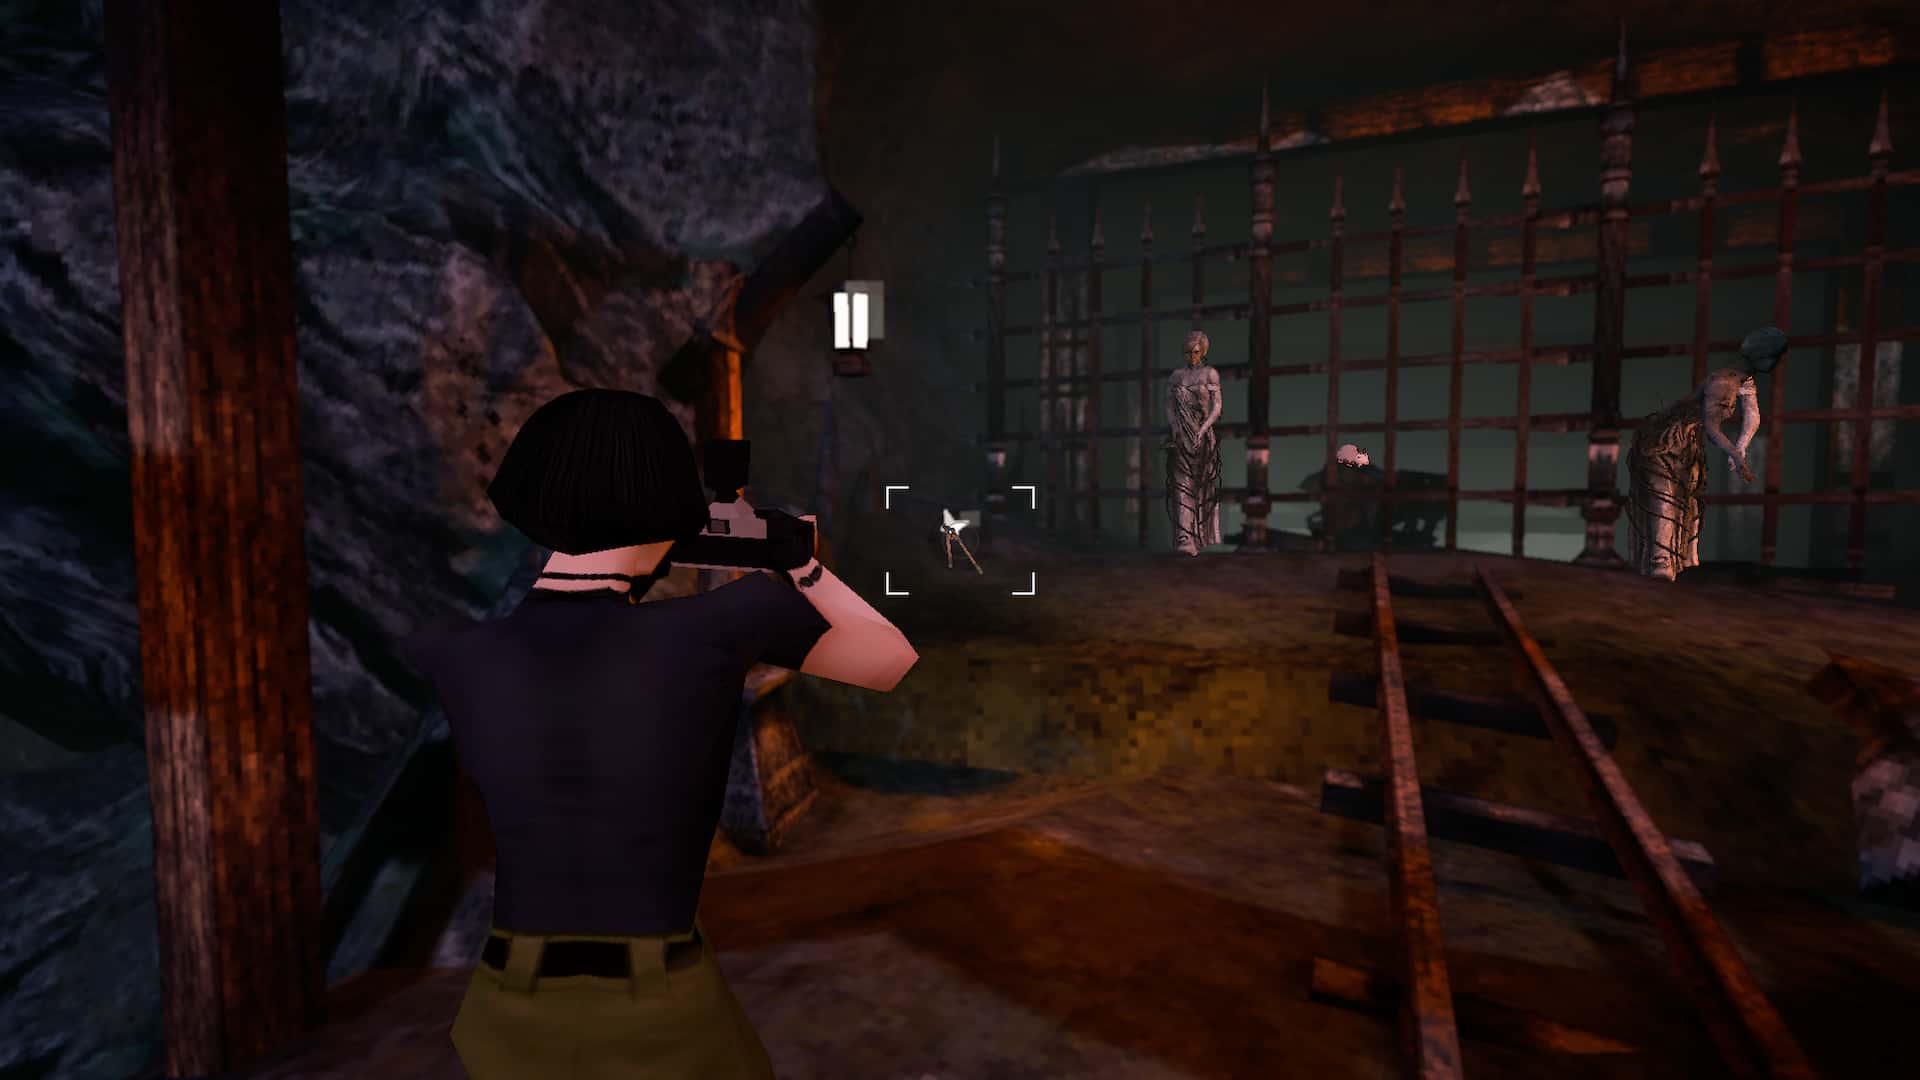
Head down the ladder and you'll enter the underground cave. Make your way across the bridge and grab the Boltcutters next to the two statues and the locked gate. The statue closer to the Boltcutters won't attack you.
There is an Antiseptic next to a statue on the left side of the area.
There is a possum you can take a picture of behind the locked gate.
Go back up the ladder and leave the cave. Go right, towards where the switch is, and then turn leftand up the hill as soon as you cross the water. You'll then enter the Fork.
Follow the road while avoiding the statues and you'll enter the Overlook. Use the telescope at the lookout and select the following constellations: Cetus (top right), Cassiopeia (top left), and Andromeda (bottom left).
There is a board detailing the Andromeda next to the telescope.
The box next to the telescope will unlock and you can pick up the Blood Kit from it.
Head right of the telescope and you'll enter the Electric Poles area.
Go forward and use the Boltcutters to open the metal door leading to the electric panels. Activate the switch (5) inside the caged area.
The electric panel will read "100" when all the switches are activated, and then you will be able to turn it on using the button.
Directly across from the power station is a path down to a boat in the river. Interact with it for a shortcut back to the Safe Room. Come back here after saving.
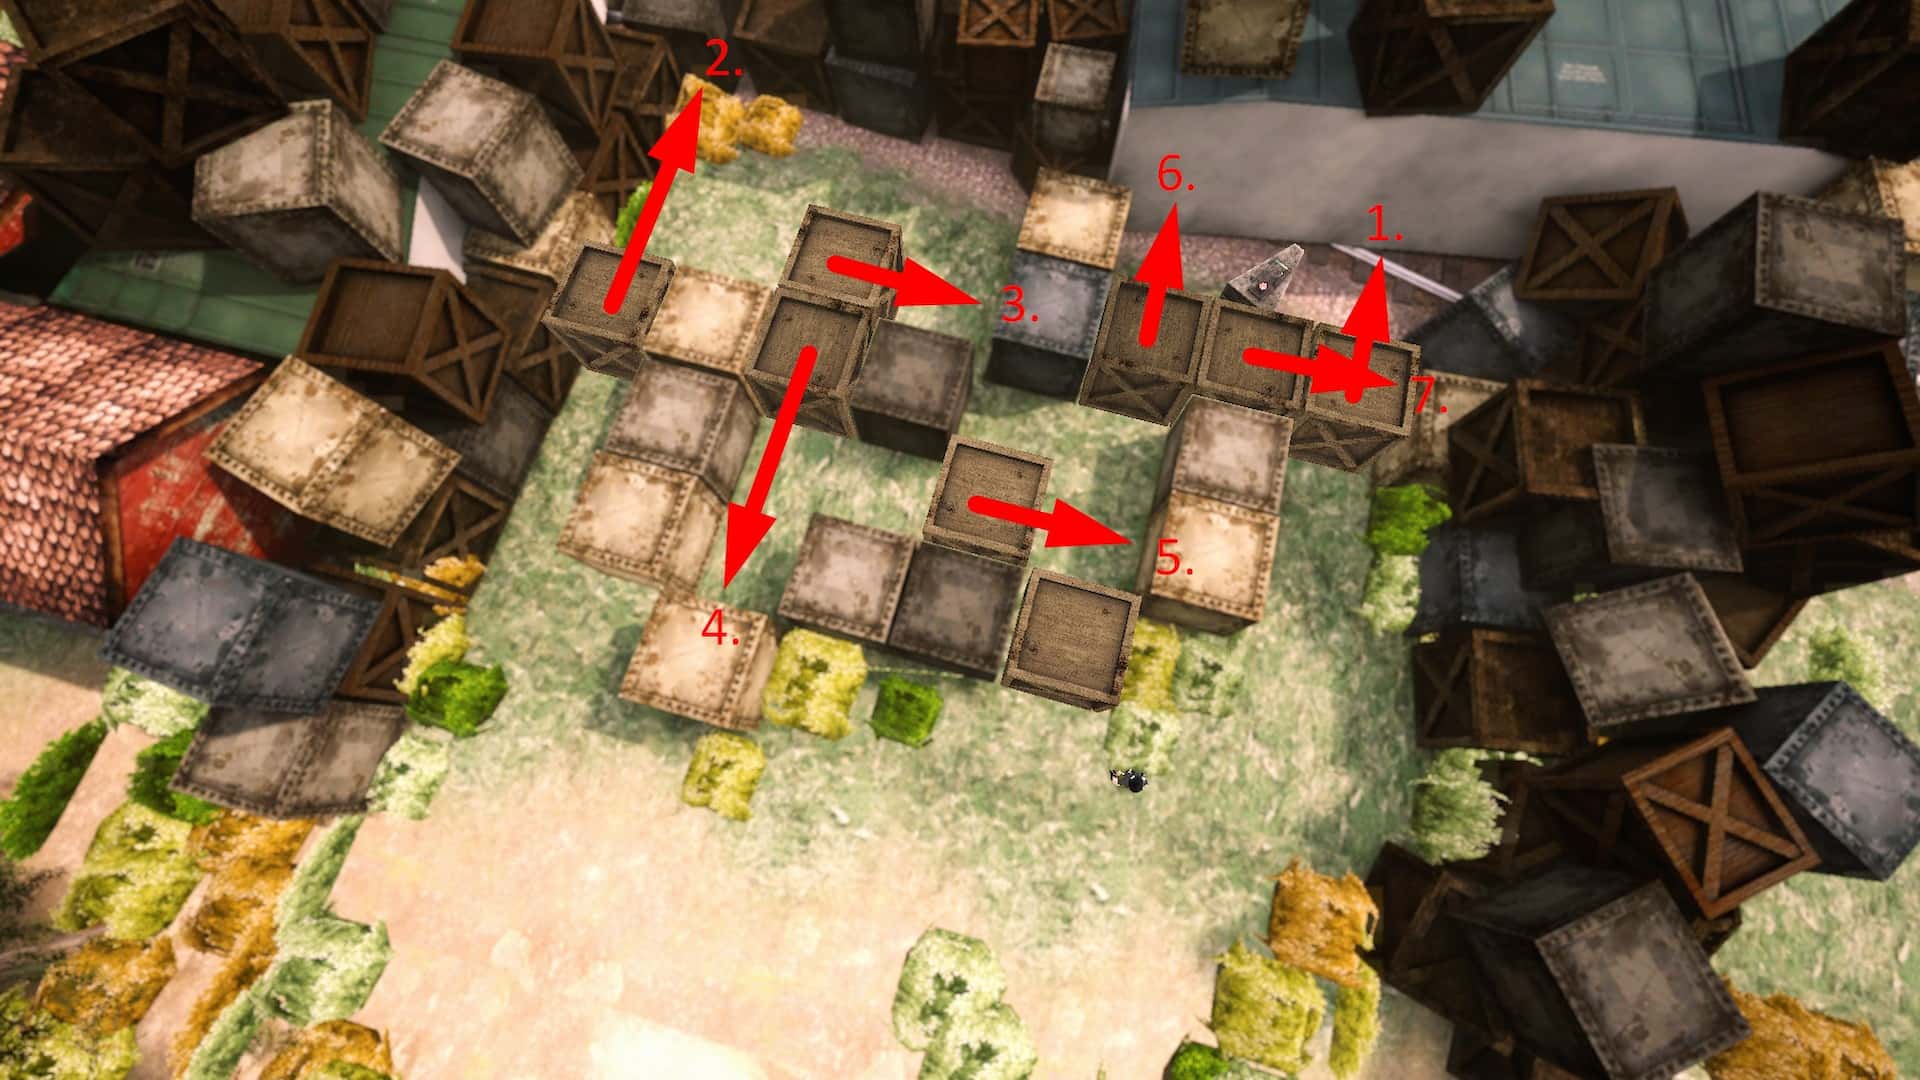
Solution to the box puzzle inside the Train area - Screenshot by Pro Game Guides
Opposite the entrance, take the left path (one without the statue) to the Train area and solve the push puzzle by doing the following:
Push the top rightmost box up.
Go back to the other side of the puzzle and push the leftmost block up.
From here, push the block to the right further right.
Then, push the block below further down.
Push the block to the right further right so you can get to the blocks near the switch.
Push the block on the left up.
Then, push the center one to the right so you can access the switch.
Activate the switch (6) there, and then head back to the Electric Poles.
Take the right path now (one with the statue) and you'll enter the Clearing.
Make your way to the house and then use the Blood Kit while next to the deer corpse.
There is a possum you can take a picture of in the bedroom to the right.
There is also a 12-pack of Film on the bed in the bedroom.
Go out the back of the house and deeper into the Clearing. Turn left inside the maze and go forward to find the last switch (7). Activate it.
On the opposite side of the maze (turn right at the intersection) there is an Antiseptic in the far right corner.
Exit the maze through the path in the middle to reach the Library. Use the Blood Kit at the altar in the middle. Note that the statues will attack you on sight.
There is a Bandage in the top right corner of the library.
Go back to the Electric Poles, and the panel will now be at 100%. Activate it using the button.
Note the pattern of green/red lights on the other panel for an optional puzzle later.
Activate all the switches to get the Hexagon Crank - Screenshot by Pro Game Guides
Now, take the boat back to the bridge and make your way to the Heart again.
With the blood pumping, now you can take the Hexagon Crank from next to the Heart.
Exit the Heart and follow the path to the right. On a small overlook, there is a machine. Use the Hexagon Crank next to it to activate it and lower the water levels, revealing a set of stairs leading underwater.
Correct computer light pattern - Screenshot by Pro Game Guides
Head into the water and you'll reach the Caves. Go to the gate with the sun symbol on it and interact with the computer on the right. Enter the green/red light sequence from the Electric Poles panel to open the sun gate.
Go inside and take a picture of the white static and then pick up the Cave Photo. This is the 2nd photo you'll need for the good ending.
Exit that cave and go right and up the slope. Save the game and put the Cave Photo in the item storage if you want.
There is an Antiseptic next to the computer. This Antiseptic respawns after you save/load the game, so you can stack as many as you want.
IMPORTANT: This is your last chance to explore The Wilderness. If you want to explore more, now is the time.
Continue through the cave once you're ready for your second Heartworm boss fight, now with the Deer. Bring the healing items and all the film you can.
Deer Boss
The Deer will try to ram you after ambush - Screenshot by Pro Game Guides
You can defeat the Deer by taking pictures of it, like any other enemy. It takes around 30 pictures to kill it (20-25 with the Burst Fire Mod).
The Deer is the easiest boss to defeat in Heartworm.
The lower the Deer's health is, the more static will appear around it.
Collect the resources around the arena to aid you in the fight.
There is a First Aid Kit to the right of where you spawn.
There is a 12-pack of Film on a log to the left of where you spawn.
There is another 12-pack of Film on a log on the opposite side of the arena.
There is another First Aid Kit on the ground on the opposite side of the arena.
Dogs will spawn around the arena during the fight. You can take them down with 2 shots (with the Burst Fire Mod). It's best you take them down first to make dealing with the Deer easier.
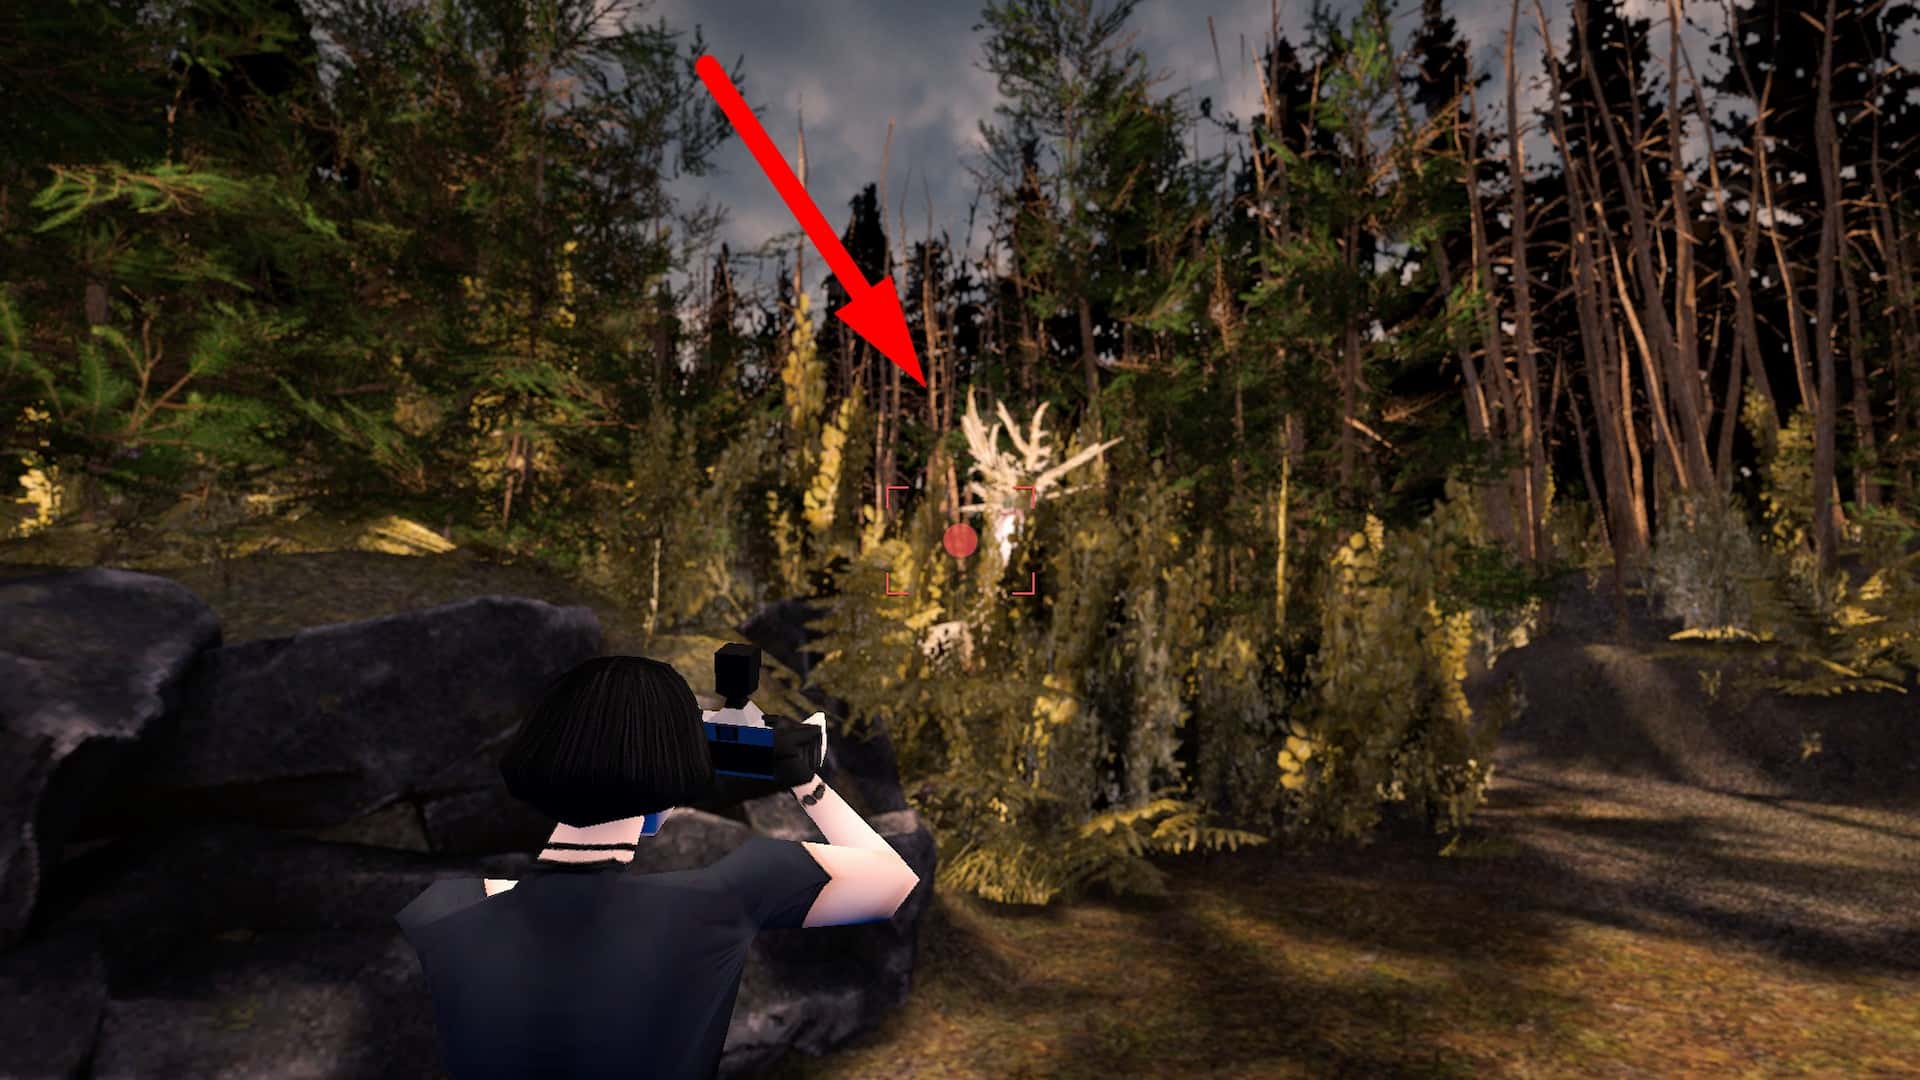
You can see the Deer in the trees easily - Screenshot by Pro Game Guides
The Deer will first hide and then try to ambush you, hiding in the trees for you to walk by. You can make out his white shape 90% of the time as you walk, so use that to your advantage.
As long as you don't get too close, the Deer won't attack you.
Attack the Deer as it's hiding for easy damage - Screenshot by Pro Game Guides
Shoot the Deer while it's in the trees and keep firing to stagger him and deal massive damage without risking your HP at all.
If it succeeds in the ambush, it will start attacking and chasing you relentlessly. Deal damage to it to stop the chase. It will yell, stunning you, and then hide again.
Archive
Clock Tower entrance - Screenshot by Pro Game Guides
After defeating the Deer, you receive the Wilderness Page and will be brought back to the Archive.
If you got the Cave Photo, you can use it next to the machine to advance the good ending. You can also save it until the last fight. It doesn't matter when you use the photos.
Use the Wilderness Page at the tome in the middle of the room to unlock the gate to the right.
Go through the gate and head to the end of the hallway, then up the stairs. Use the ladder to climb up.
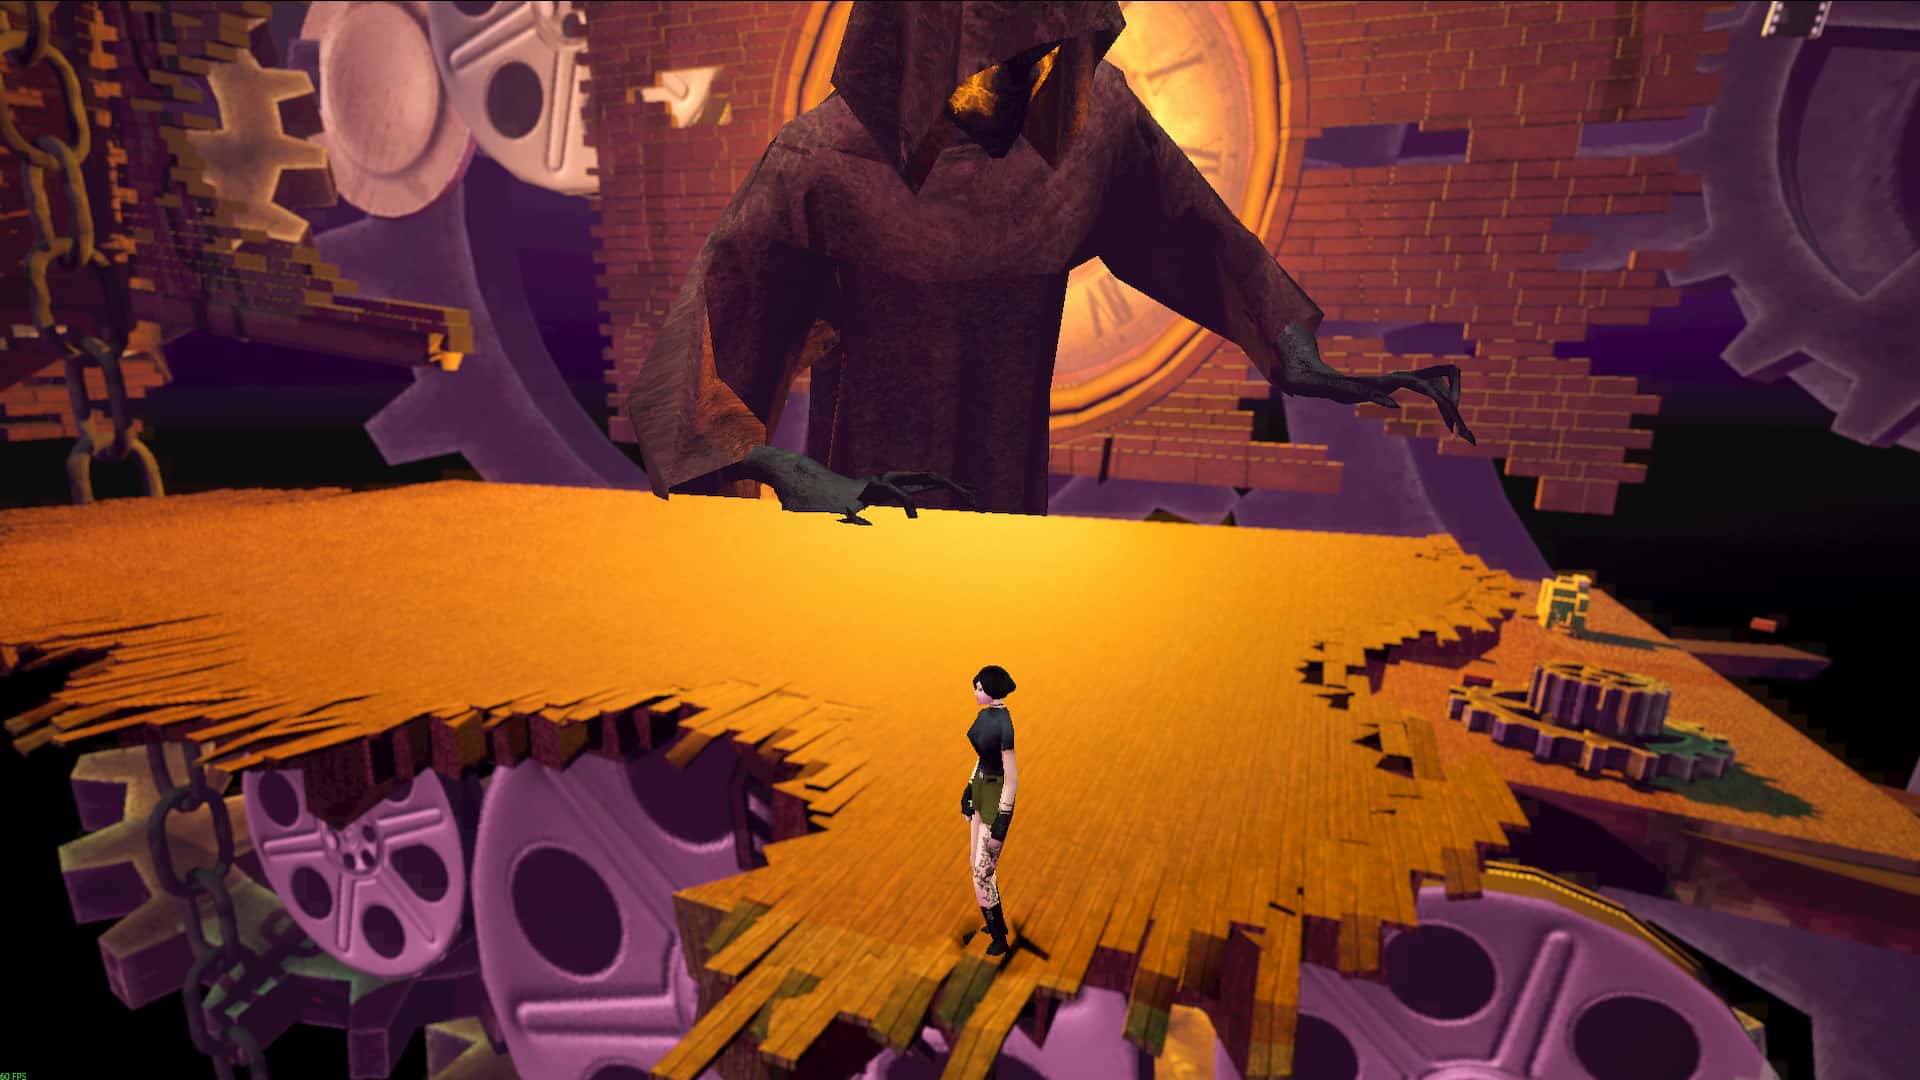
After the cutscene, head to the right, and then across the big stone bridge to enter the Clock Tower.
Clock Tower
Entrance Hall - Screenshot by Pro Game Guides
Grab the Delta Emblem in the Entrance Hall on the table by the fireplace.
There is a journal entry on the table next to the Delta Emblem.
Head upstairs and through the left side door into the Dining Room, and then through the double doors on the side into the Hallway.
There is a Bandage on one of the chairs in the middle of the Dining Room.
Headless Enemy - Screenshot by Pro Game Guides
HEADLESS ENEMIES: This will be your first encounter with Headless enemies in Heartworm. They will jump from above and attack you. They have extra HP and can leap over you. Their attacks are still fairly easy to dodge just by running. You'll know there is one nearby by the water dripping from the ceiling.
Head left/down the hallway and interact with the door to reach the Cages area. You can't get the item stuck in the cage yet, but you can enter the Gallery by interacting with the single door on the lowest level opposite the side you came in.
There is a 12-pack of Film in the far north part of the Cages.
In the Gallery, there is a note on the pedestal. The keyword you'll need to remember here is DWELLS.
Exit the Gallery and return to the Hallway that you were in previously. Continue going in the opposite direction through the Hallway until you can see two double-sided doors on each side (just past the door with the missing piece).
The door on the left leads to the Stairwell. At the bottom of the Stairwell and to the right is a Save Room. Save the game and return to the Hallway.
Interact with the door further down the Hallway and to the right to unlock it. This door will now be a shortcut to the Entrance Hall.
Delta Emblem door - Screenshot by Pro Game Guides
Head back to the door with the missing piece that you passed earlier. Use the Delta Emblem on it to unlock it. Enter, and it will bring you to the Hospital Lobby.
There is an Antiseptic on the ground on the left side of the lobby.
In the hospital lobby, head to the right wing and enter the door on the far right to get to the Waiting Room. In the back, there are TVs with four words flashing, with a number associated with them. This is the clue to the puzzle on the third floor of the hospital.
Leave the Waiting Room and go through the door across from it to get to the Stairwell. Climb up and enter the door to the third floor Delivery Ward.
The puzzle here has four rooms. You'll need to match what's happening in the rooms with the four descriptions listed above, and then press the buttons on the windows in the correct order. Here is the correct sequence:
2nd Room: Couple watching TV (Complacency).
3rd Room: Person falling through doors (Uncertainty).
1st Room: Person sitting at desk (Mediocrity).
4th Room: Person in a room with flowers (Mortality).
Now, enter the door at the end of the hall, go through the office, and enter the door that opened when you solved the puzzle. Grab the Crucifix from the crib. You will be teleported back to the Entrance Hall.
There is a journal entry on the desk inside the office.
Crucifix on display - Screenshot by Pro Game Guides
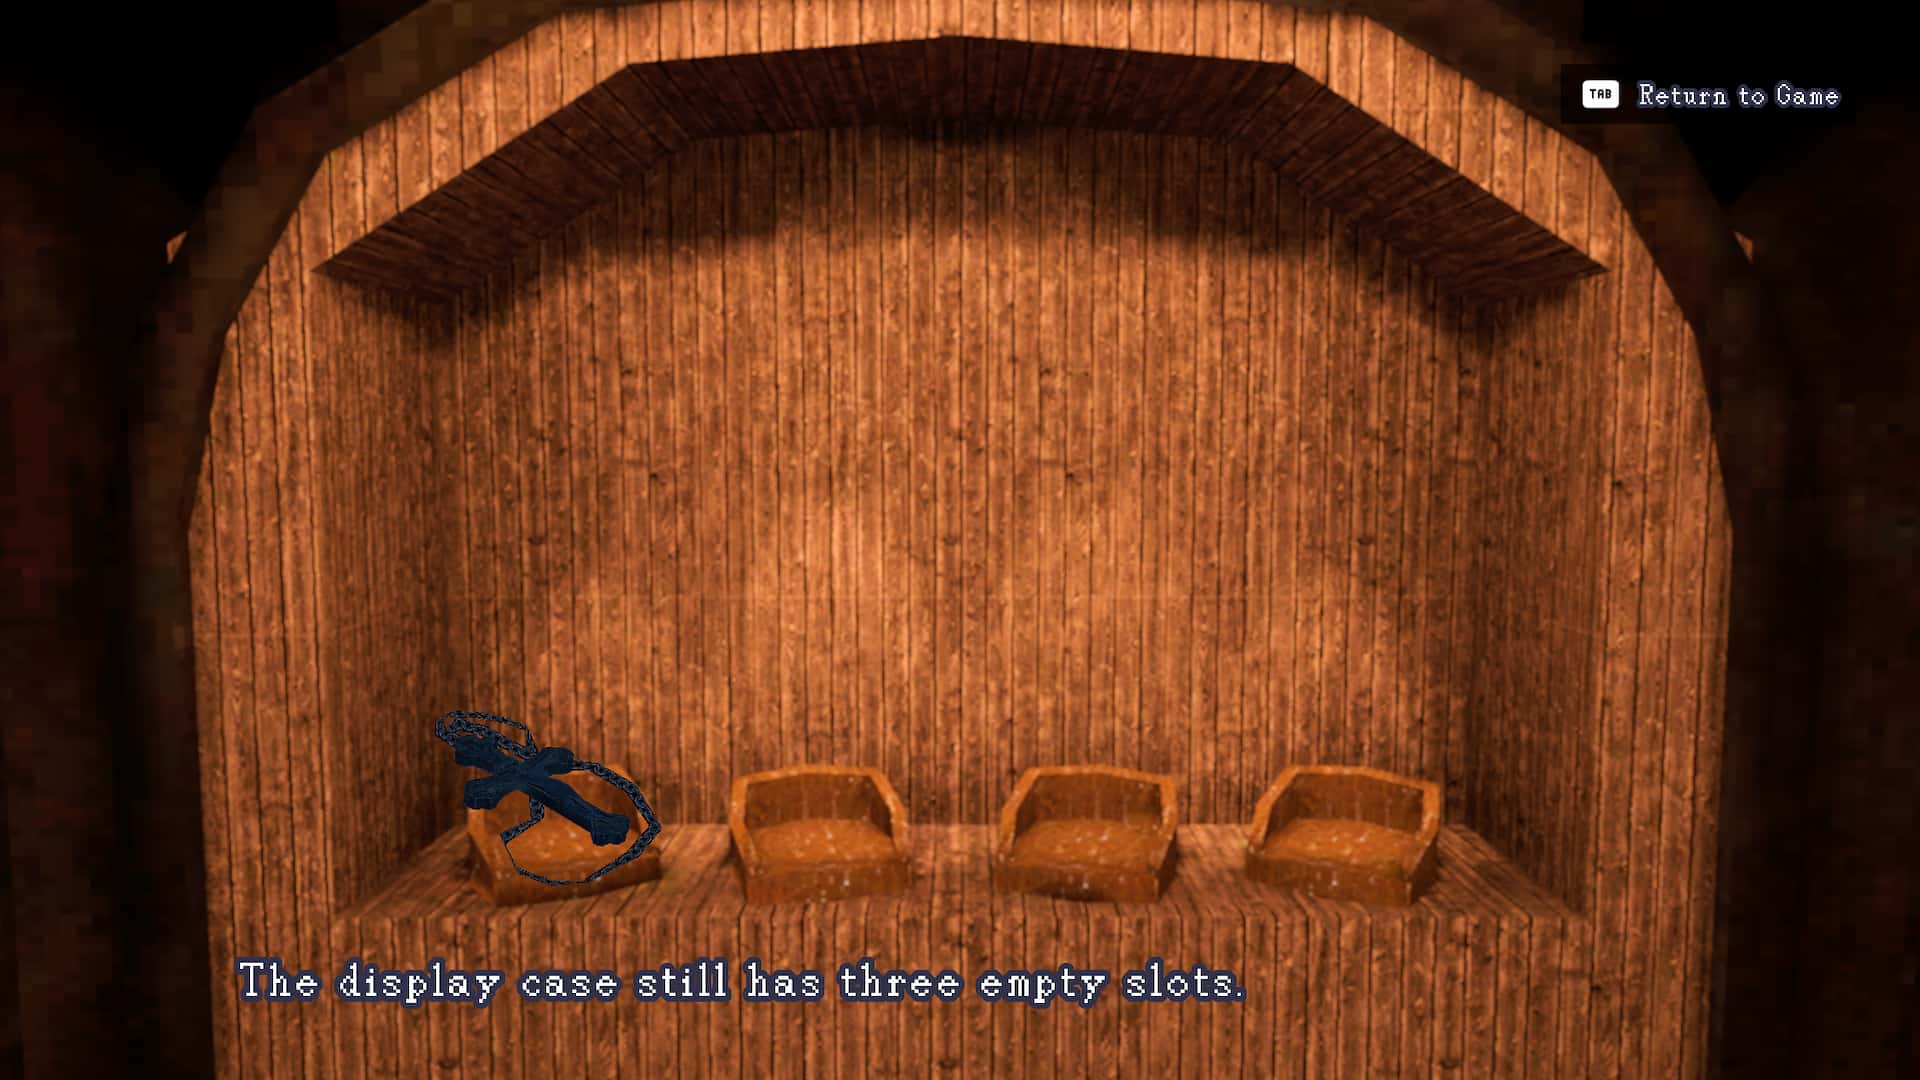
Place the Crucifix in the display case at the base of the stairs below the elevator. This will now unlock getting to the 3rd floor via the elevator.
Now, go through the door on the right side of the Entrance Hall and head back to the Stairwell.
Go to the 2nd floor, walk all the way to the left (past the Red Static Ghost), and enter the door to find another Gallery room. Interact with the book on the pedestal. The word here to note is DESIRES.
Go back to the Stairwell, and take the door to the right of the stairs. You'll now be in another Hallway.
There is a 12-pack of Film on a table in the hallway.
Take a quick left and go through the door to return to the Entrance Hall, but on the 2nd floor now. Take the elevator to the 3rd floor.
Go left on the 3rd floor and through the door. You'll be in yet another Hallway. Go through the first door on the left to enter another Gallery room. The word to note from the book in the middle is now DEPRIVES.
There is an Antiseptic on top of a cabinet in the hallway.
Enter the side door (Storage) inside the Gallery and grab the Multigrade Developer inside.
There is a possum you can take a picture of just across from the door.
There is a Bandage on top of the shelves in the middle of the room.
Solved Cages puzzle - Screenshot by Pro Game Guides
Go back to the Hallway and through the double doors at the end onto the Cages. Go all the way to the end of the platform and take the ladder down.
Push the box into the empty cage. The opposite cage will rise, and there will be a path you can cross on this level now to get down and grab the Beta Emblem.
There is a First Aid Kit in the bottom left corner of the 2nd Cages floor.
If you've unlatched the double door on the 2nd Cages floor, you can use it to get to the Hallway, and the right door as you enter will be the one to the Library. If you haven't unlatched it, go back to the 2nd floor of the Entrance Hall using the elevator, then go to the left Hallway, and enter the door all the way at the end and to the right (you can also unlatch the double door to the cages).
You can also use the door at the end of the right Hallway on the 2nd floor from the Entrance Hall.
In the Library, use the Beta Emblem while next to the Beta door to unlock the path to the School.
There is an Antiseptic in the Library next to the bookshelves.
There is a 12-pack of Film on the table in the middle.
Enter the School and navigate through the Library. There is nothing to collect here, so you can just move to the back and left and go through the door.
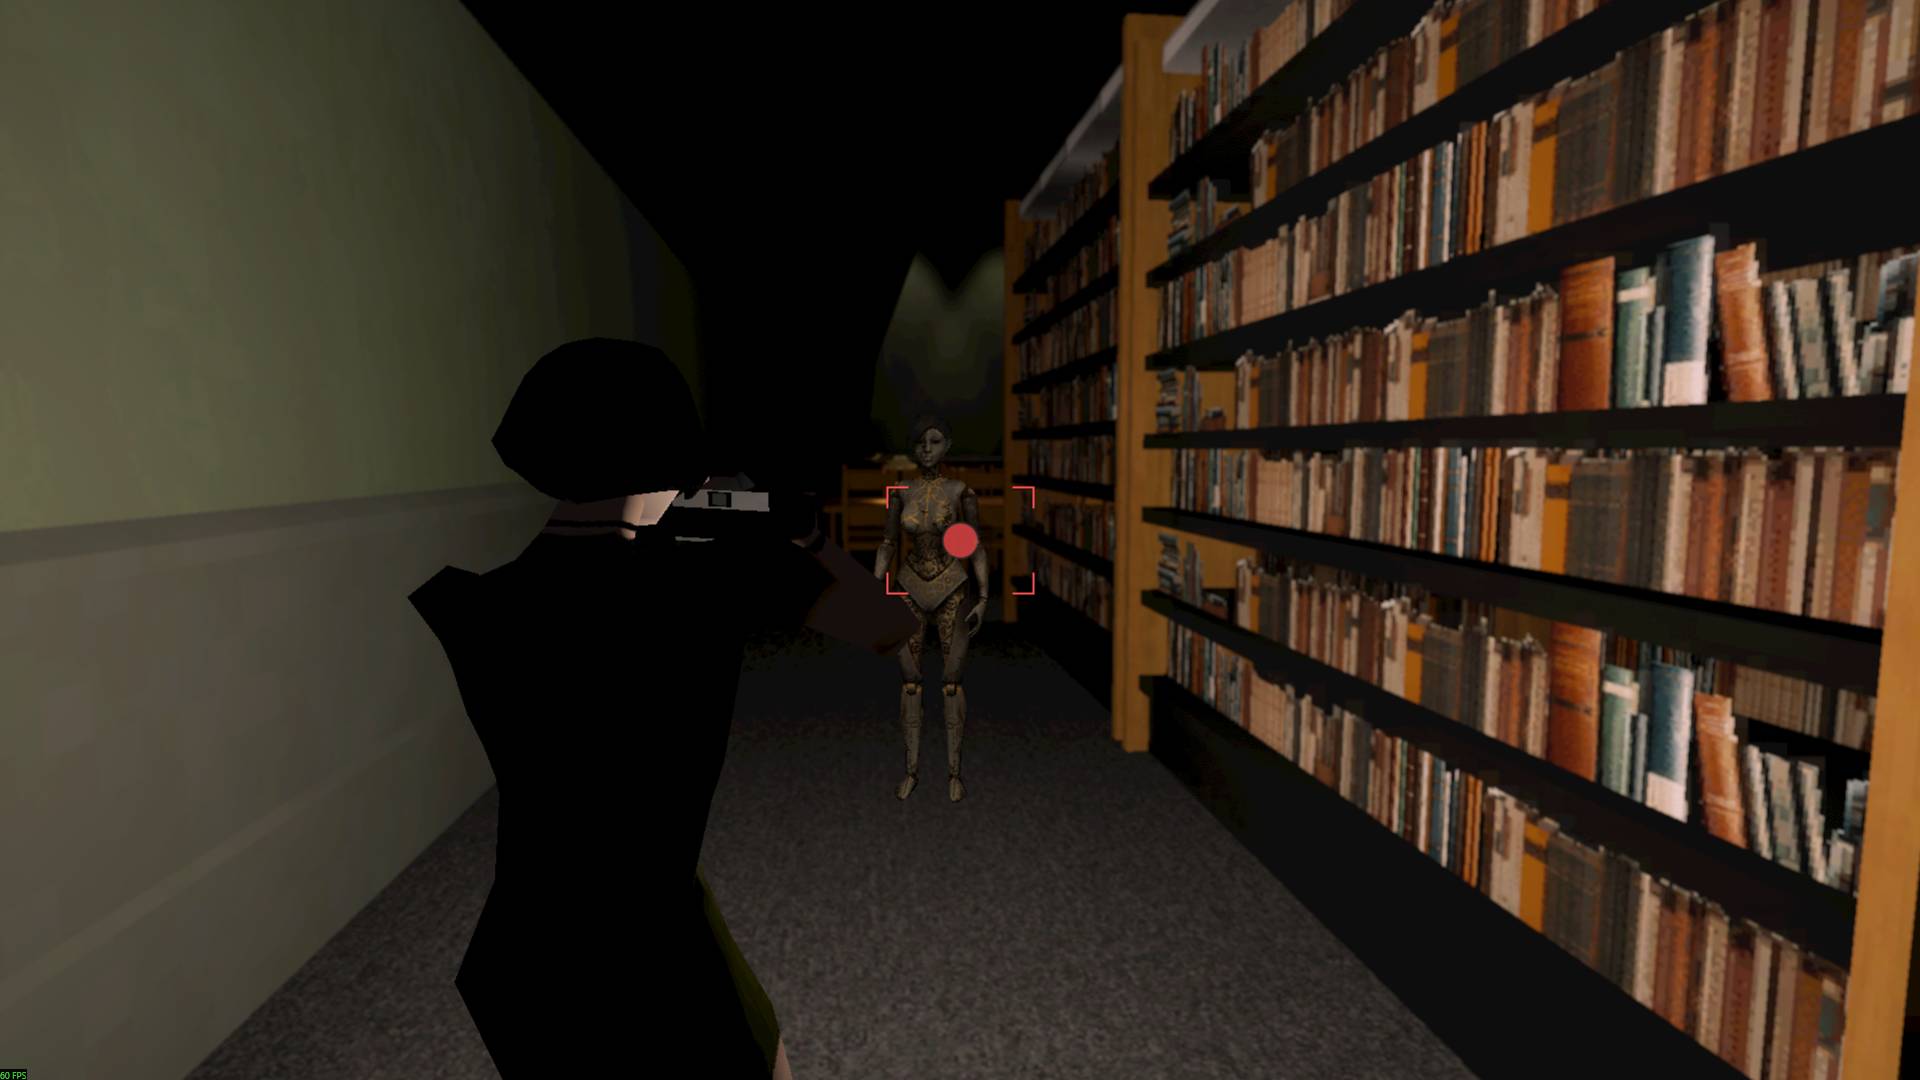
Mannequin enemy - Screenshot by Pro Game Guides
MANNEQUIN ENEMIES: This is the first time in Heartworm you'll encounter mannequin enemies. They are similar to statues, though they don't have ranged attacks and won't lock you into an arena. However, they are indestructible, and shooting them will only make them disintegrate for a second. If you get cornered by one, just shoot it and then run right through it.
Make way through the Pool and enter the single door at the end.
There is a possum you can take a picture of on the container just before the exit.
There is a 12-pack of Film on the stands.
Go through the hallway and enter the door at the end. Avoid the mannequins.
There is an Antiseptic in the bathroom on the left just as you enter.
There is a Bandage in the bathroom on the right just as you enter.
In the Classroom, there is a quiz you have to take on the TV. The quiz consists of seven questions (re-interact every time to continue), and there are no right or wrong answers. Upon completion, you'll receive the Videotape and be teleported back to the Entrance Hall.
Place the Videotape in the display below the elevator. You can also save the game at this point and stash all the extra healing items that you won't need.
From the Entrance Hall, take the elevator to the 2nd floor and go to the left Hallway. Take the door at the far end on the left and enter the Darkroom.
Use the Multigrade Developer on the undeveloped photo in the tray to receive the photo showing the path needed for the Hole puzzle.
There is a 24-pack of Film in the back of the Darkroom.
Head to the 1st floor Entrance Hall, and then to the right Hallway. Enter the door on the right just after the first turn to enter the Hole.
Hole puzzle solution - Screenshot by Pro Game Guides
Use the photograph you developed to carefully walk across the gap and grab the Gamma Emblem.
Head to the 1st floor Entrance Hall and enter the left door to get to the Dining Room. Use the Gamma Emblem on the door in the back to unlock the path to the Subway.
In the subway, go past the fare gates and enter the door between the vending machines to find a Safe Room. Save the game and go back out and through the fare gate.
There is a Bandage on the ground in the hall to the right of the Safe Room.
Head downstairs to the first track level and onto the left side tracks. Go all the way to the end of the track, and you'll find the Lower Track Key stapled to the door. Pick it up.
Clock Tower Photo location - Screenshot by Pro Game Guides
Now, go all the way to the other side of the left tracks and shoot the static barrier to get the Clock Tower Photo. This is the last photo you'll need to get the best Heartworm ending.
If a mannequin is blocking your path, shoot it and then as it's disabled, run through it.
Use the Lower Track Key on the padlocked gate in the middle of the platform. On the lower platform, head into the open train and to the door out the other end. Go through the door to get to the Office.
Office puzzle - Screenshot by Pro Game Guides
In the Office, you have to deliver four colored papers to their matching colored sections. Interact with the computer/printer in the middle to start the deliveries. Use the items from your inventory at each colored reception desk to deliver them.
Mannequins will actively try to attack you, so make sure to avoid them. Also, when you go to deliver the yellow paper, you will get trapped in the room with the enemies for ~30 seconds. Just run around until the door opens.
After you deliver the final paper, the Work ID will appear in the copier. Grab it and you will be teleported back to the Entrance Hall.
Place the Work ID in the display case below the elevator.
Head back to the 3rd Entrance Hall floor, go to the right Hallway on the balcony, and then through the door at the end to reach the Library balcony.
There is a Bandage on the cabinet inside the Hallway.
There is a Save Station and Item Storage on the Library balcony.
There is a journal entry in the middle of the Library balcony.
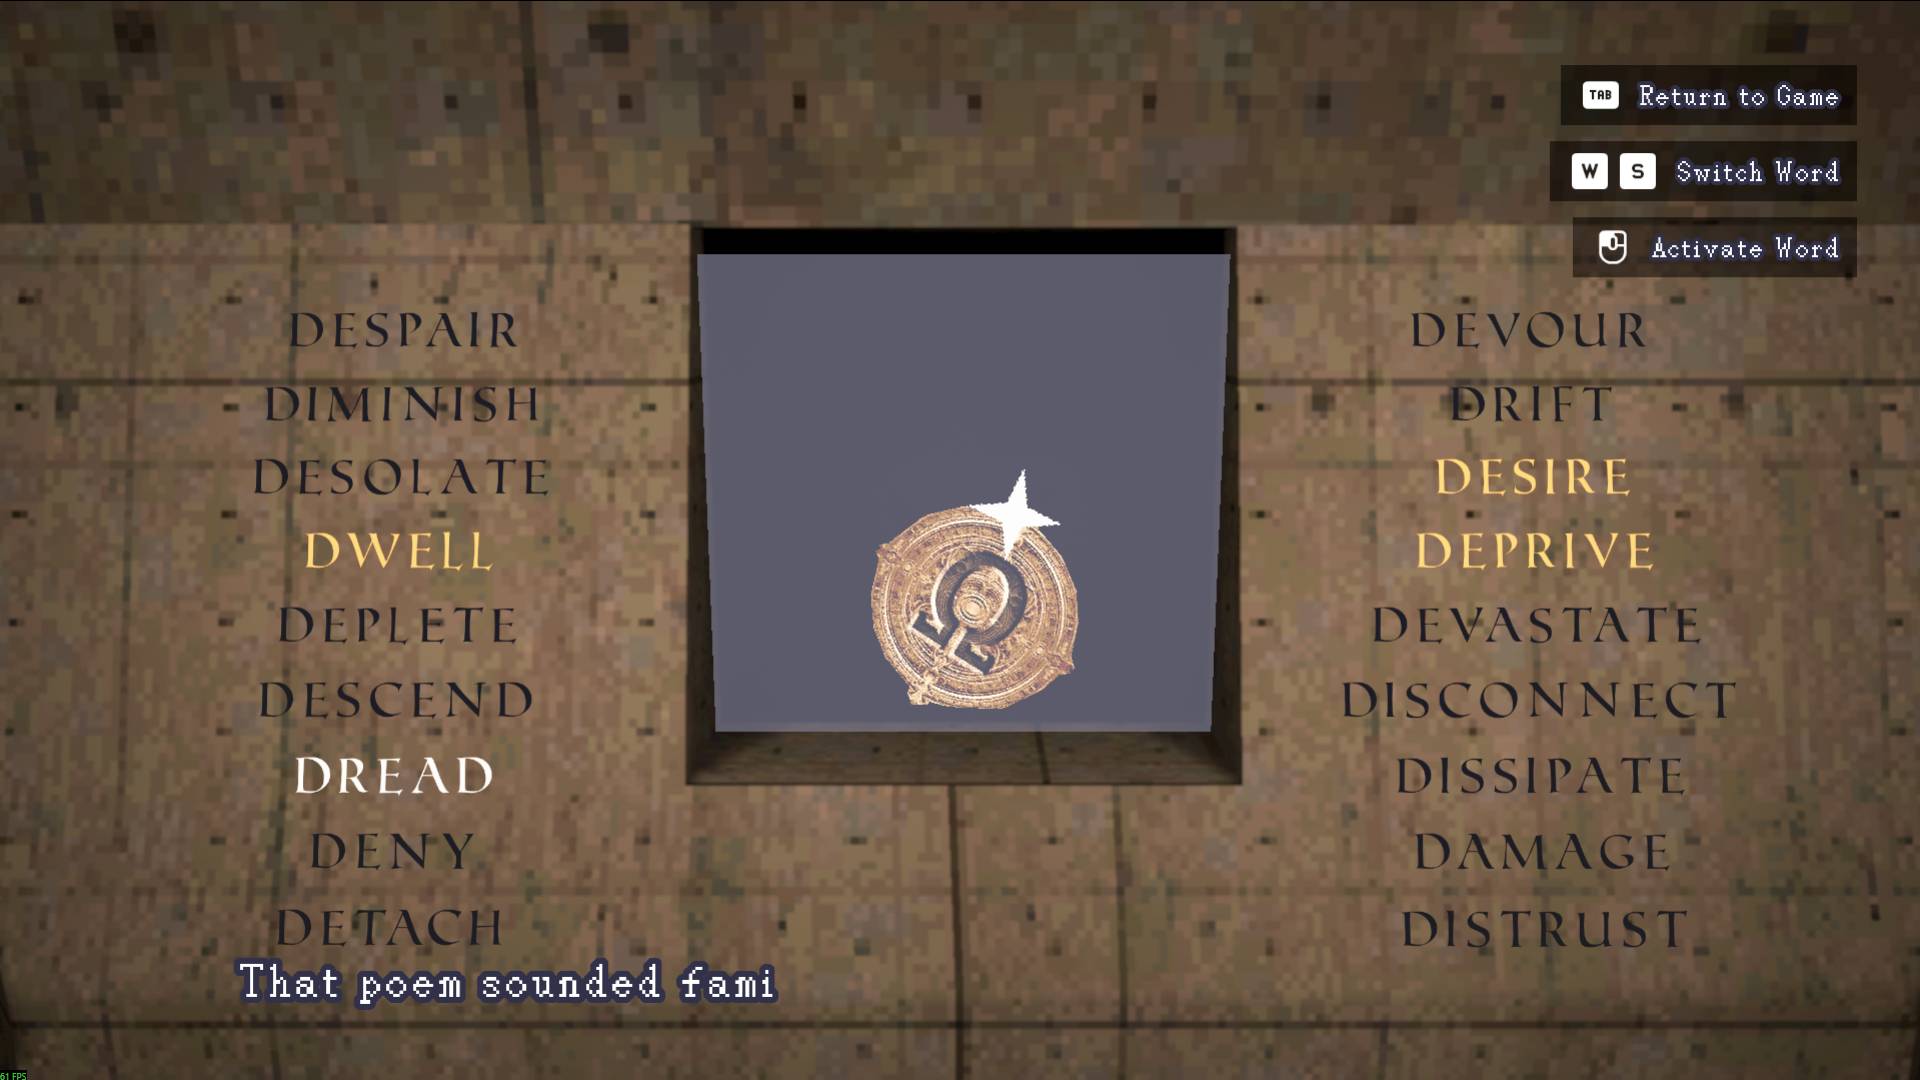
Head through the door next to the Save Station and you'll reach another Gallery. Read the book in the middle, and the word to note here is DREAD.
Omega Emblem puzzle solution - Screenshot by Pro Game Guides
Interact with the emblem device in the back and select the four words from the notes: DWELL, DESIRE, DEPRIVE, DREAD. Then, take the Omega Emblem.
Head back to the right Hallway on the 3rd floor and into the double door to the right to enter the Garden. Use the Omega Emblem to enter another Gallery.
There is a Bandage on the left side of the Garden.
There is a journal entry on the rail in the middle of the garden.
Go through the hole in that wall in the back of the Gallery and enter the house.
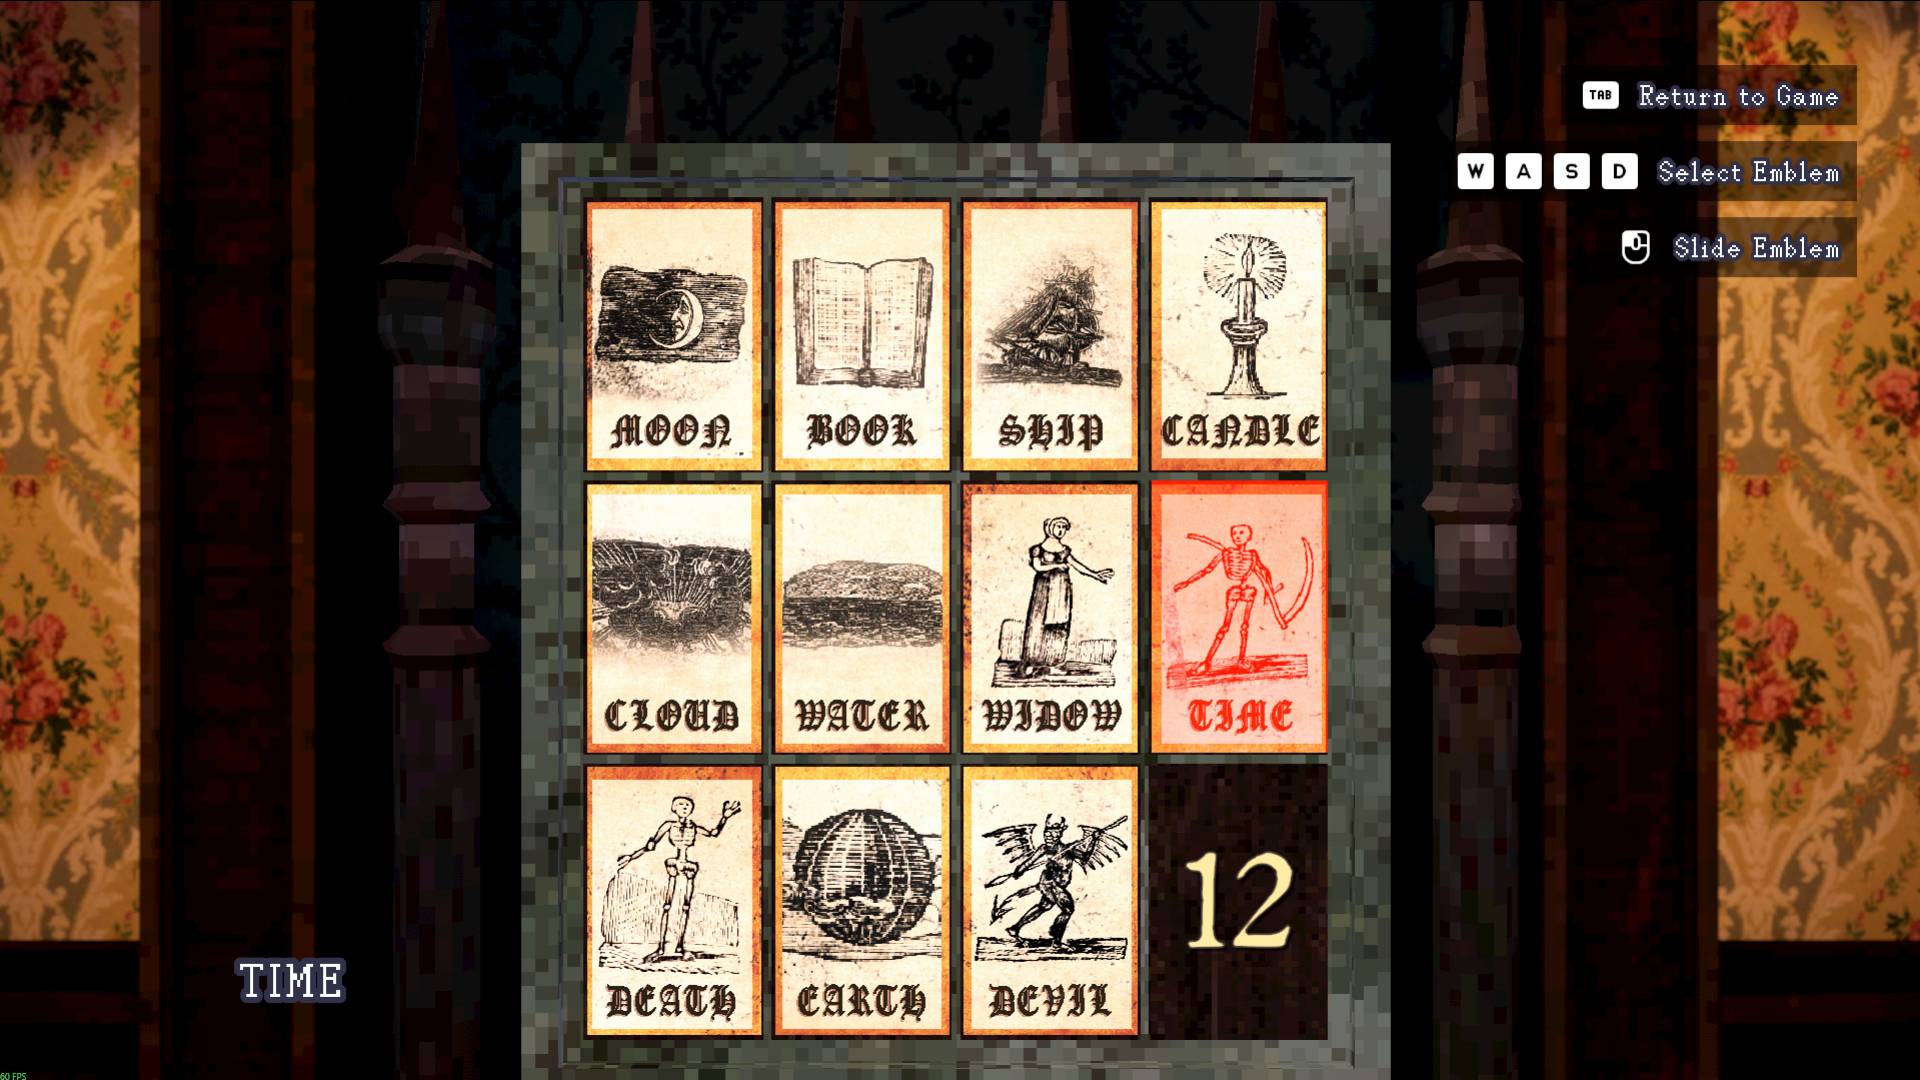
Tiles puzzle solution - Screenshot by Pro Game Guides
There are 11 Grandfather clocks, each stopped at a specific time, with an image etched on them. The time corresponds to the place that the image needs to be in the sliding puzzle upstairs. The solution is in the image above.
You can re-enter the house to reset the puzzle.
The correct move order to get the solution is (numbers are from left to right, top to bottom, 1-12):
6 - Carth
7 - Water
8 - Devil
12 - Candle
11 - Time
7 - Devil
3 - Widow
4 - Ship
8 - Candle
12 - Time
Once solved, you can enter the room. Grab the Eulogy on the floating rock platform outside the wall, and you'll be teleported back to the Entrance Hall.
There is a journal entry on the bed in the room.
Place the Eulogy in the display case below the elevator.
IMPORTANT: This is your last chance to explore the Clock Tower. If there are any more rooms you want to check out, now is the time.
Once all the mementos have been placed in the display case, head to the elevator. Choose to go to the R floor.
Climb up the stairs and get to the cathedral. A cutscene will play, and the Clock Tower Page will appear in front of the cathedral door. Pick it up.
Finally, enter the crypt to the left of the cathedral to go back to the Archive and finish the Clock Tower.
Archive
Use the Clock Tower Page at the pedestal in the middle. After the cutscene, you can grab the Ancient Key next to the door you came in from.
Photo Machine in the Archive - Screenshot by Pro Game Guides
HEARTWORM ENDING: This is your last chance to save the game and use the photos you've collected at the machine (Garden Photo, Cave Photo, Clock Tower Photo). You can save here and reload the game to try out and see all the different endings. As a reminder, here is how many photos you need to use at the machine for each ending:
0 Photos: Bad Ending (Stays)
1-2 Photos: Good Ending (Leaves)
3 Photos: Good Ending + Bonus Scene (Leaves+)
Save the game, use the photos if you want, and equip all the heals and other items that you think you'll need. The upcoming fight is the final boss of Heartworm.
Once ready, head back through the door next to the Ancient Key and use it to unlock the front door of the cathedral.
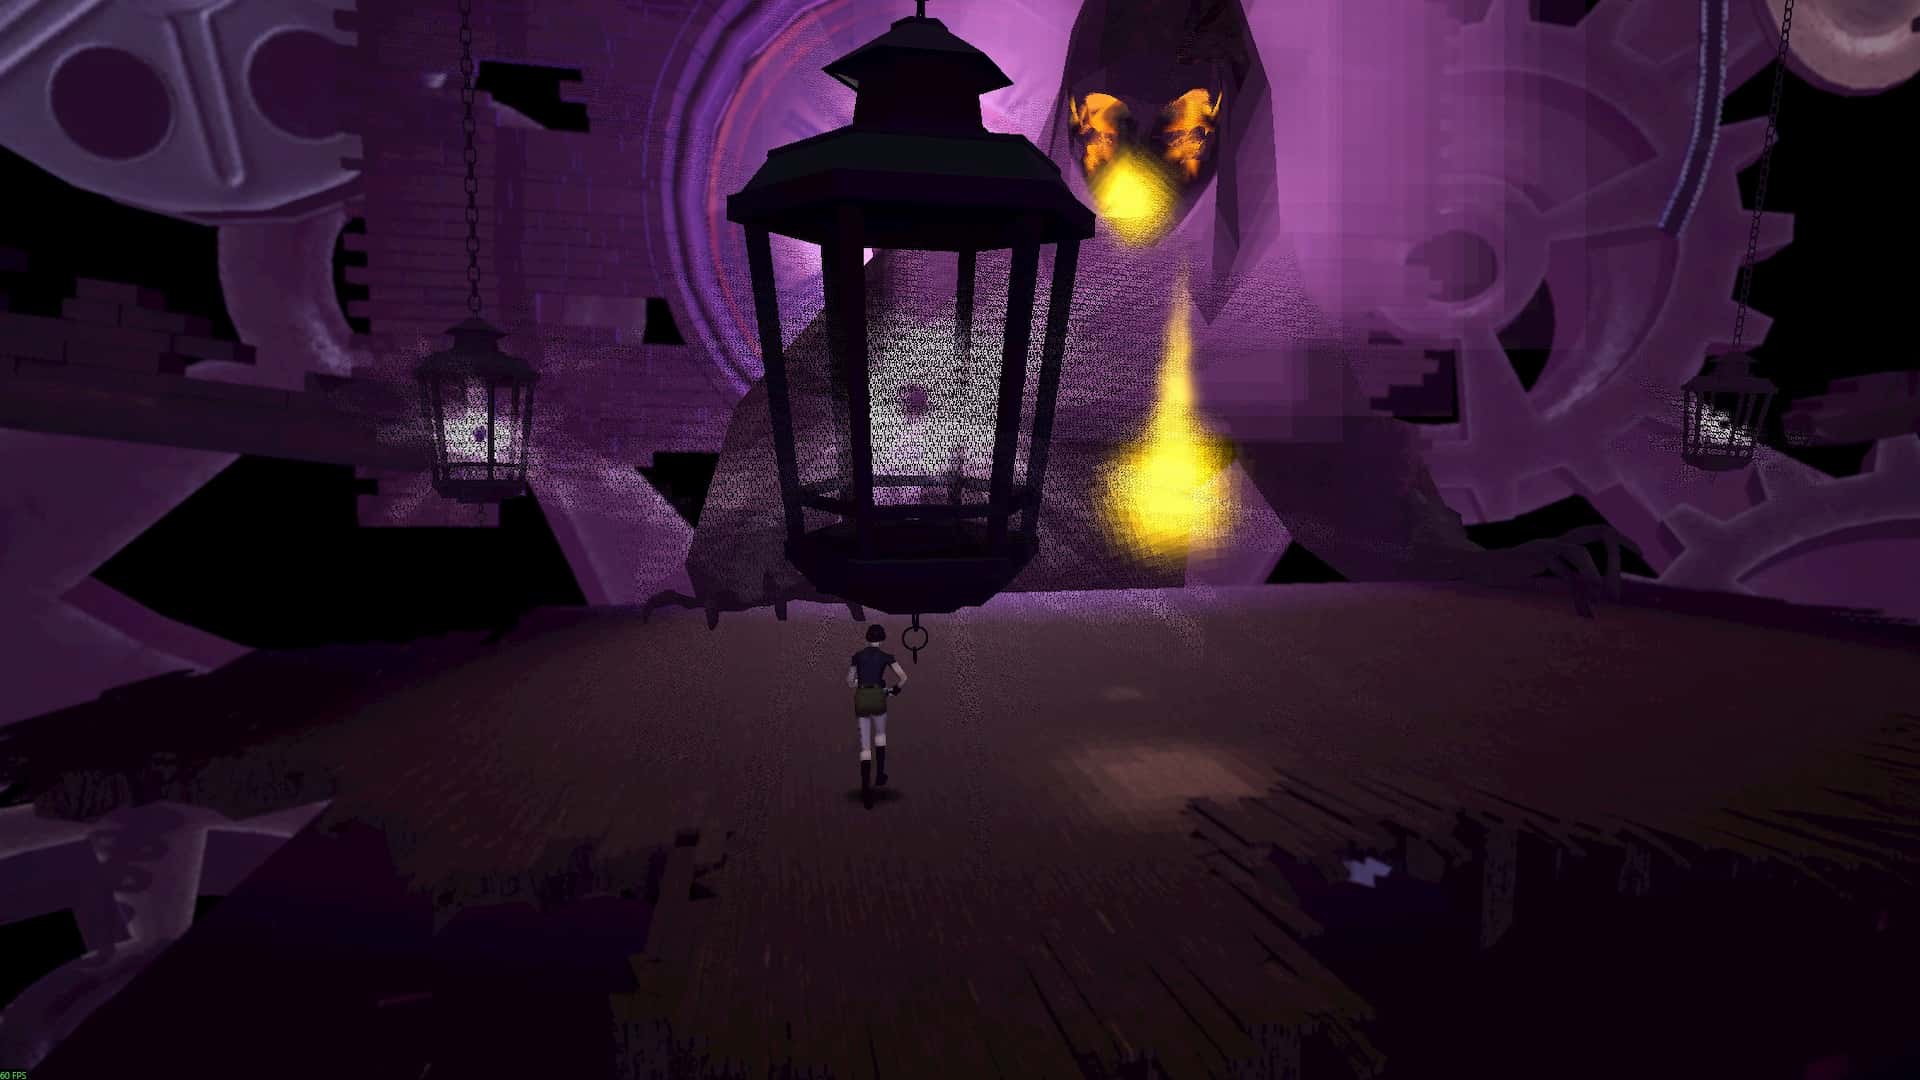
Tape Keeper Boss
Stay away from the Time Keeper to make the fight easy - Screenshot by Pro Game Guides
Unlike the other bosses, you can’t attack the Tape Keeper directly. Instead, you need to wait for them to become exposed.
The first part of the combat requires you to just dodge the Tape Keeper's attacks. It has a smash attack, a sweeping attack, and will also spawn objects that will fall from above. There will be a shadow on the ground where the objects will fall.
Both attacks are close-range, so you can just stand in one of the corners away from the Time Keeper and focus on dodging the falling objects. If you get too close, the Tape Keeper will be able to hit you with its other attacks.
Tape Keeper boss Lantern Phase - Screenshot by Pro Game Guides
Eventually, the arena will turn purple, and 4 lanterns will spawn. You'll need to shoot these lanterns to weaken the Time Keeper.
While the lanterns are there, the Time Keeper will only attack with two projectiles at a time. Just move around until you're sure both projectiles are gonna miss, and then take pictures of lanterns. Repeat this until you destroy all the lanterns.
After you've taken 1 photo of the Time Keeper, you'll need to repeat the whole process above one more time to finish the first phase of the boss fight. It takes 2 photos in total to finish the first phase of the boss (4 without the Burst Fire Mod).
Collect the resources around the arena to aid you in the fight.
There is a 24-pack of Film on the left side of the arena.
There is a First Aid Kit on the right side of the arena.
There is a 24-pack of Film on the right side of the arena during the second phase.
There is a First Aid Kit on the left side of the arena during the second phase.
Tape Keeper second phase - Screenshot by Pro Game Guides
The second phase, mechanically, is similar to the first: you need to wait for the lanterns, take pictures of them, then hit the Time Keeper while it's stunned.
The boss has new attacks where film comes up from below to hit you, and film comes out of its chest to hit everything in front of it. Again, you can just stay in one of the corners and focus only on dodging the ground film. The other attacks won't be able to reach you.
During the lantern phase, there is now a fifth lantern in the middle of the arena that you need to take a picture of. Also, the Time Keeper will fire 4 projectiles each time.
Once again, it takes 2 more photos (4 without the Burst Fire Mod) to defeat the Time Keeper and finish Heartworm.
All Endings in Heartworm and How to Get Them
There are three endings in Heartworm, and which one you get depends on how many photos (Garden Photo, Cave Photo, and Clock Tower Photo) you've collected and used in the machine within the Archive. When you use them doesn't matter, as long as you do it before the final boss fight. Here are all the endings and how they pan out:
Stays (0 Photos - Bad Ending): Even though she beats the Time Keeper, she is caught by the tapes and convinced to stay in the same world as the Time Keeper, forever.
Leaves (1-2 Photos - Good Ending): Sam manages to escape the world she was trapped in and has a chat with the Time Keeper, realizing her motives.
Leaves+ (3 Photos - Best Ending): Sam manages to escape the world, and the same scene plays out as in the Leaves ending. However, there is an extra scene at the end where Sam returns home and inspects a photo of her and another girl.
All Achievements in Heartworm and How to Get Them
Archive: Enter the Archive.
Clock: Enter the Clock Tower.
Dash: Beat the game in under 1 hour.
Deer: Defeat the Deer.
Died: You died.
End: Beat the game.
Home: Enter the Abandoned House.
Immortal: Beat the game without dying.
Keeper: Defeat the Tape Keaper.
Leaves: Get the "Leaves" ending.
Neighborhood: Enter the Neighborhood.
Possum: Find and take photos of all the possums.
Run: Beat the game in under 2 hours.
Spider: Defeat the Spider.
Stays: Get the "Stays" ending.
Together: Get the "Leaves+" ending.
Wilderness: Enter the Wilderness.
Heartworm Walkthrough FAQ
How long does it take to complete Heartworm?
It takes around 4-6 hours to complete Heartworm for the first time without a guide. Every subsequent run should take you less and less time. If you followed our walkthrough and know everything, you can probably speed run it in less than 45 minutes.
How to change Sam's outfit in Heartworm?
You can change outfits by approaching the trunk of your car and interacting with it at the beginning of the run. You unlock new outfits by completing the game.
Can you unlock all the achievements in a single run?
Yes, you can. The only things you should care about are collecting all the photos (so you can trigger all the endings), finding all the possums, and not dying. You can die and then load a save, and you'll get the Died achievement and be eligible for the Immortal if you don't die till the end. Also, you can get an ending, load the last save, and then repeat for the other two. Just make sure to keep all the photos until the last boss fight.
And that concludes our complete Heartworm walkthrough. If you followed it to the letter, you should have seen all the endings and unlocked all the game achievements! To find walkthroughs for other horror games, check out the guides category here on Pro Game Guides.
Follow us on Twitter and Facebook to get updates on your favorite games!
About the Author
Aleksa is a lifelong gamer who manages to reach the top 1% on the leaderboards in just about every game he plays. He specializes in creating in-depth guides and tier lists, mainly for mobile and Roblox games. Also, he enjoys competitive multiplayer and hardcore singleplayer games on PC, such as League of Legends, CS2, Apex Legends, Escape From Tarkov, Clair Obscur, and Dark Souls.