
Tomes in Megabonk will decide the fate of your run. Choose the right tomes early on, and you set yourself up for a big run. On the other hand, the wrong Tomes will cause your run to fizzle out in no time. If you’re having a hard time deciding which Tomes to pick and which to avoid, this Megabonk Tomes tier list will make things easier.
Megabonk Tomes Tier List
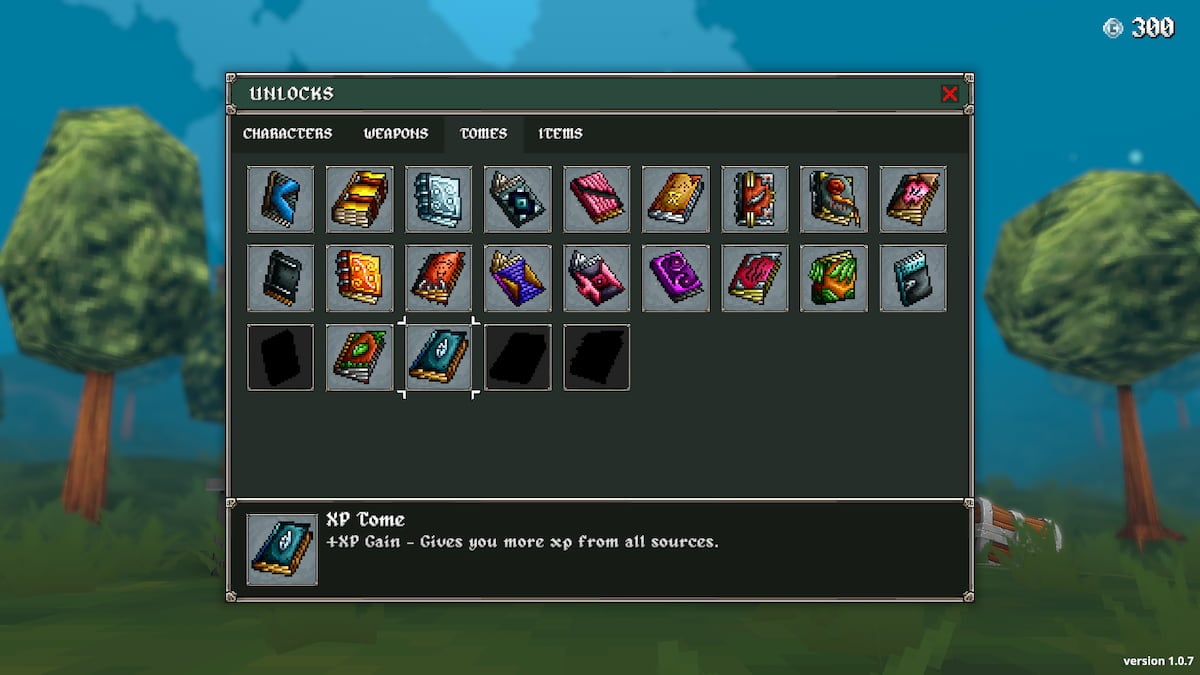
There are over 20 Tomes in Megabonk, and you can only equip up to four during a run, assuming you have unlocked all the slots. So, we’ve created this Megabonk Tomes tier list to help narrow down your options and help you choose the right Tome in every run.
| Tier | Tomes |
|---|---|
| S | XP Tome, Luck Tome, Cooldown Tome, Quantity Tome, HP Tome |
| A | Damage Tome, Agility Tome, Precision Tome, Size Tome, Projectile Speed Tome |
| B | Shield Tome, Armor Tome, Bloody Tome, Regen Tome |
| C | Evasion Tome, Duration Tome, Cursed Tome, Thorns Tome |
| D | Golden Tome, Silver Tome, Attraction Tome, Chaos Tome, Knockback Tome |
Tomes in the S tier are the ‘meta’ Tomes that will synergize well with all types of character builds. A tier has all the next-best options, and the B tier is for the situational/build-specific tomes. Tomes in tier C can be useful for certain Quests and Challenges. Lastly, the D tier has Tomes that are better to be toggled off or banished.
Read on as we highlight the strengths and weaknesses of all the Tomes, so you can decide for yourself which Tomes you want to use and which ones to avoid.
S Tier - Meta Tomes in Megabonk
| Tome | Effect | Pros & Cons |
|---|---|---|
 XP Tome | Increases XP Gain from all sources. | + More XP means faster leveling up. + You can scale your character and weapons more quickly. + Must-have regardless of the type of build you’re going for. |
 Luck Tome | Increases your overall Luck. | + Get high-rarity items from chests.+ Get better stat offers from shrines.+ Get better Weapon and Tome upgrades when you level up.+ Can help you create your perfect build. |
 Cooldown Tome | Increases the Attack Speed of all your weapons. | + Every weapon performs more attacks. + Massively improves the slow weapons that have high damage. + Can create ever-present projectiles that deal damage and form a protective shield. |
 Quantity Tome | Increases the number of attacks and projectiles of all your weapons. | + Perfect for all ranged and melee weapons. + Works well in all types of builds because it increases attack rate. |
 HP Tome | Increases your character’s Max HP. | + Needed for all types of builds if you want to clear multiple stages in a single run.+ Perfect for low-HP, high mobility characters like Calcium and CL4NK. |
A Tier
| Tome | Effect | Pros & Cons |
|---|---|---|
 Damage Tome | Increases the Damage of all your attacks. | + Buffs the base damage stat of your character as well as the weapons. + Synergizes well with damage-boosting items. - Scaling is a bit slow due to low multiplier (0.08x per level). |
 Agility Tome | Increases your movement speed. | + Can be a lifesaver for clunky characters and tank builds. + Helps evade tricky situations and dodge attacks/swarms. + Especially helpful for avoiding boss attacks. |
 Precision Tome | Increases Crit Chance. Can go above 100% for Overcrit. | + Must-have if you’re going for a crit-based build. + Scales quickly (7% increase per level) and has no stack ceiling. - Only worth it if you scale Crit Damage too. |
 Size Tome | Increases the size of all your weapons. | + Improves the range of melee weapons. + Increases the area of AoE weapons. + Projectiles of ranged weapons get bigger and can hit multiple enemies. |
 Projectile Speed Tome | Increases the speed of your weapon projectiles. | + All weapon projectiles travel faster, hitting more enemies. + Very helpful against quicker enemies. + Fewer missed attacks. - Good early on, but the buff loses utility during the late game. |
B Tier
| Tome | Effect | Pros & Cons |
|---|---|---|
 Shield Tome | Adds a regenerating layer on the shield that absorbs all incoming damage and protects your health. Recharges automatically after some time. | + Increases survivability against bosses. + Provides a nice buffer for beginners. + Can work well with all builds. - Poor scaling reduces effectiveness in the late game. |
 Armor Tome | Reduces the damage you take from all sources. | + Adds an extra, ever-present defensive layer. + Increases survivability during early and mid-game. - Not that effective against boss hits. - Requires at least 5 upgrades for a decent output, which can lock out other weapons or tomes. |
 Bloody Tome | Heals your character for 1 when you hit an enemy. Guarantees 1 heal when you go over 100%. Chance for 2 heal per hit as well. | + Increases survivability by constantly healing you. - Healing is very slow if you don’t use multi-hit or bounce weapons. - Burst damage from bosses will almost always outpace the healing effect. |
 Regen Tome | Increases HP regeneration per minute. | + You will continuously regain HP without relying on Lifesteal. + Boosts the survivability if you can’t get HP Regen/Lifesteal items. - Regeneration speed is slow early on. - Lifesteal and HP Regen items stack better. |
C Tier
| Tome | Effect | Pros & Cons |
|---|---|---|
 Evasion Tome | Increases the chance of avoiding an attack and taking no damage. | + Good for high-mobility/evasion-based builds. - Heavily reliant on RNG. - Poor scaling. - AoE attacks and swarms can outpace it. |
Duration Tome | Increases the duration of attacks, projectiles, and status effects. | + Improves crowd control weapons and items like Dragonfire, Flamewalker, and Frostwalker. - You can get similar stats from Charge Shrines. - Cost outweighs utility when you have two or three Tome slots. |
Cursed Tome | Increases difficulty. Waves have higher number of enemies that are stronger and faster. | + Can increase XP gain, gold gain, silver gain, and loot. - The sudden difficulty spike can be too much for most players. - Only works well in the XP Tome x Luck Tome x Cursed Tome combo. |
 Thorns Tome | Deal damage to enemies when they attack you. | + Provides a decent passive attack. - Scaling is very slow. You only gain 1 Thorn per level up. - Tick damage is low and does not scale. - Only works in melee builds. |
D Tier
| Tome | Effect | Pros & Cons |
|---|---|---|
 Golden Tome | Increases Gold gain from all sources. | - Redundant utility tome that is outpaced by items. - Only synergizes with Robinette (Damage increase by total Gold in inventory). - Offers no other real value since you can already earn gold at a decent rate. |
 Silver Tome | Increases Silver gain from all sources. | + Useful early on when you’re low on Silver. - Not worth giving up a slot once you figure out how to farm Silver fast. - The increase in earnings is minimal. |
 Attraction Tome | Increases XP pickup range. | - Minimal increase in range. - Items like Shrine of Succ and Sucky Magnet do the same thing but better. - Pickup Range is available from charge shrines. Using the Attraction Tome is a waste. |
Chaos Tome | Buffs a random stat with each level up. | - Low buff multiplier. - Heavily reliant on RNG. - Can mess up the entire build by buffing an unrelated stat. |
 Knockback Tome | Increases the distance that you push enemies back when hitting them. | + Can be helpful for beginners. - Requires a weapon or character that has the Knockback effect. - Only works for melee builds. - Bosses can ignore Knockback some of the time. |
That concludes our Megabonk Tomes tier list, but we're not done just yet. Scroll down to find three powerful Tome combos to run in Megabonk for three different types of builds.
3 Best Tome Combos in Megabonk
If you're having a hard time coming up with effective and powerful Tome combos, try replicating the three shared below. You might want to avoid the Holy Trinity if you're a complete beginner and instead use the Survivor to last longer in the game, get some kills and silver, and start unlocking better characters and weapons.
| Build | Tomes Combo | Why It Works |
|---|---|---|
| The Survivor | Shield Tome + Armor Tome + HP Tome + Regen Tome | Shield protects your Max HP bar, which will constantly scale with the HP Tome. Armor Tome reduces incoming damage from mobs, so you're better prepared to tank boss hits. Regen Tome keeps healing you without relying on Lifesteal weapons. |
| The DPS Spike | Quantity Tome + Cooldown Tome + Damage Tome + Precision Tome | Quantity Tome increases projectile count, and Cooldown Tome increases attack rate. Add Damage Tome to scale base damage per hit and Precision Tome for a nice Crit-boost. |
| The Holy Trinity | XP Tome + Luck Tome + Cursed Tome | Cursed Tome increases enemy quantity, health, and speed. This means you'll have more XP and Gold drop on the map. XP Tome increases the value of each XP shard, and Luck Tome improves level-up choices and chest/shrine/merchant drops. |
Megabonk Tomes FAQs
The Holy Trinity of Tomes (XP, Luck, and Cursed) is still the game-breaking Tomes combo. That said, the Size Tome and the Gold Tome are now considered the best tomes of the new meta. The Gold Tome with Robinette is currently the deadliest combo in the game, while the Size Tome now synergizes with a lot more weapons and can be used to create massive projectiles of weapons like Blood Magic, Katana, Dexecutioner, and Bananarang.
Yes, very much so. The nerf decreased the XP Tome's multiplier from 9% to 7% but it's still the best choice to increase your XP Gain and speed up scaling. With the XP Tome, a few Time Bracelets, and the XP Gain stat from the Charge Shrines, the snowballing can reach the pre-nerf levels in no time.
Beginners should avoid the Cursed Tome, the Chaos Tome, and other single-purpose tomes like Evasion, Gold, Silver, Attraction, and Thorns that don't synergize with beginner-friendly characters and weapons like Mr Fox, Megachad, and Sir Oofie.
2 Tome slots are unlocked by default in Megabonk, and you can unlock 2 more by completing different quests. Completing 35 quests will unlock the third tome slot, and completing 55 quests will unlock the fourth tome slot. Once unlocked, you have to purchase the slots from the Shop using Silver.
Let us know which combos you're running in Megabonk in the comment section below. While you're here, also check out our Ultimate Megabonk Weapons Tier List + Unlock Guide and Ultimate Megabonk Items Tier List.