


Fixing a device in ReStory takes three steps: disassembling the device, swapping out faulty parts, and putting it back together. Some jobs also ask you to clean the parts before they go back in. Reassembly gets fiddlier the deeper you get, since later devices pack in more parts and more screws. Below, we lay out the correct order for eight of the more complex devices in ReStory right now.
ReStory: Chill Electronics Repairs mixes officially licensed Atari hardware with parody takes on other retro brands, which is why the Atari Lynx keeps its real name while Sony shows up as Nony and Nokia as Pokia. Most devices need their own license before you can take repair jobs for them, and every fix means unscrewing panels, replacing the broken parts in the right assembly order, and closing it all back up. This guide breaks down the higher part-count devices, their full parts lists, and the exact order to reassemble each one.
How Do You Fix Devices in ReStory: Chill Electronics Repairs?
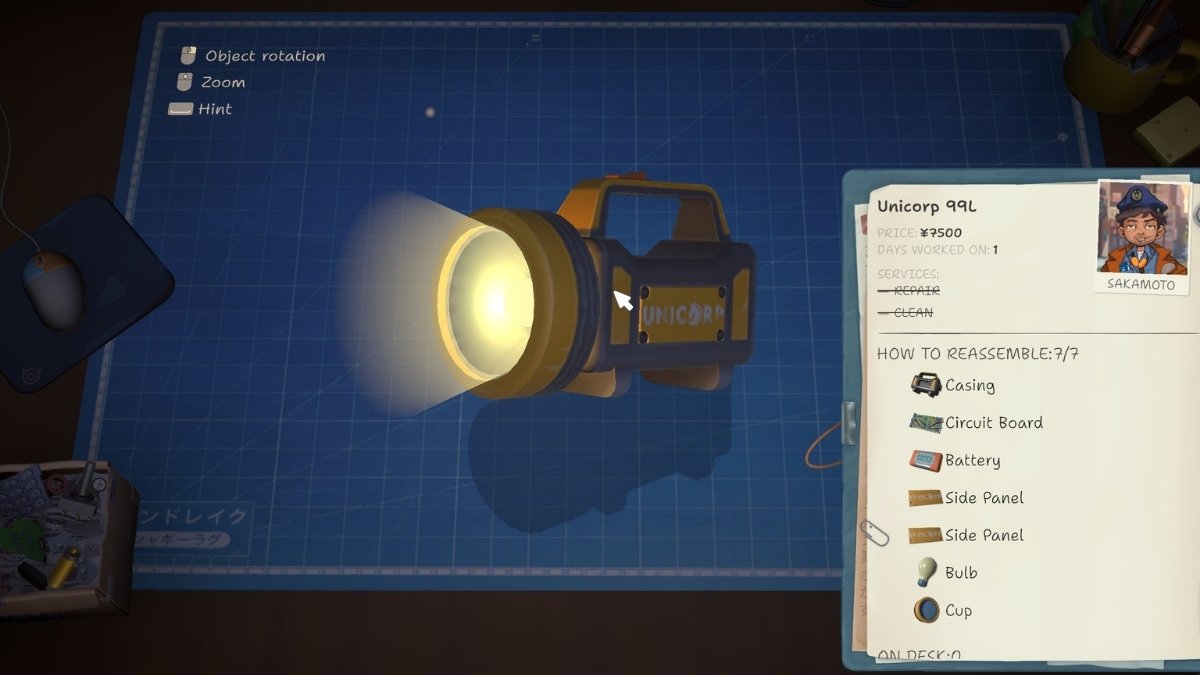
Every repair in ReStory runs on the same loop. You accept a repair job for the device, disassemble it by taking out screws and panels, replace the faulty part, then reassemble in reverse. The game lists parts in assembly order, and reading that same list backwards gives you the disassembly sequence. One thing to watch in the tables below: the part totals count every installed unit, so a line like Battery (6x) adds six to the count rather than one.
NOTE: If you lose track of a job, open the in-game notebook to check the repair details and your progress, or press the Space Bar for a hint.
Nony PMP (Sony PSP)
| Detail | Info |
|---|---|
| Sell Price | ¥ 23,400 |
| Parts Price | ¥ 35,100 |
| License Cost | ¥ 40,000 |
| Total Screws | 18 |
| Total Parts | 13 |
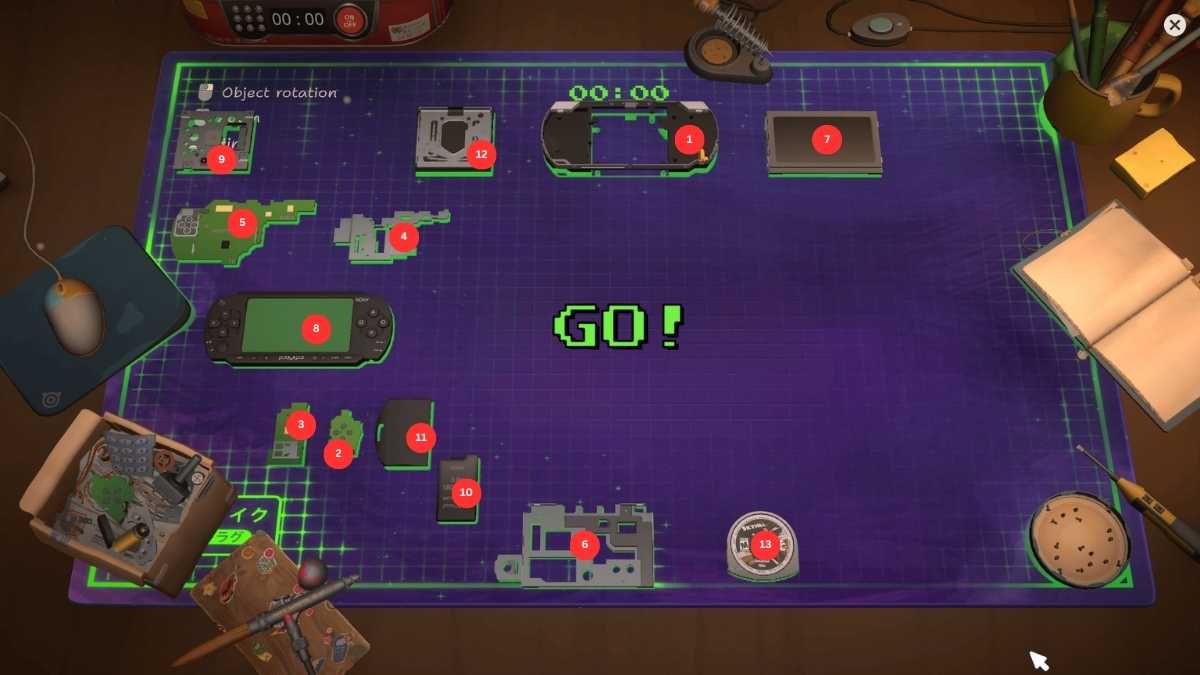
The Nony PMP stands in for the PlayStation Portable (PSP-1000). It carries 18 screws across 13 parts, and the display and front panel hold the most of them, so line those up carefully when you close it back up.
How to Fix the Nony PMP?
Here is the assembly order for the Nony PMP, from the first part to the last.
| Assembly Order No. | Part | Screws |
|---|---|---|
| 1 | Frame | NA |
| 2 | Wi-Fi Board | NA |
| 3 | Metal Frame | 2 |
| 4 | Motherboard | NA |
| 5 | Display Frame | 5 |
| 6 | Control Board | NA |
| 7 | Display | 2 |
| 8 | Front Panel | 4 |
| 9 | Disc Drive | 4 |
| 10 | Disc Drive Lid | 1 |
| 11 | Disc | NA |
| 12 | Battery | NA |
| 13 | Battery Lid | NA |
Atari Lynx
| Detail | Info |
|---|---|
| Sell Price | ¥ 45,000 |
| Parts Price | TBA |
| License Cost | NA |
| Total Screws | 12 |
| Total Parts | 23 |
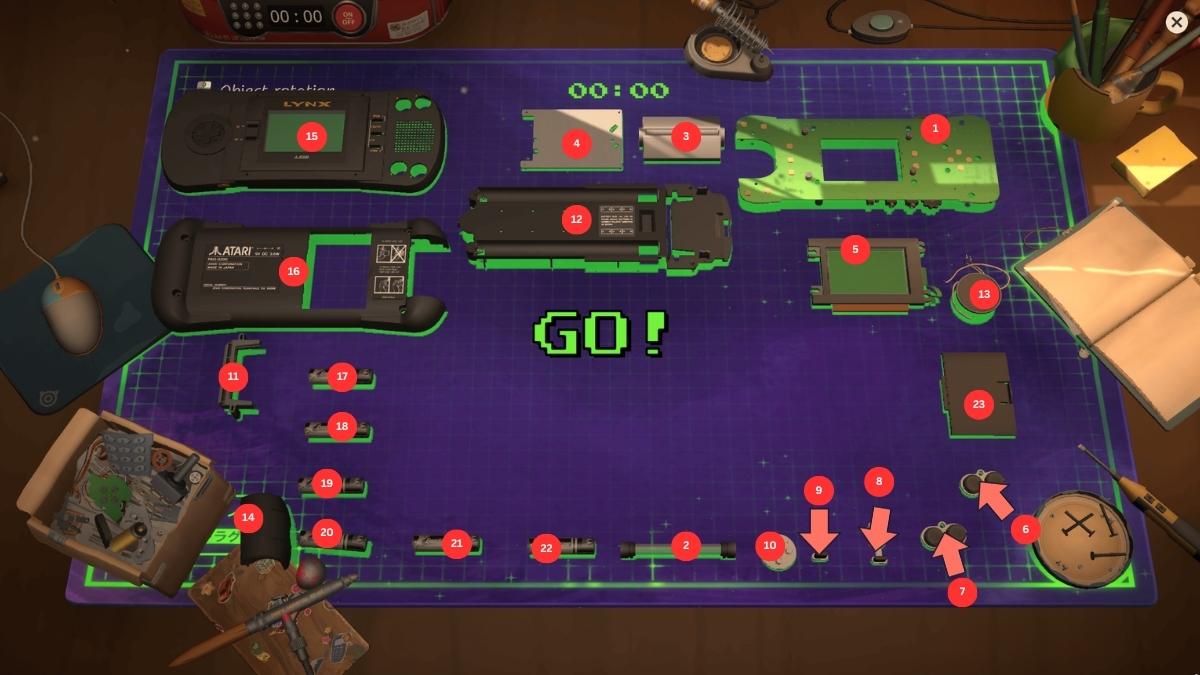
The Lynx is one of the licensed Atari handhelds in ReStory, running 12 screws but a full 23 parts. That part count looks daunting, though the job moves quickly once you know the order.
How to Fix the Atari Lynx?
Here is the assembly order for the Atari Lynx, part by part.
| Assembly Order No. | Part | Screws |
|---|---|---|
| 1 | Circuit Board | NA |
| 2 | Lightbulb | NA |
| 3 | Lightbulb Housing | 2 |
| 4 | Display Seal | NA |
| 5 | Display | 4 |
| 6 | Cartridge Slot | 2 |
| 7 | Action Buttons (2x) | NA |
| 8 | Menu Buttons | NA |
| 9 | Power Button | NA |
| 10 | Directional Buttons | NA |
| 11 | Battery Compartment | NA |
| 12 | Speaker | NA |
| 13 | Front Casing | NA |
| 14 | Cartridge Cover | NA |
| 15 | Back Panel | 4 |
| 16 | Battery (6x) | NA |
| 17 | Battery Compartment Cover | NA |
Game Duck (Game Boy)
| Detail | Info |
|---|---|
| Sell Price | TBA |
| Parts Price | TBA |
| License Cost | ¥ 191,000 |
| Total Screws | 16 |
| Total Parts | 15 |
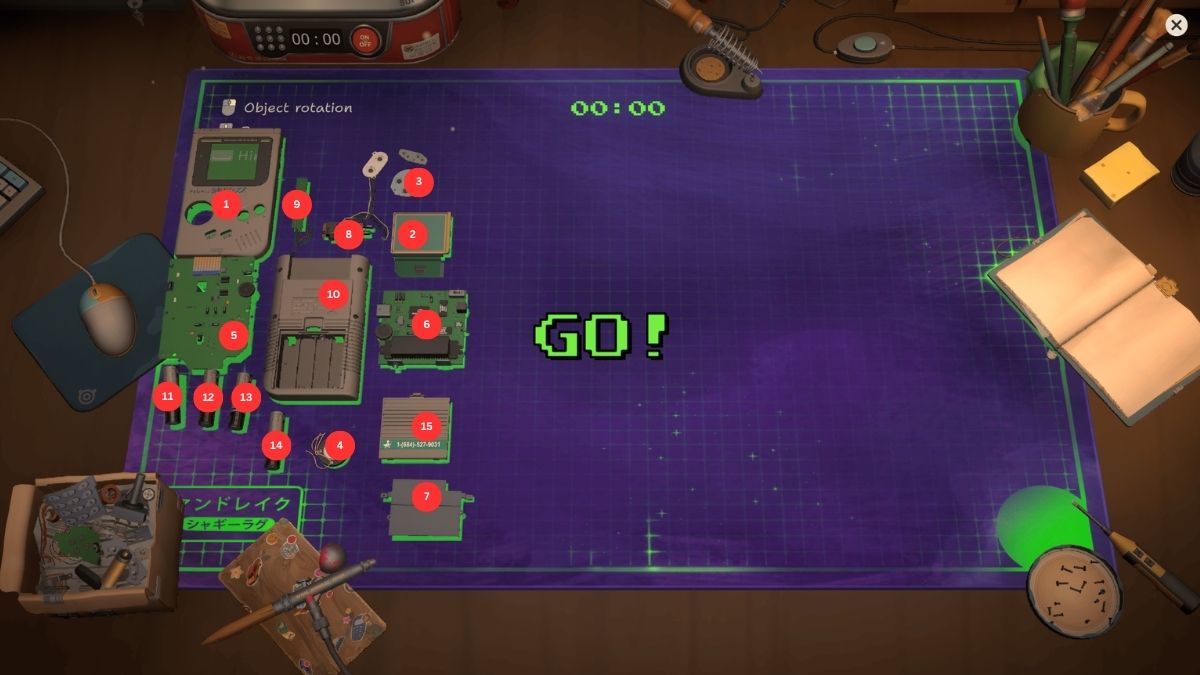
The Game Duck is the stand-in for the original Nintendo Game Boy. You will work through 16 screws and 15 parts, and its license runs ¥ 191,000, which makes it one of the pricier unlocks in the game.
How to Fix the Game Duck?
Here is the assembly order for the Game Duck, top to bottom.
| Assembly Order No. | Part | Screws |
|---|---|---|
| 1 | Front Panel | NA |
| 2 | Buttons | NA |
| 3 | Speaker | NA |
| 4 | Screen | NA |
| 5 | Control Board | 4 |
| 6 | Motherboard | 2 |
| 7 | Frame | 2 |
| 8 | Sound Card | 2 |
| 9 | Circuit Board | NA |
| 10 | Back Panel | 6 |
| 11 | Battery (4x) | NA |
| 12 | Battery Cover | NA |
Nony Goman (Sony Walkman)
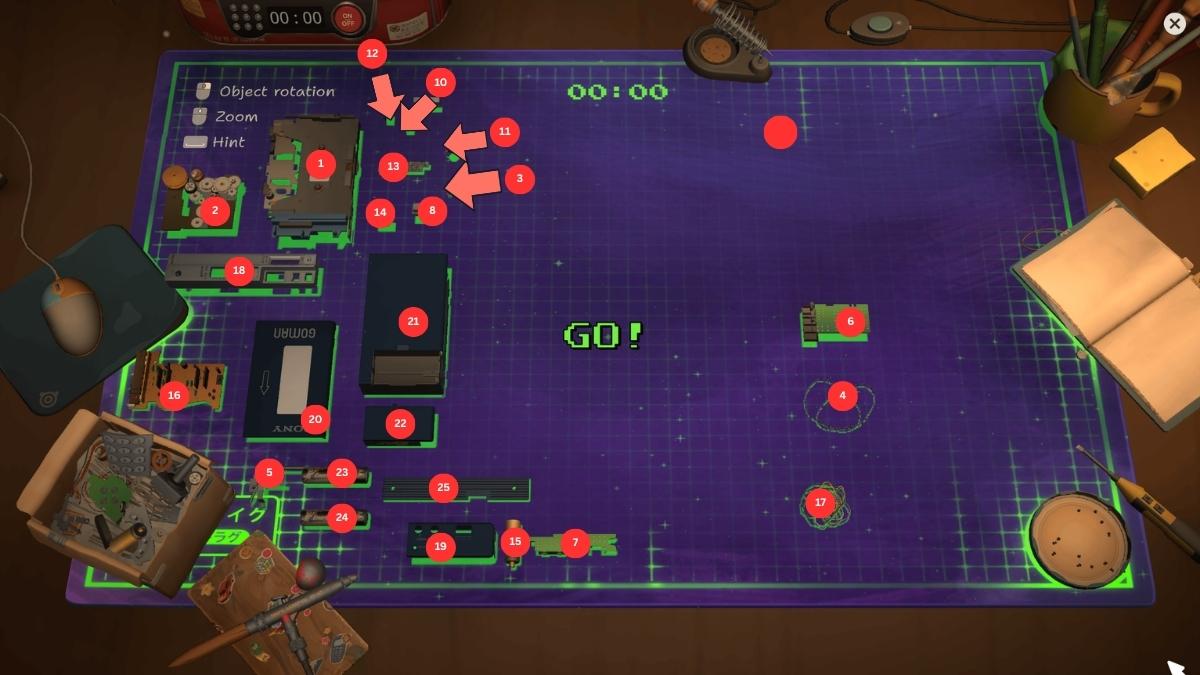
| Detail | Info |
|---|---|
| Sell Price | ¥ 36,000 |
| Parts Price | ¥ 105,000 |
| License Cost | ¥ 46,000 |
| Total Screws | 14 |
| Total Parts | 25 |
The Nony Goman is the game's Sony Walkman. It is a cassette player rather than a console, and at 25 parts it is one of the busiest teardowns in ReStory, on top of 14 screws.
How to Fix the Nony Goman?
Here is the assembly order for the Nony Goman, part by part.
| Assembly Order No. | Part | Screws |
|---|---|---|
| 1 | Casing | NA |
| 2 | Drive Unit | 2 |
| 3 | Drive Belts | NA |
| 4 | Drive Frame | 1 |
| 5 | Mainboard | 2 |
| 6 | Control Board | NA |
| 7 | Motor | NA |
| 8 | Wires | NA |
| 9 | Tape Head | 2 |
| 10 | Microphone | NA |
| 11 | Open Button | NA |
| 12 | Rewind Button (2x) | NA |
| 13 | Play Button | NA |
| 14 | Volume Control | NA |
| 15 | Right Panel | NA |
| 16 | Cassette Compartment | NA |
| 17 | Back Panel | 3 |
| 18 | AA Batteries (2x) | NA |
| 19 | Battery Cover | NA |
| 20 | Sound Card | 2 |
| 21 | Hotline Button | NA |
| 22 | Top Panel | NA |
| 23 | Side Panel | 2 |
Patento BS (Nintendo DS)
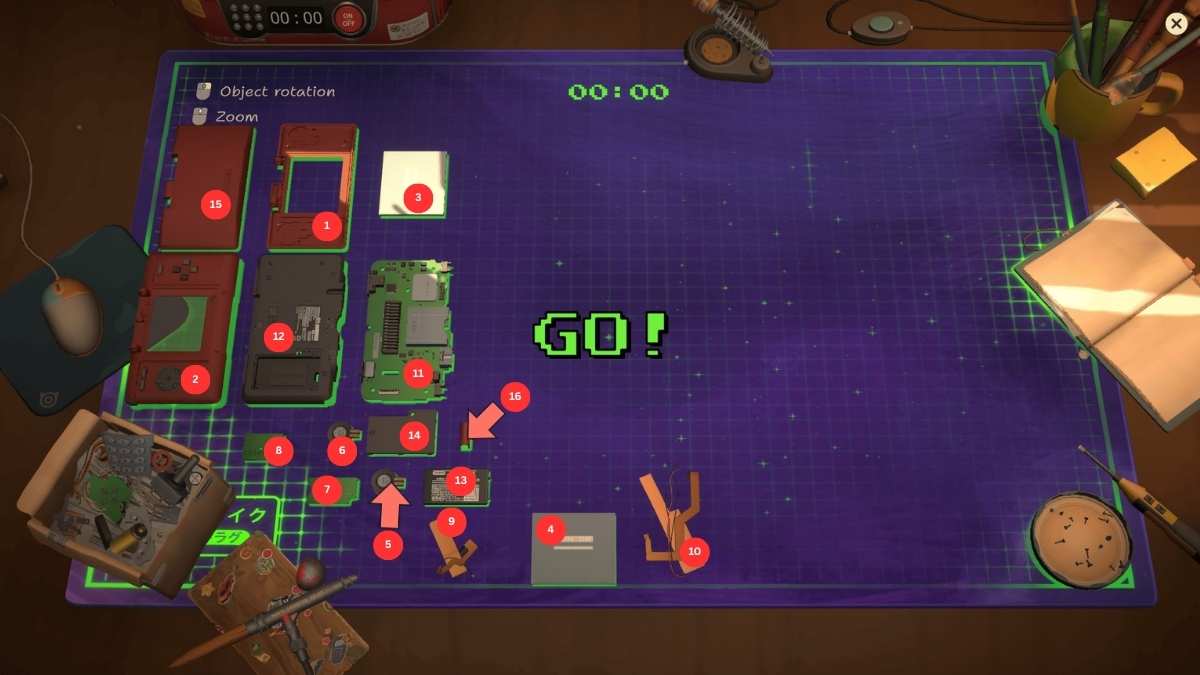
| Detail | Info |
|---|---|
| Sell Price | ¥ 32,000 |
| Parts Price | ¥ 48,000 |
| License Cost | ¥ 61,000 |
| Total Screws | 16 |
| Total Parts | 15 |
The Patento BS is the Nintendo DS stand-in, a clamshell handheld with 16 screws across 15 parts. Watch the two-screen layout when you seat the displays and hinge.
How to Fix the Patento BS?
Here is the assembly order for the Patento BS, from first part to last.
| Assembly Order No. | Part | Screws |
|---|---|---|
| 1 | Upper Display Panel | NA |
| 2 | Lower Display Panel | NA |
| 3 | Lower Display | NA |
| 4 | Mainboard | 3 |
| 5 | Bottom Wire | NA |
| 6 | Back Panel | 6 |
| 7 | Battery | NA |
| 8 | Battery Cover | 1 |
| 9 | Upper Display | NA |
| 10 | Speaker (2x) | NA |
| 11 | Right Audio Board | 1 |
| 12 | Left Audio Board | 1 |
| 13 | Top Wire | NA |
| 14 | Hinge | NA |
| 15 | Upper Panel | 4 |
XI-Box (Xbox)
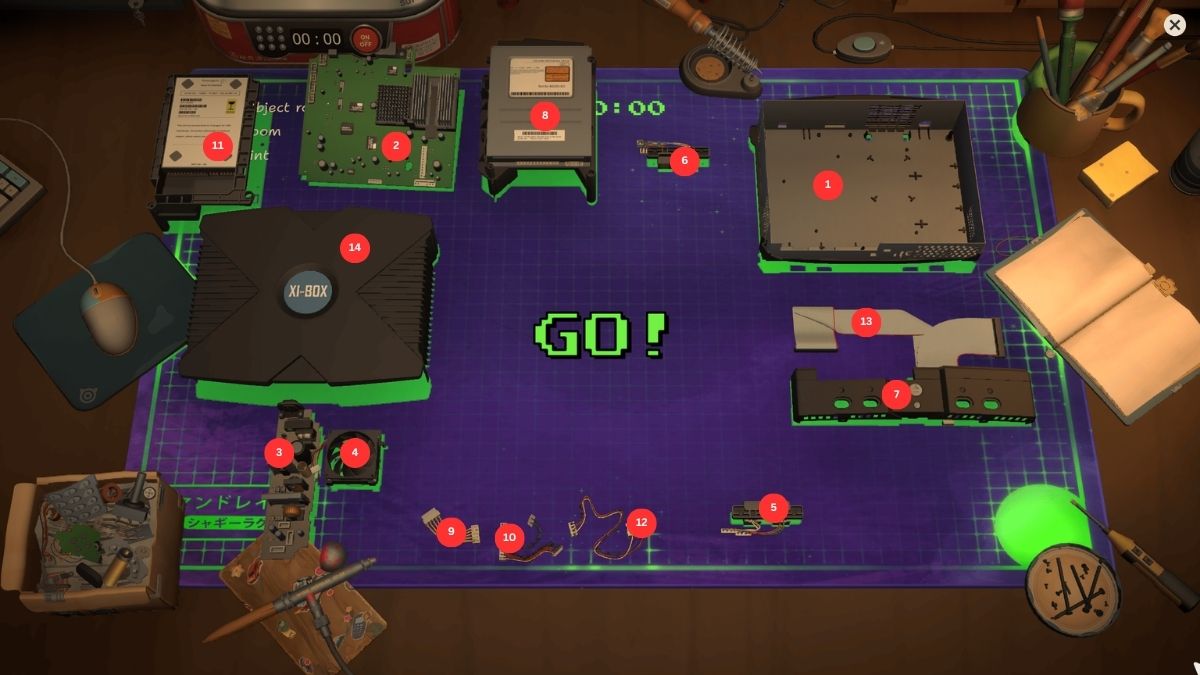
| Detail | Info |
|---|---|
| Sell Price | TBA |
| Parts Price | ¥ 90,000 |
| License Cost | ¥ 110,000 |
| Total Screws | 19 |
| Total Parts | 14 |
The XI-Box is ReStory's take on the original Xbox. It runs 19 screws across 14 parts, one of the heaviest screw counts in this list.
How to Fix the XI-Box?
Here is the assembly order for the XI-Box, part by part.
| Assembly Order No. | Part | Screws |
|---|---|---|
| 1 | Back Panel | NA |
| 2 | Motherboard | 6 |
| 3 | Right Ports | 2 |
| 4 | Left Ports | 2 |
| 5 | Fan | NA |
| 6 | Power Unit | 2 |
| 7 | Motherboard Cable | NA |
| 8 | DVD | 1 |
| 9 | DVD Cable | NA |
| 10 | Front Panel (1st) | NA |
| 11 | Hard Drive | 2 |
| 12 | Hard Drive Cable | NA |
| 13 | Ribbon Cable | NA |
| 14 | Front Panel (2nd) | 4 |
NOTE: Two parts share the name "Front Panel." Pick the right one by matching the visual model in the parts menu instead of the label.
Pokia Njoy (Nokia N-Gage)
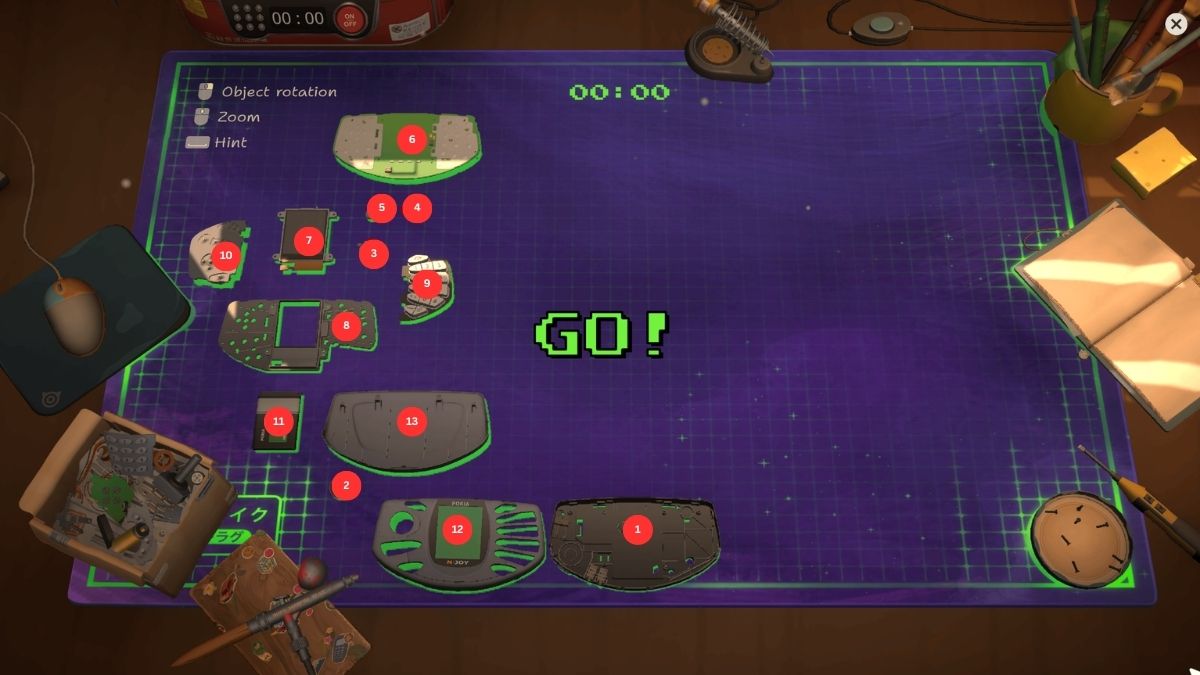
| Detail | Info |
|---|---|
| Sell Price | TBA |
| Parts Price | TBA |
| License Cost | ¥ 32,000 |
| Total Screws | 8 |
| Total Parts | 13 |
The Pokia Njoy is the Nokia N-Gage, the famously odd "taco" phone. It has 13 parts in total, and all 8 of its screws sit on the UV Shield, so once that comes off the rest of the teardown moves fast.
How to Fix the Pokia Njoy?
Here is the assembly order for the Pokia Njoy, part by part.
| Assembly Order No. | Part | Screws |
|---|---|---|
| 1 | Casing | NA |
| 2 | Vibration Motor | NA |
| 3 | Microphone | NA |
| 4 | Tweeter | NA |
| 5 | Speaker | NA |
| 6 | Circuit Board | NA |
| 7 | Display | NA |
| 8 | UV Shield | 8 |
| 9 | Right Keyboard | NA |
| 10 | Left Keyboard | NA |
| 11 | Front Panel | NA |
| 12 | Battery | NA |
| 13 | Back Panel | NA |
Nony PlayMachine (Sony PlayStation)
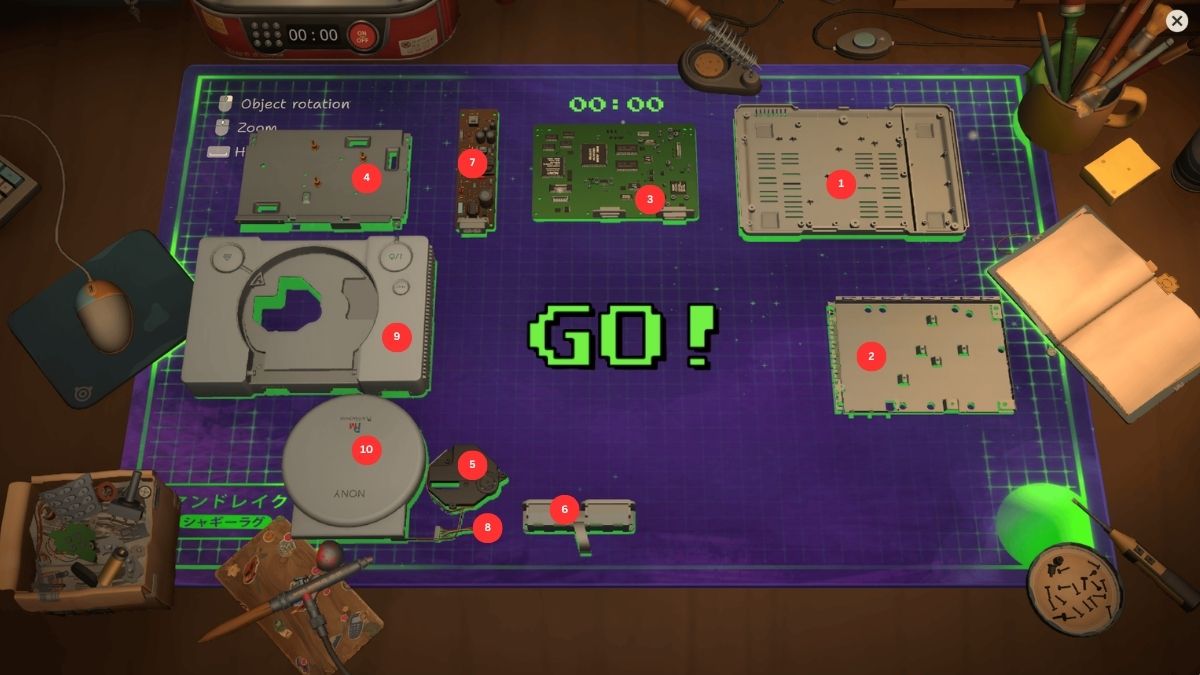
| Detail | Info |
|---|---|
| Sell Price | ¥ 54,000 |
| Parts Price | ¥ 36,081 |
| License Cost | ¥ 71,000 |
| Total Screws | 20 |
| Total Parts | 10 |
The Nony PlayMachine is the original PlayStation. With 20 screws spread over just 10 parts, it is the most screw-heavy device here even though the part list is short.
How to Fix the Nony PlayMachine?
Here is the assembly order for the Nony PlayMachine, part by part.
| Assembly Order No. | Part | Screws |
|---|---|---|
| 1 | Back Panel | NA |
| 2 | Bottom Frame | NA |
| 3 | Motherboard | 5 |
| 4 | Frame | 3 |
| 5 | Memory Slots | 2 |
| 6 | Power Card | 2 |
| 7 | Cable | NA |
| 8 | Disc Drive | NA |
| 9 | Front Panel | 6 |
| 10 | Disc Drive Cover | 2 |
Frequently Asked Questions (FAQs)
No. Most devices need their own license, bought in-game, before their repair jobs open up. Starter devices are the exception and come unlocked from the get-go.
Two separate components in the XI-Box both fill the Front Panel slot in the parts list, and that overlap is part of the puzzle. Go by the visual preview of each part rather than the name so you install the right one.
Building a device from all-new supplier parts usually loses money, since most electronics cost more in parts than they sell for once finished. The steady income comes from customer repair jobs, where you swap only the faulty part and keep the fee, and from buying cheap broken devices on the marketplace, fixing the one fault, and reselling them restored. Bigger, higher-value consoles pay more per job, so once you hold the license they return more than small phones for a similar amount of work.
Buy spare units from the marketplace on your in-game PC, then strip them down for their working components. Those parts go into your inventory and cover future repairs without waiting on a delivery.
For more indie game coverage, check out our JoJo's Bizarre Adventure Golden Spirit tier list or What Does tj9nbハmsに Mean in Meccha Chameleon? here on Pro Game Guides.


