


Want to know which minions are the best in Be The Final Boss? The game is exceptionally grindy, which makes it essential to know which units are worth investing in early and which ones are best for farming and progression. In this Be The Final Boss Tier List, I’ll try to evaluate both each unit’s standalone value and how well it performs in realistic gameplay scenarios. Buckle up and read on!
Be The Final Boss Tier List - Best Minions in Update 2
⇓ META UNITS ⇓

Skull King

Demon Lord

Doomfist
⇓ VERY GOOD UNITS ⇓

Mighty Orc

Deathlock
⇓ DECENT UNITS ⇓

Skeleton Archer

Lava Imp

Hellfire Warlock

Demon Butcher

Bone Guard

Barbarian
⇓ MID UNITS ⇓

Soul Collector

Necromancer

Iron Skeleton

Grave Warlock

Cursed Acolyte

Blood Gargoyle
⇓ WEAK UNITS ⇓

Tomb Hound

Imp Bomber

Bone Grunt
If you just want to know which units are objectively the strongest in the game, then a quick glance at the tier list above is all you really need; no need to spend any more time here. However, if you'd like to learn more about each unit and understand how I evaluate its strengths, weaknesses, and overall value, I highly recommend taking a few minutes to read the detailed Be The Final Boss tier list below.
Keep in mind, though, that this list reflects my own opinions and impressions of the game. Some players will undoubtedly disagree with certain rankings, and that's perfectly fine. As I continue progressing and gain more experience (especially in the later stages of the game), my evaluations will most likely change. For now, though, this is my Update 2 Be The Final Boss tier list of the best minions.
Ranking note: Stats below are Normal Level 1 base values before mutation, level, Skill Tree, and other account-wide bonuses. Rankings weigh endgame ceiling, Population efficiency, upgrade difficulty, and practical progression value.
| Unit | Evaluation |
|---|---|
S Tier — MetaThe strongest endgame units and safest long-term investments. | |
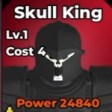 Skull King Secret Guard ATK450 HP5,850 Range6 Cost4 Active — Deep Recovery: Restores 40% of max HP. No cost. Passive — Pain Recovery: When taking damage, restores 50 HP + 3% max HP (1s cooldown). | Pro: The best pure wall in the roster: huge base HP and percentage healing scale brutally well with levels, mutations, and HP bonuses. Pro: Deep Recovery plus Pain Recovery makes him the safest high-wave tank and buys your backline an absurd amount of firing time. Con: Secret rarity, 4 Cost, and brutal upgrade demands make him a late-game project rather than a sensible first chase. Con: He offers little team utility or wave-clear speed; Skull King wins by refusing to die, not by helping you farm faster. |
 Doomfist Secret Melee ATK900 HP4,050 Range5 Cost4 Active — Overdrive: Gains +60% ATK and +60% ATK SPD for 3s. No cost. Passive — Battle Recovery: After dealing damage, restores 80 HP + 30% ATK. | Pro: A top-tier hybrid with excellent DPS, a huge self-buff, and ATK-scaling healing that lets him brawl through late waves. Pro: Battle Recovery triggers through offense, so Doomfist sustains while doing his actual job instead of waiting around to be hit. Con: Four Population and Secret-level investment are enormous; an underleveled Doomfist is a very expensive benchwarmer. Con: His 5 Range puts him directly in danger, and burst-heavy waves can still fold him without a proper formation. |
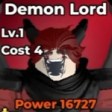 Demon Lord Secret Ranged ATK1,170 HP1,800 Range18 Cost4 Active — Demon Domain: Deals 200% ATK damage to up to 8 enemies (ability range 10). Passive — Demonic Poison: On hit, deals 20% ATK damage each second for 3s. Passive — Aura: Enemies within 16 Range lose 8% ATK SPD and 8% Move SPD. | Pro: The premier dedicated carry: massive base ATK, eight-target burst, poison, and a useful enemy slow are packed into one slot. Pro: He handles bosses and dense waves alike, while 18 Range keeps that massive investment safely behind your tanks. Con: Four Cost plus Secret upgrade requirements make the payoff painfully back-loaded. Con: He still depends on a durable frontline; once enemies reach him, 1,800 base HP will not perform any miracles. |
A Tier — ExcellentPowerful units that remain relevant deep into progression. | |
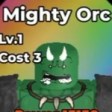 Mighty Orc Mythic Guard ATK210 HP3,850 Range6 Cost3 Active — Mighty Smash: Deals damage equal to 60% of Mighty Orc's max HP. Passive — Self Heal: Every 2s, restores 60 HP + 4% max HP. | Pro: The best non-Secret tank, with unconditional regeneration that remains reliable even when enemy targeting gets messy. Pro: Mighty Smash turns HP investment into real boss damage, so he contributes more than simply standing there looking green. Con: Three Cost is a serious commitment, especially before Population upgrades come online. Con: Skull King eventually outscales him, and Mighty Orc brings no taunt or team-wide defensive aura. |
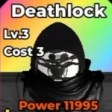 Deathlock Mythic Support ATK700 HP700 Range18 Cost3 Active — Raise Skeleton Archers: Summons 2 Archers with 25% of Deathlock's ATK/HP until the wave ends. The summons cost no Population. Passive — Aura: Melee allies within 10 Range gain +15% ATK and +20% DEF. This aura does not stack with another Deathlock. | Pro: Provides excellent value without needing a Demonic mutation or heavy upgrades, which is rare for a Mythic. Pro: The melee aura strengthens your frontline while the free Archers add bodies and damage without consuming Population. Con: The aura only supports melee allies and has 10 Range, so sloppy positioning wastes a large part of the kit. Con: Duplicate auras do not stack, and Deathlock's 700 base HP makes careless placement very punishable. |
B Tier — Very GoodReliable progression picks with clear roles and strong value. | |
 Skeleton Archer Uncommon Ranged ATK100 HP100 Range18 Cost1 Active — Power Shot: Deals 200% ATK damage to one enemy. Passive — Quickdraw: On spawn, gains +40% ATK SPD for 5s. Passive — Bone Pin: On hit, stuns for 1s (8s cooldown). | Pro: Arguably the best progression investment: 1 Cost, easy duplicates, fast leveling, and respectable damage for almost no Population. Pro: Bone Pin gives cheap, repeatable boss control, and multiple Archers fit naturally behind any frontline. Con: The 100 base HP is pure paper; one backline leak can erase your entire Archer convention. Con: Higher-rarity carries eventually overtake its raw output once you can actually afford to build them. |
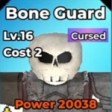 Bone Guard Rare Guard ATK40 HP1,200 Range6 Cost2 Active — Bone Taunt: Taunts up to 3 enemies for 3s (ability range 10). Passive — Guard Shell: When taking damage, gains a shield equal to 125% ATK for 5s (10s cooldown). Passive — Bone Block: When taking damage, blocks 5 + 10% ATK damage. Passive — Aura: Allies within 12 Range gain +2 DEF and take 8% less damage. | Pro: The best early-game tank package: cheap to build, easy to level, and loaded with taunt, blocking, shielding, and team mitigation. Pro: Its aura protects the whole formation, making Bone Guard far more valuable than its tiny ATK stat suggests. Con: No real healing means attrition eventually catches up with it during long, high-wave fights. Con: The shield and block scale from a miserable 40 base ATK, so the defensive ceiling is lower than the kit first appears. |
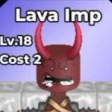 Lava Imp Epic Ranged ATK300 HP300 Range18 Cost2 Active — Burn Patch: Burns up to 4 enemies for 45% ATK damage over 4s (ability range 10). Passive — Burning Wound: On hit, deals 30% ATK damage each second for 3s. | Pro: Excellent sustained damage for 2 Cost, with both the active and passive continuing to hurt enemies between attacks. Pro: A strong mid-game carry against bosses and durable waves once your Skeleton Archer core begins to hit its ceiling. Con: Damage is back-loaded, so quick farming waves may end before the burns deliver their full value. Con: Epic leveling is far slower than upgrading an Archer, and 300 HP leaves almost no room for positioning mistakes. |
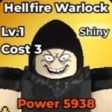 Hellfire Warlock Legendary Ranged ATK500 HP500 Range18 Cost3 Active — Hellfire Rain: Deals 200% ATK damage to up to 7 enemies anywhere on the battlefield. | Pro: Global targeting makes Hellfire Rain unusually reliable for checkpoint pushes and enemies that slip outside normal coverage. Pro: Good base ATK and seven-target burst give him a clean, plug-and-play ranged role with no complicated setup. Con: Three Cost is hard to justify in farming setups when cheaper ranged units can cover more lanes per Population. Con: With no passive, DoT, stun, or aura, he falls behind the top carries between Hellfire Rain casts. |
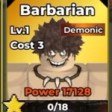 Barbarian Legendary Melee ATK450 HP1,800 Range5 Cost3 Active — Execution Cut: Deals 300% ATK damage to one enemy. Passive — Guard: When taking damage, blocks 35 + 10% ATK damage. | Pro: A dependable single-target bruiser with solid base stats, strong active damage, and enough blocking to work as an off-tank. Pro: Much easier to build than Demon Butcher while delivering surprisingly similar practical performance through the mid-game. Con: No healing means prolonged frontline duty eventually wears him down. Con: Three Cost and 5 Range become difficult to defend once Mythic and Secret bruisers enter the account. |
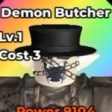 Demon Butcher Mythic Melee ATK490 HP2,100 Range5 Cost3 Active — Execute: Deals 250% ATK damage with 35% lifesteal; deals 50% more damage below 30% HP. Passive — Butcher Block: When taking damage, blocks 60 + 10% ATK damage. | Pro: A solid damage-and-sustain hybrid that can block chip damage, heal through Execute, and hit hard when close to death. Pro: Better raw stats than Barbarian make him a credible off-tank for developed accounts. Con: The Mythic price tag buys only a modest improvement over Barbarian, which is rough value in a resource-starved game. Con: His best damage requires sitting below 30% HP, also known as the traditional danger zone. |
C Tier — SituationalUsable units that need the right stage, team, or progression point. | |
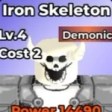 Iron Skeleton Epic Guard ATK60 HP1,500 Range6 Cost2 Active — Iron Brace: Gains +6 DEF and takes 18% less damage for 5s. No cost. Passive — Self Repair: Every 2s, restores 15 HP + 1% max HP. | Pro: Reliable timed healing and an active mitigation window make Iron Skeleton a stable early-to-mid-game wall. Pro: Two Cost is reasonable, and unlike hit-triggered healers, Self Repair keeps ticking whenever HP is missing. Con: Its damage contribution is basically a rounding error. Con: Bone Guard offers stronger team utility, while Mighty Orc provides far better sustain and scaling once available. |
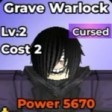 Grave Warlock Epic Ranged ATK300 HP300 Range18 Cost2 Active — Grave Fire: Deals 200% ATK damage to up to 5 enemies (ability range 13). | Pro: Straightforward five-target AoE for only 2 Cost makes Grave Warlock a serviceable wave-clear filler. Pro: Its 13-range active is easier to position than many short-range support or damage abilities. Con: No passive means Lava Imp delivers much better sustained and single-target value at the same Cost. Con: Epic upgrade demands are difficult to justify when Skeleton Archer covers cheap DPS so efficiently. |
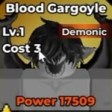 Blood Gargoyle Legendary Guard ATK100 HP2,500 Range6 Cost3 Active — Stone Blood: Deals 200% ATK damage with 55% lifesteal. Passive — Blood Mend: When taking damage, restores 5 HP + 2% max HP (0.5s cooldown). | Pro: High base HP and percentage healing let Blood Gargoyle soak a respectable amount of punishment. Pro: Stone Blood adds emergency sustain, making it a workable checkpoint tank before Mighty Orc arrives. Con: Blood Mend only triggers when hit, so its real healing is much less reliable than Mighty Orc's automatic regeneration. Con: Three Cost and Legendary investment are steep for a tank that is clearly a temporary stopgap. |
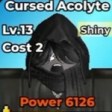 Cursed Acolyte Rare Support ATK100 HP400 Range18 Cost2 Active — Weakening Hex: Up to 3 enemies take 20% more damage for 5s (ability range 10). | Pro: A 20% damage amp can meaningfully accelerate bosses and elites when several strong carries focus the same targets. Pro: Its main value comes from the debuff, so Cursed Acolyte can function without expensive mutation or level investment. Con: Only three targets, five seconds of duration, and 10 ability Range make the useful window narrow. Con: Outside Weakening Hex, the unit contributes almost nothing: low stats, no passive, and 2 Cost of premium standing space. |
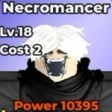 Necromancer Epic Support ATK150 HP600 Range18 Cost2 Active — War Rhythm: Up to 3 allies gain +30% ATK SPD for 6s (ability range 10). Passive — Aura: Allies within 10 Range gain +8% ATK SPD. | Pro: Attack Speed buffs improve basic DPS and pair nicely with on-hit stuns, burns, poison, and self-healing attackers. Pro: Like most supports, Necromancer can provide most of its value without being Demonic or heavily leveled. Con: The 10-Range aura is awkward to cover, especially once your formation spreads across a wider defensive line. Con: At low Population, another Skeleton Archer or Lava Imp usually adds more damage than the buff creates. |
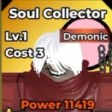 Soul Collector Legendary Support ATK250 HP1,000 Range18 Cost3 Active — Soul Harvest: Up to 2 allies gain +12% ATK and +8% CRIT for 7s (ability range 10). Passive — Soul Mark: On kill, gains +3% ATK, up to 20 stacks; stacks persist between waves. Passive — Aura: Allies within 12 Range gain +3% CRIT. | Pro: Soul Mark can ramp to a substantial personal ATK bonus during long runs, while Soul Harvest buffs two key carries. Pro: The CRIT aura provides passive value to nearby units even between active casts. Con: A support needing final blows to ramp is awkward, especially when your real carries keep stealing the kills. Con: Three Cost and Legendary investment are hard to defend when Deathlock offers broader impact with less setup. |
D Tier — WeakStarter or niche units that are usually replaced quickly. | |
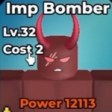 Imp Bomber Rare Melee ATK200 HP500 Range5 Cost2 Active — Cluster Bomb: Deals 250% ATK damage to up to 4 enemies (ability range 10). Passive — Death Blast: On death, deals 200% ATK damage to up to 5 enemies. | Pro: Cluster Bomb gives new accounts accessible AoE before stronger ranged options are developed. Pro: Death Blast can clean up a clump when the frontline collapses. Con: A fragile melee DPS paying 2 Cost is already a bad deal before comparing it with Skeleton Archer. Con: The passive requires dying to contribute, which is not exactly a premium damage rotation. |
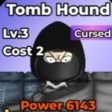 Tomb Hound Epic Melee ATK240 HP450 Range5 Cost2 Active — Backline Pounce: Pounces on a target and deals 200% ATK damage. Passive — Grave Stealth: On spawn, gains +80% Evasion and -80% Threat for 20s. Passive — Reveal: On hit, removes Stealth from the target. Passive — Hamstring: On hit, reduces Move SPD by 45% for 3s (6s cooldown). | Pro: Backline Pounce and the opening Evasion window can occasionally disrupt awkward enemy formations. Pro: Hamstring provides a respectable single-target slow when it lands on the right threat. Con: Low ATK, terrible HP, and no sustain make this Epic assassin mostly cosplay. Con: Its utility is too inconsistent to justify 2 Cost over reliable ranged damage or another frontline body. |
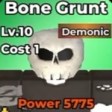 Bone Grunt Uncommon Melee ATK50 HP400 Range5 Cost1 Active — Heavy Slash: Deals 200% ATK damage to one enemy. | Pro: Available immediately, costs only 1 Population, and can hold the line while you learn the basic loop. Pro: Cheap copies make it easy to fill the index and gain a few early levels. Con: The stats and kit are both bare-bones in every sense of the phrase. Con: Any serious investment delays much better early targets, especially Skeleton Archer and Bone Guard. |
Note: Unit avatars are courtesy of KingGoose on YouTube.
RELATED: Be The Final Boss Mutations Guide
So there you have it: the ultimate Be The Final Boss tier list of the best units, or minions. Keep in mind that these rankings are based on a combination of my own experience and feedback from other players. A special shout-out goes to content creator KingGoose, who made an in-depth tier list of his own.
RELATED: Be The Final Boss Weather Events – Effects, Times, & More
Thanks for reading, and while you're here, don't forget to check out our other Roblox guides over at our dedicated Roblox hub. And given that this is a rather grindy game, make sure to use the latest Be The Final Boss Codes.


