
Silent Hill 2 Remake is Bloober Team's complete reimagining of the original horror masterpiece, and there are plenty of familiar and new mysteries and terrors to uncover during James' journey through the abyss of Silent Hill. Here's our in-depth walkthrough to help you with the game's many objectives, puzzles, and other cryptic secrets.
Silent Hill 2 Remake Walkthrough - Observation Area & the Cemetery
The following walkthrough is done with both types of difficulty (i.e. - Combat and Puzzles) set to Standard, so if you're playing a different difficulty there may be a difference in the location and/or availability of certain items such as health drinks and ammo. Solutions for puzzles may vary as well.
After the iconic opening cutscene, get your bearings with James' movement and interactions, and grab your first Map from the driver's seat in his car.
While exploring the Observation Area, if you attempt to go down the road in the opposite direction from Silent Hill, you can quickly unlock the 'No Turning Back' achievement.
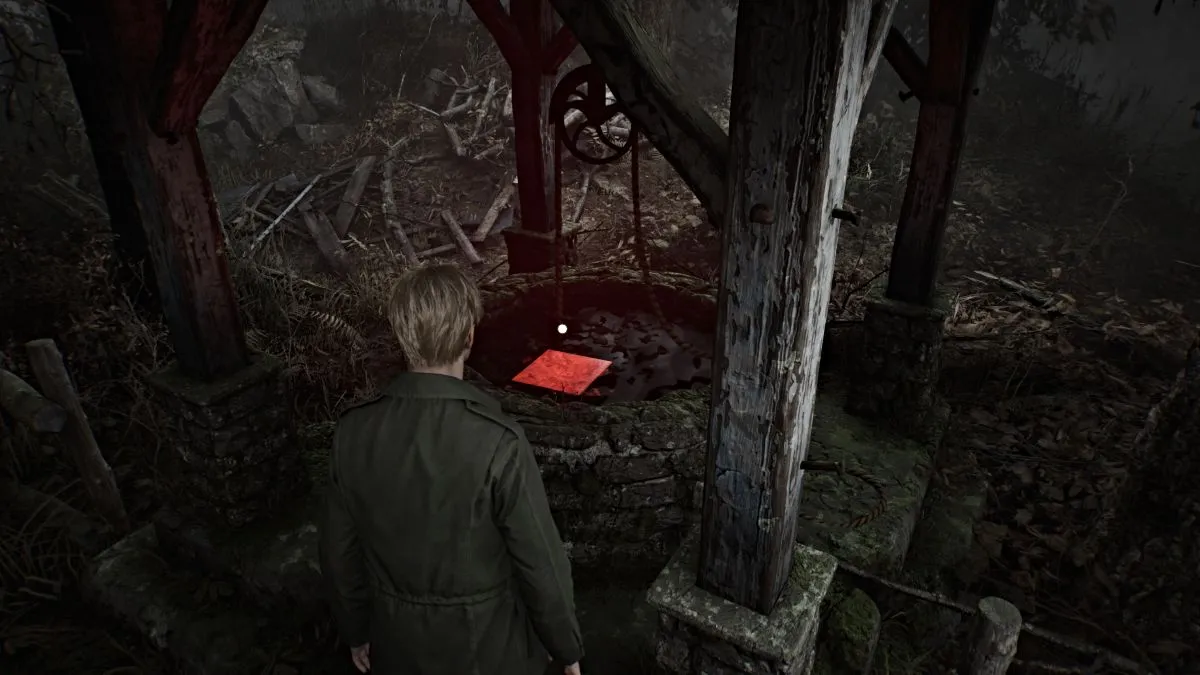
Go down the stairs at the far end of the Observation Area and start your long, fog-filled walk towards Silent Hill. At one point you'll come across a well with a red light emitting from it. Go up to it; inside is a bright red square that signifies your first Manual Save Point (we'll refer to them from now on as "Red Save Points"). Find and use as many of these as possible during your playthrough.
Continue along the main path until you reach a church with a cemetery, where you first meet Angela Orosco. She claims to be looking for her mother along with her father and brother, but reveals little else. After the cutscene, feel free to explore the area, but know there are no items to pick up here. You can also speak to Angela a few more times for more unique dialogue if you want.
If playing New Game Plus, you can find the Crimson Ceremony book (seen above) at a grave near the pond in the cemetery. This item is required for the 'Rebirth' ending.
Silent Hill Ranch
Leave the cemetery and keep walking along the same main path, which takes you through the Silent Hill Ranch area.
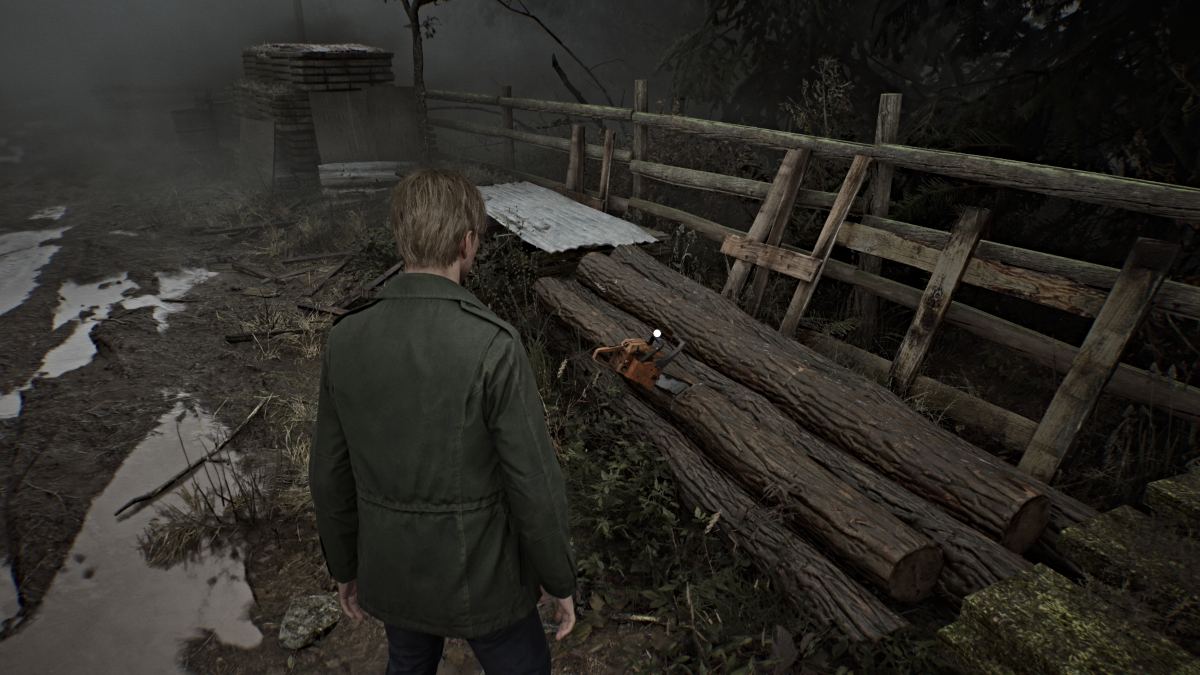
After completing the game at least once, a special Chainsaw weapon will spawn here near the white pickup truck filled with tree logs, and you can unlock the 'Lumberjack' achievement with it as well.
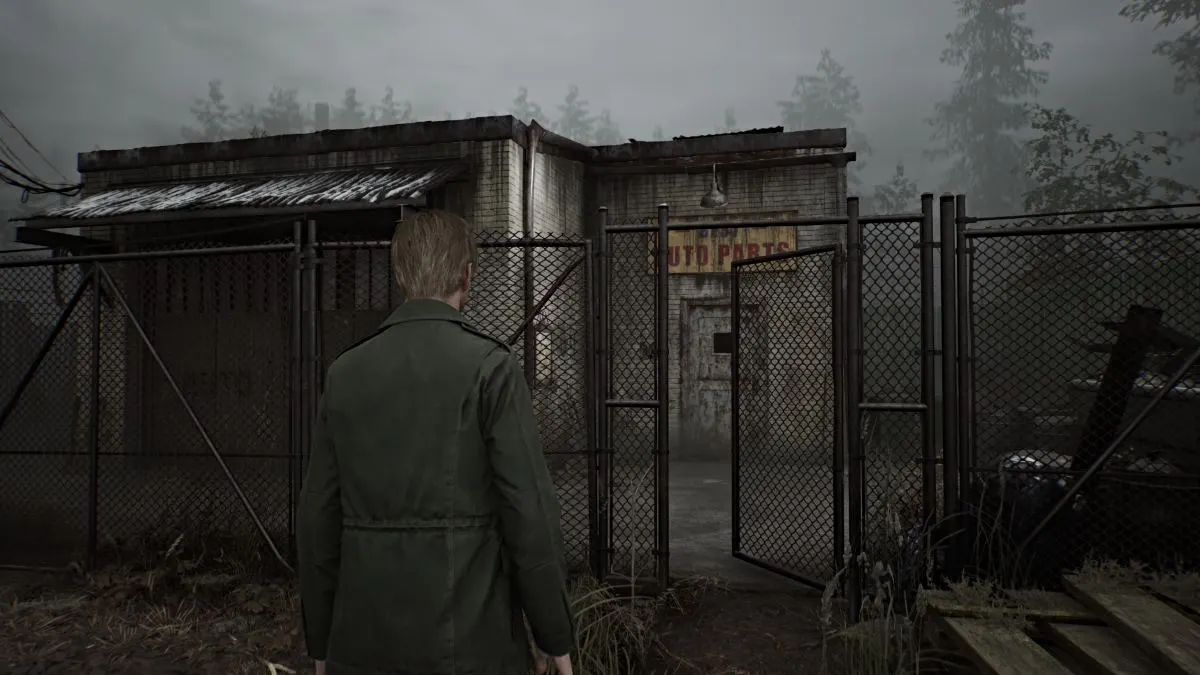
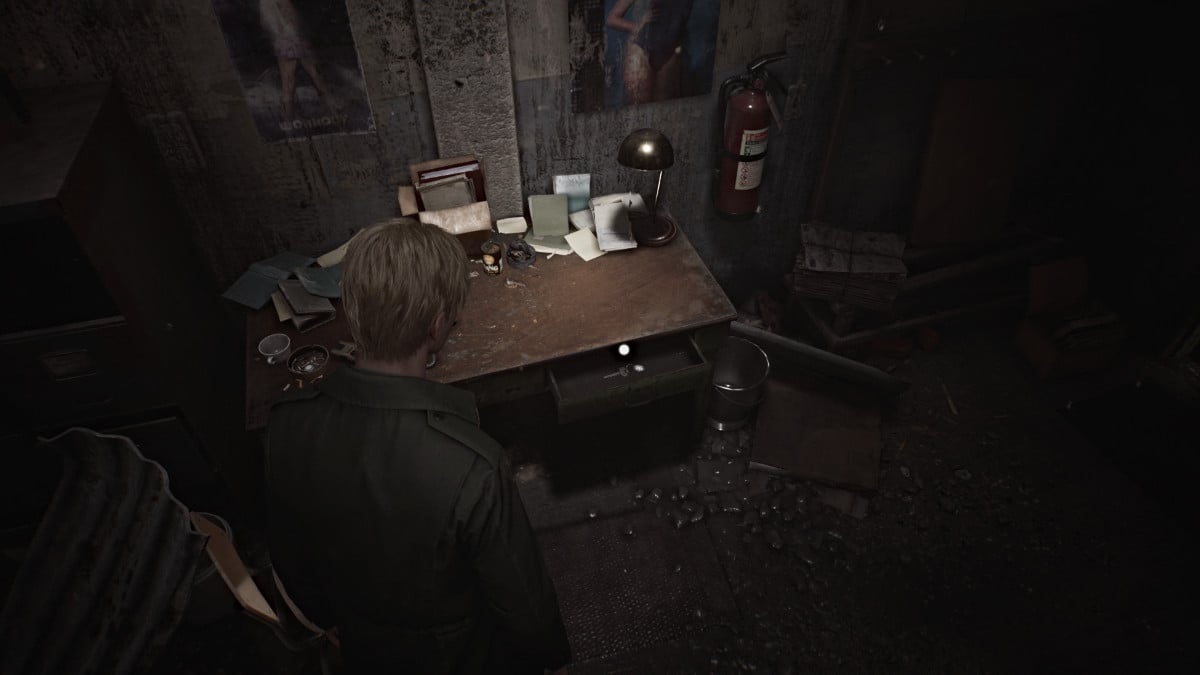
Continue on until you reach a large barricade in the road with a small door on it that's locked. Look for a small Auto Parts Shop nearby on your left with its gate open. Enter the premises and go left around the building where you can jump through an open window. Look for a lit-up desk inside, and inside the drawer will be the Auto Parts Key that unlocks the door outside blocking your way.
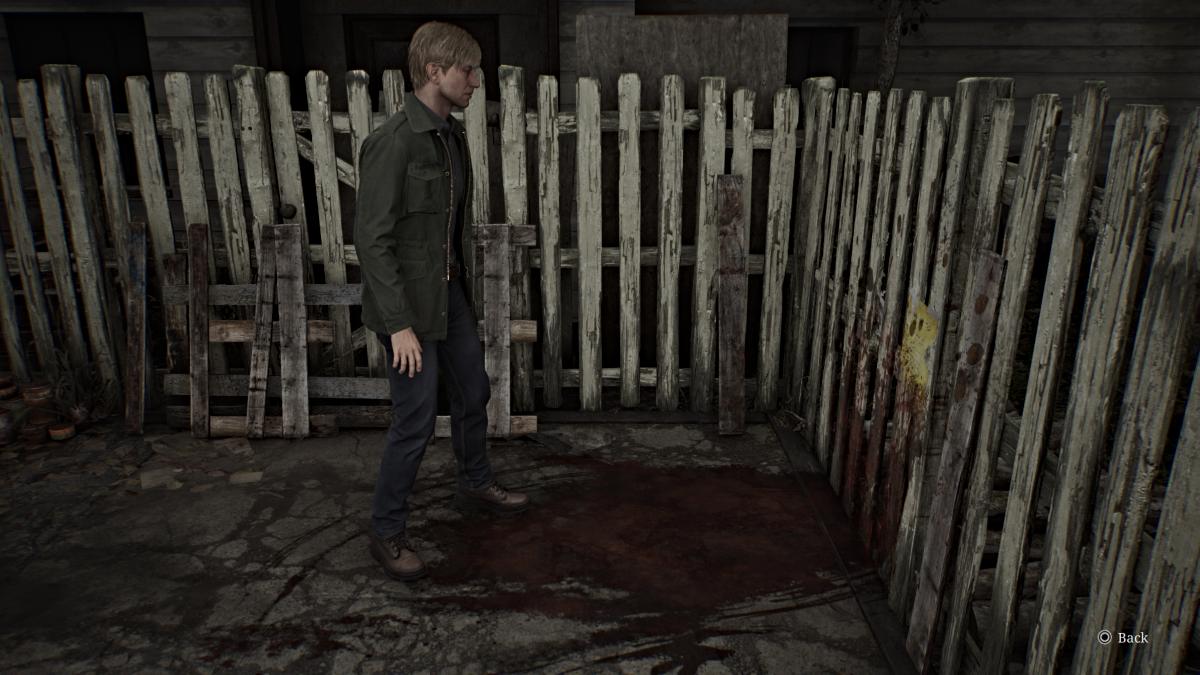
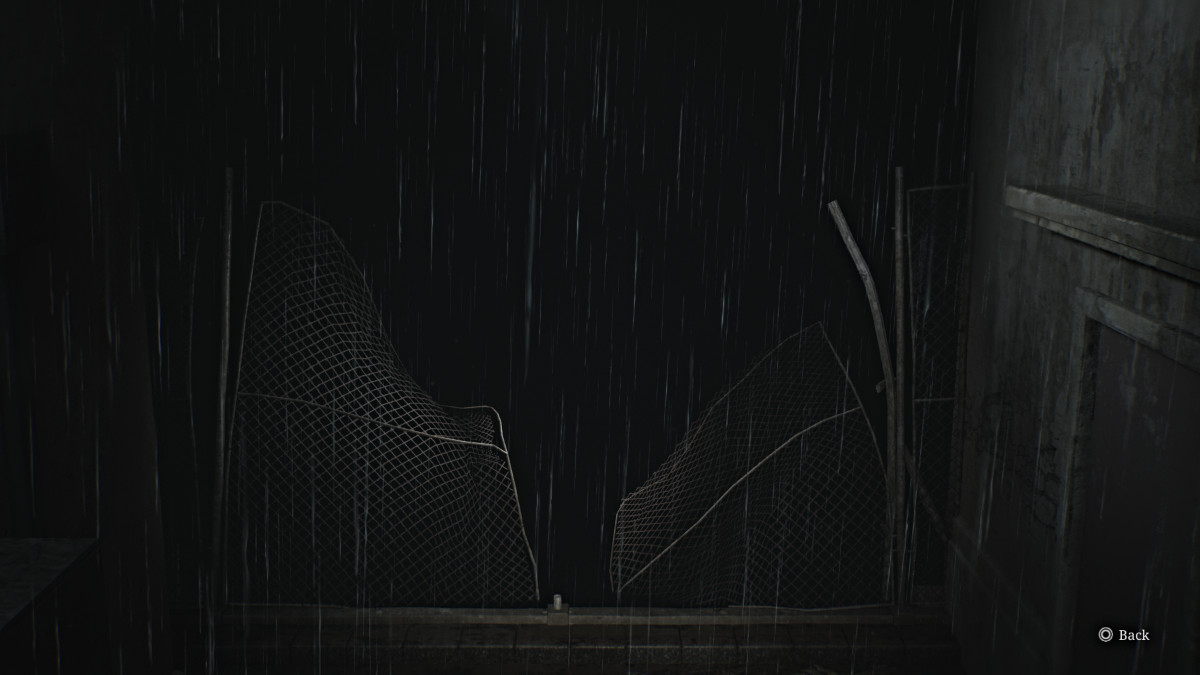
Keep following the path straight until you come up to a familiar (if you played the original) spot under an overpass that's filled with fencing and broken boards. While you can't enter it, you can interact with the spot as it's a Glimpse of the Past easter egg.

Getting all Glimpses of the Past in a single playthrough will get you the 'Echoes' achievement.
Hang a left under an open area of the overpass and through the gate ahead, which will take you to Witse Road (per your map) and into the town of Silent Hill.
Silent Hill 2 Remake East South Vale Walkthrough

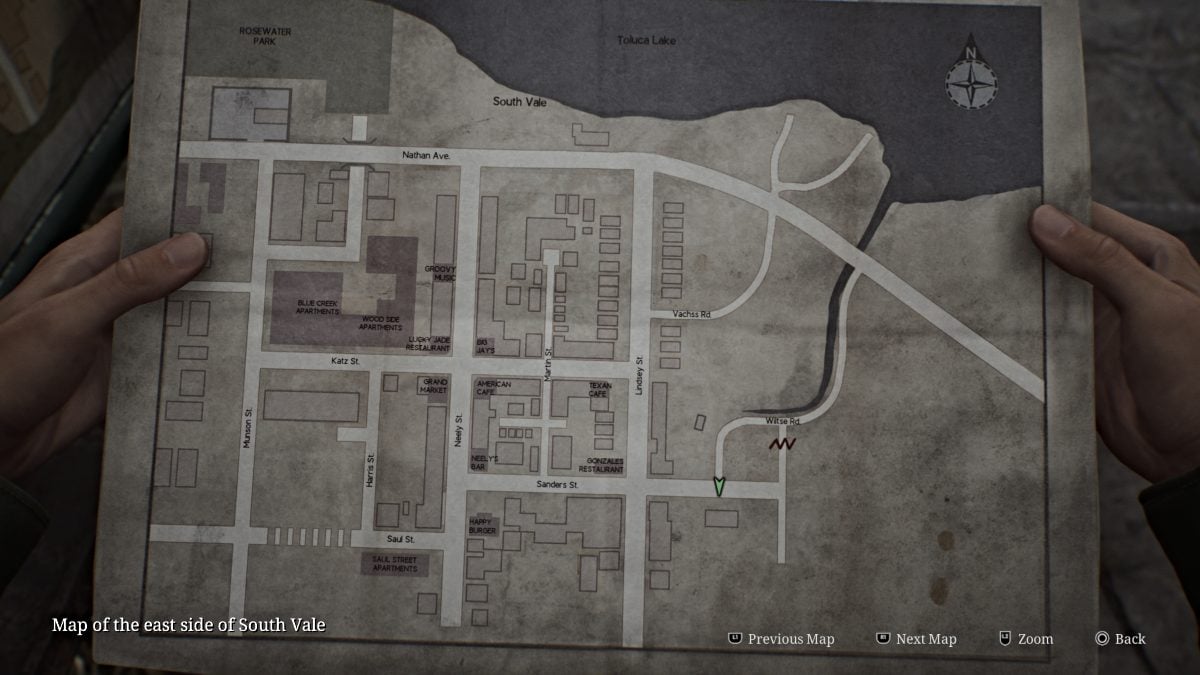
Upon reaching Sanders Street, a cutscene will play where James finds another, more expanded map of the town sitting beneath a sign. This allows you to look at both the west and east sides of the town map and all major landmarks from overhead.
Important Note: As you explore the streets, James will passively draw unique points of note on his map, such as places that are blocked off (e.g. - streets, buildings, doors), save points, secret shortcuts you can take, certain objectives, etc.
Explore as much as possible, especially while it's daytime, so that you fill your map with these markers and get a full understanding of everywhere you can and can't go (yet).
First off, go into the nearby Flower Shop and pick up the Flower Shop Message (memo) off the front counter.
Memos are notes/clues that James will pick up (rather than just read them) and place in his inventory. Collecting all memos in a single playthrough will get you the 'Archivist' achievement.
Apart from a blood stain on the floor nearby that James can look at, there's nothing else to find inside so head back out and down Sanders Street until you see a much bigger blood trail that leads north up Lindsey Street. All other paths are blocked off by huge barricades for now, so just follow the trail.
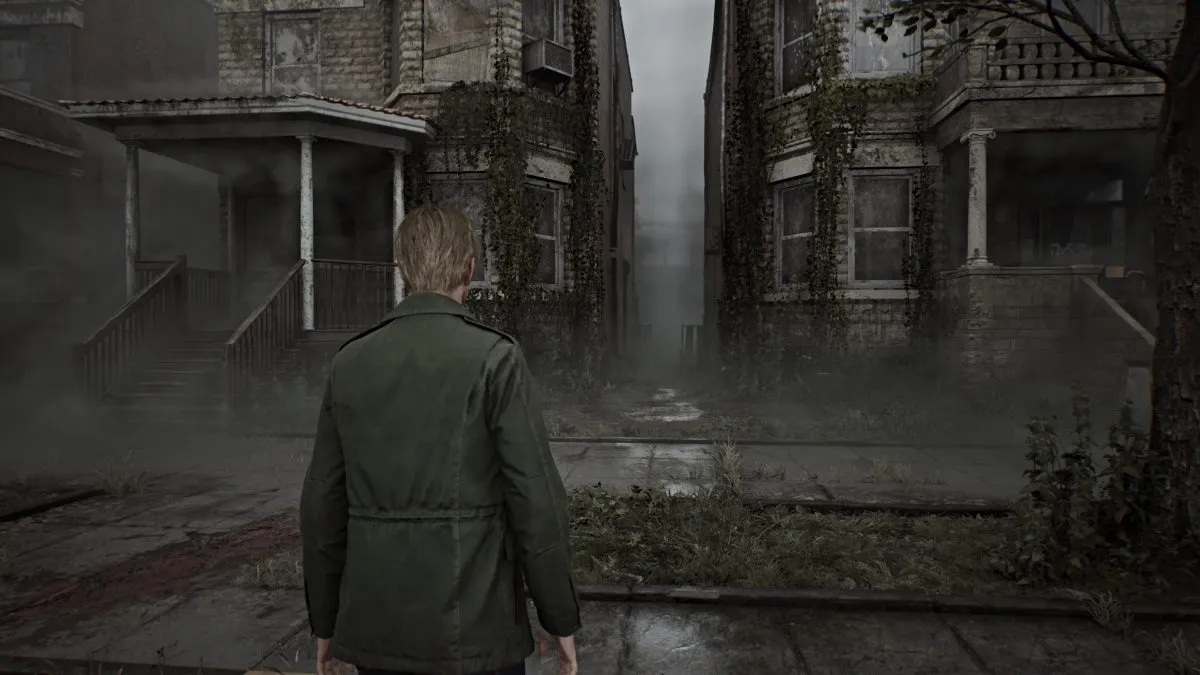
Another cutscene reveals a strange figure walking in the distance ahead of James, and you'll want to follow it. Keep straight and the blood spatters will lead you to an eerie detour off the left side of the road between two buildings (seen above).
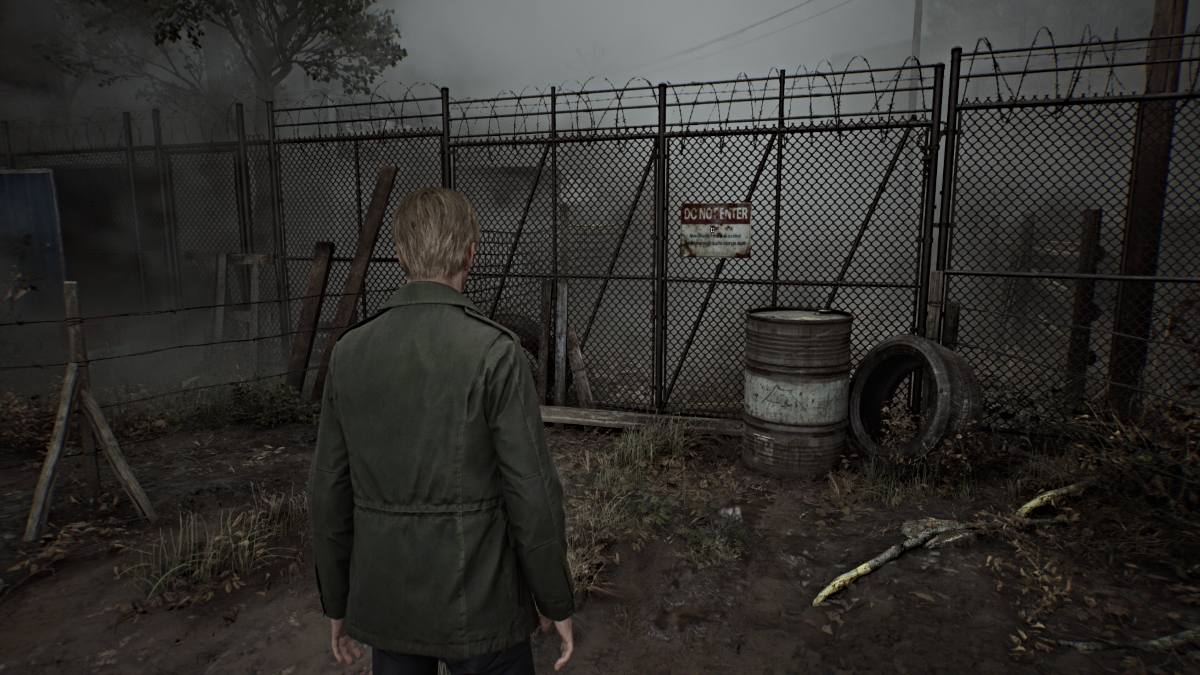
Before you go through the alley, pivot and run down Vachss Road until you reach a 'Do Not Enter' gate. Interact with it to get another Glimpse of the Past.
Now, go through the alley and follow the strange noises through the back alley area until you reach a garage with a broken hole at the bottom of the door. Crawl through it to enter the house.
Getting the Radio and Wooden Plank
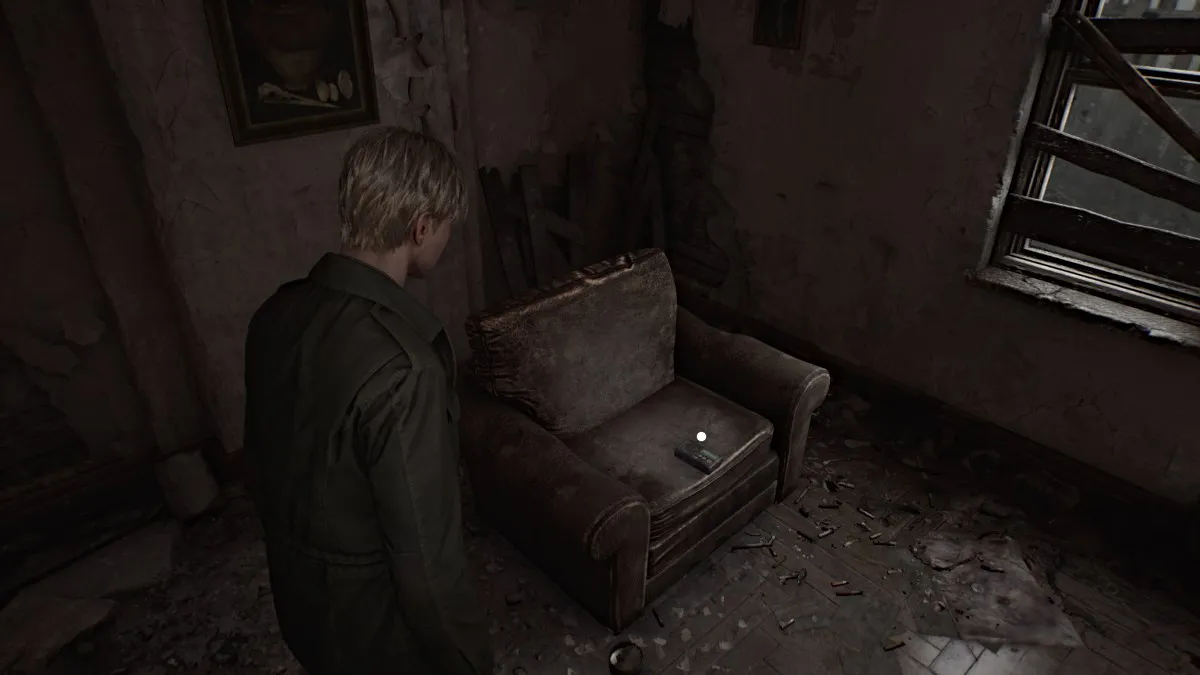
Use the Red Save Point on the nearby wall then go right into the kitchen. Grab a Health Drink from one of the drawers and continue to the door to your left. Follow what sounds like radio static down the hallway until you can enter a door on your right. Inside the room, a Radio will be sitting on an armchair.
Grab it, and a cutscene will ensue where James confronts the same figure from before, which turns out to be a monster (known as a Lying Figure).
To get the 'Radio Silence' achievement, you need to keep your Radio turned off for the entire game. You can toggle this setting from your inventory.
This is your first introduction to the game's combat system, which allows you to both Attack and Dodge (using the appropriate buttons). Use the Wooden Plank James grabs from the window to land blows on the Lying Figure while watching out for its physical and acid attacks. Keep pressure on it until it goes down on the ground and use the same Attack button to stomp it until dead.
Continue through the house until you find a broken gap in a wall to slip through. Open the first aid kit on the desk to your right for a Syringe (strong health item) and then break the window open straight ahead with your plank to escape the house. After a cutscene, you can continue on from Martin Street.
At the northernmost point on Martin Street you'll find another Glimpse of the Past near a white picket fence (seen below).
Now run south and interact with the bloodied corpse on the pavement ahead to pick up a Matchbook from Neely's Bar, one of your next destinations. Also, pick up the Martin Street Note a few feet ahead of the corpse.
If playing New Game Plus, you can go to the Jewelry Store two doors north of Big Jay's and smash the display window on the left side to find the Blue Gem. This item is required for the UFO ending.
You can also go into the Pet Palace store directly next to Big Jay's, and in the back room you'll find the Broken Key Part (Paw) sitting on a table. This item is required for the Dog ending.
Big Jay's Cafe
Several monsters will now be active in various places around Silent Hill, so be sure to watch your back, pick your battles, and use your health items wisely.
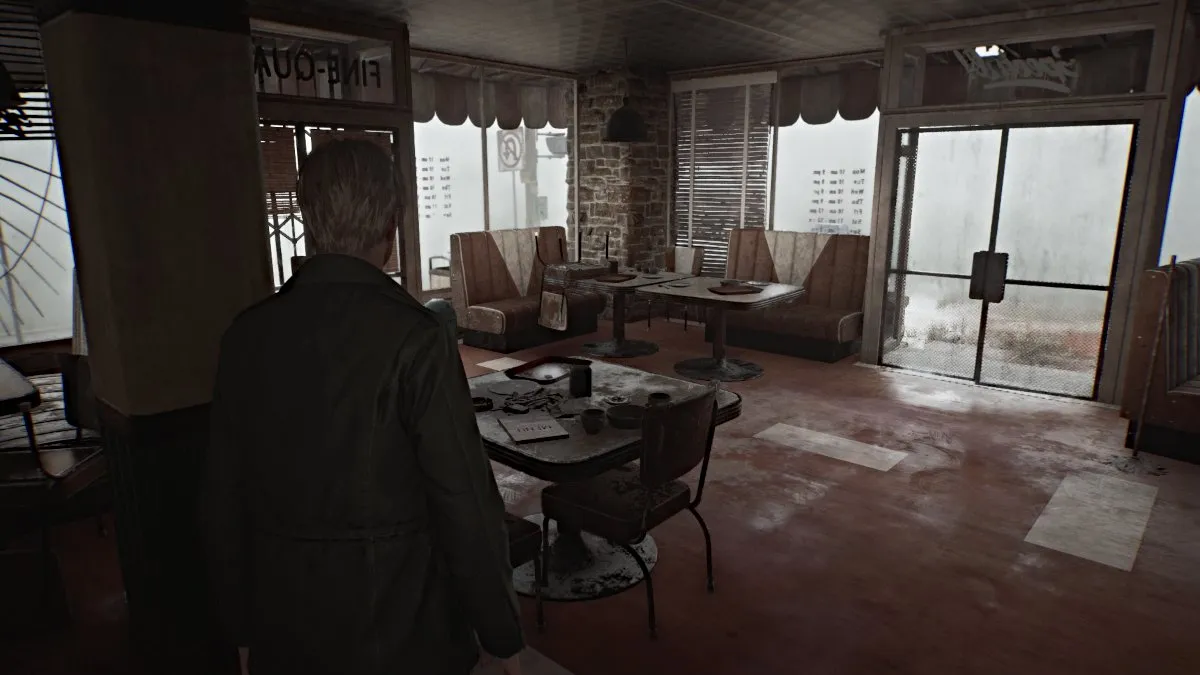
Continue along Katz St until you find the back door to Big Jay's cafe. Go inside and be careful of the Lying Figure lurking inside. Deal with it and head to the front of the cafe to find Big Jay's Note on one of the tables. A Health Drink will be on another table in the booth area. Leave the cafe's front entrance onto Neely Street.
I Love Groovy Music Shop
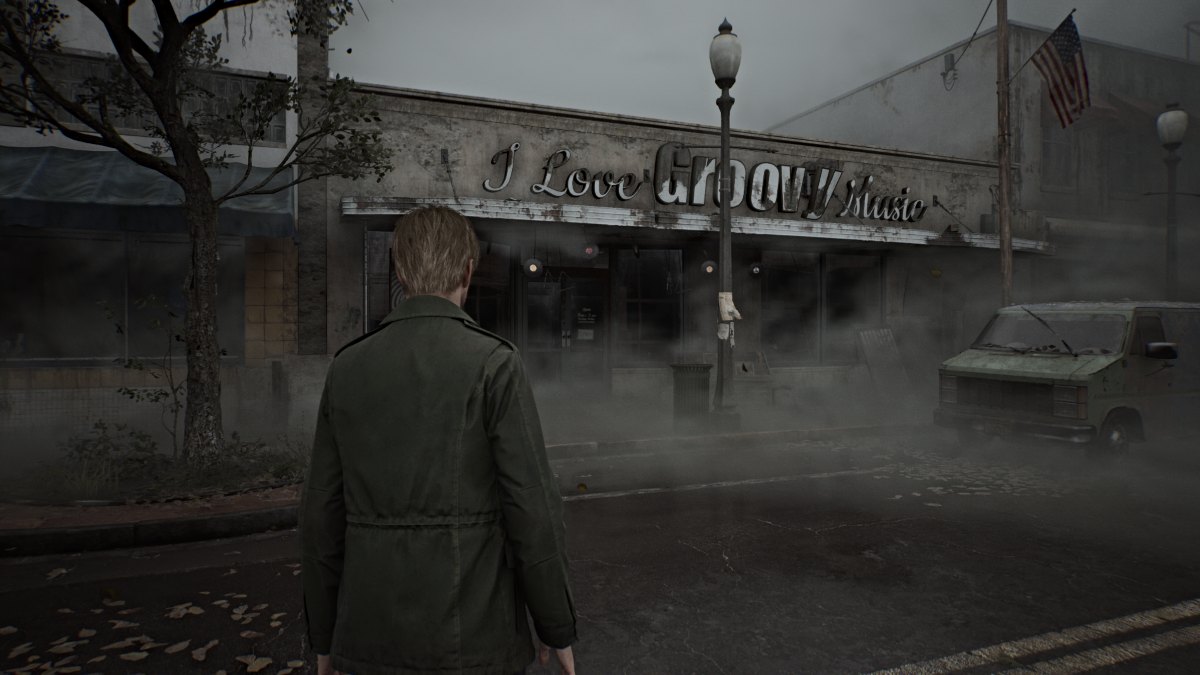
First, go north on Neely and break the windows of the nearby police car for your first batch of Handgun Bullets, which will come in handy later. When you reach the I Love Groovy Music Shop (easy to spot by the wind chimes), first detour to the alley opposite it for a Health Drink on a table.
Backtrack to the Music Shop and go inside, where two Lying Figures will be waiting. Do your best to deal with them one at a time, as you only have a plank to defend yourself with right now. Once done, gather the Record Store Note from the counter and then head to the back and smash one of the big windows to go into the record room. On the low table in the center will be Vinyl Glue and a Broken Vinyl Record.
Neely's Bar
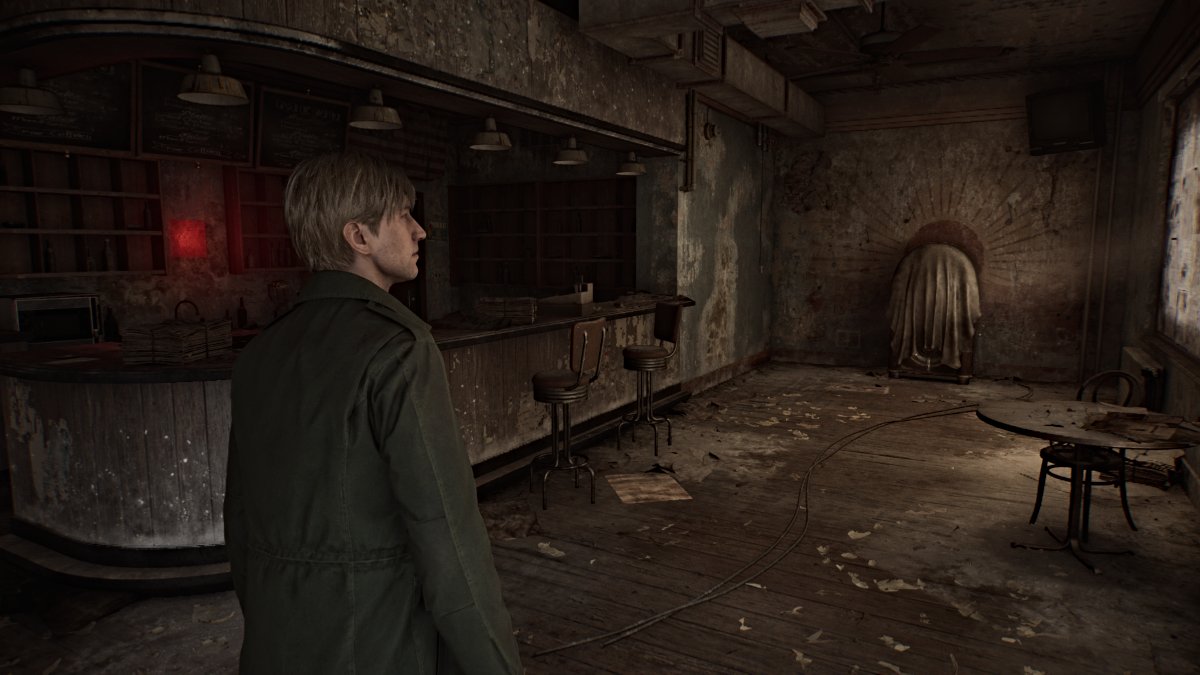
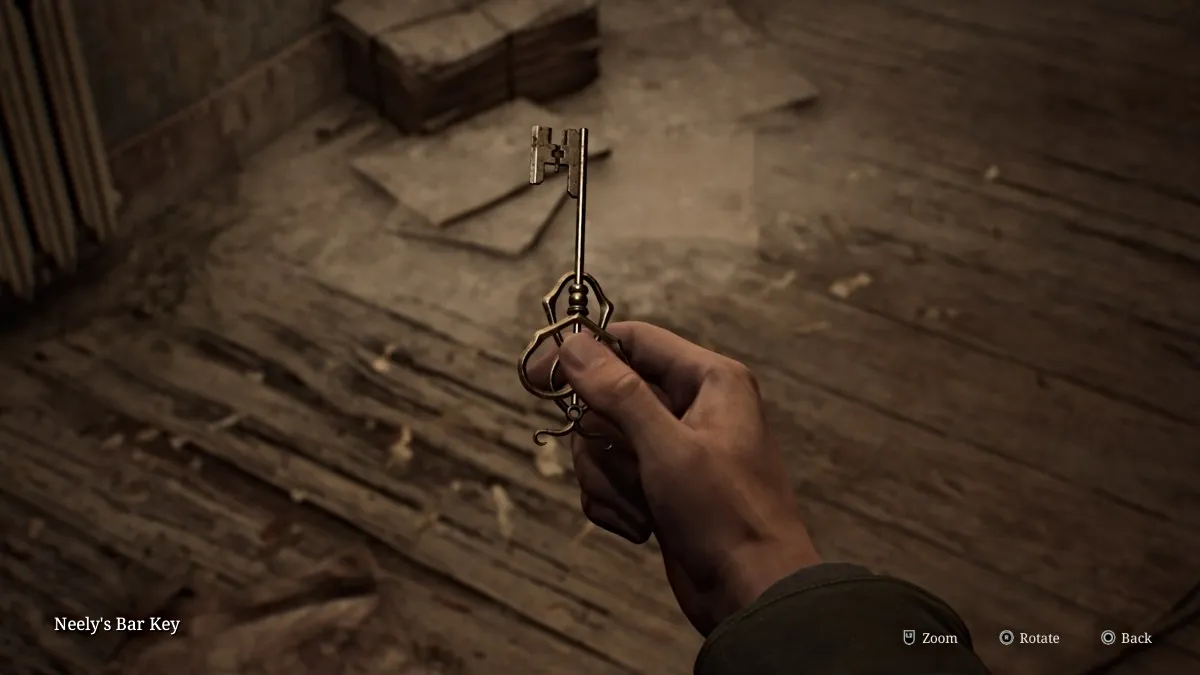
Leave the shop and finally make your way towards Neely's Bar. Inside it will be another Red Save Point on the wall to your left, Neely's Bar Note on the counter, and a locked door that requires a special key. On one of the windows is an unsettling message that reads "There was a HOLE here. It's gone now.". By the back wall is a broken jukebox which serves as the game's first puzzle.
Broken Jukebox Puzzle
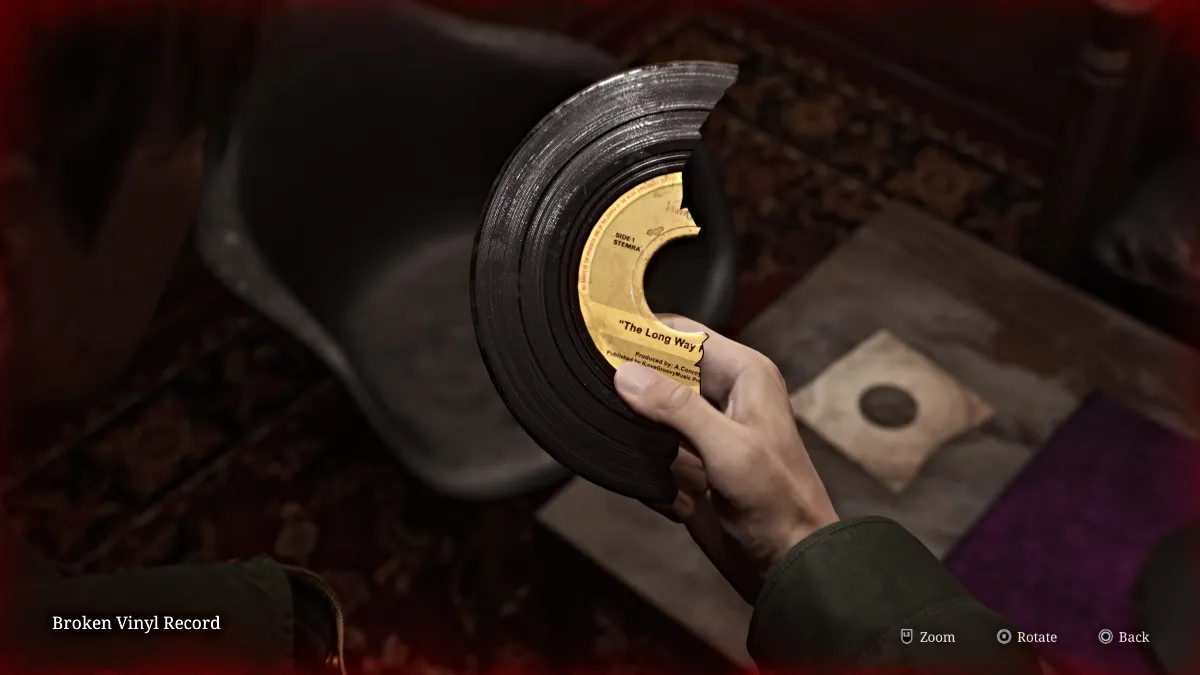
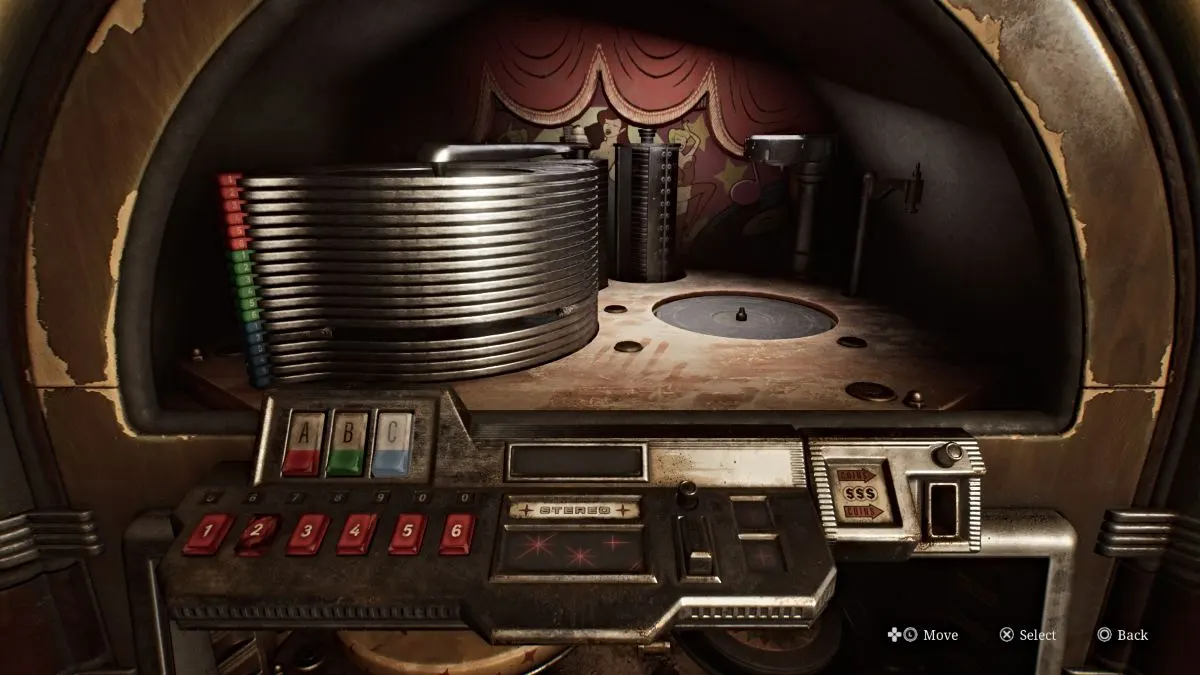
Inside it is half of a broken vinyl record sitting on a track waiting to be played. Interact with it to remove it from the machine, adding it to your inventory. Now, use the Vinyl Glue and the other half of the Broken Vinyl Record to combine both pieces. This will give you the Glued Vinyl Record, titled "The Long Way Home".
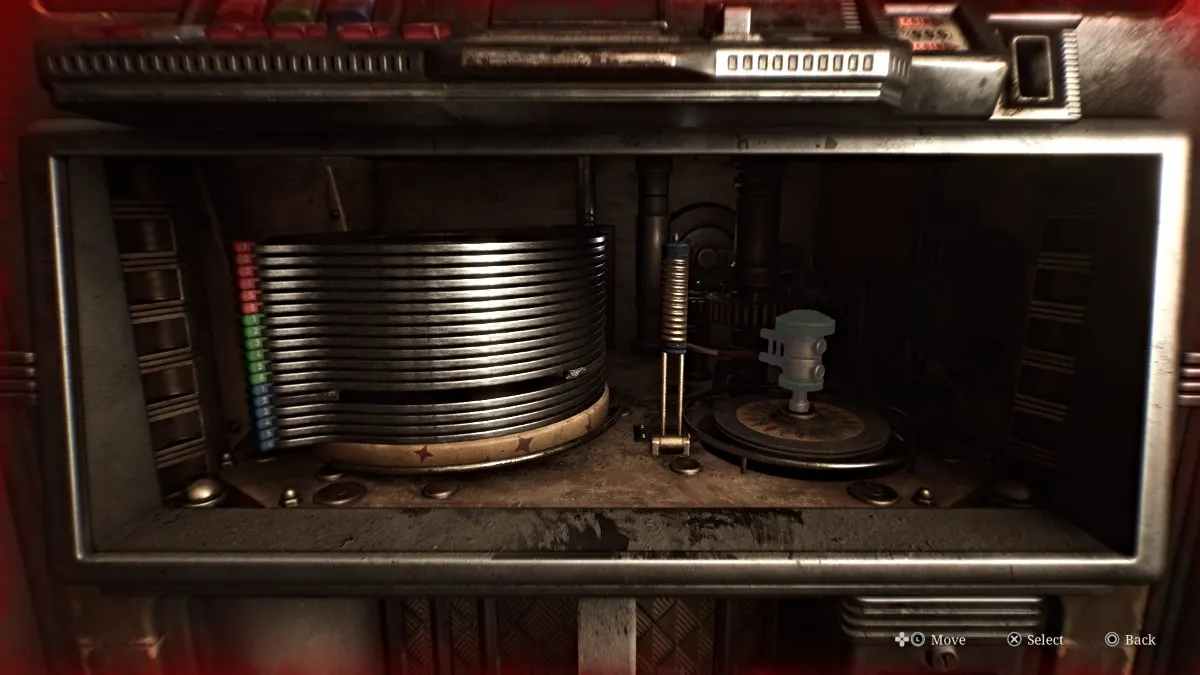
Next, you need to prepare the machine to play the record, and there are three parts inside that you can move that are colored blue, red, and green. Your first goal is to connect the red part to the green part so that it can move back and out of the way of the blue part, which you need to push down.
Once you've done that, press the green part until it pushes out the track for you to place the Glued Vinyl Record on. The track mechanism will then lift up, where you need to press the correct buttons to play the record. However, the '2' button you need is missing and you need a Coin as well. So leave the jukebox for now.
The Neely's Bar Note indicates that a man ran off with the button and half the record (which you already fixed) and that he lives in Apartment 9 on Saul Street by the pharmacy. The Saul Street Apartments will be circled on your map.
Happy Burger
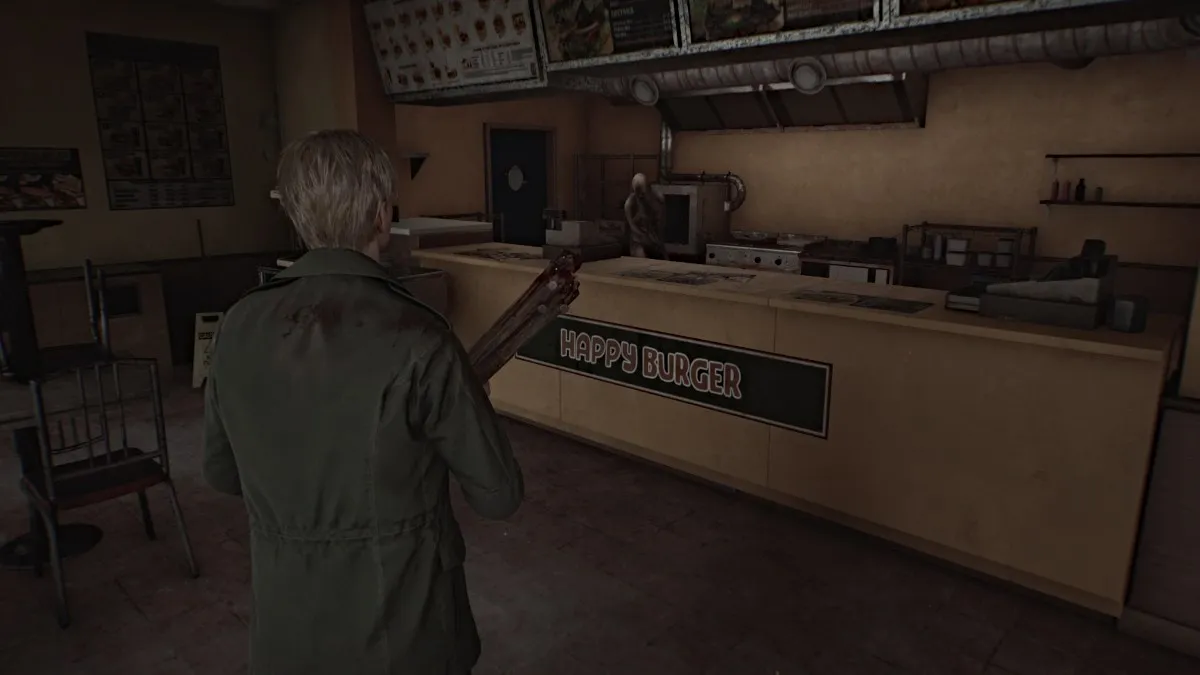
Make your way towards the Saul Street Apartments. You can check out Happy Burger along the way if you want, but it's got three Lying Figures lurking in and around it. All that's inside is a Health Drink (on the table right next to the window you jump through) and a Syringe (kitchen area) that's guarded by one of the monsters.
Unless you think yourself confident enough to fight or run past it, we otherwise recommend just grabbing the Health Drink for now and continuing.
Saul Street Apartments
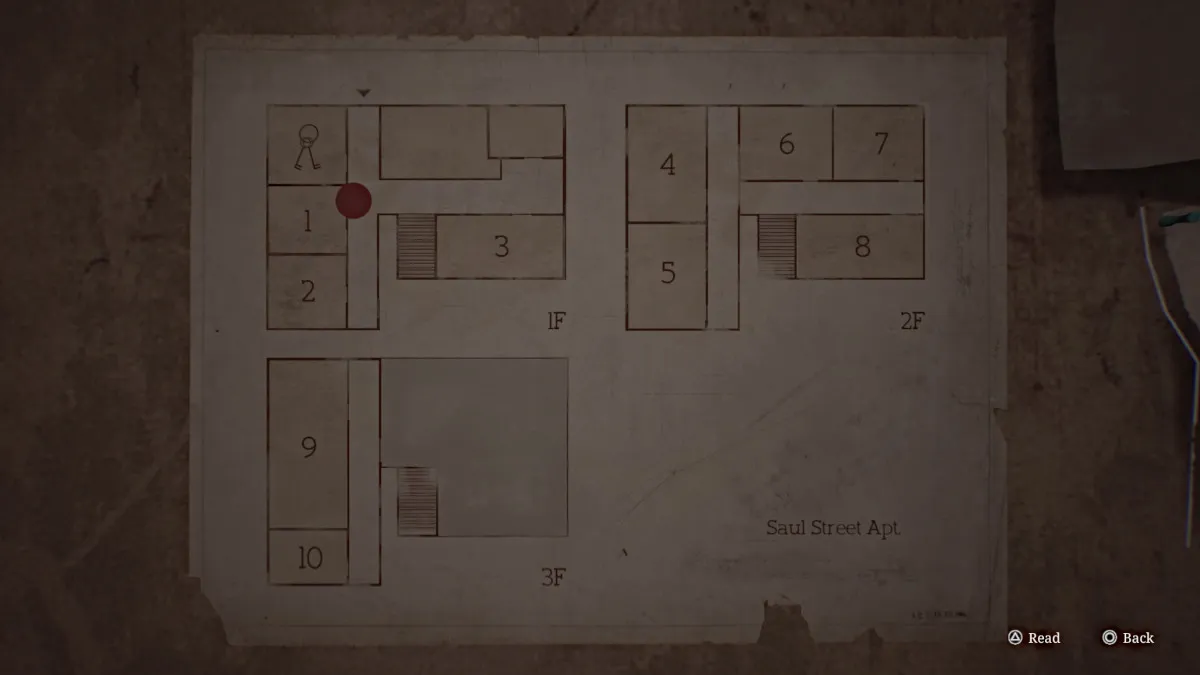
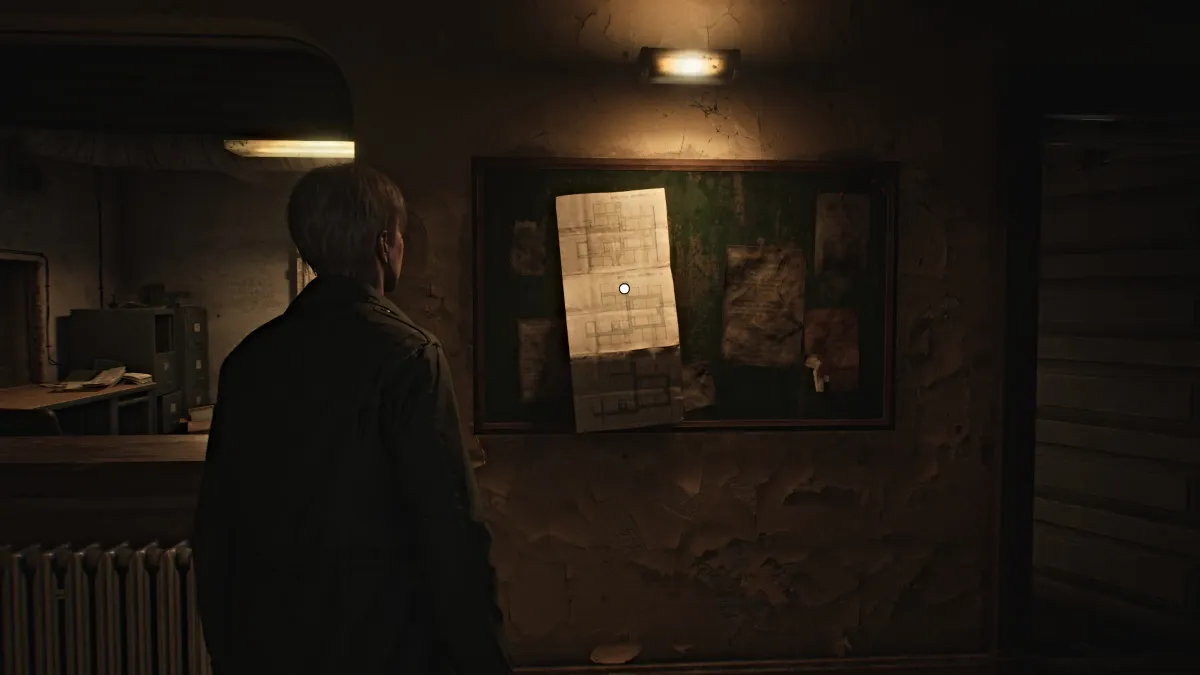
Enter the Saul Street Apartments and make note of the office immediately to your right. The door to it is locked, but you can still get in by going further down the hall to the next doorway on the right (Apartment 1), where you can push a dresser out of the way. Inside the office, you'll find the Apartment 5 Key and a Small Note about a leak in there as well. Also, make a note of the building map on the wall in the hallway (seen below) to find your way to the right apartment.
Before you head there though, make a left past the stairwell and go through the cracked door on your left and opposite Apartment 3, which leads into Green Pharmacy. A Syringe will be in a first aid kit on a table to your right as you enter.
Now backtrack to the stairwell that leads to the second floor of apartments and go right until you see a crawlspace next to Apartment 7. Go through it and inside you'll find the Tenant's Note. Go back through the crawlspace or the door you can unlock and now head for Apartment 5. Use the key to get in and look for a gap in a wall that leads you over to Apartment 4. During a cutscene, the noise James causes will cause a disturbance on the third floor above, in Apartment 9 where you need to get to. Fun.
There are no items to pick up here so go through the next wall gap that leads to the other side of the hallway blocked by debris. Go through the open window to the balcony and go up the fire escape stairs until you find another open window on the far right at the top. As soon as you jump through the fire escape breaks, so no going back.
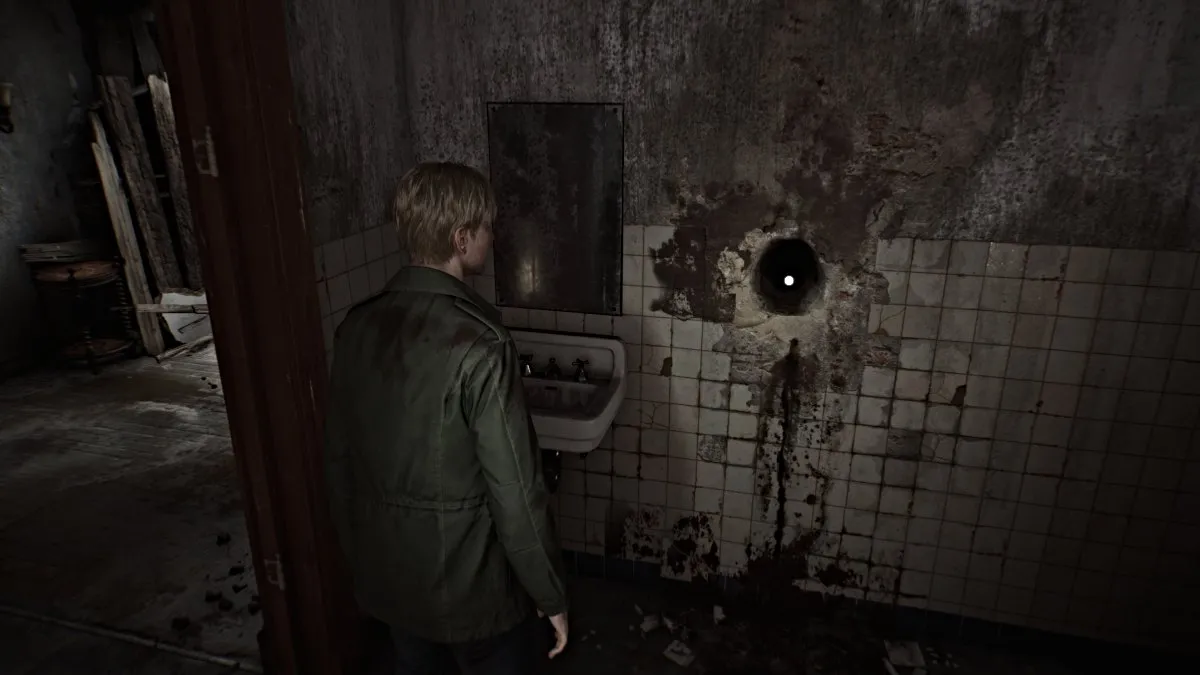
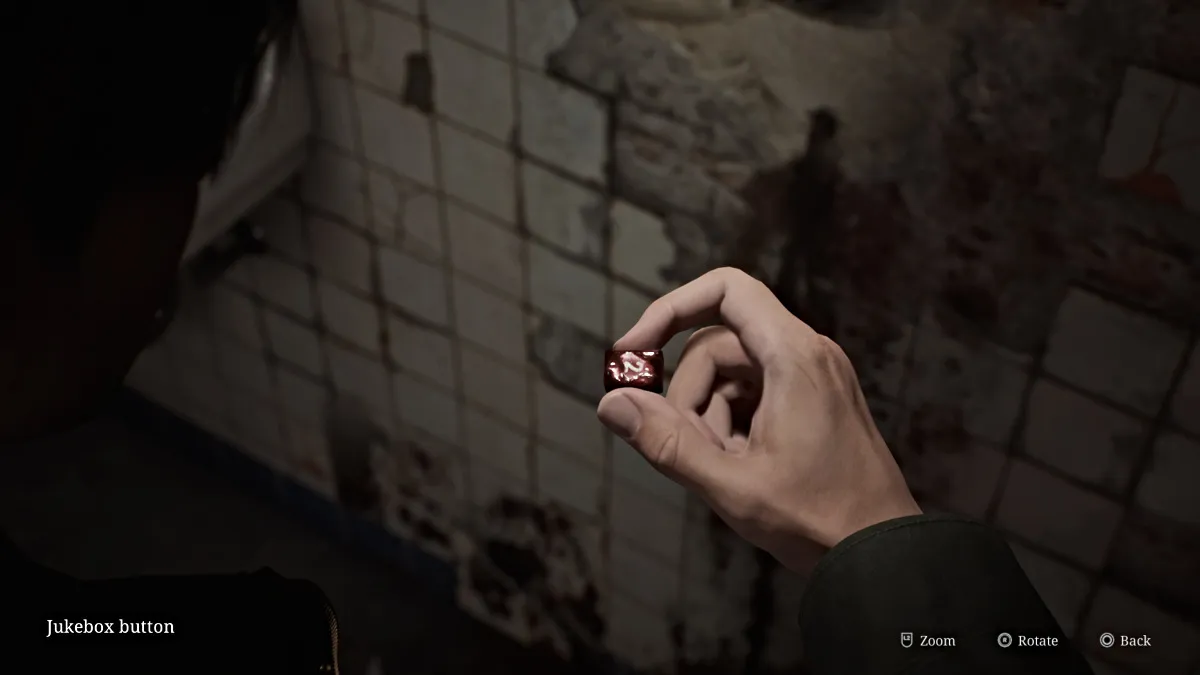
Go across to the door next to the bathroom, and a cutscene will play where James attempts to open the door only to find it chained shut, a horrible smell from within, and his hand from the doorknob stained with a black substance. Now, go into the bathroom next to it where there will be a large hole in the wall (seen above). Interact with it to 'search' it (lovely sounds included) until James pulls out the missing '2' button for the jukebox.
Now head out onto the roof through the nearby door and you'll see a ladder ahead of you.
If you're playing New Game Plus and you want to get the UFO ending, when you hear strange noises on the roof, go into your inventory and inspect the Blue Gem. Once it flashes, you can move on.
The door to your right leads to another indoor stairwell, but it's completely destroyed so that isn't an option. Go down the ladder and you'll end up in the building's trash area. Exit through the door that was locked from the other side.
You can continue down Saul Street, and on the left will be a Motor Home behind an open gate. A Lying Figure near it will approach you, so deal with it and then go inside. Grab the Motor Home Note and a Health Drink, then the Saul Street Note on the ground when you leave that tells you, "They can be killed. Just make sure they stay down".
Also, be sure to grab the Old Map (another memo) lying on the street near the Motor Home as well.
Grand Market
You still need the Coin to play the record in the jukebox, so don't head back to Neely's Bar yet. First, go past it up Neely Street until you find an open alleyway with a back door to Grand Market. You need a code to unlock the door, and the Code Note found near a truck on Sanders Street will give you a hint.
Essentially, the person who last attempted it got up to the number '4439' and felt they were "so close now". That means you can punch the subsequent numbers in until you get it right, but to save you time, the code is '4444' (Standard Puzzle difficulty). Inside, you'll find a whopping four Health Drinks and two boxes of Handgun ammo, so the pit stop is well worth it.
Texan Cafe
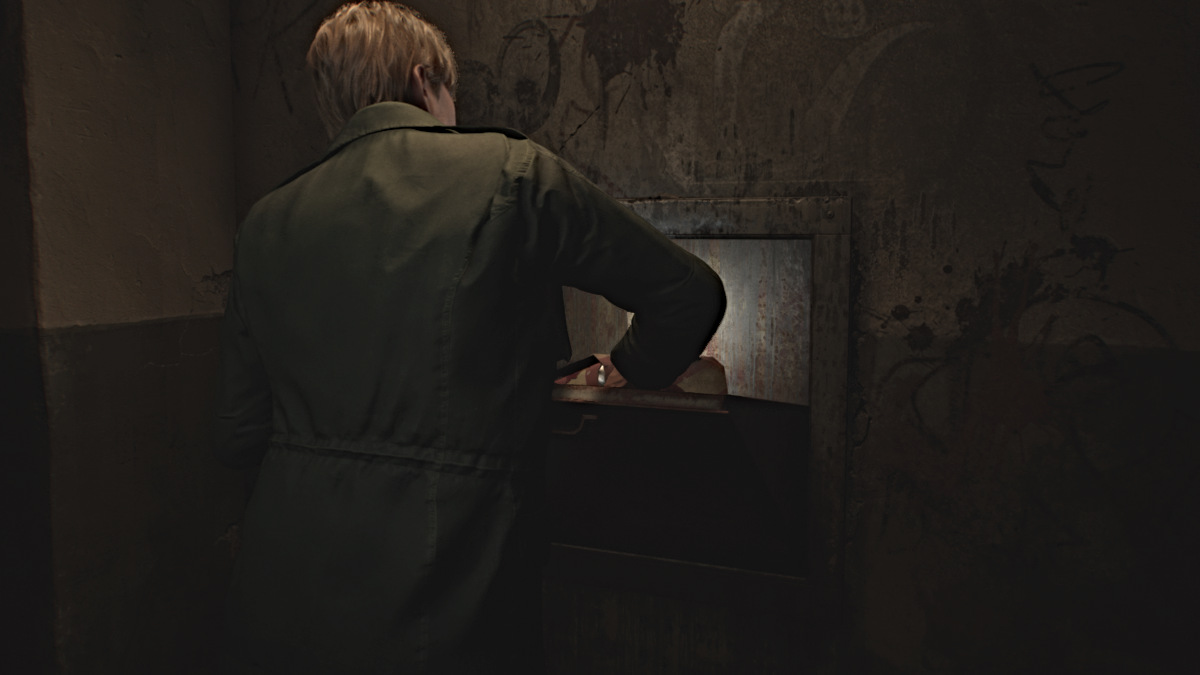
Make a right onto Katz Street and run all the way down to Texan Cafe at the far end, by the big barricade. Go through the unlocked side door to the register behind the counter. Use the key already inside the register and the button at the bottom to open the drawer and retrieve a Neely's Bar Coin. Watch out for the Lying Figure that ambushes you afterward.
Now it's time to head back to Neely's Bar, but before you do, make sure you've grabbed the Sanders Street Note from the corpse lying near a big rig truck halfway down on Sanders Street.
Back to Neely's Bar and Finishing the Jukebox Puzzle
Insert the Neely's Bar Coin into the jukebox and press the 'C' and '2' buttons to finally play the record. A familiar tune plays while James experiences a disjointed flashback. After finishing (or breaking rather), the jukebox spits out the Neely's Bar Key, which you can use on the nearby locked door.
Go through the door and immediately look to your right. A crawlspace can be seen high up on the wall, and you'll need to use the cart blocking the way to reach it. Push it towards the wall, then climb up and through.
Grab the Health Drink from the first aid cabinet on the wall and then go into the next room and pick up the Back Room Letter from the desk, indicating that you need to find a green-blue car with a plate ending in '06' close by. Leave out the back door which leads to another back alley area full of cars.
The only car in the area that has something in it is the bright green car to your right at the intersection with Martin Street. A Health Drink will be sitting in the driver's seat. Backtrack and keep going straight towards the question mark on your map that James drew. Go through the barricade door and the abandoned green-blue car will be to your right, with a pile of bloody clothes next to it.
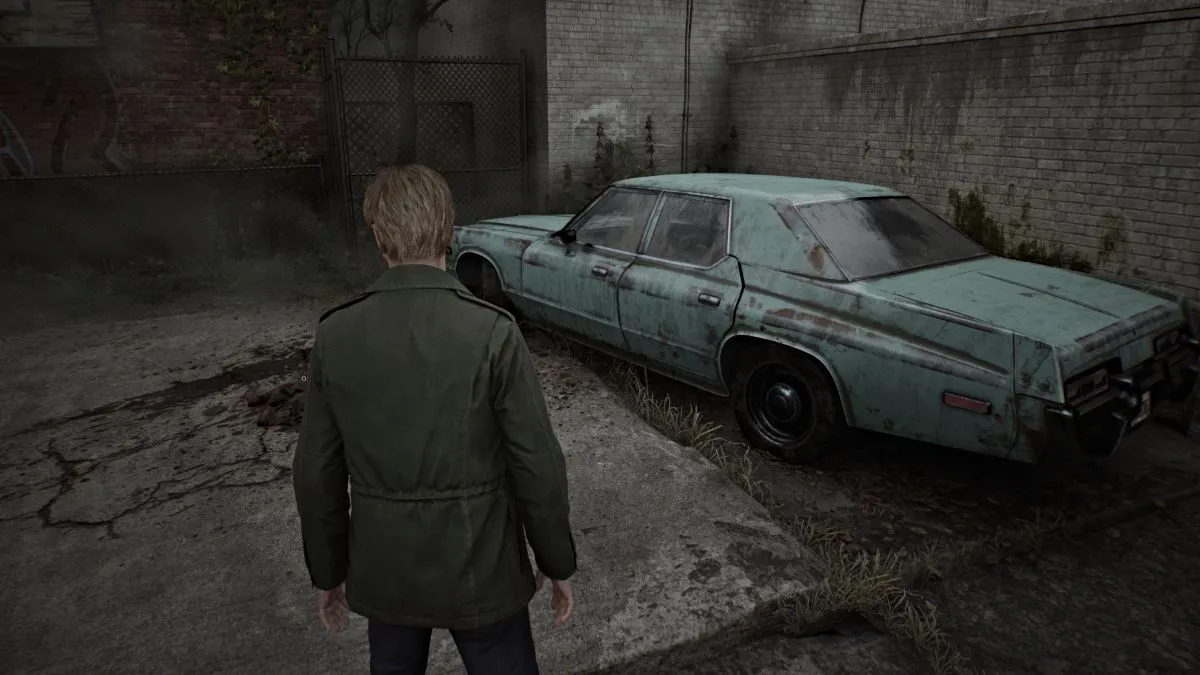
Interact with it and James will pull the Wood Side Apartments Key from it before being ambushed by multiple Lying Figures. You can't fight them all so look for an escape through a nearby alley (the door you came through will be locked so don't try). The alley will bring you back to Katz Street, which is also full of Lying Figures now that you need to avoid to preserve your health.
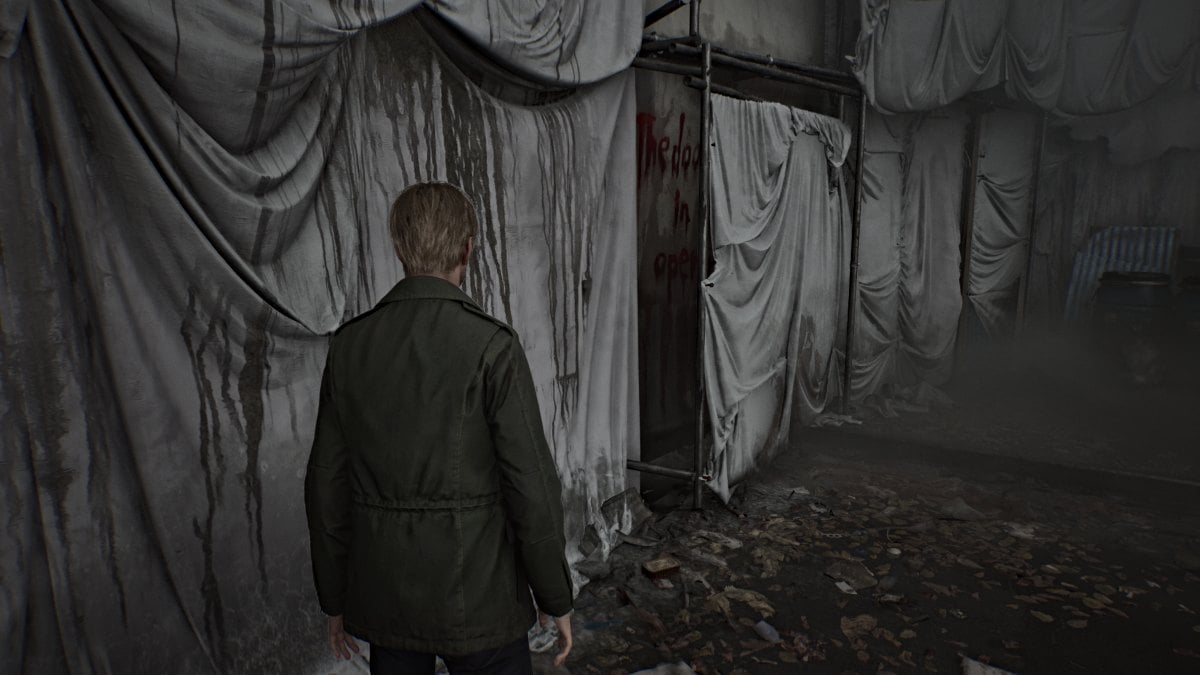
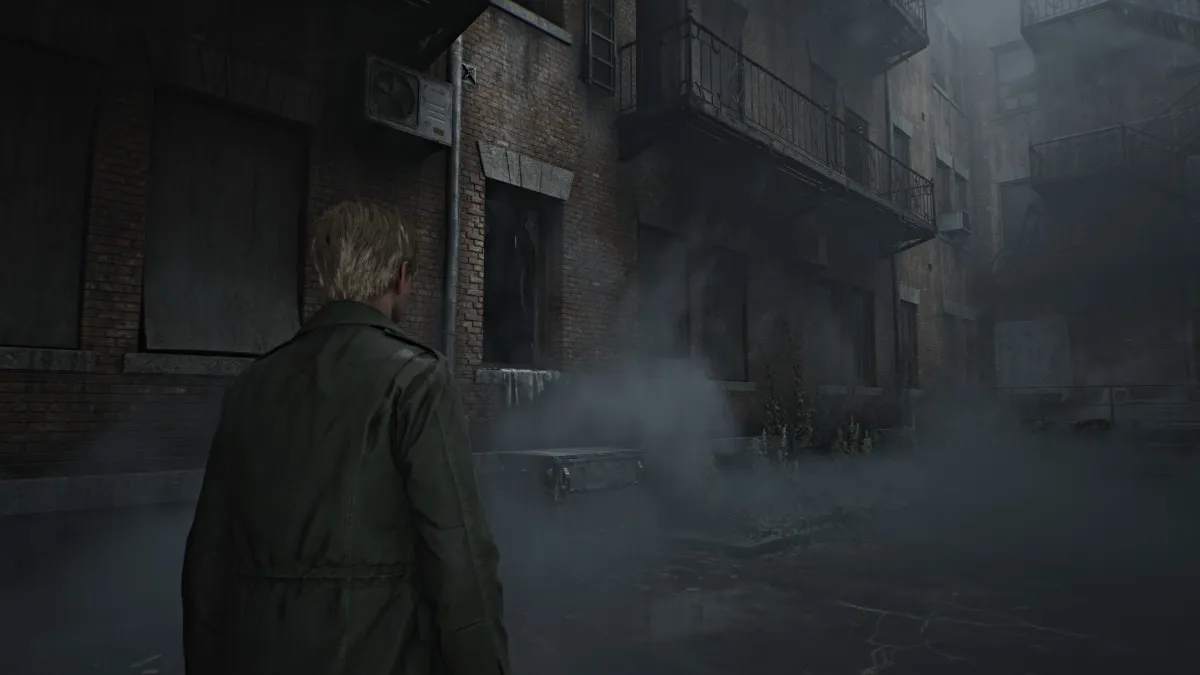
First, run west all the way down Katz Street until you reach the huge barrier. Grab the Barrier Note memo lying on the ground, and look for a gap in the barrier where you can see a phrase written in blood (seen below) for another Glimpse of the Past.

Now backtrack until you see the entrance to the Wood Side Apartments on your left. Before you go in, run to the dumpster to the right of the entrance (seen above) and interact with it for one more Glimpse of the Past. Grab the Texan Cafe Flyer memo off the nearby board and then use the key to go inside.
Silent Hill 2 Remake Wood Side Apartments Walkthrough
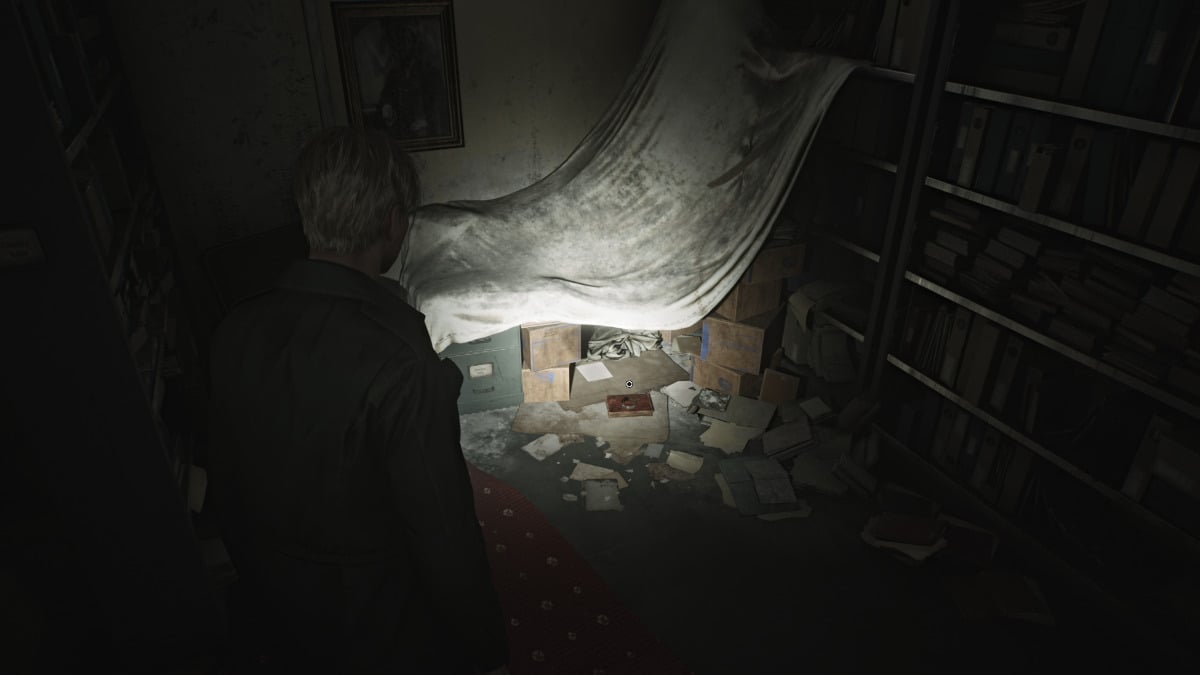
Head into the lobby and grab the apartment building map from the bulletin board on the wall. It will show you the layout for Wood Side Apartments 1F-3F, and you can cycle through each floor using the appropriate button. Next, go into the lobby office and use the Red Save Point to your left. Go into the room beyond it and open the cabinet to your immediate right for Handgun Ammo.
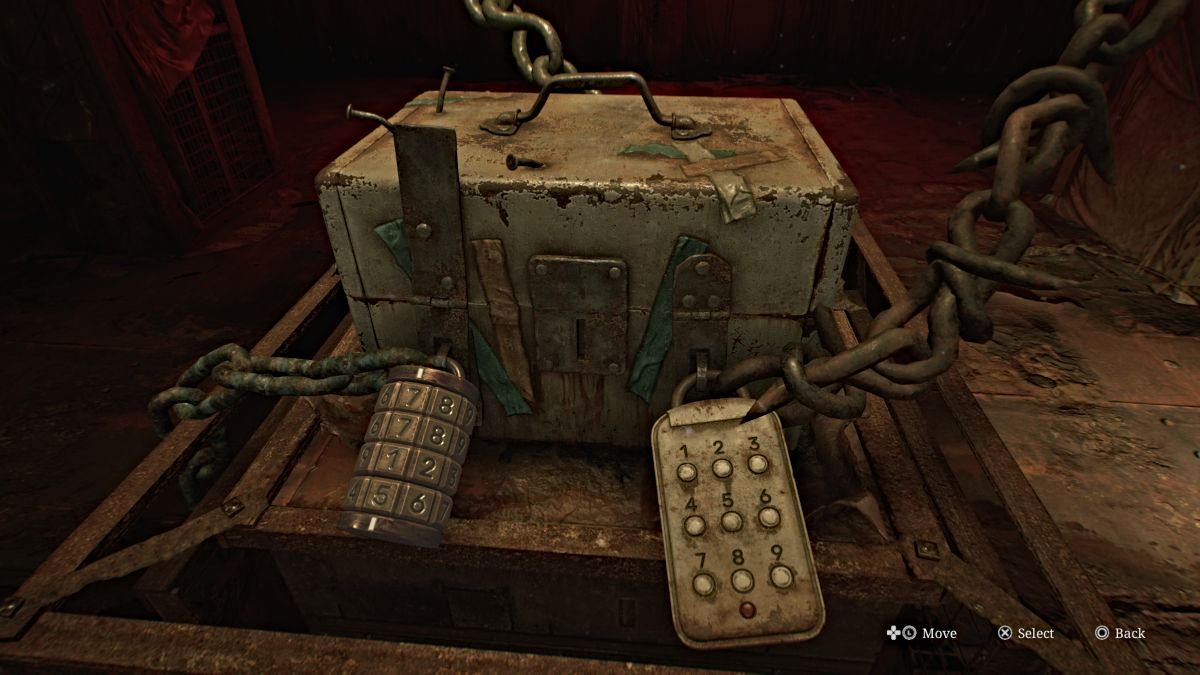
Under a sheet on the other side of the room, James will uncover a strange cabinet that serves as the next puzzle for you to solve. You'll need to find special coins to place in the indentations, so we'll come back to it later.
Check the janitorial bathroom to the right of the office for more Handgun ammo. The other doors on that side are locked for now, so head back to the left side of the floor. Go towards the back left where a shelf full of document binders is and grab the Administration Note memo from it, which talks about gunshots coming from Apartment 217. Also, grab another Health Drink from sitting under the stairs.
All other doors on the first floor are locked, so for now head upstairs to 2F.
Woodside Apartments (Floor 2) - Flashlight
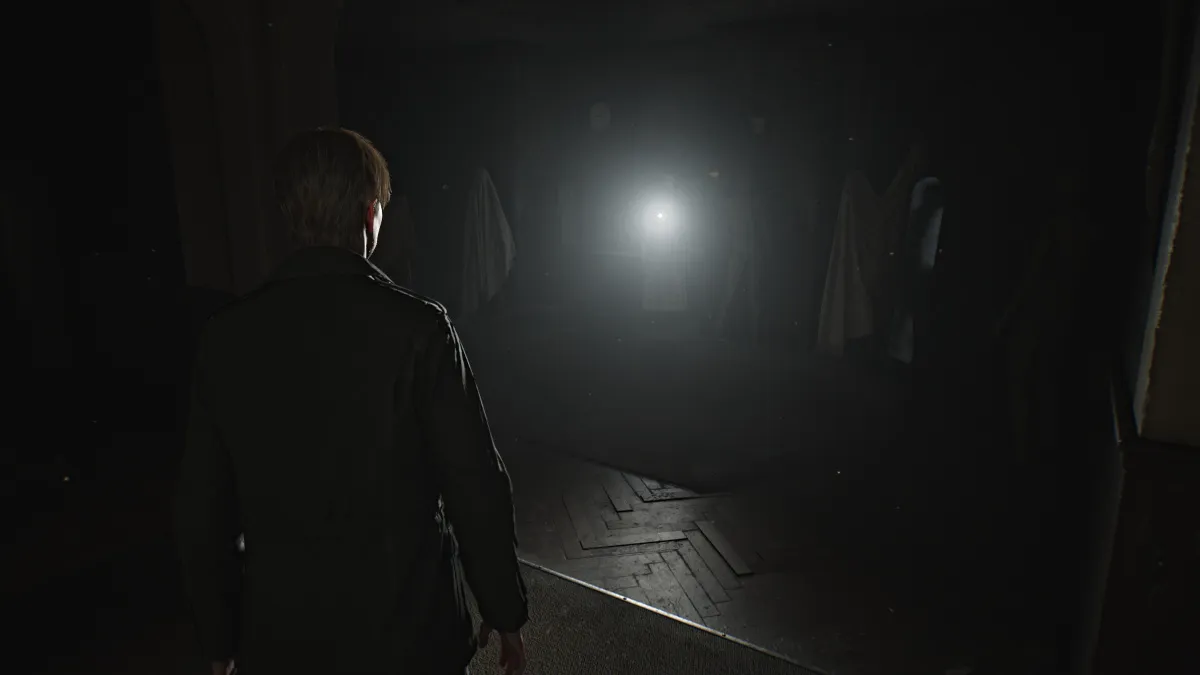
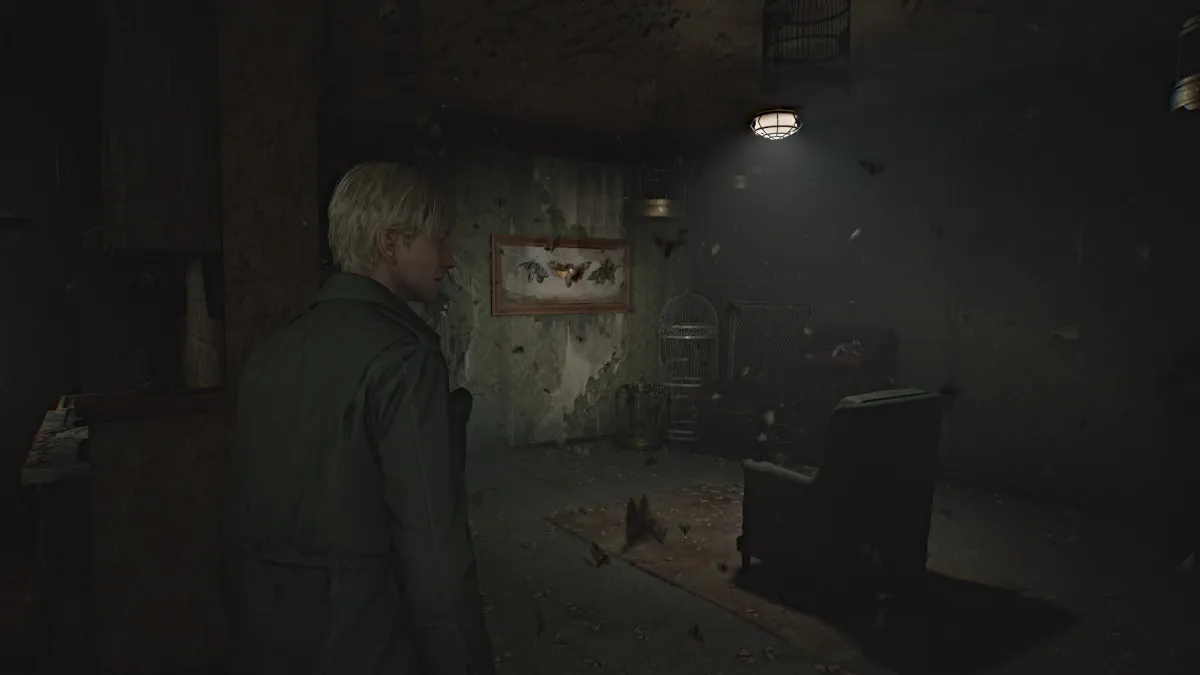
Much of the second floor is currently inaccessible, except for the apartments to your right. The door to Apartment 202 is wide open, so go inside. An unusually bright light can be seen in the living room, and it turns out to be a mannequin wearing Mary's outfit, with a Flashlight tucked into it. Before you take it, first go over to the kitchen area and grab a Health Drink from one of the cabinets.
Now go over and claim the Flashlight, which will be very beneficial going forward. A new type of monster hiding behind it called a Mannequin will ambush you, so after the brief QTE use your plank to take it down. While it doesn't spit acid like the Lying Figures do, its physical hits are brutal so be careful. They also prefer sneak attacks and can even trick your radio sometimes by staying still.
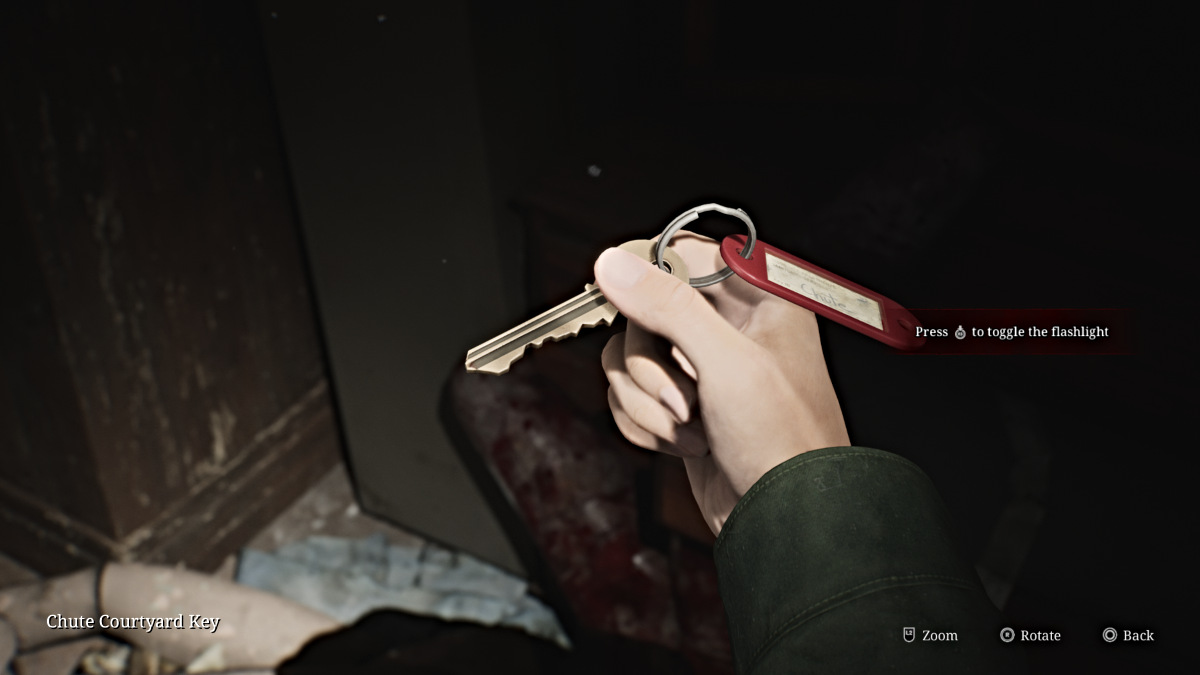
Afterward, grab the Chute Courtyard Key from the nearby dresser and then leave the apartment.
Run up the stairs past the third floor (currently locked) until you reach a dead end. More Handgun Ammo will be on a small table here. Run all the way back down to the first floor.
Wood Side Apartments - Chute Courtyard and a Strange Girl
Use the Chute Courtyard Key on the door to the left of the janitorial bathroom, which will take you outside to an inner courtyard where the building's main trash chute is. Notice an open window to the right of the chute and pull the nearby handcart towards it to climb through into Apartment 112.
In the room immediately to the left, find Handgun Ammo in a dresser drawer. On a table in the kitchen to the right is a local news article about the convicted murderer Walter Sullivan. Leave the apartment and go right down the hall to Apartment 109.
A Mannequin will be hiding underneath the table in the living room, so prepare to fight it. Afterward, grab Handgun Ammo from the nearby bedroom and then leave the apartment. Continue down the hallway around to unlock a door on your right that leads out to the opposite side of the Chute Courtyard. Then continue ahead to see a key on the ground blocked by some bars. Interact with it to cue a cutscene.
After the young girl kicks the key and runs off, take the shortcut through the courtyard back to the lobby area. You'll notice that both sides of the first floor are now fully accessible and full of monsters, so tread carefully. Head down the right side first, since that's where you need to get the key from.
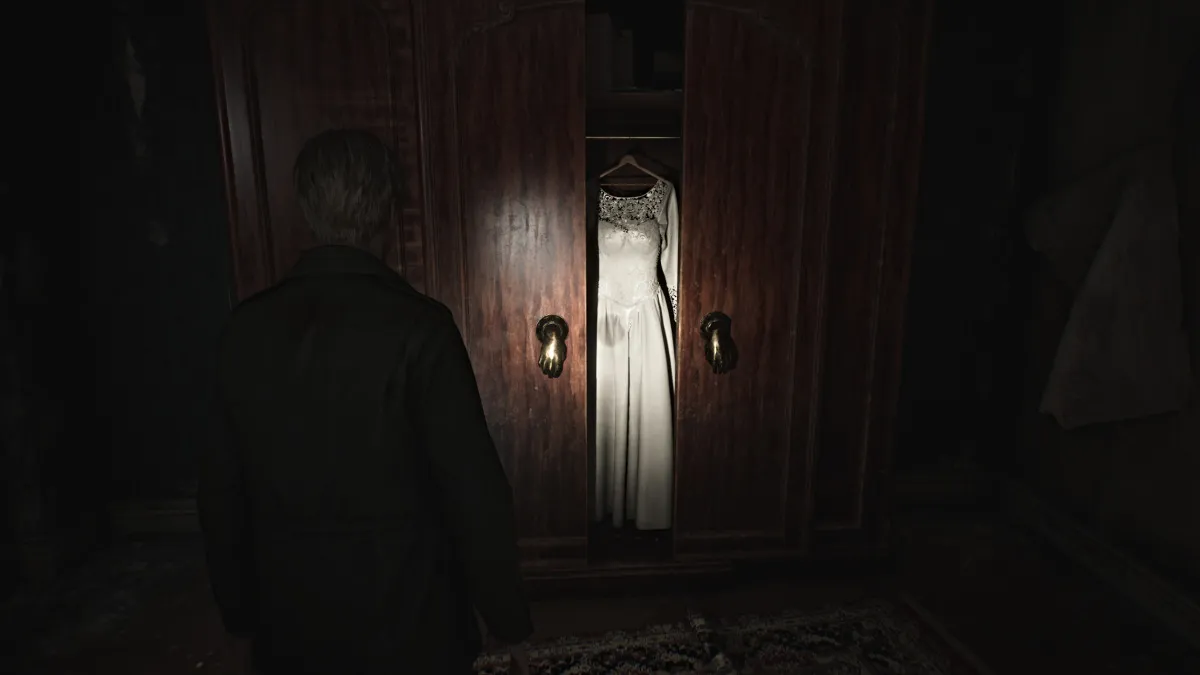
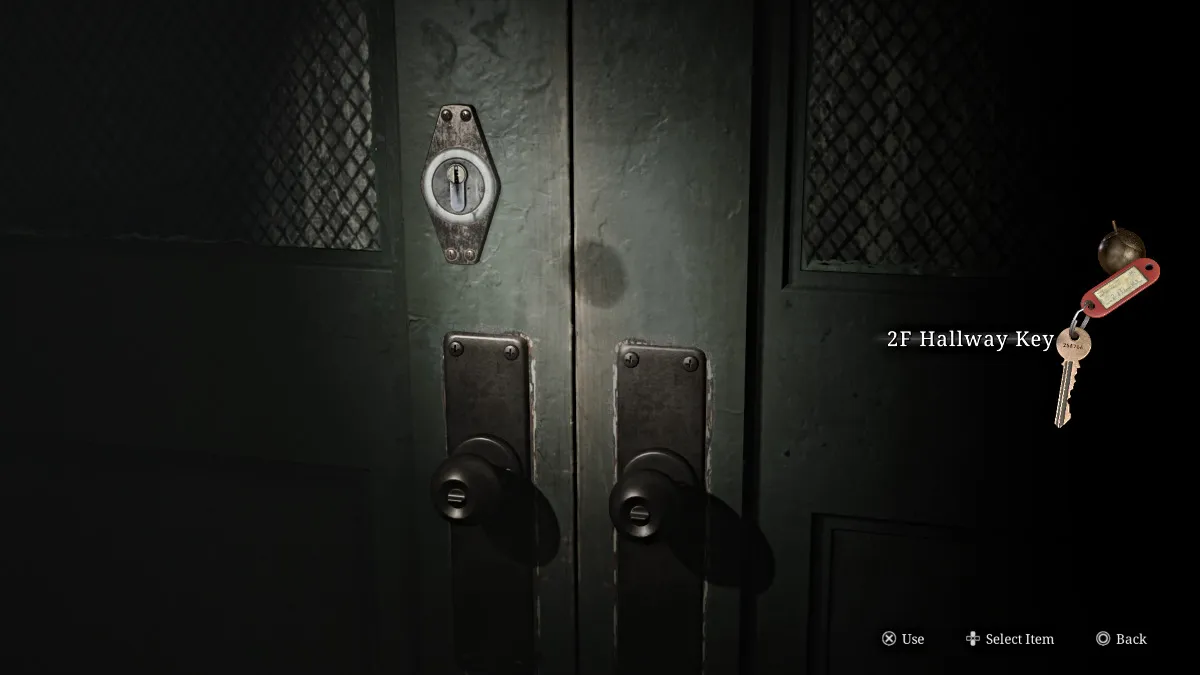
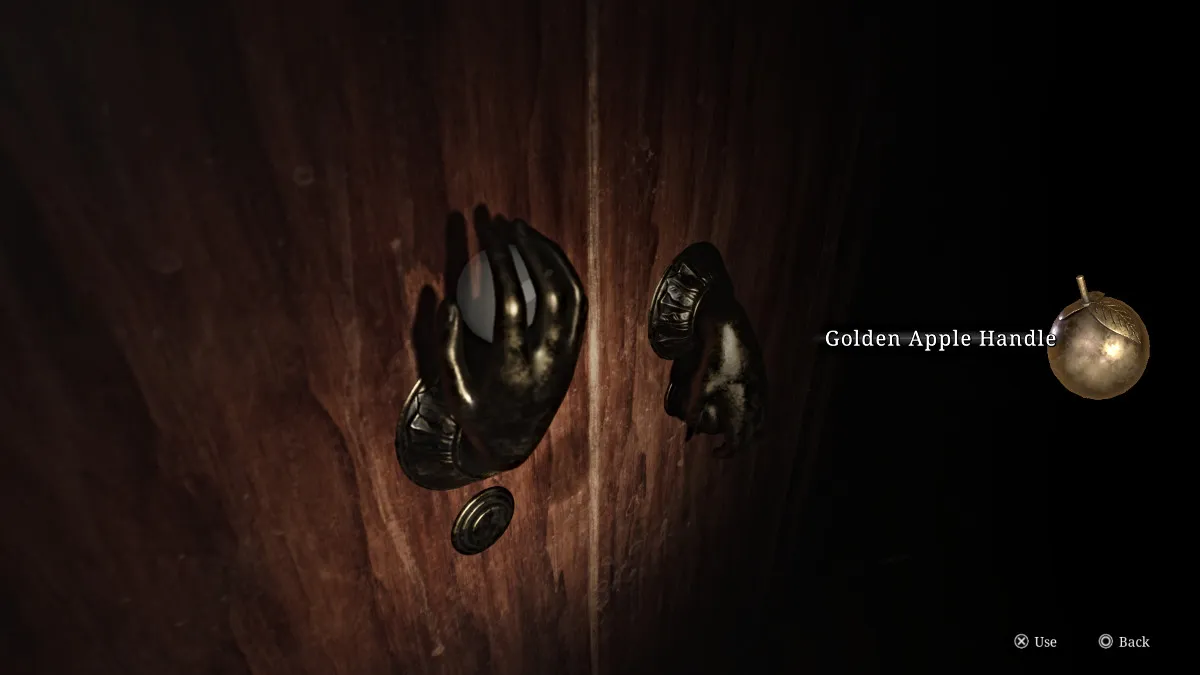
Stop by Apartment 108 and go to the large wardrobe in the bedroom fitted with strange, hand-shaped handles (seen above). Interact with the left hand so it turns downward and knocks off the Golden Apple Handle. Take it and leave the apartment. Continue down the hallway to claim the 2F Hallway Key by the bars. Quickly run into Apartment 107 opposite it and grab a Health Drink from the bedroom's dresser then leave.
The door to Apartment 106 is now open with a Lying Figure blocking your path. Defeat it and run into the apartment to grab some Handgun Ammo from a cabinet in the living room. Continue back towards the left side of the building.
After dealing with more Lying Figures, enter Apartment 102 and go pick up a Strange Photo sitting near a TV labeled "Valentine's Day".
Wood Side Apartments (Floor 2) - Handgun and Meeting Pyramid Head
Head back up to the second floor with your new key and unlock the green double doors to your left, making the rest of the floor accessible. As you go down the hallway, a gap in a window on your left reveals a baby carriage sitting in an empty swimming pool outside the building. You'll want to remember that.
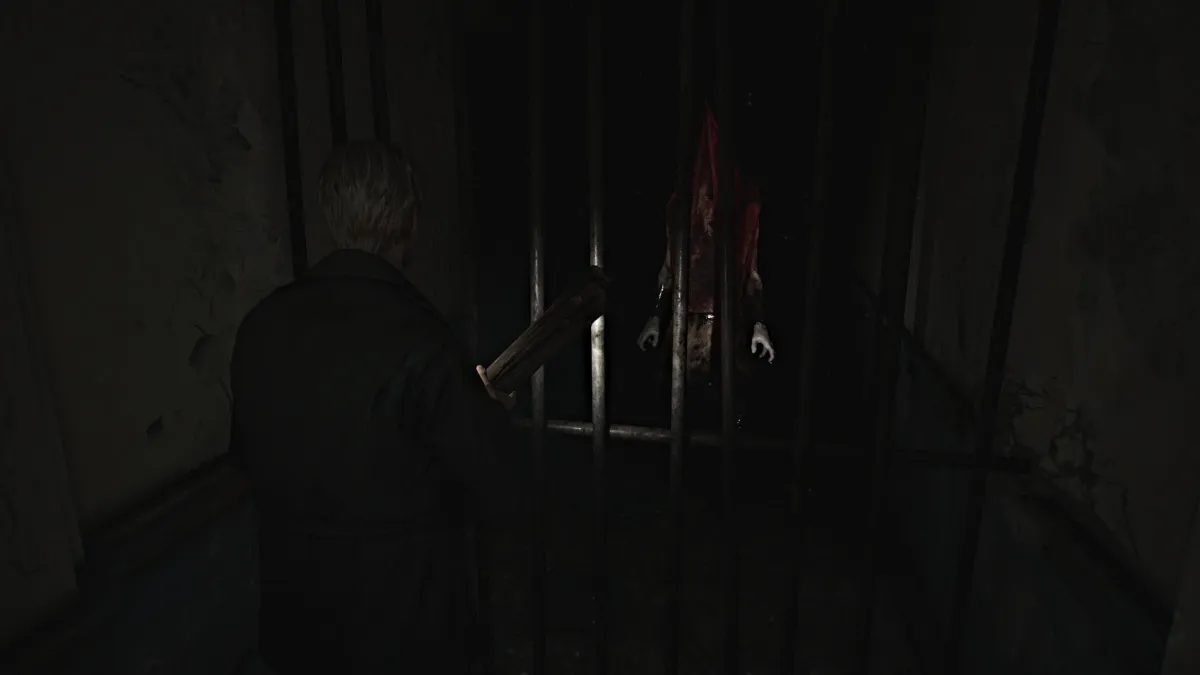
Continue down the hall and make a right until you see something red glowing in the distance. Approach it, and it turns out to be none other than Pyramid Head, staring at James from behind another set of bars. As unsettling as it is, he doesn't do anything (for now), so backtrack a bit to Apartment 213.
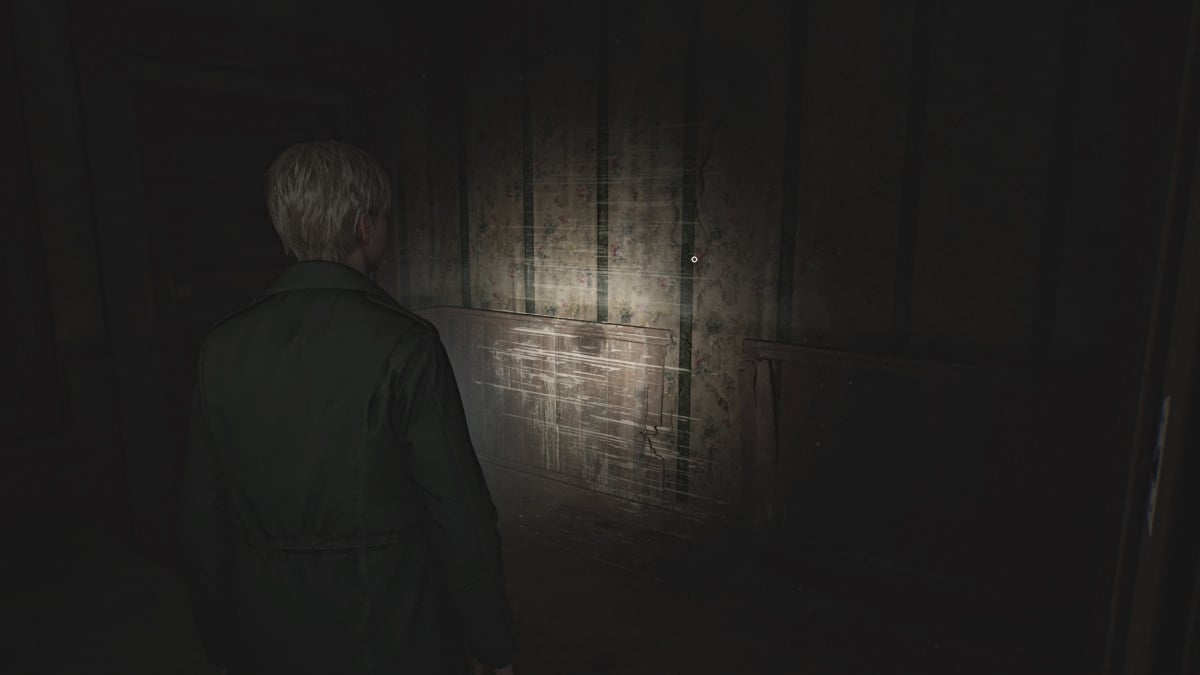
Inside there, look for another Glimpse of the Past spot on the bedroom wall (seen above), then go to a gap in the wall near the kitchen that leads to the other side of the hallway blocked by a broken door. Make your way to Apartment 217 at the end.
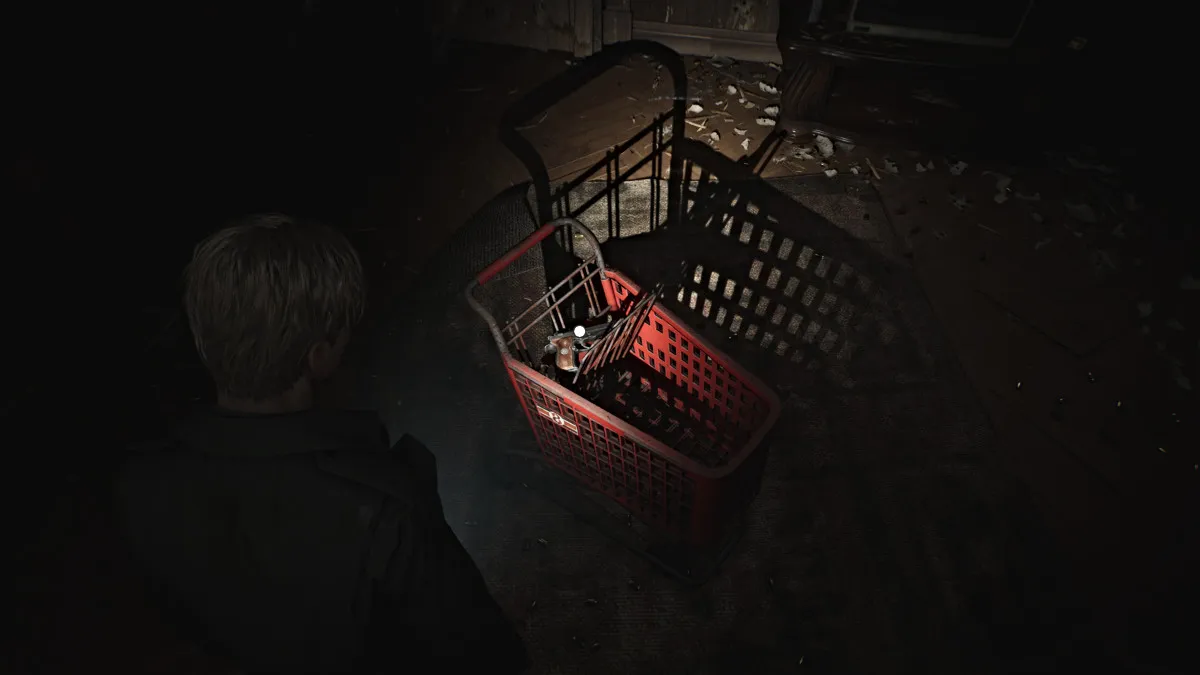
Go inside to see a living room full of bullet holes and shell casings, with a red shopping cart in the middle. Look inside it and you're rewarded with a Handgun, your second weapon so far. Also, as you'd expect, the apartment is full of Handgun Ammo to claim so check everywhere. If you've been diligent about collecting ammo up to now you should have at least 20 rounds or so.
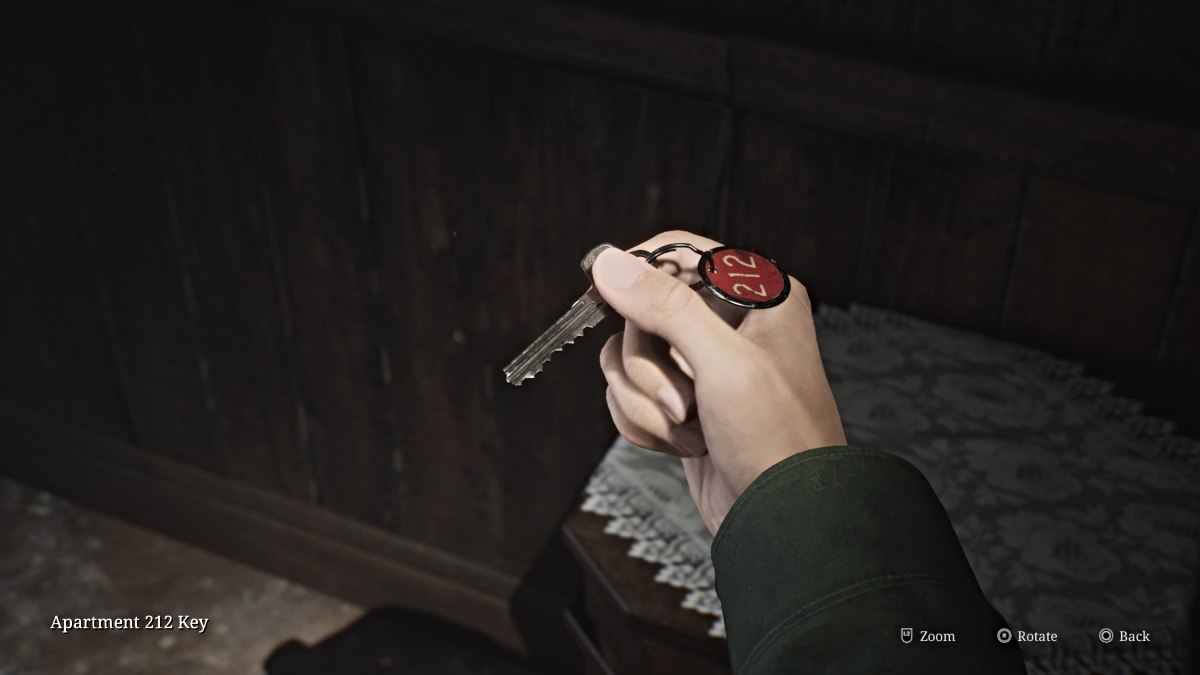
Leave the apartment and go back through the wall gap into 213, where a mysterious figure covered and soaked in blood is sitting in front of a static TV. Interact with it for a brief cutscene, then grab the Apartment 212 Key from the nearby dresser. Leave the apartment and you'll notice Pyramid Head is gone. Use the key to enter the other apartment.
Grab a Health Drink from the kitchen inside, then head through the open door to the balcony. Go across it to the apartment on the other side, where you'll find a Mannequin along with some Handgun Ammo in the open fridge. Leave the apartment and head down the hall and around to the southeast side of the floor. Along the way, go out on another balcony and pull the nearby lever to lower the fire escape to the ground level for another shortcut.
Wood Side Apartments (Floor 2) - Safe Puzzle and North Staircase
Go into Apartment 207 where you'll find a Lying Figure, a Mannequin hiding in the bathroom, and Handgun Ammo.
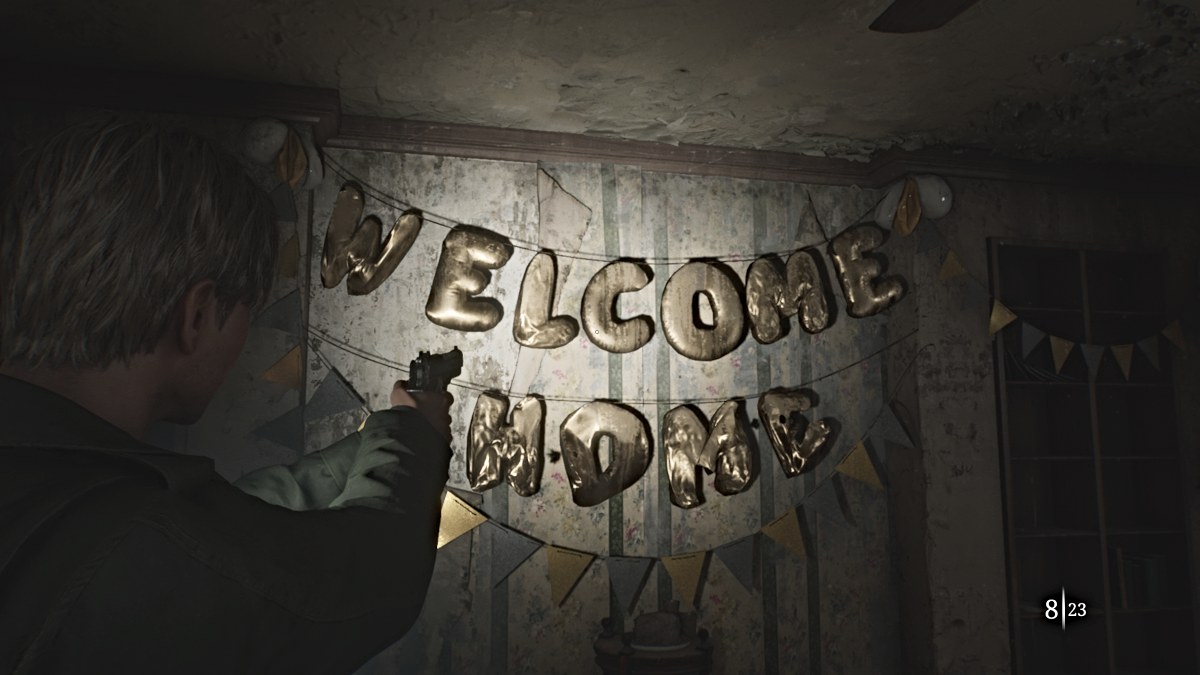
In Apartment 207 you can unlock the 'Let's NOT Party!' hidden achievement by shooting every balloon in the "Welcome Home" sign with your Handgun. It's highly recommended to reload your last save afterward, to replenish the bullets you used, or on New Game Plus once you have the Chainsaw to rely on.
205 is blocked from the balcony so head back up to the hallway and to Apartment 208 instead.
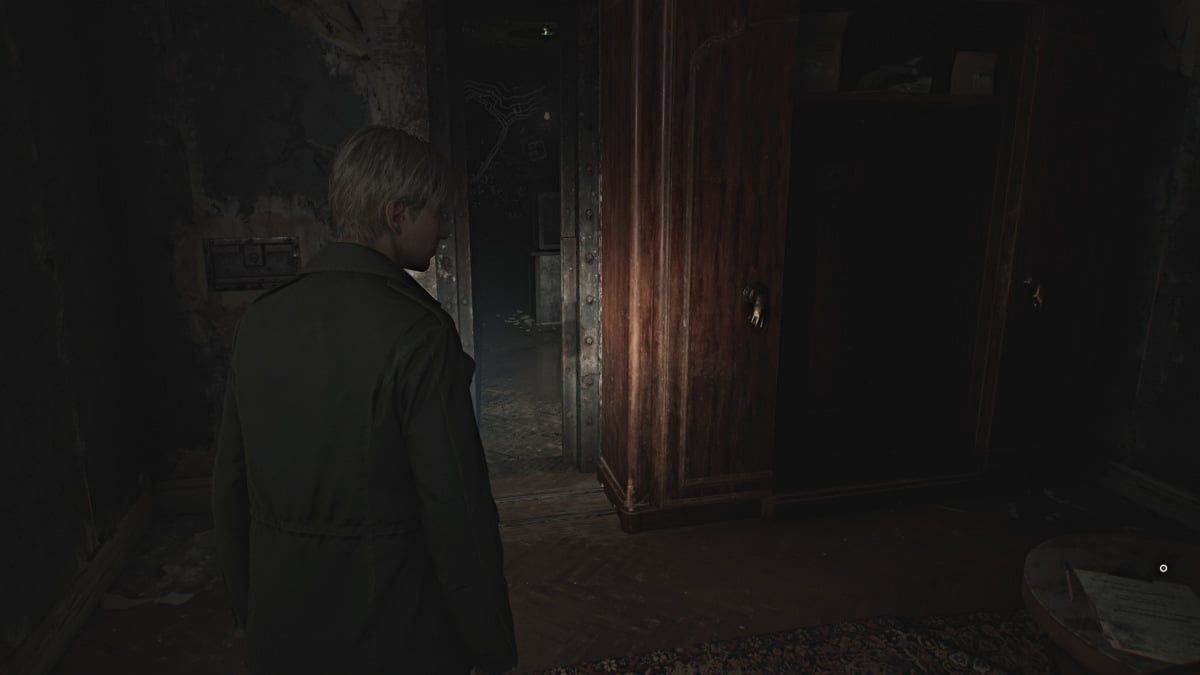
Inside you'll find another grand wardrobe with golden hands. Walk up to it and use the Golden Apple Handle you obtained earlier on it to unlock the wardrobe. Go to its left and interact to push it over and reveal a secret room with writing on the walls and a locked safe in the center. As soon as you enter, the door will seal behind you.
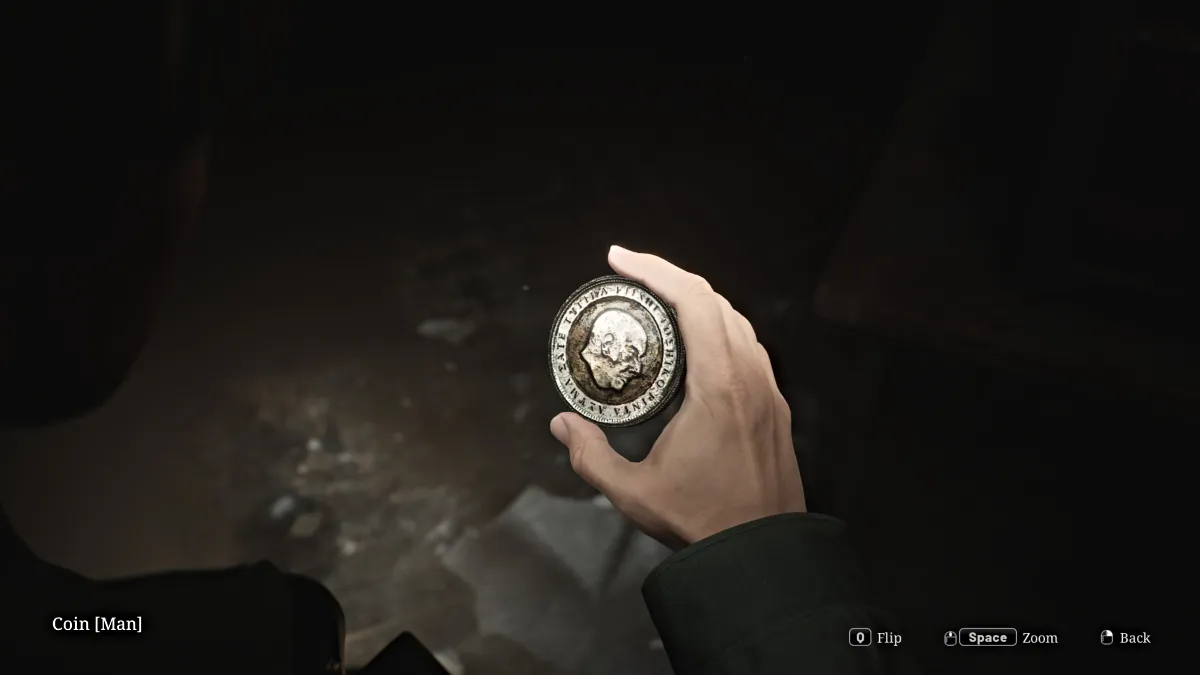
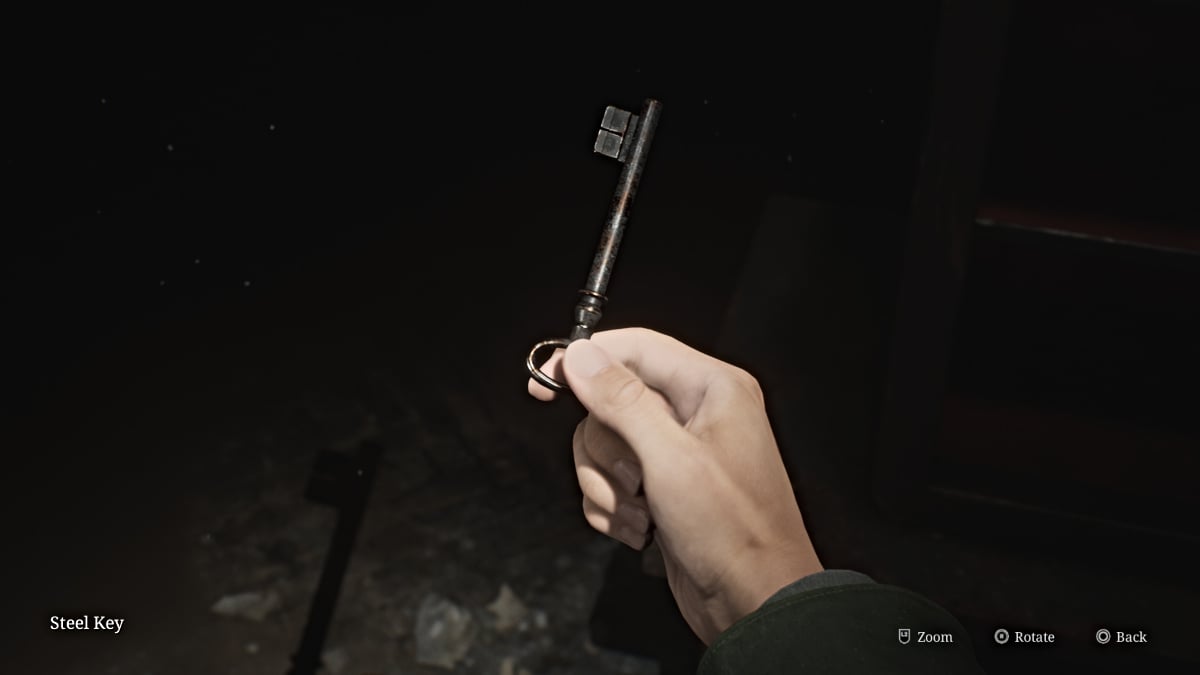
To open the safe, you need to put in the correct combination, and the only hint you get is from the written passage on the wall near where you came in. The correct combination (Standard Puzzle difficulty) is 'right 13', 'left 7, then 'right 11'. The safe will open, revealing the Man Coin (for the Coin puzzle downstairs) and a Steel Key to use on the door on the other side of the room (with white squares drawn on it).
Escape the room and you'll be back in the hallway where the door to Apartment 205 is now wide open. Go inside where you'll find some Bug monsters along with a Health Drink in a medicine tin, Handgun Ammo in the kitchen, and the 2F Small Staircase Key sitting on the chair in the middle of the room.
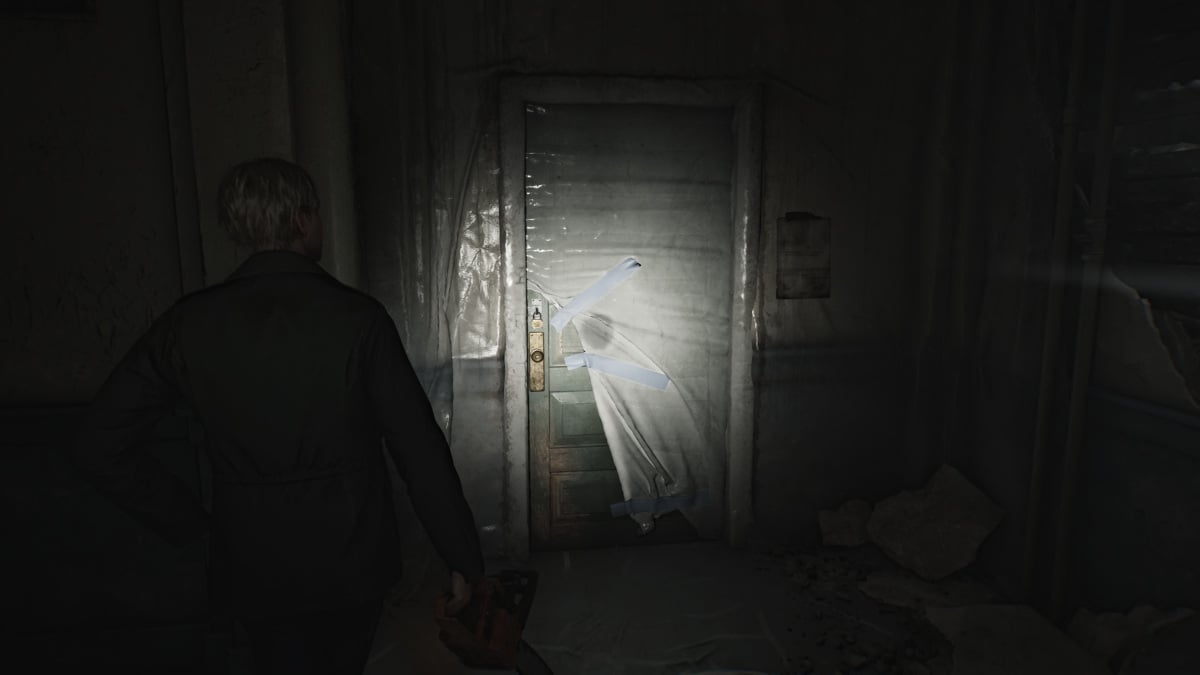
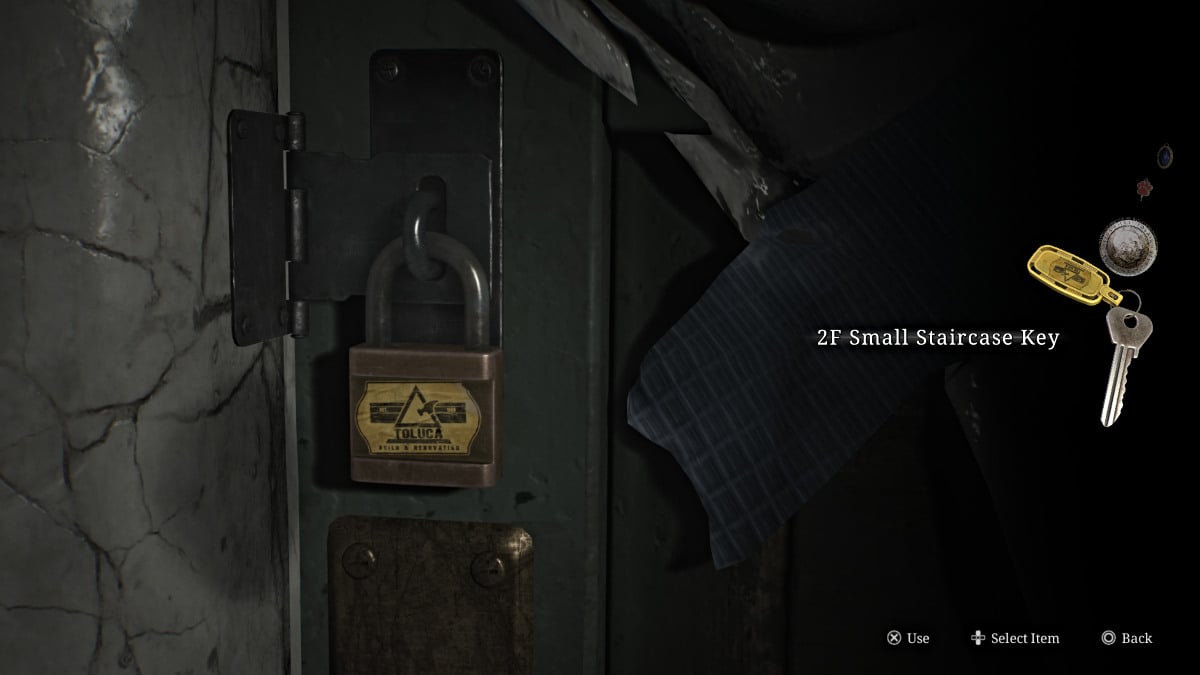
With that in hand, head all the way back to the staircase on the north side of the floor that's covered in plastic. Use the 2F Small Staircase Key on it to finally access it. Use the Red Save Point inside then head up to the third floor.
Wood Side Apartments (Floor 3 and 1) - Canned Juice, the Woman Coin, and Meeting Eddie
Once on the third floor, go straight down the hallway first to claim some Handgun Ammo sitting on an armchair at the dead end. Then backtrack and head right until you reach another dead end and a wall gap that leads you into Apartment 311 (seen below). Watch out for two Mannequins waiting to ambush you nearby.

Make your way through and cross over into Apartment 309, then briefly back into the hallway and through another gap to Apartment 310. This apartment is split in half, so make sure to check both sides. The side at the far end of the hallway will have the Strange Note for you to pick up off a desk and some Handgun Ammo in a first aid container.
Watch for more ambushing Mannequins and use the balcony to cross over into Apartment 312, where you'll find a Syringe in a first aid kit, a Health Drink, and the Sinister Note memo hanging on a wall.
On the left side of the apartment, there is a crawlspace with black residue. Crawl through it and you'll emerge in the Laundry Room. Grab the Canned Juice pack from the table and take it over to the nearby chute to drop it in. The weight will cause a bunch of trash to fall through into the Chute Courtyard, including another Coin. Grab more Handgun Ammo sitting on a washing machine on your way out.
Take the north staircase all the way down to the first floor, and grab more Handgun Ammo sitting on a box at the bottom. Exit to the hallway, and you'll hear what sounds like retching noises coming from the right. Follow them into Apartment 116 at the end, where a corpse is sitting in an open fridge and someone is throwing up in the nearby bathroom.
Approach it and a cutscene plays introducing James to Eddie Dombrowski, who seems strangely skittish and clearly unwell. He seems anxious to leave the town and asks James to come along, who politely refuses. After the cutscene, search the apartment for items and before going to the pool area, which is crawling with Lying Figures so you'll need to navigate it carefully.
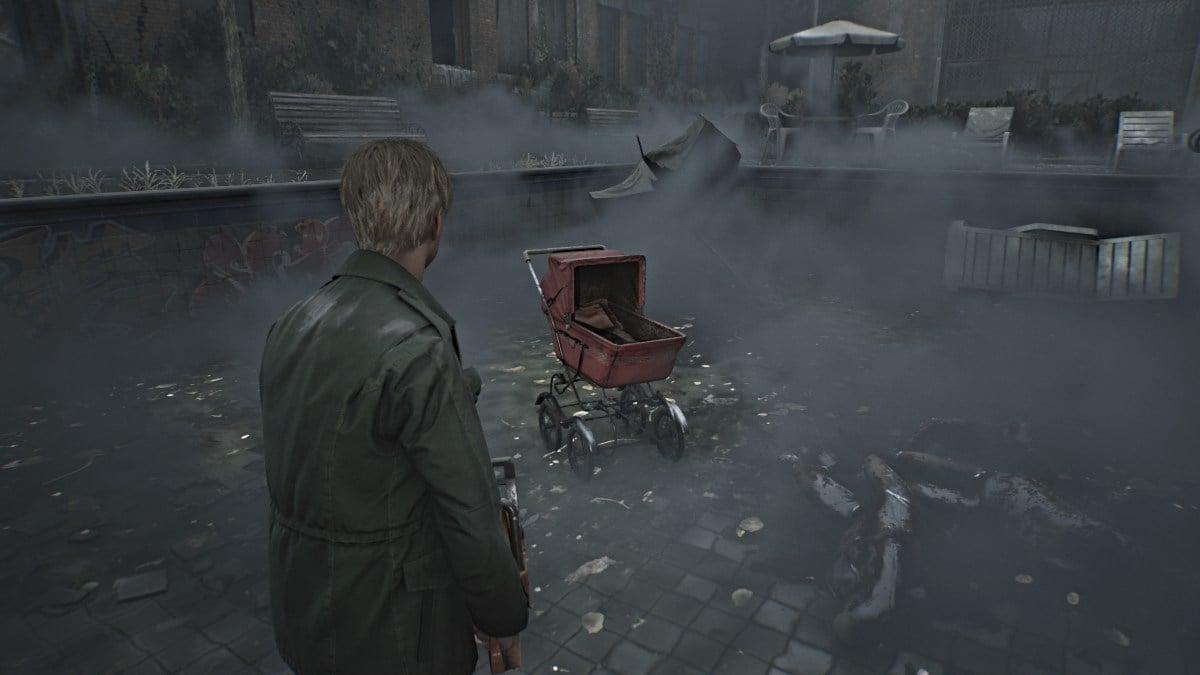
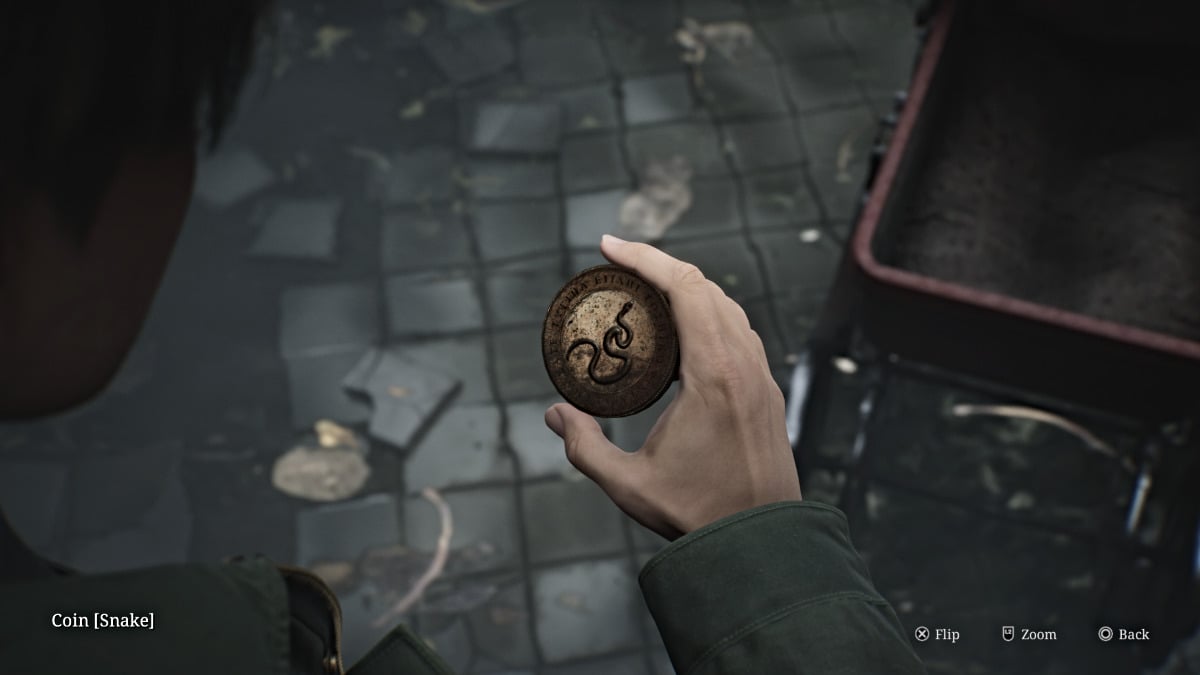
Kill only what you must and make your way to the baby carriage in the pool which contains the Snake Coin.
Escape the area back the way you came and out of the apartment, then head for the double doors that lead back to the Chute Courtyard.
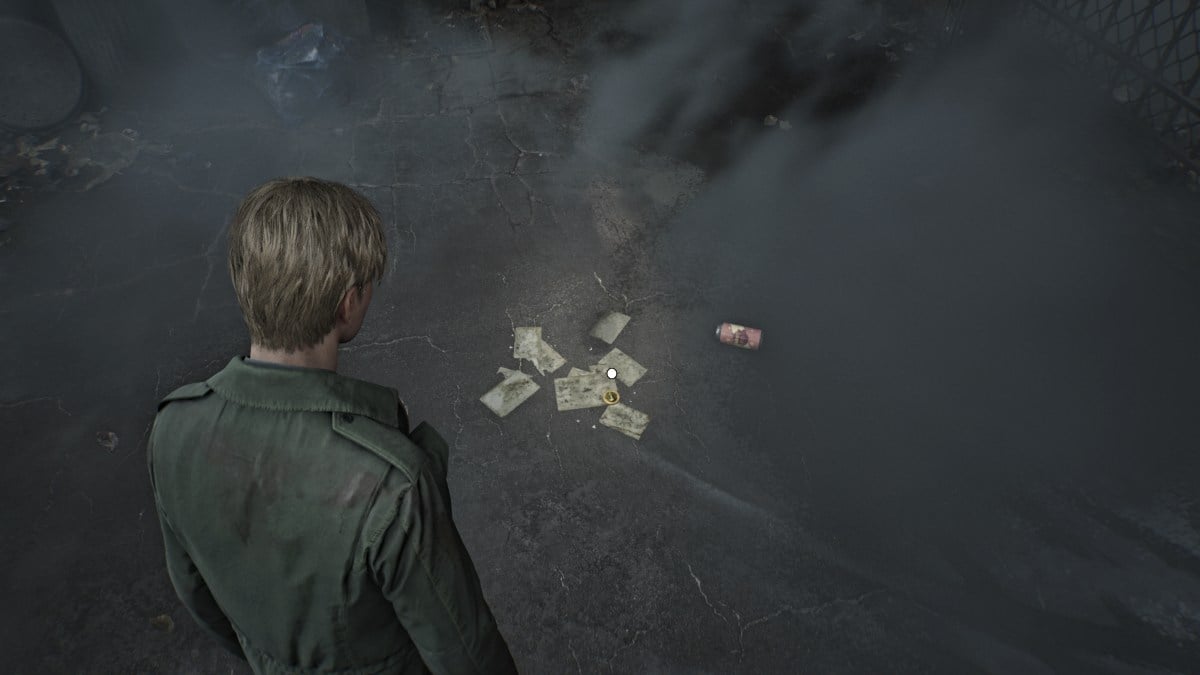
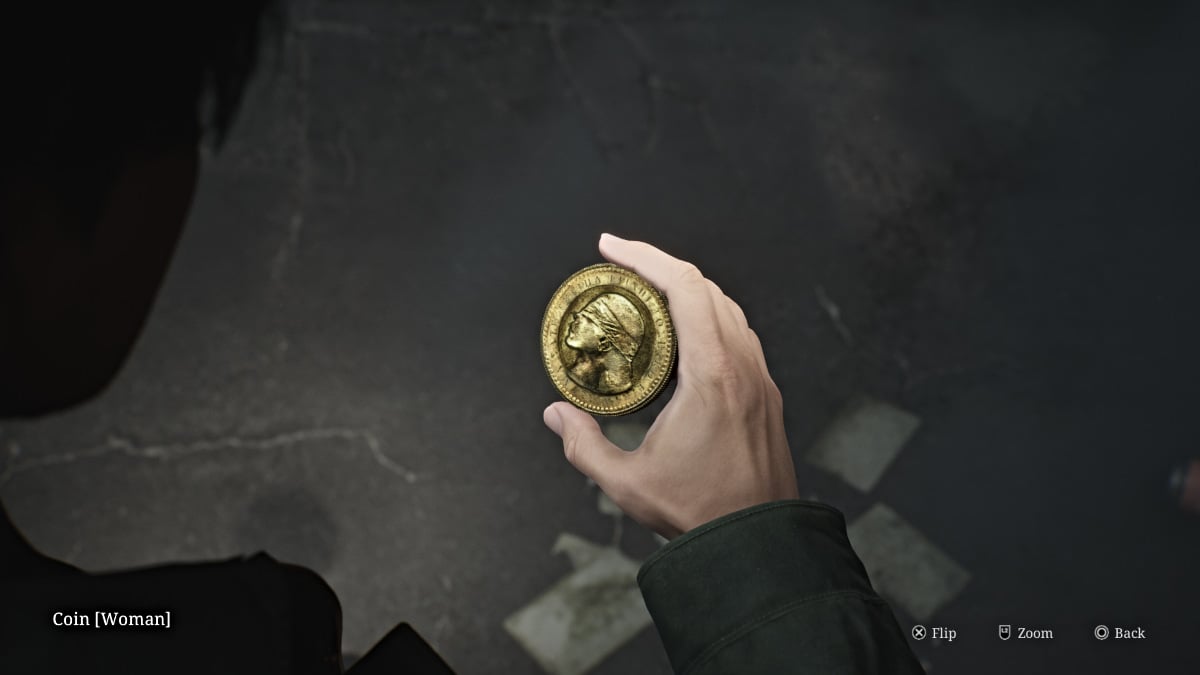
Carefully search the ground for the Woman Coin, which will be lying near one of the juice cans (seen above). Now you have all the necessary coins, so make your way back to the lobby office to finally complete the puzzle.
Wood Side Apartments (Floor 1) - Coin Puzzle
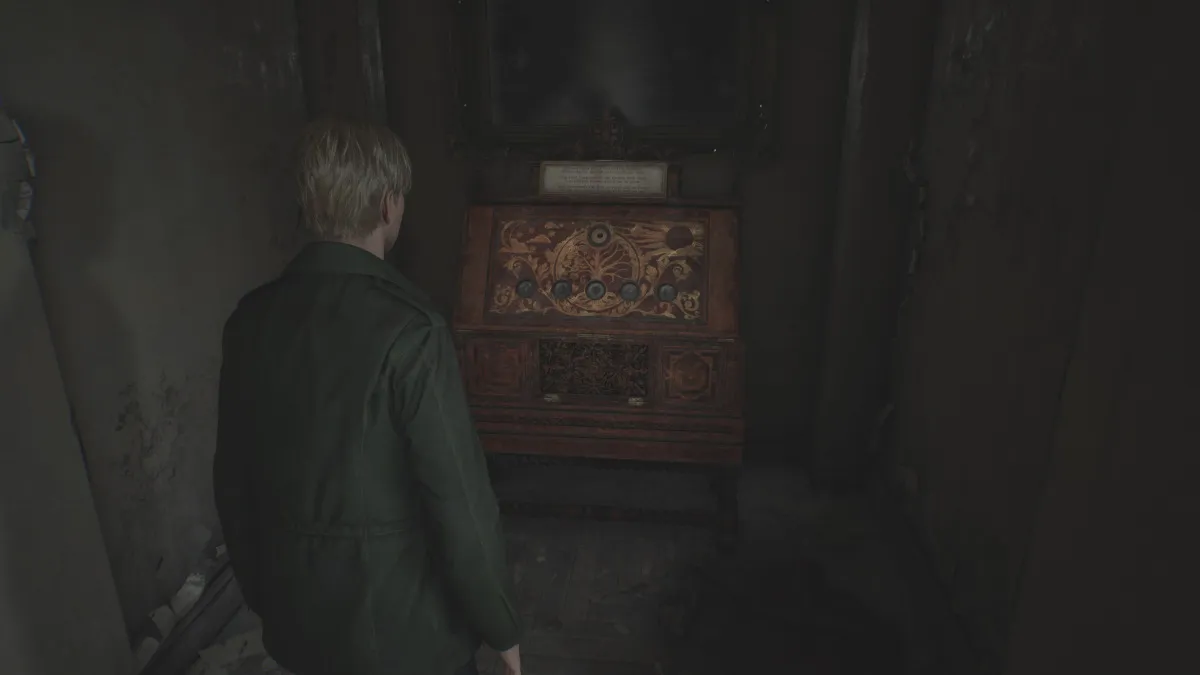
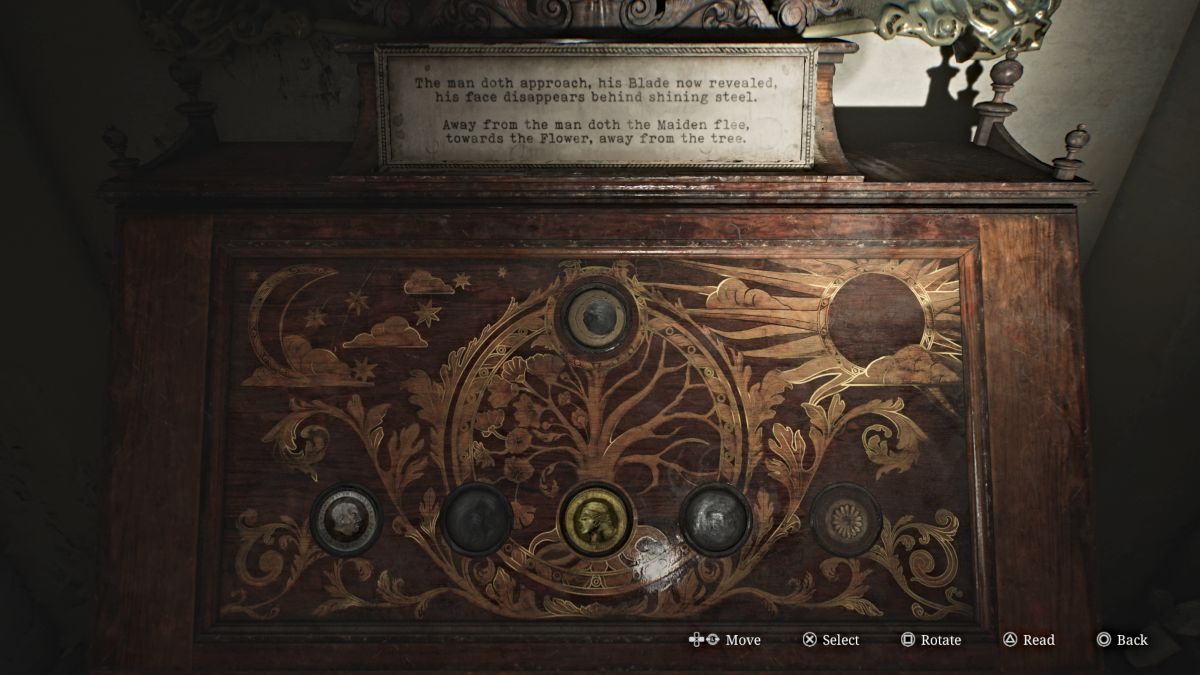
To open the ornate cabinet in the lobby office, you need to place three coins (and their variants) into the correct slots according to the poem indicated above, which will change as you complete each step. Here is the full solution to the puzzle (Standard Difficulty), with steps listed in order:
- Place the Woman Coin in the center slot (Woman's face up)
- Place the Man Coin in the far left slot (Man's face up)
- Flip the Snake Coin to the Flower Side and place it in the far right slot
- Flip the Man Coin to the Sword side and move it to the space left of the center
- Move the Woman Coin one space to the right
- Flip the Snake Coin back to the Snake Side
- Flip the Woman Coin to the Gravestone Side
- Flip the Man Coin back to the Man Side and move it back to the center slot
With that, the puzzle has one last step, which requires you to pick which coin to "blame" (Man, Woman, or Snake). While there's no wrong answer, your choice will affect the ending you get. You will also get the Apartment 201 Key for your efforts.
Wood Side Apartments (Floor 2) - A Close Call with Pyramid Head and the Otherworld

Use the main lobby staircase to go back up to the second floor, and turn right to head into Apartment 201. Explore until you come across a Handkerchief on a writing desk, which will cue an infamous cutscene with Pyramid Head and some Mannequins.
After he leaves, go back to the desk and collect the Handkerchief, then approach the bright red door on the other side for another cutscene where James must literally cross from one building to another. While it's technically the Blue Creek Apartments, it's a version that's trapped in the Otherworld.
Silent Hill 2 Remake Blue Creek Apartments Walkthrough
In the Otherworld, an otherwise normal environment appears significantly different; more dilapidated, rusted, and often stripped down to a grimy, industrial skeleton. Get your bearings as you don't have access to a map yet, and go through the nearby blue door. Grab Handgun Ammo from the armchair to your right, then head left and follow the hallway until you do get a map of Blue Creek Apts 2F-3F.
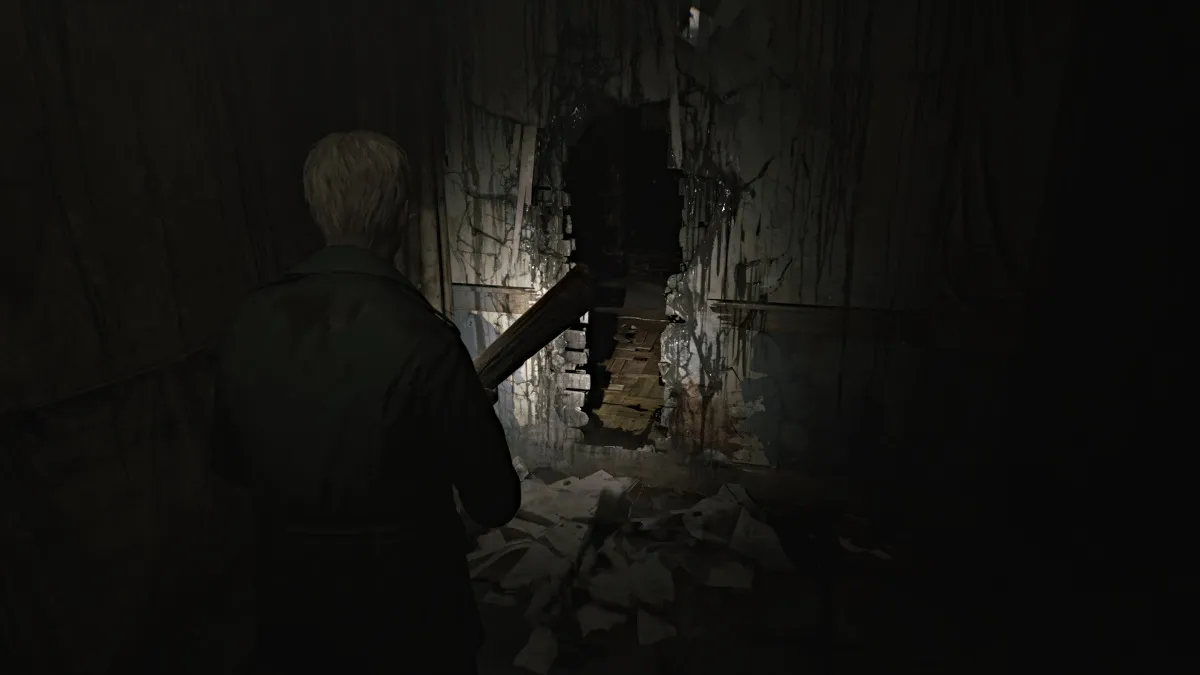
Continue down the hallway until you come to what looks like a breakable wall. Use your Wooden Plank to break it down and slip through. Collect Handgun Ammo from a nearby drawer and make your way carefully to the other side of the apartment. Take care of the monsters and get more Handgun Ammo from the kitchen area before exiting to the hallway.
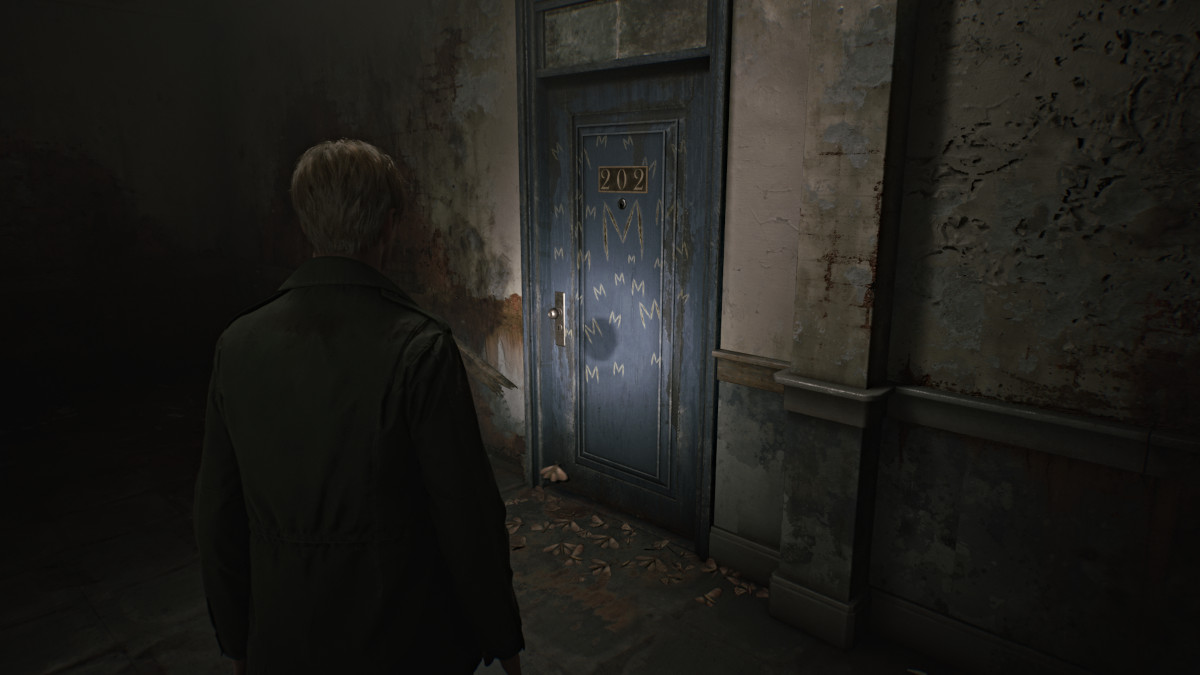
At one point you'll pass the blue door to Apartment 202, which has 'M' etched repeatedly into it and several dead moths in front of it. You'll return to it later.
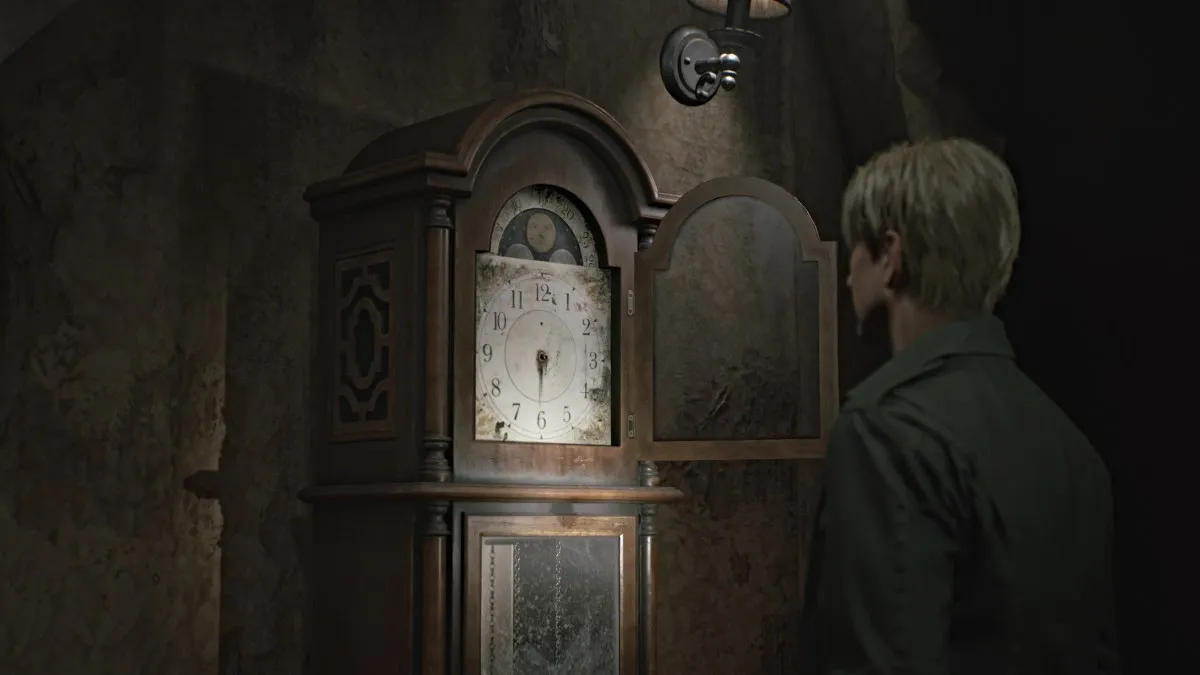
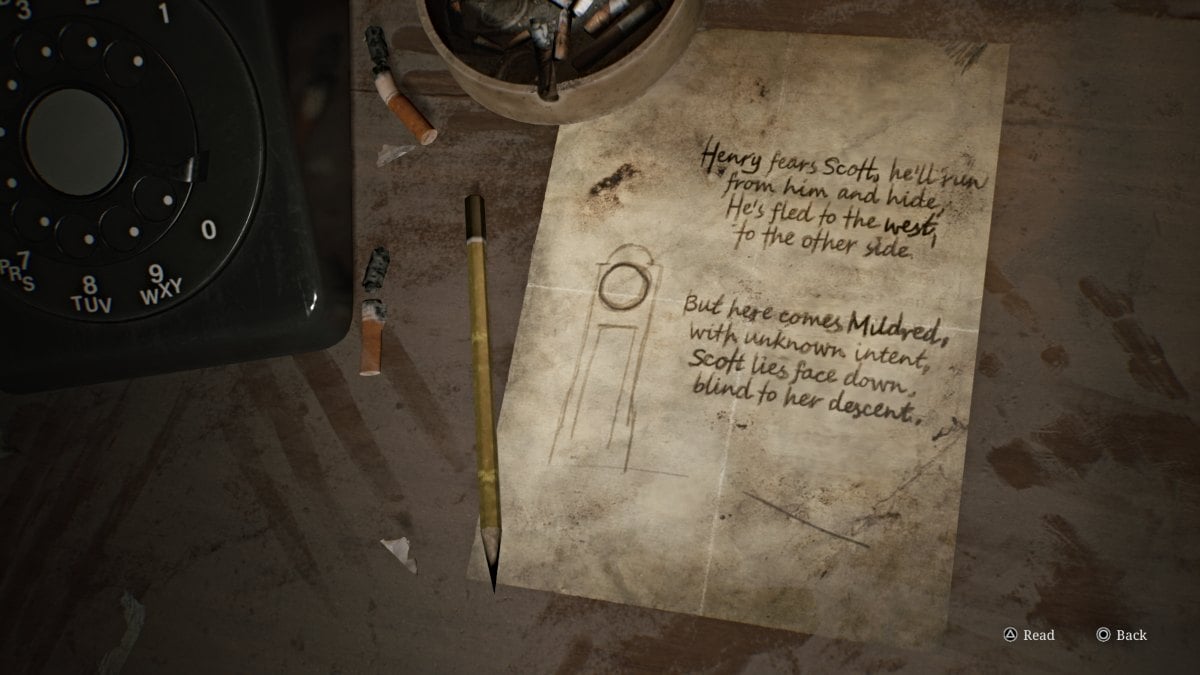
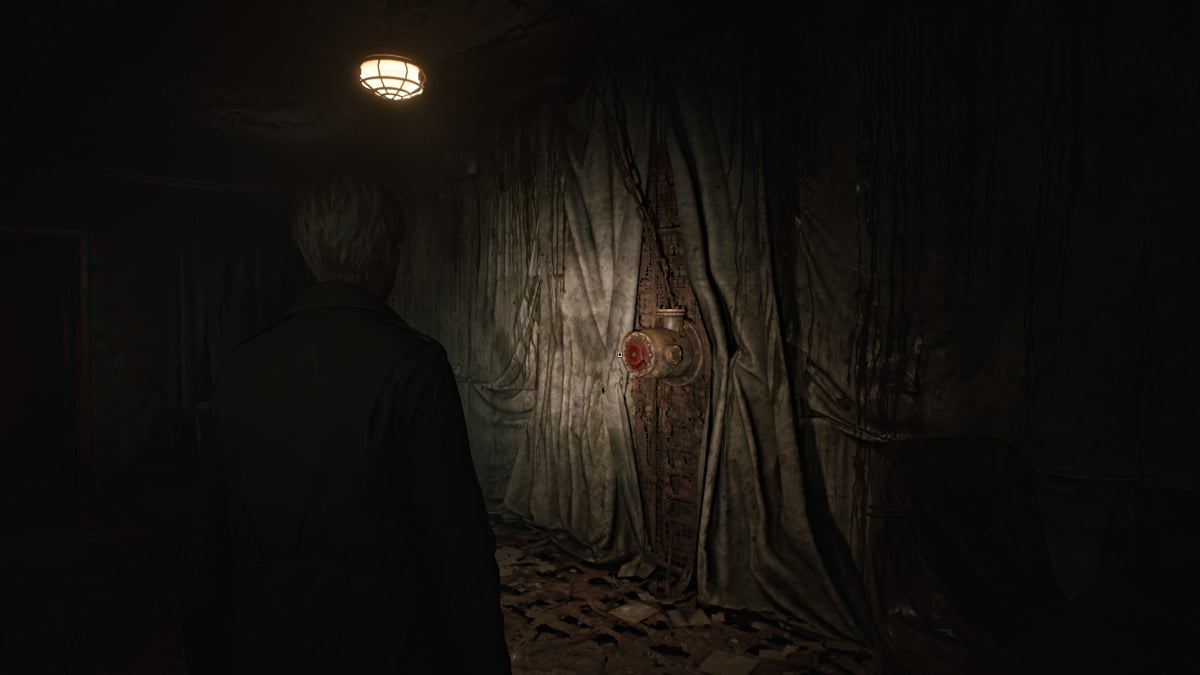
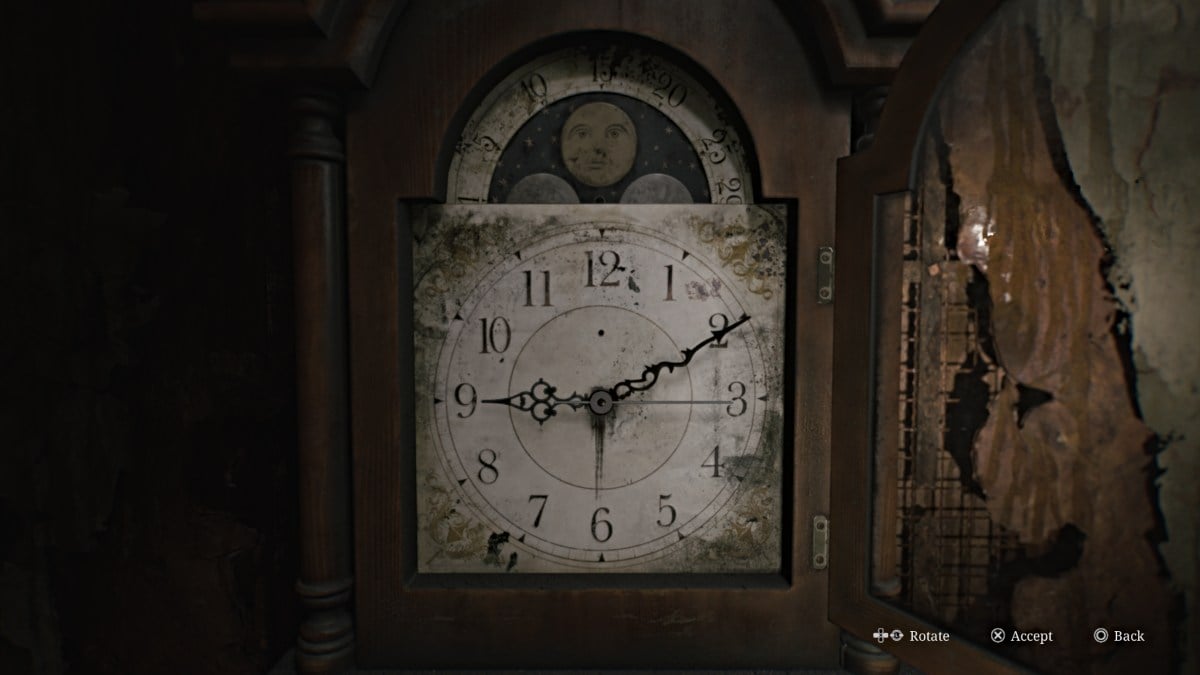
For now, go into Apartment 212, where you'll find a Red Save Point and a Grandfather Clock that's actually a puzzle. To complete it, however, you'll need to find the missing Hour, Minute, and Second hands first.
There's also a handwritten note on the table opposite the clock that provides some hints about what directions those hands need to be placed in.
Blue Creek Apartments (Floor 2 and 3) - Cranks, a Clock Puzzle, and a Radio
Go out to the balcony, where there's a proverbial fork in the road. To the right is an orange door with a big 'H' scratched on it, but you can't open it yet. Instead, go left and into Apartment 203. Grab the Syringe inside the kitchen and break down the wall there to get into 205.
Collect the Handgun Ammo from the baby crib on the other side and make your way through until you reach another open window to another balcony. Grab more Handgun Ammo from the nearby bathroom before you go. Take the stairwell up to the third floor and climb up through the crawlspace to land in Apartment 303.
First, go through to the kitchen area, where there's another breakable wall. Past that, you'll reach the Utility Room where you'll find Handgun Ammo and a Health Drink.
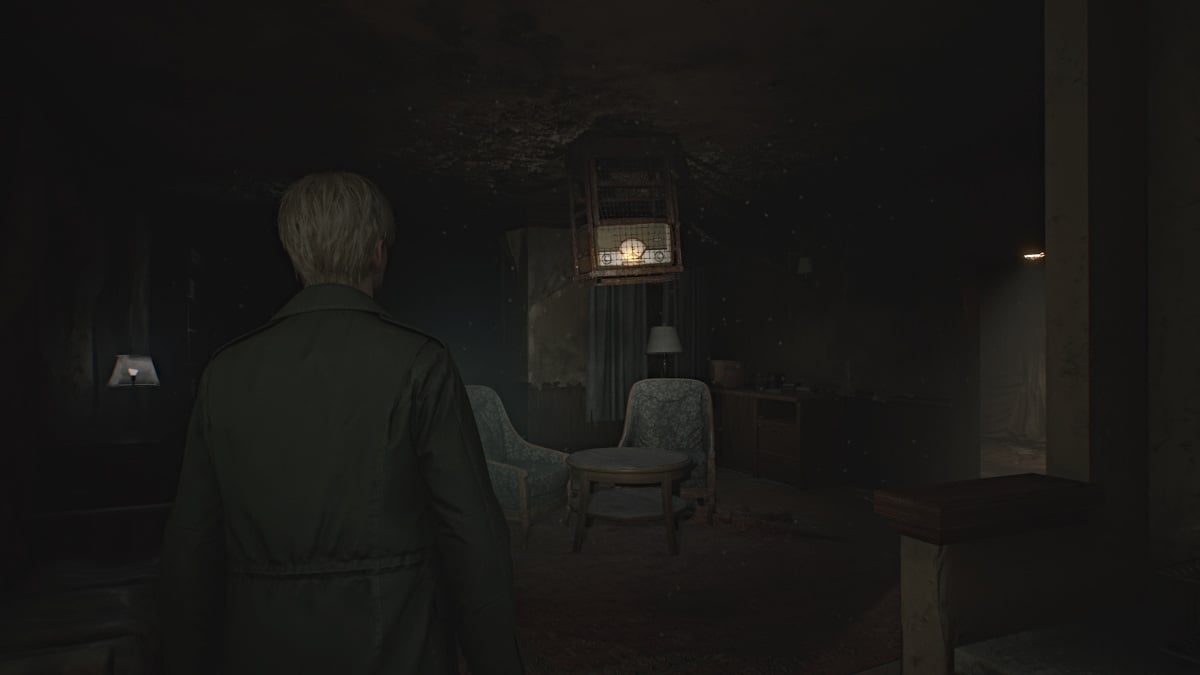
Go out to the hallway and to Apartment 307 where you'll see a large Radio caged to the ceiling playing music. After gathering more Handgun Ammo go to the room on the right with a Red Crank on the wall that's missing a valve.
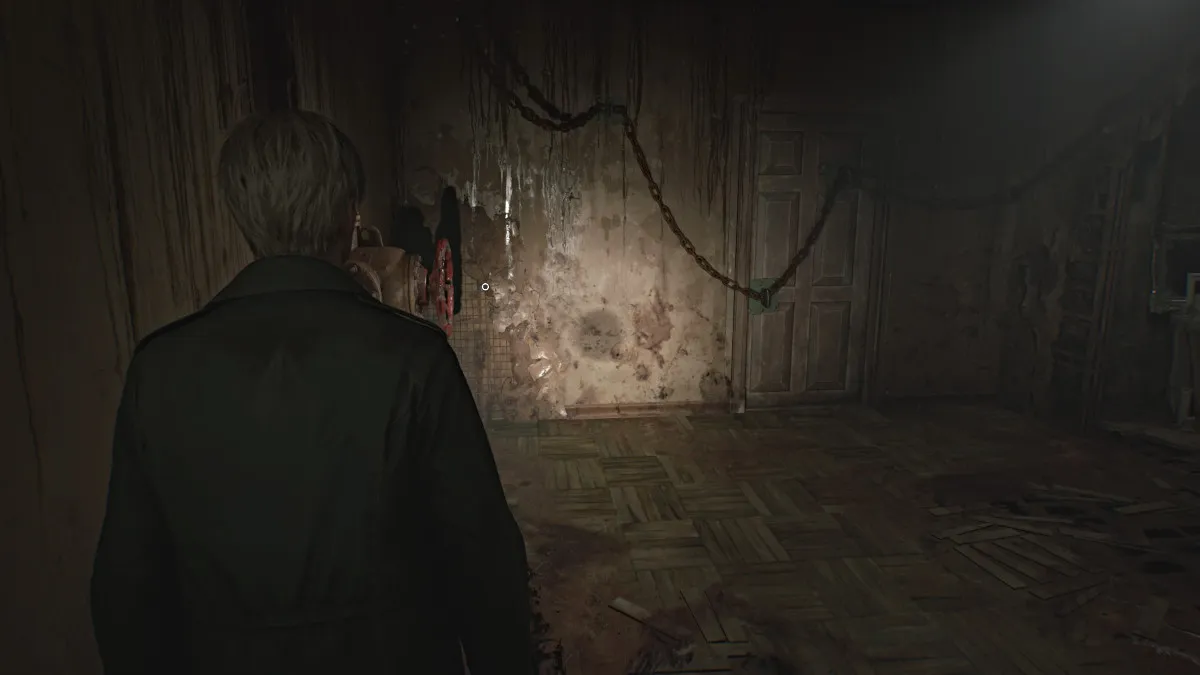
First, go through the other door in the room which will take you to another balcony and back into Apartment 305. The window will seal behind you, and you need to break open the chained door nearby using the other Red Crank on the wall (seen above). Two Lying Figures will quickly attack, so dispose of them. Make sure to grab the Apartment 306 Key from the table before you leave.
Make your way around to Apartment 306 and explore and collect all the Handgun Ammo and Health Drinks you can. In the living room, you'll see another Red Crank.
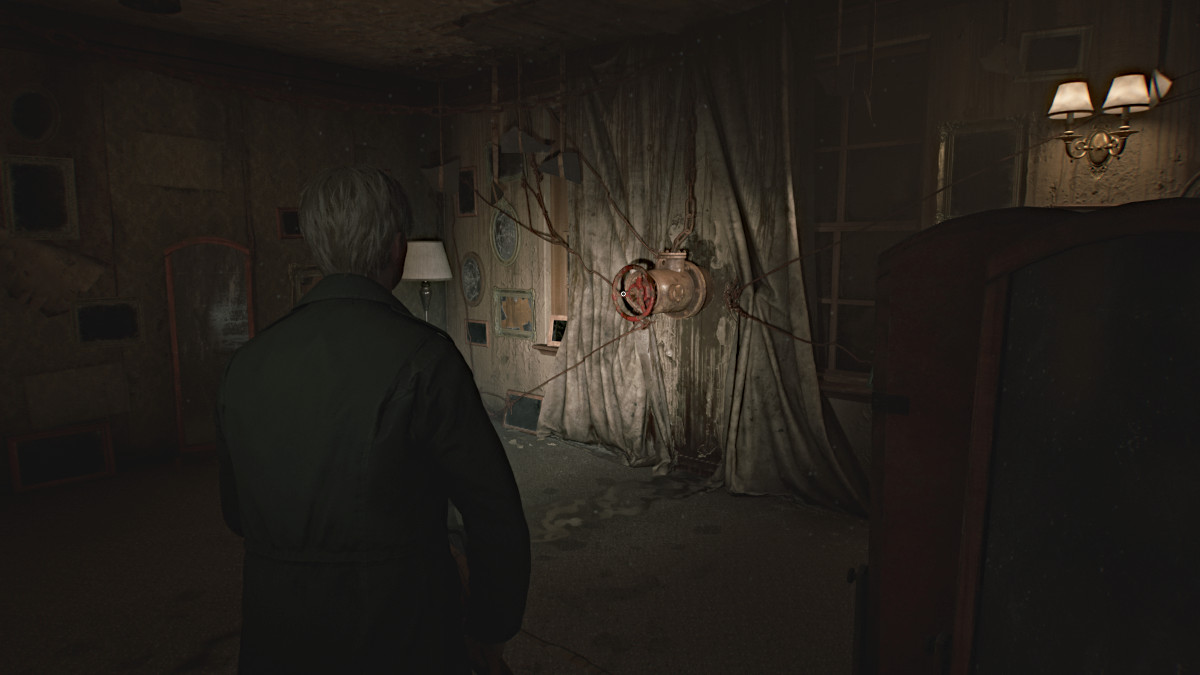
Turn it to pry open the door across the room, and retrieve the Valve that breaks off after. Now head back to Apartment 307 and use the Valve on the wall crank to bring down the caged Radio.
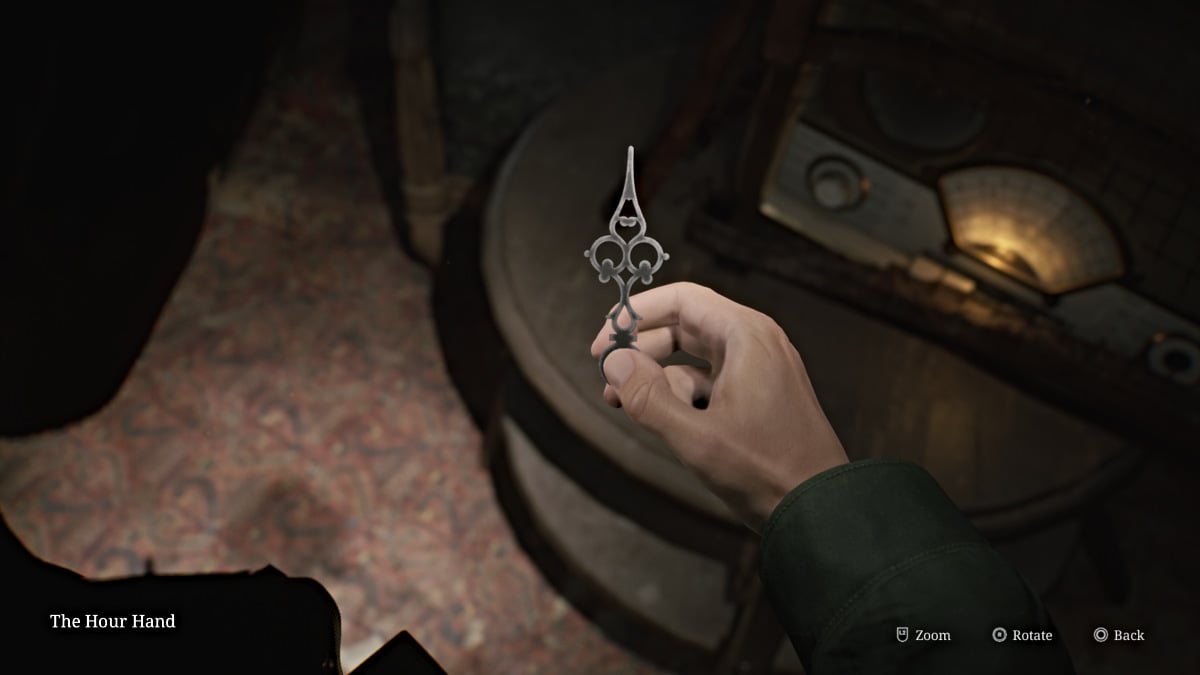
Approach it after to obtain the Hour Hand for the Grandfather Clock. With that, head back down the fire escape (use the lever on the wall to lower the stairs to the second floor) to Apartment 212 and place the Hour Hand in the Clock to start the first Clock Puzzle.
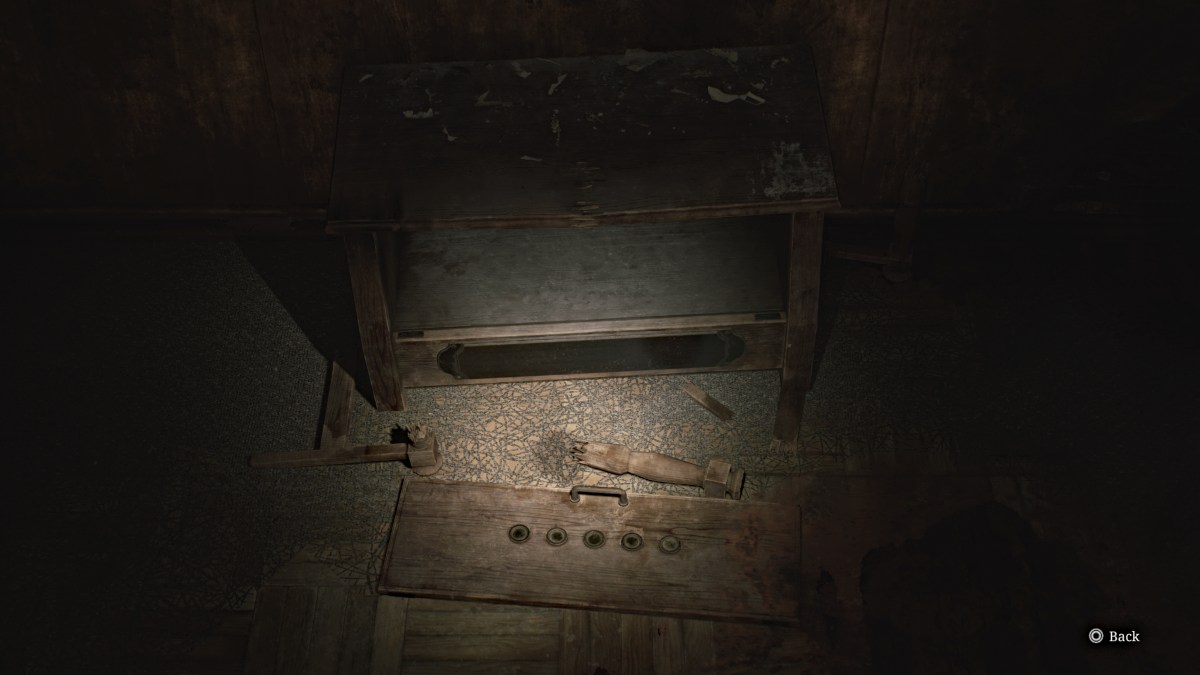
In this case, turn the Hour Hand to '9' on the clock, and the orange 'H' door nearby will finally unlock. Make your way over to the 'H' door via the balcony and it will take you into Apartment 210. Inside, you'll notice there's very much a bird theme with everything. A small "seesaw" (as James calls it) in the living room needs a bird-shaped object to weigh it down, and a locked door nearby requires a key for its bird-shaped lock.
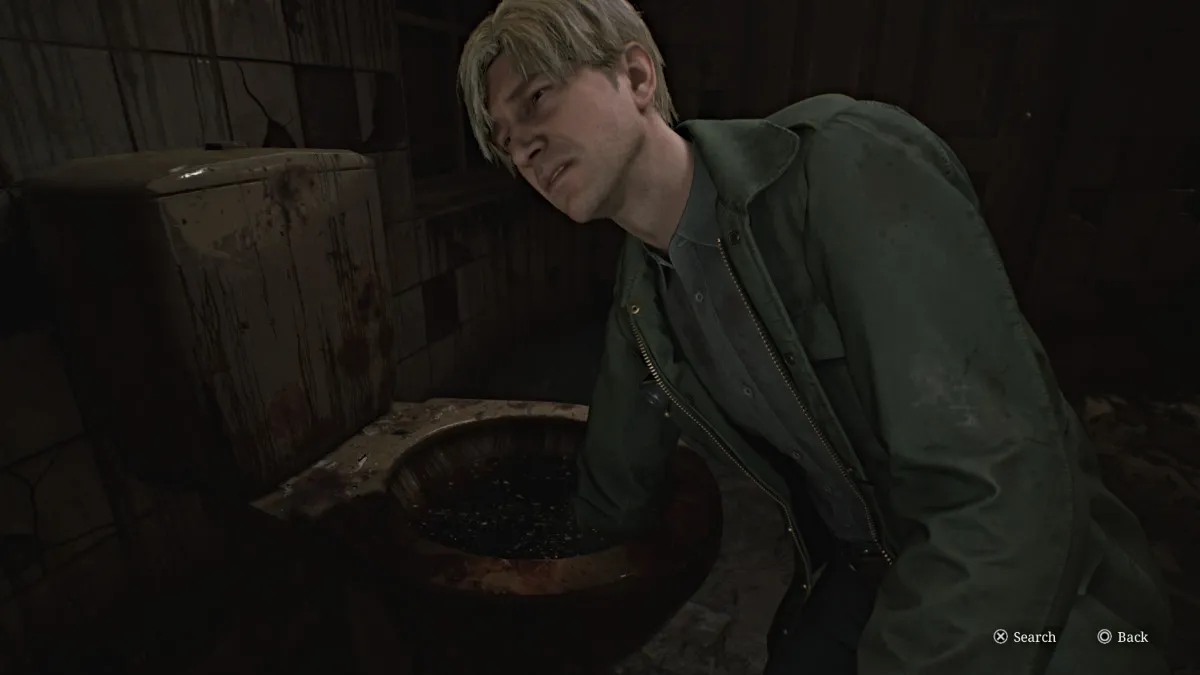
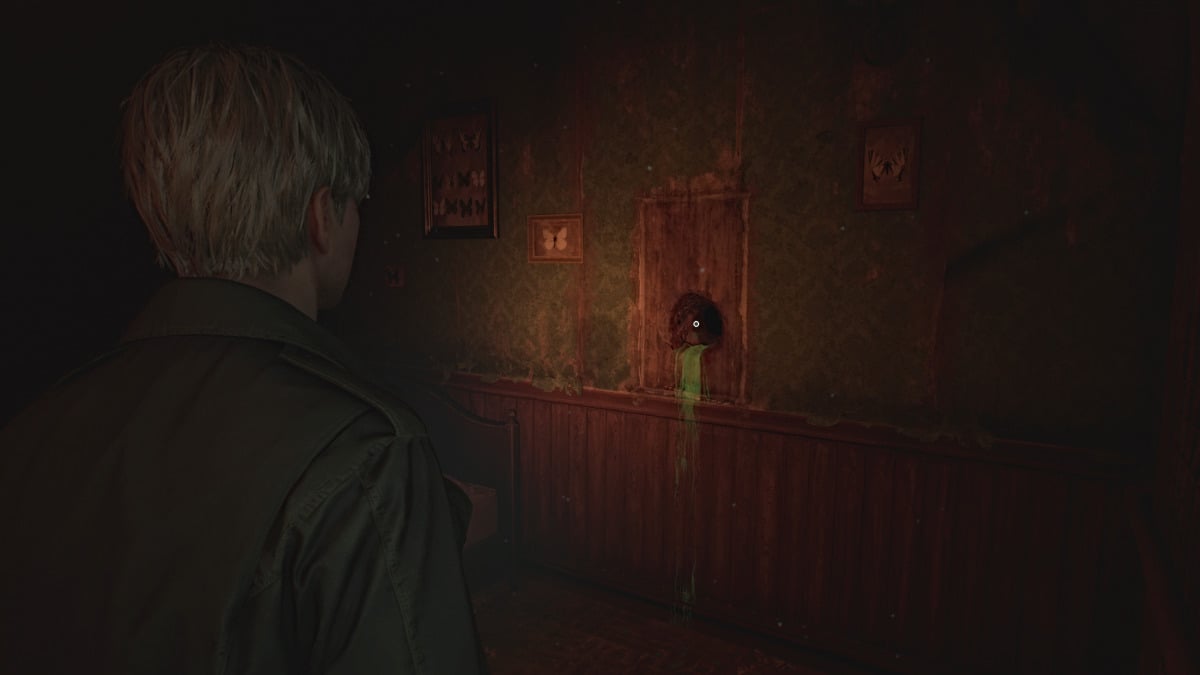
Go over to the kitchen, grab the Handgun Ammo from the counter, and break down the wall nearby to access the bathroom. Go inside and the only searchable area is (of course) the toilet full of...well, "goop". 'Search' it until James pulls out the Minute Hand for the clock.
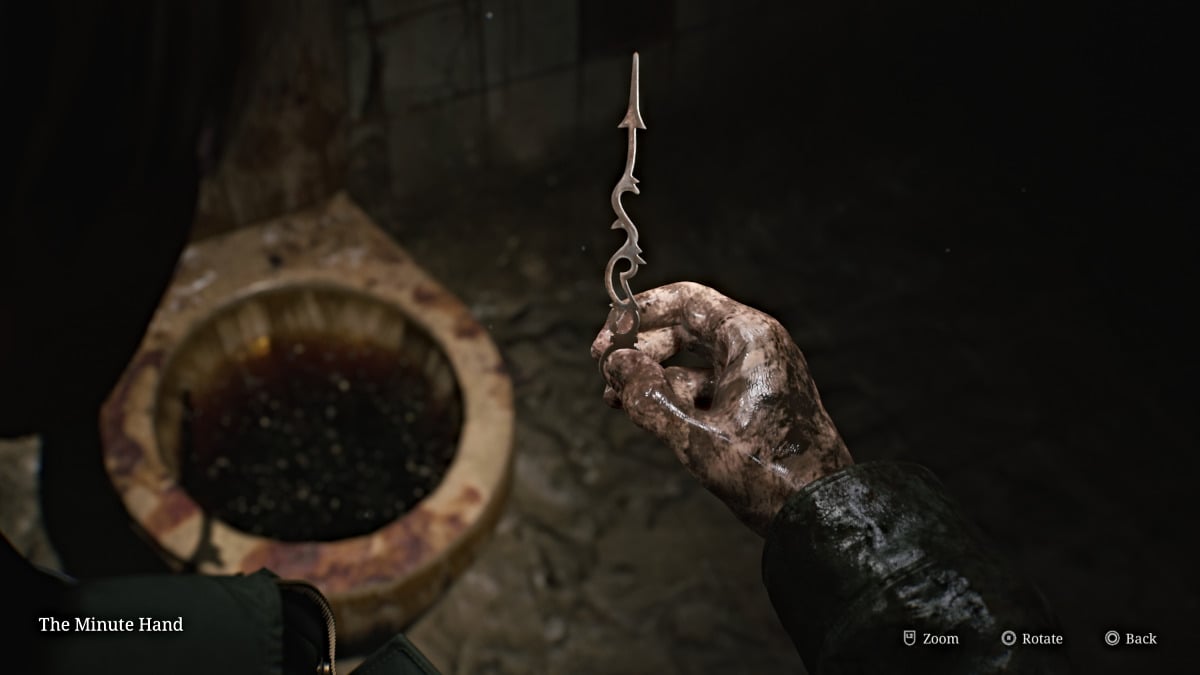
However, upon doing so the environment around James suddenly changes and you'll need to find a different way out. Leave the bathroom and grab the Pigeon Figurine from the nearby shelf (seen below). After dealing with the Lying Figure that charges in (remember they explode after dying in the Otherworld), place the Pigeon Figure on the left side of the seesaw. Now you need to find the other figure to balance it.

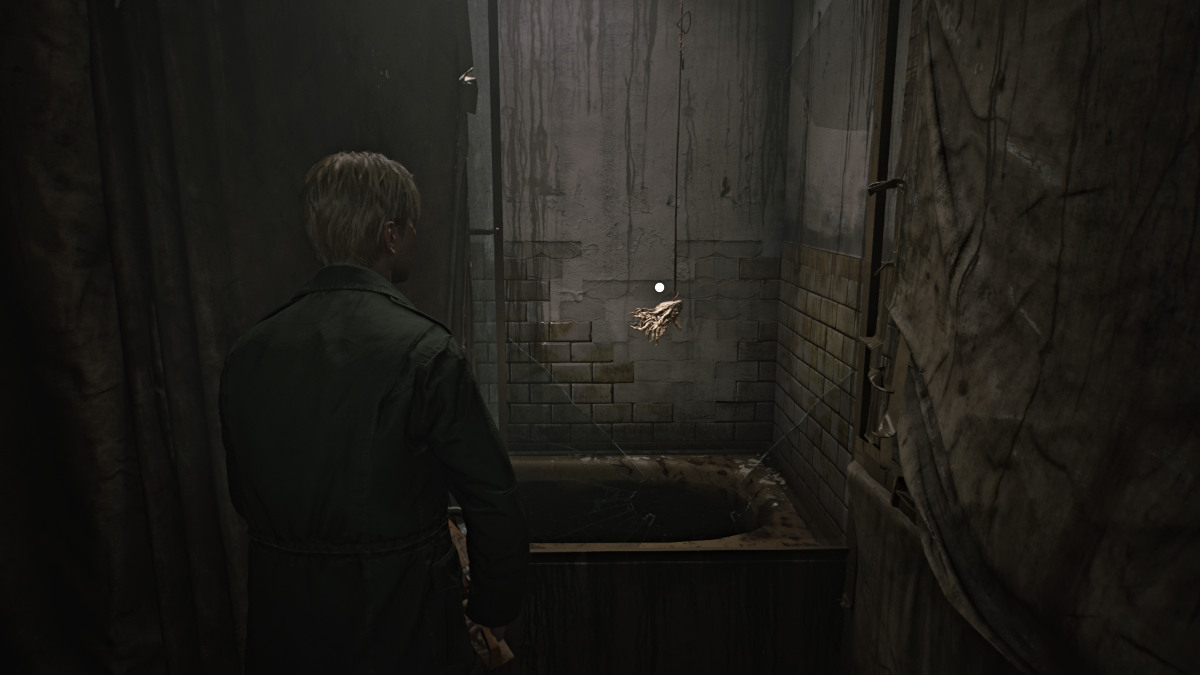
Leave and go down the hall to Apartment 209, where you'll suddenly hear some strange whispering (throwback to the original). Go through the bedroom to get to the bathroom and break the shower door inside to obtain the Malformed Figurine Part (seen below).
Be careful of a Lying Figure on your way out, grab Handgun Ammo from the dead end to your left and now head down to Apartment 211. You can enter via the broken wall or the actual door, and a Health Drink will be sitting near the door.
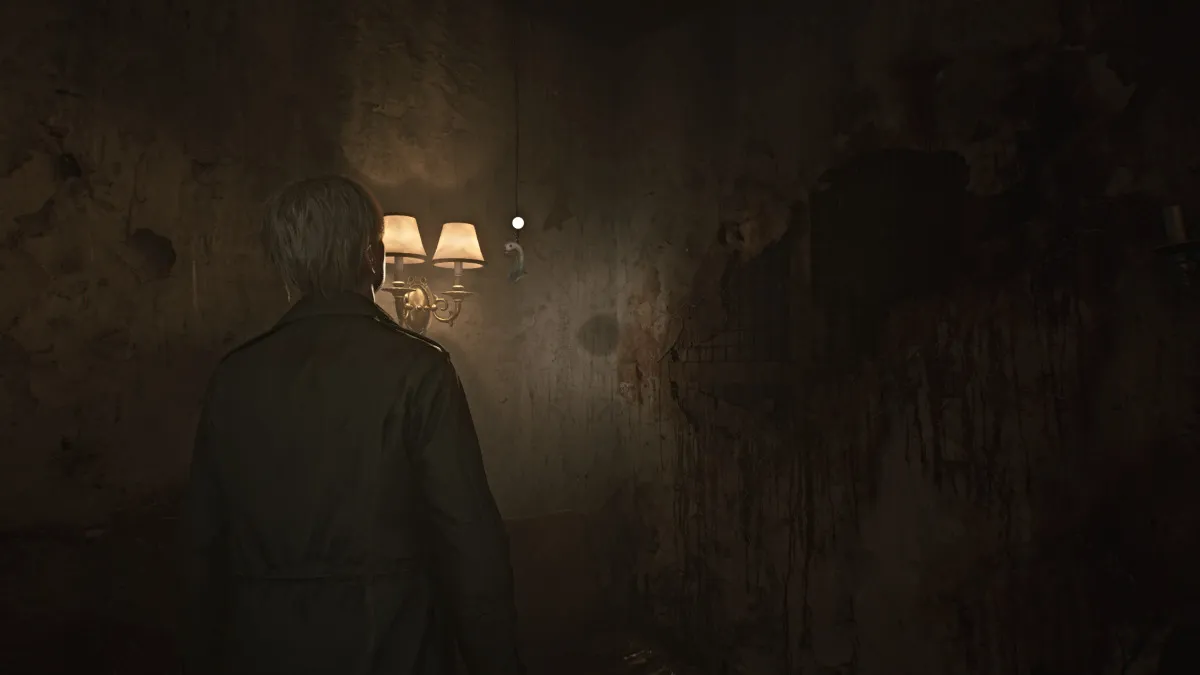
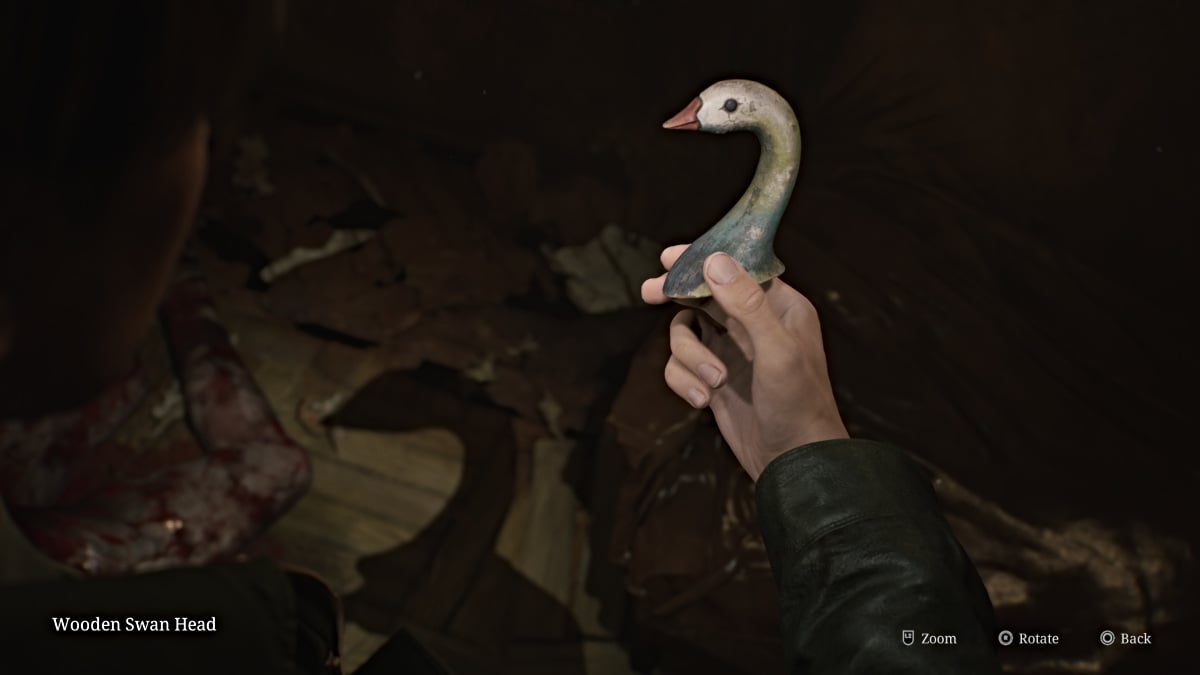
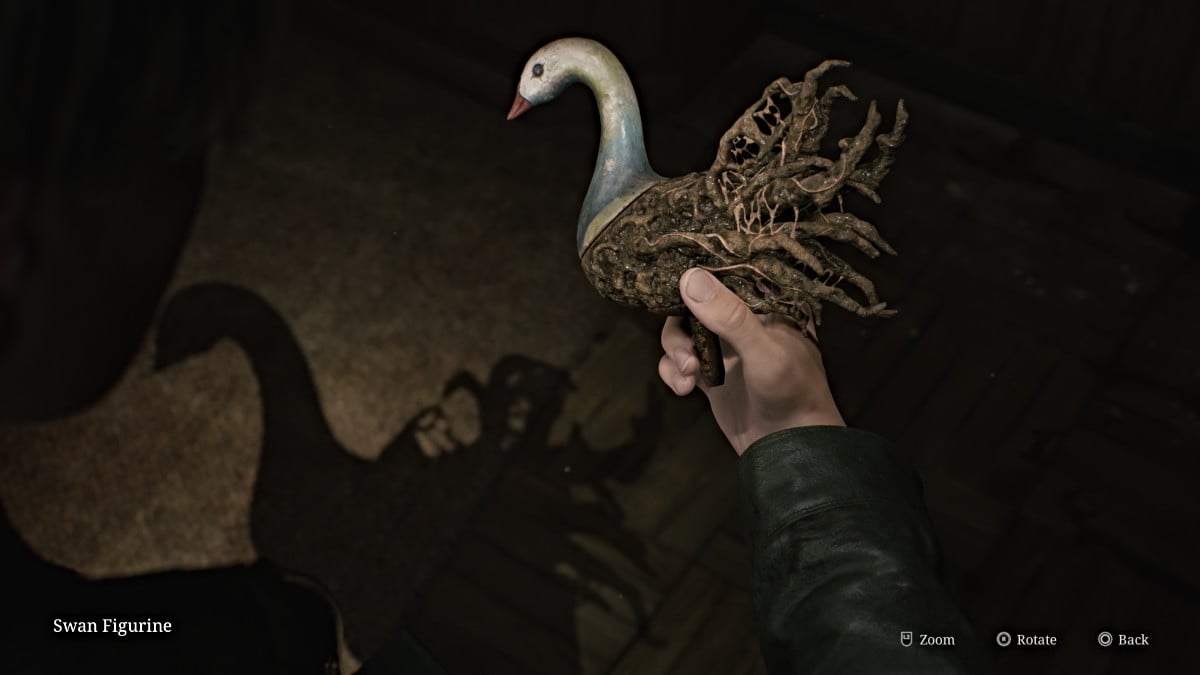
Go inside and deal with the two Mannequins trying to get the drop on you. In that same room on the right you'll notice a strange shadow on the back wall. Look around and the Wooden Swan Head (seen above) will be hanging from a string near a light. Take it and then combine it in your inventory with the Malformed Figurine Part to make the Swan Figurine. Grab more Handgun Ammo from the kitchen on your way out and head back to Apartment 210.
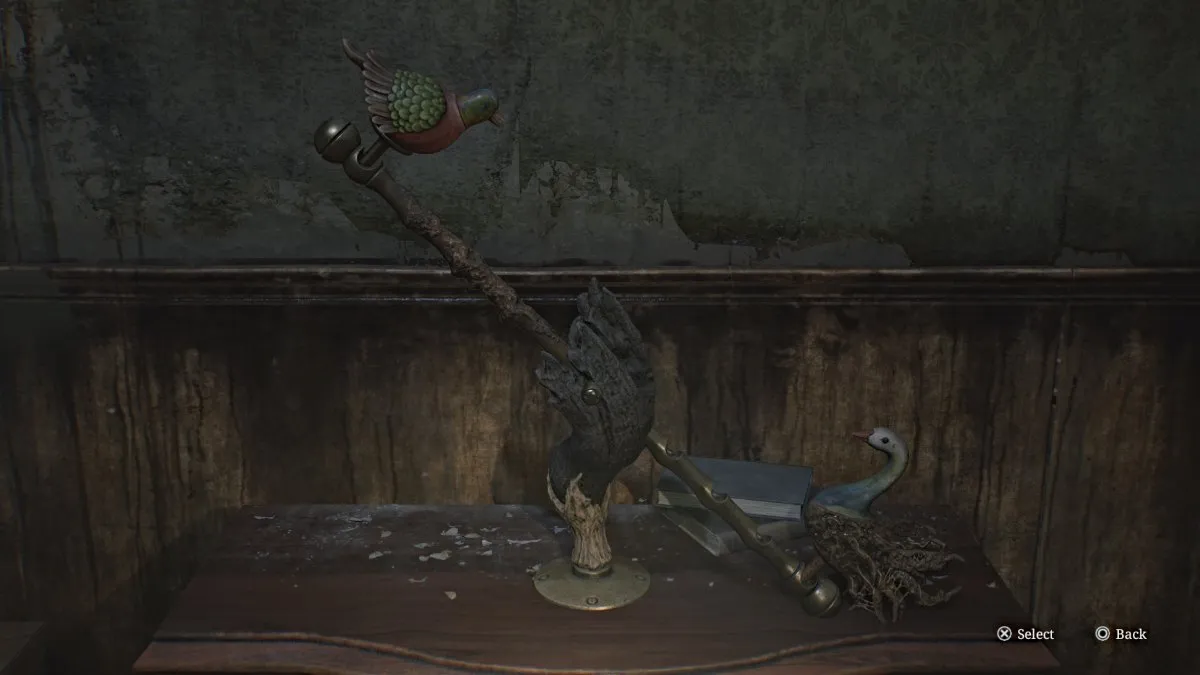

Place the Swan Figurine on the seesaw and adjust to the second slot from the center to balance the seesaw. The wood fulcrum will shatter, revealing the Winged Key. Take it and use it on the nearby locked door. Go inside and you'll see a gaping hole in the floor that you'll need to jump down. This brings you to the first floor of Blue Creek Apartments.
Blue Creek Apartments (Floor 1 and 2) - Angela's Lament and Unlocking the M Room
Open the map and you'll find yourself in Apartment 110 on the first floor. Make your way through and you'll come across another Glimpse of the Past (seen above), which is the coin puzzle cabinet from the original game. Continue on and exit through the gap in the wall as the entrance door is locked. Head north up the hallway, and you'll notice that the environment looks different on that side, less broken down.
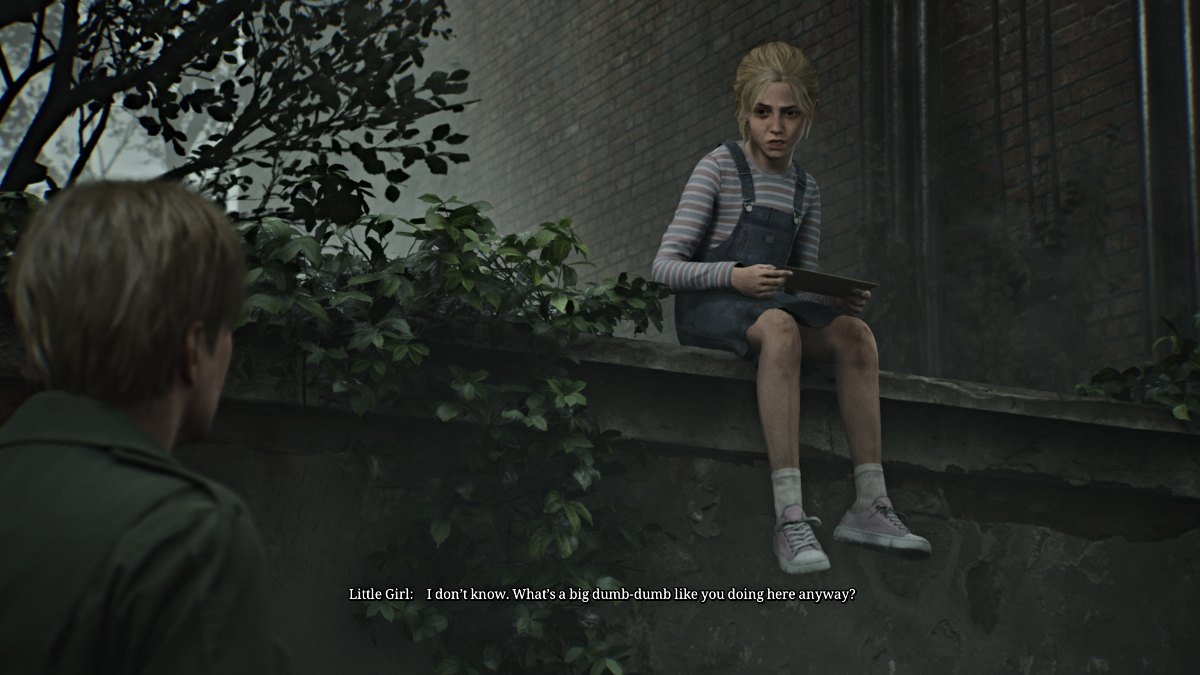
Go inside the much cleaner-looking Apartment 109 and through the white door ahead. A cutscene will play with Angela, who seems more lost than before.
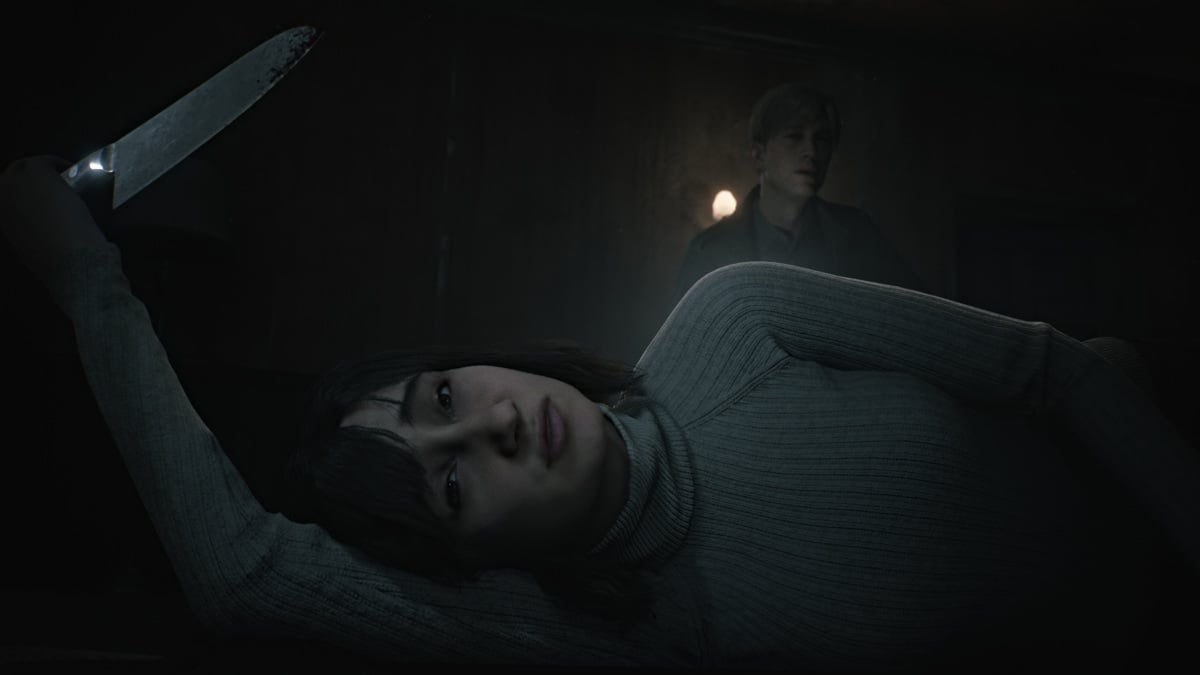
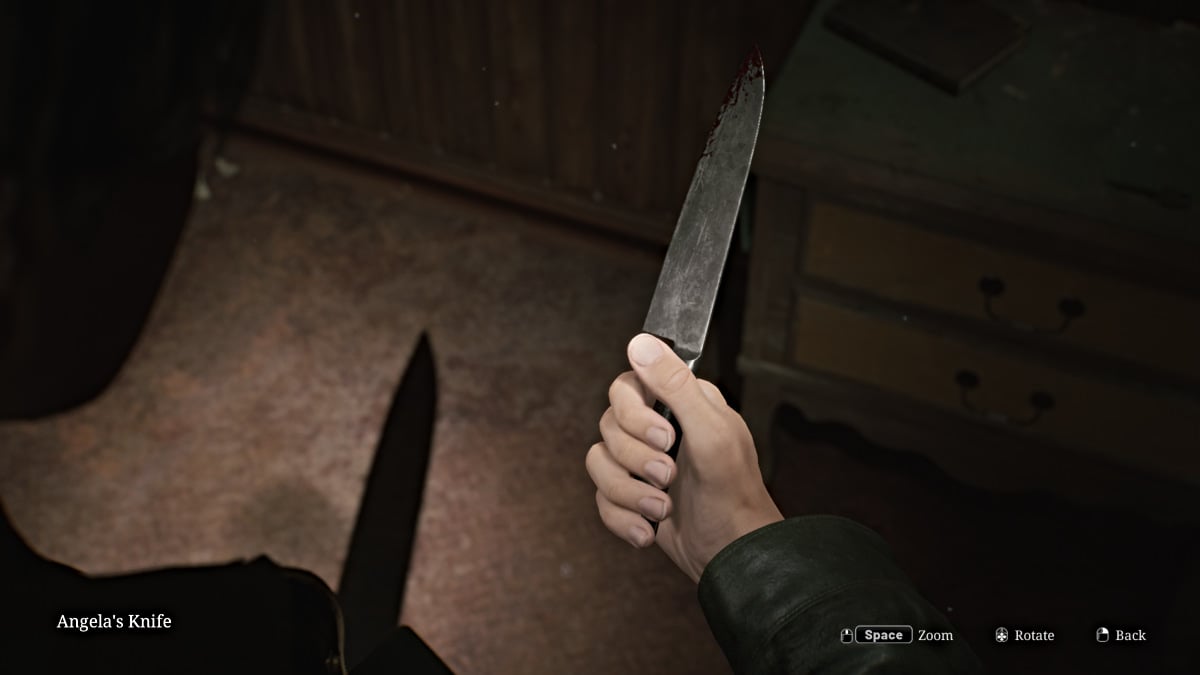
As the cutscene ends and she leaves the knife behind, James will take it for his inventory (seen above).
Be aware, Angela's Knife is a key item, NOT a weapon you can use. Also be careful of looking at it too often, as doing so greatly influences the ending you get.
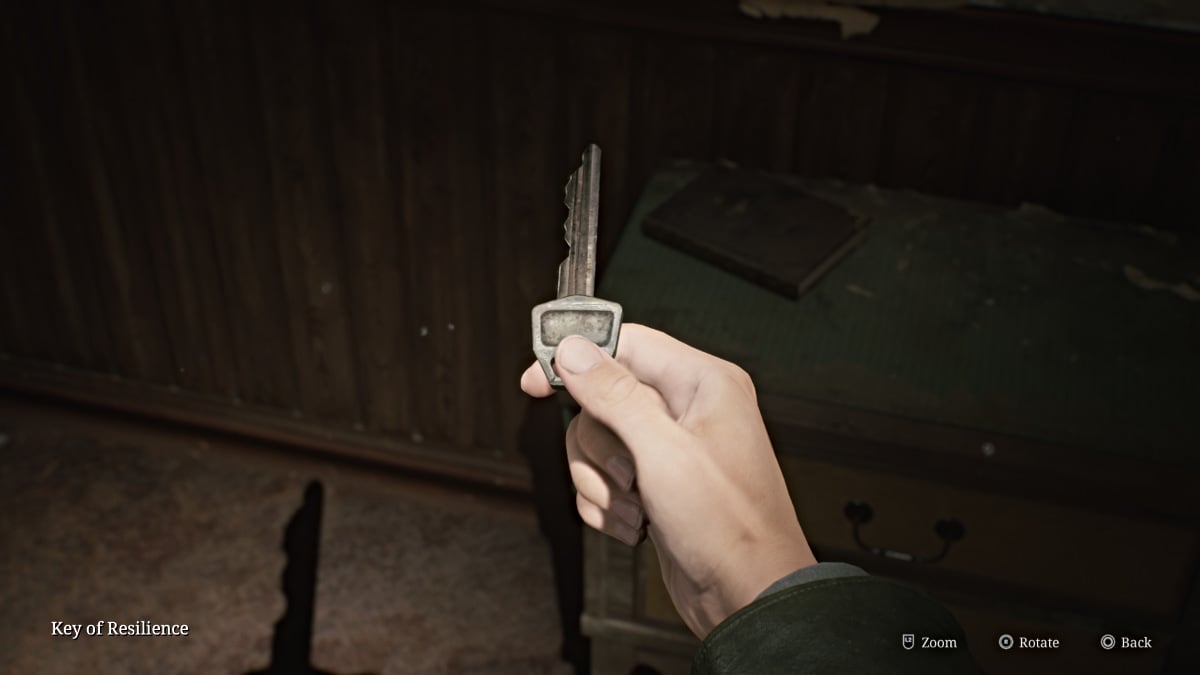
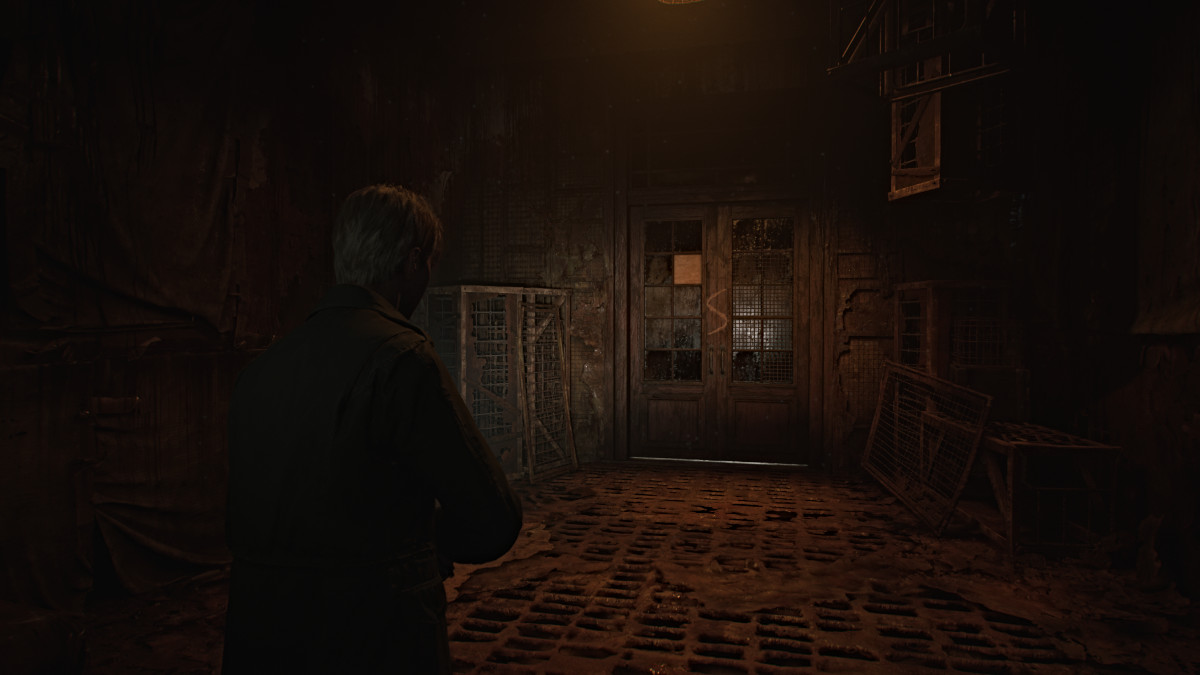
Take the Key of Resilience that's also on the table and then leave the apartment. Use the Key of Resilience on the southmost door that leads to a foyer area and double doors etched with the letter 'S' (seen below). It's locked, however, so you'll need to find another way.
Go past the foyer into Apartment 101, gather the Handgun Ammo and Syringe from there, and use it to bypass a barrier in the hallway, and it leads to the Stairwell Room. Go inside, where a Mannequin will ambush you. Kill it, so that you can get the "Together Forever" picture (Strange Photo) from it.
Go up the stairs (no, he's not waiting for you in there) and through the door back to the second floor. Head back to the Clock Room (212) since you have the Minute Hand and place it in the clock. Turn it to '2' and hit 'Accept' to solve the next part of the puzzle. This will unlock the 'M' Room on the second floor that you came across a while ago.
Blue Creek Apartments (Floor 2) - Moth Puzzle and Finishing the Clock Puzzle
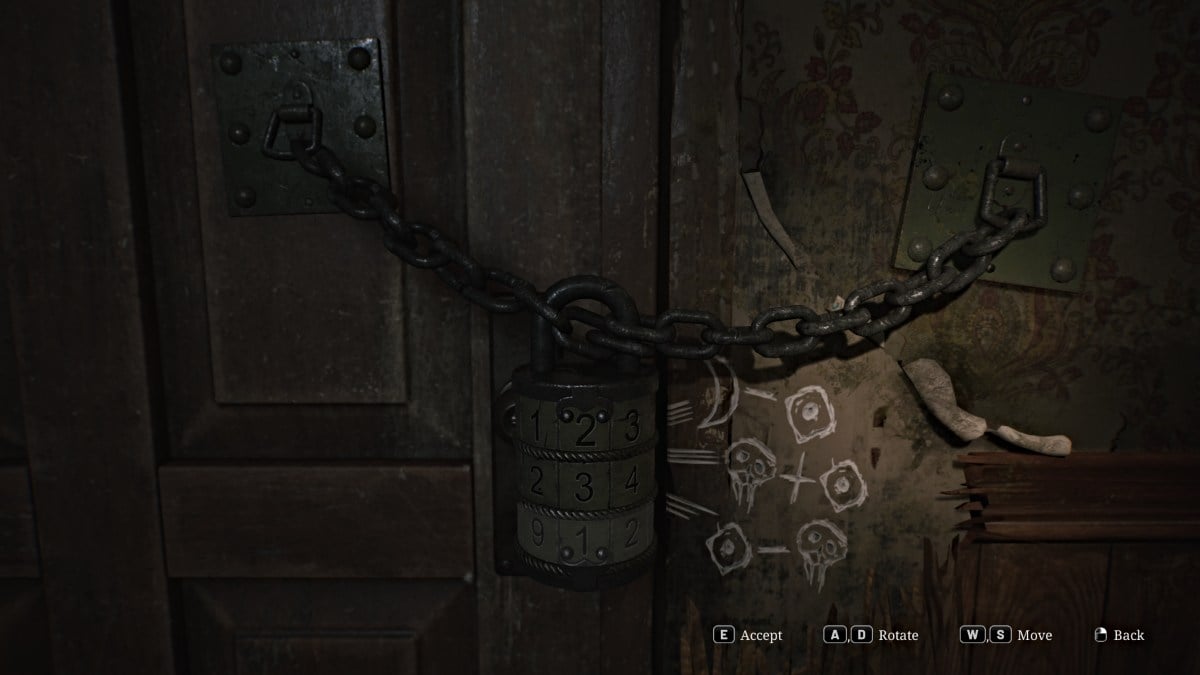
Head down the hall to the M Room (or Apartment 202) and go inside for another puzzle. The entire place is filled with moths, and you'll notice various displays of moth taxidermy around the main room. Behind the armchair is another door chained shut with a large combination lock that you need to solve to break it off.
Essentially, to get the correct combination you need to take count of all the moths displayed in the entire apartment (including the hidden ones behind the breakable wall) and the symbols on their wings. You factor those into the symbolic math problems next to the lock, and once solved you'll have the numbers.
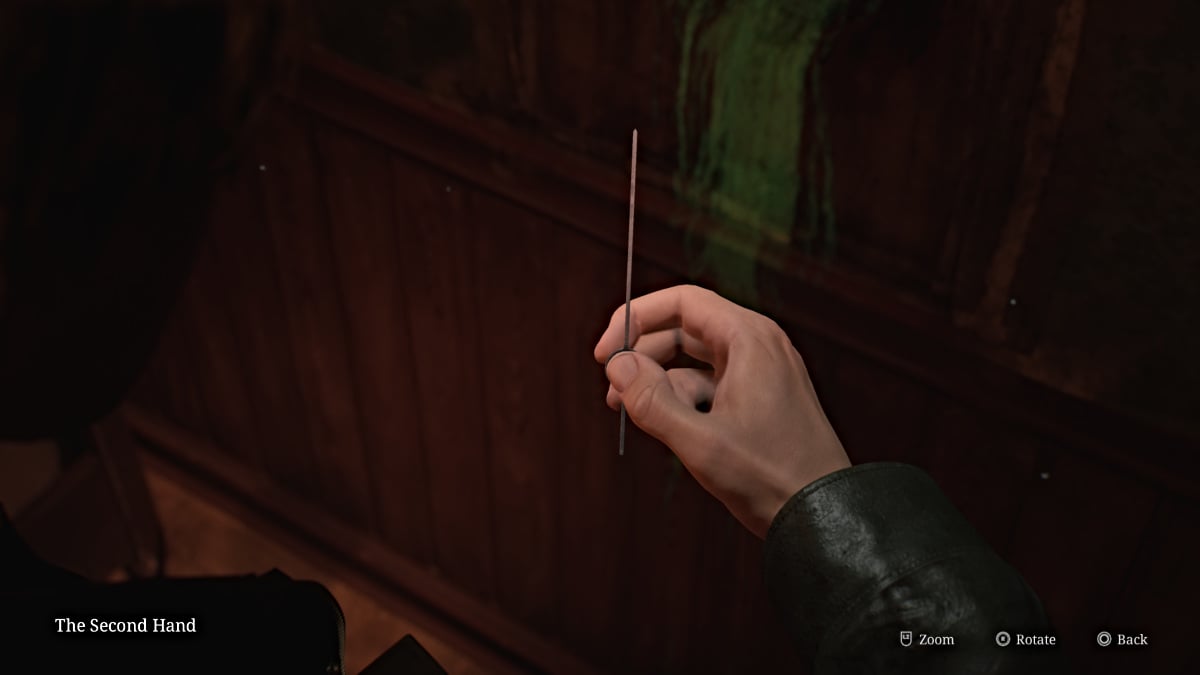
To save you time, however, the correct code for the lock (Standard Difficulty) is 373. Once done, go inside where you'll see another incredibly inviting hole in a wall for James to stick his hand in. 'Search' it enough times and you'll retrieve The Second Hand for the clock. Leave the apartment afterward.
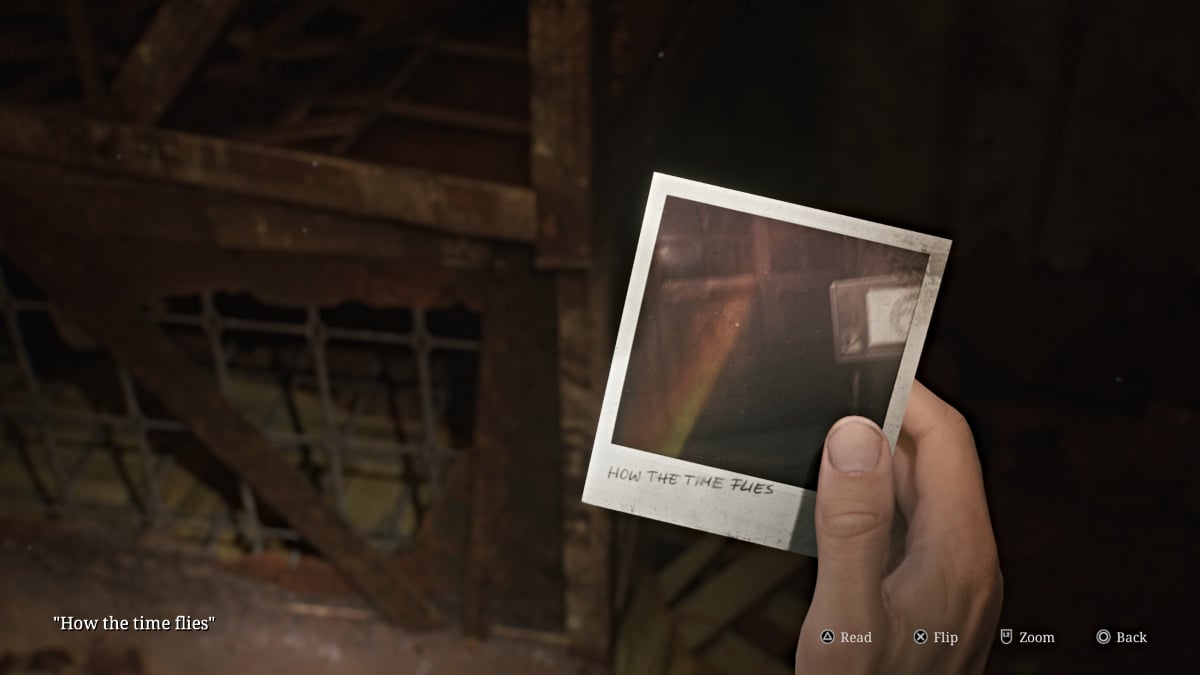
Return to the Clock Room and place the Second Hand inside the clock. To complete the third and final part of the puzzle, turn it to '3' and this will unlock the ominous 'S Room' back on the first floor. Before you leave the Clock Room, make sure to grab the Handgun Ammo from the neighboring room and the "How the time flies" Strange Photo.
Also make sure to explore anywhere else that you want to in the Blue Creek Apartments before progressing, as the S Room is the point of no return for this area.
If you're ready, take the second floor's west-side stairwell down to the first floor. Along the way you can notice fresh gashes in the floors and walls, indicating someone with a huge blade has been stalking the area. Go back to the foyer area where the S Room is, take a deep breath and go inside.
Blue Creek Apartments (Floor 1) - How to beat Pyramid Head
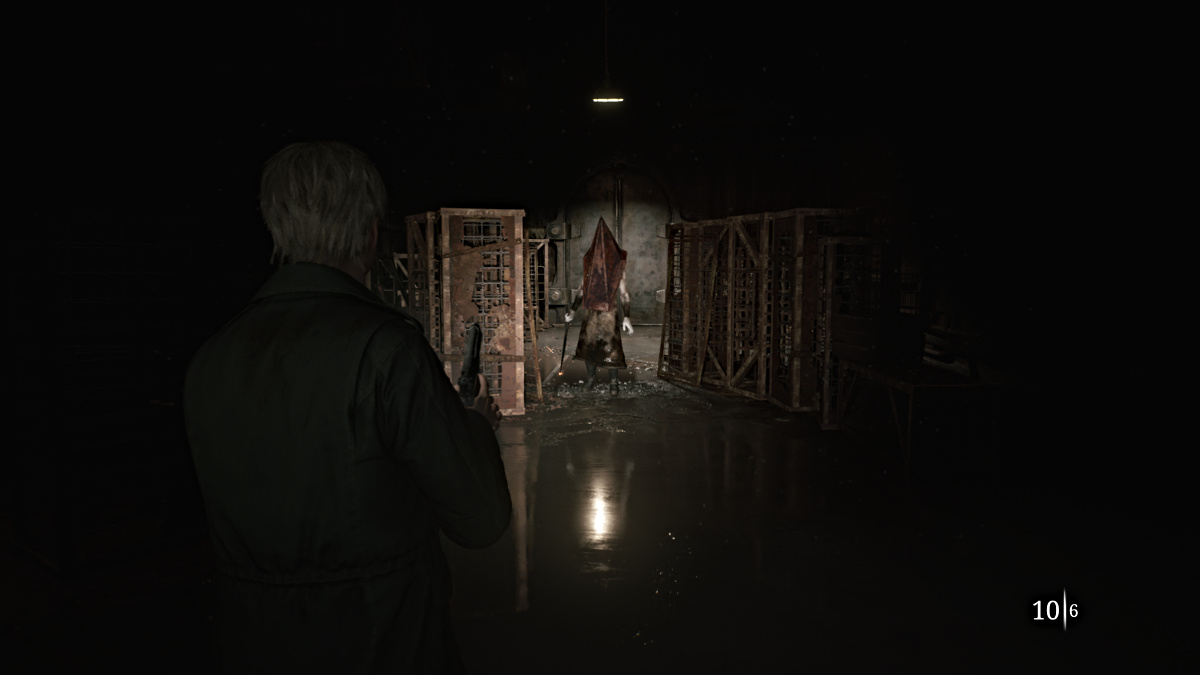
The S Room is home to none other than Pyramid Head himself, who has been lurking and waiting for your arrival. As soon as he turns to face you, the fight begins.
Rather, it's your fight to stay alive long enough because as you'll quickly realize, Pyramid Head takes little to damage at all. The only weapon you want to use here is your Handgun because keeping your distance from him is the top priority. If you attempt a melee attack, one swing of his Great Knife will either severely damage or kill you outright.
Thankfully, the room is littered with boxes of Handgun Ammo, so make use of those while continuously making circles around the room. Keep firing bullets into him (avoid his helmet) and at one point he'll become more aggressive while the room begins to flood.
Continue the same strategy until finally, sirens begin blaring and Pyramid Head immediately stops his attack. A cutscene will show him leaving, ending the fight altogether. Once you have control, double-check the room for any Handgun Ammo you might have missed and then go out the same doors, which will take you straight outside, back onto the streets of town, the Otherworld now gone.
Fun Fact: If you go back into the building, the exit area will have changed back into its original residential aesthetic, like nothing ever happened.
Silent Hill 2 Remake West South Vale Walkthrough
Hit the Red Save Point right outside after the fight to save your progress, then check the car next to it for a Health Drink. Check your map and you'll now find yourself in the West South Vale area of Silent Hill. You'll see that Rosewater Park up north is circled, meaning that's your next main objective.
Turn the corner and check the green car on your right for Handgun Ammo in the driver's seat. Keep going and another cutscene will play where James runs into the young girl from before (named Laura but she doesn't reveal it until later). She appears to be holding a letter but refuses to tell James what it is, saying that he "didn't love Mary anyway" and taking off again. The cutscene ends with James baffled that someone else is here for Mary also.
Rosewater Park
Continue on through the tunnel that takes you straight into Rosewater Park. Take the first left towards the bench area, where you can find a Syringe next to a jacket. Then, take the small bridge across which then diverges. Take the right path and follow it, as there will be some Handgun Ammo to salvage on that side.
Keep going straight and underneath the 'Rosewater Park' sign, which brings you to a pier area by Toluca Lake.
If you're playing New Game Plus and want to achieve the UFO ending, inspect the Blue Gem for the second time at Rosewater Park's pier once you hear the same audio cue as before.
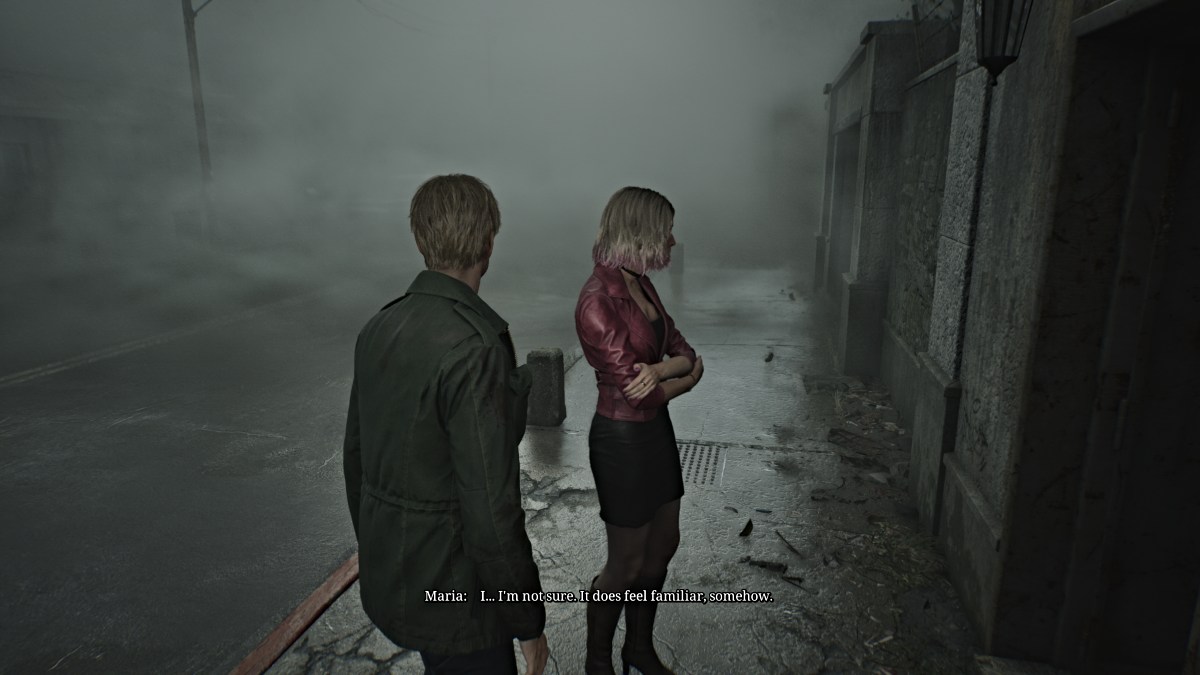
Take the long central path across to a gazebo, where you'll see a female figure in the fog.
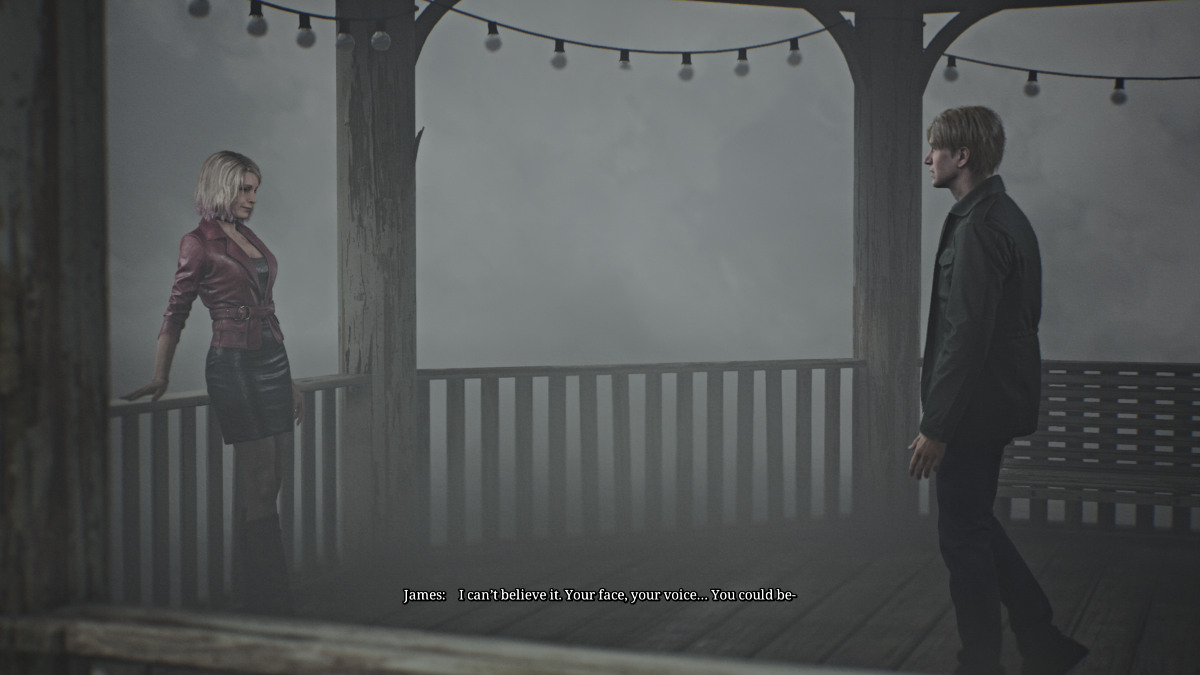
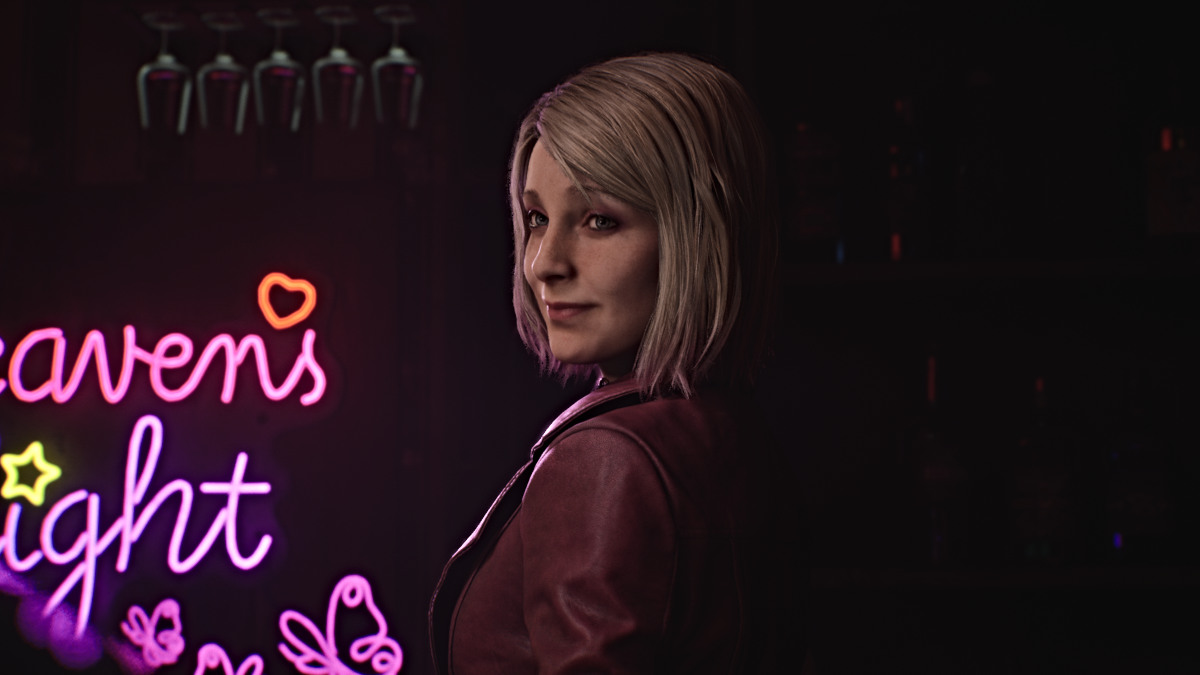
A cutscene reveals it's a woman who eerily resembles Mary, but with a noticeably more come hither look. She reveals herself as Maria.
As James grows visibly disappointed and confused, Maria offers to take him to another possible "special place" Mary might be at. Despite his preference to go alone, Maria insists on coming with him with "all the monsters around". He reluctantly agrees and now your journey includes Maria as your companion.
Circle down and around the left side of the park, where you'll find the "So far from home" Strange Photo in a sitting area, a bit more Handgun Ammo on a chess table and a Health Drink in a public restroom area. Leave Rosewater Park out the west exit and onto Nathan Avenue.
Jack's Inn
Maria tells James to cut through Jack's Inn to get to their destination, so head there across the street. Head into the motel office first, which can be accessed from the door on the back side. There's a small safe beneath the counter that requires a code to be opened. Grab the Reception Desk Note from the bulletin board, which hints at Room 107. You'll find it at the elevated building towards the back of the motel, but you'll need to break the window in Room 108 to get there.
Once in, break down the wall connected to Room 107, and in the bedroom you'll find the Toolbox Memo, which gives you the following riddle:
- One (One Less), Three (One More), Eight (Three Less), Zero (One More)
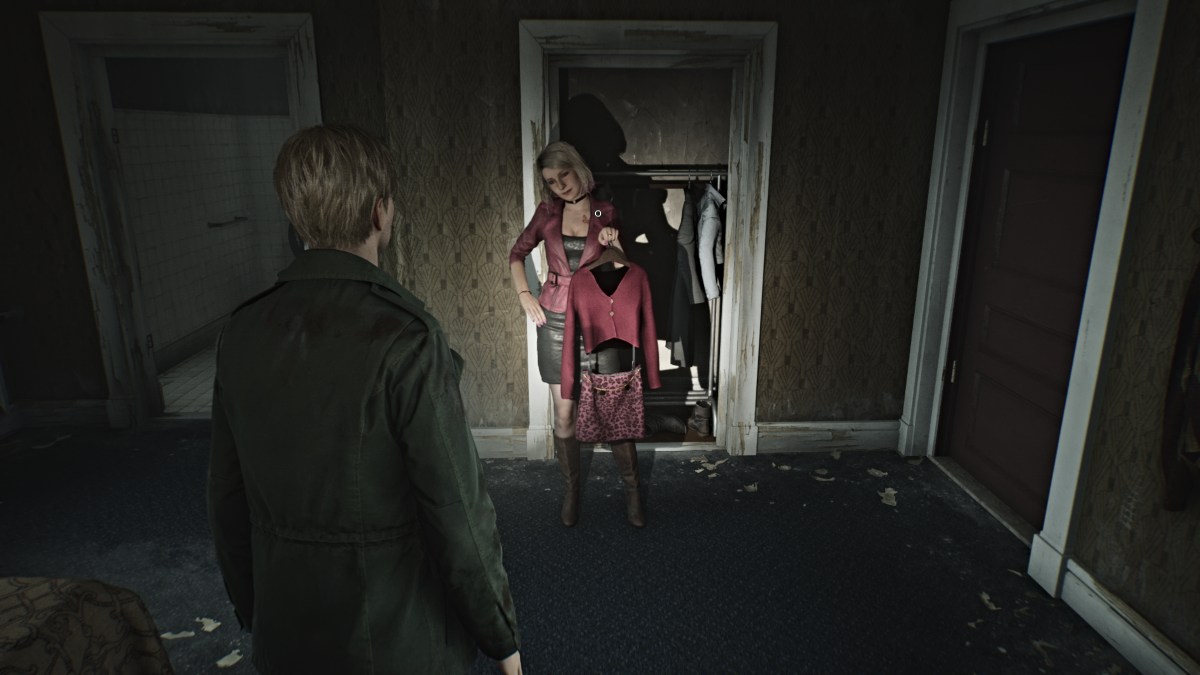
By doing the appropriate math, you'll get the code 0451. As you ready to leave the room, Maria will tease you with an outfit she found in the closet, asking if it would look good on her.
The outfit Maria shows just so happens to be her outfit from the original Silent Hill 2 game, so it makes for a nice easter egg.
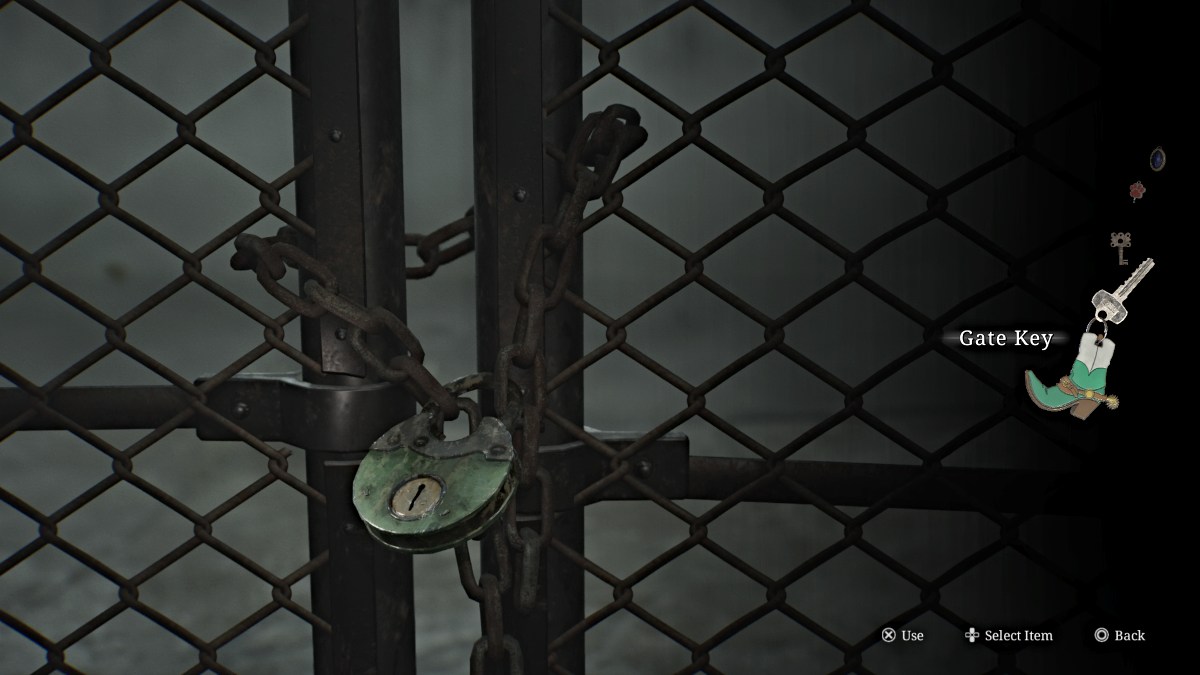
Go back to the motel office, use the code, and inside the safe you'll find the Gate Key. You don't get much time to look at it though, as a Mannequin suddenly ambushes Maria. One shot will take it down.
Octanis Fuels
After using the Red Save Point sitting on the trunk of a car, now is the time to explore other places in the area before continuing the story, as you won't be able to return for a while and it will be nighttime (and more dangerous) when you do.
If you're playing New Game Plus, before you go anywhere else, go to the small row of houses directly behind Jack's Inn. In one of the backyards you'll find the Broken Key Part (Bone) near a dog house. Now you can combine both parts to repair the key and use it later.
From where you entered Jack's Inn, head left down Nathan Avenue until you reach Octanis Fuels. Upon arriving, Maria will say you're going the wrong way and be aware that ignoring her advice and letting her get attacked by monsters throughout the game will influence your ending.
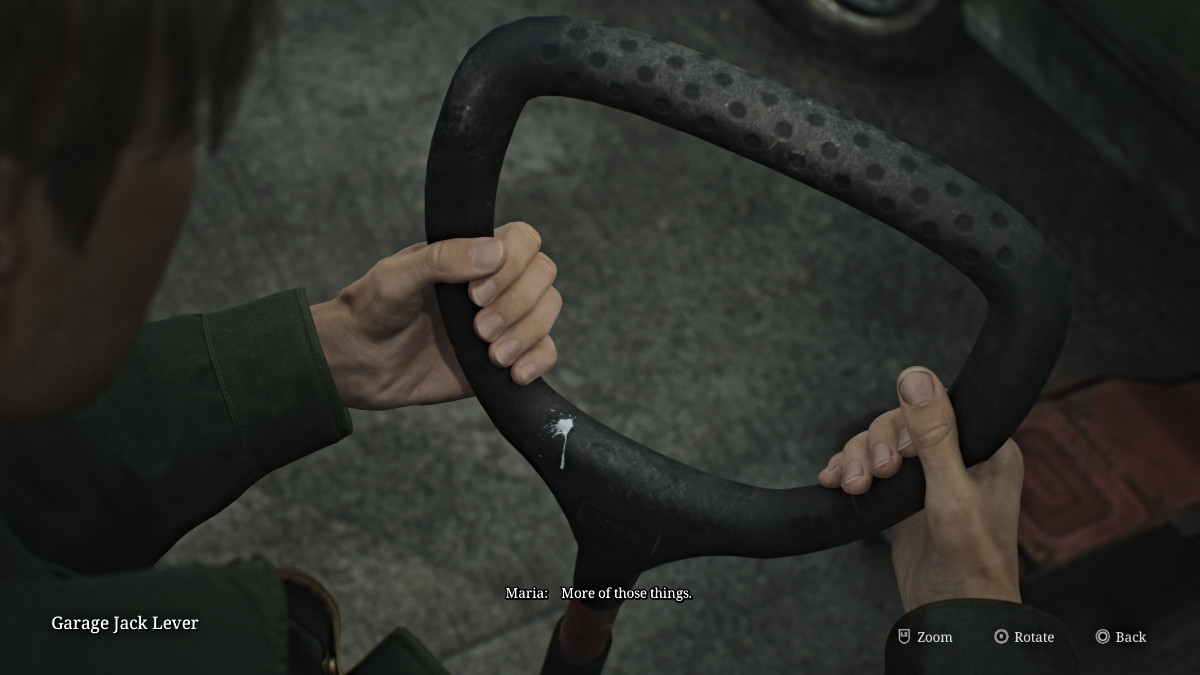
Go around to the back of Octanis Fuels where you'll find a car lifted by a garage jack. Walk up and take the Garage Jack Lever from it, but the noise will wake up several monsters in the process. Take care of the Lying Figures and Bugs that come running.
Pete's Bowl-O-Rama
Also while you're over there, head across Carroll Street to Pete's Bowl-O-Rama and go explore inside. While in the original game you'd stumble across Eddie and Laura here, that isn't the case in the remake. The place is completely empty but you can find a Red Save Point, some spare Handgun Ammo and Health Drinks lying around, along with a nearly-eaten pizza near the bowling lanes.
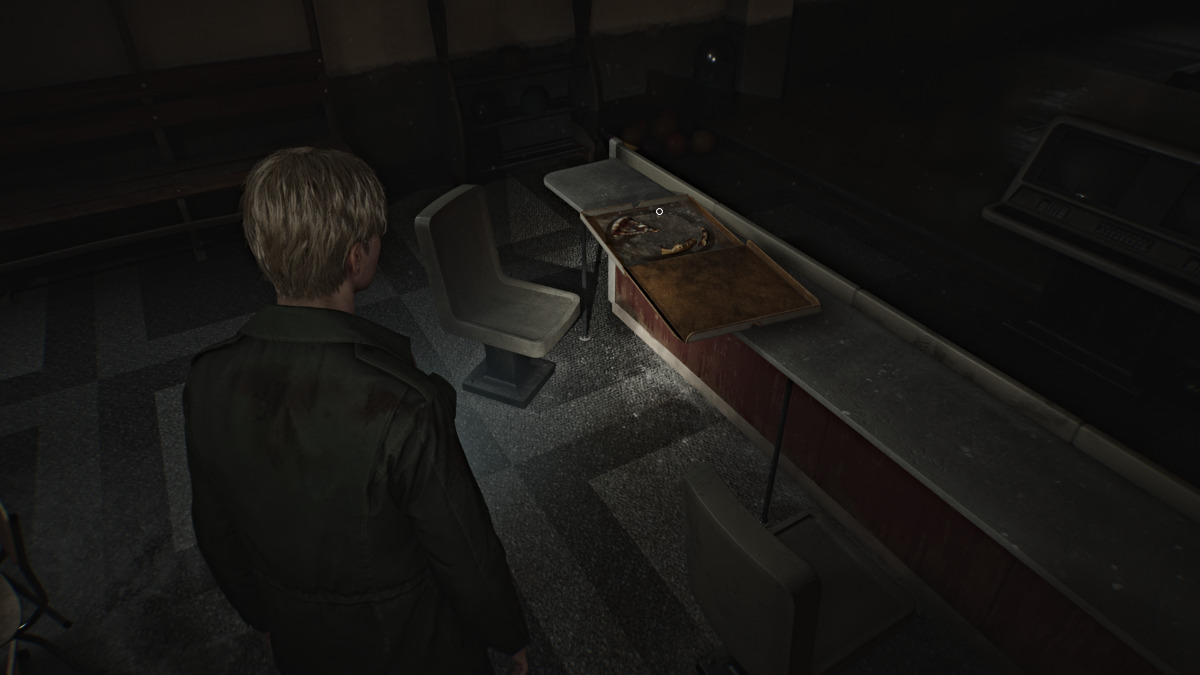
Interact with it to get another Glimpse of the Past, and James will remark "This place is full of monsters, how can someone sit here and eat pizza?". It's a fun nod to one of the most iconic scenes from the original game, and Eddie may very well have still been here.
If you're playing New Game Plus and want to get the 'Bliss' Ending, look for a safe behind the shoe rental counter, sitting in one of the cubby holes. The code to open it is 1887 and inside you'll find the Rusted Key.
Car Park (outside Rosewater Park)
Leave Pete's when you're ready and head all the way back down Nathan Avenue towards Rosewater Park. Be mindful of the monsters now scattered along the street. Once you're back, go specifically into the Car Park just outside Rosewater Park. One of the parked cars inside it will have some Handgun Ammo, so smash and grab.
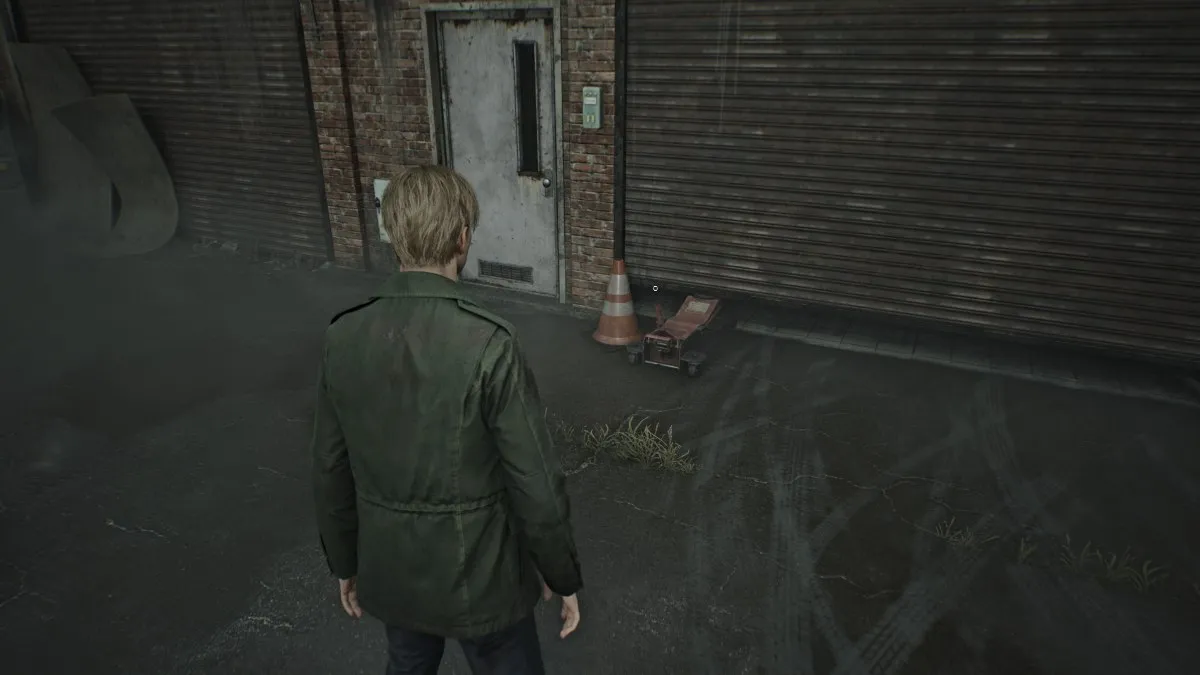
Run around to the back of the garage in the Car Park, where you'll see a gate being held open by a garage jack, albeit missing its lever. Use the one you salvaged and you'll be able to open the gate up fully. Inside you'll find a trove of helpful items, including:
- Handgun Ammo
- Health Drinks and a Syringe
- "Made It!" Strange Photo
- Newspaper cliff about employee layoffs at Brookhaven Hospital
With that, you'll have covered much of everything you'll need to explore in the area for now. So head back through the parking lot of Jack's Inn, use the Red Save Point there again, and use the Gate Key you acquired earlier to unlock the west side gate and get access to the rest of West South Vale.
Baldwin Mansion
If you detour to the left first you'll come across the Baldwin Mansion, a prominent location from the original game's side story Born From a Wish. Unfortunately, its doors are locked and Maria will refuse to even go into the courtyard, saying that while she feels like she's been there before, it seems to be a "bad memory".
If you're playing New Game Plus and want to get the 'Rebirth' ending, while you're at the Baldwin Mansion look for the White Chrism sitting on a table in the porch area.
Steel Pipe Weapon Upgrade
With that, head south down Munson Street then hang a right at Katz Street since another tall barricade is in your way. Eventually, a cutscene will reveal that the road ends with another huge gap in the ground, and Maria insists on finding another way. James senses something and finds an alley shortcut close by just as monsters start to swarm and the fog riles up again, similar to before.
After getting through the alley gate, James barricades it with his wooden plank to keep monsters out, his only melee weapon seemingly lost. However, he turns and finds a Steel Pipe sticking out of a smoking car to make use of instead, giving you an upgrade in the process.
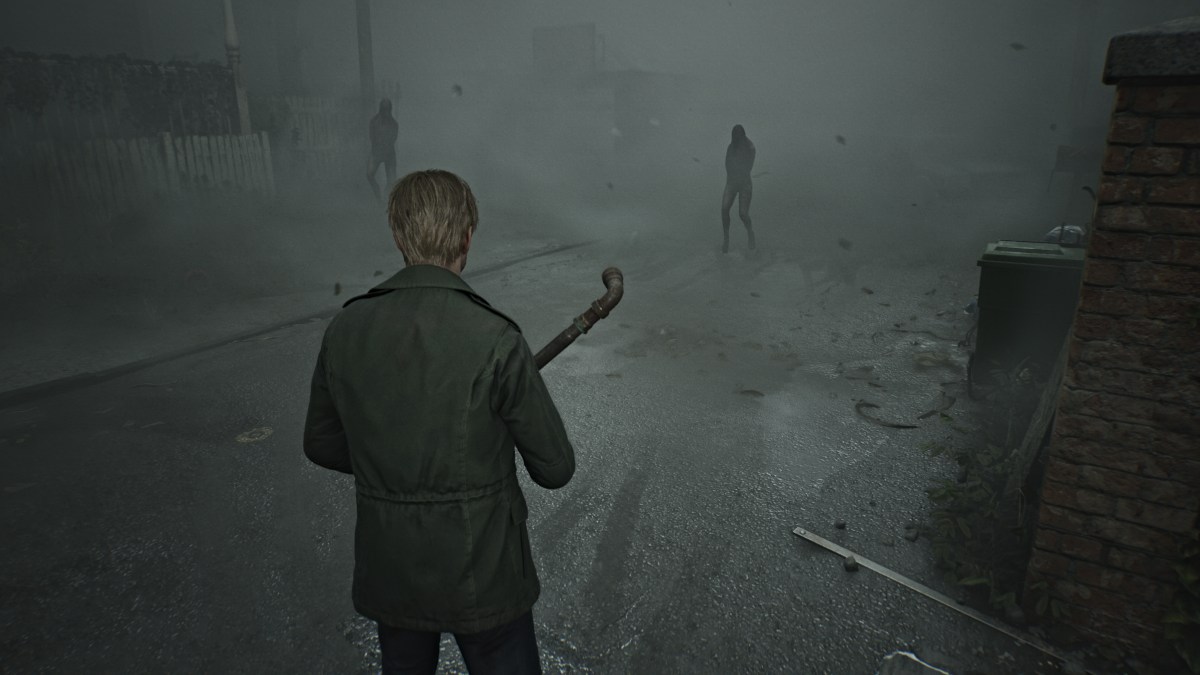
Use your new melee weapon to fend off the monsters ahead of you and make a path through the back alleys and yards toward Heaven's Night. Pick up all the Handgun Ammo that you can along the way.
If you feel comfortable doing so, this is a great opportunity to rack up some serious melee kills for the 'Blunt Force Trauma' achievement. Just keep an eye on Maria while you do so.
Heaven's Night
Eventually, Maria will direct you to a gap in a fence to escape through. Take it, and after a brief cutscene, you'll find yourself right behind Heaven's Night. Head to the building's back door, and despite it being locked Maria will open it for you. Explore the kitchen and dressing room areas for items, including the "Ready to kill it!" Strange Photo.
Afterward, go through the open door and around the backstage area (more items here) until you reach the front dining area and bar. A lengthy cutscene will play out with Maria trying to entice James to relax and for them to spend some time there, for one reason or another. She insists this wasn't the "special place" she was referring to, that it was merely a shortcut.
Ultimately, he decides it's better to keep moving and Maria leads him out the front door and to the actual "special place" she meant.
Fun Fact: On the way out the front door of Heaven's Night, if you look at the "Kiss" neon sign in the top right corner, in the mirror beside it the sign reads "Sick" in disjointed letters. A clever reference to the game's overarching theme of sickness.
Moonlight Grove
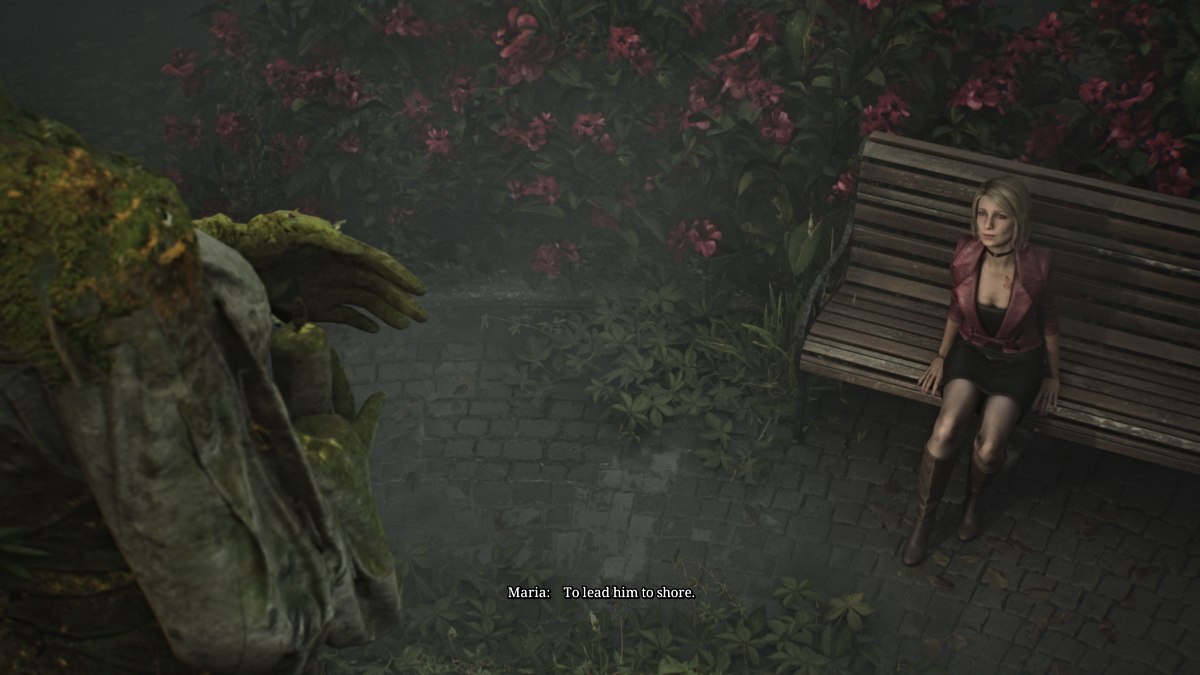
Maria guides James into a place he's never been in Silent Hill (and new to the remake) called Moonlight Park. They arrive in a small courtyard where a statue of a woman stands, and during a length cutscene Maria tells James about the enamoring yet tragic story behind her.
Meanwhile, the story clearly affects James, who starts to lose hope that he'll find Mary given the circumstances. Maria consoles him and insists they'll keep looking, and suddenly a nearby scream alerts them.
Reverie Theater
Follow Maria towards the back side of Reverie Theater next door, where there will be a crawl space high up for James to fit through and investigate. Maria insists on staying behind since she hates movies (geez, but not bowling?).
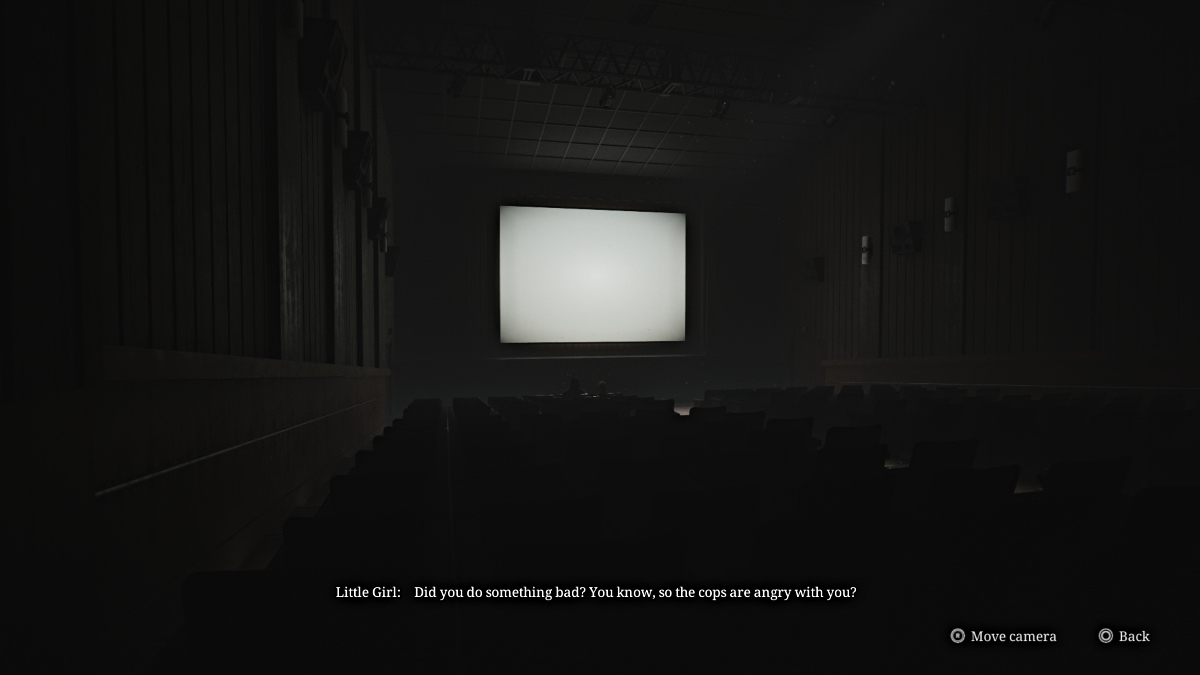
Once inside, you'll soon hear the voices of none other than Eddie and Laura, who are apparently watching a movie together and Eddie teases Laura for screaming (the one you heard earlier).
Look around and interact with the nearby cabinet to move it out of the way of a door, which causes a ruckus. Laura gets spooked and runs off while Eddie stays. Go through the door and around the corner to your left to go into the theater, where another cutscene will play out with Eddie.
After it's over, go through the doors on the far left side to the next theater room, where Laura will prank James by turning on the projector. Head up through the back doors to the hallway and then up a nearby stairwell. Make your way through the projection room and back through the room full of film reels. Squeeze through a gap between two shelves and James will spot Laura in the next projection room who runs off again.
Go through the second projection room and out through the back doors, and continue chasing her all the way out the theater's front doors. Pit stop both lobby bathrooms for more Handgun Ammo before you go.
Run outside and Maria will say they can still catch her. Go left down the street and around the corner, and another cutscene will reveal Laura running into Brookhaven Hospital, the next major location in the game.
Silent Hill 2 Remake Brookhaven Hospital Walkthrough
Brookhaven Hospital (Floor 1) - Map and Basement Key
Enter Brookhaven Hospital and immediately turn right into the entry office. You'll notice an open gun cabinet where a Shotgun used to be, hinting that it's likely still in the hospital somewhere. Grab your first batch of Shotgun Shells from the nearby desk.
Go through the next set of doors and run over to grab the Brookhaven Hospital Map 1F-3F from the magazine rack under the bulletin board. Go left to Reception Office and grab the Key Locker Note that mentions a padlock combination and Examination Room 3. There's Handgun Ammo on a desk as well.
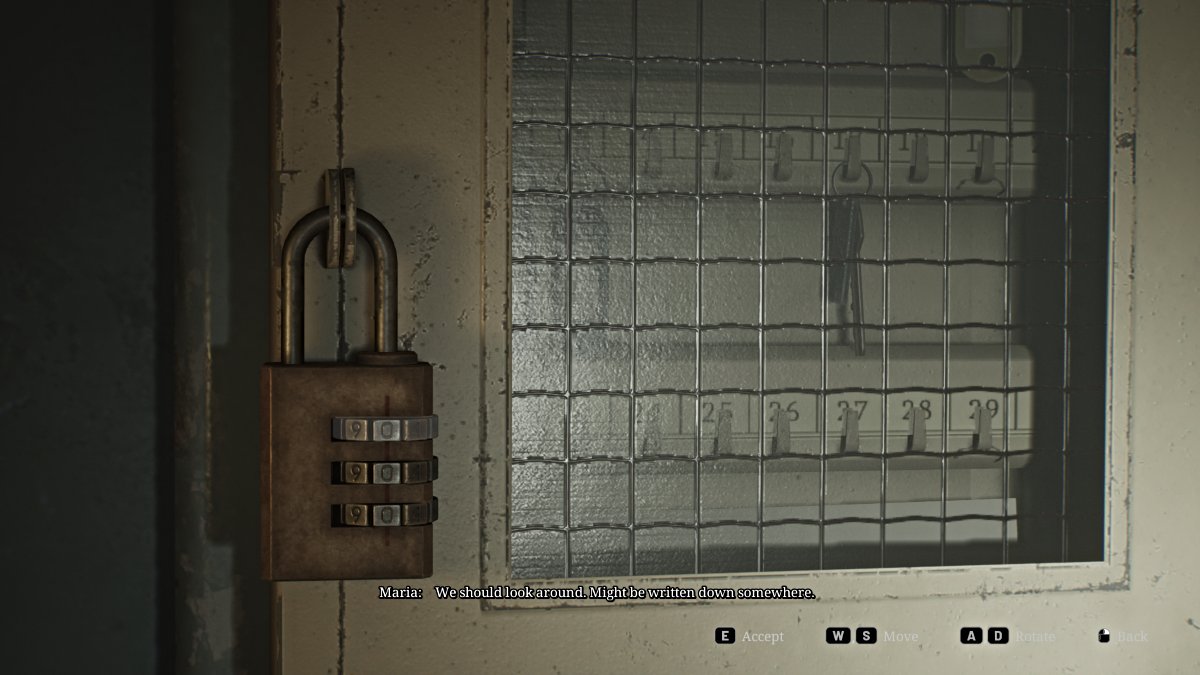
Turn and go into the room behind where wind through an open window blows some documents around. Use the Red Save Point and then make note of the key safe on the wall (seen above) with the previously mentioned padlock. The correct combination (Standard difficulty) is 724, but you can still head to Examination Room 3 to get the Nurse's Memo for completion sake, along with a Syringe and Shotgun Shells. With the box open, retrieve the Basement Key.
Most other routes on the first floor are locked for now, so head for the stairs on the east side. A cutscene will show Laura drawing on the walls before spotting James and running away, again. If you follow her up to the second floor, you'll find the doors locked for now, so head back down instead to the Basement level, since you have the key. Grab Handgun Ammo from a drawer beneath the stairs at the bottom, then head through the doors.
Brookhaven Hospital (Basement) - Restart the Generator
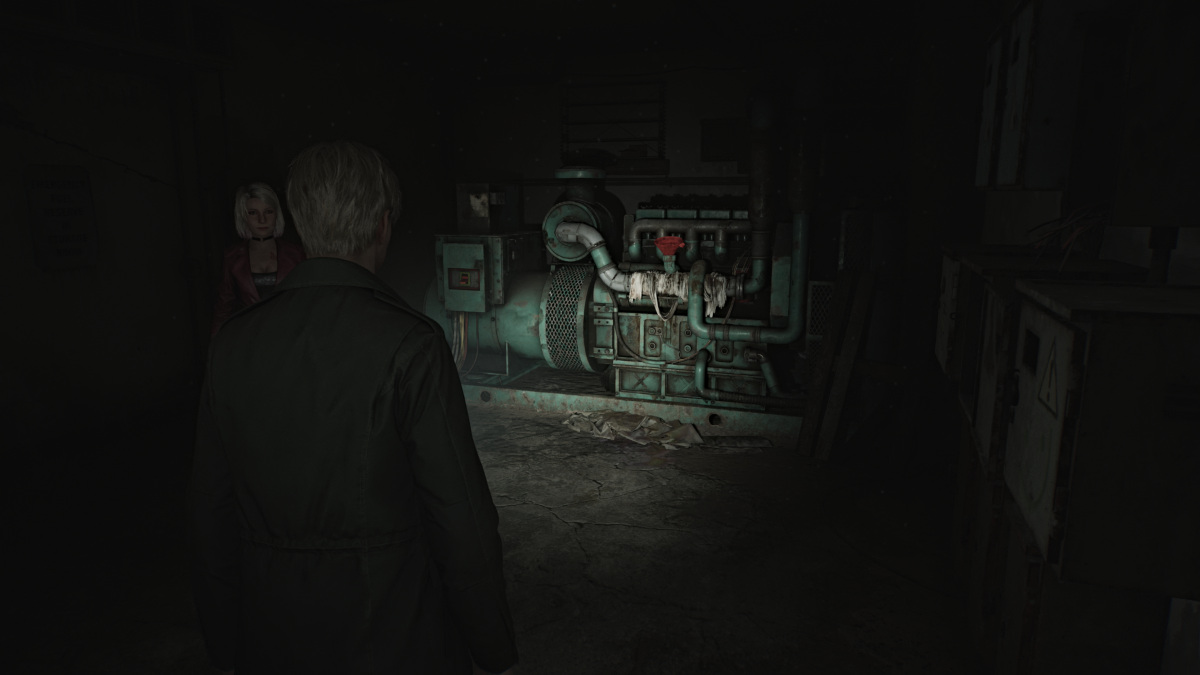
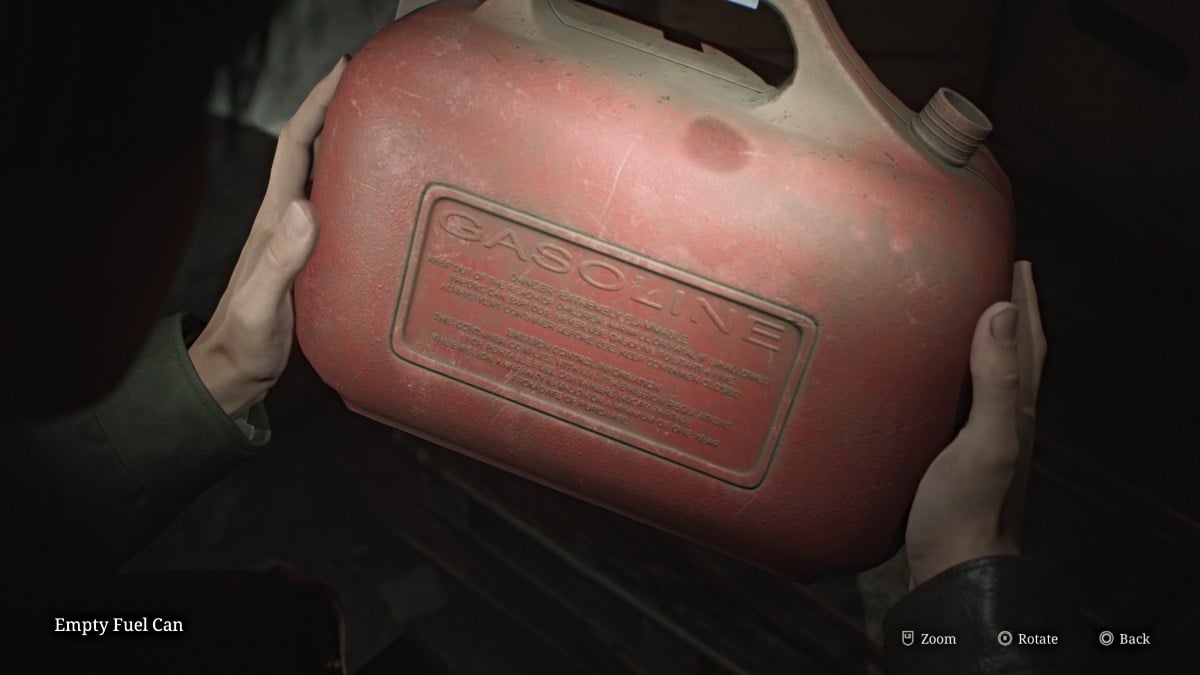
Straight ahead you'll find a Map for the Brookhaven Hospital Basement. Get your bearings, then head north to the Pump Room, where you'll find Handgun Ammo on a container to your right. Continue through to the Generator Room, where you'll see a huge generator that's currently without power. A red funnel over the tank indicates it needs Fuel.
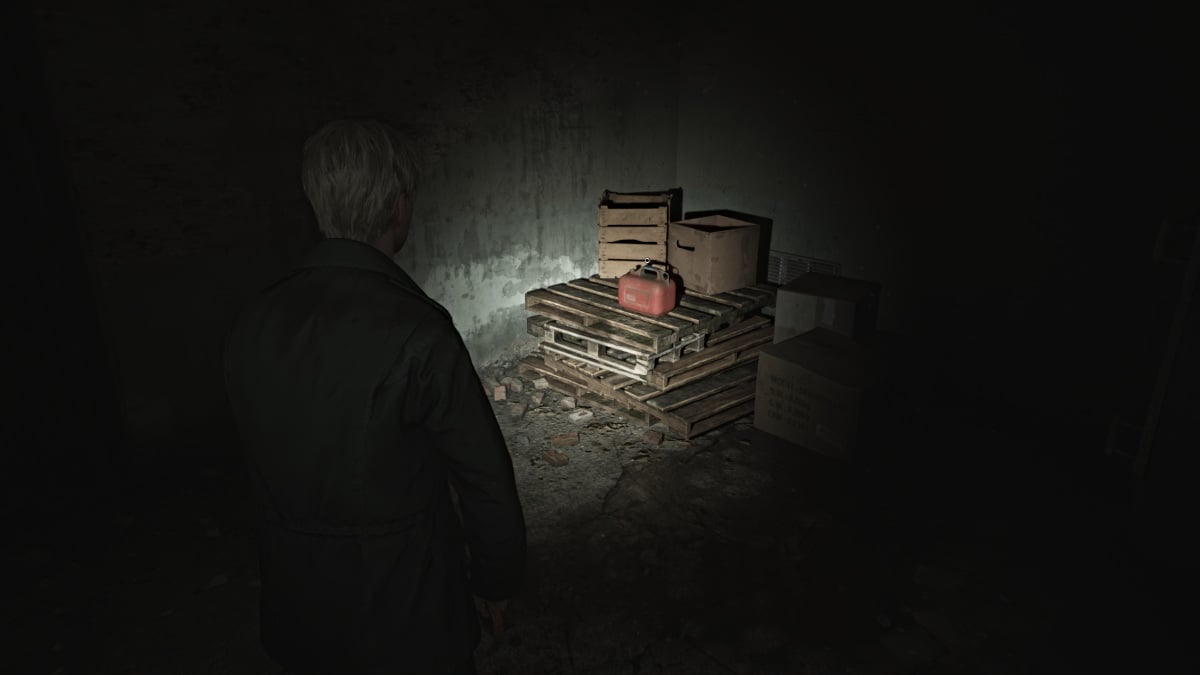
Go over into the Boiler Room area (consists of two rooms) and watch out for ambushing Mannequins. Grab some Handgun Ammo by the back wall and then go into the second Boiler Room where you'll find an Empty Fuel Can in the back corner.
Leave the Boiler Room and go over to Laundry Storage, where there's a handcart that needs pushing. Your destination for it is the high crawlspace straight ahead in the next room (Laundry Room). Another Mannequin will ambush you on the way in, so you may want to take care of that first. Grab more Handgun Ammo from the area as well.
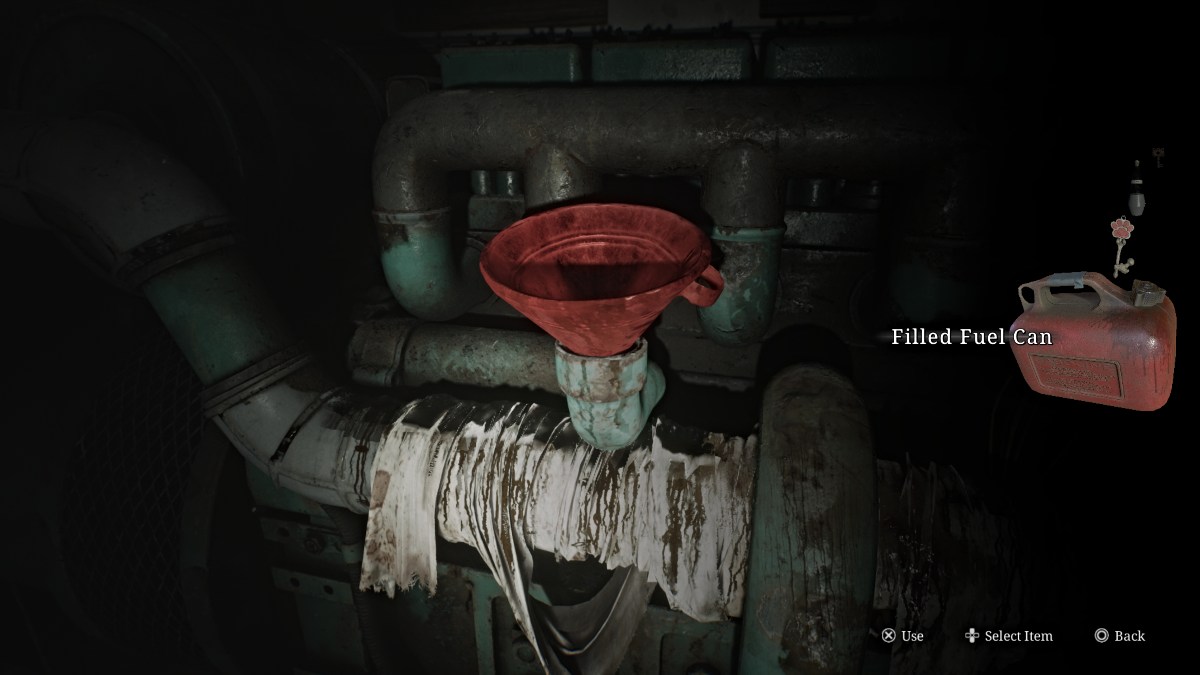
Climb into the Storage Room, where you'll find more Handgun Ammo, a Syringe, and a large fuel tank where you can fill your Empty Fuel Can. Once done, make your way back to the Generator Room. Fill the generator with the fuel you collected and then turn it on, which will restore power to the Elevator.
On your way there, stop in the Tech Room for some Handgun Ammo and Shotgun Shells. Take the elevator up to the second floor, and a cutscene will play once you get there.
Brookhaven Hospital (Floor 2) - Maria Rests and the Director's Office
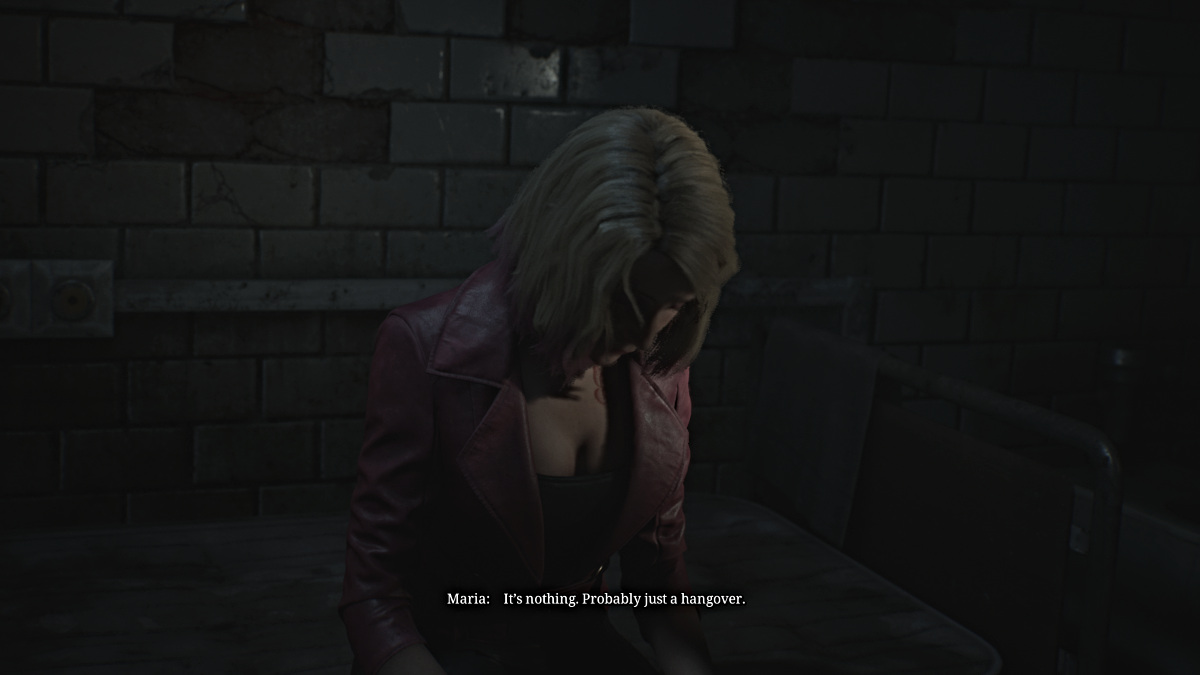
While James notices it's now dark and raining outside, Maria strangely ducks into a nearby care room. James asks her what's wrong and she insists she's just tired and decides to stop and rest, taking some medicine and lying down. James opts to continue looking for Laura and says he'll be back.
Head out of the room and go into Room C3, where there's a Red Save Point and a Health Drink. The Restroom next to it has some Handgun Ammo, as well as Room C2 across the way. The double doors near the Director's Office are locked for now, so run back up to the north hallway and through those doors, where your first encounter with the Bubble Head Nurses will be.
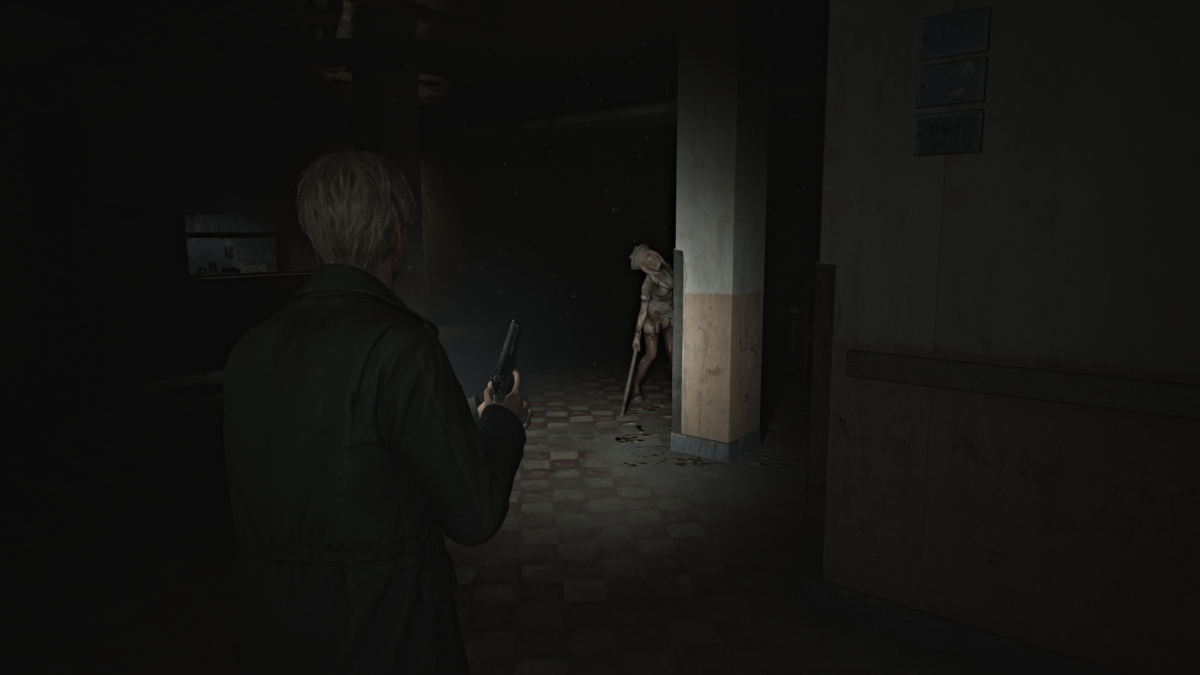
Like Mannequins, Bubble Head Nurses are agile and can dodge your attacks, so be careful. On top of that, they wield weapons of their own such as pipes and knives, they can attack repeatedly and can cover ground very quickly, so they're definitely one of the most formidable monsters in the game. And they're all over the hospital, so use your ammo wisely.
Continue down the hall until you reach the open area between the Nurses' Station and Room L3. Use the crawlspace to get into Room L3, where you'll find Handgun Ammo, Shotgun Shells, a Health Drink, and the "Her Drawings" Strange Photo over in the Observation Room.
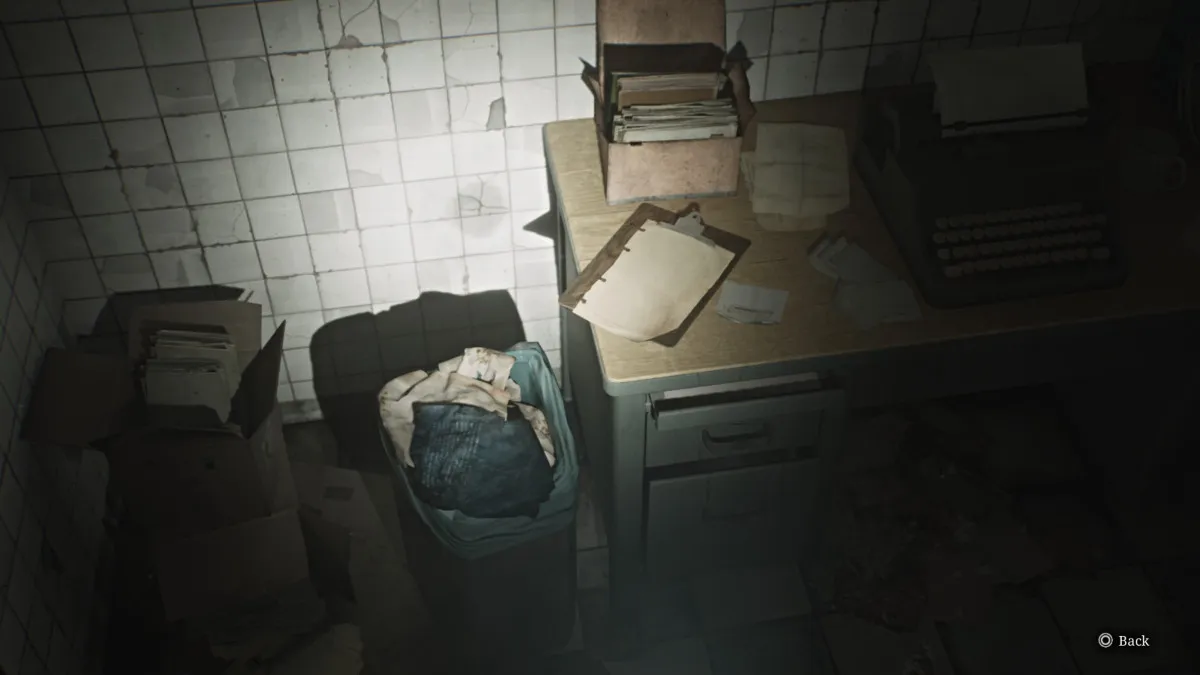
Backtrack until you can turn left and take a shortcut down the center hallway towards the Director's Office. Along the way, stop in the Laundry Room for another Glimpse of the Past in a trashcan (seen above) and some Shotgun Shells.
Take another left to first go into Room C1, where you can take a boat poster off the wall to reveal a red eye drawn in blood and the Interview Transcript. Unlock the double doors you couldn't open before, then go across the hall to the Shower Room, which has Handgun Ammo and a Mannequin waiting to pounce. Use it to reach Room L2, where you can find Shotgun Shells, Handgun Ammo, a Health Drink, and two more monsters.
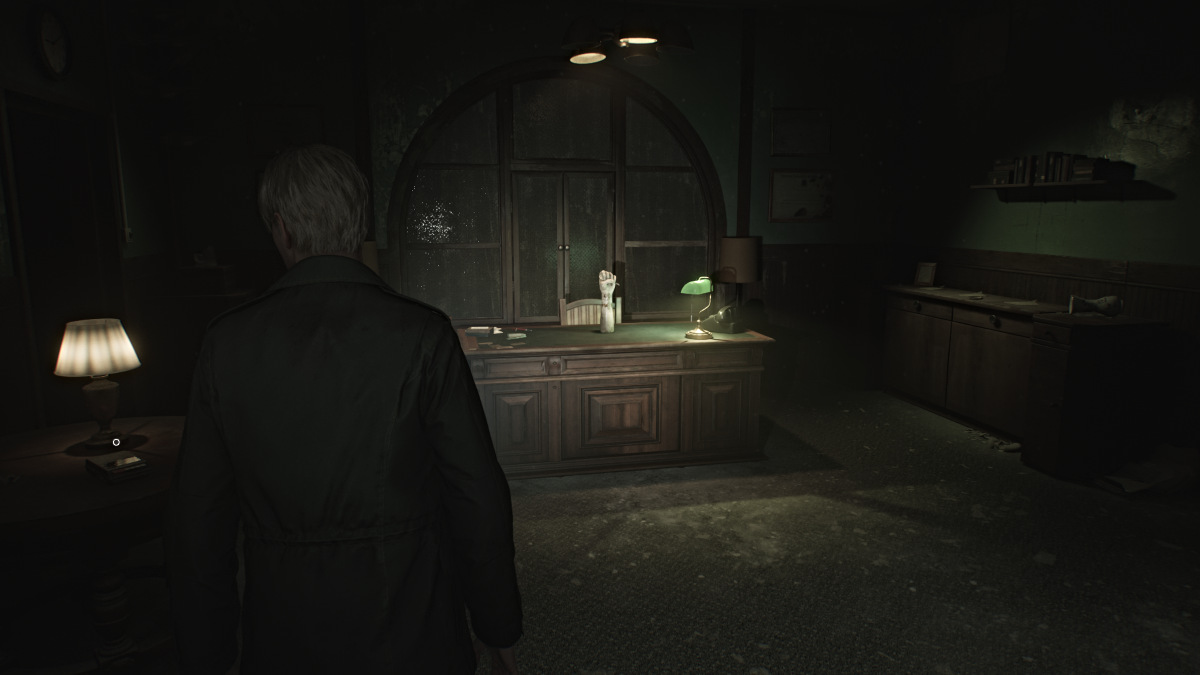
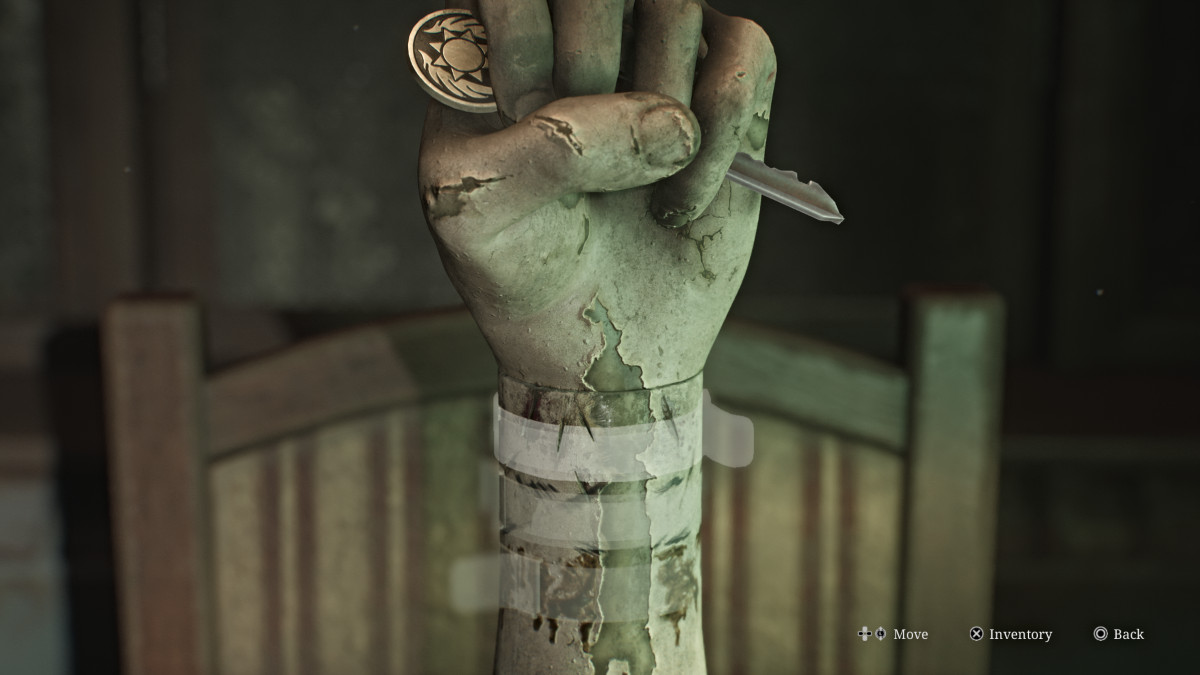
Finally, go into the Director's Office where you'll find a Red Save Point, a locked door, an audio recording, and Evaluation Cards for Patients #50, #90, and #130. Also, behind a red curtain you'll find a safe with strange symbols, though one of them is missing.
On top of all that, there's a mannequin arm propped on the desk grasping the key for the aforementioned locked door. To obtain it, the arm needs three patient bracelets placed on it.
Thankfully, the Evaluation Cards you picked up give you some hints about where to find them along with the missing symbol plate for the safe. Check your map then leave the office.
Brookhaven Hospital (Floor 2 and 1) - A Shotgun, Room L1, and Medical Records
After dealing with another Bubble Nurse, pick up some Handgun Ammo from both the Restroom across the hall and from Room M5. Further down the hall, Room M1 will have Shotgun Shells and another Glimpse of the Past to unlock.
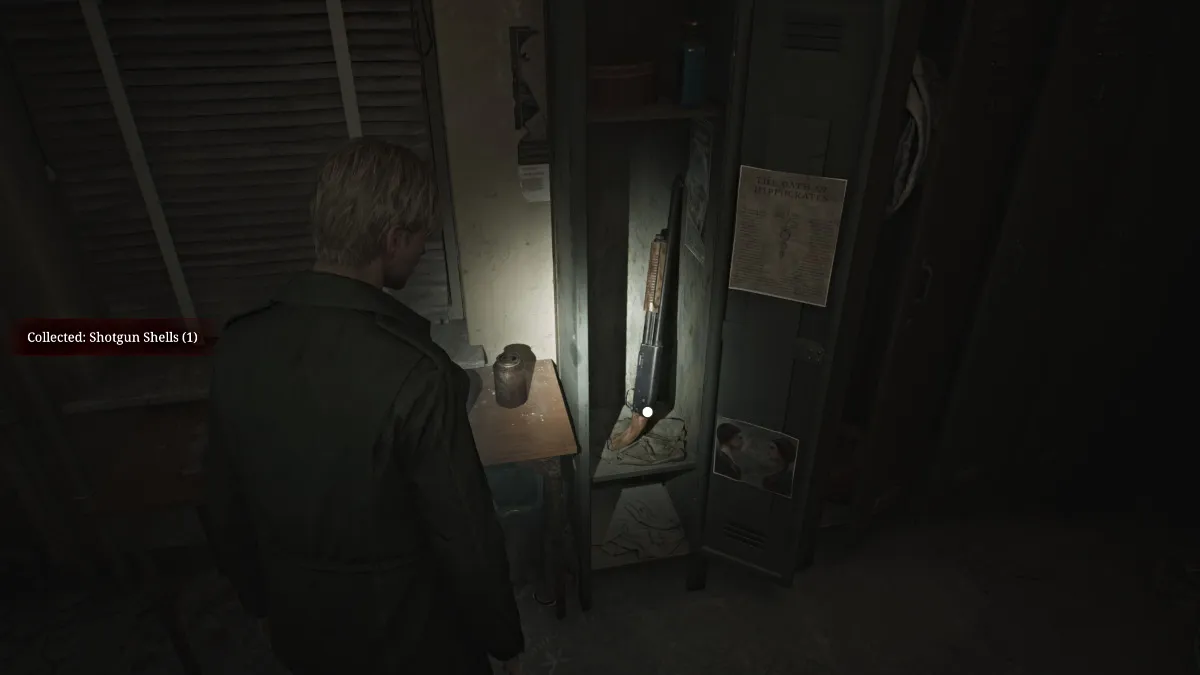
Go up the west hallway and you'll notice that the door to Room L1, where one of the noted patients was moved to, is locked from that side. Go into the Women's Locker Room where you'll find the missing Shotgun (yoink), along with more Shotgun Shells, Handgun Ammo, a Health Drink, and a Bent Needle from the stuffed bear on the chair.
Make sure to use your Shotgun wisely, as shells are harder to come by. With that, head out and continue up the hallway to the Nurse's Lounge. Inside, you'll find the L1 Room Key and a Bubble Nurse guarding it. After claiming it, head back to Room L1 and venture inside. The room is big with an uncomfortable amount of clutter, and some strange noises coming from the small room further in.
There's a high crawl space you can use to get into it, and a push cart on the right sight of the room to reach it. Grab the cart, roll it over underneath the crawl space, and jump inside. Despite the noises, the room is empty save for a note about the young girl admitted.
Leave the room and check the Utility Room across the hall, where "something" escapes through the hole in the wall. No other choice but to follow it, of course. After slipping down through the walls, you'll soon find yourself back on the first floor, in an unmarked room. The one door in front of you is locked, so go through the crawlspace next to it which brings you to the Medical Records Room.
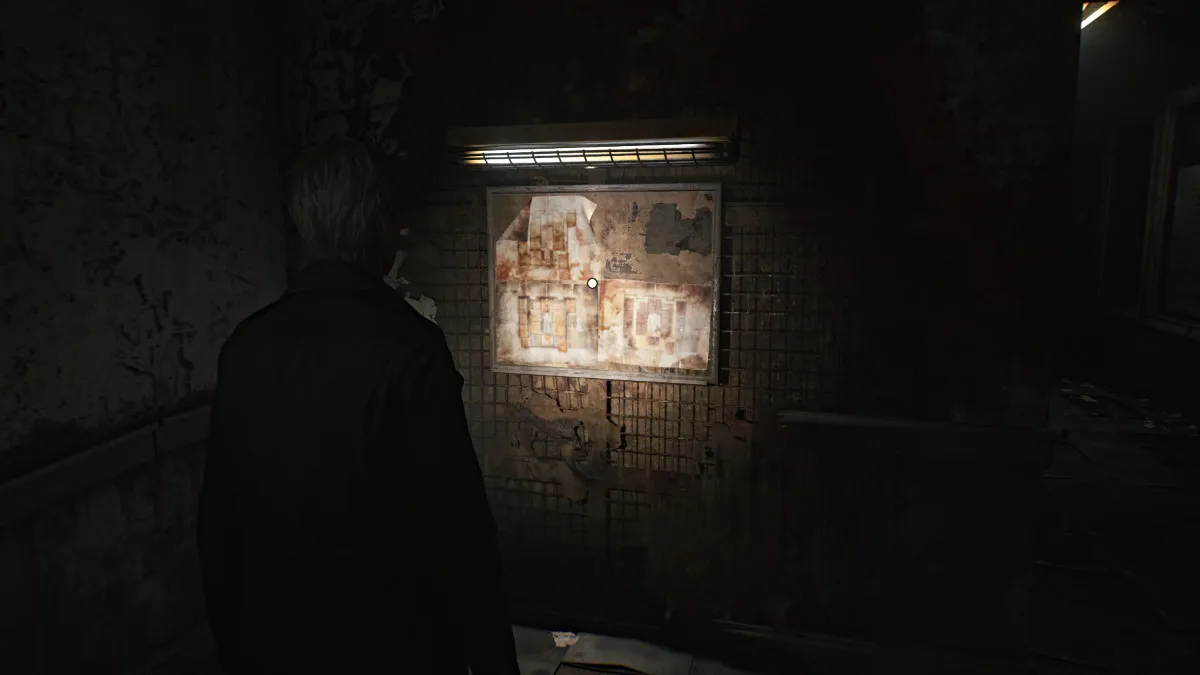
Pick up the Scribbled Note from the floor in front of you, and on the far back left side you'll find another Glimpse of the Past (seen below).

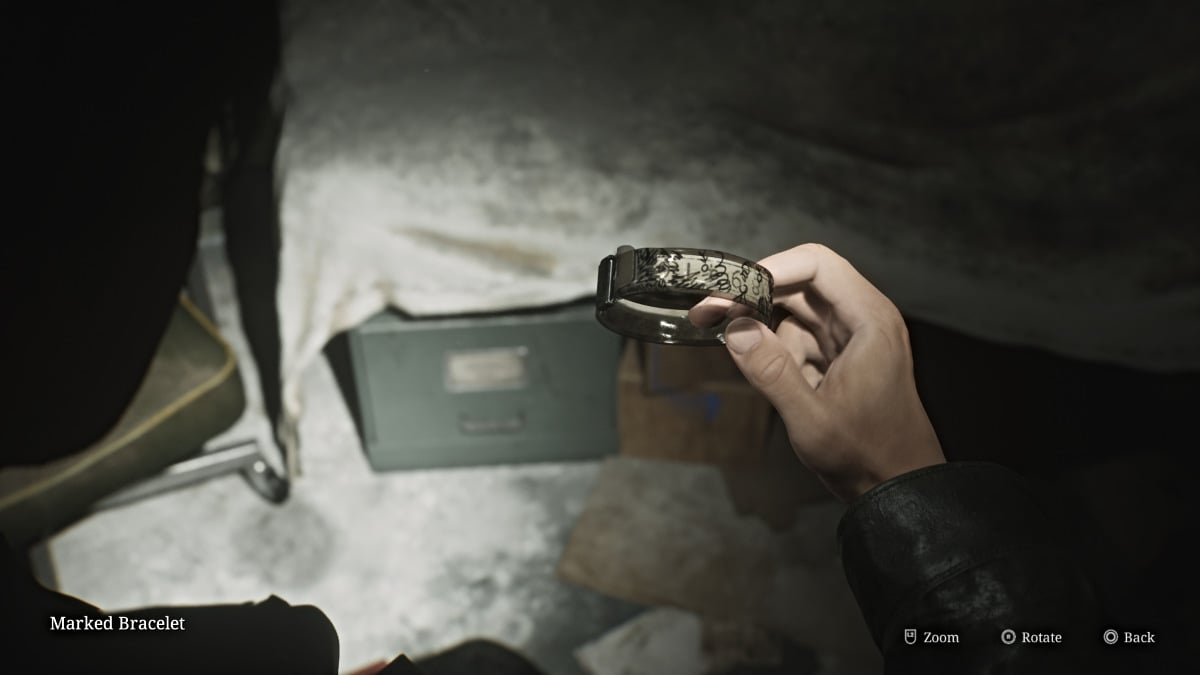
Now head right where you'll see something sitting under a sheet (seen above), and it turns out to be a Marked Bracelet, the first of three that you need. This draws the attention of a Mannequin, so deal with it afterward.
Brookhaven Hospital (Floor 2 and 3) - Nurse's Office, the Filthy Bracelet, and a Very Brief Reunion With Laura
Make your way back up to the second floor, whether it's via the restored elevator or the east stairs. You can choose to drop off your Marked Bracelet at the Director's Office or hold onto it for now.
Also, if you're looking to get the 'Maria' ending for your playthrough, make sure to check on Maria in Room C5 often while running around. If you want the 'Leave' or 'In Water' ending, don't check on her.
Either way, next you'll want to head up to the Nurse's Office, which has a keypad lock. To save you time, the correct code (Standard difficulty) is 3578. Before you go in, quickly check the Storage Room next to it for some Shotgun Shells.
Grab the Staff Memo from the window of the Nurse's Office, then inside you'll find Handgun Ammo in the first room, and in the Treatment Room beyond it...bugs, everywhere. Thankfully they're the kind that can't hurt you. Look in the third tub on the right and pick up the Moldy Lithograph from it. Before you leave, grab the Treatment Room Note as well.

Go out the next door which brings you to the west stairwell. Go up to the third floor and you'll hear what sounds like a young girl humming and more drawings on the walls. Laura is clearly nearby, and it turns out she's in the Restricted Area of the floor blocked by a huge metal door. Open the view window to see Laura on the other side. Once again, she runs off before James can get a word in.
For now, head over to Room D1, which has a combination lock on it. Normally you need to figure out the code using the two Radiographs you find on the screen in the X-Ray Room.
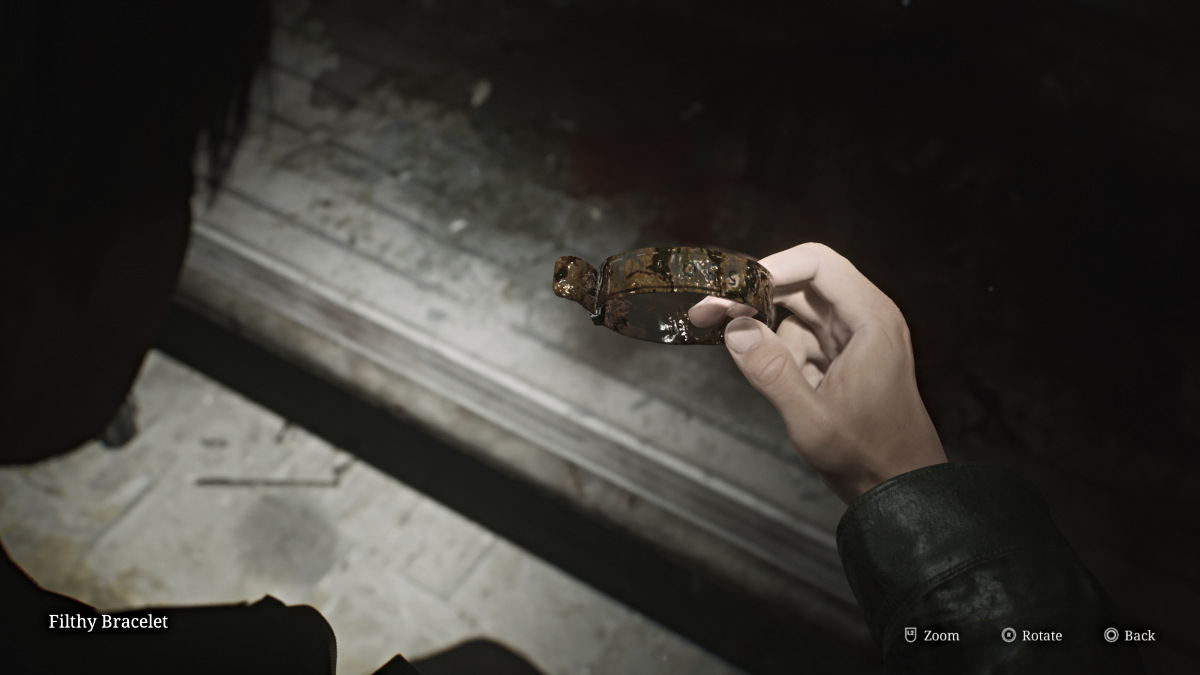
To help save you time, however, the correct code (Standard difficulty) is 04 (right), 37 (left), 12 (right). Once inside, interact with the patient bed and James will peel back the blanket to discover the gory remains of the second patient and the Filthy Bracelet.
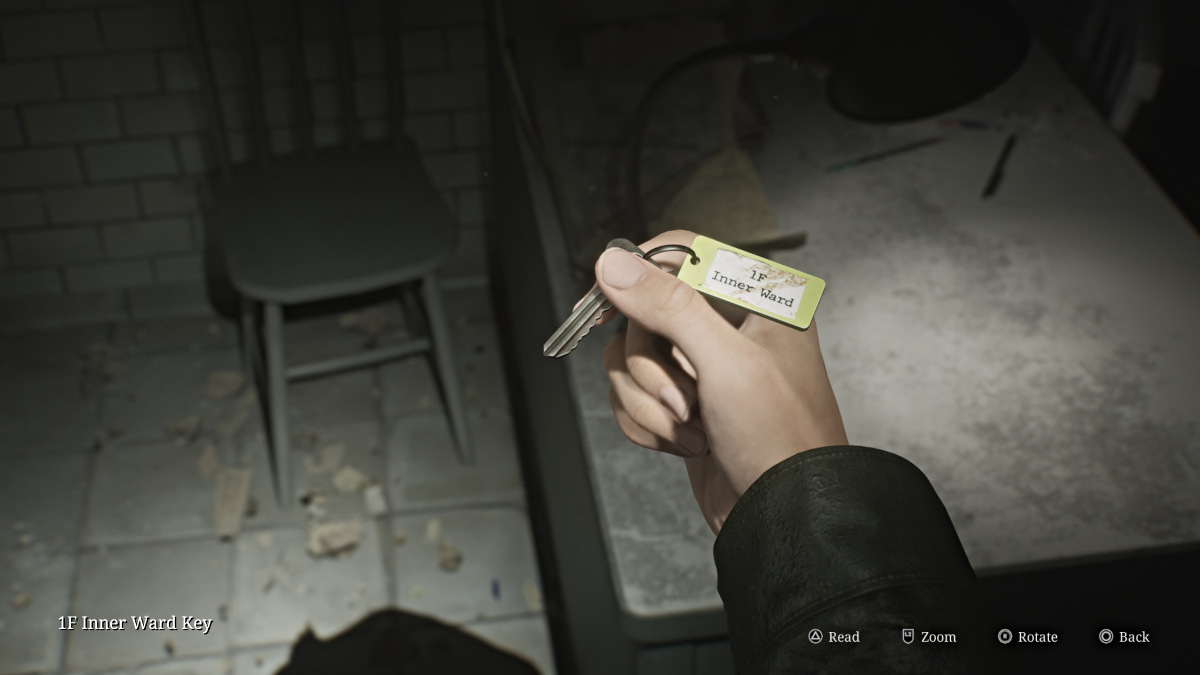
After that, explore the other nearby rooms for more Handgun Ammo a Health Drink. Smash the window to get into Exam Room 5 and claim the 1F Inner Ward Key from the desk.
Brookhaven Hospital (Floor 1) - The Inner Ward, the Garden, and the Pool
With nowhere else to go on Floor 3 or above for now, head back down to the first floor with your new Inner Ward Key. Take the east stairs down and you'll notice that the door to Examination Room 1 is now open. Go inside and deal with the Mannequin so you can claim some Handgun Ammo and the "At least she was there" Strange Photo.
Continue down the hallway while watching out for the Bubble Nurses determined to block your path. Go up the center hallway and use the Inner Ward Key to finally get access to the rest of the floor. First check out the Doctor's Office to your right for Handgun Ammo and the Keypad Combination Note.
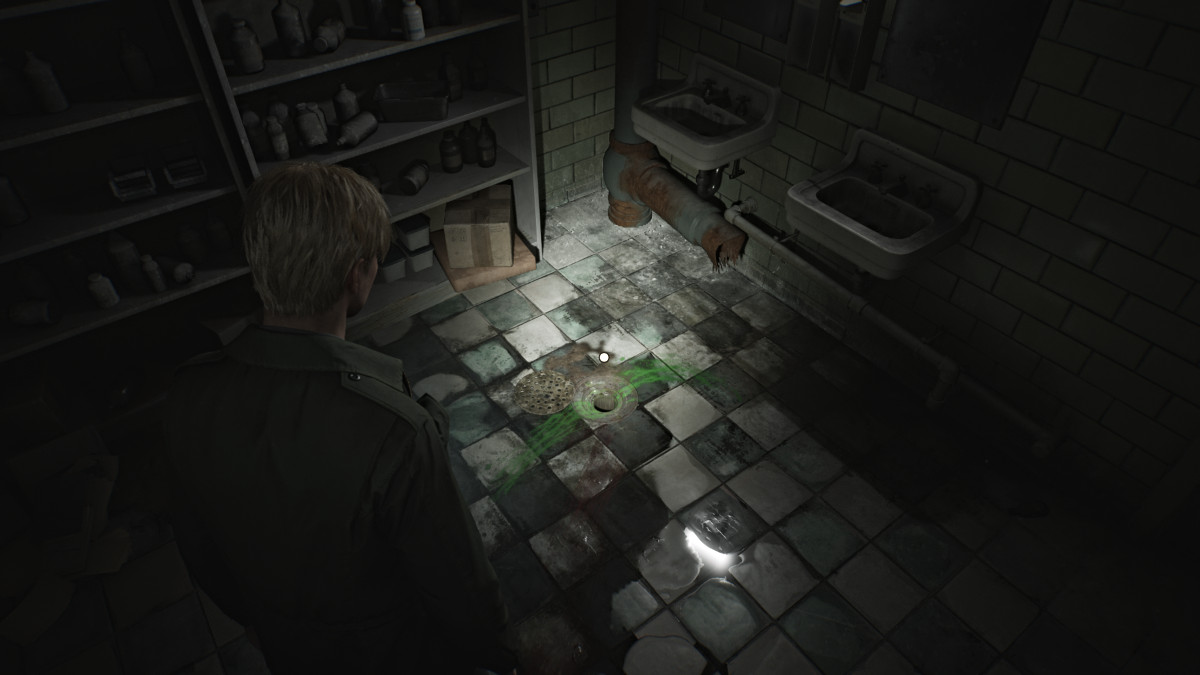
Next, go and check the Dayroom where you'll find more Handgun Ammo and a Bubble Nurse lurking. After it's dead, use the gap in the left wall to cross over to the Pharmacy. Inside there you'll find more Handgun Ammo, and a strange open pipe in the floor near the sinks, with bright green residue seeping from it. There's something stuck inside it, and you'll need the right tool to get it out. Luckily you already have half of it (the Bent Needle).
For now, turn and notice the open window that leads out to the Garden area. Jump through it and start exploring, but be careful as it's crawling with monsters (mostly Lying Figures). Go to the gazebo on the left side and use the crawlspace on the back side to get into it. Deal with the Mannequin inside, then grab the Handgun Ammo and Syringe.
If you're playing New Game Plus and want to get the 'Bliss' ending, there will also be a Small Chest inside the gazebo. Use the Rusted Key you got from Pete's Bowl-O-Rama to unlock it and retrieve the bottle of White Claudia inside.
Make your way to the right side of the garden, grab the Shotgun Shells on a wooden table, then enter the Greenhouse. Grab more Handgun Ammo from a drawer, then use the open window to cross into the Pool area.
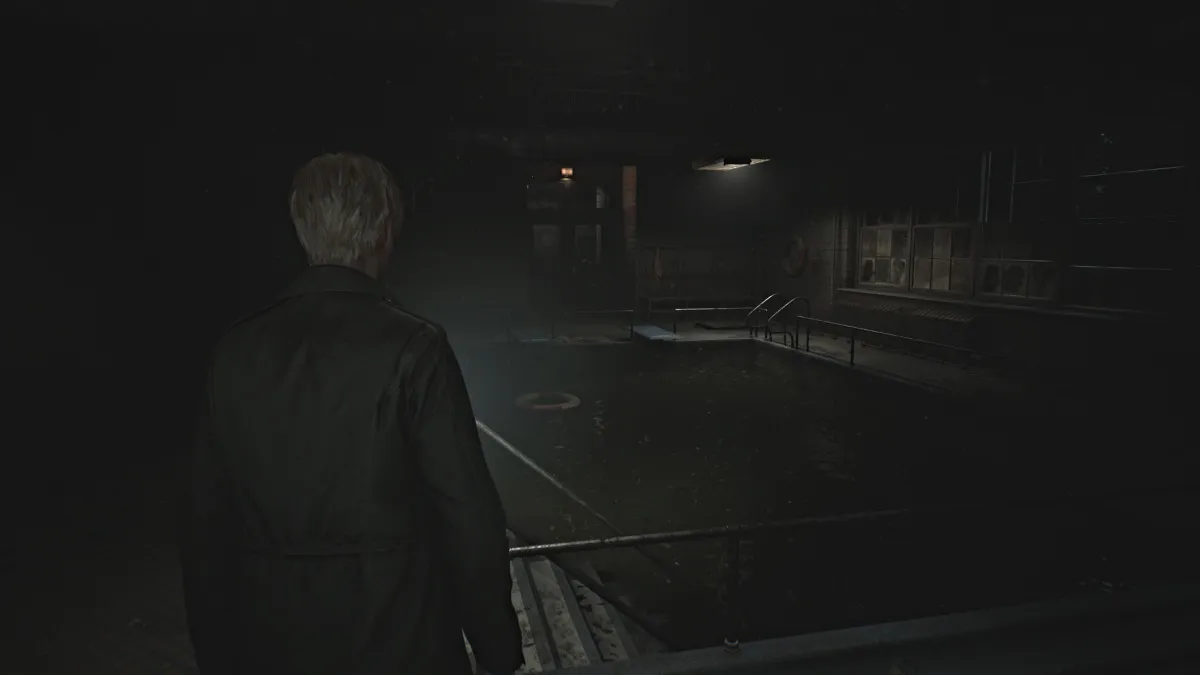
What you need to get is inside the pool, but unfortunately, it's filled with some very nasty water and even James has limits and won't go in. On the other side of the pool, you'll see a latch door in the floor that requires a key to open. This gives you access to the pool's pump system, which will allow you to drain it, so you need to find that key.
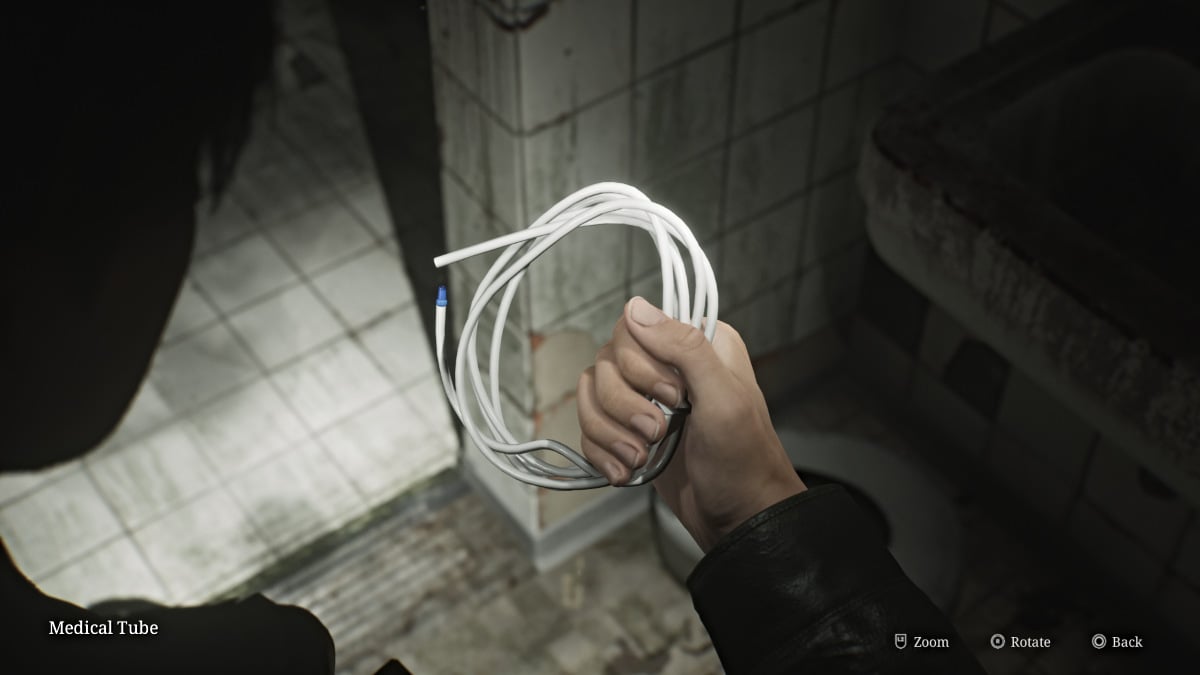
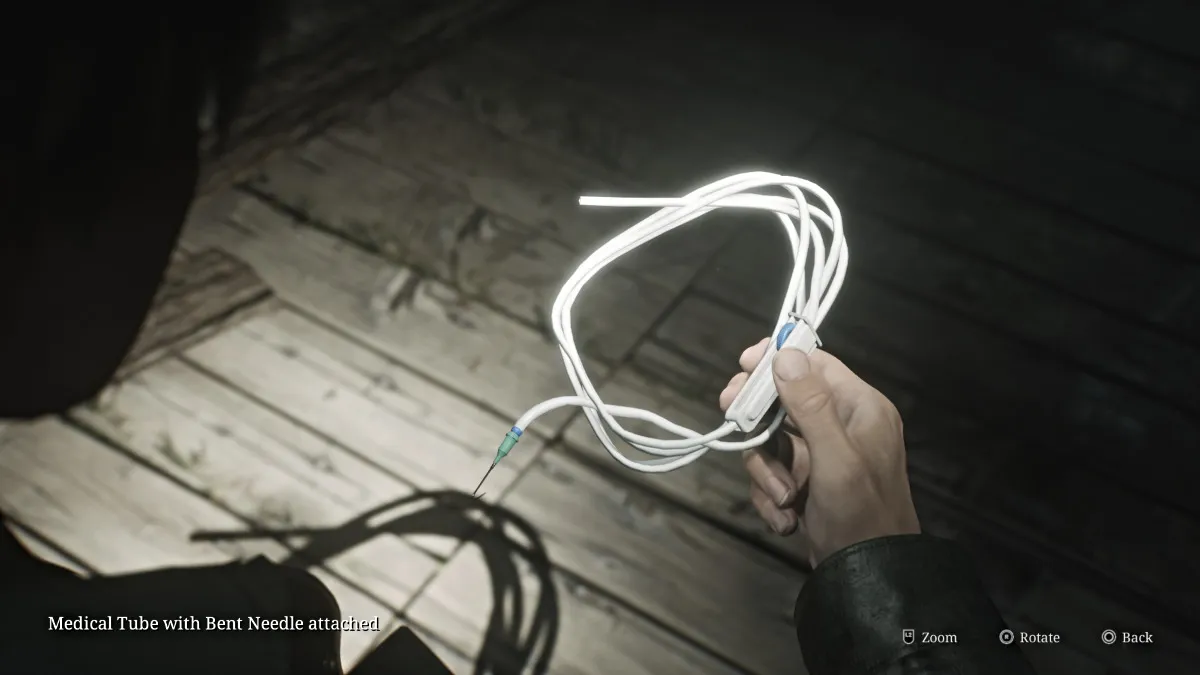
Go on into the Shower Room, deal with another Mannequin in one of the stalls, then go collect the Handgun Ammo, Shotgun Shells, and a spool of Medical Tube (seen above) sitting in one of the sinks. Backtrack through the Garden area to the Pharmacy.
Once there, go into your inventory and combine the Bent Needle with the Medical Tube. Go over to the pipe drain and use your new tool to fish out the stuck object, which turns out to be the Maintenance Key for the pool.
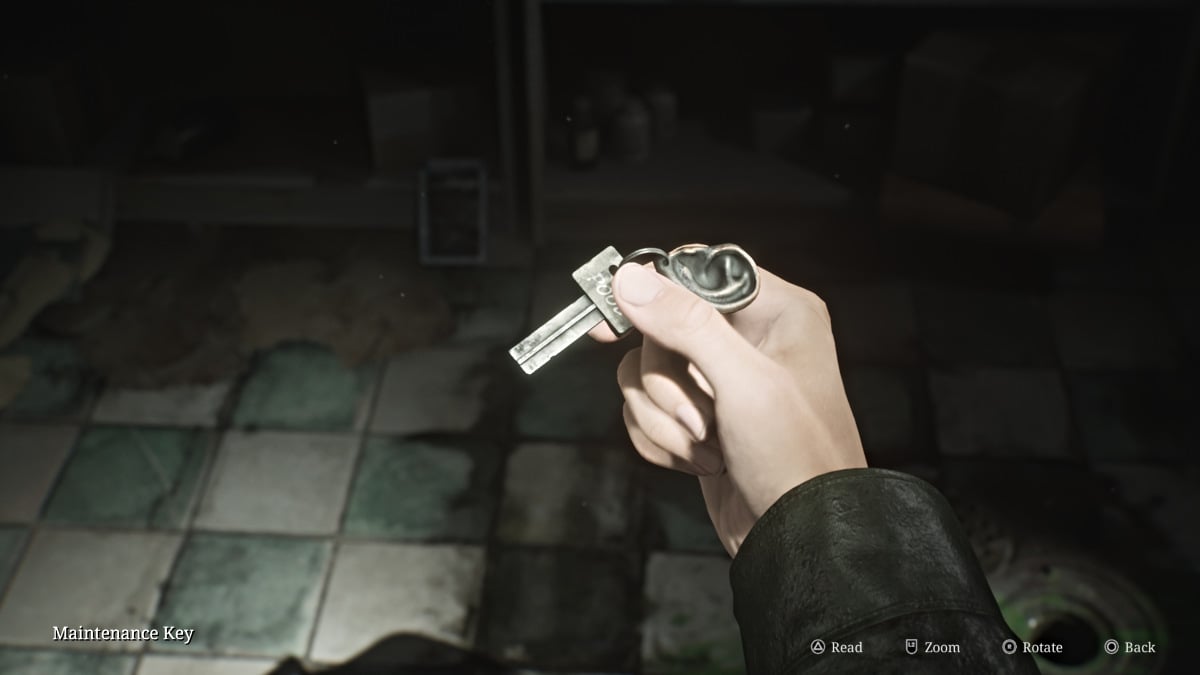
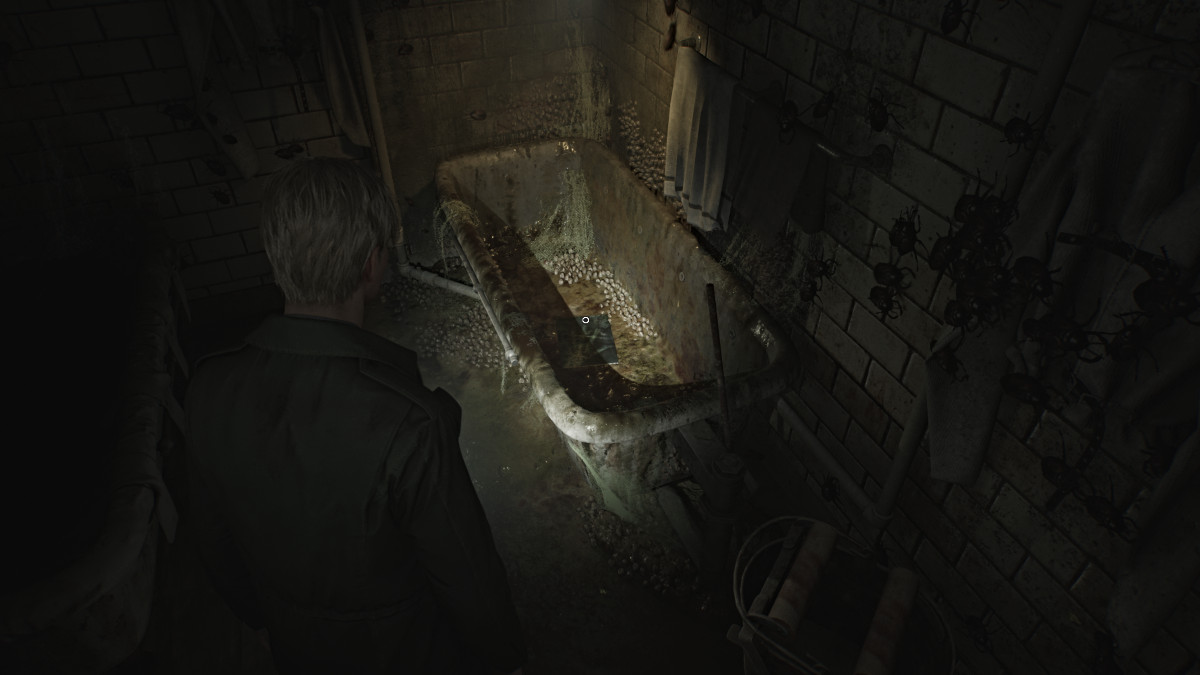
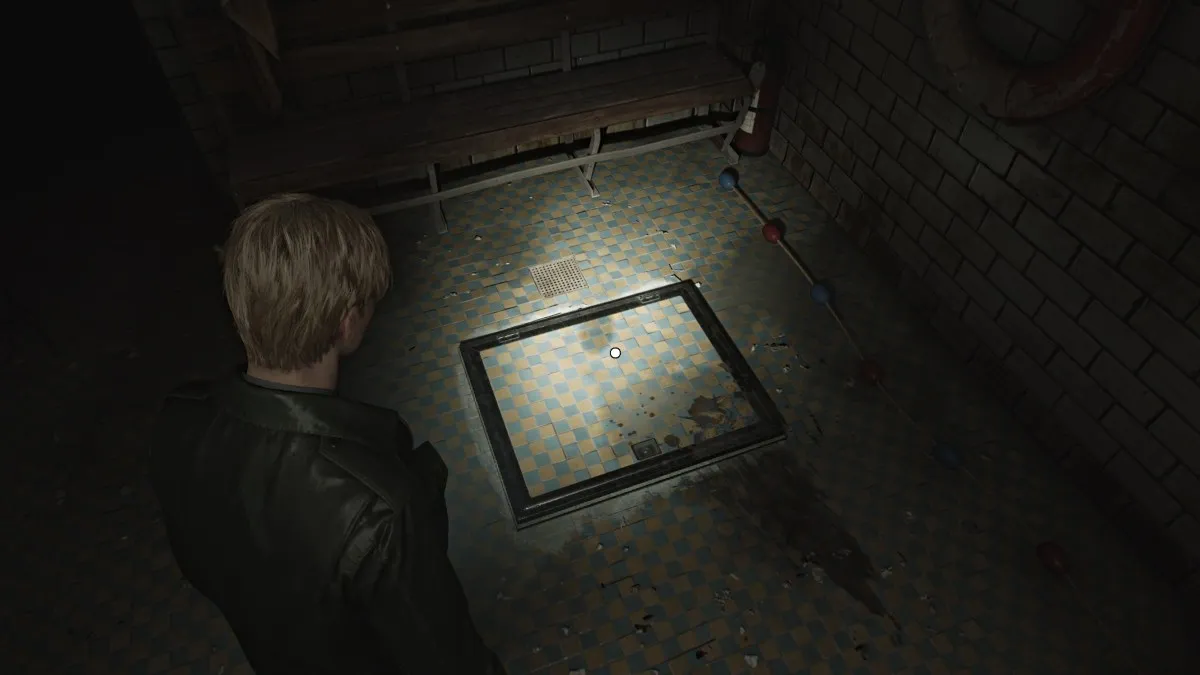
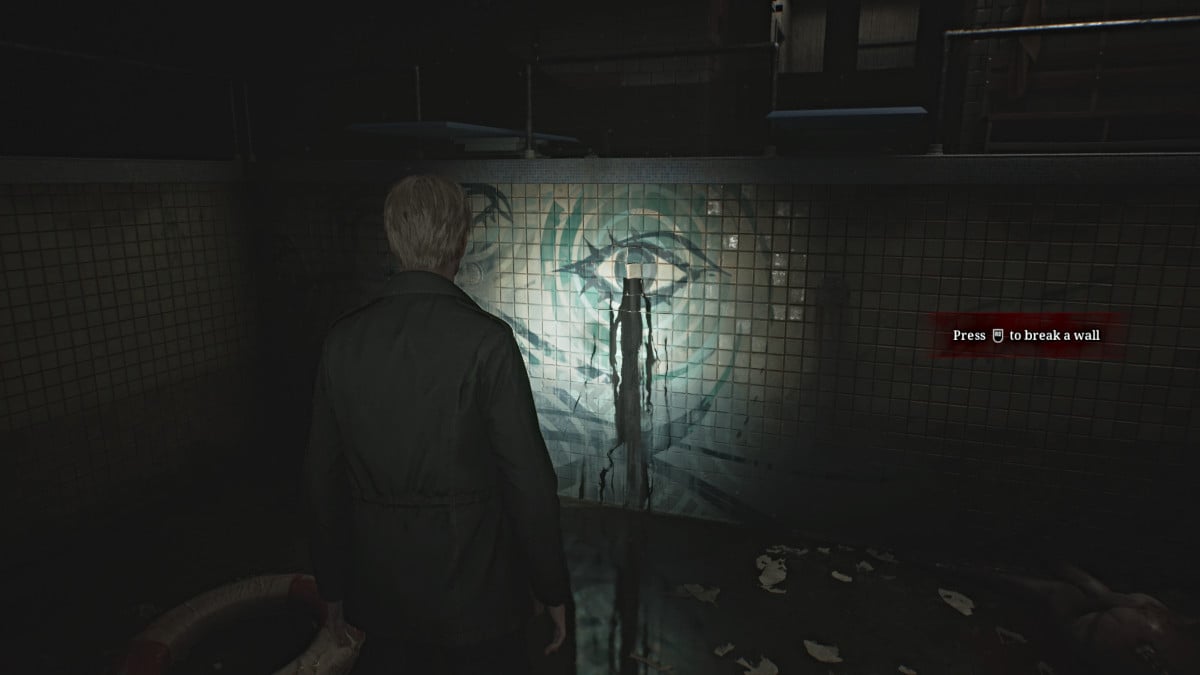
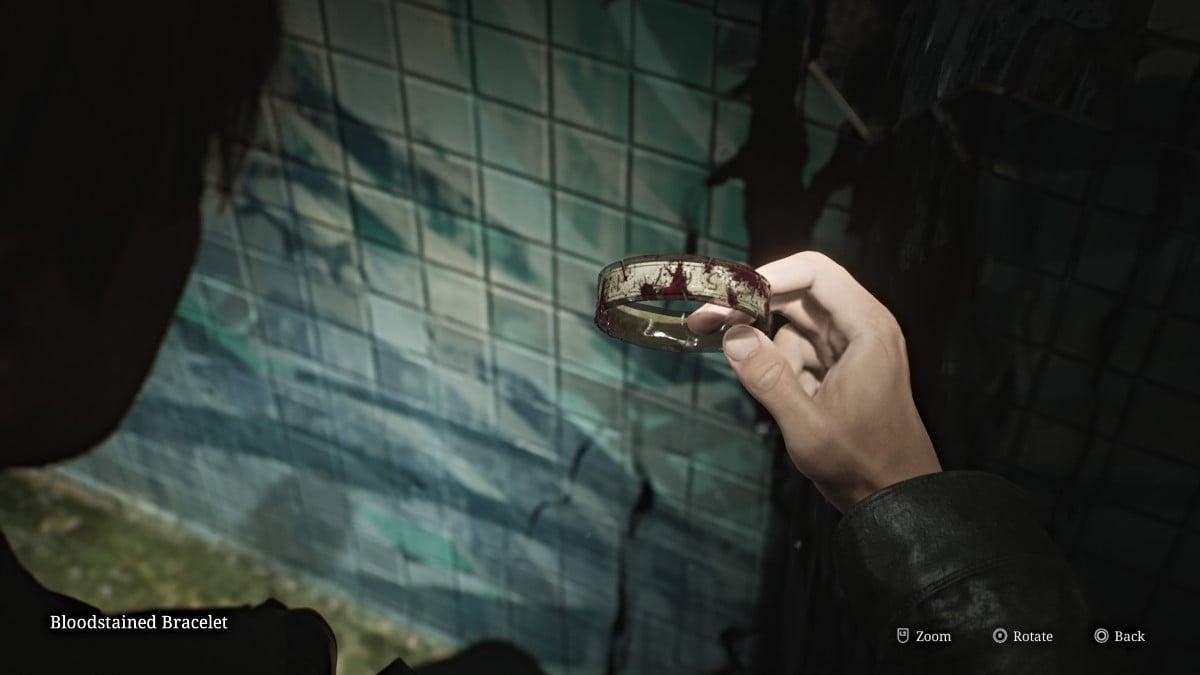
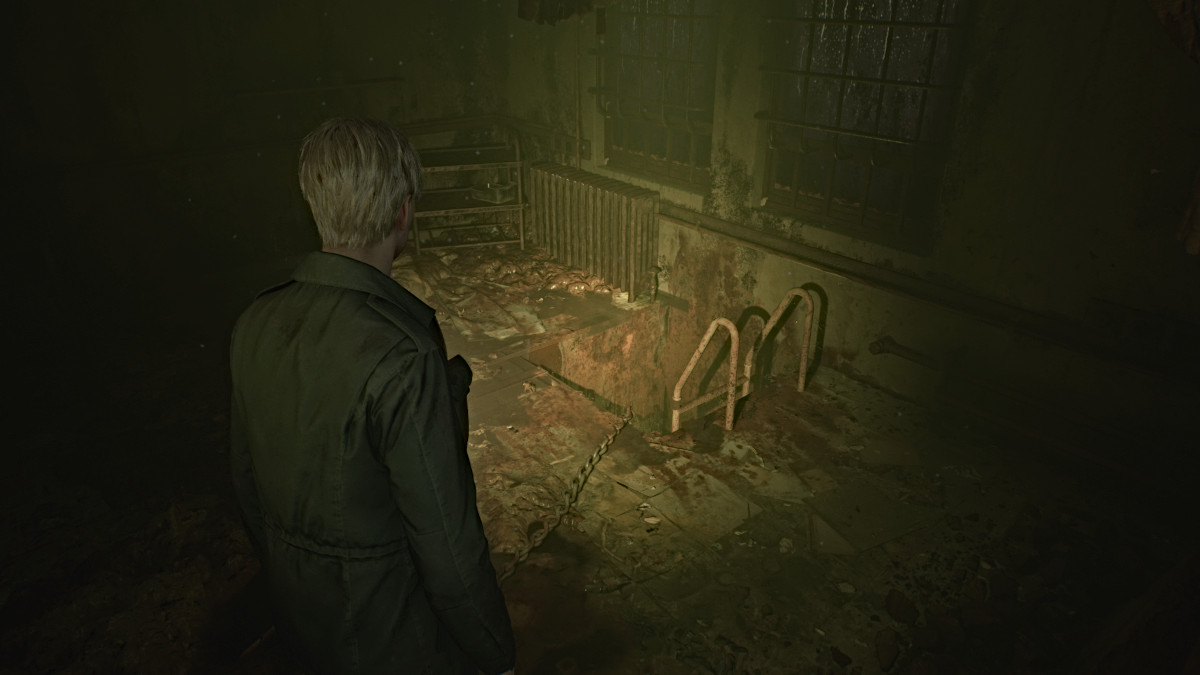
With that, head back to the pool again and use the Maintenance Key on the latch door to access the pump and drain the pool completely. Go down into it and smash the tiles where the leaking eye is to obtain the Bloodstained Bracelet, the third and last one you need.
We recommend just bum-rushing your way back to the Pharmacy, as many of the monsters you killed in the Garden earlier, including the ones in the pool, will revive and attack and you don't want to waste precious ammo and health on that.
Brookhaven Hospital (Floor 1 and 2) - The Kitchen and Director's Room
Before you head back upstairs to the Director's Room, you first need to finish exploring the rest of the Inner Ward on the west side. Make your way past the Pharmacy and unlock the gate to the northwest stairwell. Next, head inside the Kitchen, where you can find a bottle of Mold Remover sitting near the oven, You can use this to clean up the Moldy Lithograph you obtained earlier if you still need the code to the combo lock on Floor 3.
There's little else to find aside from some Handgun Ammo in the small Restroom opposite the Kitchen, and Shotgun Shells in the nearby Cafeteria area. Once you're done exploring, head back upstairs to the Director's Room.
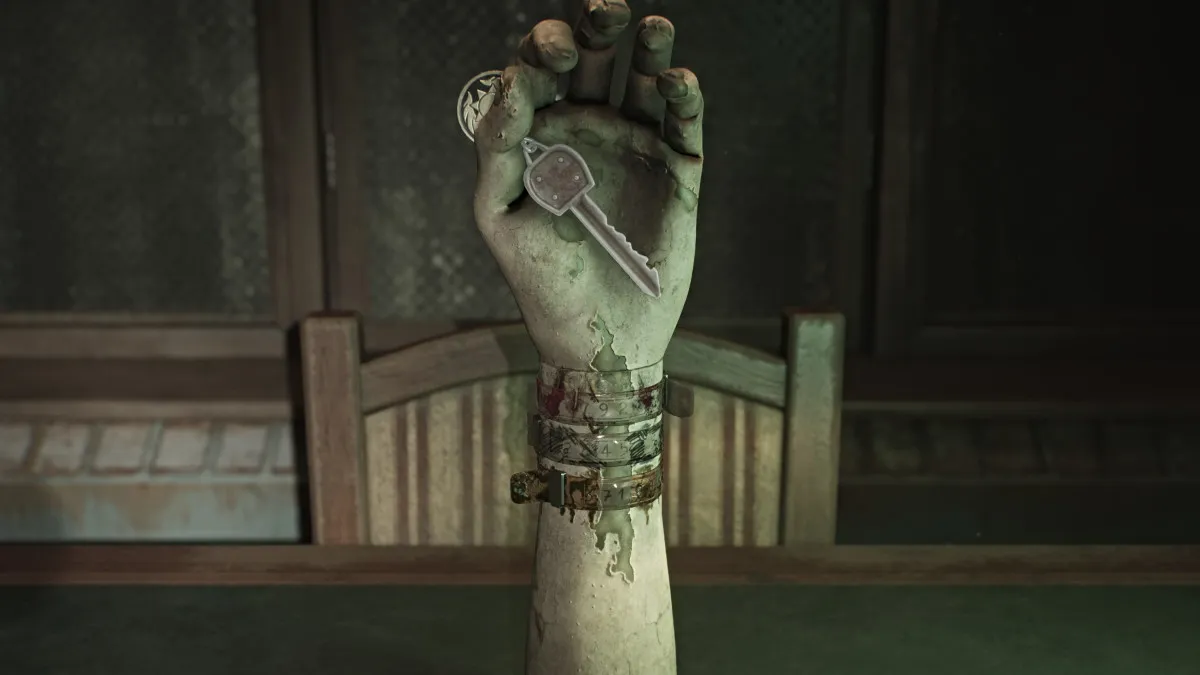
Place the rest of the bracelets you obtained on the mannequin arm, at which point you then need to arrange them in the correct order and 'Rotate' them so that the correct sets of numbers are facing out. The correct order (Standard difficulty) from top to bottom is the Bloodstained Bracelet, the Marked Bracelet, and the Filthy Bracelet with the numbers : 92, 45, 71 lined up top to bottom.
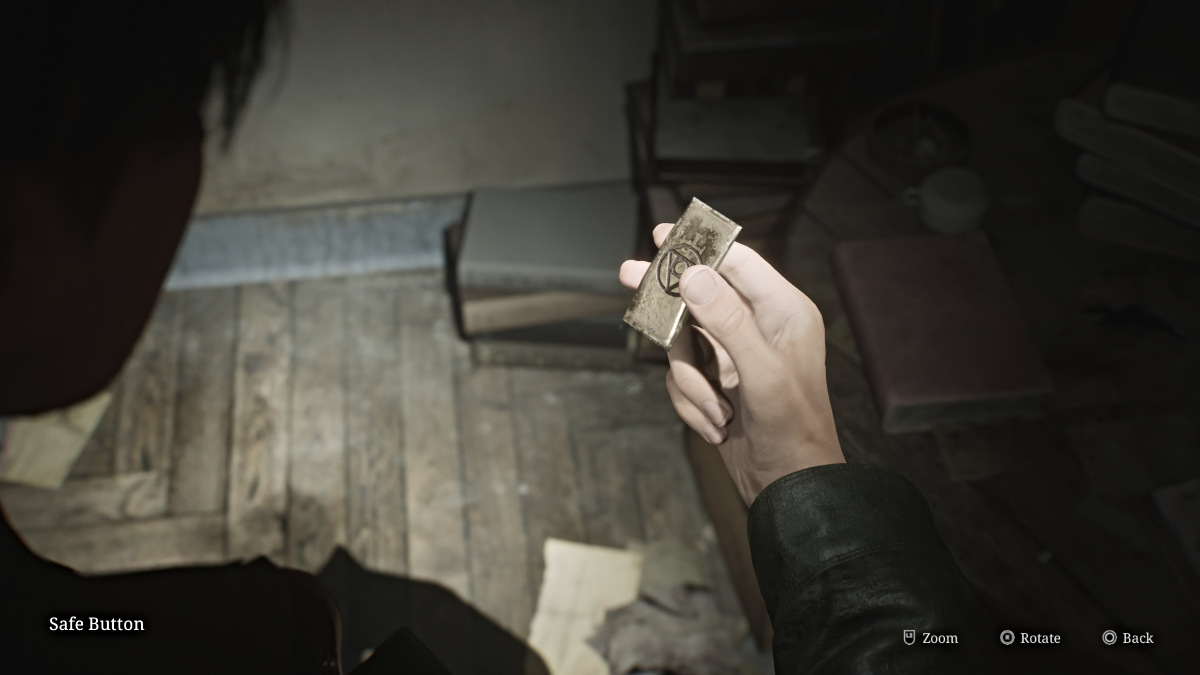
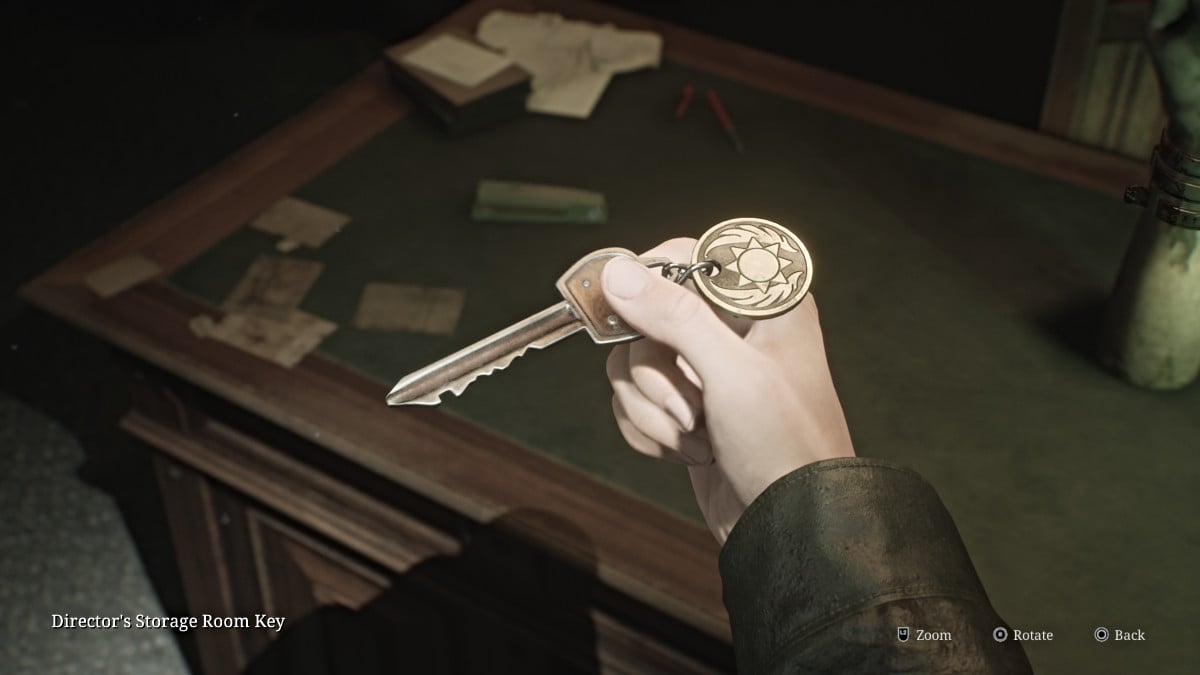
Once done, the hand will open for you to take the Director's Storage Room Key. Go and use it on the nearby locked door and head inside. There you'll find the missing Safe Button on a desk and on the shelf across from it, another puzzle.
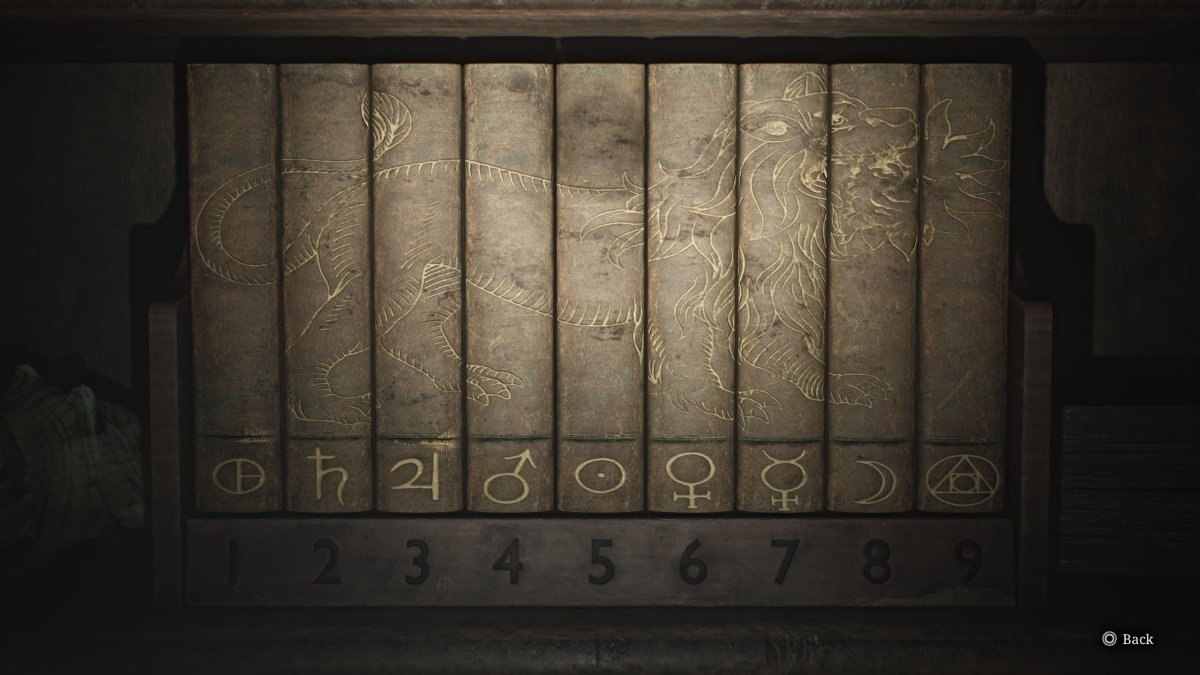
In this case, you need to arrange the nine books so their spines match up and form the image of a fire-breathing lion (as seen above). It may seem like there's no reward afterward, but in fact the order of the symbols at the bottom is a clue for what you need to punch into the Director's Safe. Your other clue is the set of numbers from the bracelets.
Brookhaven Hospital (Floor 2) - Director's Safe Puzzle
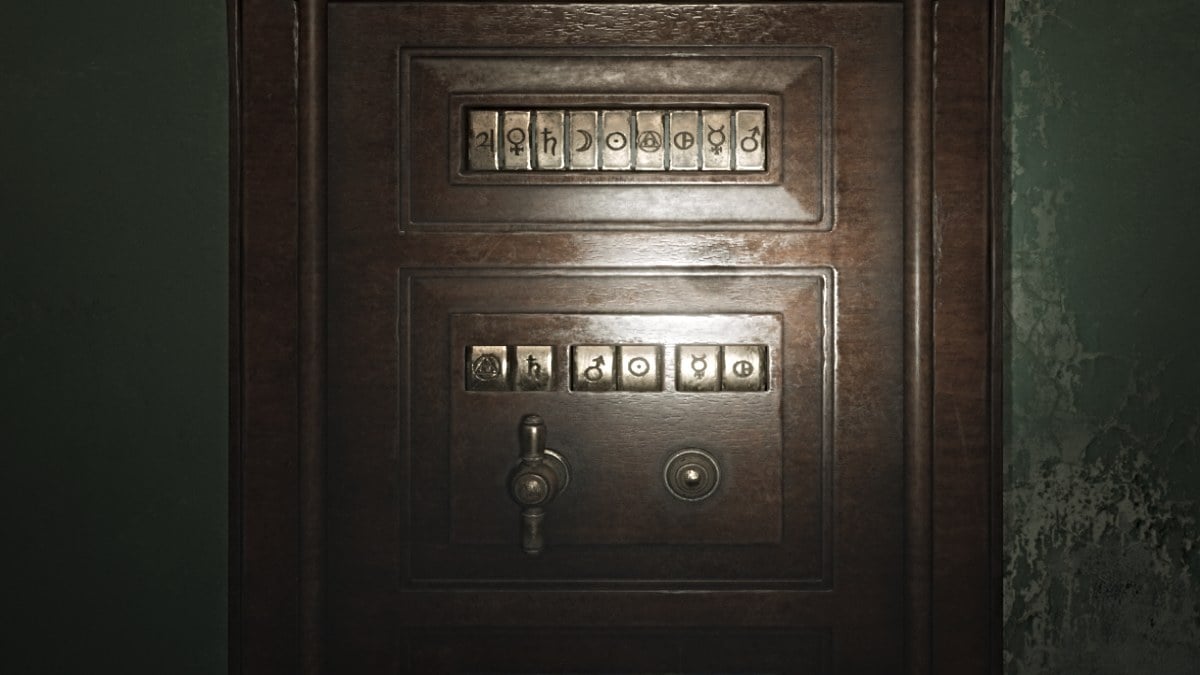
With that, go over to the safe, place the missing button you found into it, and use both your clues to figure out the correct symbol combination. Essentially, '92-45-71' from the bracelets is the numerical order of the combination, and you need to equate that to the symbol order from the book puzzle, all to form a cryptogram of sorts.
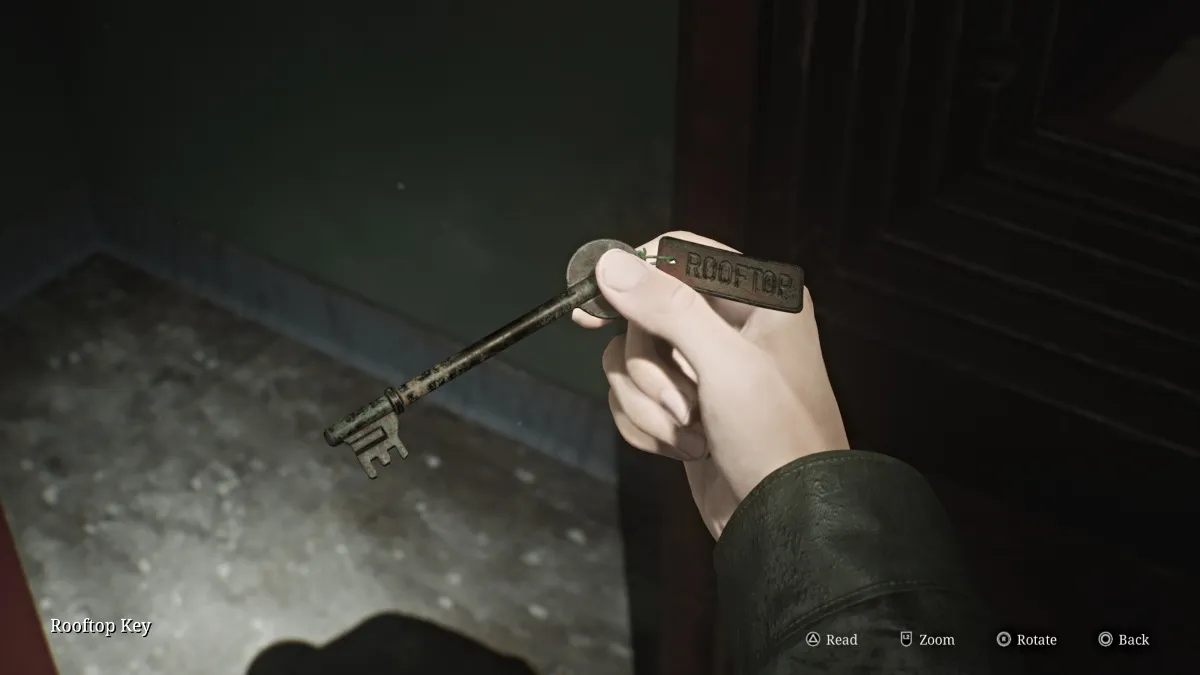
Once the correct combination is done (seen above), the safe will open and inside you can retrieve the Rooftop Key and the Safe Note, which gives some foreshadowing about the key taking James where he needs to go, and that "pain" will be involved, yay.
With that, go back and use the Red Save Point and start your journey up to the roof of Brookhaven.
Brookhaven Hospital (Roof and Floor 3) - Pyramid Head Ambush and Laura Plays Tricks
Once you arrive on the roof, first hang a right onto the nearby metal catwalk that has Shotgun Shells sitting at the end of it. Then go back to where you were and instead go straight, until you find an entrance to another metal catwalk that takes you around the left side of the roof.
At the end of it, you'll find another Glimpse of the Past (seen above) which happens to be the spot where James was shoved off the roof by Pyramid Head in the original game. However, that doesn't seem to be the case here.

Now, go and investigate the yellow double doors that lead back inside. In what looks like the top of a wooden lift, you'll find the Page From a Diary on the floor. Pick it up, and as you try to go back through the doors, Pyramid Head will suddenly appear and grab James by the throat. This time, he shoves James down through the shaft, sending him back to the third floor.
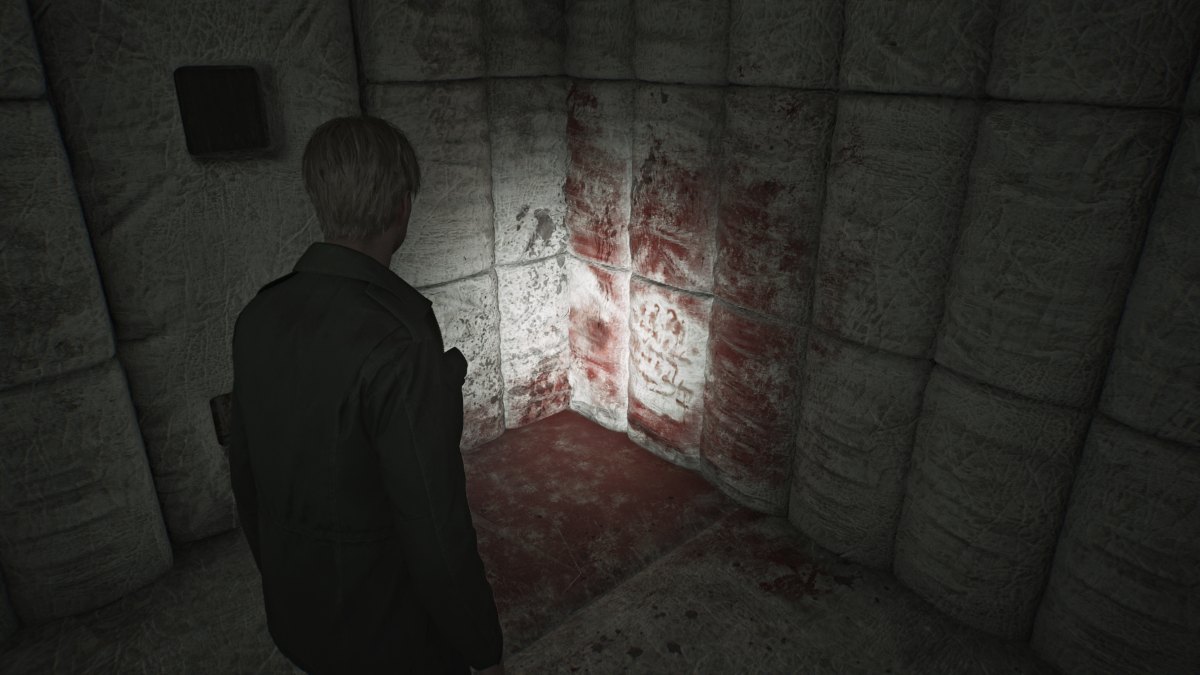
After James collects himself, you'll notice that you landed right on the opposite side of the huge 'Restricted Area' gate where Laura was last seen. First go investigate the Hydrotherapy Room, where you'll find Shotgun Shells, a Health Drink, and a Syringe. Next, when checking the padded rooms, in Room 13 you'll find another Glimpse of the Past covered in blood.
Continue on ahead and through the next set of yellow doors. Soon a cutscene will show James finally finding Laura in a room playing with teddy bears. He pleads for her to stop running and tell him how she knows about Mary. Laura seems hesitant to say much, but admits that she and Mary were friends and that they met at the hospital "last year".
In confusion, James lashes out and calls Laura a liar, who immediately grows cold again and decides to play a trick on him. She baits him to another room nearby with the promise of another letter from Mary. The noise riles up a different kind of monster from within the walls, and now it's time for another boss fight.
Brookhaven Hospital (Floor 3) - How to beat Flesh Lips
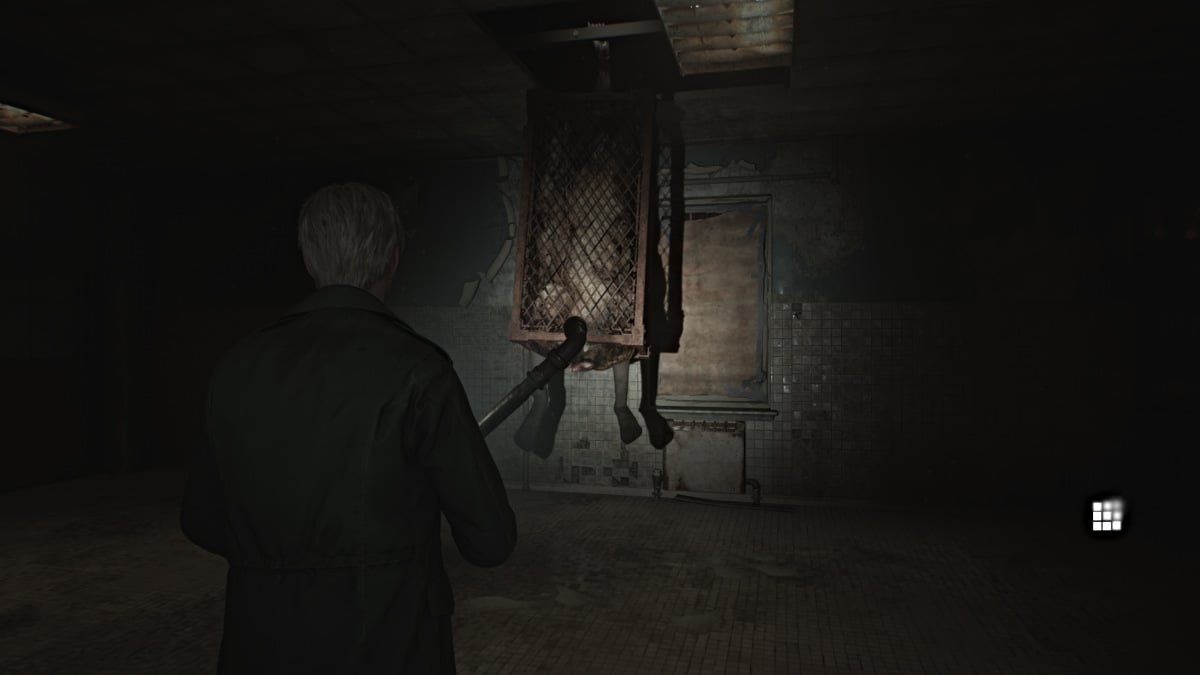
As the second boss fight in the game, Flesh Lips is as dangerous as it is disturbing to look at. Encased in a metal cage hanging from the ceiling, Flesh Lips will start the fight by essentially playing peek-a-boo with James, popping out from random places in the ceiling. Again, keeping your distance is a big priority.
While you can use both your Handgun and Shotgun to deal damage, Shotgun is king in this fight as you'll soon realize. Start by shooting its legs (shooting the cage won't do anything), and make note of the Shotgun Shells scattered around the room for your use.
The more damage you deal to it, its cage will start to come apart, allowing you to start damaging the body within as well. Eventually, this will cause Flesh Lips to take on a different form, using the metal bars from its cage like spider legs to chase you around the room.

Deal damage as fast as you can, as this boss hits like a truck and you may find yourself swigging Health Drinks faster than you can blink. Occasionally it will emit a screaming attack that, while terrifying, just serves to stun you for a moment.
Eventually, Flesh Lips will collapse dead and James will go over to assess the damage. Suddenly, a second Flesh Lips monster will appear and capture James, dragging him through the ceiling and into an ominous cutscene that eventually lands us back in the Otherworld.
Brookhaven Hospital (Floor 1 and 2) - The Otherworld Returns and the Lock Box Puzzle
After being dropped off near the hospital's garden area, get your bearings and check your map. You'll notice that all of your markings have been wiped clean and that Brookhaven's version of the Otherworld spans every floor, including the Basement. So you've got a lot of exploring ahead of you.
Start off by going through the Dayroom and picking up some ammo there along with a Syringe and the Evaluation Card, Patient #3141 from the wheelchair in the middle of the room. Head out into the hall and use the Red Save Point to your left.
Much of the first floor is blocked off right now by large gaping holes in the floor and locked doors, so your only path is to the Elevator. Notice that it's missing the button for the Basement level, and you'll need to find it to reach there. For now head to the second floor.
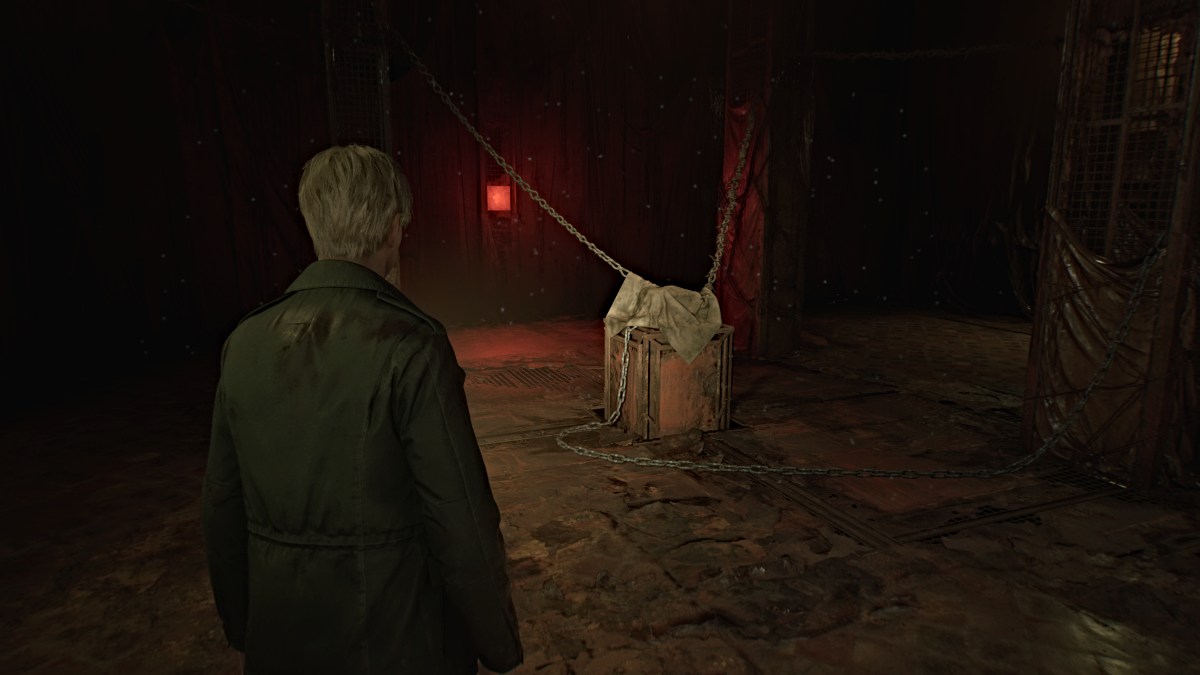
Once there, head right, and near the Nurse's Office, you'll see something sitting on top of a crate, chained and covered up (with a convenient Red Save Point behind it). Uncover it to find a lock box sealed with two numerical locks and a keyhole, meaning you'll need two codes to unlock it, as well as a key.
While we can provide you with the correct codes for the locks to help save you some legwork, before you can use those you need to find the key first. To do that, you need to get to the third floor.
First, investigate the nearby Nurse's Office for items and watch out for the Bubble Nurses who now wield knives instead of pipes. You'll find both Handgun Ammo and Shotgun Shells here, as well as a Health Drink. Cross your way over to the Treatment Room, and then take the crawlspace at the south wall into the Women's Locker Room. In there, you'll find a Syringe and more Shotgun Shells.
Circle around the hallway to the northwest stairwell, which you can take up to the third floor.
Brookhaven Hospital (Floor 3 and 1) - The Instrument of Force, the Key of Bliss, and the Lapis Eye Key
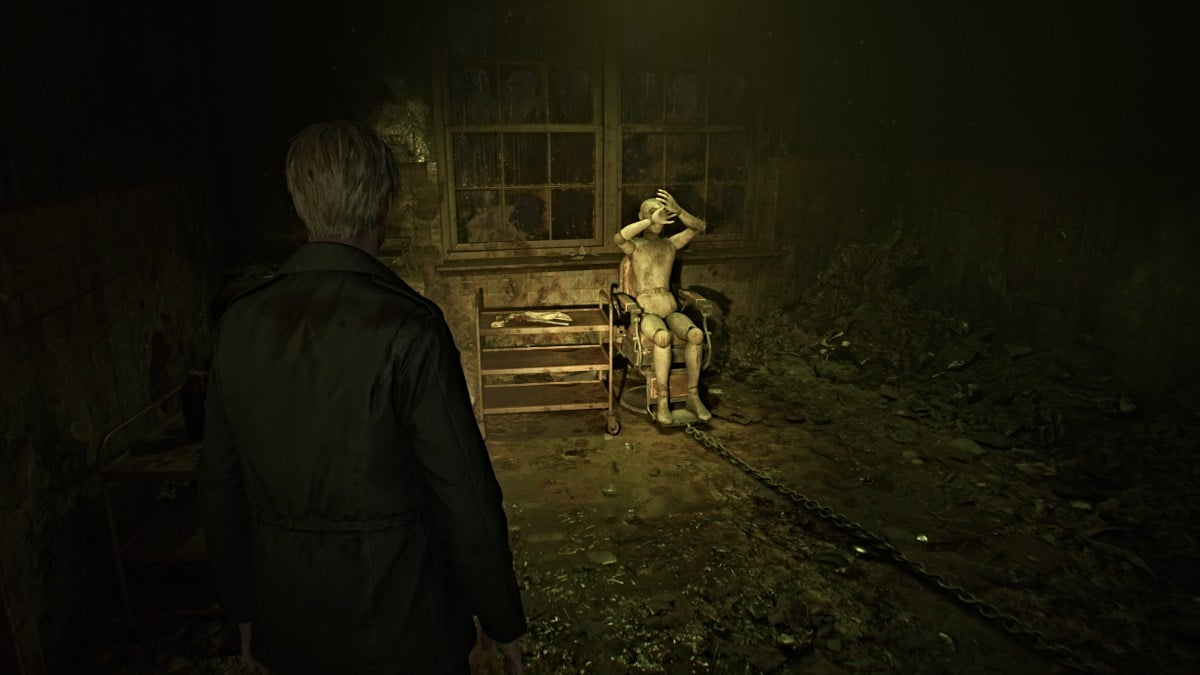
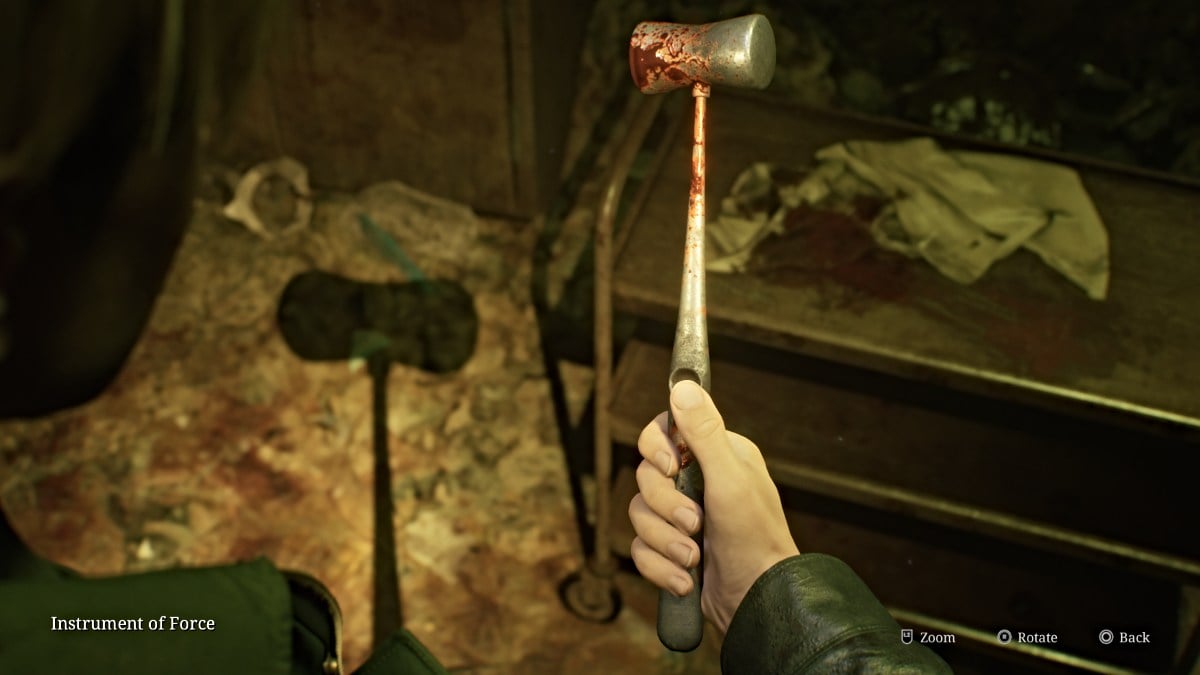
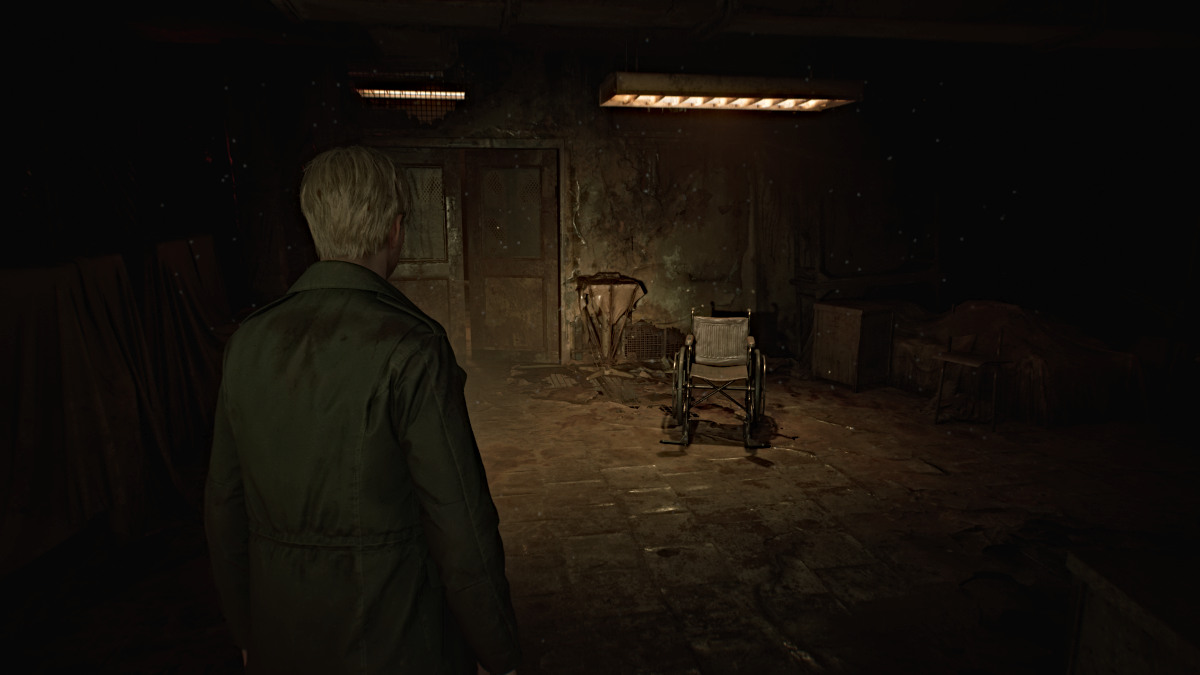
Once there, first head into the X-Ray Room and pick up The Procedure memo from the operating table. Over in Exam Room 4 you'll find a mannequin (no, not the monster) in a surgical chair with its hands in front of its face (seen above). Pick up the Instrument of Force from the tray nearby. This is one of two tools you'll need to get what's hiding inside the mannequin.
Make your way through Exam Room 5 and watch for another Bubble Nurse and Lying Figure in the hallway. Grab some Handgun Ammo from the desk tucked in the corner near Room D3. Go in there next for Shotgun Shells and a Mannequin that sneaks off to ambush you from around the next corner. Deal with it and retrieve the Health Drink from that corner.
Backtrack to Room D2 and smash the wall on the north side to get in. Use it to cross over to Room D1, where you'll find a ladder you need to climb down. This brings you down into the Kitchen on the first floor. Grab some Handgun Ammo from the Pantry area and ignore the back room behind it, as you'll only find a Mannequin in there. Explore the nearby Restrooms if you want for more Handgun Ammo and a Shotgun Shell.
Head down the south side of the Kitchen and around to the Cafeteria. Deal with two Bubble Nurses and a Mannequin there then retrieve the Handgun Ammo on the middle table. Head into the Storage and Medical Records rooms next, where you'll find more Handgun Ammo, Shotgun Shells, and a Health Drink.
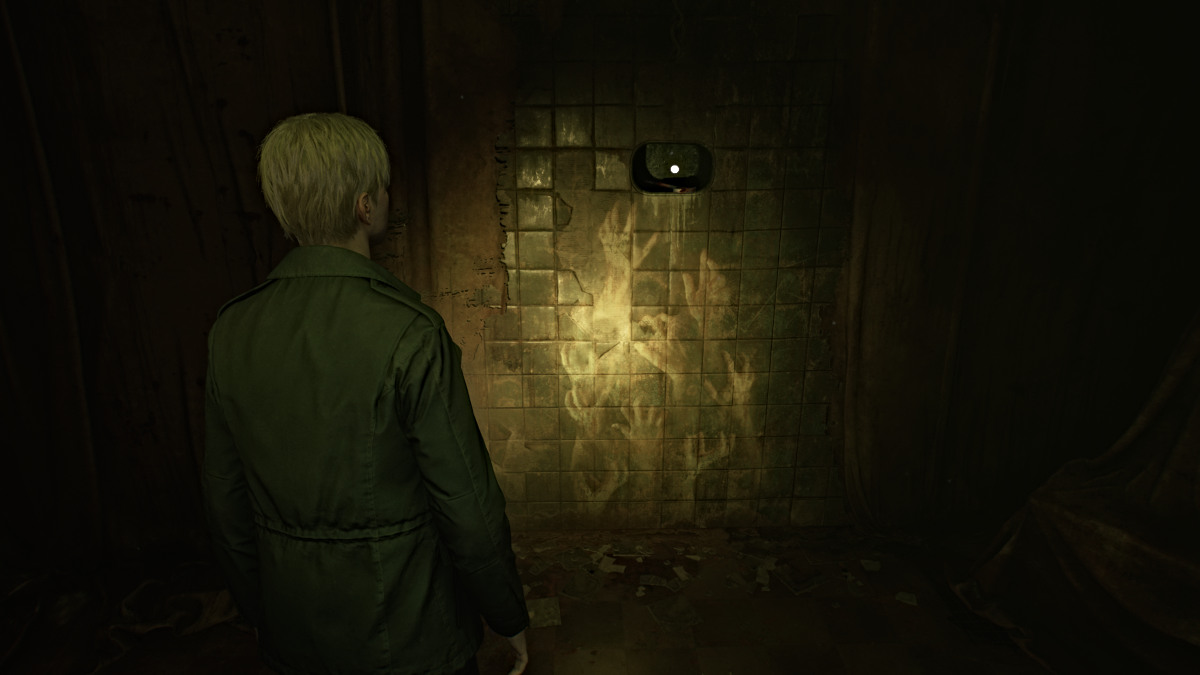
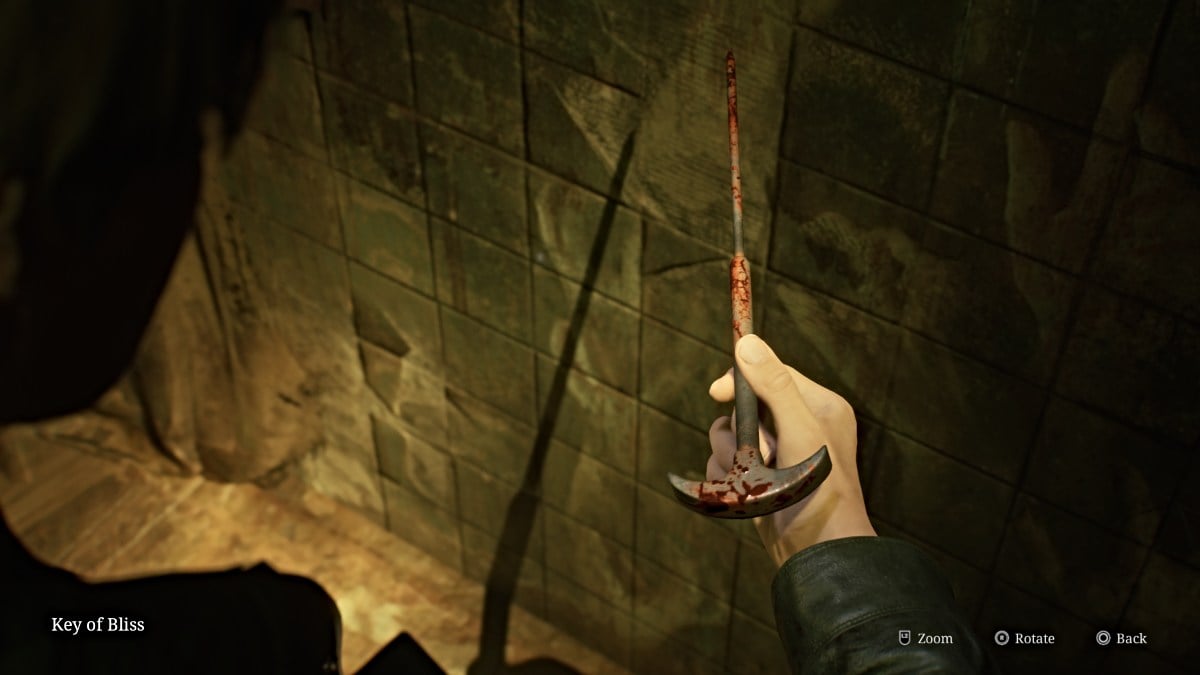
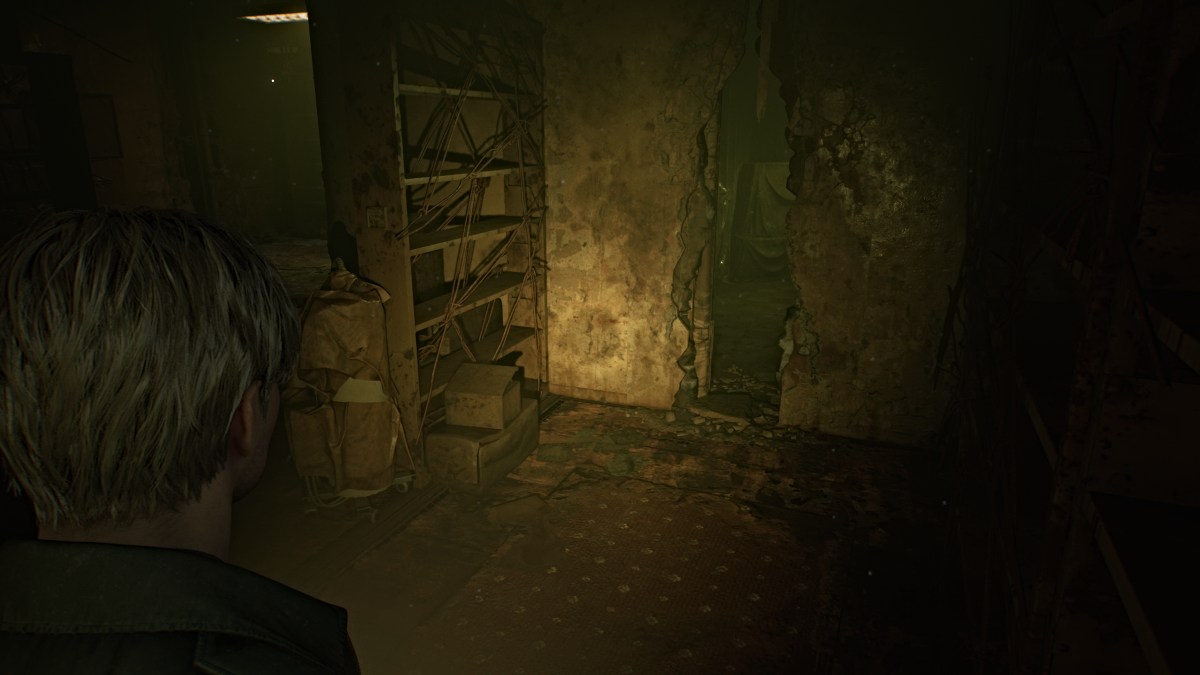
Slip through the wall crack near the back into an unmarked room, and on the wall to your right you'll see a familiar hand mural (seen above), and above it in a crevice, the Key of Bliss, the other tool you need. Take it and make your way back up the ladder in the Kitchen.


Head back to your mannequin friend in the surgical chair in Exam Room 4. Use the Instrument of Force to break the right arm off, push the left arm away, and then use the Key of Bliss to brutally lobotomize the Lapis Eye Key from the eye socket. This is the key you need for the safe box.
With that done, make your way back down to the second floor via the stairwell.
Brookhaven Hospital (Floor 2) - Completing the Lock Box Puzzle and the Trick or Treat Quiz
Head back to the chained box on the second floor, and first use the Red Save Point behind it. Use the Lapis Eye Key you just got on the box. This leaves the two numerical locks for you to crack. Luckily, we've got both of those codes figured out for you to save time.
- The code for the combination lock on the left (Standard Difficulty) is: 1622
- The code for the keypad lock on the right (Standard Difficulty) is: 9659
If you're wanting to collect all of the memos in the game for the achievement, however, you should still visit Room M2 on the second floor for the Calendar Page, which provides the hint for the combination lock.

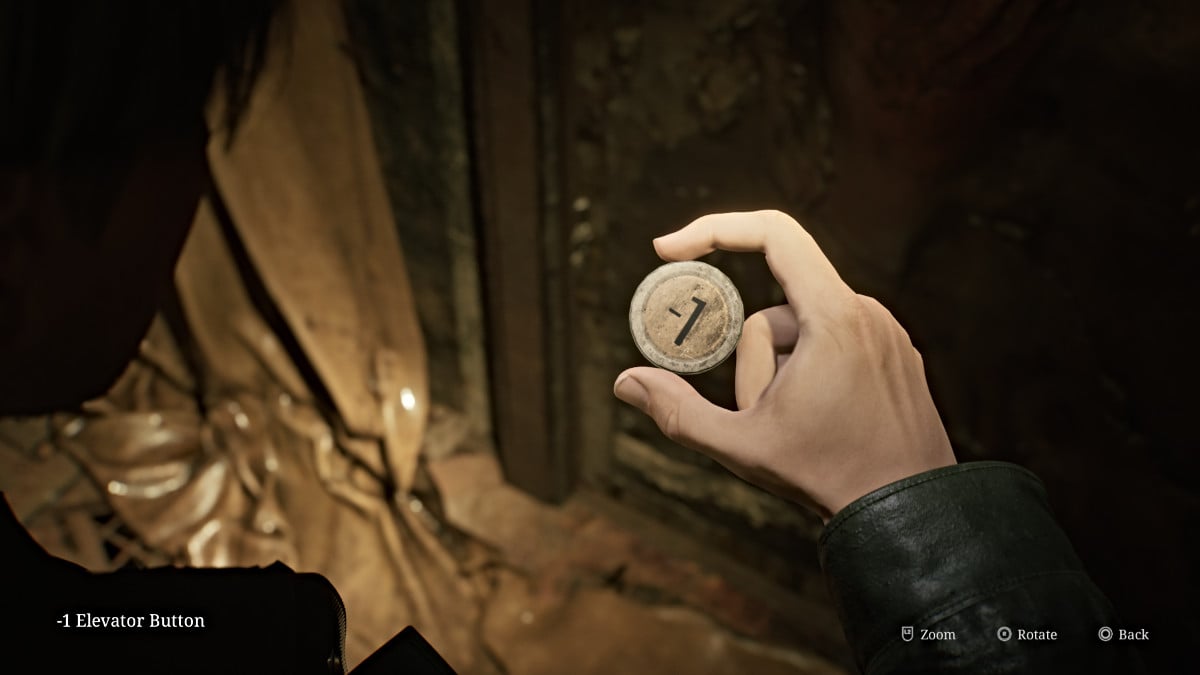
Once open, a cutscene will play where it's revealed that nothing is in the box, which leaves James dejected. However, a curtain nearby suddenly falls to reveal a strange door with a partial statue of a woman on it. James approaches it and finds the '-1' Elevator Button in its mouth, allowing you to use the elevator to reach the Basement.
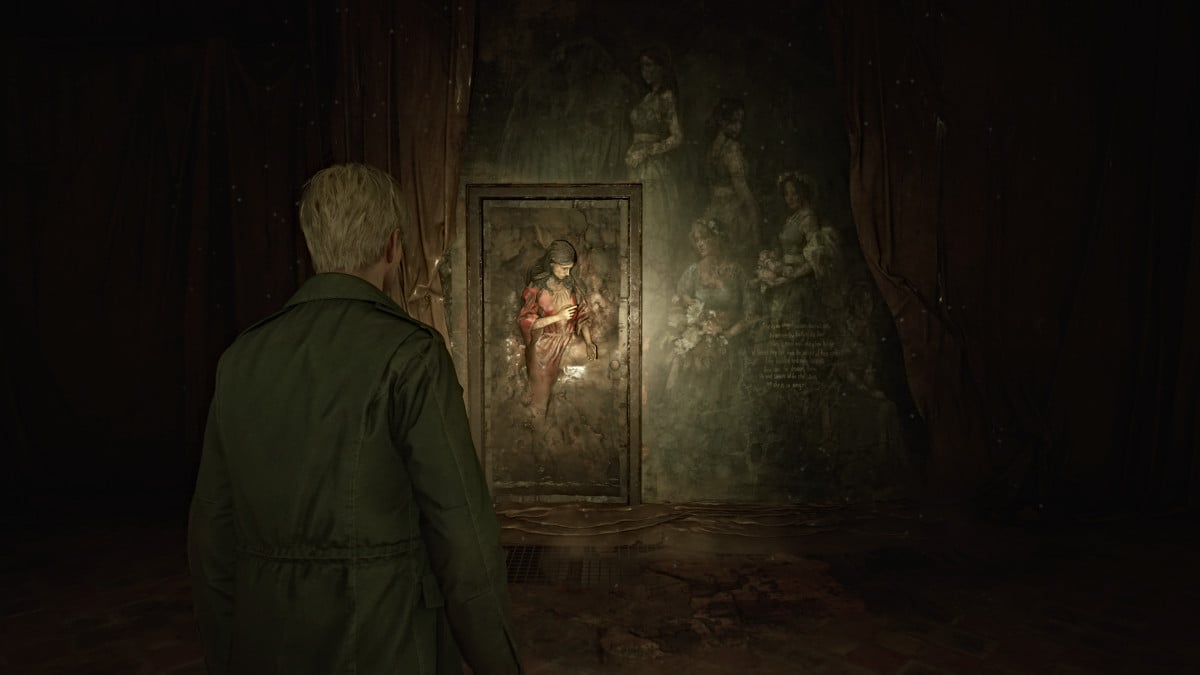
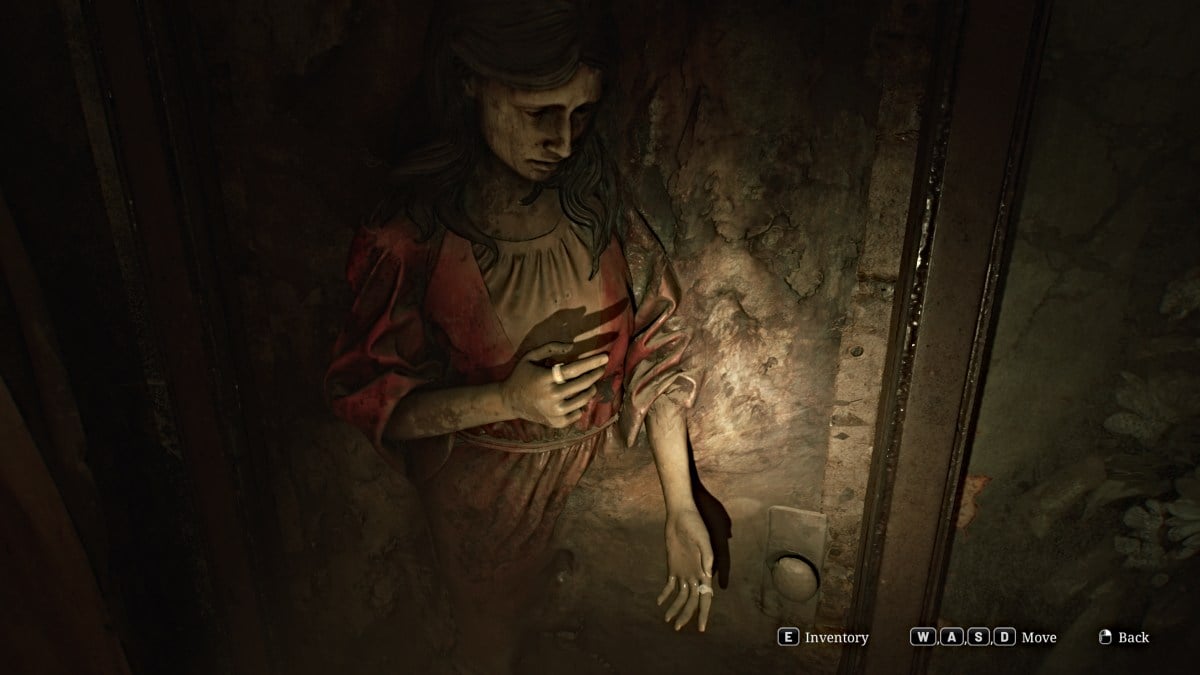
To open the Lady of the Door, you need to find the two rings missing from both her hands (seen above). To find one of them, the Basement is conveniently your next destination. Head to the Elevator and use the -1 Button to repair and take it down to the bowels of Brookhaven.
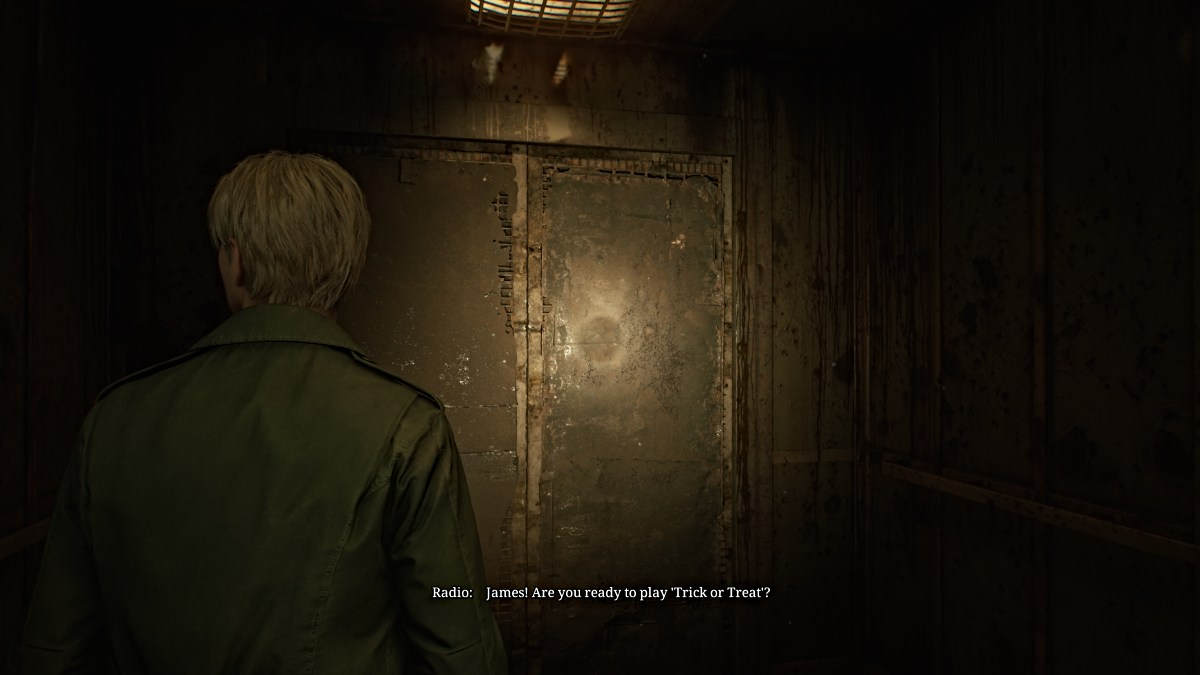
However, along the way, a mysterious voice will come over the radio system and enact a Trick or Treat game show just for James. It recites three quiz questions related to Silent Hill and its history that you'll need the right answers to when the time comes. So that you have them handy, here are the correct answers:
- Question #1 - 67 people died (Choice 2)
- Question #2 - Wiltse Road (Choice 3)
- Question #3 - Miriam (Choice 1)
Brookhaven Hospital (Basement and Floor 1) - Copper Ring, Lead Ring, and Maria Returns
Soon you'll arrive in the Basement, and the right path is blocked so you'll need to navigate around on the left side of the floor. Check the Kitchen Disposal Room for some Handgun Ammo and Shotgun Shells then go through the Maintenance Room to get to the Generator Room. From there, head south into Laundry Storage where you can find Handgun Ammo then further into the Laundry Room and Storage Room which has a Health Drink.
You'll come out on the other side of the huge gap in the floor, so you can continue down and around. The rest of the hallway is blocked, but a gap in the wall nearby will take you into the first Boiler Room. Cross into the second Boiler Room, deal with the Bubble Nurse patrolling the area, and then use the high crawlspace on the right side to make it out to the other side of the east hallway.
Your options are still very limited, so just go straight ahead through the next wall crack into the Pump Room. Sitting on a table to your right is the Copper Ring (seen below), the first of two that you need. As soon as you grab it a cutscene shows Maria suddenly appearing from the shadows, seemingly better than earlier.


James almost mistakes her for Mary, which of course doesn't sit well with Maria. The conversation instead turns to Laura, with whom Maria feels a strange connection that she can't explain and just insists on finding her. With that, Maria returns as your companion.

Continue through the Pump Room and back out into the hallway. The Tech Room is blocked, so the only way forward is back up to the first floor. Make your way up through the rooms on the east side, starting with Exam Room 2. Cross into Exam Room 3 where you can find a Syringe, then cut back into the hallway.
Follow Maria as she remarks about a "stroll in the rain", strangely unbothered by the Otherworld around them. The rest of the rooms on the right side are blocked, so the path takes you instead to the Pool area. Pick up the "They musn't know" Strange Photo from a nearby bench, then make your way around the pool (now a giant gaping pit) to the Shower Room, then across the hall to the Doctor's Lounge.
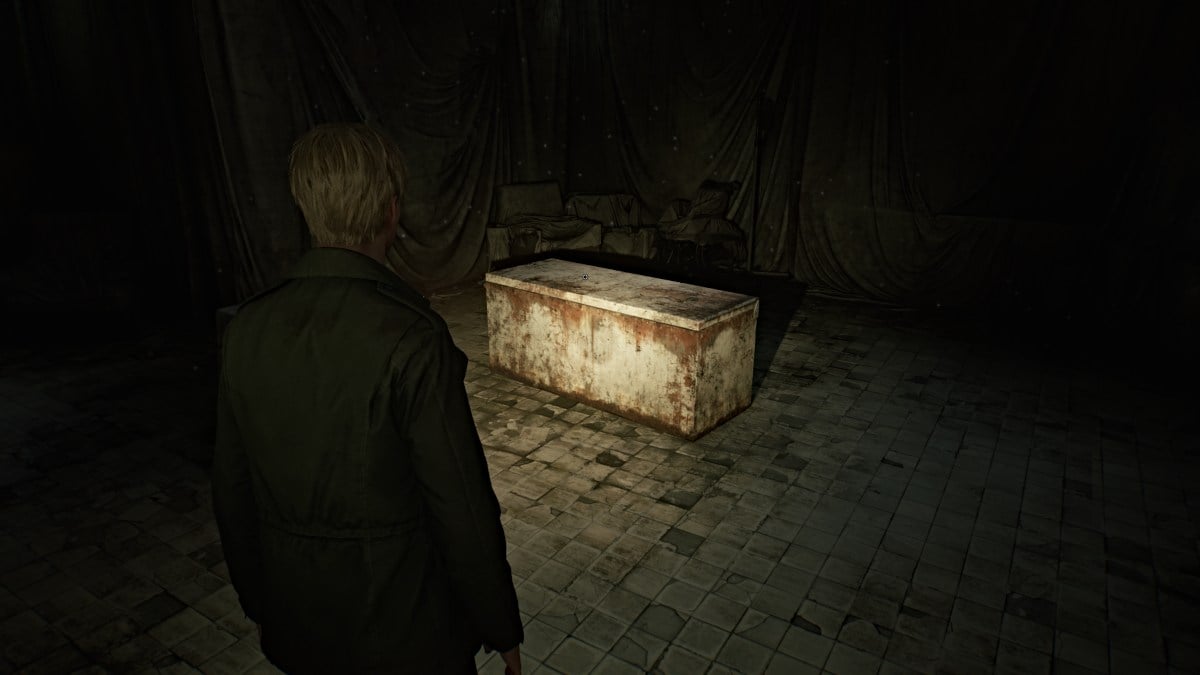
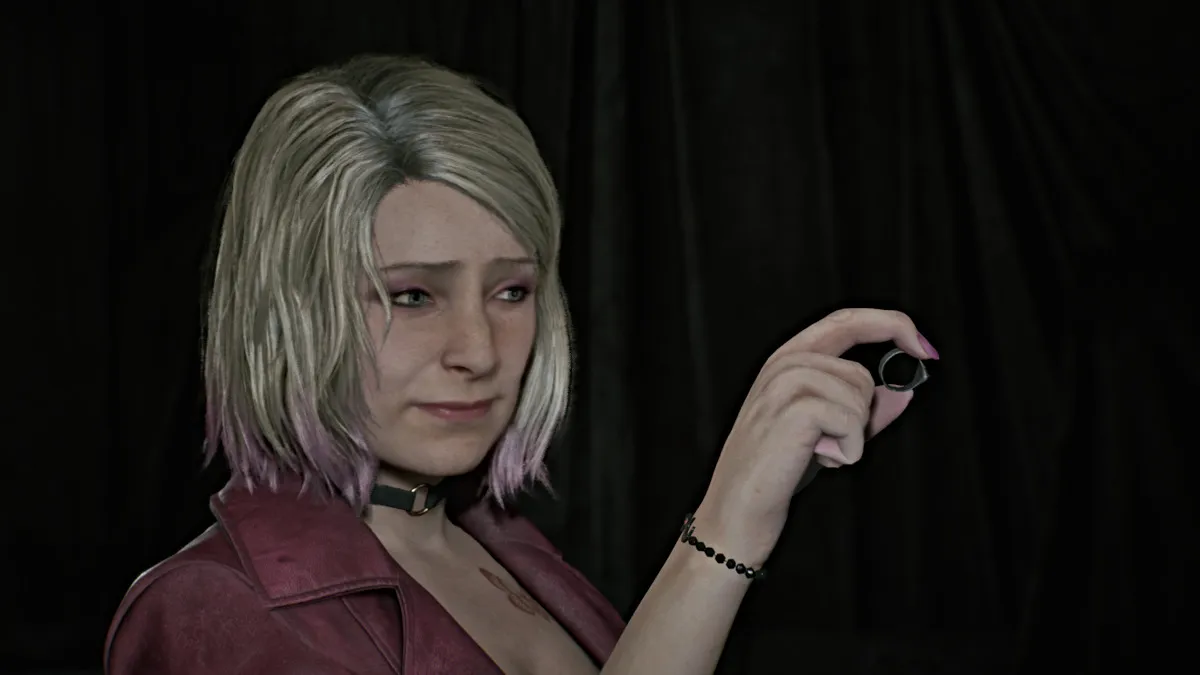
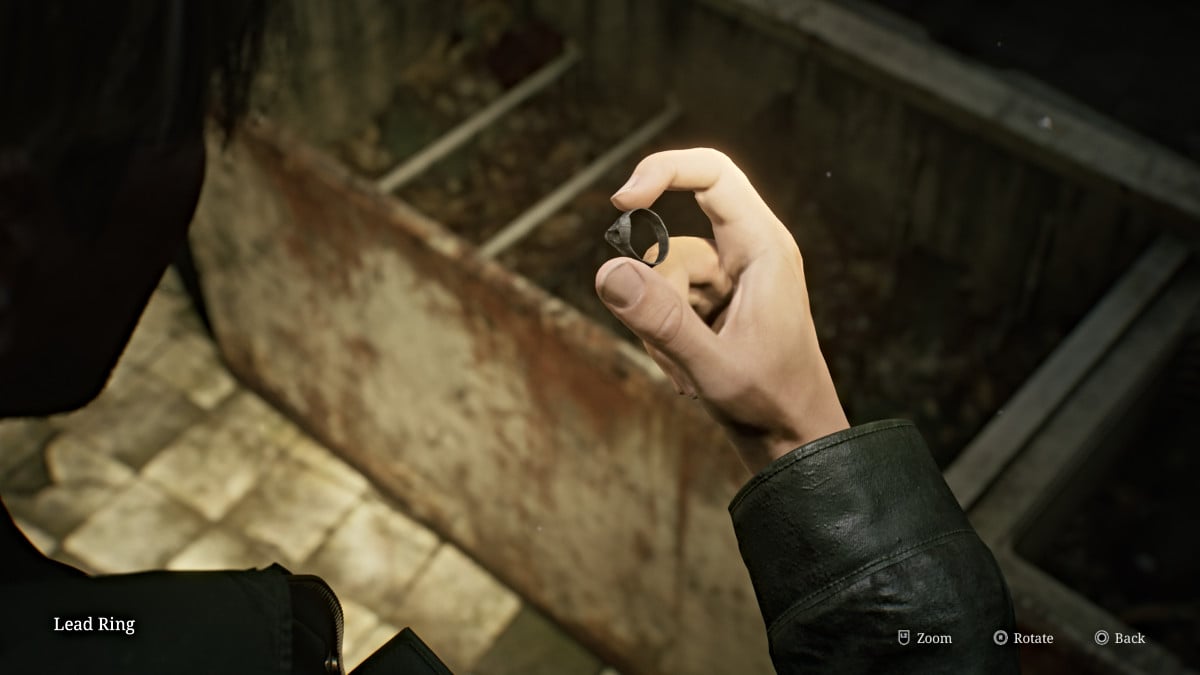
The room itself is mostly empty except for a large fridge that's been toppled over. James finds himself unable to open it alone and Maria teases him for it before offering to help with a hint of exasperation. They manage to open it together and upon peeking inside Maria finds a Lead Ring. It just so happens to be the other ring you need for the Lady of the Door.
Cross through the Locker Room to your left and pick up the Dissociated Note in there before continuing to the central hallway. Use the Red Save Point nearby before heading in the direction of the elevator. Before taking it though, head over to the Pharmacy, where you'll find an ornate box sitting on the counter.
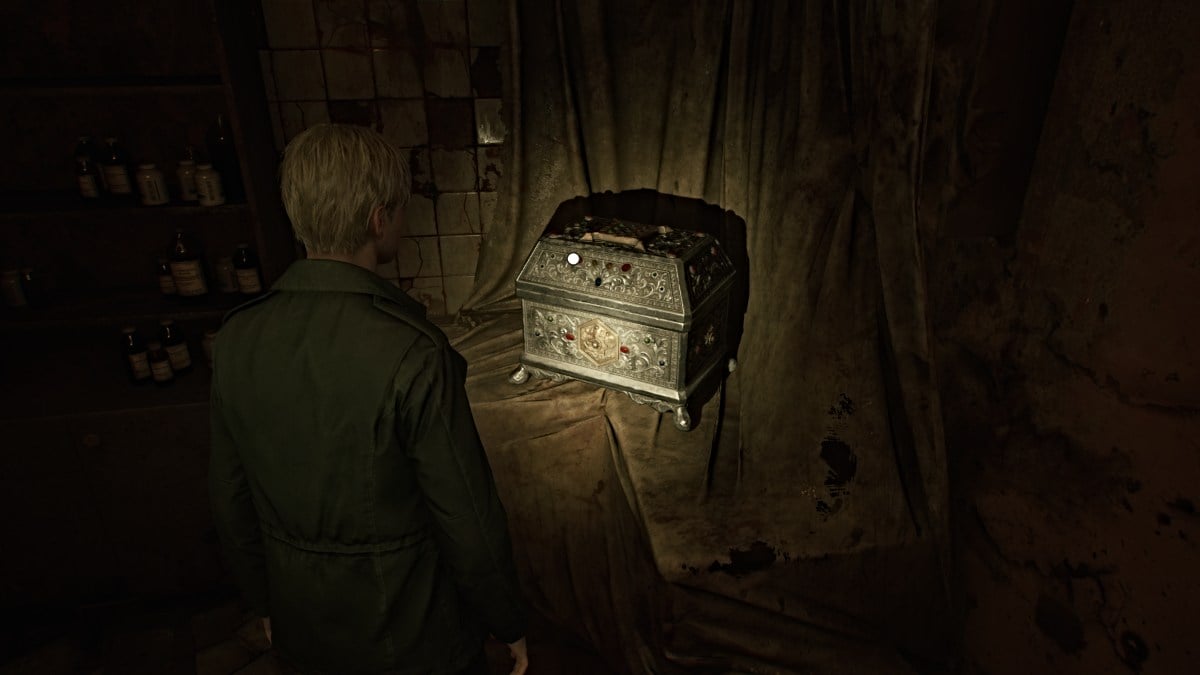
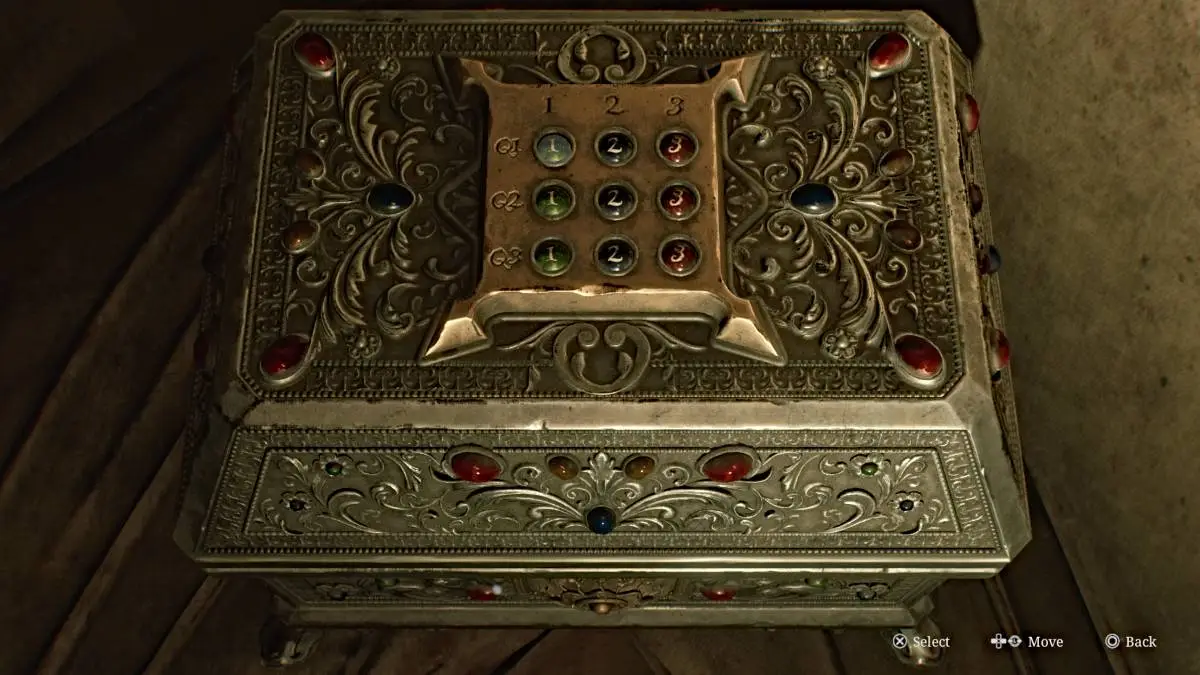
This is the "prize box" for the Trick or Treat quiz you received earlier, and you need to use the buttons on the top of it to punch in the correct answers. As mentioned earlier, the correct order is: 2,3,1.
If you punch them in correctly, you'll receive a nice reward of 5 x Shotgun Shells and 2 x Syringes. If you put the answers in wrong, you'll get pain instead, to put it lightly. When you're ready, take the elevator back to the second floor.
Brookhaven Hospital (Floor 2 and ???) - Maria Meets Her Fate and James Escapes the Hospital
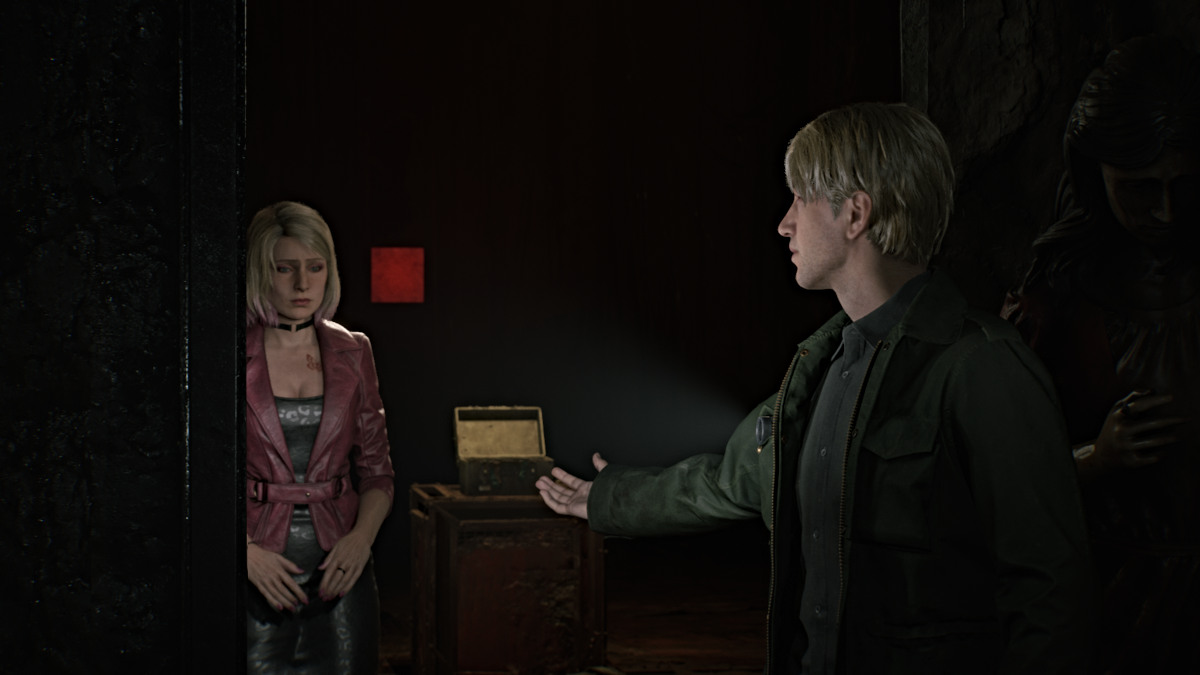
Once you're there, use the Red Save Point then go over to the Lady of the Door and place both rings on both hands. A cutscene plays as the door opens and James steps through, but Maria seems almost terrified to follow.
The path behind the door leads down a winding stairwell. Pick up the Ominous Note on the way down that reads, "It is done. Sick no more." Keep going down and there will be another Red Save Point for you to use if you haven't already. Continue down the steps and soon your map will be inaccessible, hinting that you've gone somewhere else entirely.
At the very bottom, go through the door and follow the path through the winding hallway. At a certain point, however, a cutscene triggers and James suddenly spots Pyramid Head approaching them, a spear in hand this time.

As soon as you regain control hit and hold your 'Sprint' button as Pyramid Head will be moving much faster this time, determined to catch both of you. Evade the obstacles that fall in your way and holes in the floor and keep going until you reach an elevator ahead.
James gets in first but the elevator tries to force itself shut as Maria tries to get in. However, Pyramid Head catches up and impales Maria with his spear, killing her instantly as the elevator shuts closed.
Soon the elevator opens, bringing you back to the first floor. The music calms and the threat is gone, and no monsters are present. Make your way across to the Reception Office, and on the desk by the open window is the Hospital Entrance Key. James sees Laura run off down the street into the darkness.

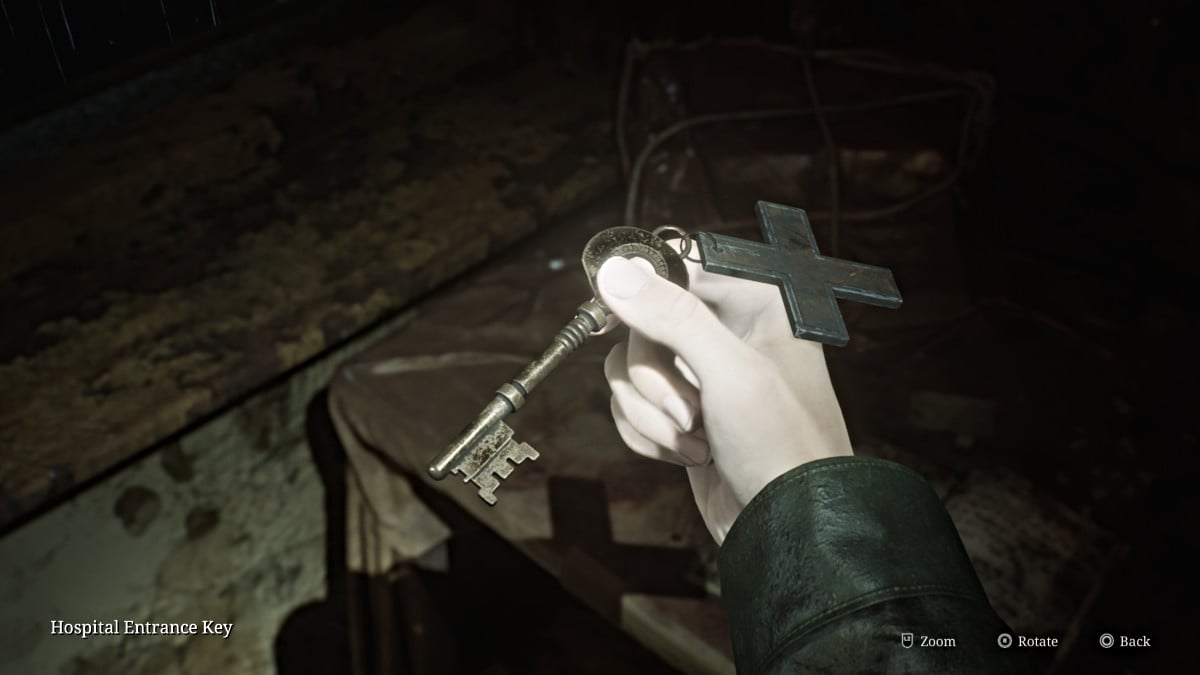
For now, make your way out of Brookhaven and into the stormy night.
Silent Hill 2 Remake West South Vale (Night) Walkthrough
Unfortunately, the Otherworld has now spilled out onto the streets and brought the monsters from the hospital with it, so tread carefully. Before you head straight to the story's next objective you can try to do some exploring in the area for items.
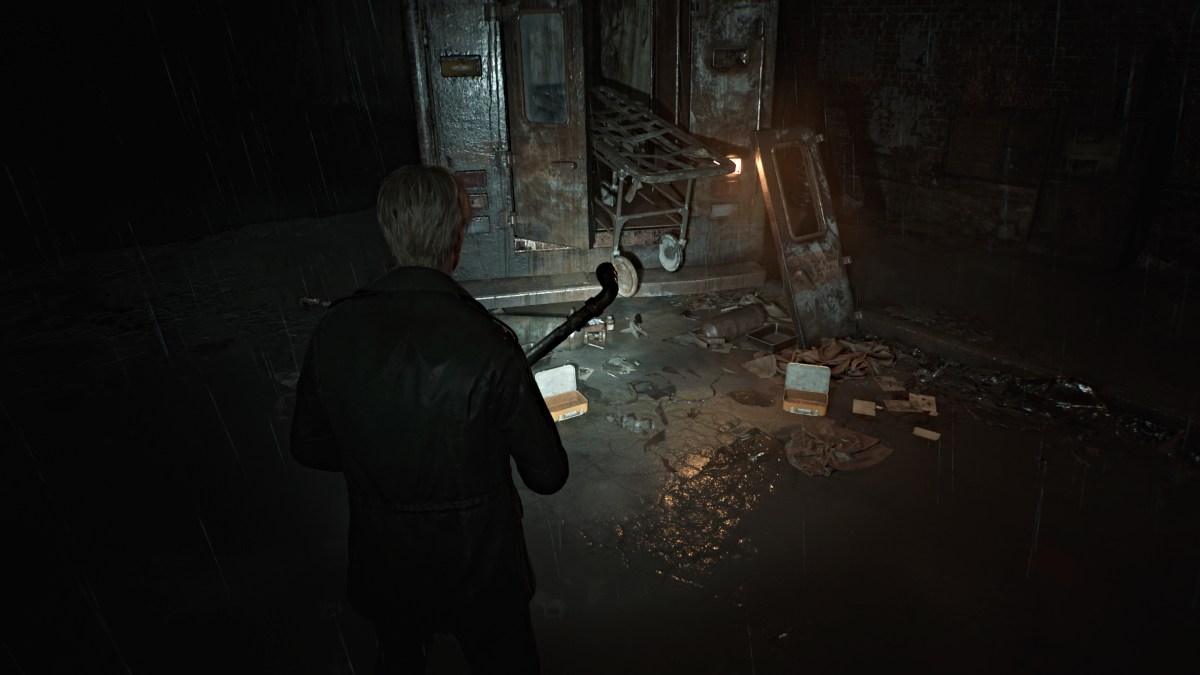
There isn't much to the left as the entire street is nothing but a chasm in that direction. There is a nearby wrecked ambulance that has a Health Drink and Syringe lying near it, if you feel up to dealing with the Bubble Nurses guarding it.
Head down the street to the right and you can find some Handgun Ammo and Shotgun Shells inside cars. Go through the door beyond a barricade near Heaven's Night and you can find more ammo in a nearby garage shed. Go all the way to the far right end of the street behind Heaven's Night where you'll see another shed area. On the right wall inside it you'll find a breakable spot, so tear it down and slip through.
Enter the Garage and grab the Syringe and Handgun Ammo, then use the Red Save Point on the wall. Head out and you'll catch Laura just beyond a gate ahead. Deal with the Bubble Nurse and Mannequin in your way first, then run to the far right corner where the door you used to get into Heaven's Night is. Some Handgun Ammo will be on the ground there.
Lakeside Diner
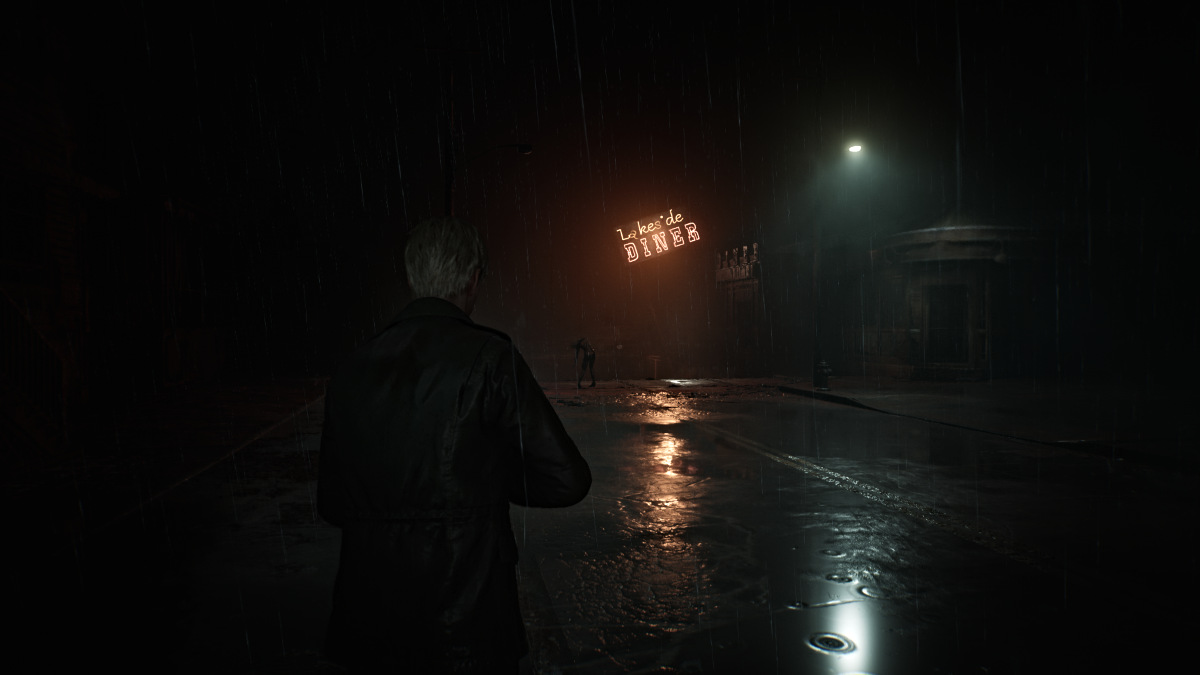
Backtrack to grab the handcart and push it in front of the gate, so you can jump over it. Soon you'll find yourself on Rendell Street and near the Lakeside Diner. First, grab Handgun Ammo sitting on the tire of a truck nearby then head towards the diner, then more on the front deck of a house on the left.
Deal with the Bubble Nurses in your way and then grab a Health Drink from one of the cars parked near the diner. Head inside and venture behind the counter for some Handgun Ammo and Shotgun Shells. Deal with more monsters in your way and use the double gate doors on the other side to leave.
Maneuver between the school bus and big rig truck, and you'll find more Handgun Ammo sitting on the bed of a pickup and Shotgun Shells on a barrel behind it. Pass through the gate back onto Rendell Street and head east. Be sure to check the front porches of the houses and cars you pass for more items.
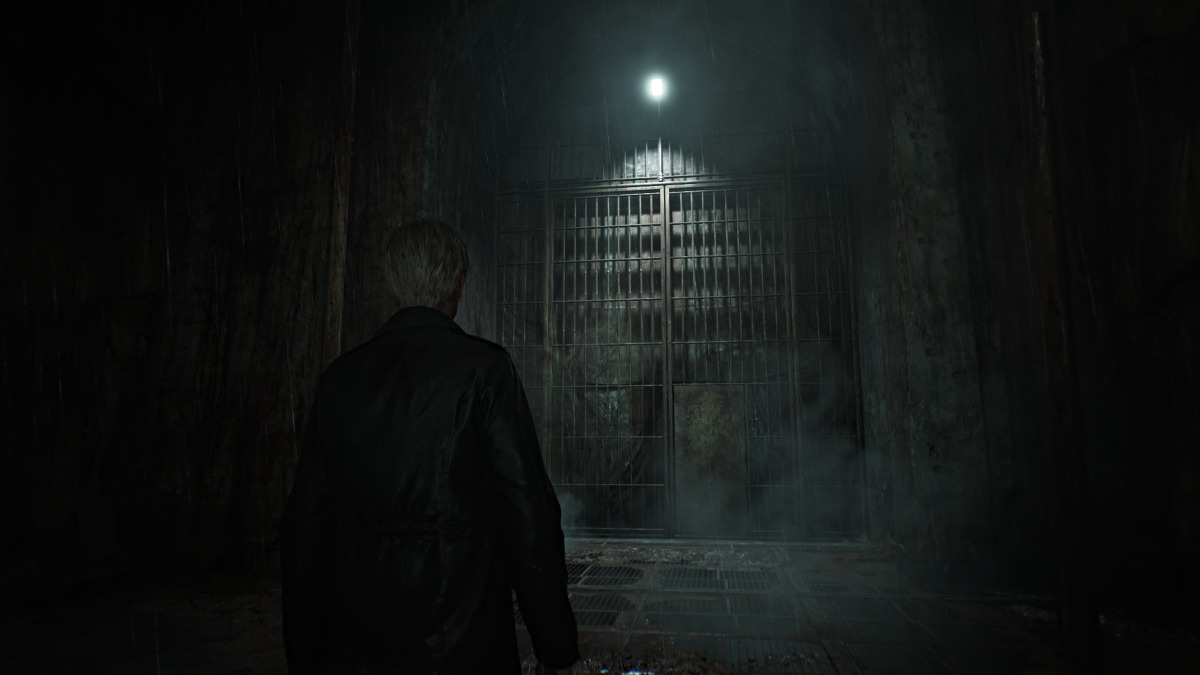
Soon you'll reach Munson Street, but there's nowhere to go but south towards the edge of your map. You'll catch another glimpse of Laura as she runs through a large gate, so follow her through. Cross the long and dark metal catwalk until you reach the other side.
Silent Hill 2 Remake East South Vale (Night) Walkthrough
Back to Neely's Bar
Now you're back on the east side of town on Saul Street. Go into the Motor Home to your right, where you'll find a Red Save Point, Handgun Ammo, and the Note on a Map which has an ominously foreshadowing written message and a clue about where to go next for a "letter and a wrench".
As you go further down the street, there will be a high crawlspace you can climb up and through to enter a warehouse. Navigate through it, pick up more ammo and deal with monsters along the way until you reach a breakable wall at the back of it. Slip through and continue on until you reach the other side of the chasm on Neely Street.
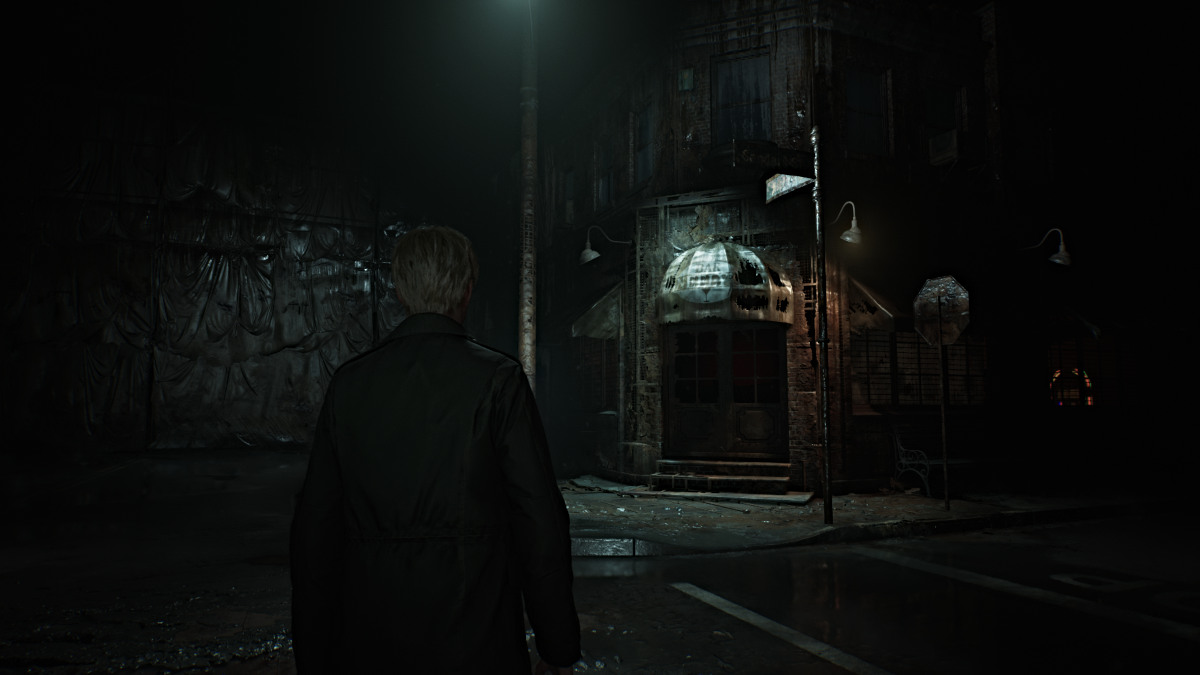
This will bring you face-to-face with Neely's Bar once again. Go inside and you'll see the jukebox is on, but rather than playing music it sounds like breathing. A threatening message on the wall behind it suggests that if he wants to see Mary "he should just die" but that he "might be going to a different place than Mary" when he does.
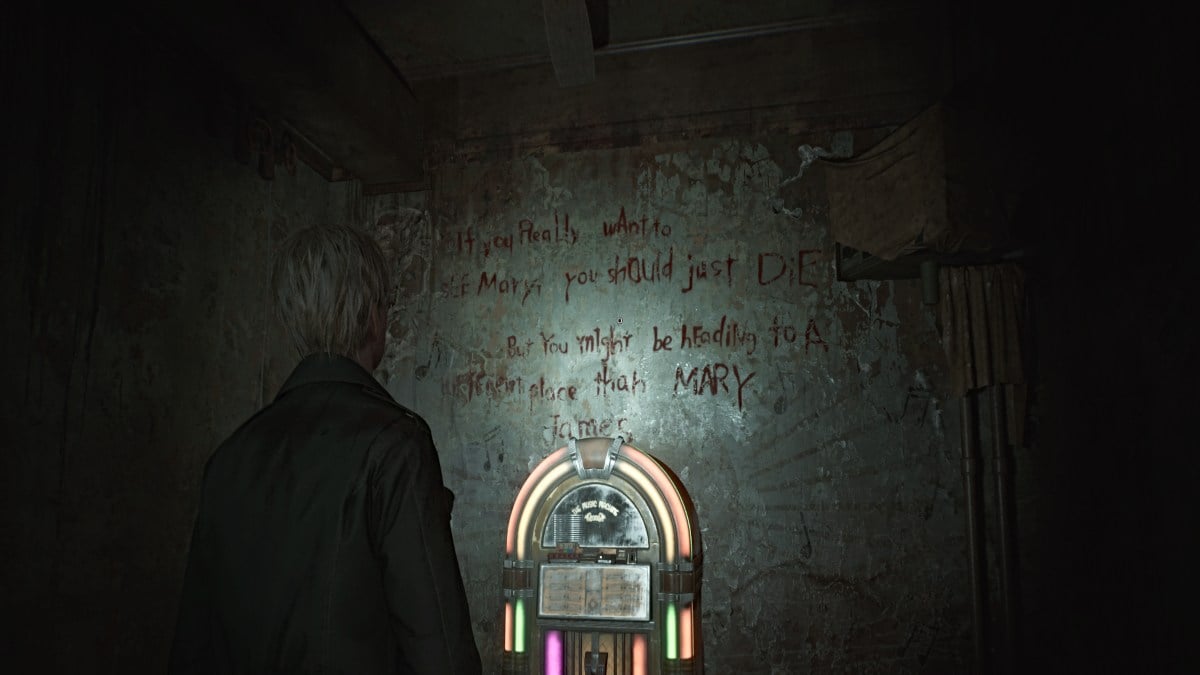
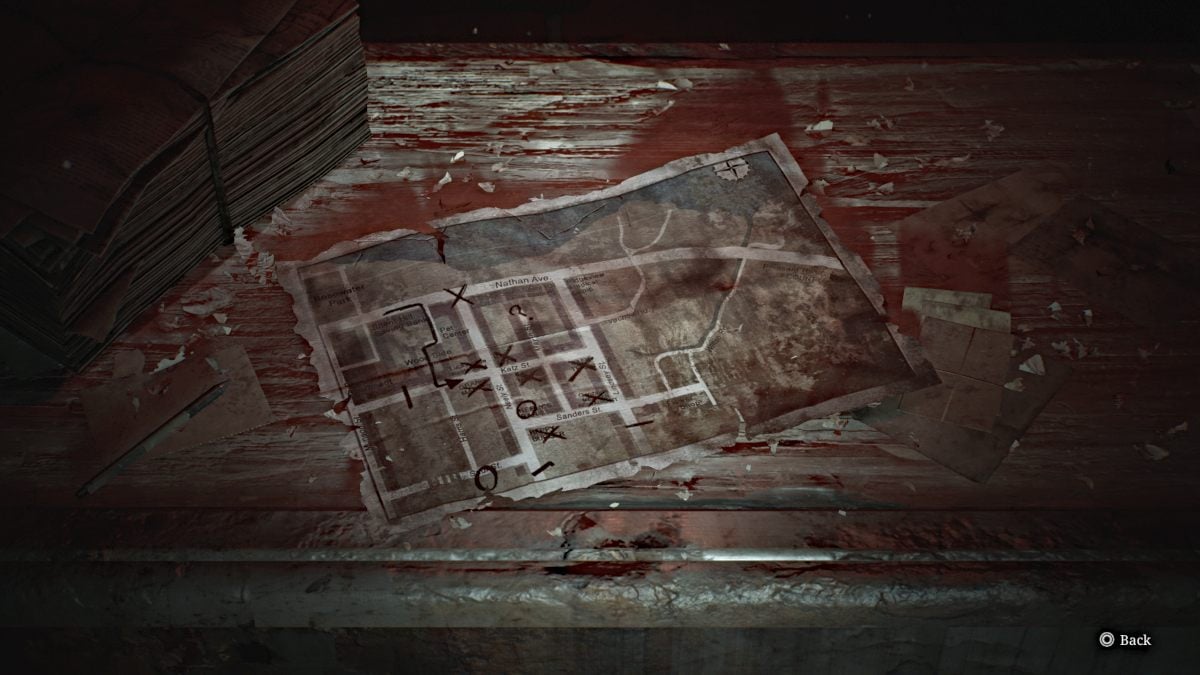
Go over to the counter to collect another Glimpse of the Past, then behind it for some ammo and a Red Save Point. Go to the door on the left that's slightly open and grab a Health Drink on your way out the back of the bar.
The Laundromat and a Phone Call
Go through the back alley area, grab some Handgun Ammo from a nearby car, a Health Drink on the ground near the chasm in front of you, and make your way around the corner to the back of a Laundromat. There will be a high crawlspace for you to climb up through.
Once inside, you'll hear a phone ringing somewhere nearby. Smash and grab the nearby Health Drink and deal with the two Bubble Nurses that approach you through the wall crack. Go through the crack yourself afterward, make your way through the front of the laundromat, and jump through the open window on the right to the street.
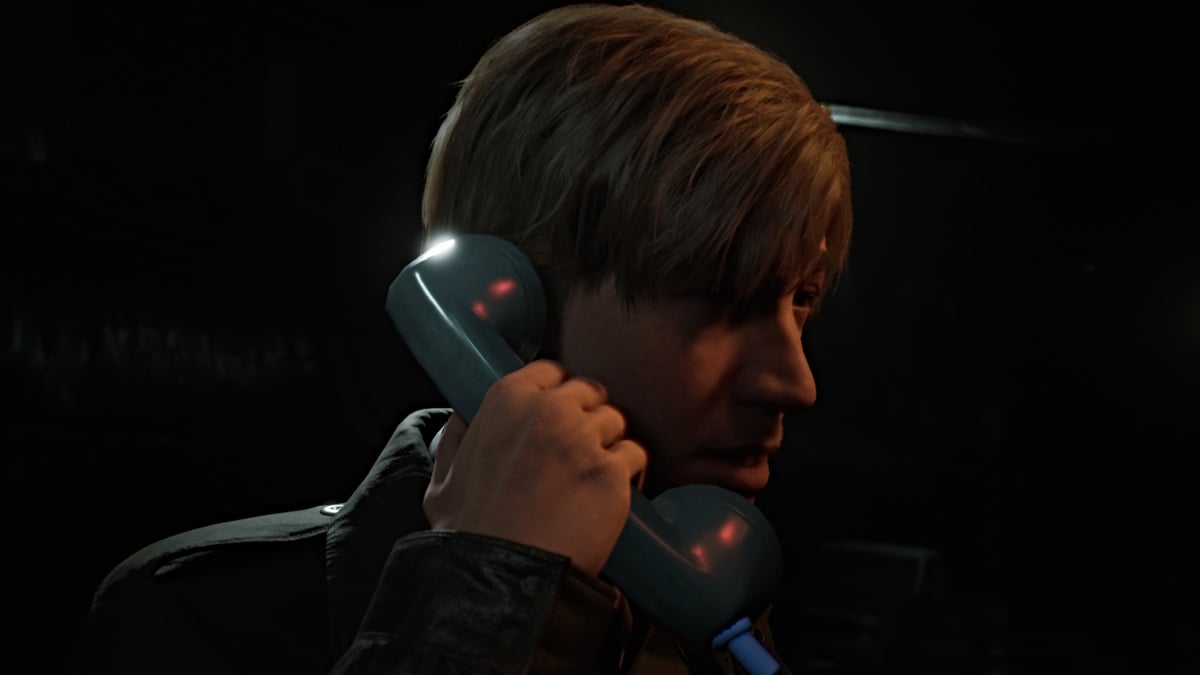
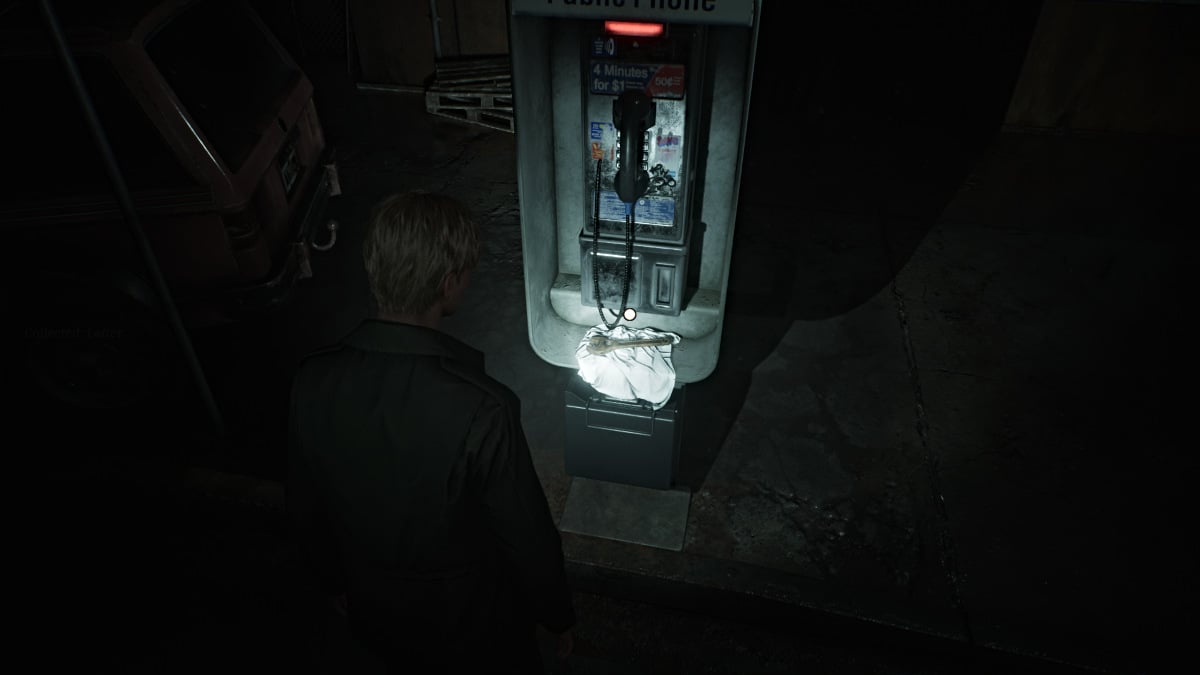
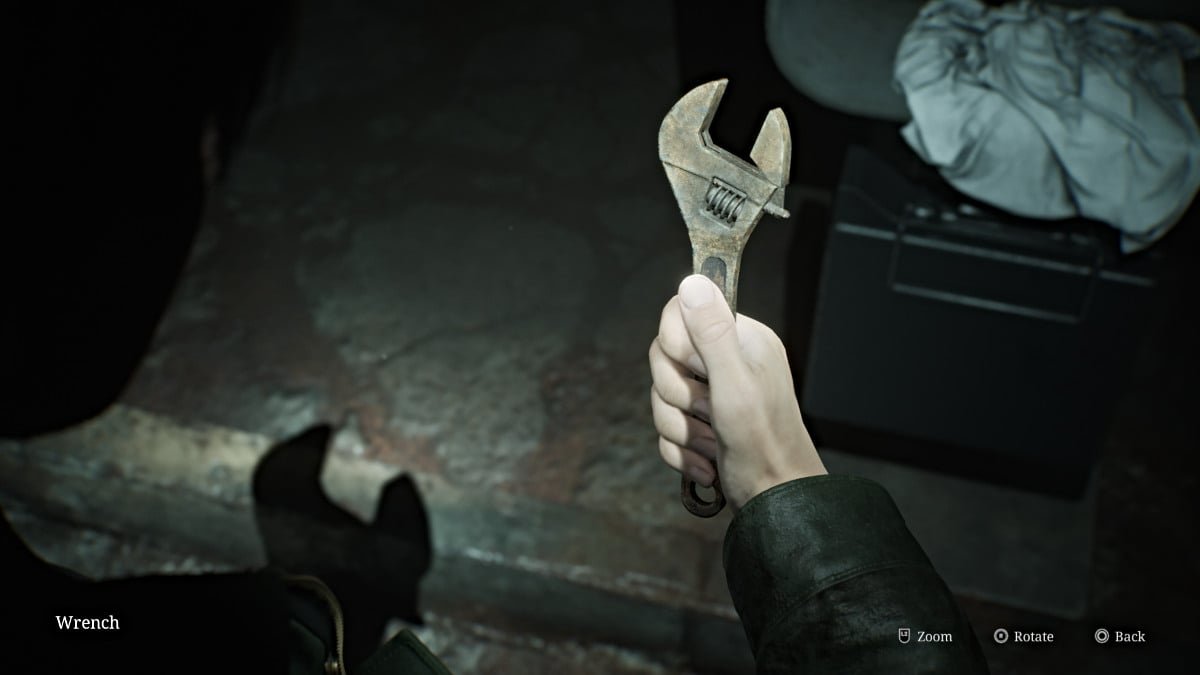
Turn left and you'll notice it's a payphone ringing. Walk over and answer it, but no one is on the other line. After James hangs up the phone, a piece of paper drops in the change slot. It reveals yet another message that implies that "the key is in the park, at the feet of the praying woman", and that "the wrench will open the gate". With that, pick up the Wrench sitting under the phone.
Back to Rosewater Park and Back to Angela
Now you'll need to head back north to Rosewater Park to find what you need. Head to Neely Street and run north until you reach a tall barricade with a door. Head through and you'll find another huge gate ahead. Use your Wrench to open it and pass through.
You'll find yourself going over another metal catwalk, but this time a new monster called a Mandarin is crawling beneath it. Even though it's beneath the grate, it can still attack you if too close, so keep your distance and keep running until you reach the end of the tunnel. Beyond that, you'll find yourself back in the same tunnel you used to enter Rosewater Park.
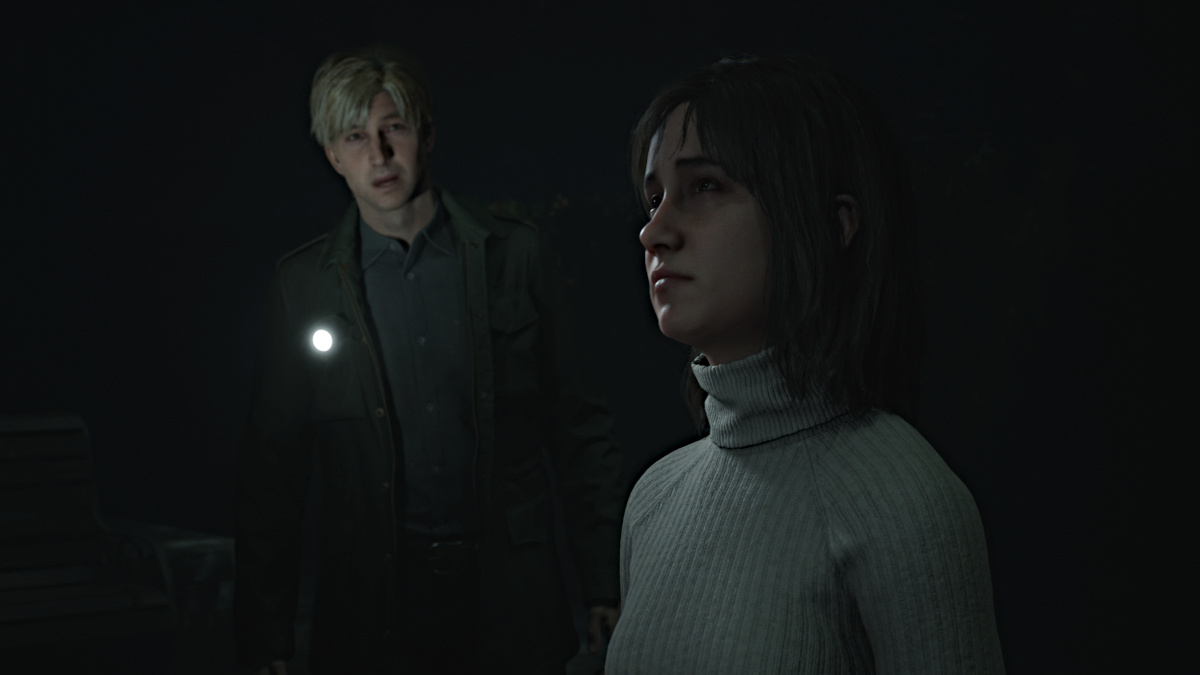
Head inside and make your way toward the west side of the entrance area. There are no items are monsters to worry about here, so just head straight for the iron gate on the west side. Follow the path straight across until you see what looks like a statue lit up ahead. Approach it and you'll notice that Angela is surprisingly there too.
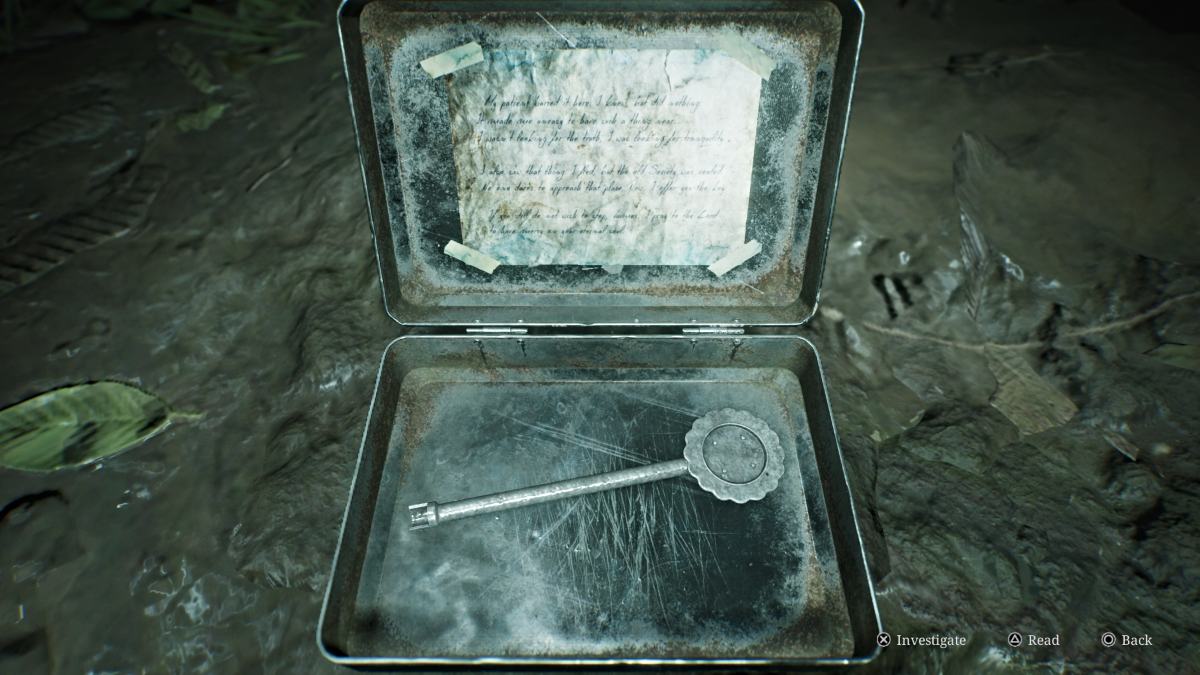
After the cutscene, interact with the praying woman statue and James will dig up a metal tin that contains the Historical Society Key. The Historical Society is located further west on Nathan Avenue, so leave the park and make your way there.
Historical Society
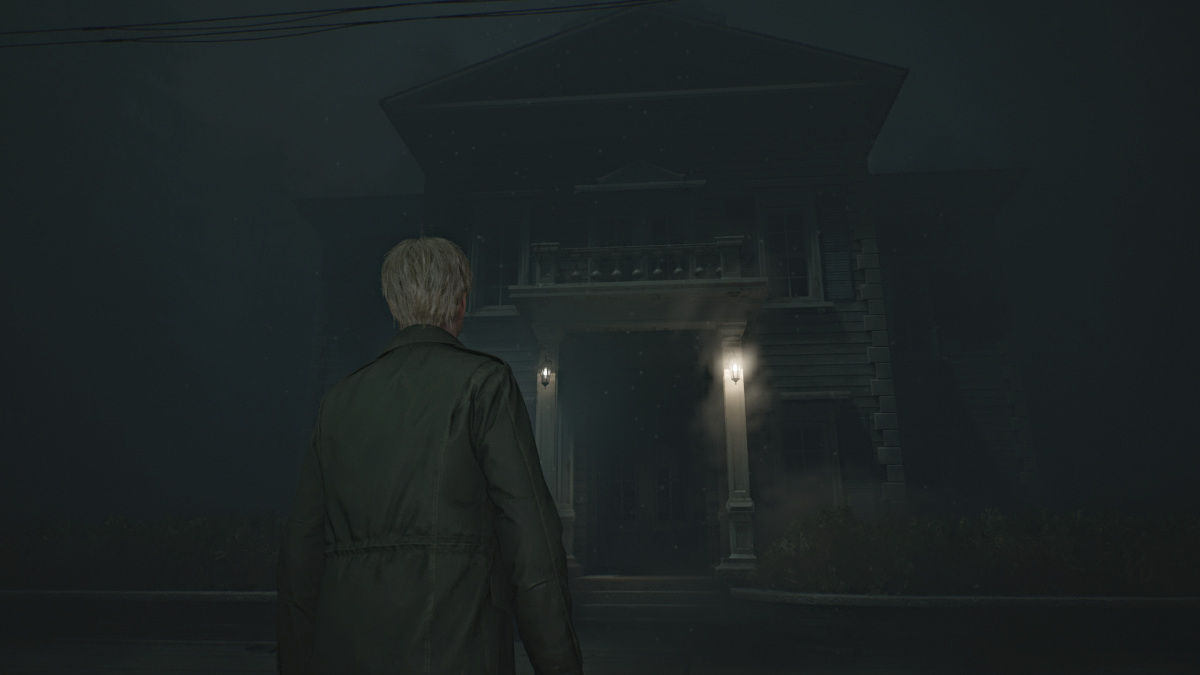
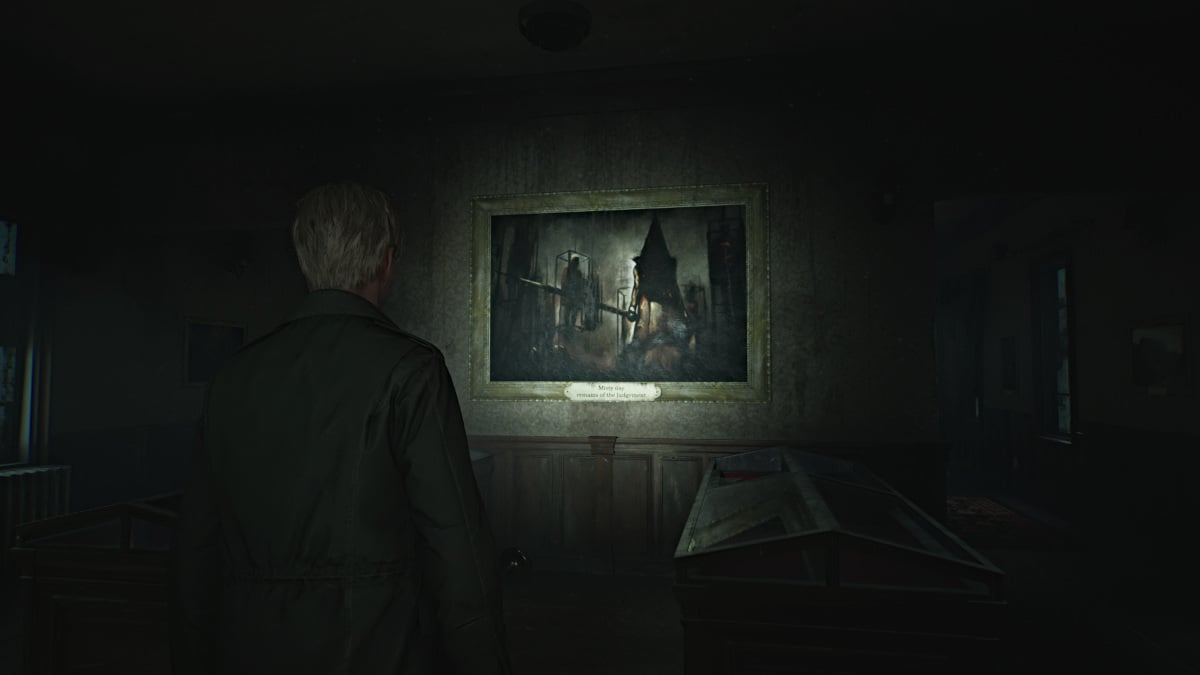
The journey along Nathan Avenue to the Silent Hill Historical Society is a somber and quiet one, as there are no monsters anywhere on the road. Soon enough you'll see the building lit up in the fog to your right. Use the Historical Society Key and head inside. Use the Red Save Point near the entrance.
As you explore, it's definitely hard to miss the portrait straight ahead that depicts Pyramid Head himself. Make your way toward the back of the museum and there will be a strange dark tunnel in the wall for you to enter. You won't be returning to the surface of Silent Hill for a while beyond this point.
The staircase you take down through the tunnel is very, very long, and the distant sound of foghorns accompanies your descent. That is a reference to the Little Baroness steamboat that sank in Toluca Lake decades earlier, of which there's a picture in the Historical Society.
This staircase seemingly takes you deep beneath the lake, but when you finally cross through a door at the bottom, you'll find yourself in Toluca Prison.
Silent Hill 2 Remake Toluca Prison Walkthrough
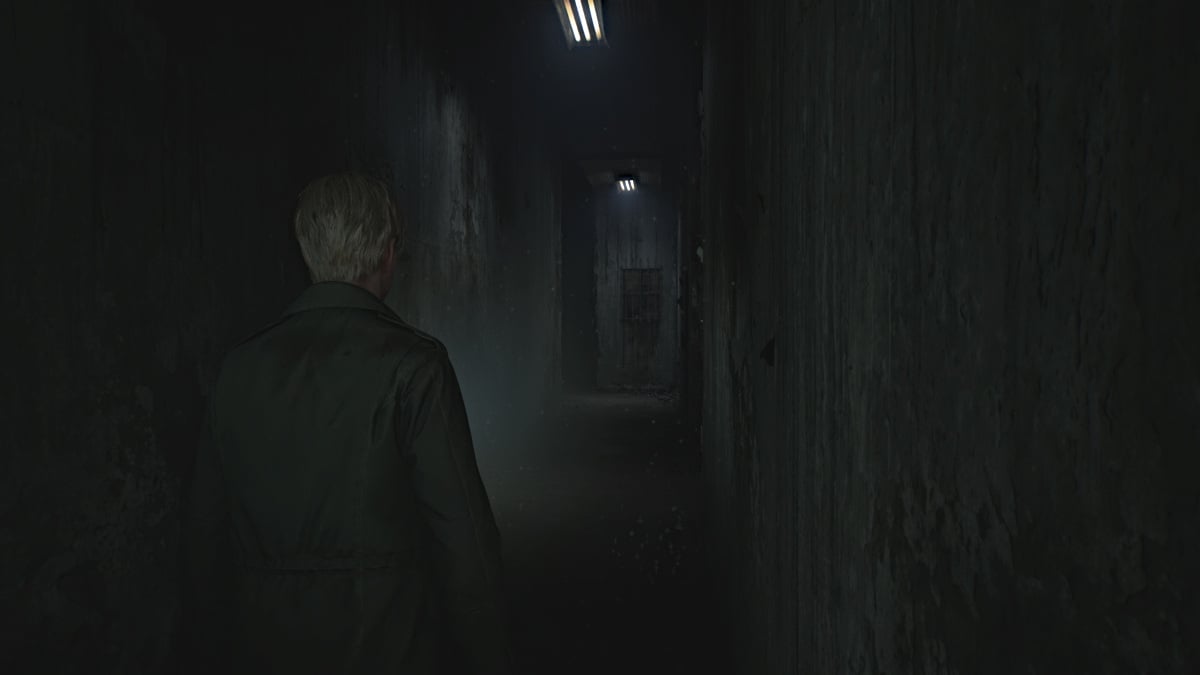
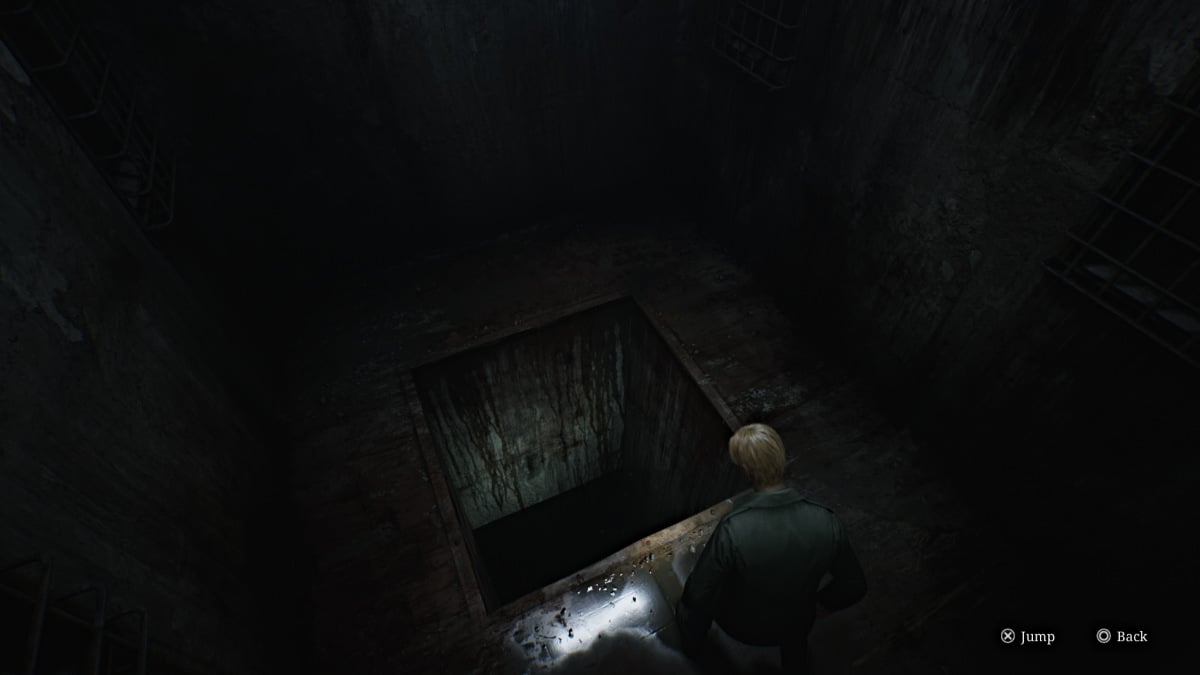
Grab the Syringe from a first aid kit on the table in the small room you pass through, then continue on through the next door. You don't have a map of this area yet, so keep an eye on your surroundings. The door to your right is locked, so head left down the hall. The path will diverge, and left is a dead end so go right.
You'll soon see another door, so go through it. Inside, you'll find nowhere to go but a large dark hole in the floor, forcing you to go deeper. Interact with it twice and James will hesitantly take the plunge.
Upon reaching the bottom, you'll find yourself in what looks like a well with no visible way out. There is a way out, however, and you just need to find the right spot on the wall to break through. Keep trying different spots until one lets you out and has a door on the other side.
You're now in what seems to be a flooded area of the prison, shaped like a maze. Go right and then turn left when you can and head straight towards the door ahead of you. Deal with the Lying Figure that blocks your way and you'll then see that there are two doors. The one in front of you is locked, so take the right door.
Bug Room Puzzle (Keypad Answers)
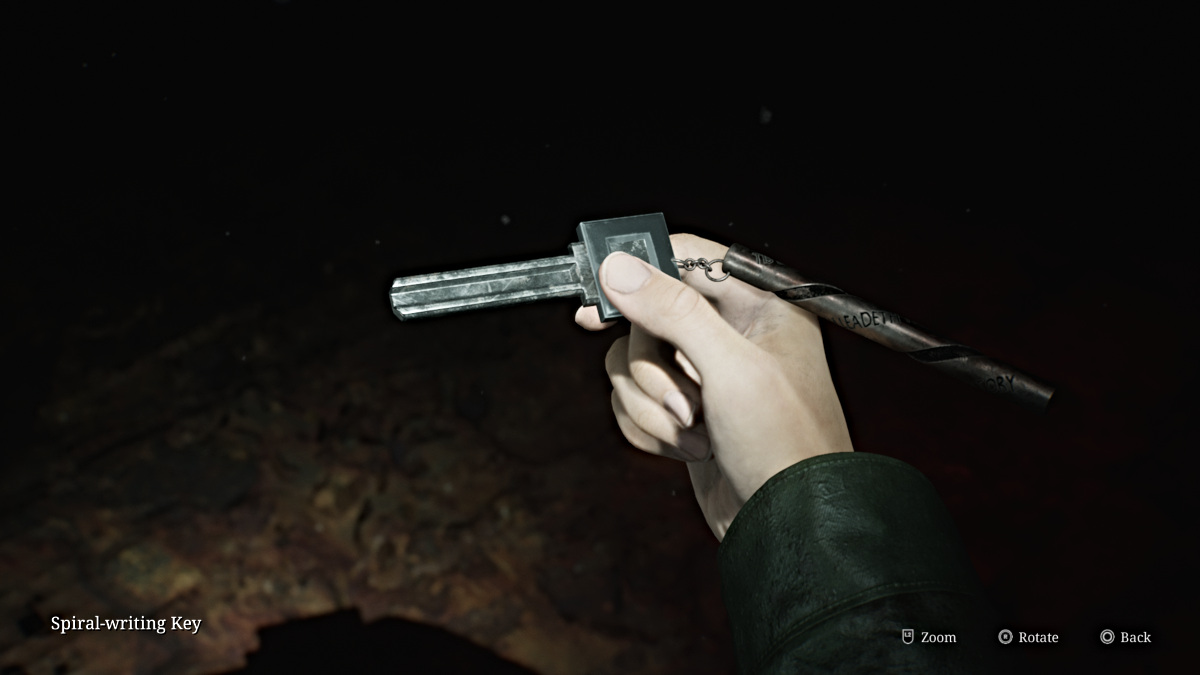
Down the hall ahead is what looks like another deep hole, but is blocked off by a locked prison gate. Backtrack a bit and go through the door on your right, where on the floor you'll find the Spiral Writing Key.
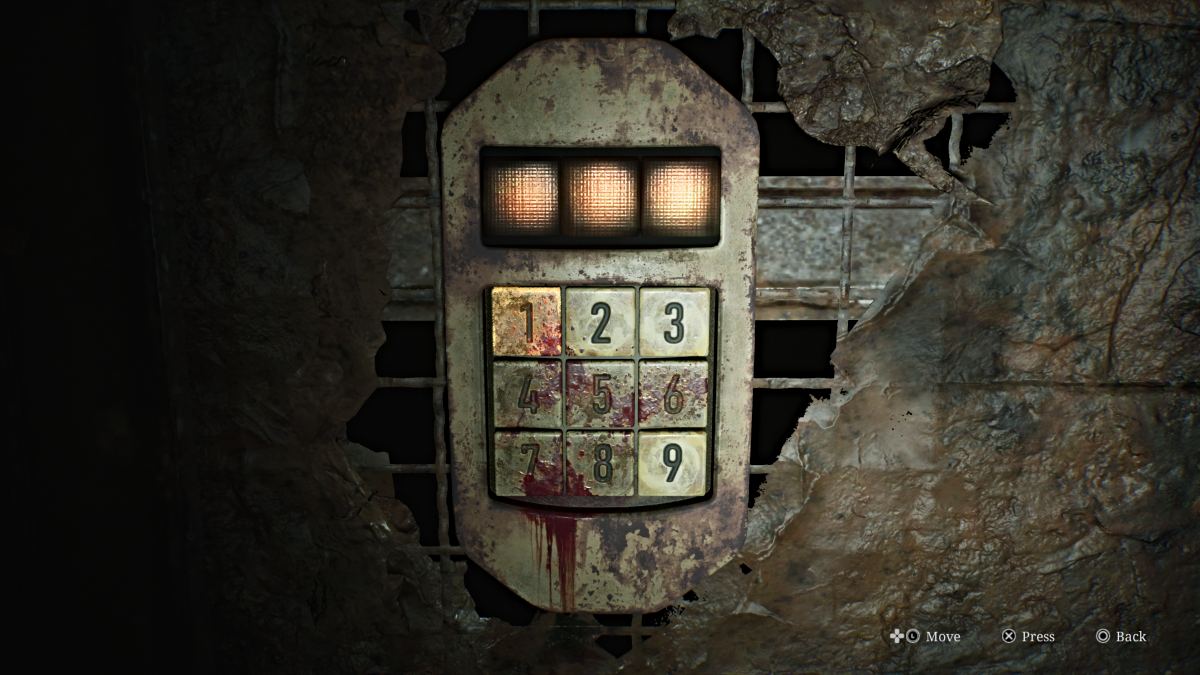
After picking it up, however, the lights will shut off and then turn back on to reveal the room suddenly covered in bugs who will bite James occasionally, causing damage.
To escape the room you need to use the keypad (seen above) and figure out the correct code, which is a random combination of the numbers 2, 3, and 9 (the only ones not covered in blood). The solution for every playthrough, regardless of difficulty, is entirely random, so it's an anxious test of trial and error. To help you out, here are all of the possible combinations for you to work through:
| 2-3-9 | 2-9-3 |
| 3-2-9 | 3-9-2 |
| 9-2-3 | 9-3-2 |
Once you break out, go back over to the locked prison gate and use the Spiral Writing Key on it, revealing the next hole for you to jump down. Interact twice to jump further into the abyss.
Toluca Prison (Floor 1) - Eddie Returns, the Armory, and the Yard
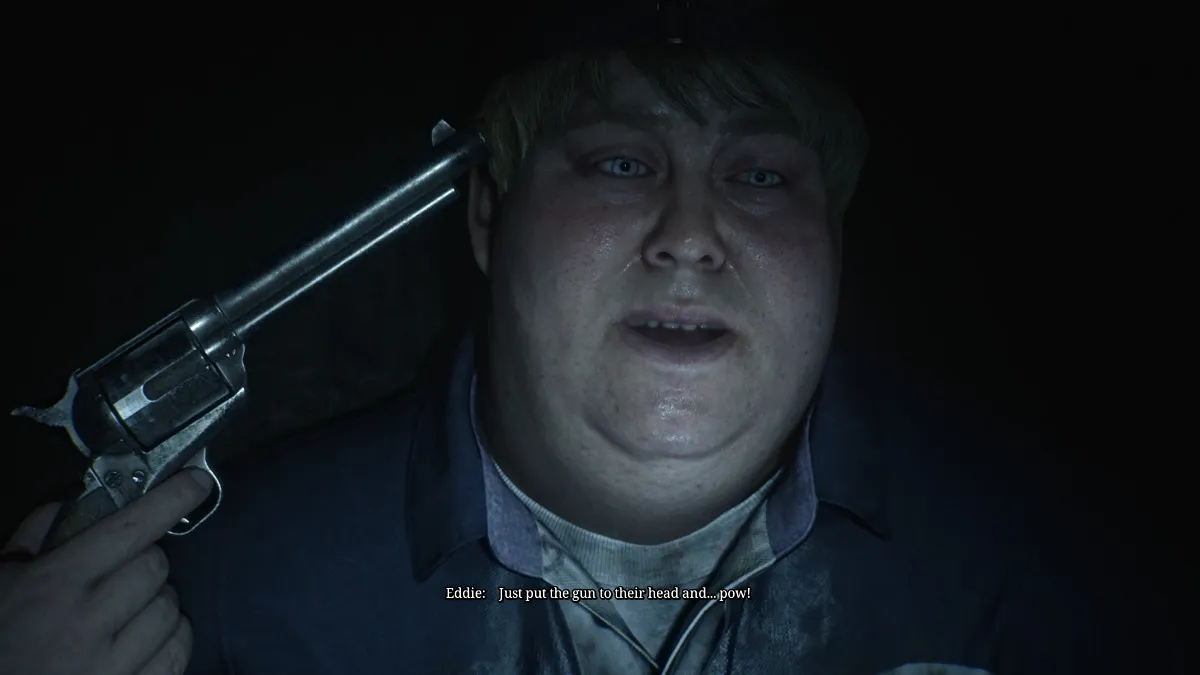
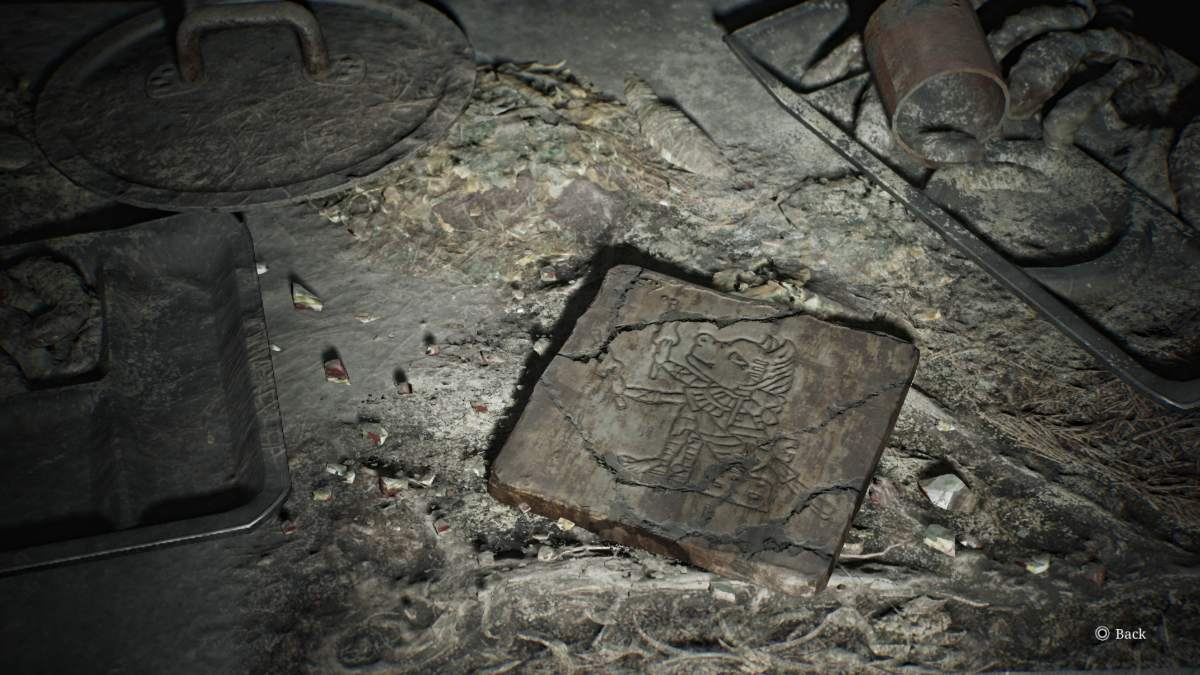
After your next fall, you'll land in the Canteen room of the prison. Grab a Health Drink from the food line at the back of the room, then explore the right side of the room to find a Glimpse of the Past on one of the tables. When you're ready, approach the body under the bright light hunched over a table, recently killed.
Eddie appears from the shadows, remarking that killing a person "ain't no big deal". James tries to understand Eddie's reasoning for what happened until it becomes clear that Eddie killed them for how they "looked at him". Eddie gets defensive when James reprimands him before opting to go off on his own.
The Armory and The Church
Once he's gone, go through the same doors and ahead you'll find the prison's Armory. After using the Red Save Point, on the back wall, you can finally grab a map of the entire prison.
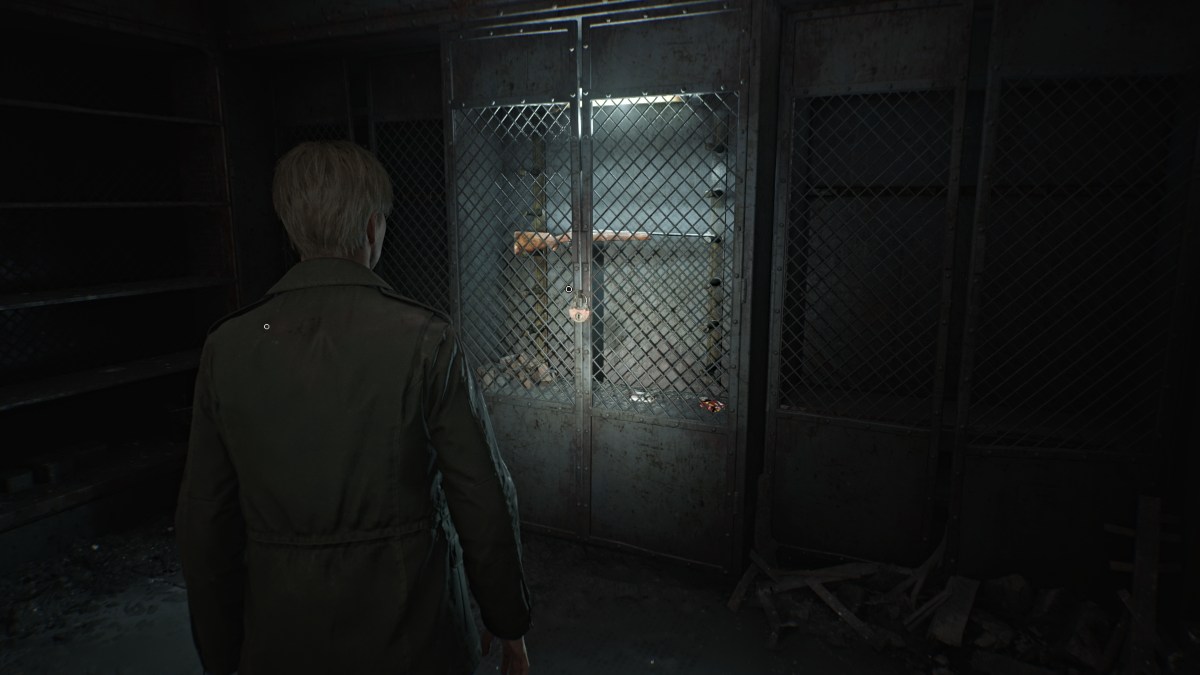
There's also Handgun Ammo, a Syringe, Rifle Ammo, and a Hunting Rifle weapon, though it's currently locked in a cabinet. You'll need to find the key for it, and thankfully there's a hint in the nearby Gun Cabinet Notice.

For now, start exploring the surrounding areas such as the Church to the left of the Armory. Inside you'll find an object called The Heaviest Weight up at the pulpit. Over in the Vestry you can find a Syringe.
Cell Block A and B
Head next through the double doors to Block A and Block B. To your right as you enter, you'll notice a door with a Hornless Ox portrait on it. Meanwhile, over in Block B is a door with an Eyeless Boar portrait, the far end of Block A is a door with a Headless Serpent, and the door to the Basement has a Wingless Dove.
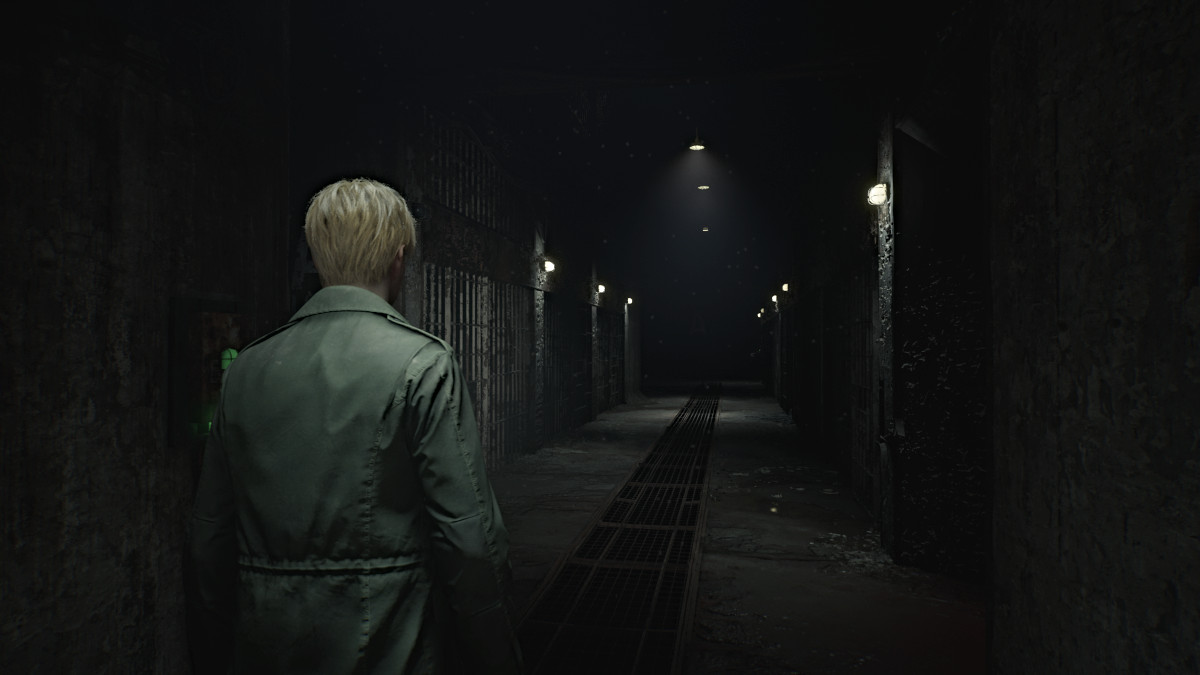
The levers on the walls can give you some temporary light in the block, as even with the flashlight it's uncomfortably dark. However, it will also send Mannequins scurrying up walls to the ceiling. Yep, you now have "Spider Mannequins" to deal with.
In Cell A3 you'll find Rifle Ammo and a Glimpse of the Past in the form of a shrine. In Cell A5 will be Handgun Ammo. Over in Cell A7 there's a crawlspace that takes you to Cell B1, which has a Health Drink and a hiding Mannequin. Cell B3 has a breakable wall that lets you cross to Cell A9 and A8, which has Shotgun Shells and another Mannequin.
The Yard
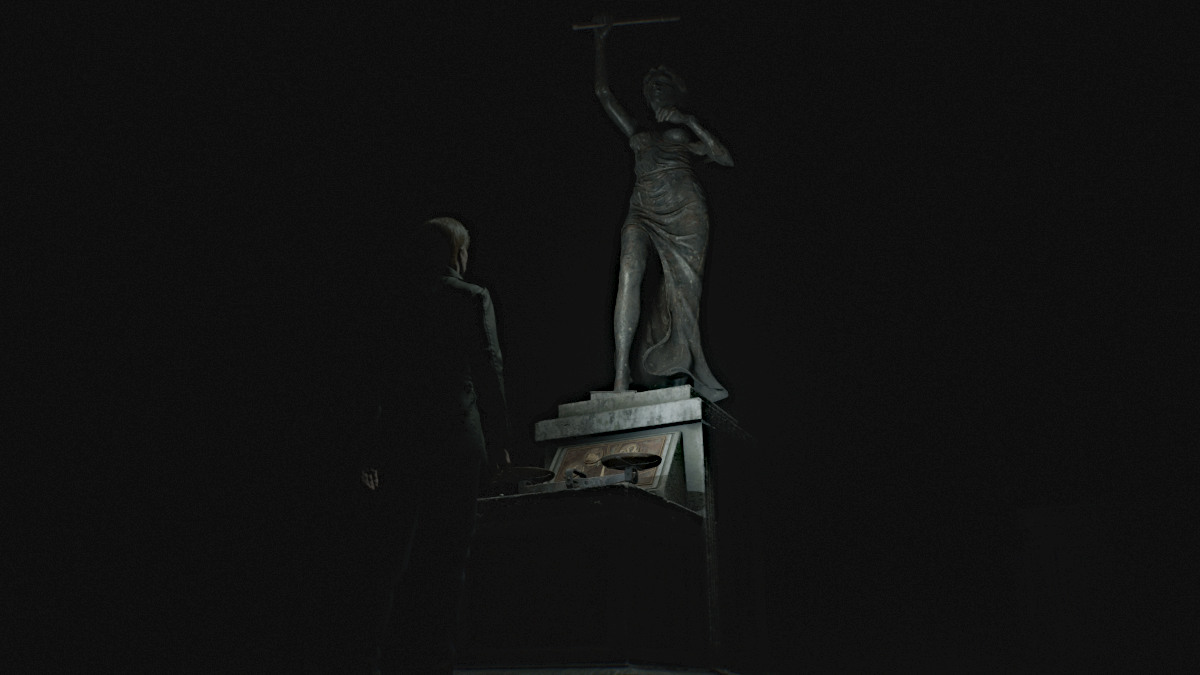
After exploring both blocks, head east down the hallway to the Yard, and use the Red Save Point to your left. This area is unbearably dark, but to keep your...bearings (aha), just run straight ahead. You'll hear a strange galloping noise circling around you, but rest assured there are no monsters in this area.
You'll soon see something ahead of you with a cover over it. Interact to pull it off, revealing a statue with a scale contraption at its base. This is where you put The Heaviest Weight to use, as you need to use it with the smaller weight already available.
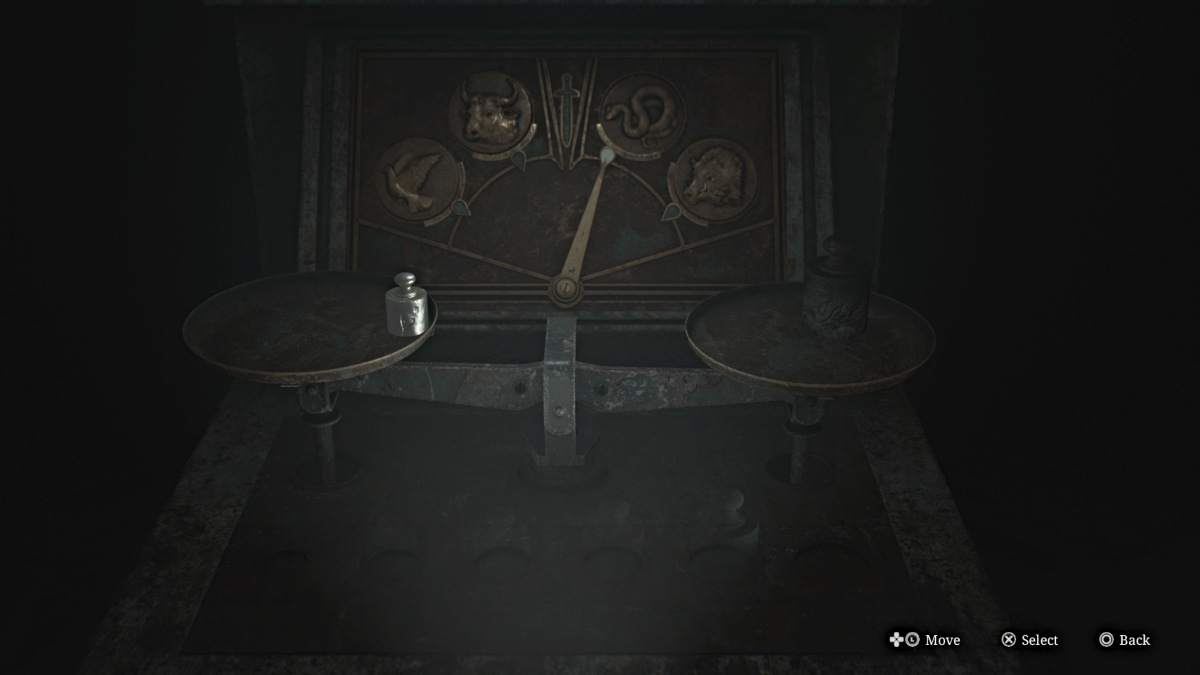
Place the smaller weight on the left scale, and the Heaviest Weight on the right scale, which will tip the arrow above it to the Serpent symbol. This means the Serpent Door within the prison has been unlocked. Head back inside.
Toluca Prison (Floor 1) - Headless Serpent Section
The Serpent Door is over at the far end of Block A, to your left after returning from the Yard. Head through it and you'll pass by a lit room with an electric chair in it.
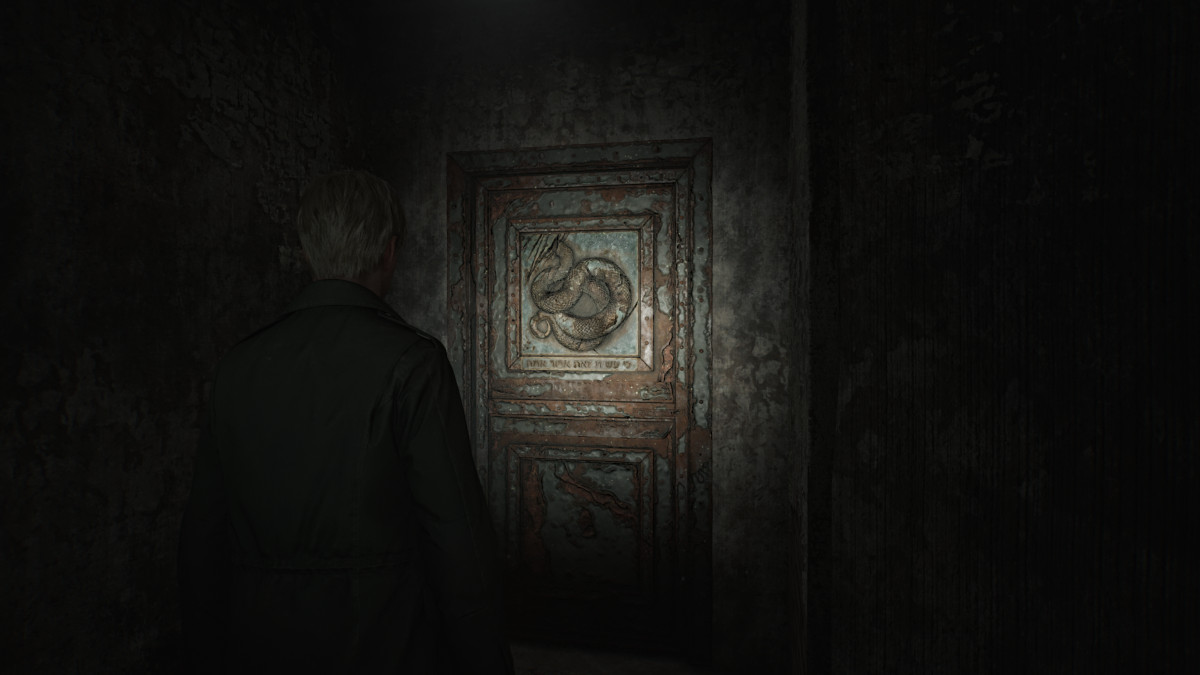
Enter the Guardroom, where you can find a Syringe, Shotgun Shells, and another wall lever you can use to light your way while keeping the spider crawling Mannequins at bay.
Make your way down the block, and in Cell E4 you can grab the Family Photo (memo). Further on, the room next to the Death Chamber has some Handgun Ammo. Now make your way across to the other side of the block, which has much higher ceilings crawling with spider Mannequins. Do your best to keep the lights on as you explore and deal with them when they jump back down to attack.


Investigate the rooms on the northeast side, including the Witness Room where you'll find, Handgun Ammo, a Red Save Point, and the machine used to operate the electric chair. Interact with it and you'll see a power gauge along with a sequence of switches and the lever to pull when ready.
The instructions note that you don't want to throw the lever when the power is in the red, but that's actually exactly what you want to do. You'll need to press the switches in the correct order to where they're all turned on at once, sending the power to maximum. Once you have, pull the lever which will overload the power system and automatically unlock all cell doors in the area.
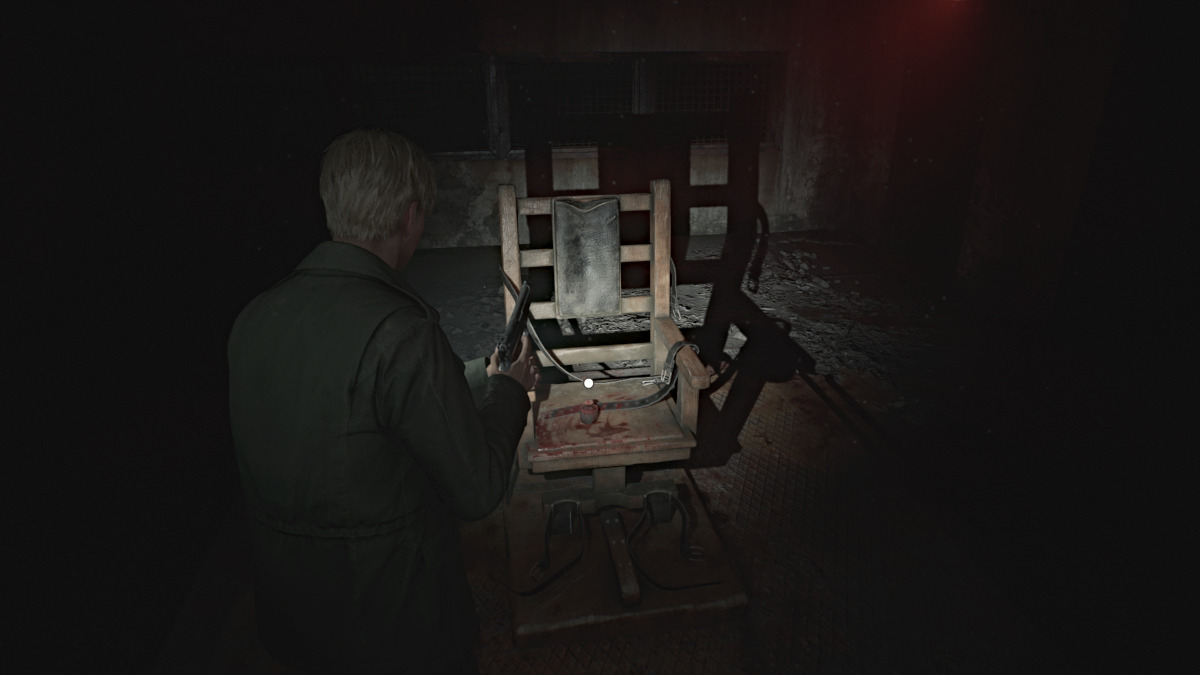
This means you can now enter the Death Chamber and claim the Medium Weight sitting on the electric chair. Now you need to focus on making it through the rest of the block alive, as the alarms have riled up all monsters in the area, and you can no longer use the lights. The path you came in is blocked so exit via the Death Chamber.
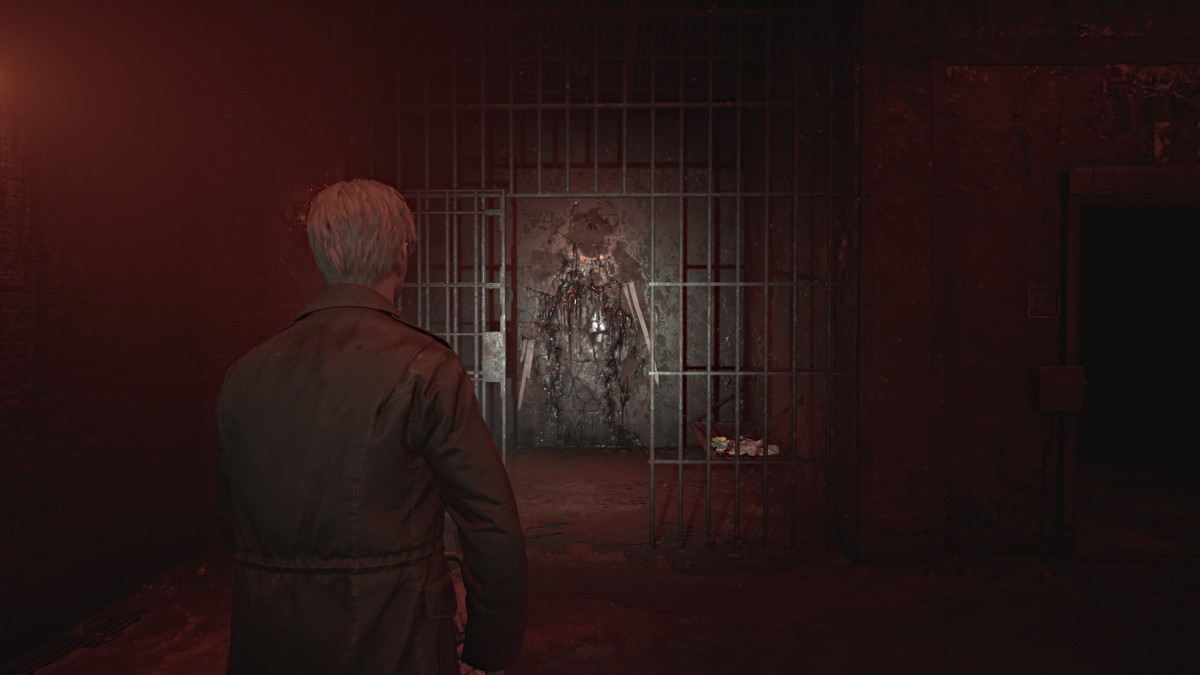
Explore the open cells to find more Handgun Ammo, Shotgun Shells, and a Health Drink. In Cell E1 near the start of the block is a breakable wall, so bash it down to get to the other side of the block. You can find several more Shotgun Shells in the cells on this side. When ready, go into Cell E10 and slide through the wall gap into the Witness Checkpoint area.
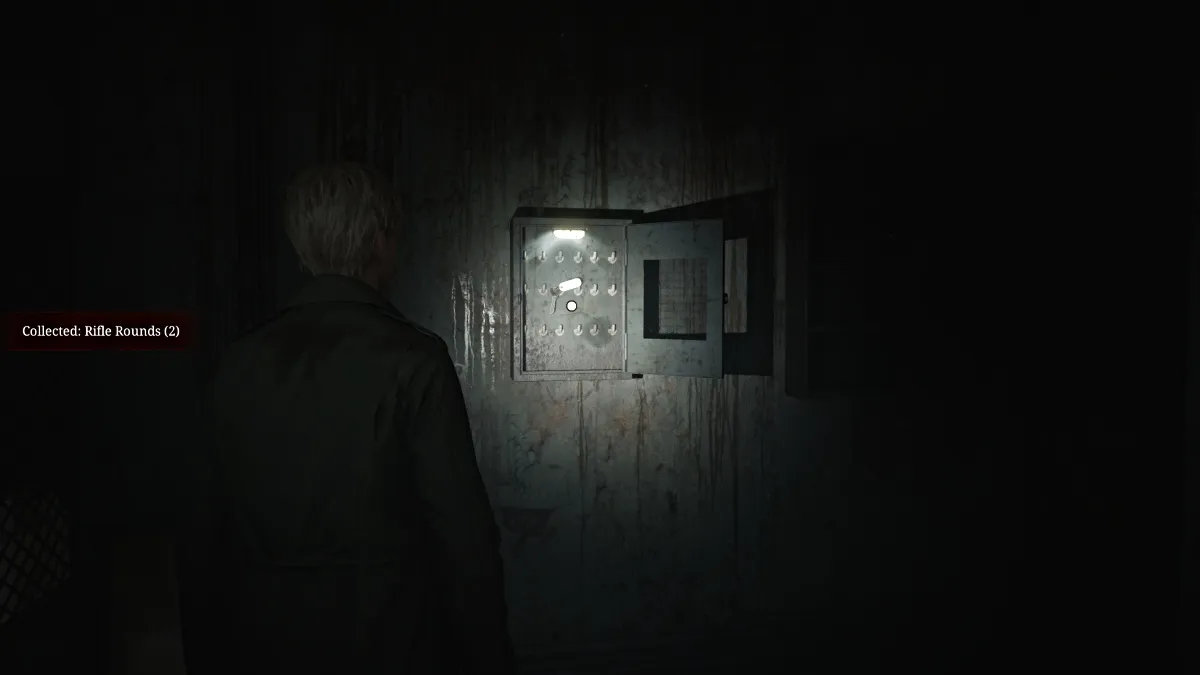
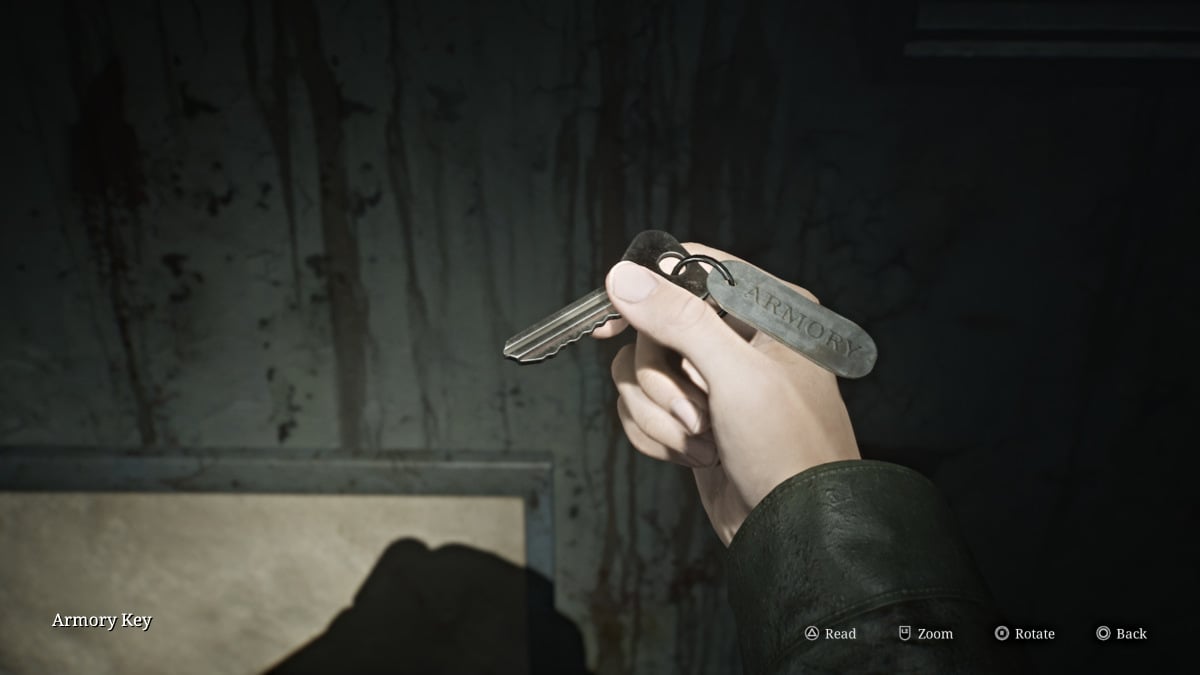
Pick up the Handgun Ammo and Health Drink you find here, as well as the Armory Key hanging in a cabinet on the wall. This will allow you to go and claim the Hunting Rifle. Head back to the Armory and do just that, then use the Red Save Point before heading back to the Scales of Justice statue in the Yard.
Toluca Prison (Floor 1 and 2) - Hornless Ox Section
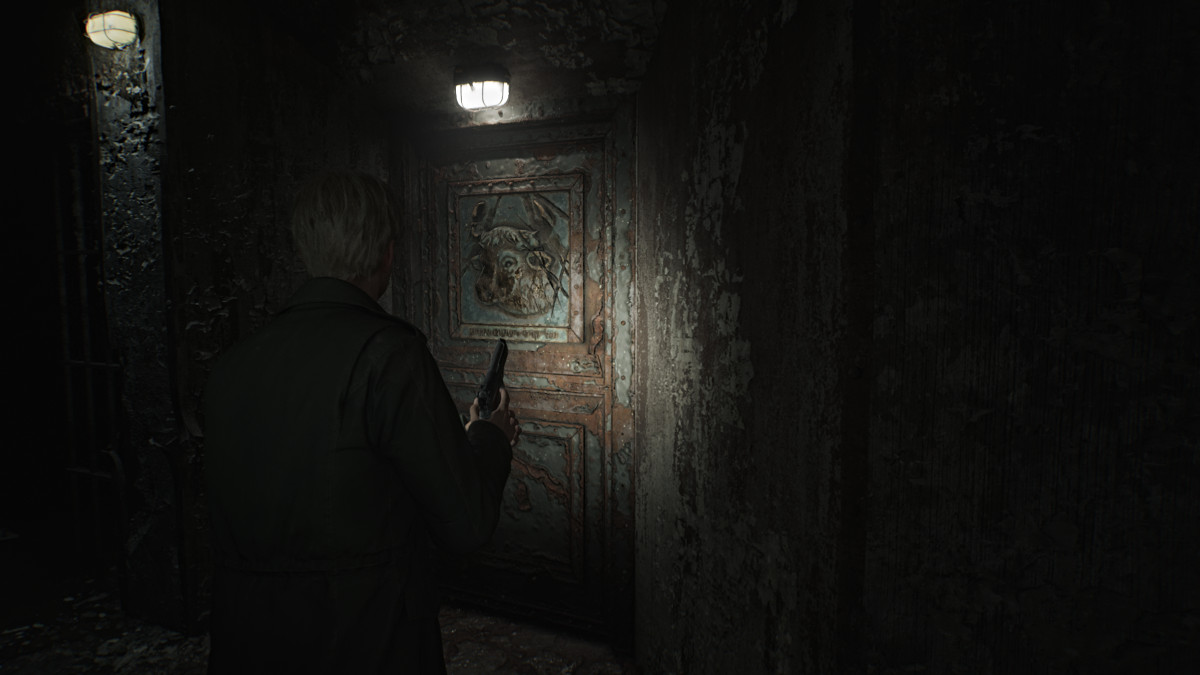
Once you return to the statue in the Yard, your next objective is to place the smallest and Heaviest Weight on the left scale, and your newly acquired Medium Weight on the right scale. Upon doing so, the Hornless Ox Door (seen above) near the entrance to the entire block will unlock.
Head back and through the new door then up the stairs to the second floor of the prison. This area is absolutely crawling with spider Mannequins, so keep your wits about you as you progress through. Go down the first row of cells on the right and use Cell C2 to cross into C3. Cell C4 has a crawlspace but requires a key to be unlocked. Grab the Health Drink from Cell C5 then head to the Guardroom on the right side.
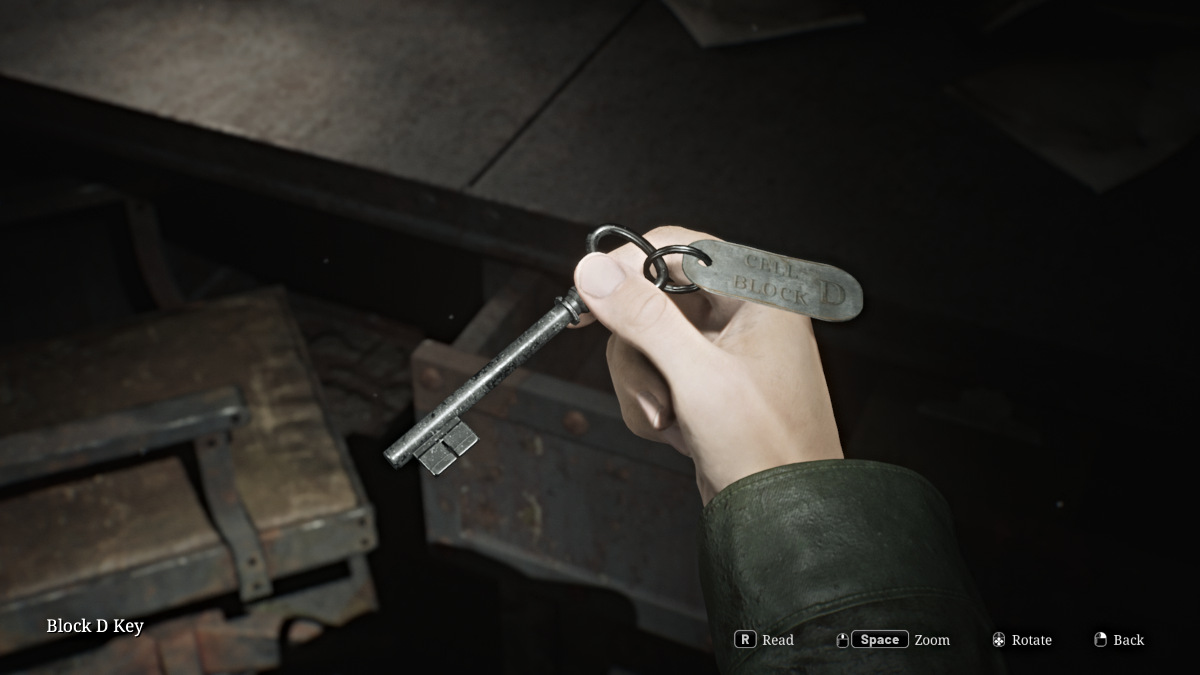
Inside you'll find the Block D Key in a desk drawer along with a Red Save Point, some Handgun Ammo, and a prison guard's notes about something important in Cell D5. Start making your way to the other side of the block. Use the breakable wall to get into Cell C6 for a Health Drink and a Syringe. Continue down the walkway and use the Block D Key on the door ahead to get into D Block.
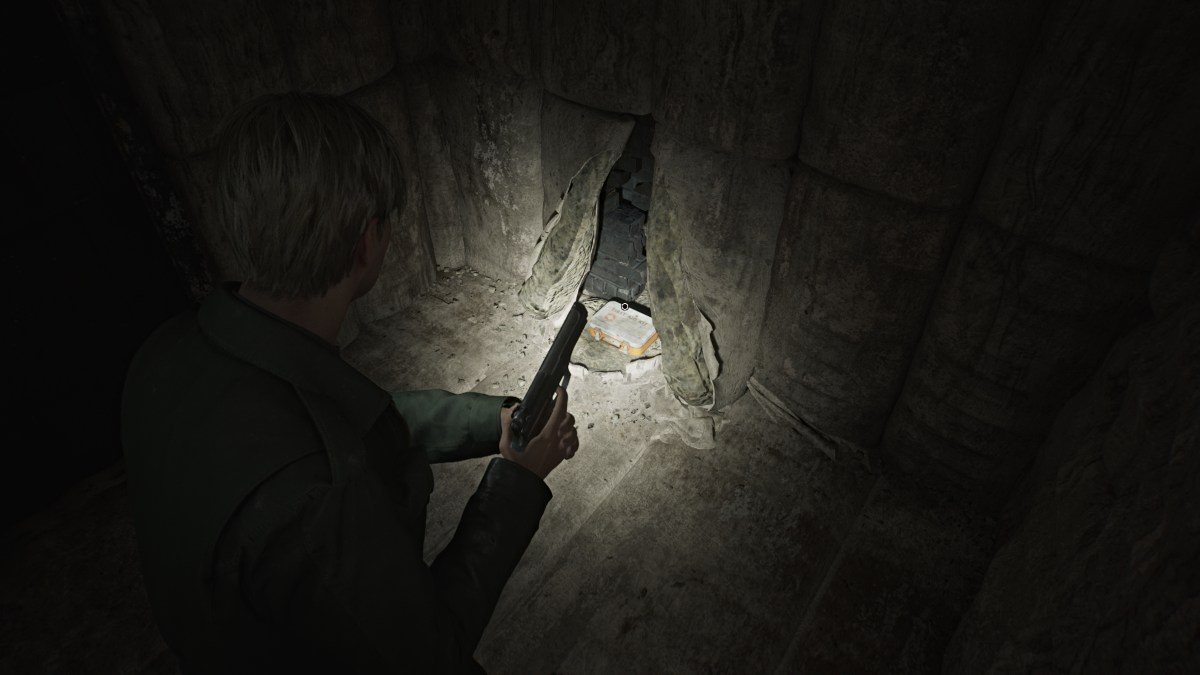
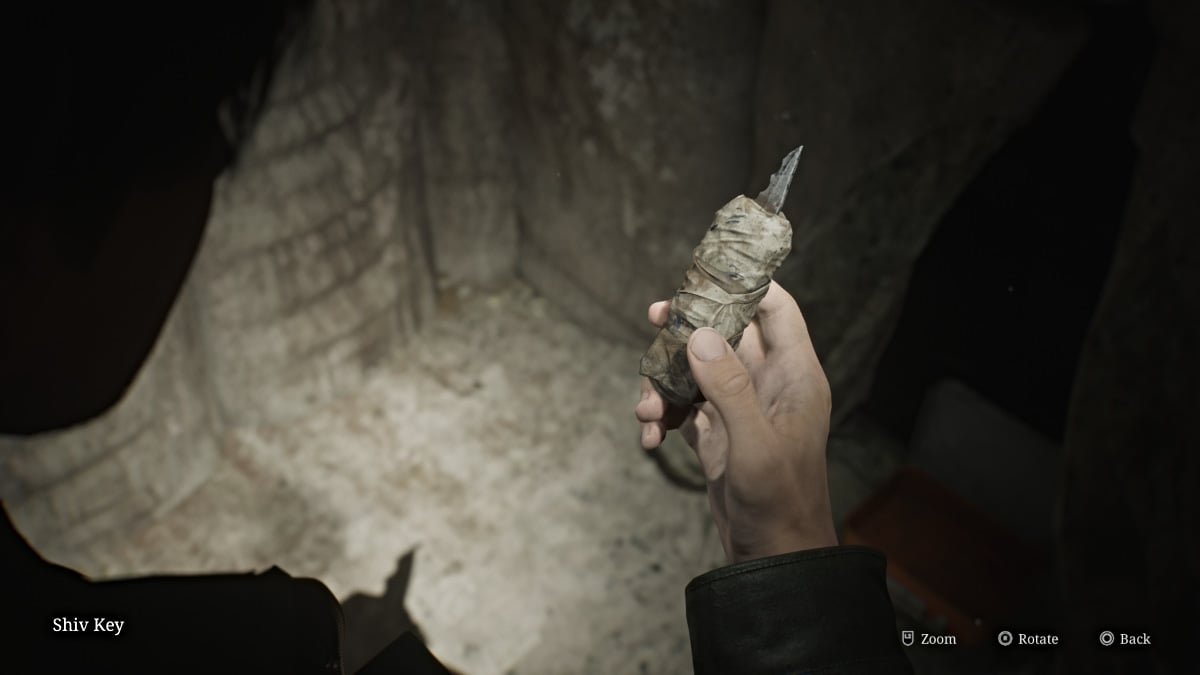
Keep the lights on as you make your way around to Cell D5, which is a padded room. Inside a first aid kit box you'll find the Shiv Key, and the Threatening Note on the wall that says "we could both use a bath". With that, head back across to the C Block and use the Shiv Key on Cell C4.
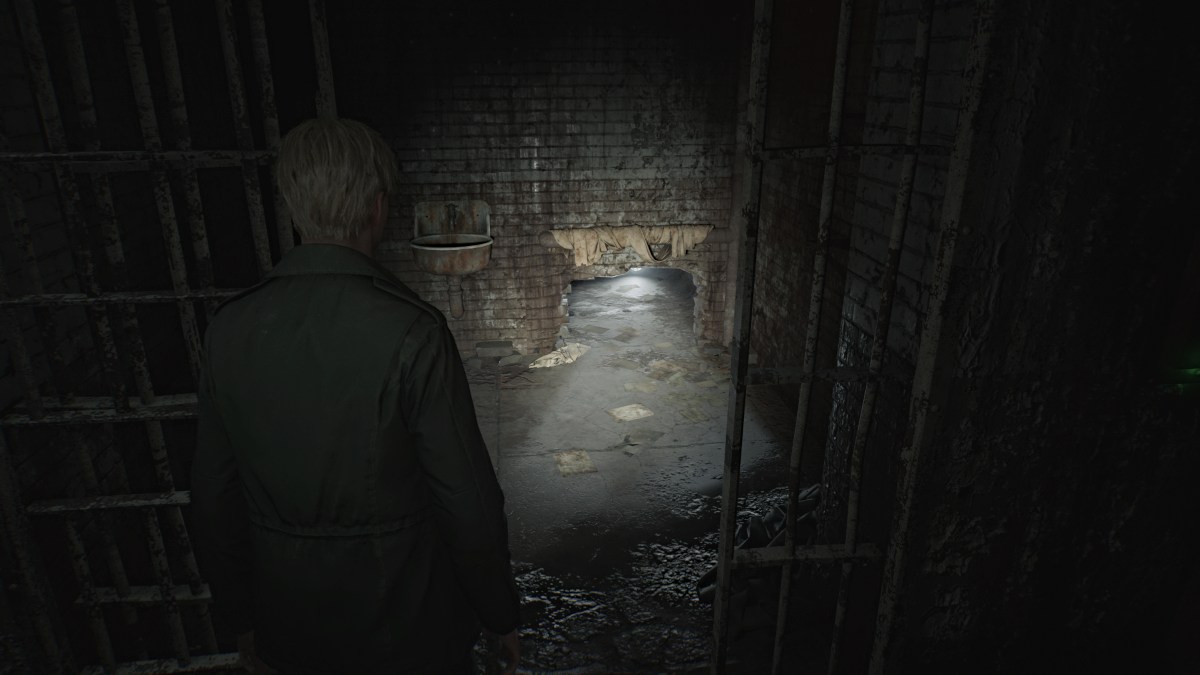
Slip through the crawlspace and grab the Paranoid Note off the pipe. Slip between the pipes on the left side, then down through another crawlspace.
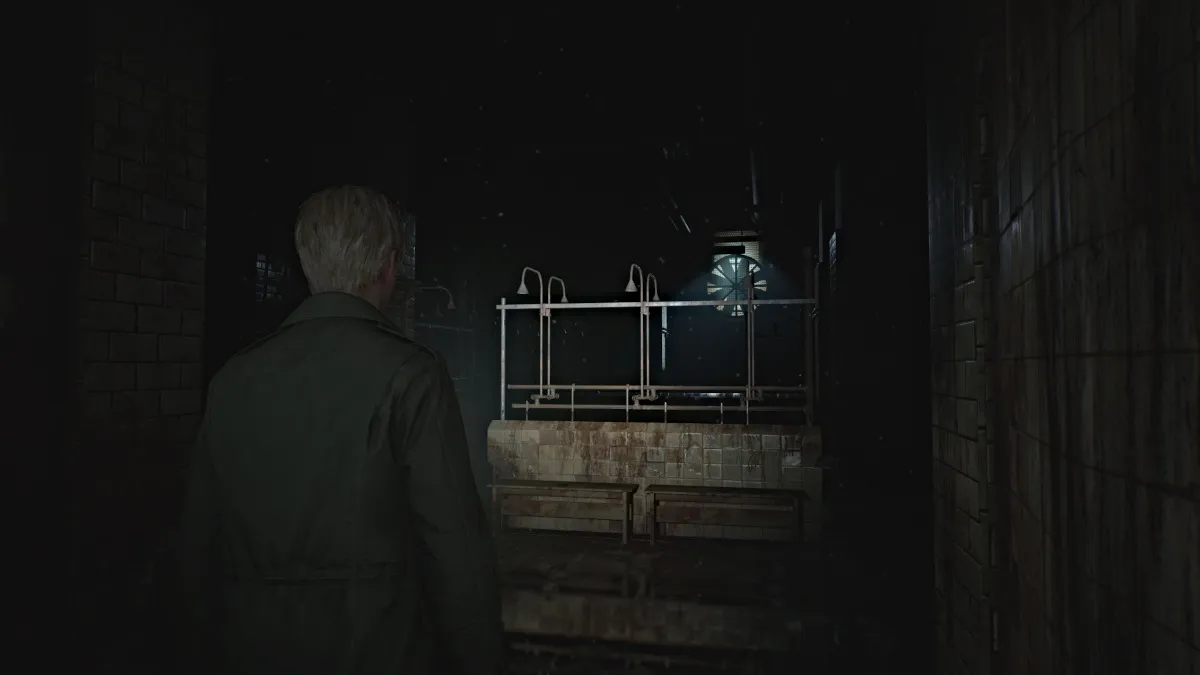
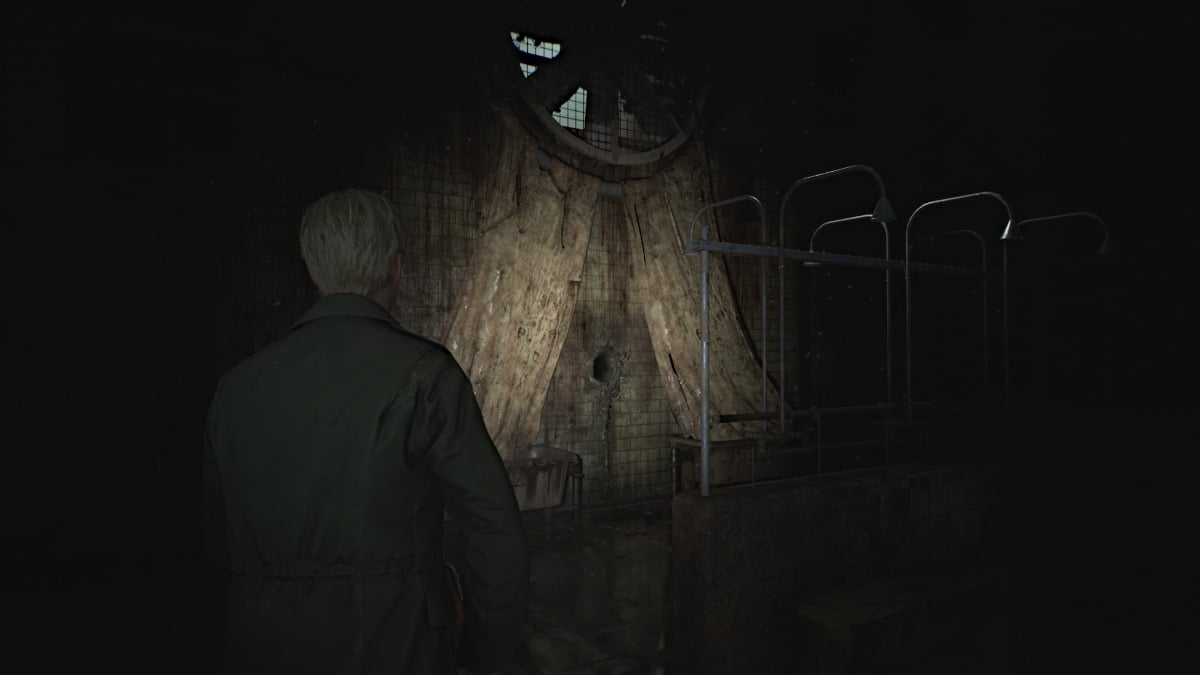
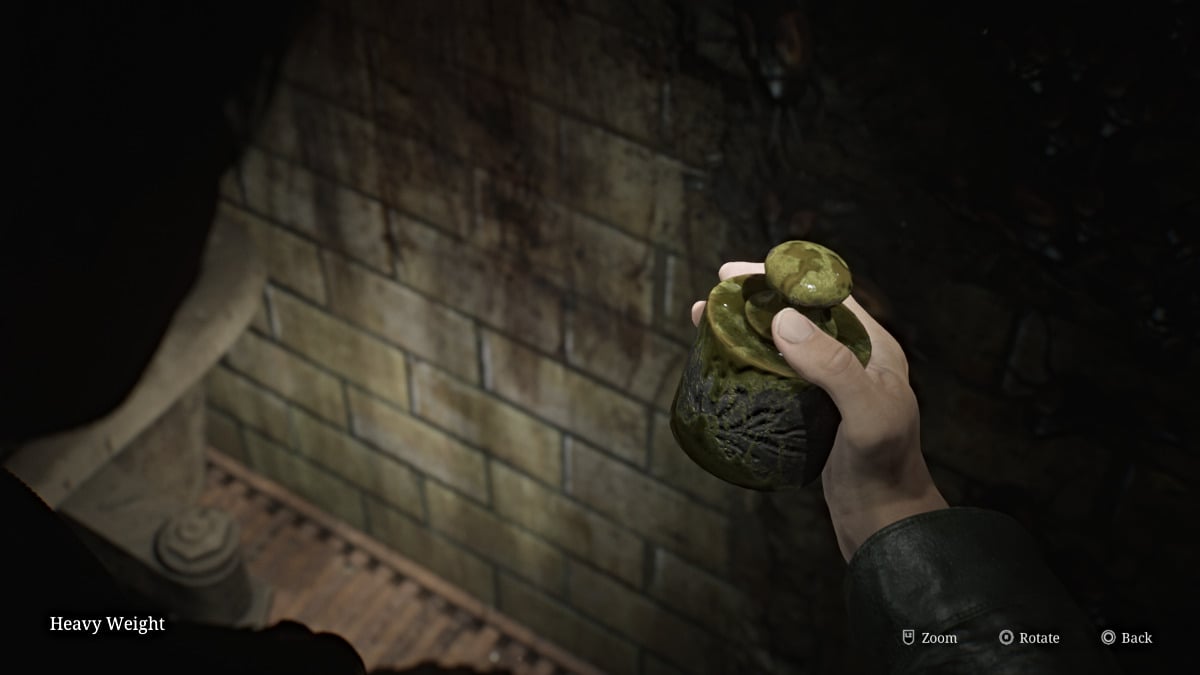
This brings you to the Toilets Room, where you can find some Handgun Ammo on a bench and a Health Drink in a stall. Head over to the Showers area next and deal with the Bubble Nurse patrolling the center of the area. Make note of all the corpses scattered everywhere too, because they won't be still for long.
Venture up the right side of the room, where you'll find another tablet-shaped Glimpse of the Past on the floor.
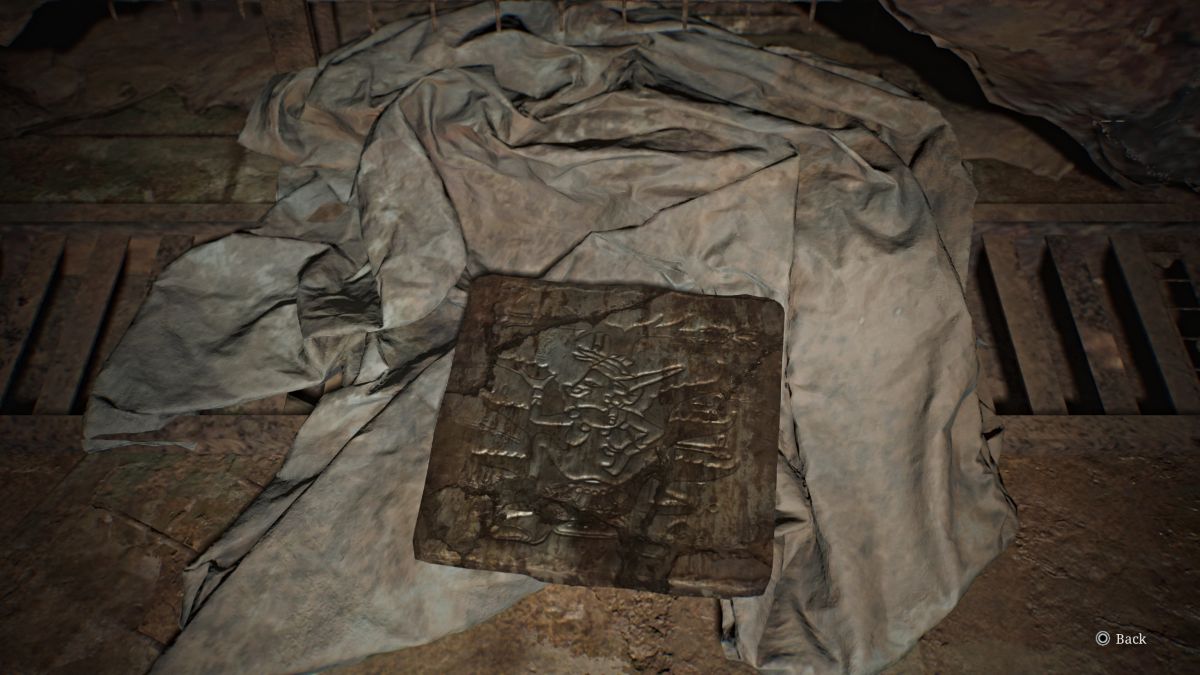
Head towards the back and underneath the rotating fan you'll find a strange "curtain" structure with a hole in the wall that obviously you'll need to have James stick his hand in. Interact with it and you'll obtain the Heavy Weight (seen above).
This will rile up several monsters in both rooms and rather than fight them all, bum rush back to the crawlspace in the Toilets Room and escape through. Make your way all the way back through the block and out the Ox Door.
Toluca Prison (Floor 1 and 3) - Eyeless Boar Section
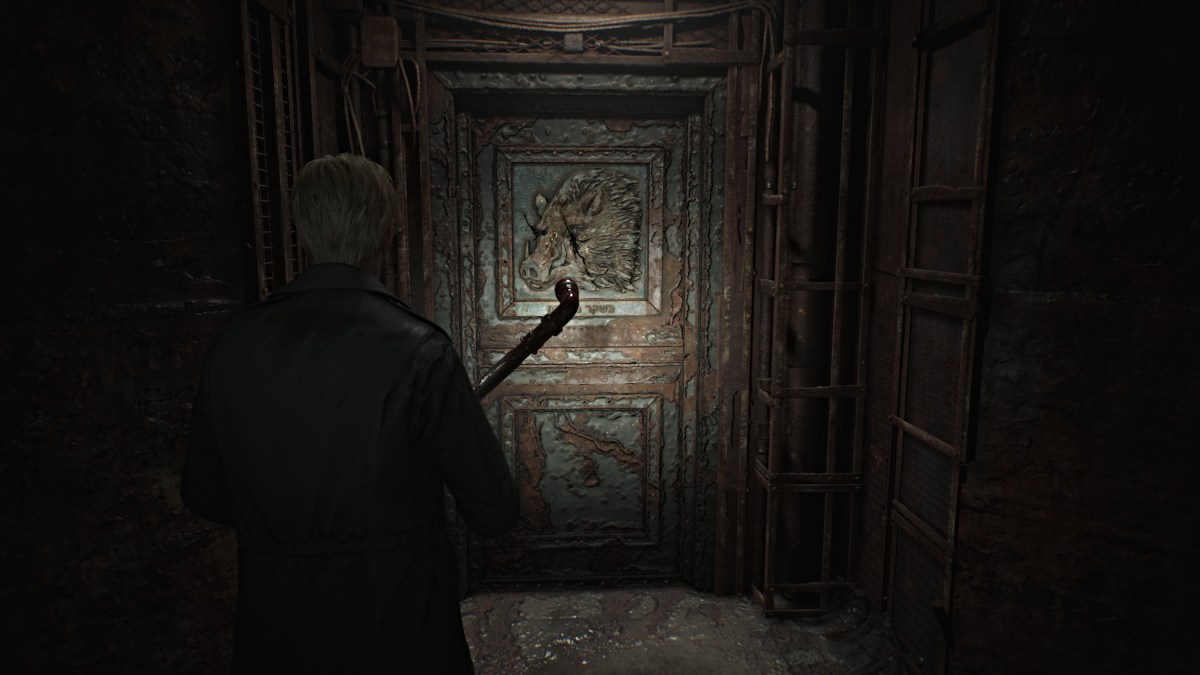
Once again, head back to the Yard to complete the next step of the Scales of Justice. This time, place all of the weights you have on the right scale, except for the smallest weight which you'll put on the left scale. This will unlock the Eyeless Boar Door next which leads to the Administrative Section of the prison. Head back inside and straight ahead to that door, which will be on your right.
Head inside and take the hallway around the Warehouse room, which you can access from the door on the left side. In there, you'll find a couple of monsters along with some ammo and the "Old Man's always prepared" Strange Photo.
Now make your way to the Visitation Room, and grab the Prisoner's Note from station 7 before backtracking to station 5 where you can jump through to the other side.
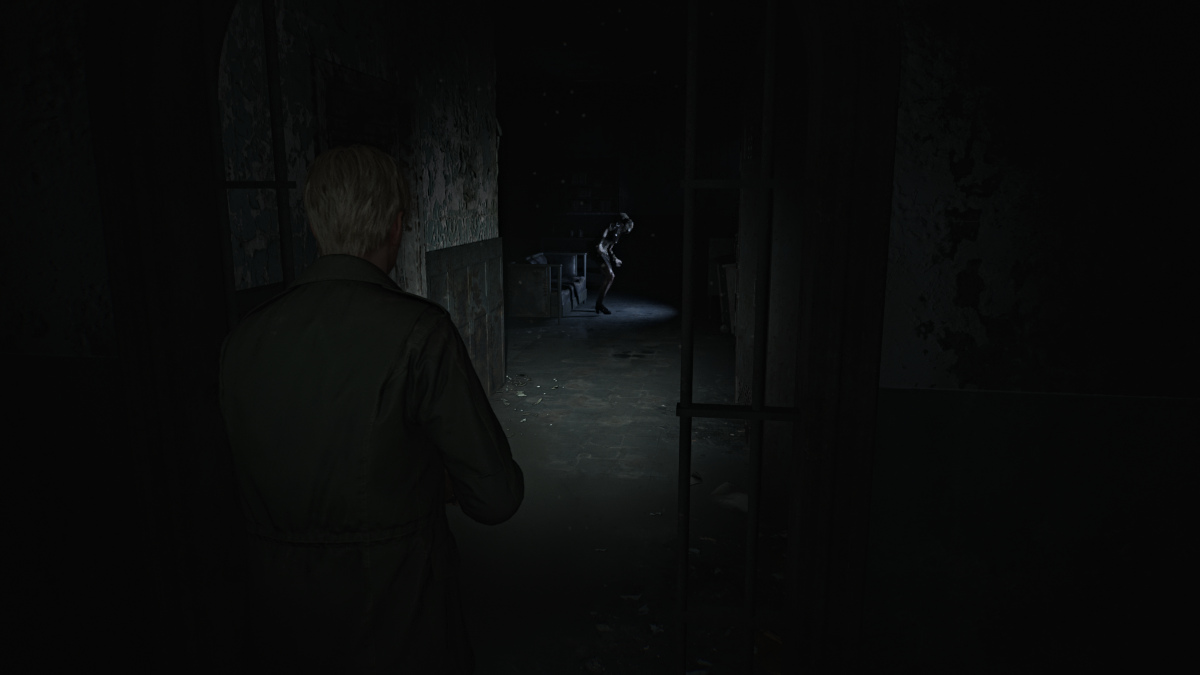
Grab the Shotgun Shells from station 7 before moving on towards the Break Room. On the way there, stop in the Women's Restroom for a Health Drink and a surprise in the last stall, then the Men's Restroom for a Red Save Point.
Cut through the Break Room, grab the Handgun Ammo that's in there, then head north to the Infirmary. As expected, there are a few Bubble Nurses to deal with in there, so fight your way through them to the very back room of the Infirmary. There you'll find Shotgun Shells, a Health Drink, and the Upper Floor Key.
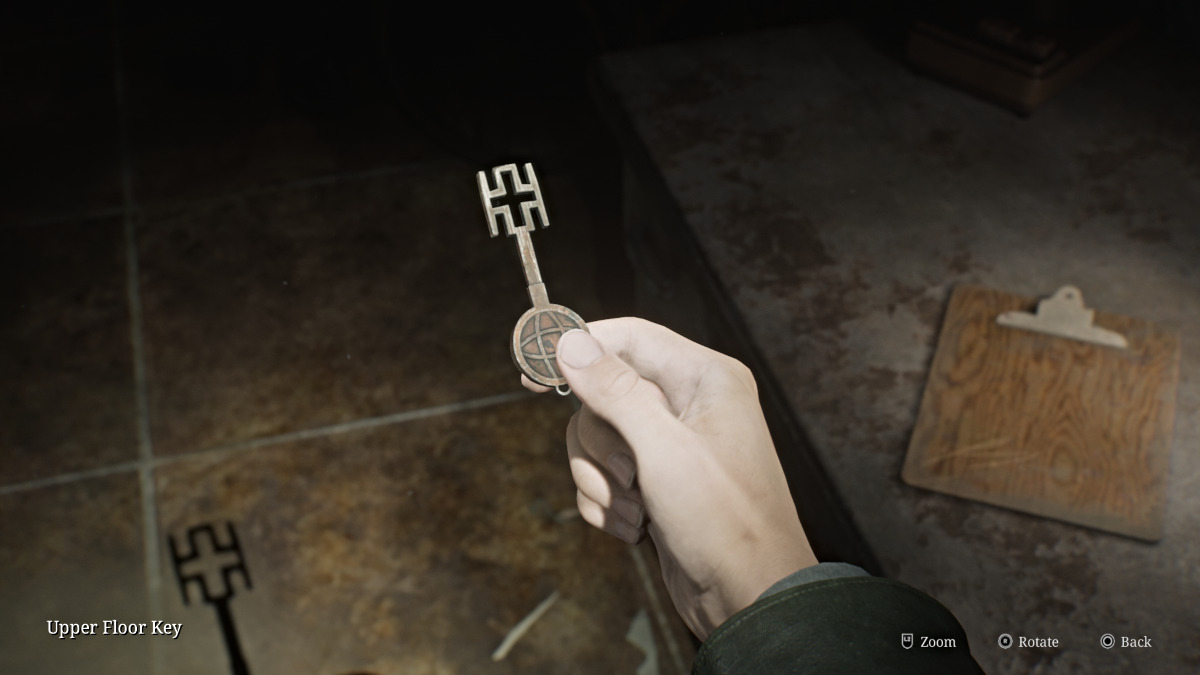
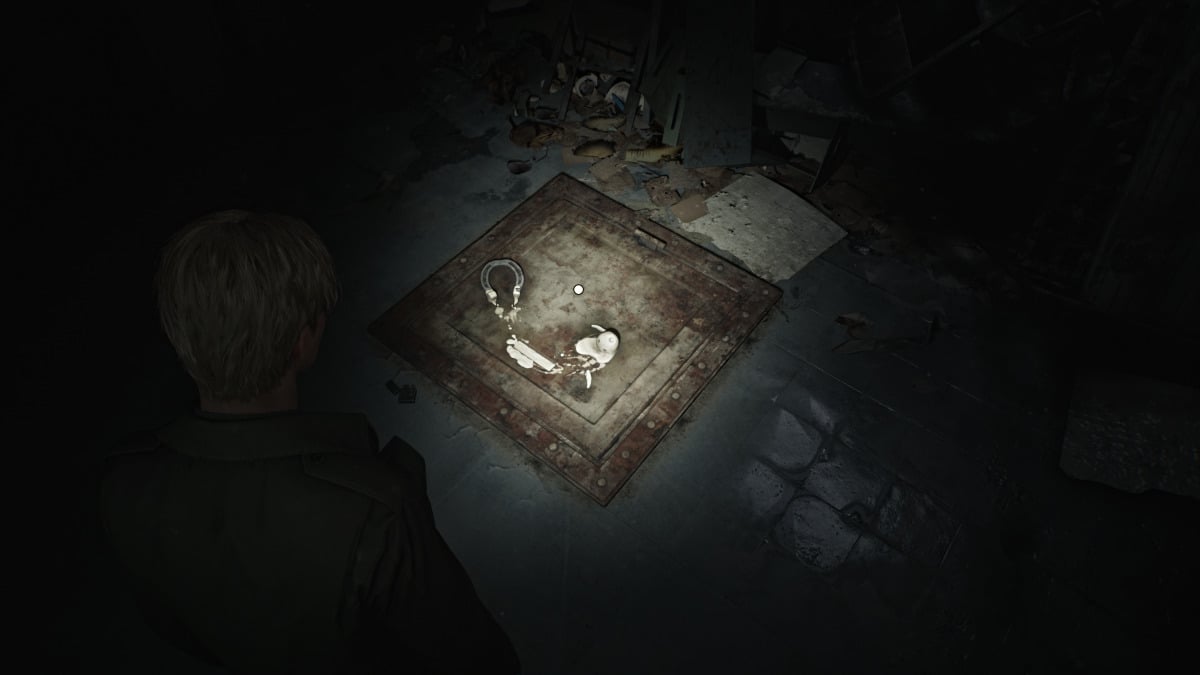
Backtrack on the other side of the Break Room to find another Glimpse of the Past on the floor in front of you, consisting of a horseshoe and a melted wax figurine.
Run back over to the Restrooms and use the Upper Floor Key on the locked gate near the Men's Restroom (by the wall that says "Reap What You Sow"). Take the stairs all the way up to the Warden's Office on the third floor, use the Red Save Point in the nearby storage room, and grab the Handgun Ammo there as well.
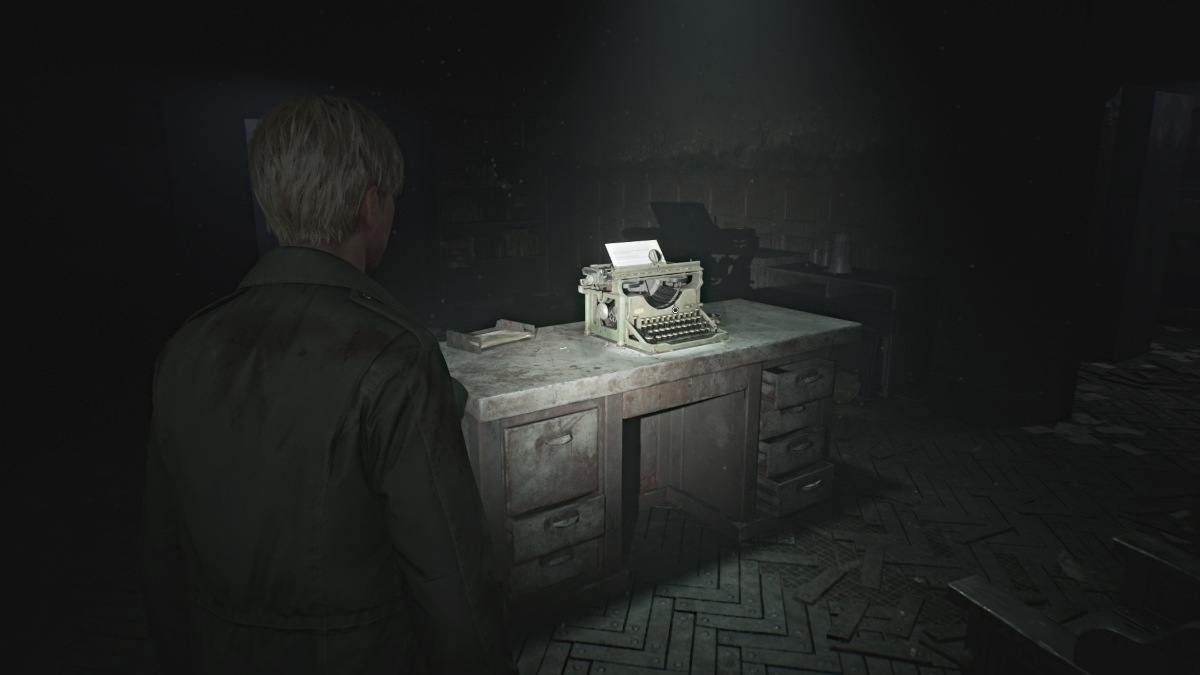

Go back into the office where there's a typewriter on the desk. The paper set in it has the word "sick" typed endlessly, and all you need to do is type repeatedly (any keys) until the desk drawer underneath opens. Inside you can claim the Light Weight. Now you need to make your way back to the Yard once again for the next step.
Toluca Prison (Floor 1 and Basement) - Wingless Dove Section
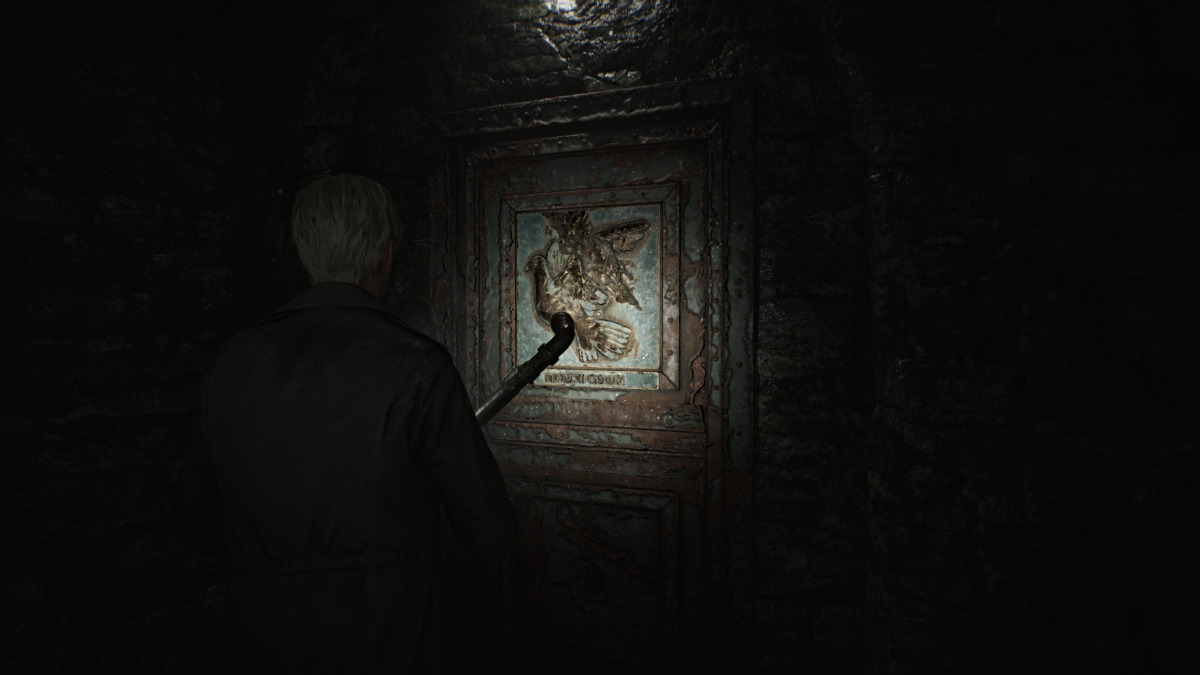
Once you're back at the Scales of Justice, this time you'll need to place every weight on the left scale, except for the Medium Weight which you put over on the right scale. This will open up the Wingless Dove Door, which leads to the Basement level. Head back inside and immediately turn left to find the door down a flight of stairs.
Once inside, start exploring the lower half of the cell block and when you look inside Cell F6 you'll notice the last weight you need sitting on a sheet. For now, go over to Cell F9 and bash through the breakable wall to get to F10, where there's a ladder you can take up to unlock one of the doors on the first floor.
Head back down and make your way through all the sneaky Mannequins to Cell F14 and grab the Health Drink there. In F16 you'll notice piles of books and glyphs painted on the walls. If you wait long enough, you'll hear an otherworldly voice chanting something.
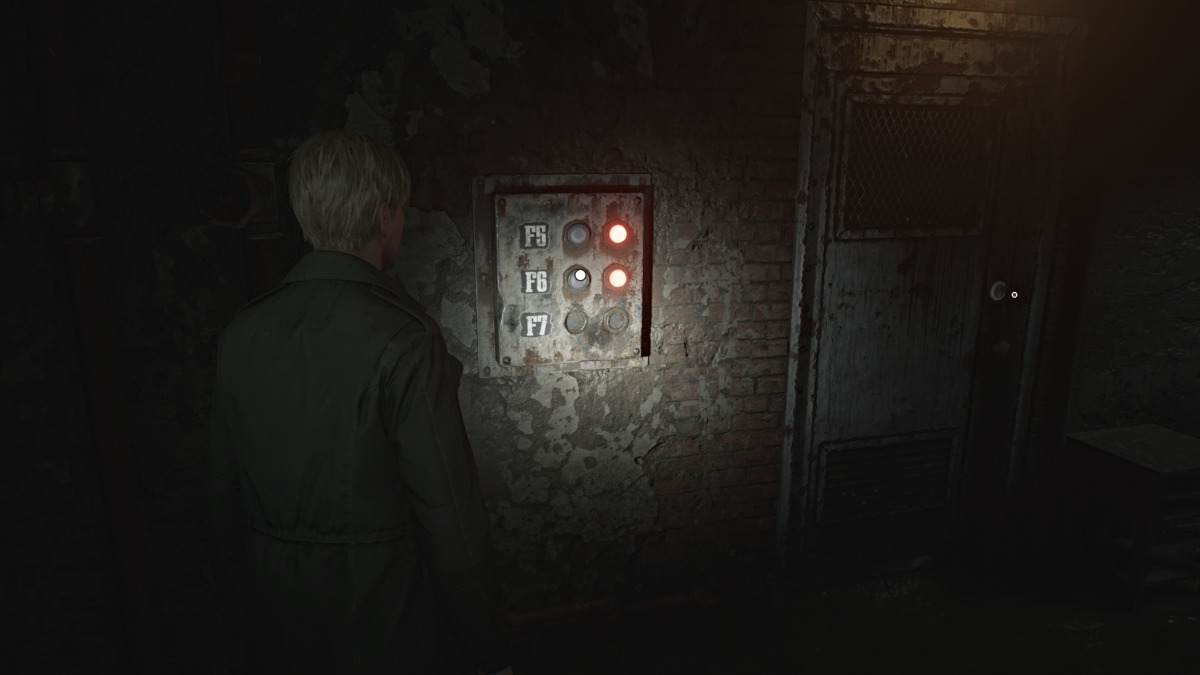
Use the crawlspace on the other side of the hall to get into the next room. Grab the Shotgun Shells from the desk, and view the note on the wall that mentions a prisoner being moved to Cell F6, where the weight you need is. Go over to the button panel where there are options lit for Cells F5 and F6.
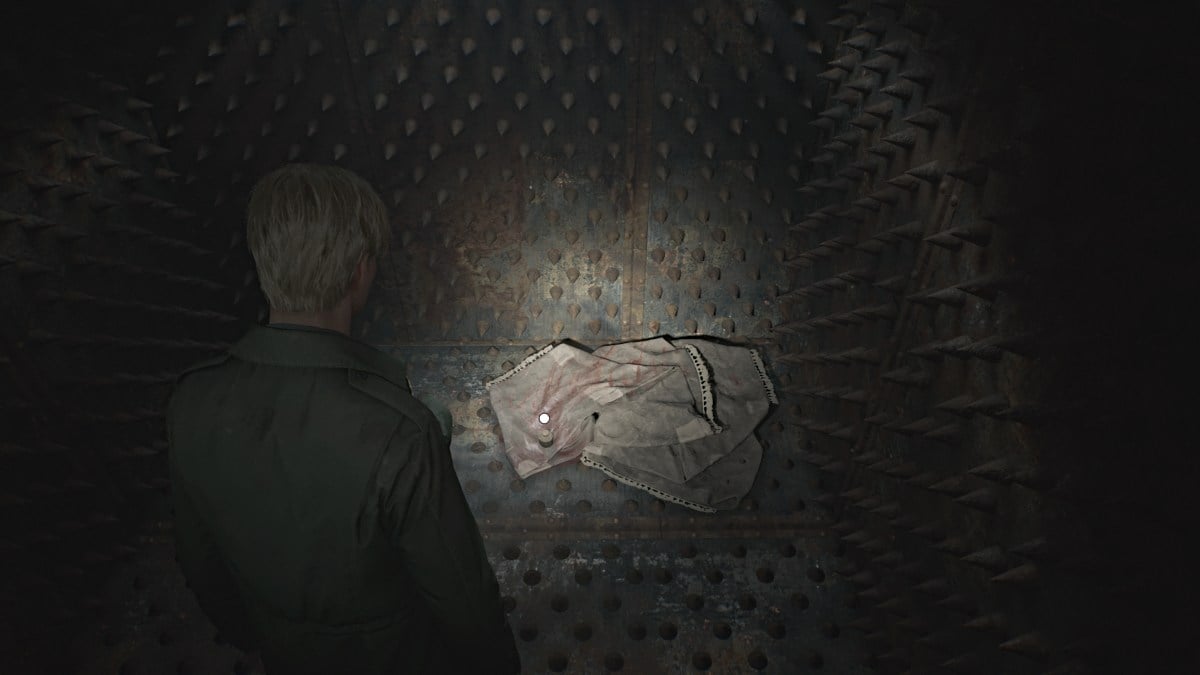
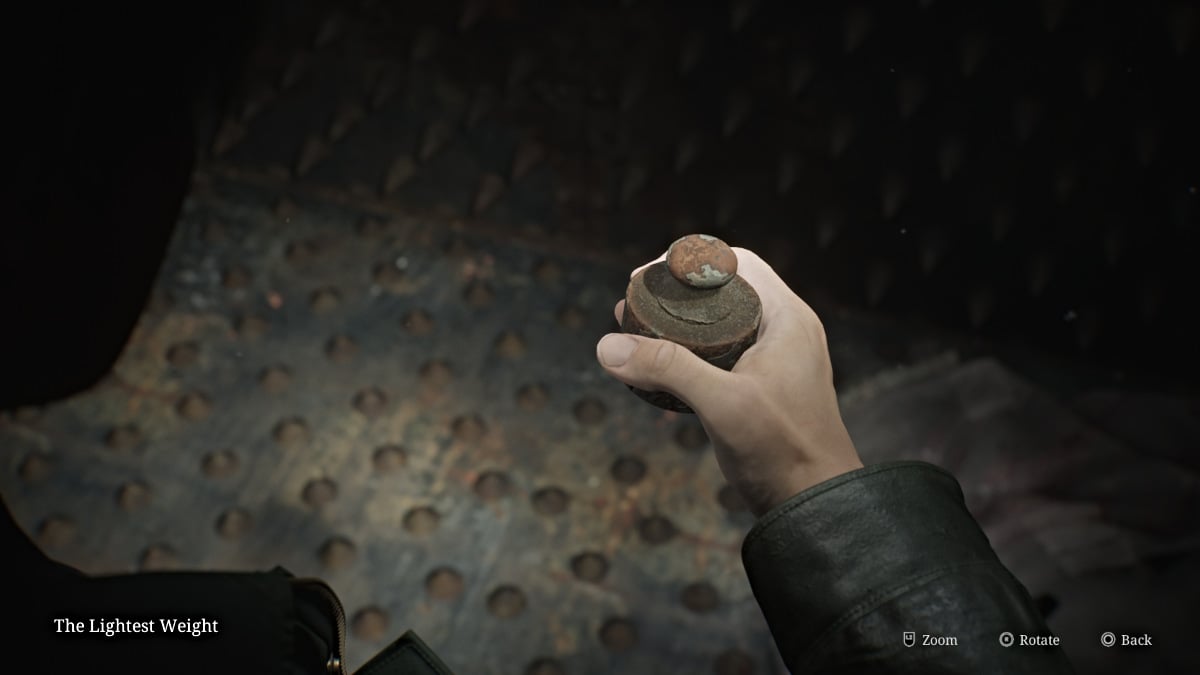
Press F6 and head over to claim the Lightest Weight from inside the cell along with the Confession memo. The door will slam shut temporarily for a nice jumpscare but you'll be able to leave soon enough. Remember to use the ladder in Cell F10 to get out since the entrance is caved in.
Time to head back to the Scales of Justice for the final time.
Toluca Prison (Floor 1) - Finding Balance and the Gallows Puzzle
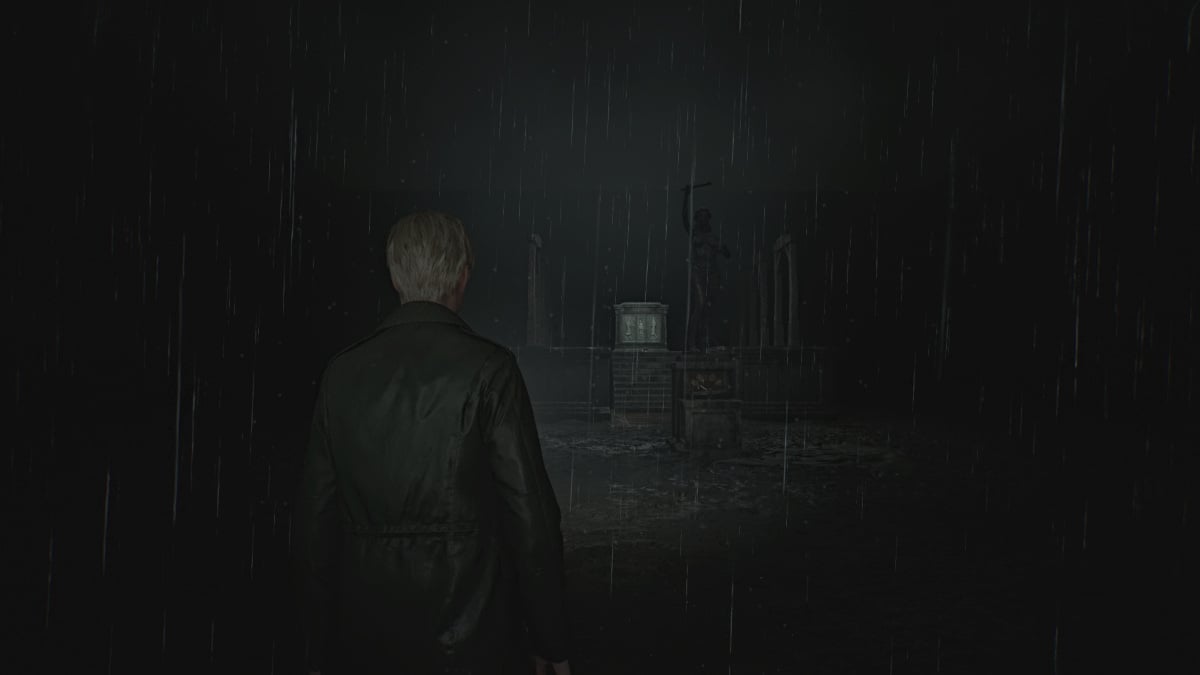
Head back out into the Yard, where it's now raining somehow (being that you're supposedly miles underground). Go over to the Scales of Justice and this time, do the following to perfectly balance the scales:
- Place the Heaviest Weight on the right scale
- Place the Heavy Weight on the left scale
- Place the Medium Weight on the right scale
- Place both Light Weights on the left scale
- Place the Lightest Weight on the right scale
Putting all the scales back in their respective slots underneath the scale first can help you figure out which weight is which if you're having difficulty. Once the weight is balanced and the arrow centers on the sword symbol, something will fall out of the statue's hand and it's the Execution Lever. This is what you'll need for the next puzzle ahead.
Gallows Puzzle (All Possible Solutions)
For the Gallows Puzzle, place the Execution Lever in the slot on the platform between both rows of Gallows. The slab in front of you will open to reveal six criminals and their sins, and six slates depicting justifications for those sins.
You'll need to sort out which slates go with which passages regarding the sins of various criminals, and some passages can be different depending on your playthrough and difficulty. At the end, you'll need to choose which criminal was "justified" in their actions, or acting in self-defense.
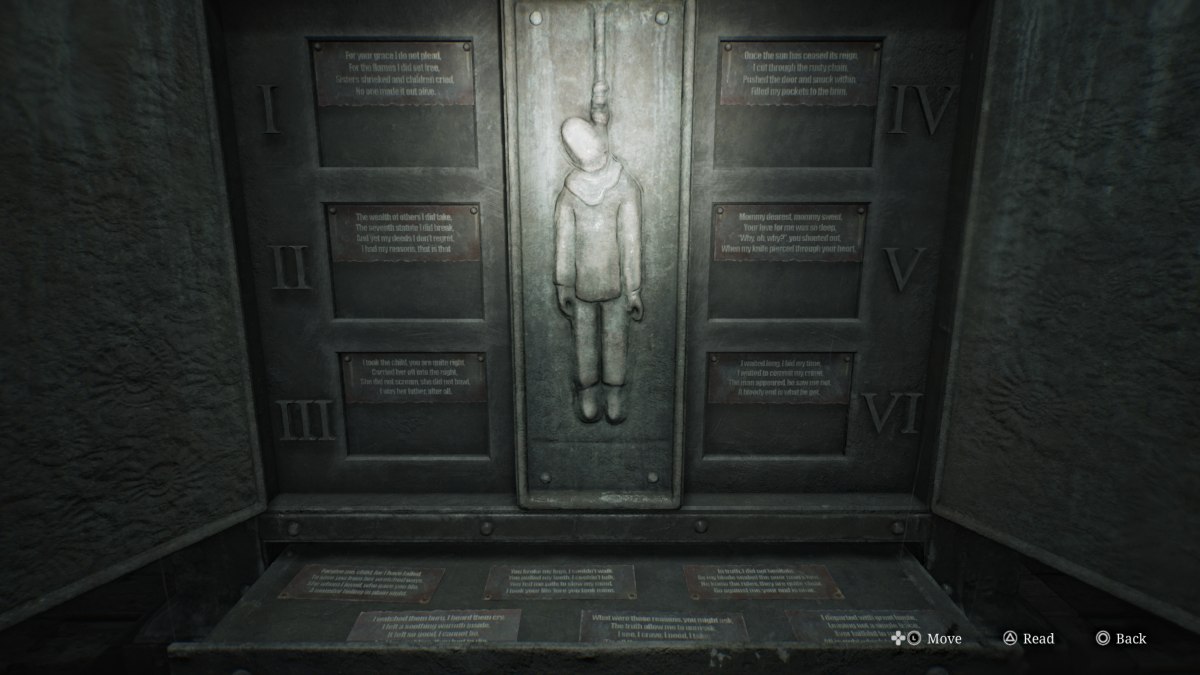
This is arguably the most difficult puzzle in the entire game, but to help you match up the slates with the correct passages, here are the possible answers for each.
| Passage No. | Poem | Possible Answers |
|---|---|---|
| I | For your grace I do not plead, For the flames I did set free, Sisters shrieked and children cried, No one made it out alive. | Answer #1 - Though the young ones' deaths I mourn, Their tormentors are no more, On young souls the nuns did prey, Took their innocence away. Answer #2 - I watched them burn, I heard them cry, I felt a soothing warmth inside, It felt so good, I cannot lie, And for my bliss, they had to die. |
| II | The wealth of others I did take, The seventh statute I did break, And yet my deeds I don't regret, I had my reasons, that is that. | Answer #1 - The reason, if I have to say, Was to survive another day, To them, it was a loaf of bread, To me, a cherished step ahead. Answer #2 - What were those reasons you might ask, The truth allow me to unmask, I see. I crave, I need, I take, 'Tis all the sense it needs to make. |
| III | I took the child you are quite right, Carried her off into the night, She did not scream, she did not bawl, I was her father, after all. | Answer #1 - Forgive me, child, for I have failed, To save you from her wretched ways, She whom I loved, who gave you life, A monster hiding in plain sight. Answer #2 - My only daughter, joy of days, They wanted to take you away, Hush, little baby, and be still, If I can't have you, no one will. |
| IV | Once the sun has ceased its reign, I cut through the rusty chain, Pushed the door and snuck within, Filled my pockets to the brim. | Answer #1 - So my guilt is plain to see, I had robbed the pharmacy, Yet, I did so not for gain, But so I could ease the pain. Answer #2 - I departed with great haste, Leaving not a single trace, Ever faithful to my creed, All is right, which feeds my greed. |
| V | Mommy dearest, mommy sweet, Your love for me was so deep, "Why, oh, why?", you shouted out, When my knife pierced through your heart. | Answer #1 - You broke my legs, I couldn't walk, You pulled my teeth, I couldn't talk, You fed me pills to slow my mind, I took your life 'fore you took mine. Answer #2 - You were, oh, so kind to me, Filled my heart with joy and glee, In the end, it was for naught, "Why, oh, why?", you ask. Why not? |
| VI | I waited long, I bid my time, I waited to commit my crime, The man appeared, he saw me not, A bloody end is what he got. | Answer #1 - In truth, he was less man than beast, And on my flesh and soul he'd feast, My will to live he'd try to break, There is so much a man can take. Answer #2 - In truth, I did not hesitate, As my blade sealed the poor man's fate, He knew the rules, they are quite clear, Go against me, your end is near. |

For the passage(s) that has Answer #1 as their choice, that will be the one you want to choose as innocent or "justified". More than one passage may indicate innocence based on this, and you need to decide which one best describes self-defense or defense of another (such as a child).
When you've made your choice, go over to the corresponding noose and pull it down.
If you guessed correctly, you'll fall through the platform and land inside The Labyrinth. If you guessed wrong, you'll instead fall into a room with several monsters you'll need to run through and make your way back up to the Gallows and try again.
Silent Hill 2 Remake Labyrinth Walkthrough
After successfully completing the Gallows Puzzle, ahead of you will be not one but two more massive holes to jump into, sending you to a depth clearly beyond reality. Afterward, you'll take a mineshaft elevator down to a floor with a Red Save Point. Use it and enter through the door ahead.
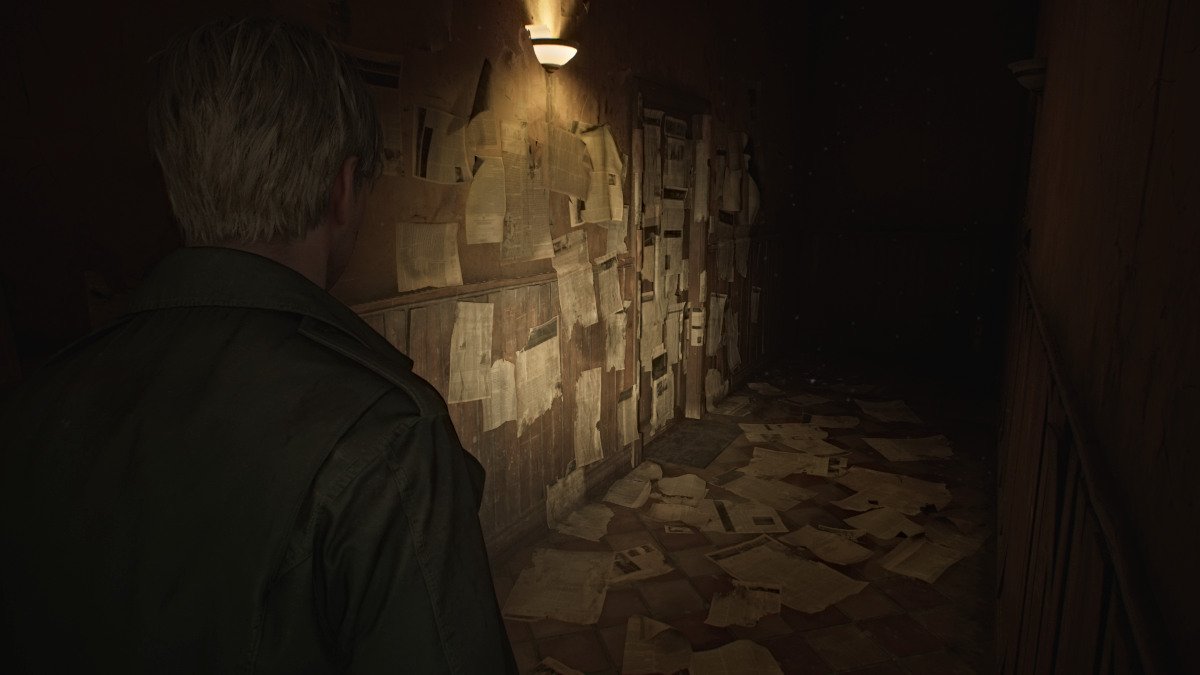
Follow the path through what resembles an apartment hallway, and you'll hear whispers behind the doors you pass. If you budge the doors, they'll hush in response. Keep going until you reach a section of the hallway decorated with newspaper clippings, including a bloodied one on the floor you can read about the murder of Thomas Orosco, Angela's father.
Suddenly, Angela's screams can be heard from behind the door ahead, alluding to a conflict with her father. Go inside, grab the Health Drink and Shotgun Shells from the kitchen area, then take a deep breath and go through the darker door on the left, where you'll see one of two more doors. The one in front of you is likely the bedroom of Angela's brother.
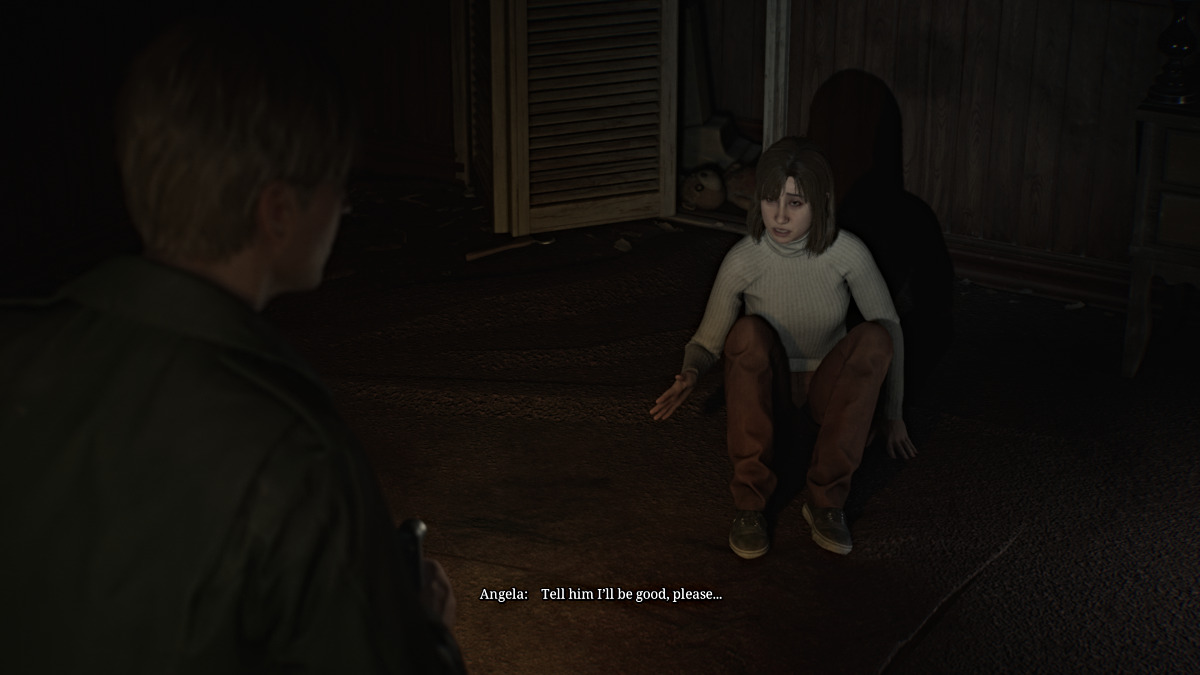
Go to the one on the left, where you'll find Angela cowering inside. Before James can figure out what's wrong, a much larger monster called the Abstract Daddy suddenly attacks and slams him through a wall. Take a deep breath and prepare for one of the most challenging and emotionally devastating fights in the game.
The Labyrinth - How to beat Abstract Daddy
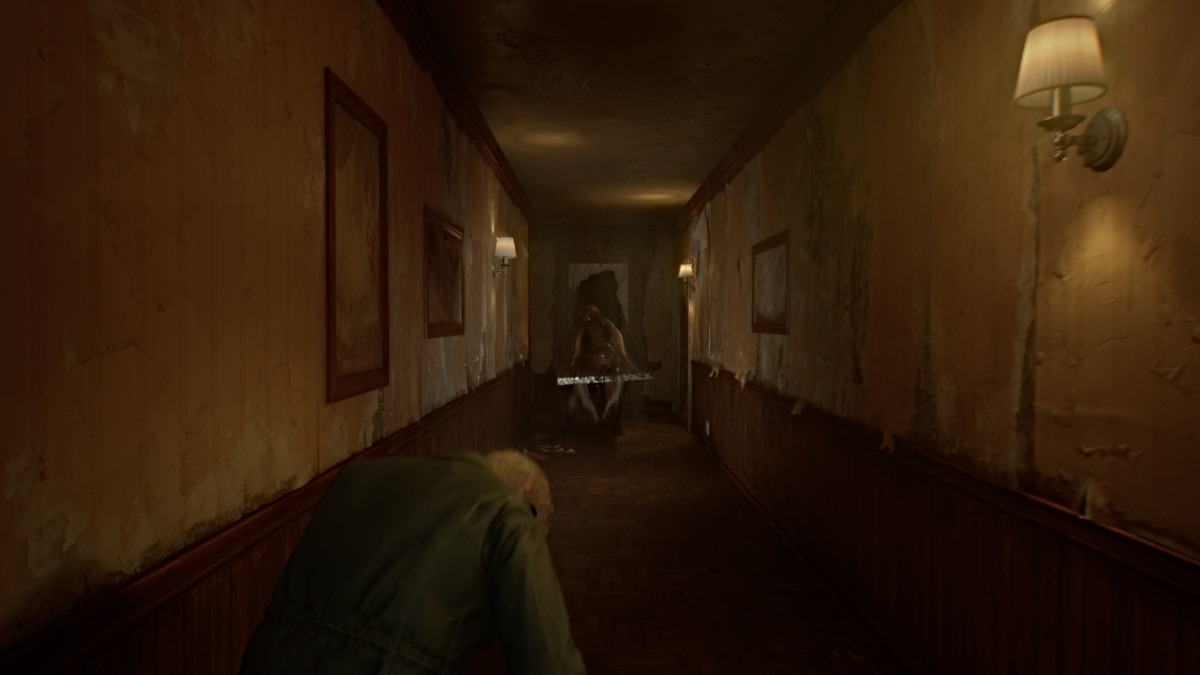
If it wasn't already obvious, Abstract Daddy is the disturbing manifestation of Angela's intense trauma from being sexually abused by her father as a child, and its physical form is meant to embody that. It makes it one of the most intense and consequential fights in the game.
The battle begins with Abstract Daddy confronting you in the hallway, and once again, keeping your distance from him is imperative. If he manages to charge and grab you, he can deal significant damage in each instance, so be sure to keep your health topped off.
You may initially think you're fighting him in tight quarters, but the "arena" has suddenly taken the form of a seemingly endless maze within Angela's home. This allows you to land hits on Abstract Daddy while constantly keeping your distance. Prioritize your Hunting Rifle and Shotgun for dealing damage, and time your shots well because he has an insane amount of health.
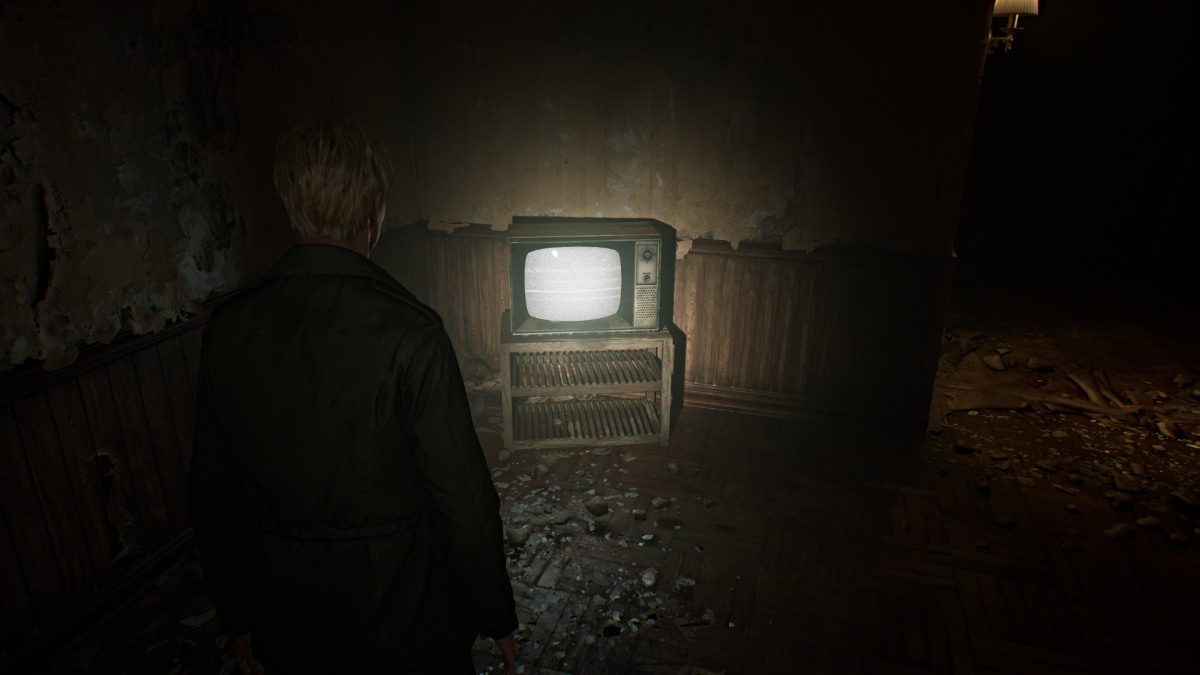
At certain junctions when you've dealt enough damage, Abstract Daddy will disappear briefly, allowing you time to recover and reload your weapons. Make sure to explore everywhere you can for extra ammo and health. As you travel through the maze, you'll see Angela fleeing in terror herself, and occasionally a scratchy recording of her father will play, further inferring his verbal abuse.
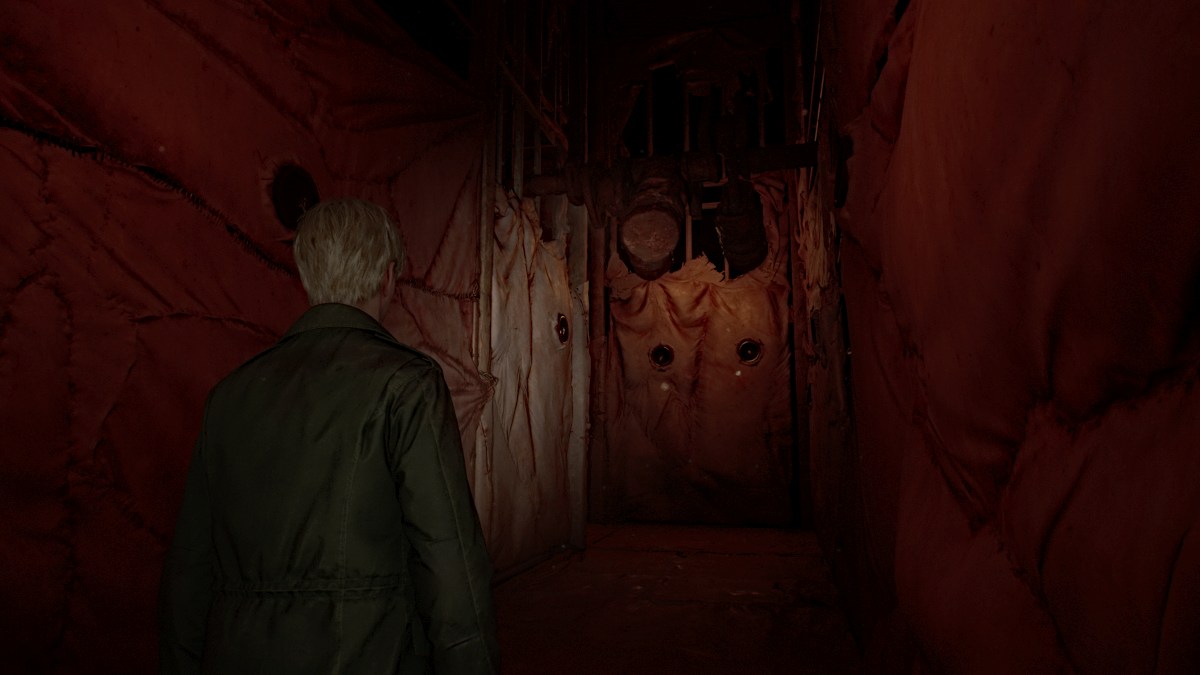
The fight occurs over multiple phases, and at least three times you'll need to trigger the next one by finding a static TV and smashing it with your pipe. The further into the fight you go, the more the environment changes into something closer to the Otherworld, and the walls turn...well, "fleshy".

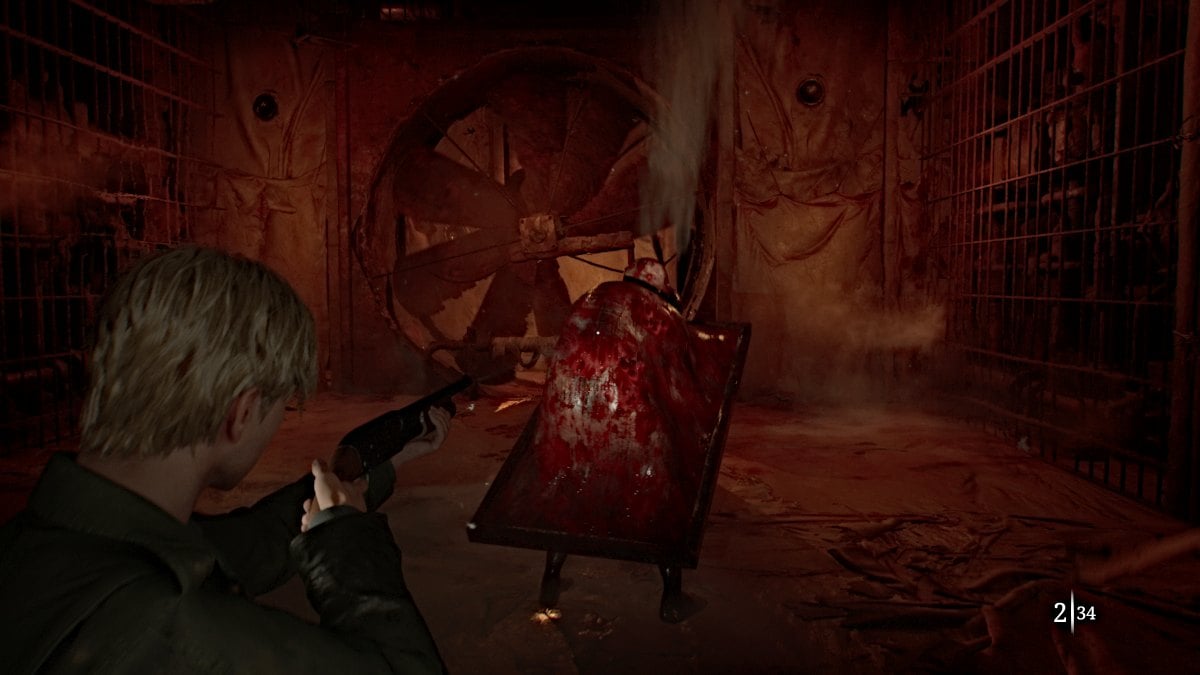
Eventually, you'll arrive at the final phase of the fight in a wide-open area. By this point, you've likely exhausted most of your ammo if not your health stores as well, so make use of the items spread around the room. Keep dealing damage, and Abstract Daddy's attacks will gradually slow down and become easier to dodge. Soon enough, he'll go down and a cutscene will follow.
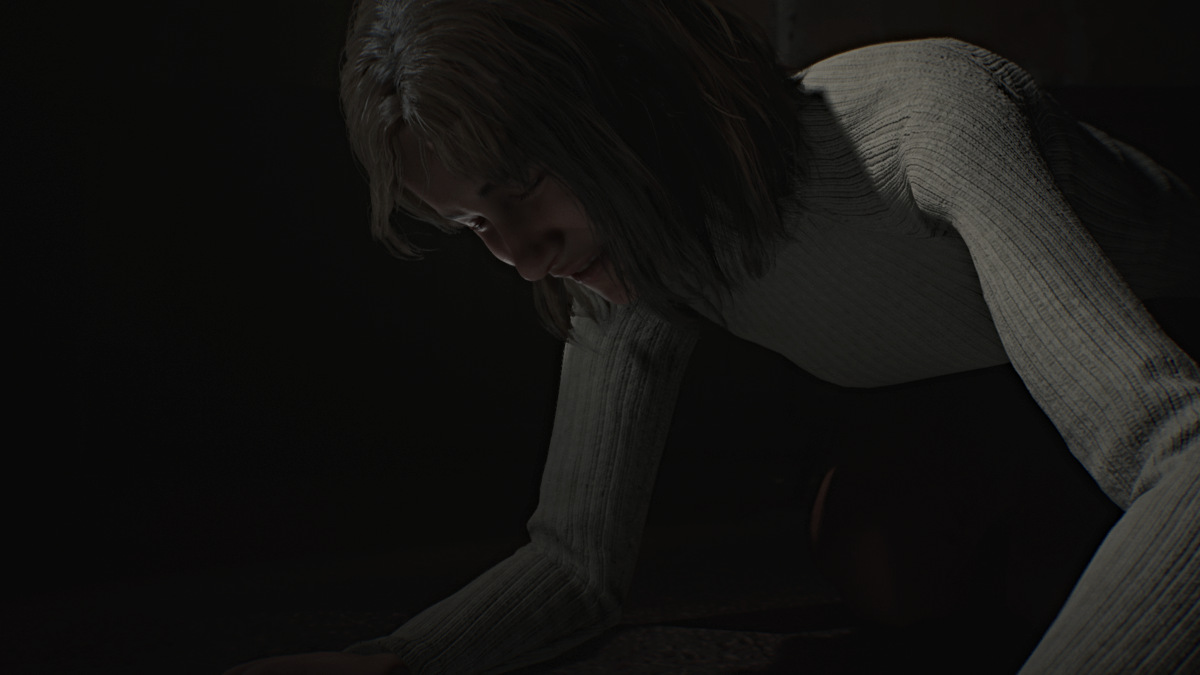
Angela approaches in rage and slams a TV on top of the Abstract Daddy, killing it. The environment has also returned to the way it was before the fight began. James tries to console Angela though to little effect, and the two argue over his possessiveness of Mary and how he treated her while she was sick.
Soon enough, Angela will retreat and now you're free to explore the rest of the Labyrinth.
Labyrinth Center - Maria Resurrected
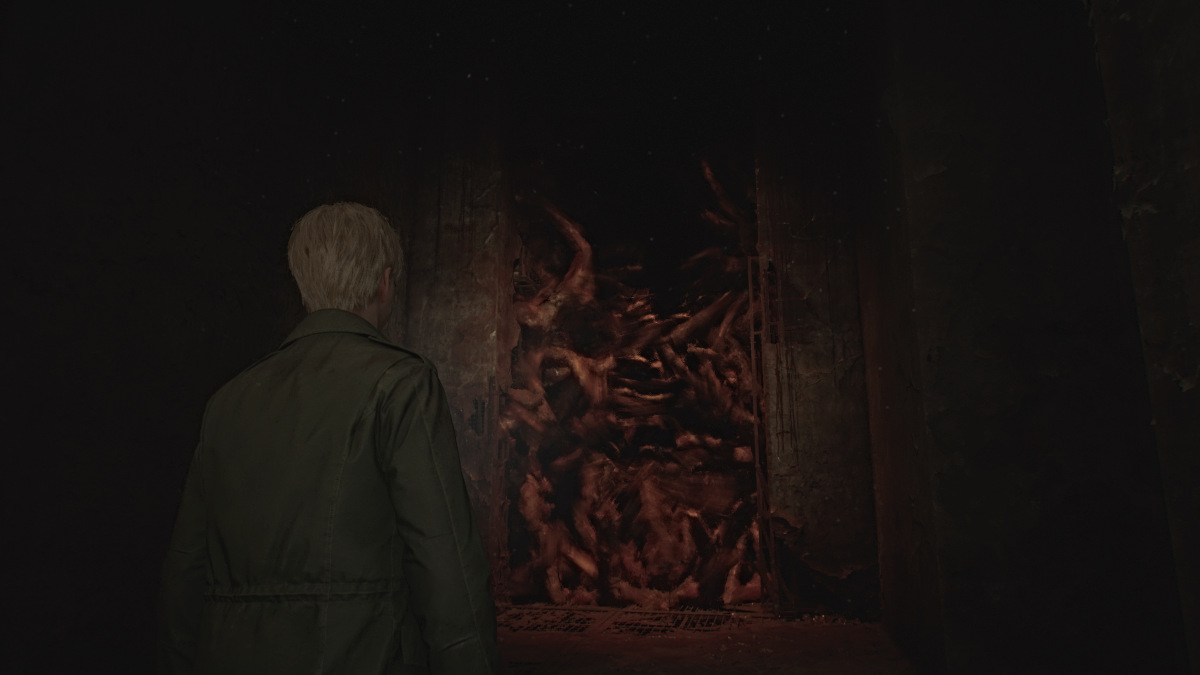
Important Note: The Labyrinth is a place technically outside of reality, and thus does not have a preset map for you to rely on like other locations in the game. Instead, James will hand-draw a map from scratch as you explore different areas, so be extra mindful of your surroundings.
After you move on from "Angela's apartment", you'll soon find yourself in a strange, maze-like area, and in front of you a barrier made of what looks like monsters from Silent Hill. If you try to cross through it, James will feel nauseous and back off, so you need to find a way to remove it. James will call it the "Strange Wall" on your map.
For now, head right and use the Red Save Point along the way. Go all the way across (the door to your right is locked) and down the stairwell and through the door ahead. On the other side is something, or rather someone, that James definitely didn't expect to see.
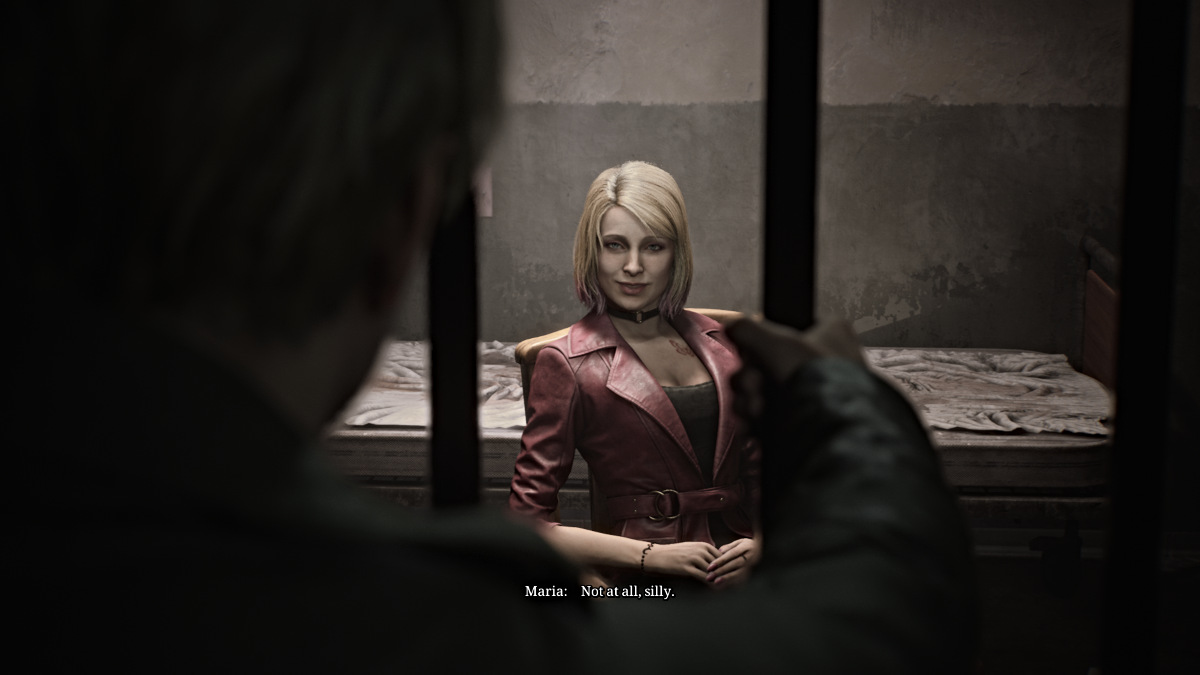
Maria is "alive" and well, sitting in a cell, and chides James for seeming to think she had been killed by Pyramid Head "in that long hallway". She laughs and muses about how he was "always so forgetful". She eerily sounds like Mary, which James notices and mentions. However, she rebuffs that she's not "his Mary", and insists that she's all he needs since she's "real".
Grappling with the situation, James starts to walk away and says with some hesitation that he'll find a way to get her out of the cell.

Fun Fact: If you re-enter the room immediately after the cutscene, Maria will be humming the "Promise" theme from the Silent Hill 2 soundtrack to herself. A hospital bed can now be clearly seen behind her as well.
Labyrinth Center - Rotating Cube Puzzle
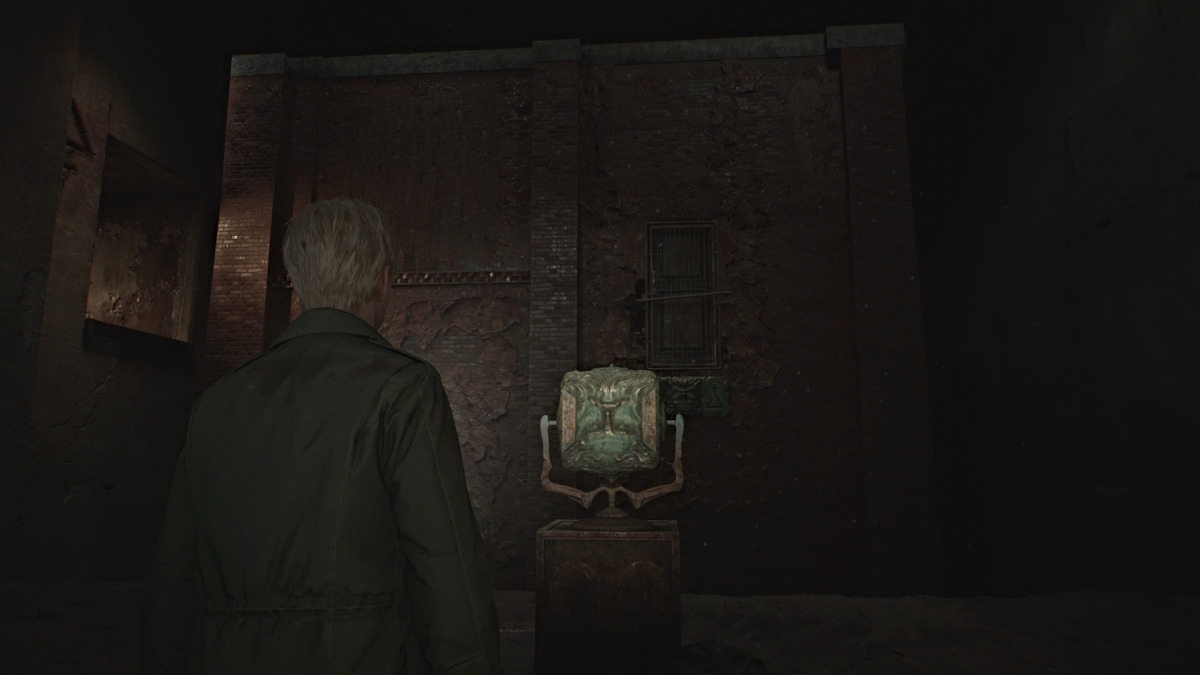
Head back up the stairs to the path you walked before, and now you'll find the Rotating Cube Puzzle contraption in the center of it, along with what looks like an entire building in the chasm next to you. The rotating cube features different faces on each side, along with different symbols.
Depending on how you turn it, the building in front of you will rotate as well and reveal new paths and three other main areas for you to explore. Those areas include: the Rotten Area, the Desolate Area, and the Ruined Area.
This puzzle serves as the focal point of the Labyrinth, and your goal here is to use it to access each of those different areas one by one. For easy reference, here are the symbols required for each area:
| Symbol | Area Unlocked |
|---|---|
| Upward-facing triangle with a cross underneath | Rotten Area |
| Infinity symbol with a vertical line above crossed through twice | Desolate Area |
| Downward-facing triangle with a cross underneath | Ruined Area |
| None (side axis of the cube) | Optional; Find the "Your best buddy!" Strange Photo inside the cube itself. |
So for now, you'll want to start with accessing the Rotten Area. Turn the cube in the proper direction, then go into the building and take the stairs that lead up to the path on the left side. Go down the hallway and at the end there will be three doors, for each of the three areas. Go through the Green Door on your left to enter the Rotten Area.
Labyrinth - Rotten Area
You'll start in a hallway completely covered in bugs, so move through carefully and watch out for where the floors switch to metal grates, as Mandarins will be lurking beneath. Remember that all of your maps for the Labyrinth are hand-drawn, so you have to learn the area as you go.
After that first metal grate path, turn left and find some Handgun Ammo on a dresser (which you're probably starved for after Abstract Daddy) at a dead end. Backtrack to the main hallway and continue on until you see a door ahead. Go through it and you'll enter a room with a Suspended Cage high up, three other different doors, and a Red Save Point.
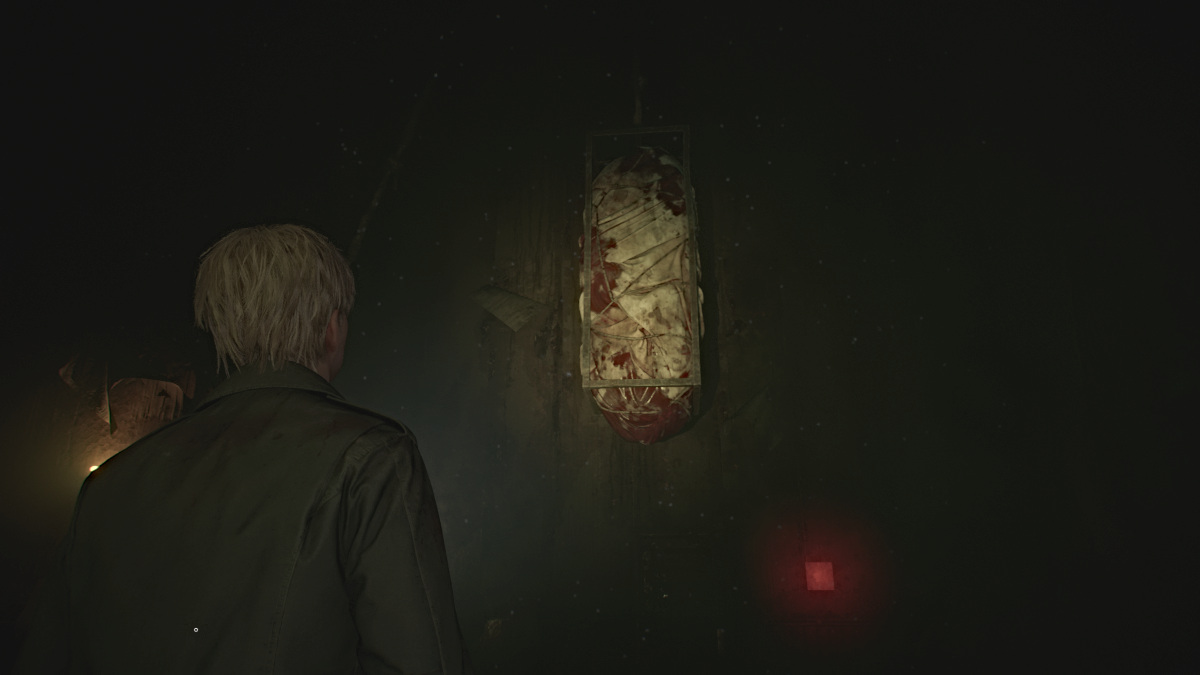
To bring down the Suspended Cage you'll need something to cut its tether, so for now head through the door to your left.
Lighter Gas
Go down the hall, grab Rifle Ammo from a small cabinet on your right, and continue straight to the open door at the end. Be extra careful here as not only are there bugs everywhere, but the floor of the entire main hallway area is metal grating, so Mandarins will be patrolling.
Keep your distance from them (these seem to be invincible so don't waste your ammo) and make your way down the hall until you reach the second left. Take it and follow the next hallway until you find another door. Inside the floor will be normal, so you get a breather. Deal with a couple of Mannequins lurking there and claim a Syringe and Handgun Ammo.
Take the pushcart in the room over to the high crawlspace near the door, and climb up and through to the next room over. Inside you'll notice the fridge in the kitchen shaking nonstop. Approach it and through all the lovely muck that pours out from it, James will find a small can of Lighter Gas. Grab the Handgun Ammo and Health Drink nearby as well.
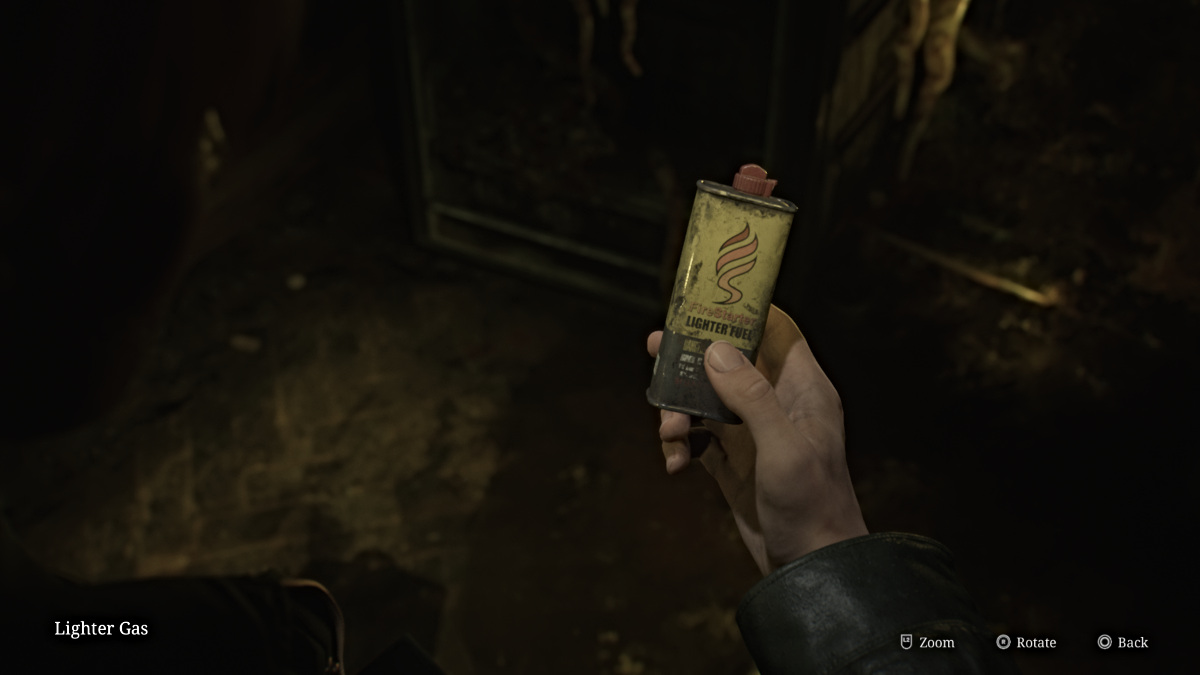
Carefully make your way back out into the main hallway and bum rush your way back to the Suspended Cage Room.
Lighter Wick and Iron Key
Now take the door to the south and sprint across the grated hallway all the way south until you can leapfrog over a box and find a set of double doors ahead of you. Go through them and grab a Health Drink on your way through the next door ahead. Watch out for a Mannequin in the dark and grab Shotgun Shells from a small cabinet.
In the next room you'll find a bed that's been brutally split in half (could venture a guess who did that) and on the wall behind it a hole oozing blood. James knows the deal by now, so go over and interact with it until you pull out the Lighter Wick.
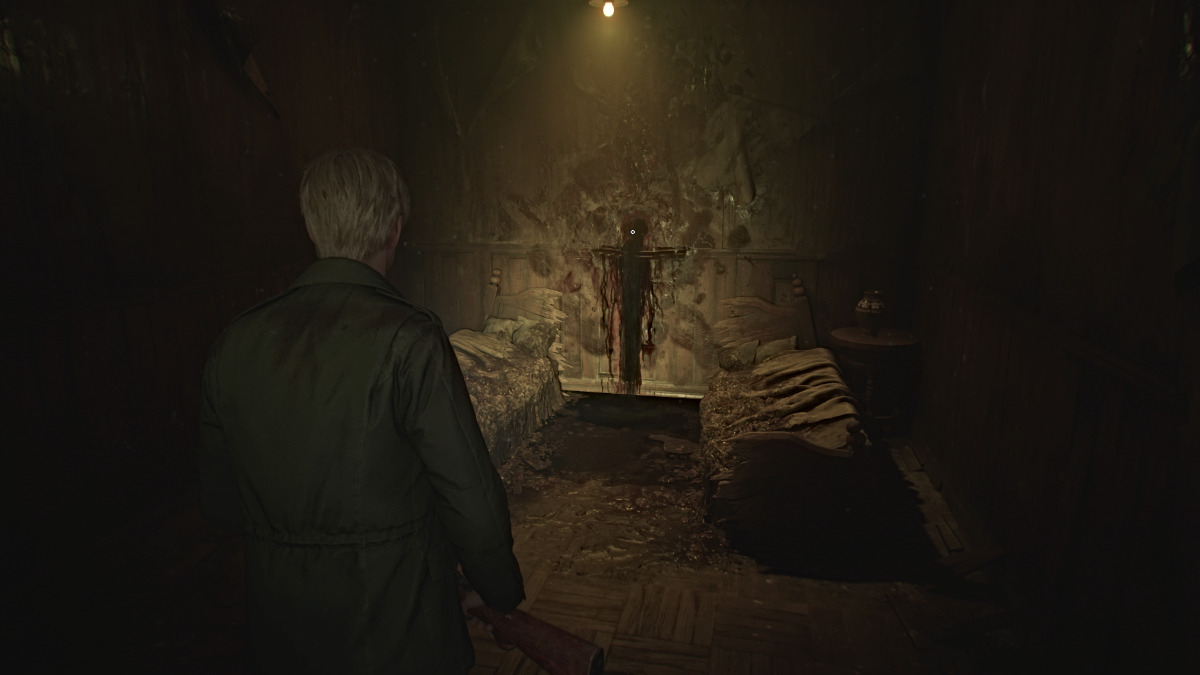
Now, before you go back to the Suspended Cage room, exit through the door beyond the bedroom, and run down the hallway until you can turn right and follow the path to another door. Go through and inside is just one huge room with a desk right in the center. Deal with the Bubble Nurse patrolling it and then check the drawer to claim the Iron Key.
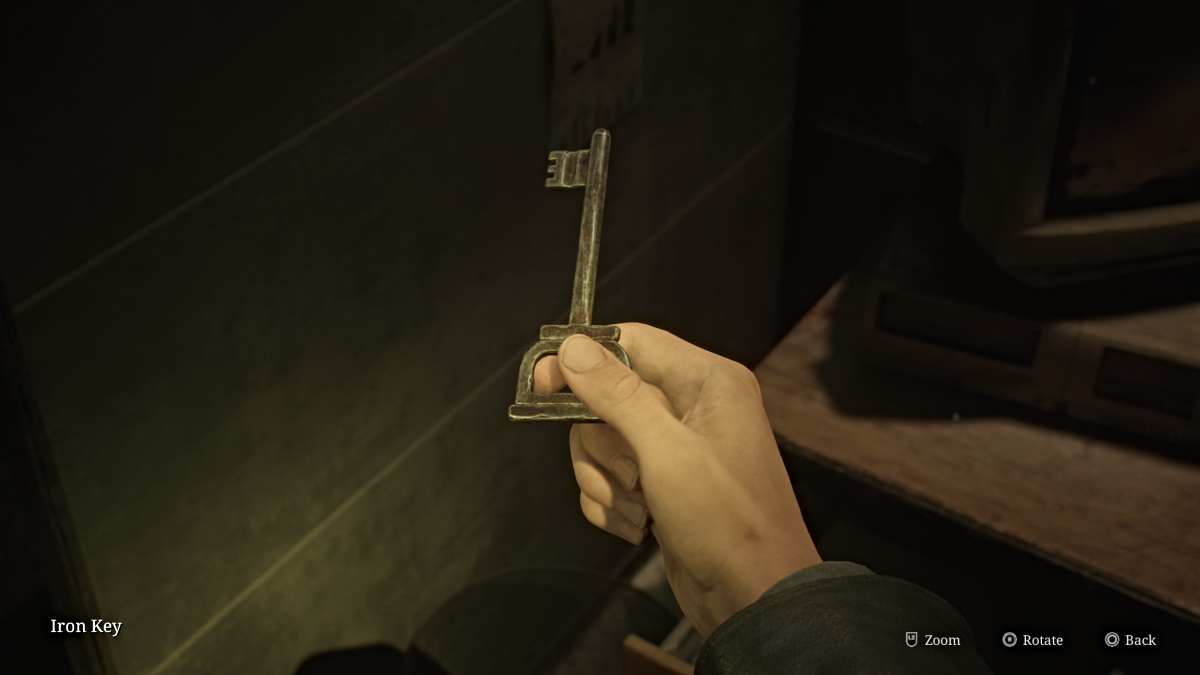
Broken Lighter
Now make your way back to the Suspended Cage Room and go back through the first door you went through where you found a locked door requiring a key. Use the Iron Key to unlock it and you'll find a bathroom inside. Interact with the nearby bathtub and James will quickly learn that the liquid bubbling inside it is too acidic for him to touch. This means you need to drain it somehow.

Go through the nearby gap in the wall and follow the narrow hallway all the way down until you reach a bug-filled room with a red crank. Turn it until the pipes burst and the tub breaks open, draining all of the bad stuff out so you can reach your prize. Return to it to claim the Broken Lighter.
Return to the Suspended Cage room and combine the Broken Lighter with the Lighter Gas and the Lighter Wick to make an actual Lighter. Use it on the tether holding up the cage and soon the entire thing will fall and break through the floor, leaving a large hole behind, perfect for you to jump through. Use the nearby Red Save Point and then do just that.
This brings you back to the Labyrinth Center with the Rotating Cube Puzzle, and now it's time to move on to the next area. Turn the cube to the appropriate direction (as seen in the table above) to unlock the Desolate Area next. Run through the building and back up to the left-side path, and this time take the door straight ahead.
Labyrinth - Desolate Area and the Handcuffed Gate
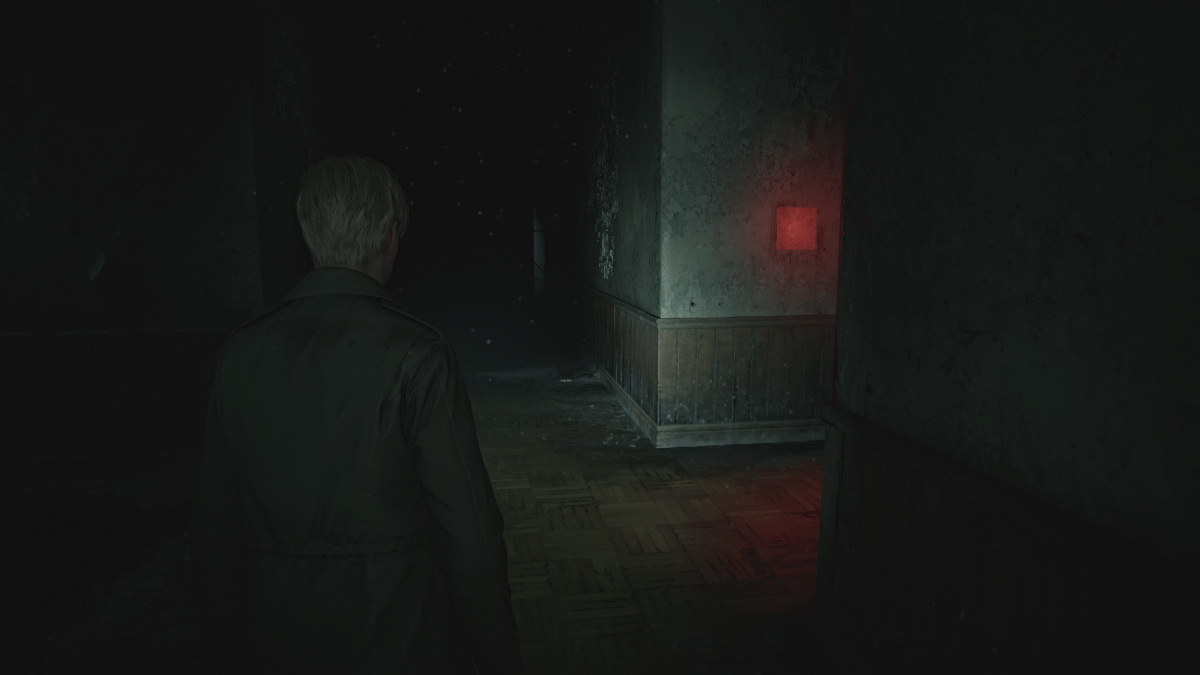
Upon entering the Desolate Area, use the nearby Red Save Point and make note of the locked door to your right, and the ladder to your left. Continue straight ahead and find the second door on your right and go through it. There will be a wall crack by a closet for you to take to the room adjacent, where you'll find some Rifle Ammo, Shotgun Ammo, and a Mannequin hiding behind a bookshelf.
Backtrack to the small bedroom where you find a Health Drink and Ladder II. Go down it to reach the Flooded Level, and follow the path until you find a hole you can peek through to see a key (which you will need).

Keep going and you'll see that the door to that room is locked. Make your way south until you find Ladder I and climb up, where ahead of you will be the Handcuffed Gate (seen above). You'll need a certain key you already saw to unlock it, but for now, go through the door to your left.
Follow the hallway until you can make two rights to find another ladder that will take you back down to a cave area. Follow it until it brings you to the room where you spotted the key. Pick up the Small Key and head back to Ladder I to use it on the Handcuffed Gate. Now you can access the rest of the Desolate Area.

Labyrinth - Desolate Area, Pyramid Head's Lair, and the Wirecutters
Follow the corridor to the next room and look for a pushcart you can use to reach a high crawlspace. Climb up and through and continue until you find Ladder IV to take back down to the Flooded Level. Another crawlspace ahead will bring you to a Wire Barrier that prohibits you from going forward. You'll need something to help get rid of those wires.
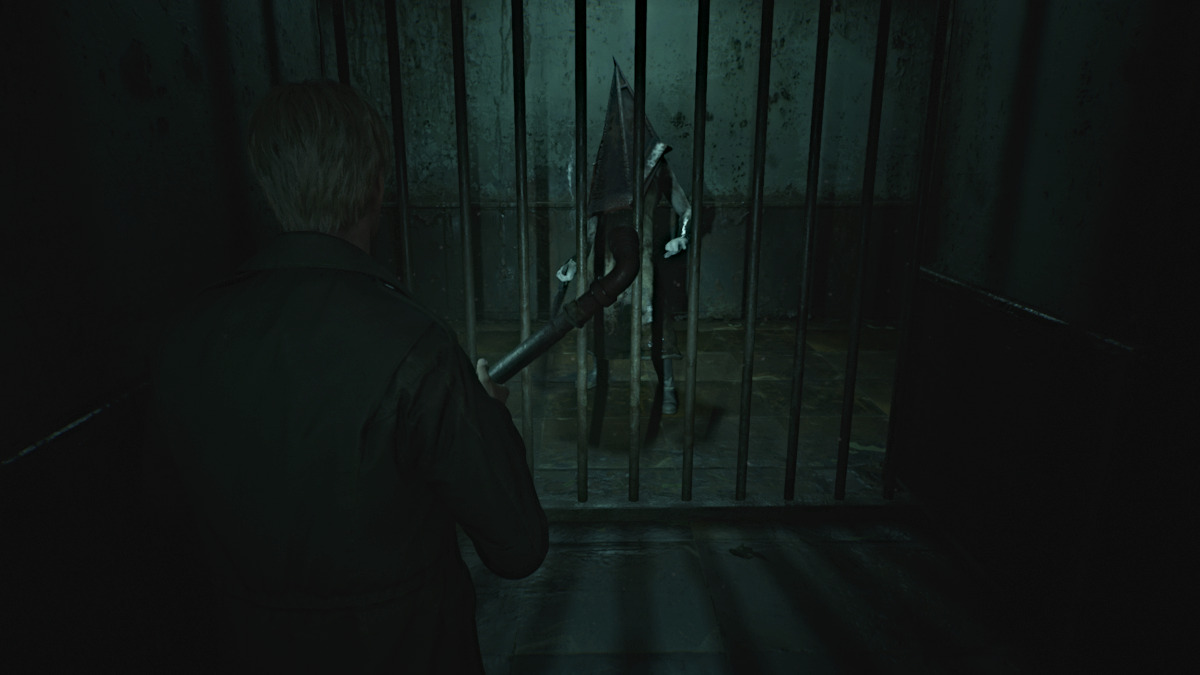
Go through the next hallway on the right, full of bugs of course, and suddenly Pyramid Head will appear and start giving chase. This is not a boss fight, you're simply in his domain now and need to avoid him at all costs while completing your objectives.
Run left when Pyramid Head chases you here, and go past the ladder until you find a pair of double doors, where his lair is. This will also give you the Inner Sanctum achievement/trophy.
Go up Ladder V and follow the long hallway up until you can turn left, but quickly go right for some Handgun Ammo in a dresser at the dead end. Backtrack and go left through the wide open door to the room where you can remove a set of Wirecutters from a broken fuse box.
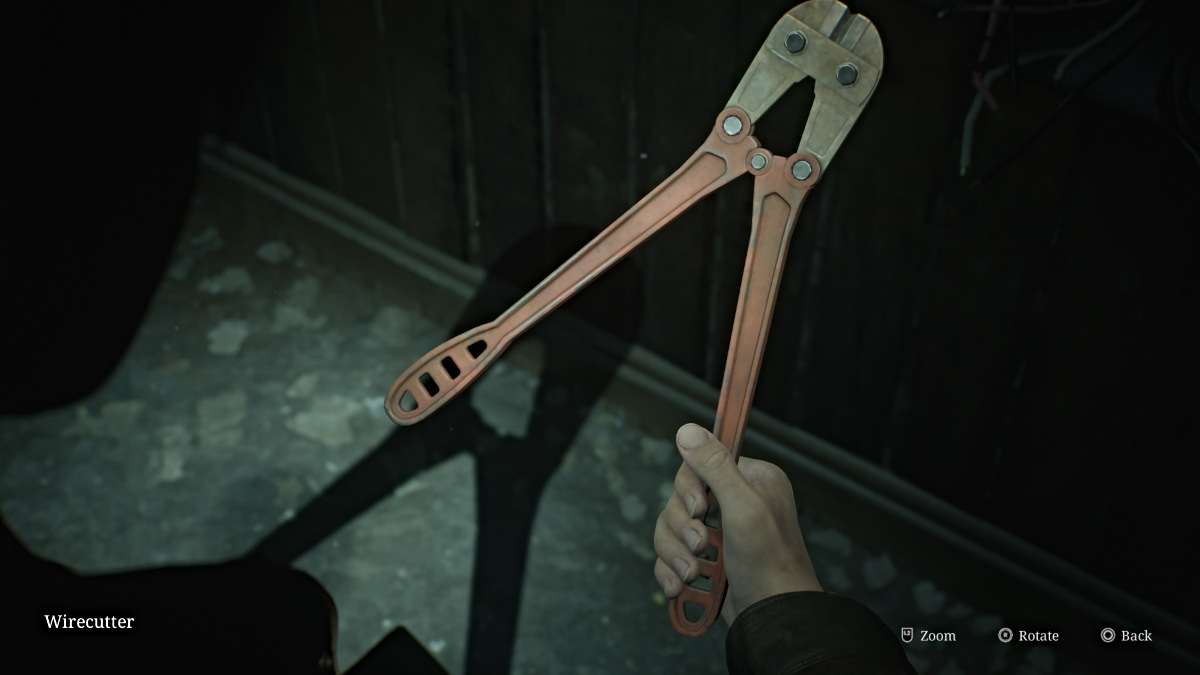
As tempting as it might be, do NOT take the south corridor past the fuse box as that will bring you back to the tunnel with the crawlspace that caved in after passing through, meaning you'll have to backtrack much further around the map.
Instead, go back down Ladder V to the area where Pyramid Head was, but he'll no longer be there. Instead, you'll have to deal with Mandarins and other monsters in your way.
For some extra items and a Strange Photo you can make your way to and up the ladder you initially passed while evading Pyramid Head. Otherwise, head back to the tunnel with the barrier of Wires and use the Wirecutters to get through. Go down the next ladder ahead, and grab a nearby Health Drink before dropping down another hole that brings you back to the Rotating Cube Puzzle once more.
Be sure to use the Red Save Point nearby to save all your recent progress. Now it's time to turn the cube in the appropriate direction for the Ruined Area. Remember, the symbol is an upside-down triangle with a cross underneath. Cross through the building and up the path to where you can now take the red door to the right.
Labyrinth - Ruined Area

The Ruined Area of the Labyrinth is quite different from the other areas in that it's essentially a monster gauntlet. You'll enter different areas where you need to defeat various monsters to progress forward. Make sure to gather all of the ammo and health items in the areas first, then go interact with the red door at the back for the alarm to go off and the monsters to come alive.
In the first two areas, it'll be mostly regular monsters such as Lying Figures, Mannequins, and Bubble Nurses. The third area will be full of bugs and you'll need to kill Mandarins crawling beneath the floors. The Shotgun and Hunting Rifle are best for those.
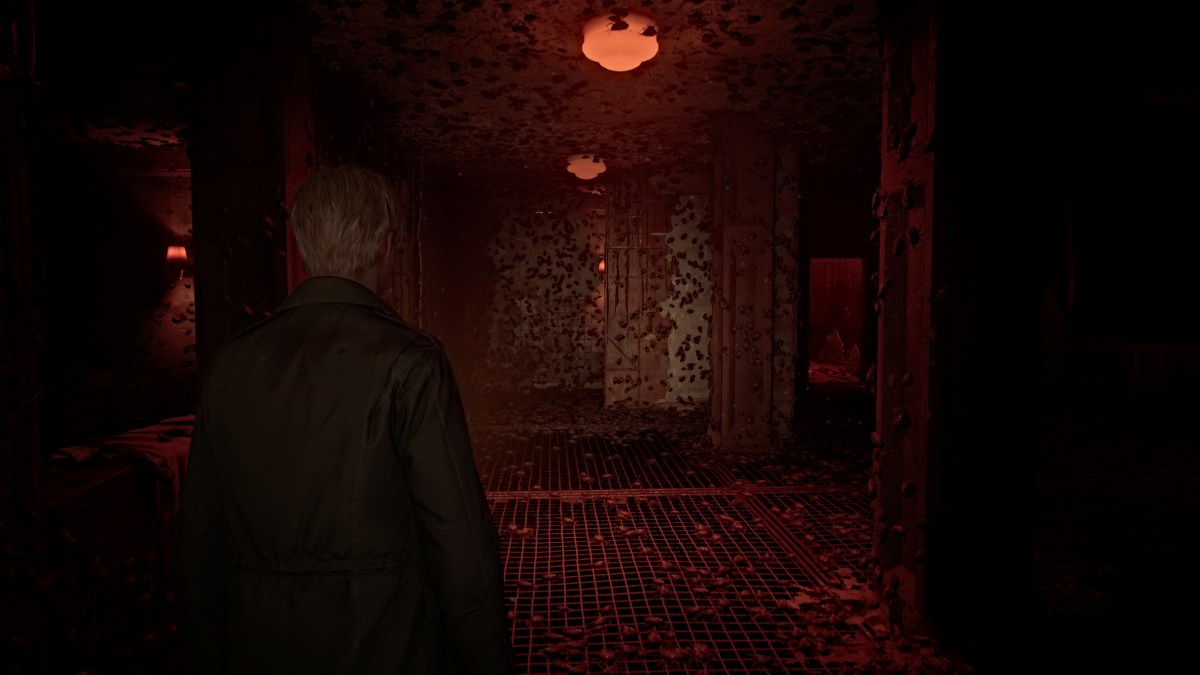
At the end of it all, you'll get a gracious Red Save Point, which we recommend because soon after you'll run into Pyramid Head yet again. He'll give chase and you need to run in the other direction until you reach a familiar-looking barrier made of monsters. This time, however, you're able to get through before Pyramid Head catches you. Continue on into the next room, where you'll find Maria at last, but it seems it's too late once again.
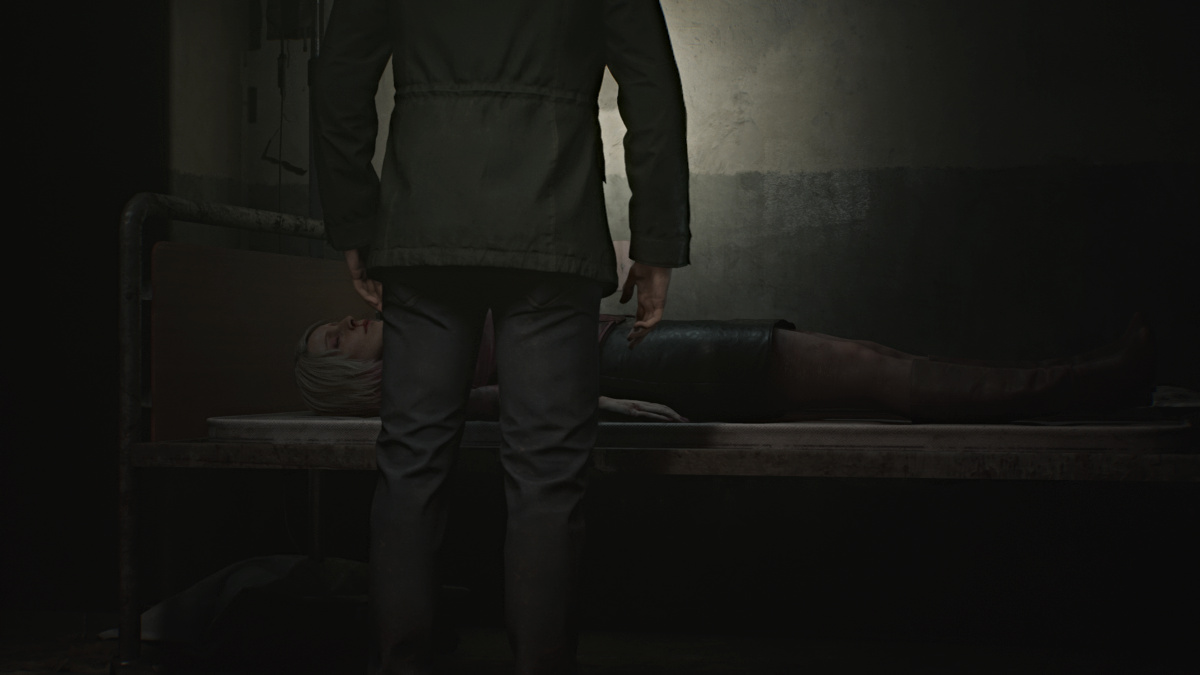
James finds himself overcome with grief at the sight of Maria clearly dead and murdered (likely by the same culprit), and him unable to help her in time. Likely a similar grief to the loss of Mary, he whispers her name and leaves, powerless to do anything else.
Once you leave the room, head up the stairs to where the Rotating Cube Puzzle normally is, but now it's been brutally destroyed, and among the rubble is the Great Knife, Pyramid Head's main weapon.
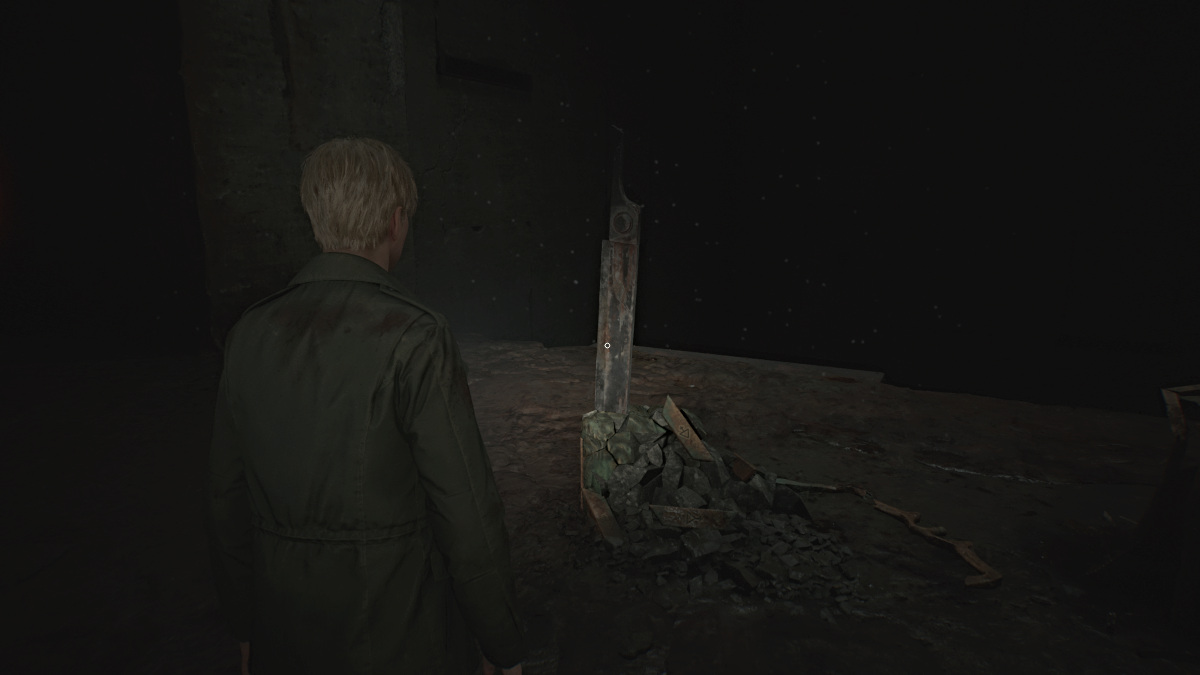
Interact with the Great Knife and James will pry it loose, allowing you to wield it, sort of. Drag it left toward the Strange Barrier and you'll now be able to pass through it. Drag the Great Knife all the way until you're completely through the barrier with a ladder ahead of you. You can now drop it and continue on (sorry, you can't keep it in your inventory this time).
Labyrinth - James' Grave and Eddie's Reckoning
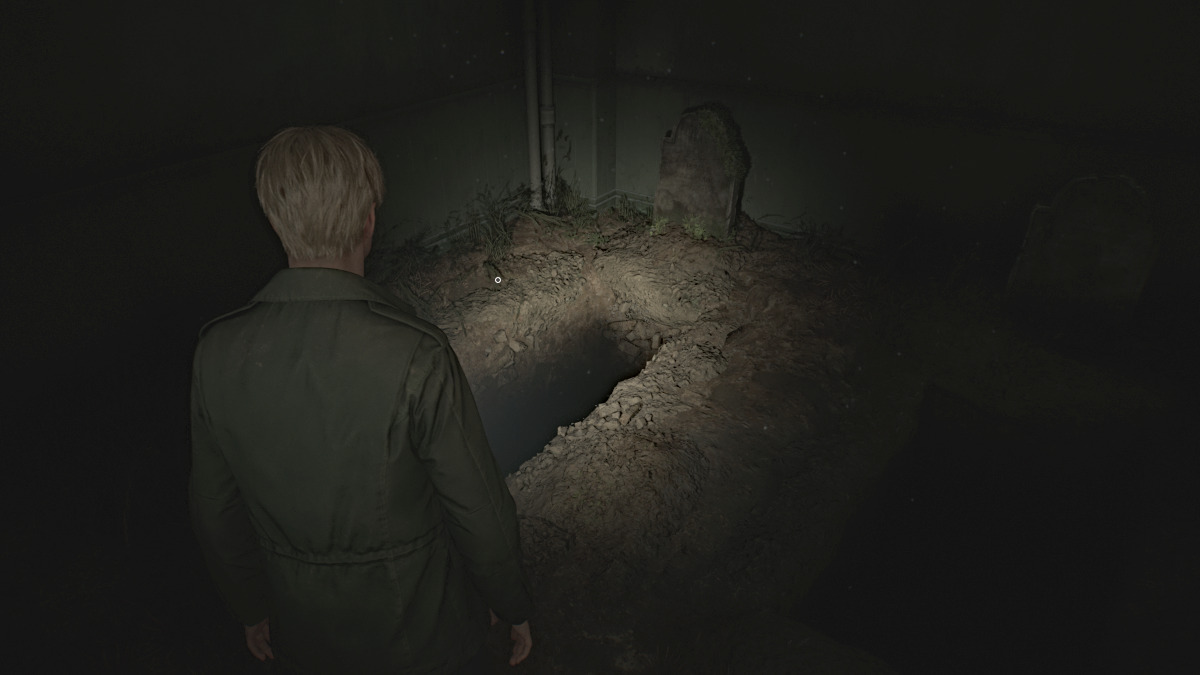
After climbing the ladder, follow the hallway until you can climb back down another ladder, which leads you to a small cemetery area. You can salvage some Shotgun Shells and a Health Drink here. Among the gravestones you'll find three that are of particular importance: Angela Orosco, Eddie Dombrowski, and James Sunderland.
To progress onward, you'll need to jump down into the hole that is your grave. When you're ready, take the plunge to the deepest reaches of the abyss, where your final adversary of the Labyrinth will be waiting. Follow the long hallway ahead of you, and at the end will be a freezer door soaked in blood. Go through it, and Eddie will be on the other side.
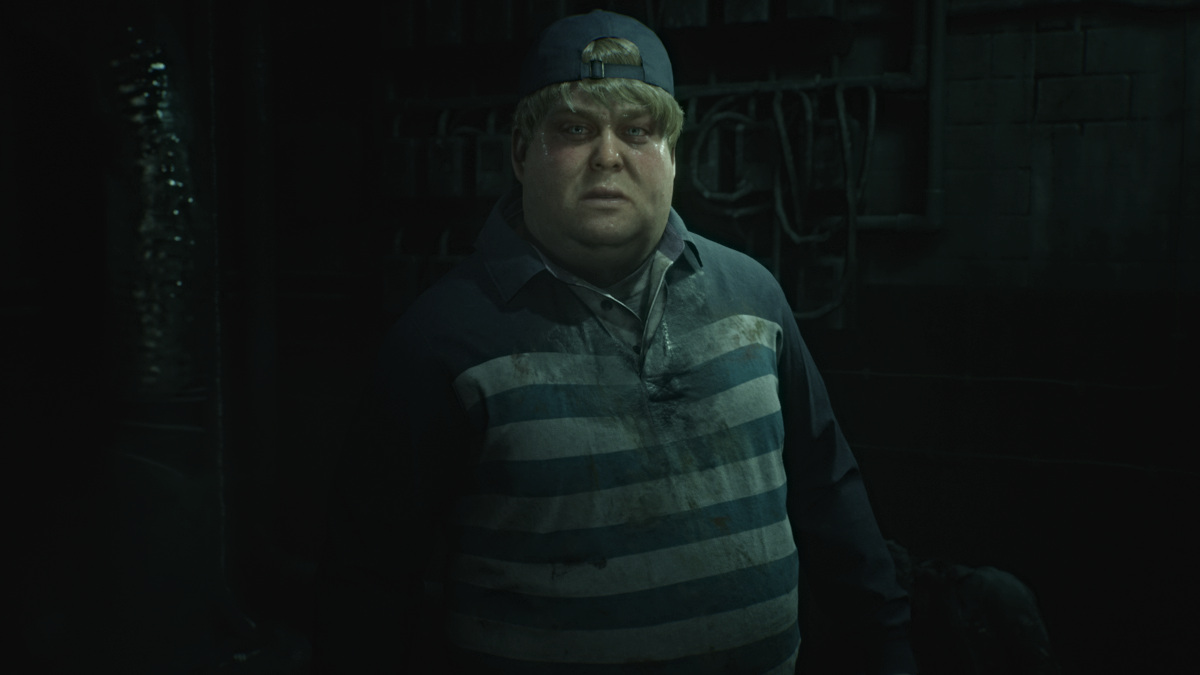
Clearly having lost himself, Eddie claims the corpse in front of him has been following him the whole time, laughing and insulting him. He then accuses James of doing the same, and that Silent Hill called them both because they're "not like other people". Determined to punish James the same way, he coerces him to the meat freezer for a fight.
Grab the Health Drinks on both sides of the room, make sure your guns are reloaded, and then follow Eddie through the same door.
Labyrinth - How to beat Eddie
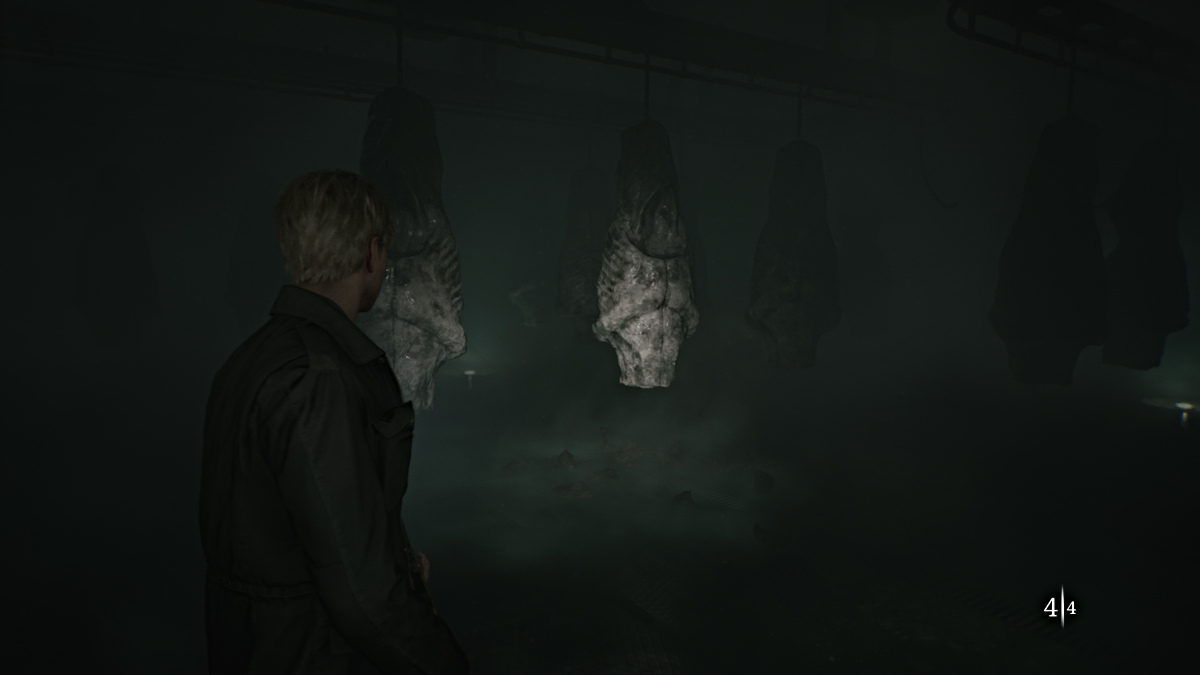
Make your way into the freezer and Eddie will officially engage you in a fight, and you'll want to avoid getting shot by him as much as possible because even just one shot from his gun hurts a lot.
Use the hanging sacks of meat for cover as Eddie circles around for sneak attacks. Do your best to keep him in your sights, or at least a sense of where he is, at all times. There will be some extra Shotgun Shells scattered around the walls of the room.
Shoot him enough times and he'll shoot a gas pipe that fills the room with fog, making it harder to spot where he is. Do your best to keep your back to a wall while waiting for him to approach. After a few more shots, the conveyors of meat will start to rotate, and you'll need to be wary of being caught in the open.
Be extra vigilant as Eddie will get more aggressive now with more gunshots and will attempt to sneak behind you for a pistol whip. Keep damaging him as much as possible and soon he'll succumb to his wounds and collapse, dead.
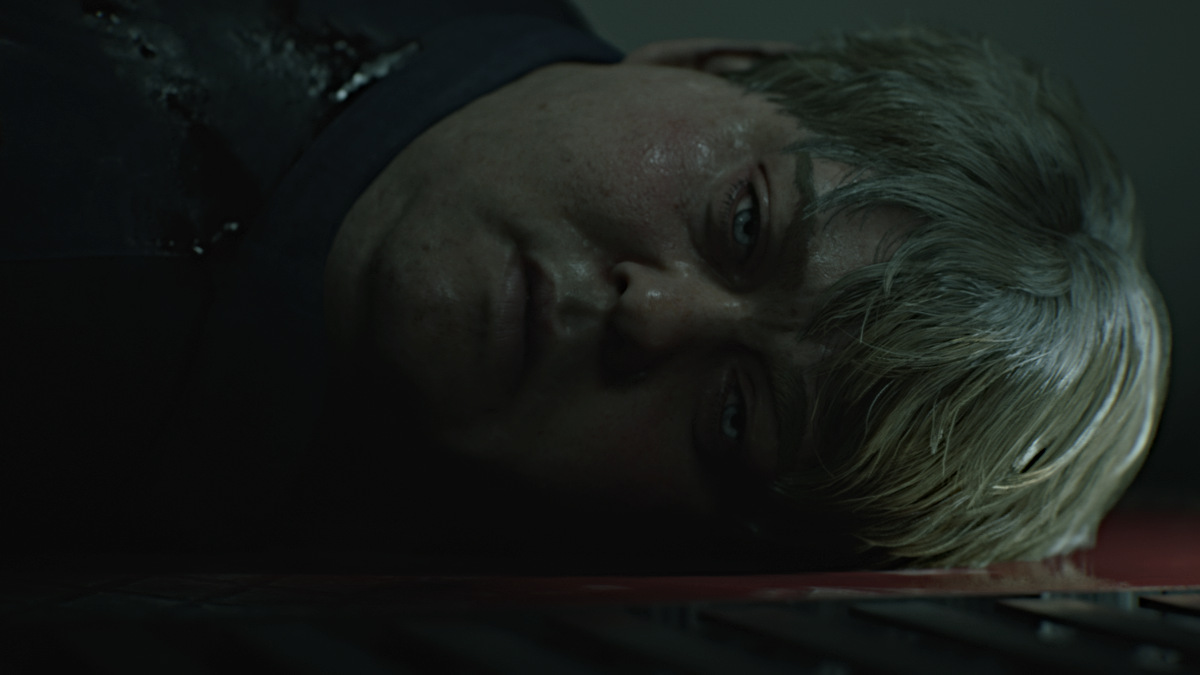
There's nothing left to do, so find the black double doors and open them to find your way out. Go through one more door, and you'll find yourself somehow back outside at the edge of Toluca Lake.
How to use the Boat to cross Toluca Lake
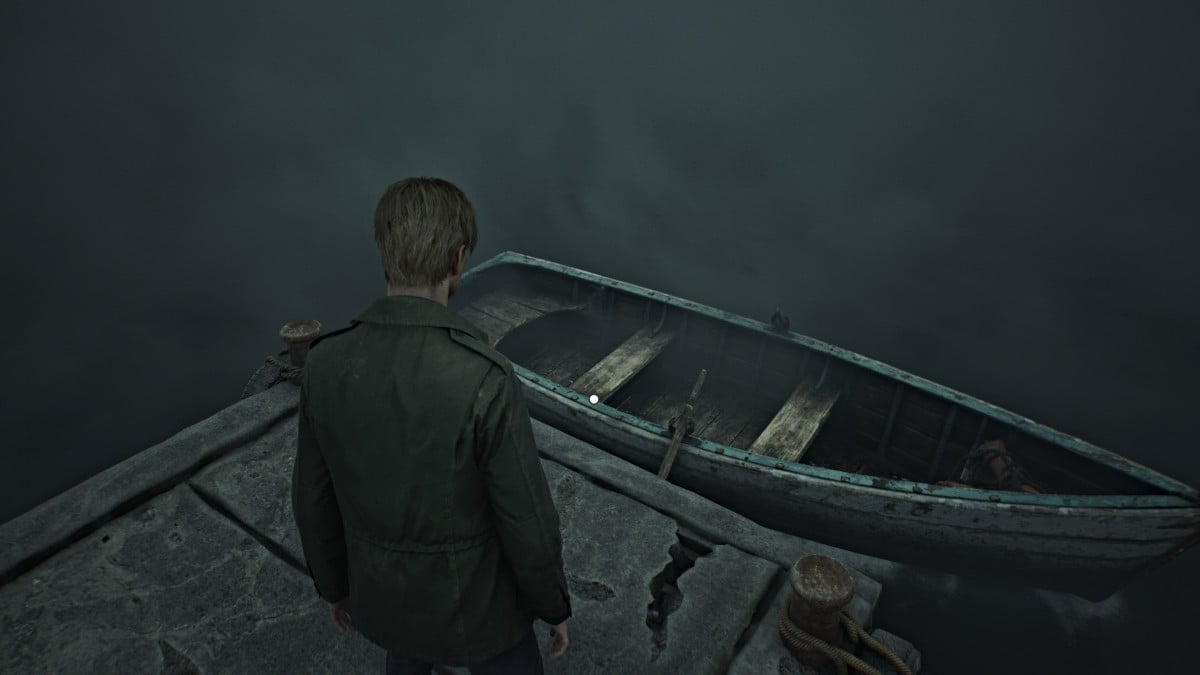
With all that James has experienced so far, it's now time to go to the one other "special place" Mary could be, which is the Lakeview Hotel. To get there though, you'll need to get across Toluca Lake, meaning you'll need a boat of some kind. Walk down the pier after using the Red Save Point and a small rowboat will be waiting for you.
After James climbs in and starts rowing, you'll soon need to take over yourself. You can control both oars separately (to turn if you veer off-course) with the appropriate controls or together at the same time to row straight.
To get the Scourge of Toluca Lake trophy/achievment, simply idle in the boat for 10 minutes before you row your way to the Lakeview Hotel.
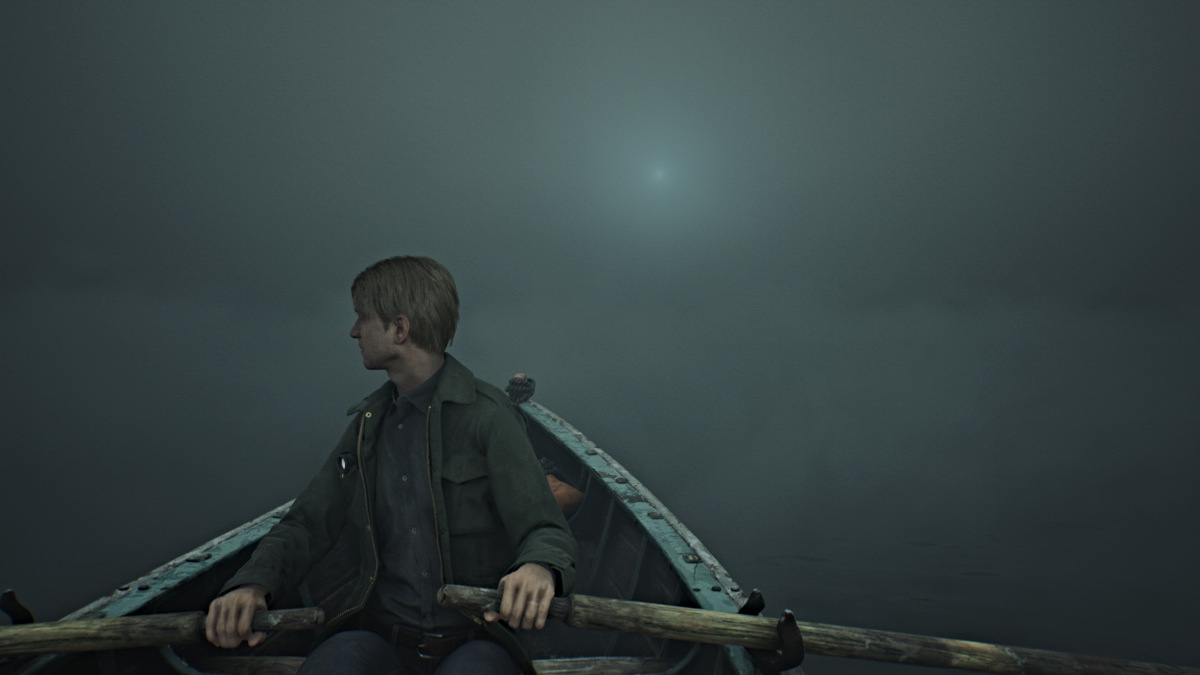
Your goal is to follow the light in the distance, which is coming from Lakeview Hotel. As you get closer, the light will grow bigger and brighter, so follow it until James reaches the pier in front of the hotel.
Silent Hill 2 Remake Lakeview Hotel Walkthrough
Lakeview Hotel - Garden Entrance
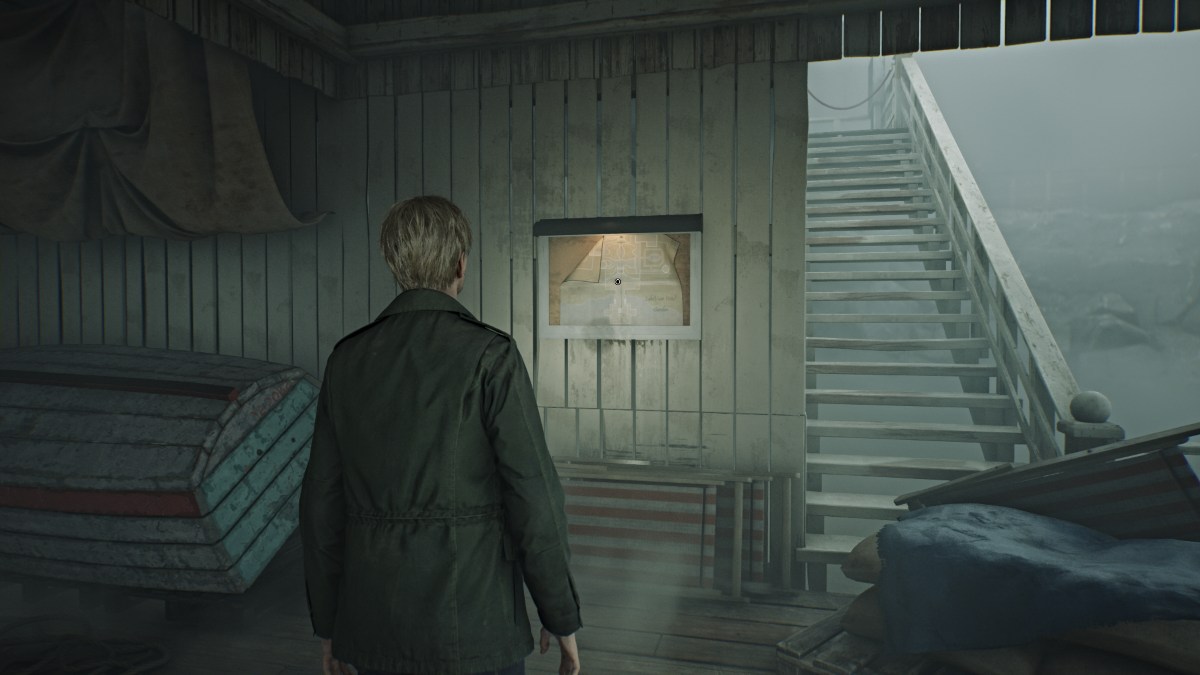
After another brief cutscene, you'll find yourself at the Lakeview pier. Go immediately to your right where you should spot the Lakeview Hotel Garden Map posted on a wall. Take it to get a look at where you are, which is the massive front entrance to the hotel.
If you're playing New Game Plus and want to get the UFO ending, you should hear the UFO audio cue as you approach the map. Inspect your Blue Gem once again until it sparkles.
For now, head up the central stairs and north in the direction of the garden area. Go up the next set of stairs and head left to find some Handgun Ammo in a gazebo. Now run to the far right side and on a small bench will be the Rotten Apple. Take it and make your way up the east side of the garden. Inside the Fish Fountain, you'll find a Glimpse of the Past in the form of a broken music box.
There's nothing else of note outside for now, so head to the hotel's entrance where you'll hear a piano being played inside.
Lakeview Hotel (Floor 1) - Check-In, the Music Box, and Cafe Toluca
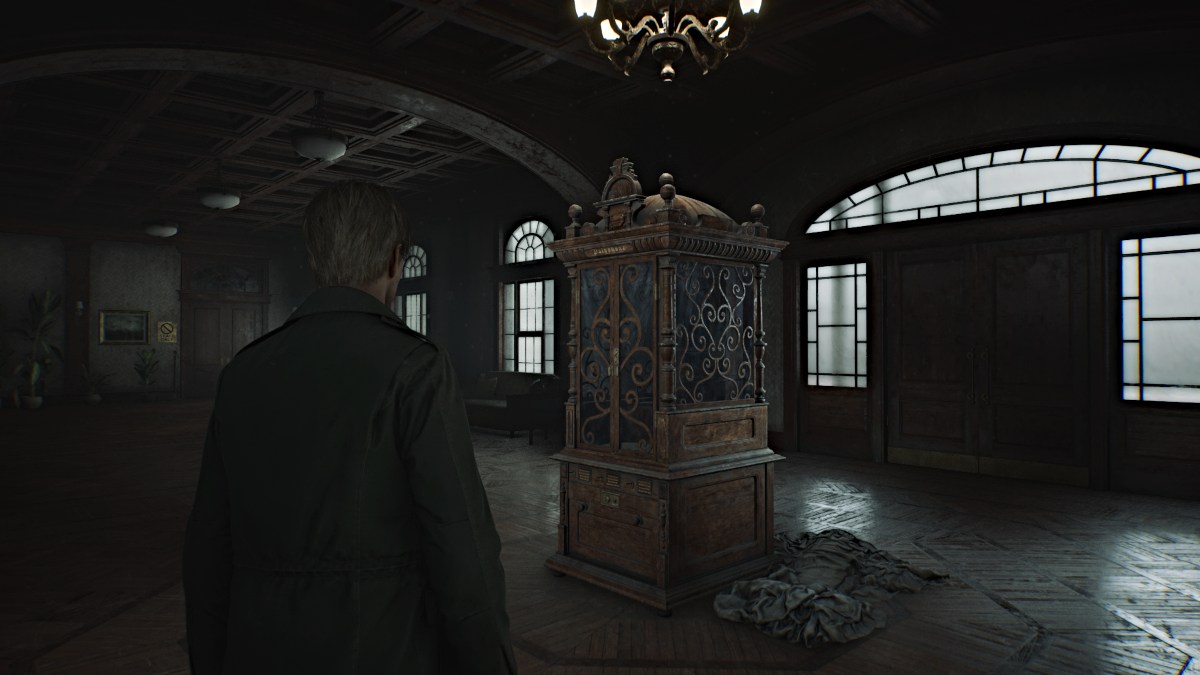
Go through the double doors and head right to collect the Lakeview Hotel 1F-3F Map, which also shows a map for the Venus Tears Bar in the Basement. Now, circle around to the front of the lobby, where you'll see a large and ornate Music Box (seen above) that requires a special key to open it.
Backtrack a bit and go inside the Check-In Room on the right to find a Red Save Point, a keyring that contains both the Room 312 Key and the Ornamental Key, and the Receptionist Memo that mentions the videotape James and Mary left now being kept in the Employee Section of the first floor.
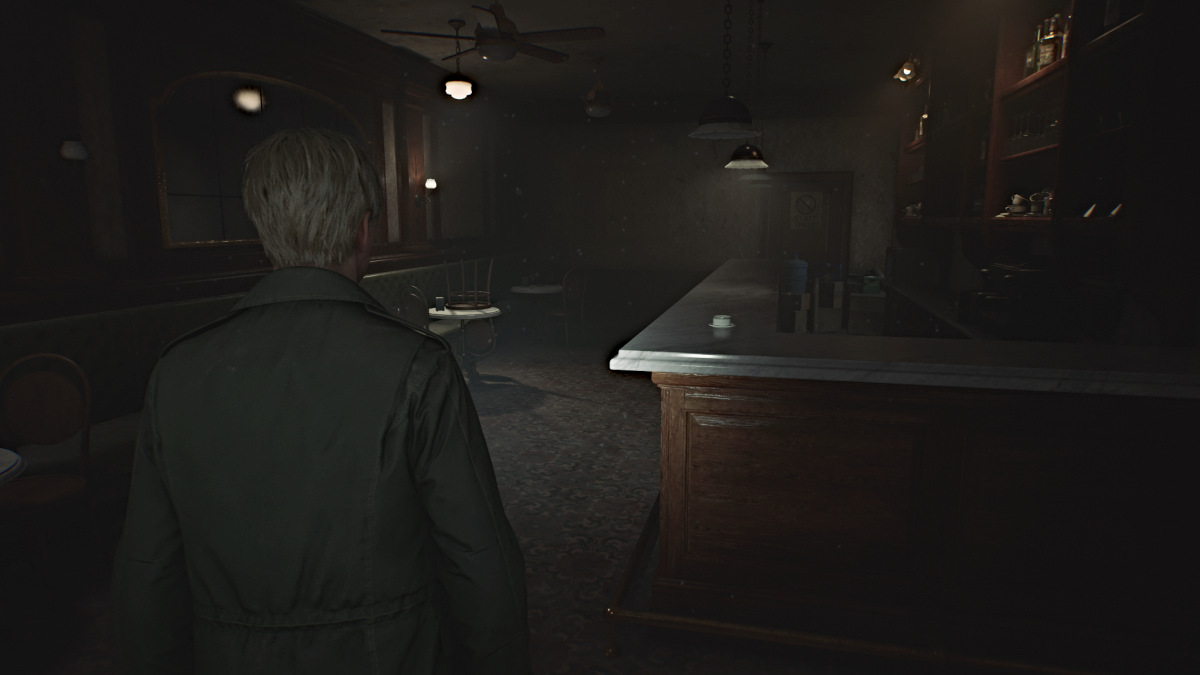
Go check out the far right side of the lobby for some Handgun Ammo and head into Cafe Toluca. Grab a Health Drink from one of the tables, then go behind the bar to find the Room 102 Key at the far end. Go around the corner to find a breakable spot in the wall, letting you through to the Lost and Found Room. There you'll find more Handgun Ammo and the Lost and Found Note.
If you're playing New Game Plus and want to get the Rebirth ending, the Lost Memories book is found in here as well.
Go back to the Music Box machine and use the Ornamental Key to open it. Inside you'll see that three figurines are required to play the music reels. For now, head down the left side of the lobby and through the open door on the left, where the piano tunes are coming from.
Laura's Truth About Mary
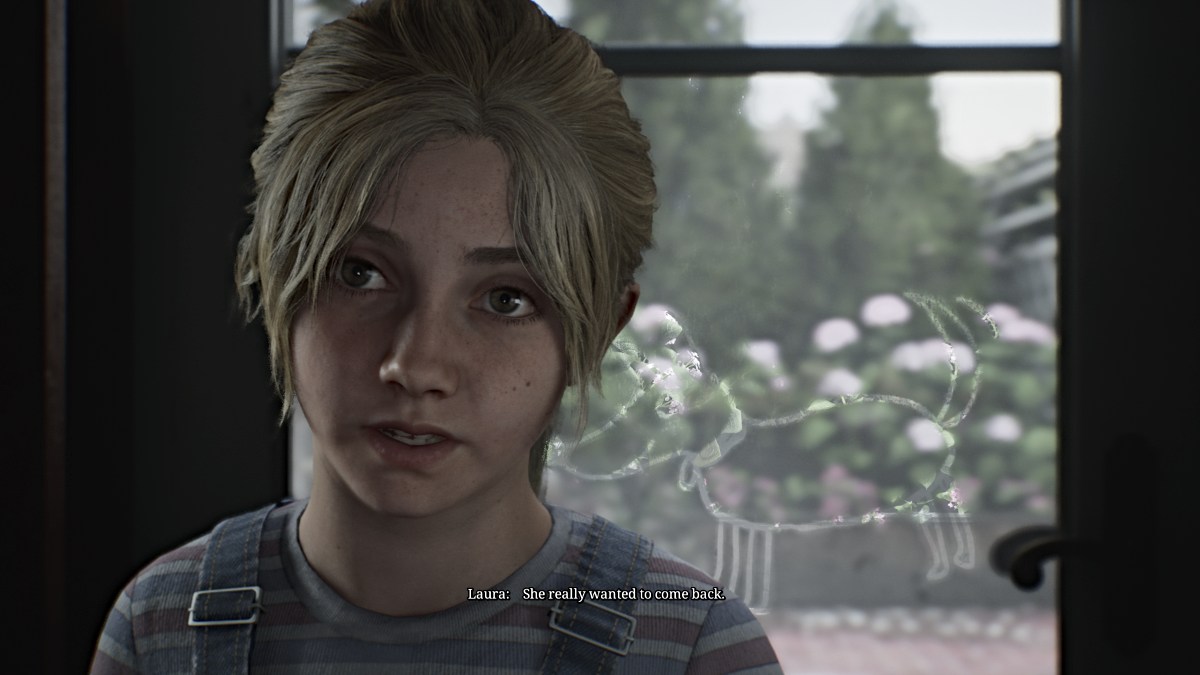
While looking around in the Lake Shore Restaurant, James gets startled by Laura hiding near the piano. The two of them talk about Mary and how they both want to find her for very similar reasons. In a letter from Mary addressed to Laura, it's revealed that Mary cared deeply for her and even hinted at adoption, if things had been different and she wasn't sick.
After James reads the letter which ends with Mary wishing Laura a happy eighth birthday, he asks her how old she is. Laura reveals that she turned eight "last week". That would mean that James' timeline of events has completely crumbled, as Mary didn't die three years ago after all, or even last year. If that letter is real, then Mary died only days ago.
Before James realizes that, however, Laura says that there was a second letter for James. She hands the envelope to him, but somehow it's empty. For now, she runs off to look for it.
Lakeview Hotel (Floor 1) - The Sunrise Wing Key
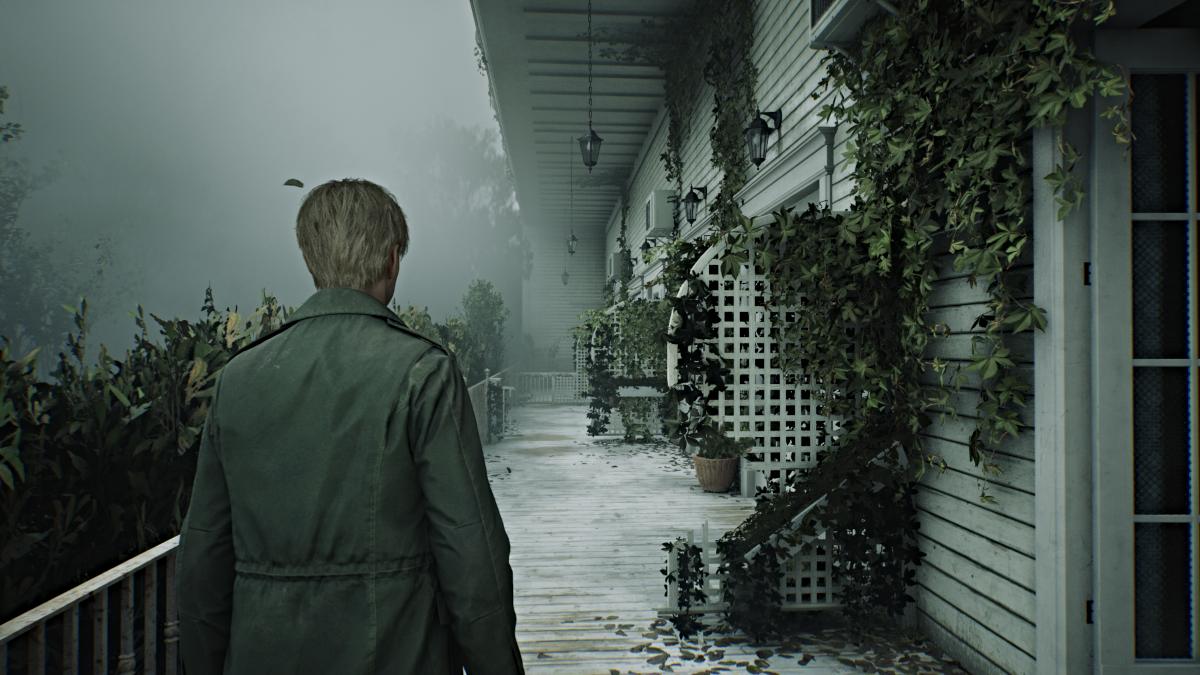
After leaving the Restaurant, follow Laura to the hotel rooms on the east side of the floor. As soon as you go through the parlor doors, however, you'll see that monsters are dwelling in the halls. Deal with the ones in your way and check the small cabinet outside Room 101 for some Handgun Ammo. There's nothing of note in that room, so go to Room 102.
Use the key to get in, and inside you'll find a nice trove of useful items, including a Syringe, Health Drink, Shotgun Ammo, and Rifle Ammo.
Leave the room, and right across from the door, there's a crawlspace that leads into Room 103. Slip through and grab the Health Drink from the bedside table before heading out to the patio. To the right, you'll notice that you can go all the way across to the other side. Every other room along the way is locked from the patio side, except for Room 106 at the very end.
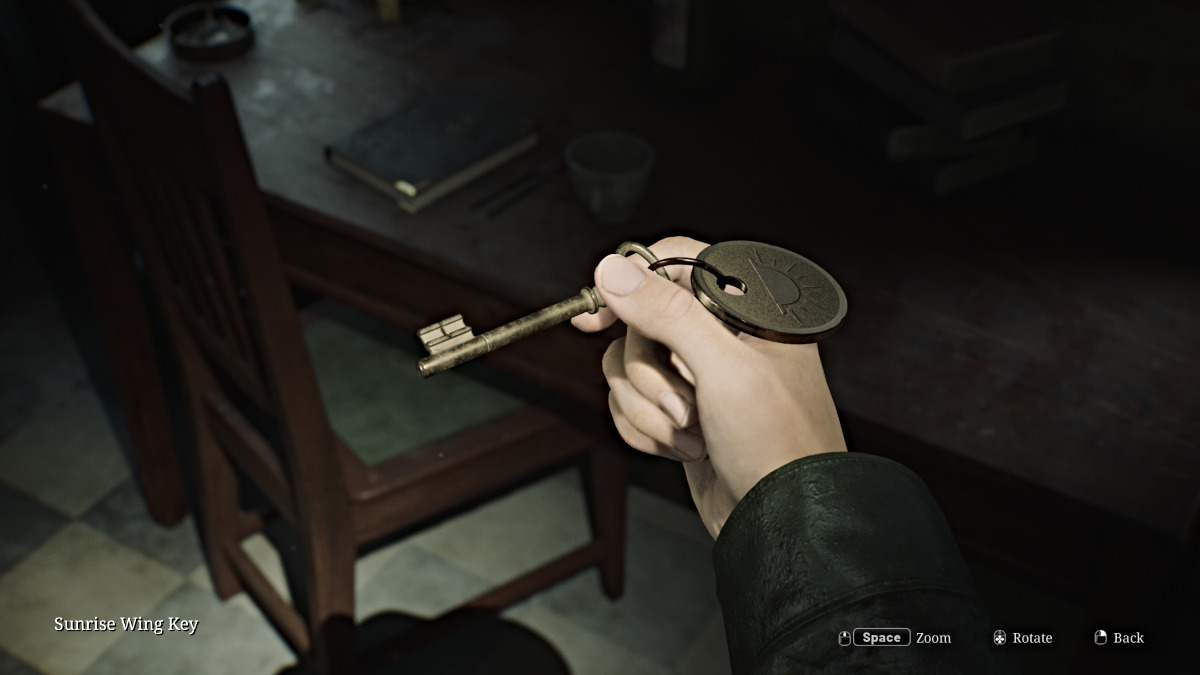
Go inside and check the bedside table for some Handgun Ammo, then go out into the hallway. A couple of Mannequins will ambush you in the dark, so take care of them first. Go check Room 104, the only other accessible room on that side for the "aftermath..." Strange Photo and some Rifle Ammo.
Room 107 at the far south end requires a key to get in, so for now check the Utility Room nearby. Inside there's some Handgun Ammo and the Sunrise Wing Key, which unlocks an area of the second floor. Afterward, go unlock the door nearby that leads back to the front entrance area, if you want.
For now, make your way back to the lobby and up to the hotel's second floor.
Lakeview Hotel (Floor 2) - Sunrise Wing, a Ripe Apple, and Room 202 Key
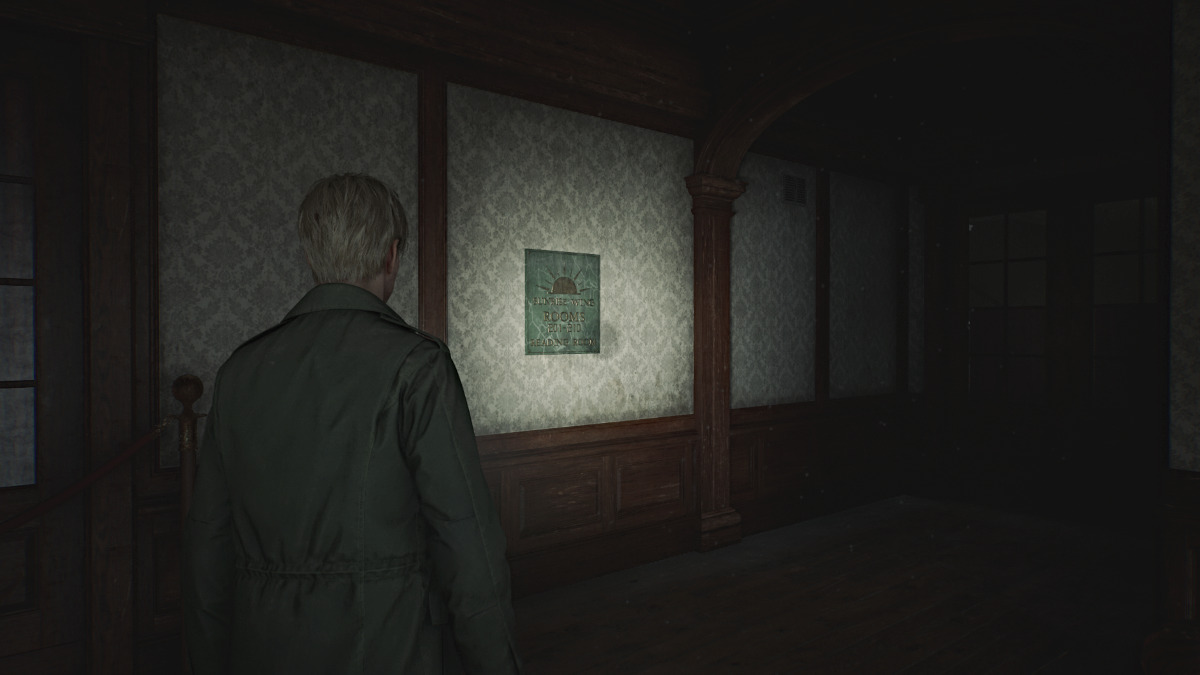
Upon reaching the second floor, you'll notice that the west half of the floor is locked off. So for now, go to the east side, which happens to be the Sunrise Wing where you can use the key you just got. Head inside and watch out for more lovely spider Mannequins crawling the walls and ceilings.
Before you investigate the Reading Room, duck into the Cloakroom on your left, which gives you access to the Hall room next door. Go in there and grab the Room 202 Key from a couch on the left side, then deal with a couple of Mannequins to get to the back of the room where you'll find the Ripe Apple (yum).
The patio is accessible and leads to the west side of the floor, but hold off on that for now.
Reading Room Book Puzzle
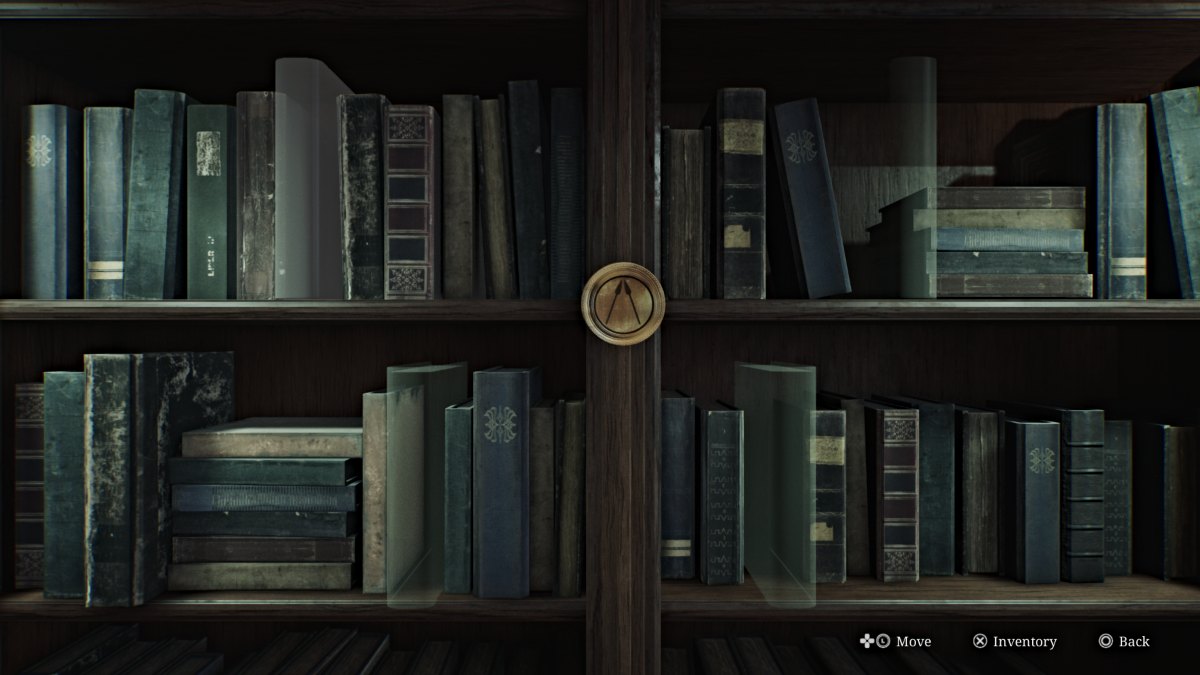
Now head into the Reading Room on your right, which James has marked on the map. Inside will be a Red Save Point along with four books you can pick up, including:
- The One Who Soared - Alice Burroughs
- Revelations: A New Understanding
- Stalwart to the End
- Price Before the Fall - Leonard E. Niavos
You'll need to place these books in the correct spots on the nearby bookshelf with a bronze emblem marked with two spears. Notice that the spine of each book has a different gold symbol, including an Eagle, Angel, Lion, and a Bull.
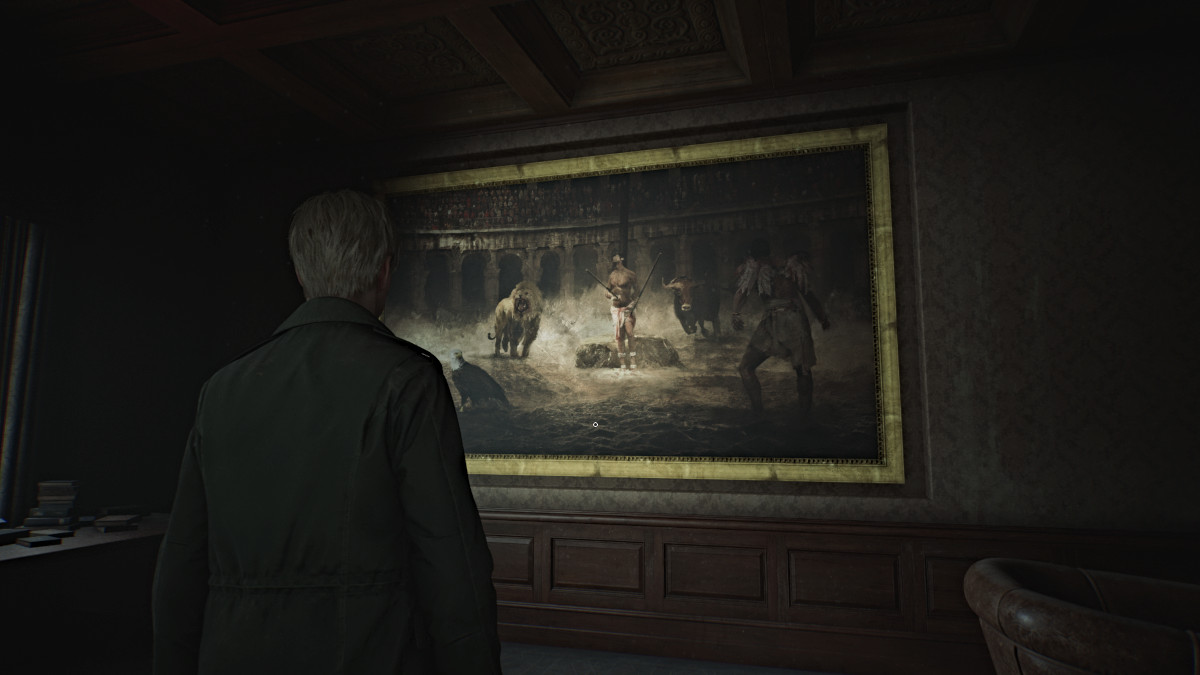
Next, look at the huge painting on the opposite wall, and you'll notice that it contains all of the aforementioned symbols as painted subjects. Two are in the background while the other two are in the foreground. Based on that, the books need to go on the shelf in the following order:
| Book | Location |
|---|---|
| The One Who Soared (Eagle) | Top Right Slot |
| Revelations: A New Understanding (Angel) | Top Left Slot |
| Stalwart to the End (Bull) | Bottom Left Slot |
| Pride Before the Fall (Lion) | Bottom Right Slot |
Briefcase Code and Employee Elevator Key
Once done, the bookshelf will slide back to reveal a secret room that also connects to Room 205. Go inside where you'll find a series of Photos (#1-3) in the room along with a Briefcase that requires a letter-based combination to open.
Normally, to figure out the code you would need to replace the broken light bulb in the nearby Vanity Mirror with a new one. To do that you need to find the Paint Can (Room 318), the Can Opener (fallen book in Lake Shore Restaurant), and the new Lightbulb (locked left side of Garden area; use Boltcutters to access).
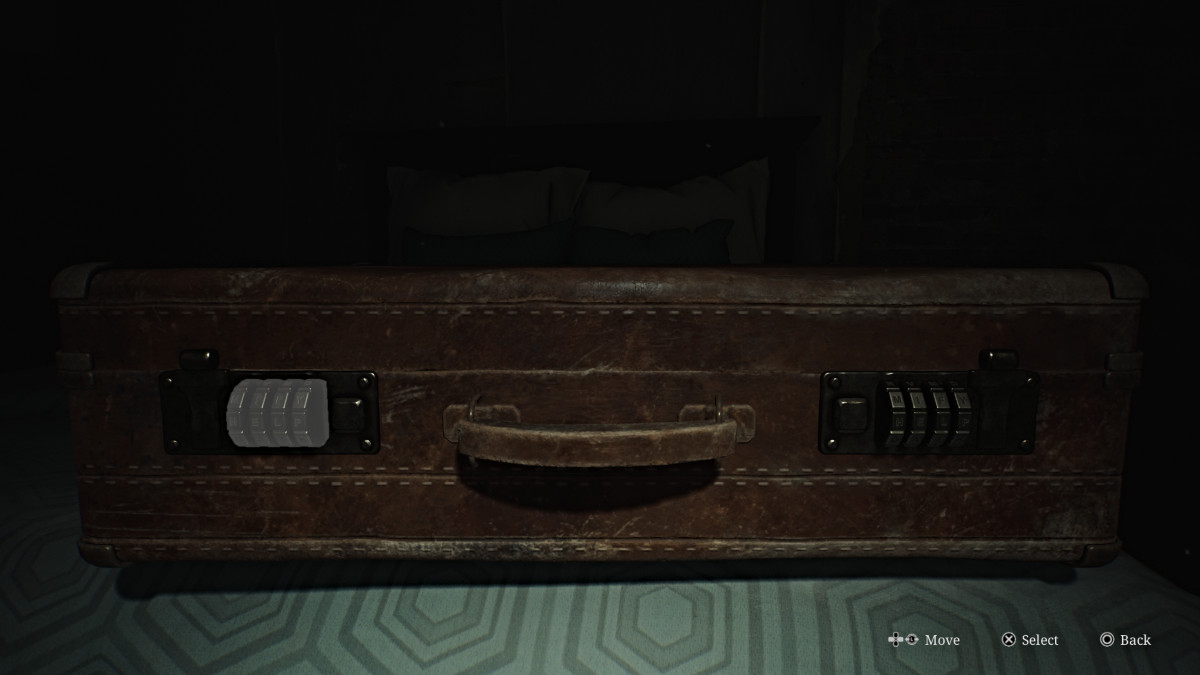
However, if you'd rather save time, the correct combination (Standard Difficulty) is "DEED DONE". So input "DEED" on the left combination lock and "DONE" on the right one. Inside the Briefcase will be the Employee Elevator Key.
Up top, only Room 209 is accessible but has nothing valuable (only a Mannequin to jumpscare you). Head south and into Room 206, where you can use a crawlspace to enter 207 and claim some Rifle Ammo. Double back out to the hall and Room 204 will have a Health Drink and Handgun Ammo for the taking.
Room 202 - Mirror Puzzle and Snow White Figurine
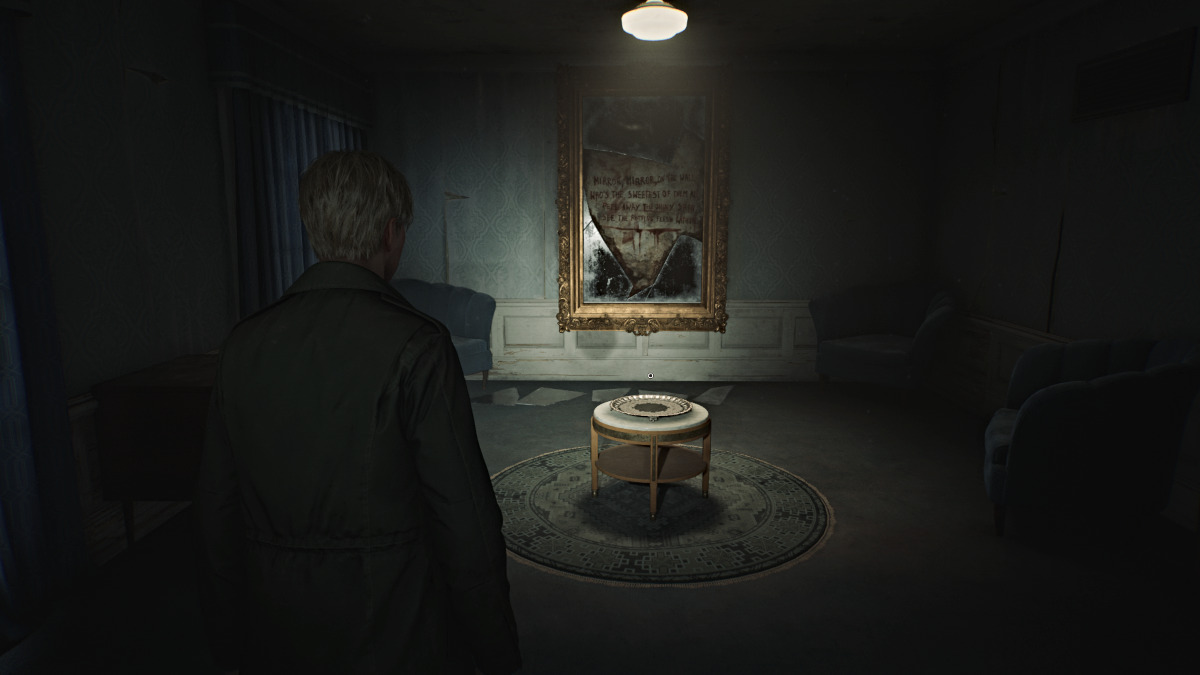
Finally, go to Room 202 and use the key you got to enter. Inside you'll find an ominous room with a small table and a platter on top of it. On the wall behind it is a broken mirror with words inside written in blood. "Mirror, Mirror, on the wall, Who's the sweetest of them all, Peel away the shiny skin, See the rotting flesh within."
On the floor beneath the mirror are five broken shards. A sixth one can be found in the bedroom on the opposite side; grab it before you start the puzzle. When ready, you first need to place either the Ripe Apple or Rotten Apple on the platter. For the sake of completing the puzzle, your choice doesn't matter.
Choosing the Ripe Apple influences the "Maria" ending, while choosing the Rotten Apple influences the "Leave" ending.
Next, you'll be required to place each of the broken shards on the floor back into the mirror in the correct spots. The last one will be the one you took from the bedroom.
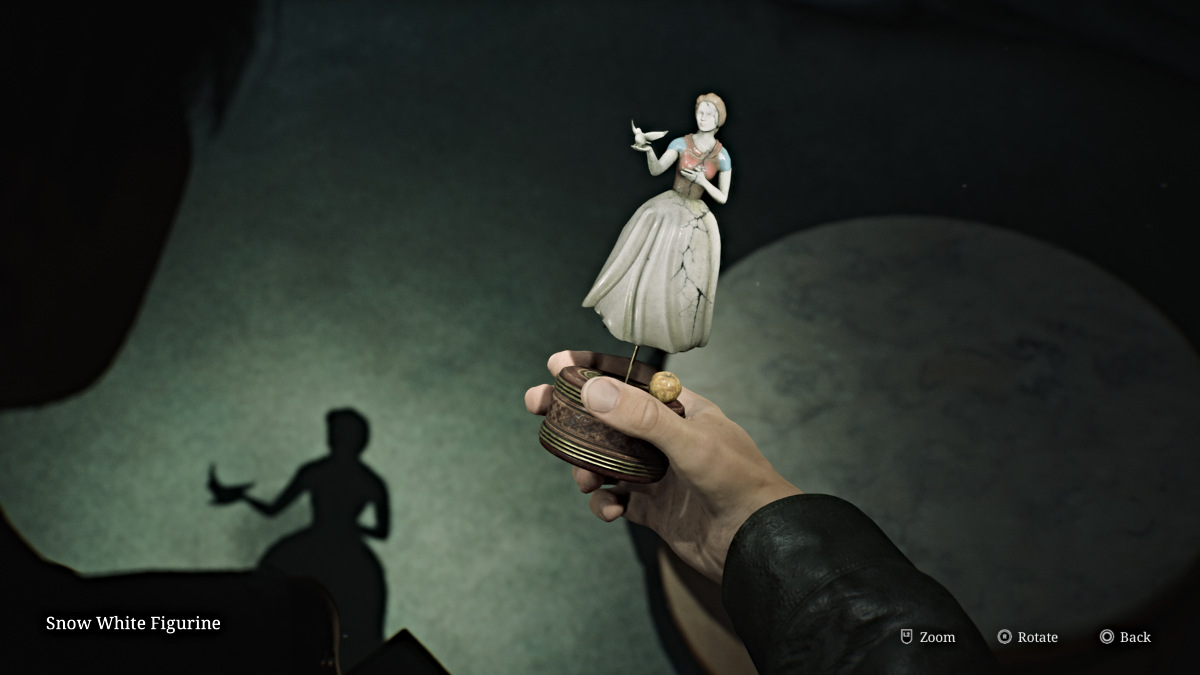
Once done, the mirror will reform and you'll then want to head to Room 201 next door to claim your reward, the Snow White Figurine.
Lakeview Hotel (Floor 2) - Sunset Wing
Now make your way back through all of the spider Mannequins to the Cloakroom, and cut through the Hall room to the extended patio outside. Use it to reach the Nurse's Office on the left side of the floor, where you'll find a Bubble Nurse and a medical record sitting on a desk with the initials "M.S.S". Mary's perhaps?
Go out to the hallway and unlock the double doors to your left to make the Sunset Wing on the west side accessible. Go straight and around the corner to get some Shotgun Shells from a drawer. Bypass the Employee Elevator Room for now (for a specific reason) and explore the rest of the rooms on the floor first.
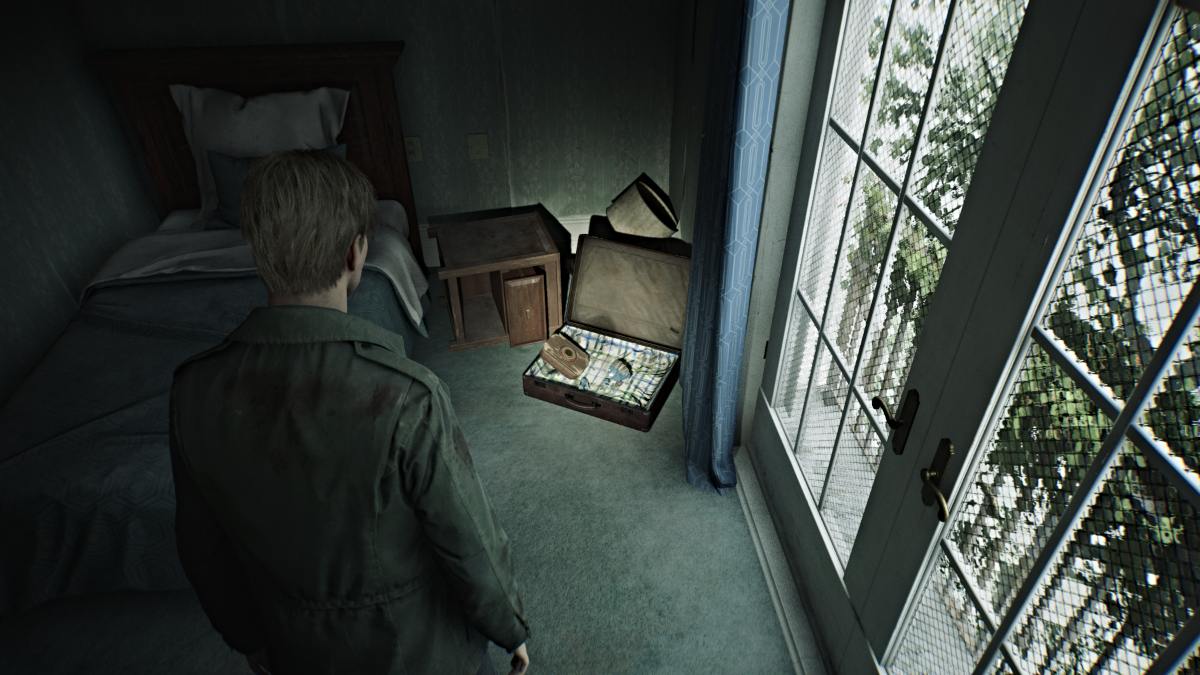
Note that the third floor is accessible from this side. Grab some Shotgun Shells from the drawer near Room 214. Go straight up the hall to the window at the far north end, where a Mannequin will be hiding and some Rifle Ammo on a table. Double back and turn right to find more Rifle Ammo at the end of that hall.
Inside Room 212 you'll find another Glimpse of the Past in an open briefcase. Leave and now head up to the third floor.
Lakeview Hotel (Floor 3) - Conference Room and Boltcutters
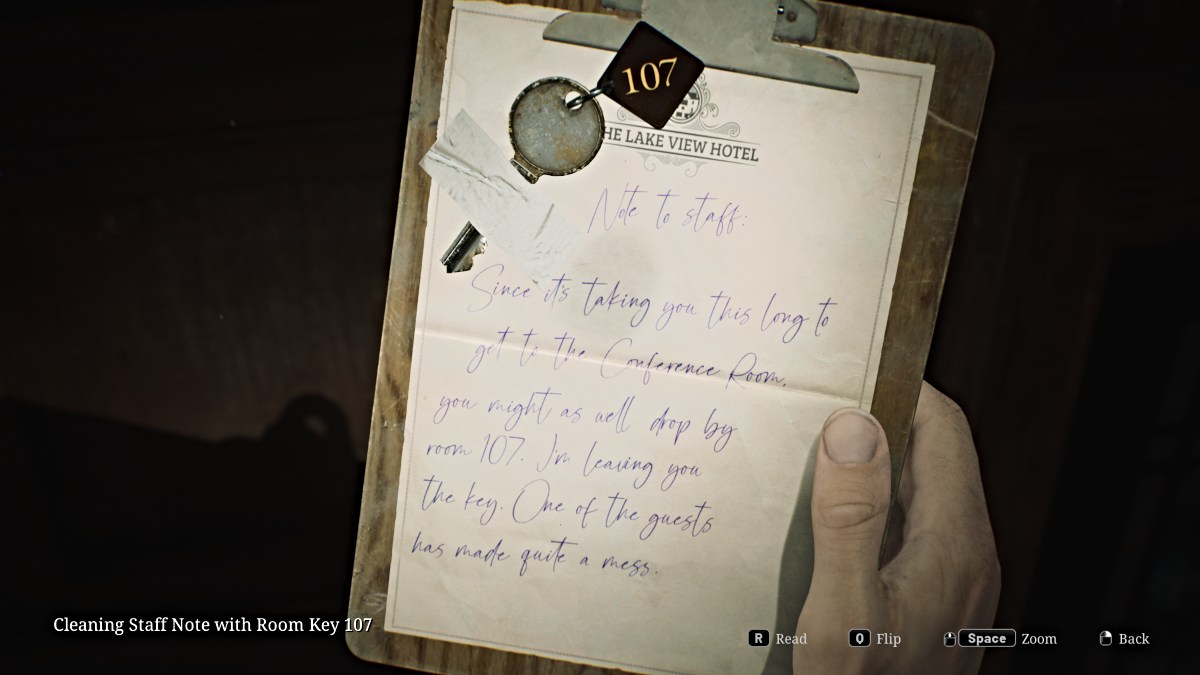
Go up the stairs to the third floor and first head into the Conference Room in front of you. Go across the room and pick up the Cleaning Staff Note With Room 107 Key off the fireplace. Now interact with the fireplace itself, and you'll notice one of the Music Box Figurines is stuck inside it. You'll need something to unlock the fireplace first.
For now, run back out into the hallway, and you'll notice double doors locked by an iron gate. If you approach it, Mary's voice will suddenly shout for James, surprising him. You'll need a key to access that part of the floor, however. For now, go check the Utility Room around the corner, where you'll find Handgun Ammo, Shotgun Ammo, and a set of Boltcutters (used to unlock the outside Garden's left side).
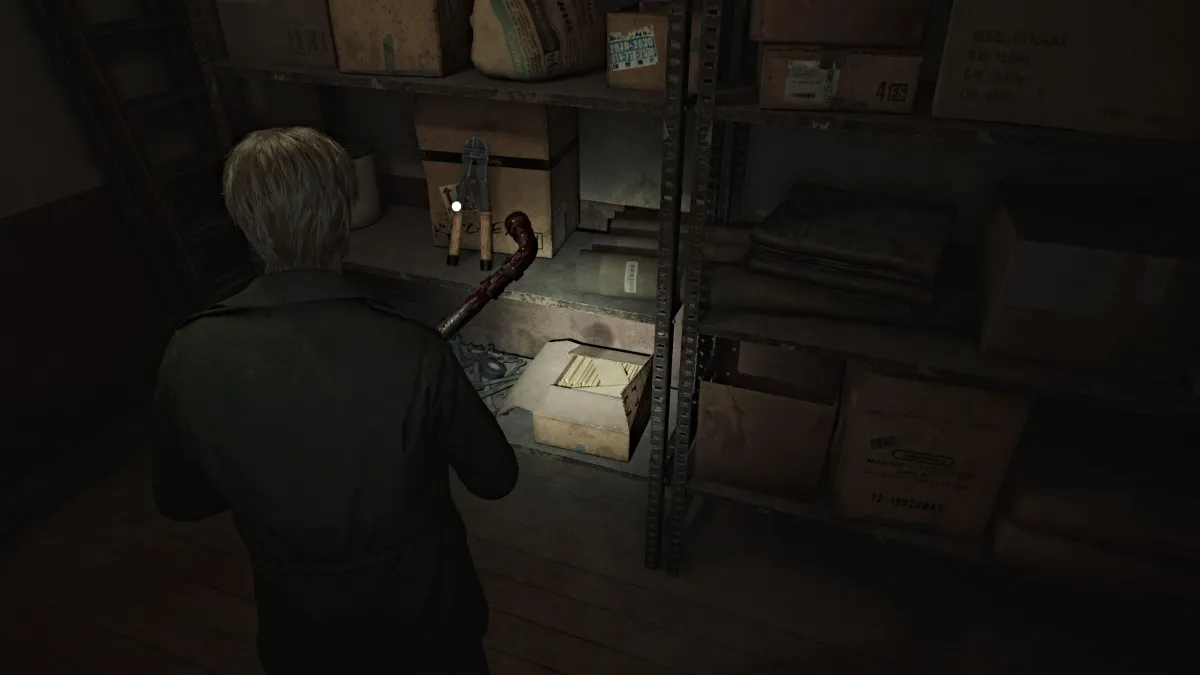
Double back around the hallway to where you see a bright red 'Exit' sign. This will take you outside and down a stairwell (grab the ammo from the table on the way down) to the second floor, into the southeast corner you couldn't access before.
Lakeview Hotel (Floor 2 and 1) - Bird Room, Room 107, and the Fireplace Key
First go into Room 215, where you'll find a breakable wall that will take you to 214. Unlock the door in there, and you now have a handy shortcut to the other side of the Sunset Wing.
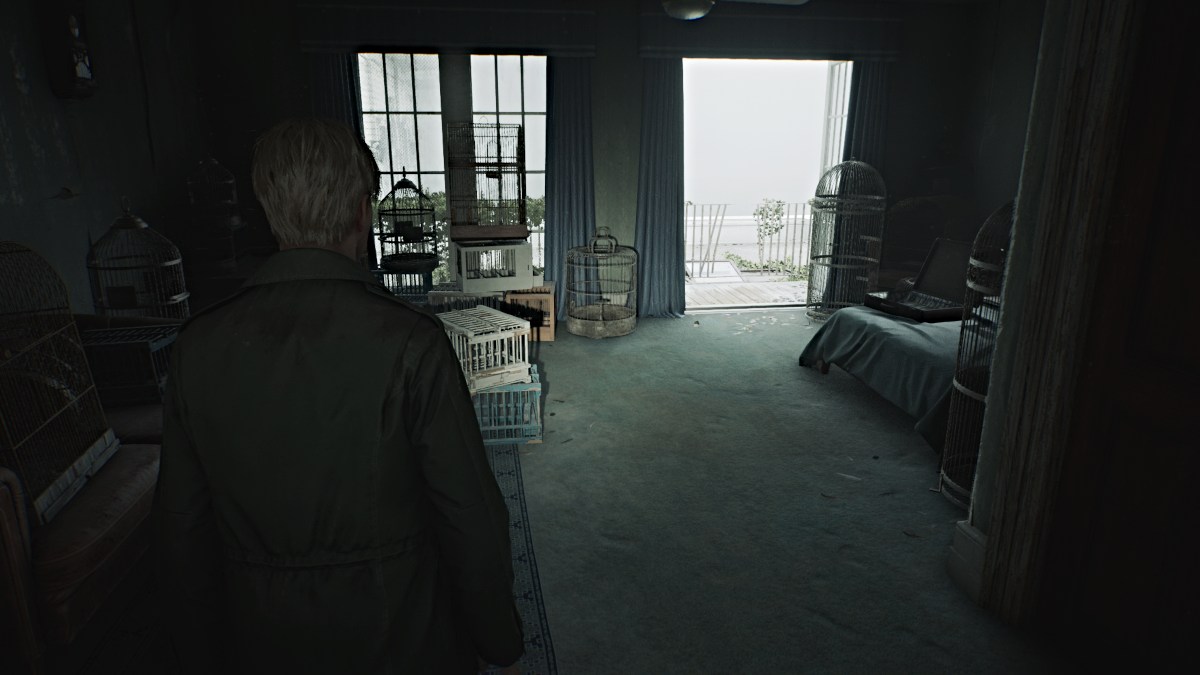
Now double back to Room 217, a room full of bird cages where the patio doors will blow open, making another path for you. Grab the ammo from the suitcase on the bed and go look outside, where you'll see another red book lying on the glass ceiling across the way. Use your Handgun to shoot the cracked glass plate underneath it, so it falls into the Lake Shore Restaurant below.
Use your new shortcut and head all the way back down to the first floor and to the restaurant, where the book will be lying on top of a box. Interact with it, and it will open to reveal the Can Opener (for the Paint Can, if you're uncovering the briefcase code yourself). Take it and then head to Room 107, now that you have the key for it.
Unlock it and go inside. First, pick up the Cleaning Staff Note #3 from the nearby table, then a Health Drink from the bathroom, and then head outside to the patio area.

Turns out that this leads to the east side of the Garden area that you couldn't access initially. Grab Shotgun Shells from the table near the doors then start exploring the area. Deal with the monsters patrolling the grounds and make your way to the gazebo in the back corner. Inspect the overturned cleaning bucket and you'll get the Fireplace Key.

Now you can head back up to the third floor to put that key to good use.
Lakeview Hotel (Floor 3) - Cinderella Figurine and Red Paint
Make your way back up to the third floor of the hotel (notice that some walls and windows are starting to wither) and go into the Conference Room. Run over to the fireplace and use the Fireplace Key to unlock it and retrieve the Cinderella Figurine.
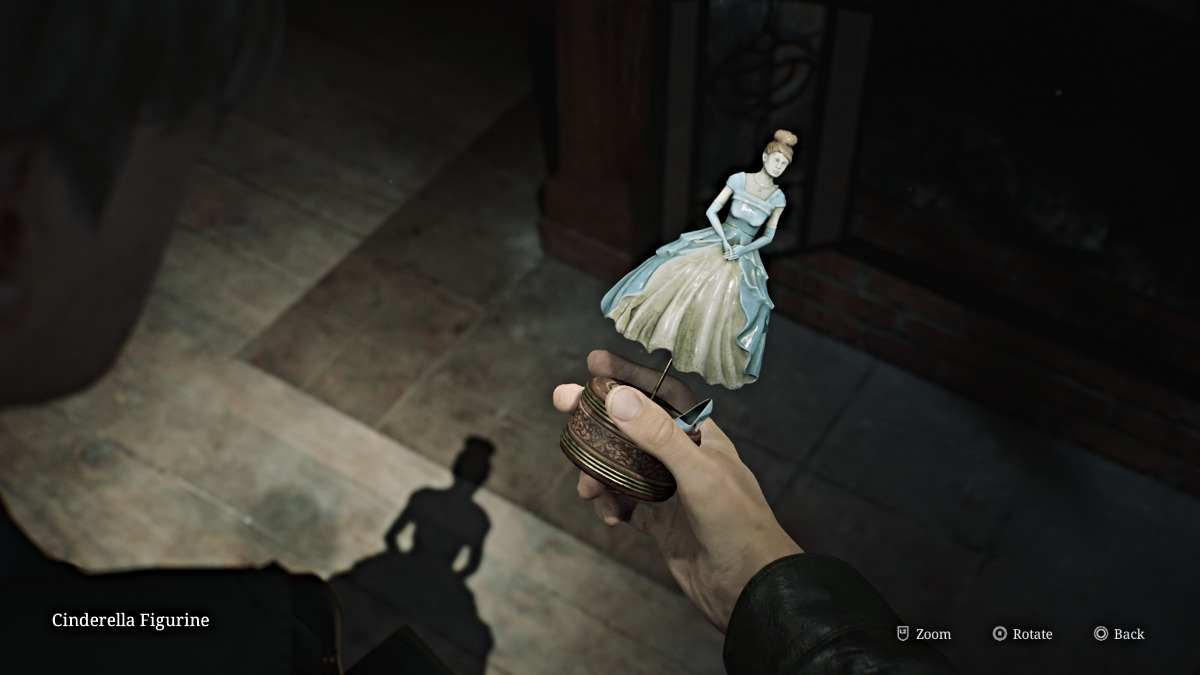
A cutscene follows that shows a huge Mandarin enemy burst through the side of the room and attack James. While it may look like it at first, this isn't a boss fight. Just unload some Shotgun Shells (or whatever you have) into it until it dies.
Go into the side room the monster came from and grab a Health Drink and ammo from the phone table, then turn your attention to the shelf ahead. Push it out of the way to reveal a breakable wall. Bust through it to get into Room 317. The wall behind you will collapse, so the only way forward is outside.
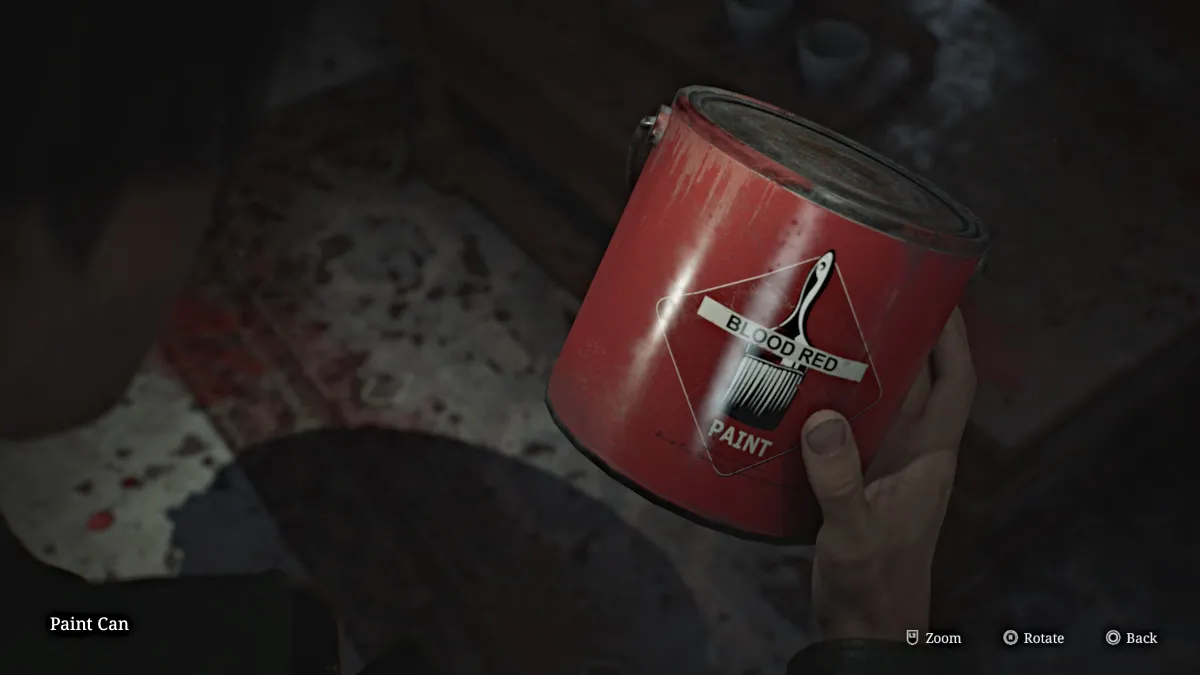
Hop across the low fence to the patio of Room 318 and go inside to see what looks like a catastrophic mess of blood on every surface, but it turns out to be red paint. There's an unopened Paint Can for you to claim, and you can combine it with the Can Opener to open it. You just need a Lightbulb to dip in the paint itself, which is at the fish statue in the Garden area.
You can take all those items back to Room 205 behind the Reading Room and use them on the Vanity Mirror to reveal the aforementioned code.
Lakeview Hotel (Floor 2 and 1) - Employee Section and Break Room Safe
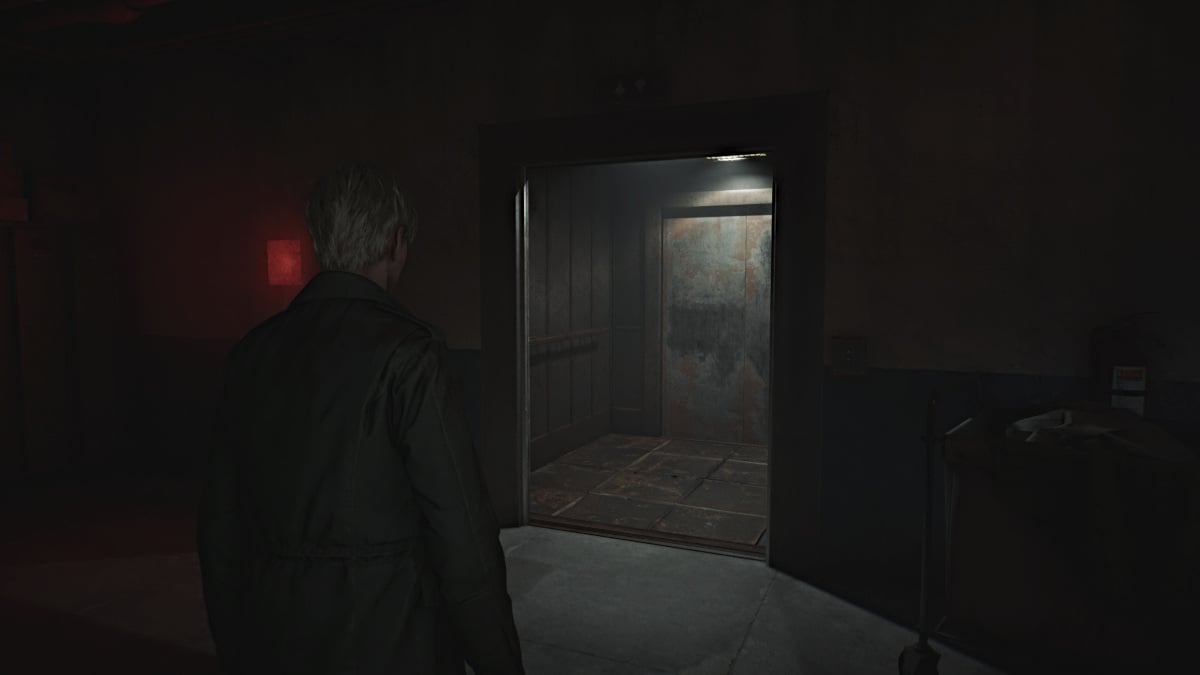
Once you've taken care of everything mentioned up to this point, it's now time to head back to the Employee Elevator Room on the second floor. If you attempt to go into the elevator immediately, you'll notice a loud alarm go off, meaning there's too much weight present.
In other words, you're going to need to offload everything you're carrying. Your weapons, your healing items, your flashlight, your key items, everything.
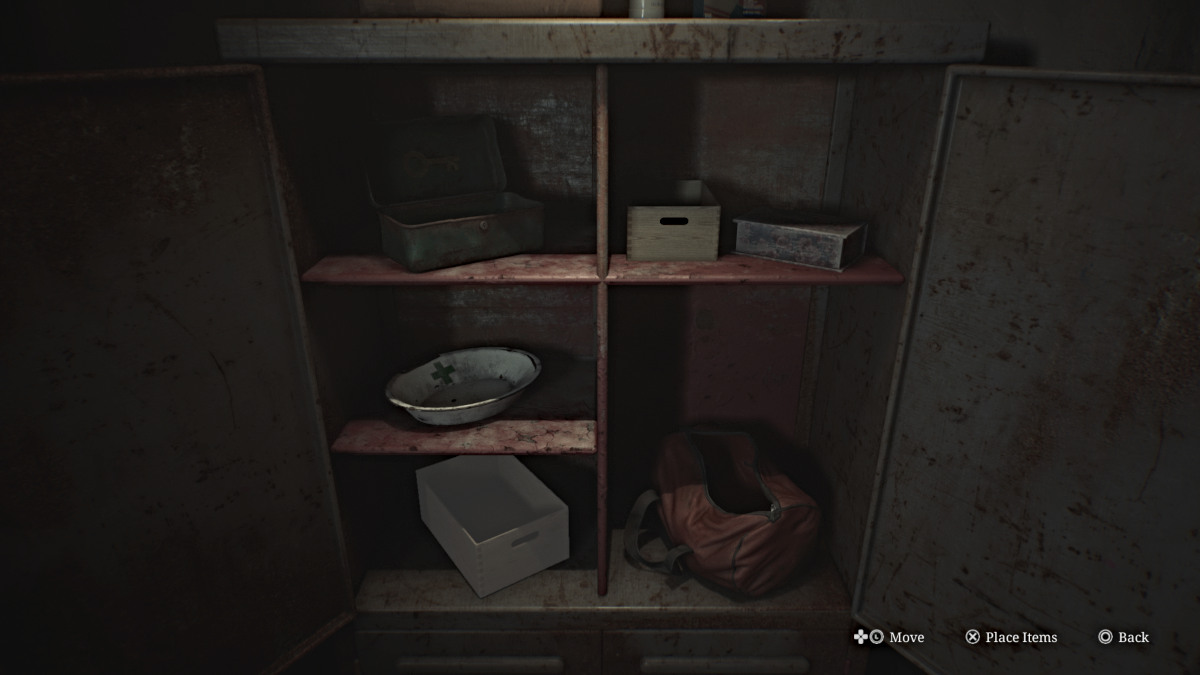
Use the Red Save Point inside, and then interact with the nearby cabinet. Inside, you'll see containers for each type of item you're carrying. Start dumping everything you have into them, however, you're oddly allowed to keep your photo of Mary, her letter (which if you look is now strangely blank), her handkerchief, and Angela's Knife.
Now you can enter the elevator and take it to the first floor, the only place you can go. Be forewarned, there are Mandarins patrolling these areas, and you will need to do your best to sneak around and avoid them since you have no means of killing them. If you walk quietly and keep your distance, they won't detect you.
Jump into the Break Room across the hall in front of you first, and grab the map for the Employee Section of the hotel(since you had to leave your other map behind). Now go to the Break Room Safe on the other side of the room.
The safe requires a keypad code to unlock it, and normally to figure it out you would need to solve the Gem Box Puzzle located in the Manager's Office and find all of the gems around the floor to do so.

However, since this area is especially dangerous, we have the code for you to help save both time and your health. The correct code for the Break Room Safe is 7414. Inside you'll find the Video Tape and Basement Key, which will allow you to go to the Basement level of the Employee Section.
Tiptoe past the Mandarins and unlock the door to the stairwell that will take you down there.
Lakeview Hotel (Employee Basement) - Little Mermaid Figurine, Venus Tears Bar Key
Upon reaching the Basement level, check your map and carefully make your way south to the Maintenance Room first, avoiding the one patrolling Mandarin as you go. Once there, pick up the blue Pump Valve sitting on a table.

Exit the room via the gap in the wall to save yourself time on the Mandarin's patrol route (we recommend tailing it and then shortcutting up the middle once it's passed back around) and now head for the Liquor Storage Room.
Go inside, slide through another gap in the wall on the left side (wait for the Mandarin to pass before you do), and use the Pump Valve to cut off pressure from a nearby steam valve that's blocking access to the Boiler Room. Once done, go into the Boiler Room and grab the Venus Tears Bar Key hanging on a pipe by the boiler.
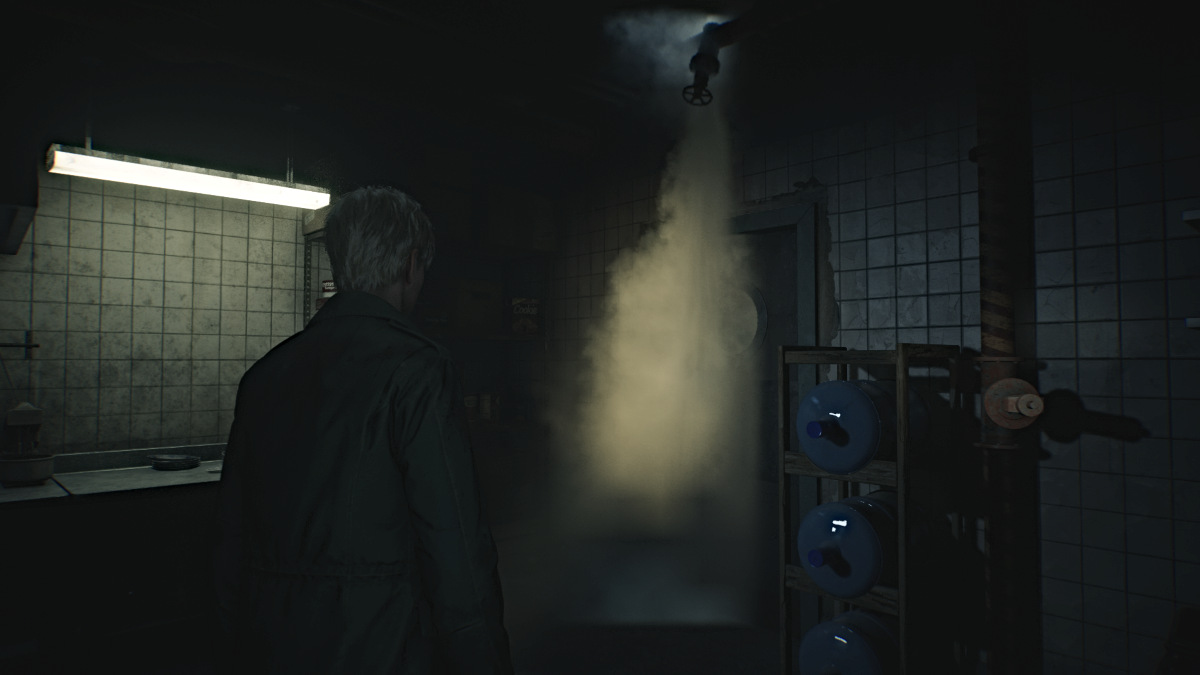
Leave the room and grab your Pump Valve because you'll need it one more time. Use the key to unlock the door to your left to the Venus Tears Bar Kitchen and go in. There will be one more spewing steam pipe that you need to depressurize, so use the Pump Valve nearby to do so.
Go through the next door to the bar itself, where you'll find a broken jukebox underneath a shattered aquarium that's flooded the room. Grab the "Better leave..." Strange Photo behind the bar, then go over and pick up the Little Mermaid Figurine off the floor, then use the Red Save Point nearby.
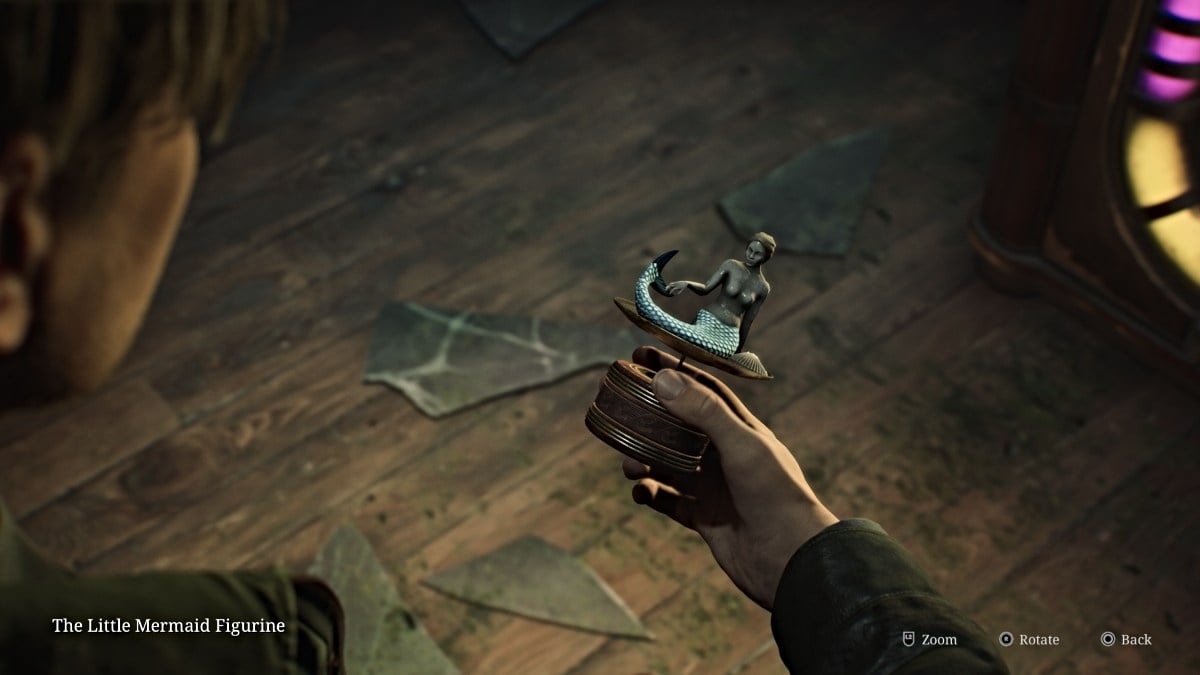
Leave the Venus Tears Bar through the front entrance and now make your way back up to the second floor to quickly reclaim your items from the Employee Elevator Room. Once that's done, head back down to the first floor where the Music Box is, now that you have everything you need.
Lakeview Hotel (Floor 1) - Music Box Puzzle and 3F Corridor Key
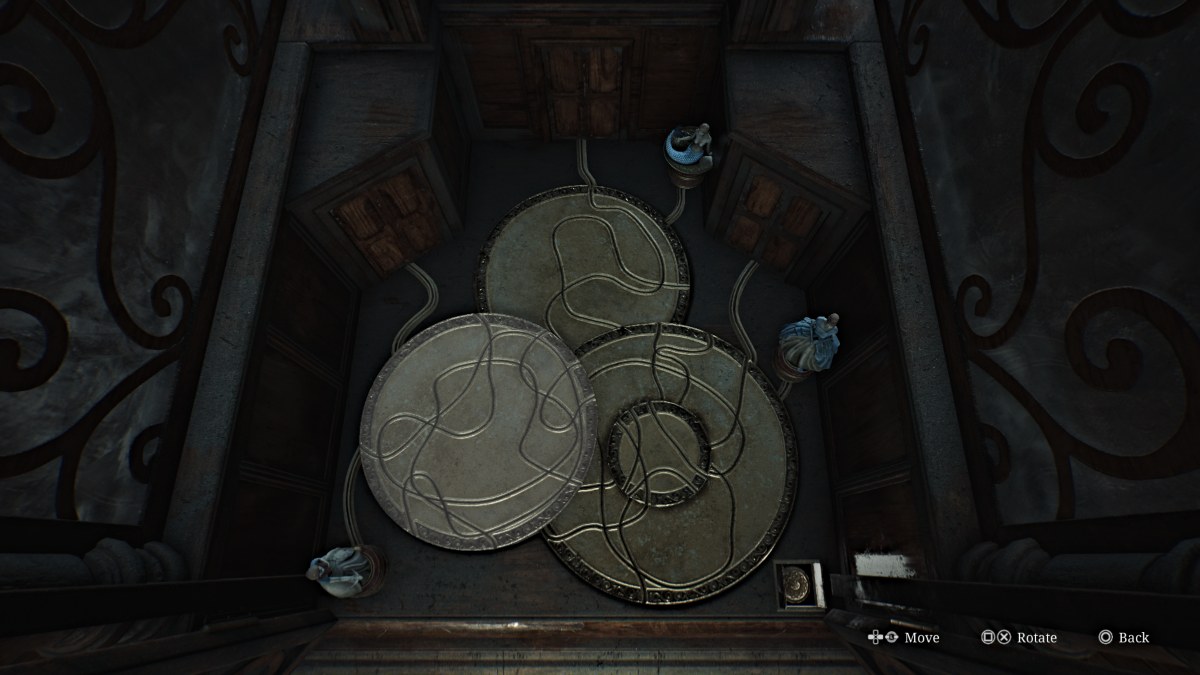
Approach the Music Box and look inside to place the three figurines you've collected in their respective spots. Your goal is to send those figurines along the correct track etched into the discs to their correct doors.
To do that, you need to rotate the discs inside the machine until they form the correct paths to the correct doors. The solution for all three figurines is:
- Snow White - Left side door
- Little Mermaid - Middle door
- Cinderella - Right side door
Once you've aligned the tracks, press the button at the bottom right and the machine will prepare the sequence. However, there's one more step to complete.
You can now view the poems for the respective princesses on the facade of the machine, and there is a key above each passage (seen below). Your goal here is to turn each key the correct number of times, according to the numbers mentioned in each passage.
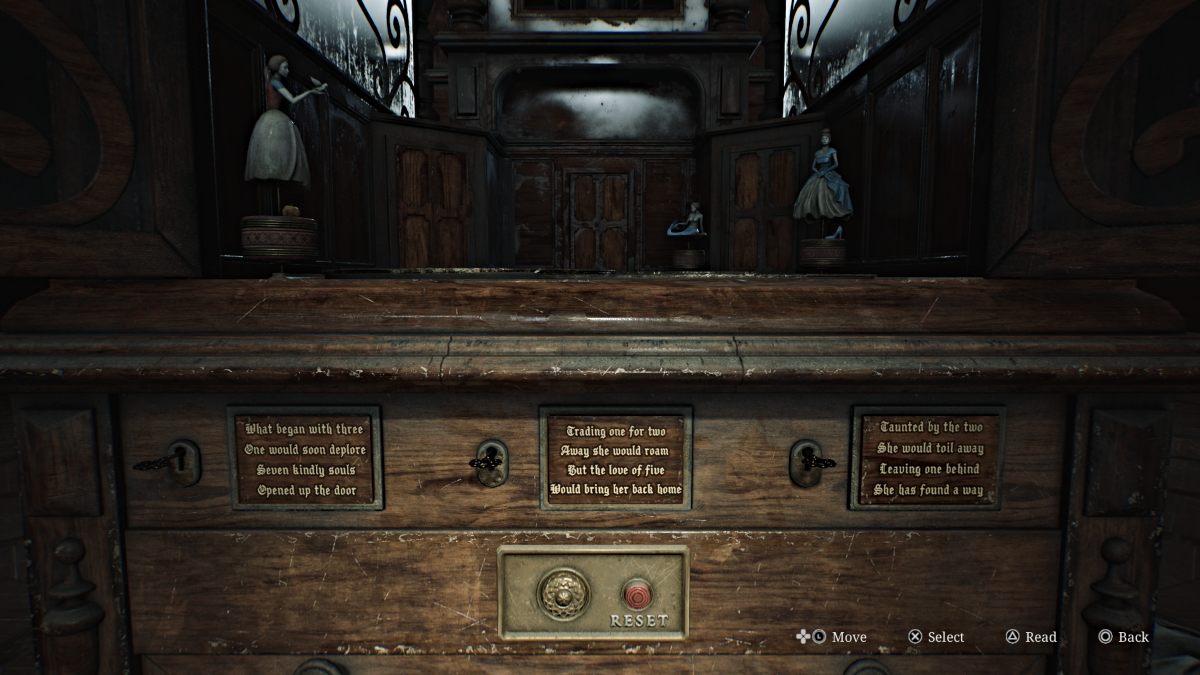
For Snow White, turn her key seven times. For Little Mermaid, turn her key five times. Finally, for Cinderella, turn her key one time.
Once you do, a familiar tune will play for James and he'll receive the 3F Corridor Key. This will unlock the gated hallway on the third floor, where you heard Mary's voice.
It's now time to face the music, literally?
Lakeview Hotel (Floor 3) - Room 312
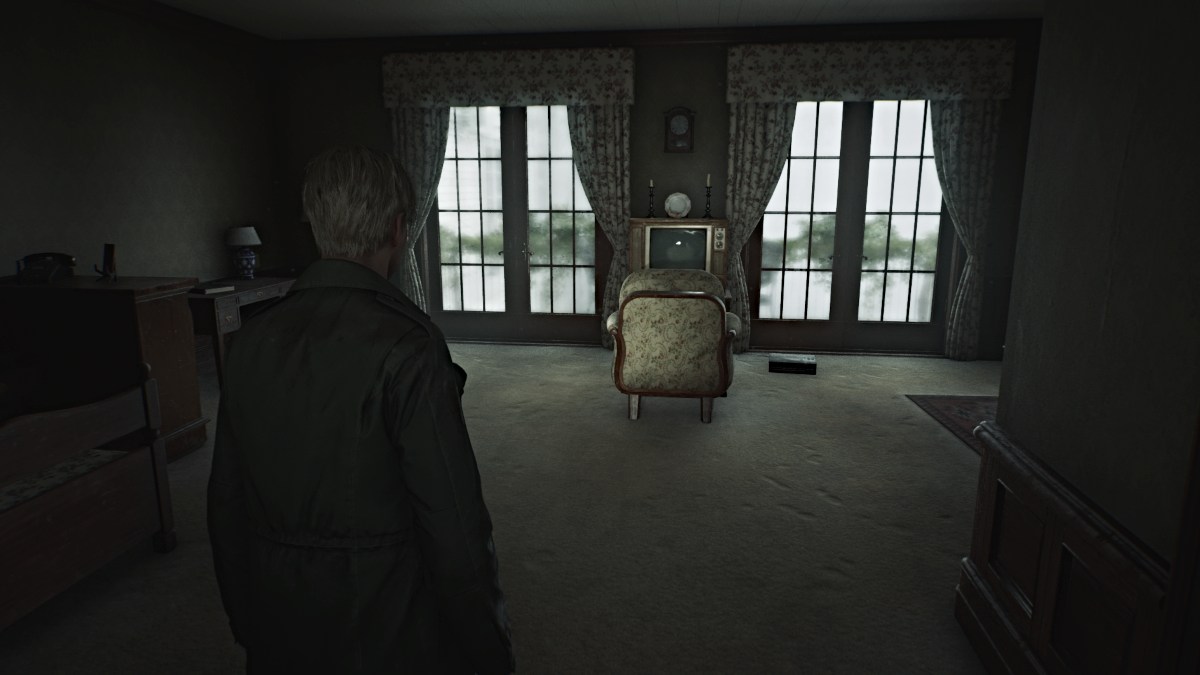
Go all the way up to the third floor and use the 3F Corridor Key on the gate. Go down the hall to the last room on the right and use the Room 312 Key to enter.
As you'll recall, this is the room where James and Mary stayed during their last visit to Silent Hill. Despite his assumption, Mary doesn't seem to be here either, but there's a TV with a VCR for your use. Go over and put the Video Tape you got from the Basement inside the VCR.
During the cutscene, the tape begins with the final moments of their visit to the town, and Mary asking James to bring them back one day. At one point she coughs, and the tape devolves into a mess of static and unstable images. However, among them a sequence plays of James approaching Mary in her bed and suddenly suffocating her with a pillow, revealing that he actually killed her.
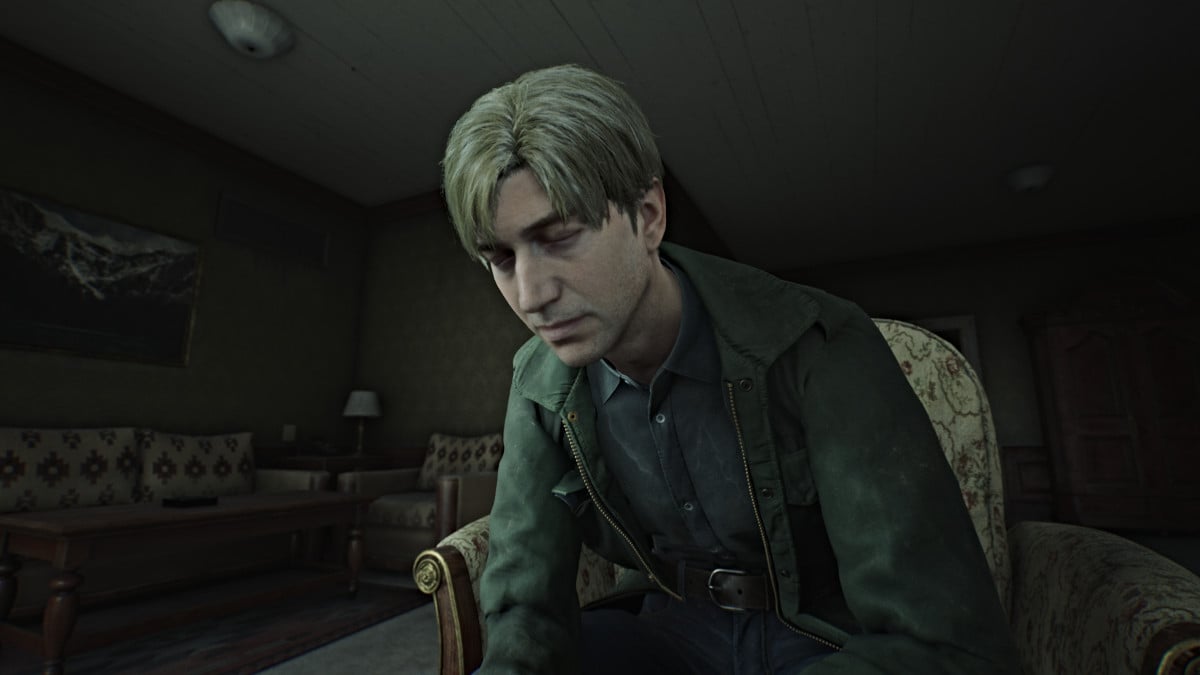
James sits in silence, at last faced with the actual truth that he's subconsciously denied this entire time, to the point of believing Mary was dead for three years yet actually still alive (in fact it was only days, thanks to Laura's information).
After an emotional scene with Laura, the room transforms, though not into the usual version of the Otherworld. Instead, everything in the room is burnt and drenched in water, as if in the aftermath of a fire. Mary's voice suddenly calls out to James on his radio.
Once you have control, leave the room.
Lakeview Hotel (Otherworld) - Make it to the Elevator
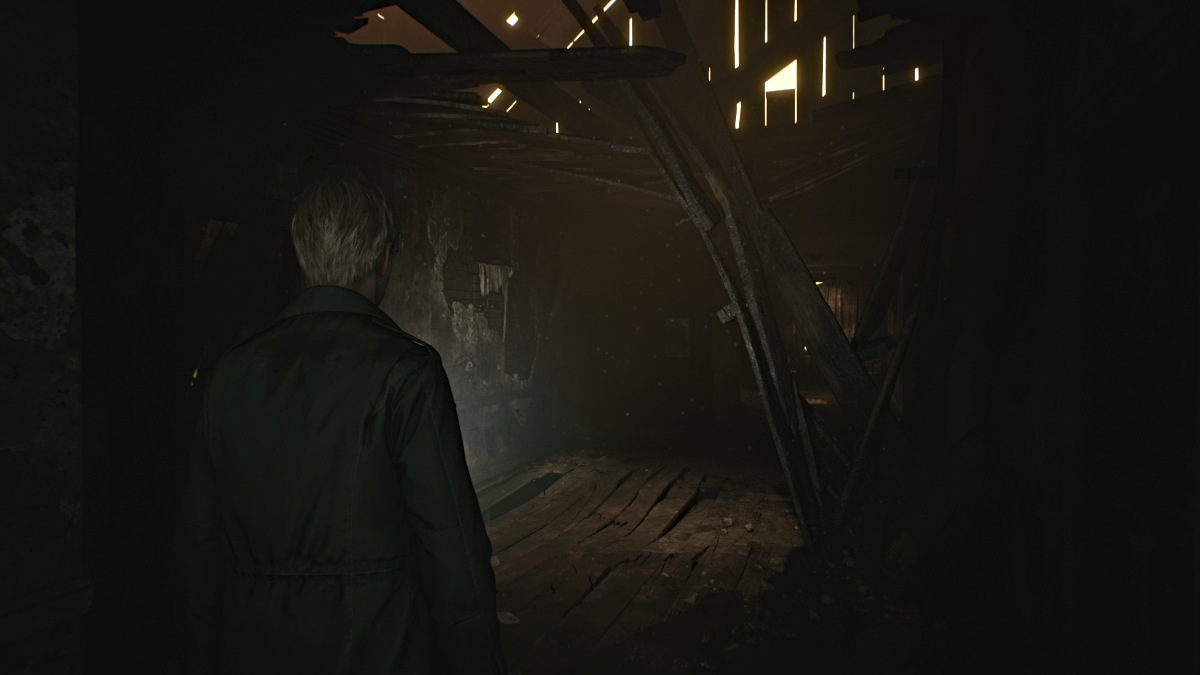
With the truth now known, the rest of the hotel appears to also be burnt, soaked, and falling apart. Go into Room 314 and grab Handgun Ammo from the bedside table, then go into the bathroom and through the wall gap to the hallway. There's more Handgun Ammo inside a table drawer to your right.
Also, be aware that there are NO monsters in Lakeview's Otherworld, so you can travel freely without having to worry.
The only way forward is south down the hall, so head that way and duck through the debris. You'll notice there's a high crawlspace to your left as you pass. Go down the hall and to the left where there's a pushcart for you to use. Crawl into the room ahead first where there's an ominous message scratched on the wall and a Syringe on a table.
Take the pushcart down the hall to the crawlspace, but it quickly collapses through the floor, ruining that plan. Instead, jump down the hole that's been made, bringing you to the second floor. Go down the hall and grab a Health Drink from Room 207 before going into the nearby Restroom.
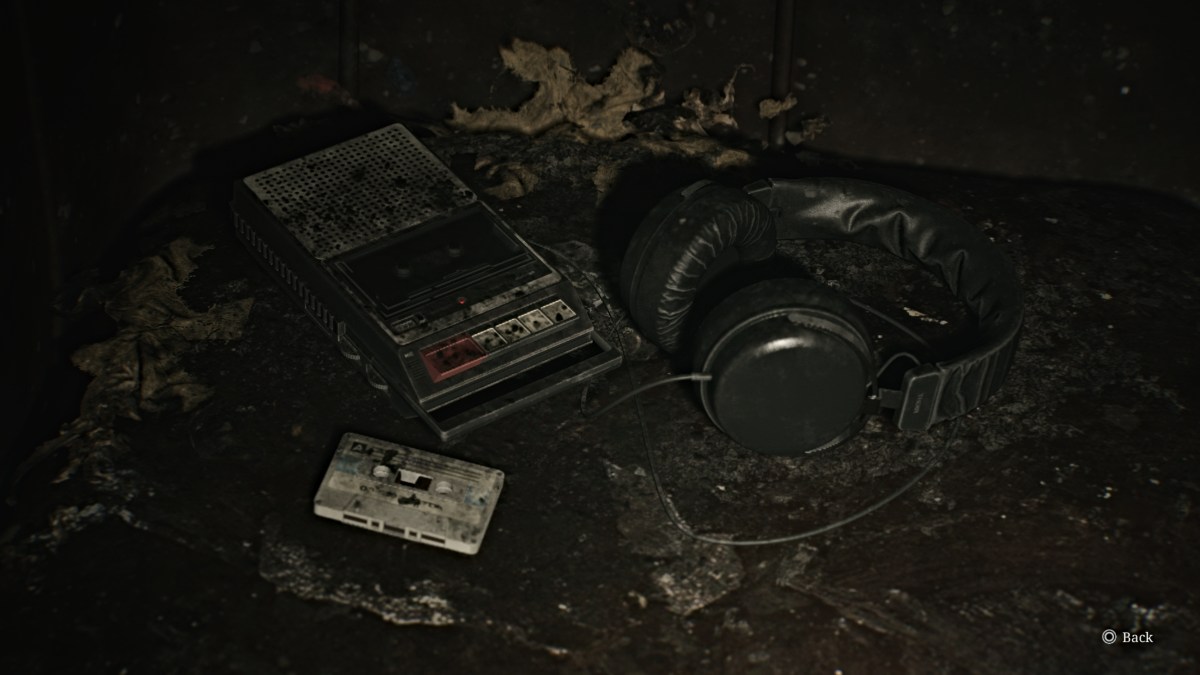
Use it to cross over into the Reading Room, and you'll find a Glimpse of the Past (seen above) sitting on a nearby couch. Use the Red Save Point then leave the room through the double doors. Go across to the Cloakroom and into the Hall. In the back left corner, you'll see the lit Elevator through a hole in the wall, which you need to get to.
To do that, go to the right side of the Hall and look up to spot a crawlspace. Use the shelf under it to climb through to the Nurse's Office. Make your way around through the office, listen to an ominous tape recording on the table if you wish, and then continue through the wall crack to the hallway. Follow it all the way to the Elevator and take it down to the Basement.
Lakeview Hotel (Otherworld) - Angela's End and a Final Judgment
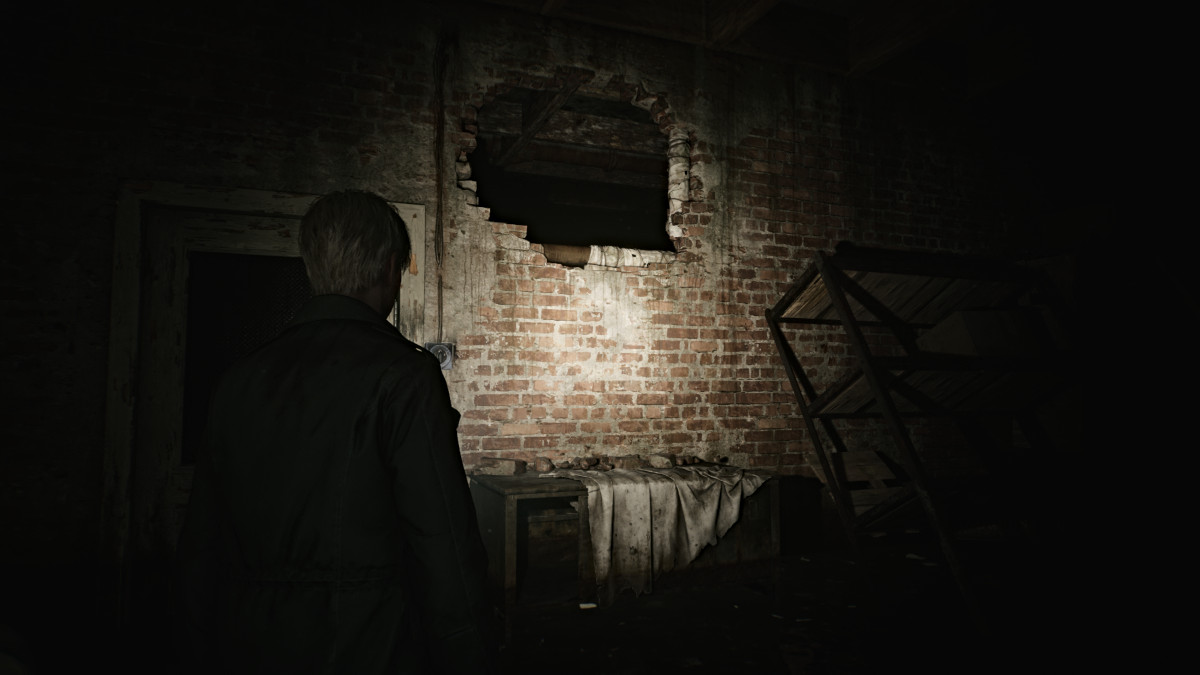
Once you exit the elevator, make your way through the flood to the Venus Tears Bar. Use the Red Save Point behind the bar and then head through the kitchen area and then to Liquor Storage. Grab the Rifle Ammo that's in there and then use the high crawlspace in the wall beside the locked door to get out.
Ahead of you will be a door that's glowing strangely bright from the other side. Head over and go inside, where a cutscene will play with Angela standing on a fiery stairwell.
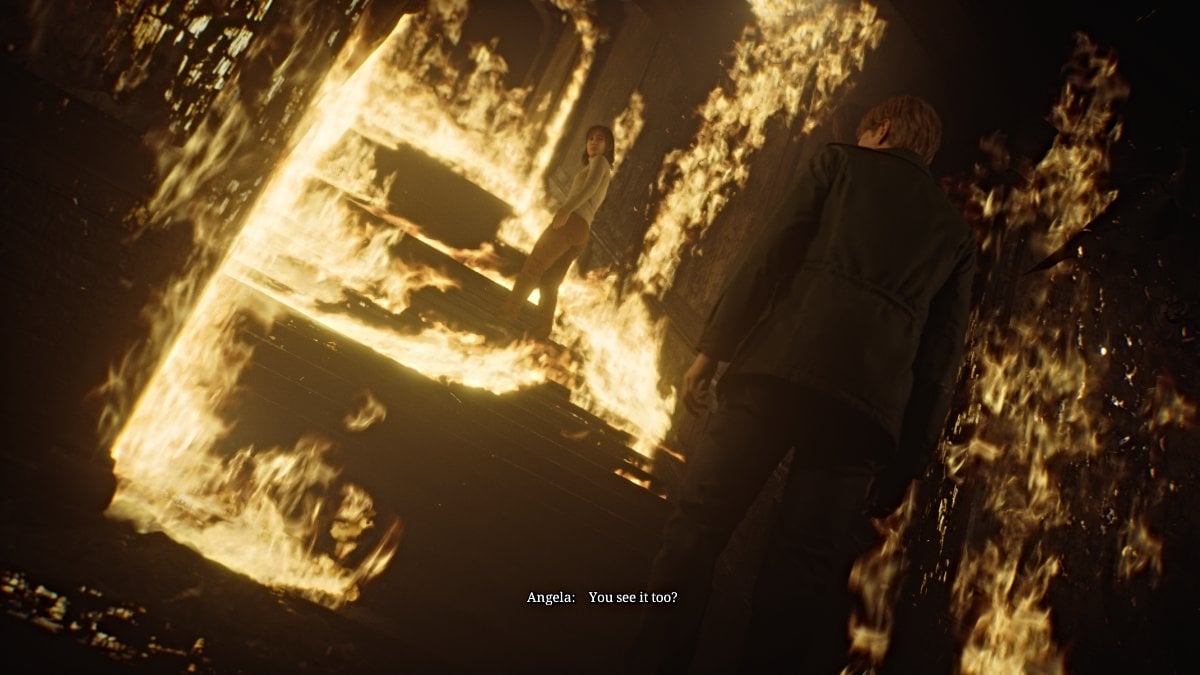
This serves as Angela's final farewell as she goes up the stairs, her fate unknown but hinted. James leaves to continue on.
Make your way through the rest of the Basement, where you'll notice there are now some monsters but they will not attack James. They're entirely passive, so just leave them be and save your ammo. Go into the Manager's Office, cross into the TV Room, and follow a hall that leads off the map.
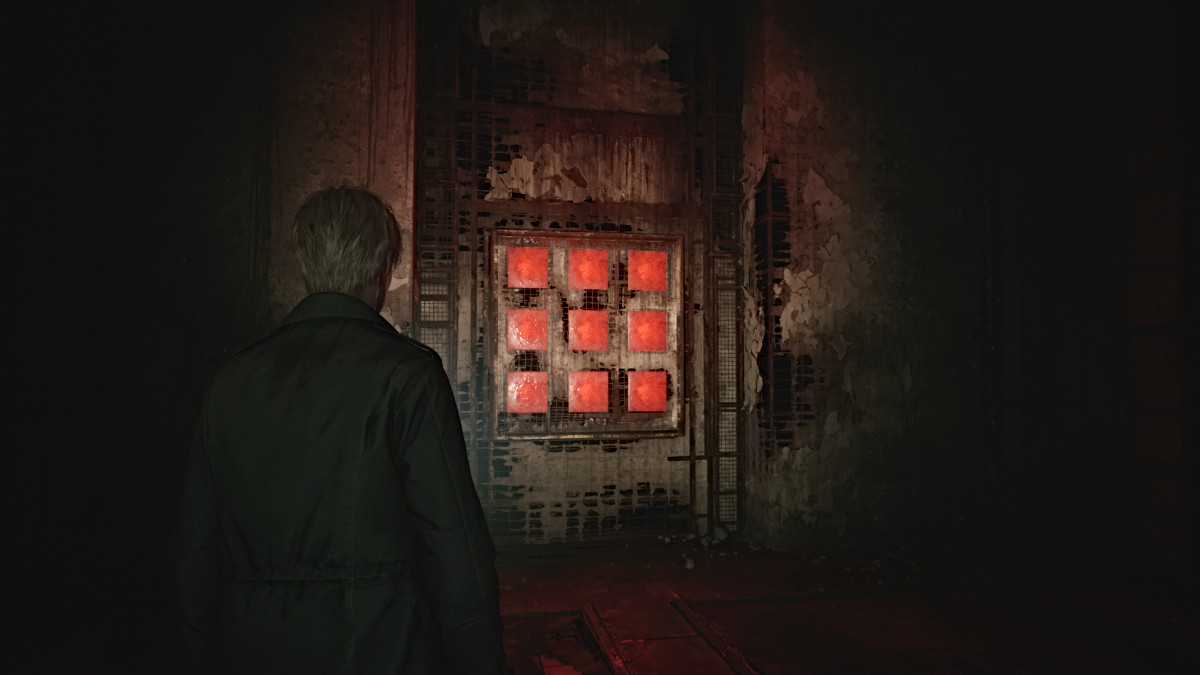
Continue until you come across a set of nine Red Save Points. The game obviously insists that you save here, so do so. With that, take a deep breath and go through the double doors ahead.
Inside is a seemingly dark and empty room, but suddenly Mary...or rather, Maria's voice yells for James. Once again she's "alive" but held captive now by two Pyramid Heads. Despite James' pleas, they proceed to stab Maria dead once again, and he yells in frustration.
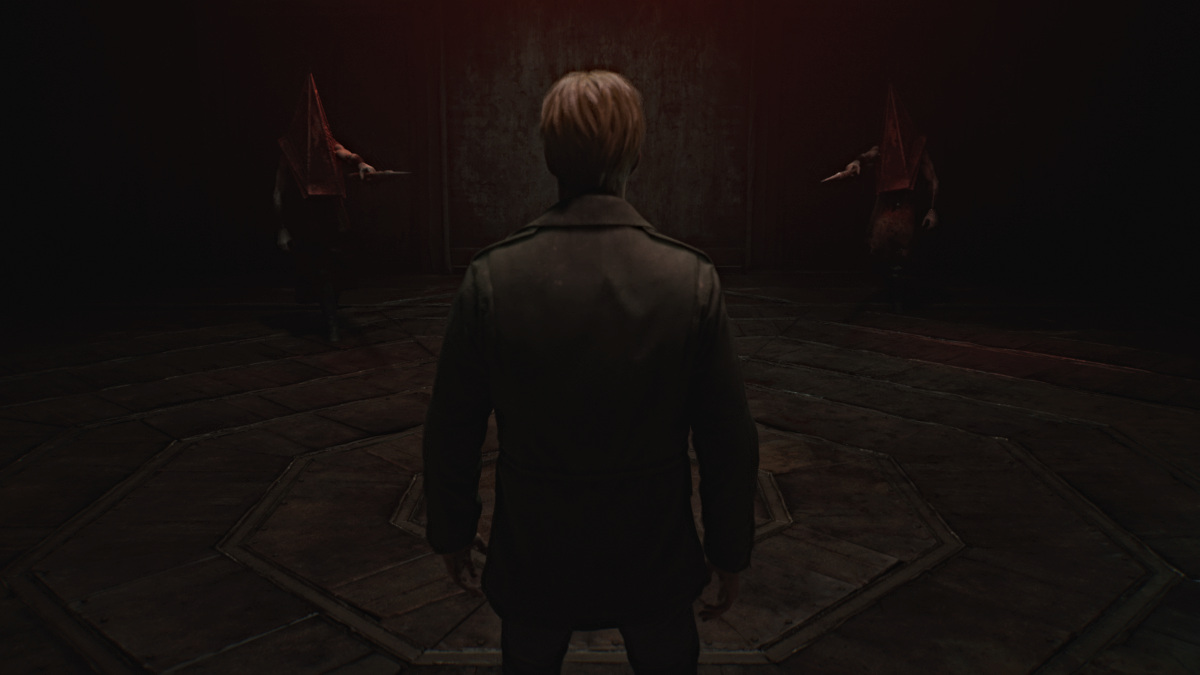
He finally makes his confession of needing Maria, an alluring shadow of his deceased wife, to soothe his pain and at the same time punish him for what he's done. That punishment has clearly been dealt, and James declares, "I don't need you anymore", likely referring to both Maria and Pyramid Head.
With that, they both approach James with spears in hand, ready to test that declaration.
How to beat Pyramid Head
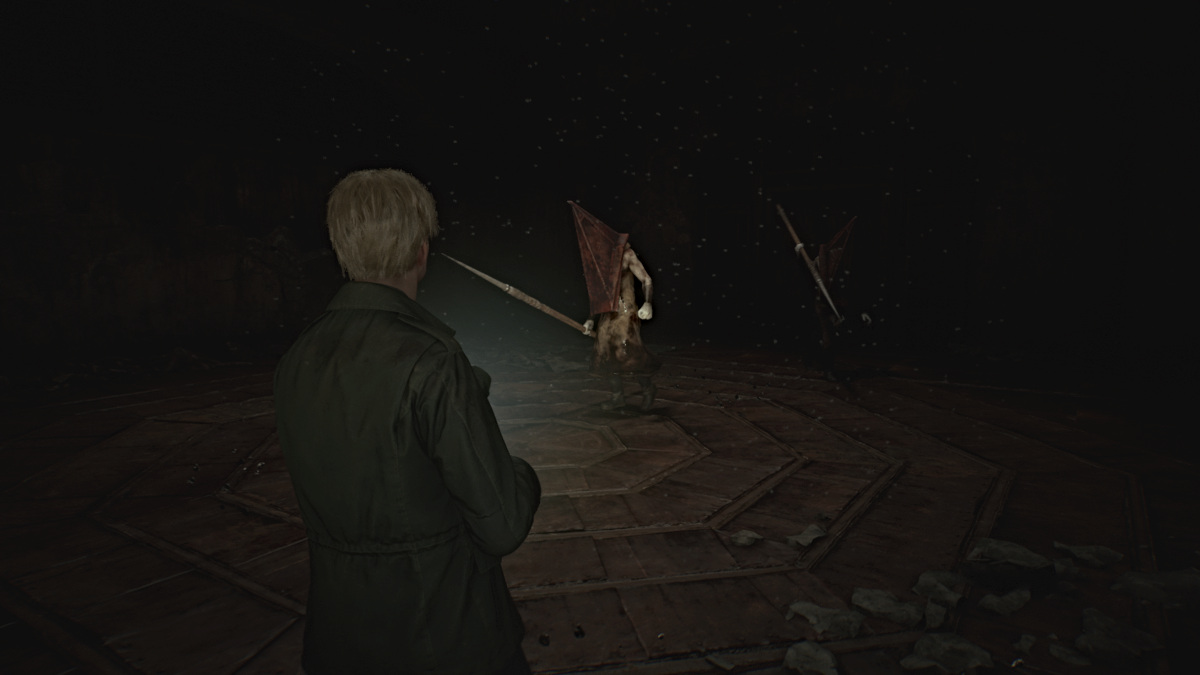
As soon as James says, "I'm ready", the battle begins. Both Pyramid Heads will quickly advance toward you with their spears, and your goal here is to deal as much damage as possible to both of them. You'll need every bullet you've got, and if you need more, there are plenty of ammo boxes and Health Drinks scattered around the room.
Starting with the Hunting Rifle is optimal, as it has the best range with the most damage dealt. After that, you can interchange between the Handgun and Shotgun as needed. Keep your distance as they'll both attempt various lunge and stabbing attacks with their spears. Kite them around the room while unloading as many shots as possible, and eventually, a cutscene will trigger.

Both Pyramid Heads will go to the center of the room and ceremoniously impale themselves with their own spears. Their judgment has been made, so their presence is no longer needed.
Approach them and take the Scarlet Egg and Rust-colored Egg from their hands. Use these to unlock the doors that lead out.
The "egg door" you choose to walk through can affect the ending. If you choose the Scarlet Egg, it can influence the "Maria" ending. The Rust-Colored Egg will influence the "In Water" ending.
You'll arrive back outside on a metal walkway, where there are several more ammo cartridges to pick up, along with a Syringe and the "SHAPE FORCES THE MIND" Strange Photo at the back right corner.
Reload all your weapons, top off your health, and head all the way up the stairs until you reach the top of the building. From here, a cutscene with Mary will play that's influenced by your decisions up to that point in the game. How you treated Maria, whether you looked at certain items often, whether you kept your health high or low, etc. They will all affect the subsequent ending as well.
How to beat Mary and Ending
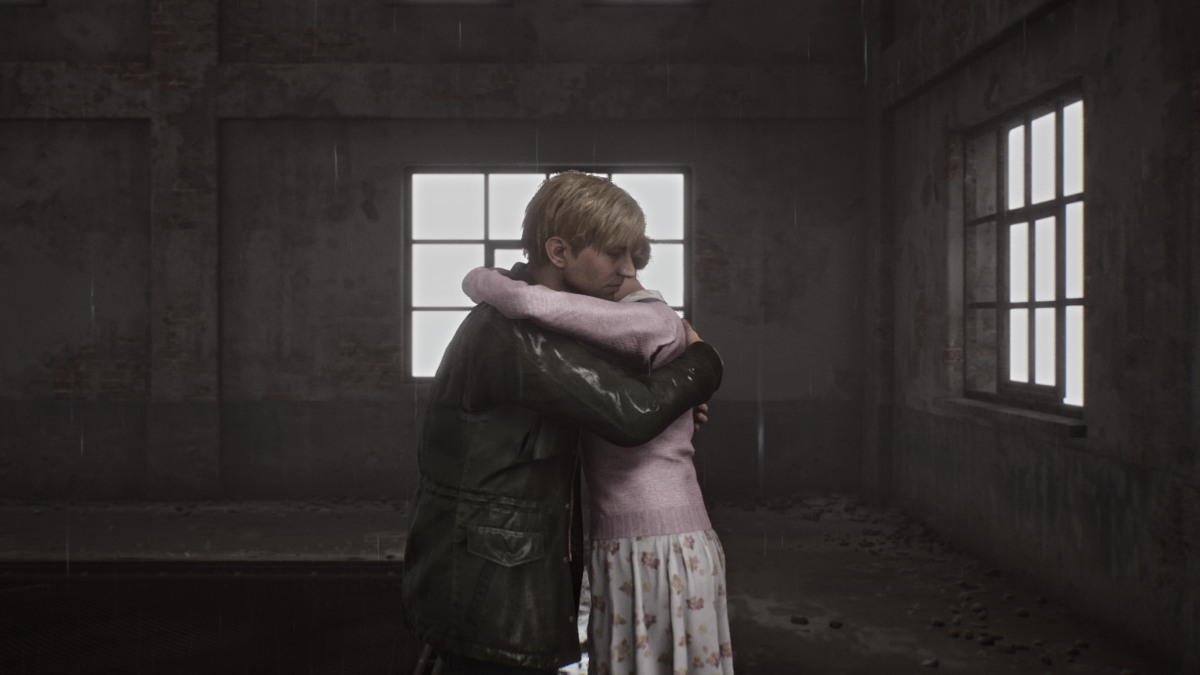
Once Mary (or Maria) succumbs to her turmoil and transforms into a monstrous version of herself, you'll be forced to fight her to ultimately bring peace or at least some sort of finality.
Like the Flesh Lips boss much earlier in the game, she'll be encased in a floating cage, and you'll need to keep your distance and deal damage, preferably with either your Hunting Rifle or Handgun. She also uses flocks of moths to chase and deal ranged damage to James, while also using a tentacle appendage to deal brutal stabbing attacks.
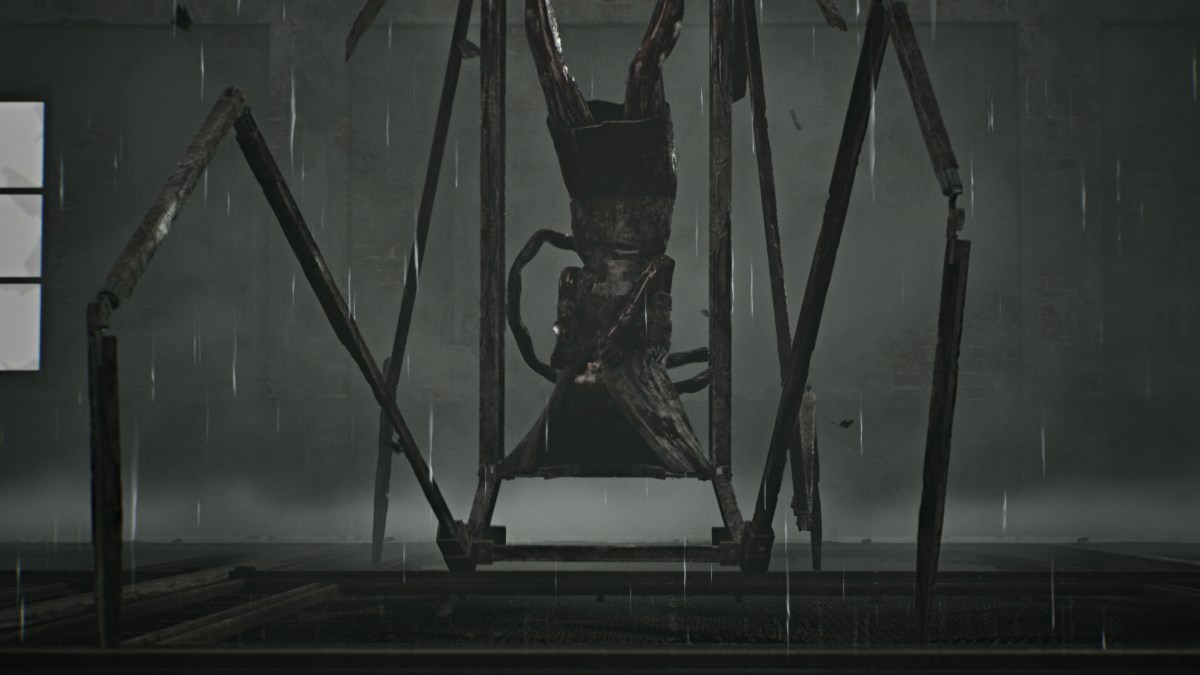
Once you deal enough damage, the cage surrounding Mary will morph into something akin to a spider, also similar to Flesh Lips' second form. She'll force James down into a dark passage area right underneath the metal platform, and you'll need to do damage whenever she appears from above.
The final phase of the fight will collapse the entire area, and you'll need to keep shooting while dodging her charge and swing attacks with her metal "legs". Her attacks hit hard, so be sure to stay topped off as much as possible. This is the final boss of the game, so make use of everything you have.
Eventually, her cage will collapse, leaving her unable to move and mumbling James' name. Go over and shoot one last time to end the fight.
Afterward, your designated ending will play out, again depending on your actions up to now. Congratulations!
Silent Hill 2 Remake Walkthrough - All Achievements/Trophies
Below we've listed all 43 unlockable achievements/trophies in Silent Hill 2 Remake, including 31 hidden ones. Unlocking all of them will require multiple playthroughs.
| Achievement/Trophy | How to Unlock |
|---|---|
| You Made Me Happy | Collect all other trophies/achievements in the game. |
| No Turning Back Now | Try to leave Silent Hill in the Observation area. (Walk down the opposite direction on the road at the start of the game until James turns back.) |
| Enjoy Your Stay | Reach Silent Hill. |
| Nice and Cozy | Reach Wood Side Apartments. |
| Let's NOT Party! | Shoot all the balloons in Wood Side Apartments. (Shoot all balloons in the "Welcome Home" apartment; recommend saving before doing so to recover the bullets used.) |
| Otherworldly | Enter the Otherworld for the first time. |
| Passed | Made your way out of Blue Creek Apartments. |
| Uncanny | Meet Maria. |
| All Seems in Order | Discover the secret of Room 106. |
| Leftovers | Find the pizza in Pete's Bowl-O-Rama |
| Admitted | Reach Brookhaven Hospital. |
| Nightmare Fuel | Defeat the Flesh Lip. |
| Alone Again. | Survive the Chase in Brookhaven Hospital. |
| Into the Abyss | Reach the end of the long staircase. |
| Unforgivable | Defeat the Abstract Daddy. |
| Inner Sanctum | Find His Room. (When Pyramid Head first chases you in the Desolate Area of the Labyrinth, run left past a ladder and through double doors to find his lair. Quickly exit after to avoid getting caught by him.) |
| A Human Being | Kill Eddie. |
| Glimmer of Hope | Reach the Lakeview Hotel. |
| Scourge of Toluca Lake | Spend 10 minutes out on Toluca Lake. |
| Truly Special | Obsolete |
| It's Bread. | Interact with bread. |
| Obselete | Destroy what you don't need. |
| That Part of Me. | Defeat Her. |
| Lumberjack | Find the chainsaw. |
| Merciless | Finish off 50 enemies with a stomp attack. |
| No Big Deal | Kill 75 enemies with ranged weapons. |
| Blunt Force Trauma | Kill 75 enemies with melee weapons. |
| You Never Know... | Try to open locked doors 50 times. |
| Shattered | Destroy 50 windows. |
| Making Peace | Reach the "Leave" ending |
| Vicious Circle | Reach the "Maria" ending |
| Only Way Out | Reach the "In Water" ending |
| Defy Even Death | Reach the "Rebirth" ending |
| The Goodest Boi | Reach the "Dog" ending |
| Tinfoil Hat | Reach the "UFO" ending |
| I Saw That Town | Complete New Game Plus on any difficulty. |
| Radio Silence | Complete the game without using the radio. |
| James of All Trades | Kill at least one enemy with Wooden Plank, Steel Pipe, Handgun, Shotgun and Rifle in a single playthrough. |
| Pieces Unarranged | Collect all the Strange Photos in a single playthrough. |
| Archivist | Collect all memos in a single playthrough. |
| Faster Than Fog | Complete the game in under 10 hours. |
| As Close as You Like | Finish the game without killing enemies using ranged weapons. |
| Party Like It's 2001 | See all classic endings (Leave, Maria, In Water, Rebirth, Dog). |
| Echoes | Witness all glimpses of the past in a single playthrough. |
All Silent Hill 2 Remake Endings (Walkthrough)
There are a total of eight possible endings in Silent Hill 2 Remake, and each has its own requirements to be unlocked. Only three specific endings ("Leave", "Maria", and "In Water") can be obtained during your first playthrough, while the rest can be unlocked during New Game Plus.
Ending 1 - Leave
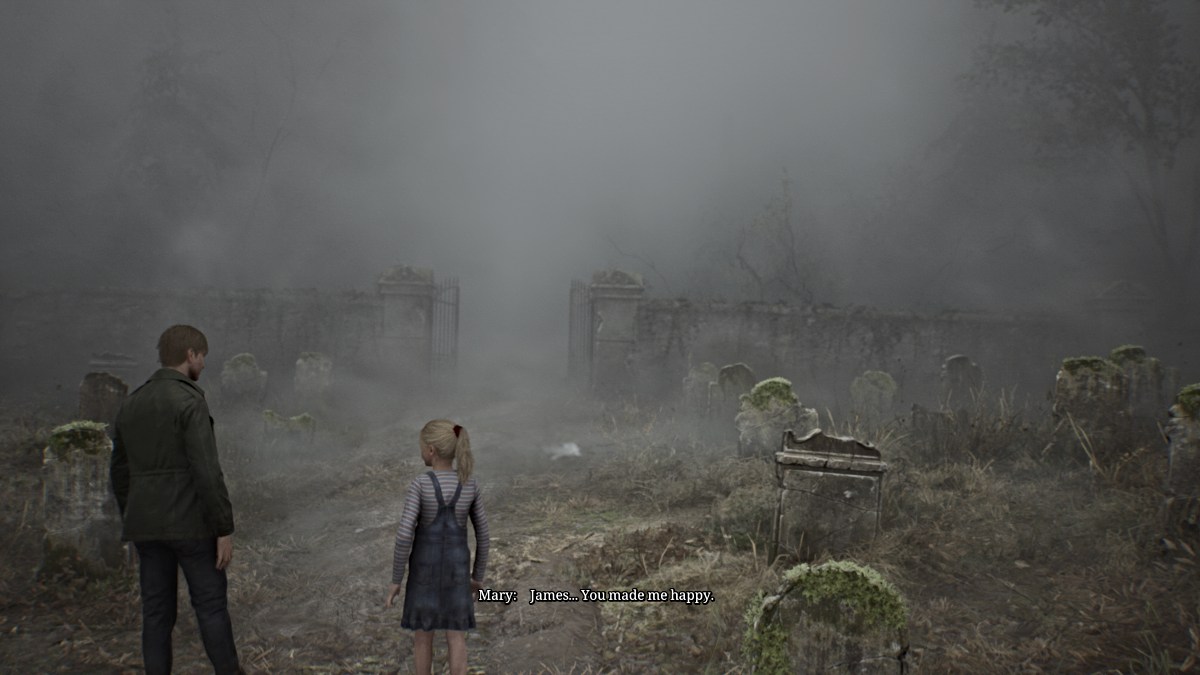
This is the "Best" ending for Silent Hill 2 Remake, as the story ends with James leaving Silent Hill with Laura in tow, having received forgiveness from Mary and realizing that he's allowed to move on. He and Laura leave Silent Hill together, and it's assumed that James adopts her as his daughter, since Mary wasn't able to.
Requirements for this ending:
- Inspect Mary's photo and her letter a few times over the course of the game.
- Do not inspect Angela's Knife.
- Keep your health topped off as often as possible.
- Don't check in on Maria during the Brookhaven Hospital or Labyrinth chapters (once is confirmed fine, but avoid repeated visits).
- Listen to the entire conversation between Mary and James during the long hallway sequence near the end of the game.
Getting this ending also unlocks the 'Making Peace' achievement.
Ending 2 - Maria
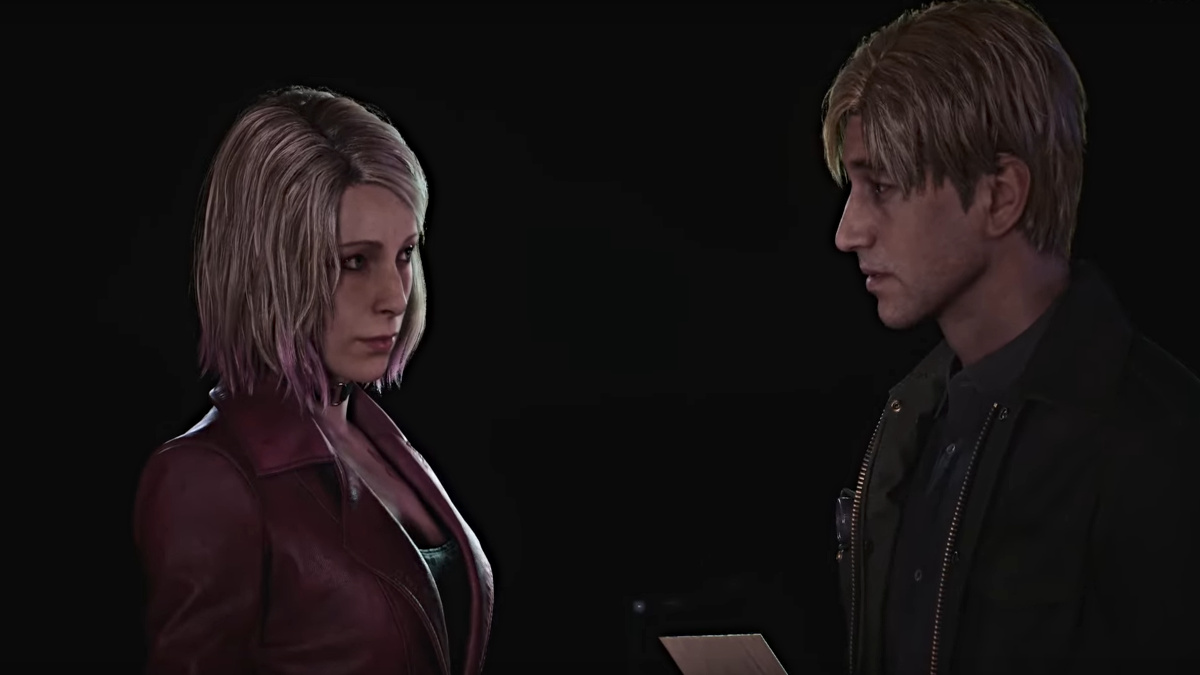
This is the designated "Bad" ending, as James instead leaves Silent Hill with Maria, having chosen her over Mary. At one point, Maria lets out a coughing fit and James acts annoyed, telling her to do something about it. He's learned nothing from his journey and Maria is likely doomed to succumb to the same illness that took Mary, the cycle beginning all over again.
Requirements for this ending:
- Do not inspect Mary's photo or letter at all.
- Do not inspect Angela's Knife.
- Interact with Maria as often as possible and exhaust all of her optional dialogue throughout the game.
- Stay close to Maria while traveling instead of running ahead and leaving her behind; protect her from all threats, including the monster at Jack's Inn.
- Check on her often during both the Brookhaven Hospital and Labyrinth chapters.
- Do not stop to listen to the conversation between Mary and James during the hallway sequence near the end of the game.
Getting this ending also unlocks the 'Vicious Circle' achievement.
Ending 3 - In Water
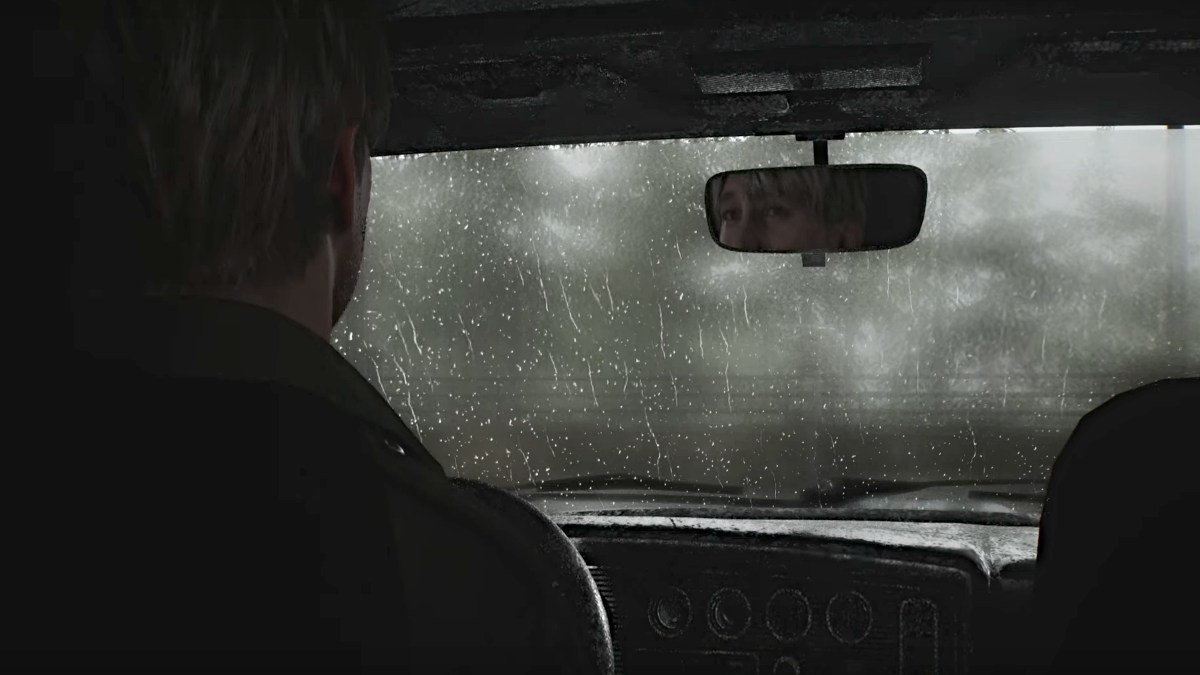
Debatably another "bad" ending, this is absolutely the most tragic ending in Silent Hill 2 Remake. After everything, James finds himself unable to move on from Mary's death and confesses that he simply can't live without her in his life. James drives his car into the depths of Toluca Lake in an attempt to reunite with Mary in death.
Requirements for this ending:
- Do not inspect Mary's photo or letter (VERY important).
- Inspect Angela's Knife as often as possible.
- Avoid and ignore Maria as often as possible. Don't check on her in Brookhaven Hospital or the Labyrinth.
- Listen to the entire conversation between Mary and James during the hallway sequence near the end of the game.
- Act reckless during monster fights and stay at low or critical health as often as possible.
Getting this ending also unlocks the 'Only Way Out' achievement.
Ending 4 - Rebirth
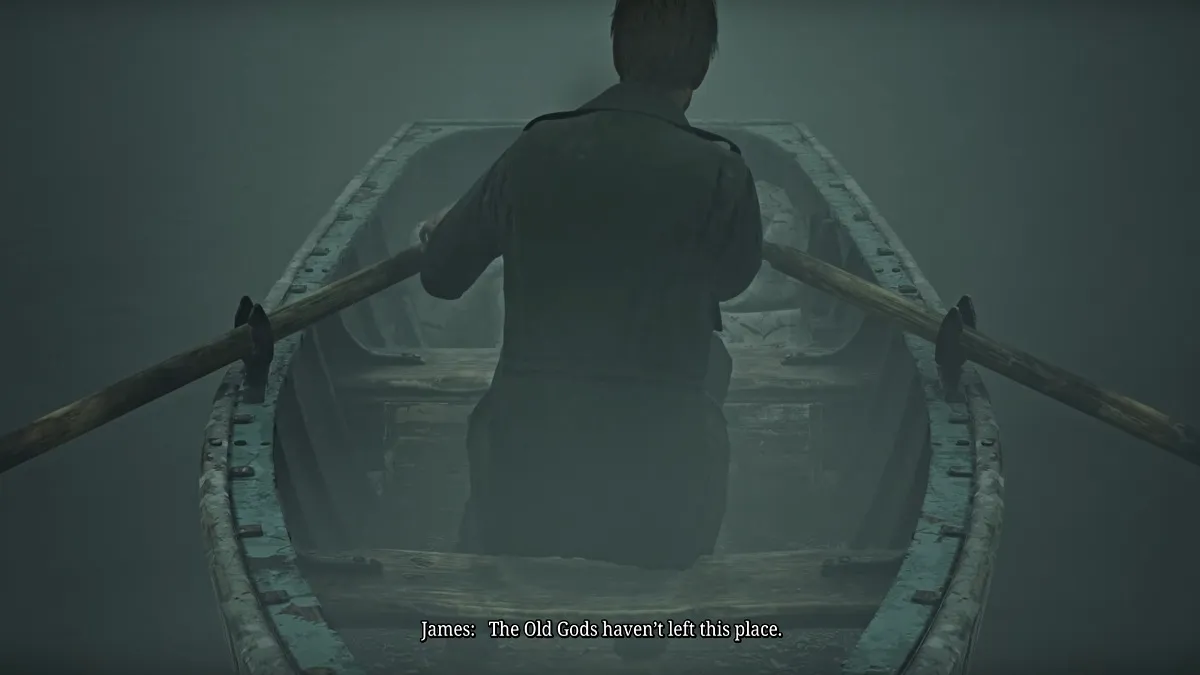
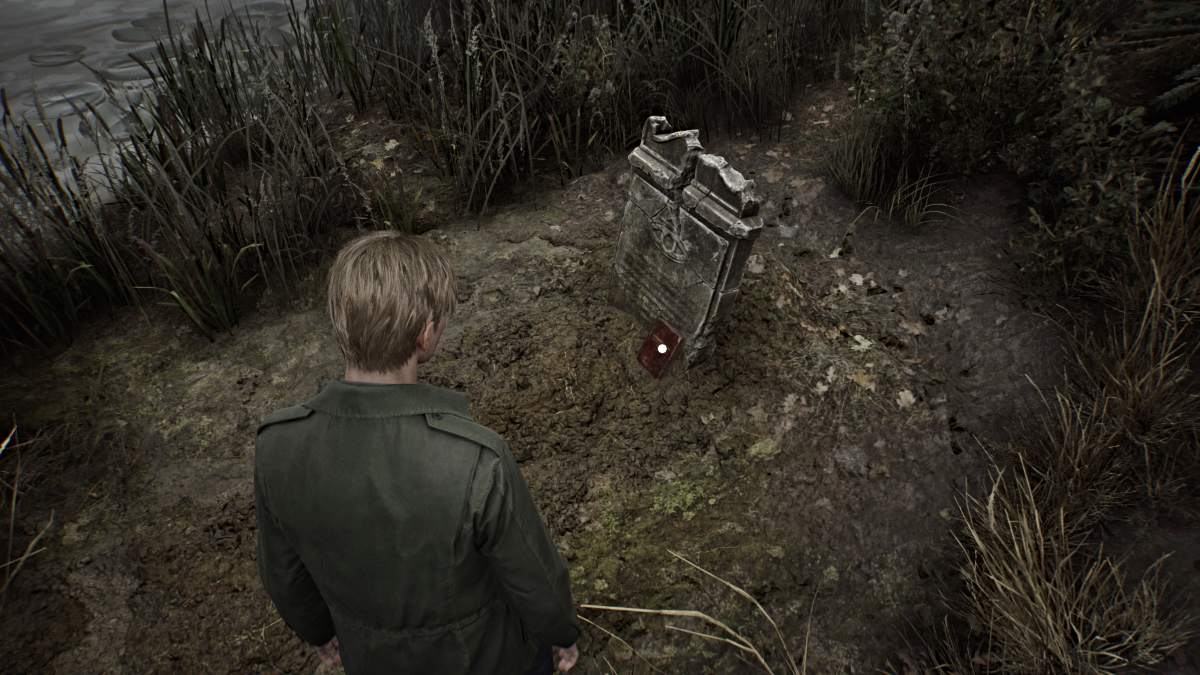
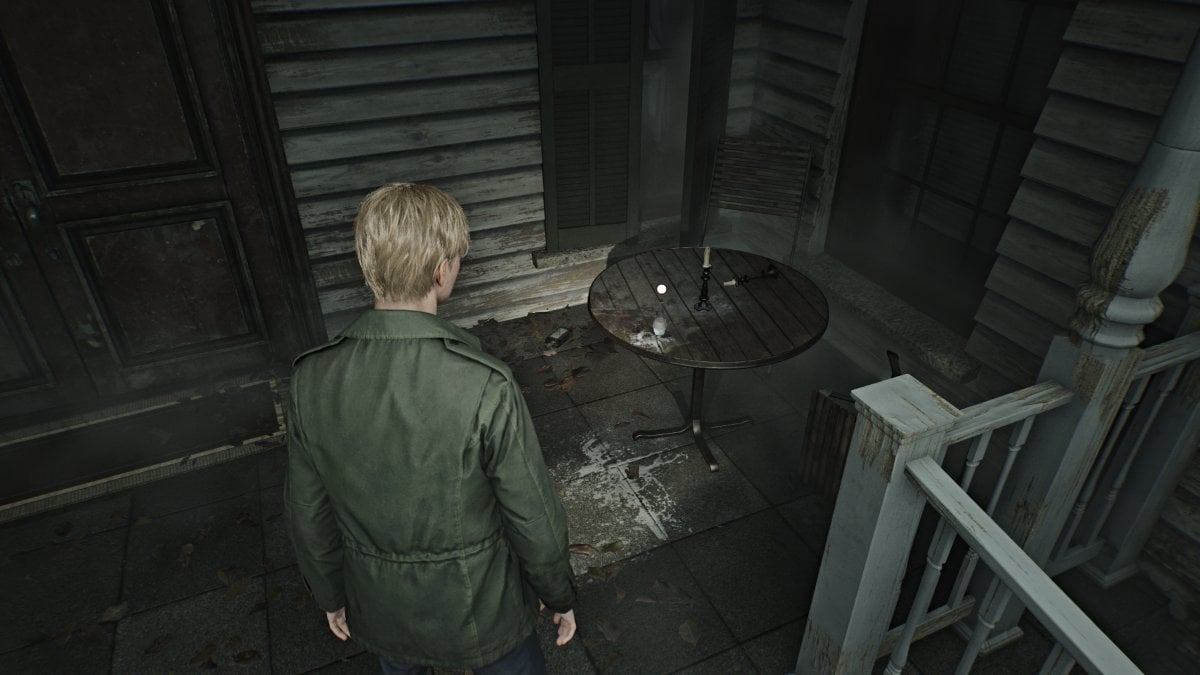
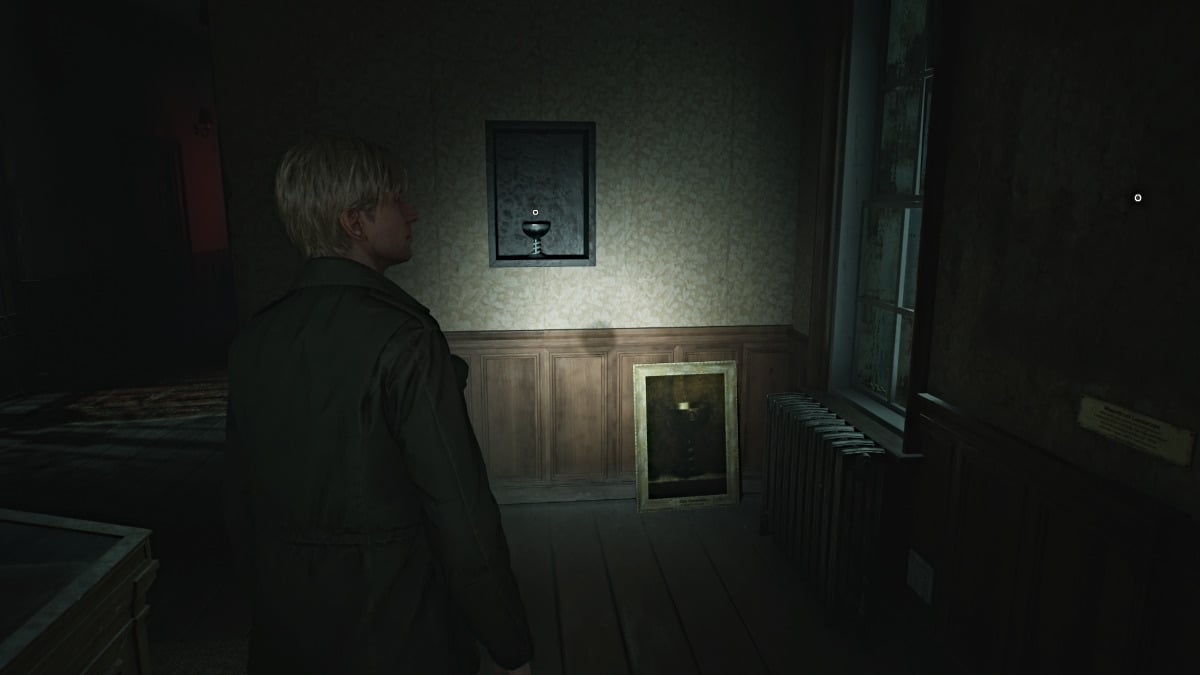
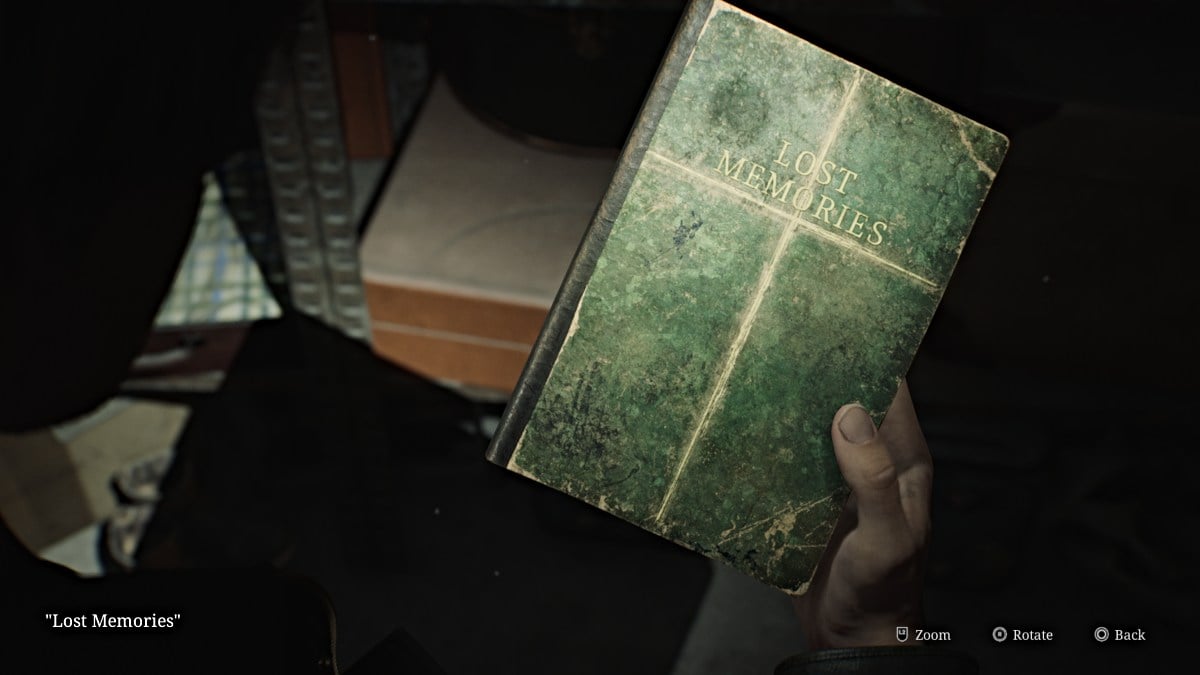
In this ending, after obtaining all the necessary ritual items James takes Mary's body and rows out to the island in the middle of Toluca Lake, where an old church is located. While its history is shrouded in mystery, James is determined to revive Mary using a strange ritual there, and we never know if it actually works.
Requirements for this ending:
- Can only be unlocked during New Game Plus
- As long as you have the required items in your inventory, all other gameplay parameters don't matter.
- Obtain the Crimson Ceremony book (seen above) from the cemetery where you first meet Angela.
- Obtain the White Chrism from the table just outside the entrance to the Baldwin Mansion after passing through Jack's Inn.
- Obtain the Obsidian Goblet from a hidden space behind a painting inside the museum area of the Historical Society building. After entering, take the second left before the Pyramid Head painting.
- Obtain the Lost Memories book from the Lost and Found room in the Lakeview Hotel.
Getting this ending also unlocks the 'Defy Even Death' achievement.
Ending 5 - Dog
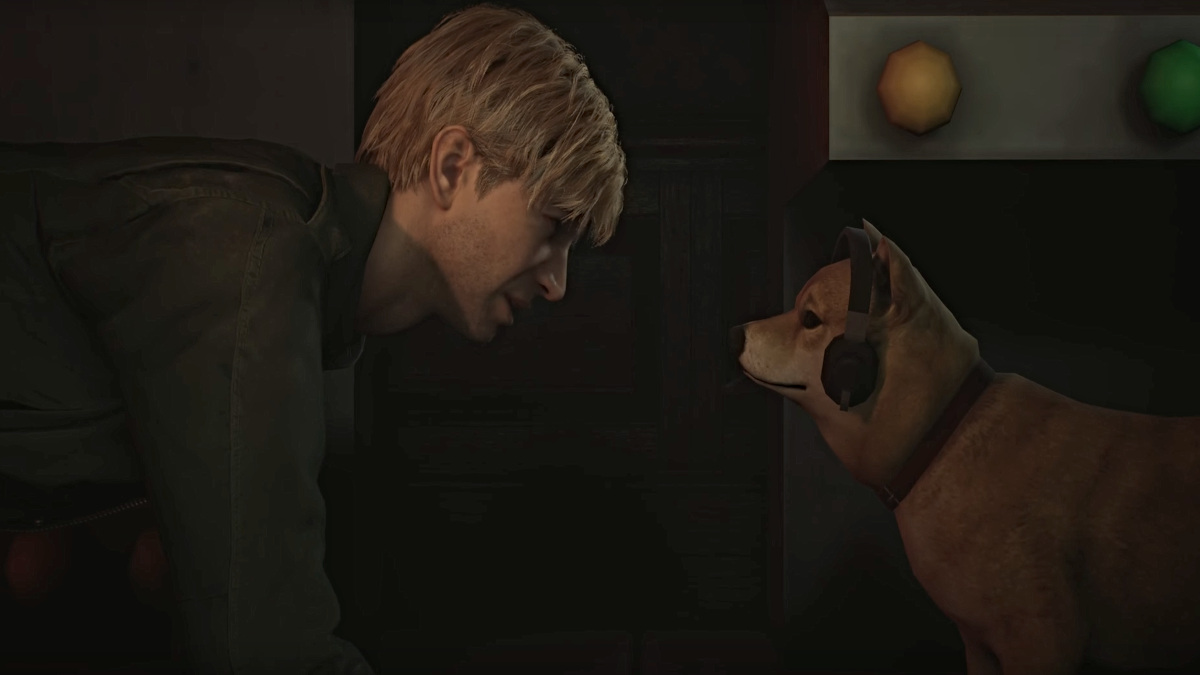

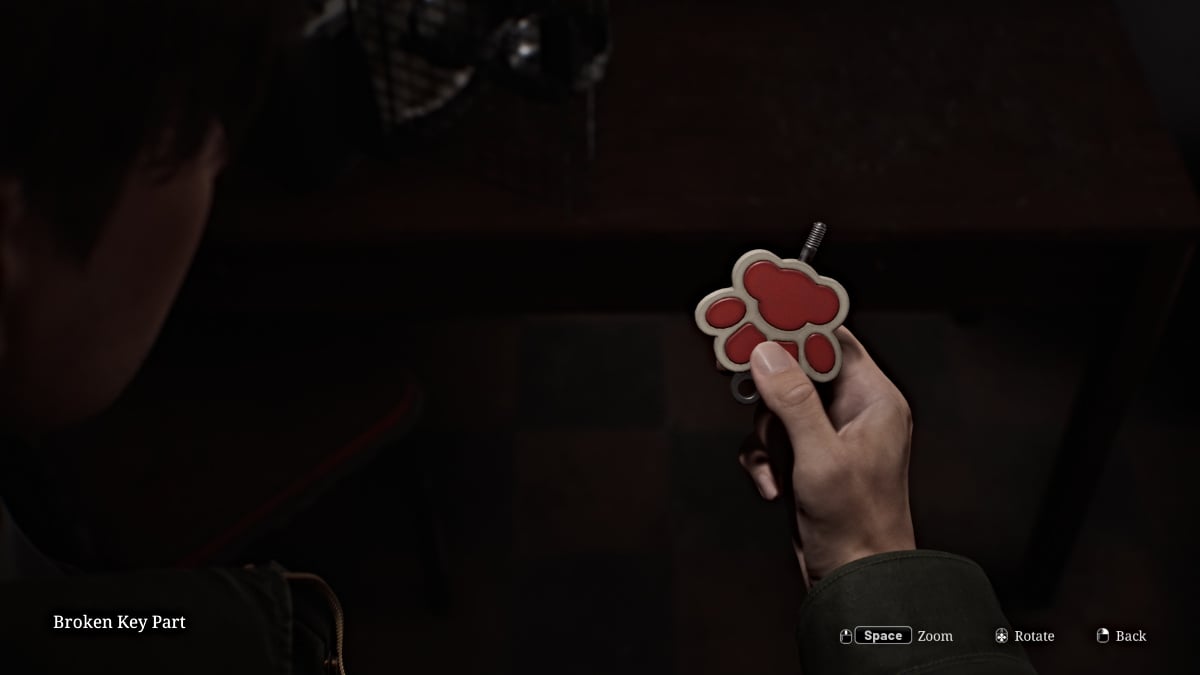
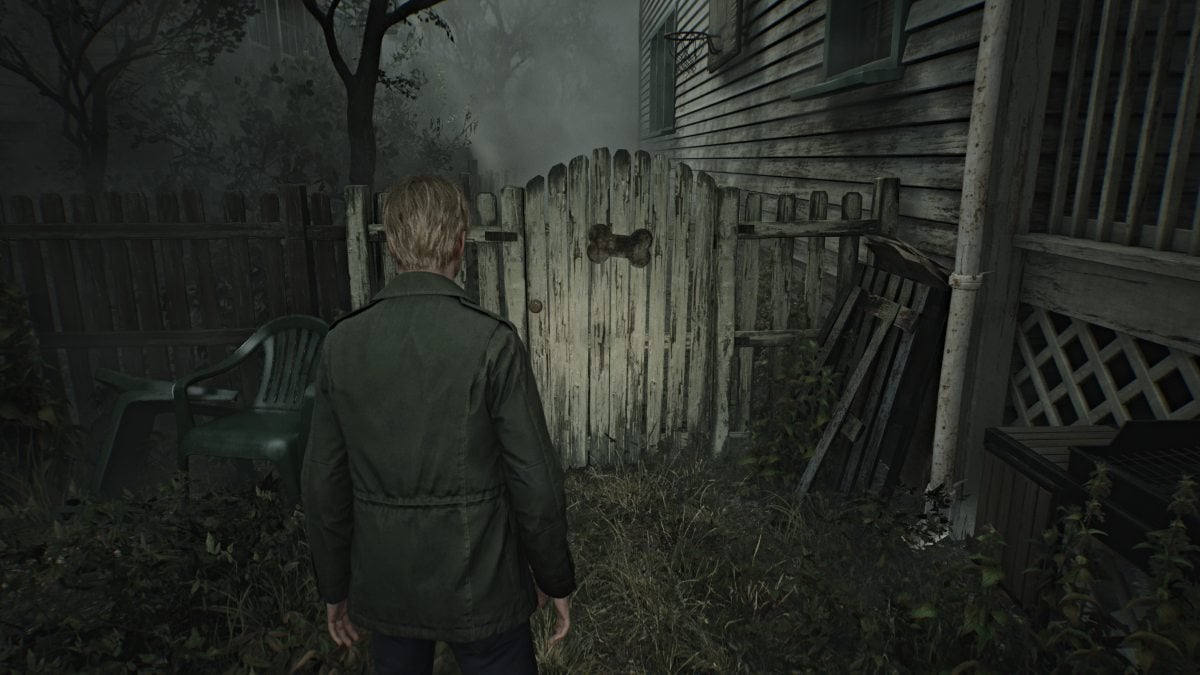
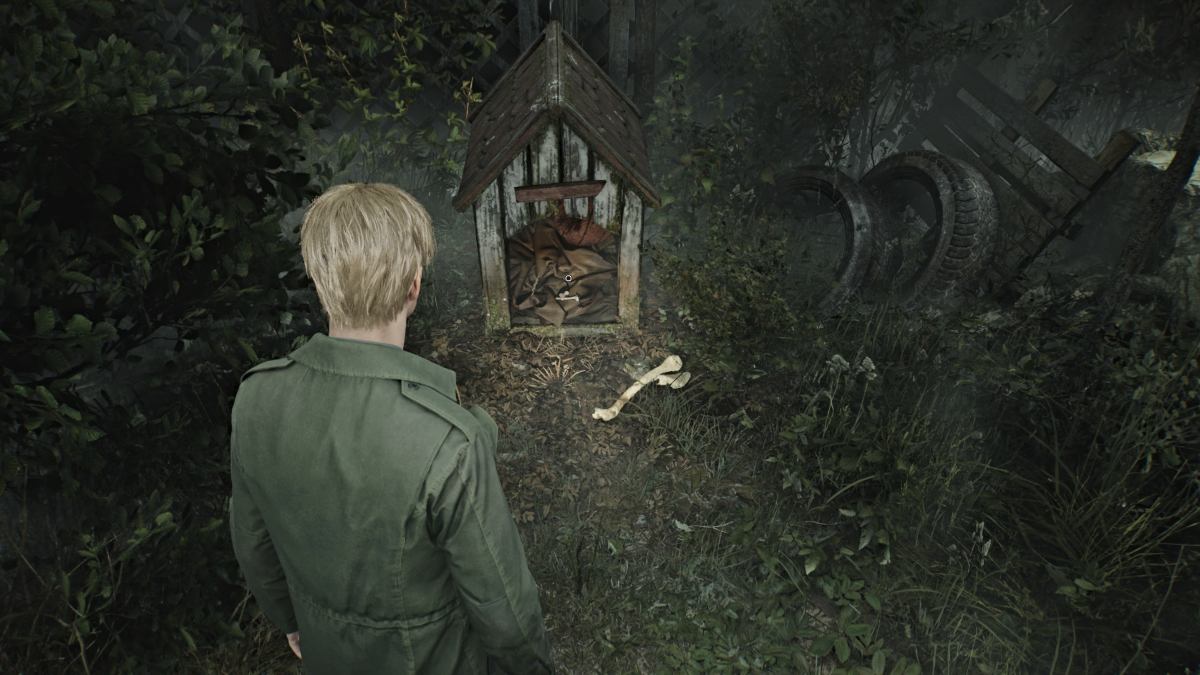
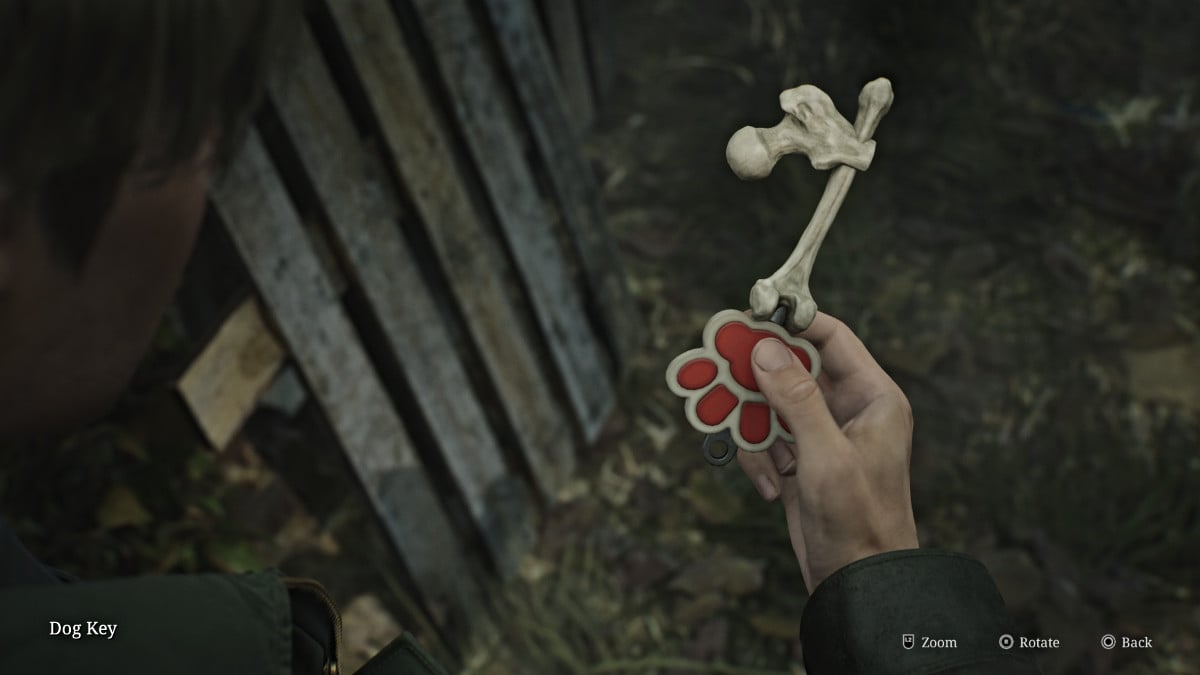
This is one of the game's two comical endings, and probably its most infamous. It has James open a door at the Lakeview Hotel to reveal a Shiba Inu dog named Mira sitting at a big computer console, controlling everything that's happened in Silent Hill up to that point.
Requirements for this ending:
- Can only be unlocked during New Game Plus
- As long as you have the required items in your inventory, all other gameplay parameters don't matter.
- Obtain both parts of a broken key; the first part is inside the supply closet in the Pet Palace store next to Big Jay's.
- Obtain the second Broken Key Part from a white dog house in the backyard of a house right behind Jack's Inn. You must first unlock the back gate that allows you to leave Jack's Inn, then find a fence door between the first and second houses with a Bone symbol on it. The dog house with the key part will be just ahead.
- Combine both parts of the key to repair it, and then use it at the Observation Room in the Lakeview Hotel.
Getting this ending also unlocks the 'The Goodest Boi' achievement.
Ending 6 - UFO

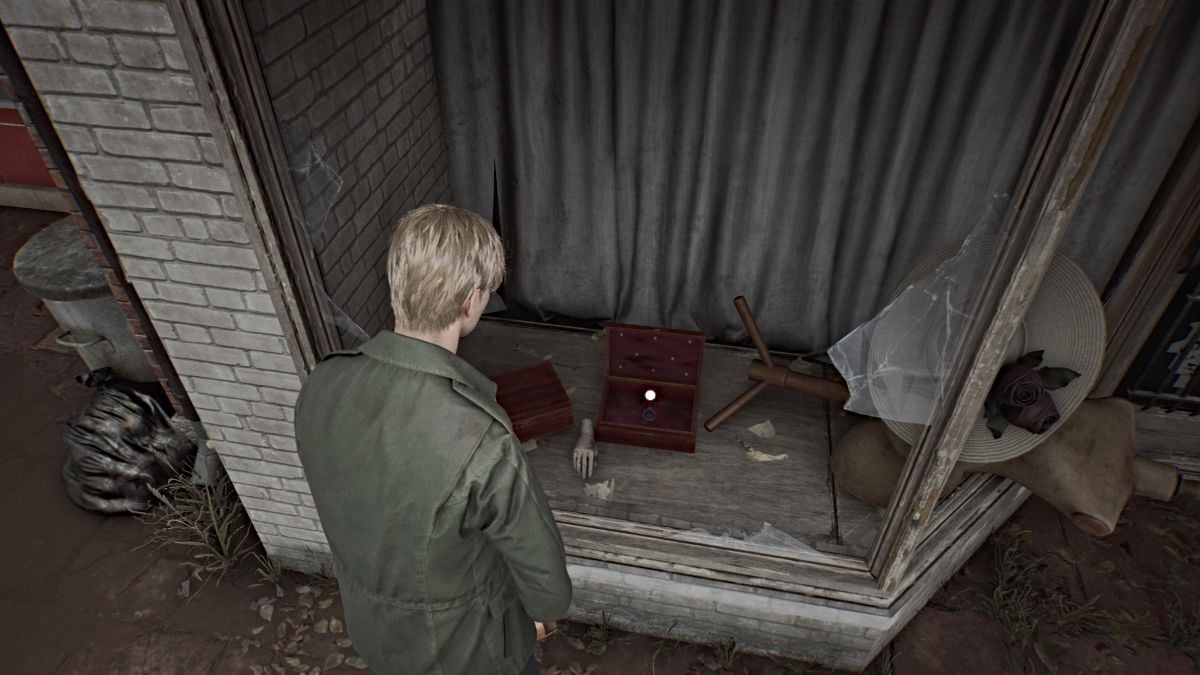
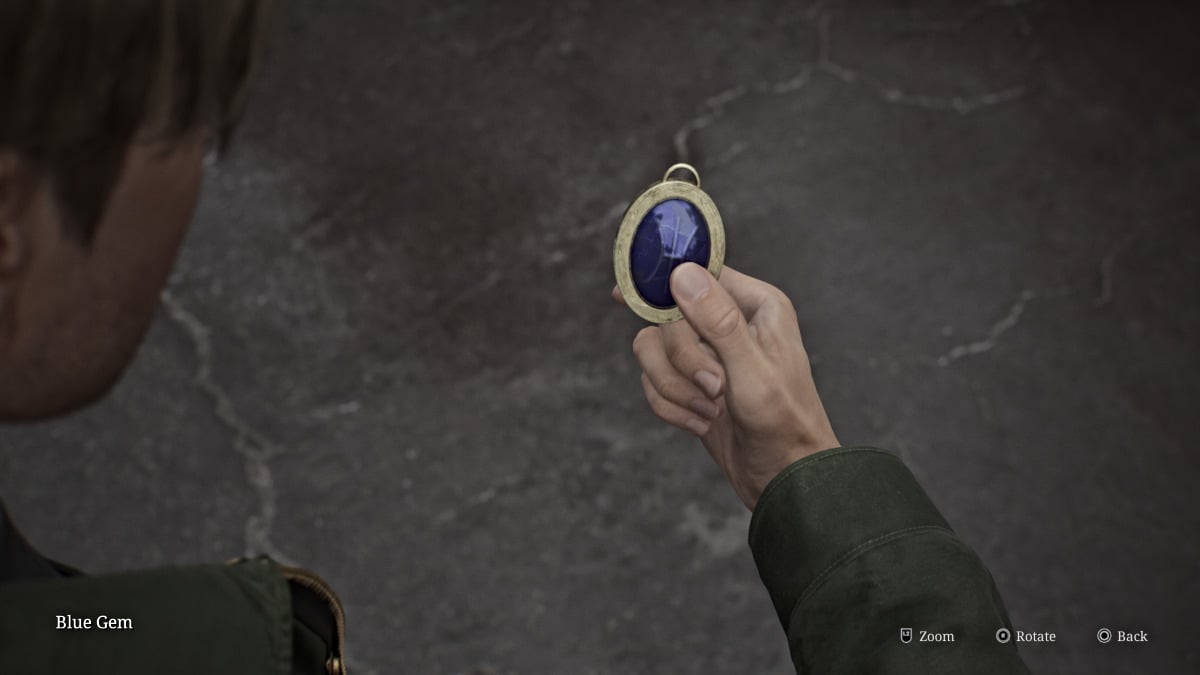
The second comical ending, presented as a silent film sequence, also takes place at the Lakeview Hotel and sees aliens actually visit James along with a hilarious cameo of a character from the original game.
Requirements for this ending:
- Can only be unlocked during New Game Plus
- Obtain the Blue Gem item Blue Gem from the jewelry box in the store window just past Big Jay's in East South Vale.
- After you get the missing jukebox key, go to the roof of Saul Apartments and once you hear a certain audio cue, inspect the Blue Gem in your inventory.
- Inspect the Blue Gem again right after you first meet Maria in Rosewater Park.
- Again, inspect the Blue Gem right after crossing Toluca Lake in the boat.
- Upon entering Room 312 near the end of the game, inspect the Blue Gem one last time BEFORE watching the Video Tape, and the ending will trigger.
Getting this ending also unlocks the 'Tinfoil Hat' achievement.
Ending 7 - Stillness
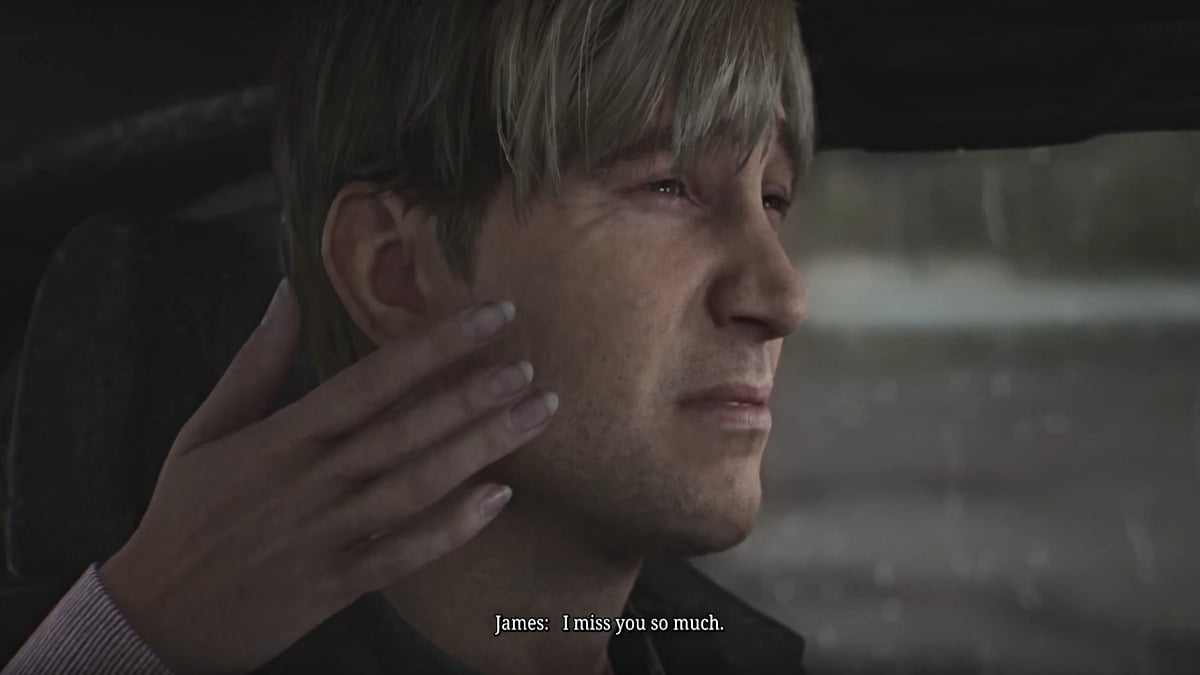
This is the first of two new endings added in Silent Hill 2 Remake, and it acts as a sort of expansion of the "In Water" ending. As James expresses that he simply can't live without Mary, in this version she appears next to him in the car, soothing him with her touch and voice.
James asks if she'll wait for him, and Mary insists that she's "always been waiting for him". The scene ends there, likely meaning that James chooses to live instead.
Requirements for this ending:
- Can only be unlocked during New Game Plus
- Break the car windows on the right-hand side of a car near the entrance to South Vale at the beginning of the game to retrieve the Key of Sorrow from the back seat.
- Find the wooden safe in the Manager's Office of the Lakeview Hotel and insert the Key of Sorrow into it, then do the following combination code:
- Left 3, Right 1, Left 4
- Obtain the Toluca Postcard from the safe, inspect it from your inventory, and then continue the game as normal.
Ending 8 - Bliss
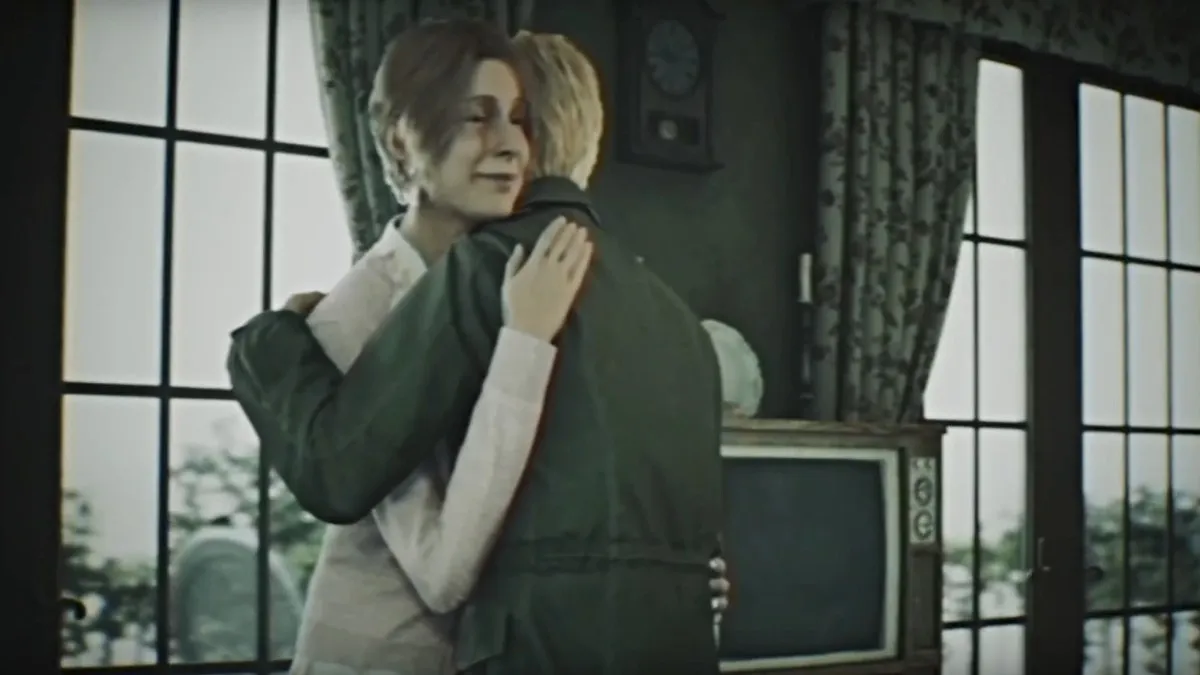
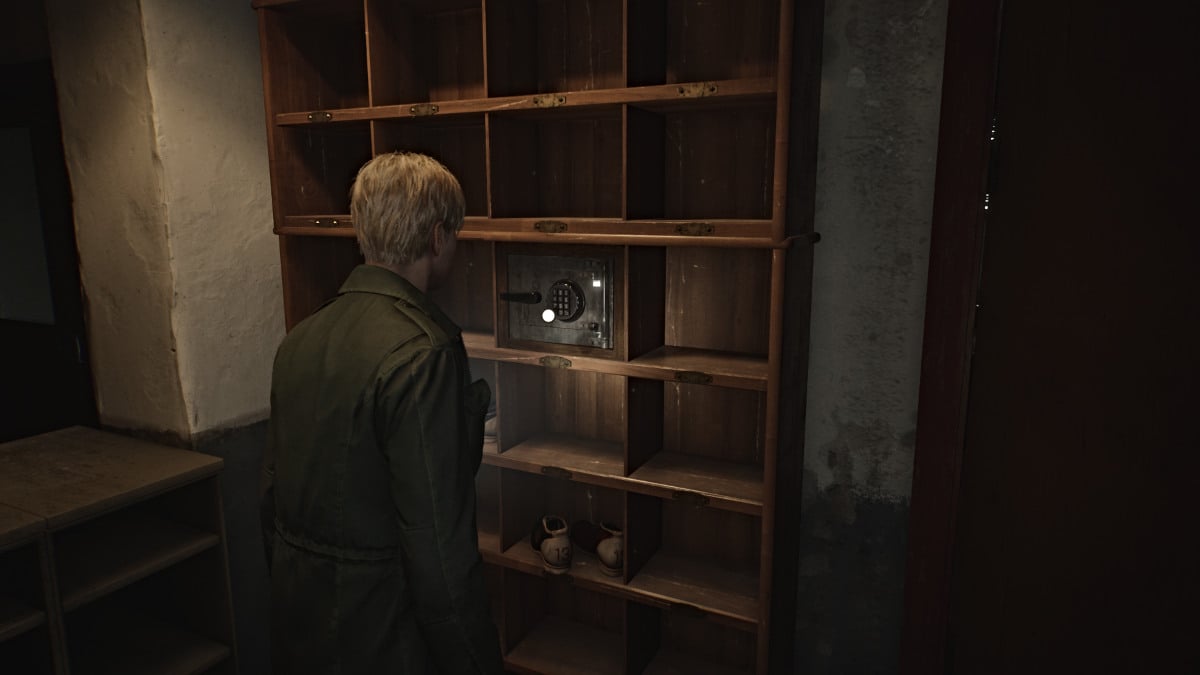
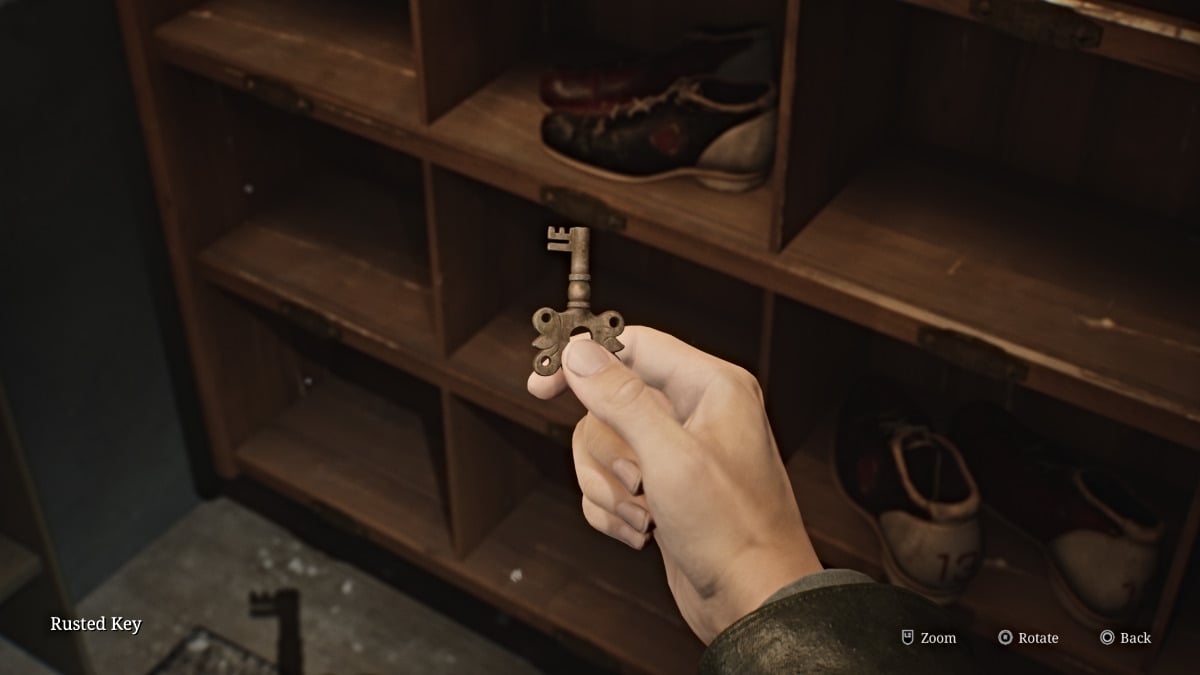
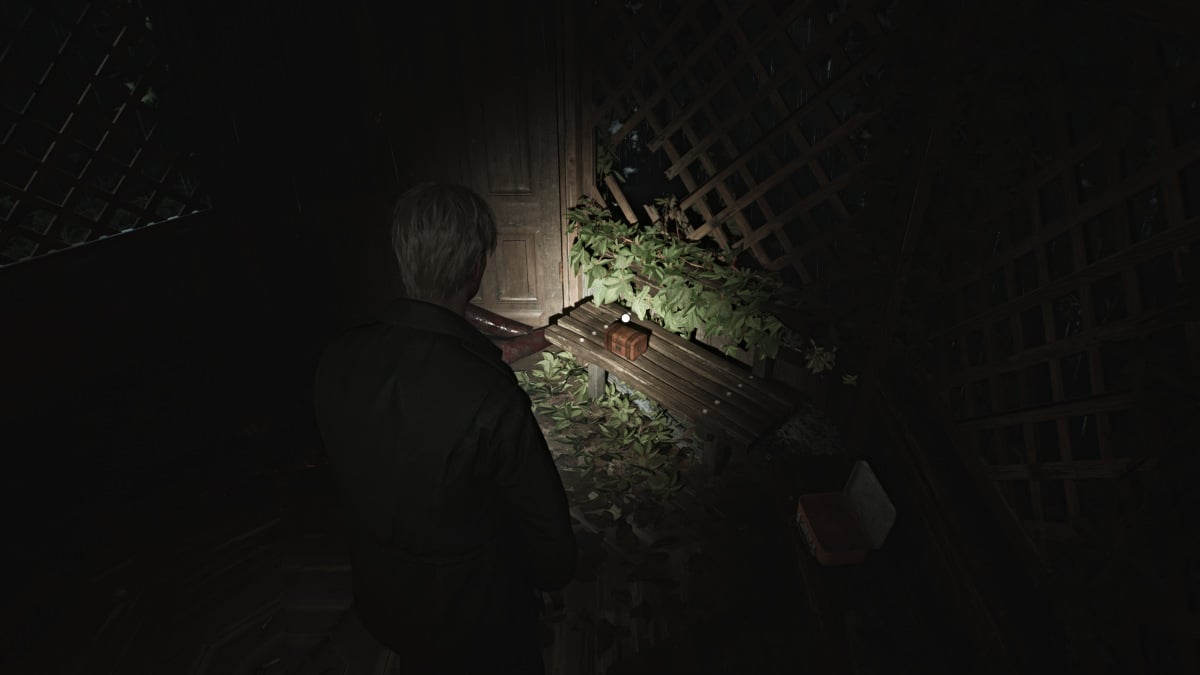

This is the second of two new endings added in Silent Hill 2 Remake, and it essentially presents the tape scene in the Lakeview Hotel much differently. Instead of the tape showing Mary's visible symptoms of illness and her death, James stays behind the camera in their hotel room and eventually puts it down as they continue packing. He promises to bring her back to Silent Hill, and the tape ends.
In the present, James is no longer sitting in the chair, seemingly gone. It alludes that because of the change in events on the tape, Mary was never sick and thus was never killed, meaning that the events of Silent Hill 2, at least for James, never happened.
Requirements for this ending:
- Can only be unlocked during New Game Plus
- Go to Pete's Bowl-O-Rama as soon as you reach West South Vale (before Jack's Inn) and get the Rusted Key from the safe behind the counter there.
- The code for the safe is: 1887 (regardless of difficulty)
- Go into the gazebo in the northwest corner of the Garden area of Brookhaven Hospital, and take the chest that's inside.
- Combine it with the Rusted Key to open it and inside will be a bottle of White Claudia.
- Enter Room 312, drink the bottle of White Claudia, and then watch the Video Tape to trigger the ending.
Be sure to check out all of our latest gaming guides and news for the Silent Hill franchise here at Pro Game Guides, such as Silent Hill the Short Message walkthrough.