Crow Country, a survival horror game from SFB Games, released to glowing user reviews. It's inspired old Resident Evil style survival gameplay is enjoyable, but its endless locked doors, keypads, puzzles and mysteries means you'll want a walkthrough to help you through.
Crow Country Walkthrough - Crow Country Hub Area I
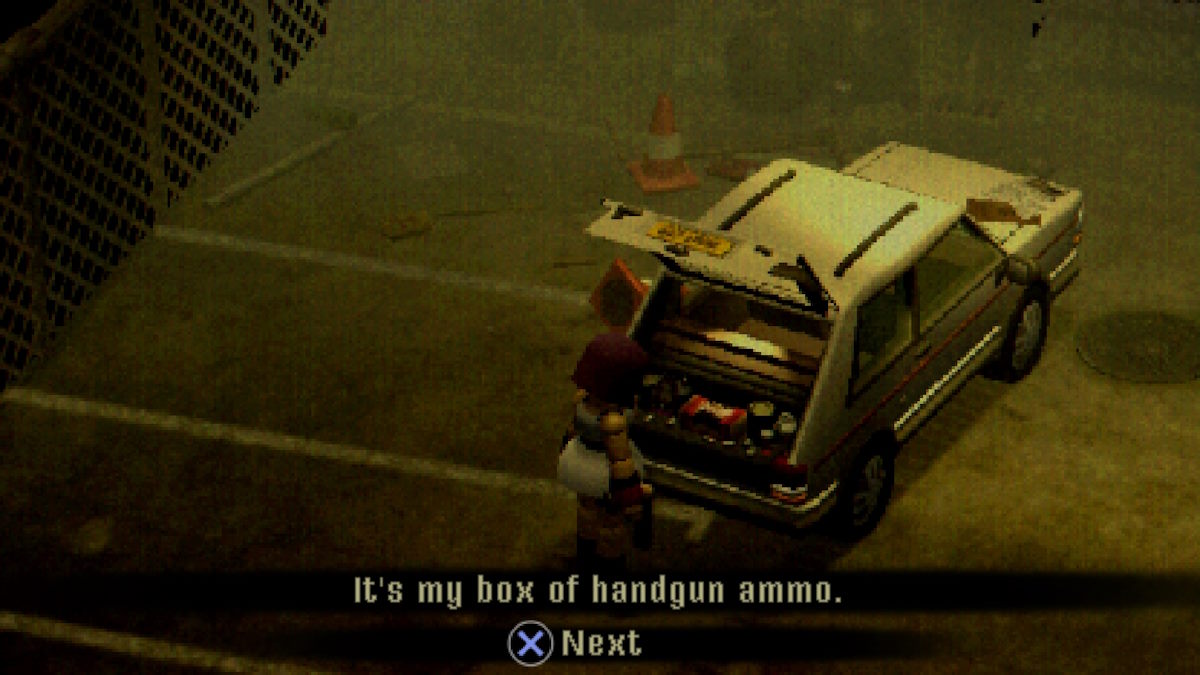
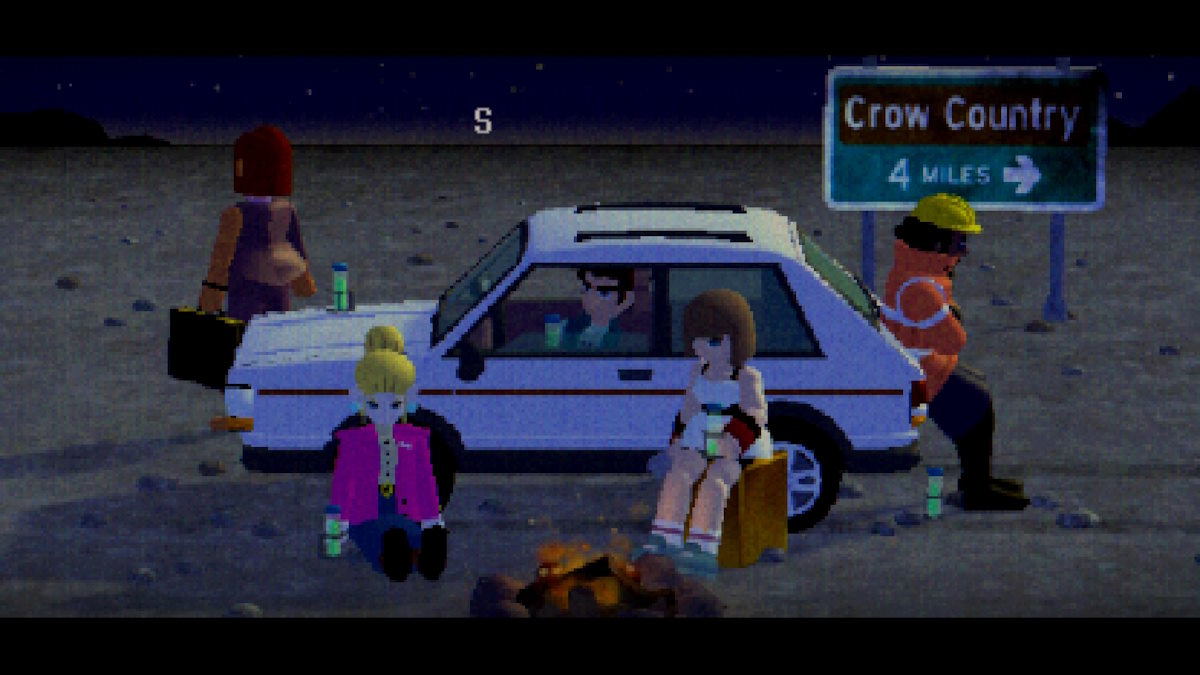
You start the game in a dingy parking lot with only your car and some notes splayed out over the hood. The first major point in the parking lot is that you can interact with the trunk of your car, which will reveal some ammo. This will only ever give you eight rounds, but it will do so infinitely.
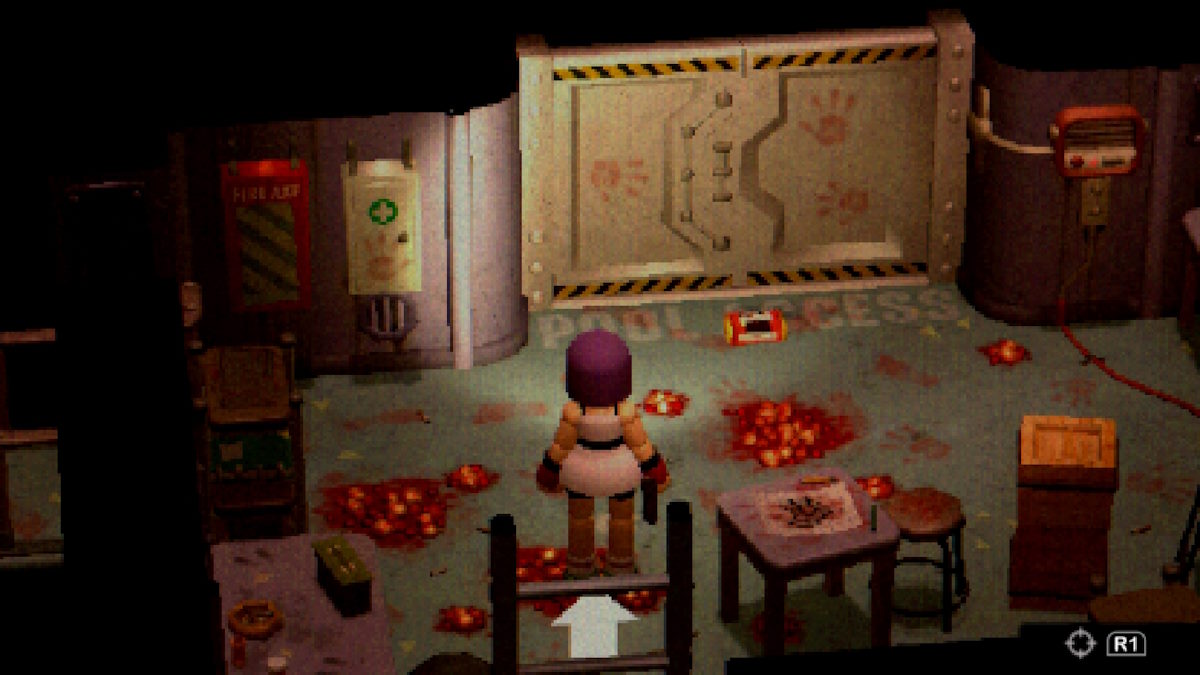
When you go through the main gate (making sure you pick up the flashlight on the way), you'll be in what I will refer to mostly as the 'Hub' area, as it is the place you will access all three of the main areas in the game. The bathroom is on your left as you enter the hub, and within there is some items, a blocked door, and an ominous pile of bones that we'll have to come back to later.
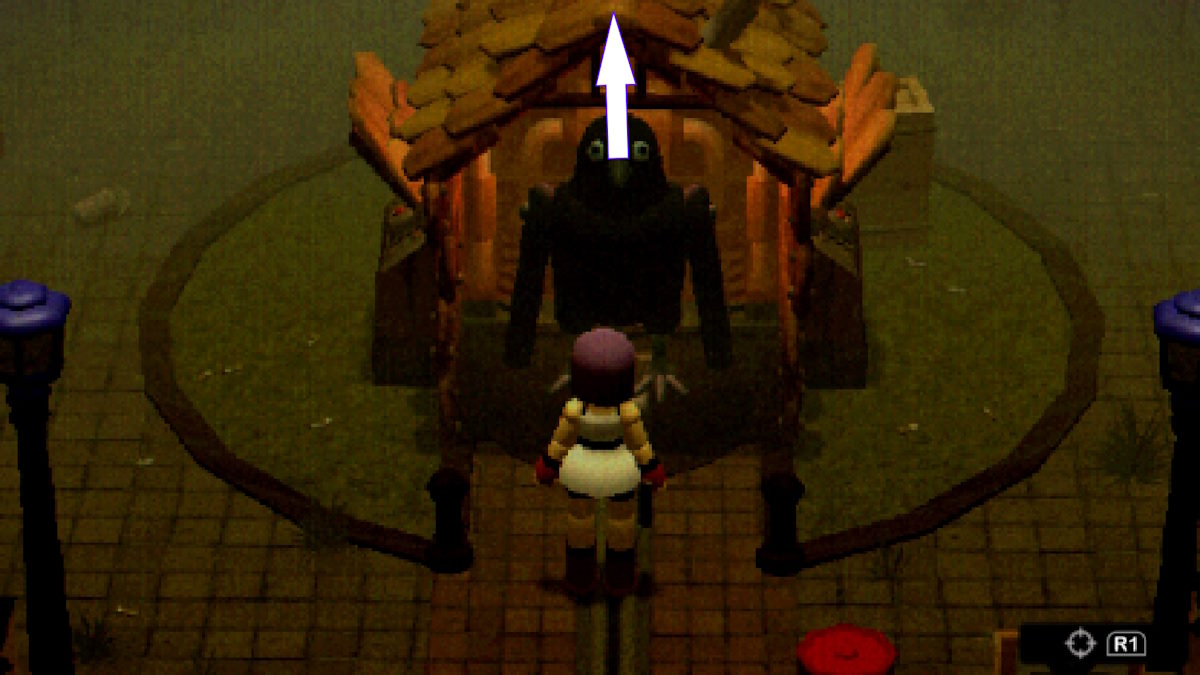
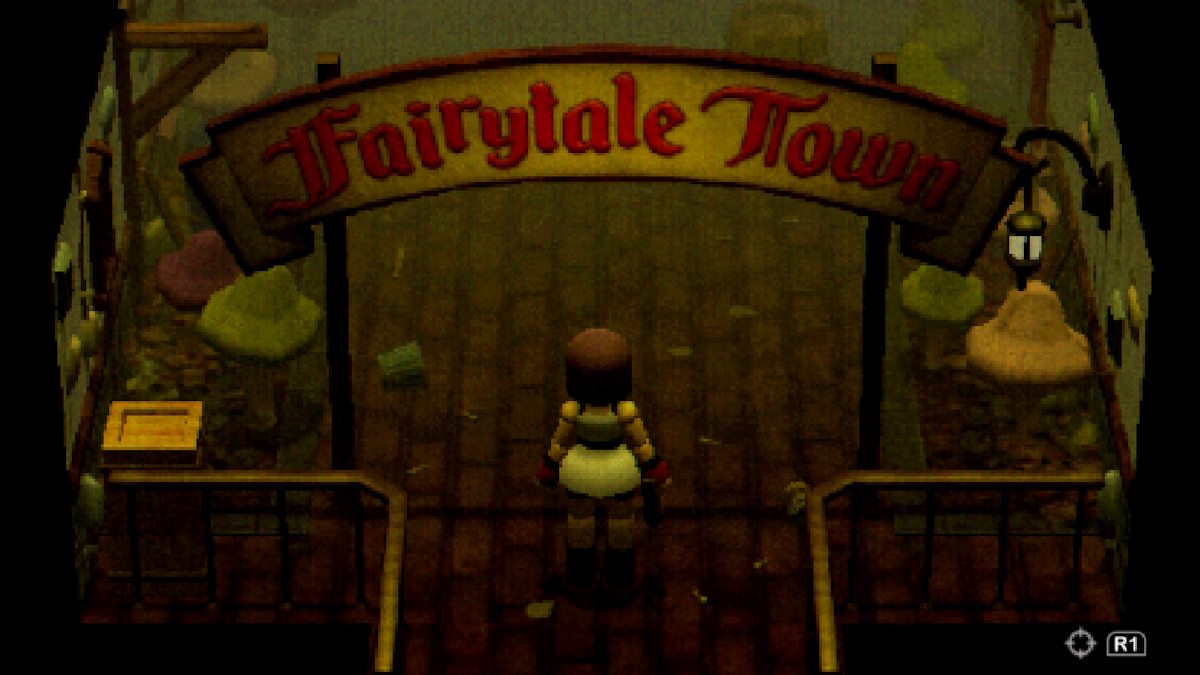
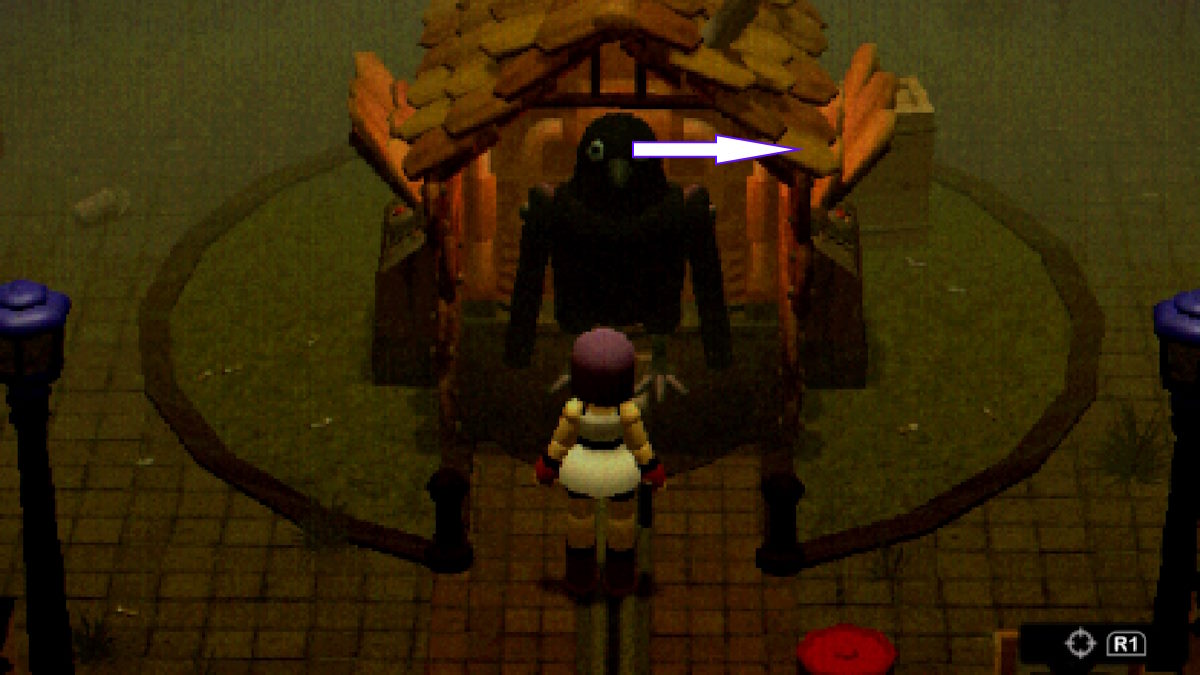
Have a good look around to collect any items and notes, and then go straight ahead at the rather large crow, and enter your first main area... Fairytale Town.
Fairytale Town Walkthrough
Lovely spot for those that like mushrooms (which I really don't), Fairytale Town is our first step in the journey of finding Mr. Crow.
One of the first things we need to do (which you'll know if you've been reading the notes) is find the bronze key; which one note mentions is in the fairy pond. You'll find the entrance to said pond here, but we'll need a keycode.
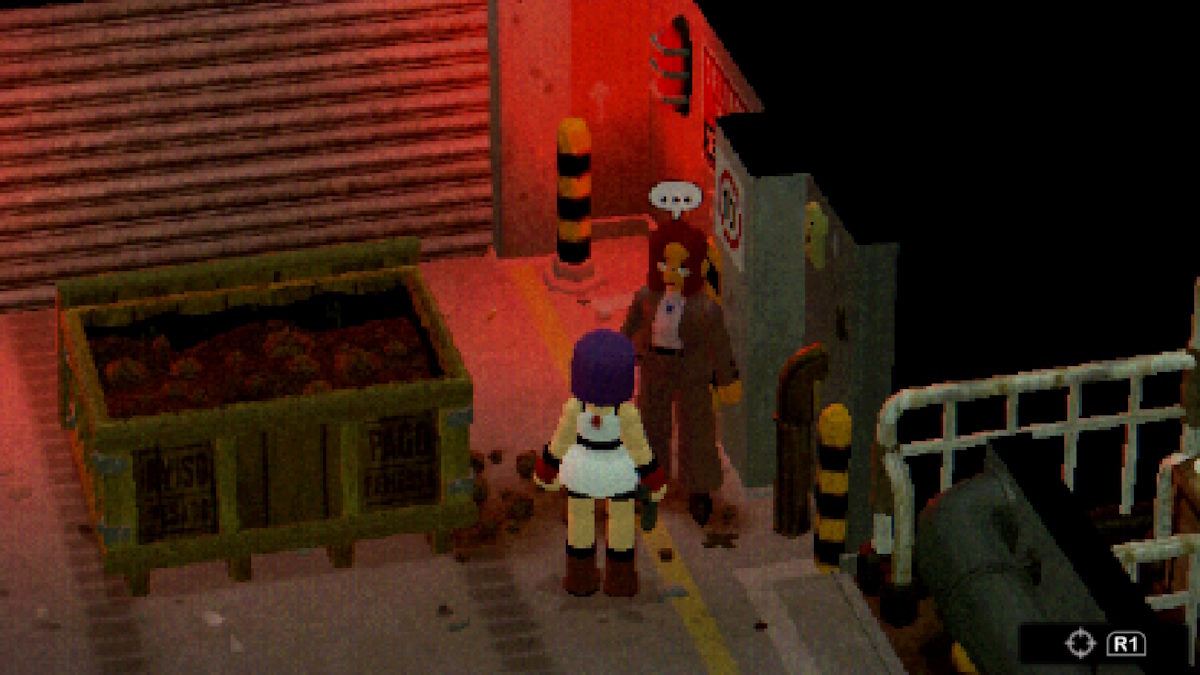
Keep moving forward until you find a man on the ground, who is injured. Talk to him as many times as you're able or until you're prompted to offer him a healing item (I'd suggest using a regular med kit here; there's no point wasting one of the big ones you may have found).
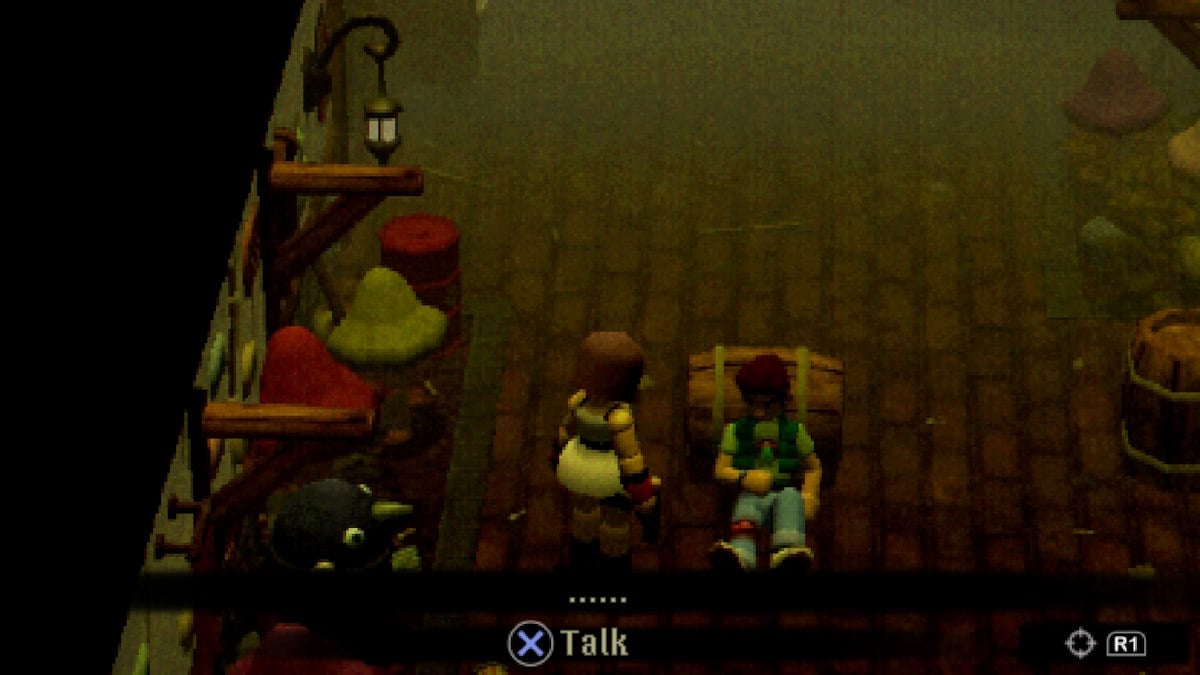
Talk to him again, and you'll then be able to return him to the car, where he will remain for now. (Go back to your car and talk to him for an achievement and some dialogue - return at steady intervals and the two will have more to discuss.)
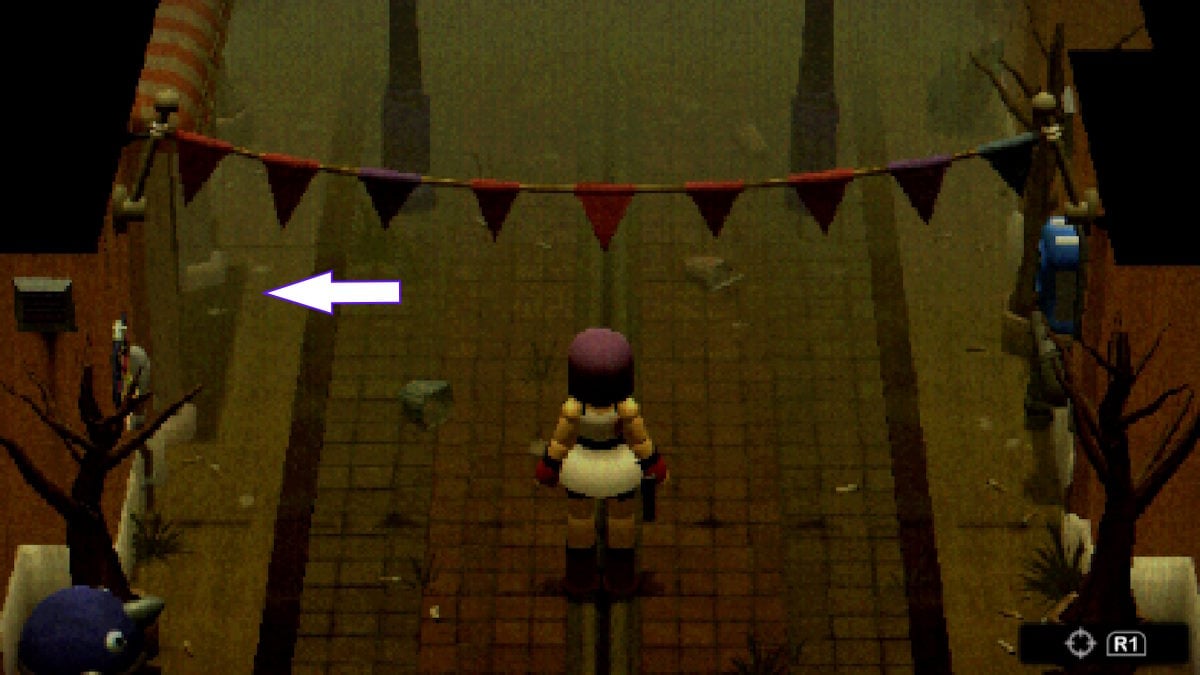
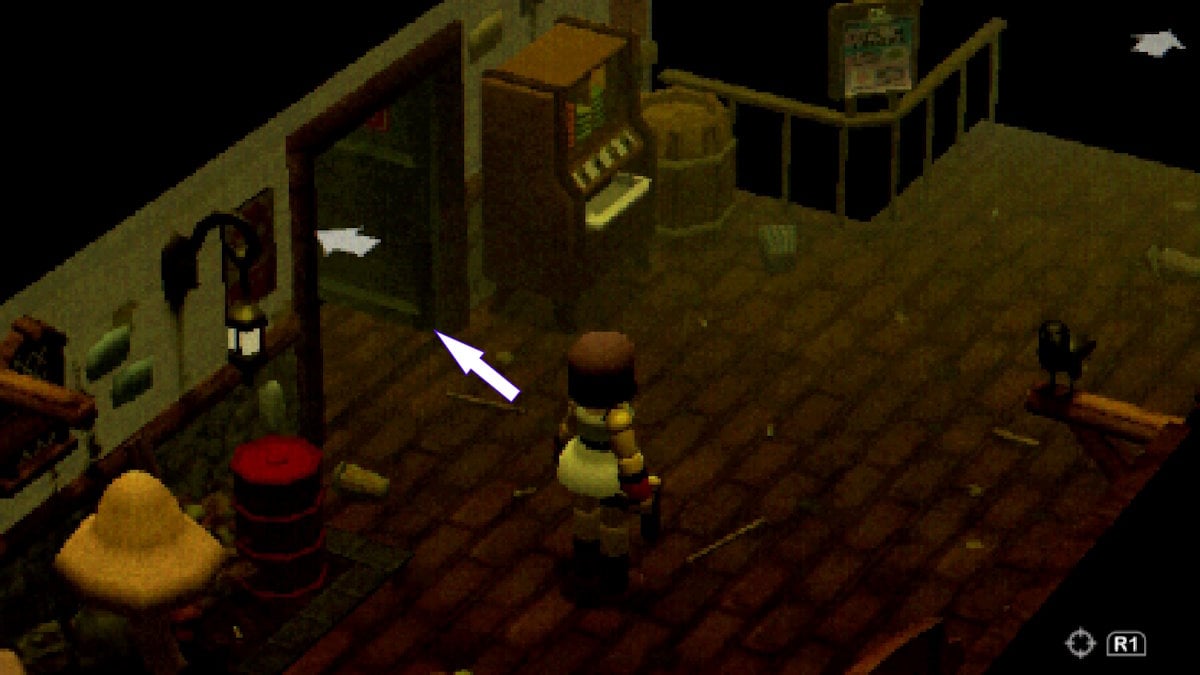
Once you're back at Fairytale Town, he'll be gone and in his place will be a scrap of paper with the code to the fairy pond. Just ahead of where the NPC was, there is a door leading straight on, and a door leading to the left.
Head through the door on the left first, but take care, as it will be your first official combat encounter (if playing on the survival horror difficulty), but also your first safe room. Head through the door, and dispatch the two enemies blocking your way.
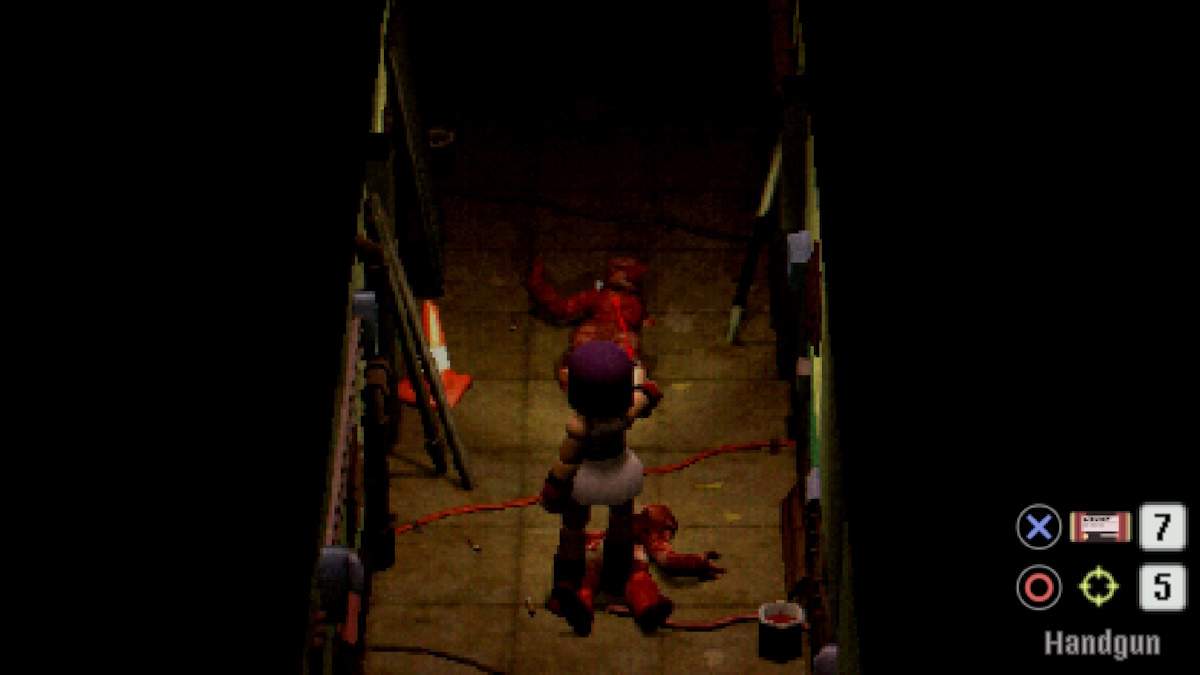
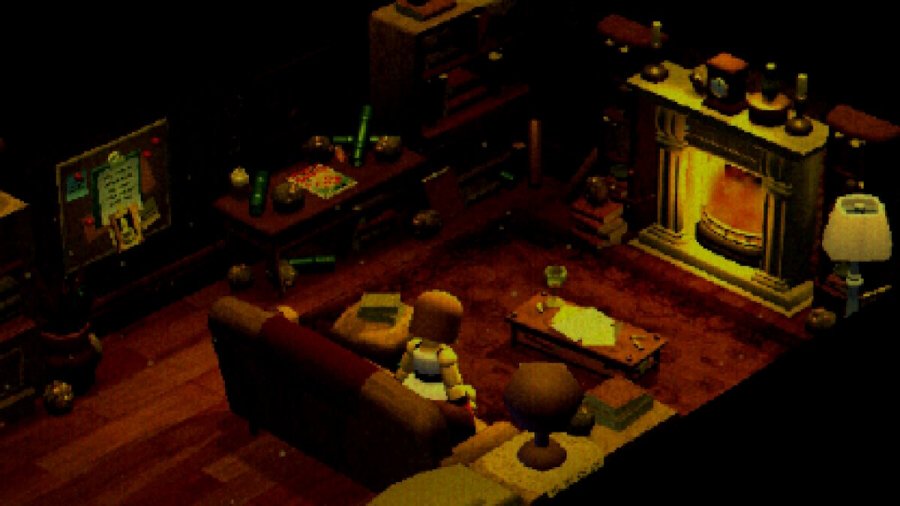
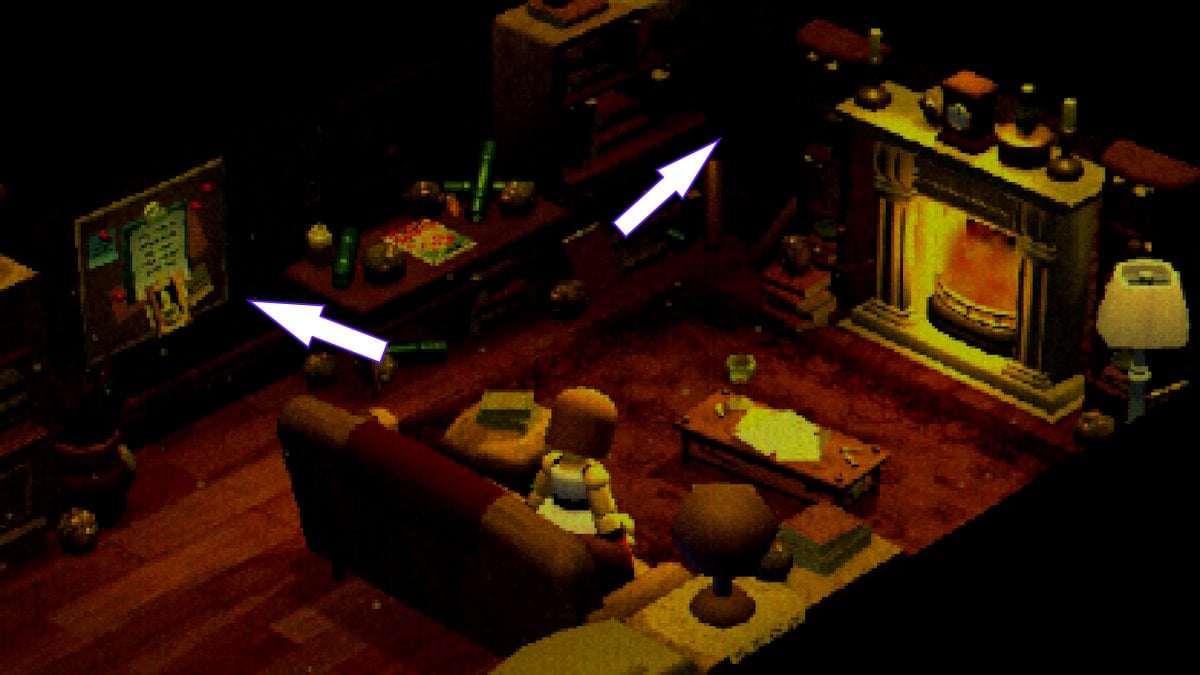
When in the safe room, there are lots of things you can interact with. The major ones you absolutely shouldn't miss, however, are on the left and back wall. One is some information on how to actually get into the Fairy Pond, and the other is an item of absolutely incredible importance, your first map. Make sure to interact with the fireplace too, as this is what allows you to save the game.
Once you're done investigating head back out, but be careful, as some spiders will jump out at you on your way out. Don't waste too much ammo on them and avoid them if possible, as there will now be enemies wandering around Fairytale Land. Make sure you're careful with your ammo. Remember to utilize bear traps, exploding barrels, wall traps, and get closer to the enemies (and aim for the head) to do as much damage as possible whilst expending as few rounds as possible.
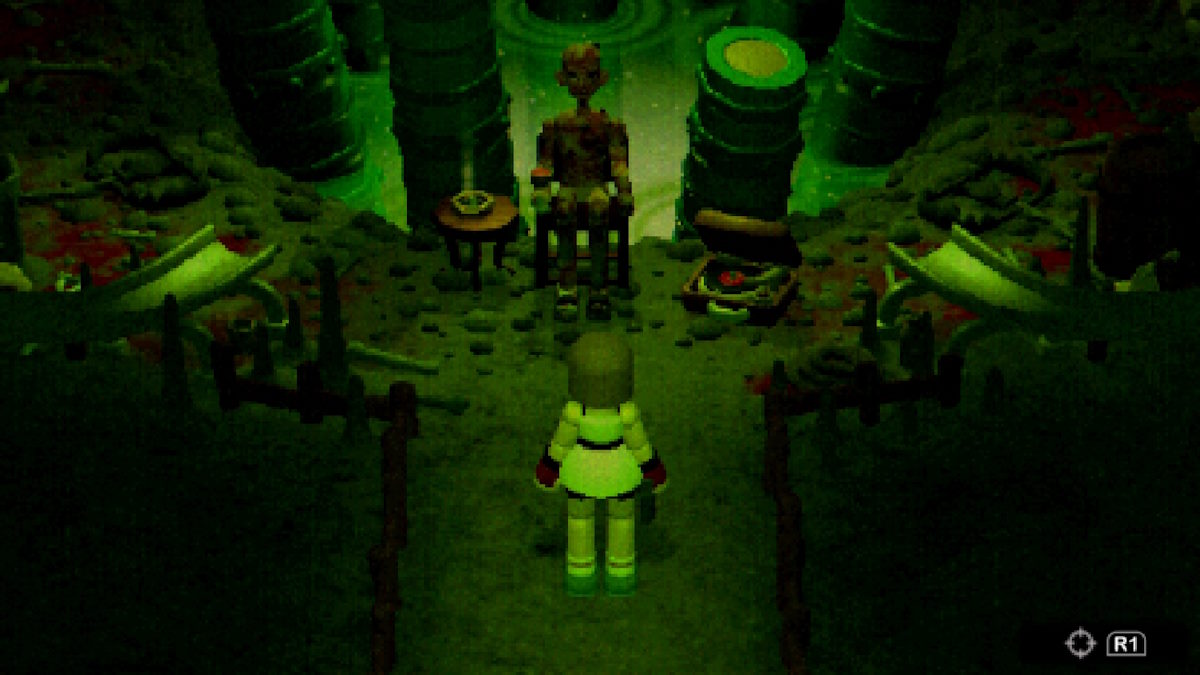
Next, we'll head back to the 'tree lady' we passed on the way to the safe room and enter 3184 on the keypad. She'll then turn around, so interact with her, and say the following words as we read in the note.
"Hear me, oh Great Fairy of Fairest Forest!"
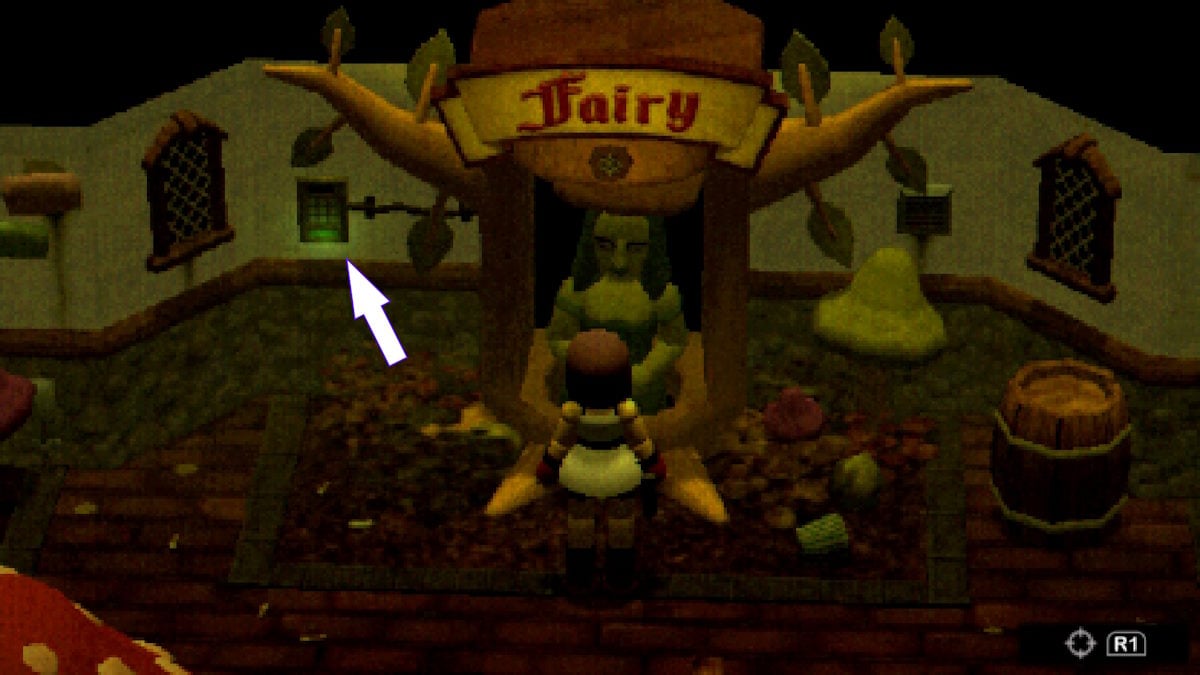
Once inputted correctly (using up and down to select the phrase and left and right to change the part of the sentence), she'll do a nice twirl, and gladly get out of the way for you.
Fairy Forest and Valve Puzzle Walkthrough
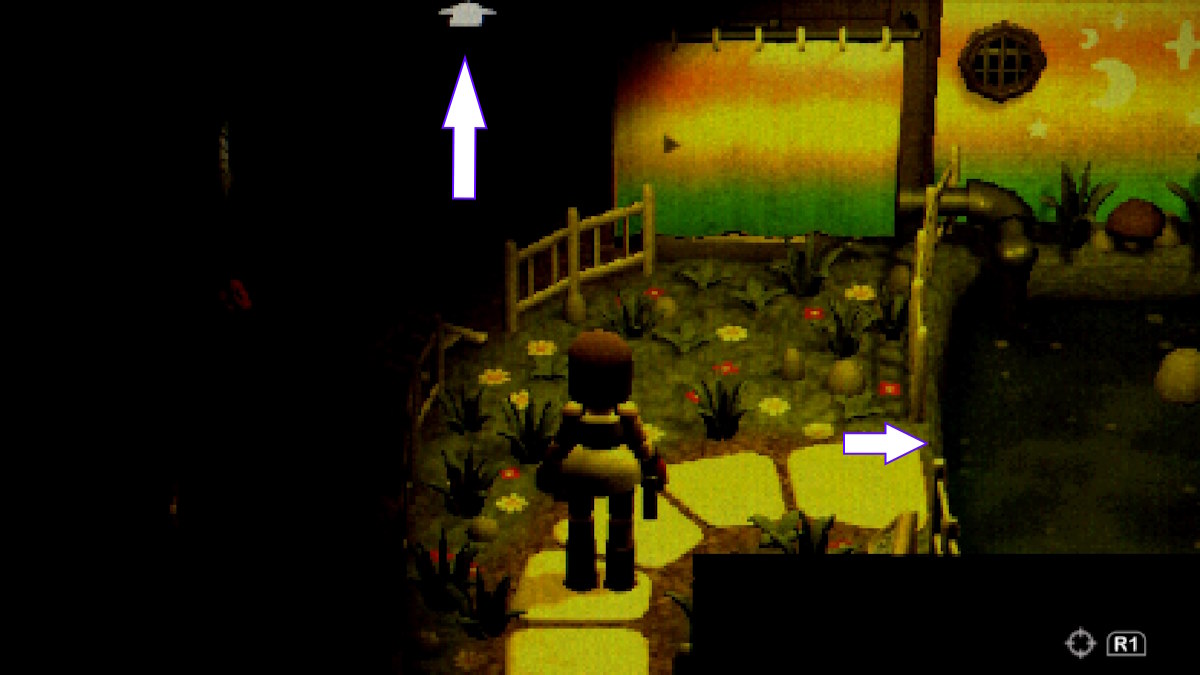
Right as we walk into the Fairy Forest, you can see another room directly ahead, which contains a weapon upgrade hidden in a wall on the back right wall. We won't get this weapon until much later, but it's worth grabbing early.
The solution to this puzzle is balancing the pressure in the filter pump using the valve. And if we mess it up, the vents will start up (and an earlier note mentioned that this might not be good for our health). Thankfully, there's an antidote in the corner to the left of the vent override which you can use if you mess up. Be careful, though; once you start fiddling with the pressure valve, it will start to spew out steam, which will harm you, so make sure to walk carefully around it.
Thankfully, this is a nice and easy puzzle, so simply turn your camera so you can see the pressure gauge on the pump whilst being able to interact with the valve. Keep turning it until it's slightly over the white section, and then carefully move to the pump, wait until it's in the white if it isn't already, and interact with the pump. If you mess up, run to the vent override and interact with it; and use the antidote as you'll be poisoned.
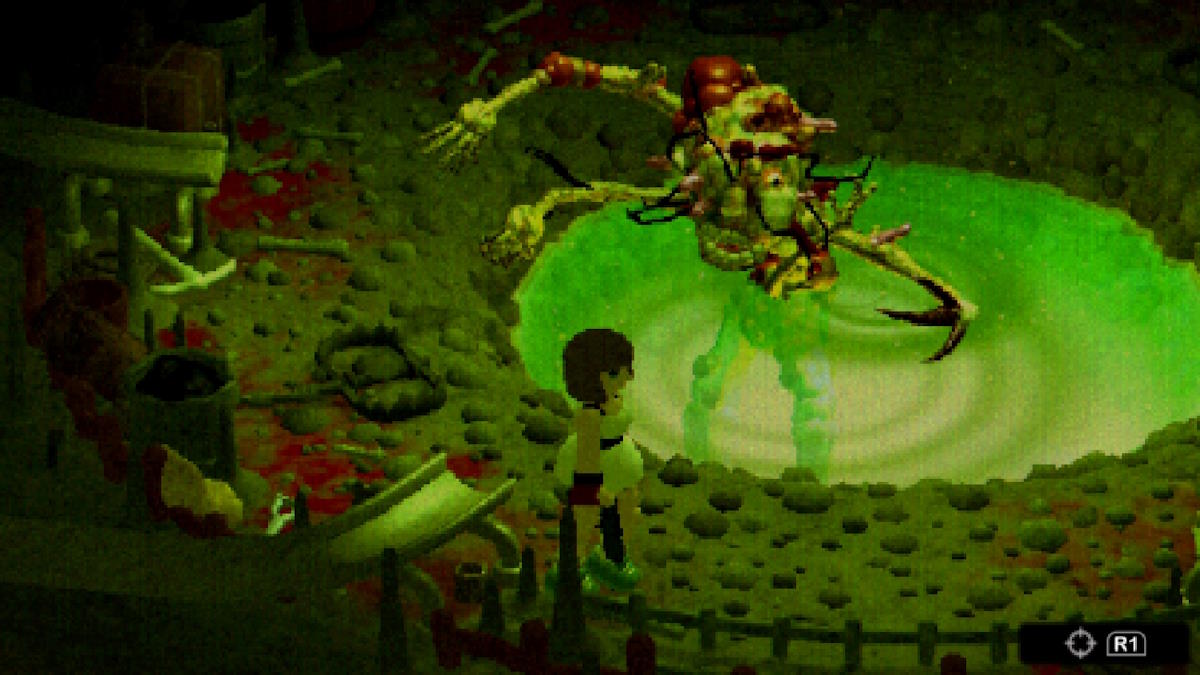
Turn back to the pond and you'll see a target in the water. Shoot the target, and the fairy will return holding the bronze key.
Crow Country Hub Area II Walkthrough
Heading back to the hub area, be careful as you enter, as there is a new enemy type on the left as you enter. Lead it over to the exploding barrel and shoot it for some extra initial damage before finishing it off with your handgun. Once it's dealt with, head back over to the training room you passed earlier and unlock it with the bronze key; inside is another safe room with some more interactions.
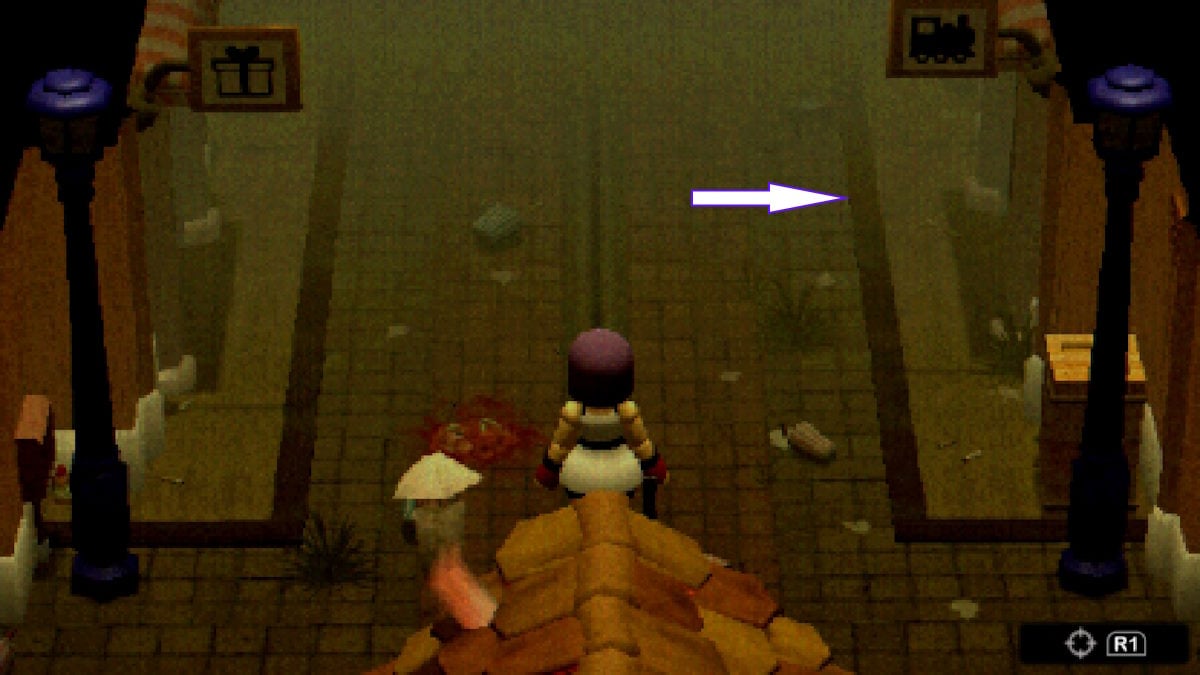
Head back to the bird and, this time, head right, using the bronze key to unlock the next main area... Haunted Hilltop.
Haunted Hilltop Walkthrough
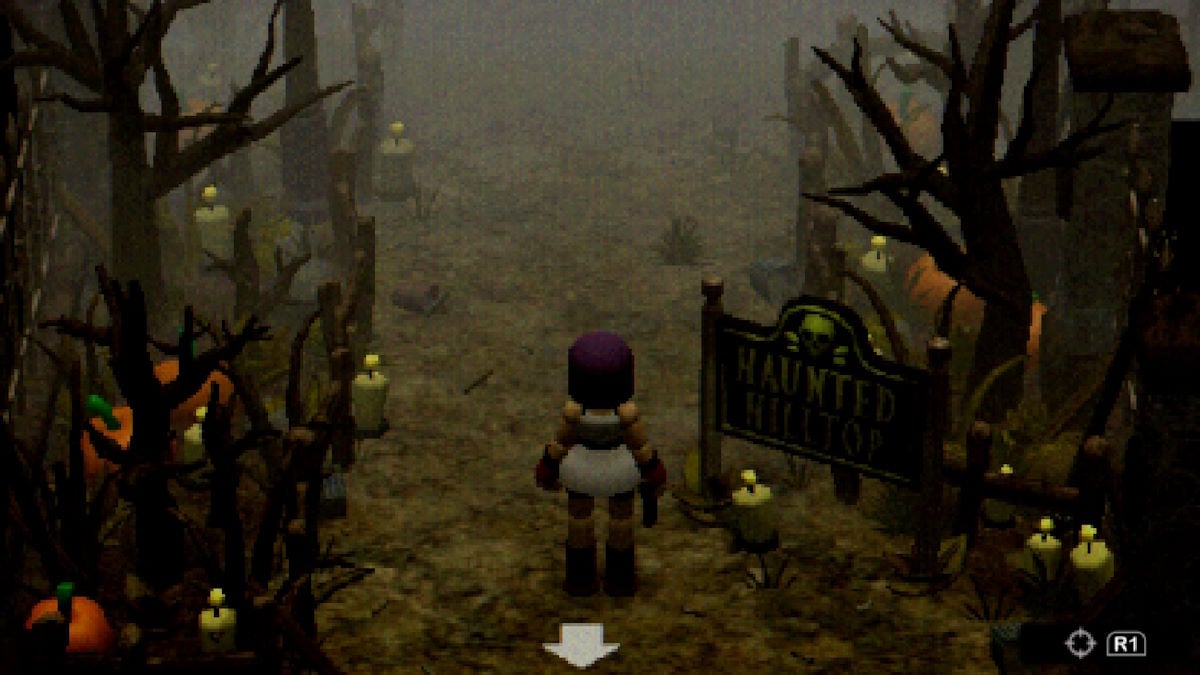
Our next locale should be a nice one, as now we're in the clearly labeled 'HAUNTED HILLTOP' (complete with a little skull and bones and everything).
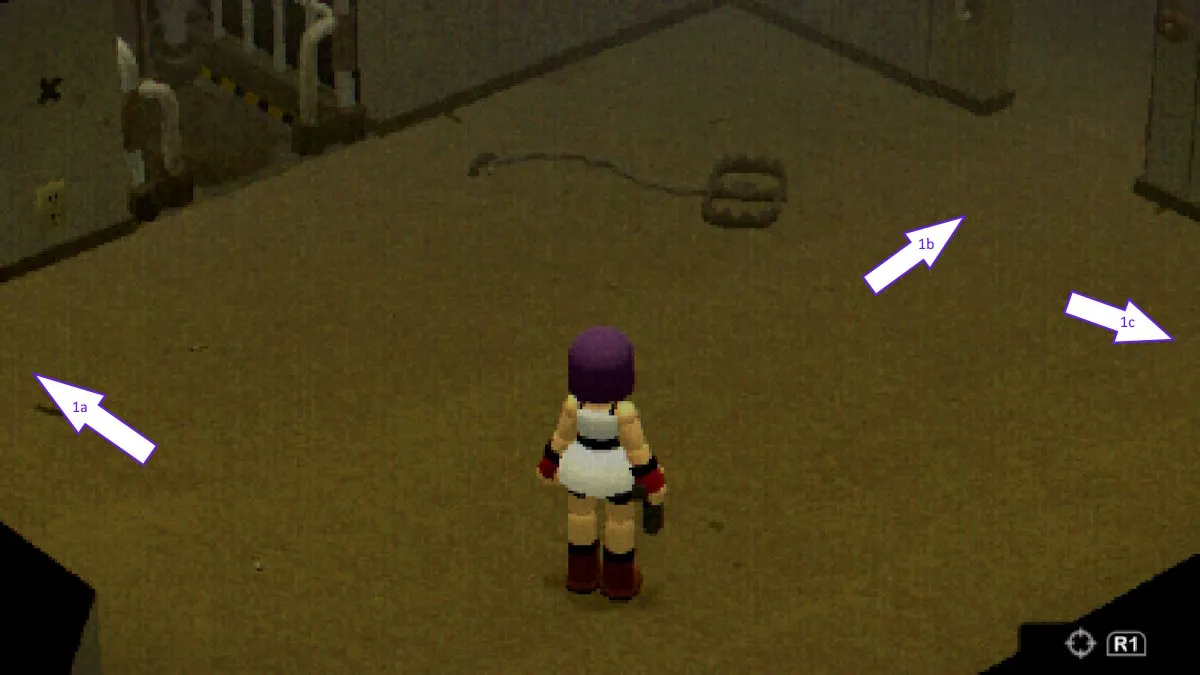
As you enter Haunted Hilltop, there's a few potential places to go. Make sure to grab the second map first, and head to the right to speak to another NPC, this one banging on a metal door.
- 1A - Dungeon
- 1B - Crypt & Mansion
- 1C - Map Container
- 1D - NPC
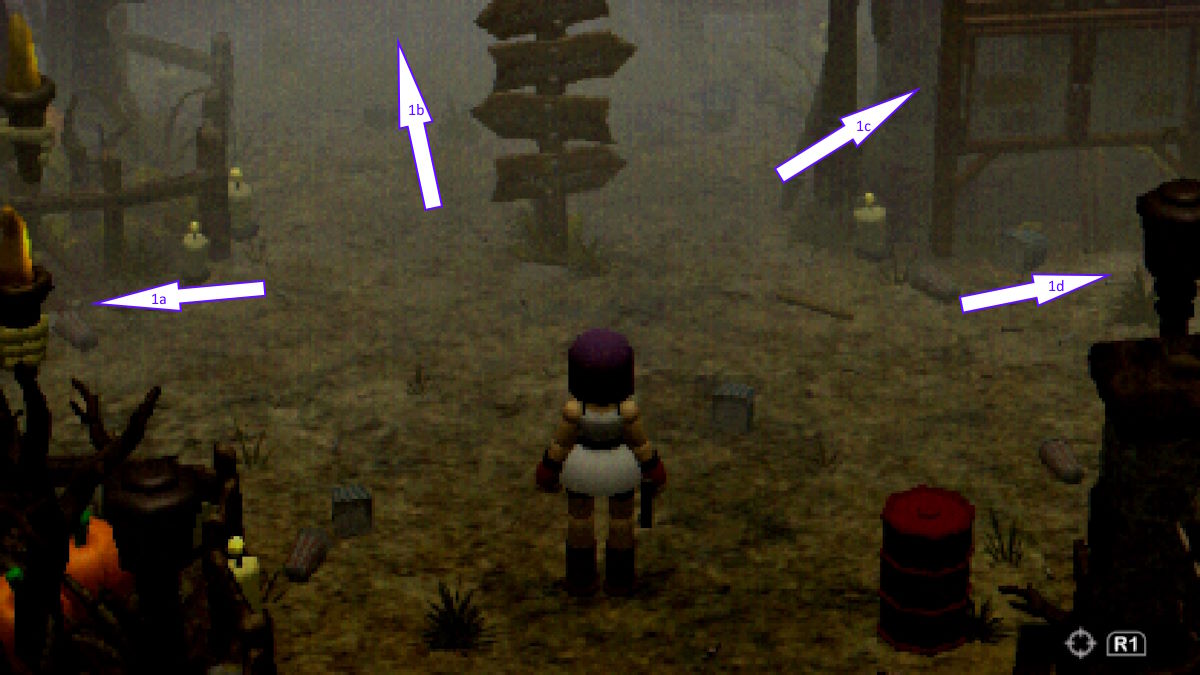
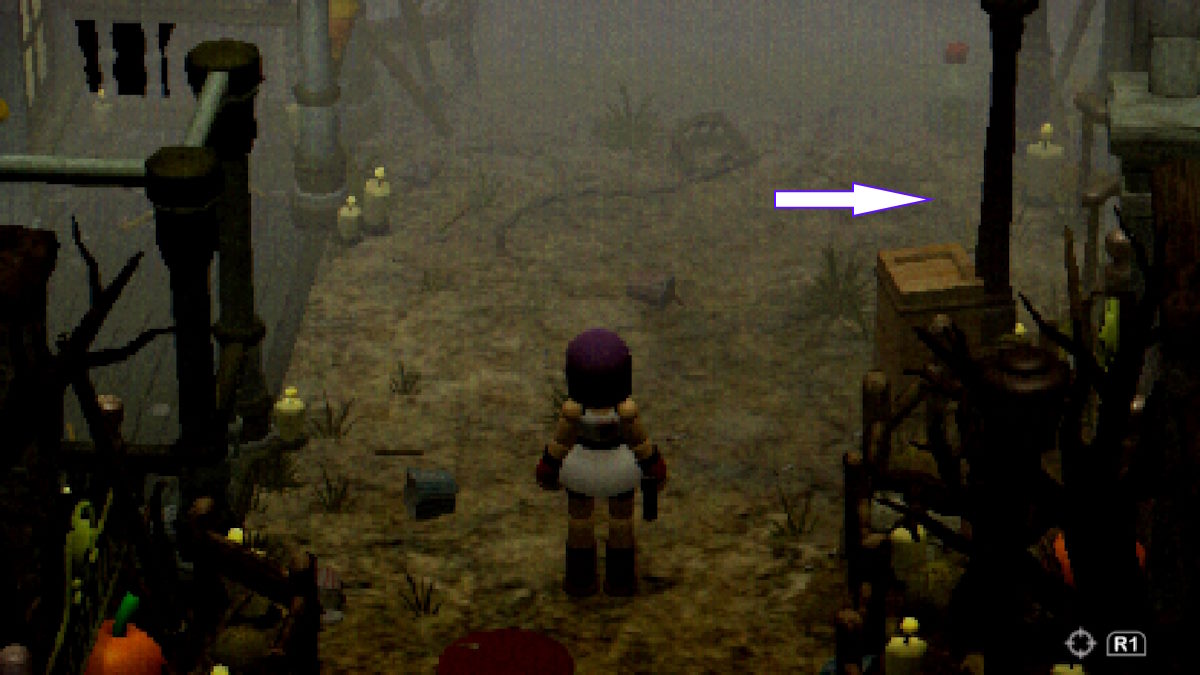
First, head to The Crypt which is straight ahead, and then a right from where you came in. Another reminder to make sure you've saved before entering, as you'll be locked in The Crypt until you solve a puzzle.
Crypt Puzzle Walkthrough
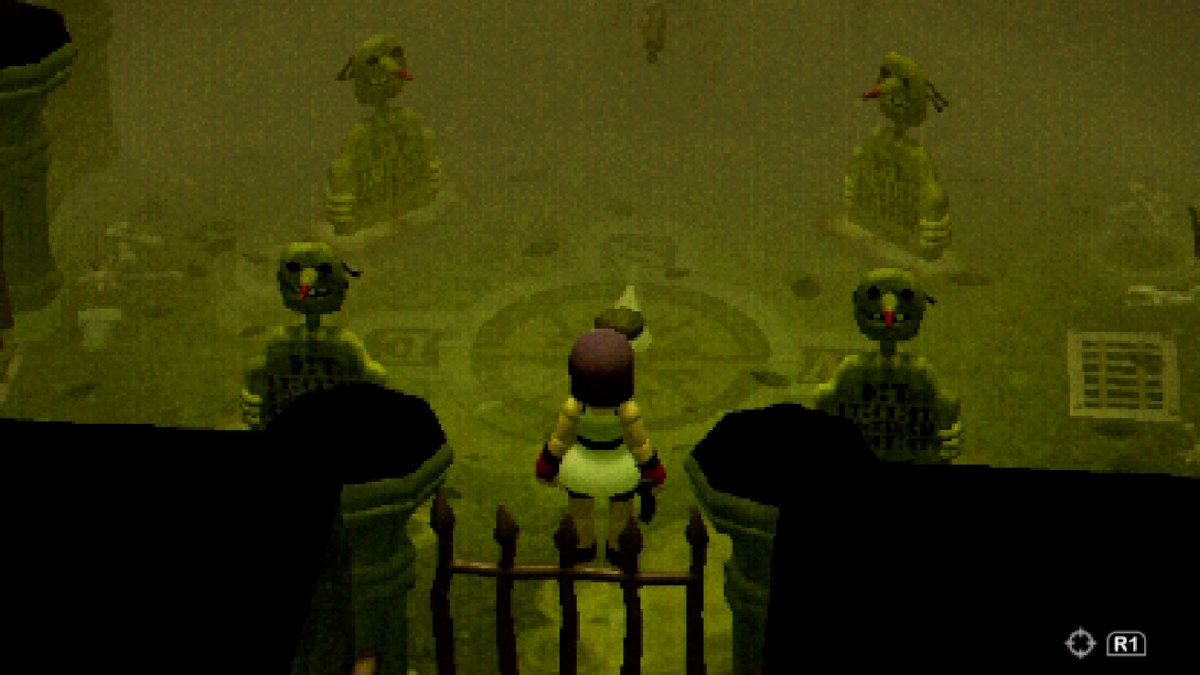
Upon entering you'll be met with a ticking clock, a shotgun, and four gravestones.
The solution to this puzzle is check the first letters of whatever names the gravestones might have, and then turn the heads to the corresponding compass direction accordingly, using the compass on the floor as a guide.
Once you're done with the puzzle, a monster will burst from a hidden compartment to the right of the gate on the back wall of the room. Lead it away from the wall, and there'll be some ammo hidden on the right of the hidden compartment if you run out.


Once it's dealt with, return to the wall compartment and interact with the handle to open the gate to the safe room, and a new area. Before you leave, make sure to carefully check the walls of the Crypt as there is an item (gasoline) that you'll need later.
Crypt Saferoom and South Utility Corridor Walkthrough
Upon opening the gate and heading up the stairs, you'll be met with another save point, so be sure to use it. Heading straight on from the fire will lead you to The Cell, an elevator, a safe, and the vault door the NPC is stood on the other side of. Check out the door at 1A first to collect some handgun ammo and gasoline.
- 1A - Door
- 1B - Elevator (Not working)
- 1C - Safe, Map, Cell, NPC Door


Head straight on and interact with the latch on the right of the large metal NPC door to open it and allow her inside. This will allow you to converse with her, to which you should do so until her dialogue is exhausted. Assuming you help her, she'll mention she's heading into the cell.
Before following her, interact with the safe. There's a book to the right of it which will give you a hint, but otherwise, the safe code is 1872. This will give you the hand crank, another important item we need for later along with the gasoline.
Enter The Cell and speak with Julie again, exhausting her dialogue. She'll give you a hint on where to go next, but first, interact with the hidden floor panel to open the cell door for a large med kit. There is also some more handgun ammo hidden behind Julie.
- 1A - Hidden Panel
- 1B - Large Med Kit
- 1C - Handgun Ammo

Leave through the door you opened for Julie and head for The Haunted Mansion.
Haunted Mansion Walkthrough
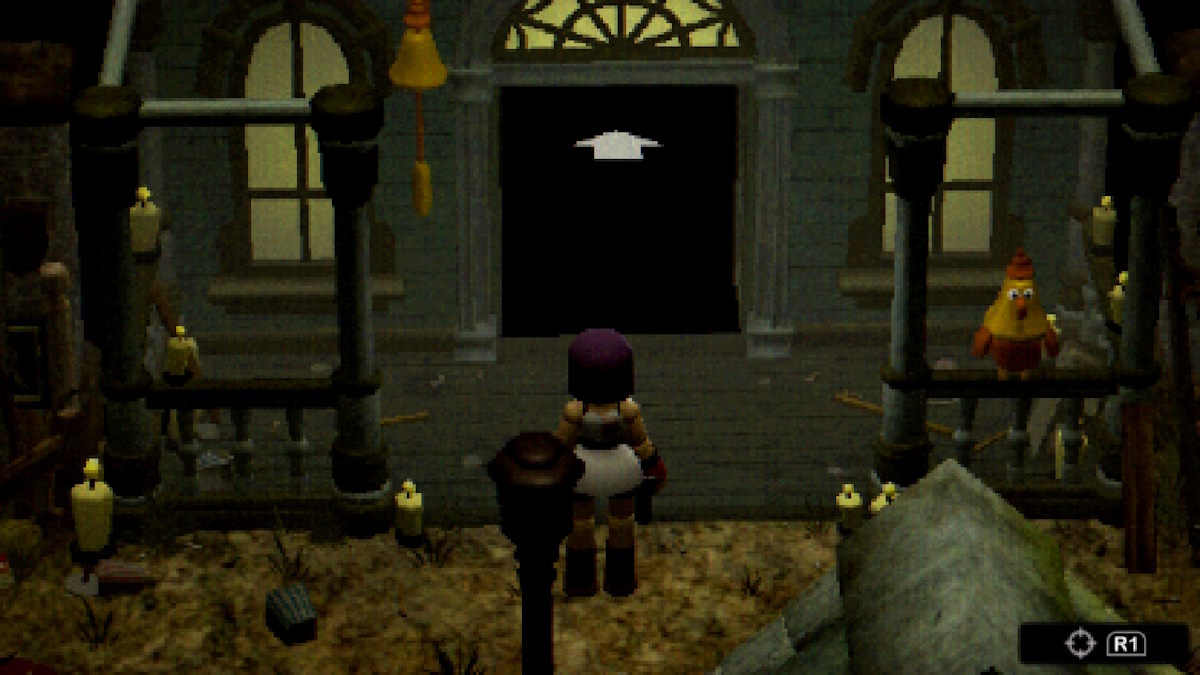
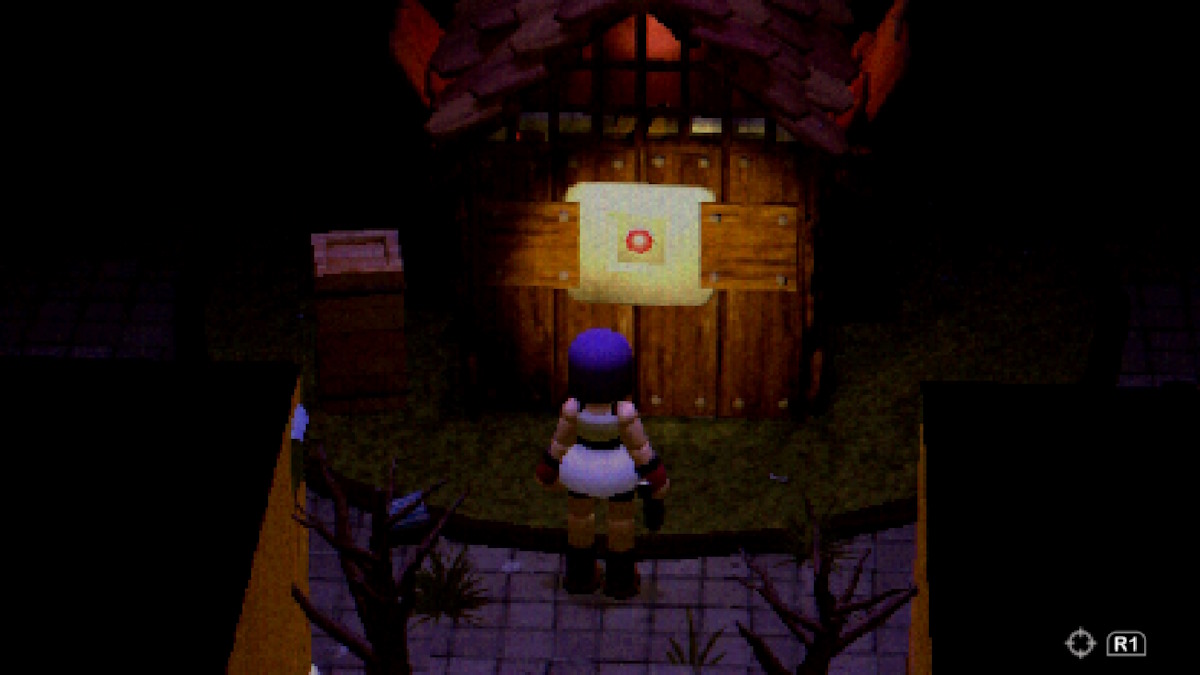
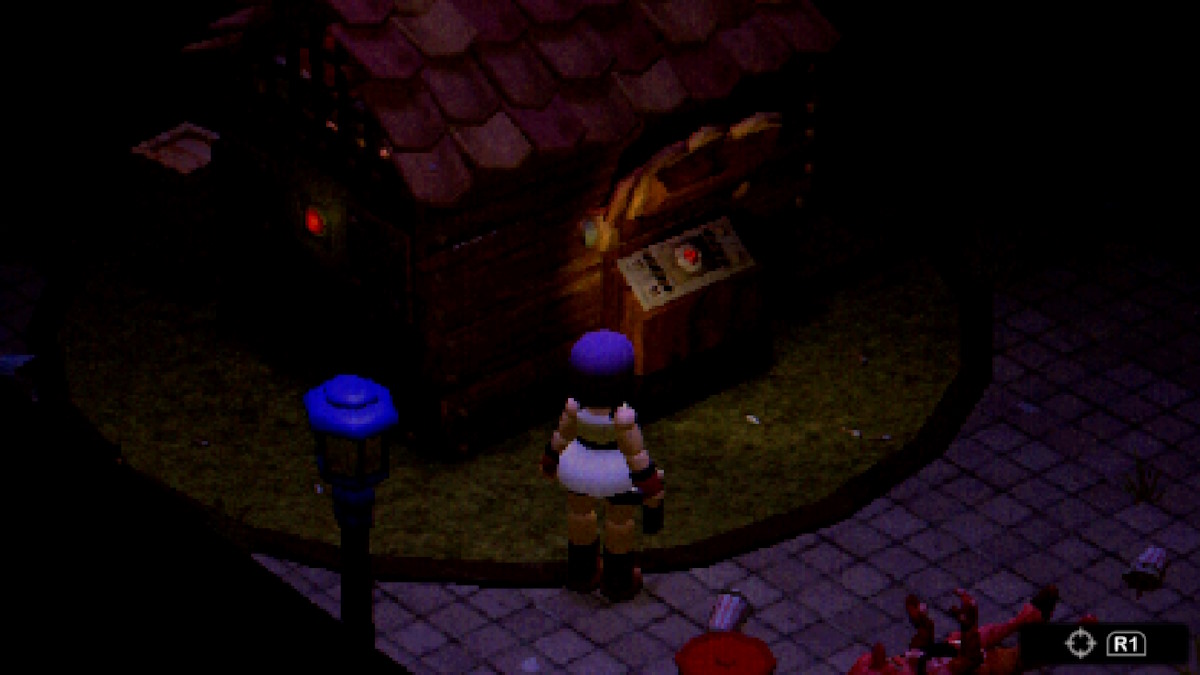
Once again, there is more enemies in the area now, so be careful heading out. The Haunted Mansion is directly opposite where you entered into The Crypt, so head back that way. You'll be met with an owl and a locked door, interacting with the owl will prompt it to hoot five times, so you simply need to ring the bell to the left of the door five times, and then choose the 'leave' option.
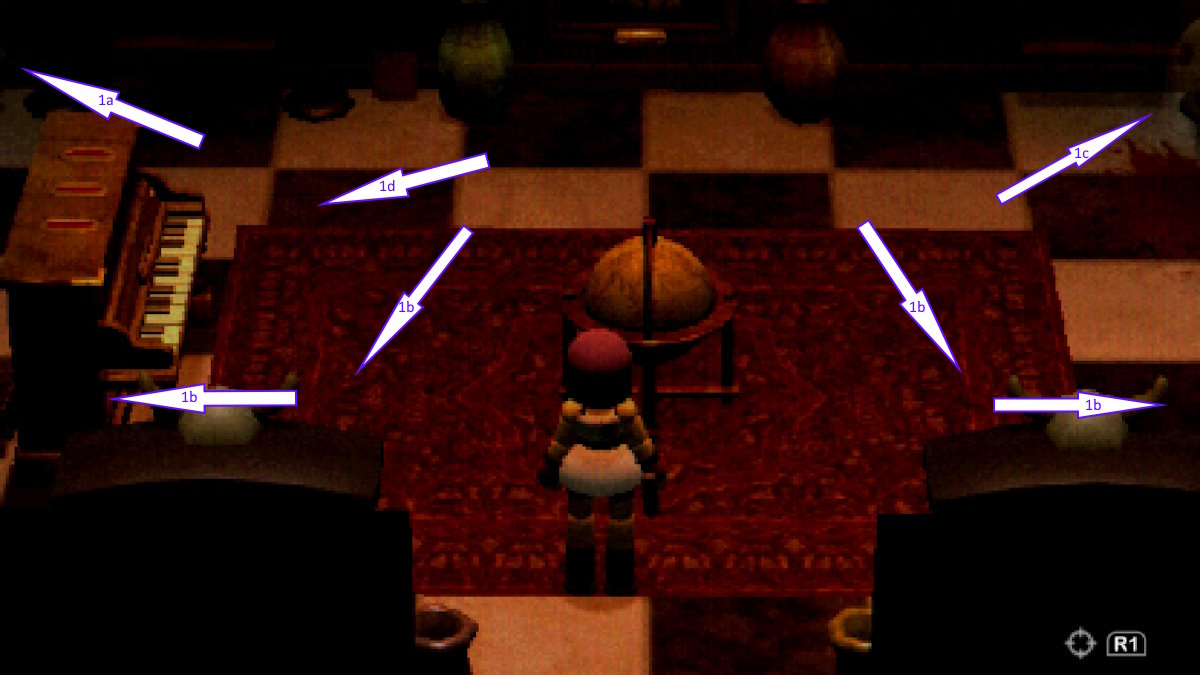
Upon entering, you'll hear a telephone ringing. Head towards the top left to find it and pick up, exhausting the dialogue. In the Mansion there is a Piano, Bookshelves, and Clocks and a fortune teller machine in the room.
- 1A - Telephone
- 1B - Bookshelves
- 1C - Clocks
- 1D - Piano
Be careful interacting with the bookshelves, as the name of the book will correspond to an effect if you interact with the book again.
Inconsequential will do nothing, Histories Deadliest Poisons will poison you, A Swift End will instantly kill you, and Pull The Pin will grant you a grenade item. The books on the shelves appear to be random each time, so there may be some not mentioned here. Head over to the clocks, and interact with the demon painting in-between them for a hint on the solution, but otherwise, you'll have to set the left clock to 10:20, and the right clock to 11:15. You can do this by using the crank item you got from the safe in the tunnel.
Interact with the item that appears from the demons mouth to retrieve the gemstone, which we'll be using for a puzzle back in Fairytale Town.
On your way back from Haunted Hilltop, the telephone near the fortune teller machine in the hub area will be ringing, pick it up for some more mysterious dialogue. Once you're done, head back into Fairytale Town, taking care of a new enemy type. Once again, lead them towards barrels to save ammunition, but be careful not to stand on these ones as they will explode and damage you. Head to the door on the left as you enter to see the Swan Puzzle.

Swan Puzzle Walkthrough
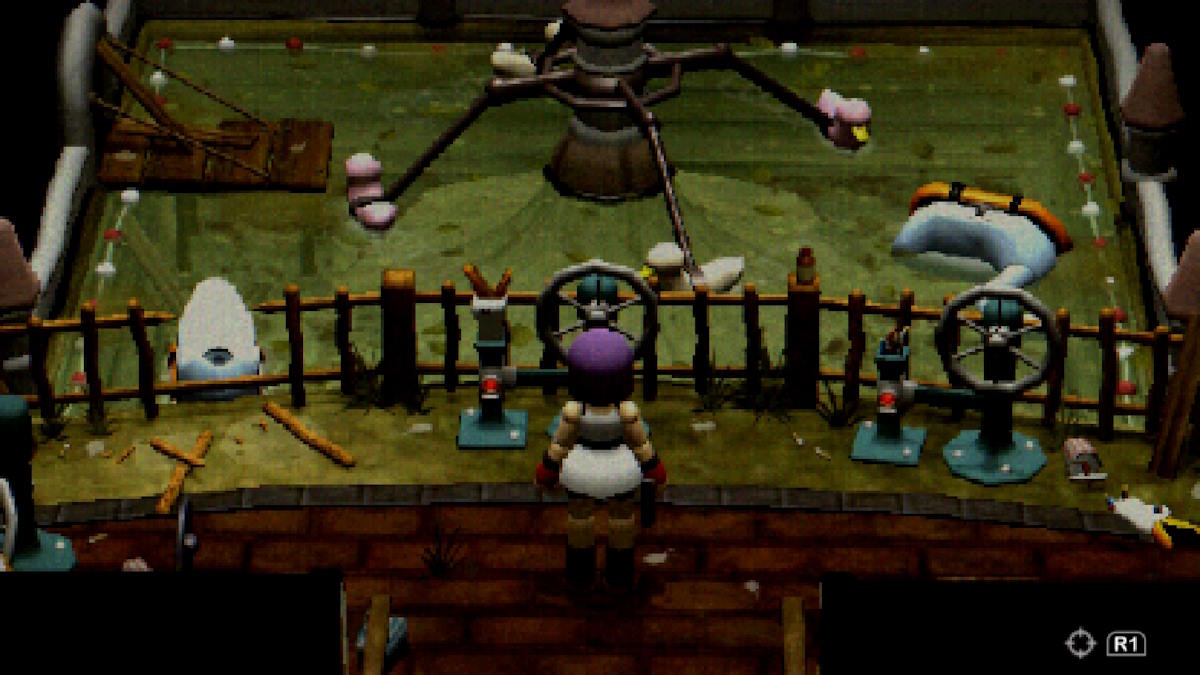
With the gemstone at hand, interact with the pillar next to the wheel. Use the gemstone item, and then take control of the wheel. Your aim is to guide the swan to the broken spot in the fence to the left of the wheel. Once you've done that, interact with the swan to get the chain item.
Next we'll head to the new door that has opened up since the last time we were in Fairytale Town, the Mush Room. After leaving the Swan Room, head straight down until you see a large mushroom on the right, directly opposite the Fairy Pond we were at earlier. Enter through the mouth of the mushroom.
Mush Room Puzzle Walkthrough
It is highly suggested you save before doing this puzzle, as it has a higher chance of killing you than most. Enter the Mush Room, and shoot the chandelier trap so it doesn't catch you later. Head straight down the room, and check the scrolls on either side of the Mushroom King.
The solution is intentionally misleading; the aim is not to eat only the good mushrooms, it is to eat ALL of the mushrooms, so you must do so strategically. Use the guide below to know which are good, and which are bad. You'll know if you've eaten a bad one based on the animation of your character holding their stomach. After eating a bad one, ensure you heal or use an antidote if you are poisoned.
- "LENTINULA EDODES" = Good (Shiitake)
- "MORCHELLA" = Good (Morel)
- "AMANITA RUBESCENS" = Good (Blusher)
- "AMANITA PHALLOIDES" = Bad (Death Cap)
- "LEPIOTA BRUNNEOINCARNATA" = Bad (Deadly Dapperling)
- "AMANITA BISPORIGERA" = Bad (Destroying Angels)


Completing this puzzle will grant you your first weapon upgrade by speaking to the small mushroom that appears in the head of the Mushroom King after successfully eating all the mushrooms.
Hut Puzzle Walkthrough
When back in the main causeway of Fairytale Town, head to the small hut directly opposite the Swan Puzzle. If you haven't already, use the bronze key on the mailbox to open the door up. Enter and clear out any enemies that may be there. Head inside, and then you'll need to interact with a few things.
- 1A - Gasoline Tank
- 1B - Crane Chain
- 1C - Pipe Crank

Start in whatever order you choose, just ensure that you put the two gasoline bottles you've already found in the tank, attach the crank to the pipe and turn it, and then attach the chain to the crane. Once you've done all three, spin the wheel on the crane, and then activate the flamethrower to melt the resin and retrieve the Witchwood Mask.
Witchwood Maze Walkthrough
Return to Haunted Hilltop and head right as you enter, there you'll see the entrance to the Witchwood. Interact with the empty slot on the right of the door, and use the mask item you got from the resin in the previous section.


The Witchwood Maze isn't really a maze or puzzle in the traditional sense, so simply hit any of the glowing green pillars to match their symbol to the pillars you would like to retract. The first one is on your immediate right as you enter the maze.
Be sure to check other routes, as virtually all of them contain a helpful item of some sort, but your ultimate goal is to reach the center of the maze and interact with the cauldron until you retrieve the trident item.
Bear in mind once you do, the maze will turn dark and enemies will spawn, so be prepared and make sure you're healed. The Trident is used in an area we've not been to yet, so return to the hub and enter the next main area... Ocean Kingdom.
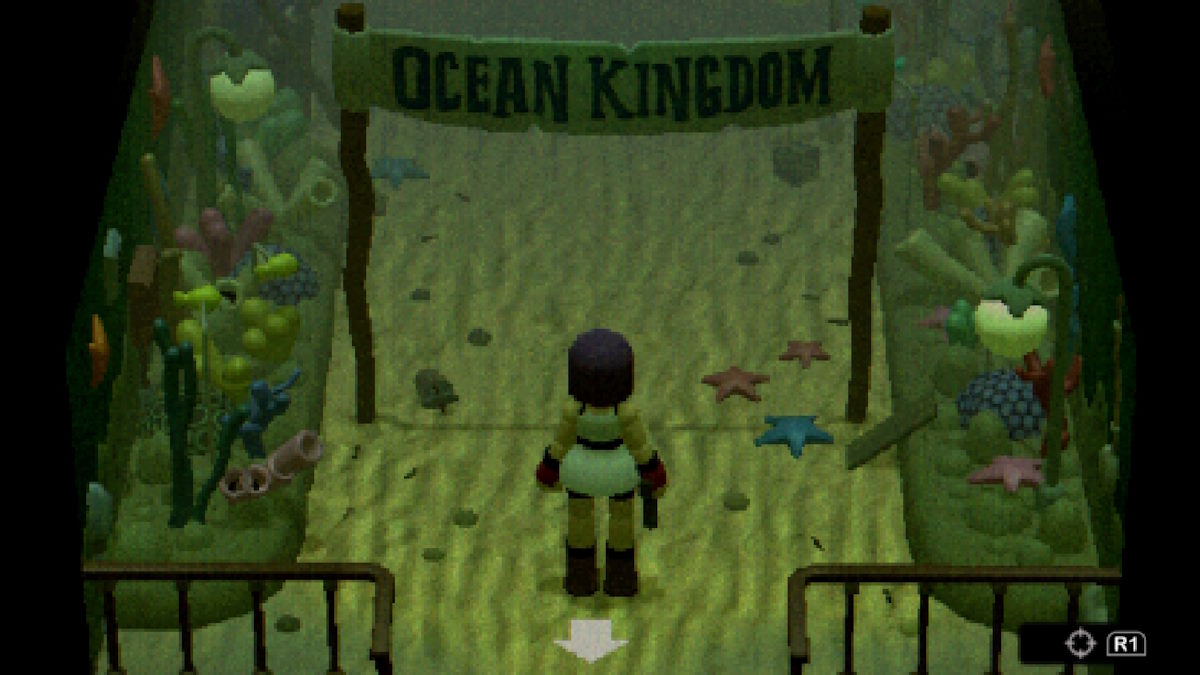
Ocean Kingdom Walkthrough
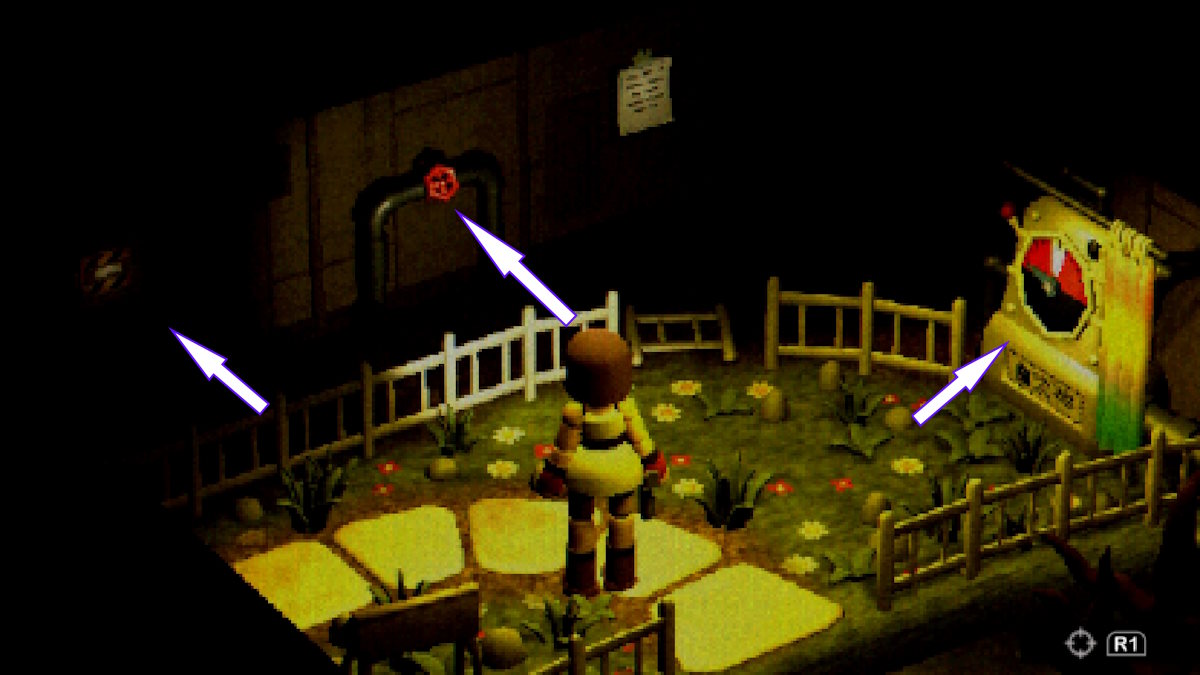
To get to Ocean Kingdom, return to the hub area and head to the left of the crow. Interact with the hole on the left of the door, and select the hand crank when prompted to give an item. Interact with the crank, and turn until the spikes are entirely retracted. Be careful when you step through, as the spikes will jolt forward and harm you, so make sure to heal first if you have to.


When inside Ocean Kingdom, there are only two places we can enter at first, so we'll first be heading straight and then to the left to enter the submarine to try our hand at unlocking the shotgun.
Head to the hatch on the submarine, and head down. This area doubles as a save point, and it's strongly suggested to save before attempting to unlock the shotgun. There's some ammo scattered around in here, so make sure you pick it up.
- 1A - Submarine
- 1B - Sunken Treasure Arcade

When in the Submarine, ensure you have at least five bullets available. (Some extra in-case you miss is absolutely suggested here.) The aim of this game is to reach 21 by following the scoring board rules for what each sea creature is worth, but thankfully it's a bit simpler to do than it might seem at first. Shoot the following sea creatures to ensure the most efficient use of ammo.
- Shark
- Shark
- Shark
- Shark
- Dolphin
Once done, the container holding the shotgun will open. Another save is suggested, as there is another new enemy type waiting once you leave the Submarine for the first time, far larger than most, with a health pool to match. Once he's dealt with, continue forward, and look to the left of the doors blocked by gas to find the map of the area.
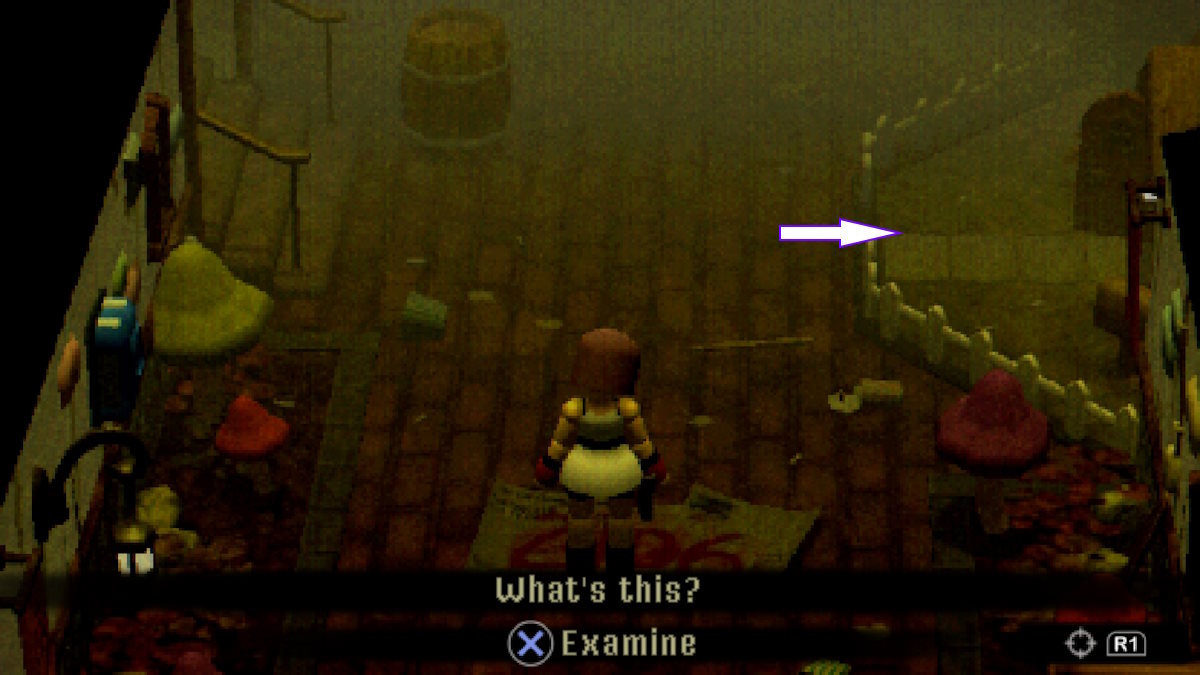
Then move to the right, and head for the open door on the back wall of Ocean Kingdom. Head in, and you'll be met with a dark arcade and another NPC. Speak to the NPC (whilst making sure your flashlight is off) and exhaust his dialogue. Eventually, he'll move out of the way and you can enter into the area behind him, which will lead you to the Staff Hallway.


The Staff Hallway serves mostly as a shortcut between Ocean Kingdom and Fairytale Town - however it also leads to our next puzzle.
- 1A - Map and Shortcut to the Lounge Safe Room
- 1B - Shortcut to Fairy Forest Pond
- 1C - Restaurant
Be careful of the crate that will be in the room when you first enter, as if you interact with it, the next time you enter the area a powerful enemy will spawn. Open up all of the shortcuts, save at the Lounge Safe Room, and continue on into the Restaurant.
Restaurant Puzzle Walkthrough
Again, this section isn't so much a puzzle as it is some careful movement and repositioning. Your aim is to get all four of the sea monsters singing, so you'll need to tap the glass at certain angles so that all four of them will sing when you're stood in front of the chest. The chest will have four green lights on it, so you know which ones might need to be readjusted.


Once completed, the chest will open, and within will be the silver key. Head out the same way you came in, and head back for the arcade.
Arcade Puzzle Walkthrough
Head straight for the back wall when you enter into the Arcade again, and interact with the panel on the wall and use the silver key to turn the power back on. The aim of this puzzle is to get all of the machines to a certain amount of points.
Your end goal is to score the following:
- One on Mermaid Quiz
- Two on Dolphin Dash
- Four on Speed Boat
- Eight on Shark Shooter
Once you're done, interact with the change machine to get a data disk which we'll be using for two upcoming puzzles.


With that done, head back to the Hub area, as we'll use the silver key to open another door and solve another small puzzle.
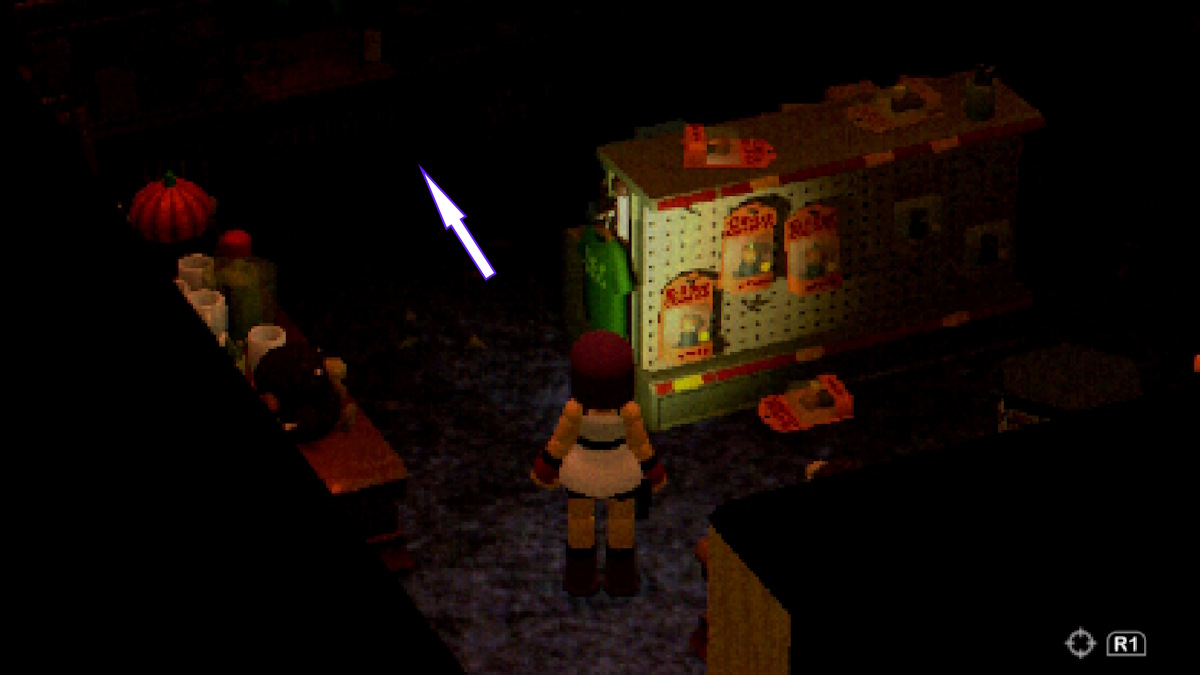
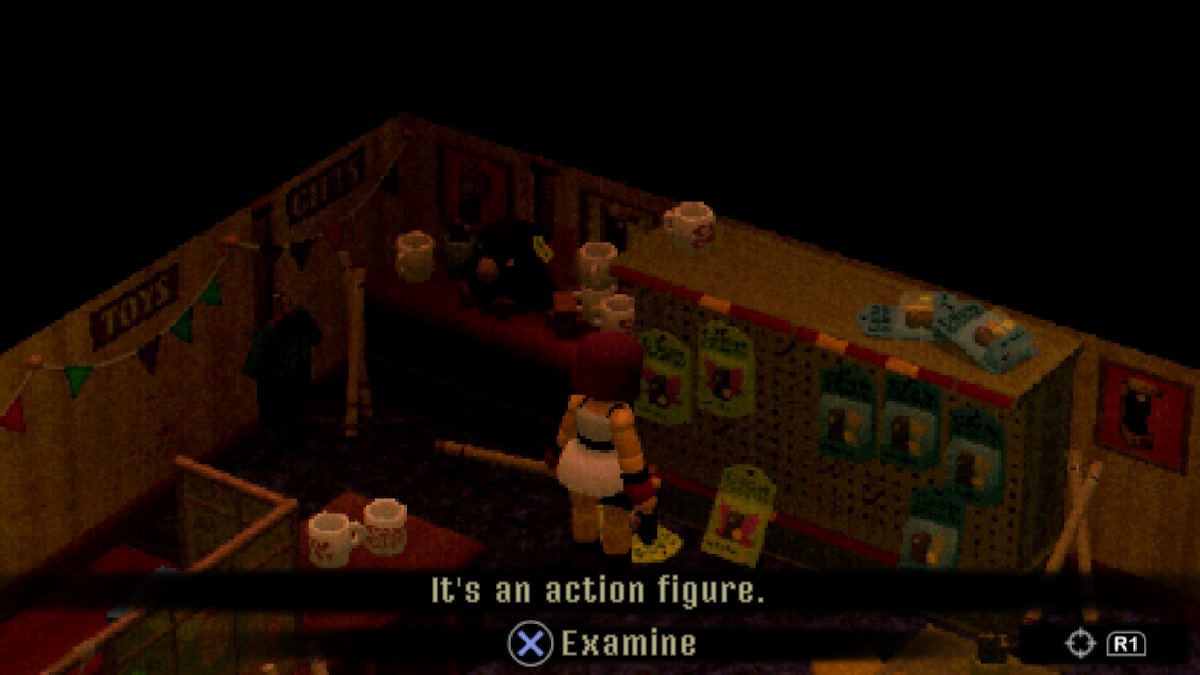
Gift Shop Puzzle Walkthrough
Once back in the hub, head for the side door to the gift shop, and use the silver key to unlock it. Once inside, clear out any enemies, and then go behind the counter to find the puzzle hint, and a mushroom who will upgrade the capacity of your shotgun.
The aim of this puzzle is to find the three gifts mentioned in the note, check their prices, and add them together.
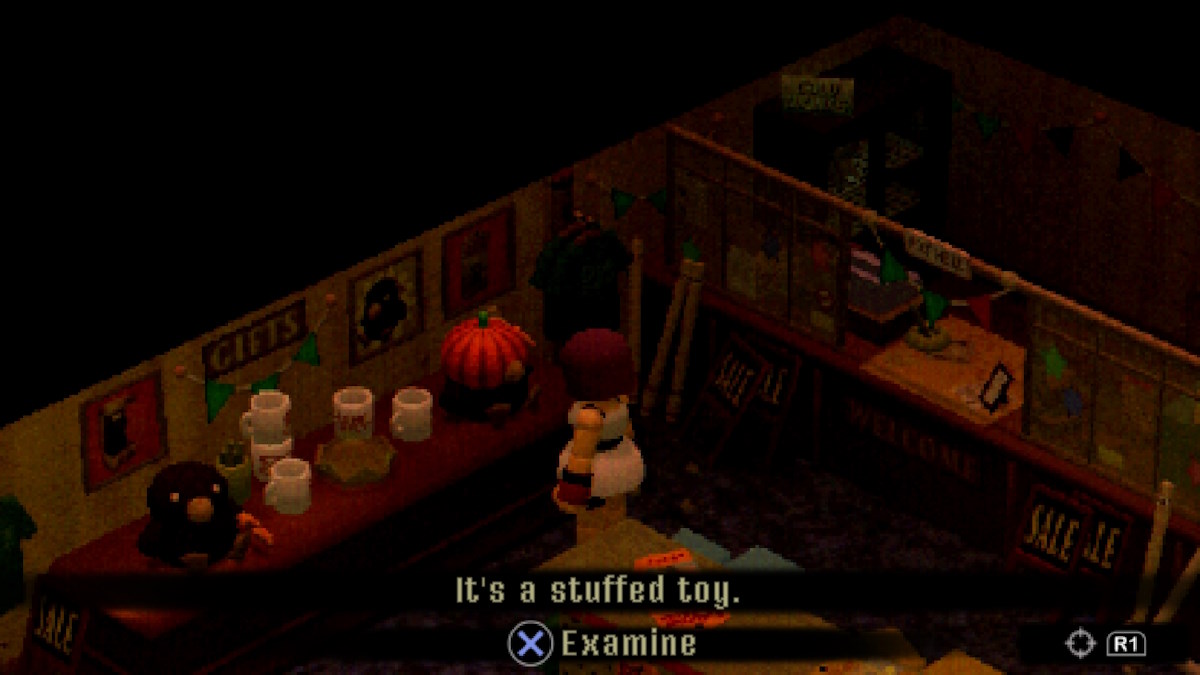
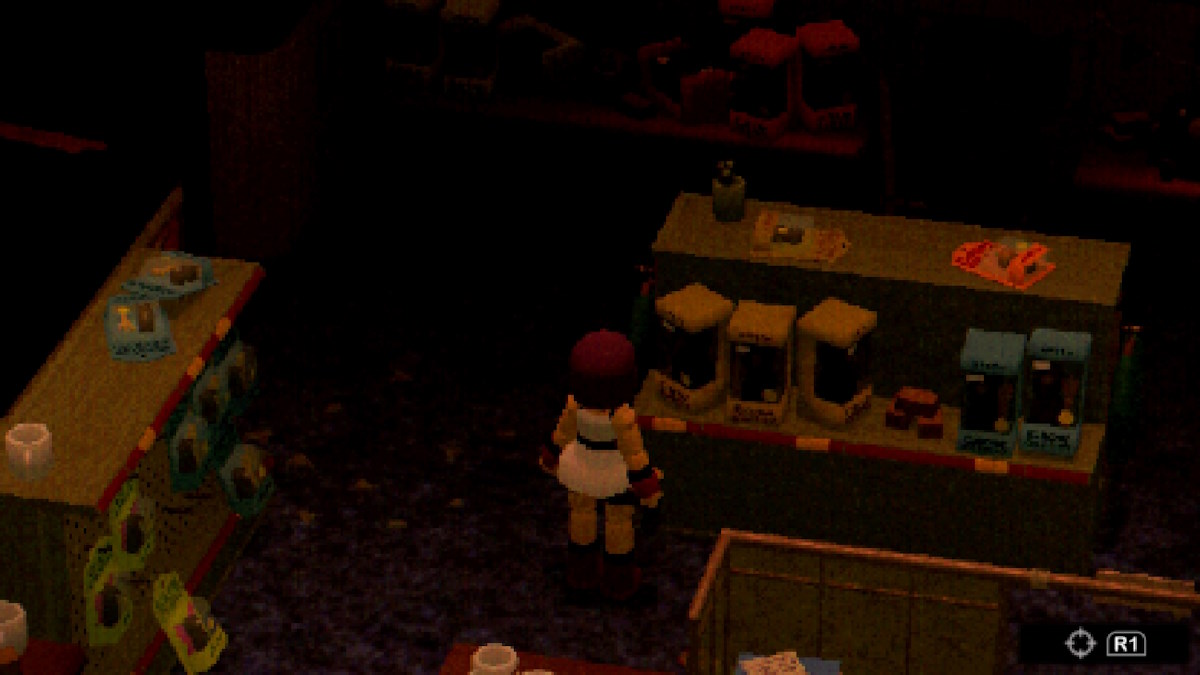
The total comes to 19.75, so take that number and punch it into the cash register, which will reward you with the magnum revolver.
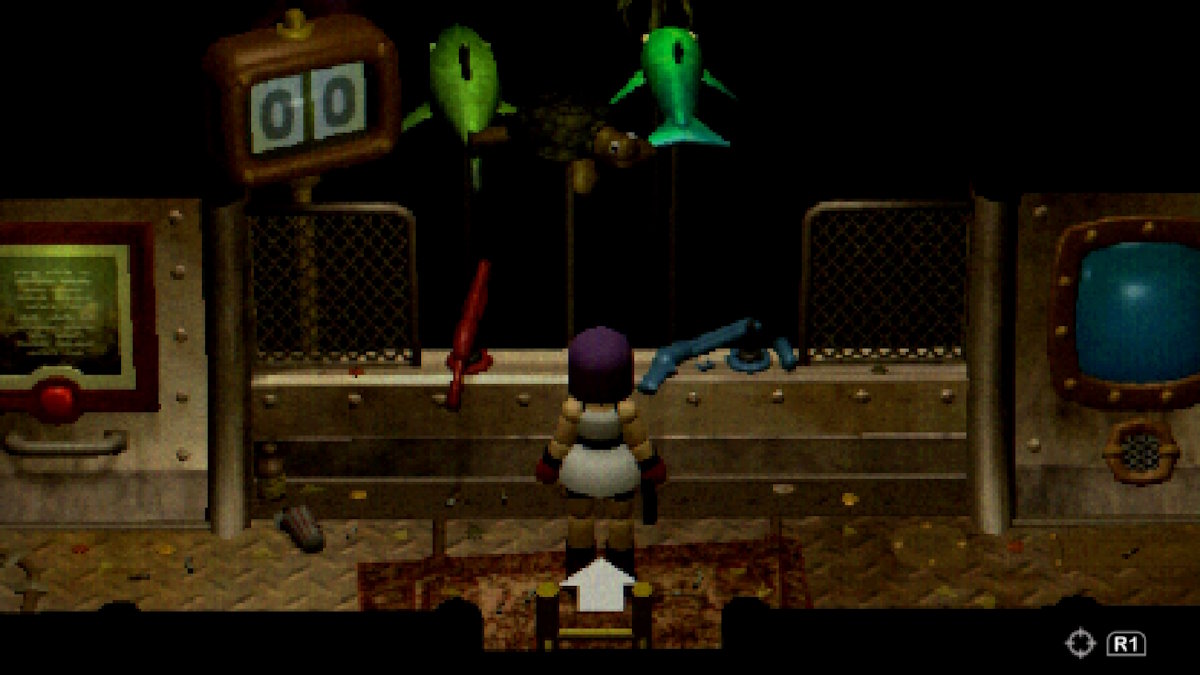
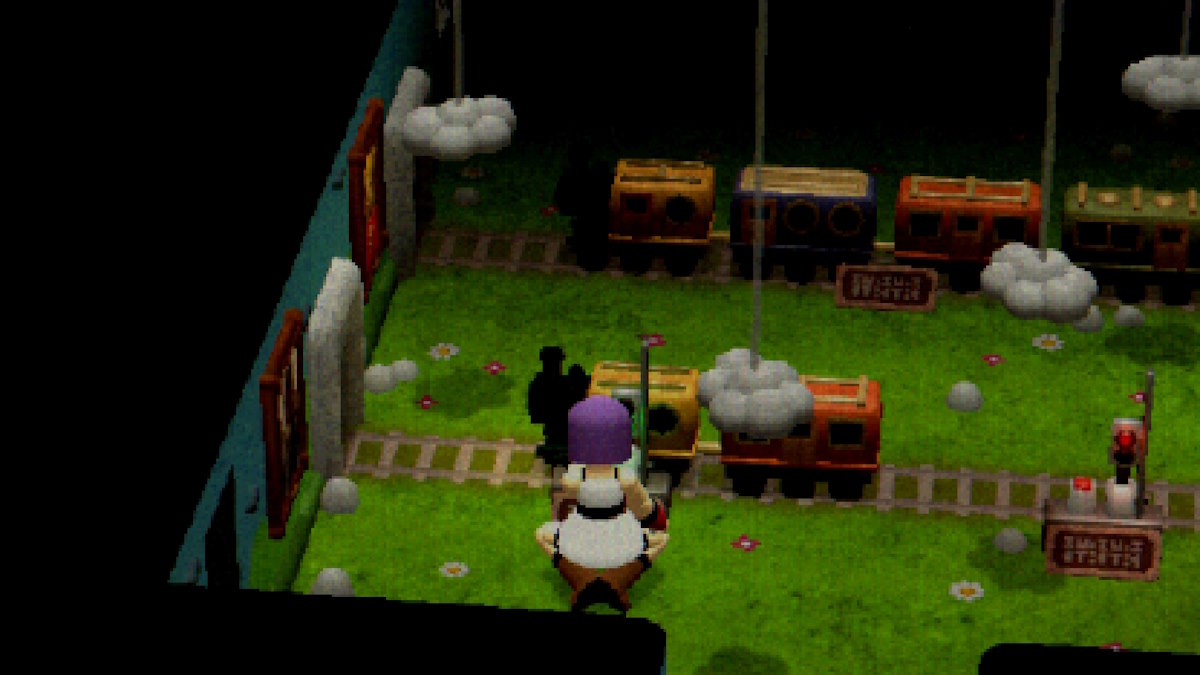
Train Room Puzzle Walkthrough
Leaving the gift shop and heading directly into the train safe room will yield yet another new weapon, the flamethrower. The train room puzzle had me a bit stumped at first, but it turns out it's as simple as reading some more first letters.
Interact with the computer use the security disk we got at the arcade earlier, and input the following combination. The solution is found by examining the plaques in front of the two interactive trains, and noting down which 'Style' of cars they have. Refer to the images below if you'd like to try solving it yourself, or check below for the solution.
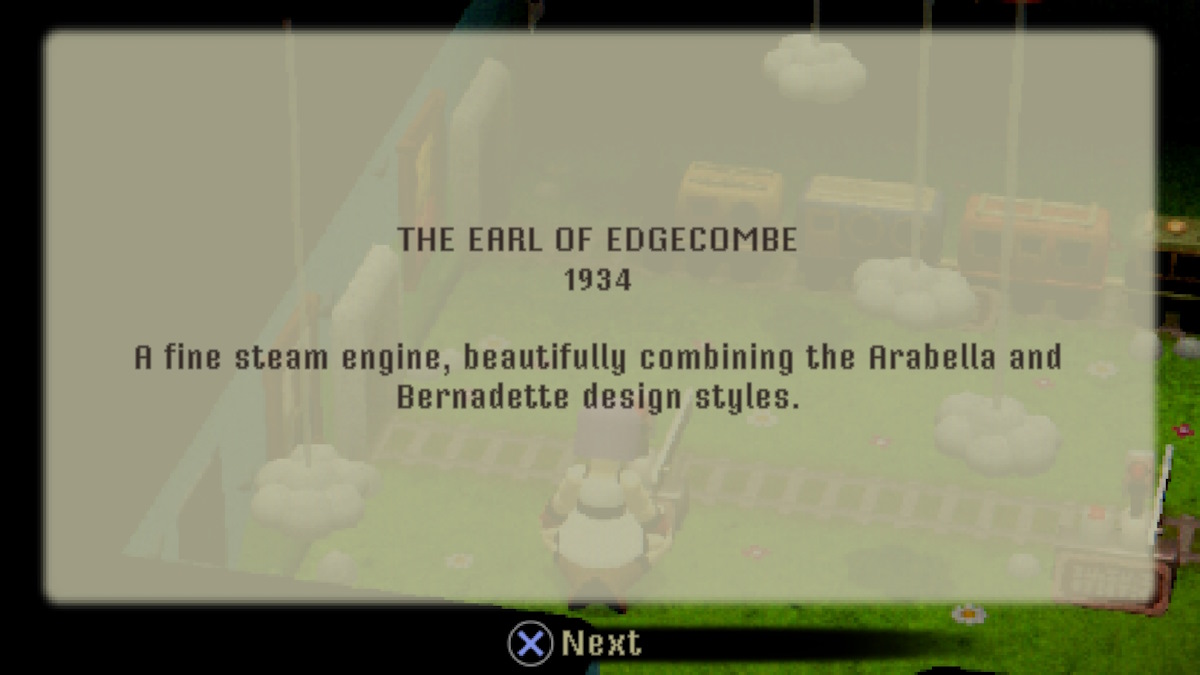
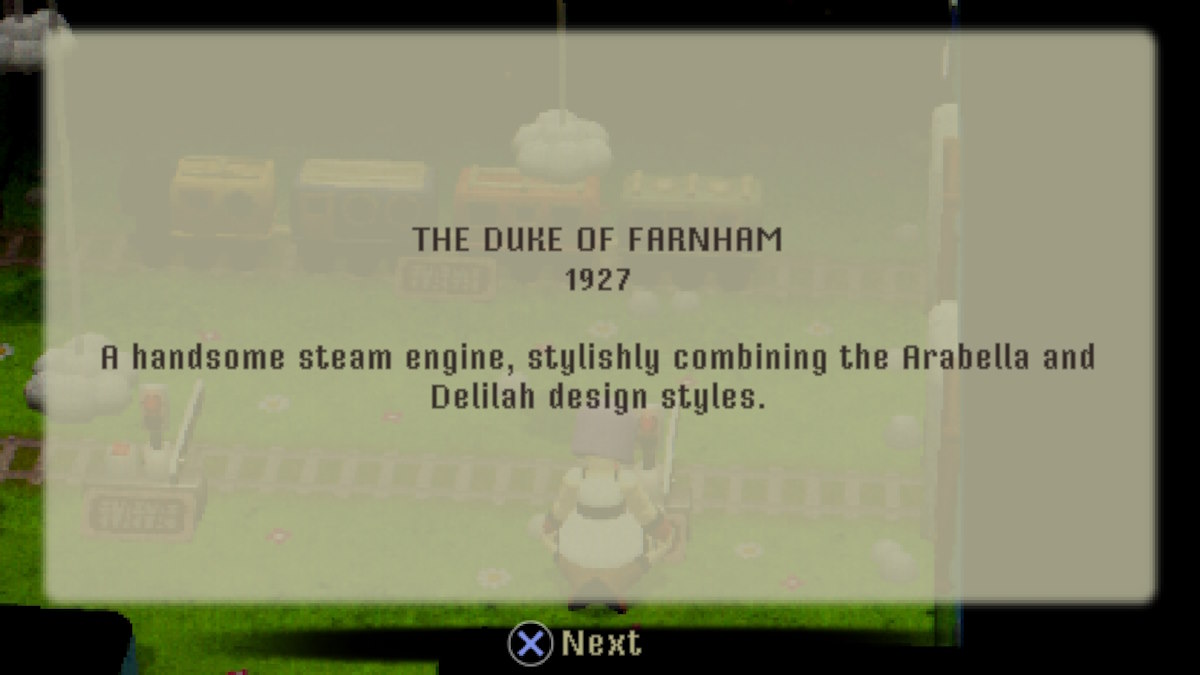
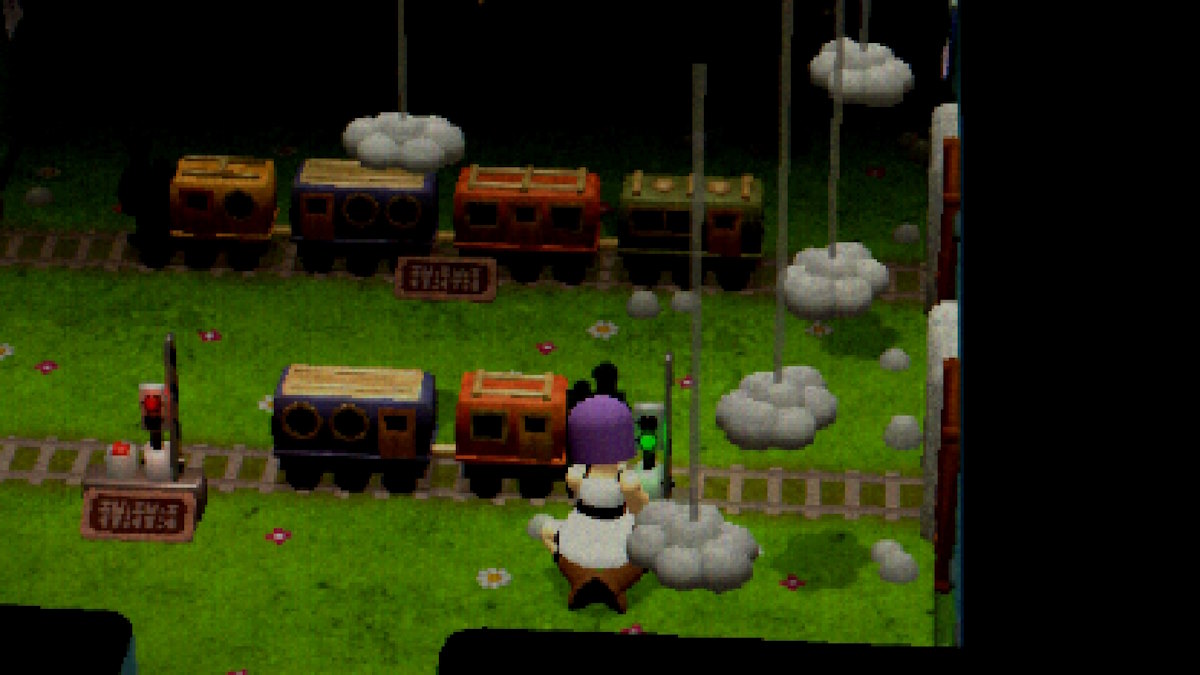
- B - D - A - C
Input this string into the computer to receive the flamethrower. Next, we'll be heading back to Haunted Hilltop to retrieve another key item we'll need soon.
Dungeon Puzzle Walkthrough
We'll be getting another key item from this spot, also using the data disk we found earlier, so when you're back in Haunted Hilltop, enter the first door on your left as you enter to get into the Dungeon. Here, you'll insert the disk into the computer, and from there, you'll open cells by inputting the corresponding amounts of legs, arms, heads, and eyes each creature has.
The one of importance is the mermaid cell, as that contains an acid bottle we'll need later.


The solution to open each cell is:
- MERMAID = ZERO LEGS / TWO ARMS / ONE HEAD / TWO EYES
- WOLF = FOUR LEGS / ZERO ARMS / ONE HEAD / TWO EYES
- CYCLOPS = TWO LEGS / TWO ARMS / ONE HEAD / ONE EYE
- SNAKE = ZERO LEGS / ZERO ARMS / ONE HEAD / TWO EYES
After entering each set of numbers, leave the computer and enter the cell, as changing the numbers will close any cell you had open. The other cells are worth a look too, as they contain useful items like med kits and ammo.
lTolman's Office Puzzle Walkthrough
Head back to the Staff Hallway and find the wooden door, kicking it if you haven't already to reveal the silver keyhole. Interact with the NPC and exhaust his dialogue before continuing. You'll be met with a TV, four tapes, four calendars, and a keyboard.
The solution to the puzzle is to play the tapes in the order they appear on the calendars and watch the TV carefully as a letter with flash up in green. You take these notes, and play them on the keyboard.


- 1350 = F
- 1912 = A
- 1937 = C
- 1945 = E
Input the notes in the correct order into the Keyboard to unlock the elevator switch. Interact with it to unlock the elevator just outside Tolman's office, and some others around the map. Take the elevator down to reveal the root access area.
Root Tunnels Walkthrough
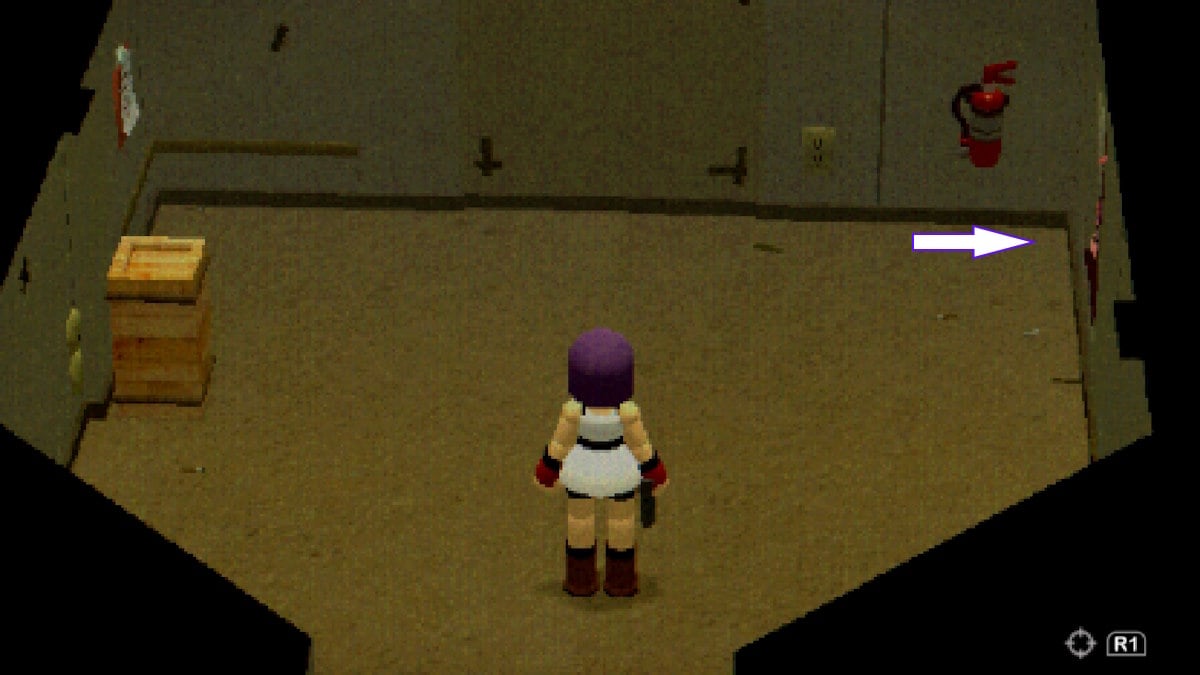
When you're down the elevator, head straight to the left to enter the break room. In here there lever at the back of the room, which will grant "root access". Interact with the lever, but be careful, for as soon as you do a large new enemy type will appear in the room and lock the door. Once defeated, check where it died for the combination to get out. The combination is 2663.


The Root Tunnels are effectively a loop around most of the areas you've already been to, with rooms branching off intermittently. Here I'll break down each of the side rooms, and detail what is within them.
Going back the way you came to get to the Break Room, we'll head right and work our way around from there. We'll also be referring to the root rooms by their given days of the week from here on.

Screenshot by ProGameGuides 
Screenshot by ProGameGuides 
Screenshot by ProGameGuides 
Screenshot by ProGameGuides 
Screenshot by ProGameGuides 
Screenshot by ProGameGuides 
Screenshot by ProGameGuides 
Screenshot by ProGameGuides 
Screenshot by ProGameGuides 
Screenshot by ProGameGuides 
Screenshot by ProGameGuides 
Screenshot by ProGameGuides 
Screenshot by ProGameGuides 
Screenshot by ProGameGuides
- ROOT FRIDAY - Use the acid bottle we got from the dungeon on the dripping tap on the right of the room, to collect the acid and fill the bottle.
- ROOT THURSDAY - Here, we see yet another computer puzzle to be solved involving gas pressures; this will allow us to access a new area in the Ocean Kingdom. The aim of this puzzle is to balance the numbers so that the total output is 50. The solution to this is CO - 17 / SO2 - 14 / NO2 - 11 / COCL2 - 8
- ROOT WEDNESDAY - This is a safe room, so take the opportunity to save as the root tunnels are full of dangerous enemies.
- ROOT TUESDAY - A puzzle involving an item we don't yet have.
- ROOT MONDAY - Both Tolman and the strange man from the arcade will be in here, talk to them both and exhaust both of their dialogues.
- ROOT SUNDAY - A power generator that we can destroy, and the internal underground map.
- ROOT SATURDAY - A room with a strange model, and the external underground map.
Once you've checked out all of the root rooms, and solved the Thursday puzzle, grabbed the acid, and destroyed the generator you can head back up to Ocean Kingdom, but sadly, whilst we can access The Seven Seas ride, it's still useless to us.
However, to the left of The Seven Seas, the mysterious metal door from earlier has unlocked. Head left from The Seven Seas to enter the new area. Go right as you enter, and interact with the large wooden box with banging coming from within, and open it.


Inside will be Julie, the NPC we met in Haunted Hilltop earlier, and she'll give us our next destination. There is another small room in this section that contains some helpful items, but be careful of mimic items which you may have come victim to already.
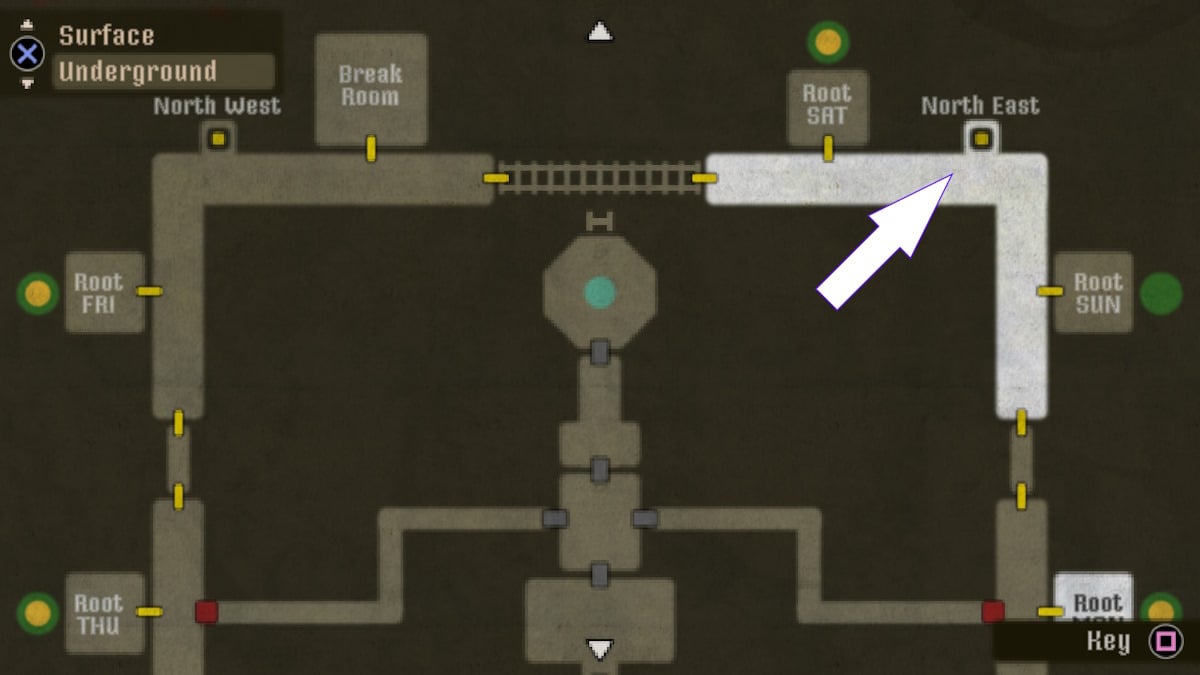
Even though we already know where the Theatre is, sadly we can't access it through the front door, so instead we'll need to return to the root tunnels, and make our way to the North East Elevator (the one between Room Saturday and Room Sunday).
Staff Hallway and Theatre Walkthrough
When you arrive in the elevator, you'll be met with a large area with a lot of routes to follow - take a moment to explore, check out Pikes Office, and talk to Natalie, daughter of Edward Crow, and offer her an antidote - she's directly next to the elevator you arrive in.
- 1A - Elevator
- 1B - Theatre
- 1C - Crow's Office
- 1D - Pike's Office (and more shortcuts back to Haunted Hilltop)
- 1E - Natalie

Once you're done exploring, move on over towards the Theatre area, as this is where we'll be getting the gold key.
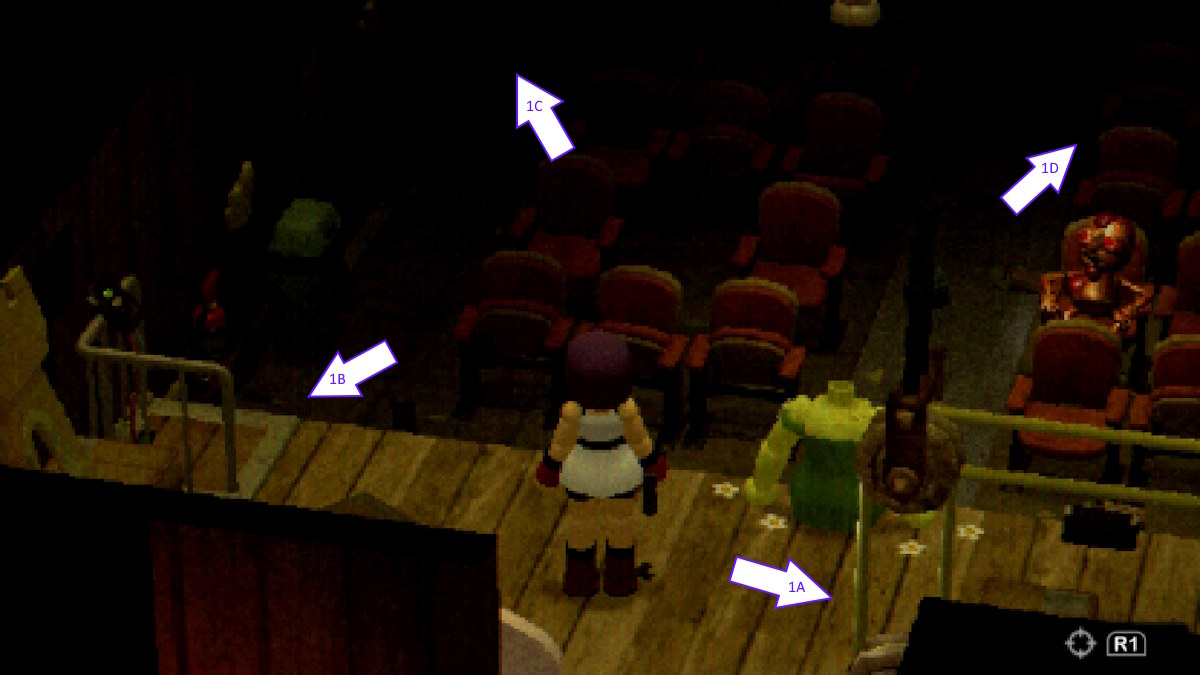
First, you'll want to interact with the curtain pulley (1A) and raise it all the way, then head down the lift (1B) and be careful as the theatre is now filled with plenty of enemies. The telephone (1C) will be ringing, so pick it up to talk to Mr. Crow again. Finally, approach the water tank (1D) and interact with it to add the bottle of acid. Finally turn around and head back to the stage, where you'll see a red valve.
Before using it, shoot the head off the fairy (which will reveal the key locked in more resin) and then use the valve. Use the lift to get back on the stage, and head up to collect the key, which you can now use to enter Mr. Crow's Office.
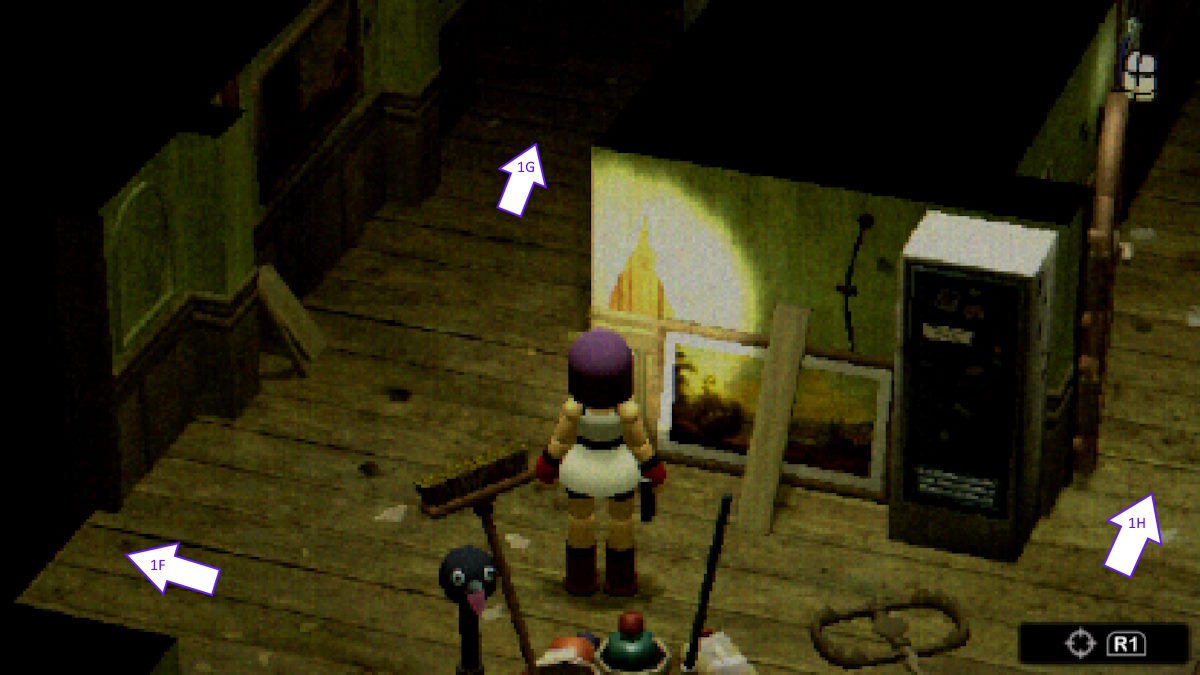
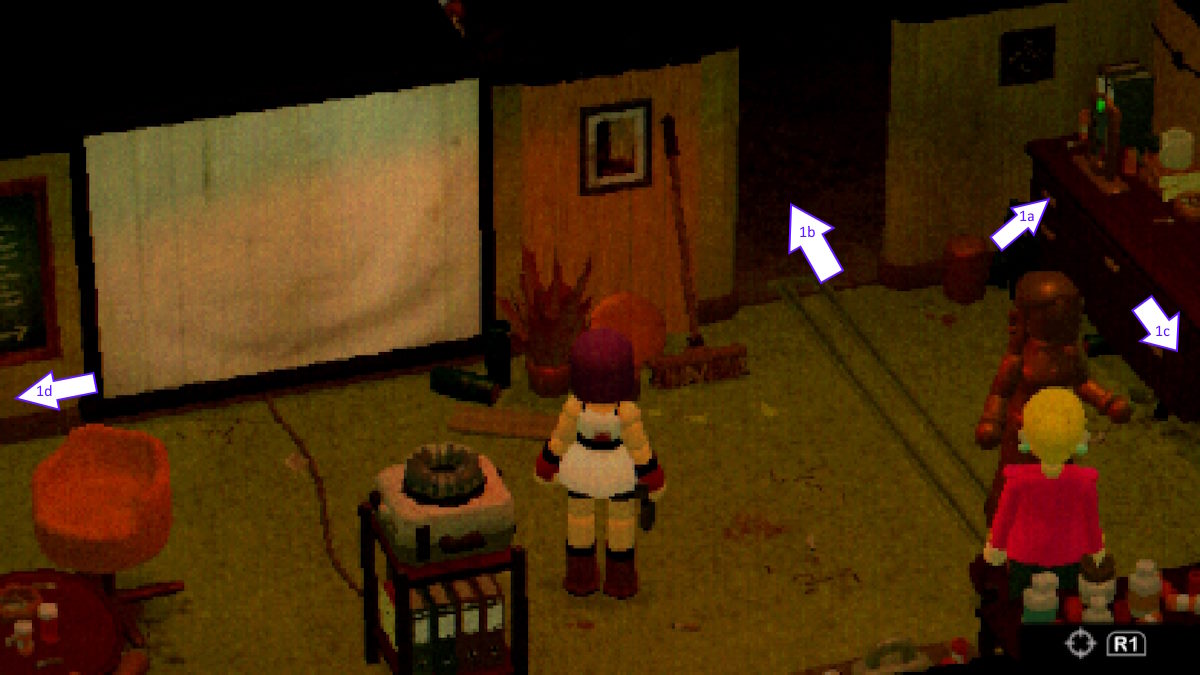
Head on in, and take a quick look around. The telephone will ring once again, so go and answer it. Keep an eye out for the picture frame by the statue at the right end of the back wall as this will allow access to another safe room.
- 1A - Picture Frame
- 1B - Safe Room
- 1C - Telephone
- 1D - Control Room
After you enter the safe room and come back out, Natalie will be waiting there for you, so exhaust her dialogue again. Reading the chalkboard next to the projector will inform us we'll need some kind of code eventually, so it might be best to figure it out now and keep it on hand for later.
Projector Puzzle Walkthrough
The chalkboard will present you with a list of conditions for picking out numbers in the lineup of images of hostiles on the projector.
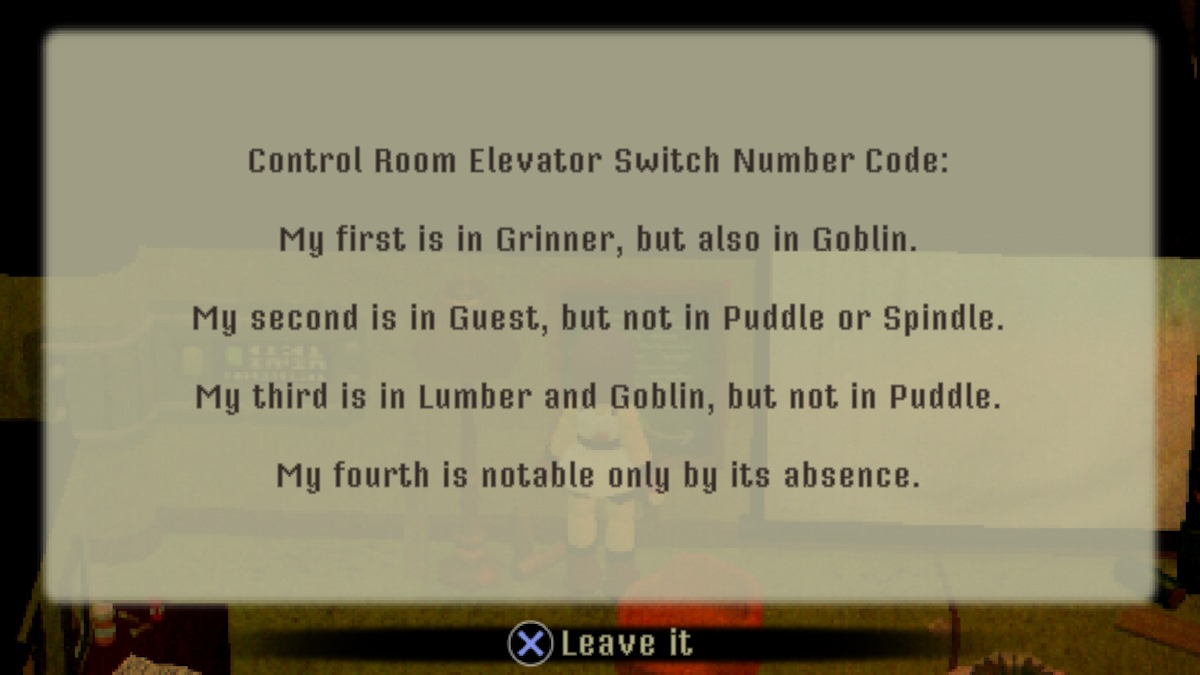
- The first number is in both Grinner and Goblin. (5592 / 1739)
- The second number is in Guest but not in Puddle or Spindle. (3762 / 3973 / 6413)
- The third number is in Lumber and Goblin but not in Puddle. (1347 / 1739 / 3973)
- The fourth number does not appear in any sequence of numbers. (8)
Breaking it all down, we're left with the combination of 9 - 2 - 1 - 8.
Head for the control room, open the door and head on in. You'll be confronted with two monitors, a keypad, dice markings on the floor, and a strange screen on the wall opposite the keypad that seems to show random numbers over time. You can use the left monitor to interact with Arthur, the NPC you saved back in Fairytale Town.

Interact with the keypad and input the code we got from the office, this will show another elevator has unlocked somewhere in the middle of the map, in the root tunnels. Be careful on your way out, because as you head to leave, the fourth mini-boss will burst out from the wall on the right of the room. Dispatch him quickly, and if you're following this guide and playing on the survival horror difficulty, this should net you an achievement, as this is the final mini boss.
You'll also be locked in the control room, but the solution to escape is simple - the dice on the floor add numbers to the screen at the back of the room - and interacting with the gate informs you that the code is 123456.
If you've already stepped on some, interact with the screen and hit the reset button. Then walk carefully around until you've inputted all of the correct numbers, and the gate will automatically open.
Now with the golden key, we have to return to Ocean Kingdom, so we can get our last key item.
Seven Seas Walkthrough
Remember to use the root tunnels to get back to Ocean Kingdom quicker, using the elevator just outside Mr. Crow's office. Once down there, head for the south west elevator.
Head up, and you'll be in the room with Julie again. Earlier she offered to help us if we unlocked the ride control room door, which we can now do. Head out, and take the very first door on your left as you exit. If you head in, the telephone will be ringing, so answer it to speak to Mr. Crow again.
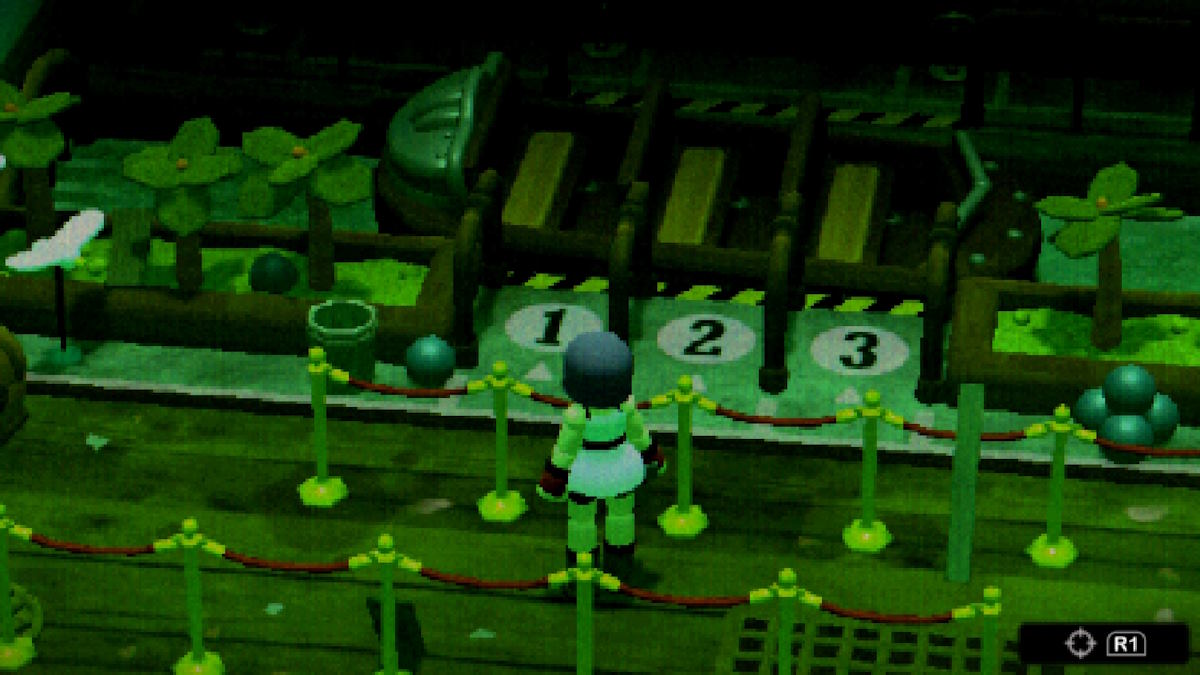
Head out, back into the elevator room, and speak to Julie. Once you've spoken to her, head back to the Seven Seas area, not the control room, and head for the boat in the middle - remember to sit in the middle, seat number two.
The ride sadly doesn't last long, as we're stopped almost instantly by a Whale. Get out of the boat, on the right side, and interact with the large lever to open the door back to the control room. Julie will be missing, so head back into the ride.


Your aim is to find a battery within one of the mermaids. Use the box on the left to bring a mermaid forward, and the box on the right to raise them from the water. The battery is in the third mermaid, but the second mermaid contains some shotgun shells.
Battery Charging Walkthrough
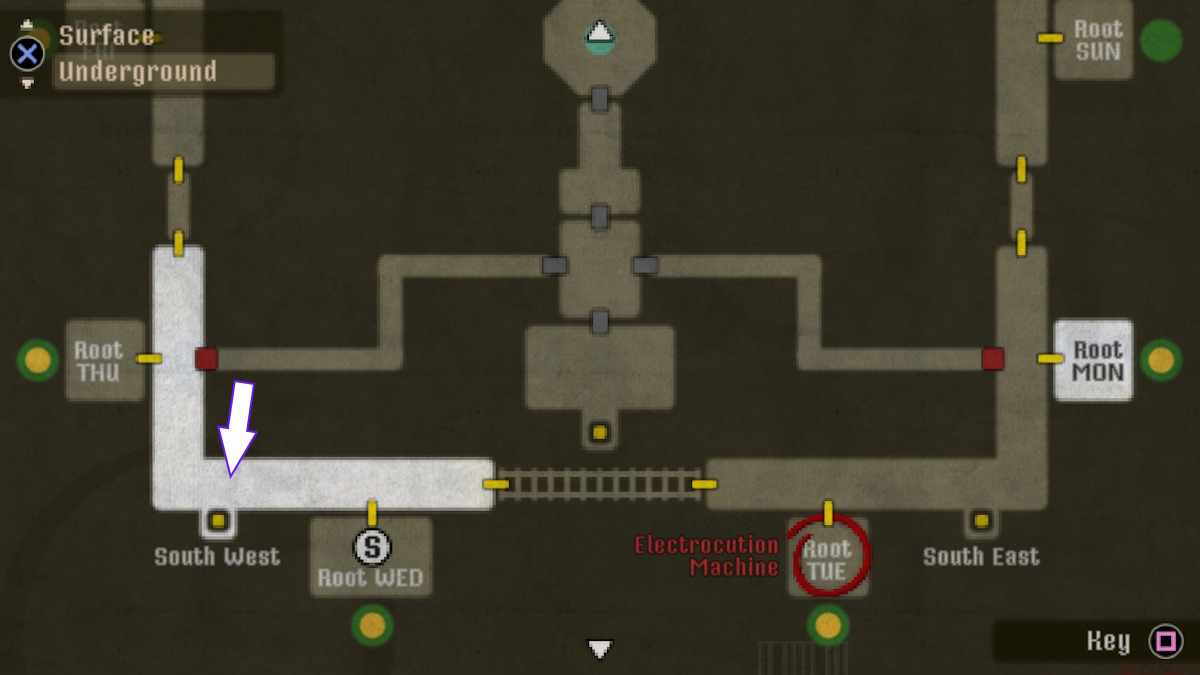
The battery is the last key item we need, but we need to charge it, so return to the elevator you took to come back to Ocean Kingdom, and travel down, being careful of the enemies now there. You need to go to Root Tuesday, which is where the electrocution machine we found earlier is to charge the battery.
Heading right out of the elevator and getting into the cart will take you straight there if you're heading from the elevator suggested.


Place the battery into the contraption on the left, move over to the button on the right, interact, and hold until the battery is fully charged. (You can turn your camera whilst holding the button the see how it's coming along.)
Crow Elevator Walkthrough
With the battery charged, we have to return to the main hub area. It's advised to stop at whatever safe room you can find before continuing.
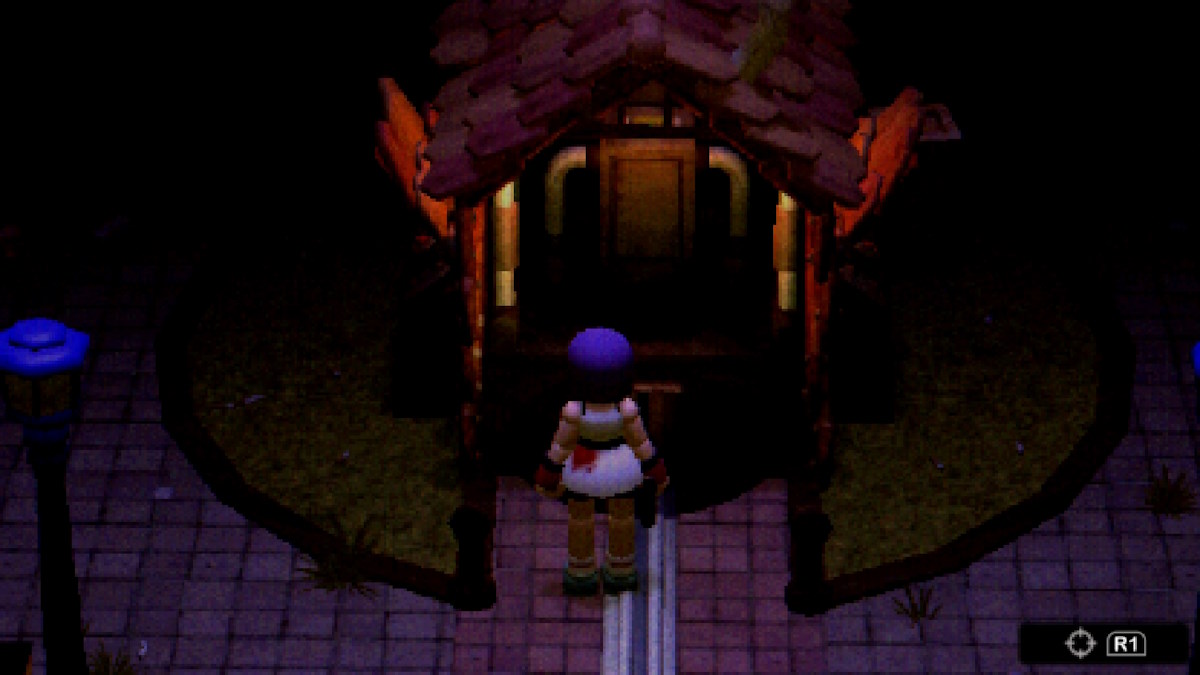
When you reach the hub, head straight for the crow hut in the center. Head to the back of it, and if you haven't already interact with the hidden panel to reveal a button.
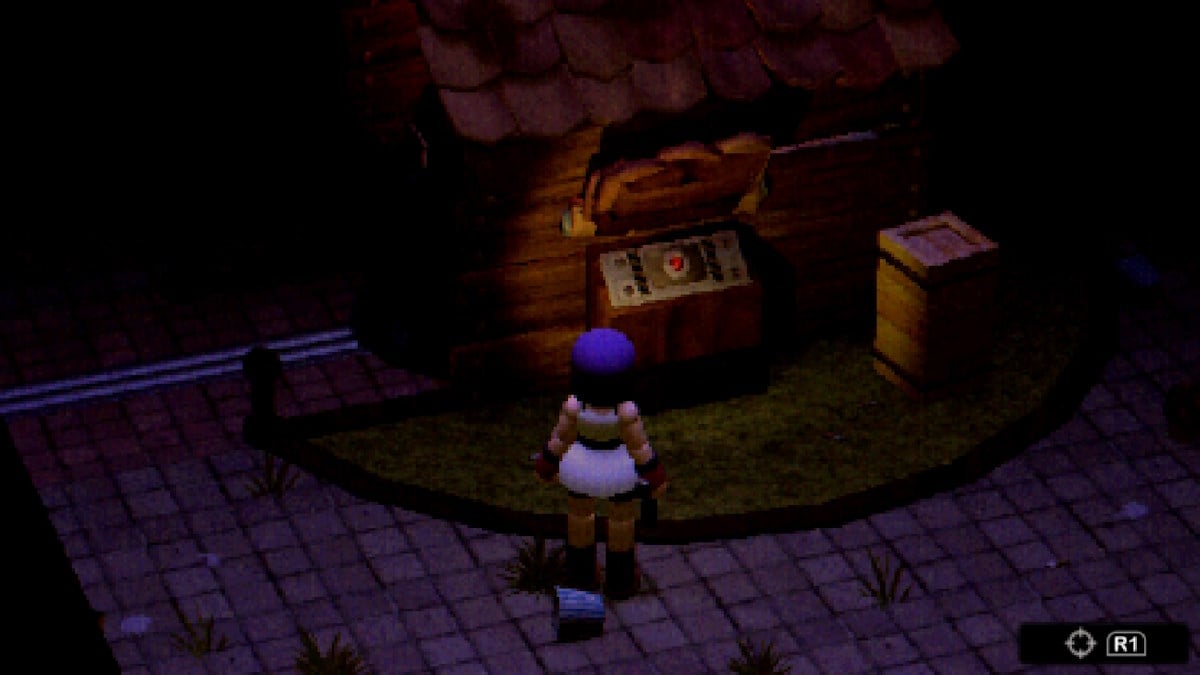
Interacting with the button will open two control panels, head for the one to the right of the button first to spin the crow around, and then insert the battery into the slot on his back. Then, return to the turning panel and turn him to face the right way again. Move to the other panel and activate his walking sequence. This will reveal the elevator.
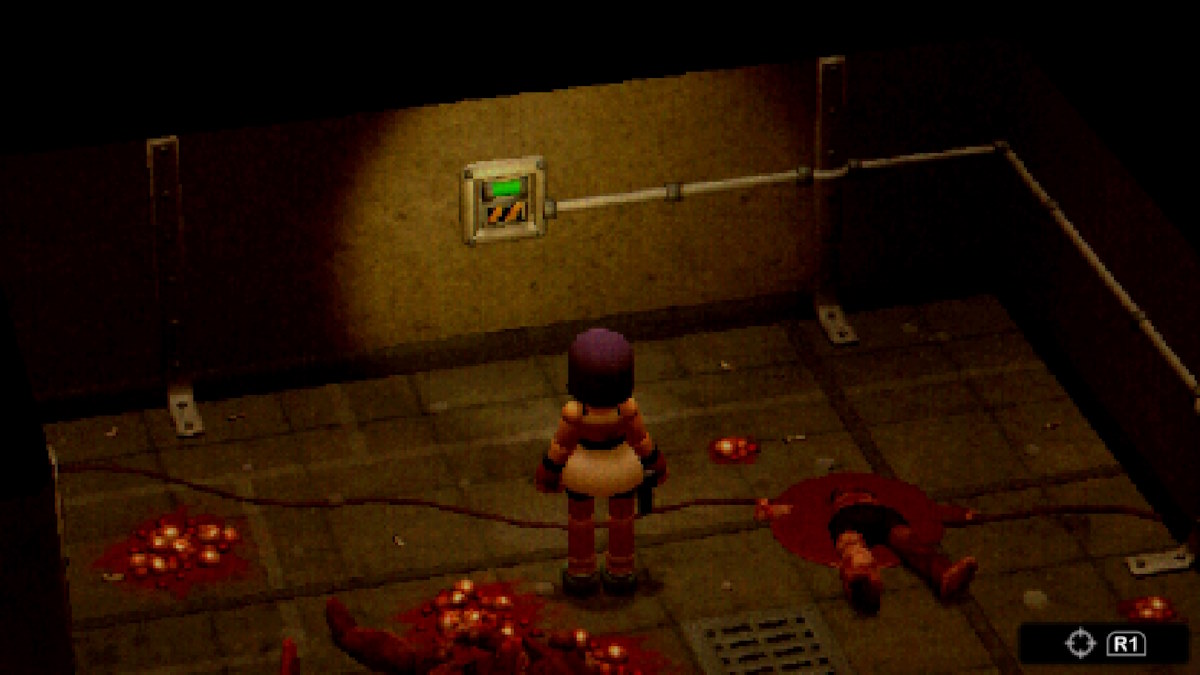
When you get down, the small room you enter will contain many enemies, but your goal is simply to activate two switches, one on the left and one on the right. You can save the ammo and run around them, but be careful not to take too much damage.
Keep pressing onward, and in the next room, I suggest taking the south west tunnel, and going to rest at Root Wednesday before returning and pressing on. When you're done, continue onward to the lantern puzzle.
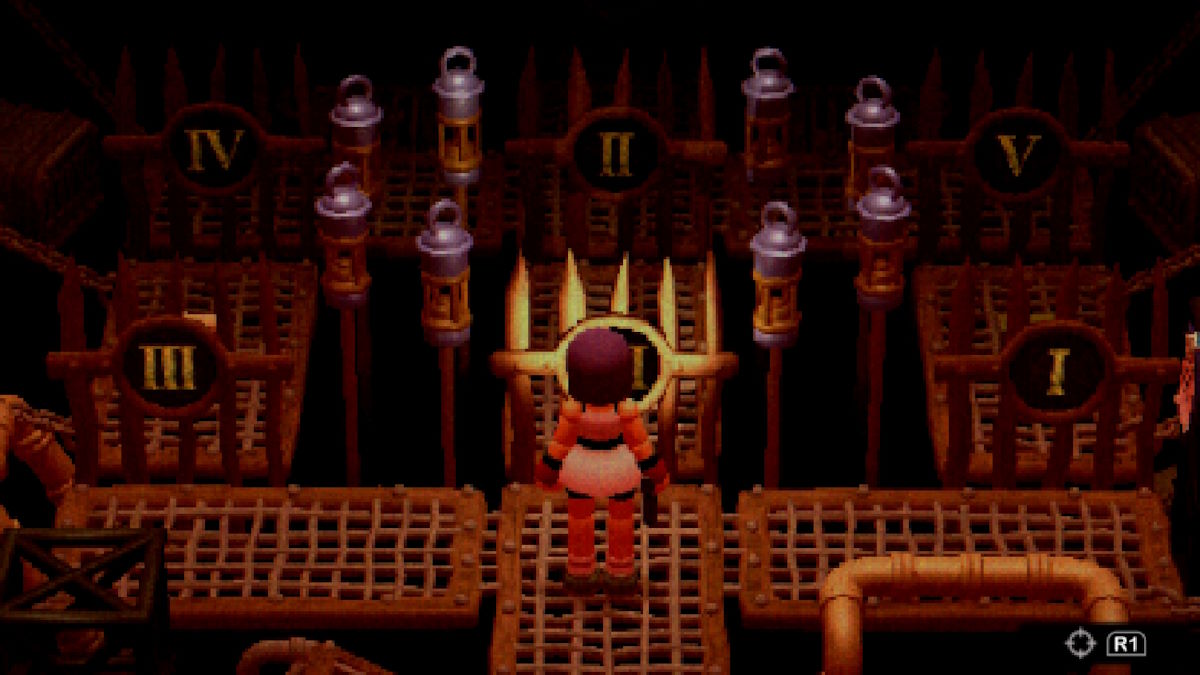
The lantern puzzle isn't as complex as it might first seem, as it's simply a case of each lantern representing a number one, and you must shoot the corresponding amount of lanterns to open the corresponding gate.
For example, shooting one lantern would open the gate labelled 'I', shooting two would open the gate labelled 'II' and so on. The most efficient way through is to shoot one lantern and step into the 'I' gate before shooting four more and stepping through the 'V' gate.
Despite the handgun ammo in the middle row, there is another gate that will require you to have seven lanterns lit, meaning the right route only results in a loss of seven total rounds.

Continue on until you reach Tolman blocking the path, interact with him, watch the cutscene play out, and then help Julie out from the vent. Speak to the pair and exhaust their dialogue, before continuing on. Interact with the gate twice to continue.


Head past the small pool (interacting with it will heal you and clean your player model of any damage), and descend down the long ladder to access our next area… The Lab.
Crow Country Lab Walkthrough - How to beat Crow
Our first room is another safe room, interact with the Bunsen burner over in the right corner to save. There's lots to interact with here, so take your time. When you're ready, interact with the intercom next to the big metal doors.
Once you've spoken to Mr. Crow on the intercom, he'll instruct you to grab the vials on the table before continuing on. Do so, and return. When the door opens, continue onward. Approach and speak to Mr. Crow, he will inform you on the nature of what's been going on, and then the final fight of the game will begin.
Once the boss battle begins, I suggest shooting the bear traps as you approach them, as to not take any damage. The goal is simple: shoot 'Crow' until he dies—you'll know how you're getting along based on the color of the pool. One thing to watch out for is flashes of red and an alarm sound. When you see this, move out of the red area, as the rockfall will cause you damage.
Once you've beaten him, you'll be prompted to speak to him again - do so, and as you promised, put him out of his misery.
And with that, congratulations! You've successfully beaten Crow Country!
After watching the credits, you'll be shown a screen that shows your overall rank - higher ranks yield new rewards! In my playthrough, I achieved a total 'A' rank, only because I had to take so much damage to test things for you, dear reader. There are other secrets and achievements to get in Crow Country, so use those completion rewards and get back out there!
If Crow Country has you in the mood for some more horror related content, check out our 10 Best Horror Games of 2023, or if you're not out to face it alone, our Best Multiplayer Horror Games of 2023 will see you right. Whatever the case, we've got you covered at Pro Game Guides.