If you're a fan of puzzle mystery games, Mystery Detective Adventure is a great one to try. This casual game is filled with hidden objects and puzzles to solve in a thrilling, mystery-themed detective tale. Here's some help working your way through the first case.
Mystery Detective Adventure Walkthrough - Case 1 Troubles on the farm
The first case will begin with us traveling to Easttown, where strange things have been happening at the local farms there. We'll arrive at the farm, and we can speak to the nearby farmer to get some basic information on the case. The farmer states that someone has killed all his chickens. He believes someone is behind the crime and is trying to pin it on the mythical creatures of the town's folklore.
Before we begin investigating, the farmer tells us we can drop off our items in the house. Inside, we can speak to the farmer's wife. Unlike the farmer, the wife believes it is a creature because she saw it with her own eyes, describing it as "huge and creepy." She'll allow us to place our suitcase on the desk to the right.
Farm House
Click on the desk to place the suitcase and then grab all the items from inside it; you should end up with a knife and lighter in your inventory. Then, look around the room and grab the following items:
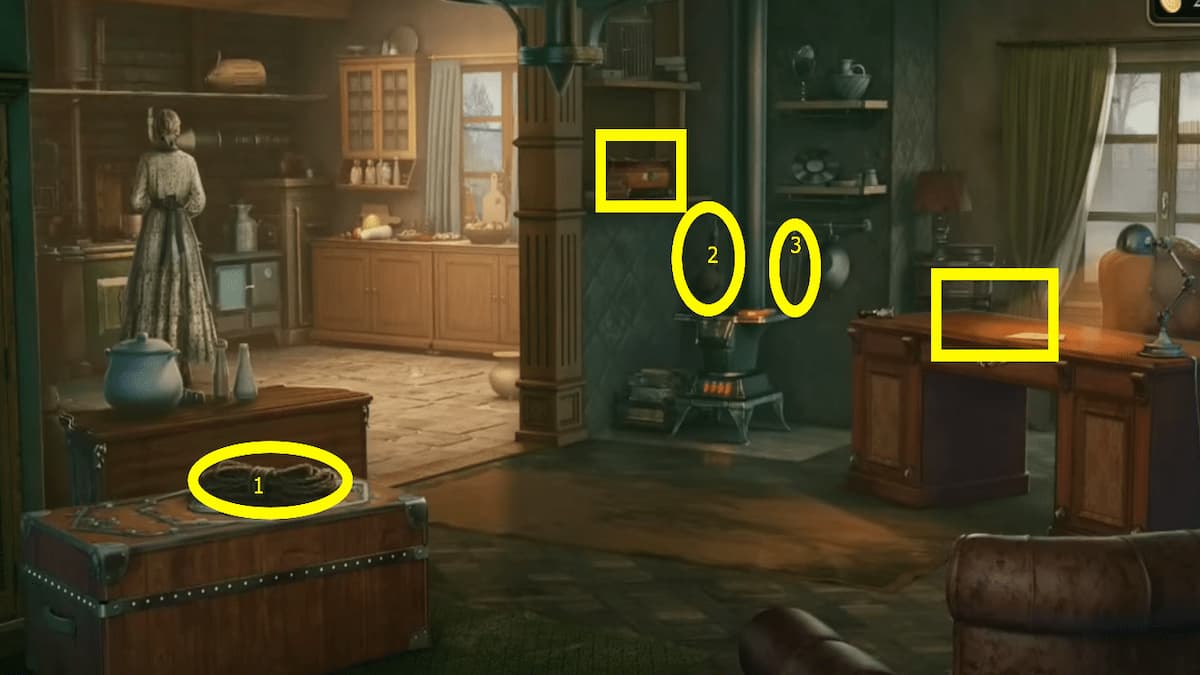
- 1. Rope - On top of the chest to the left.
- 2. Ladle - Above the stove
- 3. Pincers - Above the stove
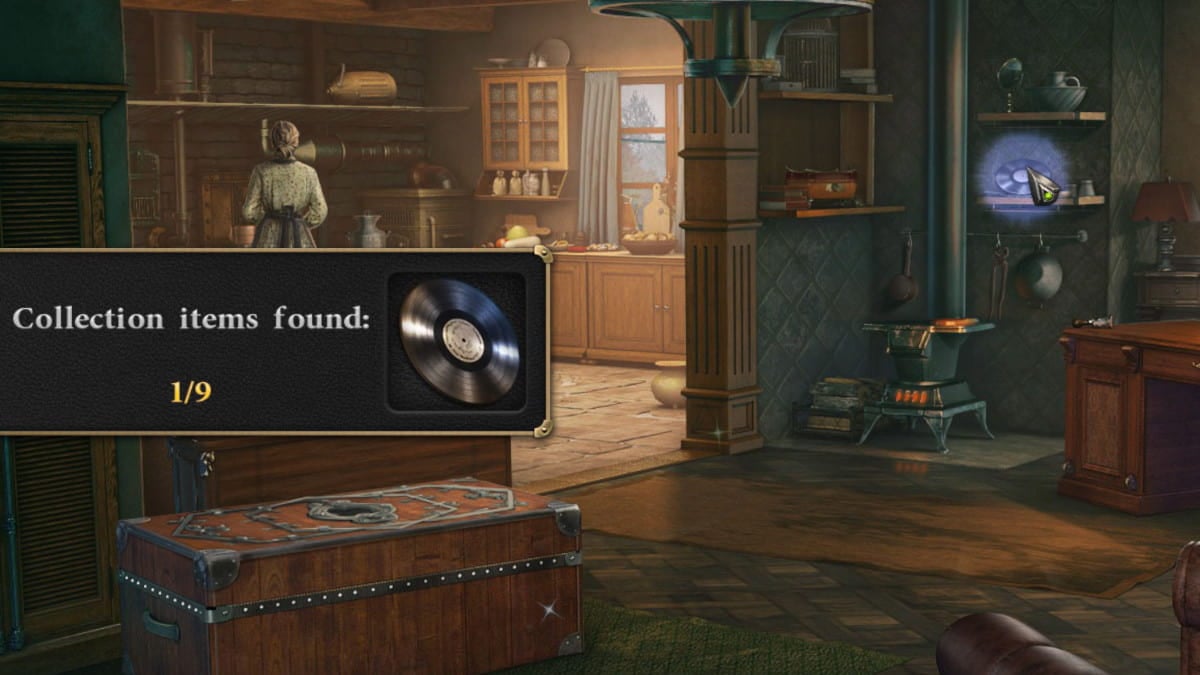
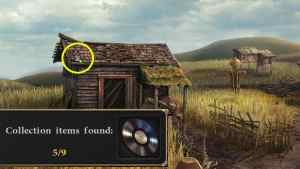
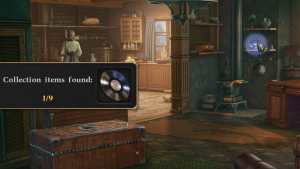
- There is a Music Collectible above the stove; it looks like a record.
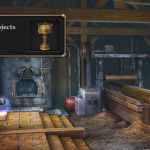
Also, make note of the small box on the shelf to the left of the stove. We can put items on the top of the lid to open it, but we'll need to come back at another time to do this. After grabbing these items, we can head back outside to the farm yard.
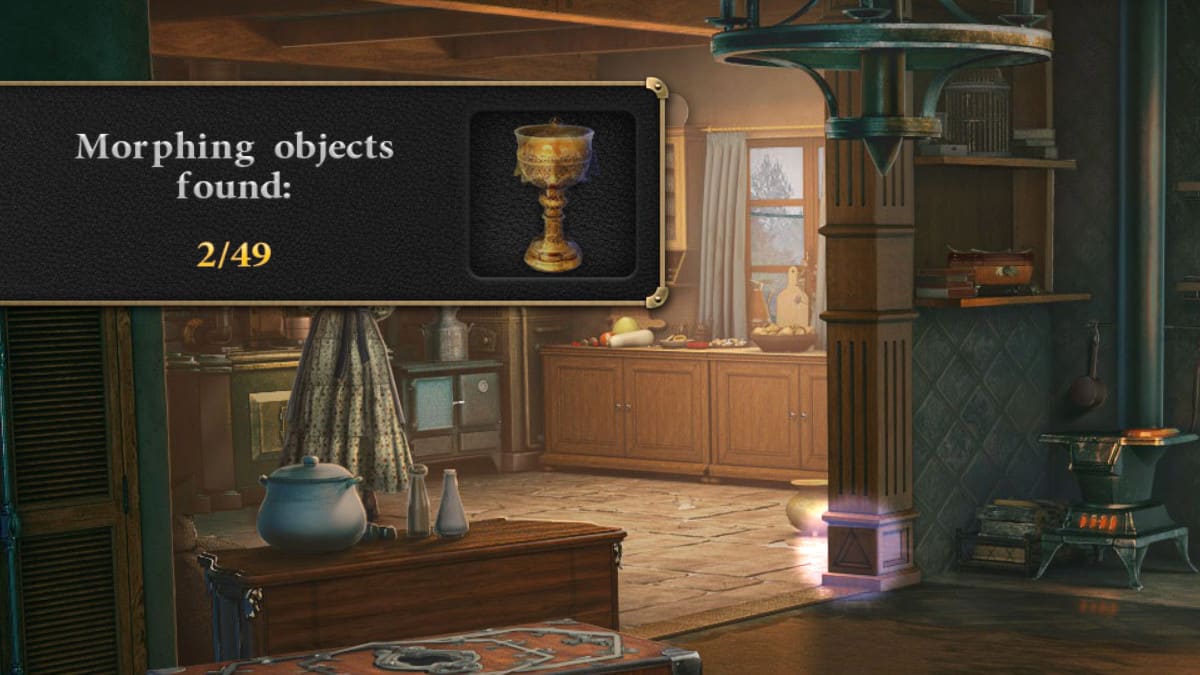
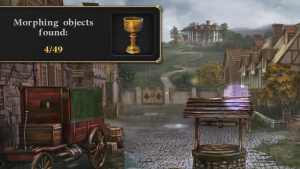
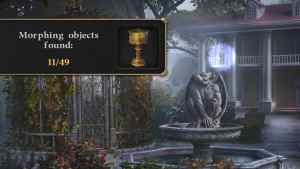
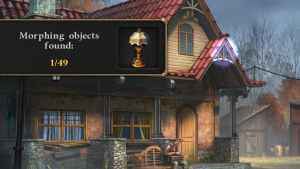
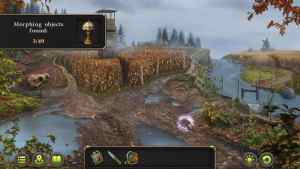
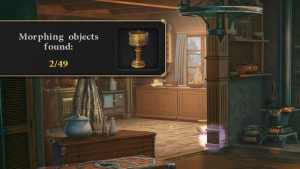
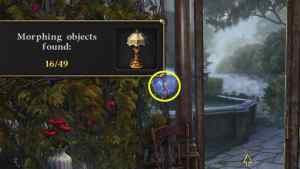
Over the course of the three cases, you will find 49 morphing objects hidden around. In the first case, there are 18 total to find. You can can recognize them as they change shape between two or three different things, so keep an eye out for these. There is one inside the Farm House, at the base of the pillar leading into the kitchen.
Farm Yard
There are a few different points of interest you can investigate in the farm yard. Head to each one to look for clues and items you can use.
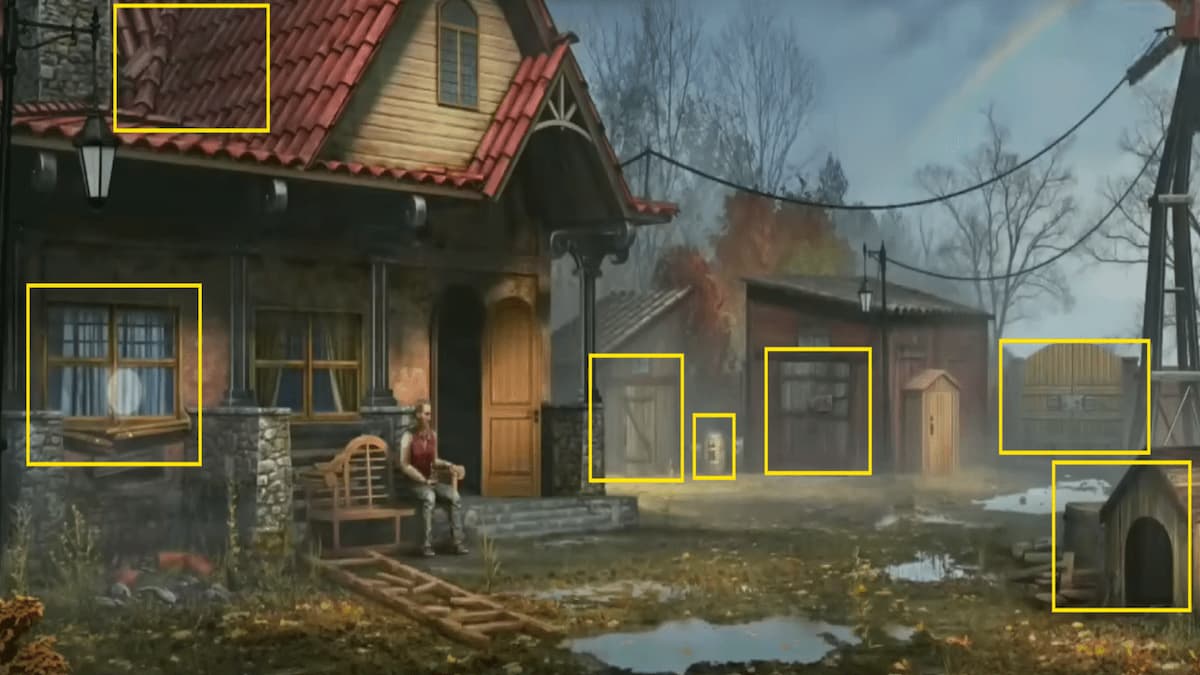
- Window - On the left side of the house.
- Dog house - On the right side of the yard across from the house.
- Broken barrel - Between the coop and the barn.
- Chicken coop - On the left side of the broken barrel.
- Roof - On top of the house (reached with the repaired ladder).
- Barn - On the right side of the broken barrel.
- Fields Gate - On the right side of the barn.
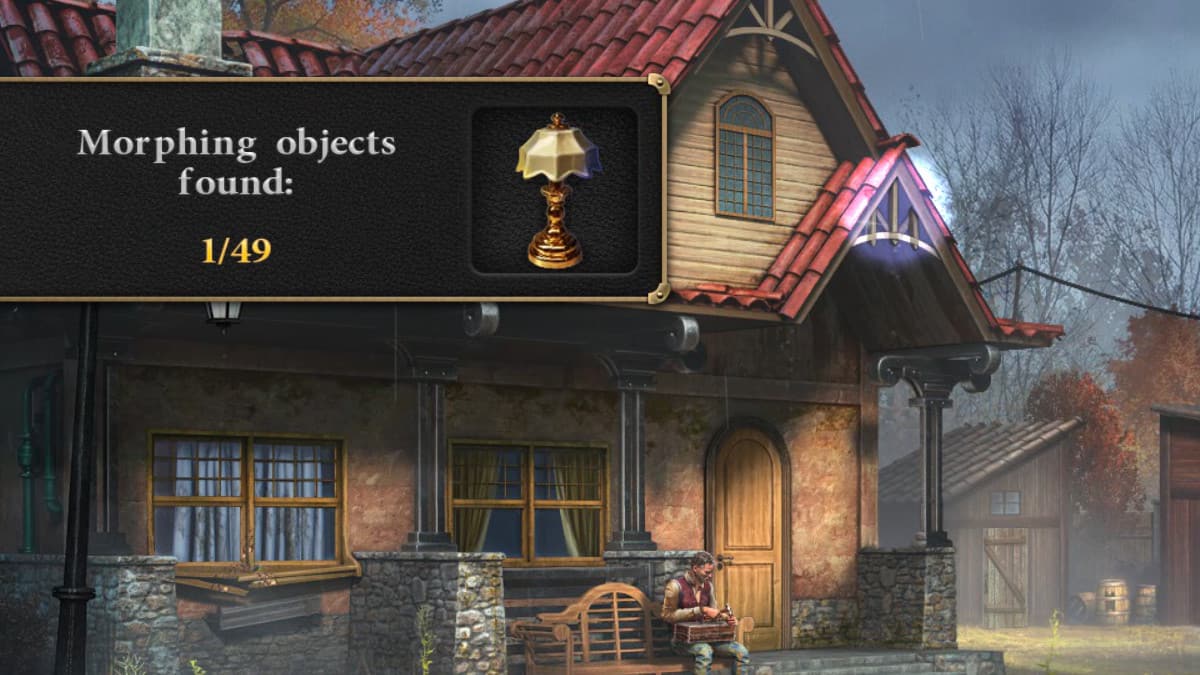
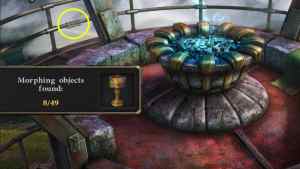
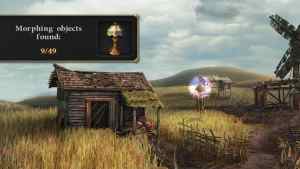
The morphing object here is on the porch roof of the farmhouse; it is the decorative eaves at the top corner of the roof, where the blue glow is in the screenshot above.
Window
In the yard, click on the window on the left side of the house, where the farmer's wife mentioned she heard the beast climb up. You can find some evidence here.
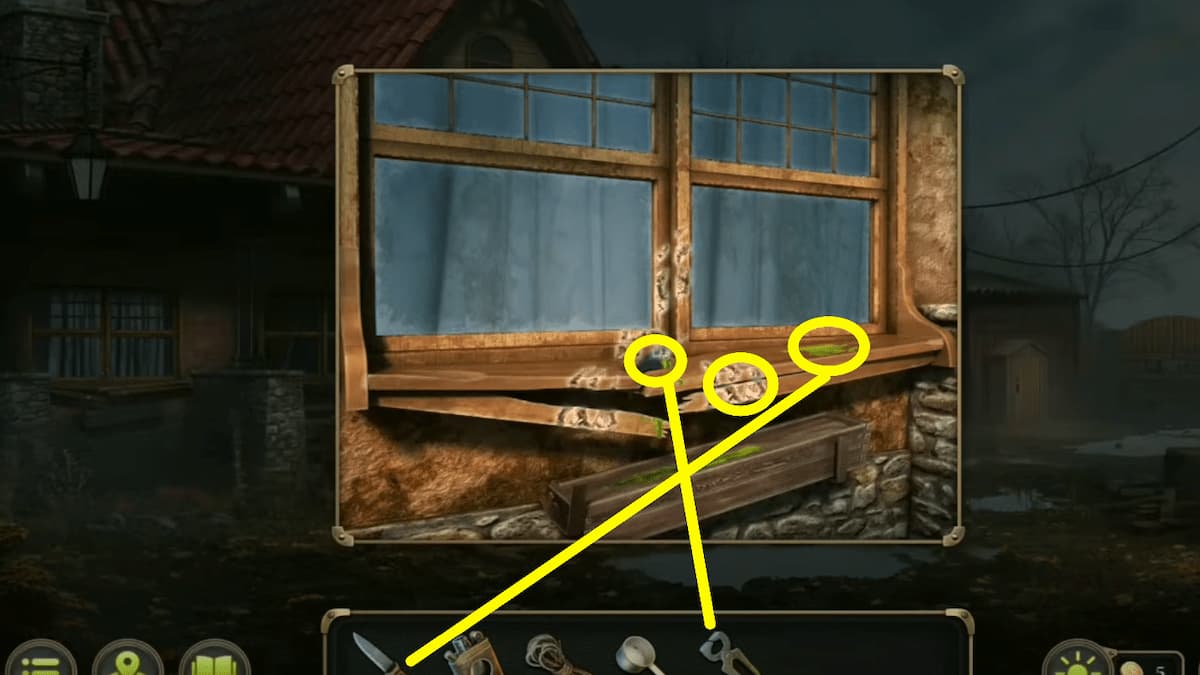
- Evidence 1/7 - Beast tracks
- Evidence 2/7 - Beast claw (Use the pincers to pull it out).
- Substance sample (Use the knife to scrap it off).
Dog house
In the yard, you'll also notice a dog house on the right side. Click on it to approach and search it.
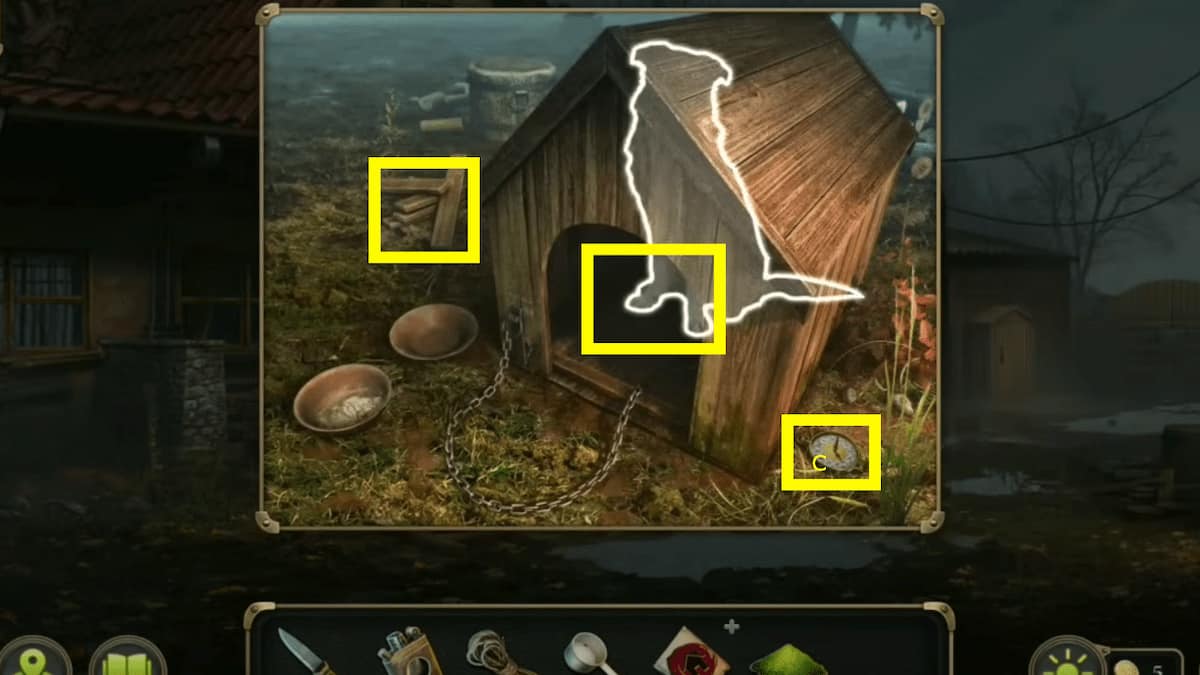
- Evidence 3/7 - Scared dog
- Boards - On the left side of the dog house.
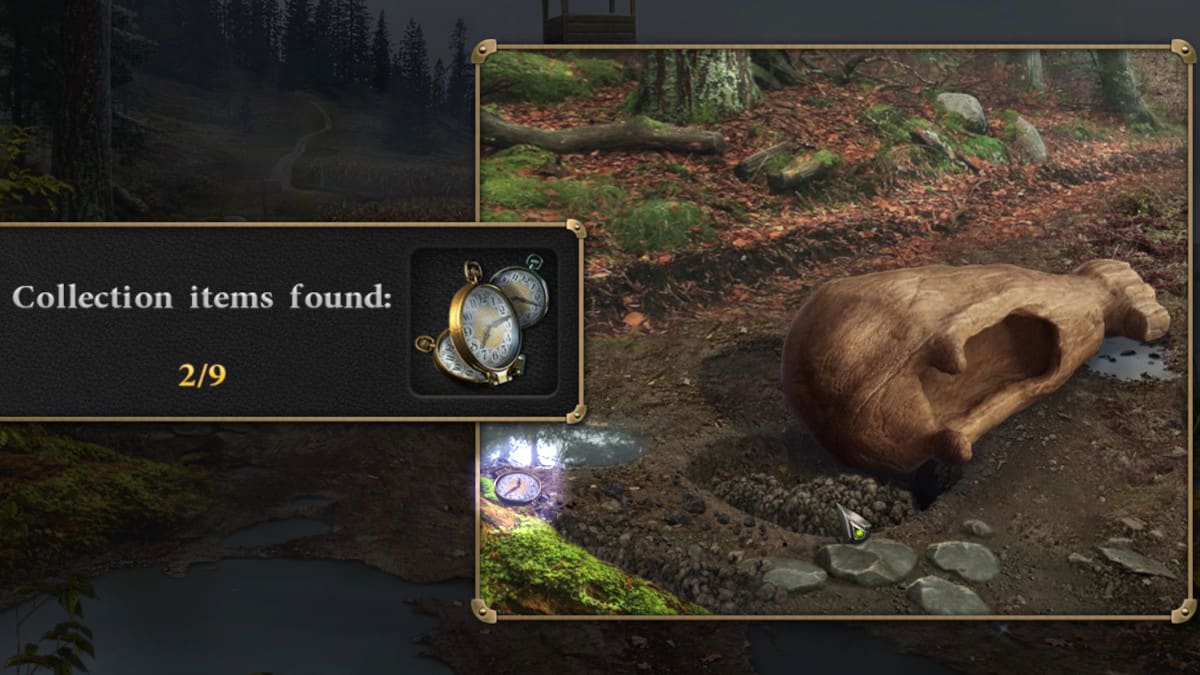
- Collectible Watch (1/9) - Watch on the right of the dog house.
Chicken coop
Now, back up to the yard again and click on the broken barrel between the coop and the barn. You'll find the key to the coop door. You can use it to get inside the coop and investigate the farmer's chickens.
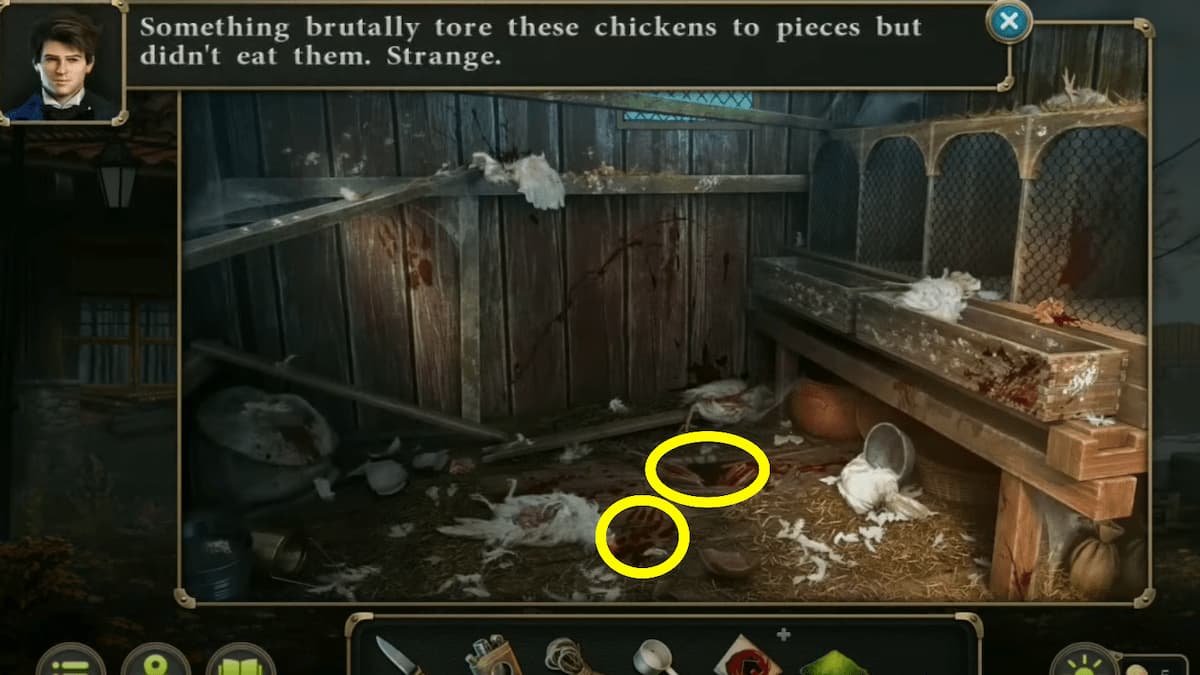
- Evidence 4/7 - Beast tracks
- Evidence 5/7 - Broken board
Roof
After you investigate the coop, look at the broken ladder on the ground next to the farmer. You can use the items you've collected to repair it. Drag the boards and the rope over to it to make it functional again.
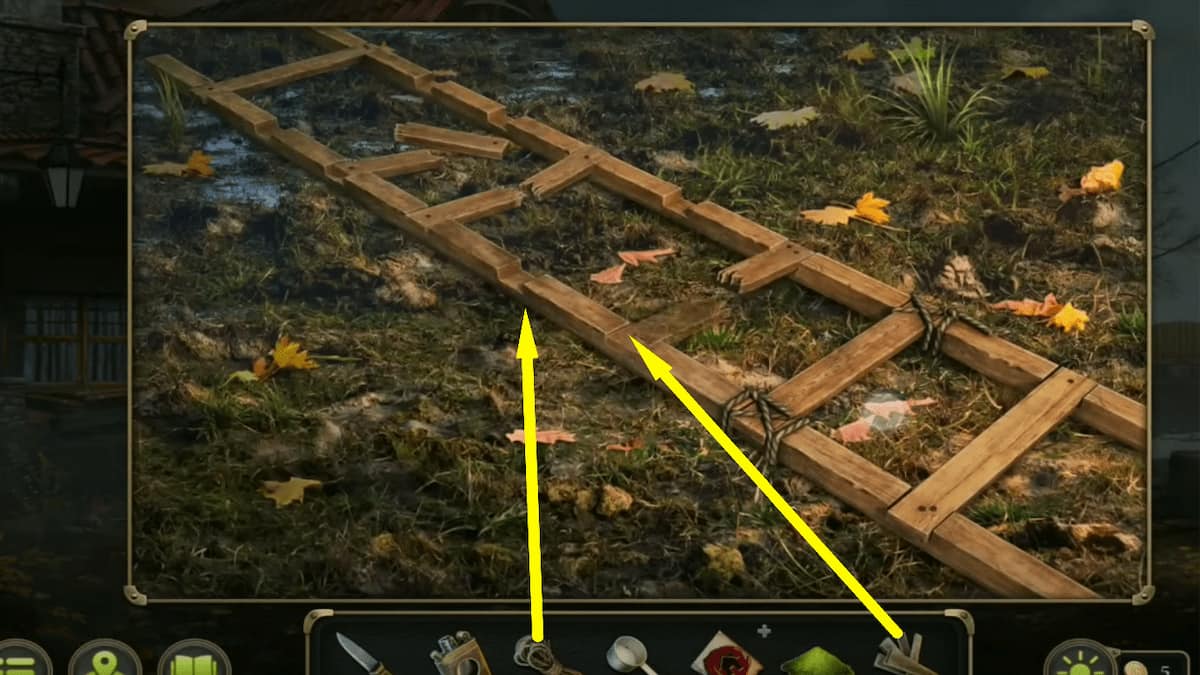
Now, you can click on it to prop it up against the side of the house and investigate the roof of the house.
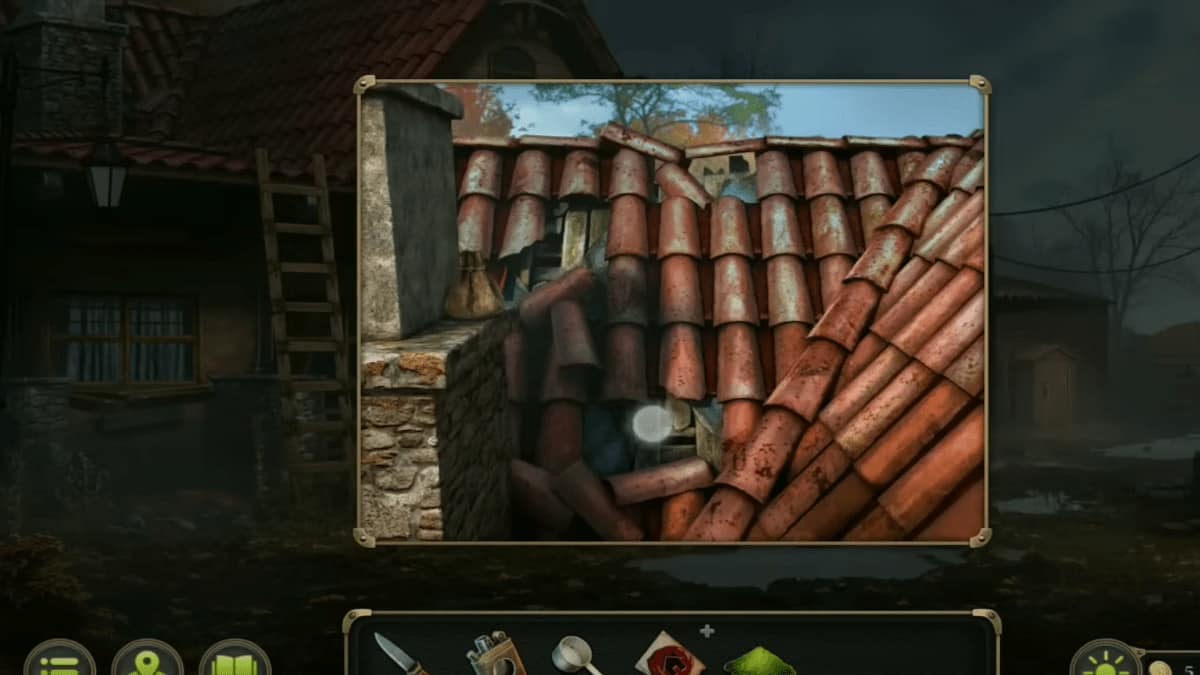
- Evidence 6/7 - Traces on the roof (Roof tiles)
- Pouch - On the chimney ledge on the left side (Interact with it in your inventory and use the knife to cut it open. You'll gain Flower 1/7).
Make note of the barn on the right side of the chicken coop in the yard, There's a strange gear-like mechanic on the door. We'll come back to this at a later point. For now, head back inside the farm house to test the substance sample we collected from the window.
How to test the sample substance
Back in the farmhouse, return to your suitcase and open the lower level (if you haven't already) to find the microscope inside. You'll need a few other vials of liquids from the suitcase as well. Follow these steps to complete the process:

- 1. Attempt to place the substance sample in the microscope
- 2. Put the ladle on the desk from your inventory.
- 3. Fill the ladle with the substance sample.
- 4. Pour the clear vial of liquid into the substance.
- 5. Pour in the brown vial of liquid from the top right cubby of the suitcase.
- 6. Pour in the blue liquid from the bottom right cubby of the suitcase.
With those items put into the ladle, take it over to the stove in the farm house to heat them. Select the ladle from your inventory and click on the red stove top to start heating it. It will foam up and turn reddish. Once the pot is taken off the heat you can collect it as your last piece of evidence for the farm inspection: Evidence 7/7 - Strange colored blood.
Once we have all seven pieces of evidence for the inspection, we can return to the farmer to discuss our initial conclusions. He'll tell us about the fields dying and other troubles the town has faced due to these unknown creatures. The fields seem like a great place to continue our investigation, so he'll give us the key to the gate.
Dead Fields
To continue to the Dead Fields, approach the gate on the right side of the barn and use the key the farmer gave us to begin unlocking it.
How to unlock the Dead Fields gate
The goal of this puzzle is to sort all the flowers so they are in matching color containers. For example, all the red flowers within the red square on the top left, all yellow flowers within the yellow square, etc. Clicking a flower will rotate all the flowers around it. So we'll want to be careful which ones we're rotating and use the rotation to move them where they need to be.
Since they rotate clockwise every time, it's better to work from the edges inward. Try to rotate the pieces so that the colors are all lined up together; that way, you can just keep rotating them into the right locations together. Once it's all put in the right spots, the gate will unlock and we can continue on through.
There are plenty of items we'll want to look at here in the Dead Fields.
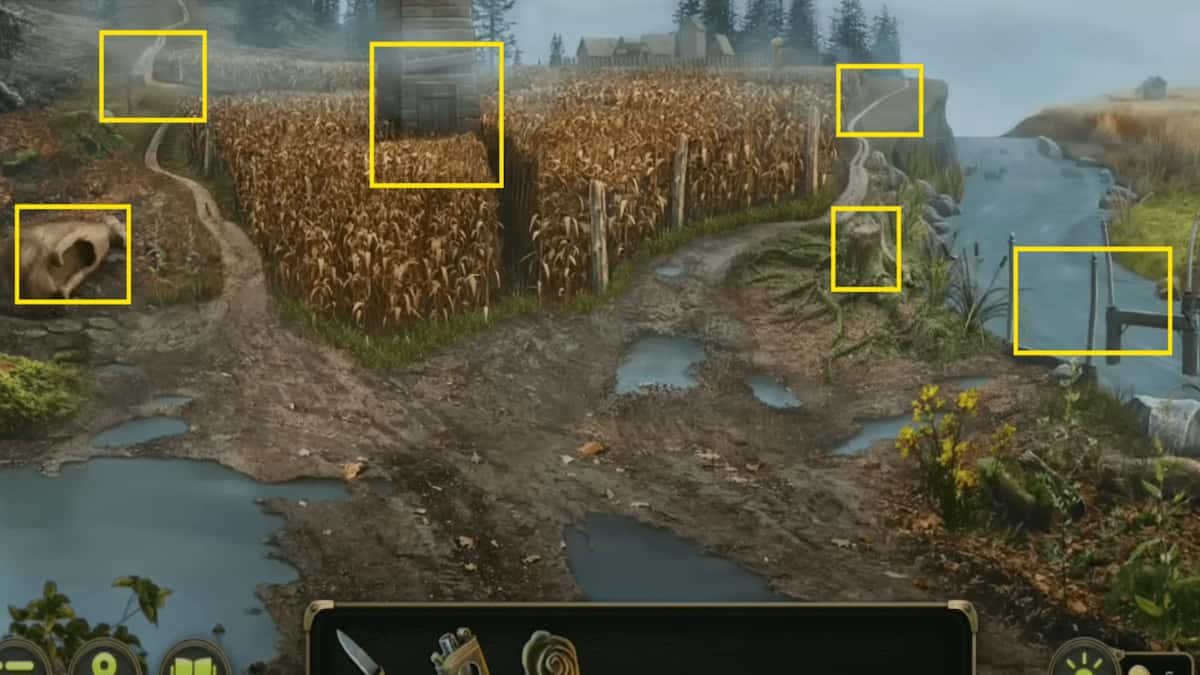
- Tower - In the center of the corn field.
- Stump - On the right side, just before the path to town.
- Path to town - Past the tree stump on the right side of the tower.
- Broken bridge - All the way to the right, next to the tree stump.
- Totem - All the way to the left, next to the path to the woods.
- Path to the woods - On the left side of the tower.

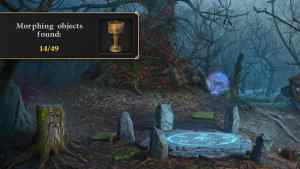
There is another morphing object here, located in the mud. It's an animal track that switches between a bear paw and a deer hoof track. There is another watch collectible on the ground next to the Totem that has fallen over.
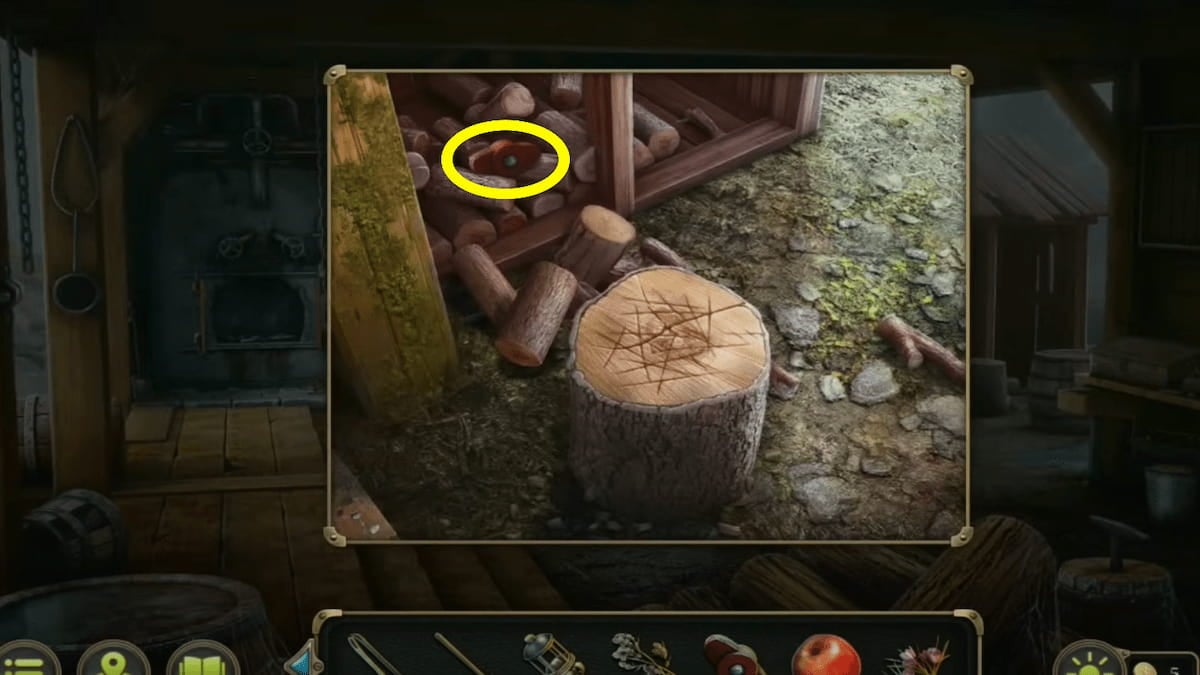
Tree Stump
First, approach the tree trunk on the right side of the area. There's a chest covered in vines at the base of the stump.
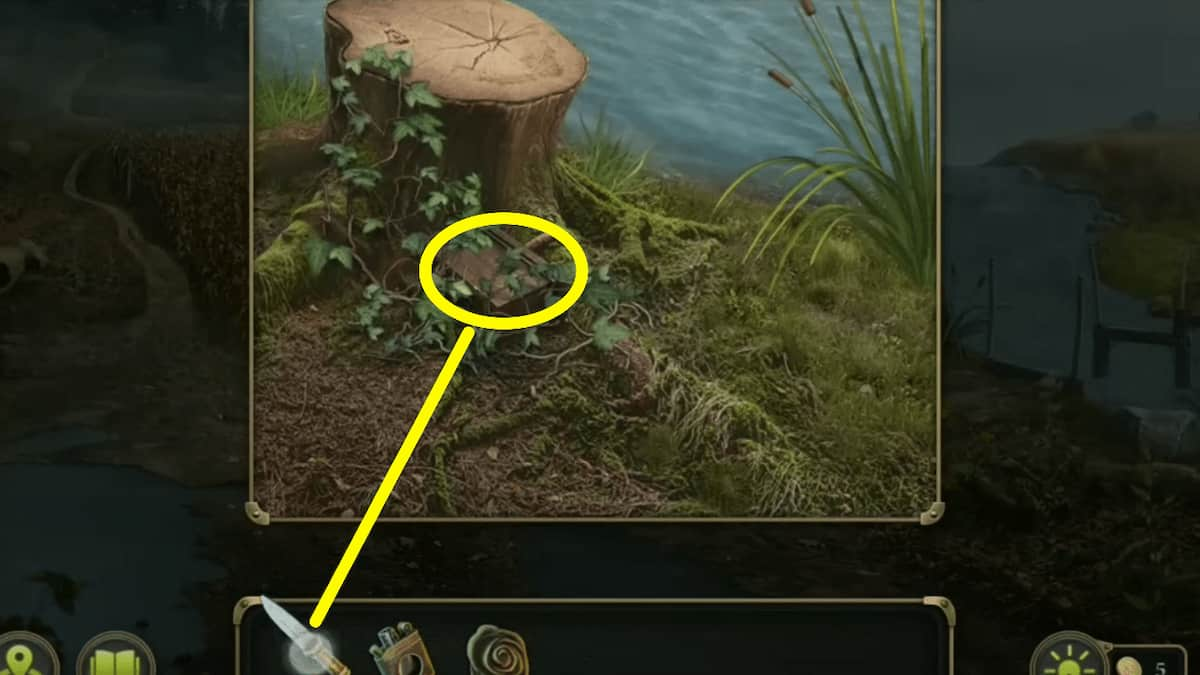
- Chest (Use the knife to cut the vines and collect the chest).
After grabbing the chest, take the path to the left of the tower toward the sawmill in the woods.
Woods - Sawmill
Taking the left path from the Dead Fields will lead us to the sawmill woods area. Here there are some more points of interest you will want to note. Plus, you can gather some useful items that you will need.
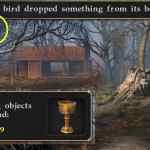
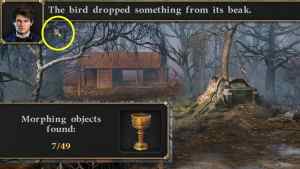
- Crow - In the tree branch on the left (Press on it to scare it away and make it drop something from its beak).
- Roots - Under the rock on the left.
- Sawmill - In the back left of the area.
- Stone altar - Under the tree in the center.
- Fallen tree - On the right of the stone altar.
- Storage shed - All the way to the right behind the tree with an eye.
- Morphing Object - In the trees right above the bird; it's a little twisty branch.
- Watch Collectible - Click on the stone altar to zoom into it, and the watch will be in the upper right side of that screen.
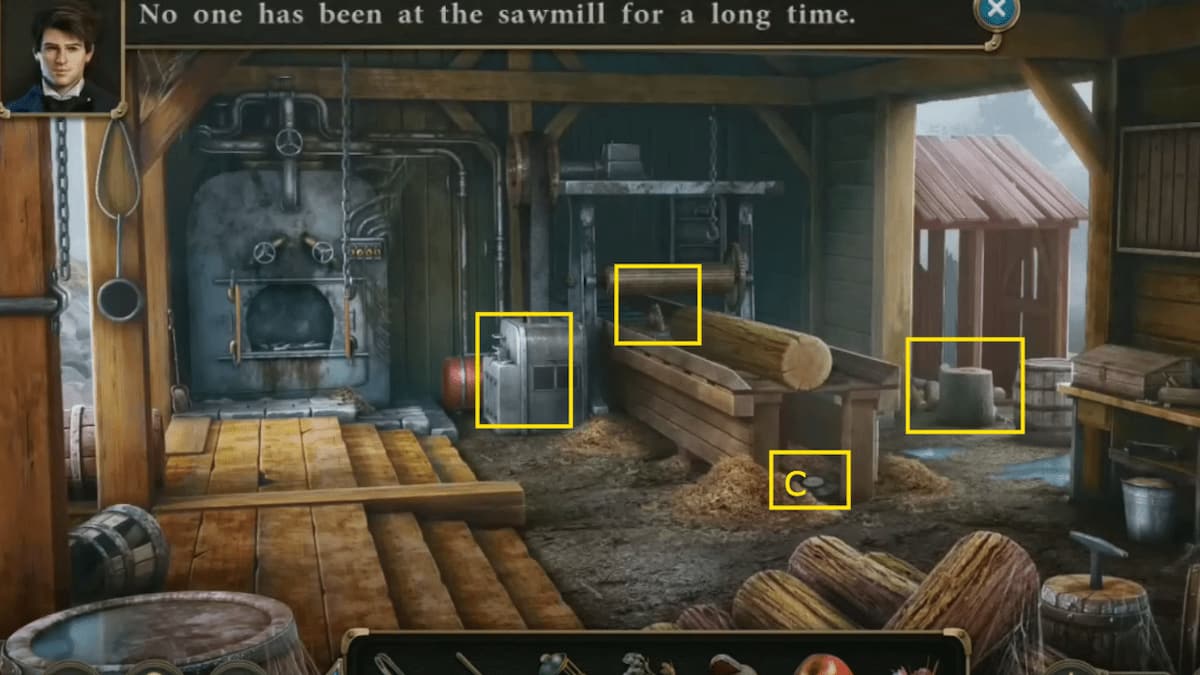
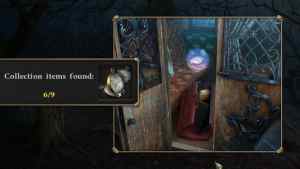
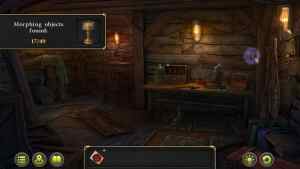
You won't be able to do too much in this area right now, but head to the sawmill (second image above) and do the following:
- Interact with the machine on the right of the furnace and remove the gear from the inside (it needs to be replaced).
- Interact with the log saw and remove the saw blade from it.
- Then, look at the wood chop block on the right of the mill, and you'll find a valve piece.
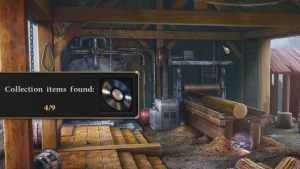
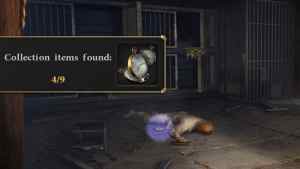
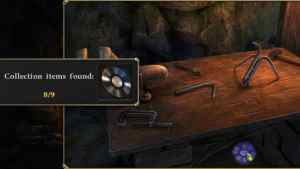
- Record Collectible (4/9) - Under the wood saw table.
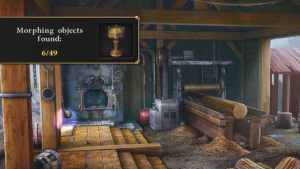
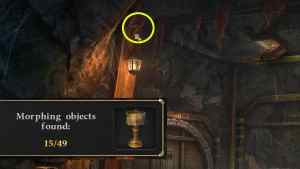
- Morphing Object (6/49) - Right next to the kiln on the floor.
Now, head back to the Dead Fields (i.e. go back twice) and take the right path toward town.
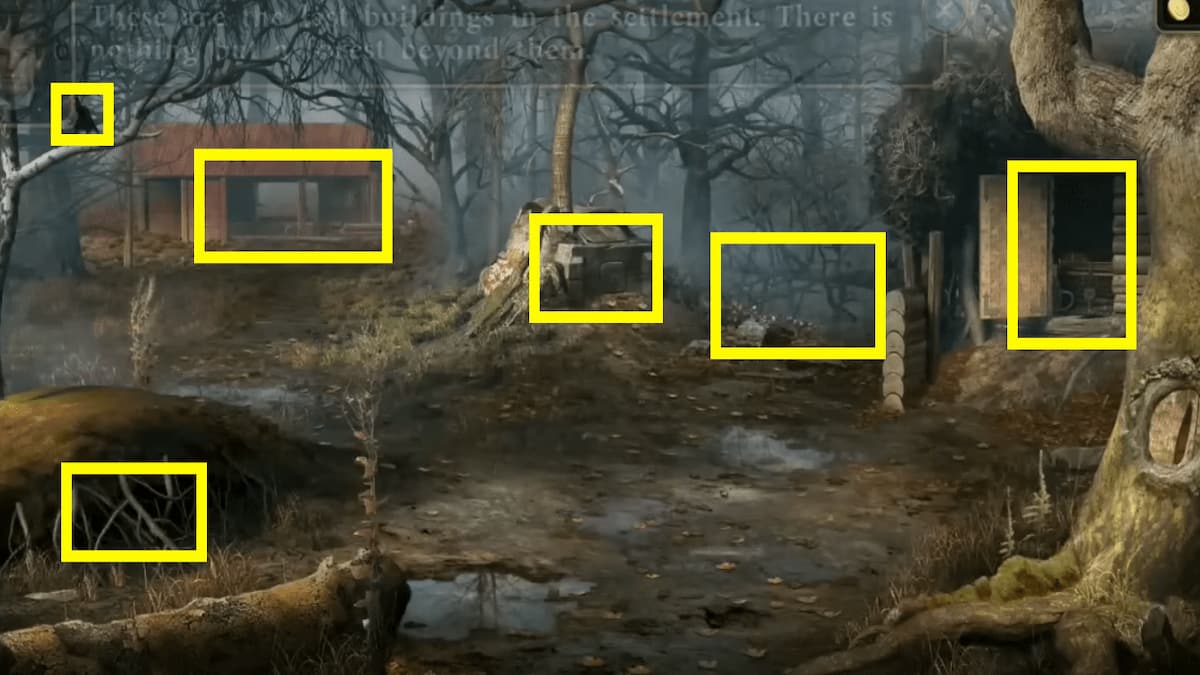
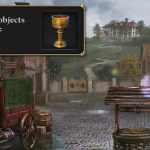
Town
Using the path to town, we can head down and view a bunch of more items, and gather some useful tools we can use later. Here's what you'll want to look at:


- Wagon
- Tongs (Use the knife to cut the wagon canvas cover).
- Shovel - Beside the notice board
- Tree wind chimes (look for the red apple tree on the right)
- Flower 2/7 - Hanging from the bottom of the center chime.
- Planter - Part of the stone wall outside the Temple.
- Sagebush
- Valve 2/2 (After cutting the sagebrush with your knife - you cannot do this until later).
- Temple (Speak to the Cleric)
- Estate Gate
- Well - The well has a morphing object on top of it that looks like an arrow.
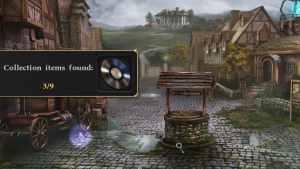
- Collectible - Underneath the car, there is a record.
Temple
The farmer mentioned we could speak to the Cleric for more information about the mystical beasts. However, the cleric doesn't want to spill anymore information until the totem has been properly restored, protecting against the evil spirits.
Make sure to examine the following in the Temple (grabbing the Lampada and Totem book in the process):


- Lampada - On the podium on the left side of the room.
- Totem book - On the podium on the left side of the room.
- Valve doorway - On the right side of the room.
- Stone archway - On the far wall beside the room.
- Model set display case - On the far left side of the room.
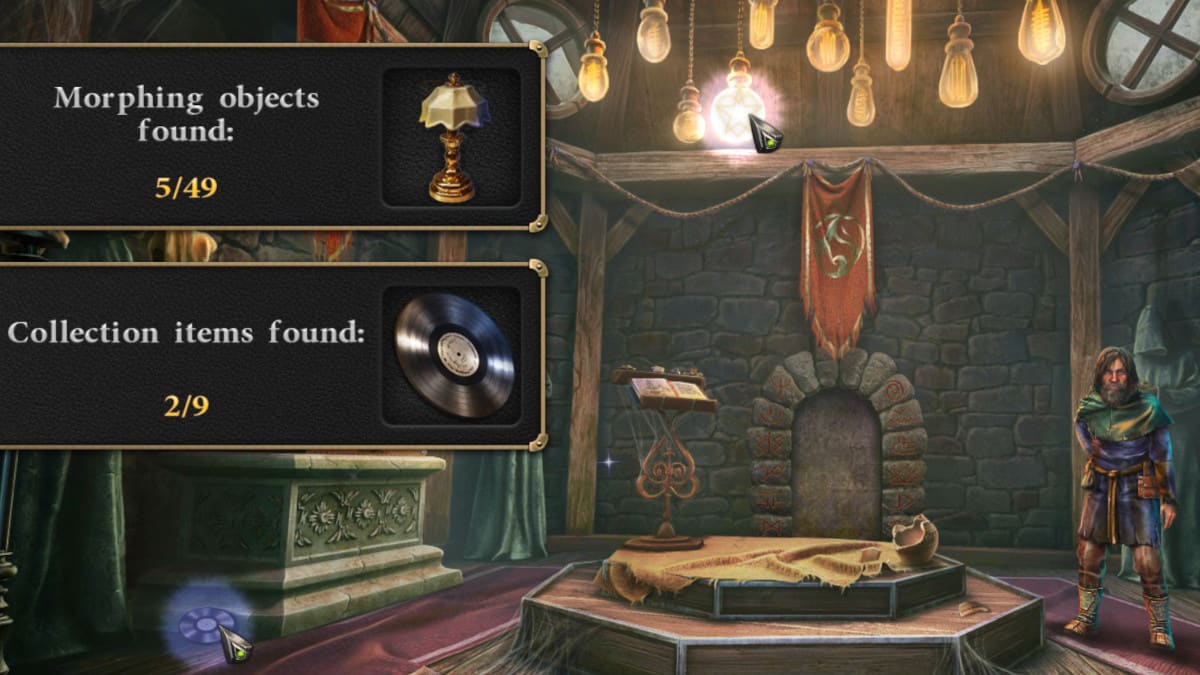
- Collectible Record - On the floor beside the stone display.
- Morphing Object - In the round lightbulb hanging from the ceiling.
Cleric Valve Puzzle
On the right side of the Temple, there is a doorway with cylinders. You won't be able to start dispersing the liquid in the cylinders until you have both valve pieces. Return to town and cut the Sagebrush with a knife to receive a second valve (look to the left of the notice board to find the Sagebrush).
At this point, you should have the valve from the sawmill and the town planter. Return to the Temple and place the valves on the missing spots at the bottom, and you can begin solving the puzzle.
The goal of this puzzle is to fill the middle cylinder with all the liquid by turning on the valves and raising and lowering the presses in the smaller cylinders. Lowering one press will raise another, so we'll need to do everything in the correct order.
If we label all the valves as A, B, C, and D, we can better keep track of them. Keep this in mind: A is unattached to the others, lowering B raises D, lowering D raises C, and lowering C raises A. When any of the presses press down on liquid at the first marker, it will dispense into the center cylinder. With that in mind, we'll hit the valves in this order:
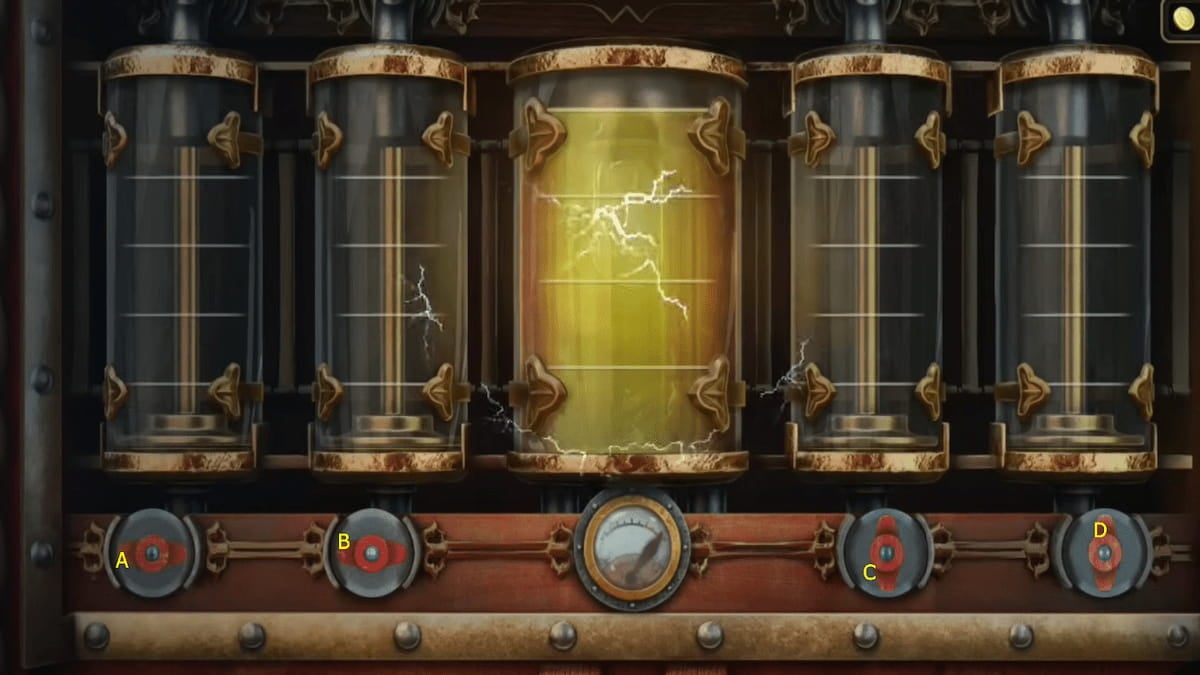
- Starting from all the way to the left, press valves A, B, D, then C.
- Then hit B to raise D to the top. Then lower D so that D and C are level.
- Then, hit valve A x2 to disperse the liquid into the center cylinder.
- Hit C x2 to disperse the liquid into the center cylinder.
- Now, press D x2 to disperse the liquid into the center cylinder.
- Press C once to raise A to the highest level, then lower A once.
- Now, press C to disperse some liquid into the center cylinder.
- Hit A x3 to disperse more liquid.
- Then, hit C to raise A, and then D to raise C.
- Press C again to raise A, filling it to line 2, and hit A x2 to dispense the liquid into the center.
- (Now we will transfer the liquid from B all the way to A) Press B to raise D, D to raise C. Press B again to empty it into D.
- Then, press C to transfer the liquid to A, and press D to transfer the rest of the liquid to C.
- Hit A to disperse the liquid to the center, then hit C to transfer the rest of the liquid to A.
- Now, hit A x2 to completely fill the center cylinder.
This will open the door to some stairs leading further up into the cleric tower.
Cleric Tower
Climb the stairs up into the cleric tower, and you'll see a blue brazier. There are a few things you'll want to look at here.


- Blue brazier - Use the tongs to grab the handle from within the fire and use your Lampada on the fire to turn it into Burning Lampada.
- Crack in the stone - Use your knife, then use the tweezers (get them from your suitcase at the farmhouse) to collect the iron Flower 3/7.
- Watch Collectible (3/9) - On the right side, past the crack in the stone.
- Morphing Collectible (8/49) - On the bar to the left of the flame.
Dead Fields Tower
Now that we have the handle, we can use it to access the tower in the Dead Fields. Backtrack through the town, back to the fields (the area with two roads). Then, approach the tower to replace the handle on the door.
Head up into the tower to look out at the infection spot in the crops. This will allow us to approach the infection spot by backing up out of the tower and heading through the field.
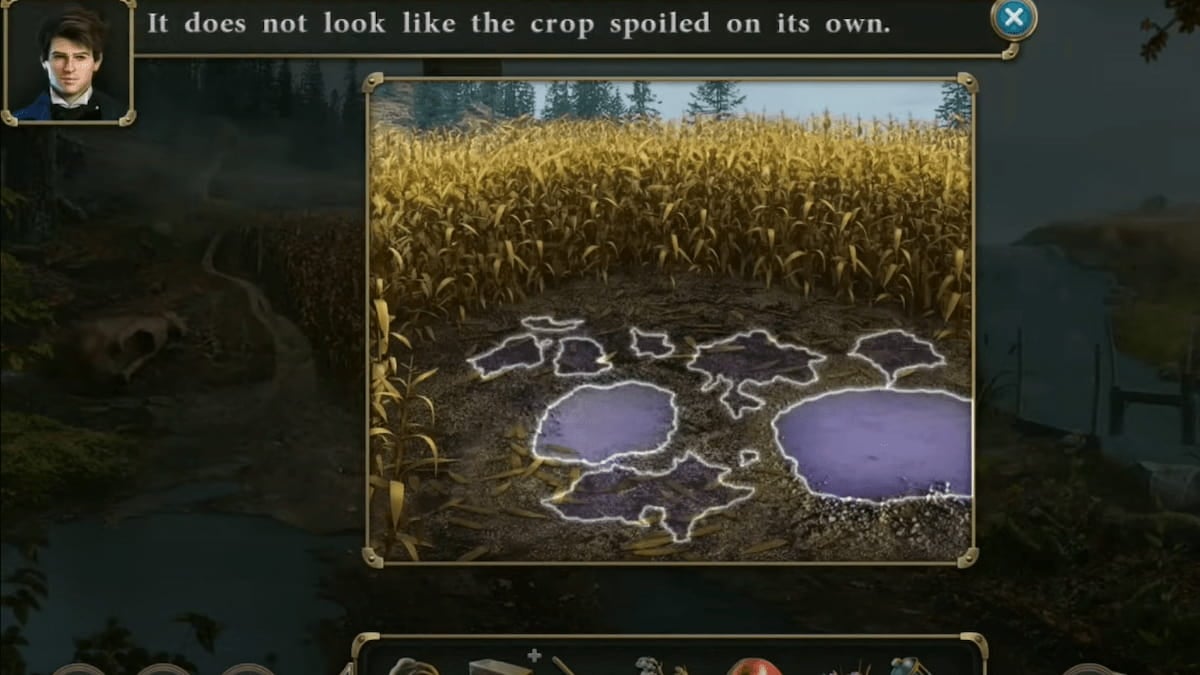
At the infection spot, we can click on the purple puddle to see Evidence 1/2 - The place where the harvest died. However, you'll need a measuring cylinder from your suitcase (the large object on the left side of the suitcase) to collect the soil sample. We can bring this back to our suitcase to test it like our other sample.
How to test the soil sample
Bring back the soil sample to the farm house and place it on the desk next to our suitcase. Drag the soil sample onto the desk and then add the following other items into the sample:
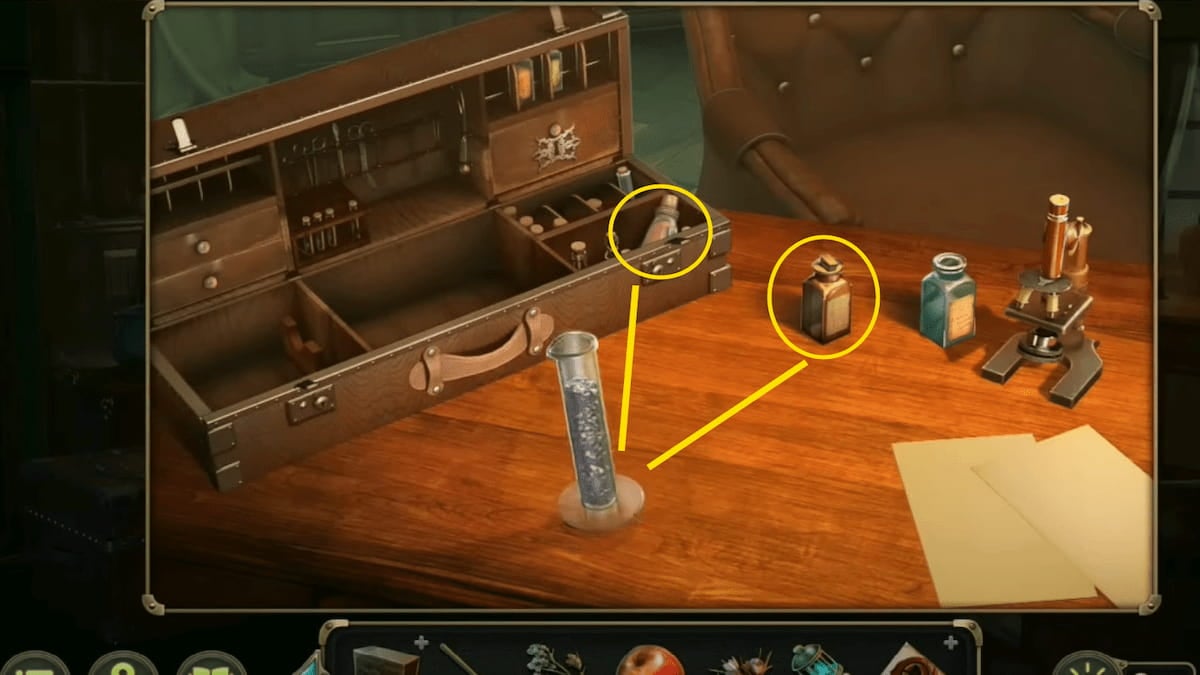
- The red vial - In the bottom right cubby of the suitcase.
- The brown vial - On the desk at the top right.
The soil will dissolve into something else. From the looks of it, it's not mystical at all. Now click on the measuring cylinder to collect Evidence 2/2 - Herbicide sample.
This leads us to another conclusion for our case. We'll need to speak to the farmer again to explain our discoveries. The farmer isn't too surprised that someone could be sabotaging him. Now, we can focus on learning more about the Cleric. To do this, we'll need to perform the offering at the totem as he requested.
How to gather totem offering items
According to the book in the Temple, we'll need to gather a few items we can use at totem offering. The items you need are sagebush, apple, crocuses, cinnamon, and wheat.
Here's where you can find them all:


- Cinnamon - Speak to the farmer's wife in the farmhouse.
- Sagebush - You will already have some from earlier when you acquired the second valve next to the notice board in town.
- Apple - In the wind chime tree in town.
- Crocuses - Near the fallen tree and to the left of the shack in the woods sawmill area. (Also, grab the Part from underneath them).
- Wheat - Inside the barn at the farmhouse (complete the barn door puzzle and the hidden objects puzzle).
How to open the barn - barn door puzzle
To get the wheat, we'll need access to the barn. We can use the Part we picked up from under the crocuses to get inside it. Head back to the farm yard and place the part in the middle of the mechanical puzzle piece on the door. We can now start solving the puzzle to unlock it.
The goal of this puzzle is to move all the green symbols so they are lined up with their matching pink symbols. In the center key mechanic, you can grab two symbols at a time, then slide left or right and push the symbols to a new slot.
You'll want to try and figure out a way to line up the green symbols so you can pick them up together and place them in their correct spots. Your basic strategy should be to focus on the red symbols and lining up one correct symbol at a time until eventually there are only two to line up and they match the green symbols in your possession. You can also pick up one piece at a time if there isn't anything else directly beside it.
Where to find all the Wheat spikelets
Inside the barn, you'll need to complete a hidden objects puzzle to find all the pieces of wheat you need. Just remember you can zoom in and move the camera as needed. Here's where you can get them all:


- 1 - On the sack on the top left next to the stool.
- 2 - Underneath the pumpkin in the center of the barn.
- 3 - In the crate of corn on the right side.
- 4-6 - Near and inside the 'potions' barrel at the top of the room (Inside the barrel, at the top right, and in the green bottle).
- 7 - On the banner hanging on the back wall above the 'potions' barrel.
- 8-11 - On and near the saddles hanging on the back wall (On the saddle, on the rake to the right of the saddle, inside the satchel all the way to the left, and hanging below the satchel with the red gem).
- 12-14 - Inside the cabinet on the back left of the barn (On the statue's staff, on the wreath, in the center jar on the top shelf).
- 15 - On the wooden pillar on the left side of the barn.
- Basket - (You'll also need this basket to store the wheat.) Hanging on the wooden pillar above where you found the wheat.
How to prepare the offering at the totem
With all the wheat, you can exit the barn and put together the basket of offerings. Select the basket of wheat from your inventory and add all the other offering items (the apple, the sagebrush, cinnamon, and the crocuses). It will become combined objects called Offering.
Now return to the Dead Fields and approach the totem that is tipped on its side.
Use the shovel to dig out a spot for it, and collect the Flower 4/7 from the digging spot. You can also grab the collectible off to the left side of the digging spot. Now, you place the totem up and click on the shovel to fill in the hole.
After the totem is standing again, place the Burning Lampada and the Offering at the base of the totem. The totem will begin to glow, signaling you've completed it correctly. The Cleric will now be more willing to talk to you; return to the Temple to do so.
The cleric tells us of another incident that happened at the Mill nearby, and he gives us a protective amulet. We can continue on to the Mill to uncover more evidence in our investigation. To get there, we'll need to fix the broken bridge in the Dead Fields.
How to fix the broken bridge to the Mill
To fix the bridge, we'll need the right materials. Thankfully, the amulet that the cleric gave us can help us get them. Head to the storage shed at the woods sawmill area. Place the amulet inside the strange chest to open it up.
How to solve the Strange Chest puzzle
Inside the chest, there's another puzzle to solve. The goal of this (random) puzzle is to slide all the animal tiles onto their matching locations on the board. However, moving one piece will move all the pieces. Your basic strategy should be to match 2-3 pieces at once, then take advantage of the silver tiles to block movement of tiles you don't want moved as you try to fit the final tile or two (you may want to block the white symbol tiles in this process).
Inside the now unlocked chest, you can view a paper about the beast and collect the Axe. Take the axe over to the roots on the left side of the woods sawmill area. Use it to chop out the roots and collect Flower 5/7.
Next, go to the tree with the eye on it to the right of the sawmill area and use the axe to make a hole. Inside the hole, you'll collect a red bundle. You can open it up via your inventory and collect a few more different pieces: a statuette and a handle. (You can also go back to town and use the axe on the well to retrieve another statuette. To do so, use the wheel after using the axe.) Now, continue into the sawmill.
How to saw logs into planks
We can use the sawmill to create planks to repair the bridge. However, there are a few steps we'll need to do to get the sawmill up and running again.


- First, place the handle we got from the bundle on the machine to the right of the furnace (place it on the left side of the machine).
- Go to the wood chopping block and use the axe to chop pieces of wood into firewood (collect the crowbar from atop the logs).
- Now, go to the furnace and place the firewood inside. Collect some pellets off the ground below the furnace and place them on top. Then, grab the lighter from your inventory to light the fire.
- Look at the box with the padlock on the right side of the sawmill. Use the crowbar to break the lock and open it up. Inside, you'll find a gear you can place in the machine to the right of the furnace.
- All you're missing now is a saw blade for the saw table. Head into town and look inside the wagon on the left side. Use the crowbar to break open the box inside. You'll find a new saw blade that you can place on the saw table.
- Return to the saw mill and place gear on the machine to the right of the furnace, then saw on the cutting area.
- Now that everything is repaired, you can pull the handle on the machine and begin sawing the logs.
You'll receive the boards from the sawing table, which you can use to repair the bridge. First, look inside the padlock box where you found the gear and grab some nails. Then, take them to the broken bridge in the Dead Fields to begin repairing.
Place the boards down on the foundation structure first, and then place the nails. Then, you can use the back of the axe to nail them down. With this little makeshift bridge, we can continue to the Mill.
The Mill
The mill has experienced a strange fire that has only burnt the windmill and none of the surrounding structures. We'll want to investigate the points of interest in the area to figure out more.
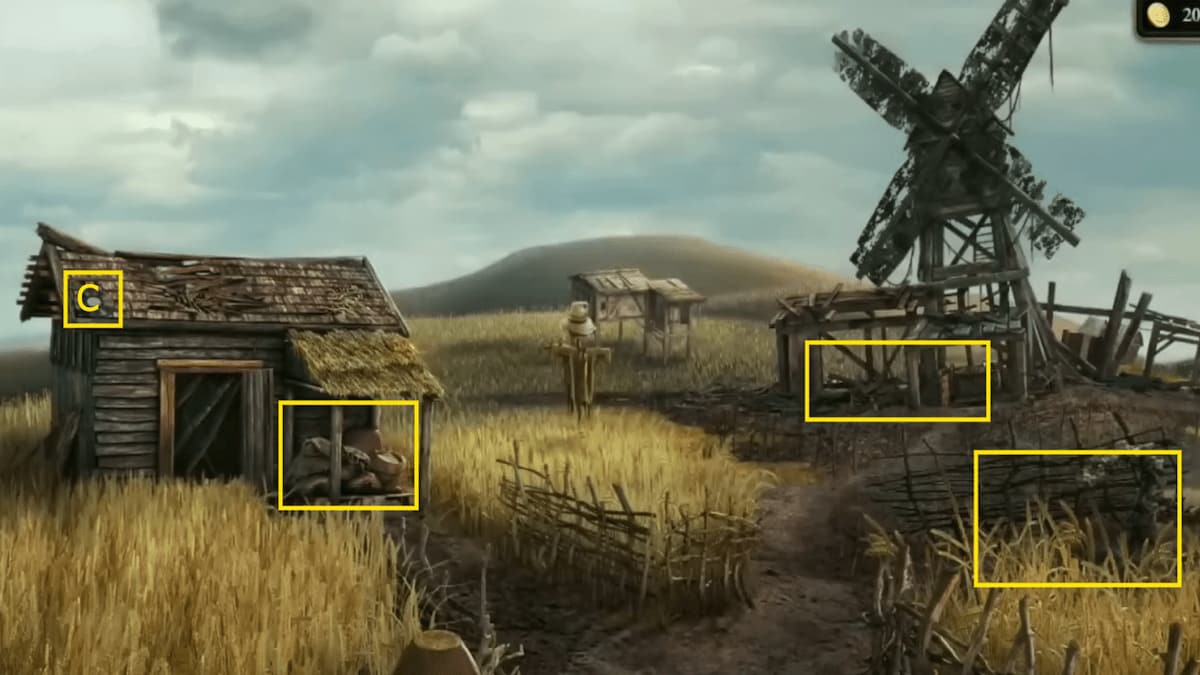
- Burnt stump - On the right side of the mill yard (Evidence 1/4 - Lightning strike).
- Covered supplies - Check the left side shed, then the right side of the shed with the thatch roof (Hook and chain).
- Trap door under mill
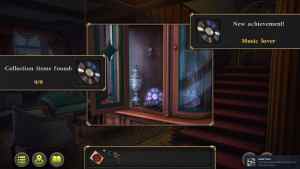
- Music Collectible - On the shed roof on the left side.
- Morphing Object - The hat on the scarecrow.
First, collect some evidence by looking at the burnt stump on the right side of the yard. Then, look at the supplies under the thatched covering on the shed to the left. You can open a bag and collect the Chain with hook. Then, head forward toward the burnt mill (on the right side), and you'll spot a trap door with a fallen beam on top.
To uncover the trap door in the mill wreckage, attach the Chain with hook to the fallen beam. Then, use the crank behind it to pull the beam up off the door. With the beam removed, you can open the trap door and climb down.
The Mill Basement
The basement below the mill looks very much like it's still a crime scene as obvious from the body lying on the ground. We'll want to look around the area to pick up any items or evidence we can get.


- Body - In the middle of the floor (Evidence 2/4 - The suffocated miller. Look closer at the hand to collect Key and the safe code. Write down the code.)
- Cage - In the top right corner (Evidence 3/4 - Dog's fur.)
- Gate - (Brush).
- Safe - Key
- Morphing Object - On the bottom of the stool by the body.
- Watch Collectible - On the floor right next to the body.

First, look over the miller's body to pick up a key. You can use this key to unlock the gate in the back right corner. Then, grab the brush from the top of the dynamite crates. This brush will help you brush away the soot on the wall inside the cage with the dog fur. Write down the code.
How to unlock the safe
We now have access to two different sets of numbers: the one near the miller's body and the one written on the cage wall. We can use these numbers to unlock the safe on the right side of the basement.
Turn the dial to adjust the numbers on the front of the safe. You'll want to enter the numbers found on the body first and then the ones written on the wall. (These are random, so don't just use the ones in the image below. If you encounter the number 0, simply click 0 to 'enter' it.)

Inside the safe, you'll find another key and some information about the mill breeding dogs, which you can collect as Evidence 4/4 - Documents on the dog's sale.
The documents suggest the miller was illegally breeding dogs in the basement of the mill, all for sale to Count Babington. We can fill in the farmer with this new information and ask him about the count to further our investigation.
How to solve the bird box puzzle
Before we go back to the farmer, take the new key you received from the safe and open the chest you collected from the tree stump. Inside is another puzzle for us to solve.
The goal of this puzzle is to fill in each circle with the proper colored gems (e.g. blue gems in the blue circle). You can switch all the inner edge pieces by pressing the bird rotation button in the center. You can also rotate each circle in its own spots.
A great way to easily figure out this puzzle is to note that the pieces will all rotate clockwise each time you press the bird button. To keep the pieces in the right spots, rotate each circle so that the right colors stay on the outer slots (i.e. the ones not facing the bird button) and only the inner corner has the piece you want to change out.
Additionally, always keep in mind you want the 'odd' fourth gem in each circle to be 'correct' for the next circle (e.g. top left odd gem should be red, top right odd gem should be green, and so on). In other words, arrange it so each circle has three 'correct' colours not facing the button, then hit the button to complete the puzzle.
Once you open the bird box, you can grab the Dog figurine from inside it. Hang on to it for a later time.
Now, return to the farm yard to speak to the farmer. He will mention that the count wanted to buy land from him right around the time incidents started happening. He'll also tell us that the count lives in the estate at the top of the hill, which we can reach by venturing through the town.
The Estate
To get through the estate gate from town, use the Dog figurine that we collected from the bird box puzzle. Past the gate, the butler will be waiting for us in the yard. Before we go inside to meet the count, we'll want to take a good look around.
Estate Garden


- Gazebo
- Gargoyle Statue - In the center of the garden on the fountain (Detail 1/5 at the gargoyle's feet).
- Fountain drain - On the ground at the right side of the fountain (Evidence 1/12 - Blurred traces of blood of an unusual color, Detail 2/5, and Screwdriver).
- Flower pot - On the right side of the garden (Detail 3/5).
- Garden bench - On the top right side near the estate stairs (Flower 6/7)
- Music Collectible - On the left side of the base of the fountain.
- Morphing Object - On the balcony above the gargoyle in the middle of the fountain.
Here in the garden, you'll find some evidence and start collecting some pieces to another puzzle that you will use down the road. First, look at the fountain drain to collect evidence and use the crowbar to pry open the drain. Inside, you can collect a detail piece and a screwdriver. Now, look at the gargoyle statue and the flower pot in the garden and collect two more detail pieces (look in the bottom right corner of the flower pot image to find the detail piece). Finally, look at the garden bench beside the stairs and grab the iron flower with the screwdriver. Now, we're ready to head inside to speak to the count.
Estate Living Room
When we go inside, we can speak to the count sitting in the room. He will tell us that his grandfather was obsessed with tracking down the demon dog and that he disappeared into a 'secret room' to research it. We can look for this secret room in an attempt to learn more. After the count leaves, we'll want to explore this room further.
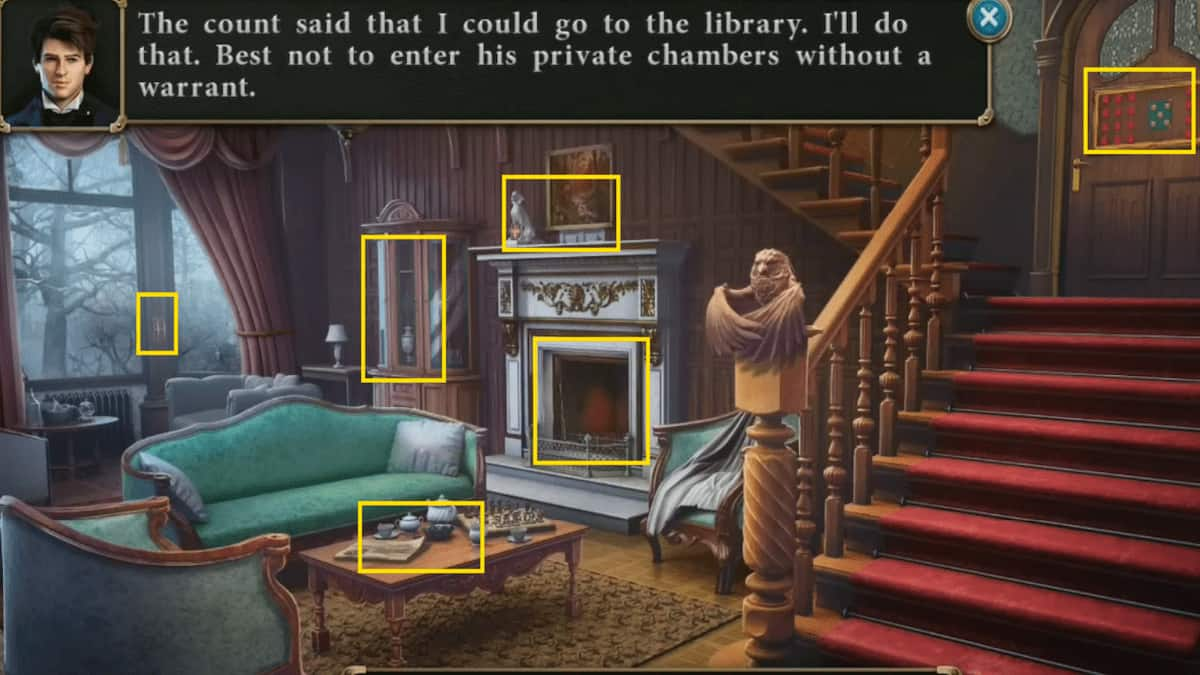
- Curtain - In the window on the left (Lever).
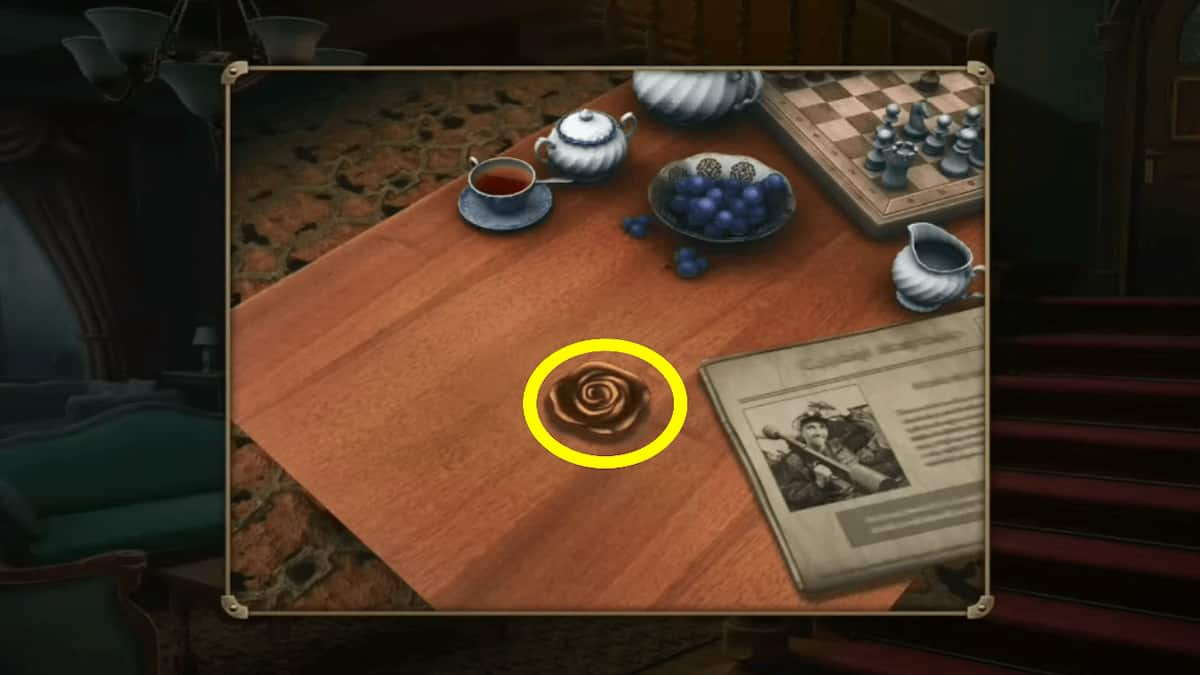
- Coffee table - In the middle of the room in front of the couch (Flower 7/7 under the newspaper).
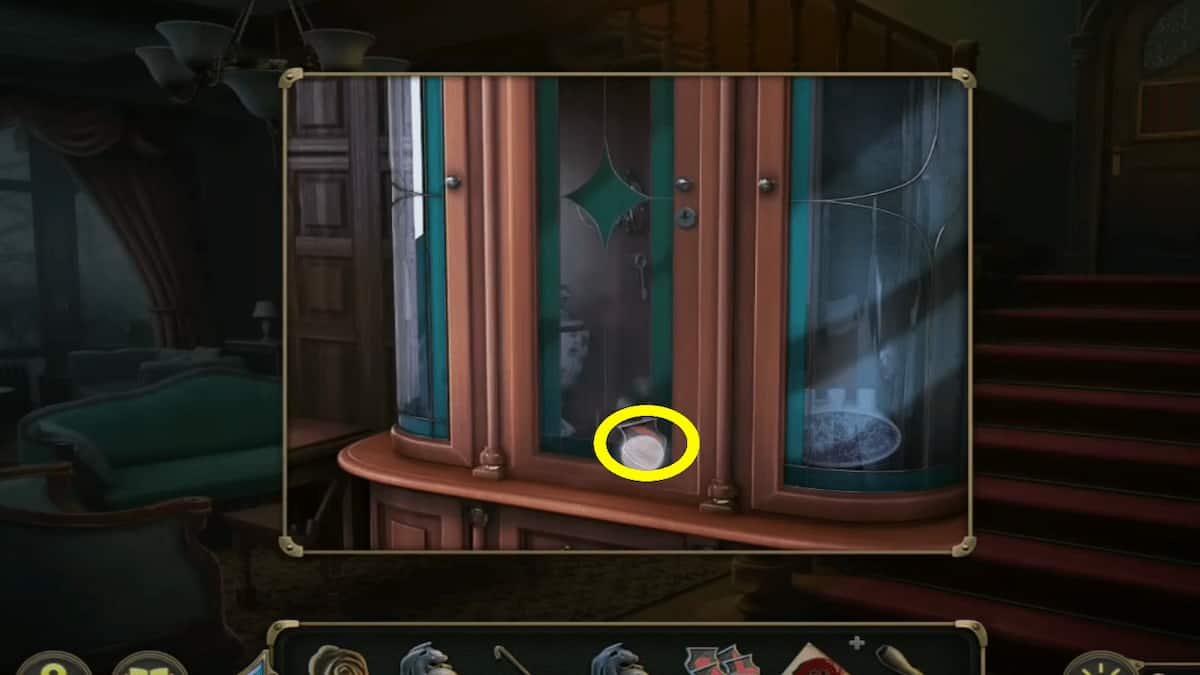
- China cabinet - In the left corner of the room (Detail 4/5).
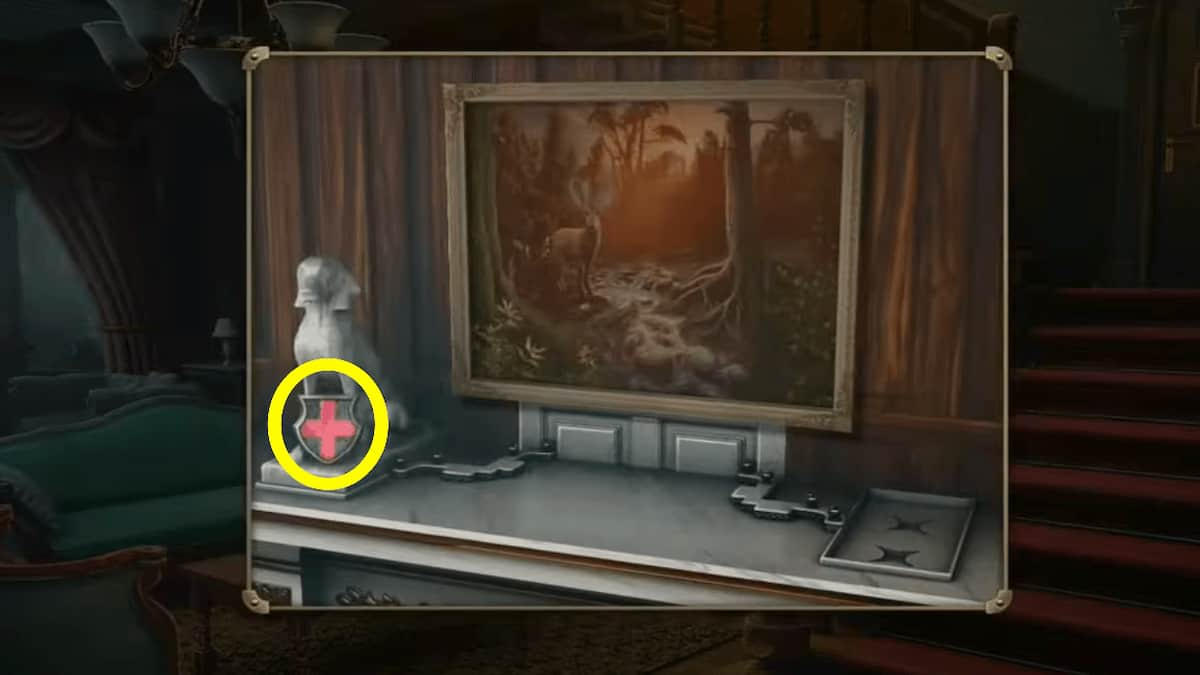
- Fireplace mantle - At the head of the room above the fireplace (Detail 5/5).
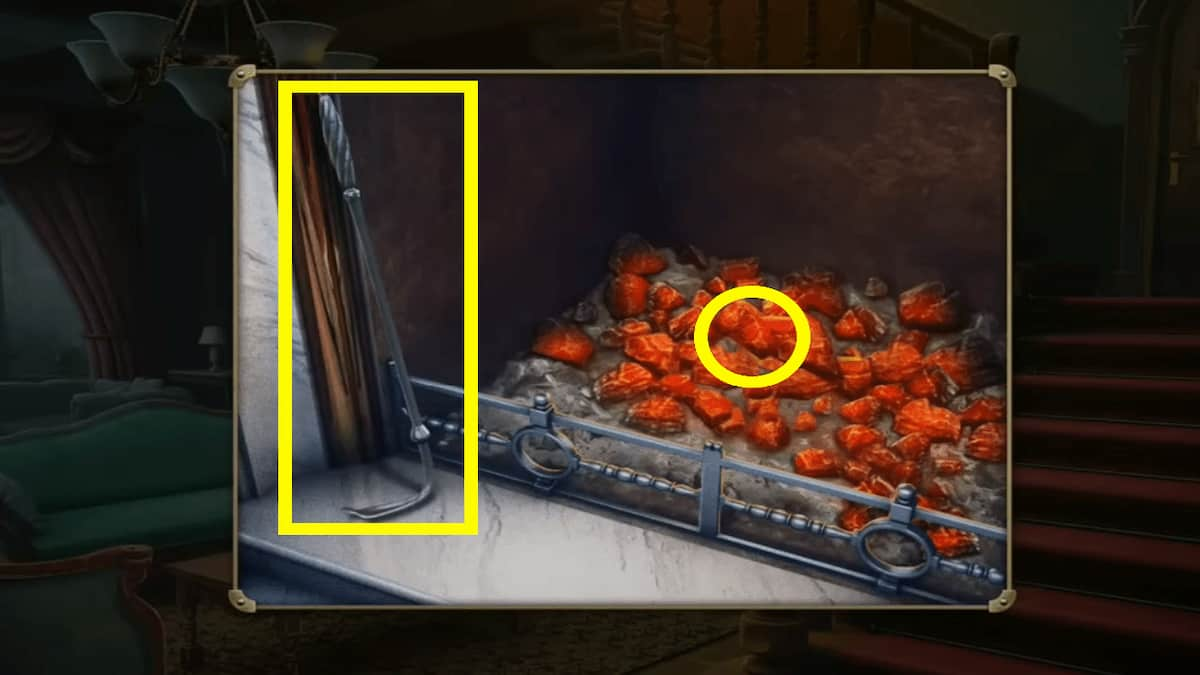
- Fireplace - At the head of the room underneath the mantle (Orange Stone).
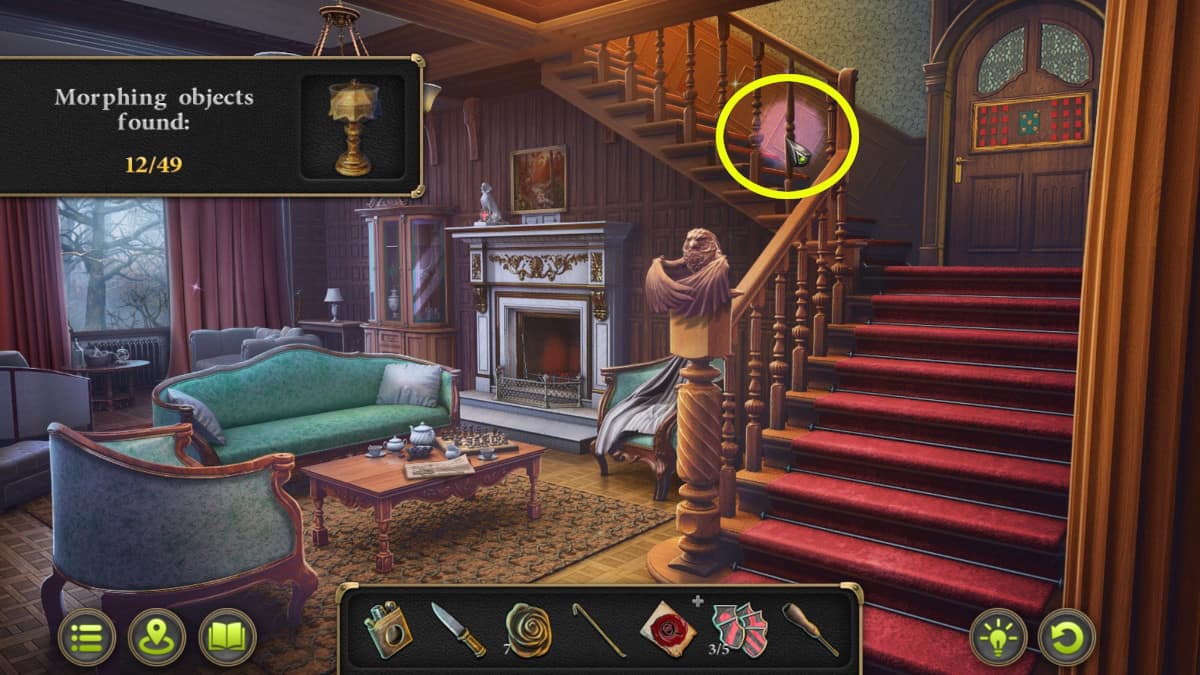
- Library Door
- Morphing Object - On the Spindles going up the stairs.
First, check out the coffee table in front of where the count was sitting. There is a newspaper you can move to the side to grab the last iron flower piece. Then, look at the china cabinet in the back right corner. There is a keyhole, but we can't open it yet. Instead, take the detail piece. Then look at the fireplace. You can look at the mantle above the fireplace first and grab the last detail piece. Then, inside the fireplace, use the poker to get the Orange Stone from within the coals. Now we can head a little ways up the stairs to look at the library door.
Estate Library
We'll have to figure out the puzzle on the door to get inside the library. Luckily, we've been collecting detail pieces we need this whole time. You'll need five pieces altogether. Place them in the slots in the center book to get started.
How to solve the library door puzzle
The goal of the puzzle is to open up all the books. However, opening some books will make other books close. That means we'll need to open them in the proper order to get them all open at the same time.
The 'trick' here is to observe that when you hover over a book, it shows you which other books will be flipped over when you click. As such, simply try to plan ahead. Done properly, you can solve the puzzle in a handful or so of short moves.
Once all the books are opened, the door to the library will unlock and let us enter. Here, we'll look for the diary that belonged to the count's grandfather. It should be in the display case that the count mentioned, but we can look around the area for more items as well.
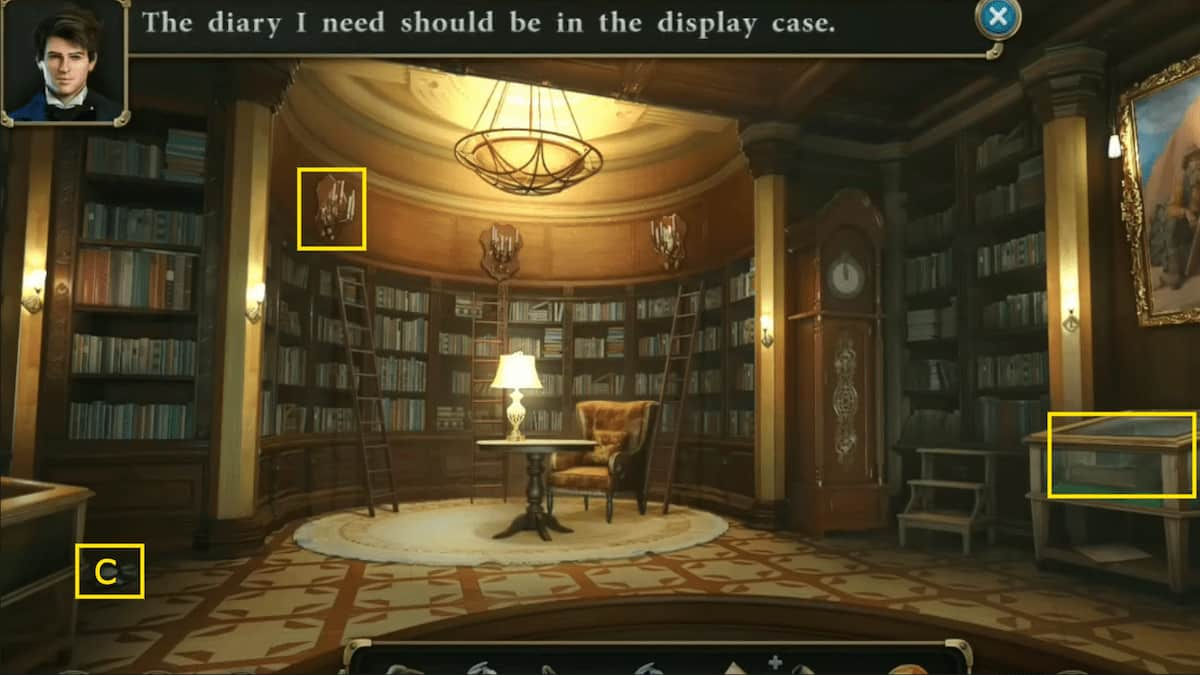
- Display Case - On the right side of the room underneath the large painting (Diary, Statuette, and Order)
- Mounted candles - At the top of the wall where the ladder leads to.
- Music Collectible - On the bottom left of the room.
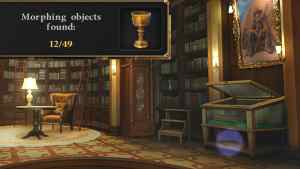
- Morphing Object - Underneath the display case on the right side.
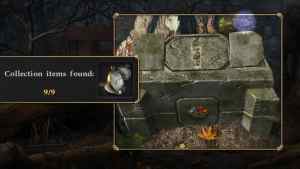
Where to find all the loop symbols
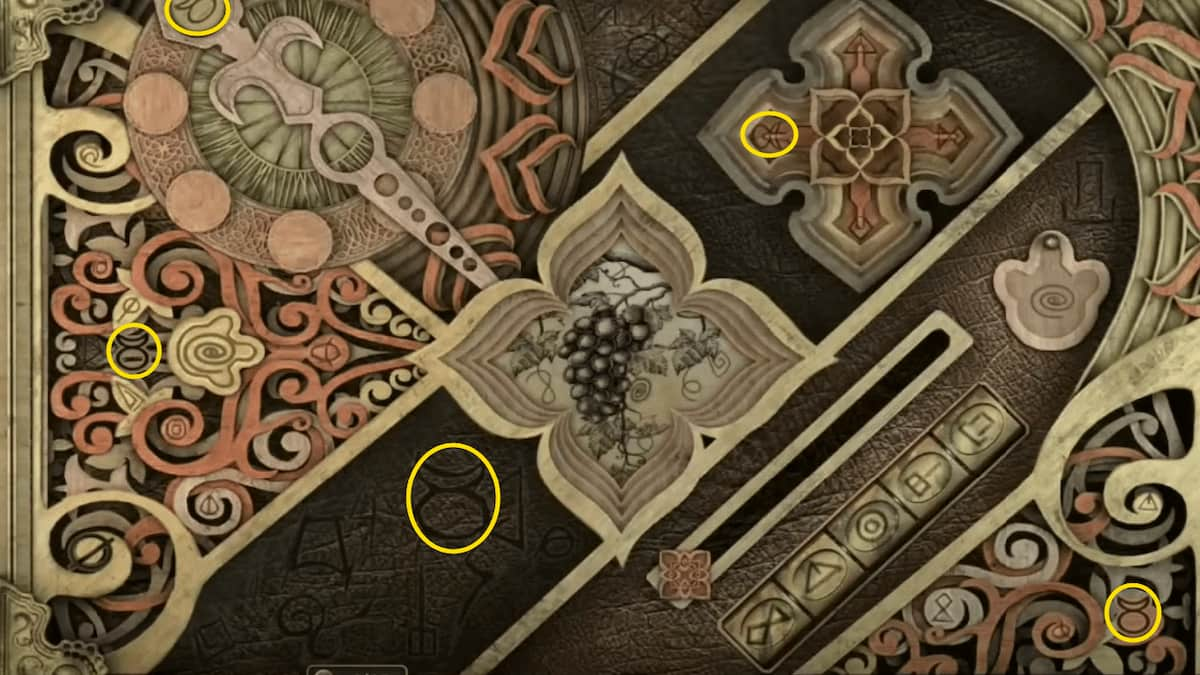
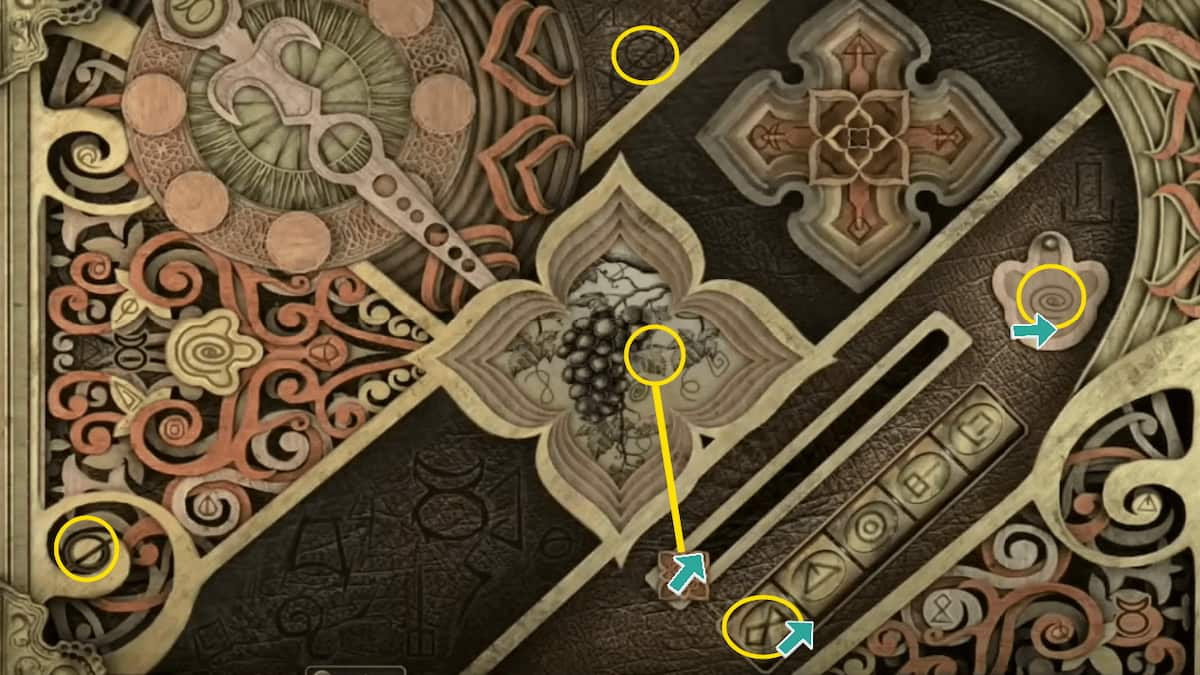
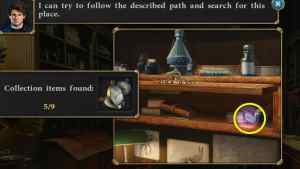
To open the display case and retrieve the dairy, use your knife to slide the lock free. Then, you'll need to complete a puzzle about hidden objects. You'll need to locate all the symbols shown on the loops on the right side. Here's where to get them all (remember you can zoom in and out and move the camera):
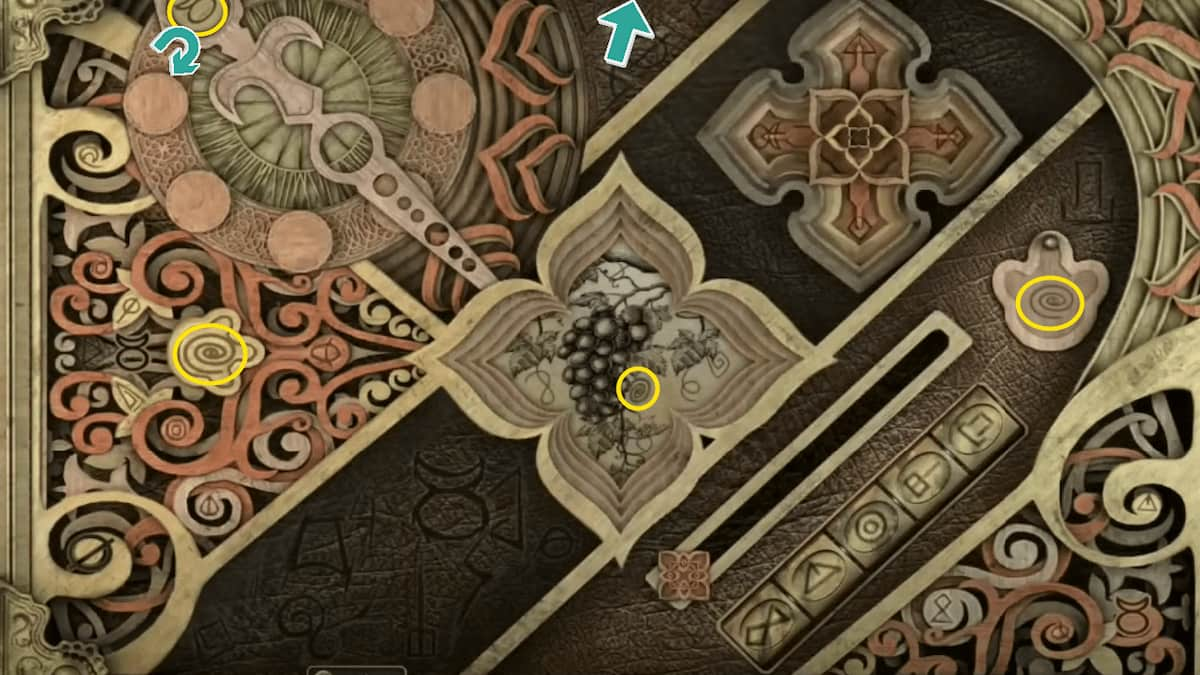
(Note: The top blue marker in the first image above refers to an object on the edge of the image.)
When you find all the pieces, the display case will open. There are a few things you'll want to do inside the display case.
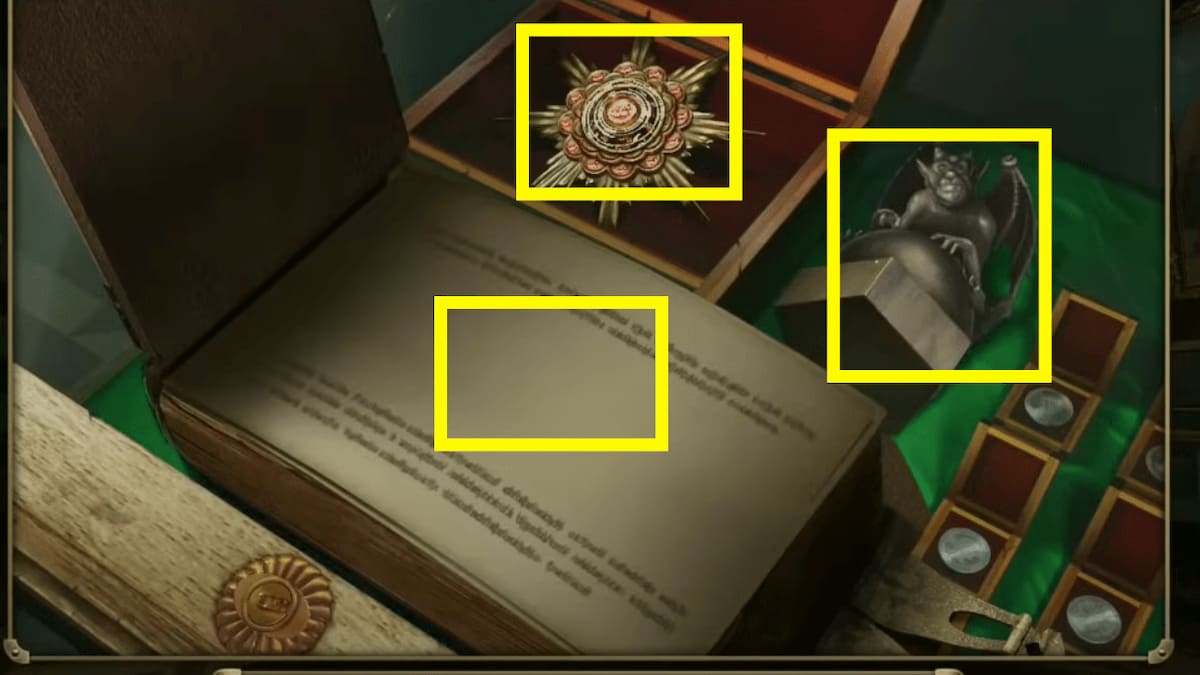
- Use your lighter on the diary's first page to reveal the hidden text.
- Grab the Order piece above the diary.
- Grab the gargoyle statuette on the right side of the diary.
The diary page shows three different molding pieces. These moldings are within the mounted candles in the library. One of them is missing, however. To continue, we'll need to locate the last piece.
Where to find the stucco molding piece
The last stucco molding is within the gargoyle in the estate garden. To get it, we'll use the gargoyle statuettes on the gargoyle fountain.
We've collected two statuettes as we've gone on, but we can backtrack to get the final two in the well in town and in the farm house iron flower box. Here's a quick reminder of where to find them all:


- In the well in town (using the axe).
- In the iron flower box in the farm house (look above the wood stove, which is to the left of the desk; place the iron flowers inside it).
- In the bundle from the eye tree in the sawmill area (using the axe).
- In the display case in the estate library.
Now, bring all the statuettes to the estate garden to get started. Approach the gargoyle fountain in the center of the garden. You'll notice there are four slots around the outside of it. You can place all the gargoyle statuettes in these slots. This will open up the fountain and give you another puzzle to solve.
How to solve the gargoyle fountain puzzle
The goal of this puzzle is to slide and rotate all the shape pieces so they are in the right positions. You'll want all the light blue spirals to be on the outer ring, then the dark blue circles, the purple squares, and lastly, the pink trinities (go for it in this order). Use the rotate circles to quickly move pieces around or temporarily store pieces out of the way.
Once all the symbols are in the correct spots, the gargoyle will begin to glow and interact with the other gargoyle near the stairs. The other gargoyle will turn and face you; examine it to collect a Stucco molding.
How to solve the Stucco molding puzzle
With the final stucco piece, you can return to the estate library and place the piece on the rightmost candle where it belongs.
Now that we have all the stucco moldings on the candles, we'll need to rotate them so that they match the page found in the diary (check the display case on the right side of the room from earlier). Click on each of the mounted candles to view them and rotate them accordingly (the correct positions will vary for each player).


A secret opening will be revealed on the left side of them room once all the moldings are facing the right direction. In this opening, there will be a slot to place the Order we picked up. Doing so will reveal another puzzle to complete.
How to solve the Order Roman numeral puzzle
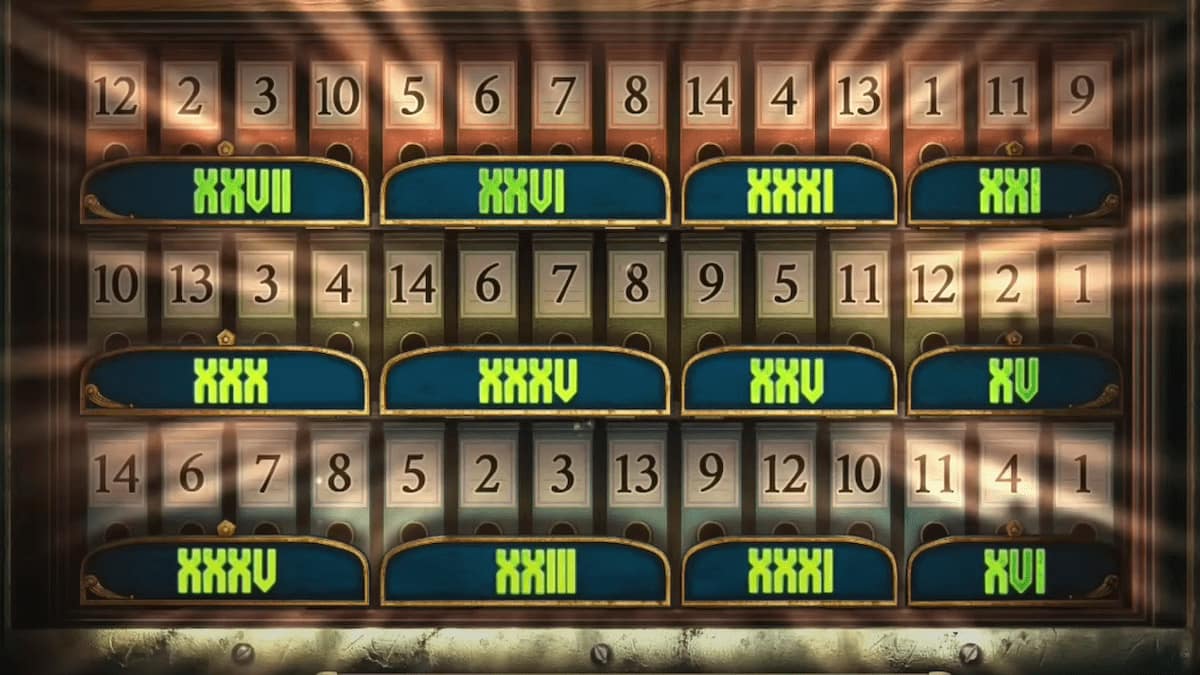
The goal of this (random) puzzle is to sort all the numbers so they make up all the Roman numerals in each section. Just click on the number and the spot you want to move it to; when you have the correct set in a given section, that section will light up. You can only move numbers across rows (e.g. you can't move a number from the first row to the third or vice versa).
An easy way to figure out which numbers to move is to add the current ones in a section up then figure out how much is missing (e.g. if you're at 23 and need 27, swap a 4 for an 8, as you need 4 more). Also, it's better to start with the sections with only three numbers, as you're left with more options afterward for the more complex four number sections.
Solving this puzzle will completely open up the bookcase on the left side to reveal the secret room the count mentioned briefly before. We can continue through to investigate.
Estate Secret Room
This room screams obsession with this demonic dog creature. We can take a look around to try and find some more information about it, and collect some other useful items.
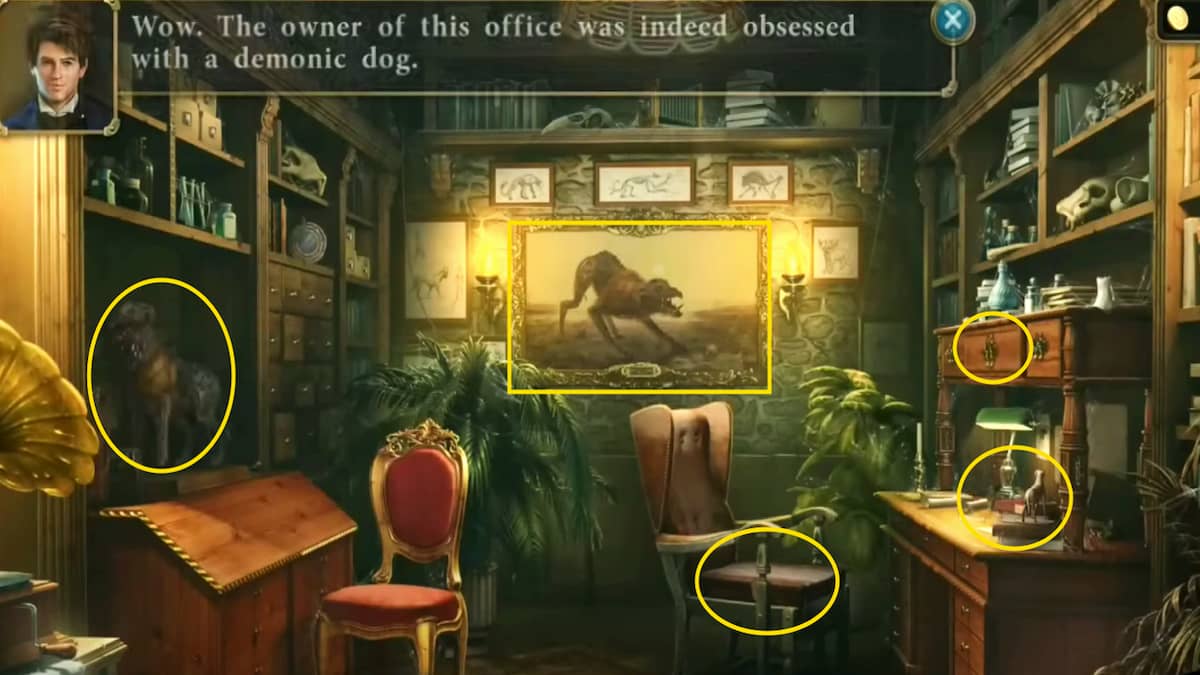
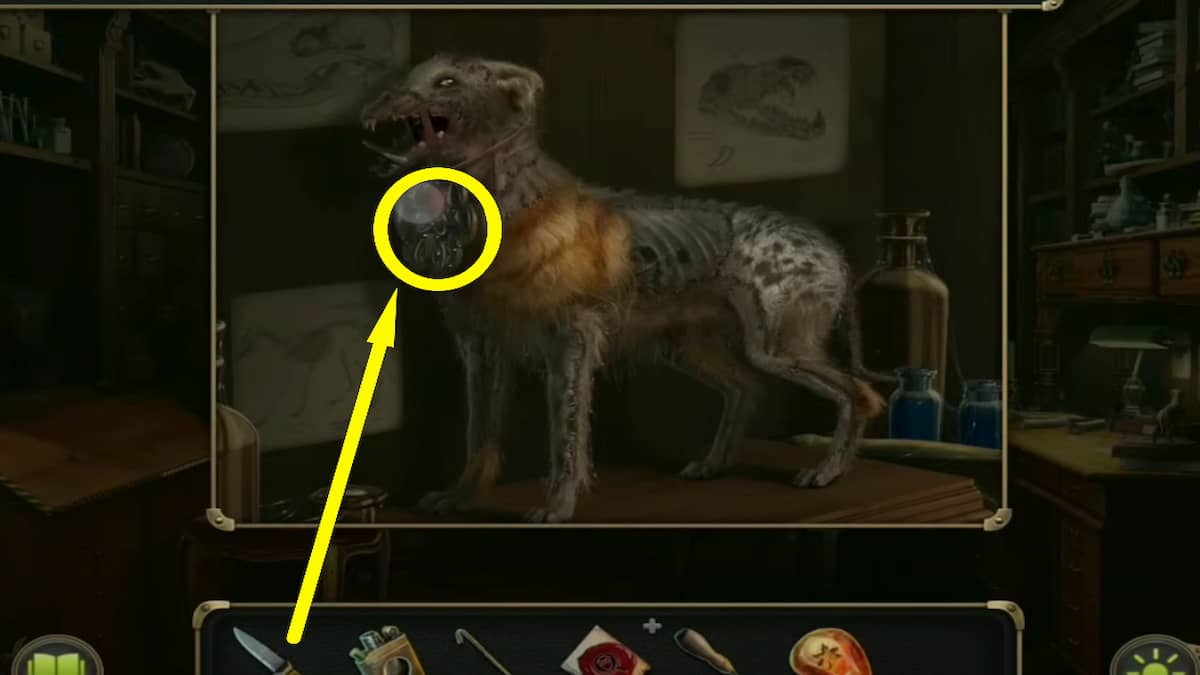

- Stuffed dog - In the cubby on the left side of the office (Pendant - Cut down from its neck with the knife).
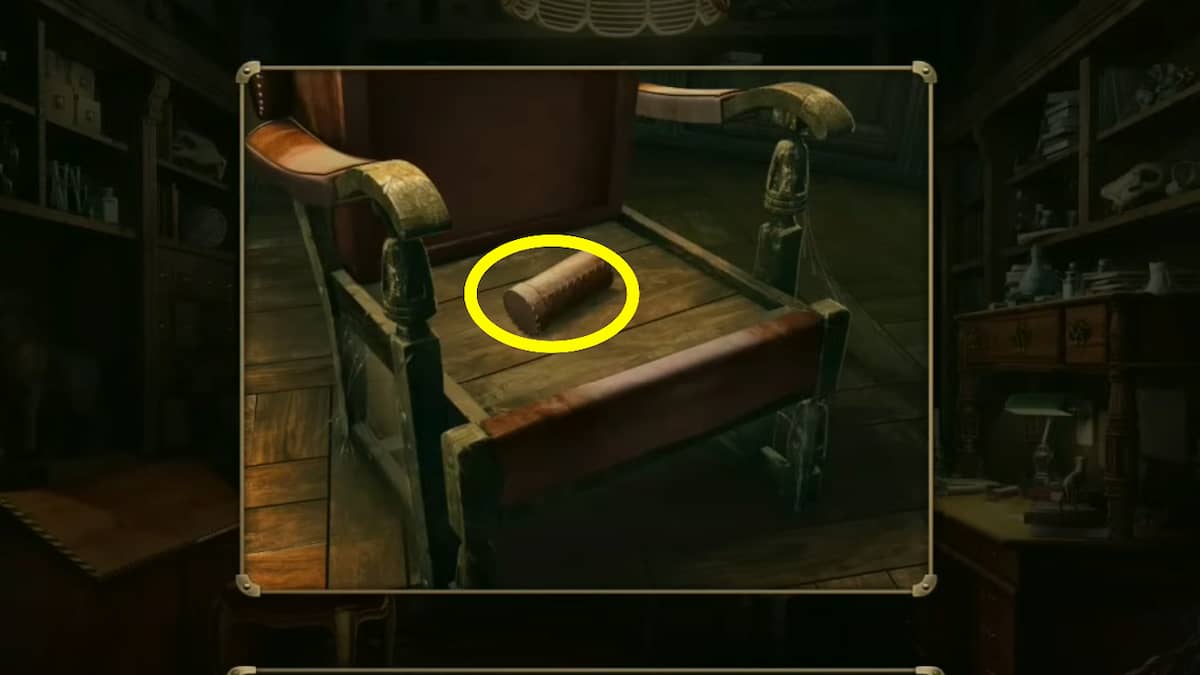
- Chair - On the right side near the desk (Red Stone - Cut open the seat cushion using the knife).
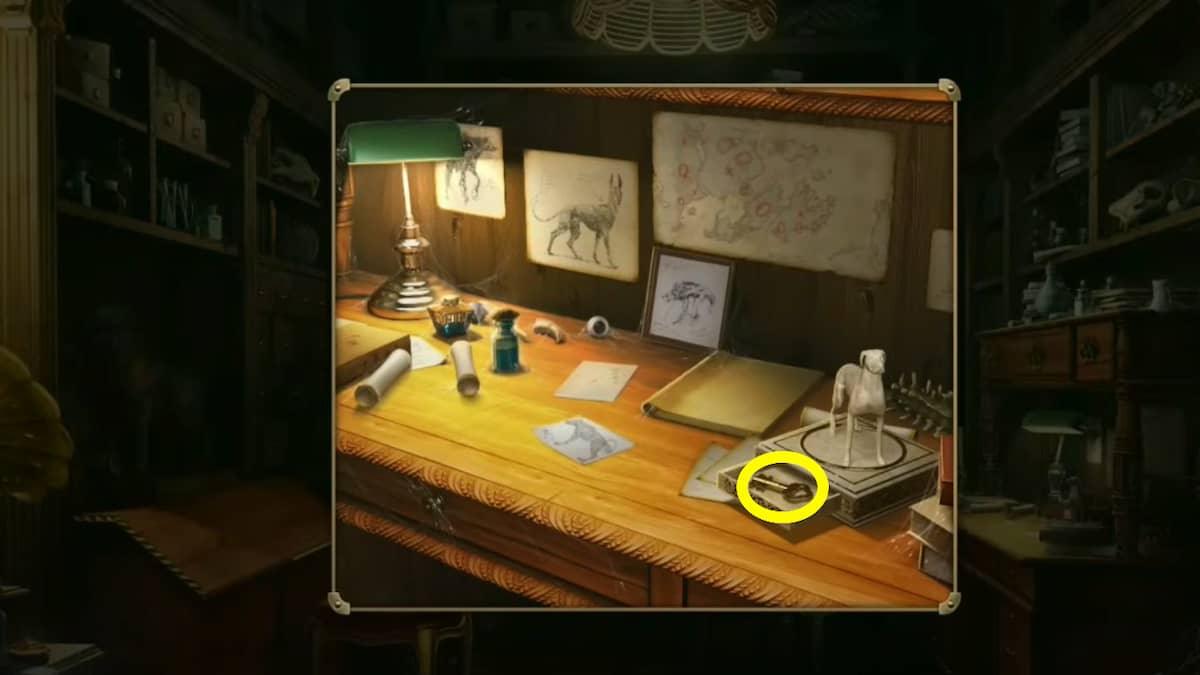
- Desk - On the right side of the office (Key - Rotate the dog statue to reveal it).
- Desk Drawer - Above the desk (Use the Key to acquire journal page and Collectible)
- Demon dog painting
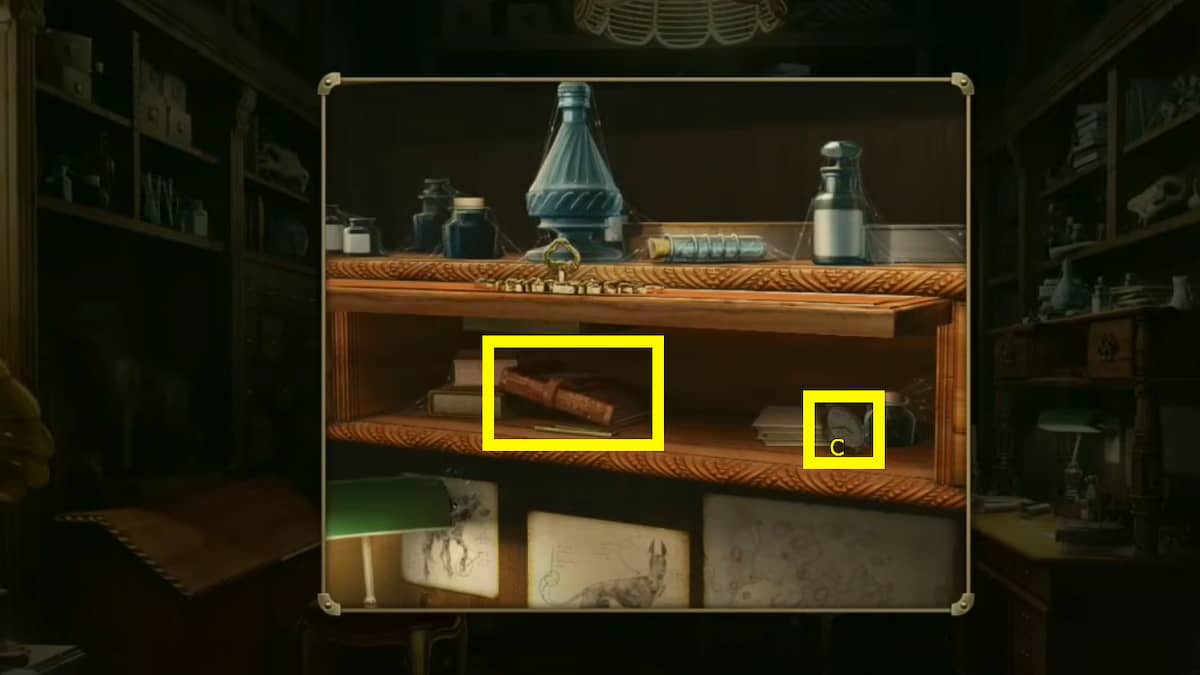
- Morphing Object - On the shelf above the Demon Dog on the left of the room.
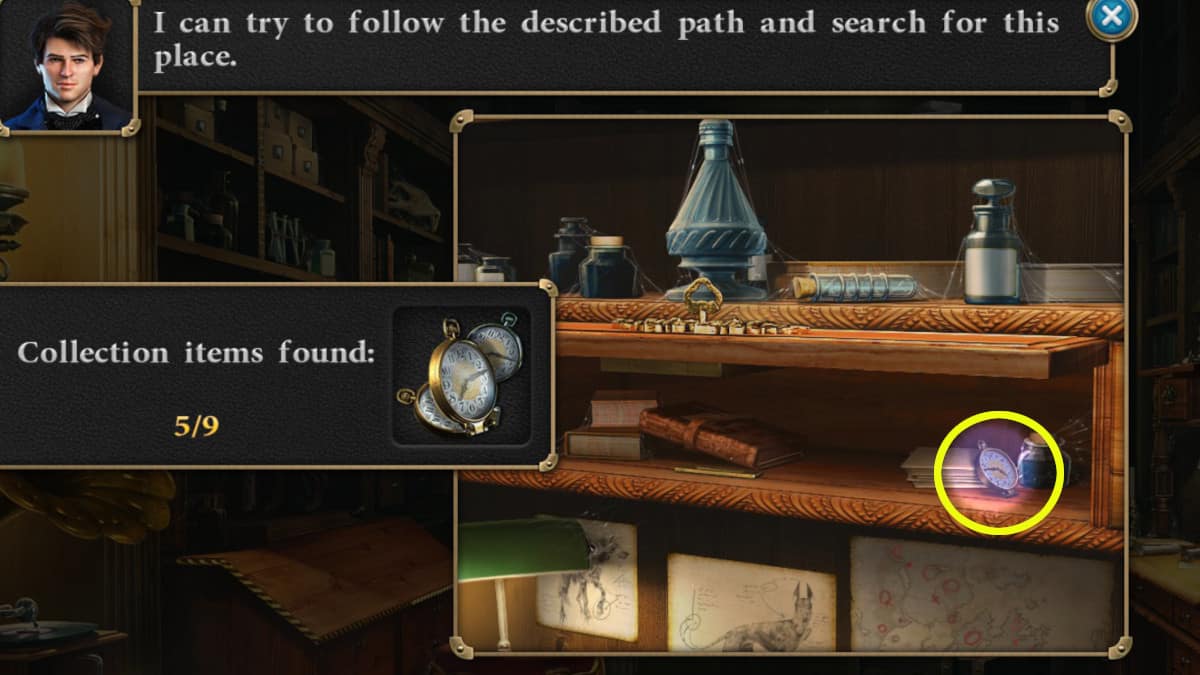
- Watch Collectible - Inside the locked cabinet above the desk on the right side of the room.
In this secret room, use the knife to cut the pendant from the stuffed dog's neck and the chair cushion to retrieve the red stone. Then, investigate the desk, rotating the dog statue, to collect a key. You can use this key in the drawer above the desk. Inside, you'll find a journal detailing a specific location in the woods where the demon dog is supposed to go back to. We can try to locate it. Take note of the demon dog painting on the wall; we'll want to come back and investigate this after finding the tree stump face.
How to find the tree stump face
According to the journal in the desk drawer, the demon dog will head back to a specific area in the woods. We can try to follow the path to it by heading to the woods near the sawmill. When you get there, head toward the right where the fallen tree is, then click to continue further into the woods.
This area is a bit of a maze. To find the path to the tree stump, you'll want to follow the bright green trees.


- Left
- Right
- Center (Clear the blockage of rocks)
- Right
- Left
You'll come to a large suspended bridge that is sinking into the swamp. To continue forward, you'll need to lift the bridge using any cargo parts that you can find as weights. This is another hidden objects puzzle, but you can backtrack through the woods to locate them all, making it a bit more complicated.
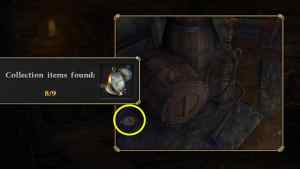
Where to find all the cargo parts


The location of the weights is somewhat random; above are images of the potential locations. For the weight stuck in the bird's nest, grab the stick from the bottom left corner of the image and use it to knock the weight down; for the weight stuck in the tree (the close-up shot), knock it down with the three rocks then click around the area below where the weight was.
Once we have all of them, we can stack them on the front of the bridge to raise it up. Now we have a clear path forward. This will initiate a small cutscene where we'll see the cleric performing some kind of ritual. When the cutscene ends, we can investigate the area more closely.
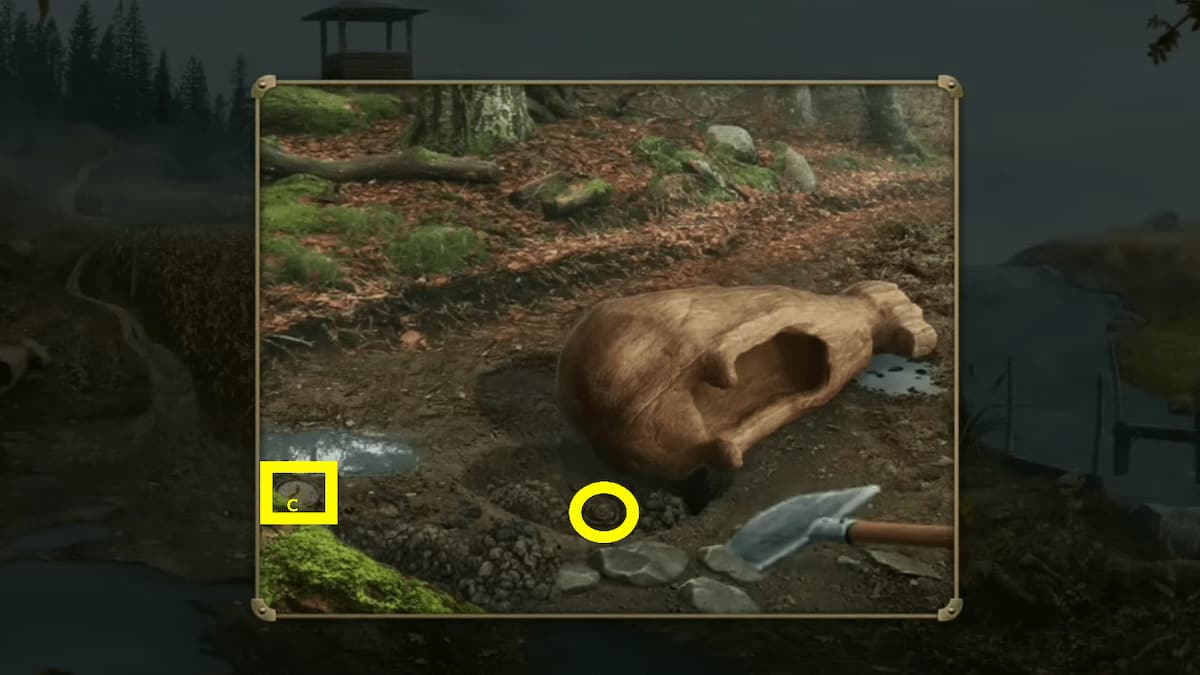
Woods - Ritual Site


- Tree stump face
- Ritual stone - In the center of the area (Evidence 1/2 - Circle with strange symbols)
- Satchel - On the right side of the ritual stone (Figurine)
- Carriage car - On the top left of the area (Key)
- Carriage chest - On the back of the carriage
- Blue Stone - Hanging from the tree at the top of the area (Use the stick on the ground in front of the carriage on the right side to knock it down).
- Morphing Object - Wolf/dog above the ritual runes, next to the red flowers on the tree.
- Watch Collectible - Inside the carriage, under a rag on the seat.
You'll want to quickly look at the Ritual stone in the center of the area to grab the evidence. Then, open the satchel just to the right of it to collect a figurine. In the distance, you can see a small, shiny blue object hanging from the tree. Grab the stick on the right side and use it to knock it down, collecting the Blue Stone.
Now go to the carriage car and pry open the door with your crowbar. Inside is a red bag where you can find the key to the carriage chest. Use the key on the chest, and you'll unlock another little puzzle to complete.
How to complete the carriage chest puzzle
The goal of this puzzle is to slide the tokens along the track to match up the images with similar items. For example, the shoes and the footprints would go together.
Tokens move counter-clockwise and can only move along one of two different tracks depending on the position they're in. See below for the tracks (in yellow and white); the tokens that move alongside the others are marked in pink (i.e. clicking a given token will move the other two tokens it's pointing to).
Don't overthink this puzzle, though; mainly, just keep experimenting, remembering you can revert your decisions at any time by clicking the same token.
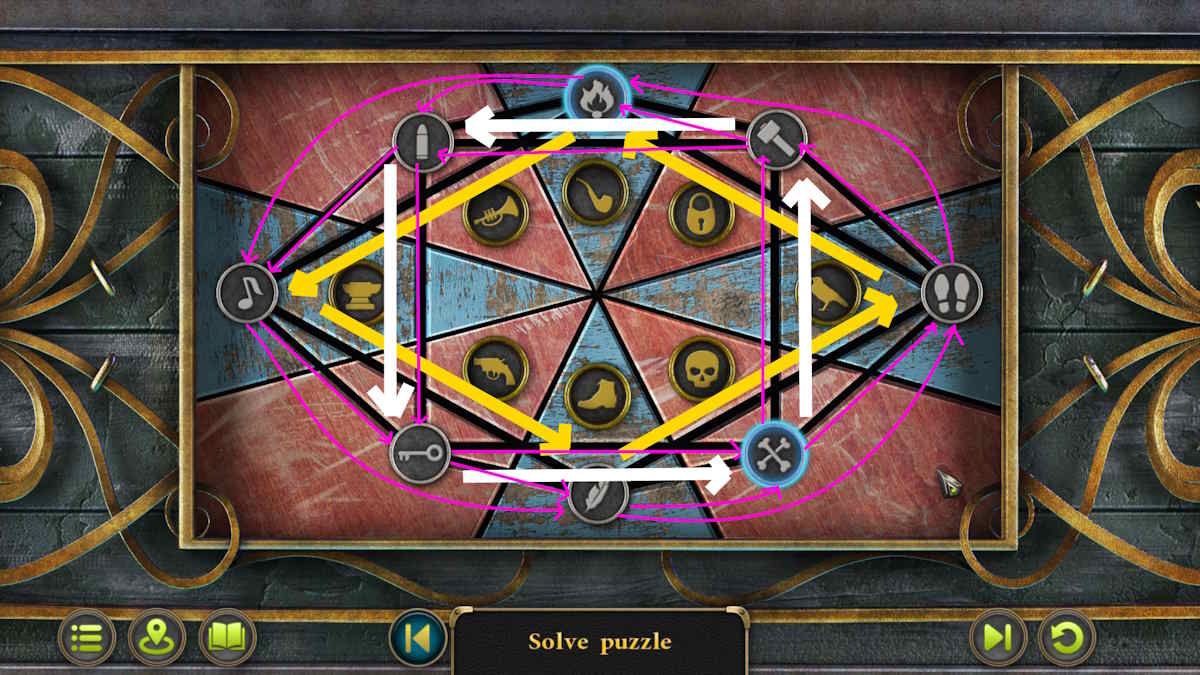
- Anvil - Hammer
- Gun - Bullet
- Bird - Feather
- Trumpet - Music Note
- Padlock - Key
- Skull - Bones
- Shoe - Footprints
- Pipe - Fire
Inside the chest, you'll collect a Detail and a Garden trowel. We found the first piece of evidence about the ritual site here, and we can collect the second by heading back to the Temple and using the new items we found.
How to solve the model set puzzle
First, examine the model set in the display on the left side of the Temple. We can now open it using the Figurine we found in the satchel at the ritual site. Once we do, we'll want to rearrange the model set back to its correct scene. This means clicking on the objects in the wrong place and placing them in the right places. Here's where everything needs to go (we numbered the spots to make it easier):
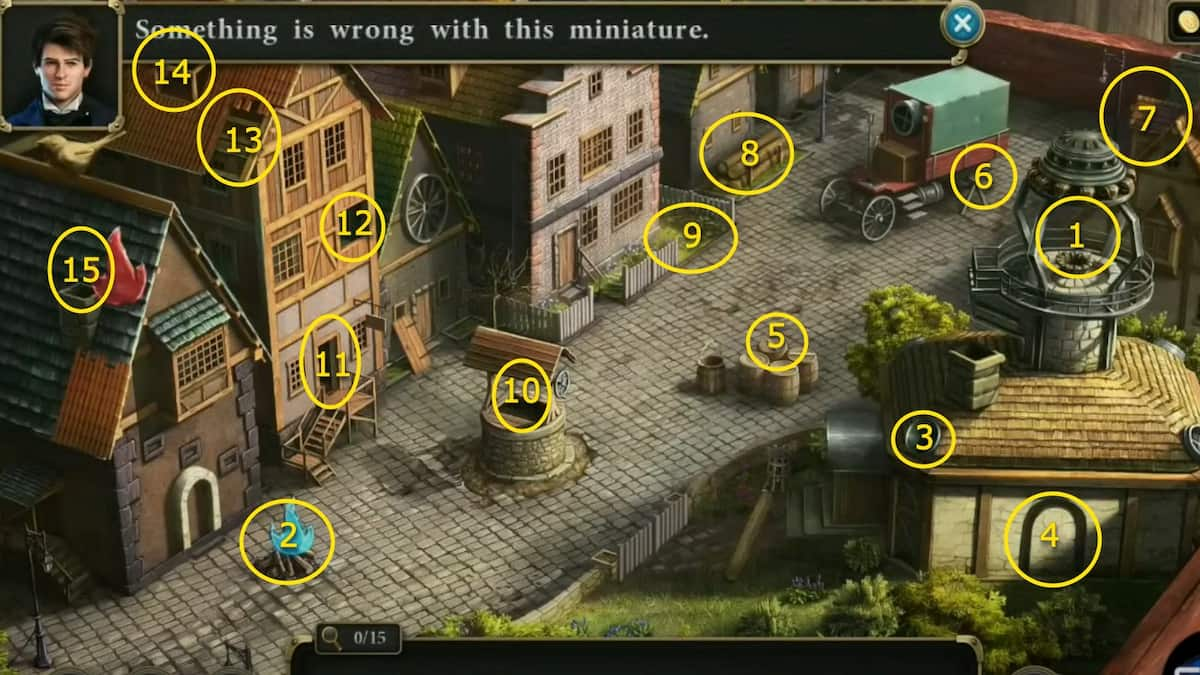
- 1. Blue fire - Off the campfire on the left side of the set.
- 2. Red fire - Off the roof on the far left side of the set.
- 3. The circular window - Off the front of the wagon.
- 4. Stone window arch - Off the building on the far left.
- 5. Barrel - Off the right side of the Temple model (bottom right).
- 6. Wagon wheel - Off the front of the shortest building on the left side.
- 7. Bird - Off the roof of the house on the far left side.
- 8. Wooden log - Off the yard of the Temple model (bottom right).
- 9. Picket fence - Off the stone fence entrance to the Temple model.
- 10. Bucket - Off the cobblestone street near the barrels.
- 11. Wooden door - Off the shortest house on the left side.
- 12. Wooden window - Off the stone picket fence house (top center window).
- 13. Orange roof shingles - Off the house roof on the far left side.
- 14. Box window - Off the stone house with the picket fence roof on the left side.
- 15. Stone chimney - Off the Temple model roof.
When all the pieces are put back into their correct spots, the model will open up and give you a Signet. Now, you'll want to examine the stone archway on the far wall with the rune symbols.
How to solve the rune archway puzzle
The goal of this archway is to press the runes in the correct order so that they open up. We've seen runes like this before back at the ritual site stone. We can use that to figure out what order to press them in. Here's how:

Look at the intricate-looking journal inside on the shelf, and use the Signet to open it. In the journal, you can find the Ritual Evidence 2/2 - Ritual of protection and purification.
Now that we've found the location mentioned in the journal and found enough evidence of the ritual to make another case conclusion, we can backtrack to the Estate and look more closely at the demon dog painting in the secret room.
How to solve the demon dog painting puzzle
Underneath the painting are three strange-looking symbols. You can change them by clicking on them. To solve the puzzle, we'll need to know what three symbols they need to be changed to. We can figure this out by heading back into the library and looking at the painting on the wall above the display case (on the right side).
The symbols below this painting are the same type as the ones in the secret office. We'll need to make the demon dog painting symbols match the symbols in this painting (note: this is a random puzzle, so what you see in the images below may be different in your game).


Once you do this, the painting will open up and reveal an even more extravagant puzzle. This puzzle has very similar symbols to the ones on the outside of the painting. To figure out how to solve it, pick up the clue paper that reveals the locations of the symbols.
All demon dog painting symbol locations
The clue shows pictures of the locations where you'll need to check for symbols. Once you find one, it will automatically fill in your clue sheet with the symbol found at that location. These locations are:


- The owl on the estate staircase - Click on the owl to make it open its wings, revealing the symbol.
- The clock in the estate library - Set the clock to 4:45 (i.e. move the short arm to IV and the long one to IX). Grab the Lever Arm as well.
- Chandelier in the estate living room - Attach the Lever Arm to the lever frame on the window near the curtains. This will lower it and allow you to look at the symbol.
- Planter in the estate garden - Use the Garden trowel (found in the carriage chest) to dig out the plant and see the symbol under the soil.
- Tree stump with a face - Head to the Mysterious Forest (Glade). Use your knife to carve away some moss and view the symbol.
- The altar in the woods near the sawmill (Edge of the Forest) - Look for the altar in the center of the image. Place the pendent in the center with all the colored stones inside of it (see below).
- Mounted candle with leaf molding in the estate library - Use the screwdriver to unscrew the candle from the wall.
How to get the Green stone pendant
To get the final symbol at the altar in the woods, you'll need to use the pendant piece we found on the stuffed demon dog. However, the pendant won't be complete without all the colored stone pieces inside of it. We've found three of the stone pieces already, but to get the last one, use the Detail piece found in the carriage chest to open the farm house chest. Grab the dog statuette and bring it to the estate fireplace. Place the statue to open the painting and grab the green stone.
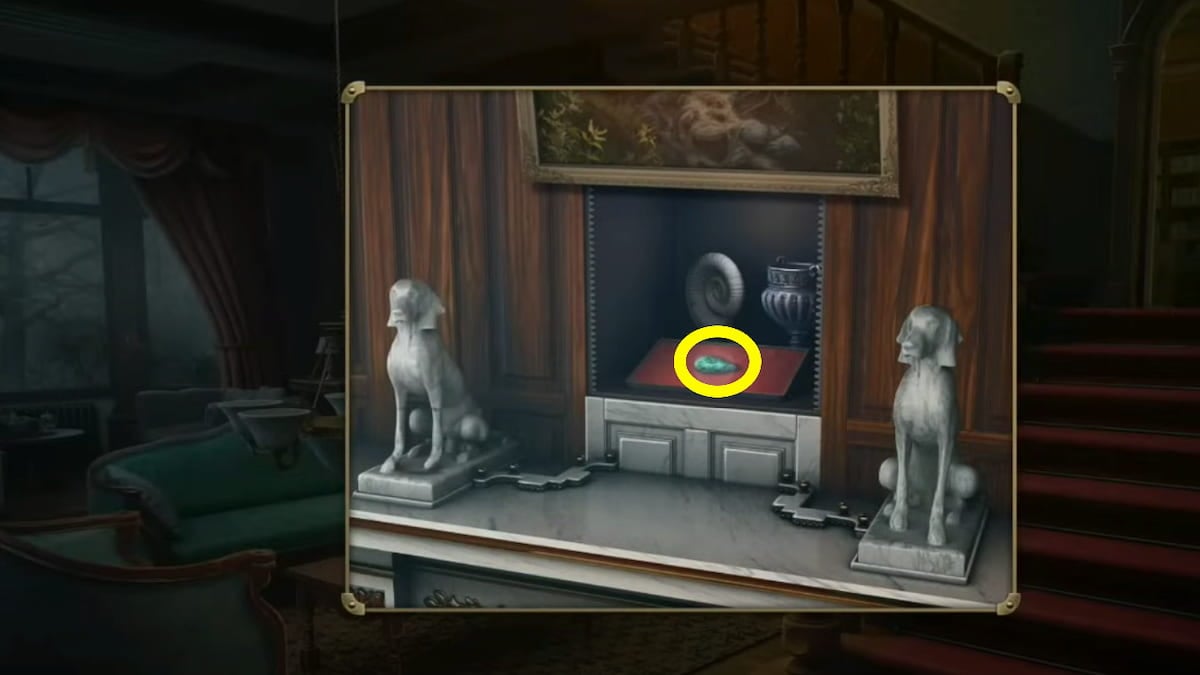
With all the stones, you can examine the pendant from your inventory and place all the stone pieces inside of it. Now, it's ready for you to place on the front of the altar at the Edge of the Forest (look in the center of the Forest image to find the altar), where you'll get the last symbol you need for the demon dog painting.
How to solve the stone altar seasons puzzle
Before you can get the symbol from the altar, you'll have to complete another puzzle. This requires getting the four season pieces in their correct spots on the far right side of the board. However, they can only move to the spots onto their designated spots on the board (meaning the flower can only move on top of flower pieces). Each piece can leave behind a trail of a different season, allowing them to lead the others to the correct spot, but you must create the right path.
Beyond that, the trick when you're approaching the right side of the board is to lead the piece behind you to their correct slot as you land in yours (e.g. flower lands in the flower spot while simultaneously leaving a path to the sun for the sun piece).
Once the seasons are in the correct spots, the altar will open and reveal the last symbol you need for the demon dog painting. With our clue sheet fully filled in, we can return to the secret room in the estate library and begin solving the demon dog painting puzzle.
Thankfully, our cheat sheet is right on the top left of the puzzle for us to view as we need. The goal is to replicate all the symbols we found in the right order. The screens will show us what the final shape of all the combinations looks like and lock in if it's correct. Here's how to recreate all of them:


When all the symbols are entered correctly, we can open the vault behind the demon dog painting. Inside, another journal depicts a secret entrance to some abandoned mines from the Glade. We'll want to head back there now and look closely at the tree with red flowers.
How to get rid of the poisonous ivy
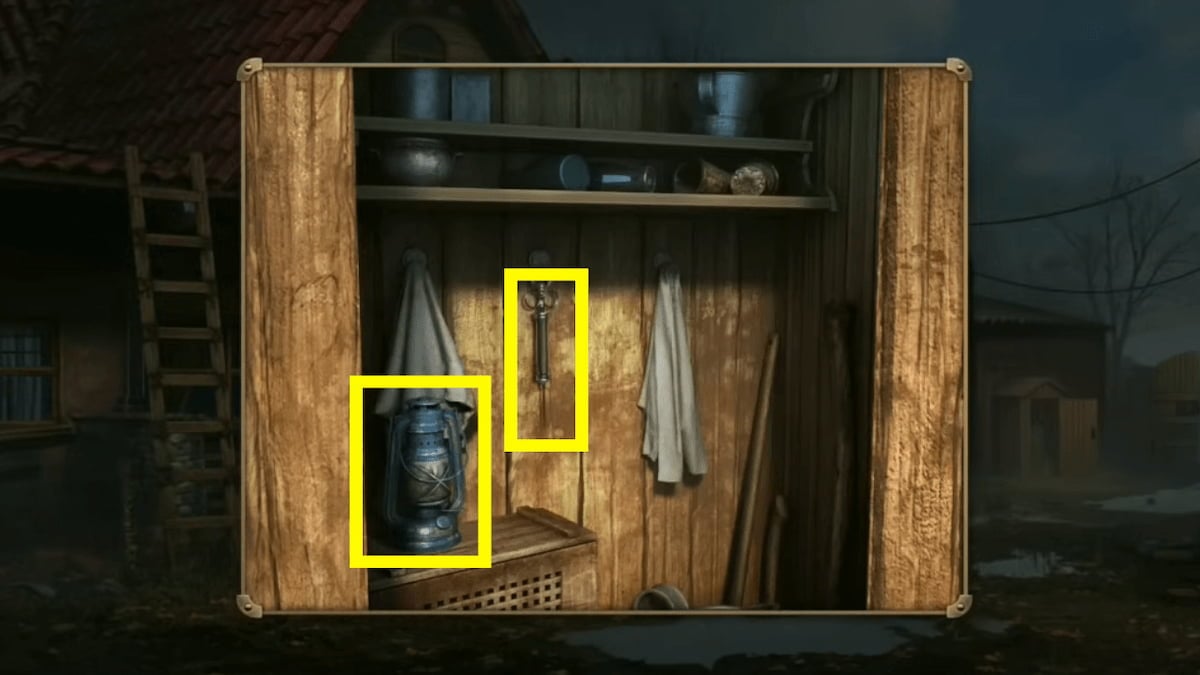
The tree shown in the journal image (the one with red flowers) is covered in poisonous ivy. We'll need to get rid of it before we can venture into the mines. The farmer may know a way to do so safely.
After speaking to the farmer, he'll give us a key to open the small shed attached to the barn. Inside, we can grab a Syringe. We can use this to inject herbicide into the poison ivy. We can also grab a Lantern, which we'll need once we get into the mines.
Luckily for us, we already have an herbicide, which we tested earlier. Go into the farm house and approach your suitcase at the desk. The vial should still be filled with some liquid there. Use the Syringe to get some herbicide from it. Bring that syringe to the ritual site to insert the herbicide into the poisonous ivy.
Once the herbicide is administered, we can use the knife to carve away the branches to create an opening. You can hang the lantern at the top of the cave entrance so you can see. Unfortunately, we won't be able to continue moving forward until we remove the large stone. We saw some explosives earlier in the mill basement that we could use to do so (just use the crowbar to open the crate of it).
Place the explosives against the large stone (it may require some pixel hunting, but it does work) and then use your Lighter to ignite it. This will definitely do the trick. Hang your lantern again; you can now enter into the abandoned mines, which will trigger another brief cutscene.
Abandoned Mines
There are plenty of things we'll want to inspect here.


- Covered barrels - On the right side of the mine (Rope, Evidence 2/12 - Herbicide batch)
- Work table - On the front left side of the mine (Collectible)
- Suspended ladder - On the very top of the mine
- Puzzle door - On the left side of mine
- Morphing Object - In the upper left side near the ceiling on one of the beams.
- Collectible Record - Under the workbench; interact with it to zoom in, and it will be under it at the bottom of the screen.
First, examine the covered barrels on the right side of the mine and use the knife to cut the rope off of them. Take the rope, then collect evidence of herbicide (uncover the barrels first then click on them). Bring the rope over to the work table to combine with the hook (click the hook despite the lack of interact icon). After combining, pick the two items up (which are now combined).
We can use this hook and rope to pull down the suspended ladder at the top of the mine (again, click it despite the lack of interact icon). When we try to go up, we will see two people talking, the count, and one other figure. This proves the count is the one creating the illusion of the beast, but we'll need to prove his guilt.
How to unlock the mine door
The door on the left side of the mine is locked, but we can unlock it with the proper item. Head through the trap door at the top of the suspended ladder, and you'll enter the estate gazebo. On the table to the left, you'll see a ring on the table (you can also grab the collectible among the plants on the right).
Take the ring inside the estate living room and use it on the china display cabinet in the left corner. Inside, you can grab a ring of keys (when you back away from the key hook you can also find another collectible inside the china cabinet).


Now go back to the mines and use the bunch of keys on the door on the left side. This will open up the puzzle for you to solve.
How to solve the mine door puzzle
The goal of this puzzle is to form all the right images by rotating and moving the three pieces you are given. The sheet on the top left will show you all the images you need to form and keep track of which ones you've completed as you go along. You only need to do one at a time, so just pick an image from the sheet and go from there. Rotate the middle section of the puzzle first and then slide the blue 'buttons' on the left or right side to align the pieces as needed (many will not require any sliding).


Once you unlock this door, you can enter the final area of the investigation. Here, you can find all the rest of the evidence you need to solve the case.
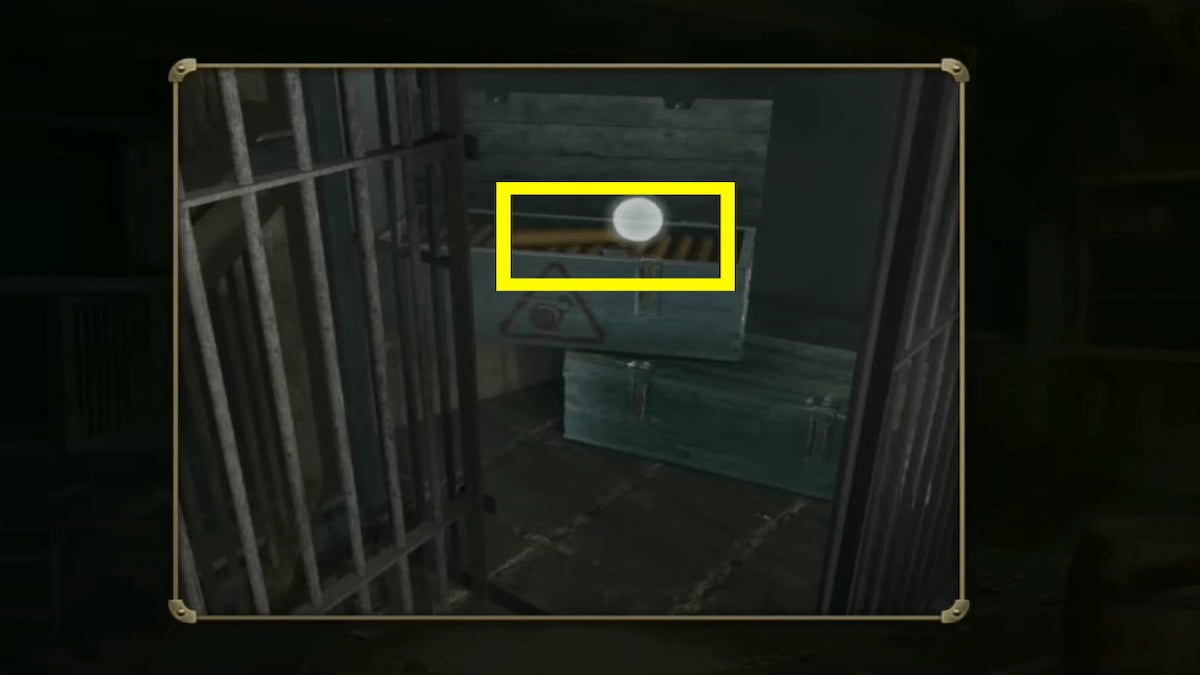
Abandoned Mines - Attacker's Lair
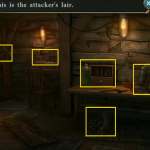

- Barrels - On the left side of the room (Evidence 3/12 - Herbicide canister, Collectible - on the bottom left side of the barrels)
- Animal head - In the back left corner (Evidence 4/12 - Helmet with an animal face).
- Desk - In the back left side of the room (Evidence 5/12 - Land acquisition documents, and Evidence 6/12 - Dog whistle).
- Boots - On the floor underneath the table (Evidence 7/12 - Boots with paws).
- Table cubby - On the left side of the center table (Evidence 8/12 - Green paint, and Evidence 9/12 - Purchase receipts in drawer).
- Table toolbox - On the right side of the table (Evidence 10/12 - New claw blank, and Evidence 11/12 - Claw prototype).
- Hanging pelt - On the wall on the right side (Evidence 12/12 - Cloak that looks like animal skin).
- Morphing Object - You can find a morphing object on the wall to the right side of the room.
- Watch Collectible - Next to the herbicide sprayer in the hidden workroom.
Once we find all these points of evidence, we'll have enough to prove the crimes of the count. It's evident that the Count pretended to be the beast to scare the people of the town. An elaborate hoax in the hopes that he could take over their land. The first case is closed!
All collectibles guide for Case 1 of Murder Mystery Adventure
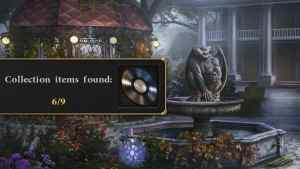
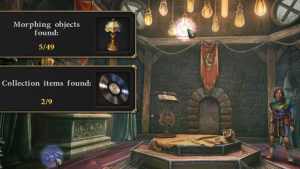
If you are just here for the collectibles, you can find all of them below. There are three types in this case, including the watches, the records, and the Morphing Objects. There are nine total watches, nine records, and 18 morphing objects.
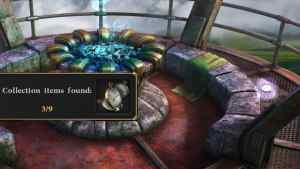
All records collectible objects in Case 1
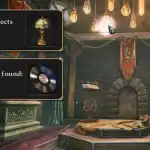
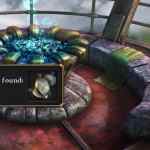
All watch collectibles in Case 1


All 18 Morphing Objects locations in Case 1


Looking for more mystery game coverage? Check out 5 best mystery video games that make you feel like a detective here on Pro Game Guides.