
Like most Sandbox experiences, Hytale also features a set of Console Commands that players can run on their system to spawn and customize certain items/parameters in the game. So, if you are wondering what the console commands in Hytale are and how to use them, here is a complete guide to follow.
What are the various Console Commands in Hytale?
Below, you can find details about all the Console Commands in Hytale with an example. I have arranged the Console Commands in two categories: Exploration & Creative
Exploration Mode Console Commands
| Command | Description | Example |
|---|---|---|
| /emote <emote> | Play an emote | /emote wave |
| /help <command> | Display command help | /help ping |
| /op | Commands for managing operator permissions | /op |
| /op self | Adds you to the OP permission group | /op self |
| /ping [--options] | Network ping information | /ping --detail |
| /ping clear [--options] | Clear the ping information history | /ping clear |
| /ping graph [--options] | Print ping information as a graph | /ping graph |
| /who | List who is on the server | /who |
| /whoami | Prints your player information | /whoami |
| /whoami <player> | Prints the player information of the given player | /whoami John_doe |
Creative Mode Console Commands
| Command Name | Description | Example |
|---|---|---|
| /block | Block-related commands | /block |
| /block set <x> <y> <z> <block> [--options] | Set a block | /block set 10 64 10 stone |
| /block get <x> <y> <z> [--options] | Get a block | /block get 10 64 10 |
| /block getstate <x> <y> <z> [--options] | Get a blockstate | /block getstate 10 64 10 |
| /block setstate <x> <y> <z> <state> [--options] | Set a blockstate | /block setstate 10 64 10 grass[snowy=true] |
| /block row <wildcard block query> | Spawn base blocks matching a wildcard query | /block row stone* |
| /buildertoolslegend [--options] | Show/hide builder tools legend HUD component | /buildertoolslegend |
| /buildertoolslegend --hide | Hide the builder tools legend | /buildertoolslegend --hide |
| /clearblocks | Set all blocks in selection to Empty, or clear blocks in an area | /clearblocks |
| /clearblocks <positionOne> <positionTwo> | Clear blocks within the specified area | /clearblocks 0 0 0 10 10 10 |
| /clearedithistory | Clear clipboard history | /clearedithistory |
| /contractselection <distance> [--options] | Make your selection smaller | /contractselection 2 |
| /copy [--options] | Copy the selection contents into the clipboard | /copy |
| /copy <xMin> <yMin> <zMin> <xMax> <yMax> <zMax> [--options] | Copy the specified world area into the clipboard | /copy 0 0 0 10 10 10 |
| /cut [--options] | Cut the selection contents into the clipboard | /cut |
| /cut <xMin> <yMin> <zMin> <xMax> <yMax> <zMax> [--options] | Cut the specified world area into the clipboard | /cut 0 0 0 10 10 10 |
| /deselect | Clear your current selection | /deselect |
| /editline <start> <end> <material> [--options] | Draw a line of blocks between two points | /editline 0 64 0 10 64 10 Rock_Stone |
| /emote <emote> | Play an emote | /emote wave |
| /environment <environment> | Sets the environment in the selected area | /environment desert |
| /expand [--options] | Expand your selection | /expand --distance 3 |
| /extendface | Extend the target face | /extendface |
| /fillblocks <pattern> | Fill all air within your selection with specified block types | /fillblocks Rock_Stone |
| /flip | Flip the blocks in your clipboard | /flip |
| /flip <direction> | Flip the blocks in your clipboard in a direction | /flip x |
| /gmask <mask> | Sets the global block mask | /gmask Rock_Stone |
| /gmask clear | Clears/disables the global block mask | /gmask clear |
| /help <command> | Display command help | /help move |
| /hollow [--options] | Sets material on the inside of the selection, excluding the walls of thickness | /hollow --thickness 2 |
| /hotbar <hotbarSlot> [--options] | Sets your hotbar to a previously saved value | /hotbar 3 |
| /hub | Return to the Cosmos of Creativity hub | /hub |
| /importimage | Open the image → blocks import tool | /importimage |
| /importobj | Open the OBJ → voxel import tool | /importobj |
| /itemstate <state> | Set the state of the item currently held | /itemstate activated |
| /move [--options] | Move selection and its contents by the specified amount | /move 5 |
| /move <direction> <distance> [--options] | Move selection in a specified direction by distance | /move x 5 |
| /move <distance> [--options] | Move selection by distance (direction based on where you're looking) | /move 5 |
| /op | Commands for managing operator permissions | /op |
| /op self | Adds you to the OP permission group | /op self |
| /rotate | Rotate your clipboard | /rotate 90 |
| /rotate <angle> [--options] | Rotate the clipboard by an angle | /rotate 180 |
| /rotate <yaw> <pitch> <roll> | Rotate the clipboard using yaw/pitch/roll | /rotate 90 0 0 |
| /selectchunk | Select a chunk | /selectchunk |
| /paste | Paste the contents of your clipboard | /paste |
| /paste <position> | Paste the clipboard at a specific position | /paste 0 64 0 |
| /ping [--options] | Network ping information | /ping --detail |
| /ping clear [--options] | Clear the ping information history | /ping clear |
| /ping graph [--options] | Print ping information as a graph | /ping graph |
| /pos1 [--options] | Set the first position of your selection | /pos1 |
| /pos1 --x <x> --y <y> --z <z> | Set pos1 using coordinates (optional) | /pos1 --x 0 --y 64 --z 0 |
| /pos2 [--options] | Set the second position of your selection | /pos2 |
| /pos2 --x <x> --y <y> --z <z> | Set pos2 using coordinates (optional) | /pos2 --x 10 --y 64 --z 10 |
| /prefab | Prefab commands | /prefab |
| /prefab save | Save a prefab | /prefab save |
| /prefab load | Load a prefab | /prefab load |
| /prefab delete <name> [--options] | Delete a prefab | /prefab delete house1 |
| /prefab list [--options] | List prefabs | /prefab list |
| /redo | Redo the last change | /redo |
| /redo <count> | Redo multiple changes | /redo 3 |
| /repairfillers | Repair filler blocks in the selection | /repairfillers |
| /replace <to> [--options] | Replace selection from specified block(s) with a block | /replace Rock_Granite |
| /replace <from> <to> [--options] | Replace a block type with another | /replace Rock_Stone Rock_Granite |
| /selectchunksection | Select a chunk selection | /selectchunksection |
| /selectionhistory <enabled> | Record selection box changes in undo/redo history | /selectionhistory true |
| /setblocks <pattern> | Set all blocks in selection to the specified blocktype | /setblocks Rock_Stone |
| /settoolhistorysize <historyLength> | Set builder tool history size | /settoolhistorysize 50 |
| /shift [--options] | Shift selection | /shift --distance 1 |
| /stack [--options] | Stack selection | /stack 5 |
| /stack <direction> <count> [--options] | Stack selection in direction by count | /stack x 5 |
| /submerge <fluid-item> | Submerge the selection in a fluid | /submerge Water |
| /time [--options] | Get the world time | /time |
| /time <time> [--options] | Set the world time | /time noon |
| /tint <color> | Tint the selection with the specified color | /tint red |
| /tp | Teleport commands | /tp home/tp top/tp back/tp forward/tp history |
| /tp home | Teleports you to your home | /tp home |
| /tp top | Teleport to the highest block above you | /tp top |
| /tp back [--options] | Teleport to the most recent teleport location | /tp back |
| /tp forward [--options] | Teleport to the next teleport location | /tp forward |
| /tp history | Dumps teleport history to console | /tp history |
| /undo <count> | Undo last change | /undo 5 |
| /updateselection <xMin> <yMin> <zMin> <xMax> <yMax> <zMax> | Update selection bounds | /updateselection 0 0 0 10 10 10 |
| /wall <pattern> [--options] | Sets material on the walls of your selection with the thickness | /wall Rock_Stone --thickness 2 |
| /whereami | Prints the current location of a player | /whereami |
| /who | List who is on the server | /who |
| /whoami <player> | Prints player information | /whoami vignesh |
How to use Console Commands in Hytale?
To use Console Commands in Hytale, follow the steps below.
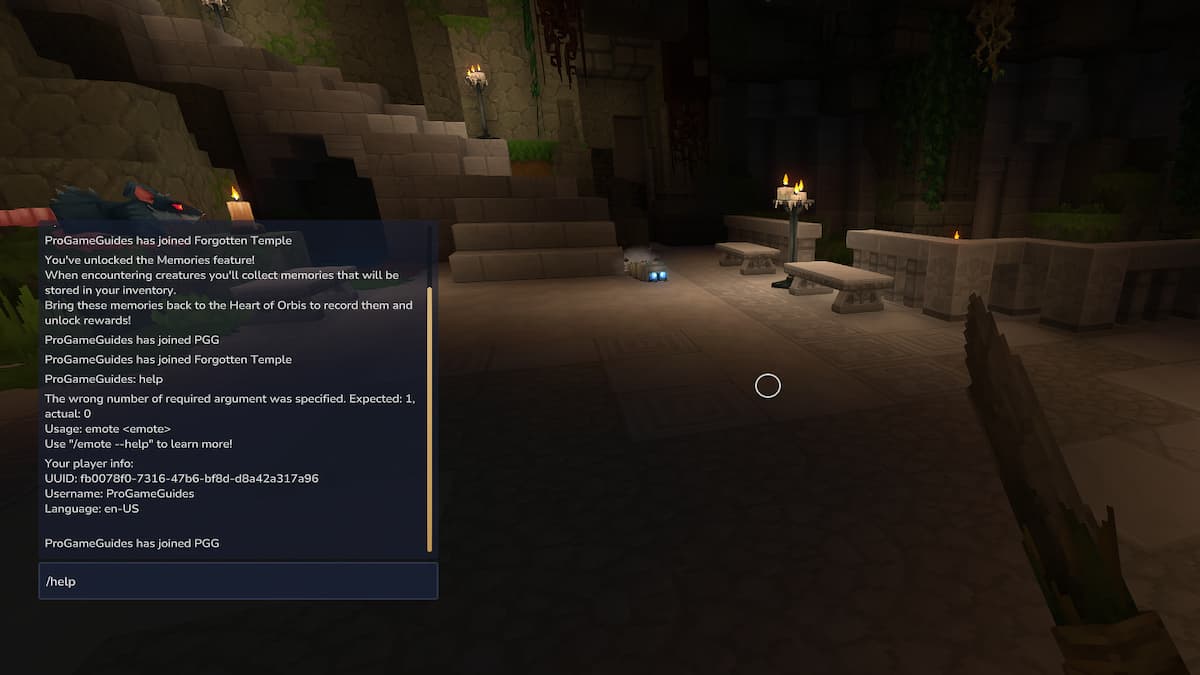
- Launch Hytale and open any game.
- Press Enter to open the chat box on the left side of the screen.
- Type the Admin Console Commands mentioned above in the chat box.
- Lastly, press Enter again to execute the Command.
Hytale Console Commands FAQs
All Console Commands are case-sensitive in Hytale. Ensure all your command values are typed correctly in accordance with the provided templates/examples.
Yes, the developers will undoubtedly add more Console Commands in Hytale in future updates. We will definitely update the article with more commands as they are released.
The Ping command is most useful in Hytale, as it provides detailed information about your entire network, allowing you to understand and get a much smoother gameplay experience.
For more on Hytale, check out Hytale Essence of Life - How to Use and Farm or Hytale Failed to Connect to the Server Fix