


Updated October 14, 2026: This guide now covers Hytale Chapter 1: Out of the Breach (Update 7). We added sections on how to start Chapter 1 and unlock the Goblin Lab, Goblin Breaches and the Guttering Hollows, the Deepworks dungeon and Gobliterator boss, Runestones and Mana, and the new Goblin gadgets. We also reworked the combat and healing tips for the new food and weapon changes, and fixed several crafting recipes.
This hub of mini-guides walks you through Hytale's basics, advanced mechanics, and progression, now fully updated for Chapter 1: Out of the Breach. Use the Table of Contents below to jump straight to the topic you need. Here's my complete Hytale Beginner's Guide.
Beginner's Guide in Hytale
Below is a list of topics that will guide you through your first hours in Orbis, Hytale's survival world. They cover everything from your first crafting recipes to advanced gear and progression, plus specifics like taming horses, starting the Chapter 1 storyline, and using Essence of Life and Essence of the Void.
Pickaxe, Hatchet, and Weapon (Rubble, Sticks, and Plant Fiber)
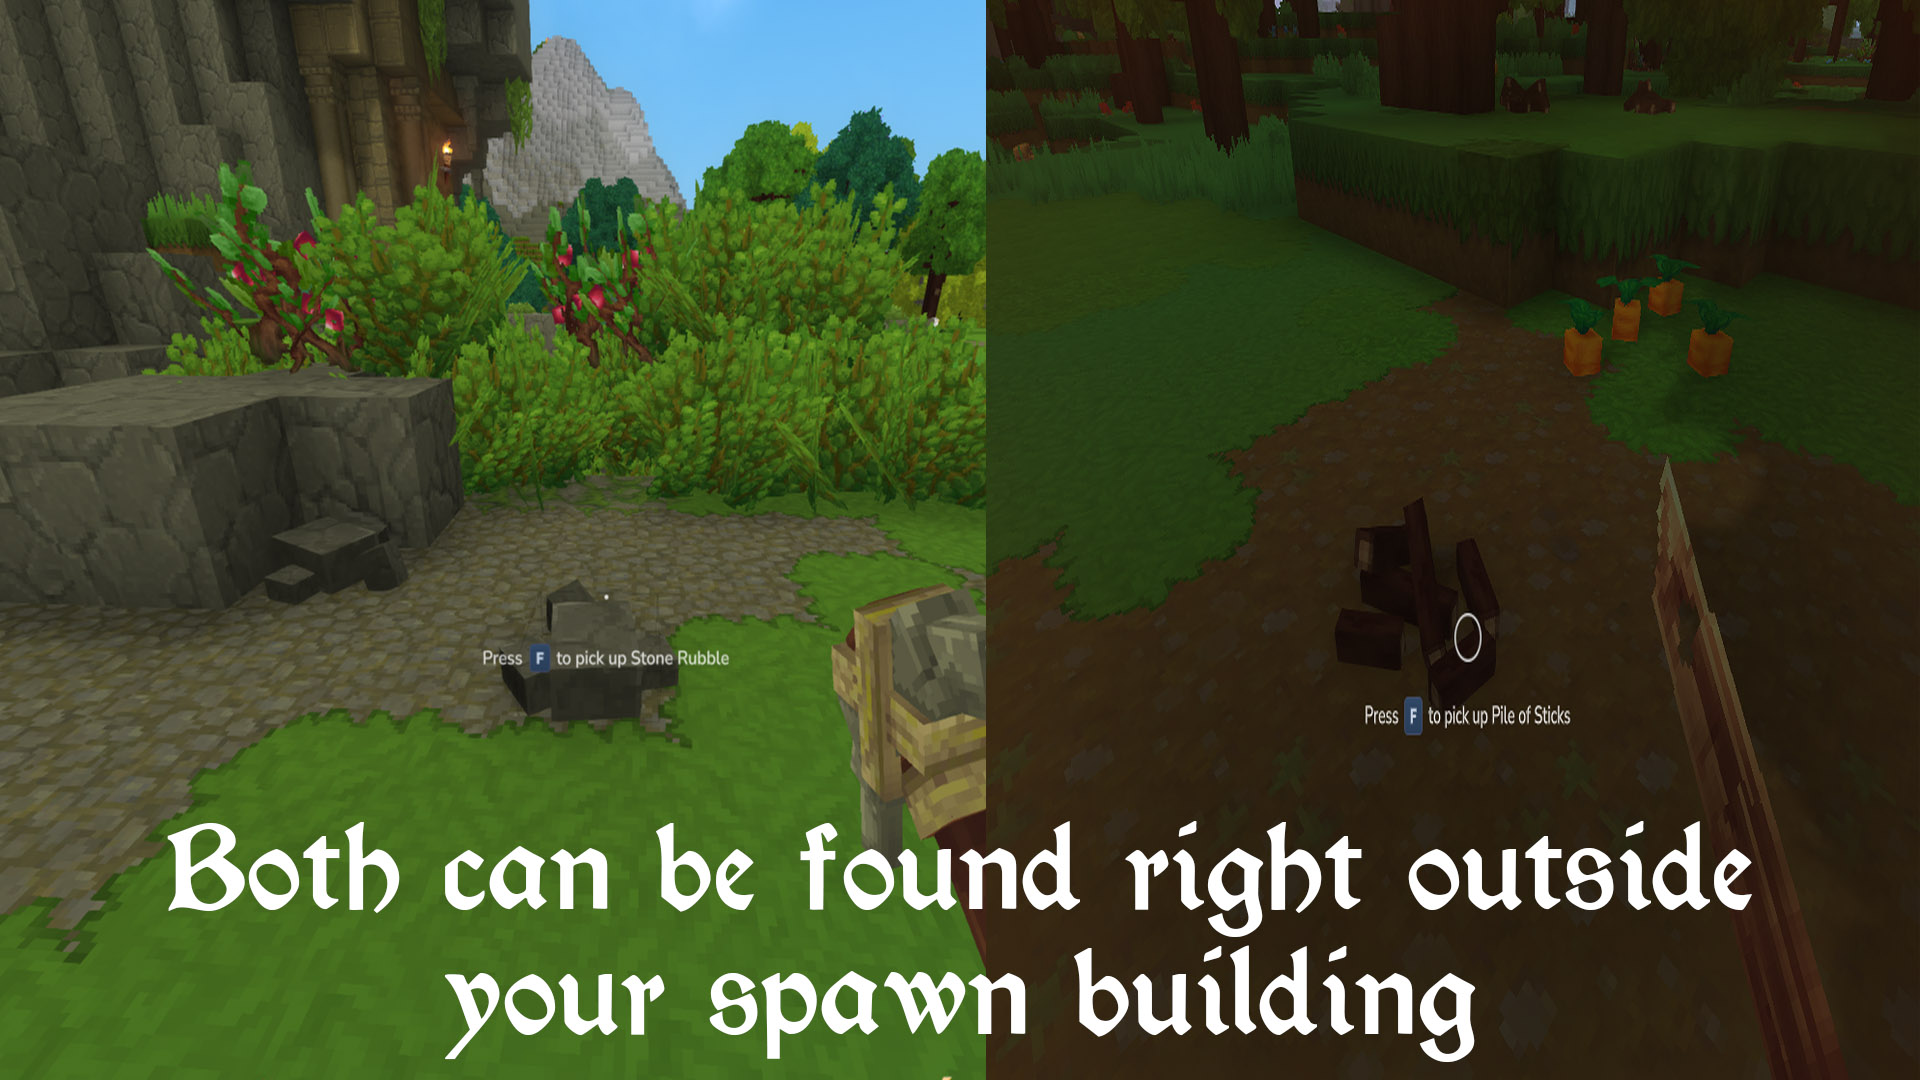
Your first Crude Hatchet (for cutting trees), Crude Pickaxe (for mining), and Crude Sword all use the same pocket crafting recipe: 2 Rubble, 2 Plant Fiber, and 2 Sticks each. Step outside the spawn building and pick up Sticks and Rubble off the ground. For Plant Fiber, break bushes with your bare hands. Since Chapter 1, weapons can no longer break foliage like bushes, vines, and leaves, so don't swing your sword at them. Press Tab, click the tool you want, check the ingredients, and hit craft. Then put it on your 1-9 hotbar and select it to chop trees and mine rocks.
The cool thing about Hytale trees is that all tree blocks drop once you cut down the bottom block.
Your First Base and Workbench
The Workbench unlocks nearly every other recipe in Hytale. Use your Crude Pickaxe to get Stone from caves or by digging down, then use your Crude Hatchet to get Tree Trunks by cutting the bottom block of a tree. Press Tab, click the Workbench, and craft it. I recommend placing it inside your spawn building as a makeshift first base that keeps you safe from hostile mobs. You can also patch up the spawn building's roof with dirt or wood blocks for extra protection.
How to Craft Torches
A Crude Torch needs 1 Plant Fiber, 1 Tree Sap, and 1 Stick, and you can make it from the pocket crafting menu without a Workbench. Plant Fiber comes from bushes, Sticks come from the ground or from chopped trees, and Tree Sap usually drops when you cut down a tree. Press Tab and craft the torches. Each craft gives you 4 torches, just like in Minecraft.
How to Get Copper
Copper Ore is found in naturally generated caves. Before heading down, make sure you have torches, a Crude Sword, and a Crude Pickaxe. I recommend bringing at least 20 torches. Look around your spawn building for a cave entrance, then work your way down, placing torches every so often, until you spot Copper Ore blocks. Your Crude Pickaxe can mine them. Once you've cleared two or three veins, you can keep exploring, but I recommend heading back to the surface to turn that copper into better gear.
Never dig straight down, or you might fall into a cave and die from fall damage, lava, or a swarm of hostile mobs. Always mine with a safer method like a stairway pattern.
How to Craft Better Tools, Weapons and Armor
Once you have Copper Ore, craft a Furnace from the Crafting tab of the Workbench and smelt the ore into Copper Ingots, using wood or sticks as fuel. Then I recommend crafting gear in this order:
- Shield: Craft the Armorer's Workbench from the Crafting tab of the Workbench, place it down, and open it. The last tab holds shields, where you can make your first Copper Shield. Shields are excellent defensive tools against regular enemies, mini bosses, and bosses. To equip it, press Tab and drag the shield into your utility slot. Press Z to bring up the Utility Slot Selector, then hold RMB to raise the shield. It stays equipped alongside any one-handed weapon, block, or tool.
- Copper Weapon: Craft the Blacksmith's Anvil from the Crafting tab of the Workbench, place it down, and open it. I recommend a one-handed Copper Sword since you can pair it with your shield for a good balance of defense and offense. Landing hits charges your Signature Ability, which you can unleash with Q once the bar is full for heavy damage.
- Copper Tools: Craft these at the Workbench in the second (Tools) tab. No special station is needed.
- Get a Bow: Bows are much easier to craft than in Minecraft since you don't need spiders. The Crude Shortbow takes 4 Sticks and 6 Plant Fiber, and Crude Arrows take 4 Sticks and 1 Rubble, both at the Workbench. A bow gives you excellent ranged utility, letting you shoot and back away to kite mobs and bosses.
- Get Armor: Armor is the last thing you should spend Copper (or any advanced material) on, since higher-tier weapons and tools are usually more valuable. Still, armor drastically boosts your survivability, so go for Gauntlets or a Helm as cheap options, or a Cuirass and Greaves as pricier ones, at the Armorer's Workbench. A good rule of thumb is to wear armor from the previous tier while spending your current-tier materials on weapons and tools first. For example, once you're crafting with Iron, wear Copper armor.
Combat Tips
Chapter 1 reworked a big chunk of Hytale's combat, making melee faster and more aggressive. Here's everything you need to know about the basics after the update:
- One-Handed VS Two-Handed: For beginners, I recommend a one-handed sword and shield since it's the easier combat style to start with. You can basic attack and charge attack, then block with the shield to avoid damage while backing off to recover Stamina and HP. It's also the easiest way to beat the Earthen Golem at the Forgotten Temple Gateway (see below). Two-handed weapons like the Battleaxe and Mace deal more damage, have better AOE attacks for groups, and still let you block. They're harder for beginners because they're slower, rely on charge-attack timing, and don't block all incoming damage.
- Faster Melee: Since Chapter 1, sword, dagger, mace, and battleaxe attacks are about 15% faster. Movement penalties while attacking are now fixed: you move 25% slower when swinging swords, maces, and battleaxes; 15% slower with daggers; and 50% slower with crossbows (which previously had no penalty at all). Plan your footwork around that.
- Flinching: Non-elite enemies in Chapter 1 areas now flinch when you hit them, which interrupts their attacks. Hit them too many times in a short window, and they temporarily become immune to flinching, so use those openings wisely.
- Best Weapons (Tier List): As you gain experience, weapon choice is no longer just about DPS or having a shield; our tier list guides you through more advanced mechanics.
- Shield Bash and Blocking: Besides being the best early blocking tool, you can press M1 while holding your shield up to shield bash, which helps push groups away when you want to retreat. Raising your shield can still cancel your own attack's wind-up, but it can no longer cut an attack animation short after the hit lands. Also, damage-over-time effects like poison can't be blocked anymore.
- Charge Attack: Holding down LMB charges a higher-damage attack that usually lunges you forward. It's a great way to bait a hostile mob's attack from range, close in for damage, then back away.
- Signature Ability: The bar in the bottom right fills as you deal damage, and you can release your weapon's Signature Ability with Q once it's full for massive damage. After Chapter 1, Signature Abilities also restore Mana when they hit, with more Mana for hitting multiple enemies (see Runestones below).
- Healing: If you get low on HP, back off and eat cooked food from the Campfire. Taking damage no longer interrupts eating, but it's still smart to put a block or obstacle between you and the enemy while you heal.
- Get Armor: Once you have weapons, a shield, and food, invest in armor at the Armorer's Workbench. Even at the Iron tier, a few Copper armor pieces go a long way for your HP and defenses.
- Stealth: Hold Left Ctrl (the default crouch key) to sneak up behind a creature and open the fight with a charge attack.
For advanced tactics, check out our Hytale Combat Guide, and for every default keybind, see our Hytale Controls Guide.
How to Heal
You heal by eating food, and Chapter 1 changed how food works quite a bit. Press Tab and craft a Campfire (4 Sticks and 2 Rubble), then use it to cook healing items like Cooked Vegetables (from Carrots on the surface or Mushrooms in caves) and cooked meat from Cows, Bears, Fish, and other animals. For fuel, you can use Sticks, wood blocks, or the Charcoal left over from smelting ore with wood. Here's what changed with the food rework:
- Eating Is Safer: Every food now takes 2.5 seconds to eat, taking damage no longer interrupts you, and you only move 25% slower while eating (down from 60%).
- Cooked Food Buffs: Buffs from cooked food, such as Health regeneration, max Health, and max Stamina, now last 6 minutes. Eat before a big fight, not just during it.
- Raw Food: Raw fruit, vegetables, and crops now give a small Health regeneration buff for 1 minute. Raw meat, fish, and eggs don't.
- Nerfed Snacks: Bread, Popcorn, and Cheese now restore only 5% Health, so don't rely on them in combat.
- Potions: All Health Potions share a 15-second cooldown and all Stamina Potions share a 30-second cooldown. On the plus side, Health, Stamina, and Energy Potions now stack up to 10.
How to Tame Horses and Travel Faster
Unlike in Minecraft, riding a horse in Hytale is as simple as finding an adult horse and pressing F near it. Sprinting on horseback makes traveling much faster, and I recommend it for exploring and reaching the Forgotten Temple Gateway quickly. Horses usually stay close to where you left them, so you can keep one outside your base and it'll often still be there the next day. That said, I recommend boxing it in with dirt or wood as a makeshift stable so you always know where it is.
Forgotten Temple Gateway: Memories, Life Essence Trading and Progression
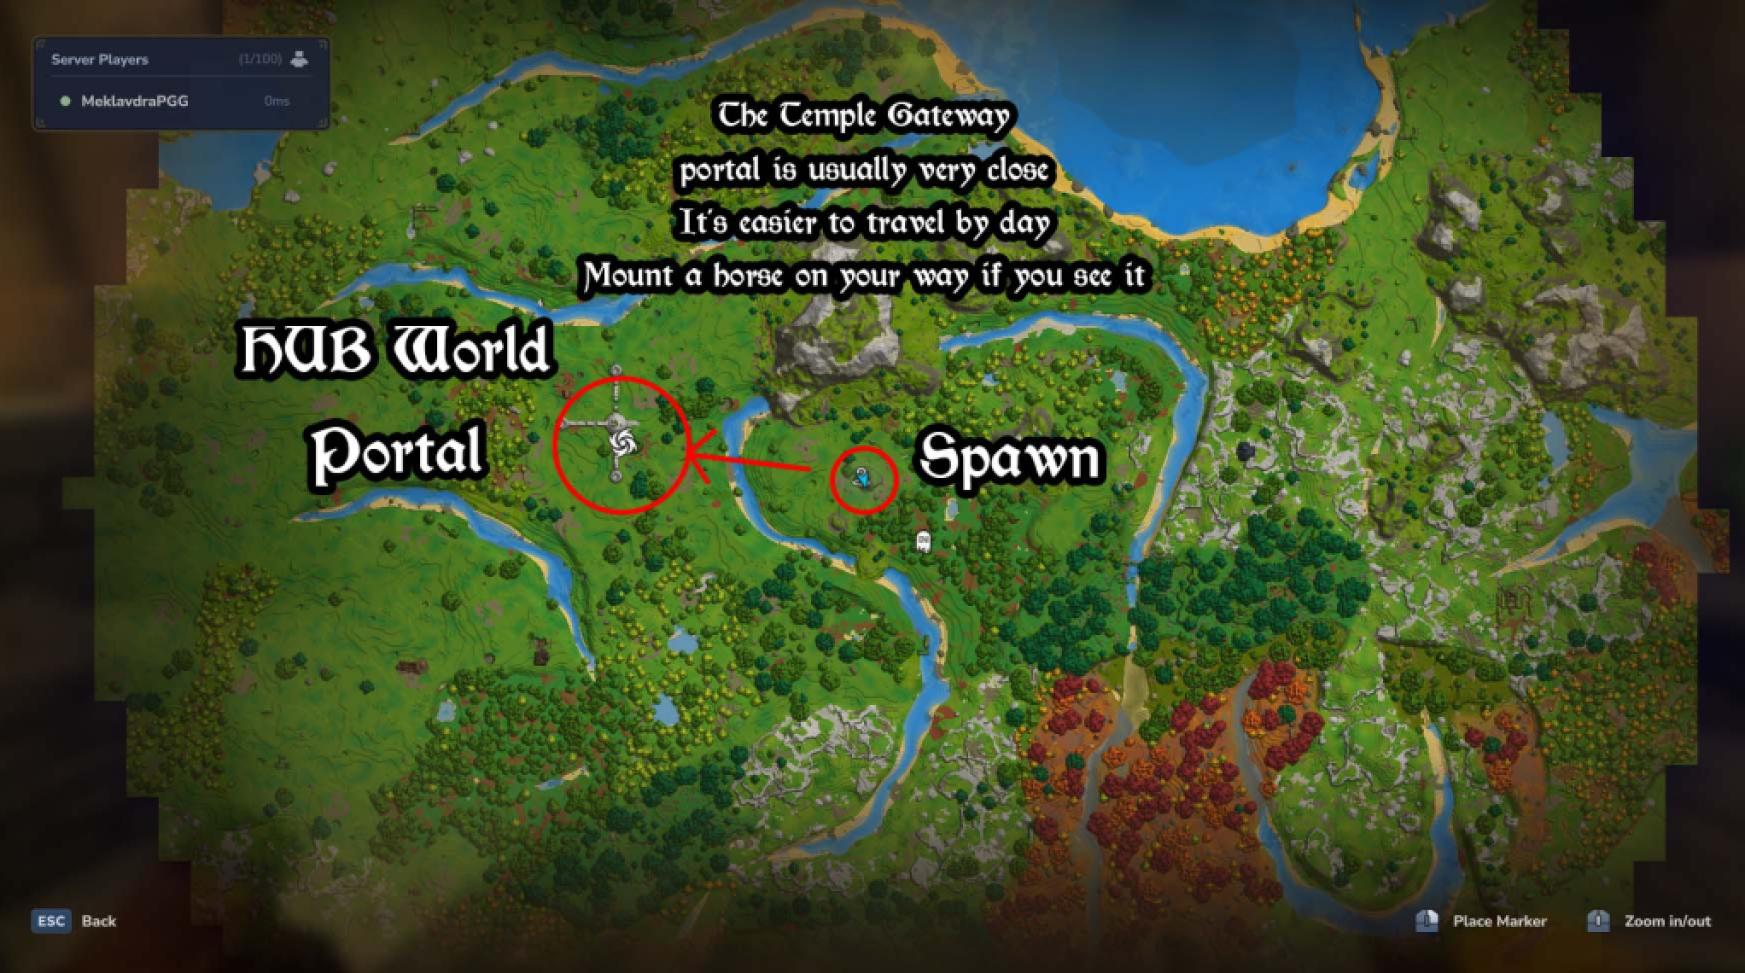
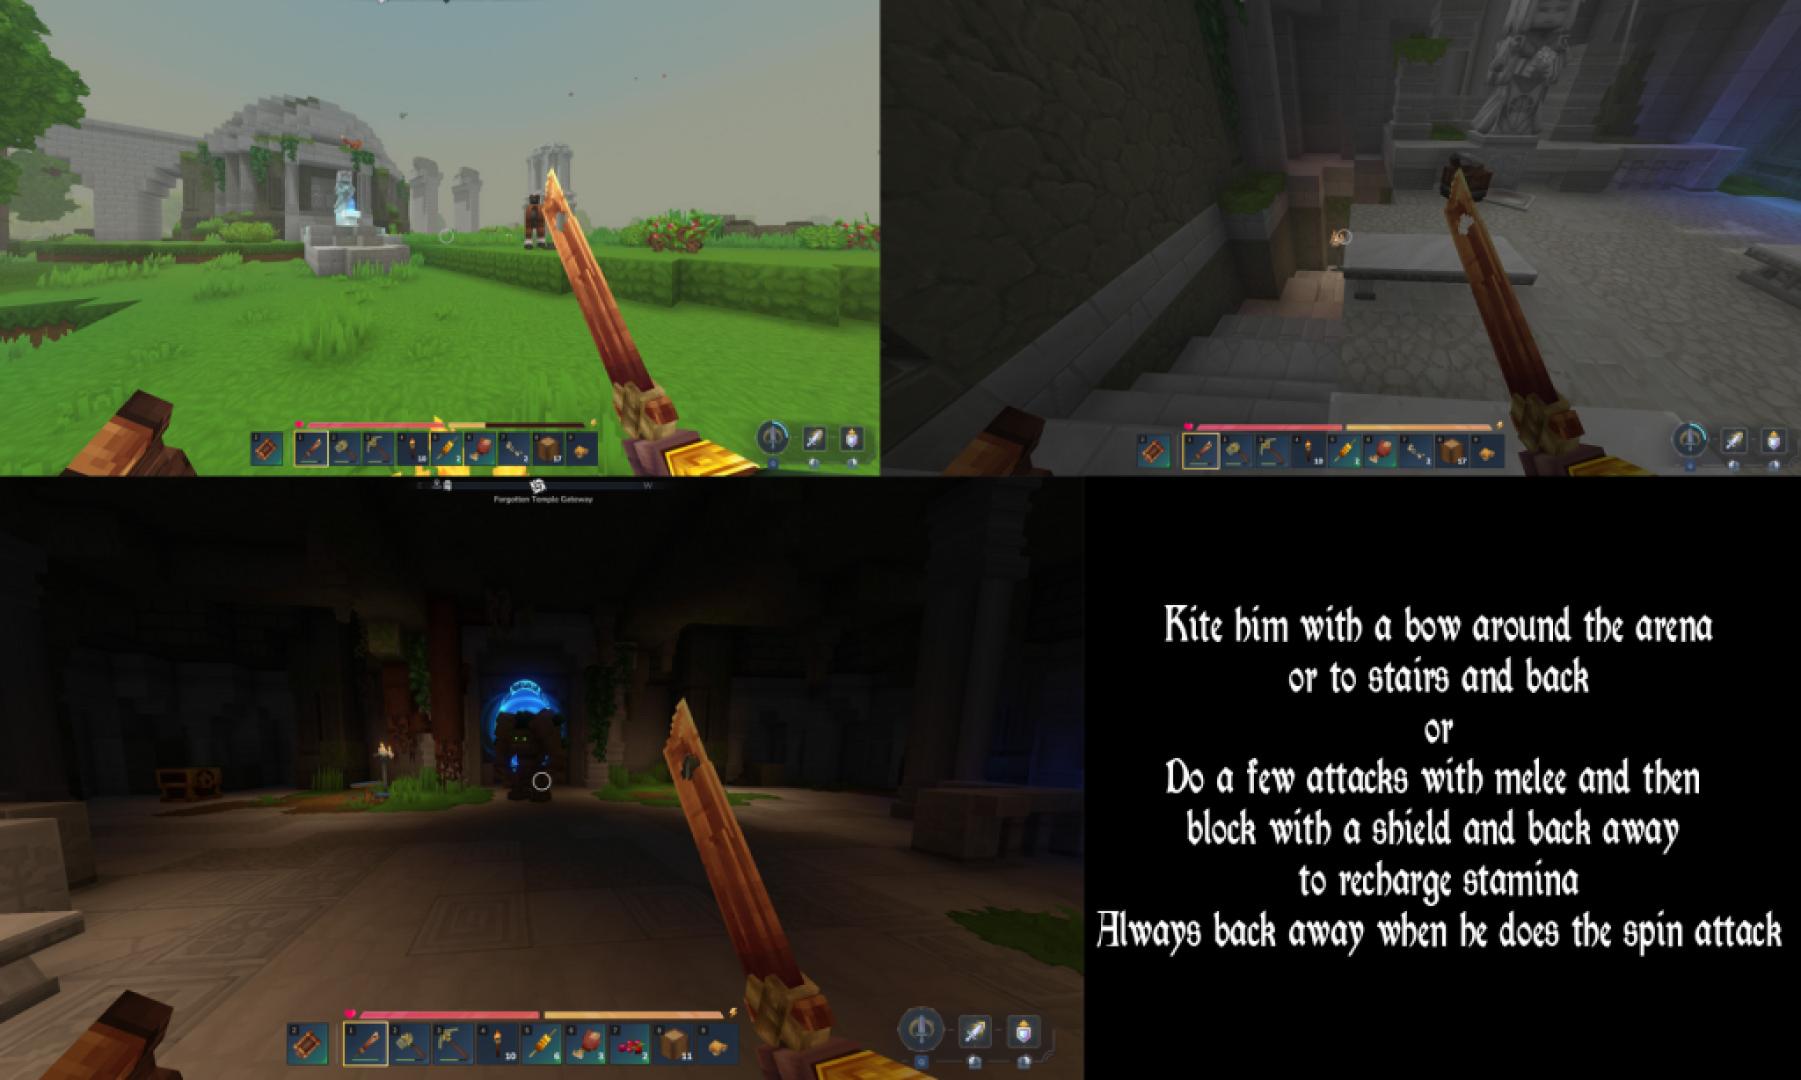
Once you have Copper weapons, a shield, some cooked food, and maybe a few armor pieces, head to the Forgotten Temple Gateway. This is where Hytale's main progression kicks off: it unlocks Memories, Essence of Life trading, and since Update 7, the entire Chapter 1 storyline. Follow the Forgotten Temple marker on the compass at the top of your screen, or open your map with M and look for the spiral portal icon. When you arrive, you'll see a glowing statue. Go behind it and down the stairs to the level below, where the gateway is guarded by an Earthen Golem, your first mini boss:
- Fighting the golem is optional. It's slow, so you can sprint past it and jump into the portal, but beating it lets you access the room's loot.
- The easiest way to beat it is to either pepper it with arrows while backing away or use a one-handed Copper Sword and shield.
- For the melee strategy, land a couple of M1 swings or a single charge attack, then block with your shield or step away depending on how close the golem is. Use your Q Signature Ability whenever it's charged.
- Repeat this pattern until it goes down. The most important thing to know is that when the golem starts winding up its spin attack, don't try to block it. Sprint away and keep your distance until it finishes.
- Once the golem is down, loot the chests in the room and enter the portal.
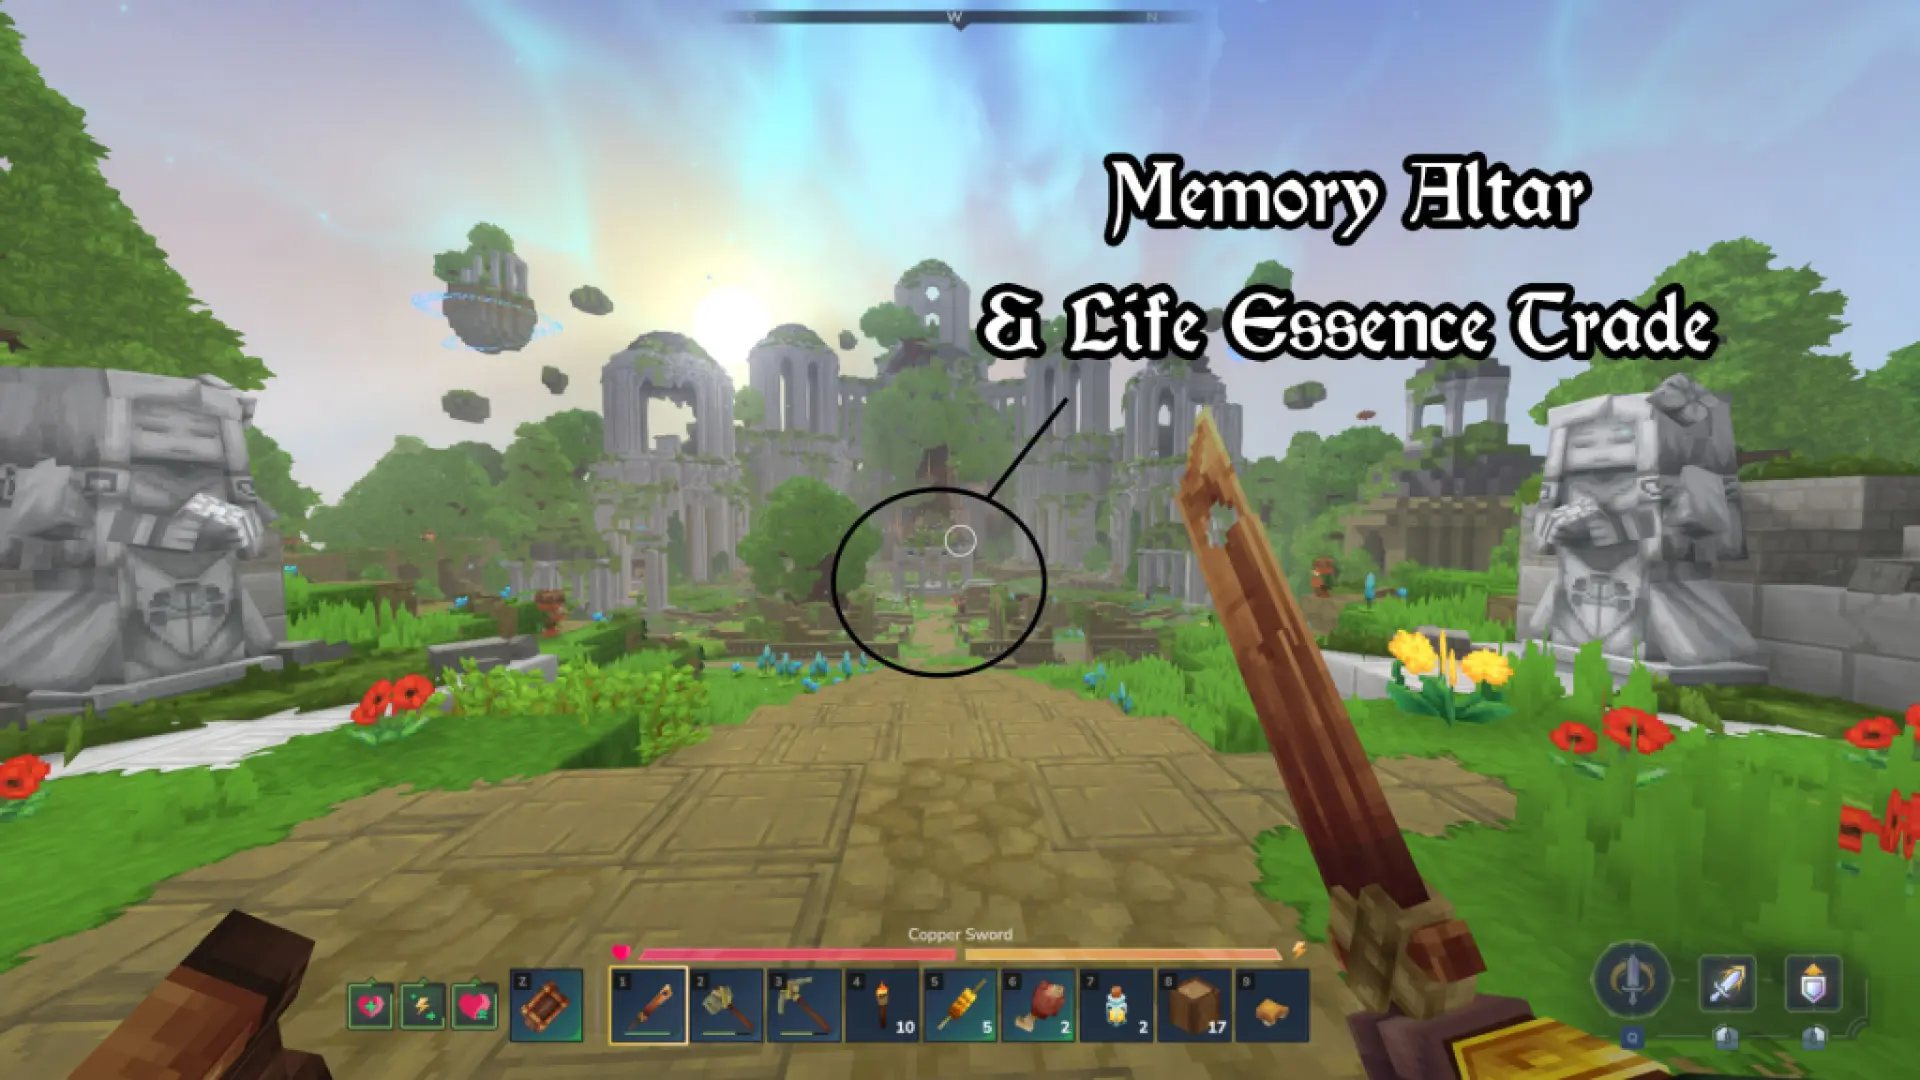
The portal takes you to the Forgotten Temple itself, a safe hub full of friendly NPCs. Head to the center and interact with the Heart of Orbis statue (F by default) to unlock Memories. From then on, you record Memories of the creatures you encounter out in the world. Note that since Chapter 1, you must defeat some creatures in combat before you can get their Memory. Return to the Heart of Orbis to restore your Memories and claim milestone rewards like new recipes, teleporters, and backpack upgrades. You can trade Essence of Life with the friendly NPC near the Heart of Orbis. One more Chapter 1 change: you can no longer use the bed inside the Forgotten Temple, so don't plan on sleeping there.
How to Start Chapter 1: Out of the Breach
Chapter 1: Out of the Breach launched on October 12, 2026, as Hytale's first Early Access chapter, and it works in both new and existing Exploration Mode worlds. The Forgotten Temple is its starting point, and a new Chapter screen lists your current objectives and what each one unlocks, so you always know what to do next. Here's how to get the chapter going and unlock the Goblin Lab:
- Explore the Goblin Lab: It's a rusty heap of metal scraps to the left of the Heart of Orbis inside the Forgotten Temple, full of broken goblin devices like the Goblin Power Generator, Boiler, Engine, and Compressor. Investigating the disturbance here starts the Goblin Breaches. If you don't, breaches will still start on their own after a few nights.
- Enter a Goblin Breach: Leave the Forgotten Temple, and a "BREACH IN PROGRESS" alert will appear on screen. The first breach usually shows up right away.
- Collect 10 Scrap: The Goblin Power Generator needs 10 Scrap, and you'll find plenty inside the breach. Look for Shiny Scrap Piles, which you can mine with a Copper Pickaxe or better. You can usually grab all 10 in a single run of under 10 minutes.
- Repair the Generator: Head back to the Forgotten Temple and feed the Scrap into the Goblin Power Generator. This unlocks the Goblin Lab, including the Goblin Workbench and the Goblin Breach Console, and the rest of the lab's devices open up as you progress through the chapter.
For a step-by-step walkthrough, check out our How to Fix Goblin Power Generator and Unlock the Goblin Lab guide.
Goblin Breaches and the Guttering Hollows
Goblin Breaches are a new world event: temporary portals that slam into the world, and active ones are marked on your map. Look for a bright yellow beam of electrical energy shooting up from the ground. A few goblins guard the portal, but you can skip them and jump straight in. The portal takes you to the Guttering Hollows, a new biome on an unstable fragment of Orbis that the goblins have claimed while the Void closes in around the edges. Here's what to expect on the other side:
- Time Limit: The Void will eventually push you back out. You can earn extra time by fighting back the Void inside and by upgrading the Goblin Breach Console in the Goblin Lab with Void Crystal Shards.
- It Resets: The area regenerates every time you enter, so you can farm it repeatedly and each visit can play out differently.
- What's Inside: Most of the revamped goblin faction (scrappers, miners, guardians, lobbers, burners, and more), Void assassins, predators you can track and trap, puzzles, and treasure chests that can unleash enemy waves when opened. Goblins fear the Void and will run from Void creatures unless they have backup, which you can use to your advantage.
- Hunts: Hunt sites have their own icon on the world map, and starting a hunt on the far side of a breach costs a Voidheart.
- Void Crystal Shards: This new material drops from Revenant Guardians, Void Fiends, and Void Crystals. Void Crystals spawn during Void Surge events in the Guttering Hollows and can drop up to 10 shards each. You'll also find shards in Tier 3 to 5 chests, usually in the cellars under the small thorny-bush houses, which you reach by ladder. Shards upgrade the Goblin Breach Console and let you craft the Spyglass, the Dubious Assembly, Void Crystals, and the Fragment: Orbis, the Deepworks key. Our Void Crystal Shards guide covers every source.
Not every goblin wants you dead, either. Chapter 1 also adds friendly goblins, including a Goblin Trader who runs a shop.
The Deepworks Dungeon and the Gobliterator Boss
All of Chapter 1's progression leads to the Deepworks, Hytale's first handcrafted dungeon. You'll fight through rooms packed with goblin hordes, dodge flames and falling debris, solve puzzles, and activate checkpoints along the way. Midway through, the Elite Goblin Feastmaster blocks your path, and he's much more agile than his size suggests. At the end waits the Gobliterator, Hytale's first major multi-phase boss fight. Go in with your best gear, plenty of cooked food, and ideally a few friends. For an even harder fight, a menacing-looking button sits to the left of the boss chamber entrance, but Hypixel Studios warns you to press it at your own risk.
Progressing through Chapter 1 also unlocks two new cosmetic sets for your Avatar: Scrap Arcanist and Junk Pilot.
Runestones, Rune Abilities and Mana
Chapter 1 introduces the Runestone Ability system, which adds powerful combat abilities to your weapon. Here's how it works:
- Runestone Shards: You'll find these throughout your Chapter 1 adventure. An Ability Runestone costs 2 Shards to craft and a Modifier Runestone costs 1.
- Runebinder's Lattice: Slot your Runestones into a Runebinder's Lattice to equip them. There's one inside the Forgotten Temple. You can equip up to two Ability Runestones at once.
- Ability Runestones: These grant a new ability with its own cooldown and Mana cost. There are seven: Chain Hook, Charged Shot, Enrage, Fireball, Ground Slam, Imbue Poison, and Wind Strike. Casting one briefly slows you by 40%.
- Modifier Runestones: Attach these to an Ability Runestone to change its damage, cooldown, cost, or behavior, like splitting a projectile, making it bounce between enemies, or adding a bleed or wither effect. There are eight: Colossal, Enduring, Quickening, Rebound, Rend, Splinter, Thrift, and Wither. Each Modifier only works with certain abilities, and you can't stack the same Modifier twice on one ability.
- Mana: All Rune Abilities cost Mana, which now shows up where the Stamina bar used to be (the Stamina bar moved lower on your HUD). Mana regenerates over time, and your weapon's Signature Ability refunds some whenever it hits.
New Goblin Gadgets and Tools
Chapter 1 adds seven new Goblin-made tools and gadgets that make exploring and fighting much easier:
- Hookshot: Latch onto Hook Anchors to zip across the world.
- Scrap Drill: A mining tool that chews through a 2x2 patch of blocks at once and can also break and loot metal blocks.
- Spyglass: Zooms in on what's happening in the distance, handy for scouting camps and breaches. Crafting it takes Void Crystal Shards.
- Scrap Glider: Lets you glide, dive, and climb while keeping your momentum. Gliding drains Stamina, so watch the bar or your landing will get rough.
- Rocket Boots: Footwear that gives you a double jump.
- Goblin Repair Kit: Repairs items without lowering their maximum durability.
- Bangstick: A throwable stick that explodes.
How to Get and Use Essence of Life, Essence of the Void and Voidheart
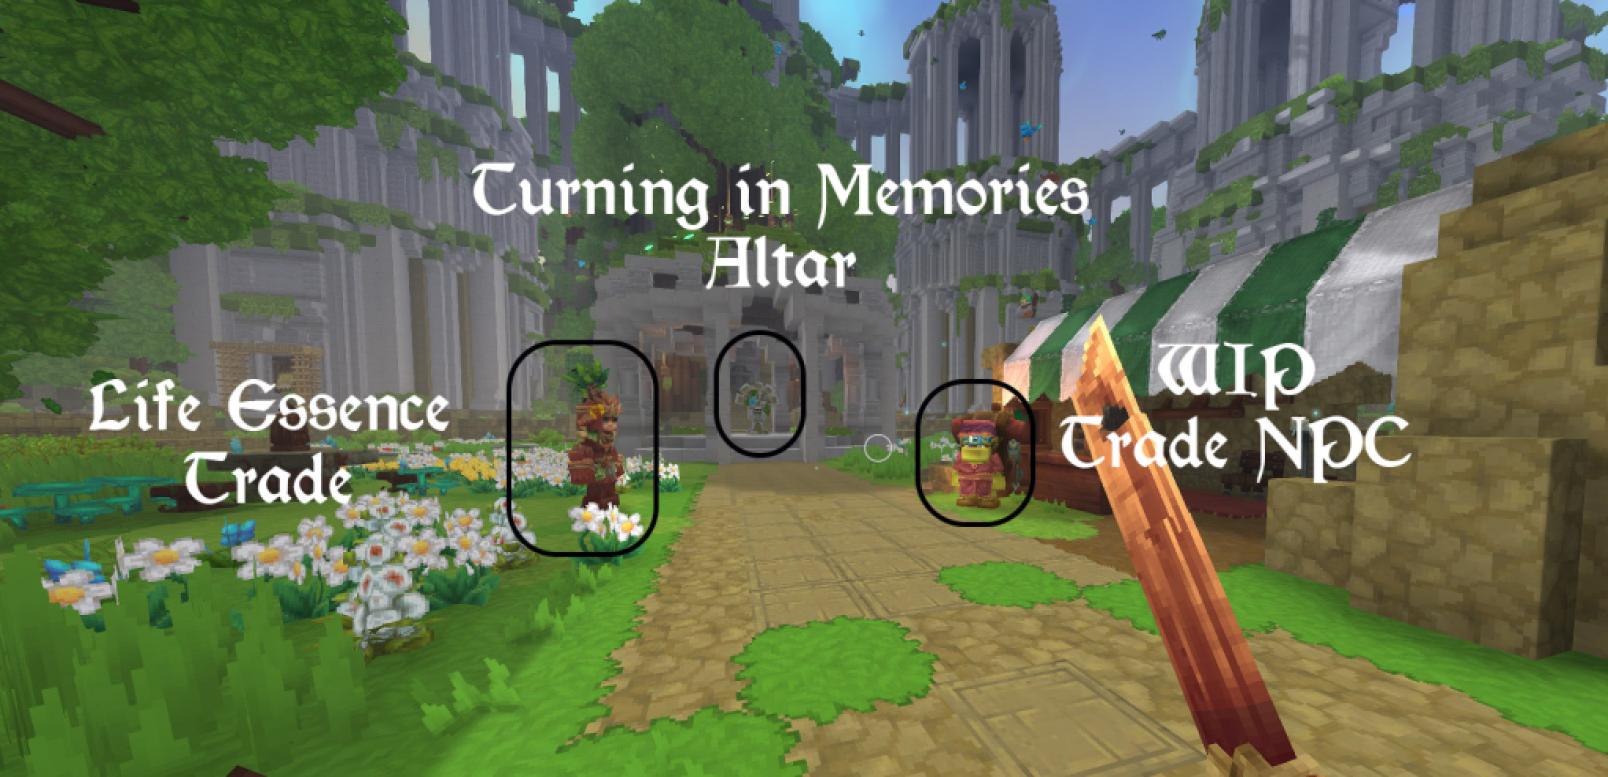
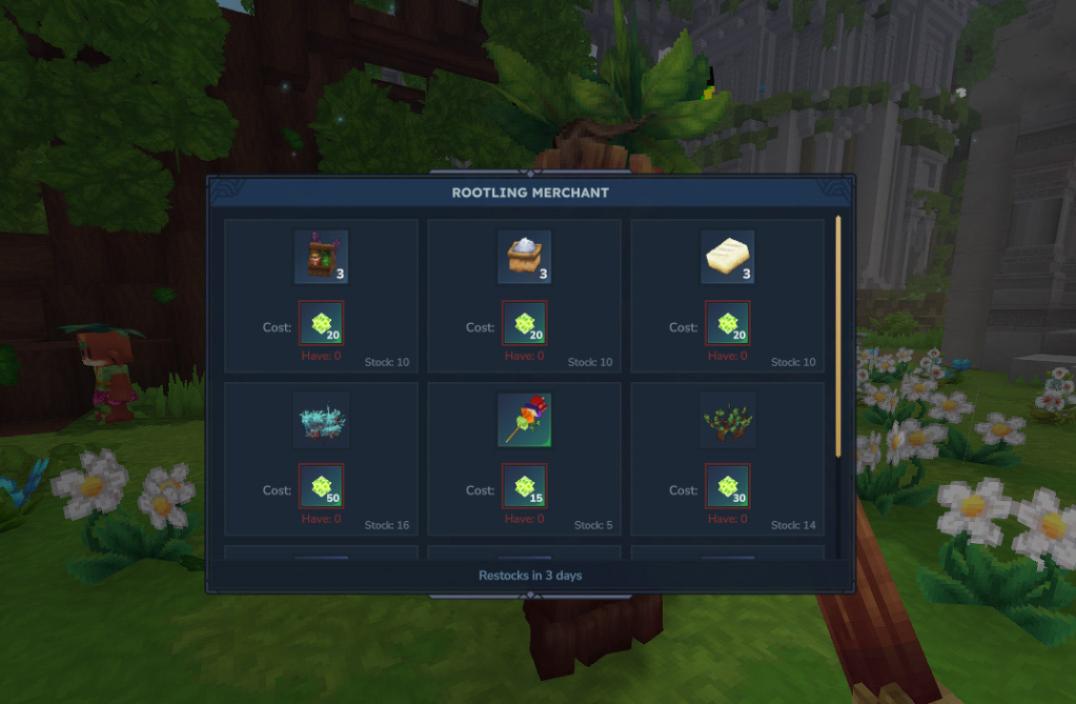
You get Essence of Life from carrots, plants, trees, and animals around Orbis. Void creatures drop Essence of the Void and Voidhearts, and this is one of the biggest changes in Chapter 1: Void creatures no longer roam the overworld at night. Instead, you'll run into them in the Guttering Hollows on the other side of Goblin Breaches, where the Void presses in around the edges. To make up for it, most Void enemies now drop more Essence of the Void than before (except Void Larvae, which drop nothing), while Voidhearts drop less often. Here's how to use these three resources:
- Essence of Life: Trade it with the friendly NPC near the Heart of Orbis in the Forgotten Temple (see the section above). You also need it to grow saplings at the Farmer's Workbench and to craft the Ancient Gateway.
- Essence of the Void: Use it to craft the Arcanist's Workbench at the Workbench, high-tier armor at the Armorer's Workbench, and the Ancient Gateway.
- Voidheart: Use it to craft the highest-tier weapon at the Blacksmith's Anvil. Since Chapter 1, you also need a Voidheart to hunt in Goblin Breaches, so don't waste your only one.
How to Get Light, Medium, and Heavy Leather for Advanced Weapons and Armor
Leather is a crucial crafting material for advanced weapons, armor, and Repair Kits, and you get it from animals as Hide. Craft a Tanning Rack at the Workbench, place it down, and put your Hide in it to turn it into the matching Leather:
- Light Hide: Drops from rabbits and other small animals.
- Medium Hide: Drops from Cows, Horses, and other animals larger than rabbits.
- Heavy Hide: Drops from Bears and other large animals.
At the Tanning Rack, Light Hide becomes Light Leather, Medium Hide becomes Medium Leather, and Heavy Hide becomes Heavy Leather.
All Ore Locations: Thorium, Cobalt, Adamantite, Mithril & More
Our All Ore Locations Guide walks you through finding every ore in Hytale, along with the best farming spots for each one. You can mine all ores with an Iron Pickaxe, though this might change in future updates. If you have a Scrap Drill from Chapter 1, it's also great for clearing several blocks at once while you dig toward a vein.
When to Upgrade Crafting Station Tiers
I recommend upgrading a station only after you've found the higher-tier material you want to use. For example, upgrade the Armorer's Workbench or Blacksmith's Anvil to Tier 2 only once you find Iron, to Tier 3 once you find Thorium, and so on. Upgrade the Workbench to Tier 2 once you have at least 20 Essence of the Void for the Arcanist's Workbench (or Venom Sacks from Spiders for the Alchemist's Workbench). Since Void creatures no longer spawn in the overworld at night after Chapter 1, plan to farm that Essence in Goblin Breaches. Upgrading early isn't worth it since you can't use the new tier without the matching materials.
How to Check Death Location
The place where you died shows up on your map (press M) as a gravestone marked with the day you died. This is the best way to find where your items dropped so you can go back for them. If you died underground, retrace your path through the caves. If you don't remember the way, go to the marked spot and dig down in a spiral or stair pattern so you don't fall into a chasm and take fall damage or worse.
How to Repair Equipment
Craft a Repair Kit in the second (Tools) tab of the Workbench using 2 Linen Scraps, 1 Iron Ingot, and 1 Light Leather (from Light Hide dropped by rabbits and other small animals). A Repair Kit restores the durability of any item that has it. Chapter 1 also added the Goblin Repair Kit, which repairs items without lowering their maximum durability, so it's the better pick for your best gear. On top of that, the update significantly raised the durability of all weapons, pickaxes, and hatchets, so you'll need to repair far less often than before.
How to Find Enemy Camps
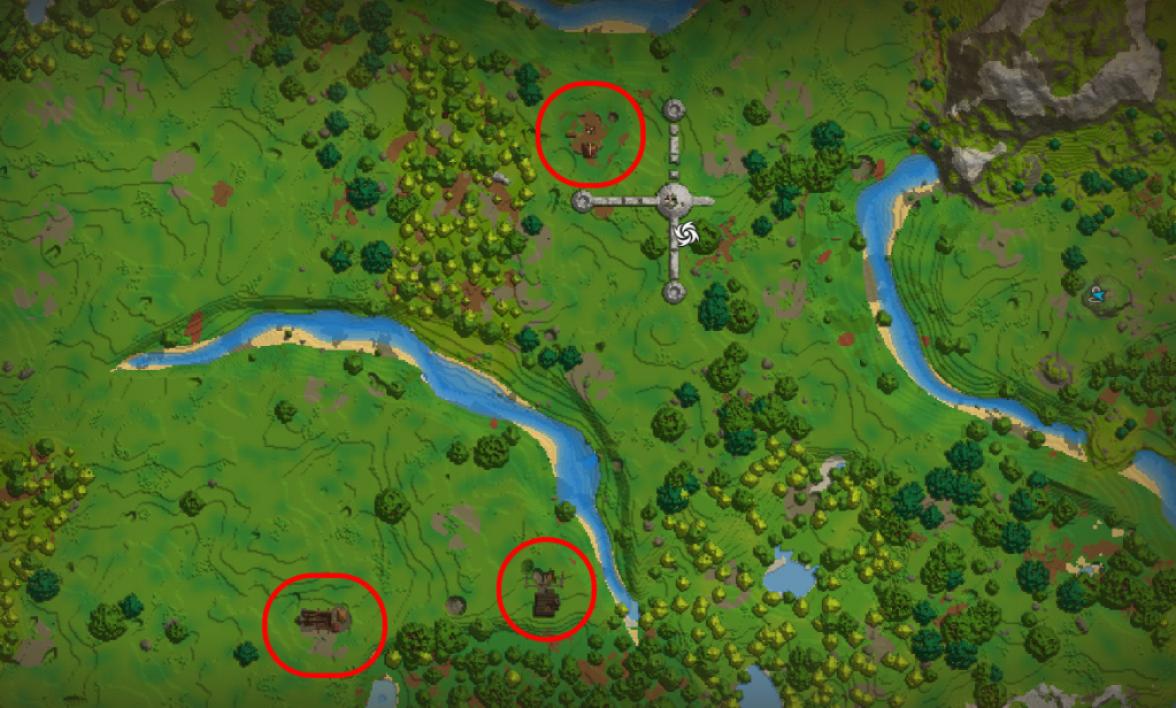
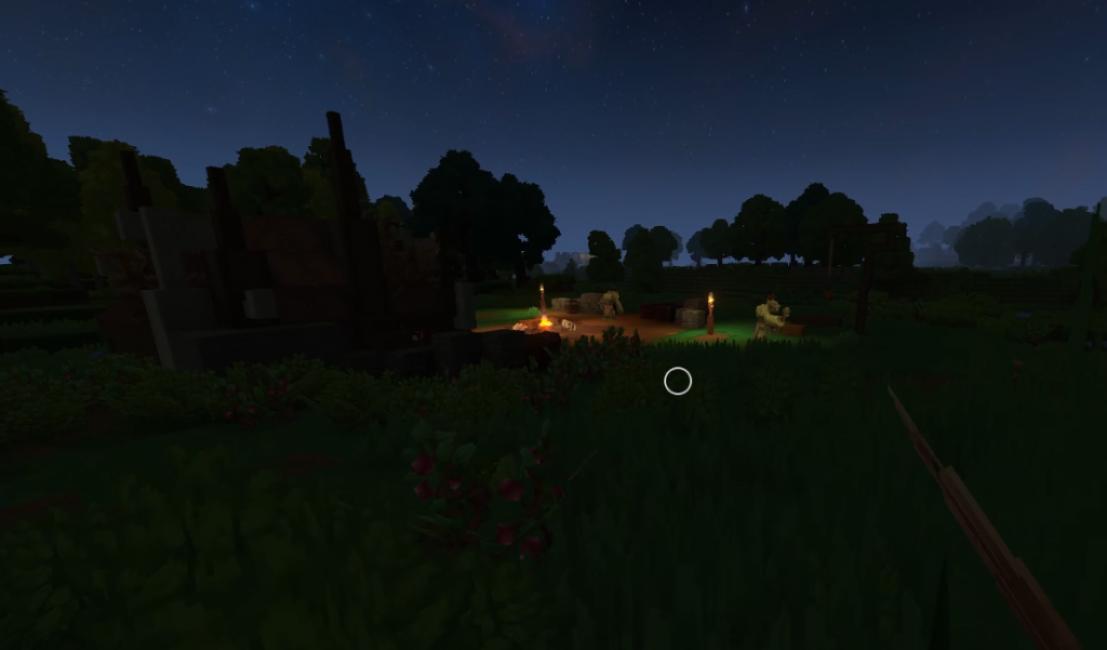
Press M to open your map and look for icons like the ones shown above. These mark mob camps full of enemies and loot. Defeat everyone in the camp, then open their chests and break their crates, boxes, and pots. It's a great way to earn extra resources early on.
How to Regrow Trees
Trees don't drop saplings like in Minecraft, but you can craft them in Hytale. At the Workbench, open the Crafting tab and make a Farmer's Workbench using 6 Tree Trunks and 20 Plant Fiber. Place it down, open it, and go to the third (Saplings) tab to craft all sorts of tree saplings with Essence of Life. Plant them around your base about 8 blocks apart and watch them regrow over the coming days. While you're at the Farmer's Workbench, craft Shears too: since Chapter 1, breaking player-placed foliage drops sticks and berries instead of the plant itself, so you need Shears to pick plants back up or gather fallen leaf piles.
How to Bunny Hop With Weapons
The charge attacks on Daggers, Battleaxes, and Swords let you bunny hop for extra mobility, both in combat and while exploring. Jump just before you release the charge attack, then jump again as soon as you land. Daggers are the best for this and let you cover huge distances with sprinting jumps. If you have Rocket Boots from Chapter 1, their double jump is another great way to get around.
That's it for our Hytale beginner's guide for Chapter 1: Out of the Breach. If you need a break from survival, the update also added Minigames, which you can find under Minigames on the Main Menu, including Prop Hunt and Shuffle Jam. Stay tuned for more guides and check out our Hytale Creator Codes.


