
Mushrooms have been in Minecraft
since Beta. For a long time, they didn't serve many purposes except as a part of crafting Mushroom Soup, which used to refill four hunger and take up one inventory space per bowl. Thus, mushrooms weren't a popular resource for farming. However, over the years, mushrooms have begun to serve more purpose and are now sought out much often!
How to Make an Automatic Mushroom Farm in Minecraft
This idea was first created and presented by Youtuber EagleEye621! The mushroom farm in this is not the most productive farm in the Minecraft universe, but give the way that Mushrooms grow, none of them truly are. However, this farm is expandable, and every additional layer adds more productivity to your farm! This farm is also automatic, so you don't have to worry about harvesting! Let's see how to make this thing.
Step One: Get the Resources
Shown above are the absolute minimum requirements to build this farm. There is a high cost of resources. You'll be using a lot of Pistons and a lot of Observers. However, the plus side is that the Redstone usage is minimal, and most of the work is done by the Observers. The full cost of resources for one module of this farm is listed below.
- 21 Rails
- 14 Powered Rails
- 1 Dropper Minecart
- 3 Droppers
- 32 Observers
- 32 Sticky Pistons
- 64 Podzol
- 1 Chest
- 16 Red Mushrooms
- 16 Brown Mushrooms
- 36 Fillers (Can be any block, we used Wooden Planks)
- 6 Redstone Blocks
Step Two: Build the Base
Your farm's base level consists of the following: 1 Chest, 3 Hoppers, 28 Planks, and 6 Redstone Blocks. Place them in as shown in the image above, starting with the Chest in front. There is a specific way to place the Hoppers for them to flow into the Chest.
- Place the Chest.
- Place the middle Hopper against the Chest so it fits to drop items into it.
- Attach the new Hoppers to the middle one by holding down Crouch as you place them.
The rest of the blocks may be placed in any order you please, but these must be placed as directed!
Related: How to Play Snapshots in Minecraft - Pro Game Guides
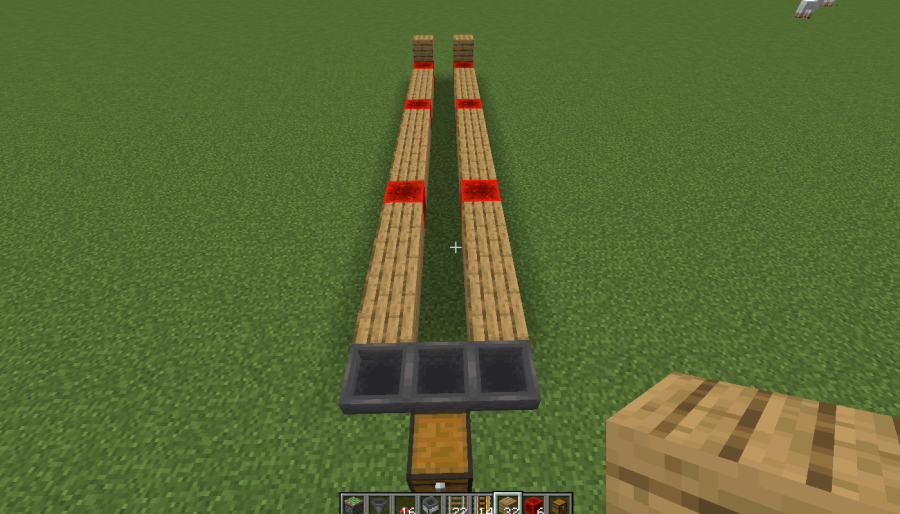
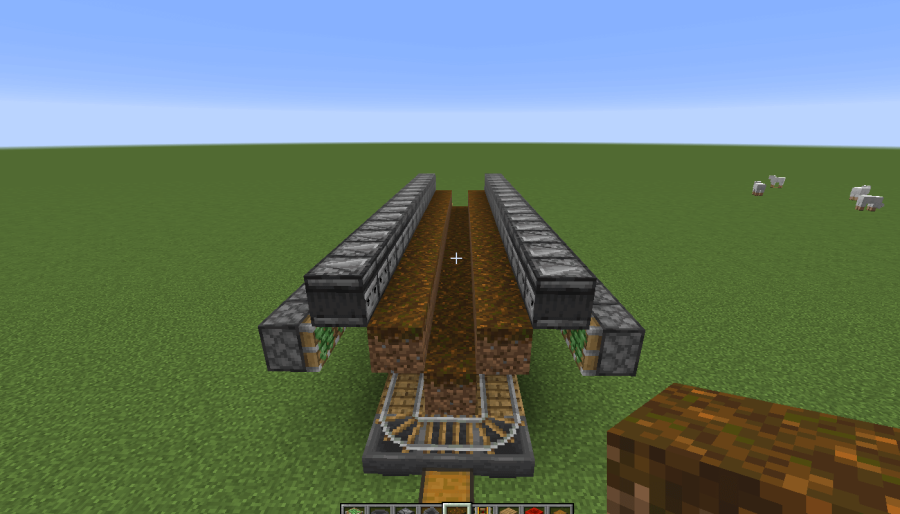
Step Three: Place the Rails
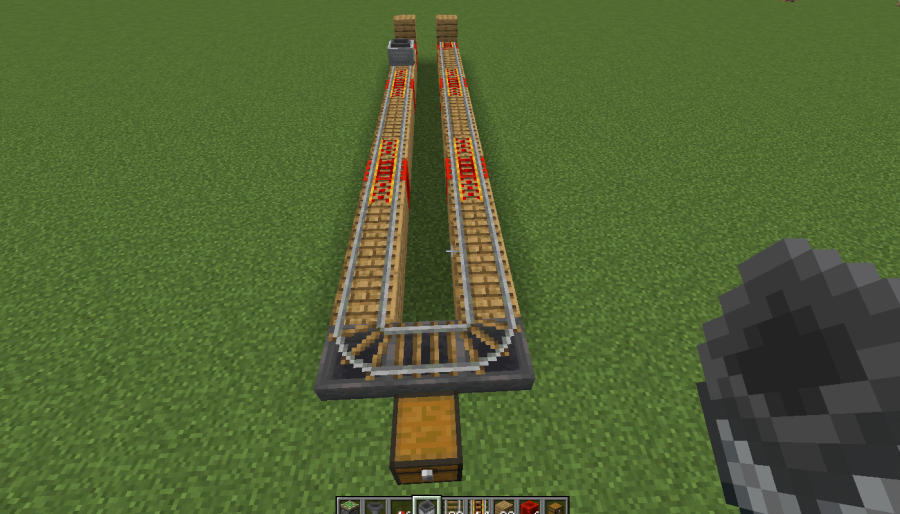
This is the easiest step. Place a Powered Rail on both of the Redstone Blocks in the back. Then, place three Powered Rails in succession on every other Redstone Block. The Redstone Blocks against the back walls will act as a force to push the Minecart back once it hits the wall. After this, place the rest of the rails as shown, including on top of the three Hoppers. Lastly, you just need to place the Hopper Minecart and give it a push!
Step Four: Place Some Podzol
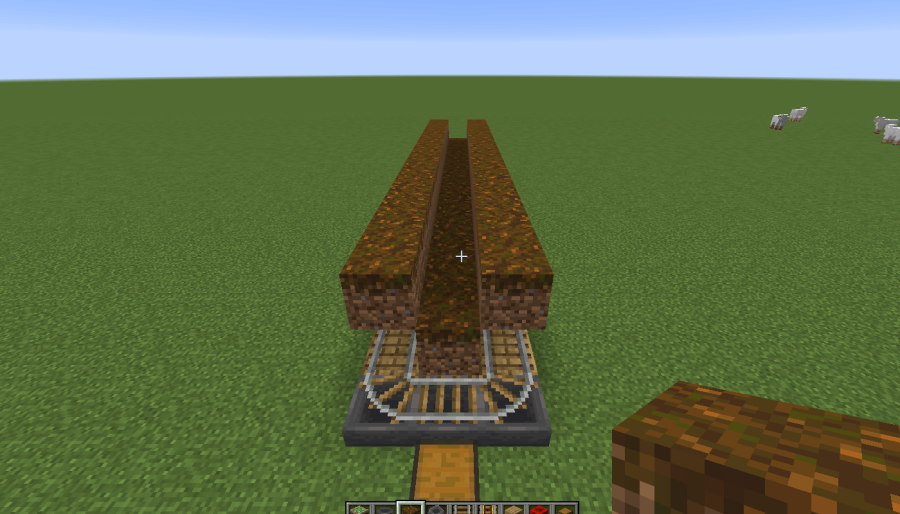
Podzol produces perfect spawn conditions for Mushrooms. It's not incredibly easy to make, but it works if you can't seem to find any Mycelium. You'll want to place a row of Podzol going all the way from the back to just behind the Hoppers. Then you'll also want to place a row of Podzol in the middle, one layer lower than the others. In the end, it should look like the image above and use 48 Podzol.
Step Five: Place the Sticky Pistons and Observers
This is the most expensive step but is relatively easy to do. From both rows of Podzol on the sides, place the Sticky Pistons facing the block, as shown in the image above. Do this for every sing Podzol until you use 32 Pistons. Afterward, place an Observer between the Piston and the Podzol, but one layer up. This will use 32 Observers. You can see both of these actions in the image above.
Step Six: Place the Mushrooms
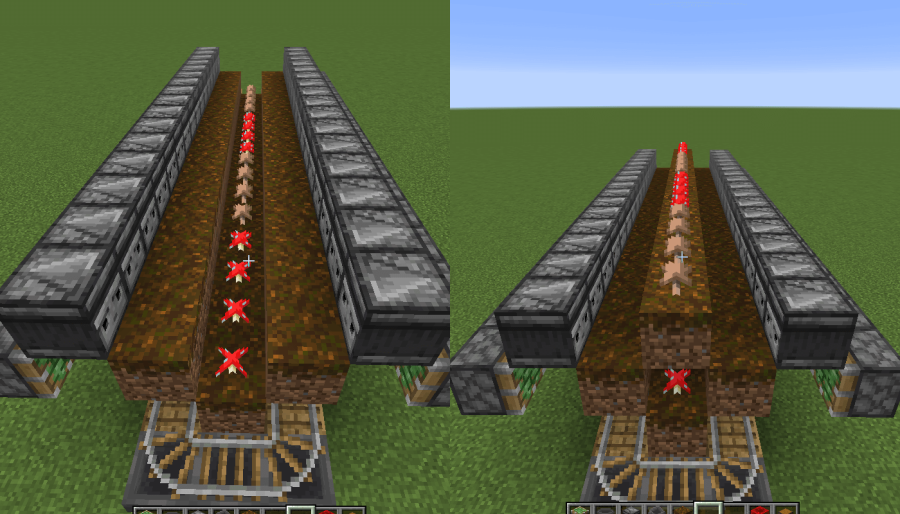
Another easy step, but there are some caveats to it. Due to how mushrooms spawn, you must place them on the Podzol in alternating colors four at a time. This assures that there aren't too many similar Mushrooms in range of each other. Mushrooms detect several blocks outward to determine whether or not they should attempt to spawn another. If there are too many similar mushrooms in the same vicinity, they will not attempt to respawn them.
In the split image above, you'll see the first layer of Mushrooms placed to the left. On top of those Mushrooms is another row of Podzol. Mushrooms are then placed on top of that row as well, in alternating types four at a time. Now technically, this farm would work as-is. However, we're going to go through a couple more steps to ensure it works to its maximum efficiency.
Step Seven: Maximize Productivity
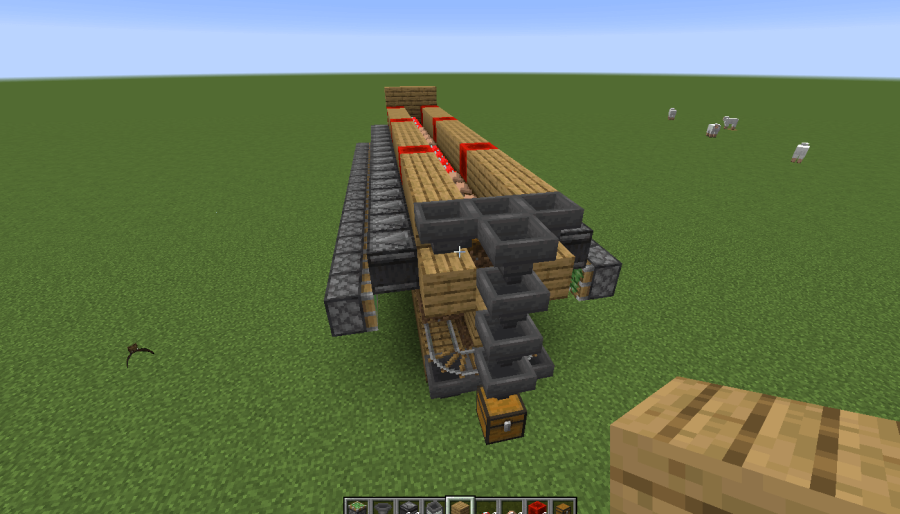
The most important thing about the image above is the Mushrooms are now blocked in from getting light. Mushrooms can only grow at a light level of 10 or less.
The image above may look like a major shift from the Mushroom farm we've built so far, but it has only added one layer of blocks. This new layer requires 6 Anvil, 28 Planks, and 6 Redstone Blocks. Place the anvils in order first, starting by placing the one that leads into the Chest. This allows us to grow this farm vertically as long as we'd like, making this farm one of the most adaptable ones we've ever seen.
Related: How to Make All Rails and Minecarts in Minecraft - Pro Game Guides
Step Eight: Anyone Got Shrooms?
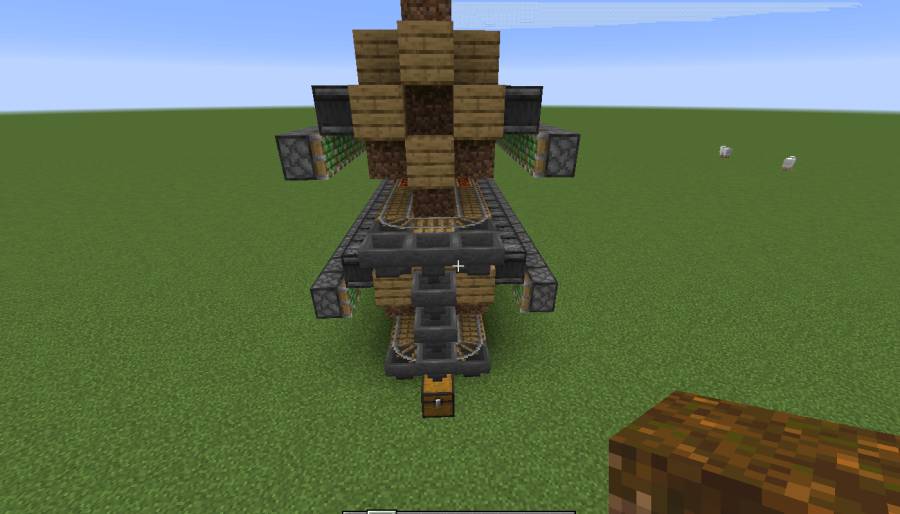
The image above presents how this farm is expandable. By changing up the hopper placement, you can not only build this farm as tall as you want but as wide as you want as well. It may look complicated, but the next module up is just a copy of the first one placed on top of it. Some extra hoppers are required to direct the collections to the chest, but that is the only major change.
Now that you've finished the farm, we'd like to mention a few important notes if you'd like to expand the farm upward.
- Place light sources around your observers. Mushrooms can grow on your observers, which will reduce or even completely stop their ability to spawn on the Podzol.
- Cover the mushroom growth spots with blocks. If there is too much light on the block, a mushroom will not be able to grow. Mushrooms can only grow on a block with a light level of less than 11.
- Each additional module after the first one costs additional resources. Until you start getting so many resources that you don't even know what to do with them, we recommend keeping it at one layer. It's not a fast way to get mushrooms, but since it's automatic, you can set it and forget it and let the game do all the harvesting for you.
That's it for this farm! Now take a step back, relax, and get ready for more Mushroom Stew than you can eat.
Want to see more automatic farms? Check out our guide on how to make an Auto Melon and Pumpkin Farm!