Mystery Detective Adventure is a quality puzzle mystery game with some challenging puzzles. If you're having trouble with them, read on for our full walkthrough of Case 2.
If you're looking for the rest of the game, we've got you covered here:
Mystery Detective Adventure Walkthrough - Case 2 Improbable suicide
In the next case, we will attempt to help a brothel owner whose son died recently. The police ruled the death as a suicide, but the mother doesn't believe this is the cause. She suspects a local businessman is the culprit, but you'll need to find proof.
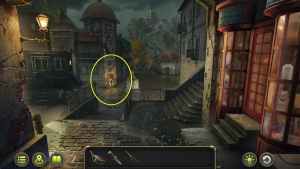
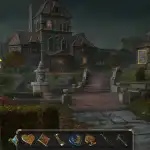
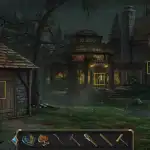
You start this adventure in downtown, where you'll speak to the mother. She'll tell you where the crime scene is so you can investigate. She'll tell you to take the stairs across from our carriage to the town's central square. First, however, there are several places around this downtown area we'll want to take note of:
Downtown Square
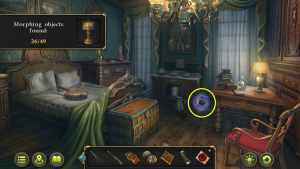
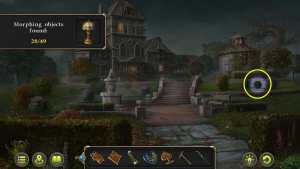
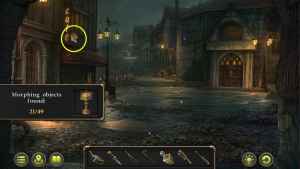
The first location is the Downtown Square. There is a morphing object above the door of the Brothel. It switches back and forth between a clock face an a decorative stone object. Make sure to pick that up before you get started.
Use the key to open your carriage. Inside the carriage is the portable experiment table, where you can test samples. On the left is a bag that we can open to collect some useful supplies: tweezers and a knife. Also pick up the oiler from the table, then pick up a chess piece Chess Collectible 1/8 on the right side of the screen. Now that you have picked up the items needed from the carriage, you can head back into the street. Click the brown door where the mother of the deceased was located before. This is the Brothel, and it will take you into the lobby.
Brothel - Lobby

Now that you are in the lobby, you can interact with several items. There is a locked door the left and a locked door to the right, a grandfather clock, and some other objects. The only things you can actually do anything with at the moment are:
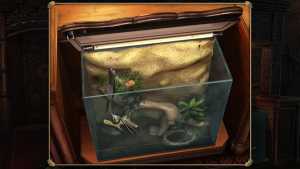
- The Spider cage has a Brush inside. If you open up the cage, you can use the Tweezers to pull the brush out.
- There is an alcohol cabinet above the spider's cage toward the top of the screen; inside is a bottle of alcohol you should pick up.
- To the left of the screen is an umbrella stand; take the Umbrella out.
- There is a Morphing Object above the doorway to the billiards room. It's a rose carving above the door on the left side of the screen.
Central Square
After you have gotten all the items in the Brothel's Lobby, go back into the street and head up the stairs by the Antiques Shop. This will lead you to the Central Square. There are several objects to pick up or take note of, so I noted them all below.

- Drain grate - On the ground in the center of the square; there is a Screwdriver under the grate. Use the tweezers to pull them out.
- Flower bed - To the left of the wooden door.
- Metal gate - On the front left side under the Cafe sign.
- Pond - Past the cafe on the left side.
- Path to the Gazebo - In the distance on the left side.
- Doghouse - On the far left side.
- Morphing Object - The beer mug on the Cafe sign is a morphing object.
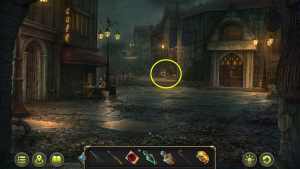
First, look inside the drain grate on the ground and use the tweezers to retrieve the Screwdriver. This will be useful later on. You won't be able to interact with much of Central Square right now. Take the path in the distance to the left as your make your way to the gazebo.
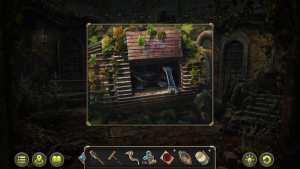
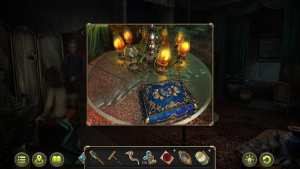
Gazebo
This is the crime scene, so you'll want to be very thorough in your investigation and pick up as much evidence as you can.


- Body outline - On the ground on the left side (Evidence 1/5 - Torn button; you'll need to brush some leaves out of the way).
- Weeds - On the left side beside the body outline (Evidence 2/5 - The deceased's watch, use the knife to cut some weeds out of the way).
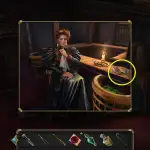
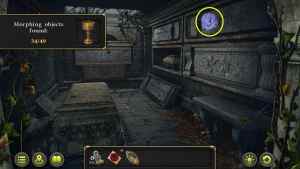
- Bench - On the left side against the stone wall (Goblet)
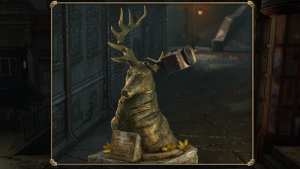
- Statue - In the center of the gazebo (Evidence 3/5 - Scratched initials, use the brush from the spider tank in the brothel to clean the moss off of them).
- Loose brick - On the right side of the statue near the window.
- Mechanism - On the far right side up the stone steps.
- Crack in the stone - On the ground in front of the statue (Bottle - clear out the weeds and then use the tweezers to grab the bottle).
- Bush next to the bench - There is a rose underneath.
- Lamp in the upper left part of the screen - You can interact with it but it doesn't do anything.
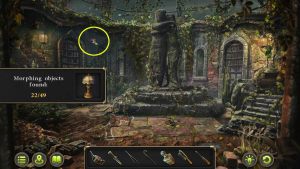
- Morphing Object - There is a bat in the upper center part of the wall that changes; click on it to pick it up.
- Chess collectible - Zoom into the bush on the immediate right of the bench with the goblet underneath. There are a couple of plants with a rose underneath. In one of the windowsills is a well-hidden chess collectible.
There are several evidence items in this area. First, look at the body outline on the ground and spot the torn button beneath the leaves. Then, check the weeds beside the outline to cut some away with your knife and spot the watch. Look at the statue in the center of the gazebo and use the brush (found in the brothel) on the lower right corner to spot the carved initials (ignore the lack of interact icon). Finally, look at the crack in the stones on the ground in front of the statue. Inside, you can brush away some leaves, then pull out a small bottle using the tweezers.
This bottle might have poison in it, which could be the real cause of the son's death. We can test it in our carriage lab to find out. Before we head all the way back, stop in the Central Square and look at the doghouse.
How to take the goblet from the doghouse
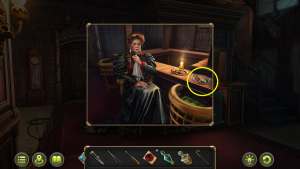
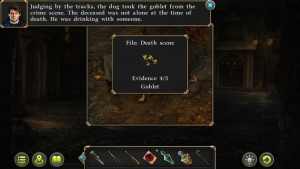
The Doghouse has a goblet that matches the one underneath the bench in the gazebo. However, the dog won't let you look at it without an item in exchange. To get something to trade with the dog, head back downtown and enter the brothel. Next to Diana on the counter is a sandwich you can take. Bring it back to the dog, and you can get Evidence 4/5 - Goblet. Then, we can continue back to the carriage to test the poison.
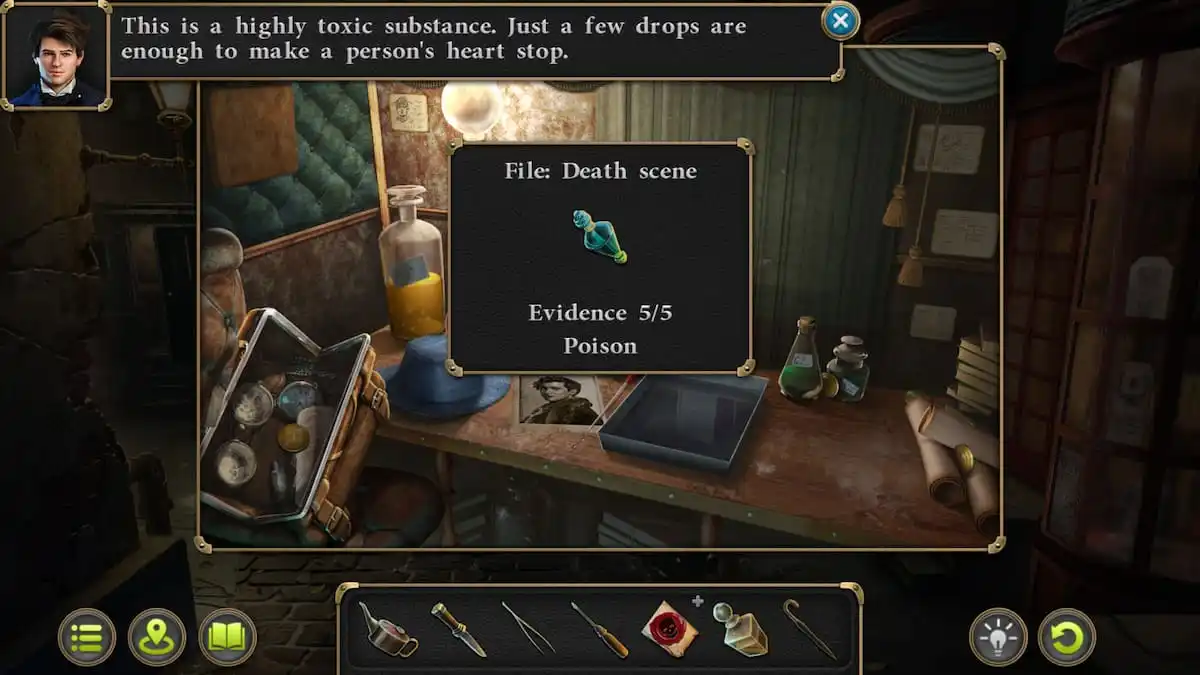
How to test the bottle of poison (Evidence 5/5)
Bring the vial you found in the crack of the floor of the murder scene to your carriage. Inside your portable lab, you can figure out exactly what it is. All you have to do is pick up the bottle from your inventory and click it on the lab; the game will take care of the rest. Turns out, it's a bottle of very potent poison, so it looks like this was a murder after all. You will need to bring this evidence back to Diana.
Back to the Brothel
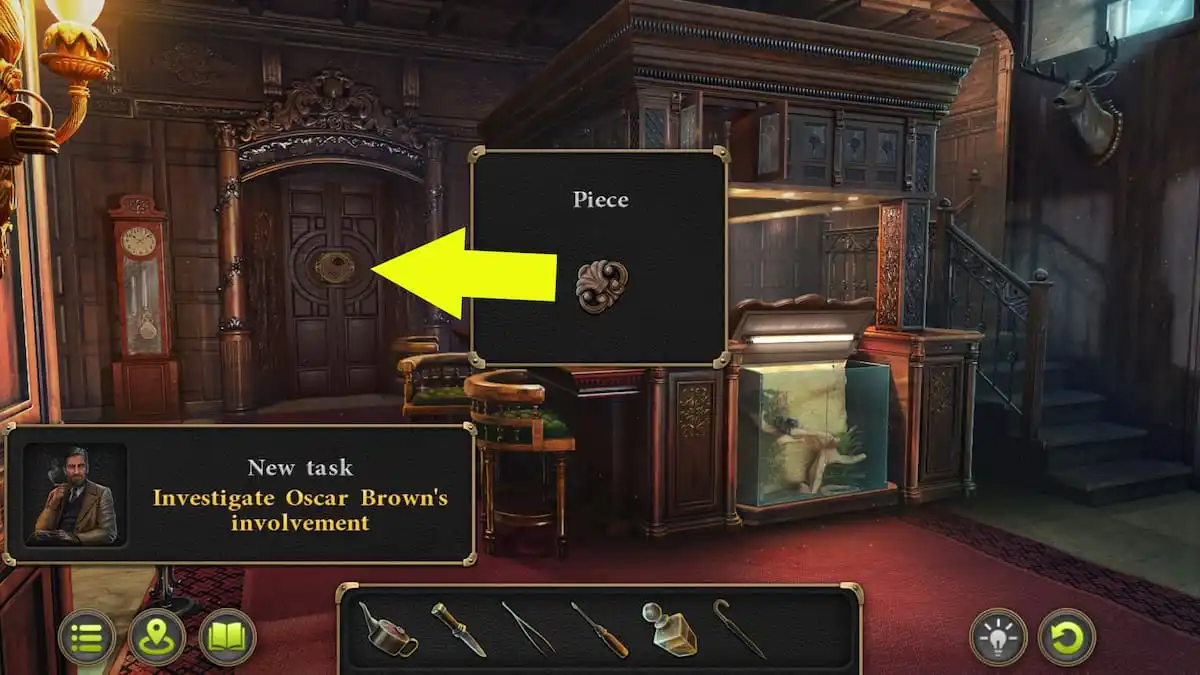
After speaking to Diana, you'll want to take a look at her son's room. However, the key to the room is conveniently lost. Diana tells you to speak to Oscar Brown, the man she believes murdered her son. He is located outside the cafe in the central part of town. Diana will also give you a puzzle door piece to help you get into the billiards room.
How to solve the brothel billiards door flower puzzle
The goal of this puzzle is to slide the flowers into their correct colored slots. However, whenever we slide a flower into another slot, all the slots will rotate clockwise. We'll have to move them in the right order to get them to end up where they belong. While the puzzle is random, here's one example of how it's done:
The trick is essentially not to think of getting the flowers into the correct slots but arranging them such that your next move will send everything into the correct slot (and then making the move based on that decision). Once you solve your own version of the puzzle, you can open the door and head through to the billiard room.
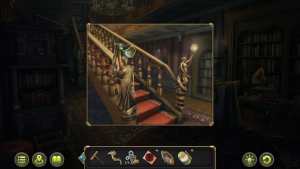
Brothel - Billiard Room
There are more objects we can collect and things to look at here.


- Billiard Table - In the center of the room; there is an object caught in the netting that you can't get yet.
- Card Table - On the right side of the room. You can't interact with anything here just yet.
- Lights - Over top of the billiard table (Part of box - Use the umbrella to knock it down).
- Jester painting - On the far left side near the staircase.
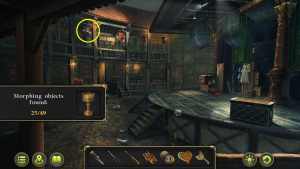
- Cushions - On the balcony above the billiard table (Powder, Jester box, Torn Tapestry, Collectible)
When you enter the billiard room, look at the billiard table first and click it to notice a Detail piece stuck in the mesh. Then, look up above the lights, and you'll see something on top of the lampshade. You can't reach this normally, but thankfully, you can grab the umbrella from the brothel lobby and use it to knock it down. Up in the balcony area of the room, you can grab the powder sitting on the cushion to the right and make note of the other items around.
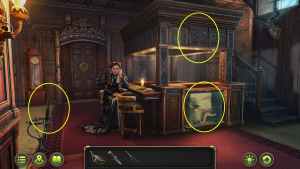
Oscar Brown and his apartment
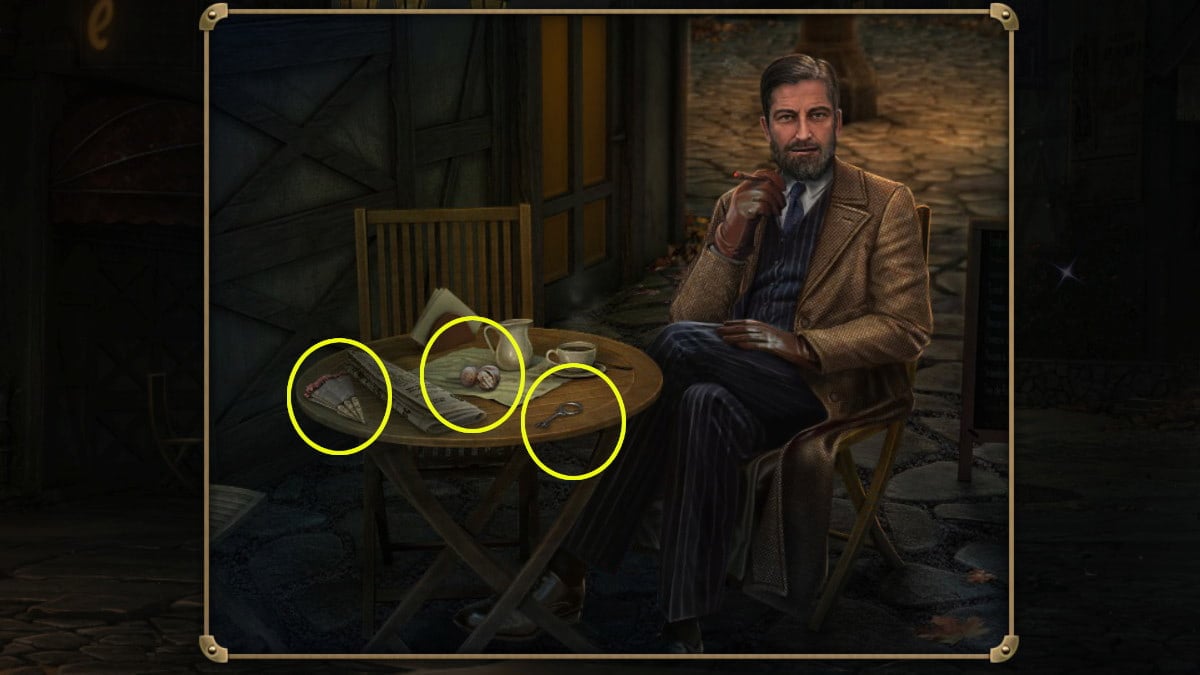
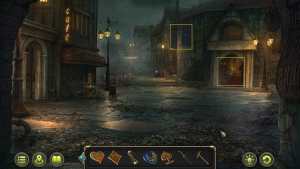
Head outside to the central part of town, and speak to Mr. Brown at the cafe outside the Square (where you took the goblet from the dog). After speaking with him, grab Key and Nuts and a collectible from the table afterward. Open the gate left of the cafe with the Key you took from the cafe table, then you can enter Oscar's apartment.
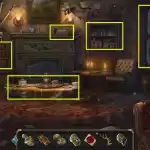

- Large table - Poster (Evidence 1/4) and Comedy mask.
- Window - Use Alcohol on this to remove the stains and reveal a pattern. Take Part of box from the bottom left corner of the window.
- Bookshelf - Examine this on the right side of the room and input the pattern you saw on the window (going from top left > top right > bottom left > bottom right). Doing so will reveal a safe which we'll open later.
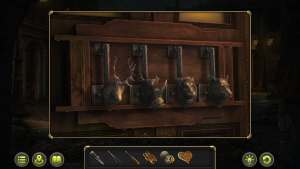
- Drawers - Use Powder on them to reveal handprints and click three with either the most or least handprints to open the large drawer below. Take Antler and acquire the Medicine for the liver (Evidence 2/4).
- Painting - Businessman's personalized tickets (Evidence 3/4) and Tragedy mask (next to the evidence)
- Chess Collectible - Can be found on the right side next to the window.
- Morphing Object - Just below the Chess collectible.
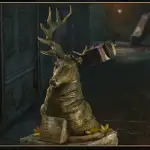

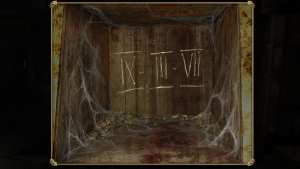
Return to the Street and attempt to insert the Antler onto the deer's head only to find the connector is rusty. Use Oiler on the head, then try again. Open the object in front of the door to reveal three numbers: IX - III - VII. Return to the apartment and enter the code into the safe (9 left - 3 right - 7 left). Open the safe to collect Director's cash receipt (Evidence 4/4). Examine the safe again and take Case. Insert the Comedy mask and Tragedy mask onto the case and open it to acquire Binoculars.
Theater
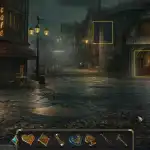
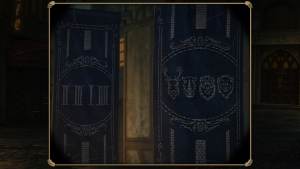
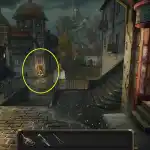
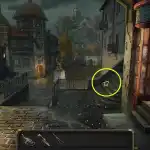
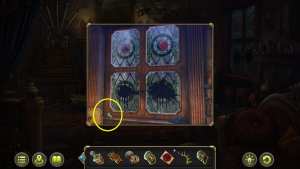
Return to Square and use the Binoculars on the blue flags to the upper left of the large brown theater door to observe a pattern of numbers and animals. Examine the theater door and then click the animals as follows: Lion, Deer, Rhino, then Bear.
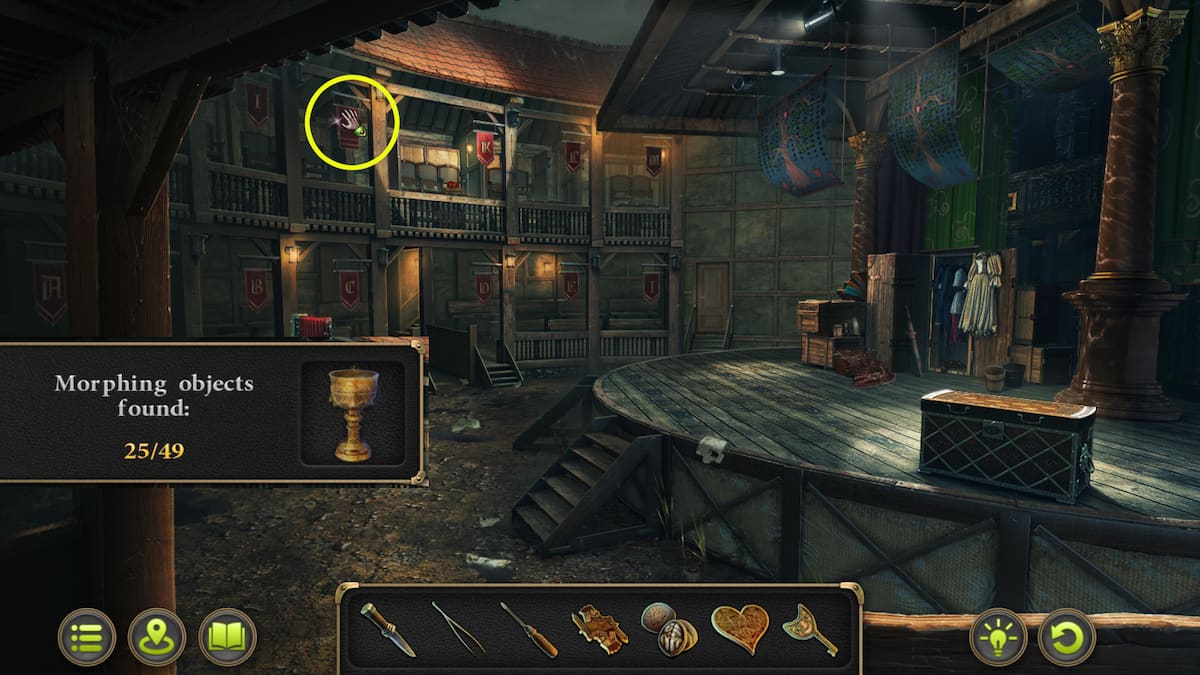
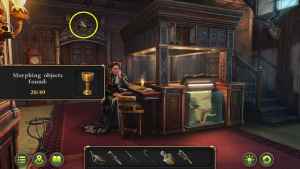
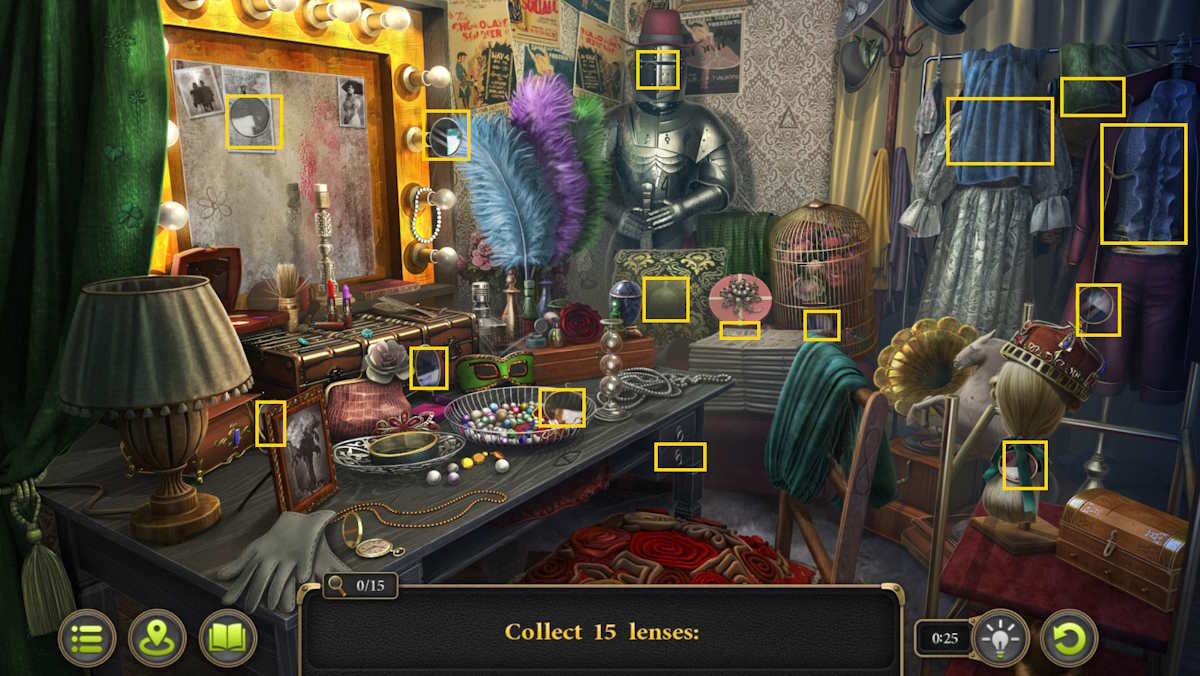
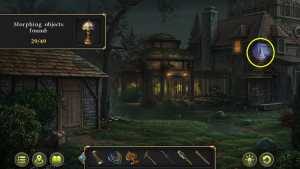
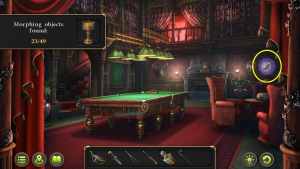
Inside, speak to Scott Roth and receive a Key. Before using the key, grab the Morphing Object on the flag as in the screenshot above. Then, use the key on the back right door and head up the stairs, where you'll be tasked with finding 15 lenses. Back in the theater, use the lenses on the box on the right to begin a new puzzle.
How to solve the theater box puzzle
The goal of this puzzle is to end up with just one red piece on the board. To do this, you have to jump a red piece over another red piece (checkers style, though no diagonal movement is permitted). The trick is to essentially plan a move or two ahead and to try and keep the pieces as close together as you can in order to maximize your next moves and to ensure you always have a next move (if they become too far away, you'll have to reset).
After completing the puzzle, take Needle and Thread as well as Case from the box. Examine the camera on the left side and open it with Screwdriver, then use Case on it to acquire Film. Return to your carriage (Street area) and swap the white light with the red one, the add Film to the table. Interact with the Film to place the photo in the tray then examine it to find Photo (Evidence 1/5).
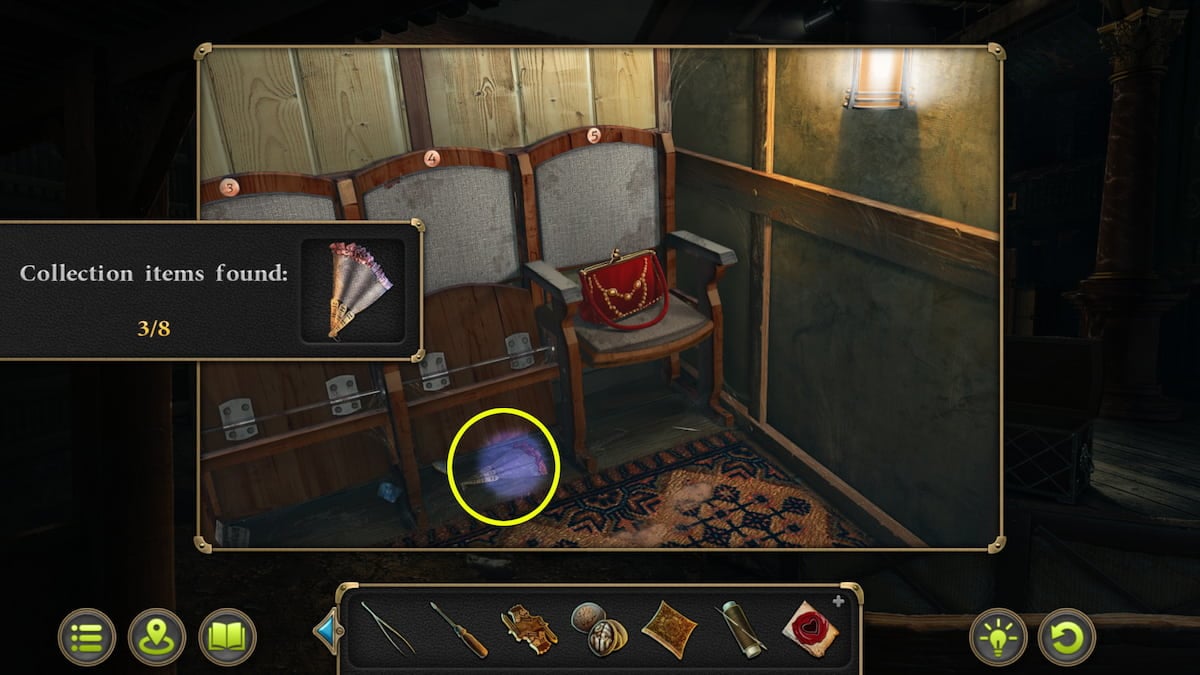
Return to the Theater and use the Photo on the director, who will point you to the theater hall. Examine the balcony above. Take Fan Collectible item from beneath the center seat, then take a look at the red purse to find Women's clutch (Evidence 2/5). Inside, find Personalized tickets of the deceased +1 (Evidence 3/5). There is also a Fan Collectible under the seat.
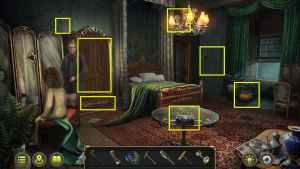
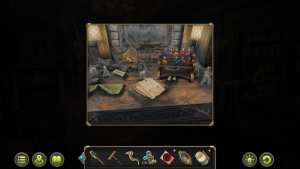
Deceased's room

Return to Brothel Hall to speak with the mother (Diana) to receive Key. Use the key to open the door on the right side (near the deer head). Take notebook from the desk on the right and Warming pan from the bed. Open the pan to acquire Charcoal and use it on the Notepad, yielding Clue.
Examine the symbol on the desk handle drawer on the right and select Clue to hold it up against the puzzle. Your goal here of course is to arrange the symbols as seen in the Clue. To do so, use the grey "k" symbols to line up a path for the symbols to move along, directing them to the rectangular slots for storage. Naturally, you'll want the middle and bottom parts out of the way first. Once the puzzle has been solved, read the Love Letters in the desk (Evidence 4/5) and take Token. This room also contains a Morphing Object and a Chess Collectible.
Return to the Game Room (aka Billiard Room) and use Token on the machine on the right desk (with the three drinks and pipe) to acquire Joker. Look to the left and up the stairs and use the Joker on the painting on the wall.
Joker puzzle
The goal here is simple: spot the 12 things that are different between the Joker card and the painting.
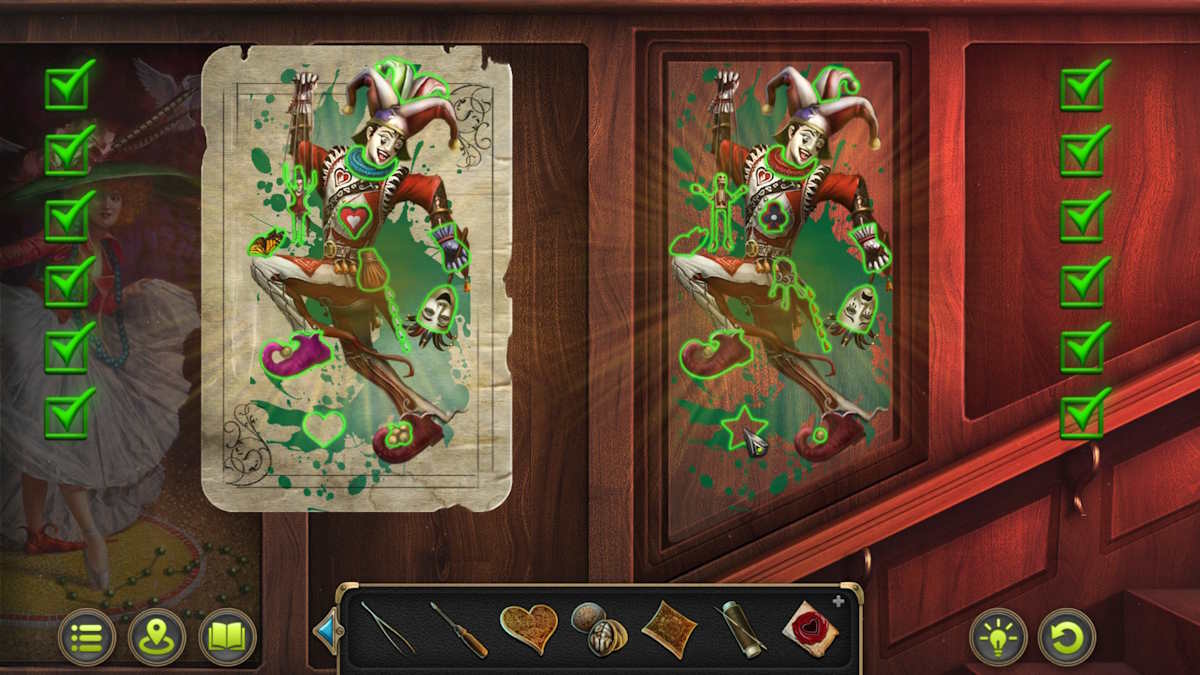
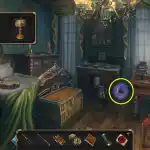
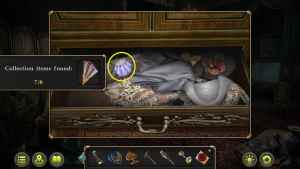
After completing the puzzle, take Figurine and Key from behind the painting. Return to the Deceased's bedroom and insert the figurine into the center of the end table next to the bed. Take Heart from the desk, then use Key to unlock the chest at the foot of the bed. Take Weight for clock and Part of box from the chest, then move the sheet and use Tweezers on the crack to uncover Medallion for a keepsake (Evidence 5/5). Return to Diana, then use Weight for clock on the clock left of the screen. Behind the clock, grab Lock pick, hammer, and a collectible Fan.
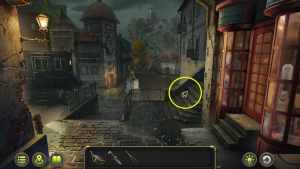
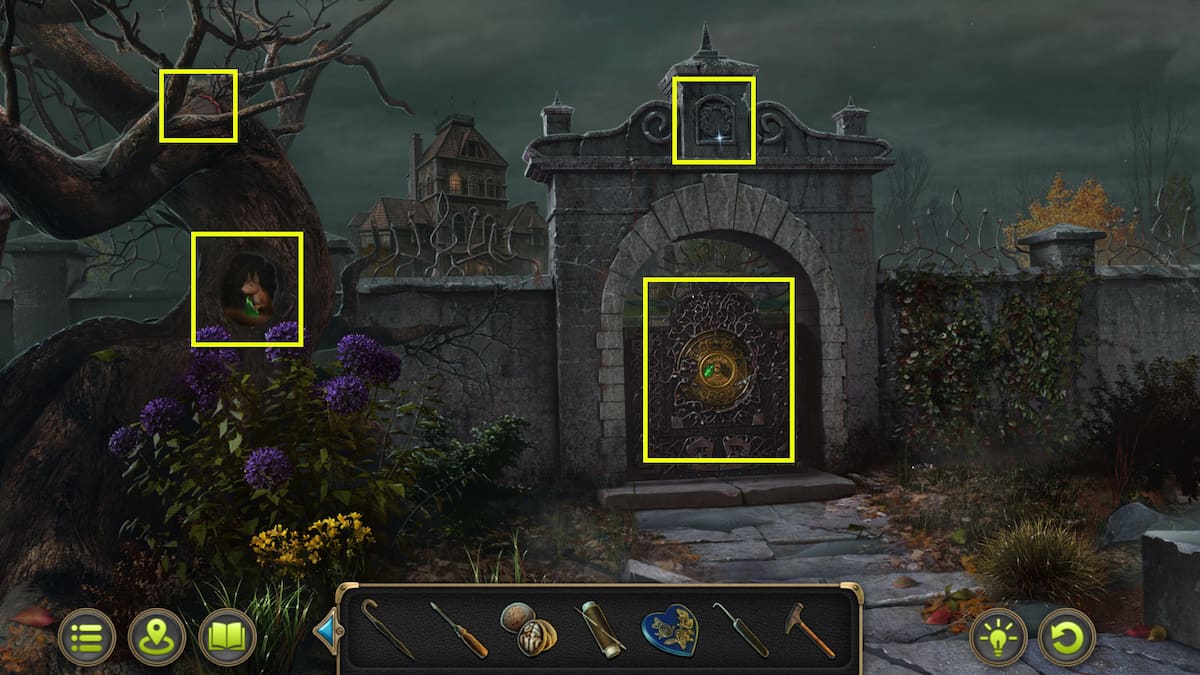
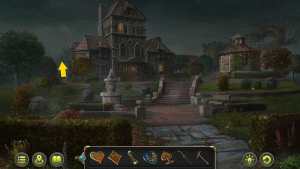
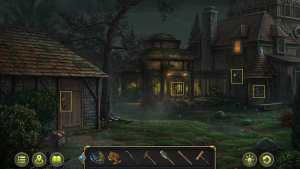
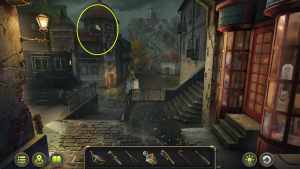
Return to Street, this time taking the road in the distance toward the house at the top of the hill (click the top part). Grab the Fan collectible from the tree on the left and the Morphing Object above the gate, then check out the squirrel. Give it Nuts to acquire Part of the lock, then insert the part into the gate before clicking it. With that, a new puzzle appears.
How to solve the gate puzzle
This one is on the simpler side. The goal is to have all symbols adjacent to matching symbols; the trick is to put all the central triangular pieces in order except the last two. Switch the final two pieces' order, then put in the other triangles, as shown in the video below. You can put pieces back from either the middle or the right at any time, and there is also a reset button on the bottom in the middle.
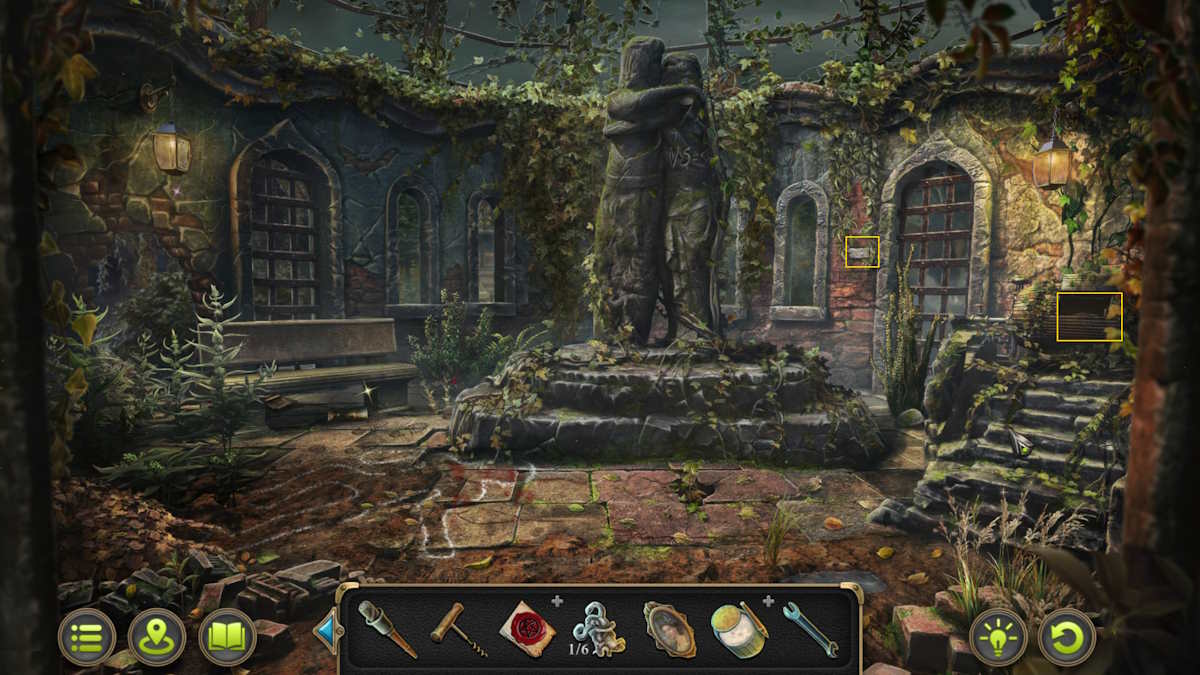
Estate
Approach the door on the left side of the house to speak with Lord Brian Shaw, who won't let you in. Click the door on the right side to acquire Torch, then use Screwdriver to open the door. Inside, pick up the Fan Collectible from the bed, the Board from in front of the bed, and Corkscrew from the floor.
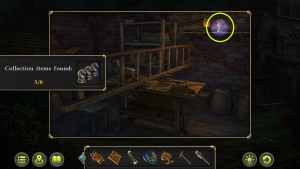
Back in the yard, take the left route (see arrow in top image above). Use Lockpick on the left door. Inside, add the Board to the ladder, take Nails from the table and add them to the ladder, then hammer the nails in with the Hammer. Take the Ladder (and the collectible from the top right corner of the image), then head back out.

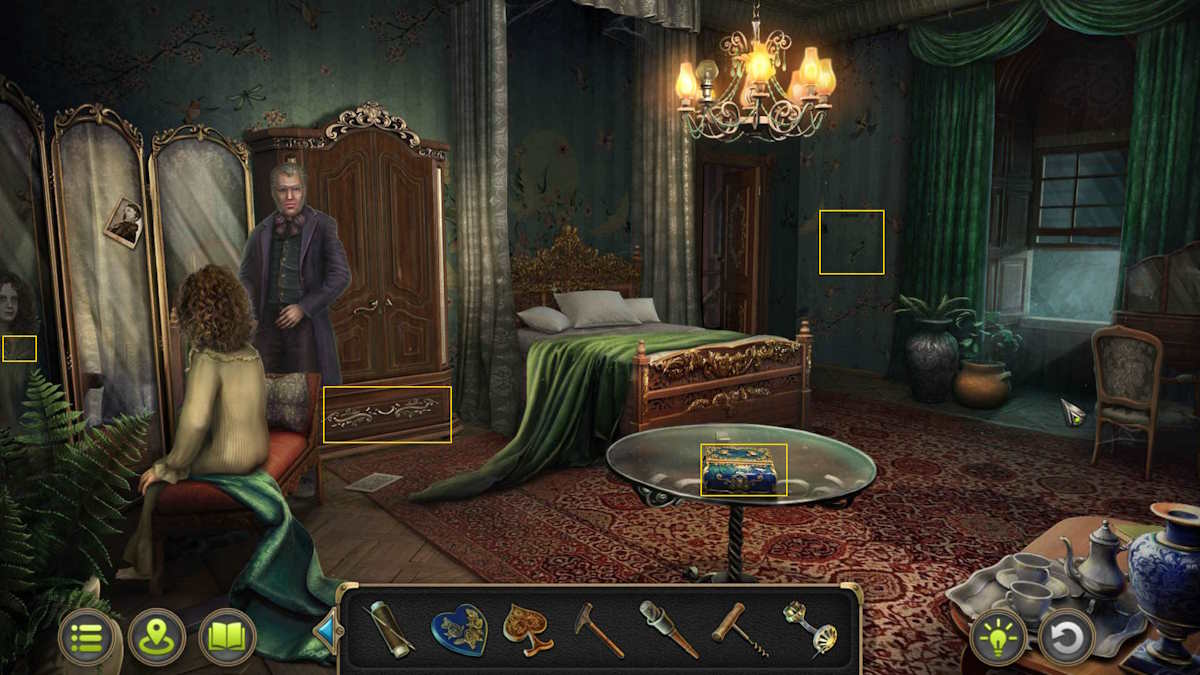
Set the ladder up against the lit up window, then climb up. There will be a Tone Arm holding the window open; take it, then climb into the window. A cutscene will play, and then you will be able to speak to the father.
- Broach imbedded in the girl's chest (Evidence 1/8).
- Open the drawer to the right of Shaw and move the clothes around until you uncover Cape without button (Evidence 2/8).
- Click the Collectible Fan while you are inside the drawer to acquire it.
- Look at the Photo on the Mirror (Evidence 3/8).
- There is a Morphing Object just above the wardrobe; it's a dragonfly.
- You can also interact with the blue box on the table; put the Blue Heart from the Deceased's Bedroom in it to open it up. You won't be able to solve this yet.
- There is the Ceiling Light that you will need later.
- Crank in the wall is missing a gear.
- Planter has some disturbed dirt in it.

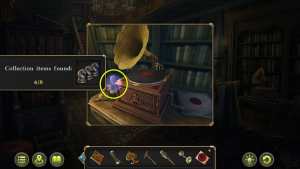
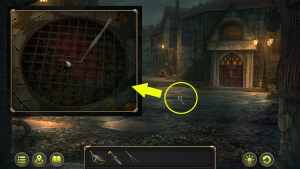
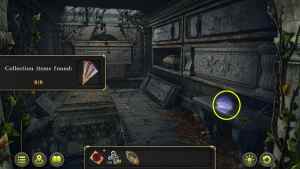
Go downstairs (look for the doorway in the right corner) to the Estate. Insert Tone arm onto the phonograph on the right. Turn the phonograph using the handle on the right side and take Key. There is also a Morphing Object by the books on the left side, as well as a Chess Collectible next to the phonograph. This is all you can do in this room for now, so it's time to head back to the backyard.
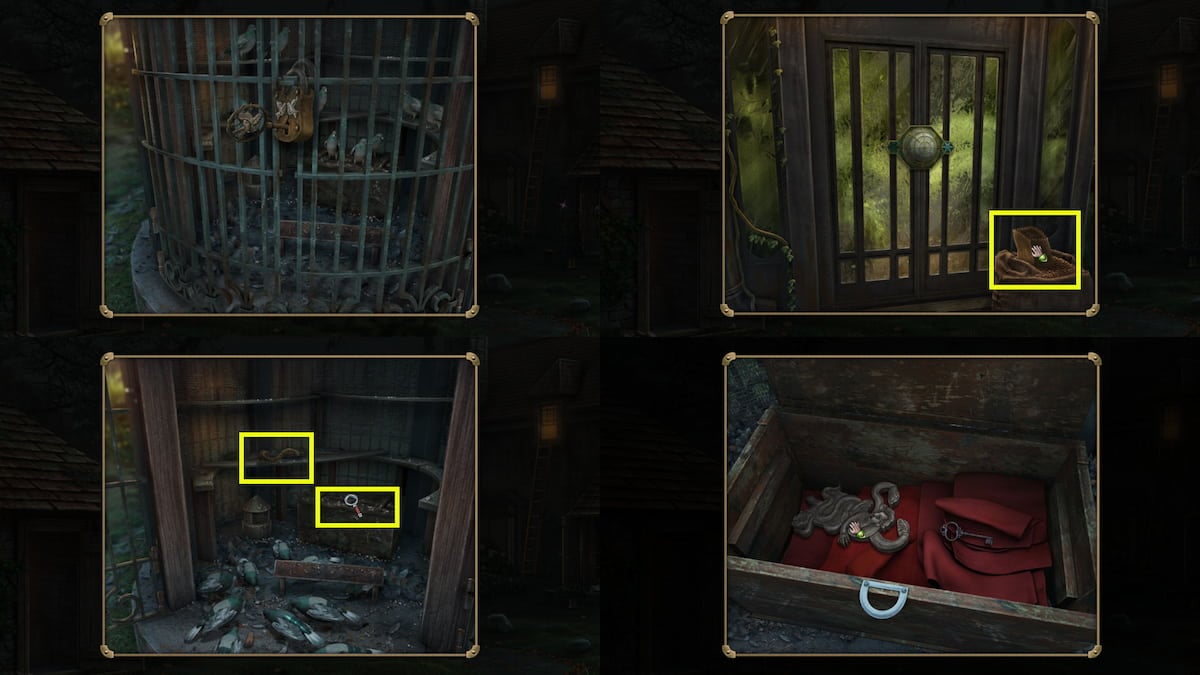
Use Key on the birdcage, then look at the greenhouse door. There will be Grain there; pick some up. Use Grain to distract the birds, then take handle from the left shelf. While you're at it, open the box to find Bas-relief (1/6) and Key. If you head back into the Foyer, you can now interact with the cupboard on the left side of the screen; there is a locked door at the top of it that contains a new puzzle.
How to solve the Estate cupboard puzzle
A deceptively simple puzzle, this is one of the more difficult ones in the game (or will be for some, anyway). There's no trick per se, just line up the blocks as seen in the video. As usual, the puzzle is random, so you may get a different version, but the end result of course should look the same.
Afterward, take Portrait from the cupboard and acquire Portrait of the grandmother with a brooch (Evidence 4/8). While you're at it, take Glue and Wrench. Head back to the bedroom, and use Handle on the armoire (to the right of Shaw) to find Dirty Boots (Evidence 5/8).

Using the map, click on the Place of Death in Lower city. Use the Wrench on the device on the right side of the screen, then take Gear. This can be used in the Girl's Bedroom to fix the crank with a missing gear in the back of the room by the door. After putting the gear in place, crank the light down and take the lamp that isn't lit up.
Go back downstairs and place the Lamp on the banister to open a secret room. Check out the letters on the desk to find Grandma's notes on poisons (Evidence 6/8); touch the rack to find Poison rack (Evidence 7/8). Pick up Bell from the center of the desk (below the painting).

Return to the Billiards Room in the Brothel, and examine the upper balcony. Use Needle and Thread on the torn cloth with the different color flowers, then Knife to take it with you. Back out of the Billiards Room and into the Lobby of the Brothel. Use the lit candle on the bar to light the Torch to acquire Burning Torch. After that, you need to return to the Girl's room, and it's time to solve the Blue heart puzzle.
How to solve the Blue Heart puzzle
Use Clue to observe the final intended pattern (you can keep clicking it to remove and add it to your view). The point is to get the colors lined up by moving the lines vertically and horizontally. The best way to solve this puzzle is to get the pieces lined up in one vertical line, then scooting the lines to make sure that the horizontal order is correct. Start in the upper right-hand corner and fill in the correct colors as you go. Check out the video if you need more help. This will earn you another Bas Relief (2/6), and some more dialogue with Shaw.
How to unlock the cemetery
Shaw will tell you to head to the cemetery, but it is locked up tight this time of night. To get into the cemetery gate, you'll need 15 metal roses. All the metal roses are available in the Antique shop (enter it through the red door in the Street). After asking the woman running the shop how much they are, you will need to collect seven coins from your carriage. You won't be able to collect the coins until after you have interacted with the woman and asked how much they are.
All coin locations
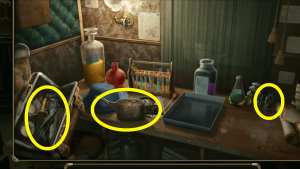
Head to your carriage and you'll find the coins scattered around in these locations:

Where to find all 15 metal roses
Now that you have seven coins, you will need to find all the roses in the shop. While some are located out in the open, several require that you interact with boxes, bags, and other objects in the shop to find them.
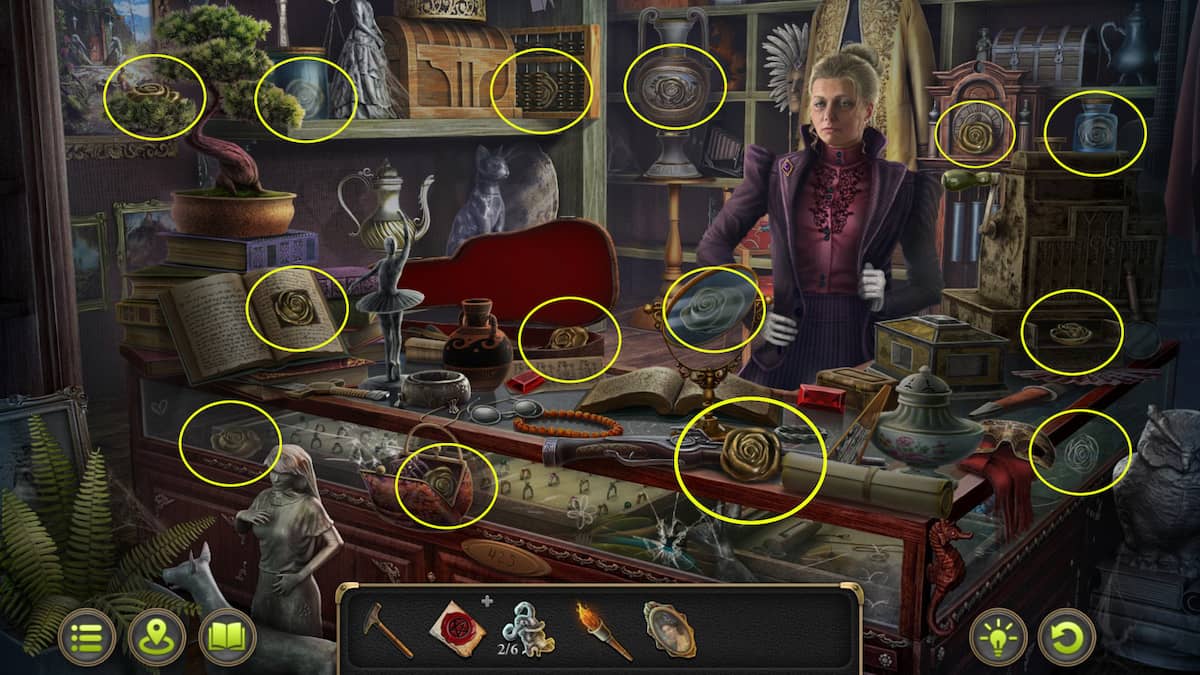
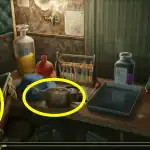
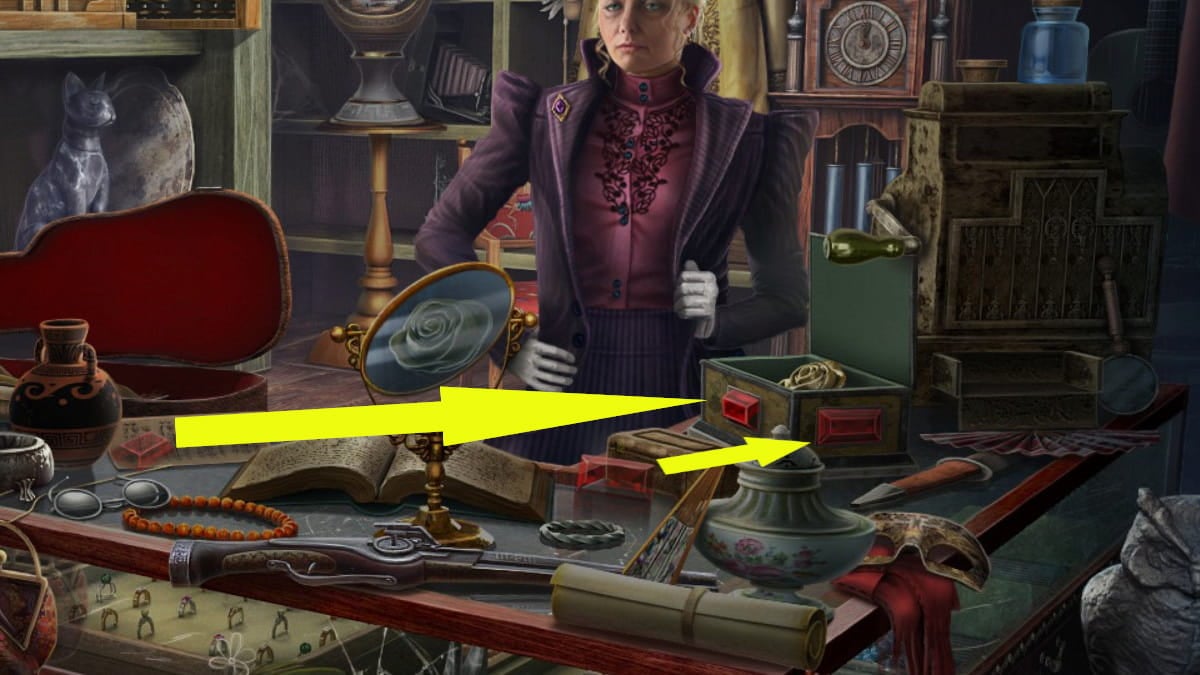
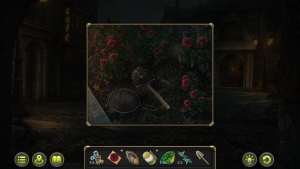
As shown in the screenshot below; there is a box next to the cash register. You need to put the two red gems from the counter into the box to open it up and take the rose.
Once you have collected all 15 metal roses, you need to put those roses into the Cemetery Gate. This will unlock the Cemetery Gate puzzle.
How to complete the Cemetery Gate Puzzle
If you are stuck on this puzzle, I have included a quick video to help you through it. You will need to line up the roses on the left and the right so none of the roses overlap when you pull them together with the lever at the bottom of the puzzle. You can complete the puzzle by moving just one bar on the left, then lining up the right roses to match.
Inside the Cemetery
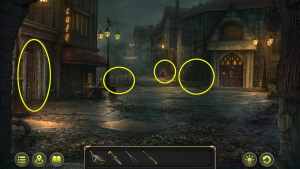
Once the gate is unlocked, you can head into the cemetery location. There are several screens to this place, and the first one has a whole lot to look at. The following list will start with the object on the left of the screenshot below.
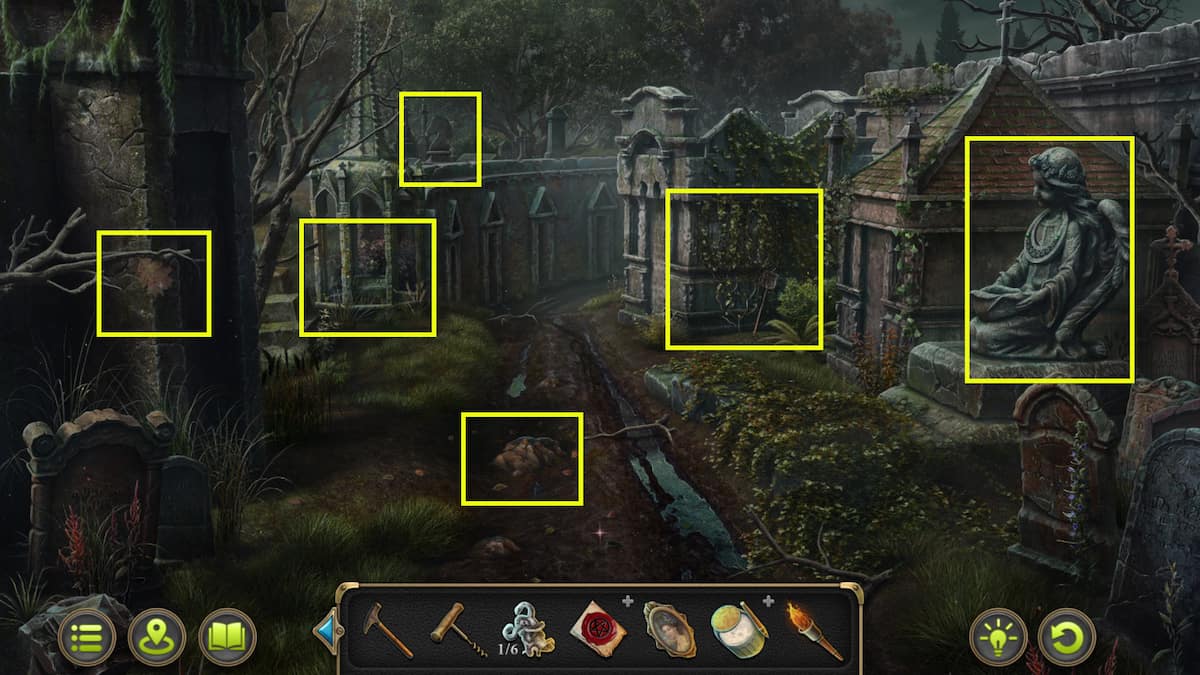
- All the way to the left, there is a leaf that is a Morphing Object hanging off the branch above the tombstones.
- There is a Chess Collectible in the upper middle of screen, above the path.
- Just below the chess collectible is a little grave area; on the stone in this little location is an Emerald (1/8)
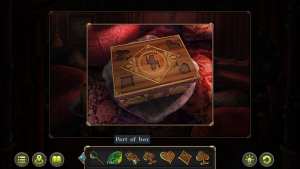
- In the middle of the road is a stone with a Piece of the Box located in it. Break the stone with a Hammer to take it out. It will be dirty, but you can clean it later.
- To the right of the path is an overgrown patch of vines. Pick up the Hand Net from beside it.
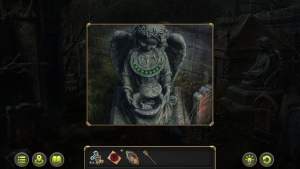
- There is an angel statue to the far right; it is missing the emeralds around its neck. You've already found one of these, and the rest are easy to track down.
Now that you have the Hand Net, you can use it on the little pond next to Oscar Brown's apartment. This will give you the billiards ball. Use the Billiards Ball in the Billiards Room in the Brothel on the pool table. This will knock the Star Piece out of the netting of the pool table.
All Part of Box pieces for the Billiards Room box
Now that you have broken the stone and taking the Box Piece, you should have all the pieces for the box's top in the Brothel's Billiards Room. But the piece you took from the stone is dirty, and you need to wash it before using it. In order to wash it, head back to the Estate Front Yard, and click on the Fountain. Use the Cork Screw to remove the cork in the fountain, and you will have clean water to wash the box piece off with.

How to complete the Billiards Room box puzzle
The key to this puzzle is to start by completing the edges so they line up. Make sure all the lines are connected, and keep spinning the pieces until they are no loose ends left. You'll earn another Bas Relief piece (3/6) for your trouble.
Deeper into the Cemetery
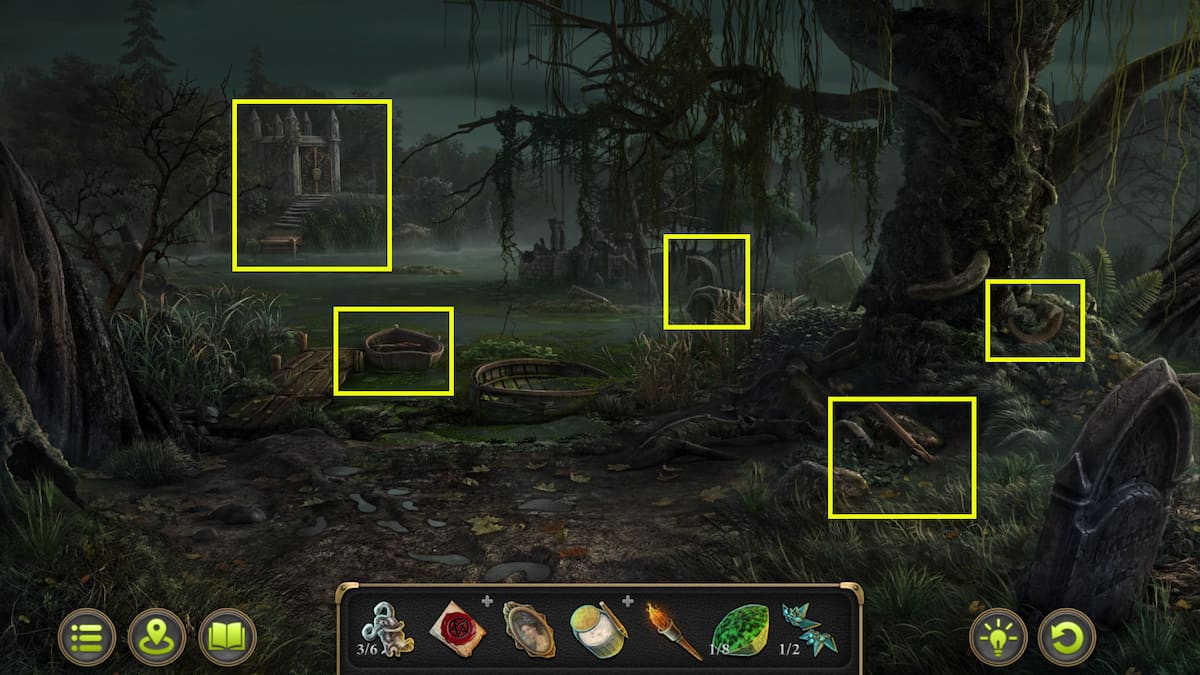
Now that you have done all you can do in the first part of the Cemetery, it's time to go deeper in. You will have several items you can interact with here, but some of them you will need other objects for that haven't been available to you yet. Here's the breakdown:
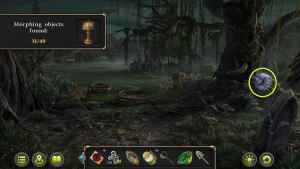
- All the way to the right, at the base of the tree, is a Morphing Object.
- Just below the morphing object and a little left is a shovel surrounded by snakes. In order to get the shovel, you need to scare away the snakes with the Burning Torch.
- In the middle of the scene, right under the branches of the tree, is a Chess Collectible.
- There is a Boat that you can use to take over to the Crypt. However, there is no oar. But you can pick up the Colander from the inside of the boat.


Head back to the Square in Lower City, and interact with the rose bushes to the left of the Theater door and the right of the doghouse. There are some Emeralds in the dirt; use the Colander and the Shovel to sift the gems from the dirt. Go to the Backyard of the Estate, and take the Oar from the workroom. Last, head to the Girl's Bedroom in the Estate, and use the Shovel on the disturbed dirt in the Potted Plant. This will get you the second Star Piece. Use the Glue to put the Star back together.
The Greenhouse Door puzzle solution
Now that you have the Star, you can open up the Greenhouse, which is located in the middle of the backyard in the Estate. Interact with the door, place the Star in the door, then solve the puzzle. You will need to rotate the vines so none overlap.
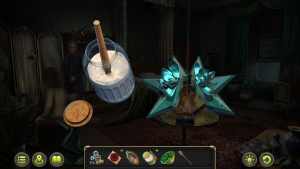
Inside the Greenhouse
There are a ton of different objects to interact with in the greenhouse, so I made a numbered list to help you through it. You'll need to find several objects and use them to pick up other objects.
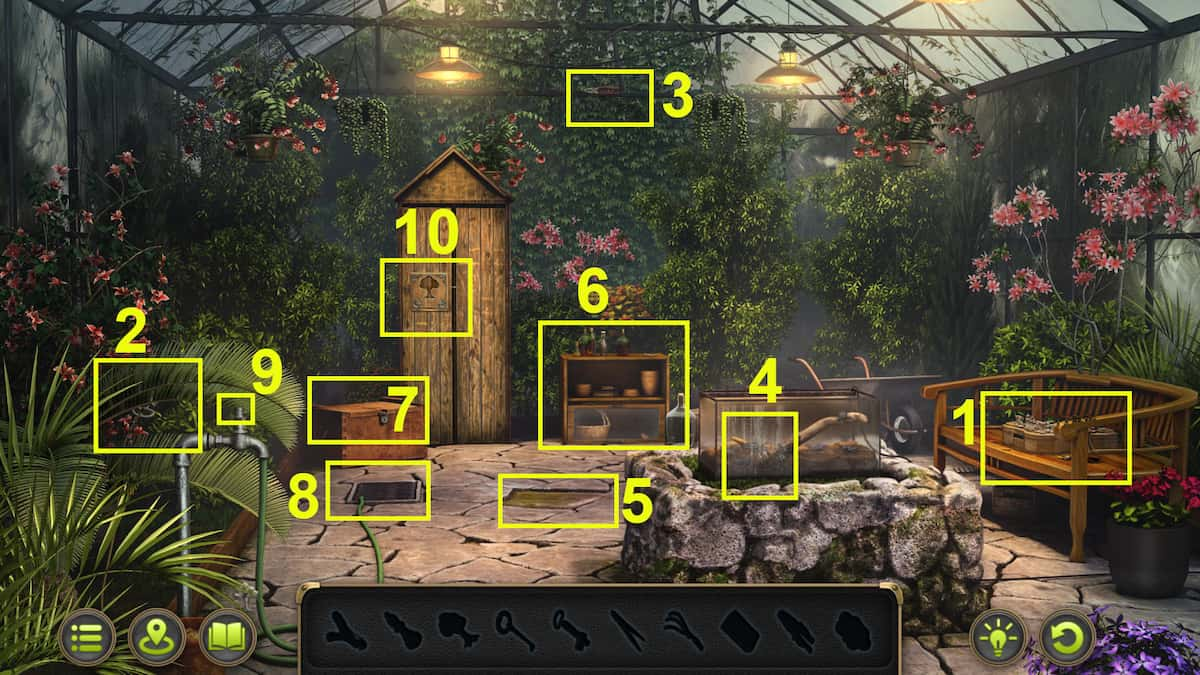
- 1 - Chess Set - There is a Slingshot sitting next to the chess set. Pick it up.
- 2 - Insecticide - Move the branches out of the way to get the insecticide.
- 3 - Use the Slingshot to knock down the Pilers.
- 4 - Use in Insecticide to kill off the bugs inside the glass tank. Once they are dead, you can pull the gardening Rake.
- 5 - Use the Rake to pry up the loose stone on the floor. This will give you Soap.
- 6 - Use the Soap on the sliding glass drawer that is stuck to get the Valve. Use the Nail on the top of this dresser and put it in the cork in the Glass Bottle with the Key in it. Use the Pliers to pull out the cork, then interact with the Glass Bottle to get the Key.
- 7 - Use the Key on the wooden box to get the Tweezers.
- 9 - Put the Valve on the faucet and turn it to fill up the grate (8).
- 8 - Use the Tweezers to grab the chess piece from inside the grate.
- 1 - Use the chess piece on the Chess Board. This will unlock the drawer in the side and give you the Silver Tree.
- 10 - Use the Silver Tree to unlock the big armoire. Complete the puzzle below to get the Machete.
How to complete the Greenhouse Tree puzzle
This one is pretty simple; you just need to line up the tree pieces to make a picture. This will give you the Machete to use in the Cemetery.
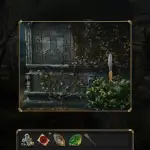
Return to the Cemetery
Head back the Cemetery and use the Machete you just got to cut down the thick vines. There will be a code as well as another Bas Relief (4/6). On this same screen, you can now use all the Emeralds you have collected on the Angel Statue to get yet another Bas Relief (5/6). Now move to the next screen in the Cemetery and put the Oar you picked up from the Estate in the Boat. You can now head over to the Crypt, but there is a puzzle waiting for you there.

How to solve the Crypt Door puzzle
If you still have the Bell in your inventory from the Secret Room in the Estate, you need to put that bell in the coat of arms over the fireplace in the Foyer of the Estate. This will highlight the answer for the Crypt Door Puzzle, like below. Interact with the base of each arm by clicking the bottom or middle jewel, and bend the arms by clicking the top jewel.
In the Crypt
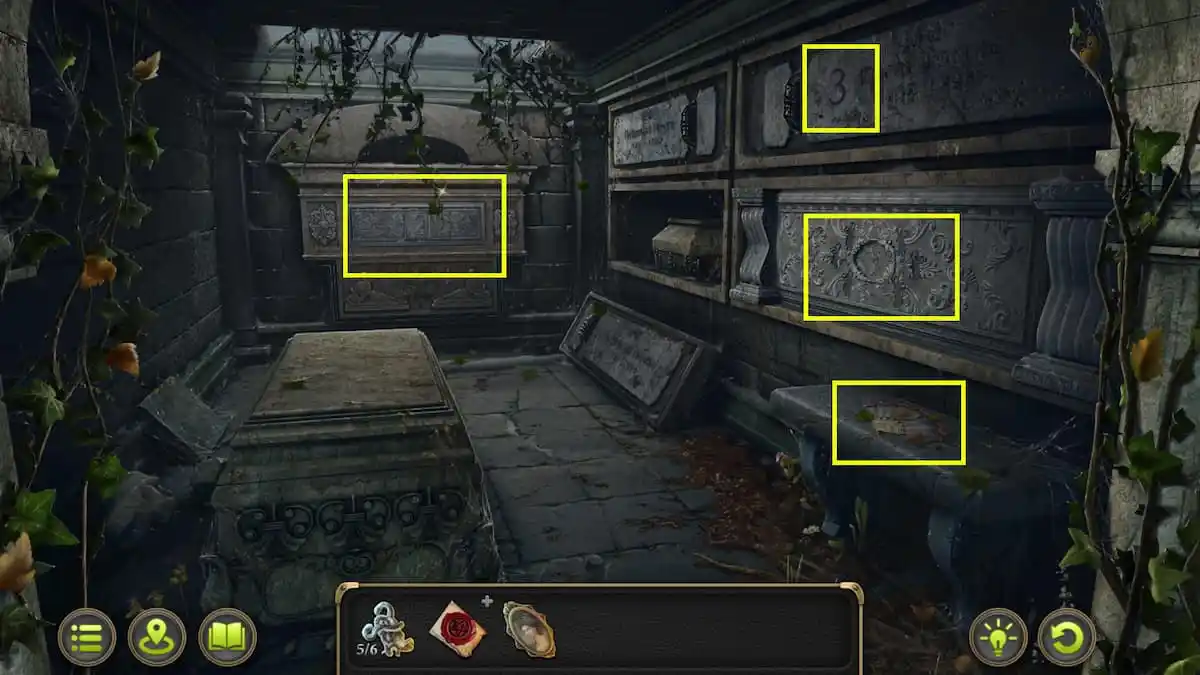
Once inside the Crypt, you'll have several things to interact with, including a Collectible, a Morphing Object, and a puzzle. Here are all the hotspots to look out for. First, click on the three in the upper right; it is a Morphing Object. Below it on the bench is a Fan Collectible; if you have been collecting them all, this should be the last Fan Collectible. It should also be the final Morphing Object. Next, you need to interact with the tomb at the back of the room. You can wait on the tomb to the right.
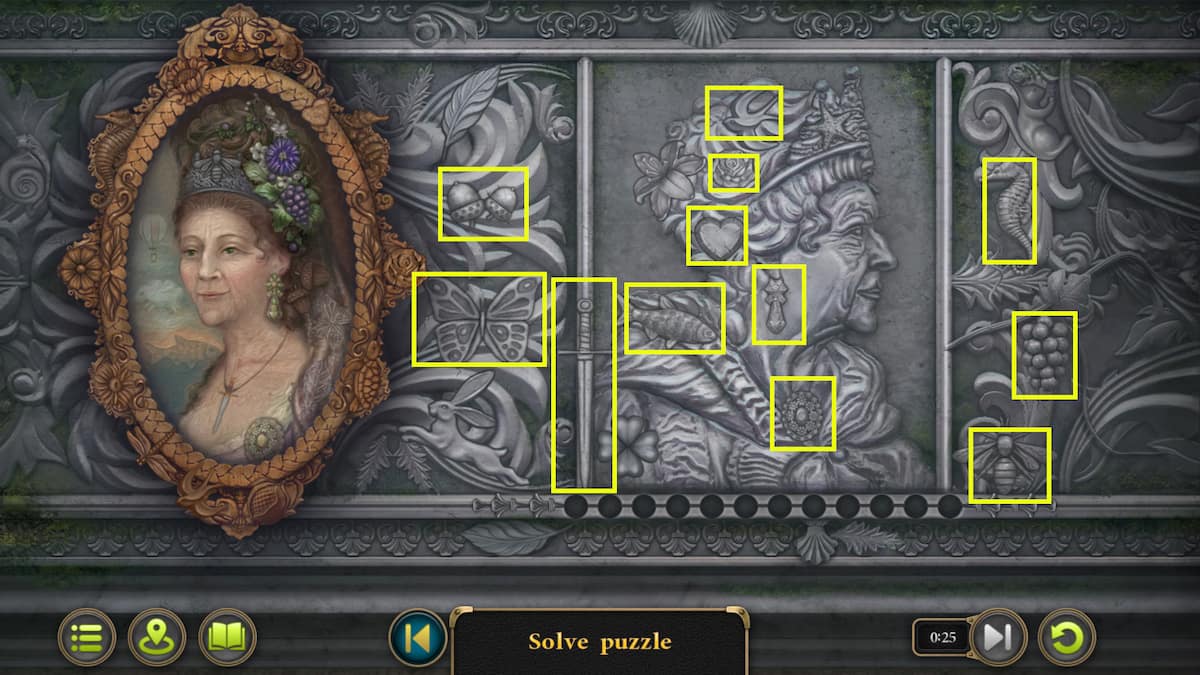
Tomb Portrait Puzzle
In order to get into the grandmother's tomb, you need to click on the tomb at the end of the room. Then, lay the Portrait of the Grandmother over the tomb. Click on all the objects that are in both the portrait and the carving on the tomb. The items are Acorns, Butterfly, Sword, Dove, Rose, Heart, Earring, Amulet, Seahorse, Grapes, and Bug. This will give you a Bas Relief (6/6).
Crypt Bas Relief Puzzle
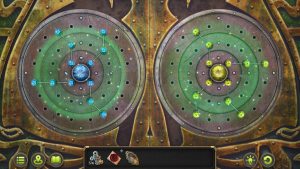
In order to solve this puzzle, you will need to have collected all six Bas Relief pieces and put them into the Bas Relief in the Crypt of the Cemetery. You will also need to have uncovered the code from the cemetery wall with the Machete from the Greenhouse. Here's how to solve it.
Once the tomb is opened, interact with the Scroll inside. After that, the game will prompt you to talk to both Shaw and Diana. This will finish up the Case with all the collectibles.
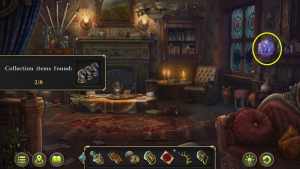
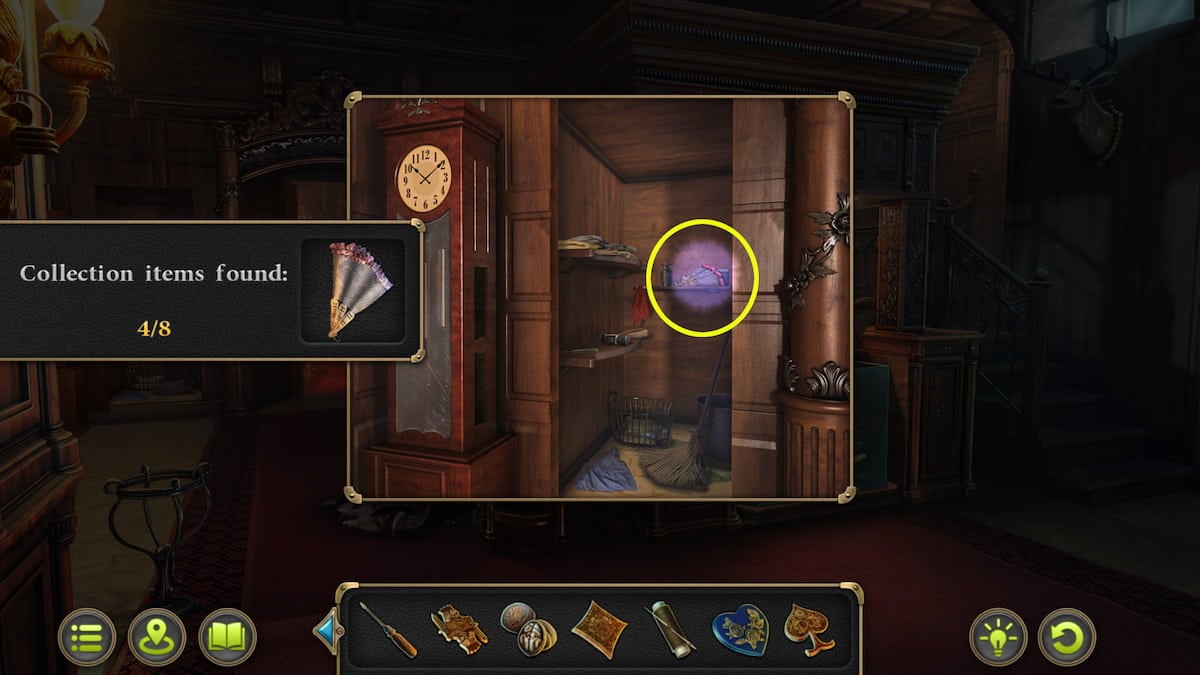
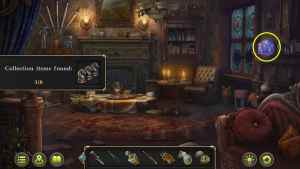
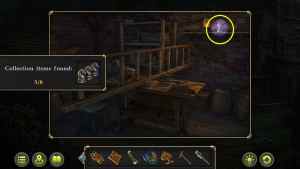
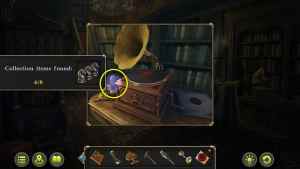
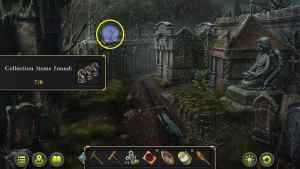
All collectibles and morphing objects in Case 2 of Mystery Detective Adventure
There are another set of 16 morphing objects to find in Case 2, along with eight Chess pieces and eight fans. They are scattered around the maps, and some of these are incredibly challenging to find. Here are all the locations of each.
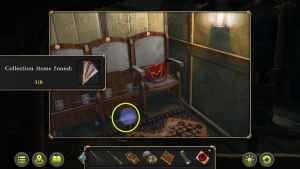
All Chess Collectibles in Case 2

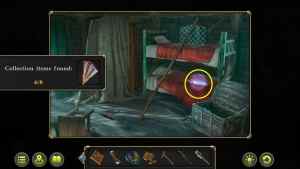
All Fan Collectibles in Case 2
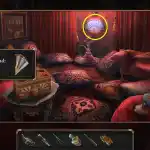


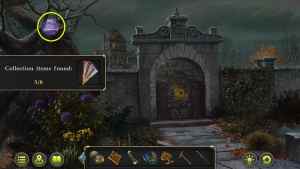
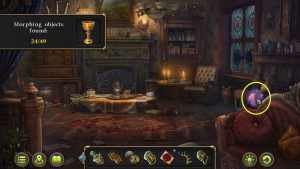
All Morphing Objects in Case 2


For more indie game 100% walkthrough guides, check out Botany Manor Walkthrough (All achievements) on Pro Game Guides.