Anime Squadron Tier List [UPD 4] – Best Update 4 Units

Check out our Update 4 Anime Squadron tier list with the latest units from Anime Squadron UPD 4.

Updated on September 5, 2026: Anime Squadron Update 4 is here! The update has introduced 8 new units: Michigo (Horn of Salvation), Jyn (Monkey King), Rakia (Ice Queen), Bambi (The Explode), Yumamoto (Commander), Yubacha (The Almighty), Kanpachi (Beast), and Yaruichi (Flash Goddess). I've testing them the whole day, so check out my UPD4 Anime Squadron Tier List to see how I rank them.

Recommended Videos

Anime Squadron Update 4 TL:DR:

  • S: Michigo (Horn of Salvation), Shadow (Atomic), Yubacha (The Almighty)
  • A: Yumamoto (Commander), Rakia (Ice Queen), Kanpachi (Beast), Jyn (Monkey King), Bambi (The Explode), Yaruichi (Flash Goddess)
  • Goju (Six Eyes): S → A because Update 4 adds several comparably high-ceiling carries that demand less team commitment.

Building the best Anime Squadron team takes more than simply collecting the rarest units. Attack speed, total deployment damage, upgrade costs, survivability, crowd control, buffs, debuffs, and passive scaling all play a role in determining whether a unit is truly meta or just looks strong on paper. Our Anime Squadron units tier list ranks every relevant final-form unit based on how much practical value it brings across the game’s most important modes.

Anime Squadron Units Tier List

S
Michigo (Horn of Salvation) game image

Michigo (Horn of Salvation)

DPSBossLeader
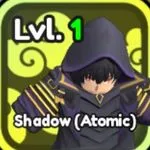
Shadow (Atomic) game image

Shadow (Atomic)

DPSSummonLeader
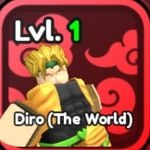
Diro (The World) game image

Diro (The World)

DPSControl
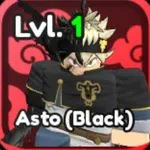
Asto (Black) game image

Asto (Black)

DPSControlBoss
Yubacha (The Almighty) game image

Yubacha (The Almighty)

TankDPSBoss
Sakuna (Curse) game image

Sakuna (Curse)

DPSExecute
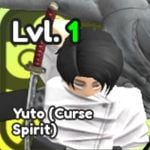
Yuto (Curse Spirit) game image

Yuto (Curse Spirit)

DPSSupportTank
Rizzuto (Six Path) game image

Rizzuto (Six Path)

DPSTankSupport
3B (YaRHa) game image

3B (YaRHa)

SupportDPS
Nazaka (Berserk) game image

Nazaka (Berserk)

SupportHealer
Tsanada (Hakage) game image

Tsanada (Hakage)

SupportHealerControl
Fastwagon game image

Fastwagon

Economy
A
Goju (Six Eyes) game image

Goju (Six Eyes)

DPSTank
Yumamoto (Commander) game image

Yumamoto (Commander)

DPSDoTBoss
Rakia (Ice Queen) game image

Rakia (Ice Queen)

DPSControlAoE
Kanpachi (Beast) game image

Kanpachi (Beast)

DPSBoss
Jyn (Monkey King) game image

Jyn (Monkey King)

DPSBoss
Bambi (The Explode) game image

Bambi (The Explode)

DPSAoEBoss
Yaruichi (Flash Goddess) game image

Yaruichi (Flash Goddess)

DPSBoss
Yomi (Darkness) game image

Yomi (Darkness)

DPSBoss
Potry (Licht) game image

Potry (Licht)

DPSBoss
Yano (Spirit Dive) game image

Yano (Spirit Dive)

TankDPS
Jotoro (Platinum) game image

Jotoro (Platinum)

DPSBoss
Madora (Six Path) game image

Madora (Six Path)

DPSDoTLeader
Mighty Guy (8th Gate) game image

Mighty Guy (8th Gate)

DPSControl
Rogna (Ice Dragon) game image

Rogna (Ice Dragon)

ControlSupport
Meto (One Eyed) game image

Meto (One Eyed)

SupportBoss
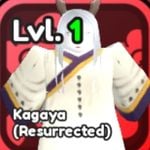
Kagaya (Resurrected) game image

Kagaya (Resurrected)

SupportDPS
Kashima (God of Lightning) game image

Kashima (God of Lightning)

TankSupportControl
Jaseph (Old) game image

Jaseph (Old)

SupportControl
Maaki (Soul Katana) game image

Maaki (Soul Katana)

TankSpeed
Avdal (Hell To You) game image

Avdal (Hell To You)

TankSupportDoT
Bralu (Legendary) game image

Bralu (Legendary)

DPSTankLeader
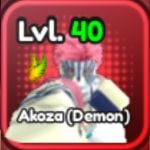
Akoza (Demon) game image

Akoza (Demon)

DPSBossTank
Kan (Ghoul) game image

Kan (Ghoul)

DPSDoTBoss
Gometa (Blue) game image

Gometa (Blue)

DPSBossLeader
Gometa (SSJ4) game image

Gometa (SSJ4)

DPSTankLeader
Saske (Susanoo) game image

Saske (Susanoo)

DPSDoTTank
Puppeteer (Transcendent) game image

Puppeteer (Transcendent)

TankDPS
Baras (Meteoric Burst) game image

Baras (Meteoric Burst)

DPSBoss
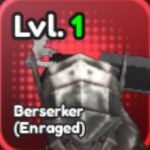
Berserker (Enraged) game image

Berserker (Enraged)

DPSDoTTank
Woo (Shadow) game image

Woo (Shadow)

DPSSpeedTank
B
Hokari (Jackpot) game image

Hokari (Jackpot)

EconomySpeed
Rangaku (Demon) game image

Rangaku (Demon)

DPSDoTAoE
Tanjaro (Sun Breathing) game image

Tanjaro (Sun Breathing)

DPSExecute
Freezer (Golden) game image

Freezer (Golden)

DPSControlSummon
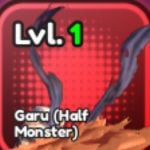
Garu (Half Monster) game image

Garu (Half Monster)

DPSTankSupport
Skeleton Knight (Resonance) game image

Skeleton Knight (Resonance)

TankSupport
Falcon (Dark) game image

Falcon (Dark)

EconomyDPSSupport
Shinks (Emperor) game image

Shinks (Emperor)

SupportControl
Beby (Super) game image

Beby (Super)

SupportTank
Vargil game image

Vargil

SupportControlDPS
Shanron (Omega) game image

Shanron (Omega)

ControlDPSTank
Rudaus game image

Rudaus

SupportControl
Kan (Investigator) game image

Kan (Investigator)

TankDPS
Karashi (Sharingan) game image

Karashi (Sharingan)

SpeedDPS
Android (Super) game image

Android (Super)

ControlDPS
Shield Hero game image

Shield Hero

TankSupport
Caska (Resilience) game image

Caska (Resilience)

DPSSupport
Dente game image

Dente

DPSDoT
C
Madora (Gunbai) game image

Madora (Gunbai)

DPSDoTLegacy
Rizzuto (Sage) game image

Rizzuto (Sage)

DPSSupportLegacy
Goki (SSJ4 Full Power) game image

Goki (SSJ4 Full Power)

DPSProgression
Vegata (SSJ4 Full Power) game image

Vegata (SSJ4 Full Power)

DPSProgression
Big Beard (Father) game image

Big Beard (Father)

TankDPS
Mamosa game image

Mamosa

HealerSupport
Zemitsu game image

Zemitsu

DPSSpeed
Ramuru game image

Ramuru

DPSTank
Zaro game image

Zaro

DPSDoT
Choi game image

Choi

DPSDoT
Igras game image

Igras

DPSTank
Shin game image

Shin

DPSDoT
Tranks game image

Tranks

DPS
D
Michigo game image

Michigo

DPS
Asto game image

Asto

Tank
Goki (Base) game image

Goki (Base)

DPSProgressionLegacy
Mab game image

Mab

DPS
Muffy game image

Muffy

Tank

How We Rank Anime Squadron Units for the Tier List?

Our Anime Squadron tier list looks at how useful each unit is across the game as a whole, not just how high its raw damage numbers can go in ideal conditions. We compare units based on their DPS, survivability, utility, crowd control, boss performance, farming value, team support, scaling, and consistency, while also considering how much setup they need to reach their full potential.

Units with strong self-scaling, cooldown reduction, damage amplification, healing, control, economy, or team-wide buffs naturally rank higher because they contribute more than simple damage. We also pay close attention to how reliably a unit performs against difficult enemies and Gimmicks, including Dodge, Regeneration, shields, debuffs, crowd control, and other mechanics that can completely change the value of a kit.

Placement also reflects investment and opportunity cost. A unit can have an incredible ceiling but rank lower if it needs a very specific team, long ramp-up time, multiple copies, expensive upgrades, or favorable stages to work properly. Conversely, flexible units that perform well immediately and fit into many different teams receive extra credit.

Finally, we reassess older units whenever new Anime Squadron updates introduce stronger alternatives, new synergies, or mechanics that change the meta.

RelatedAnime Squadron Discord, Trello & Wiki Links

Anime Squadron Units Tier List (Update 4)

The rankings below primarily consider realistic DPS, passive and ability uptime, placement potential, cost efficiency, support value, team synergy, and endgame performance. S-tier units are major pieces of the current meta, while A-tier characters remain excellent investments with more noticeable limitations. Units in the lower tiers can still work during progression or in specialized compositions, but they are generally outperformed by stronger alternatives.

S
Meta-defining units
Optimal-team pieces with elite output, amplification, sustain or economy.
UnitEvaluation
Michigo (Horn of Salvation)
S Tier
DPSBossLeader
Top Update 4 carry
  • Twin Zangetsu swaps every eight seconds between Heavy Blade (+50% DMG, +15% Cooldown) and Light Blade (-40% Cooldown, -20% DMG), so Michigo alternates naturally between burst and high-tempo windows.
  • Heavy Blade attacks ignore 100% Defense and deal +150% extra DMG to Overhealth, while Light Blade gains +40% Crit Chance, giving him answers to both armored bosses and general sustained combat.
  • True Shikai adds +50% Ultimate DMG per blade swap; the normal cap turns his 750% Ultimate into 1,250% DMG, and fully mastered Mastery Realization raises that ceiling to 1,500% DMG.
  • His Leader skill also grants +30% DMG to Peroxide units and +10% to Divine-element units. Best trait: Superior. Best use: DPS, Boss, Leader.
Shadow (Atomic)
Shadow (Atomic)
S Tier
DPSTankLeader
Top Update 3.75 carry
  • Seven Shadows summons one independent Shadow every 12 seconds, up to eight; each copy inherits 20% of Shadow’s DMG and HP, while every active summon gives the main unit +5% DMG and +2% Crit Chance.
  • At the eight-Shadow cap, Eminence alone supplies +40% DMG and +16% Crit Chance, while I Am Atomic consumes the army for a 940% DMG Ultimate before permanent Atomic Mastery scaling.
  • Atomic Mastery can permanently add up to +75% Ult DMG across runs, and his Leader skill grants +30% DMG to Protagonists plus +10% to Curse-element units, giving him elite personal scaling and account-wide value.
  • Best trait: Superior > Cloner. Best use: DPS, Tank, Leader.
Diro (The World)
Diro (The World)
S Tier
DPSControl
Top priority
  • Still one of the cleanest current carries: Deceleration cuts enemy attack/ability tempo while ten permanent Acceleration stacks halve both of Diro’s cooldowns.
  • Add Stolen Time’s +50% attack ceiling and self-heal, and he reaches roughly 3× basic throughput before abilities - without sacrificing team utility.
  • Best use: DPS, Control.
Asto (Black)
Asto (Black)
S Tier
DPSBossControl
Top anti-gimmick priority
  • Anti-Magic suppresses Regenerate, Confusion, Hexer, Summoner and Dodger on Asto’s target for eight seconds every 30 seconds, and the charge is held until he finds a target.
  • Relentless gains +2% DMG every second, then doubles the stored bonus during Anti-Magic before resetting; a normal 30-second ramp reaches +60% stored and turns into +120% for the burst window.
  • Demon-Slayer Sword adds another +60% DMG per suppressed Gimmick, up to +180%, giving Asto a huge ceiling against gimmick-heavy bosses while leaving him noticeably less explosive against clean targets.
  • Best trait: Superior > Cloner. Best use: DPS, Boss, Control.
Yubacha (The Almighty)
S Tier
TankDPSBoss
Top frontline priority
  • Magnetic Tank forces every enemy entering Yubacha’s Range to attack him and grants +5% Defense per attacker, capping at +40%, making him one of the cleanest dedicated lane anchors in the roster.
  • The Almighty adds damage equal to 20% of Yubacha’s max Health on every landed hit and ignores Defense, letting defensive investment directly increase his offense.
  • Every 20 seconds Shadow of the Crown makes him invulnerable for three seconds and gives +50% DMG while Magnetic Tank stays active, so he keeps enemy attention without exposing the rest of the squad.
  • Best trait: Superior; tank-focused alternatives are also valuable. Best use: Tank, DPS, Boss.
Sakuna (Curse)
Sakuna (Curse)
S Tier
DPSExecute
Top priority
  • At 20 Overwhelm, +100% damage and -60% cooldown work out to roughly 5× core DPS, and Dismantle executes normal enemies below 20%.
  • He needs nearby bodies to avoid direct targeting and refuses outside heals/buffs, but those buffs become Overwhelm, so a planned team ramps him frighteningly fast.
  • Best use: DPS, Execute.
Yuto (Curse Spirit)
Yuto (Curse Spirit)
S Tier
DPSSupportTank
Top priority
  • Copy Technique turns the strongest ally into Yuto’s damage stat, so every new top-end carry indirectly raises his ceiling; Update 4 makes that future-proof scaling even more valuable.
  • At ten allies its five-second window averages roughly 16.7–25% of that carry’s sustained DPS depending on live stacking order.
  • Delayed Onset also gives an 18-stud, five-second anti-death buffer, keeping Yuto relevant as both damage support and emergency protection.
  • Best use: DPS, Support, Tank.
Rizzuto (Six Path)
Rizzuto (Six Path)
S Tier
DPSTankSupport
Best first endgame build
  • The best all-round investment.
  • Sage Charges give Rizzuto +50% personal damage before the +30% Nature aura, clones gain +100% damage and join United Assault follow-ups, and the kit supplies healing, range and Defense.
  • No other unit combines meta damage, frontline stability and team support this cleanly.
3B (YaRHa)
3B (YaRHa)
S Tier
SupportDPS
Top support priority
  • A universal -30% Defense target is already endgame-worthy.
  • Weak Spot then turns that cap into +45% personal damage.
  • Because every percentage point stripped removes one second from every 3B ability timer (floor five seconds), multiple copies create one of the strongest debuff-and-ultimate loops in the game.
Nazaka (Berserk)
Nazaka (Berserk)
S Tier
SupportHealer
Top support priority
  • The safest general sustain slot: frequent debuff cleanse, fallback healing when there is nothing to cleanse, up to -20% enemy Accuracy, and a once-per-copy emergency heal plus Dodge buff.
  • Tsanada has flashier hybrid output, but Nazaka prevents more bad runs with less setup.
  • Best use: Support, Healer.
Tsanada (Hakage)
Tsanada (Hakage)
S Tier
SupportHealerControl
Top hybrid support priority
  • Before Hundred Healings, every third hit stuns.
  • During its 15-second window, every second hit stuns, abilities gain +50% damage, and attacks heal every ally in range for 15% of her damage.
  • Medical Jutsu also revives one ally per Tsanada with 20% HP and three seconds of immunity, giving her one of the most complete control/sustain packages in the roster.
  • Best trait: Superior > Cloner.
Fastwagon
Fastwagon
S Tier
Economy
Mandatory for progression
  • Zero DPS, yet still meta-defining: +20% Yen generation while alive, another +4% per upgrade, and 500 Yen on death accelerate every expensive carry.
  • Falcon and Hokari have higher-variance economy, but Fastwagon pays immediately and does not need kills, marks or intentional cycling.
  • Best use: Economy.
A
Excellent units
Endgame-worthy, but slower, narrower or outperformed in a direct role comparison.
UnitEvaluation
Goju (Six Eyes)
Goju (Six Eyes)
A Tier
DPSTank
Excellent high-ceiling boss carry
  • Full Curse can still build enormous Corruption by redirecting damage through nearby allies, while Red mode raises offense and Blue mode makes the health tax safer.
  • Hollow Purple remains a 700% front-line nuke, and a properly supported Goju still has an excellent boss ceiling.
  • Update 4 adds several carries that reach comparable or higher payoff with less team commitment, so Goju moves to A rather than remaining an automatic S-tier slot.
  • Best use: DPS, Tank, Boss.
Yumamoto (Commander)
A Tier
DPSDoTBoss
Elite long-fight Burn carry
  • Hellfire applied by Ability attacks deals 15% of Yumamoto’s DMG every second and never expires while he is alive, so durable bosses keep taking pressure without requiring repeated reapplication.
  • Kyokujitsujin increases that Burn by 0.5% per second up to +50%, eventually raising Hellfire to 22.5% of Yumamoto’s DMG per second.
  • Ennetsu Jigoku ignores 5% Defense for every second the target keeps Burning, capping at 50% Defense ignore after ten seconds; the selfish nature and long ramp keep him just below S overall.
  • Best trait: Superior. Best use: DPS, DoT, Boss.
Rakia (Ice Queen)
Rakia (Ice Queen)
A Tier
ControlDPSAoE
Elite freeze carry
  • Sode no Shirayuki Freezes every enemy hit by Rakia’s Ability for three seconds, completely stopping movement and attacks; affected enemies then gain a ten-second Freeze immunity.
  • Tsukishiro doubles Rakia’s own damage against Frozen targets on both normal attacks and her Ability, turning each control window into a real burst phase instead of pure utility.
  • Hakka no Togame cuts the next Ability cooldown by one second per Frozen enemy, up to -4 seconds, making her especially efficient on crowded waves; Freeze immunity and selfish amplification keep her below the universal S-tier pieces.
  • Best trait: Superior > Cloner. Best use: Control, DPS, AoE.
Kanpachi (Beast)
Kanpachi (Beast)
A Tier
DPSBoss
Elite boss specialist
  • Eyepatch suppresses Kanpachi to only 30% DMG until the same enemy survives against him for 30 seconds; once removed, he deals full damage for the rest of the stage, but changing targets resets the initial timer.
  • After the Eyepatch comes off, Battle Frenzy automatically prioritizes the highest-max-Health enemy in Range, making bosses and tanks his natural targets instead of allowing weaker enemies to waste his uptime.
  • Nozarashi then makes both attacks and Abilities ignore 35% Defense, and the effect explicitly stacks with other Defense-ignoring mechanics. The boss ceiling is excellent, but the 30-second single-target unlock is a serious general-stage drawback.
  • Best trait: Superior. Best use: DPS, Boss.
Jyn (Monkey King)
Jyn (Monkey King)
A Tier
DPSSupport
Excellent comp-scaling carry
  • Copy borrows 5% of the base DMG of up to five allies inside Jyn’s Range, automatically prioritizing the highest-DMG options when more than five are available.
  • Charyeok also takes 10% of each copied ally’s Crit Chance and Crit DMG, so Jyn scales directly with the quality of the units surrounding him instead of relying only on his own sheet stats.
  • Monkey King adds +7.5% DMG for every different Element represented among the copied allies, with dual-element units counting twice. His ceiling is enormous in optimized mixed-element teams, but the positioning and roster requirements make him less plug-and-play than S-tier carries.
  • Best trait: Superior. Best use: DPS, Support.
Bambi (The Explode)
Bambi (The Explode)
A Tier
DPSBossAoE
Excellent stored-burst DPS
  • Normal attacks plant permanent Bombs, up to ten per enemy, while Bambi’s Ability deals no direct damage and instead detonates every Bomb currently on the field.
  • Bombardment makes simultaneous Bombs amplify one another: at a full ten-stack, each Bomb deals 70.5% Ability DMG for a combined 705% Ability DMG burst on that target.
  • Every detonated Bomb also grants -2% Cooldown for five seconds, capping at -20%, so a full detonation accelerates the next stacking cycle. She is excellent when enemies live long enough to build Bombs, but less efficient in very fast clears.
  • Best trait: Superior. Best use: DPS, Boss, AoE.
Yaruichi (Flash Goddess)
A Tier
DPSSpeed
Excellent low-cost carry
  • At only 500¥, Yaruichi has outstanding deployment efficiency: every consecutive landed hit adds +3% DMG through Flash Combo, reaching +75% DMG after 25 hits.
  • At maximum Flash Combo, Shunko adds another +60% Crit DMG, giving her a very strong sustained-DPS ceiling for a Mythic unit.
  • The entire combo resets after five seconds without attacking, so target downtime, long walks or control effects punish her much harder than they punish the premium Secrets and Divines above her.
  • Best trait: Superior; Lethal is a strong crit-focused alternative. Best use: DPS, Speed.
Yomi (Darkness)
Yomi (Darkness)
A Tier
DPSBoss
Excellent delayed boss burst
  • Dark Cloak stores Yomi’s damage on one target for 12 seconds, then detonates for 150% of everything stored; if that target dies before the burst, the stored damage is lost.
  • Dimension Slash adds three percentage points to the burst multiplier for every 1% DMG Reduction Yomi gets from Defense, so 30% reduction turns the 150% burst into 240%.
  • Defense is read when the Cloak detonates, letting gear and timed Defense buffs raise his boss ceiling, but the 12-second delay makes him inefficient against weak waves and frequent target swaps.
  • Best trait: Superior > Cloner. Best use: DPS, Boss.
Potry (Licht)
Potry (Licht)
A Tier
DPSBoss
Excellent long-map carry
  • Light Magic ignores normal Range, locks onto the farthest valid enemy on Potry’s lane anywhere on the map and lets him keep firing from the back instead of walking into range.
  • Radiant Blade adds +0.3% DMG per stud to the target, capping at +50% at roughly 166 studs; the distance is recalculated every hit and the bonus also applies to his Ability.
  • His near-perfect attack uptime is excellent on long maps, but forced farthest-target selection and split-lane restrictions make him less universal than the S-tier carries.
  • Best trait: Superior > Cloner; Lethal is the cleaner non-premium DPS fallback. Best use: DPS, Boss.
Yano (Spirit Dive)
Yano (Spirit Dive)
A Tier
TankDPS
Excellent reactive frontliner
  • Wind Cloak gives 40% Dodge, and every successful dodge reflects the attack for 125% of Yano’s DMG; it also works against Ability hits.
  • Each reflected hit cuts his Ability CD by 0.5 seconds, stacking four times for -2 seconds with a hard two-second cooldown floor.
  • The offense and defense feed each other when Yano is actively tanking, but high-Accuracy enemies or stages that rarely target him shut down a large part of the engine.
  • Best trait: Superior; Rebirth or Cloner are excellent frontline alternatives. Best use: Tank, DPS.
Jotoro (Platinum)
Jotoro (Platinum)
A Tier
DPSBoss
Excellent, high investment
  • Crits reduce cooldown to -40%, after -30% every third hit doubles, and Buildup continuously adds Crit Chance on one target.
  • That is about 2.22× attack throughput before crit damage.
  • The catch is boss dependence and Platinum Soul’s brutal 6,000-kill grind to reach its permanent +40% Crit DMG cap.
Madora (Six Path)
Madora (Six Path)
A Tier
DPSDoTLeader
Excellent long-mode carry
  • Burn, meteors and 30% True Damage make Madora unusually good into armored waves.
  • Chakra Overflow gives -20% CD, +200% Burn and triple meteor frequency for 15 seconds.
  • Meteor Crash adds a 700% ultimate.
  • Newer carries beat his setup speed, but Shinobi/Curse leader buffs keep him highly relevant.
Mighty Guy (8th Gate)
A Tier
DPSControl
Excellent in long modes
  • Eight Gates produces -40% CD, +80% Ability DMG, 32% True Damage and a 50% follow-up on every hit.
  • Youthful Vigor can push total CD reduction to -65%.
  • That is enormous late throughput, but Gate ramp and the post-Gate-8 2% HP drain make him less consistent in short raids.
Rogna (Ice Dragon)
Rogna (Ice Dragon)
A Tier
ControlSupport
Excellent boss control
  • Freeze locks movement and attacks for ten hits, stores damage, and makes every hit deal +25%.
  • With five Rognas that becomes a 15-hit window plus +40% team Crit DMG, while all Rognas gain -50% CD and perfect Accuracy.
  • Rakia is now the stronger self-contained AoE Freeze carry, but Rogna keeps a distinct team-support niche through multi-copy Freeze scaling and Crit DMG amplification.
  • Best use: Control, Support.
Meto (One Eyed)
Meto (One Eyed)
A Tier
SupportBoss
Excellent boss debuffer
  • At 30 Analyzed, a boss takes +15% damage, loses 22.5% Defense and grants the team +15% Crit Chance.
  • Five Hunted stacks add 37.5% elemental-resistance penetration and +50% personal Meto damage.
  • Slow ramp and single-target focus keep this below 3B overall.
Kagaya (Resurrected)
A Tier
SupportDPS
Excellent, comp-dependent
  • At eight unique statuses and five elements, Kagaya personally reaches +80% damage, +40% ability damage, +25% Crit Chance and +50% Crit DMG.
  • The team receives a large fraction of all four.
  • Those numbers are S-tier, but dedicating the loadout to six statuses and five elements is a real opportunity cost.
Kashima (God of Lightning)
A Tier
TankSupportControl
Excellent when frontline
  • Ten incoming hits trigger a three-second area stun and 150% burst.
  • The following Conductor state gives +50% Defense and makes Kashima’s targets Electrified, causing all units to deal +20% damage.
  • Static Redirect adds up to 27% damage per hit.
  • He falls off when enemies refuse to target him.
Jaseph (Old)
Jaseph (Old)
A Tier
SupportControl
Excellent defensive support
  • Ten in-range kills permanently give every current and future ally +15% Accuracy and every enemy -15% Accuracy.
  • Hamon Conductor also strips one enemy’s Dodge completely for three seconds, then can grant an ally 50–75% Dodge.
  • Less raw amplification than 3B or Meto, but superb against evasive content.
Maaki (Soul Katana)
Maaki (Soul Katana)
A Tier
TankSpeed
Excellent specialist tank
  • Complete immunity to Stun, Freeze, Slow and every debuff makes Maaki one of the safest specialist frontliners on control-heavy endgame stages.
  • Death stacking can reach +100% movement and +50% Dodge for every Maaki; the ten-death ramp and low team offense keep her below S, but her defensive reliability now belongs in A.
  • Best trait: Superior; Rebirth or Cloner are excellent tank alternatives.
  • Best use: Tank, Speed.
Avdal (Hell To You)
Avdal (Hell To You)
A Tier
TankSupportDoT
Excellent in Burn teams
  • Burn heals Avdal instead of damaging him, he deals +35% to Burning targets, and every additional Burning enemy can protect a nearby ally with +15% Defense plus 20% damage redirection.
  • Update 4 gives Burn teams a major new partner in Yumamoto, whose persistent Hellfire makes Avdal’s condition easier to maintain during long fights.
  • Outstanding frontline compression in a Burn shell, but still merely good when the stage or team cannot keep Burn spread.
  • Best use: Tank, Support, DoT.
Bralu (Legendary)
Bralu (Legendary)
A Tier
DPSTankLeader
Excellent accessible carry
  • Thirty Rage gives +30% damage, +15% attack/ability speed and +30% Thorns.
  • The first attacker also takes +30% from Bralu.
  • Rage can be accelerated by damage taken, and the eventual CC/debuff immunity suits frontline play.
  • His +30% Antagonist/+10% Nature leader skill remains valuable despite newer carries.
Akoza (Demon)
Akoza (Demon)
A Tier
DPSBossTank
Excellent shield killer
  • Ten Battle Excitement stacks mean +100% damage and +50% attack speed (about 3× direct output) plus Poison, enemy damage reduction and a respawn.
  • Weak Point doubles Poison against shields, so Akoza still owns a clear raid niche even though Diro and Sakuna are better universal carries.
  • Best use: DPS, Boss, Tank.
Kan (Ghoul)
Kan (Ghoul)
A Tier
DPSDoTBoss
Excellent after ramp
  • Bleed Frenzy can reach -45% CD and +30% Bleed, Devour adds another +20% Bleed, and Sacrifice supplies +50% damage, or +100% with Cloner/Rebirth.
  • The ceiling is real, but shared Prey forces every Kan to tunnel one target and the ramp asks for Bleed kills plus intentional Kan deaths.
  • Best use: DPS, DoT, Boss.
Gometa (Blue)
Gometa (Blue)
A Tier
DPSBossLeader
Excellent boss/flying carry
  • Alternating Expose/Crit and Burn/Vulnerable attacks feed a shared same-target combo: healing at five, repeated abilities at ten, Dodge at 15 and more Burn capacity at 20.
  • Kill-based speed scaling is slow, but 500% Meteor Explosion and +30% Dragon/+10% Water leader buffs preserve endgame value.
  • Best use: DPS, Boss, Leader.
Gometa (SSJ4)
Gometa (SSJ4)
A Tier
DPSTankLeader
Excellent account investment
  • No longer the automatic best carry, but still one of the strongest account-wide investments: dependable self-scaling, endgame sustain and a +30% Protagonist/+10% Divine leader skill.
  • Newer ceilings are higher, yet Gometa remains easier to slot and more forgiving than many condition-heavy secrets.
  • Best use: DPS, Tank, Leader.
Saske (Susanoo)
Saske (Susanoo)
A Tier
DPSDoTTank
Excellent DoT specialist
  • Every fifth hit is a guaranteed, unavoidable Crit, and every Crit applies 80% Black Flames over four seconds while cutting regeneration by 75%.
  • Active allied Burn and Bleed can raise the DoT by another 40%, while War Armor adds +25% damage and ability damage after Upgrade 4.
  • Yumamoto makes the Burn half of that requirement easier to sustain in Update 4, giving Saske a small indirect meta boost even though newer carries have higher standalone ceilings.
  • Best use: DPS, DoT, Tank.
Puppeteer (Transcendent)
A Tier
TankDPS
Excellent pure frontliner
  • Reliable regen, a low-HP damage state, Confusion every fifth hit and kill-stacked Overhealth still make Puppeteer extremely hard to remove.
  • At 50% Overhealth, the one-use ultimate can trade it for a 75% damage burst.
  • Rizzuto now offers more total value, but Puppeteer is simpler and sturdier.
Baras (Meteoric Burst)
A Tier
DPSBoss
Excellent boss specialist
  • Permanent Crit Chance on the highest-HP Challenger plus every-second-hit Crit DMG and cooldown scaling gives Baras excellent single-target momentum.
  • His death hit applies +30% Crit DMG taken for all Baras, and self-revive behavior keeps pressure up.
  • Crowd clear and target switching are weaker.
Berserker (Enraged)
Berserker (Enraged)
A Tier
DPSDoTTank
Excellent low-HP carry
  • Every 1% missing HP adds 0.5% damage, so 70% missing means +35%, then -20% CD arrives below 30%.
  • Every attack also adds Bleed.
  • Refusal and temporary-HP recovery make the low-health plan playable.
  • Strong, but the risk and ramp are less rewarding than current S-tier engines.
Woo (Shadow)
Woo (Shadow)
A Tier
DPSSpeedTank
Excellent speed farmer
  • Fast movement, summons, short AoE cooldowns and four seconds of 50% Dodge after abilities keep Woo exceptional for repeat farming and evasive tanking.
  • His raw boss ceiling now trails the newer dedicated carries, which is the only reason this former meta staple sits in A.
  • Best use: DPS, Speed, Tank.
B
Good / situational
Strong specialists and progression keepers that need the right mode or shell.
UnitEvaluation
Hokari (Jackpot)
Hokari (Jackpot)
B Tier
EconomySpeed
Good gimmick economy
  • A successful 20-second Jackpot pays +300% kill Yen and instantly marks again.
  • five wins also push each Hokari’s death payout from 250 to 1,000 Yen before a possible 2× Gamble.
  • Strong in farm routes, but the HP penalty, death cycling and target timer are much less reliable than Fastwagon.
Rangaku (Demon)
Rangaku (Demon)
B Tier
DPSDoTAoE
Good Burn-team burst
  • Blaze stores damage until ten stacks, then explodes for 100% and spreads three Burns to nearby enemies with +30% Burn damage taken.
  • After four shared triggers, every second hit adds an extra Blaze.
  • Excellent AoE conversion in a Burn shell.
  • Mediocre before the chain starts.
Tanjaro (Sun Breathing)
B Tier
DPSExecute
Good with Nazaka
  • Below 50% enemy HP he gains +30% damage.
  • Below 25%, another +20% attack speed, while every fifth attack is True Damage plus Burn.
  • Nazaka in the loadout adds +15% speed and damage.
  • Solid finisher, but Sakuna executes earlier and scales much harder.
Freezer (Golden)
Freezer (Golden)
B Tier
DPSControlSummon
Good wave specialist
  • Normal enemies become up to four allied summons, four summons create a 200% Death Zone, and their deaths explode for 100% each.
  • The engine is excellent when fodder feeds it and can enable a self-revive.
  • It is unreliable on boss-only content or waves that deny kills.
Garu (Half Monster)
Garu (Half Monster)
B Tier
DPSTankSupport
Good status hybrid
  • Garu survives a lethal hit, converts Stuns into ally Defense and marks enemies for stronger, longer Corruption.
  • His ability gains +15% per status (or +20% while Marked) so diverse status teams unlock real burst.
  • The setup is heavier and payoff smaller than Kagaya or current boss supports.
Skeleton Knight (Resonance)
B Tier
TankSupport
Good carry protector
  • Linking a main carry into a shared effective HP plan and damage reduction remains valuable in punishing raids, and retaliation based on damage taken prevents a dead slot.
  • Rizzuto, Avdal and Yuto now preserve allies while contributing more offense or utility.
  • Best use: Tank, Support.
Falcon (Dark)
Falcon (Dark)
B Tier
EconomyDPSSupport
Good farm flex
  • All kill Yen rises 30%, Falcon kills pay another 50%, and normal enemies can be executed below 10–20%.
  • He also grants nearby debuff resistance.
  • Great when the lane produces kills.
  • Fastwagon is cheaper, automatic and currently the better dedicated economy slot.
Shinks (Emperor)
Shinks (Emperor)
B Tier
SupportControl
Good low-investment support
  • A simple aura cuts enemy damage by 15% and Dodge by 10%, improving team hit rate and survivability with almost no setup.
  • Cloner expands coverage.
  • 3B, Jaseph, Meto and newer support packages simply supply larger late-game swings.
Beby (Super)
Beby (Super)
B Tier
SupportTank
Good compact buffer
  • Five allies in range produce a straightforward +10% damage aura, with extra defensive relevance in Dragon-heavy teams.
  • Useful and easy to understand, but Kagaya’s optimized team buff and dedicated debuffers now outperform the one-slot gain.
  • Best use: Support, Tank.
Vargil
Vargil
B Tier
SupportControlDPS
Good boss flex
  • A stun paired with roughly 20% increased damage taken gives Vargil a useful boss window even without his partner.
  • Dente unlocks the stronger Devilish Combo package, but spending two roster slots makes the duo difficult to justify over modern supports.
  • Best use: Support, Control, DPS.
Shanron (Omega)
Shanron (Omega)
B Tier
ControlDPSTank
Good versatile flex
  • Multiple modes let Shanron cover damage, tanking and utility, with Ice slowing enemies and Wet enabling Spark damage.
  • Versatility keeps him usable, but none of his modes now matches a dedicated modern specialist.
  • Best use: Control, DPS, Tank.
Rudaus
Rudaus
B Tier
SupportControl
Good cheap cooldown support
  • A low-cost -5% Ability CD aura is universally helpful, while Rudaus himself gets -15%.
  • That remains useful when a roster lacks premium support, but it is multiplicative, small and ability-only, far below Diro, 3B or Rogna’s tempo swings.
  • Best use: Support, Control.
Kan (Investigator)
Kan (Investigator)
B Tier
TankDPS
Good alternate Kan form
  • Relentless Attack converts ability use into healing and up to 25% Overhealth.
  • At cap, Immovable Will adds +12.5% Dodge, +25% damage and doubles the heal to 10% per ability.
  • A legitimate defensive specialization, though evolving to Ghoul is better for damage.
Karashi (Sharingan)
Karashi (Sharingan)
B Tier
SpeedDPS
Good resource farmer
  • High movement and Battle Memory’s element-kill stacking make Karashi a practical fast-clear unit long after his raw DPS becomes ordinary.
  • Woo is the premium version, but Karashi is easier to obtain and still pays back investment through faster repeat farming.
  • Best use: Speed, DPS.
Android (Super)
Android (Super)
B Tier
ControlDPS
Good stun filler
  • Reliable crowd control and respectable midgame damage make Android a safe bridge into harder modes.
  • Rogna, Kashima and Tsanada provide stronger control packages with better damage, healing or amplification, so late investment has limited return.
  • Best use: Control, DPS.
Shield Hero
Shield Hero
B Tier
TankSupport
Good progression tank
  • Damage redirection and scaling durability still protect fragile carries through story and early raids.
  • Once Yubacha, Rizzuto, Puppeteer, Avdal, Maaki or Yano is built, Shield Hero’s low offensive contribution becomes hard to defend.
  • Best use: Tank, Support.
Caska (Resilience)
Caska (Resilience)
B Tier
DPSSupport
Good synergy pick
  • Landing the first hit can triple her damage, and Berserker or Falcon adds +40% against enemies above 60% HP.
  • She also supports that shell.
  • Strong opening pressure in the intended comp, but target ownership and two specific teammates make her inconsistent elsewhere.
Dente
Dente
B Tier
DPSDoT
Good only with Vargil
  • Burn pressure and the Vargil combo can still produce respectable boss damage.
  • Alone, Dente loses the direct comparison to Madora, Rangaku and Saske.
  • Together, the pair pays a two-slot tax that modern one-card engines do not.
C
Outclassed / legacy
Functional for progression, fusion paths or a narrow niche; poor long-term reroll targets.
UnitEvaluation
Madora (Gunbai)
Madora (Gunbai)
C Tier
DPSDoTLegacy
  • The original Burn/meteor kit still works, but Six Path directly upgrades the same plan with True Damage, stronger meteor scaling and a 700% ultimate.
  • Keep a spare only if account constraints prevent the final evolution.
  • Best use: DPS, DoT, Legacy.
Rizzuto (Sage)
Rizzuto (Sage)
C Tier
DPSSupportLegacy
  • Ten Nature Charges give +100% personal damage plus a +30% damage/+15% Defense team aura.
  • Those numbers remain useful in progression, but Six Path adds clones, healing, follow-ups and better support on top of the same charge identity.
  • Best use: DPS, Support, Legacy.
Goki (SSJ4 Full Power)
C Tier
DPSProgression
Build for Gometa
  • Below half HP, +25% damage and ability damage plus lifesteal give decent midgame staying power.
  • Full Power also seals enemy abilities.
  • Combat value is now modest, but the form is essential to the Gometa path, which makes the investment worthwhile.
Vegata (SSJ4 Full Power)
C Tier
DPSProgression
Build for Gometa
  • A serviceable midgame sub-DPS whose solo-position condition improves damage and Accuracy.
  • Goki is slightly better in combat, but Vegata’s main value is also progression: the fully awakened pair is required for Gometa.
  • Best use: DPS, Progression.
Big Beard (Father)
Big Beard (Father)
C Tier
TankDPS
  • Missing HP converts to up to +20% Defense, with an extra low-health stat bump and a large global ultimate in newer builds.
  • The unit is expensive, slow and overshadowed by tanks that also heal, buff, clone or redirect damage more effectively.
  • Best use: Tank, DPS.
Mamosa
Mamosa
C Tier
HealerSupport
  • Nearby allies regenerate 5% of Mamosa’s max HP each second, which is genuinely useful early.
  • Fixed aura healing cannot keep pace with endgame burst, cleansing, immunity or revival, so Nazaka and Tsanada replace her completely.
  • Best use: Healer, Support.
Zemitsu
Zemitsu
C Tier
DPSSpeed
  • Sleep Mode periodically gives +20% damage and -10% attack/ability cooldown for 15 seconds.
  • That is solid starter tempo, but the random 20–30 second trigger and low base ceiling make further investment poor.
  • Best use: DPS, Speed.
Ramuru
Ramuru
C Tier
DPSTank
  • Kills can convert absorbed HP into up to 100 extra damage, giving Ramuru a visible early progression loop.
  • The fixed cap is tiny next to percentage scaling, and stronger units deny the kills needed to ramp him.
  • Best use: DPS, Tank.
Zaro
Zaro
C Tier
DPSDoT
  • A 50% ability Bleed cuts regeneration by 75%, and a kill can reset the ability on a 25-second internal cooldown.
  • Useful against early regen enemies, but every serious Bleed unit scales faster and far higher.
  • Best use: DPS, DoT.
Choi
Choi
C Tier
DPSDoT
  • Fire allies can grant up to +50% damage and +100% Burn damage, while Choi’s ability applies a 30% Burn.
  • The ceiling needs ten nearby Fire allies and still loses badly to Rangaku/Madora Burn cores.
  • Best use: DPS, DoT.
Igras
Igras
C Tier
DPSTank
  • The first ability after entering combat deals double damage and heals 5% max HP.
  • Both effects help a cheap lane pusher, but neither scales into bosses or crowded endgame waves.
  • Best use: DPS, Tank.
Shin
Shin
C Tier
DPSDoT
  • Ability Burn starts at 30%, and ten casts add +100% Burn damage.
  • The ramp is too slow for the underlying Legendary stats, making Shin a temporary bridge rather than an endgame DoT investment.
  • Best use: DPS, DoT.
Tranks
Tranks
C Tier
DPS
  • Usable basic damage and a favorable early cost curve are the whole case.
  • No current scaling, control or team utility lets Tranks compete once evolved Mythics and Secrets enter the roster.
  • Best use: DPS.
D
Starter-only
Base forms and low-ceiling units that should not receive scarce resources.
UnitEvaluation
Michigo
Michigo
D Tier
DPS
  • Dropping below half HP grants only +15% damage and +20% speed.
  • The unit has to become fragile for a buff smaller than modern passives receive for free.
  • Best use: DPS.
Asto
Asto
D Tier
Tank
  • Taking 25% less ability damage is a narrow defensive perk on starter stats.
  • It neither protects allies nor creates meaningful output, so almost any proper tank is a strict upgrade.
  • Best use: Tank.
Goki (Base)
Goki (Base)
D Tier
DPSProgressionLegacy
  • Every third attack adds +50% Ability DMG, but the base card is not a current combat investment.
  • Its real value is as the first step toward SSJ4 Full Power and ultimately Gometa.
  • Best use: DPS, Progression, Legacy.
Mab
Mab
D Tier
DPS
  • Every third attack dealing +75% damage averages only +25% before misses and downtime.
  • No AoE, scaling or utility rescues the Rare-stat foundation.
  • Best use: DPS.
Muffy
Muffy
D Tier
Tank
  • A flat 20% Dodge occasionally stalls an early lane, but Muffy cannot convert survival into damage, support or economy.
  • Replace immediately when a real frontline unit appears.
  • Best use: Tank.

Best Anime Squadron Team Comps for Update 4

Once you have a few S-tier units, the goal is to build a squad that covers damage, debuffs, survivability, and economy at the same time rather than stacking carries. Here is a flexible endgame template built around the strongest units and the synergies in this list:

Team CompsWhy It Works
Best Overall Team
Balanced Update 4 endgame team for progression, raids and mixed mechanics.
Best Overall
Michigo (Horn of Salvation)
DPSBossLeader
Shadow (Atomic)
Shadow (Atomic)
DPSSummonLeader
Yubacha (The Almighty)
TankDPSBoss
3B (YaRHa)
3B (YaRHa)
SupportDPS
Tsanada (Hakage)
Tsanada (Hakage)
SupportHealerControl
Fastwagon
Fastwagon
Economy
  • Michigo and Shadow give you two top-end carry engines without asking the rest of the team to be pure damage slots: Michigo alternates between Defense-ignoring Heavy Blade pressure and fast Crit-heavy Light Blade, while Shadow builds eight autonomous summons and a huge Atomic finisher.
  • Yubacha is the frontline glue. Magnetic Tank forces nearby enemies onto him, scales his Defense as they pile in, and The Almighty adds max-HP-based damage that ignores Defense; 3B then strips Defense for everyone else.
  • Tsanada covers healing, stuns and a revive while Fastwagon accelerates the expensive Secret-heavy setup. Use whichever leader skill better matches the tags/elements on your equipped version of the team rather than forcing a leader that buffs only part of the squad.
Boss & Gimmick Breaker
Heavy single-target pressure for long bosses, Overhealth and Gimmick-heavy raids.
Boss / Raid
Asto (Black)
Asto (Black)
DPSBossControl
Michigo (Horn of Salvation)
DPSBossLeader
Kanpachi (Beast)
Kanpachi (Beast)
DPSBoss
Yumamoto (Commander)
DPSDoTBoss
3B (YaRHa)
3B (YaRHa)
SupportDPS
Yubacha (The Almighty)
TankDPSBoss
Flex
Tsanada (Hakage)
Tsanada (Hakage)
SupportHealerControl
Swap Tsanada in for Kanpachi on shorter fights, or for 3B when survival and a revive matter more than maximum damage amplification.
  • Asto remains the cleanest answer to Regenerate, Dodger, Summoner and other Gimmicks, creating an eight-second window where the boss loses its defensive tricks and Asto gets his own enormous Anti-Magic burst.
  • Update 4 adds three excellent long-target punishers around him: Kanpachi becomes a full-power highest-HP hunter after keeping one enemy alive for 30 seconds, Yumamoto ramps permanent Hellfire and up to 50% personal Defense ignore, and Michigo can completely ignore Defense in Heavy Blade while dealing extra damage to Overhealth.
  • Yubacha keeps the boss and adds under control while 3B supplies universal Defense pressure and extra damage. This is intentionally aggressive; if the encounter is killing the team before the damage engines mature, trade one carry for Tsanada.
Update 4 Peroxide Core
A Michigo-led shell built around the new Update 4 roster and its complementary roles.
Update 4 Core
Michigo (Horn of Salvation)
DPSBossLeader
Yubacha (The Almighty)
TankDPSBoss
Yumamoto (Commander)
DPSDoTBoss
Rakia (Ice Queen)
Rakia (Ice Queen)
DPSControlAoE
Bambi (The Explode)
Bambi (The Explode)
DPSAoEBoss
Yaruichi (Flash Goddess)
DPSBoss
Flex
Tsanada (Hakage)
Tsanada (Hakage)
SupportHealerControl
For punishing stages, replace Bambi or Yaruichi with Tsanada to add healing, repeated stuns and a revive without breaking the core Michigo/Yubacha/Yumamoto plan.
  • Michigo is the natural centerpiece because his leader skill grants +30% DMG to Peroxide units, letting the Update 4 core gain team-wide value before his own Heavy/Light Blade cycle and 750%–1,500% Ultimate scaling are even considered.
  • Yubacha supplies the tank, Rakia supplies three-second AoE Freeze and doubles her own damage into Frozen targets, and Yaruichi gives the comp a very cheap 500¥ carry that can ramp to +75% DMG and +60% Crit DMG while she keeps attacking.
  • Yumamoto is the long-fight Burn engine and Bambi supplies stored AoE burst: ten Bombs can detonate for 705% Ability DMG on one target while also giving her the full -20% Cooldown buff. The result covers frontline, control, sustained boss damage and burst without relying on older units.
Infinite / Long-Fight Scaling Team
Built for stages where 30–140 second ramps, permanent stacks and mastery mechanics have time to pay off.
Infinite
Shadow (Atomic)
Shadow (Atomic)
DPSSummonLeader
Michigo (Horn of Salvation)
DPSBossLeader
Yumamoto (Commander)
DPSDoTBoss
Kanpachi (Beast)
Kanpachi (Beast)
DPSBoss
Diro (The World)
Diro (The World)
DPSControl
Rizzuto (Six Path)
Rizzuto (Six Path)
DPSTankSupport
  • Almost every slot improves with time. Shadow reaches eight Shadows after sustained play for +40% DMG and +16% Crit Chance before consuming them for up to a 940% I Am Atomic, while qualifying Ult casts permanently build Atomic Mastery between games.
  • Michigo needs long windows too: his eight-second blade swaps charge True Shikai, and a fully mastered 15-swap cycle can raise the 750% Ultimate to 1,500%. Yumamoto reaches 50% Defense ignore after ten seconds of Burn and eventually ramps Hellfire to 22.5% of his DMG every second.
  • Kanpachi wants a target that survives 30 seconds so the Eyepatch comes off permanently, Diro keeps stacking his permanent Acceleration engine, and Rizzuto gives this greedy scaling lineup the healing/frontline support it needs to survive long enough to reach those ceilings.
Jyn Rainbow Copy Team
High-ceiling Copy setup that feeds Jyn five strong allies while chasing as many different Elements as possible.
Jyn / Rainbow
Jyn (Monkey King)
Jyn (Monkey King)
DPSBoss
Michigo (Horn of Salvation)
DPSBossLeader
Shadow (Atomic)
Shadow (Atomic)
DPSSummonLeader
Yumamoto (Commander)
DPSDoTBoss
Rakia (Ice Queen)
Rakia (Ice Queen)
DPSControlAoE
Yubacha (The Almighty)
TankDPSBoss
  • Jyn can copy up to five allies in his Range, taking 5% of each ally’s base DMG plus 10% of their Crit Chance and Crit DMG. With a six-unit team, the goal is to surround him with five genuinely strong stat donors rather than wasting Copy slots on low-damage utility pieces.
  • Monkey King then adds +7.5% DMG for every different Element represented among those copied allies, with dual-element units counting twice. This lineup is a strong template because all five partners are endgame-capable on their own instead of existing only to feed Jyn.
  • Keep Jyn physically in range of all five allies and prioritize elemental variety. If two of your copies overlap too heavily in Element, swap one for another high-base-DMG carry of a different Element; Yubacha stays especially useful because the Copy shell otherwise has very little frontline protection.

If you are still early, a reliable starter squad leans on Zemitsu for damage, Fastwagon and Falcon for economy, and Mamosa and Rudaus for healing and cooldown reduction until your higher-tier pulls arrive.

Anime Squadron Tier List FAQ

Who is the best unit in Anime Squadron?

Michigo (Horn of Salvation), Shadow (Atomic), and Yubacha (The Almighty) are our strongest overall units in the current Update 4 meta. Michigo combines huge damage, full Defense ignore in Heavy Blade, a powerful Ultimate, and an excellent Peroxide leader buff. Shadow brings summons, permanent Ultimate scaling, and a +30% Protagonist leader buff, while Yubacha is arguably the best frontline hybrid thanks to his taunt, Defense scaling, invulnerability, and max-HP-based Defense-ignoring damage.

Are the new Anime Squadron Update 4 units good?

Yes. Update 4 added several endgame-worthy units. Michigo (Horn of Salvation) and Yubacha (The Almighty) are S-tier standouts, while Yumamoto (Commander), Rakia (Ice Queen), Kanpachi (Beast), Jyn (Monkey King), Bambi (The Explode), and Yaruichi (Flash Goddess) all earn places in A tier. They fill different niches, including boss damage, Burn scaling, Freeze control, tanking, team-copy scaling, burst damage, and Crit-focused DPS.

Is this Anime Squadron tier list updated for Update 4?

Yes. This tier list has been fully reassessed for Update 4. It includes all eight Update 4 units (Michigo (Horn of Salvation), Yubacha (The Almighty), Yumamoto (Commander), Rakia (Ice Queen), Kanpachi (Beast), Jyn (Monkey King), Bambi (The Explode), and Yaruichi (Flash Goddess)) as well as Shadow (Atomic), who was introduced in Update 3.75. Older units were also reranked, as the new additions changed their relative value.

What is the best team in Anime Squadron Update 4?

Our best all-around Update 4 team is Michigo (Horn of Salvation), Shadow (Atomic), Yubacha (The Almighty), 3B (YaRHa), Tsanada (Hakage), and Fastwagon. Michigo and Shadow provide elite scaling damage and strong leader value, Yubacha anchors the frontline, 3B shreds enemy Defense, Tsanada covers healing, stuns, and revival, and Fastwagon accelerates the entire build with extra Yen. Bosses and specialized stages may favor swaps such as Asto (Black), Yumamoto, or Kanpachi.

Is Fastwagon still worth using in Anime Squadron Update 4?

Yes. Fastwagon remains the most reliable dedicated economy unit in Anime Squadron because his Yen generation does not depend on kills, marks, or complicated setup. Update 4 introduced several expensive Secrets and high-investment carries, which makes getting your strongest units online earlier even more valuable. He remains an S-tier progression and economy pick despite contributing no direct damage.


Now that you have gone through our tier list, you are ready to build a dream squad and climb the leaderboard. Grab some extra rerolls and freebies from our Anime Squadron Codes page, plan your upgrades with the Anime Squadron Perks Guide, and bookmark our Anime Squadron Discord, Trello & Wiki Links to catch new drops first. Looking for something different to play next? Take a look at our Wizard Alchemy Beginner’s Guide.


Recommended Articles
Get Roblox codes and news as soon as we add it by following our PGG Roblox Twitter account!

About the Authors

Nikola Savic

Senior Staff Writer

Nikola is a Senior Staff Writer at Pro Game Guides with over 14 years of experience in gaming and esports journalism. A former editor-in-chief of the Serbian gaming publication Play!Zine and the RUR Esports portal, he has covered games professionally since 2012 across both Serbian and international media (senior editor at GINX Esports and GosuNoob). At PGG, he focuses on Roblox guides and tier lists, with particular depth in anime-inspired action RPGs and horror experiences like Paradox. Having been gaming since the early ’90s, he is a longtime PC gamer, and he brings an RPG and strategy game mindset to evaluating builds, meta picks, and game mechanics.

Topics covered: Roblox, RPG, Horror, Strategy, Arc Raiders

Find Nikola Savic on: Twitter

Luka Ilic

Roblox Writer

Luka Ilic is a Roblox writer at Pro Game Guides specialising in deep guides for some of the platform's most complex titles. His favorite beat is Sailor Piece, where he has written guides for secret race questlines, raids, item farming locations, and more. Beyond Sailor Piece, he covers a wide range of Roblox genres, from horror experiences like The Morgue Shift to roguelikes like An Average Campaign, where his background as a dedicated roguelike player translates directly into understanding the build and progression systems he writes about. Zombie survival, fashion games, anime RPGs, and tower defense all fall within his beat. He has been gaming since he was four years old, which at this point is less a fun fact and more an explanation for why he takes Roblox raid guides this seriously.

Topics covered: Roblox guides, Sailor Piece, Roblox horror games, Roblox anime, gacha

Forgot password
Enter the email address you used when you joined and we'll send you instructions to reset your password.
If you used Apple or Google to create your account, this process will create a password for your existing account.
This site is protected by reCAPTCHA and the Google Privacy Policy and Terms of Service apply.
Reset password instructions sent. If you have an account with us, you will receive an email within a few minutes.
Something went wrong. Try again or contact support if the problem persists.