


Be The Final Boss Update 2 introduced a brand-new armor system that further expands the game's strategic depth. While armor pieces may seem fairly simple at first glance, choosing which one to use involves more decision-making than you might expect. That's exactly why I created this Be The Final Boss Armor Tier List, to help you understand which armor pieces are worth prioritizing and why.
Best Be The Final Boss Armor Tier List
⇓ BEST ARMOR ⇓

Void Knight

Royal Paladin

Hellfire Mantle

Jugggernaut

Void Knight

Royal Paladin

Hellfire Mantle

Jugggernaut

Void Knight

Royal Paladin

Hellfire Mantle

Jugggernaut
⇓ VERY GOOD ARMOR ⇓

Emerald Mantle

Amethyst Gladiator

Emerald Mantle

Amethyst Gladiator

Emerald Mantle

Amethyst Gladiator
⇓ DECENT ARMOR ⇓

Obsidian Plate

Golden Bastion

Obsidian Plate

Golden Bastion

Golden Bastion

Obsidian Plate
⇓ MID ARMOR ⇓

Crimson Vanguard

Crimson Vanguard

Crimson Vanguard
These rankings evaluate each Be The Final Boss armor piece within its respective slot (head, guard, or body piece), taking into account its individual combat value and overall usefulness throughout progression. Since each armor piece grants its passive independently, completing a three-piece set is significantly more valuable than it might seem at first glance. Be sure to keep all of these factors in mind when evaluating each armor piece in Be The Final Boss.
As always, keep in mind that the evaluations below are based on my personal experience with the game and may not reflect your own opinions or those of other players. It is perfectly normal to disagree, and I am by no means the ultimate authority on the subject. As I continue playing, I will learn more about the value of each armor set and will likely expand and revise this tier list over time. For now, though, you can find my complete Be The Final Boss Armor Tier List below.
Helm Tier List
| Armor | Evaluation |
|---|---|
| S Tier — Best-in-slot The strongest helms for endgame combat and high-value set building. | |
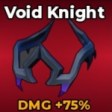 Void Knight Helm S Tier Secret Helm DMG+75% HP— Cost / Source1,400 Stones Passive TypeSustain Passive — Void Drain: Each swing heals for 12% of damage dealt, up to 2% max HP per swing. | The best offensive helm in the game. +75% DMG is already cracked, and the lifesteal passive makes every aggressive build much safer. This piece gets even nastier in a full Void Knight setup, since each matching armor piece appears to add its own heal effect. The only real downside is price. 1,400 Forge Stones is a serious grind, so this is an endgame target, not a casual pickup. |
 Hellfire Mantle Helm S Tier Secret Helm DMG+70% HP— Cost / SourceBattle Pass Passive TypeAoE Burst Passive — Hellfire Nova: Every fourth combo hit unleashes a 12-stud fire nova, dealing 30% weapon damage to nearby heroes. | One of the cleanest pure-DPS helms around. The huge DMG boost plus fire nova gives it real wave-clear value instead of just bigger numbers on paper. If the passive stacks per piece, full Hellfire sets can turn every fourth combo into a mini fireworks show. It shines most on melee combo builds. If your playstyle is more cautious or boss-poking than brawling, Void Knight is usually the safer top-end choice. |
 Juggernaut Helm S Tier Mythic Helm DMG+65% HP— Cost / Source599 Robux Full Set Passive TypeBurst / CC Passive — Crushing Finale: The fourth combo hit deals +25% damage and launches heroes 50% farther. | Great raw helm stats, plus a passive that adds both extra burst and space-making utility. It hits hard and makes room at the same time. This is one of the best helms for aggressive combo chains and boss bullying, especially when you want offense without going full glass cannon. The knockback can occasionally be a little troll, since launching enemies away is not always what you want when trying to finish them quickly. |
| A Tier — Excellent Strong helms that stay relevant and are easy to recommend. | |
 Royal Paladin Helm A Tier Mythic Helm DMG+50% HP— Cost / Source700 Stones Passive TypeClutch Survival Passive — Last Stand: The first time each battle you drop to 30% HP, restore 25% max HP. | Great “I refuse to die yet” armor. The DMG is still solid, and the emergency heal is one of the most reliable clutch passives in the game. It gets better the more Royal pieces you add, since extra Last Stand triggers can make your health bar feel like it has sequels. It is safer than it is explosive. If you want maximum offensive pressure from the helm slot, the S-tier damage helms still pull ahead. |
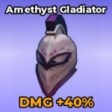 Amethyst Gladiator Helm A Tier Epic Helm DMG+40% HP— Cost / Source180 Stones Passive TypeAttack Speed Passive — Gladiator Tempo: Gain an additional +10% attack speed. | This is the best value damage helm before you step into the really expensive endgame pieces. +40% DMG and free attack speed is just good clean business. The passive is always useful, which makes it one of the least awkward pieces to slot into mixed builds. It lacks the insane ceiling of Void Knight or Hellfire, so it feels more “great all-rounder” than true top-dog. |
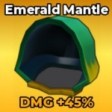 Emerald Mantle Helm A Tier Legendary Helm DMG+45% HP— Cost / Source350 Stones Passive TypeOn-Kill Heal Passive — Verdant Recovery: Killing a hero restores 1% max HP, up to once every 0.75 seconds. | A very strong progression helm. Good DMG, good sustain, and a passive that feels fantastic in wave-heavy stages where kills are constant. It is one of the best pieces for players who want survivability without giving up offensive tempo. The heal depends on getting kills, so it loses a bit of shine in slower boss-only situations compared with Void Knight or Royal Paladin. |
| B Tier — Good but narrower Useful pieces, but usually more specialized or outscaled later. | |
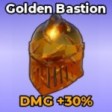 Golden Bastion Helm B Tier Epic Helm DMG+30% HP— Cost / Source120 Stones Passive TypeFarming Passive — Golden Harvest: Gain +20% coin from battle rewards. | One of the best farm-oriented helms in the game. The coin bonus makes it genuinely useful for account progression, not just meme economy setups. For its cost, +30% DMG is still respectable, so it is not dead weight while you grind. Once you are pushing hard content, this starts losing out to pieces that provide stronger combat passives instead of just extra wallet thickness. |
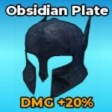 Obsidian Plate Helm B Tier Rare Helm DMG+20% HP— Cost / SourceBattle Pass Passive TypeDamage Reduction Passive — Obsidian Guard: Reduce incoming damage by 8%. | The passive is good straight away and stays useful all game. Flat survivability is never glamorous, but it always clocks in for work. This helm plays very nicely in mixed defensive builds, especially if you are still gearing up and want something steady. For the helm slot specifically, the raw DMG is just a bit too modest to hang with the better offensive pieces long-term. |
| C Tier — Early filler Cheap and usable, but quickly replaced. | |
 Crimson Vanguard Helm C Tier Uncommon Helm DMG+10% HP— Cost / Source30 Stones Passive TypeExecute Window Passive — Bloodied Fury: When Boss HP is at or below 50%, gain +15% attack. | Dirt-cheap and perfectly fine for the first stretch of progression. It is a beginner helm, and it knows it. The passive can help finish bosses faster, which is at least a real niche and not just empty flavor text. The stats are tiny, and the passive only matters once the boss is already halfway dead. You will outgrow this one pretty fast. |
Body Tier List
| Armor | Evaluation |
|---|---|
| S Tier — Best-in-slot The strongest body pieces for staying alive without losing real pressure. | |
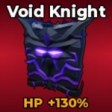 Void Knight Body S Tier Secret Body DMG— HP+130% Cost / Source2,000 Stones Passive TypeSustain Passive — Void Drain: Each swing heals for 12% of damage dealt, up to 2% max HP per swing. | This body piece is absurd. +130% HP is already elite, and lifesteal on top turns your boss into a bruiser that just keeps clocking back in. If you only craft one true endgame body piece, this is the one with the cleanest mix of raw stats, survivability, and scaling. It is brutally expensive, so the main challenge is not whether it is good. It is whether your Forge Stone stash survives the trip. |
 Hellfire Mantle Body S Tier Secret Body DMG— HP+120% Cost / SourceBattle Pass Passive TypeAoE Burst Passive — Hellfire Nova: Every fourth combo hit unleashes a 12-stud fire nova, dealing 30% weapon damage to nearby heroes. | Huge HP plus an offensive passive is exactly what you want from a body slot. It makes you tankier without turning the slot into dead utility. This is one of the best body pieces for aggressive melee clears, especially in crowded stages where the nova actually gets to farm value. It is less fail-safe than Void Knight or Royal Paladin when things go wrong, so it rewards active fighting more than sloppy recoveries. |
 Royal Paladin Body S Tier Mythic Body DMG— HP+100% Cost / Source1,000 Stones Passive TypeClutch Survival Passive — Last Stand: The first time each battle you drop to 30% HP, restore 25% max HP. | The body slot is where Royal Paladin really feels right at home. Big HP and an emergency heal is a very comfy combo for hard pushes. This is one of the most forgiving pieces in the whole armor system and an excellent anchor for mixed survivability builds. It is more safety-first than damage-first, so it is incredible for consistency but not the highest ceiling for fast clears. |
| A Tier — Excellent Strong body pieces that are absolutely worth using. | |
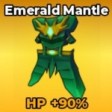 Emerald Mantle Body A Tier Legendary Body DMG— HP+90% Cost / Source500 Stones Passive TypeOn-Kill Heal Passive — Verdant Recovery: Killing a hero restores 1% max HP, up to once every 0.75 seconds. | This is a really strong general-use body. Nearly doubling HP while adding repeatable sustain makes it excellent for long stages and wave control. It feels especially good when you are playing aggressively and collecting frequent kills instead of just face-tanking forever. Against tankier bosses with fewer kill windows, its sustain is less automatic than Royal Paladin or Void Knight. |
 Juggernaut Body A Tier Mythic Body DMG— HP+105% Cost / Source599 Robux Full Set Passive TypeBurst / CC Passive — Crushing Finale: The fourth combo hit deals +25% damage and launches heroes 50% farther. | 105% HP is excellent, and the passive gives this piece more bite than most body-slot armors. It is one of the best “offensive tank” body pieces if you like getting value from both stats and combo pressure. Just like the helm, the knockback can be a mixed blessing, and the full-set-only acquisition is way less flexible than standard Forge Stone crafting. |
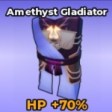 Amethyst Gladiator Body A Tier Epic Body DMG— HP+70% Cost / Source240 Stones Passive TypeAttack Speed Passive — Gladiator Tempo: Gain an additional +10% attack speed. | For an Epic body, this is really efficient. +70% HP is chunky, and the passive gives you universal value instead of niche gimmicks. It fits well into mixed builds and is one of the easiest strong body pieces to justify before you reach the luxury tiers. It is more “consistently good” than “meta war crime.” The higher-tier body pieces simply bring bigger durability swings or stronger full-set scaling. |
| B Tier — Good but narrower Solid bodies, but less impactful than the higher-end picks. | |
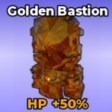 Golden Bastion Body B Tier Epic Body DMG— HP+50% Cost / Source160 Stones Passive TypeFarming Passive — Golden Harvest: Gain +20% coin from battle rewards. | This is a great economy body piece. You get meaningful HP and a farm passive that actually speeds up broader account progress. It is especially nice in midgame when you are still buying and forging constantly and every extra coin stack matters. For tough content, there is no sugarcoating it: pure combat passives are simply better than extra cash. |
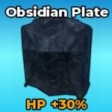 Obsidian Plate Body B Tier Rare Body DMG— HP+30% Cost / SourceBattle Pass Passive TypeDamage Reduction Passive — Obsidian Guard: Reduce incoming damage by 8%. | This is a very respectable bridge piece. The HP is modest, but straight damage reduction always ages better than most low-rarity passives. It is a solid slot-in if you want a tankier mixed setup and do not yet have the premium survivability pieces. The raw body stats are just too low for it to stay near the top once stronger HP pieces enter the picture. |
| C Tier — Early filler Budget starter pieces that do their job, then make way for better gear. | |
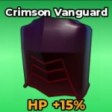 Crimson Vanguard Body C Tier Uncommon Body DMG— HP+15% Cost / Source40 Stones Passive TypeExecute Window Passive — Bloodied Fury: When Boss HP is at or below 50%, gain +15% attack. | It is cheap, easy to unlock, and totally fine as a starter body if your armor board is still mostly empty. The passive does help close out boss fights, which gives it at least some real purpose beyond being beginner hand-me-downs. +15% HP is tiny, and the passive is too conditional to rescue it once stronger body pieces become available. |
Guard Tier List
| Armor | Evaluation |
|---|---|
| S Tier — Best-in-slot The best guard pieces for finishing premium sets and adding high-impact mixed stats. | |
 Void Knight Guard S Tier Secret Guard DMG+25% HP+70% Cost / Source1,400 Stones Passive TypeSustain Passive — Void Drain: Each swing heals for 12% of damage dealt, up to 2% max HP per swing. | Fantastic mixed stats and the same busted sustain passive. This is the kind of guard piece that makes a build feel complete, not merely upgraded. Because guard pieces add both offense and survivability, Void Knight Guard is one of the highest-value single armor pieces in the whole system. Just like the other Void pieces, it is premium in every sense, including the price tag. |
 Hellfire Mantle Guard S Tier Secret Guard DMG+30% HP+60% Cost / SourceBattle Pass Passive TypeAoE Burst Passive — Hellfire Nova: Every fourth combo hit unleashes a 12-stud fire nova, dealing 30% weapon damage to nearby heroes. | Excellent mixed stats and a passive that turns your basic combo pattern into real AoE pressure. For wave-heavy gameplay, this thing is filthy. As a guard piece, it does a great job of rounding out aggressive sets because it contributes meaningfully to both damage and bulk. If you are not consistently staying in melee and proccing those fourth hits, you do not squeeze full value out of it. |
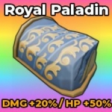 Royal Paladin Guard S Tier Mythic Guard DMG+20% HP+50% Cost / Source700 Stones Passive TypeClutch Survival Passive — Last Stand: The first time each battle you drop to 30% HP, restore 25% max HP. | Guard slots love balanced stat lines, and Royal Paladin delivers exactly that while also adding one of the best survival passives in the game. This is one of the safest pieces to recommend to almost anyone, because it works in full sets, hybrid builds, and panic-button progression setups. It trades a bit of raw offensive spice for consistency, so min-maxed DPS enjoyers may still prefer Void or Hellfire. |
| A Tier — Excellent Strong guard pieces that are very worth building. | |
 Juggernaut Guard A Tier Mythic Guard DMG+22% HP+55% Cost / Source599 Robux Full Set Passive TypeBurst / CC Passive — Crushing Finale: The fourth combo hit deals +25% damage and launches heroes 50% farther. | Really good stat spread for a guard piece, and the passive is still impactful enough to keep this set competitive. If you like pressure-oriented melee gameplay, this is one of the better guard pieces for keeping your combo string threatening. The launch effect is still a bit of a double-edged sword, and being locked behind a full-set purchase hurts flexibility. |
 Emerald Mantle Guard A Tier Legendary Guard DMG+20% HP+30% Cost / Source350 Stones Passive TypeOn-Kill Heal Passive — Verdant Recovery: Killing a hero restores 1% max HP, up to once every 0.75 seconds. | Very clean mixed-value piece. The guard slot gives it enough DMG and HP to matter, while the passive adds nice sustain during normal stage flow. It is a particularly comfortable pick in hybrid builds where you want good stats without overcommitting to one extreme. It is dependable, but not quite explosive enough to break into the top guard trio unless you heavily value kill-based healing. |
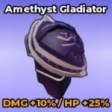 Amethyst Gladiator Guard A Tier Epic Guard DMG+10% HP+25% Cost / Source180 Stones Passive TypeAttack Speed Passive — Gladiator Tempo: Gain an additional +10% attack speed. | For the cost, this guard piece is fantastic. Mixed stats plus always-live attack speed gives it a lot of plug-and-play value. It is one of the best guard pieces for efficient progression, especially if you are building around consistent damage instead of a specific gimmick. It does not spike as hard as the top-tier guard pieces once fully optimized builds start coming together. |
| B Tier — Good but narrower Useful guards, but more specialized or easier to replace later. | |
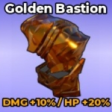 Golden Bastion Guard B Tier Epic Guard DMG+10% HP+20% Cost / Source120 Stones Passive TypeFarming Passive — Golden Harvest: Gain +20% coin from battle rewards. | Good budget farming guard. The mixed stats keep it practical while the coin boost helps a lot if you are still building your inventory and forging queue. This is an easy piece to justify in money-focused runs because it is not sacrificing everything for the economy angle. Once you are prioritizing pure combat power, the passive stops keeping up with stronger sustain or damage passives. |
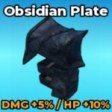 Obsidian Plate Guard B Tier Rare Guard DMG+5% HP+10% Cost / SourceBattle Pass Passive TypeDamage Reduction Passive — Obsidian Guard: Reduce incoming damage by 8%. | The stats are small, but the passive is real. That alone keeps this piece useful longer than its rarity would suggest. It is a perfectly good defensive filler if you want something stable in the guard slot while working toward pricier gear. The mixed stat bonuses are too low to seriously compete with the better guards once your collection starts maturing. |
| C Tier — Early filler Starter guard pieces that are useful early and replaceable later. | |
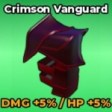 Crimson Vanguard Guard C Tier Uncommon Guard DMG+5% HP+5% Cost / Source30 Stones Passive TypeExecute Window Passive — Bloodied Fury: When Boss HP is at or below 50%, gain +15% attack. | Cheap, accessible, and fine for the earliest stages of gearing. If you need a first guard piece, this does the job. The passive at least has boss-finishing relevance, so it is not completely dead in combat. The mixed stats are just too tiny. This one gets replaced almost immediately once you start forging better armor. |
So there you have it, my Update 2 Be The Final Boss Armor Tier List. As you can see, while each armor piece looks rather straightforward at first glance, behind the surface there are a lot of factors to consider, depending on your playstyle, your needs (progress, grind), etc. Thanks for reading, and while you're here, don't forget to check out our other guides, such as Be The Final Boss Mutations Guide or Be The Final Boss Weather Events guide.


