
Updated July 7, 2026: Bridger Western Update 2.1.5 is the latest version of the game, and since the 2.0 update, we've seen four new stands: The Fool, Cream, Ball Breaker, and Six Pistols, If you want my opinion on them, check out our Bridger Western Stand Tier List!
Looking for the best Stands in Bridger Western Update 2.1.5? When we think of the Wild West and Westerns, we usually imagine gunslingers, duels at high noon, and intense firearm standoffs. However, if you want a Western setting with more traditional Roblox anime-style systems, you can use Stands as well. In this Bridger Western Stand Tier List, you'll learn everything you need to know about this core mechanic, including how to get, reroll, and rank every obtainable Stand in the game.
Bridger Western Stands Tier List - Best Stands Ranked
⇓ BEST STANDS ⇓

King Crimson Rework

TWAU Rework

Weather Report

D4C (Rework)

The World
⇓ VERY GOOD STANDS ⇓

Star Platinum World

Star Platinum

Silver Chariot

Gold Experience

Killer Queen

Mandom

Tusk Acts 1-3

Whitesnake

Hermit Purple

Soft and Wet

The Hand

Ball Breaker

Cream
⇓ DECENT STANDS ⇓

Hierophant Green

Magicians Red

Crazy Diamond

Purple Haze

Stone Free

20th Century Boy

Tubular Bells

Chocolate Disco

Catch the Rainbow

The Fool

Six Pistols
⇓ MID STANDS ⇓

Hey Ya
All Stand icons are sourced via the official Bridger Western Trello Board
Stands are a major extra combat system in Bridger Western. When you get one, you gain a unique kit of passive and active abilities that can reshape how you fight. Not all Stands do the same thing. Some are built for close-range pressure and burst, some focus on zoning and traps, while others are more about utility, mobility, survivability, or time-based mechanics.
Because of that, the best Bridger Western Stand for one player may not be the best for another. The game currently has 28 obtainable Stands split across two rarity tiers: Default and Rare. Rare Stands are the time-manipulating ones (The World, TWAU, King Crimson, Star Platinum, Mandom, and Whitesnake).
RELATED: Bridger Western Fishing Guide – How To Fish, Drops & Cooking
IMPORTANT NOTE: Keep in mind that having a Stand generally lowers your base gun damage. So, Stands are not just free power. They are more like a tradeoff: you gain access to a powerful extra kit, but your regular firearms become weaker. Utility Stands (Mandom, 20th Century Boy, Hermit Purple, Tubular Bells, Hey Ya) are an exception - they cost no stamina to keep summoned.
| Stand | Passives & Abilities | Pros & Cons |
|---|---|---|
| Stand  The World | Passives & Abilities Barrage (E) - A standard barrage attack. Shinei (R) - A long-range autolocking punch that also functions as mobility. Knife Toss (T) - Throws knives. Requires knives in inventory. Particularly strong during timestop. Kick Barrage (G) - A barrage of kicks. Long Timestop (V) - Stops time for roughly 5 seconds. | Pros & Cons
|
| Stand  TWAU | Passives & Abilities Passive: Checkmate - The Stand also throws barrages of knives when you use knives. Passive: Ol' Reliable - Lets you shoot your revolver during “Me Time”. Chop (E) - Sends TWAU forward over a long distance before slamming the floor with a quick chop that knocks enemies back. Jerrycan / Ignite (R) - Throws a bursting jerrycan that soaks enemies and creates a gasoline puddle. Press R again to dash back, throw matches, ignite the puddle, and cause an explosion. Soaked enemies are slowed and take increased damage from all sources. Knife Volley (T) - Throws a cursor-aimed barrage of knives alongside your Stand. Requires knives. Barbed Wire (G) - Throws out barbed wire that damages enemies on contact, lets you pass through, and blocks bullets. Requires Steel Wireset. “Me Time” Tap (V) - Performs a short three-second timestop with a short cooldown. “Me Time” Hold (V) - Performs a longer timestop of roughly 9 seconds after a longer windup, with a bigger cooldown. Panic “Me Time” (Low HP V) - Below 25% HP, performs a panic timestop with the tap variant's speed and the hold variant's duration. | Pros & Cons
|
| Stand  King Crimson | Passives & Abilities Passive: Frail - Reduced max HP. Eye Gouge (E) - Pierces the opponent's right eye, dealing damage and blinding half of their screen. Enhanced after Time Erase. Heavy Chop (R) - Sends King Crimson forward over a long distance before slamming collided opponents with a heavy chop that knocks them down. Enhanced after Time Erase. Donut (T) - Strikes a pose before lunging toward your cursor with a high-damage impale punch that throws the target away. Enhanced after Time Erase. Epitaph (G, hold) - Lets you see into the future, granting three auto dodges and predicting the future movement of yourself and others. Time Erase (V) - Erases time, creates a clone at your original position, and grants invincibility and invisibility. Your next Stand move is enhanced. Can be used while grounded. Epitaph + Time Erase (G + V) - Combines future sight with time erasure, teleporting you and nearby players to their future positions based on velocity, regardless of obstacles. | Pros & Cons
|
| Stand  D4C | Passives & Abilities Passives: Frail lowers your max HP, Dimension Hop lets you travel between the real world and pocket dimension by unequipping a poncho, and Dimension Save sends you into the pocket dimension and heals you when you take more than 20 damage in one blow while poncho-equipped. Chop Barrage / Chop (E) - Tap for a quick high-damage punch barrage with a finisher, or hold for a longer-range 16-damage chop that applies Grounded. Transferring Grab (R) - Choke-slams the target, heals you for 20 HP, and ends with a stand-assisted uppercut. If used on a player in the pocket dimension, it also summons three clones to attack them. Clone / Clone Swap (T / T + G) - Summons a weapon-wielding clone to pressure the nearest player, then lets you swap health and position with the clone even while downed, at the cost of lowering your max HP until respawn. Poncho Moves (T + Poncho / G / G2) - Fabricates a clone of the enemy that can erase them on contact, calls in an Aerial Clone Kick, and unlocks Dimension Chop in the pocket dimension for a behind-the-back sneak attack. | Pros & Cons
|
Stand  Weather Report | Passives & Abilities Passive: Heavy Weather Mode - Dealing damage fills a blue bar. When it reaches capacity, Weather Report unlocks Heavy Weather, buffing the moveset and giving you a cloud suit with damage resistance and enhanced jumps. Barrage (E) - Sends Weather Report forward for a punch barrage, ending with an 18-damage finisher. Heavy Punch (R) - Swipes the target for 20 damage and creates frozen spikes from splattered blood for extra follow-up damage. Electrocute (T) - Fires a lightning projectile. In Heavy Weather, it gains a follow-up lightning strike. Atmospheric Manipulation (G) - Creates localized wind pressure that deals chip damage for three seconds and blows away nearby players and projectiles. Torrential Rain (V) - Requires Heavy Weather. Conjures poisonous frog rain and changes the weather, giving Weather Report extra battlefield control while also indirectly enabling rain-based interactions. | Pros & Cons
|
| Stand  Ball Breaker | Passives & Abilities Passive: Golden Spin Ratio - Attacks bypass a flat portion of enemy defense values and scale dynamically with the user's active Spin gauge. Spin Barrage (E) - A fast-paced flurry of localized steel ball rotations. Infinite Rotation (R) - Fires an intensely accurate rotational projectile that ignores blocks and tears through target armor metrics. Rotational Leap (T) - Channels spin energy directly into the environment to vault forward, breaking close-quarters pressure. Cellular Senescence (G) - A close-range strike that enforces physical senescence, dragging down target movement speed and reducing their overall damage output for 5 seconds. | Pros & Cons
|
| Stand 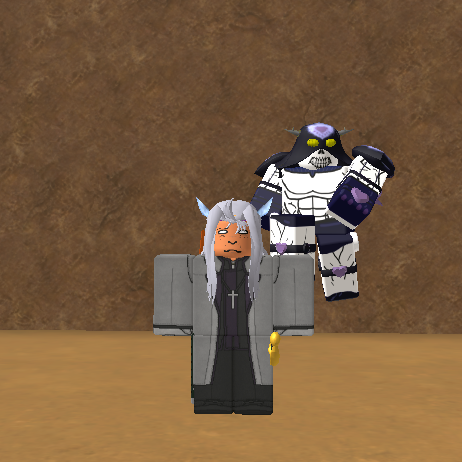 Cream | Passives & Abilities Void Barrage (E) - Unloads a swift humanoid barrage laced with spatial displacement elements. Void Chop (R) - A single heavy hand-swipe that projects a vacuum shockwave over medium distance. Void Devour (T) - Erases a large cone of space directly ahead, instantly eating projectiles and hitting targets for high baseline raw damage. Void Dip (G) - Submerges the user completely into the floor, safely evading horizontal tracking and ranged firearms for a brief period. Void State (V) - Curles into a massive sphere of absolute erasure. Grants full status invincibility and highly elevated contact damage, but severely limits turning radius and visibility. | Pros & Cons
|
Stand 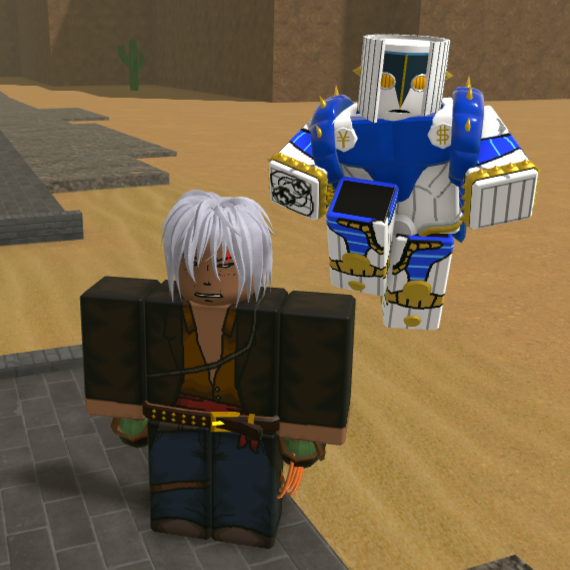 The Hand | Passives & Abilities Passive: Slow-witted - The Hand does not have basic M1 attacks. Instead, its kit is built around three powerful erasure moves. Passive: Erasure - Your right palm can erase limbs, projectiles, and entire bodies on execute, giving the Stand unusually high punish value when it connects. Erasure Swipe (E) - Erases everything in front of you for 45 damage. Has an execution variant. Erasure Leap (R) - Erases the space above you, propelling you far forward and dealing 20 damage. Erasure Pull (T) - Erases the space in front of you, dealing 10 damage and pulling nearby players and objects toward you. | Pros & Cons
|
| Stand  Star Platinum | The World | Passives & Abilities Barrage (E) - A standard barrage attack. Rush (R) - Sends Star Platinum forward to uppercut the opponent, then follows up with a mid-air rushdown barrage that slams them back to the ground. Triple Bearing Shots (T) - Fires three bearing shots that ragdoll on hit. Time Stop (G) - Stops time for roughly 2 seconds in a medium radius. Grab Beatdown (V) - A grab into a devastating beatdown sequence. Obtainment: 1% chance to evolve from Star Platinum when using Timestop Movement (G). | Pros & Cons
|
| Stand  Star Platinum | Passives & Abilities Barrage (E) - A standard barrage attack (2.2 damage per hit). Skull Breaker (R) - A mobile heavy punch (25 damage) that can decapitate low-health targets. Star Finger (T) - Deals medium damage (12) and ragdolls the target. Timestop Movement (G) - Lets you move during any active timestop if the Stand is equipped. Beatdown (V) - A grab into a pummeling beatdown (11 + 2.4 per punch + 14 finisher). Extra: Has a 1% chance to evolve into Star Platinum | The World when using G during a timestop. | Pros & Cons
|
| Stand  Silver Chariot | Passives & Abilities Barrage (E) - A standard rapier barrage. Rapier Uptilt (R) - An upward rapier strike that leaves the target airborne briefly. Lunge (T) - A slightly homing lunge pierce with good range (~20 damage). Ricochet Shot (Low HP T) - Replaces T at low HP: shoots the rapier out, ricocheting off surfaces and homing to the nearest player. Whirlwind Slash (G) - A spinning slash that hits twice around yourself, knocking targets back. Armor Removal (V) - Removes Silver Chariot's armor, greatly increasing speed and damage of all moves. | Pros & Cons
|
| Stand  Gold Experience | Passives & Abilities Passive: Life Giver - Uses a yellow bar that drains on move use and recharges slowly. Limits how many moves you can chain. M1ing the ground with the Stand out sends a branch toward the nearest target. Barrage (E) - A barrage that can lead into a 7 Page Muda QTE for heavy damage and knockback (consumes all life giver bar). Life Giver Punch (R) - Punch forward; hitting a player inverts their controls and blurs their screen. Hitting the ground triggers one of three variants below. R Variant 1 - Tree: Summons a tree, dealing medium AoE damage and heavy knockback. R Variant 2 - Eagle: Summons a tracking eagle that homes in repeatedly. R Variant 3 - Scorpions: Summons 3 tracking scorpions that deal light damage. Heal (G) - Heals yourself (~30 HP); heals a nearby ally instead if one is in close range. Variant Switcher (V) - Cycles between the three R variants. | Pros & Cons
|
| Stand  Killer Queen | Passives & Abilities Barrage (E) - A standard barrage attack. Chop (R) - A chop that breaks limbs. Plant Bomb / Detonate (T) - Plants a bomb on any player, surface, or item. Press T again to detonate. Placed bombs disappear after some time. Sheer Heart Attack (G) - Sends out SHA, which tracks the nearest player and explodes on contact. Drains stamina. Can be recalled by re-pressing G. Stray Cat (V) - Fires a re-aimable air bubble bomb via camera direction. Cannot pass through walls. | Pros & Cons
|
| Stand  Mandom | Passives & Abilities Passive: Utility Stand - Takes no stamina while summoned. Time Rewind (G) - Returns you and everyone around you 6 seconds back, including health and states. | Pros & Cons
|
| Stand  Tusk Acts 1–3 | Passives & Abilities Passive: Cripple - Greatly reduces movement speed and prevents sprinting. Also disables gun use. Passive: Acts - Lets you cycle between Acts with V. Nail Bullets (Act 1 / E) - Fires nail bullets (10 damage). Nail Glide (Acts 1–3 / R) - Glides across the floor using nail momentum. Spin Leap (Act 1 / G) - Launches you upward using spin energy. Wormhole Nails (Acts 2–3 / E) - Fires nails through wormholes; autofires on anyone who steps near the wormhole. Golden Rotation Bullet (Act 2 / G) - Fires a powerful Golden Ratio nail (62 damage). | Pros & Cons
|
| Stand 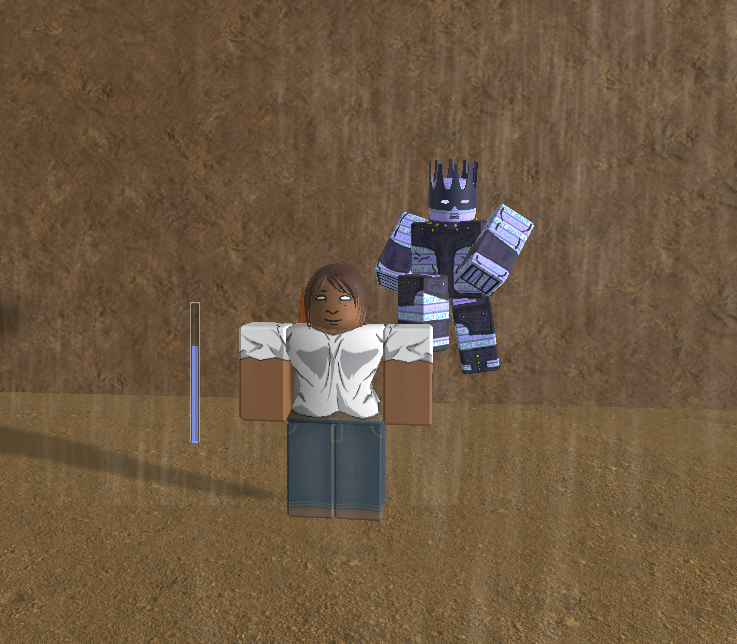 Whitesnake | Passives & Abilities Barrage (E) - A standard barrage attack (1.4 damage per tick). Disc Grab (R) - Grabs forward and impales the opponent, ripping out their disc and disabling their Stand (20 damage). Disc Throw (T) - Throws a disc that explodes on surface contact (13 damage). Direct hit inverts the opponent's controls. Acid Spit (G) - Spits a pool of acid (15 damage + 3 per tick) that puts anyone who stays in it to sleep. Pilot (V) - Splits your mind into your Stand for remote-controlled combat. | Pros & Cons
|
| Stand 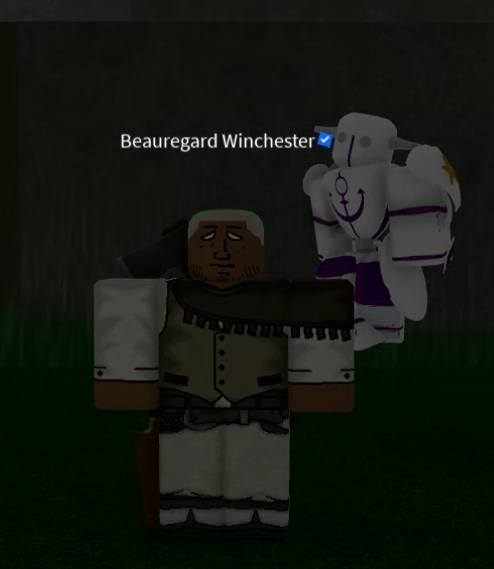 Soft and Wet | Passives & Abilities Passive: Plunder - Hitting opponents creates bubbles around you. These can be fired as projectiles that plunder properties such as friction and moisture. Barrage (E) - Sends your Stand forward for a punch barrage, ending with a finisher. Heavy Punch (R) - Slams the floor for damage and launches three bubble projectiles. Bubble Barrage (T) - Fires a barrage of bubbles; hit targets are trapped in a bubble, float upward, and gain temporary damage reduction. Slide (G) - Slides a long distance while damaging enemies. Hitting a target encases you in a bubble afterward, giving 75% damage resistance and enhanced jumps. Bubble Shot (V) - Fires surrounding passive bubbles as projectiles. On hit, randomly makes the enemy sleep, burn, or become blinded. Ground hits can plunder friction and make opponents slip. | Pros & Cons
|
| Stand  Hermit Purple | Passives & Abilities Passive: Utility Stand - Summoning and retaining Hermit Purple takes no stamina. Grapple (E) - Sends out vines to grapple onto a surface and pull yourself in. If it directly hits a player, it pulls them toward you and deals light damage. Chop (R) - Throws out a chop for solid close-range damage. If used after landing Grapple on a player, it becomes empowered for stronger follow-up damage. Silent Tendril (T) - Places a nearly invisible tendril at your cursor. Ground tendrils can trip players, while character tethers can bind targets or slam them into distant objects or other characters. Barrel Throw (G) - Latches vines onto a nearby explosive barrel and hurls it forward. Shooting the barrel makes it explode and apply Burning. | Pros & Cons
|
| Stand  Six Pistols | Passives & Abilities Passive: Bullet Pass - Speeds up gun reload intervals by 25% and guarantees subtle homing properties on marked adversaries. Bullet Kick (E) - Deflects/kicks an active mid-air bullet to magnify its velocity vector and base destruction damage. Pass Placement (R) - Spaces out pistols 1 through 6 globally into the environment to coordinate custom redirection paths for incoming revolver fire. Bullet Redirection (T) - Automatically deflects inbound bullet groupings straight back into nearby hosts. Pistol Reload (G) - Refills weapon chambers instantaneously while flashing a small passive accuracy stabilization buff. | Pros & Cons
|
| Stand  The Fool | Passives & Abilities Sand Swipe (E) - Manifests large granular sand claws that slash horizontal sectors. Sand Dome (R) - Shuts the user into a protective sand shell that directly absorbs projectiles and trades incoming health damage. Sand Glider (T) - Expands sand-sculpted wing geometry to allow horizontal soaring and map traversal. Sand Burst (G) - Blows out a blinding cloud of sand particles that hinders target visibility and temporarily dampens their aiming statistics. Sand Clone Charge (V) - Manifests an independent replica unit that stampedes straight ahead to ragdoll enemies. | Pros & Cons
|
| Stand  Oh Lonesome Me | Passives & Abilities Passive: Utility Stand - Summoning the Stand takes no stamina. Detach | Reattach (E) - Detaches your right arm along a rope. While detached/unraveled, you can shoot, use weapons, use utilities, and throw items. Press E again to reattach. Unravel (E + R) - Separates different limbs along the rope of the detached right arm. Can be used three times, with the final spread granting enhanced agility and flexibility. Elongate (T) - Extends the rope separating your body, increasing its length and range for 10 seconds. Assault Dash (G) - Dashes in your mouse direction by rapidly splitting and joining your body together. Deals 25 damage and can be used without being Unraveled. Zoom Grab (V) - Lunges forward with the detached right arm to grab a nearby foe, reel them in, and slam them into the ground for 20 damage. | Pros & Cons
|
| Stand  Catch the Rainbow | Passives & Abilities Passive: Utility Stand - Summoning the Stand takes no stamina. Passive: Armored Stand - Having the Stand summoned passively reduces received headshot damage. Passive: Weather Disadvantage - Abilities are either only available during rain or severely weakened when it is not raining. Water Barrage (E) - Fires a barrage of water droplets in front of you. Chop (R) - A high-damage chop that knocks the target back. Far weaker when it is not raining. Razor Droplets (T) - Solidifies raindrops and cuts the opponent several times. Water Walk (G) - Lets you move through the air by solidifying the rain around you. Teleport (V) - Uses the rain around you to teleport to a new location. | Pros & Cons
|
| Stand  Chocolate Disco | Passives & Abilities Passive: Utility Stand - Summoning the Stand takes no stamina. Grid Layout (E) - Places a terrain-adapting grid in the direction you are facing. Mark (T, requires E) - Marks a target entity or coordinate on the placed grid. If used on an entity, it marks and redirects to the grid position closest to them. Redirect (T Mark Variant) - Relocates airborne throwables or projectiles within the grid radius to a plot on the grid. Tonic Interaction: If you splash tonic on an entity by right-clicking with it held out, Mark can teleport that entity to a plot on the grid. Fuse Interaction: Redirecting throwables with fuse timers shortens their fuse to 0.25 seconds remaining. | Pros & Cons
|
| Stand  Hierophant Green | Passives & Abilities Tentacle Wire (E) - Tosses a tentacle that creates a tripwire similar to the Steel Wireset. Emerald Splash (R) - Hold R to charge up a powerful blast of emerald projectiles. 20 Meter Emerald Splash (G) - Places many tentacle wires; Stand goes invisible inside them. Anyone stepping in triggers an automatic Emerald Splash. Stand Pilot (V) - Enters aerial pilot mode. | Pros & Cons
|
| Stand  Magicians Red | Passives & Abilities Barrage (E) - A standard barrage attack. Flaming Roundhouse Kick (R) - A 180-degree kick that knocks and burns all targets hit. Red Bind (T) - Fires cursor-aimed flame waves that apply heavy burn and limit movement on hit. Crossfire Hurricane Special (G) - Fires a large fire projectile; re-pressing G redirects it to your cursor and splits into up to 5 projectiles. Aerial Stand Pilot (V) - Enters aerial pilot mode. | Pros & Cons
|
| Stand  Crazy Diamond | Passives & Abilities Barrage (E) - A standard barrage attack. Tracking Barrage (R) - Stand moves forward and barrages a target from all angles when it lands. Bearing Shot (T) - Fires a single bearing at the cursor. Restore Mode (G) - Converts regular damage into healing; also changes some moves to their Restore variants. Blood Slash / Reconstruction Barrage (V) - Blood Slash fires a blood-powered slash (costs ~10 HP to use). In Restore Mode (Restore V), barrages the ground and traps the opponent in a stone structure. Restore R - Facial Reconstruction: A heavy punch with a 10% chance to permanently change the target's face. | Pros & Cons
|
| Stand  Purple Haze | Passives & Abilities Passive: Poison Bulbs - Barrage and R can release poison bulbs; your own poison can damage you; bulbs regenerate over time. Barrage (E) - A standard barrage that can pop poison bulbs. Bulb Smash (R) - Smashes a poison bulb; guaranteed to burst a bulb on hit. Poison Bulb Shoot (T) - Fires a poison bulb projectile; leaves a poison cloud on direct player hit. Poison Bulb Trap (G) - Places a poison bulb on the ground; triggers if anyone walks over it, also explodes after ~20 seconds. Stand Pilot (V) - Remotely control your Stand from a distance. Both your Stand and body can be shot. | Pros & Cons
|
| Stand 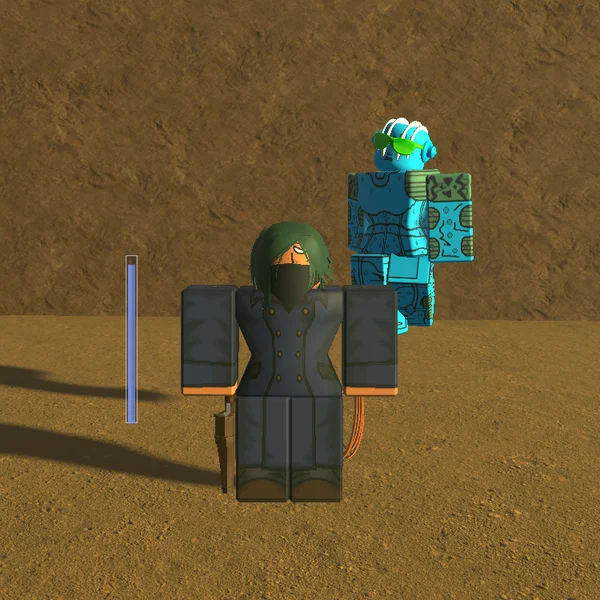 Stone Free | Passives & Abilities Passive: Thread Weaving - M1ing a surface places a thread attached to your arm. M1ing a player while the string is active pulls them into it. Barrage (E) - A standard barrage attack (1.5 damage per tick). Heavy Punch (R) - Uses thread to extend your arm for a long-range heavy punch (25 damage). String Pull (T) - Sends your Stand forward and attaches a string to anyone nearby, pulling them in. String Patchworks (G) - Threads your body back together, healing yourself. Rock Swing (V) - Uses string to pull earth from the ground and swing it around before slamming it down (12 + 12 + 12 + 12 + 20 damage). | Pros & Cons
|
| Stand  20th Century Boy | Passives & Abilities Passive: Utility Stand - Takes no stamina while summoned. Absolute Defense (G) - While crouched, you become fully immune to damage; all attacks are reflected back as an AoE blast. Dynamite Strap (V) - Straps dynamite to your body for explosive utility (12 damage per dynamite, requires 6 dynamite). Using Absolute Defense negates self-damage from this. | Pros & Cons
|
| Stand  Tubular Bells | Passives & Abilities Passive: Utility Stand - Takes no stamina while summoned. Balloon Command (E) - Sends out summoned balloons one at a time. Dog Balloons (R) - Conjures 2 Dog balloons (15 damage each). Medium speed, auto-track at close range, pop on wall contact. Snail Balloons (T) - Conjures 3 Snail balloons (5 damage each). Slow, pass through walls, track from far range. Swan Balloon (G) - Conjures 1 Swan balloon (40 damage). Very fast, follows mouse cursor. All Balloons Burst (V) - Sends all balloons toward the cursor at once at reduced damage. | Pros & Cons
|
| Stand  Khnum | Passives & Abilities Passive: Utility Stand - Summoning the Stand takes no stamina. Detach | Reattach (E) - Detaches your right arm along a rope. While detached/unraveled, you can shoot, use weapons, use utilities, and throw items. Press E again to reattach. Impersonate (E) - Imitates the appearance of an entity you place your cursor on. Resize (T) - Randomly changes your character's physical size. Smaller forms can drop your health as low as 60, while larger forms can raise it up to 140. Recolor (G) permanent changes your character into a random skin tone and deals 25 damage. | Pros & Cons
|
| Stand  Hey Ya | Passives & Abilities Passive: Utility Stand - Takes no stamina while summoned. Encouragement - Gives rotating buffs such as dodges, damage, healing, speed, and accuracy increases. | Pros & Cons
|
NOTE: Many Bridger Western Stands have powerful synergy with other aspects of your build. For example, TWAU has the Checkmate passive that doubles your knife output, D4C interacts heavily with the Poncho (which reduces overall damage taken in exchange for more limb damage), and Tusk has its own special obtainment rule tied to the Left Arm Corpse Part. Whitesnake's Disc Grab can completely disable another player's Stand, making it a devastating counter-pick in Stand-heavy lobbies.
RELATED: Ultimate Bridger Western Tier List
All Bridger Western Stand Rarities
Bridger Western Stands are split into two rarity tiers: Default and Rare. The Rare Stands are all time-manipulating ones: The World, TWAU, King Crimson, Star Platinum, Mandom, and Whitesnake. All other Stands are of Default rarity. There is also a 5% chance to get a shiny skin for your Stand on any obtainment method that rolls for your Stand. Additionally, Stand Skins exist as cosmetic variants for select Stands, including Star Platinum, Hierophant Green, Silver Chariot, Magician's Red, Stone Free, Whitesnake, and TWAU.
How to Obtain Stands in Bridger Western
Unlike guns and utility items, which you can purchase from various sources, Stands in Bridger Western are gacha-style items that you have to pull. There are currently two main ways to obtain them, and they are quite different from each other. Depending on what you want, either method can work. There is also a 5% chance to receive a shiny skin whenever your Stand is rolled through any obtainment method. Here's how to get them.
Corpse Parts (Main Stand Obtainment Method)
Corpse Parts are the primary way to get a Stand in Bridger Western, but they're also the most difficult. By design, they are a point of contention - an objective meant to draw attention and trigger PvP engagements, as other players will want to take them from you. Their value also rises the more players are around them. Here's how it works:
- Corpse Parts can only start spawning when there are at least 3 players in the server.
- Their spawn chance increases with player count.
- When one spawns, the game gives it away with:
- Loud sound
- Yellow beam
- Sphere of light
- The yellow beam disappears after 30 seconds.
- Server-wide announcements display the state of the Corpse Part (Spawn, Taken, Lost, Absorbed).
The tricky part isn't picking it first. If you pick up a Corpse Part, you do not immediately get a Stand. Now comes the hardest part:
- You need to hold onto it for a short period to absorb it.
- While holding it, you pulse yellow through walls periodically, which makes you much easier to track.
- The longer you hold it, the higher your chance of getting a Stand becomes (chance caps at around 15–20%).
Keep in mind that you can lose hold of a Corpse Part at any point while carrying it. This will always happen if you get knocked down or if the body part containing it gets broken or dismembered. As you can probably tell from all this, Corpse Parts are a high-risk, contested way of obtaining a Stand. The game basically announces them to the entire lobby, then forces the holder to survive long enough to cash them in.
NOTE: Tusk Acts 1–3 are only obtainable via a 10% chance roll when fusing with a Left Arm Corpse Part.
Corpse Part spawn rates:
- Minimum (3 players): every 30 seconds, there is a 1/150 chance for a Corpse Part to spawn
- Maximum (25 players): every 30 seconds, there is a 1/40 chance for a Corpse Part to spawn
The full per-player spawn rate breakdown, sourced from the official Bridger Western Trello, is as follows:
- 3 players = 1/150
- 4 = 1/145
- 5 = 1/140
- 6 = 1/135
- 7 = 1/130
- 8 = 1/125
- 9 = 1/120
- 10 = 1/115
- 11 = 1/110
- 12 = 1/105
- 13 = 1/100
- 14 = 1/95
- 15 = 1/90
- 16 = 1/85
- 17 = 1/80
- 18 = 1/75
- 19 = 1/70
- 20 = 1/65
- 21 = 1/60
- 22 = 1/55
- 23 = 1/50
- 24 = 1/45
- 25 = 1/40
RELATED: Bridger Western Card Tier List
Arrow Shards (Secondary Stand Obtainment Method)
Unlike Corpse Parts, Arrow Shards are a guaranteed Bridger Western Stand obtainment method, and they can grant any Stand, except for currently unobtainable ones and those with specific obtainment methods. In my opinion, Arrow Shards are extremely valuable because they are both a guaranteed Stand obtainment, and with them, you skip the whole Corpse Part survival process.
You can earn Arrow Shards through fishing. They are a Legendary pull from fishing, with only a 0.05% drop chance per pull, according to the official Trello. Arrow Shards are safer than Corpse Parts in terms of guaranteed payoff, but they also come with quite a few limitations (in the current build of the game):
- Arrow Shards cannot be banked or stored.
- They are NOT lost upon death or leaving the server.
- They cannot be used if you already have an active Stand.
- They cannot be dropped from the inventory.
- While held, they have a glowing, smoky aura.
RELATED: Bridger Western Weapons Tier List
How to Reroll and Remove Stands in Bridger Western
As mentioned above, if you want to reroll your Bridger Western Stands with Arrow Shards, you won't be able to do so if you already have a Stand equipped. Luckily, there is a way to remove it, but it isn't as simple as clicking a "Remove" button. Instead, you need to know where to look and what to do. Here's how to remove a Stand in Bridger Western:
- Obtain a Dogbane Herb. This is a very rare item (4% drop chance) which can be obtained from chests dropped from PvE encounters. Alternatively, chopping trees in the Swamp can also drop Dogbane (Swamp trees have 2x more health than forest trees).
- Bring it to the Mud Witch in the swamp area.
- From interaction with her, select wipe your Path (Stand). She also offers two other options: decreasing your character's age by 20 years, or receiving 2,500 Moola.
- This will remove your current Stand, making way for equipping a new one.
Roblox Bridger Western Stands FAQ
The main way to get a Stand is by finding and absorbing Corpse Parts. You can also get one from Arrow Shards, which are a rare Legendary fishing reward (0.05% drop chance) and are guaranteed to grant a Stand. Some Stands also have special obtainment rules, so not every Stand comes from the same pool.
There is no single best Stand for every player, because Stands fill different roles. Some are stronger in straight-up combat, some are better for utility or survivability, and some shine because of their synergy with items like Knives or Poncho. In general, the best Stand is the one that gives you the most consistent value for your build and playstyle.
Yes. One of the most important things to keep in mind is that having a Stand generally lowers your base gun damage. That is why Stands are best treated as part of a full build, not just a free power upgrade. Utility Stands (Mandom, 20th Century Boy, Hermit Purple, Tubular Bells, Hey Ya) are a notable exception as they cost no stamina while summoned.
Not necessarily. Rare Stands usually have more unique or powerful mechanics, especially the time-based ones, but that does not automatically make them better for every situation. A more straightforward Stand with reliable pressure or easier-to-use tools can still perform better in real fights, depending on your loadout and skill level.
Yes. You can remove your current Stand by using a Dogbane Herb at the Mud Witch in the Swamp area. Dogbane Herbs drop at a 4% rate from PvE encounter chests and can also be obtained by chopping Swamp trees. That means you are not permanently locked into one Stand if you want to reroll or change your build later.
D4C has a special obtainment method. According to Trello (though marked as potentially outdated), you need 100 kills and a 10 kill-streak, be in the Deserts area, and have a Corpse Part spawn anywhere while you are knocked down. This gives a 10% chance for the D4C Heart to appear and merge with you.
Bridger Western currently has 26 obtainable Stands split between the Default and Rare rarity tiers.
Whitesnake is a Rare Stand with a control-focused kit. Its most powerful move is Disc Grab, which disables the opponent's Stand entirely. It also has Disc Throw (inverts controls on direct hit), Acid Spit (deals damage over time and puts targets to sleep), and a Pilot mode for remote Stand control.
And there you have it - now you know everything you need to know about Stands in Roblox Bridger Western: what they do, how they work, how to obtain and reroll them, which ones are the best, and much more. Thanks for reading! While you're here, make sure to see all Bridger Western guides at our hub page!