
Accurate Piggy RP: The Return, or APRP: The Return for short, allows players to take on the role of various Piggy characters—both bad and good. There are over 60 skins in APRP: The Return to collect with each one is paired with its own unique badge that you must find to unlock it. For a full list of these skins and how to unlock them, continue reading below.
Infected Skins
Skins 1 - 4
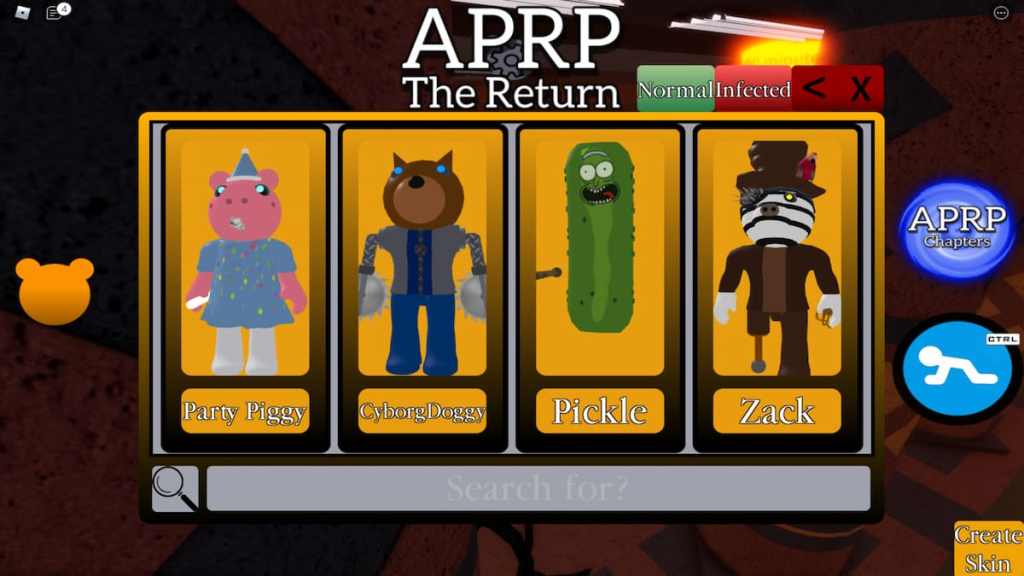
- Party Piggy
- Speak with the menu pig and select the map icon to open the teleport menu.
- Select Book 2 and locate the Safe Place area.
- Teleport to Safe Place.
- From the bedroom that you spawn in, exit through the door and turn right.
- Follow the hallway around the corner.
- Find the metal door at the end of the open hallway and open it.
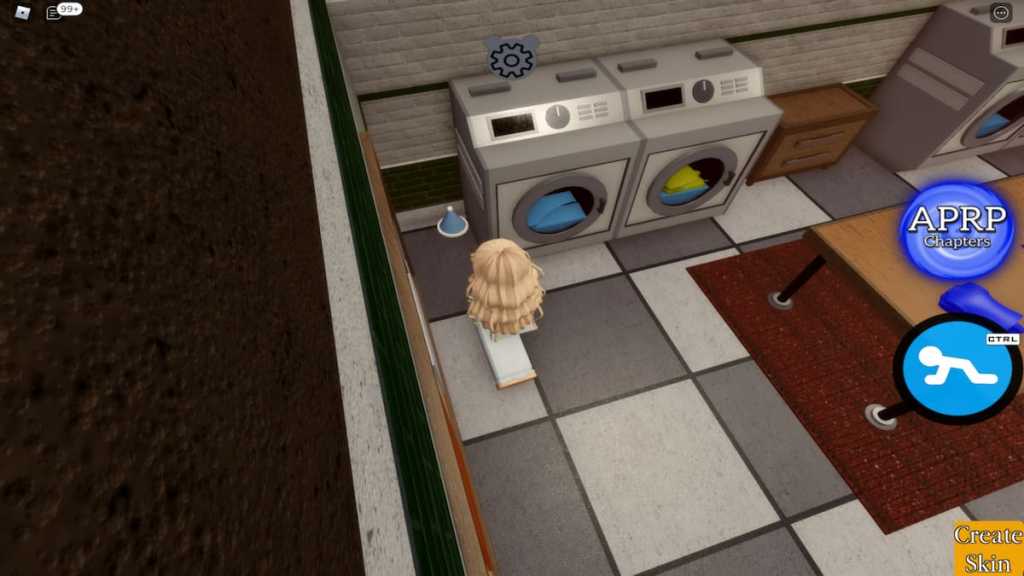
- Go down the stairs to the floor below and locate the laundry room.
- Next to one of the dryers on the floor, you'll find a party hat.
- Walking towards it will prompt the Late for Party badge.
- CyborgDoggy
- Obtainable by garnering 9,000 in-game coins or previously earning the badge in APRP: The Reborn.
- Coins are earned by simply spending time inside of the experience
- Obtainable by garnering 9,000 in-game coins or previously earning the badge in APRP: The Reborn.
- Pickle
- Obtainable by garnering 1,500 in-game coins or previously earning the badge in APRP: The Reborn.
- Zack
- Obtainable by garnering 5,000 in-game coins or previously earning the badge in APRP: The Reborn.
Skins 5 - 8
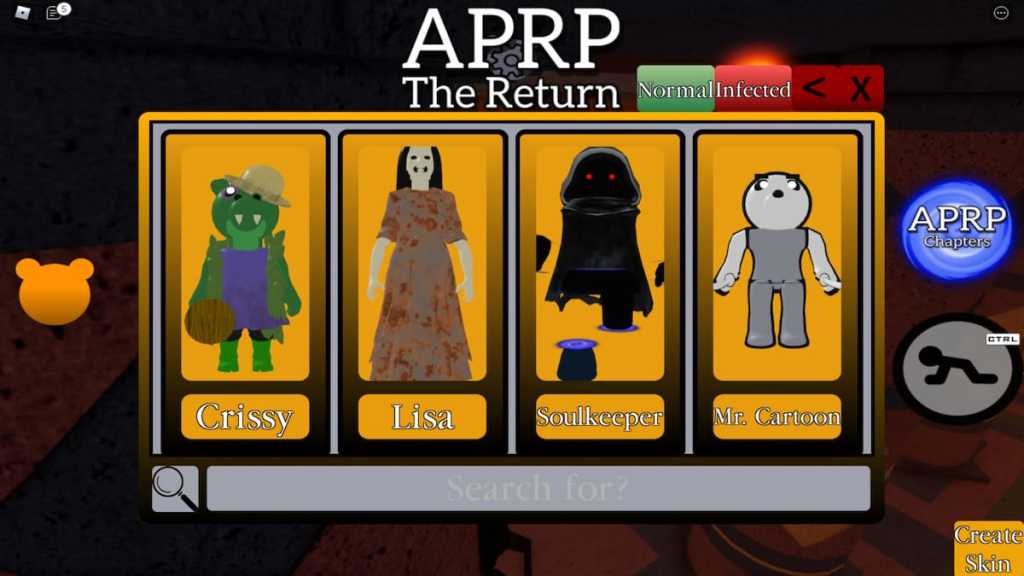
- Crissy
- Obtainable by garnering 10,000 in-game coins or previously earning the badge in APRP: The Reborn.
- Lisa
- Obtainable by garnering 15,000 in-game coins or previously earning the badge in APRP: The Reborn.
- Soulkeeper
- Obtainable by garnering 20,000 in-game coins or previously earning the badge in APRP: The Reborn.
- Mr. Cartoon
- Obtainable by garnering 25,000 in-game coins or previously earning the badge in APRP: The Reborn.
Skins 9 - 12

- Kasey
- Obtainable by garnering 30,000 in-game coins or previously earning the badge in APRP: The Reborn.
- Lotham
- Obtainable by garnering 35,000 in-game coins or previously earning the badge in APRP: The Reborn.
- Hara
- Obtainable by garnering 40,000 in-game coins or previously earning the badge in APRP: The Reborn.
- Scarecrow
- Obtainable by garnering 45,000 in-game coins or previously earning the badge in APRP: The Reborn.
Skins 13-16
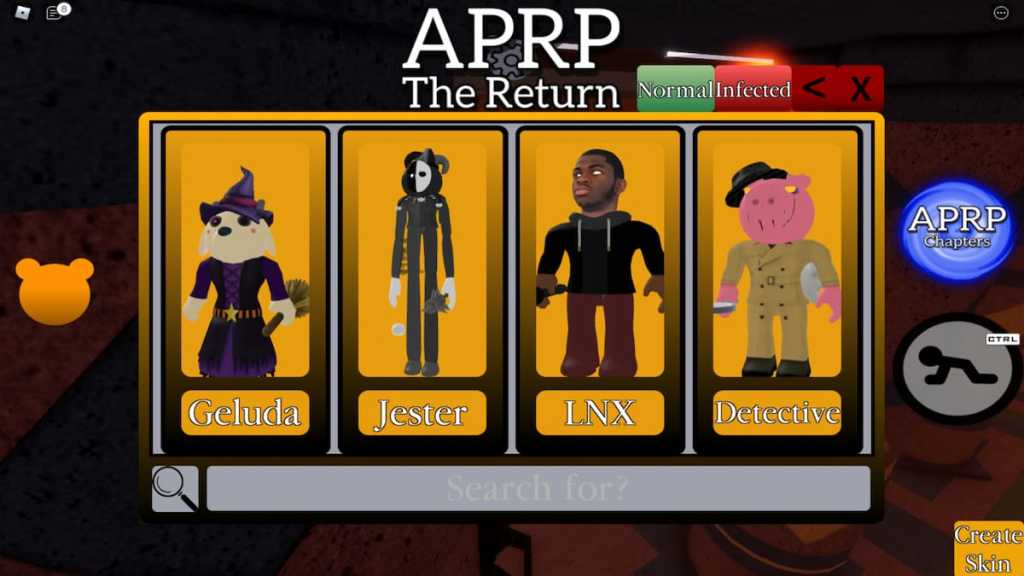
- Geluda
- Obtainable by garnering 50,000 in-game coins, or previously earning the badge in APRP: The Reborn.
- Jester
- Obtainable by garnering 55,000 in-game coins, or previously earning the badge in APRP: The Reborn.
- LNX
- Speak with the menu pig and select the map icon to open the teleport menu.
- Select Extras and locate the RBB area.
- Teleport to RBB.
- From the spawn point, locate the ticket booth and make your way past it.
- You should see the RBB stage with couches and an audience viewing area.
- Go behind the stage and walk towards the left corner of the large curtain.
- For extra help, adjust your camera so that you can see what's behind the curtain.
- You're looking for a microphone sitting on a potted plant.
- Once you've found either the microphone or the sweet spot of the curtain, you will be awarded the LNX badge and skin.
- Detective
- Obtainable by garnering 6,000 in-game coins, or previously earning the badge in APRP: The Reborn.
Skins 17 - 20

- Robby
- Obtainable by garnering 7,000 in-game coins, or previously earning the badge in APRP: The Reborn.
- FrozenPony
- Obtainable by garnering 8,000 in-game coins, or previously earning the badge in APRP: The Reborn.
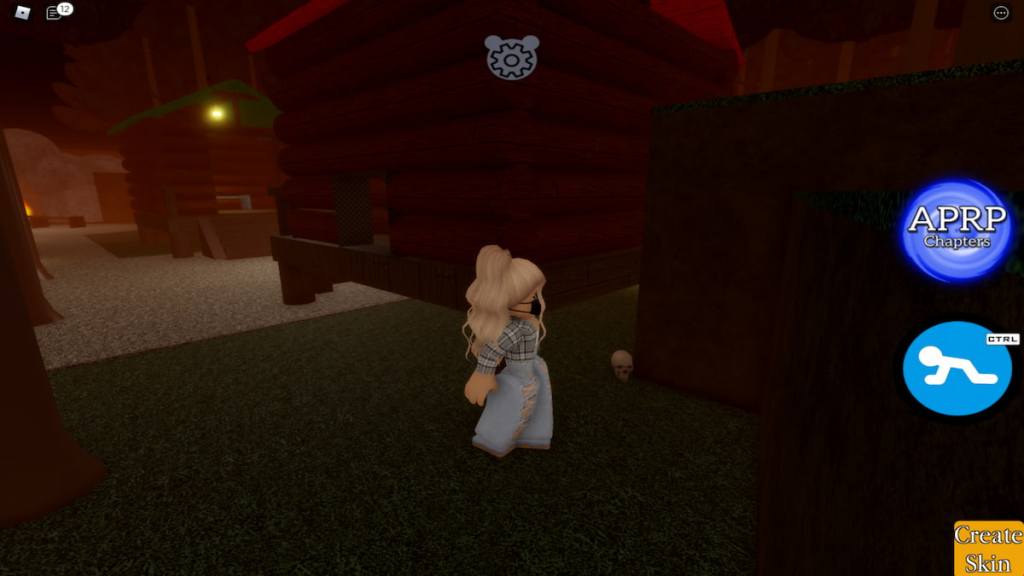
- SkullLady
- Speak with the menu pig and select the map icon to open the teleport menu.
- Select Book 1 and locate the Forest area.
- Teleport to Forest.
- From the spawn point, head towards the house with the blue roof.
- Once you've approached it, turn left and follow the path.
- You should now see two houses with red roofs and two with green roofs.
- Walk between the two houses with red roofs and turn your camera so that you're looking behind the first house.
- Here you'll find a small skull.
- Approaching the skull will complete the Petrified badge and award you with the SkullLady skin.
- Eric
- Speak with the menu pig and select the map icon to open the teleport menu.
- Select Book 1 and locate the Outpost area.
- Teleport to Outpost.
- From the spawn point, head left and follow the path.
- As soon as you reach the circle of rocks in the middle of the path, turn around and head up the stairs.
- Walk through the gym and up the next set of stairs.
- Exit the hallway through either doorway and go up the next set of stairs outside.
- Turn and walk right until you see a bench.
- Stand on the bench and use it to help you jump over the fence in front of you.
- Jump towards the helicopter.
- Once you've landed on the helipad below, look in the left corner for a golden feather.
- Collecting it will award you with the High Above badge and Eric skin.
Skins 21-24
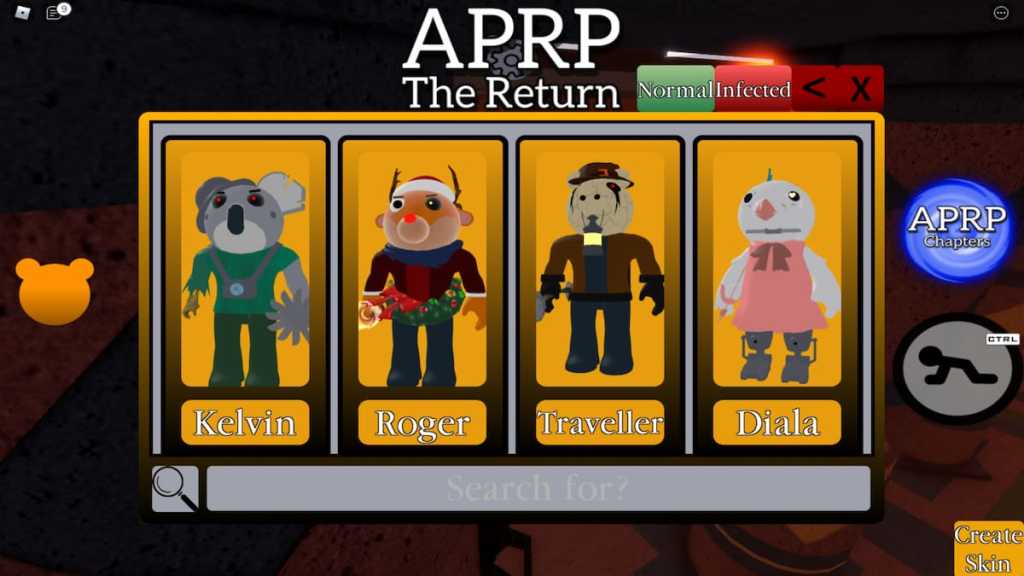
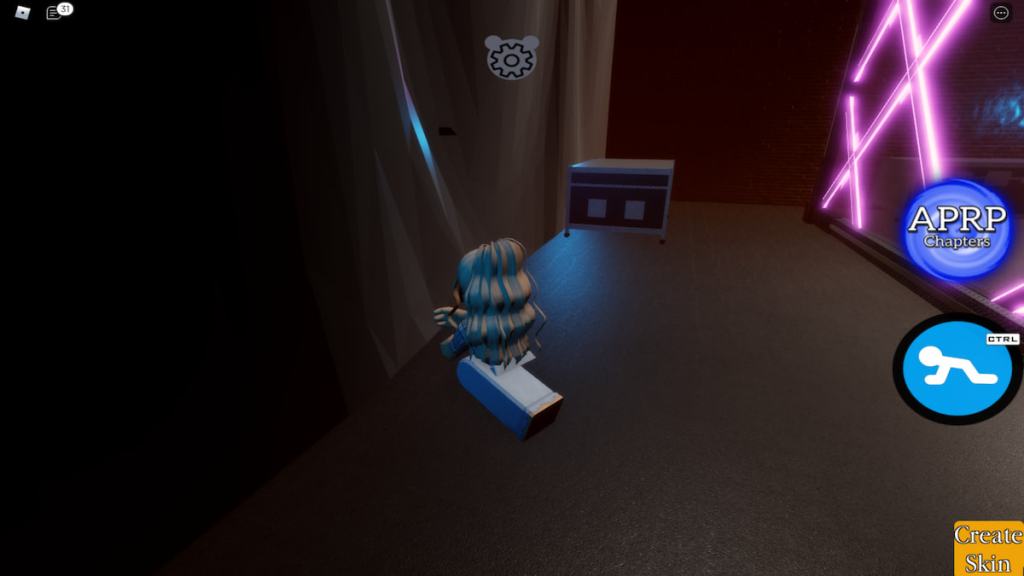
- Kelvin
- Speak with the menu pig and select the map icon to open the teleport menu.
- Select Book 1 and locate the City area.
- Teleport to City.
- From the spawn point, turn left and walk into the apartment.
- Go straight through the doorway and follow the set of stairs on the right up to the second floor.
- Once on the second floor, enter the second bedroom in the hallway.
- On the side of the bed by the window, you should see a small circular blade.
- Walking over it will award you with the Unexpected Trip badge and the Kelvin skin.
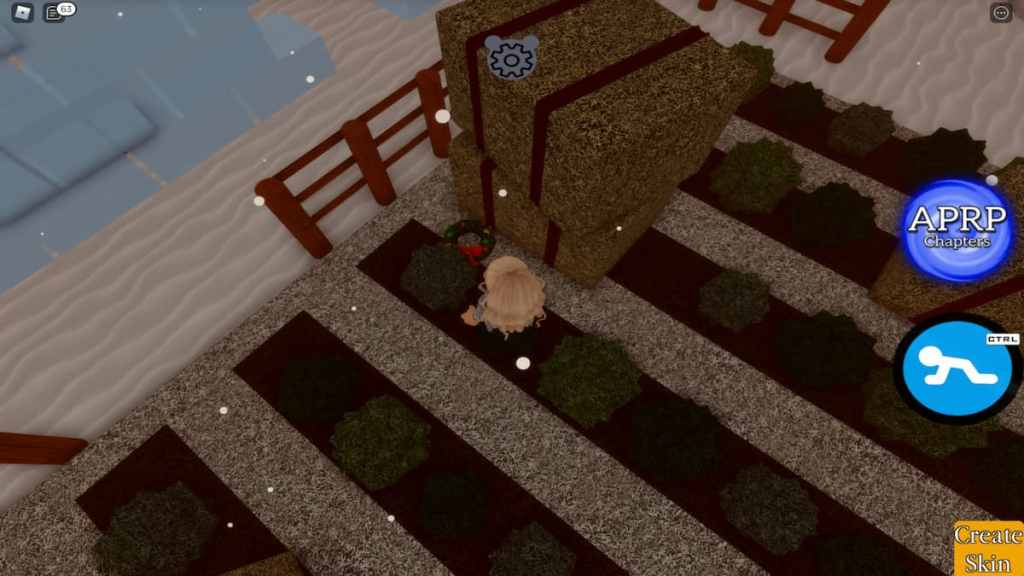
- Roger
- Speak with the menu pig and select the map icon to open the teleport menu.
- Select Extras and locate the Winter Holiday area.
- Teleport to Winter Holiday.
- From the living room where you spawn in, exit through the front door on the left.
- Walk past the pig holding the lantern and follow the sidewalk to the left.
- Enter the fenced-in field.
- A decorative wreath should be lying on the ground behind the stack of two hay bales.
- Walking over it will award you with the Crisis in Snow badge and Roger skin.
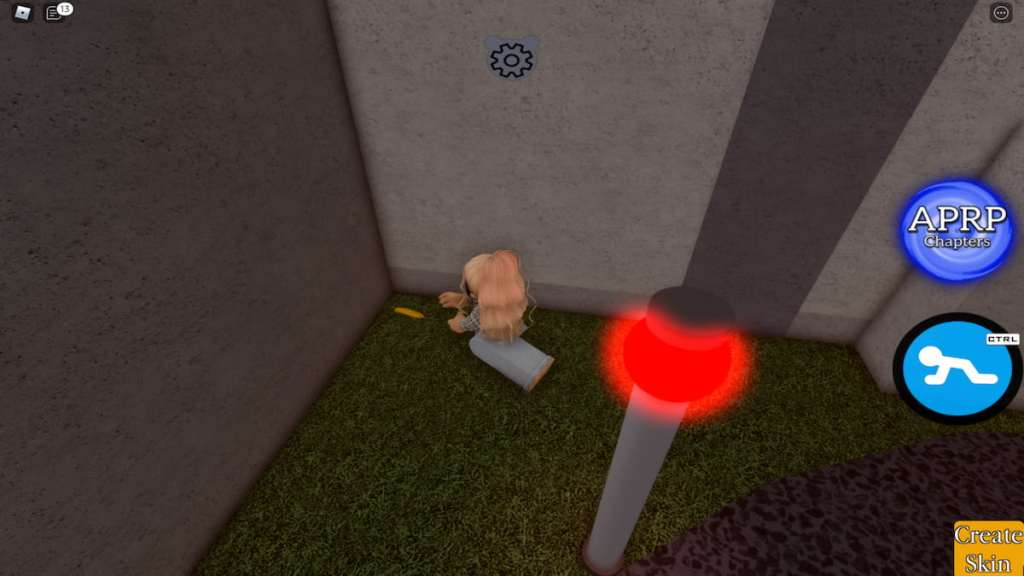
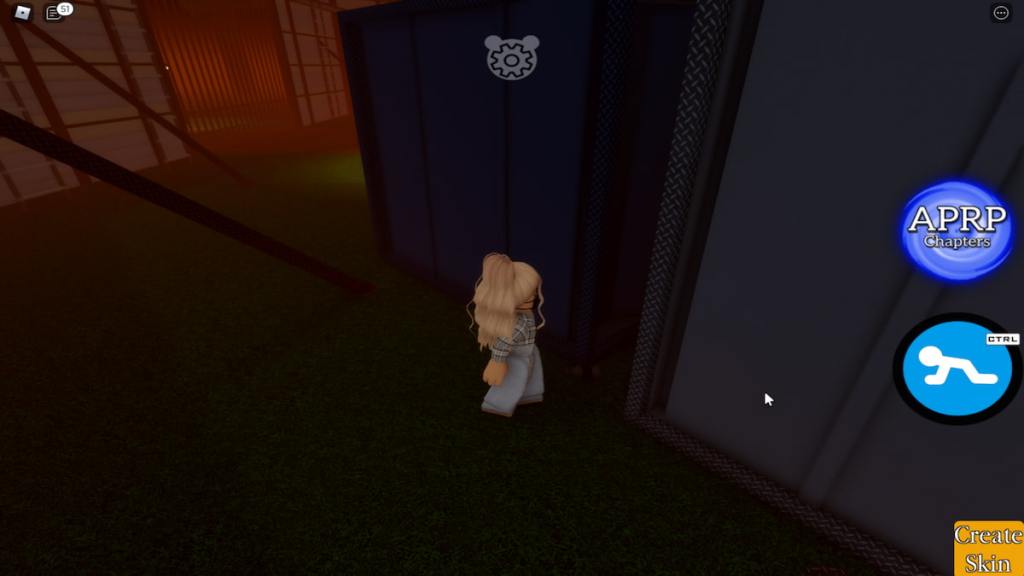
- Traveler
- Speak with the menu pig and select the map icon to open the teleport menu.
- Select Extras and locate the Intercity Base area.
- Teleport to Intercity Base.
- From the spawn point, walk straight out of the tent.
- Continue walking towards the shipping containers.
- You should pass a raccoon character.
- There should be an item lying on the ground where the dark blue and gray containers meet.
- Approaching it will prompt the Forgotten Traveller badge and award you with the Traveller skin.
- Diala
- Speak with the menu pig and select the map icon to open the teleport menu.
- Select Extras and locate the SweetySunshine area.
- Teleport to SweetySunshine.
- From the spawn point, turn and head towards the main doors.
- Stand in front of them and wait for them to open.
- The doors are on a timer, so it may take a few seconds for them to open.
- Once they open, head outside into the rain and approach the tree in the back right corner.
- Leaning against this tree will be a red heart.
- Walking over the heart will unlock the Valentronic badge and Diala skin.

Skins 25 - 28
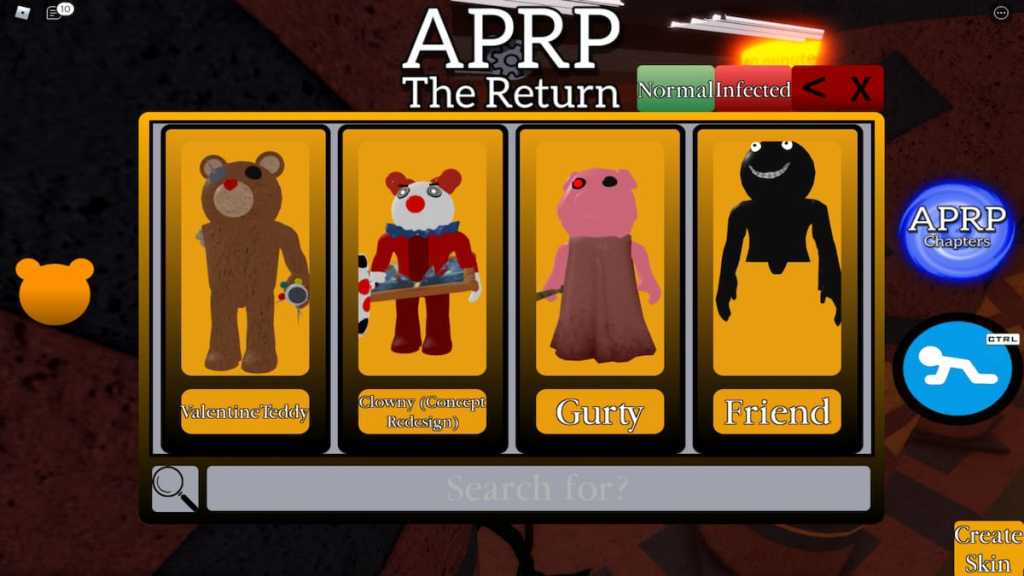
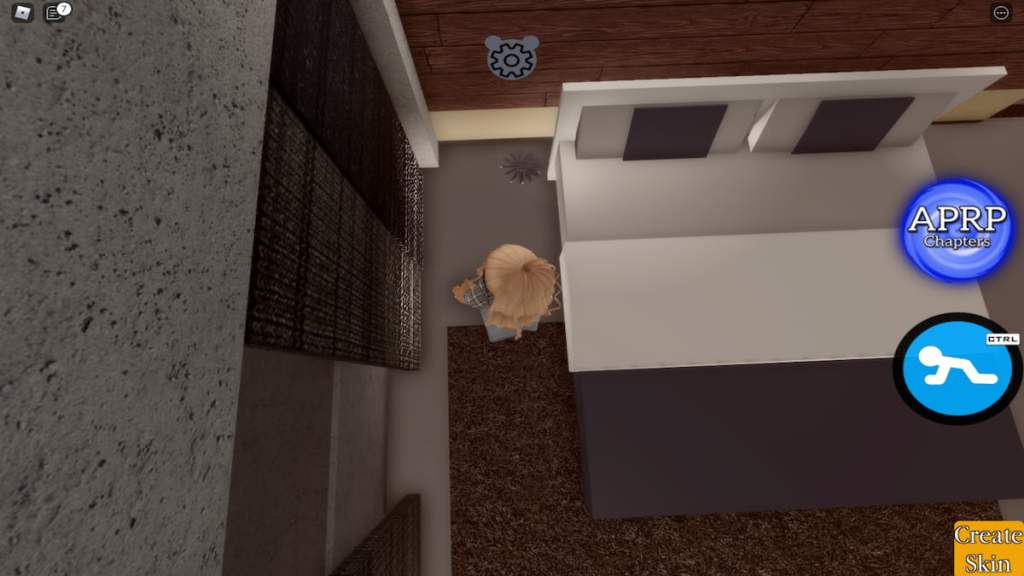
- ValentineTeddy
- Speak with the menu pig and select the map icon to open the teleport menu.
- Select Book 1 and locate the Mall area.
- Teleport to Mall.
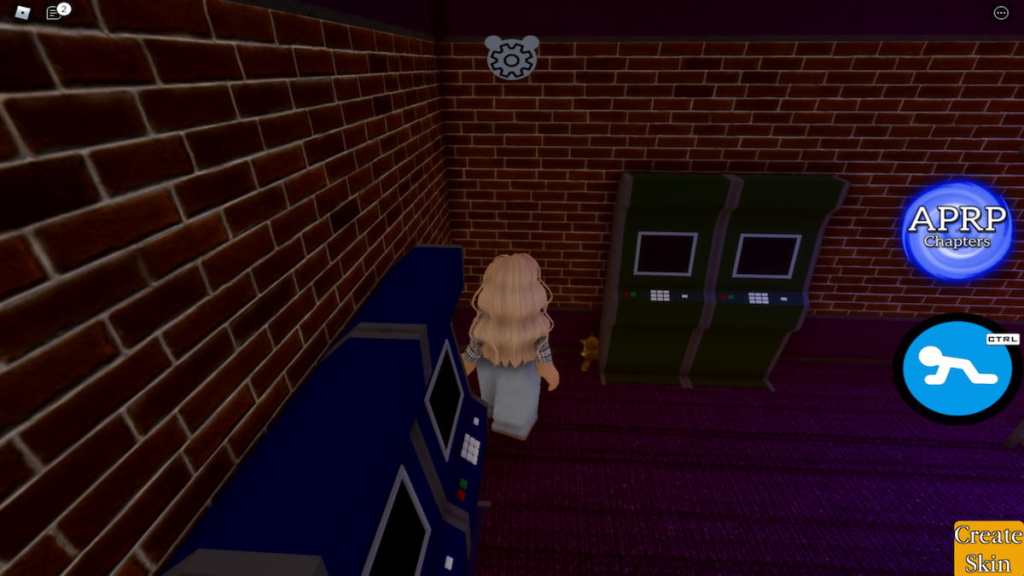
- From the spawn point, walk straight until you reach the candy store.
- Once inside the candy store, turn right and exit.
- You should now see the Aye-Aye Arcade.
- Upon entering the arcade, you will see two green arcade machines; next to one of them is a small teddy bear.
- Walking over the teddy bear will award you with the Stitched Toy badge and ValentineTeddy skin.
- Clowny
- Speak with the menu pig and select the map icon to open the teleport menu.
- Select Book 1 and locate the Carnival area.
- Teleport to Carnival.
- From the spawn point, look for the carnival game with the green and white striped roof and walk towards it.
- The building has a target inside of it.
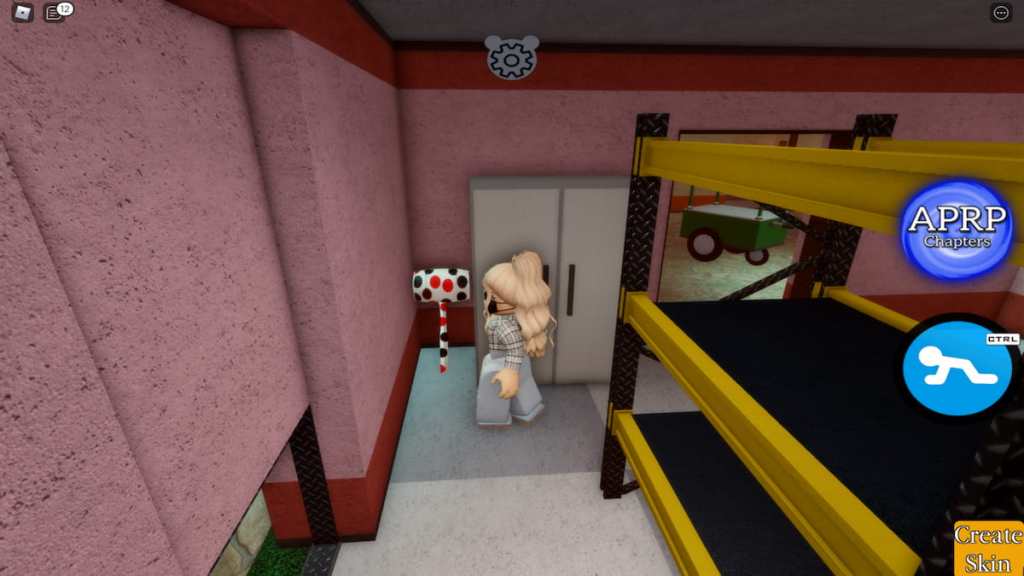
- To the right of this carnival game is a storage building with metal shelves inside.
- Enter the storage building and approach the gray closet.
- Tucked in between the wall and the closet is a polka dot hammer.
- Walking into this hammer will award you with the Clowny Redesign Concept badge and Clowny skin.
- Gurty
- Speak with the menu pig and select the map icon to open the teleport menu.
- Select Extras and locate the OldOak area.
- Teleport to OldOak.
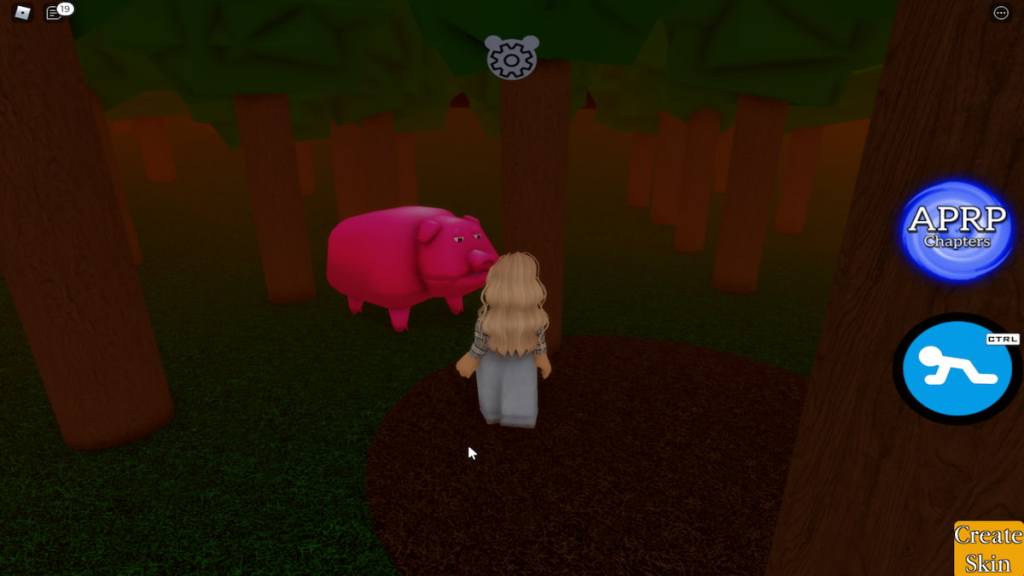
- As soon as you spawn into this area, you will notice something pink tucked in between a few trees in the distance.
- Upon approaching the tress, you'll see that the pink mystery is a large pig.
- Walking near the large pig will trigger the April Fools badge and award you with the Gurty skin.
- Friend
- Speak with the menu pig and select the map icon to open the teleport menu.
- Select Book 2 and locate the Port area.
- Teleport to Port.
- Once inside of Port, walk around the map and keep your eye out for any orange, eye-shaped icons:
- Eye #1 can be found at the bottom of one of the pillars near the car pile-up.
- Eye #2 can be found on the bookshelf inside of the lighthouse.
- Eye #3 can be found behind the counter on the first floor of the tall blue building directly across from the lighthouse.
- Eye #4 can be found on the top floor of the same blue building tucked between a nightstand and the wall.
- Eye #5 can be found on the back of one of the crates near the large ship.
- After collecting the last eye, go to the front door of the building next door to the blue one and knock on the door.
- After a few seconds Friend will run out and take down your avatar.
- Once you respawn you will be awarded with the La Vita Oscura badge and the Friend skin.
Skins 29 - 32
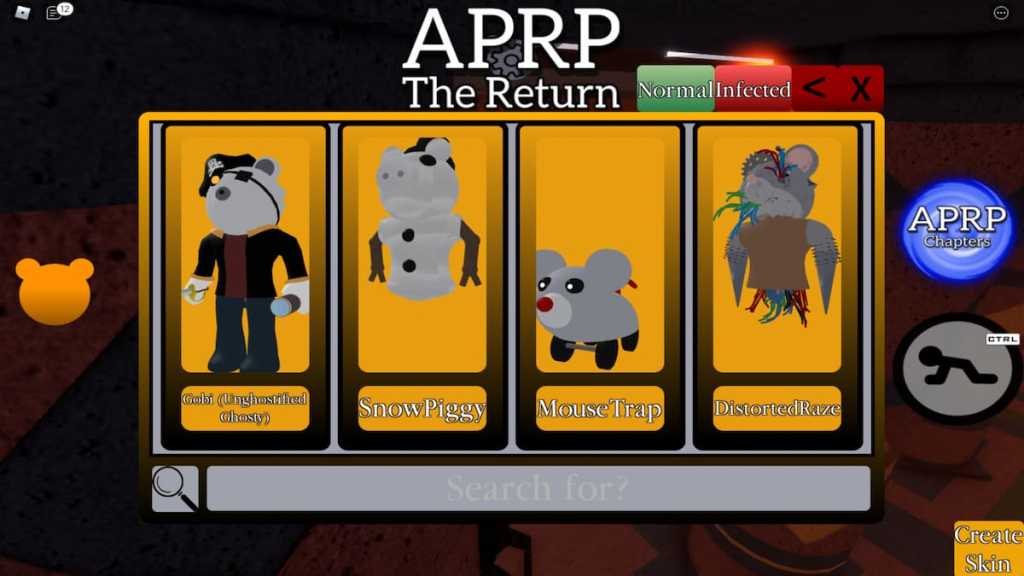
- Gobi
- To unlock the Gobi skin, you'll need to speak with the Gobi NPC near the menu pig.
- He'll tell you that to receive the corresponding badge, you'll need to join The Piggy Battle and open three treasure chests.
- After opening each chest, you'll want to look for either Ghosty, Budgey, or Zack and interact with them.
- Doing so will award you with the Encountered All Pirates badge and the Gobi skin.
- SnowPiggy
- Speak with the menu pig and select the map icon to open the teleport menu.
- Select Extras and locate the Snow Forest area.
- Teleport to Snow Forest.
- Once you've spawned in, you'll need to walk around the map and collect Snow Pig pieces:
- Piece #1 (arms) can be found just in front of the spawn point on the other side of the dock.
- Piece #2 (head) can be found in the back left corner of the map.
- Piece #3 (hat) can be found by following the left after you've grabbed piece #2.
- Piece #4 (body) can be found in a small corner by continuing to follow the same wall.
- Piece #5 (buttons) can be found by continuing along the same wall.
- After collecting all of the necessary pieces, you should see the White As Snow badge appear in the bottom right-hand corner of your screen.
- You will now have the SnowPiggy skin.
- MouseTrap
- To obtain the MouseTrap skin, you'll need to earn 2,000 points in The Piggy Battle and purchase it from the trap menu.
- Points can be earned by taking down enemy players and other Piggys.
- To obtain the MouseTrap skin, you'll need to earn 2,000 points in The Piggy Battle and purchase it from the trap menu.
- DistortedRaze
- The DistortedRaze skin is unlocked when you achieve the secret ending in the Vents story
- To start the Vents story you'll need to enter The Piggy Battle and find the manhole with a ladder.
- After a short dialogue your avatar will teleport to the Vents map.
- From here, you'll need to find items and escape Mousy as she crawls around inside of the Vents with you.
- The steps to escape the vents are as listed below:
- Find the Bucket item.
- Lead Mousy into two mirrors so that she can see her true reflection.
- Locate the water to fill your Bucket.
- Grab the Button item.
- Find the fire and put it out with the water in your Bucket.
- Grab the scissors that spawn after you put out the fire.
- Use the scissors to cut all of the bushes in the vents.
- One of the bushes will have a gas canister underneath it.
- Locate the hole for the button.
- Insert the button and pour your gas.
- After pouring the gas press the button to activate the lasers.
- These lasers won't hurt your avatar, they are only used to stun Mousy.
- Attract Mousy into the lasers so that she becomes stunned and drops her yellow key.
- Find and unlock the vault.
- After doing so, you will be prompted with a cutscene where Mousy will speak with you.
- When she asks for your forgiveness, do not choose any of the answers on screen
- If you wait around 60 seconds you will receive a jump scare from the DistortedRaze skin, be awarded with the Vents - Unkown Ending badge, and unlock your own DistortedRaze skin.
- The steps to escape the vents are as listed below:
- The DistortedRaze skin is unlocked when you achieve the secret ending in the Vents story
Skins 33 - 36
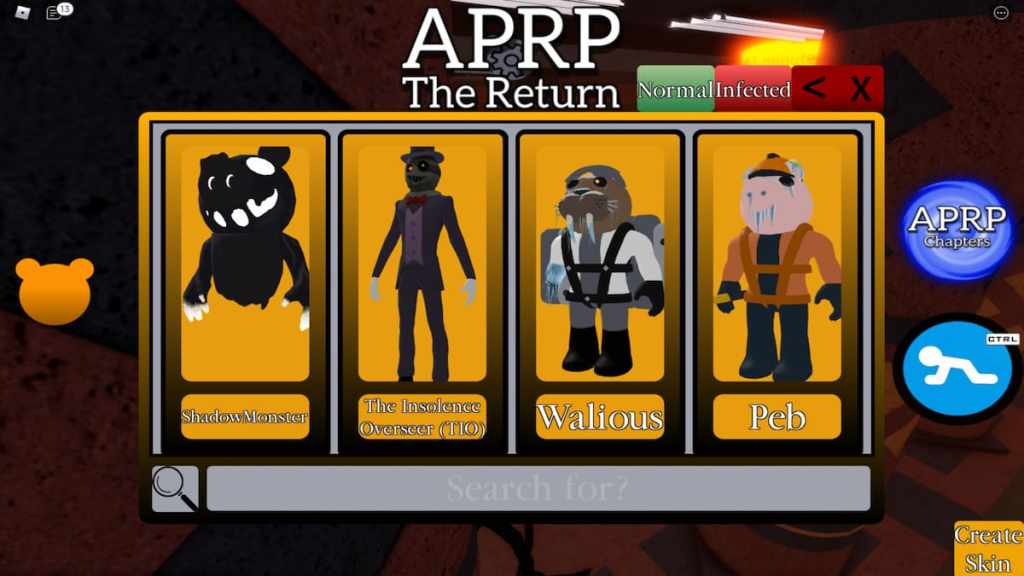
- ShadowMonster
- Speak with the menu pig and select the map icon to open the teleport menu.
- Select Book 2 and locate the Docks area.
- Teleport to Docks.
- Once you've spawned into Docks, you'll again be on the hunt for five hidden eye icons.
- Eye #1 can be found on the side of the bench below the wheel-able stairs.
- Eye #2 can be found by going up the wheel-able stairs and walking through the metal door.
- Through the door, you should see an eye icon next to one of the green benches.
- Eye #3 can be found by walking through the archway between the green benches and heading down the stairs.
- Walk through the room full of caskets and through the next archway.
- In the hallway, there will be an eye icon on the side of the bench.
- Eye #4 can be found by going back into the room full of caskets but walking through the second archway.
- Walking through this archway should take you to one of the mechanic rooms.
- Look for the forklift and follow directly behind it.
- On the wall, you will see an eye icon.
- Eye #5 can be found by walking through the mechanic room's archway.
- This archway should lead you into a brick hallway where you will find the last eye icon on the wall.
- After collecting all five eye icons, make your way back to the coffin room and click on the opened coffin.
- By doing this, you will close the coffin and be awarded the Mysterious Being badge and ShadowMonster skin.
- The Insolence Overseer
- Speak with the menu pig and select the map icon to open the teleport menu.
- Select Book 2 and locate the Temple area.
- Teleport to Temple.
- Once you've reached the Temple area, you'll need to put our 11 torches around the map.
- Explaining the locations of these torches is difficult with words, so we'd recommend checking out this video tutorial by YouTuber tsetYT for an easy run-through.
- After you've put out all of the torches, you will be awarded the The Insolence Overseer badge and skin.
- Walious
- Obtained by escaping the Construction Site.
- Peb
- Obtained by escaping the Construction Site.
Skins 37 - 40
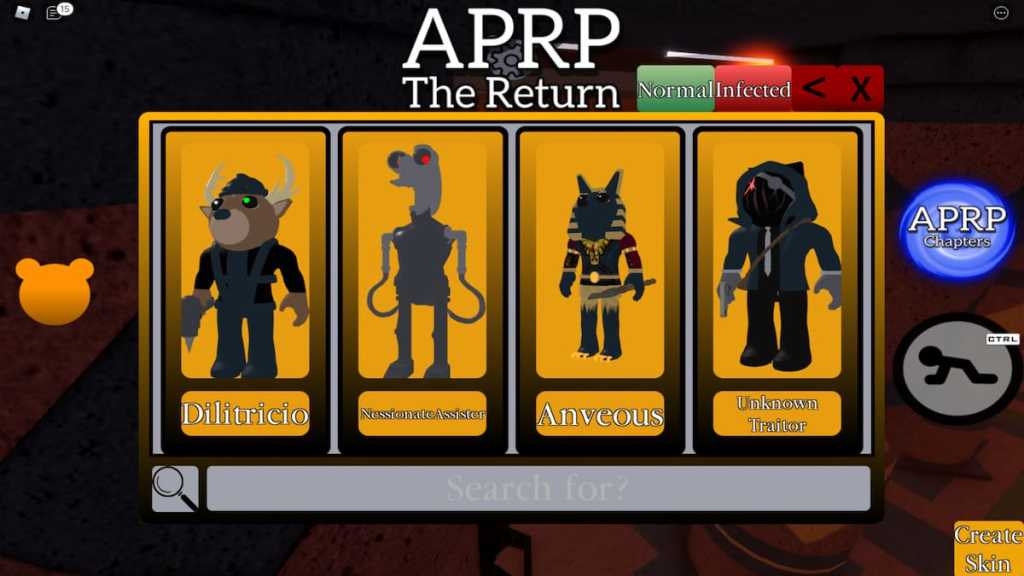
- Dilitricio
- Obtained by escaping the Construction Site.
- NessionateAssiter
- Obtained by escaping the Construction Site.
- Anveous
- Obtained by escaping the Construction Site.
- Unkown Traitor
- Speak with the menu pig and select the map icon to open the teleport menu.
- Select Extras and locate the Heist area.
- Teleport to Heist.
- Within the Heist area lives an Unknown Traitor searching for his lost gun.
- By searching around the map, finding the gun, and bringing it back to the Unknown Traitor, you will unlock The Dark Paradise badge and Unknown Traitor skin.
- The gun spawns in a random place around the map, so you'll need to do some exploring in order to find it.
Skin 41
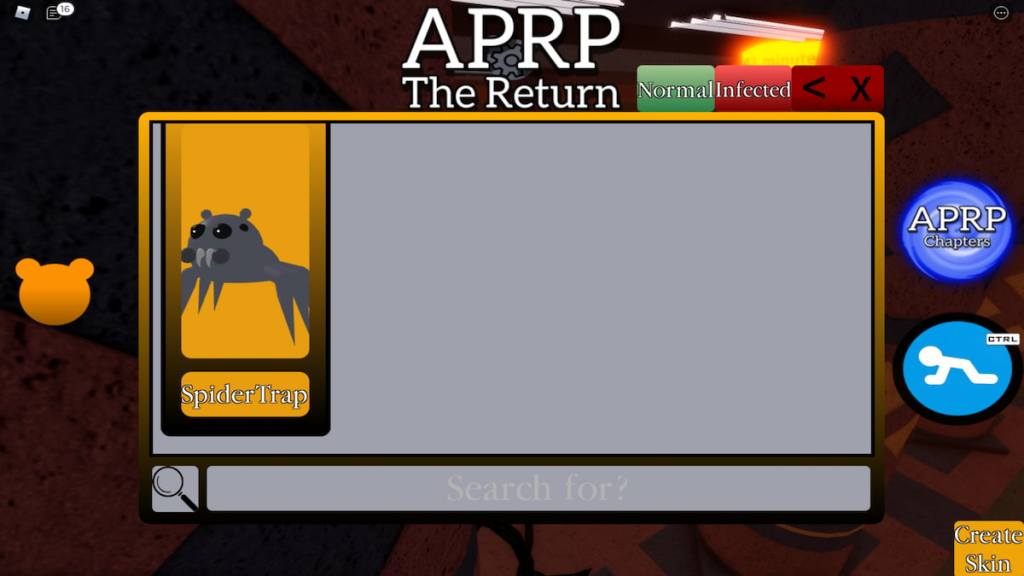
- SpiderTrap
- To unlock the SpiderTrap skin, you'll need to be alerted by a MouseTrap in The Piggy Battle.
- You can use your own MouseTrap, or someone else's, to complete this challenge.
- Once you've been alerted, you will receive the Caught by a mouse! badge and SpiderTrap skin.
- To unlock the SpiderTrap skin, you'll need to be alerted by a MouseTrap in The Piggy Battle.
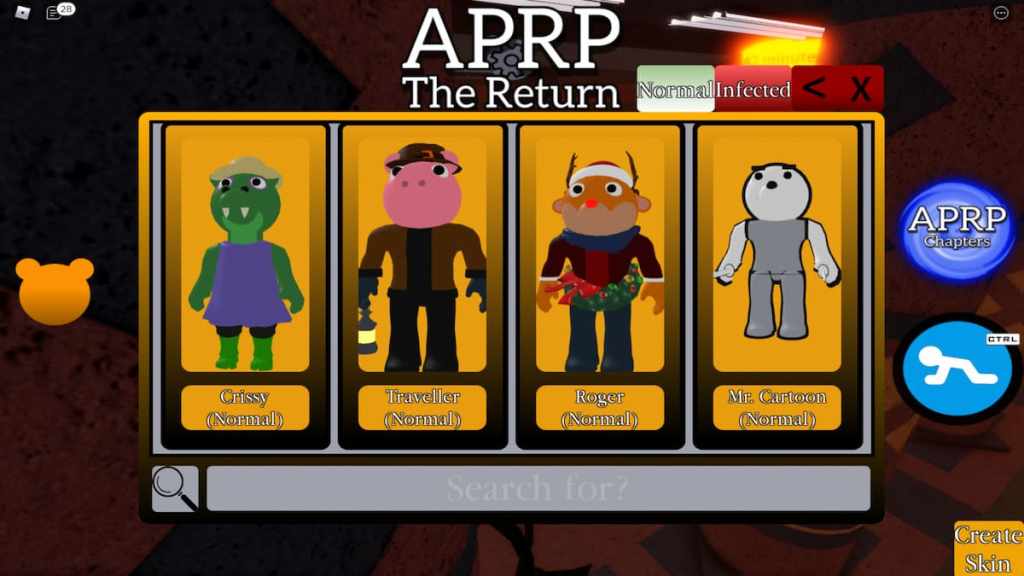
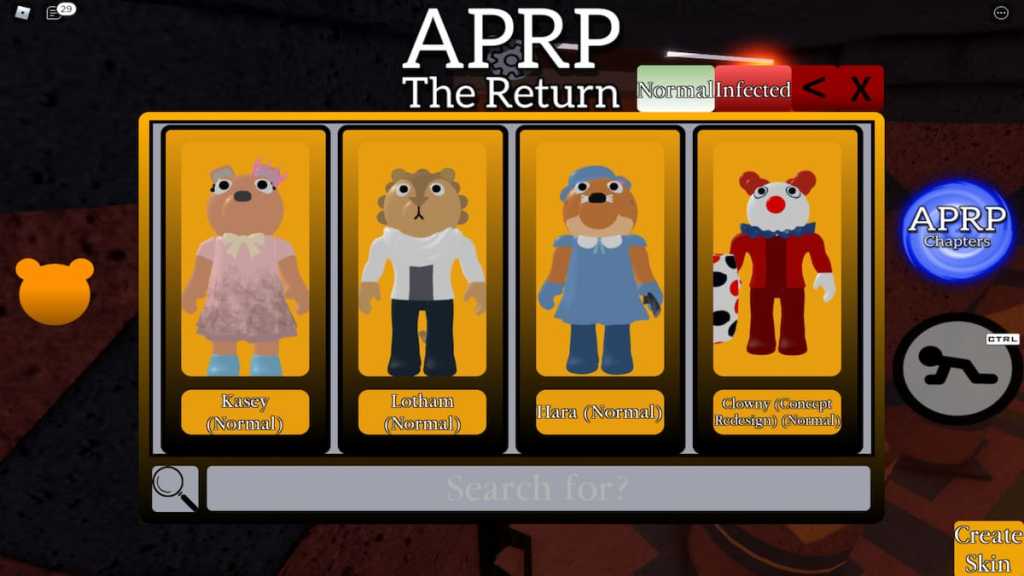
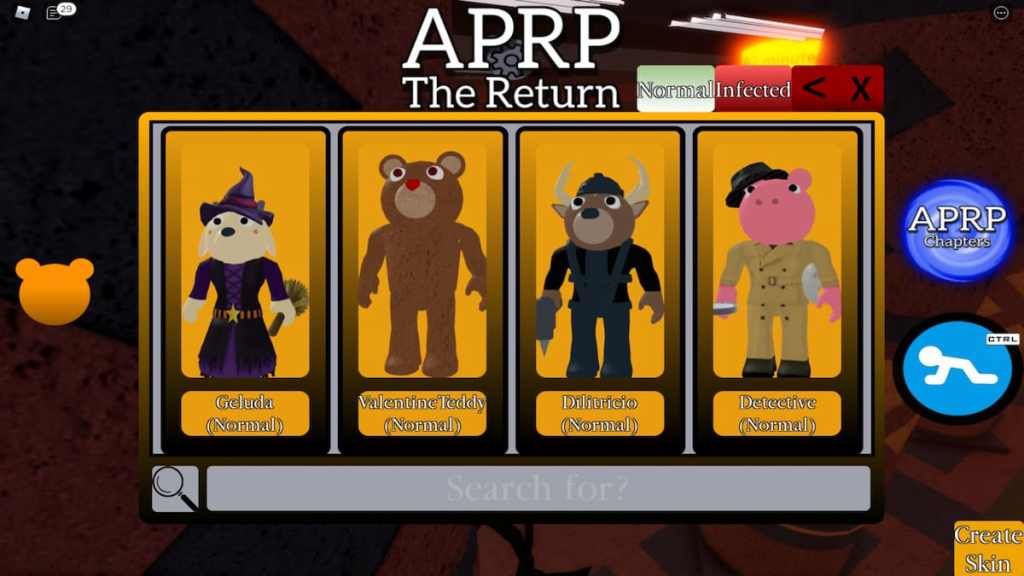
Normal Skins
Each of the Normal Skins pictured below is automatically unlocked when you earn the corresponding infected badge listed above.
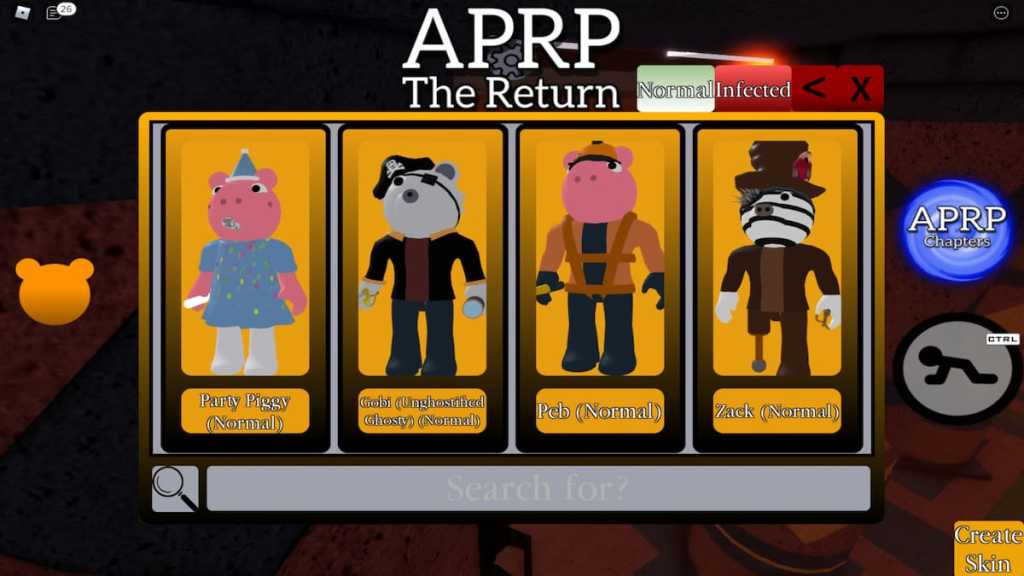

As of Nov. 2, 2021, the list above contains all the obtainable skins in Accurate Piggy RP: The Return. If more skins are added, this guide will be updated accordingly!
Looking for more Roblox Piggy content? Check out our article that answers the question Is Roblox Piggy ending? | Piggy’s final chapter to be released soon, or our guide on How to get Piggy Tokens in Roblox Piggy!