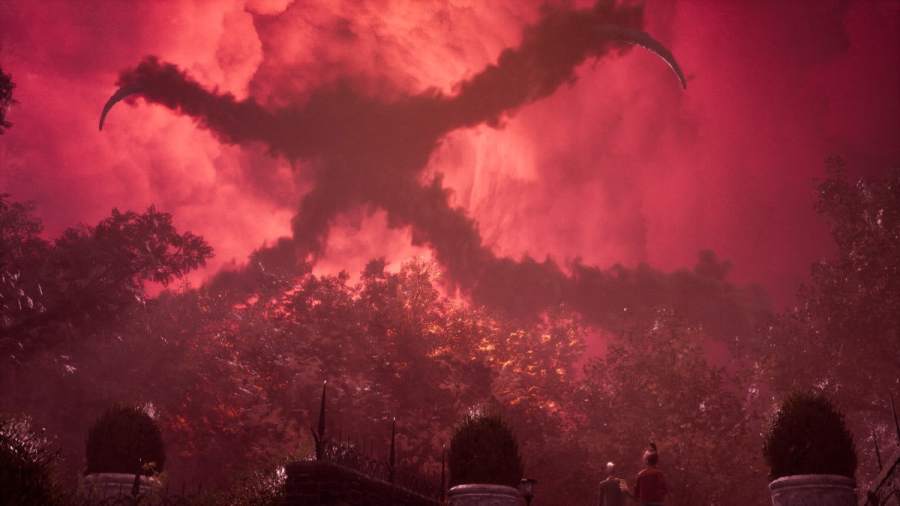
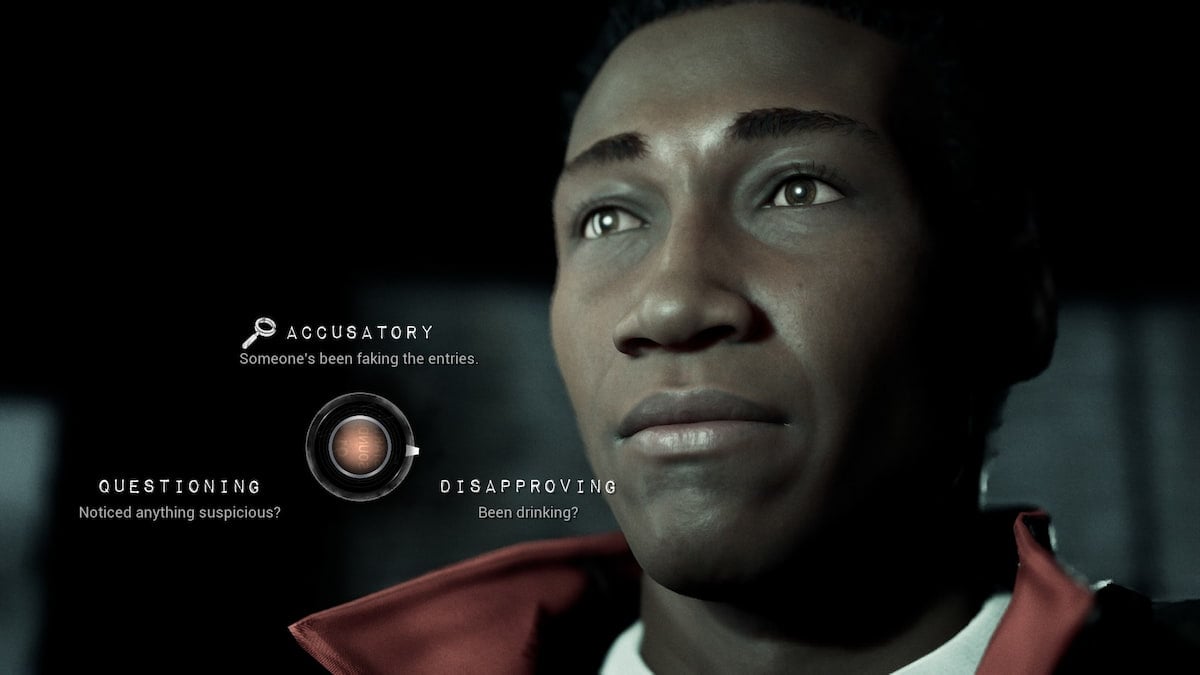
The Casting of Frank Stone is a horror game set in the world of Dead by Daylight from the developers Supermassive Games. There are loads of choices, several endings, and a bunch of collectibles. In order to get 100% of this spook title, you'll want to use our The Casting of Frank Stone walkthrough.
Note: this walkthrough is a work in progress and will be updated regularly and promptly until it's complete.
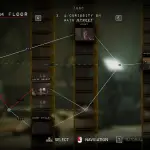
The Casting of Frank Stone Walkthrough - All Chapters
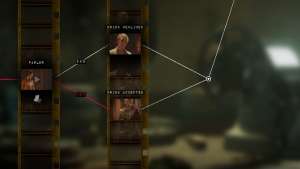
In order to complete this one, you will need to find all the collectibles and complete all the 32 achievements in The Casting of Frank Stone. This guide is split up by chapter, going over what each different choice will get you, how to get everyone to survive, all the endings, and everything else you'll need to complete it.
Chapter 1: The Burning Maw
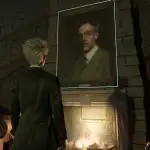
This chapter takes place in 1963 at the mill that will be important to the rest of the story. In it, you play as Sam Green, the police officer who interrupts a serial killer before he can take his final victim.
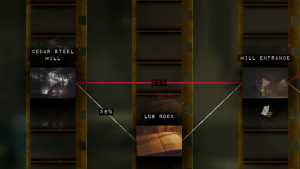
Cedar Steel Mill
As you pull up the mill, you encounter Tom, the night watch. You will have several choices to make while in conversation with him. There are two possible outcomes to the conversation with Tom; most choices will get you to argue or talk to Tom about who has looked around, and the others will allow you to look into the logbook and come up with some insights. Here's how to unlock both split paths for this scene:
- Path 1: All decisions that don't follow the path below will get you the first, most common path.
- Path 2: For choice 1, choose "Serious: I need to ask you a few questions." After that, pick "Curious: Can I check your records?" You will then gain access to the check in and check out record book.
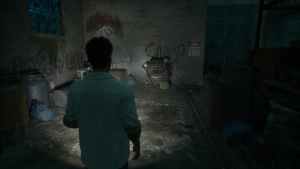
Mill Entrance
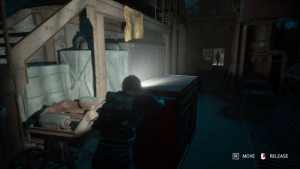
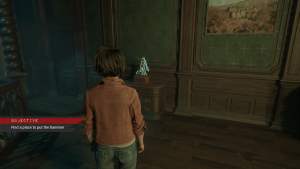
After speaking with Tom, it's time to head into the mill itself. There are several collectible items here and a couple of path choices for Sam to make.
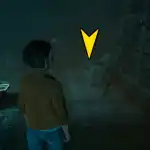
Trinket collectible 1 of 12: Iridescent King
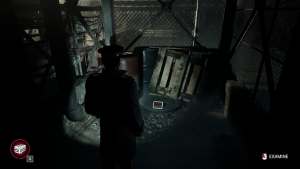
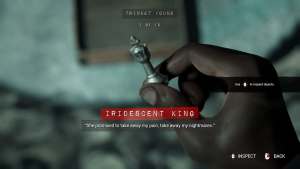
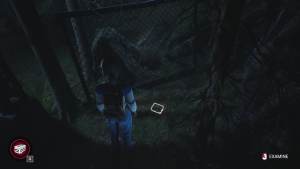
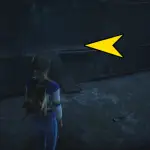
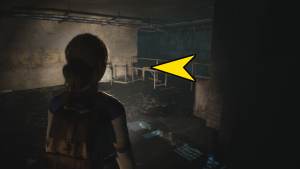
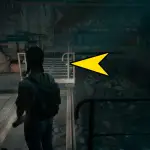
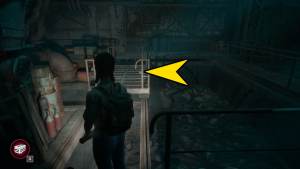
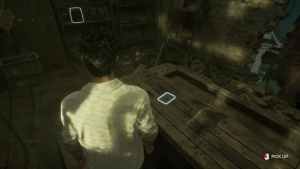
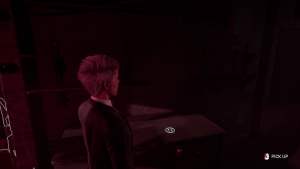
When you first gain control of Officer Green, you will be able to find the first of twelve Trinket collectibles. It will be hidden behind the section above. You need to squeeze into the crevasse marked on the screenshot above, then look around inside for a small box on the ground.
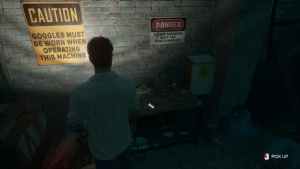
The Champion Artifact 1 of 10: Staff File
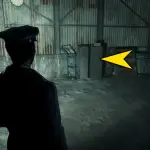
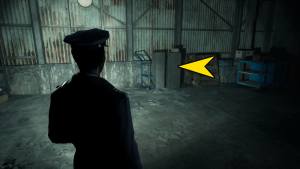
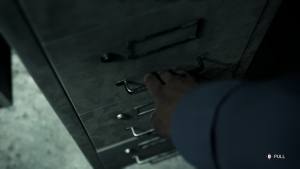
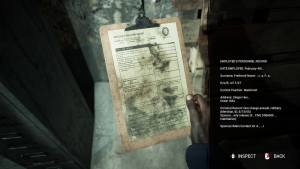
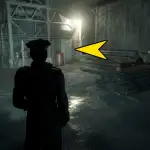
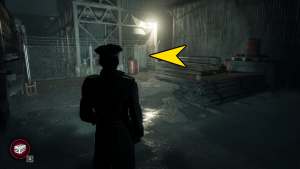
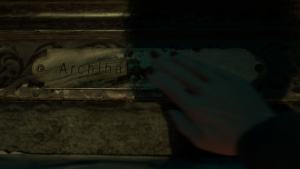
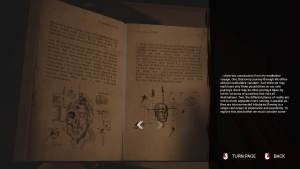
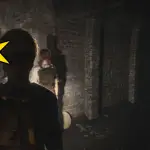
Once inside, you will need to squeeze through stack of steel sheets, then through a door. Once you are in the office, you will have a filing cabinet and a sheet of paper you can interact with. If you shake the filing cabinet, a clipboard with Frank Stone's Staff File will fall out. This is an important Artifact, and there will be several more throughout the game.

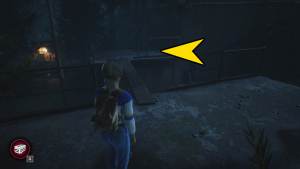
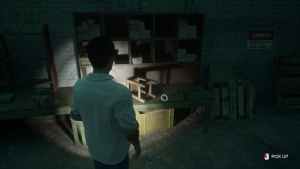
Continue through the warehouse, and you will come across Tom again as well as Merlin the dog. After leaving the interior location, you will come across a grate that Sam wishes to move. This requires the help of a crowbar, which is found by jumping over this section of the fence and grabbing it.
Jump back over to the other side, then click the crowbar on the grate to open it with a simple Quick Time Event (QTE). This QTE will be another split path.
- Path 1: Fail the QTE and have Tom help you open the grate instead.
- Path 2: Pass the QTE with the crowbar.
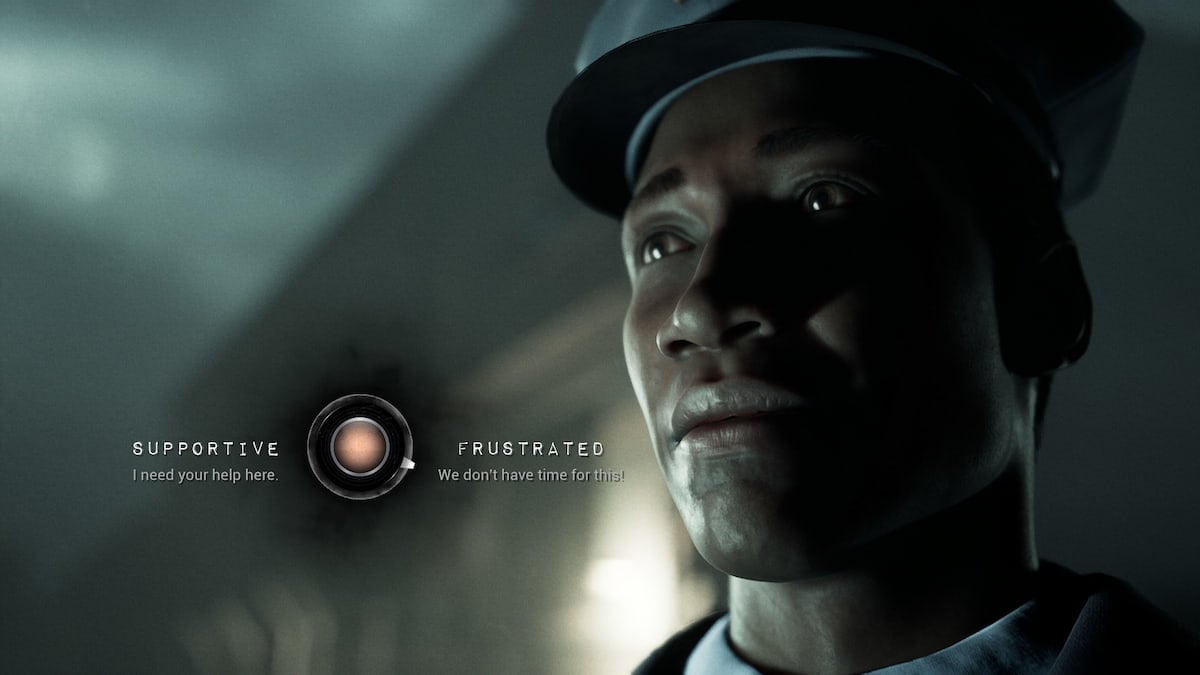
Completing this will begin a dialogue with Tom again. You can choose to be kind or mean, creating yet another split path.
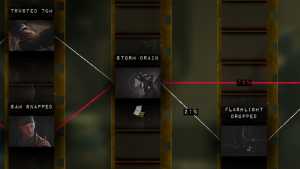
- Path 1: Supportive: I need your help here. (Trusted Tom)
- Path 2: Frustrated: We don't have time for this! (Sam snapped)
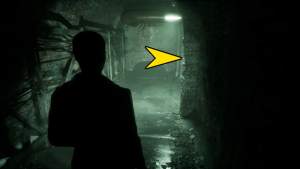
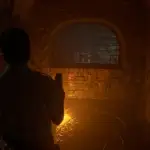
Storm Drain
It's time to climb down into the storm drain. The ladder will collapse underneath you, making it impossible to return to surface this way. So you have no choice but to head down into the furnace itself.
Trinket collectible 2 of 12: Wooden Horse


After dropping down into the underground furnace tunnels, you will drop your hat. You will start this section always facing towards the furnace area, but this trinket will be in the other direction. So turn around from your starting position, then make the first left down the tunnel. On the right side wall, there will be an open door. Inside this room is another wooden box on the floor with the horse Trinket.
The Champion Artifact 2 of 10: Symbols
As you head towards the furnace from the place you dropped down, you will have to turn right into a well-lit tunnel marked with a yellow sign that says "Furnace Access." On the wall next to this sign will be a symbol of a crude weapon painted on the wall. This is the Champion Artifact 2. There are actually a couple of these, but the game only counts the first one you interact with
Relliks 1 of 12: The Hillbilly


Just before the first location where Sam has to crawl, look to the right. There will be some pipes that are low enough to jump over; the Hillbilly Rellik will be on the other side of the pipes on the ground. After you finish crawling though the crawl space, then you will need to squeeze past a section of wall. After that will be another QTE; for this one, you will either:
- Path 1: Cut your hand and break your flashlight.
- Path 2: Pass the QTE and keep your flashlight.
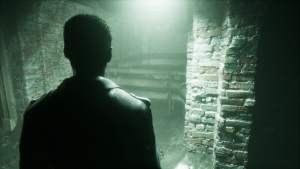
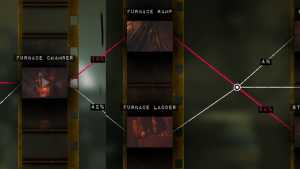
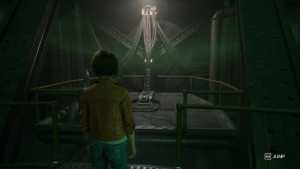
Furnace Chamber
After making it into the furnace and seeing the baby, you will have the choice between taking either the:
- Path 1: Furnace Ramp.
- Path 2: Furnace Ladder.
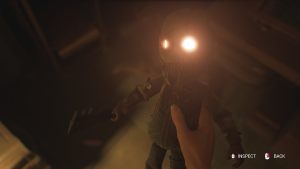
Both are triggers for another QTE; you will fall and face a second QTE if you fail. Either way, you will get up to face another path once you are in combat with Frank Stone.
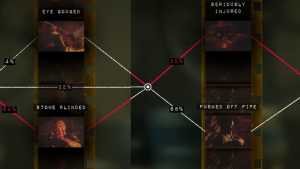
- Path 1: Fail the hand-to-hand battle QTE and get your eye gouged out.
- Path 2: Pass the QTE checks, but don't have the flashlight or fail the flashlight QTE.
- Path 3: Blind Frank Stone with the flashlight by passing all QTEs while still having the flashlight.
The next path come with the QTE when you need to react to getting hung up on the wall.
- Path 1: You fail the pipe check and permanently injure your shoulder.
- Path 2: You succeed pulling the pipe out of the wall.
Fate Sealed for Chapter 1
In the final path in Chapter 1, you can either Fail to stop Frank Stone and the baby dies, or you can shoot Frank Stone and save the baby.
- Path 1: Fail all the quick time event, and Frank will kill the baby before you can stop him.
- Path 2: Pass all the QTEs, and you will shoot Frank before he can kill the baby.

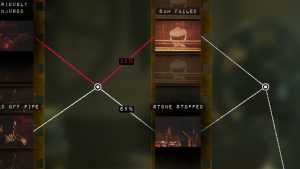
Achievement - Savior: Sam stopped Frank Stone.
Chapter 2: In the House of Darkness
Chapter 2 takes place in modern day England. You are Madi, a young college student who has gotten an mysterious invite from a woman who has asked her to visit her mansion: Gerant Manor.
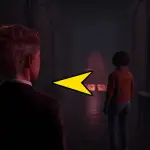
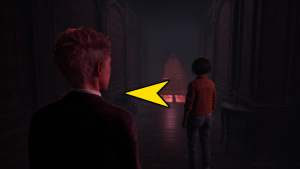
Lonely Road
After a bad nightmare, you wake on a plane on the way from Berlin to England. You then end up in a rental car, driving along a very small, out-of-the-way road. You have a choice as you come up on a stranger whose car has a flat tire and is trying to hitchhike. You have five seconds to decide to pick her up or not.
- Path 1: Choose to pick up Linda
- Path 1a: Apprehensive: Ask Linda what she knows about Gerant Manor.
- Path 1b: Don't ask Linda anything by letting time run out on the question.
- Path 1c: Curious: What do you do for a living?
- Path 2: Refuse to pick up Linda
Achievement - Fellow Traveller: Madi picked up the hitchhiker.
Lobby
After entering the manor, you will still be controlling Madi. There will be a couple of items you will want to look at to help you 100% this section. It's a pretty short chapter, so it won't be difficult to get all the possible choices.
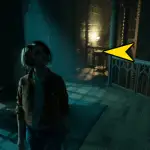
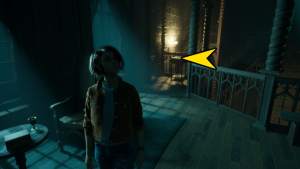
The Storyteller Artifact 1 of 10: Estate Letter
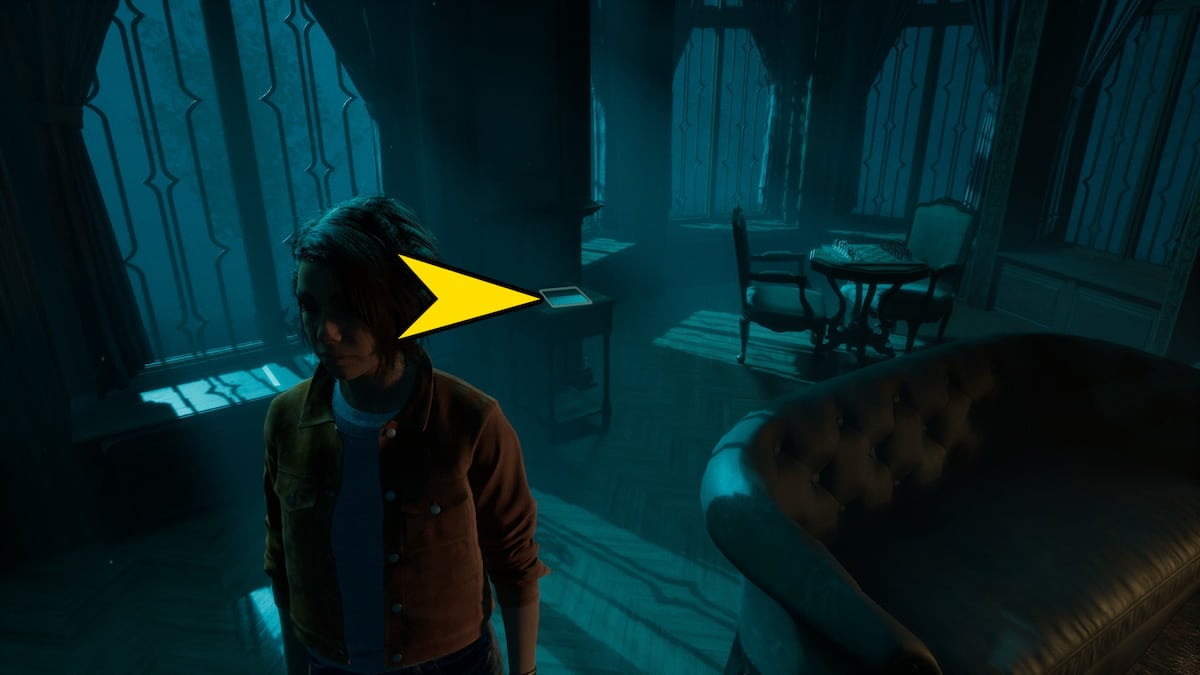
Before exploring the downstairs, head up the stairs and to the left. There will be an unlocked door to a sitting room; it will contain a piano to the right, a few sofas in front of a roaring fireplace in the center, and two objects on two different tables to the left by the windows. Pick up the letter to get the first Storyteller Artifact.
Relliks 2 of 12: The Huntress

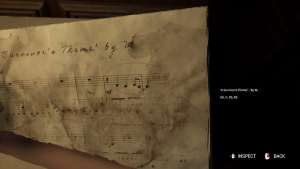


Head upstairs from the lobby, and interact with the tables at the top of the first set of stairs. There will be some music at the top on a scrap of paper. Look at it, then head into the only room on the top floor you can go into. Inside will be a piano; interact with it to play the music from the sheet. A secret passage will open up, and the Rellik will be in the room at the bottom of the stairs.
Achievement - Motif: Played a familiar theme on the piano.
Parlor
On the bottom floor, you can find a set of double doors that are unlocked. If you head inside, you'll meet Stan, another person who has been invited to this manor.
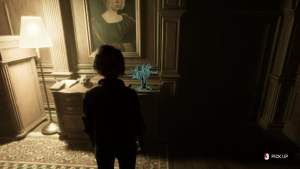
The Champion Artifact 4 of 10: Epic of Gilgamesh
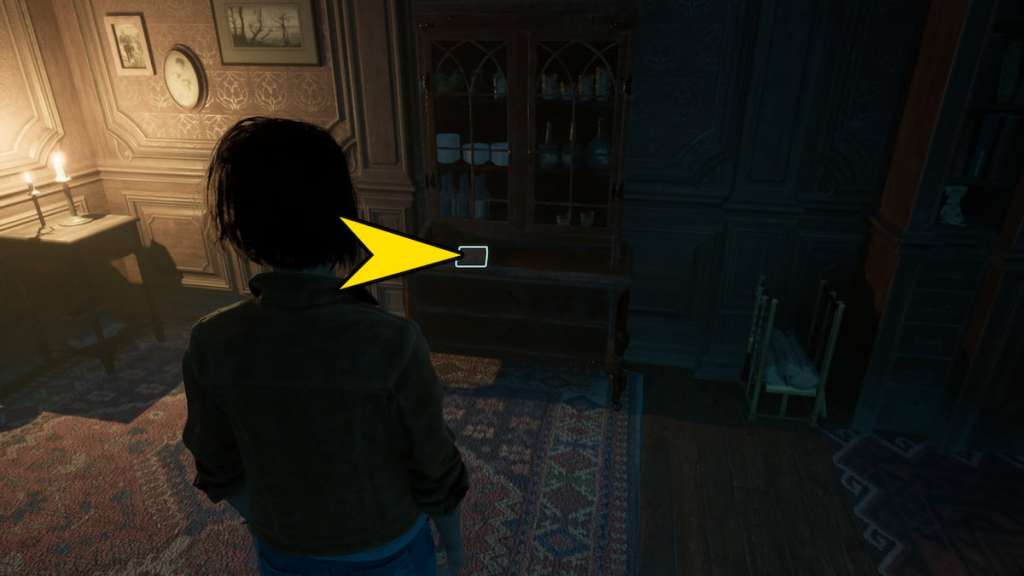
On a table in the back of the room, there is a copy of the Epic of Gilgamesh. Inside, you can find notes and highlights. This is another Artifact.
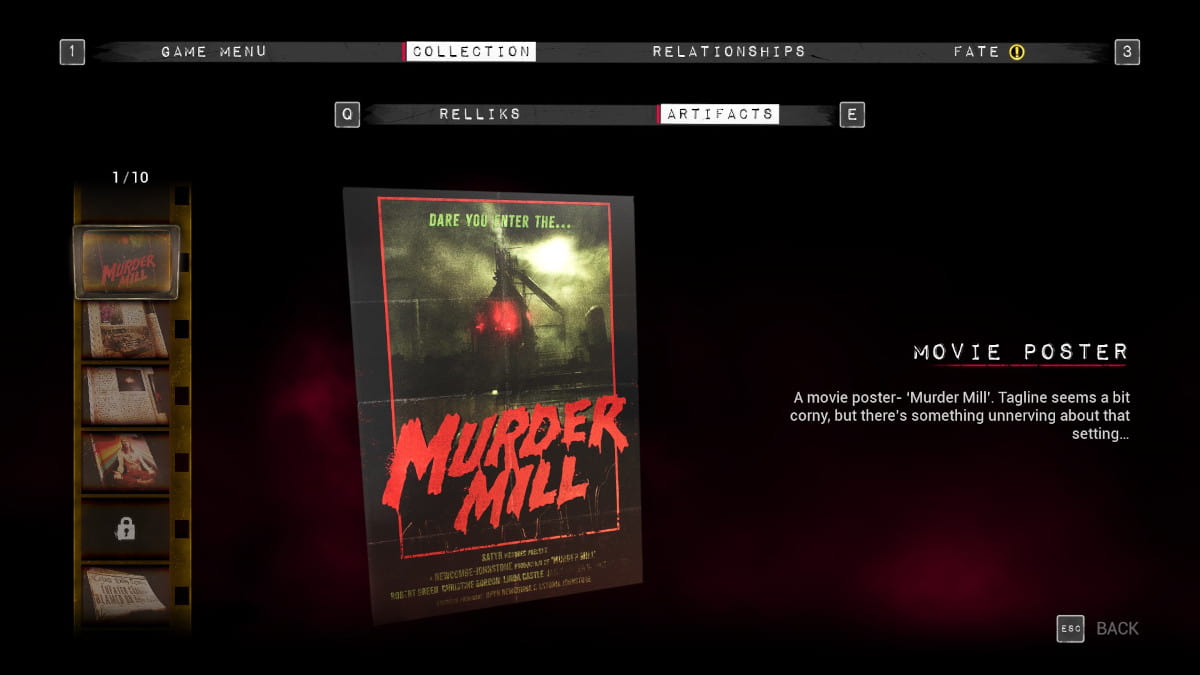
Murder Mill Artifact 1 of 10: The Poster
In order to move the plot forward, you need to open a cabinet on the wall by the door you came in. Opening it up will give you the first Murder Mill Artifact. After this, you'll get a long cutscene with your host, and she will ask you if you want a drink. Madi can either turn it down or take her up on it.
- Path 1: Decline the drink.
- Path 2: Accept the drink.
Fate Sealed for Chapter 2
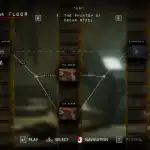
This will get you all of the possible paths for Chapter 2, filling out this section of the Cutting Room Floor.
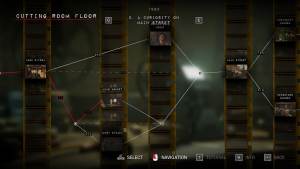
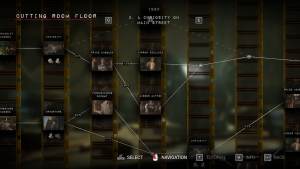
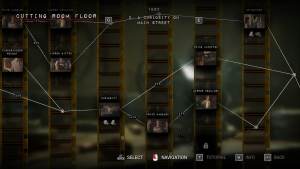
Chapter 3: A Curiosity on Main Street
In Chapter 3, you are back in 1980, as a group of teenagers are filming in the abandoned mill. While filming, you will play as Jamie as he is being filmed by his friend Linda and his girlfriend Chris.
Storage Shed
You will have a couple of choices or QTEs during filming (none of which are paths in the game), then you will have a few more decisions to make after Sam Green interrupts your filmmaking.
- Path 1: Jamie apologizes to Sheriff Green.
- Path 2: Jamie defies Sherriff Green
- Path 2a: Refuse the bribe.
- Path 2b: ?
- Path 2c: Accept the bribe.
Achievement - Easy Money: Jaime accepted the bribe from Sam.
Casa Rivera
Back in the Rivera garage, you get to meet up with Bonnie, Jamie's older sister. You have the option to ask her for money, but only if you are nice to her.
- Path 1: Ask Bonnie for money after being supportive of her.
- Path 2: If you've already gotten money from Sam, you won't ask her for any money.
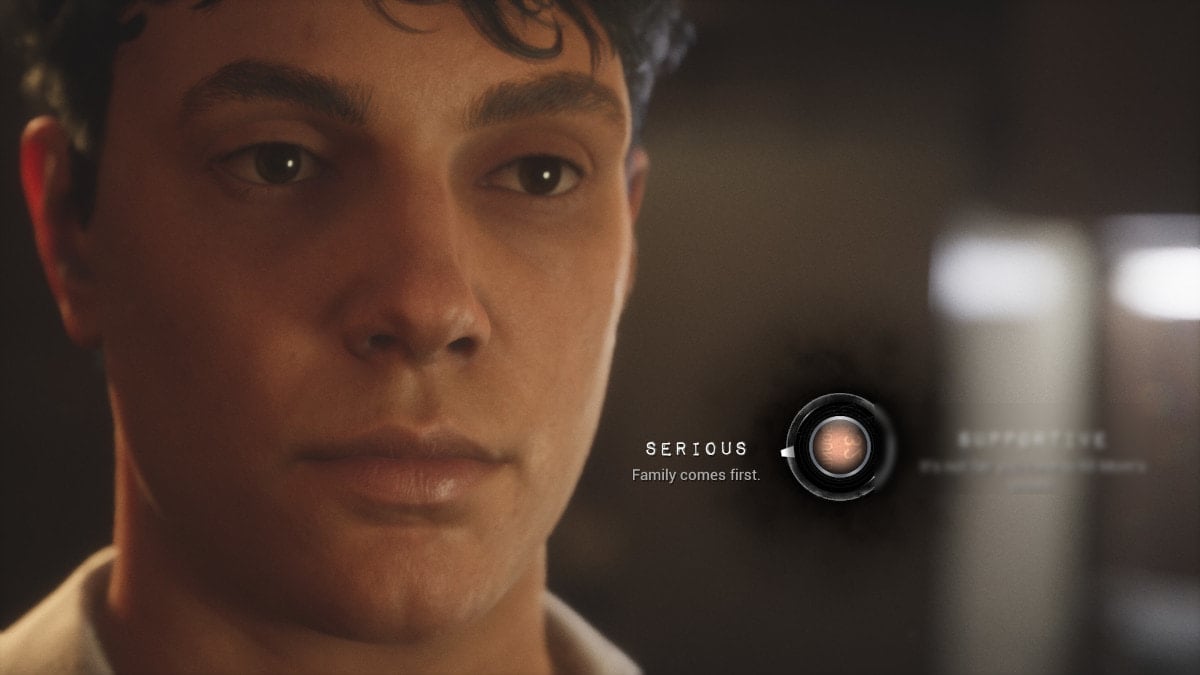
- Path 3: Make Bonnie angry by choosing first the "Jovial: Howdy, Partner," then "Shocked: That's pretty harsh," then "Serious: Family comes first."
- Path 3a: Jamie is honest and calls Bonnie back to give her the purse.
- Path 3b: Do nothing when you have the option to steal or call Bonnie.
- Path 3c: Steal money from Bonnie's purse.
Achievement - Five Finger Discount: Jaime stole money from Bonnie.
Main Street
- Path 1: Choose the Curiosity shop first.
- Path 1a: Purchase the camera without haggling.
- Path 1b: Haggle the price.
- Path 1b1: Buy the camera without accepting the mirror.
- Path 1b2: Accept the additional gift of the mirror.
- Path 2: Choose the Drugstore first.
- Path 2a: Jamie purchases fireworks.
- Path 2b: If you accepted money from any source but only got $10, Jamie will not buy any fireworks.
- Path 2c: Buy the camera without haggling.
- Path 2d: Haggle the price of the camera.
- Path 2d1: Don't accept the mirror.
- Path 2d2: Accept the mirror.
Relliks 3 of 12: The Trapper
When you are inside the curiosity shop, you can find a Rellik, regardless of whether you go there first or second. With your back to the entrance, go all the way to the back of the store on the right side, walking right by the check out counter, then to the very back. This Rellik will be on the ground in the back right corner of the store.
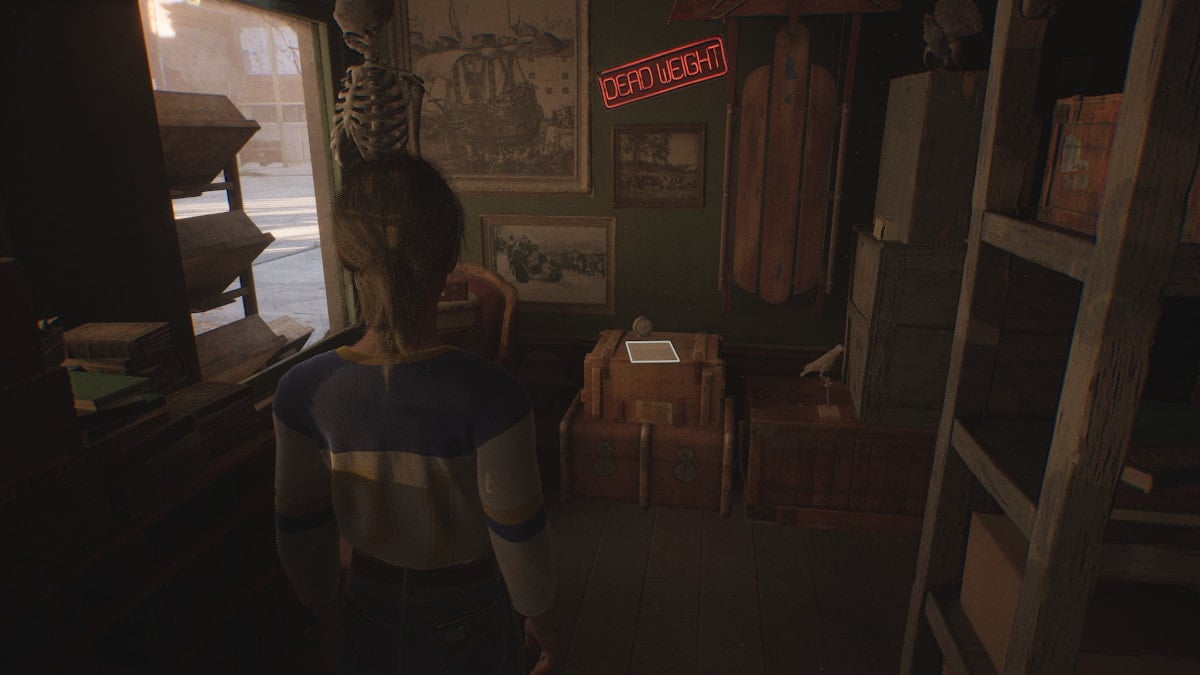
The Storyteller Artifact 2 of 10: Lawyer Letter
Before leaving the curiosity shop, make sure to look to the left of the front door. Underneath the sign that says "Dead Weight" near the window, you can find a piece of paper on a couple of trunks. This letter is a Storyteller Artifact.
In the Drugstore, you can complete an achievement and pick up another trinket collectible. In order to finish the achievement, you need to play the arcade cabinet called Fear Trap in the back of the drugstore until you get high score. It's a Space Invaders clone, and you need to score 5040 or more points to get the top spot.
Achievement - 8 Bit Hero: Got the high score on the arcade machine.
Murder Mill Artifact 2 of 10: Lost Movie Magazine
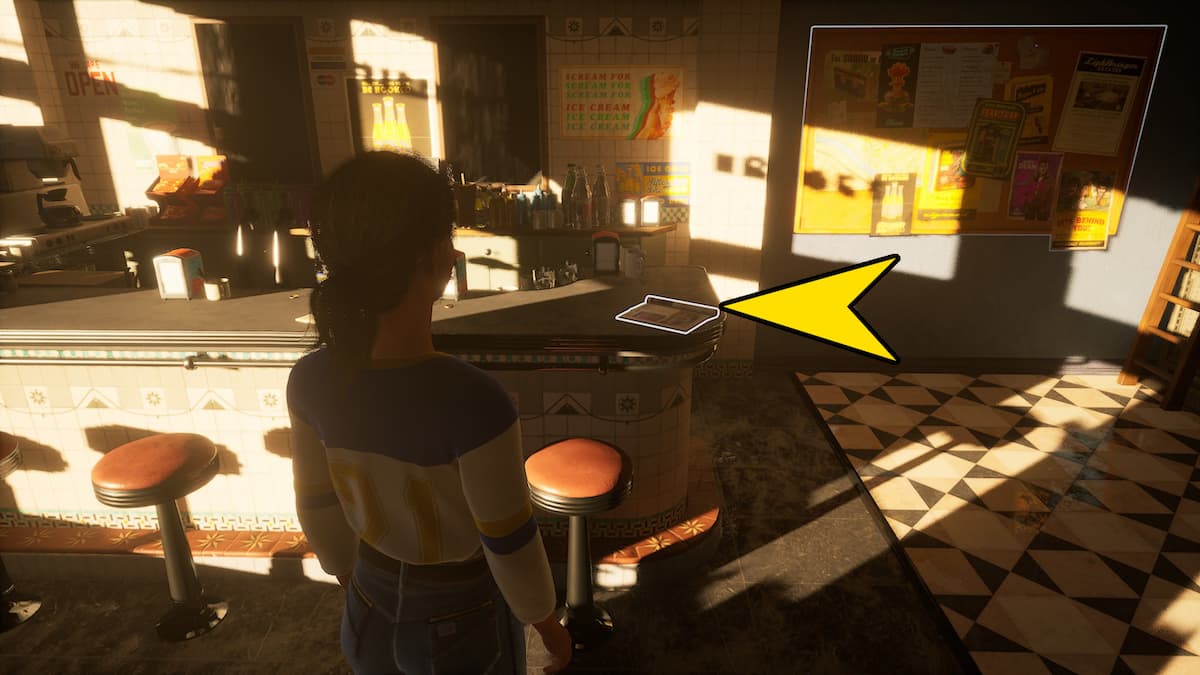
In the Drugstore on the soda jerk counter, there is a magazine open to an article about lost movies. This is a Murder Mill Collectible.
Trinket collectible 3 of 12: Waterlogged Shoe
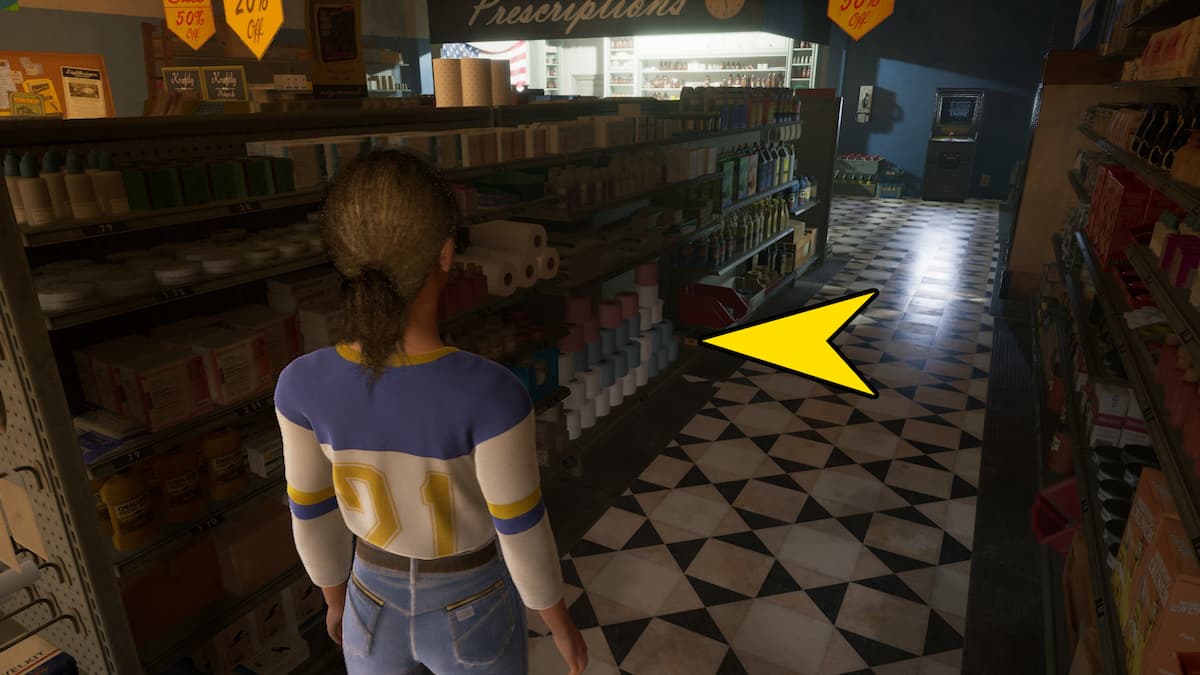
After stepping into the Drugstore, when facing away from the entrance, head to the aisle furthest to the right. In this aisle will be a small box on the left side, bottom shelf, about halfway down the aisle. In this box, you will find another trinket, the Waterlogged Shoe.
Fate Sealed for Chapter 3
Here are all the possible timelines and choices from Chapter 3:
Chapter 4: These Walls Have Eyes
It's time to catch up with Linda in Gerant Manor. Augustine has left you alone, and you are just sitting around the manor, waiting for something to happen. Madi is asleep.
Gerant Manor
- Path 1: Choose to go outside the room with Stan.
- Path 2: Stay inside the room with Madi.
If you stay with Madi, you get a second chance at picking up the Epic of Gilgamesh on the side table if you missed it the first time.
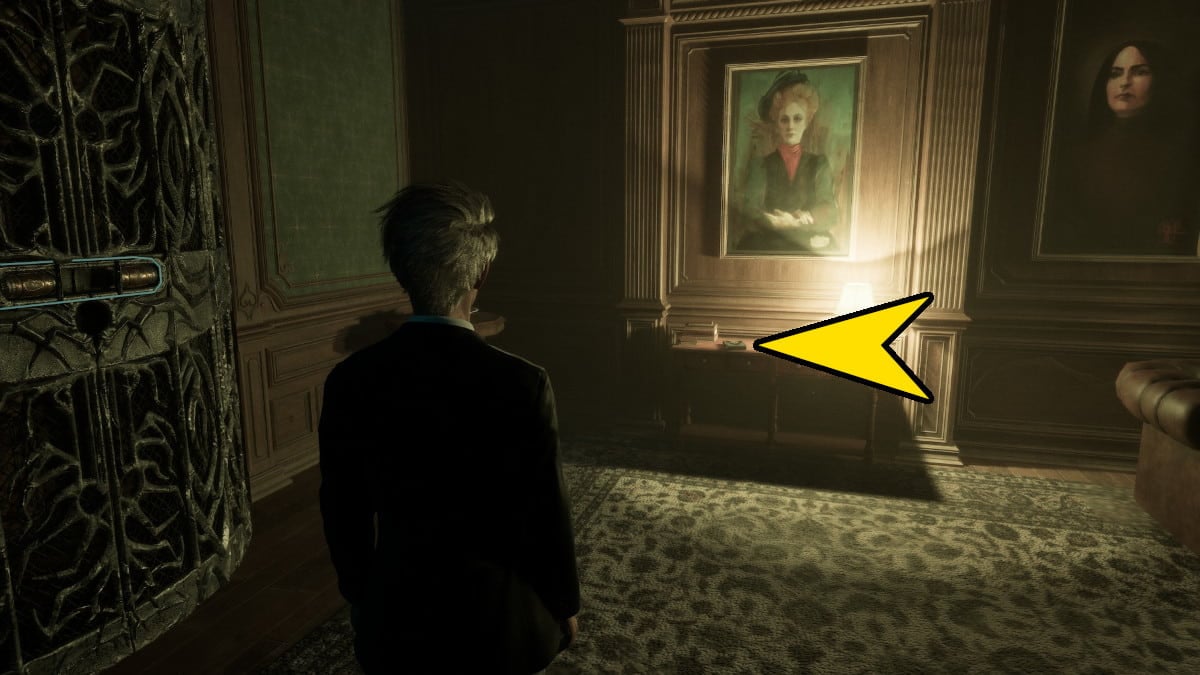
The Storyteller Artifact 3 of 10: Blueprints
Once you are in the parlor, Stan will try to convince you to shoot one of your movies in the mansion. After that conversation is over, you will be able to wander around in the stairwell. Interact with the painting over the fireplace, and you can wipe off the nameplate. It's actually a button that will open a secret door. If you go inside the secret compartment, you can find a blueprint collectible inside.


Atrium
In the Atrium, you only have one artifact to look at, and you need to have a conversation with Madi that can change your relationship with her. And that will mark the end of Chapter 4.
The Champion Artifact 6 of 10: Face of Evil
When you go to climb the stairs, Linda will start a conversation with Stan and Madi about where they got their film pieces. After that, you can go up the stairs. Walk forward on this second floor, and there will be a book on a table in the back left of the room. It will be a book about Frank Stone; pick this up to get the fifth Champion Artifact.
Fate Sealed for Chapter 3
After picking up and looking at the book, look at the metal door to the left of the book, then talk with Madi to move onto the next scene. She will ask for a story of her mom, and you have the option to tell her one or not.
- Path 1: Share a story with Madi about Bonnie.
- Path 2: Refuse to share a story about Bonnie with Madi.
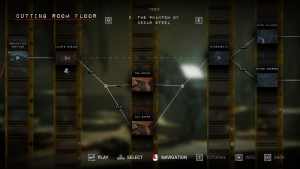
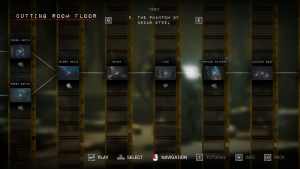
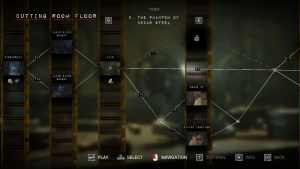
Chapter 5: The Phantom of Cedar Steel
Chapter 5 takes place in 1980 in Jaime's garage. Now armed with a new camera, the teens are looking to get back in the mill and start shooting again.
Jamie's Garage
During the production meeting, you need to look around the garage; there will be three important artifacts to pick up: a tape, an newspaper article, and a book. The tape will give you one of three options; here are its three paths:
- Path 1: Don't listen to the tape at all.
- Path 2: If you chose to be nice to Tom and choose the Supportive option in Chapter 1 when you give Tom the key to Sam's car, you will get to hear that Tom is doing better and no longer drinking.
- Path 3: If you chose to Snap at Tom in chapter 1, you will hear that Tom was still drinking during the interview and is too drunk to tell the story.
Achievement - Lumpkin and Livin': Learned that Tom stopped drinking due to Sam's kindness.
The Champion Artifact 3 of 10: Old Newspaper Article
After Robert and Chris finish talking about their Frank Stone research, you will get free reign of the garage. Interact with the articles on the killing next to Robert on the desk to get this Artifact.


Murder Mill Artifact 4 of 10: Oracle of the Omniverse
On the opposite side of the garage from where the desk is where Chris is sitting, you can find a book on the washing machine. This book, the Oracle of the Omniverse, gives you an insiders look at the multiple worlds that Augustine is traveling between.
Stormdrain
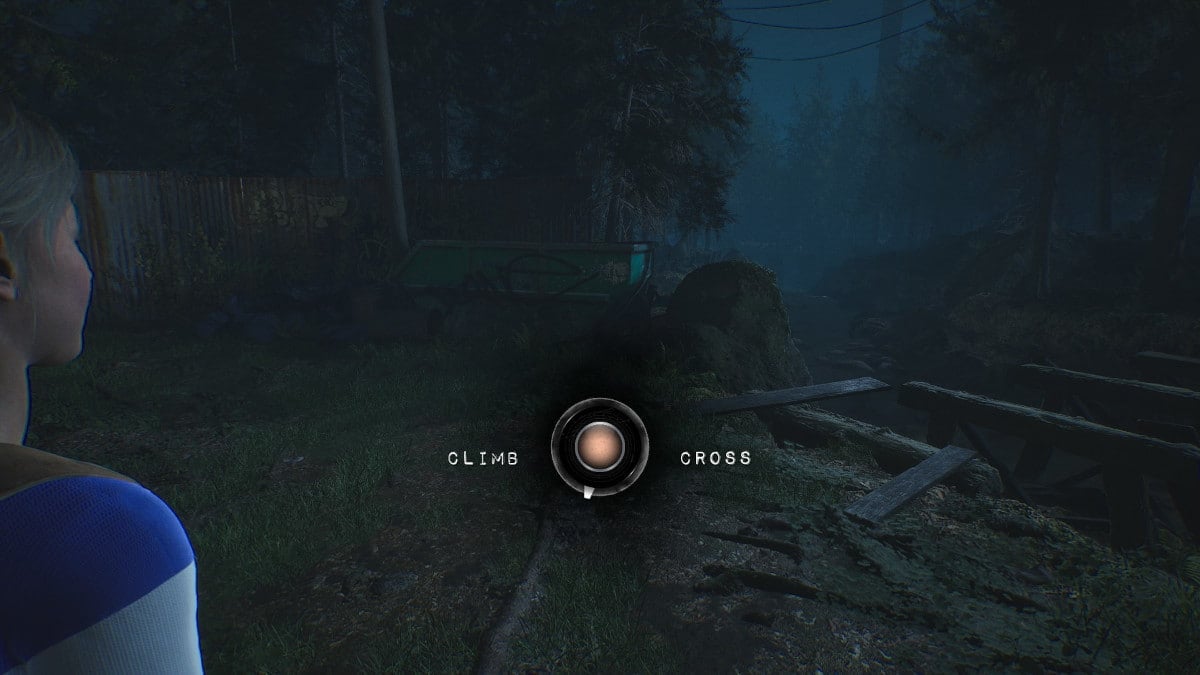
After chatting with Linda, then leaving the garage, you'll be at the stormdrain. You have to choose between climbing up the fence and going closer to Sam's patrol, or going the other direction and jumping over the broken bridge to get further from Sam. Both will get you safely into the stormdrain and into the mill.
Climb to the Stormdrain
The faster route will lead you right to the Stormdrain and into the Passage to the Mill. There is a trinket you can find along the way.
Trinket 6 of 12: The Mother Daughter Ring

After jumping over the fence, there will be a squeeze space to the left. Keep to the left and follow the rocks around until the squeeze prompt pops up. Inside will be a box on the ground with a ring inside.
Cross to the Stormdrain
Going this way means you will have to do some balance checks, walking over beams. Make sure to stay stable by pressing left and right when your character starts to fall one way or the other.
Trinket 5 of 12: Tattooed Middle Finger
After the first balance check, there is another balance beam you can choose to walk over. On the other side will be a little box with this trinket inside.

Passageway
Whether you chose to climb or cross, you will end up at the stormdrain and head inside. After Robert hands you some flashlights, you will head into the drain itself. Inside is a rellik for you to pick up and look at.
Rellik Location 4 of 12: The Wraith


After walking through the rusted metal door, Robert will say something about being under the mill and needing a way up. You'll be in the tunnels from the first part of the game again; turn left at the first intersection and squeeze through the hole in the wall. On the other side on the floor will be a Rellik Doll.
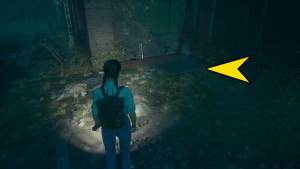
A little past the left you take to get the Rellik above, there will be a grate you can jump through. Go down this hall, through the door at the end, then into a big open room. To the right will be a table with a box on it; inside the box is a key that you will need to get the fourth trinket later on in the game.


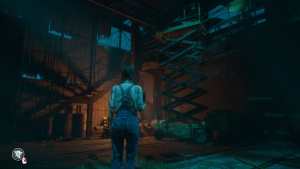
Yard
After the cutscene with Bonnie in the yard in front of the mill, but before you head into the furnace chamber, you will control Linda. Instead of going straight into the furnace chamber, take a few minutes to look around the yard.
Trinket 7 of 12: Wooden Oni Mask
In the yard, you can find the grate that Sam opened with a crowbar in Chapter 1 if you didn't break it. If you did break it, there will be no crowbar, and you will not be able to get this Trinket. Use the crowbar on the doors further back in the yard, and the Oni Mask Trinket will be in a box inside on the floor between the two shelves. After that, rejoin Linda's friends, and go inside the furnace room.

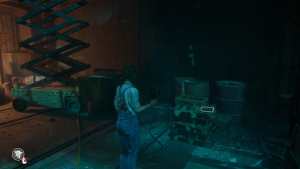
Furnace Chamber
Inside the furnace chamber, you need to make your way down to ground level, then scope out a place to shoot the next scene. Take Linda all the way to the back of this room where the double doors are, then turn to the right.
Trinket 8 of 12: The Blighted Rat
At the back right of the furnace chamber will be a small set of stairs. If you climb up them and head to the right, you will find a place where the squeeze prompt will appear. On the other side will be a crank handle.


Go back up the ramp to where Frank Stone was killed back in 1963, and look at the little platform in the center of the fire pit where Frank's body went. There will be a little box there; in order to get it, use the crank handle on the box. It doesn't need power; you just have to crank the handle to pull the platform closer to you. Once you can jump across to it, open up the box to get this trinket.
Rellik 5 of 12: The Clown
After Linda and Bonnie leave, you'll take control of Chris again. After entering the new door, head to the right and look for a rusted door in the back right corner of this room; it's further to the right than the Casting Foundry door is. Go inside and duck under the bricks that have broken. The clown doll will be on the left after the dumpster.


Trinket 4 of 12: The Iridescent Head
If you got the key for the Casting Shed back in the passageway earlier in this chapter, you can finally use it here. Once you control Chris again, you, Jamie, and Robert will look for the machine shop. In the first room you guys end up in, there are some double doors in the back of the room labeled as the Casting Room. Use the key on the door.

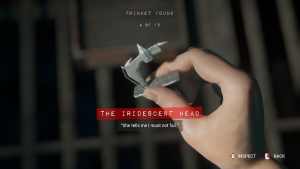
After you are inside, pull all the giant shelves out as far as they will go. Next, go to the middle of the room where to moveable toolbox is. Move it to where there is a cloth overhanging the ledge above your left when you're holding the toolbox's bar. Climb up onto it once it is in place, then up to the second floor. Take it around to the other side where there will be a balance challenge. Hop across the shelves, and on the last platform where the ladder back down into the main room is, there will be a trinket box.
Machine Shop
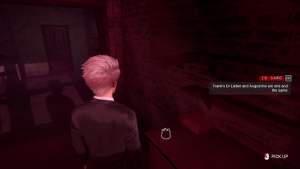
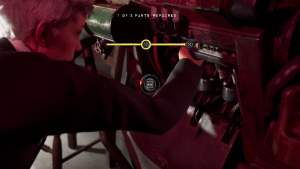
In order to move on, you'll need to get the generator working. There are two parts to find, then you have to pass a few QTE checks in order to complete it. Interact with Robert in front of the generator, then pick up the two pieces around this room to complete it. The first piece is on the same side of the room as the generator, but closer to the suspended train cars. The second is located on the other side of the train car, in the back corner of the room.
Frank Stone's Lair
While hopping over to the Lair, there will be a quick QTE to catch Robert when he loses his balance. If you fail, Robert still lives, but Chris catches him instead.
- Path 1: Fail the QTE, and Chris will save Robert.
- Path 2: Pass the QTE, and Jamie will catch Robert.
The Champion Artifacts 5 of 10: Weapon Designs
Inside the lair of Frank Stone, there is a table in the center. On it is a notebook; this is Frank's notebook and it is filled with some grisly details.

Interact with the head in a jar to finish this section. You will then have two path decisions to make.
- Path 1: ?
- Path 2: If you agree with Chris about talking about it later, the scene will move on.
- Path 3: If you choose the Shocked option, you will start an argument with Chris.
- Path 3a: Choose "I'm not sure we can talk about this later," and you break up with Chris.
- Path 3b: You choose to stay together with Chris by choosing "Okay, sure."
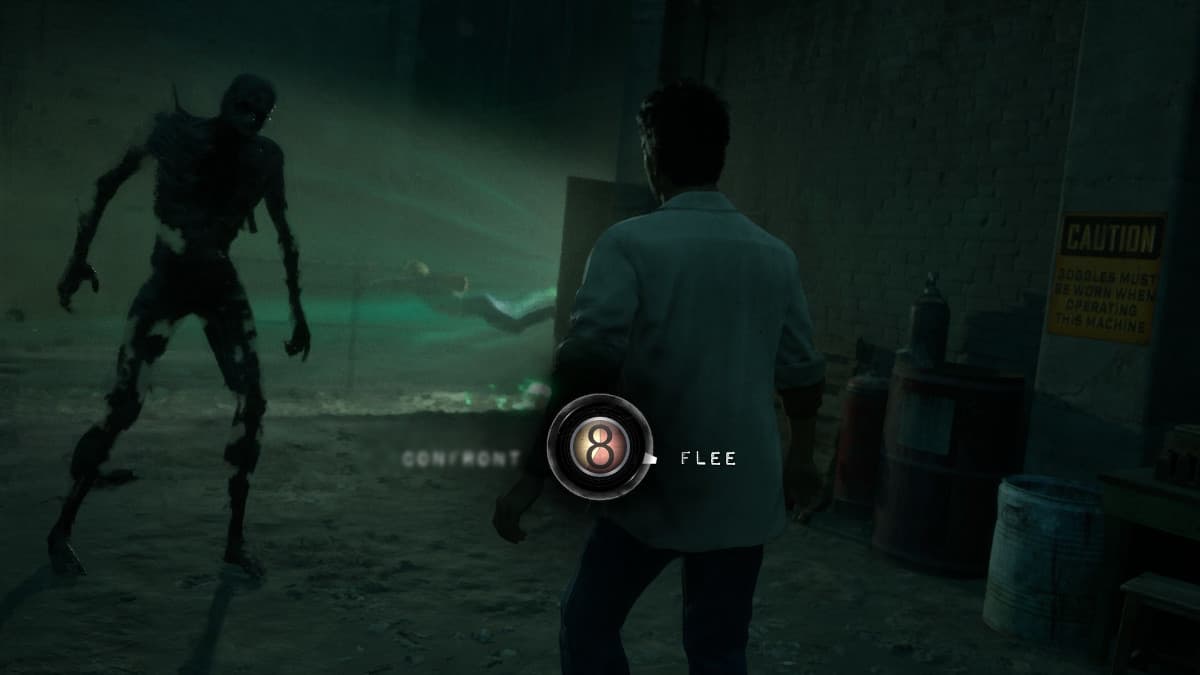
When Frank Stone shows up, you can flee or you can try to save Chris. There are several outcomes with this scene, and many end with Jamie dying.
- Path 1: Jamie stays to try to help Chris.
- Path 1a: Jamie uses the fireworks you could buy in Chapter 3 to distract Frank Stone, but Chris gets sucked into the door anyway, then Jamie runs away.
- Path 1b: Jamie attempts to use the fireworks but fails the QTE and dies.
- Path 1c: Jamie dies when he confronts Frank Stone.
- Path 2: Jamie doesn't do anything before the time is up, and he dies.
- Path 3: Jamie flees and lives.
Fate Sealed for Chapter 5
Whether Jamie lives or dies, Chris will still be sucked through the door, and Frank Stone will wander away into the mill, intent on killing all the others.

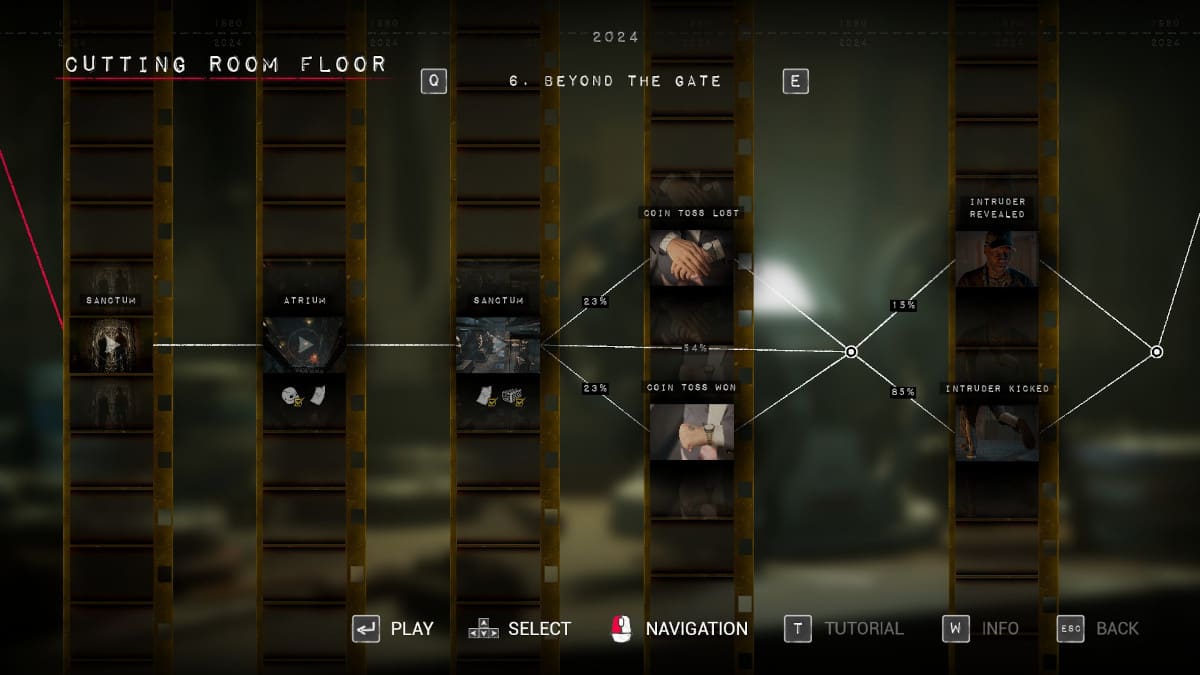
Chapter 6: Beyond the Gate
In this short chapter, you play as Madi, then Linda. First you need to get inside the intricate gate that Augustine has in her home, then you need to look around inside.
Atrium
Head up to the next floor of the Atrium when Stan unlocks it for you. There will be an Artifact, a Rellik, and a key to find on this upper floor.
Murder Mill Artifact 6 of 10: Deed of Sale
On the upper floor, you can find a Deed of Sale for the Super 8 camera in the back right of the room on a table by the window.


Murder Mill Artifact 3 of 10: Fanzine Review
On the coffee table in the center of the room, you can find a magazine open to an article about Murder Mill. Pick it up to get the third Murder Mill Artifact.


Rellik 6 of 12: The Legion
Next to one of the seats around the coffee table that holds the Murder Mill review, you can find another Rellik Doll. This one is the Legion; pick it up to get Rellik number six.


After picking up those two collectibles, look for the key; it will be on a small table overlooking the stairs by the window. This key unlocks a cabinet, located one floor down. Inside the cabinet is an incomplete diorama. If you go down another floor, you can pick up the tree across the room from the base of the stairs. Put the tree in the diorama to get the tiny hammer.


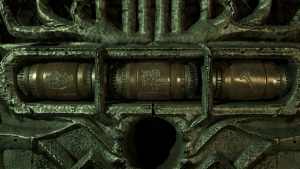
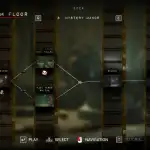
How to complete the gate puzzle in Chapter 6 of The Casting of Frank Stone
On the same floor as the cabinet diorama, there is a statue of Hillbilly on a small table by the stairs going down. Give the hammer to this statue, and you will get the final piece of the puzzle to open up the intricate gate to the Reliquary. To open the door, you will need to spin the three pieces so that the pictures match the pictures on the three items you had to interact with to open it.
- One is the house in the diorama.
- Two is the tree.
- Three is the hammer symbol inside the Hillbilly statue.


Achievement - Open Sesame: Solved the gate puzzle.
Sanctum
Inside the Sanctum, you will finish this chapter as Linda. The first thing you should do when inside this reliquary is to chat with Stan. You will have the option to offer him you friendship, or you can have a little bet on a coin toss.
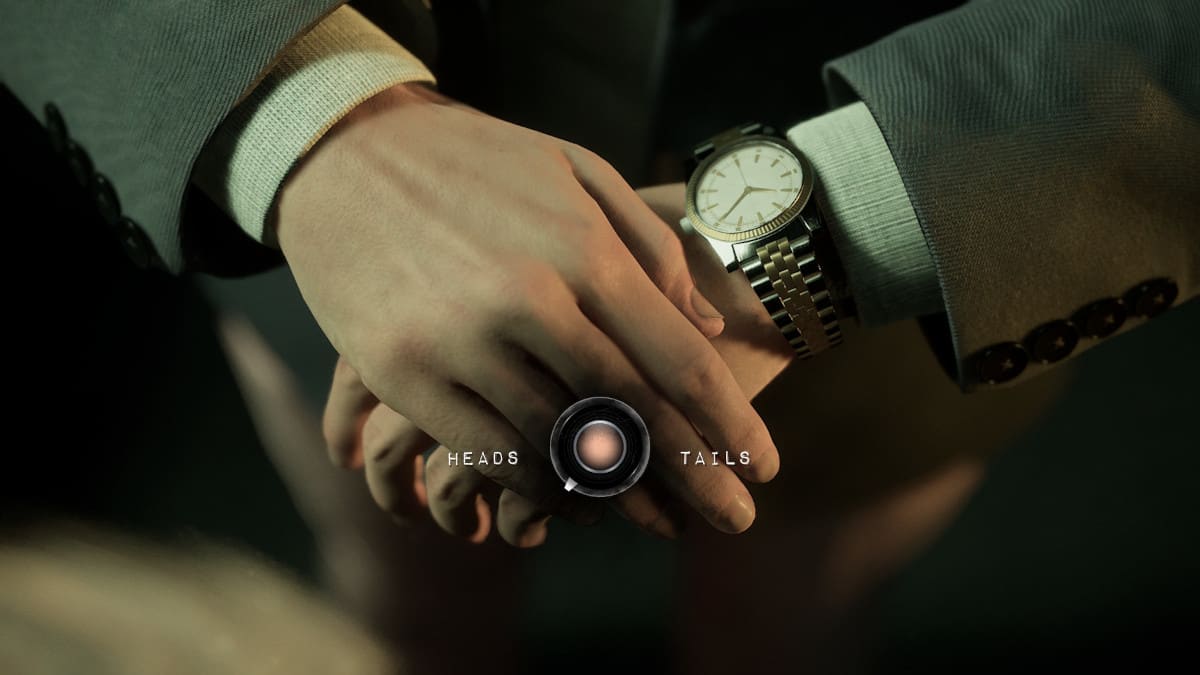
- Path 1: Bet with Stan. Lose the coin toss by guessing Heads.
- Path 2: Either don't speak with Stan at all, or choose to offer your friendship.
- Path 3: Bet with Stan. Win by choosing Tails.
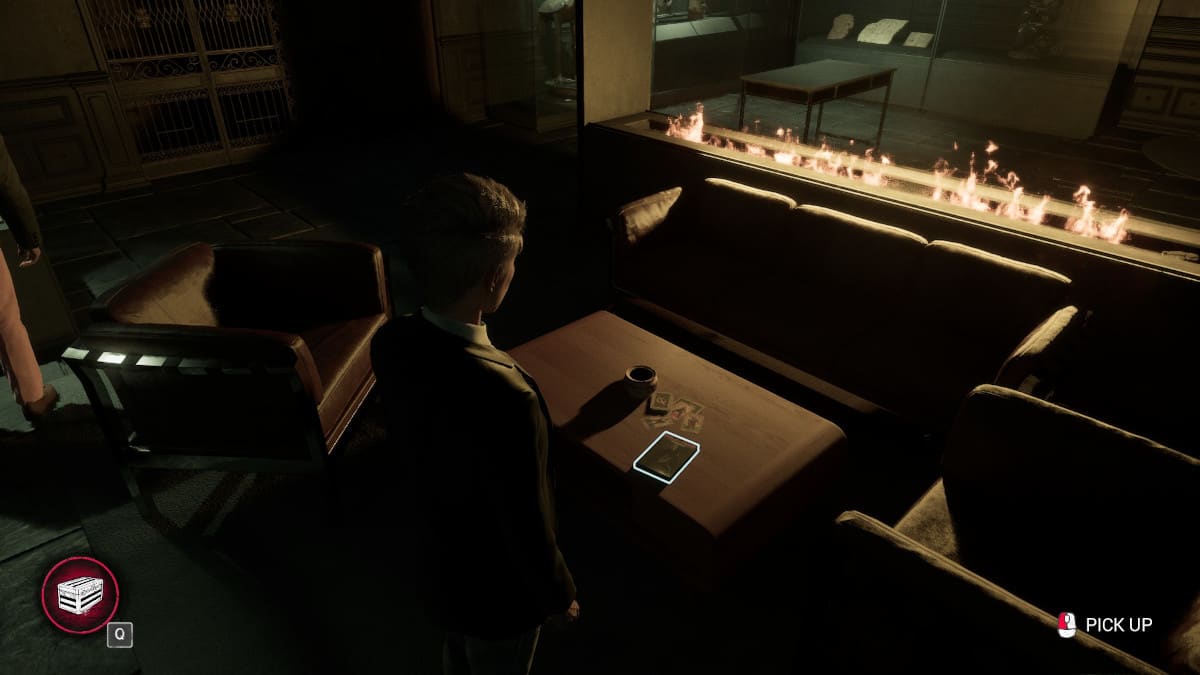
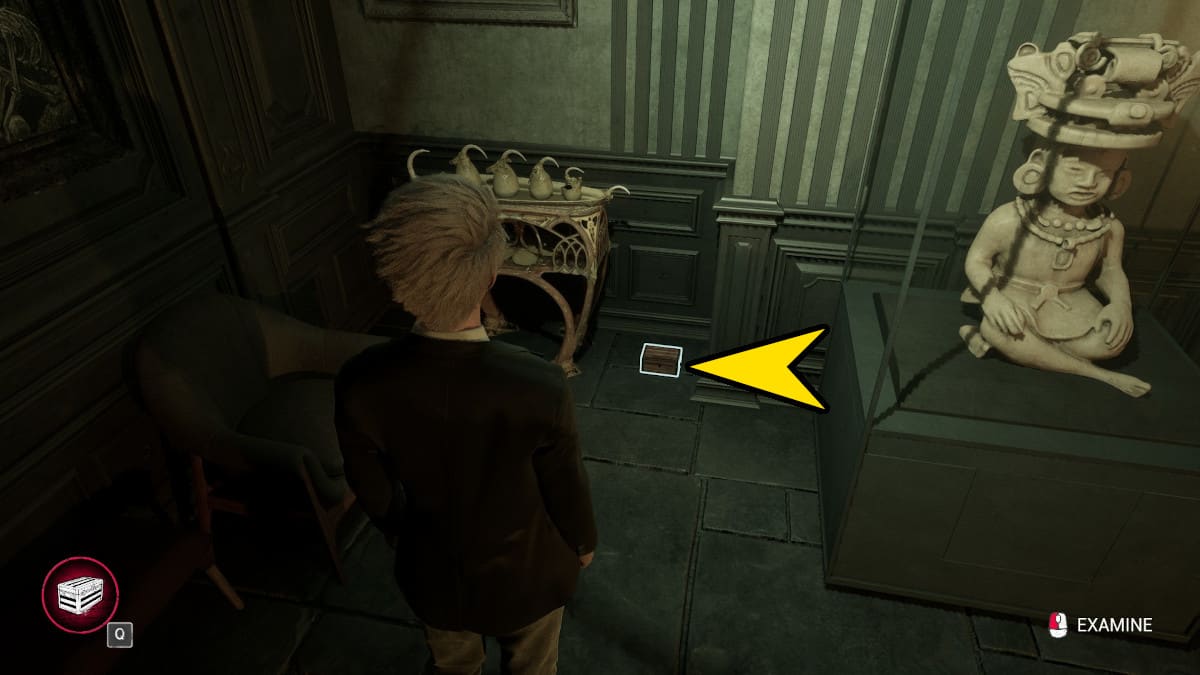
The Storyteller Artifact 4 of 10: Fiction Book
On the coffee table near the fireplace, you can find a book called Fold of Fear. It's a book about a dramatization and fantastical version of the Frank Stone murders.
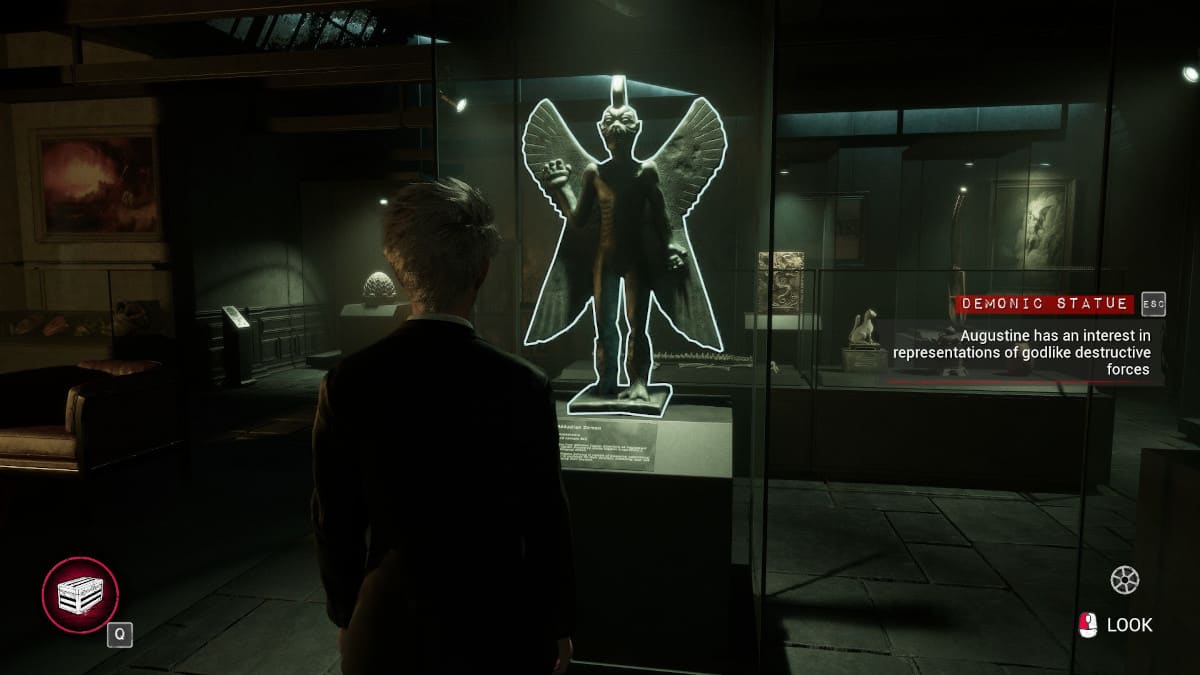
The Storyteller Artifact 5 of 10: Demonic Statue
Inside one of the glass cases by the case where Stan is standing when you are speaking with him is a demonic statue. Interact with it, then look down at the plaque underneath.
Murder Mill Artifact 6 of 10: Riot Broadcast
On the right side of the room, beside the fireplace, is a interactable object that plays a broadcast of a Murder Mill viewing. Push play on it to grab this Artifact.
Trinket 9 of 12: Victor's Soldier
As far from the door where you came in as you can get, on the other side of this room, there is a Trinket box on the floor. It is on the far side of the Fireplace, on the right of the room.
Murder Mill Artifact 7 of 10: Broken Super 8
Make sure this is the last artifact you go after, as the Chapter will end after you open up the drawer and see it. There is a table on the other side of the fireplace, over where Madi is standing. Interact with the table to open up a drawer and find your old Super 8, still broken, looking the same as it was back in 1980.


Fate Sealed for Chapter 6
Once Sam shows up, you have the option to kick him or miss with the QTE that pops up. This will be the last path you have influence over in Chapter 6.
- Path 1: Don't kick Sam, and he will turn to Linda, revealing his identity.
- Path 2: Kick the back of Sam's knee before seeing who he is.
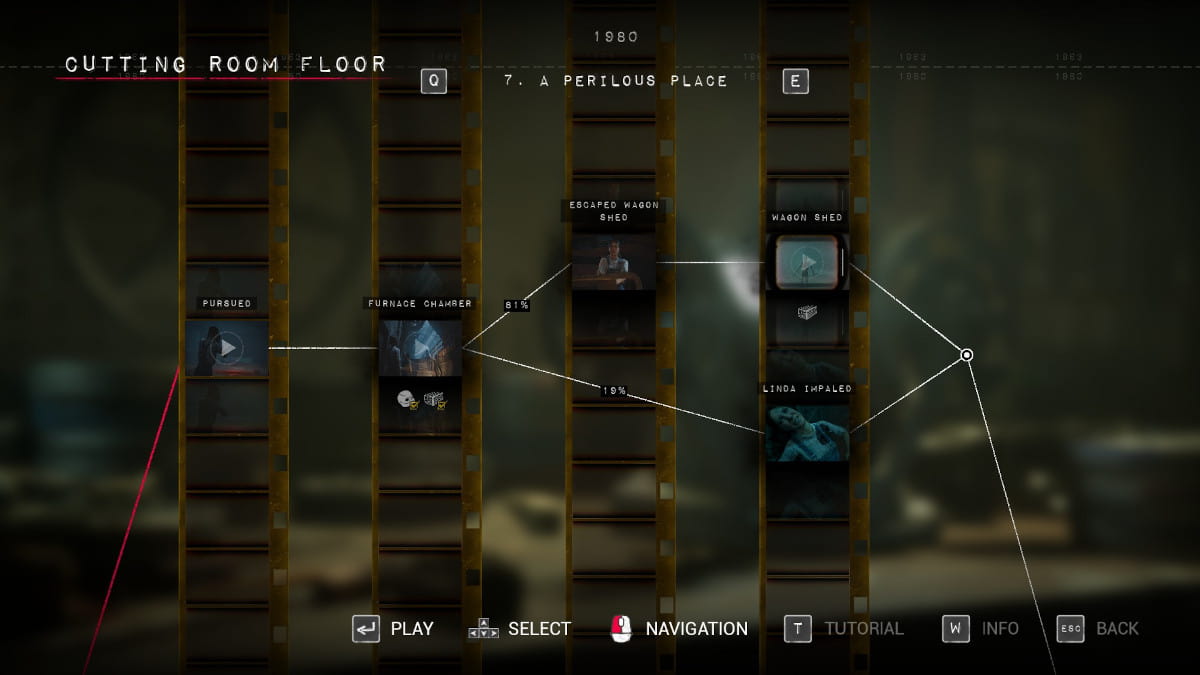
Chapter 7: A Perilous Place
In chapter 7, you take control of Linda back in 1980. You have the option to pick up the Rat trinket and the Clown Rellik if you missed them before. After picking up the camera, you will meet Jamie (or Jamie's body if he's dead) and Bonnie back outside the building again. When Frank Stone shows up, you will have two paths available to you.
How to fix the Generator in Chapter 7


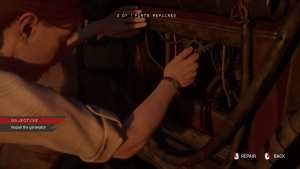
Like the previous generator you had to fix in Chapter 5, you need to find a missing part and put it into the generator with some QTEs. First, you need to interact with the forklift, then follow the cord around to the generator. Interact with the generator to realize you need a part. The part will be in a small box right next to the lift you are trying to power. Bring it back to the generator, and pass the QTEs. During this whole section, Frank Stone will be following you, and you will need to keep stopping and filming him when he gets close to you.
- Path 1: Remove the threat of Frank Stone with the camera successfully while fixing the generator.
- Path 2: Fail to use the camera and Frank Stone will hang you on a hook for later.
Achievement - Camera Shy: Warded off the Killer with the 8mm camera.
Trinket 10 of 12: Diamond Cufflinks
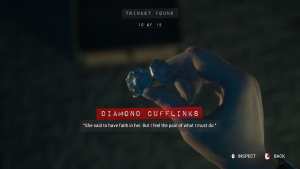
After you pass all the QTEs and you leave the building, there is a balance section right outside on the stairs. Go over this balance beam, and the trinket will be on the other side.
Fate Sealed for Chapter 7
There is only one split path in Chapter 7; you either pass the QTEs and filming or you fail. It's best to make sure you escape so you can pick up the trinket.
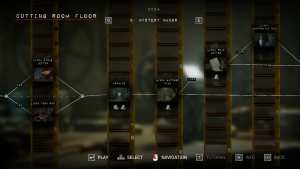
Chapter 8: Mystery Manor
The eighth chapter will switch back and forth between the modern day and 1980. You begin controlling Linda in 2024, and you have to speak with Sam about what is going on. After that, you will control Madi again.
Corridor
Once you get control of Madi during this chapter, you will be chasing after Stan in a hallway that keeps changing shape. After you have wandered back and forth for a while, you will come across a set of green, glowing stairs.
The Storyteller Artifact 6 of 10: Shrine
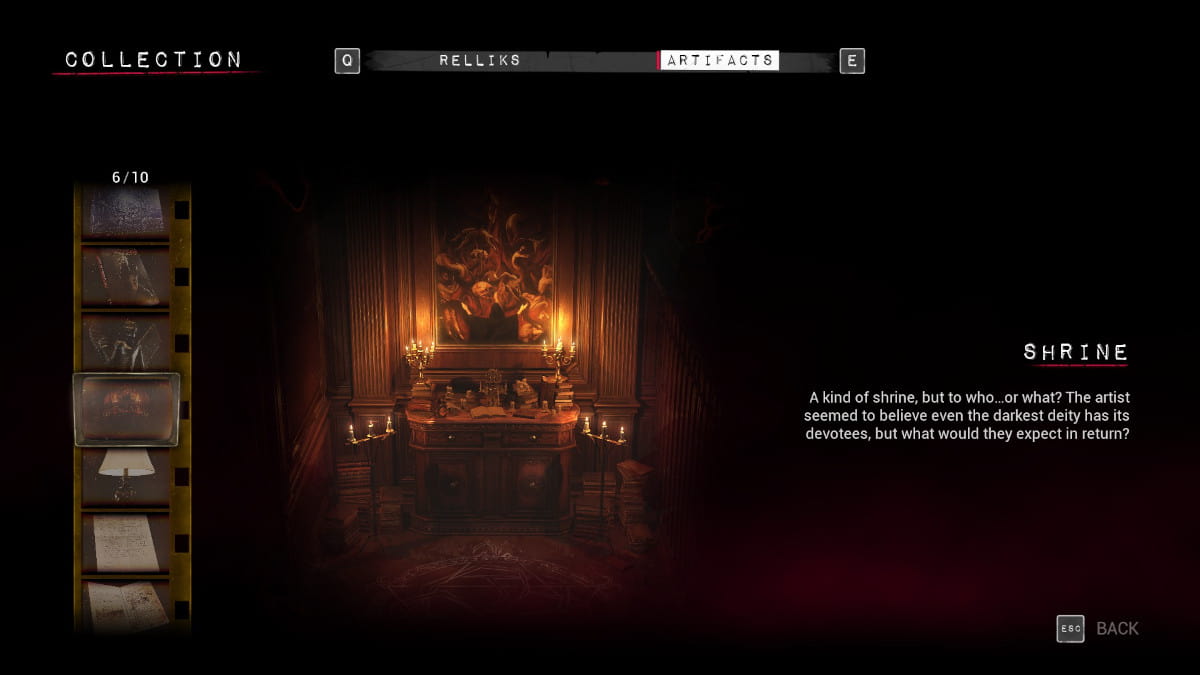
Before descending down the staircase to the horologium, look down the hallway to your left. This has a shrine; if you interact with it, it will give you a Storyteller artifact. After you have interacted with it, head down the green-lit stairs and into the horologium.
Once inside, you will have to solve a couple of puzzles to move on. In the center of the room, in front of the rings, is a control panel. It has a bunch of concentric circles, and you need to line up the lit lines in each. The outer circle is static, but the other three inside it can move to get everything in perfect order. Once all the rings are lined up, it will send power to one of the three levers in the room.


- Path 1: Fail the QTE with the final lever and Madi will die.
- Path 2: Pass the QTE with the final lever and Madi will live.
Film Archive
Once you have control of Linda, Sam will faint. You have the option to do nothing or steal something from him. Each of these is a different story path.
- Path 1: Choose the diary, pass the QTE, and take the letter.
- Path 1a: Confront Sam about the contents of the letter.
- Path 1b: Don't confront Same about the contents of the letter.
- Path 2: If you don't choose anything to take or fail the QTE, you do nothing.
- Path 3: Choose to look into the pouch, pass the QTE, then choose to take the gun inside for yourself.
After you lose track of Sam, you will wander the hallways until you find a door with an odd green light behind it. Inside are a whole bunch of films and film paraphernalia. Search around here to find a bunch of Artifacts and collectibles.
The Storyteller Artifact 8 of 10: Logan Chen's Letter
If you choose to take the diary from Sam during the scene where Sam has passed out, then you pass the QTE to take it, you will keep a letter that is tucked inside the diary. This letter is from Logan Chen, and it looks like this Chen person is helping Sam out.
The Storyteller Artifact 7 of 10: The Flawed Lamp
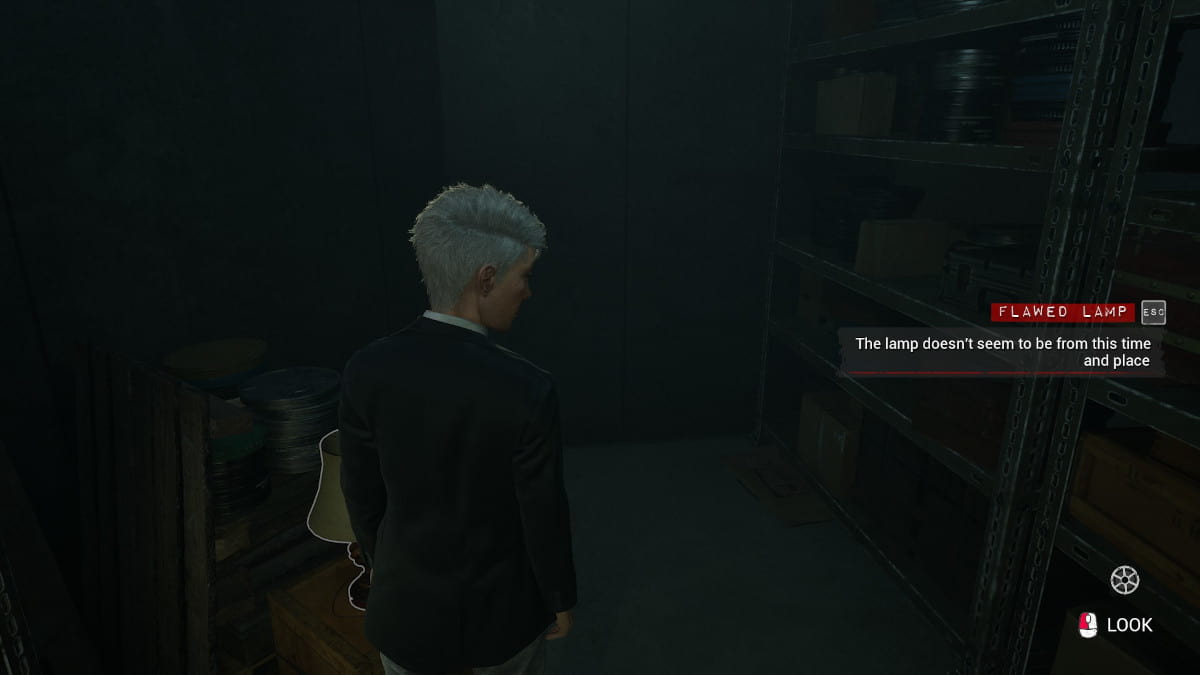
This artifact is located in the very back right of the film room, on the right side of the film-viewer.
Murder Mill Artifact 8 of 10: The Fake Prop Arm

The fake prop arm is on the right side of the room, near the front where you enter.
Rellik 7 of 12: The Nurse


This doll is on the left side of the room in the middle between two shelves. It's on the ground at the end of one of the aisles.
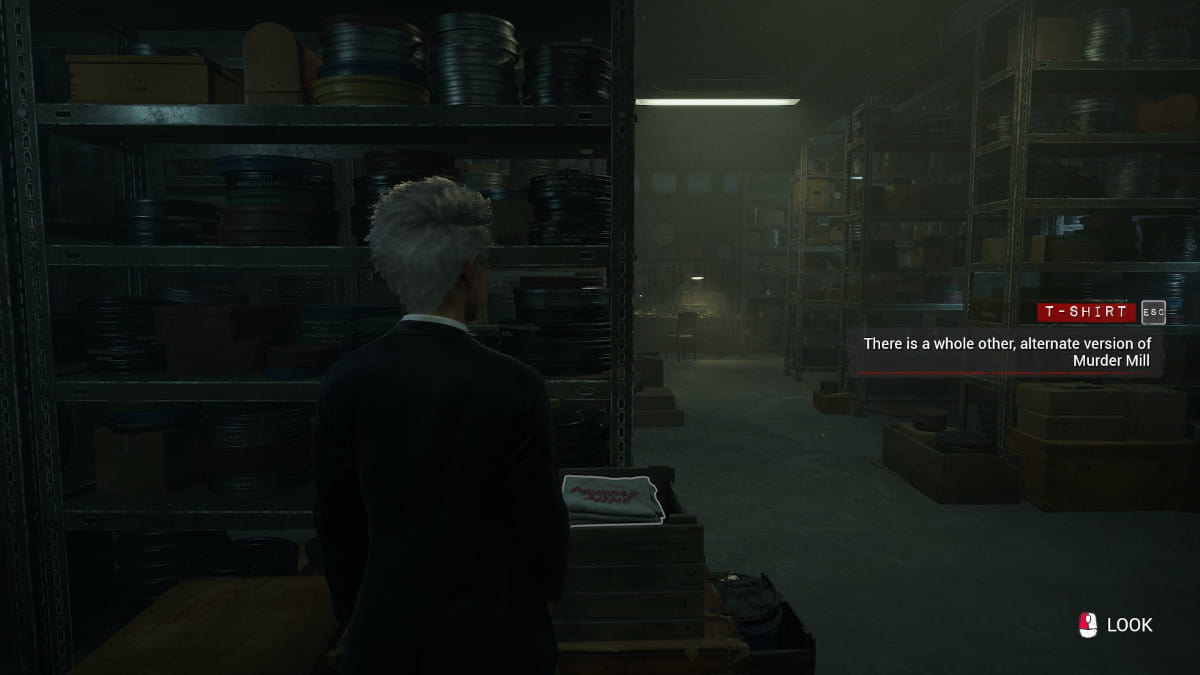
Murder Mill Artifact 10 of 10: T-Shirt
The t-shirt is on one of the first shelves on the left side, sort of near the door where you entered.
Murder Mill Artifact 9 of 10: Alt Movie Scene
In order to move on, you need to watch the film viewer at the back of this room. This is another Murder Mill artifact: an alternate scene where Bonnie was replacing Chris.
Achievement - Murder Mill: Collected all Murder Mill artifacts.
Fate Sealed for Chapter 8
Once Chris is in 2024, this chapter will end. There are only a handful of different choice for this chapter, and here are screenshots of the whole timeline for it.

Chapter 9: Decent of the Damned / Hunting Ground
There are two possible names for Chapter 9, depending on whether you escaped Frank Stone or Linda is hanging on a hook somewhere. If you did succeed, you'll find yourself in the underground parts of the mill.
- Path 1: The beginning of this chapter is Jamie and Bonnie saving you from the hook, then you head to the Yard.
- Path 2: You succeeded in running from Frank Stone, and you are in the Underbelly.
Yard
After Jamie (if he's alive) and Bonnie save(s) you, you will find yourself in the yard. You will need to run from Frank Stone, climbing onto a platform to avoid him.
- Path 1: If you fail the QTEs to pull Jamie up, he will die.
- Path 2: You pass the QTEs and pull Jamie up, and he survives.
Underbelly
You'll play through this part as Linda by herself. There is a quick puzzle in this section as well as a couple of Artifacts and a Rellik.
The Champion Artifact 7 of 10: Grandmother's Letter
Before solving the steam puzzle, you can grab this Artifact. After leaving the bathroom, you will be in a locker-room-type area. Turn to your right as soon as you are inside, and there will be two lockers leaning on one another. You can crawl underneath them; after standing back up, turn around and look to your right. There is a filing cabinet there, and you can open one of the drawers. It has a key inside.


Crawl back through to the starting spot, then follow the path of the room around to a squeeze point. After the squeeze point, you can find Frank Stone's locker; it will be the only locker you can interact with. Unlock it with the key you picked up to find Grandmother's Letter inside.
How to shut off the steam in Chapter 9
There are two levers you have to find; one is located in one of the lockers next to Frank Stone's locker, and the other is in the bathroom in one of the stalls. Put them back into the two boilers in the boiler room to shut off the steam and move to the next part of this level.
After the long crawling segment where Linda complains about tight spaces, you will find yourself in a series of underground rooms. If you keep looking along the path for offshoots to the right, one of these rooms will have Merlin's Collar inside. Pick it up to earn an achievement.
Achievement - Bad Dog: Found Merlin's collar.
Rellik 8 of 10: The Doctor


When you get to the two doors on the right side of the hallway, only one will be unlocked. Go inside and crawl around to the other, locked door. Inside, you can find a sheet of metal across another hidden space to your left; move it to find Frank's hideaway. There is a cage inside that he kept victims in before he killed them. Inside this cage is a Rellik Doll.
The Champion Artifact 8 of 10: Frank's Journal
While you are still in Frank's Hideout, you can find his journal. It is right next to locked door that you can exit out of.
Fate Sealed for Chapter 9
This is a pretty short chapter no matter which version you get, so there aren't a lot of branching paths here.
Chapter 10: In the House of Madness
In this tiny chapter, you play as Chris; she has found herself in 2024, and she is confused as to how she has gotten there. There are several paths in this chapter, but most have to be set up in previous chapters.
- Path 1: If Madi died from not properly venting the horologium, Chris will find her corpse.
- Path 2: If Madi survived and properly vented the horologium, Chris will meet Madi.
After a brief conversation with the surviving characters, you will have the choice to return to 1980, or you will be able to stay in 2024.
- Path 1: Chris wants to go back to 1980.
- Path 1a: ?
- Path 1b: Fail the QTE to grab the pipe, then fail the QTE to pull Stan up. Don't choose between helping Stan and going back into the machine, and you will miss your chance to go back to 1980.
- Path 1c: Chris returned to 1980 successfully.
- Path 2: Chris wants to stay in 2024.
- Path 2a: Stan is crushed by the horologium's rings reactiving when Chris fails the QTE.
- Path 2b: Stan is pushed out of the way by Chris and survives.
Achievement - Stan of Cleaves: Stan was cut into pieces in the horologium.
Achievement - Back to the… Past: Chris was successfully sent back to 1980.
Achievement - Tsap …eht ot Kcab: Chris was sent to 1980, though something went wrong.
Fate Sealed for Chapter 10
There is only really one choice you have to make in Chapter 10, and that's returning to 1980 or staying in 2024.

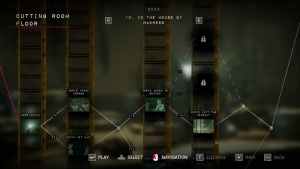
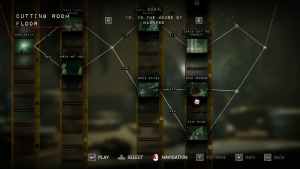
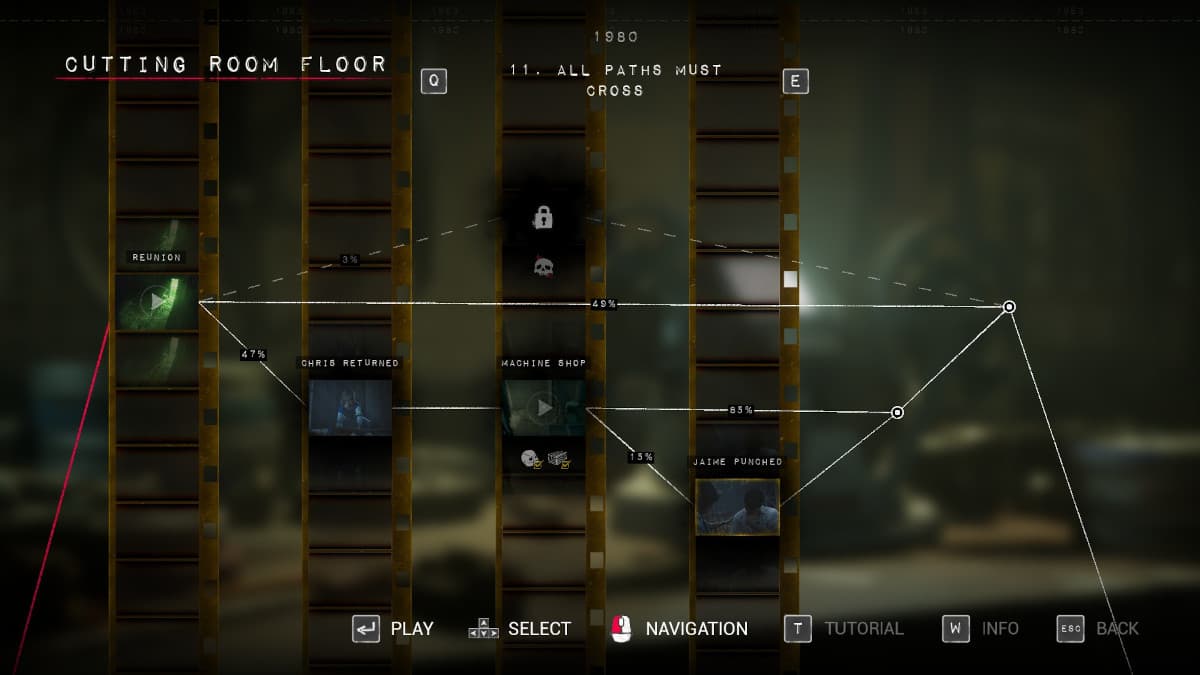
Chapter 11: All Paths Must Cross
Chapter 11 is also a super short chapter, so you can get through it quickly. First, Chris will either return safely from 1980 or she won't, then she will have a confrontation with her friends.
- Path 1: You will come back to 1980, but.... wrong.
- Path 2: Chris chose to stay in 2024.
- Path 3: Nothing goes wrong, and Chris is back in 1980 and alive.
- Path 2a: Jamie is dead or you don't choose to punch him, so there is no confrontation.
- Path 2b: You punch Jamie in the face for leaving you.
Fate Sealed for Chapter 11
You don't get a whole lot of choices in Chapter 11, but you do get to pick whether to not you choose to give Jamie a surprise right to the face.
Chapter 12: Closing the Noose
Depending on whether Madi is alive or not, this is either the shortest of all the chapters, or it can be a little bit longer. First, you will search the manor with Madi (and Stan is he's alive), and you can find some collectibles. Then you will find yourself in a movie theatre to watch the film that's been on everyone's mind.
The Storyteller Artifact 9 of 10: Grimoire Page
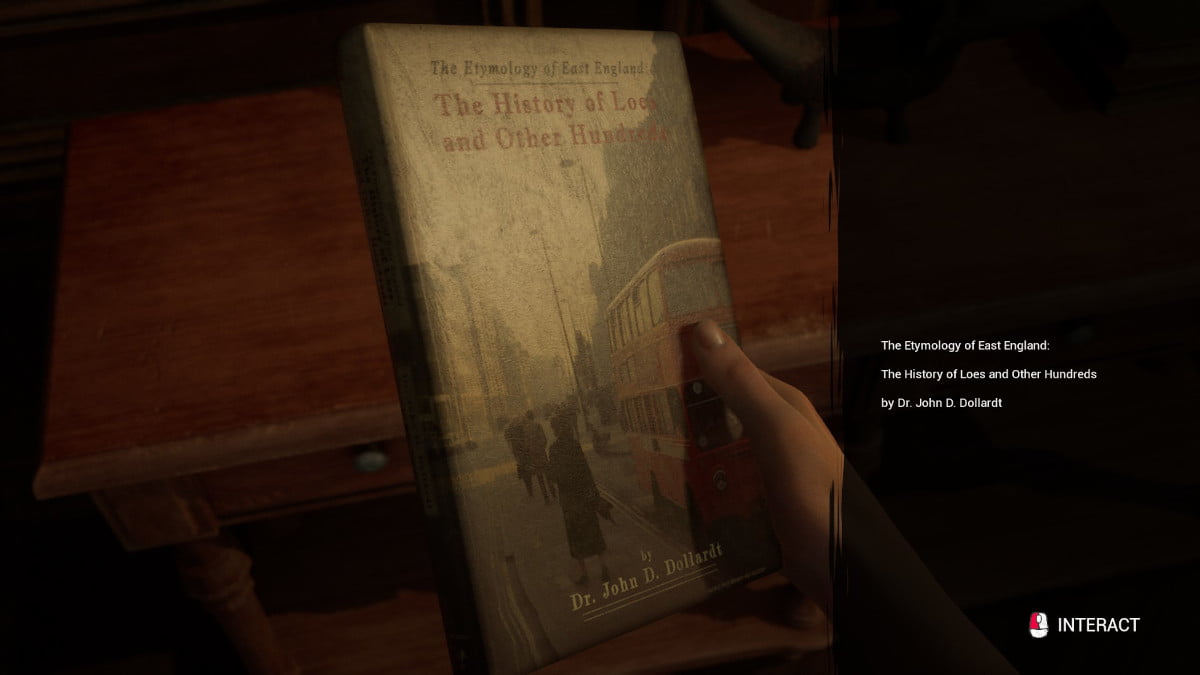
The book about the etymology of East England called "The History of Loes and Other Hundreds" that contains the key to the music box has a page from a Grimoire inside. This is another artifact for the Storyteller.
The Champion Artifact 9 of 10: Session Tape
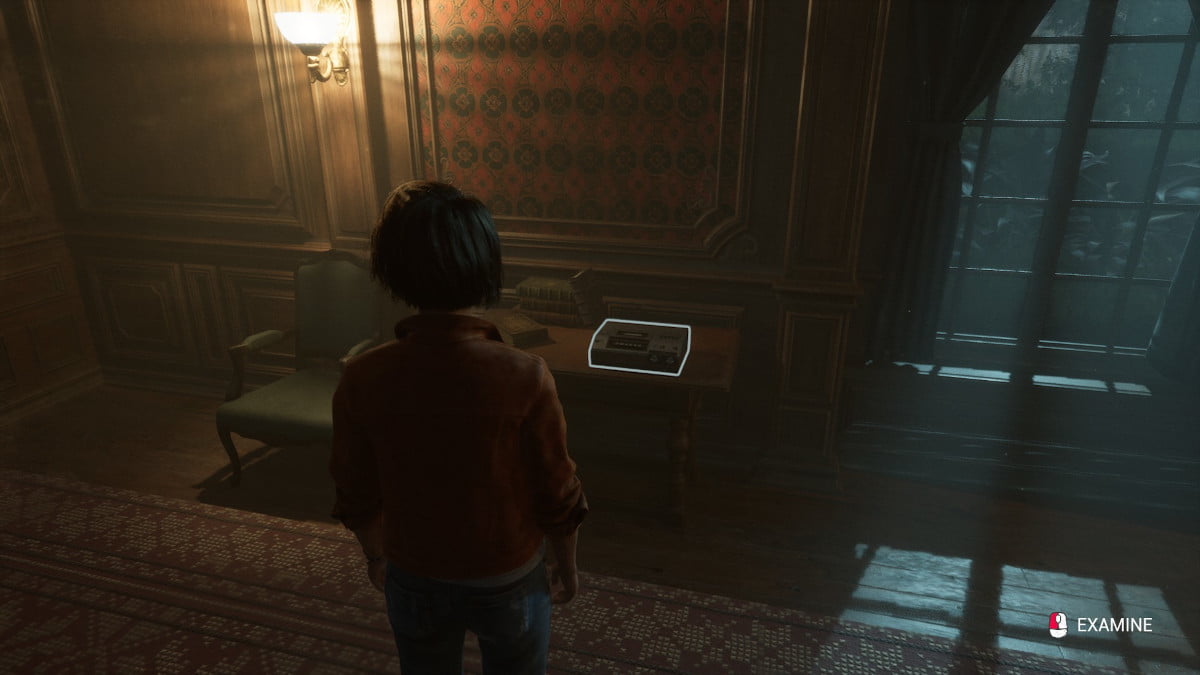
After going through the secret passage, you can turn left into the hallway. Look for the cassette player on the left on a table. Interact with it and push play to get this artifact.
Rellik 9 of 12: The Twins


The Twins are on a table a little bit further down the same hallway about on a table.
Trinket 11 of 12: Sacrificial Knife


At the end of the same hallway, on the right side in a nook on a small table on the right side of the hall, you can find a small box. It has this trinket inside.
Fate Sealed for Chapter 12
You only really have one choice in Chapter 12, and that is only if Stan is alive and Madi is dead. If you meet these conditions, you will have the option to slap Stan in the face when you play as Linda. He kind of deserves it, so go ahead and give it to him good.
Chapter 13: Murder Mill
In this second-to-last-chapter, you have a couple of different options for how it can go. You will control Linda in 1980, who will be wielding the camera against Frank Stone.
- Path 1: Jamie is alive, then he dies when Linda fails to film Frank Stone properly.
- Path 2: Chris isn't still in 2024, and Jamie is already dead. Nothing happens but a cutscene.
- Path 3: Chris dies when Linda fails to film Frank Stone.
- Path 4: Jamie is alive, and Linda successfully keeps Frank off of him with the camera.
Next, you'll be in 2024, and you have the option to comfort Madi if she is still alive. You will be playing this part as Linda.
- Path 1: Choose the option that has Linda yelling that the film is not what she filmed in 1980 when you have the chance to comfort Madi.
- Path 2: Madi is not alive.
- Path 3: Comfort Madi.
Then, the fight against Frank Stone back in 1980 will play out again. You will play this section as Sam Green, and you will have a couple of collectibles to find down in the stormdrain.
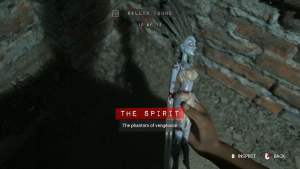
Rellik 10 of 12: The Spirit
After your first confrontation as Sam with Frank Stone, you will need to look for a turn off along that path where you met him. This turn off contains a Rellik doll of the Spirit.


- Path 1: You miss the camera QTE, and Sam dies. Robert picks up the Camera. Robert weakens him later with the camera.
- Path 2: You pass the QTE.
- Path 3: You succeed the first camera QTE against Frank Stone, and Jamie is not alive.
- Path 4: You save Jamie from the hook and ward off Frank Stone.
- Path 5: You save Jamie from the hook, but don't ward off Frank Stone and he kills Jamie and takes his jaw off.
If you follow paths 2, 3, 4, or 5, you have two branching paths you can get before the final confrontation with Stone.
- Path 1: Sam weakens Frank with the Camera.
- Path 2: You fail the camera event; Sam is knocked out and Linda picks up the camera.
Achievement - Escape Artist: Freed Jaime from the hook.
Achievement - Memento Mori: Jaime's jaw was removed by Frank Stone.
Once you are in the Final Stand with Frank Stone, you will have a plethora of branching paths to choose from, depending on who is still alive and who is not.
- Path 1: Robert weakens Frank.
- Path 2: Linda weakens Frank.
- Path 3: Robert dies.
- Path 4: Linda dies.
- Path 5: Sam uses the camera successfully in the battle against Frank Stone and locks him in the camera.
Fate Sealed in Chapter 13

Chapter 14: The Massacre at Gerant Manor
There is a lot going on in this chapter or very little, depending on which characters are still alive. There will be a couple of switches between 2024 and what's happening back in 1980. First, you'll be in 2024, and you will be watching Murder Mill as a group.
- Path 1: If you choose to confront Stan instead of Augustine, you can choose to punch him.
- Path 2: Confront Augustine or choose not to punch Stan.
After Frank Stone breaks free of the film, he will attack whoever is closest. This might be Stan, Linda, or someone else, and Sam can also sacrifice himself in this scene.
- Path 1: Stan is consumed.
- Path 2: Linda is consumed.
- Path 3: Sam is consumed.
- Path 4: Choose to sacrifice yourself.
- Path 4a: Sam is consumed.
- Path 4b: Your shoulder injury from Chapter 1 keeps you from saving the other person, and they are consumed.
- Path 5: If Chris has the talisman, she can be hypnotized and absorbed by Frank.
- Path 6: If Madi has the talisman, she can be hypnotized and absorbed into Frank Stone.
In this scene, depending on who has Sam's gun, you can also choose to shoot Frank or Madi to help save Madi.
Achievement - Phagocytosis: Madi was hypnotized and absorbed by Frank Stone.
Achievement - Friendly Fire: Sam shot Madi.
Trinket 12 of 12: Blacksmith's Hammer
Before going into the room with the generator to power up the elevator, you can go past the generator door and go right down the next hall. There will be a trinket a couple of steps into this hallway on the left on top of a little table.

Achievement - Plunderer's Instinct: Collected all Trinkets.
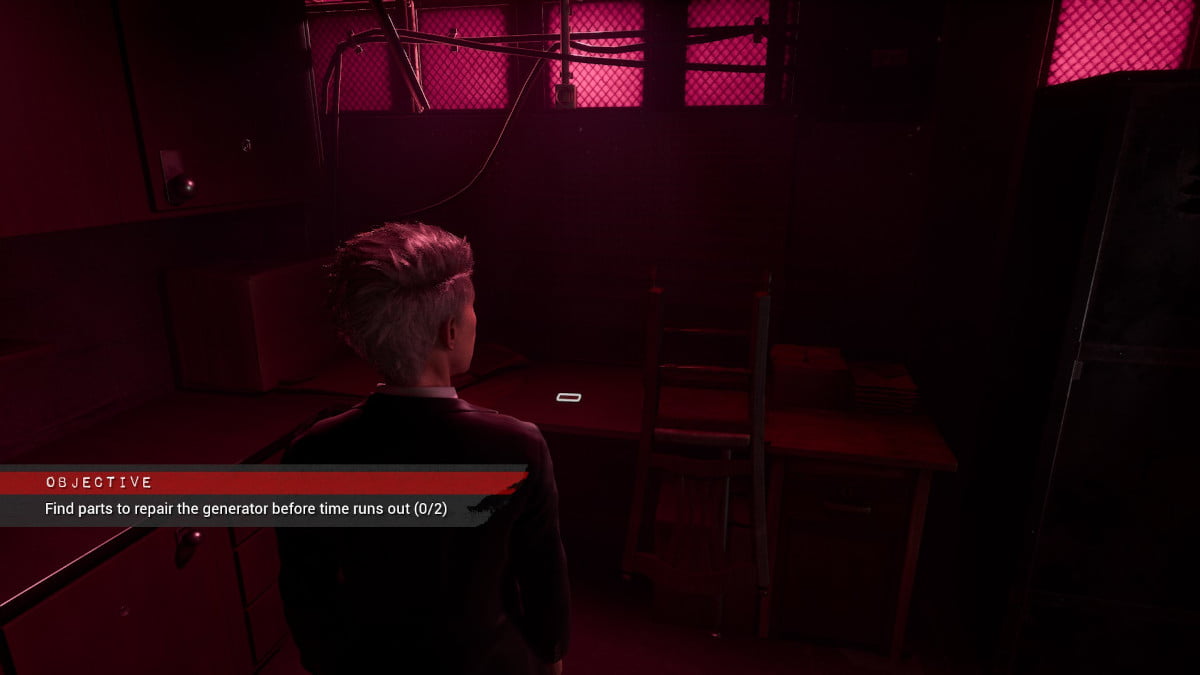
How to repair the generator in Chapter 14
There are two parts to fix this generator; you are limited on time, but you still have time to look around, so don't panic. The first piece will be on the table near the ID card, and the second will be on the table against the wall right next to the generator itself.

Achievement - Tinkerer: Repaired all generators.
The Champion Artifact 10 of 10: ID Card
In the room with the last generator, you can find an ID card that is a collectible. This is the final artifact for the Champion.
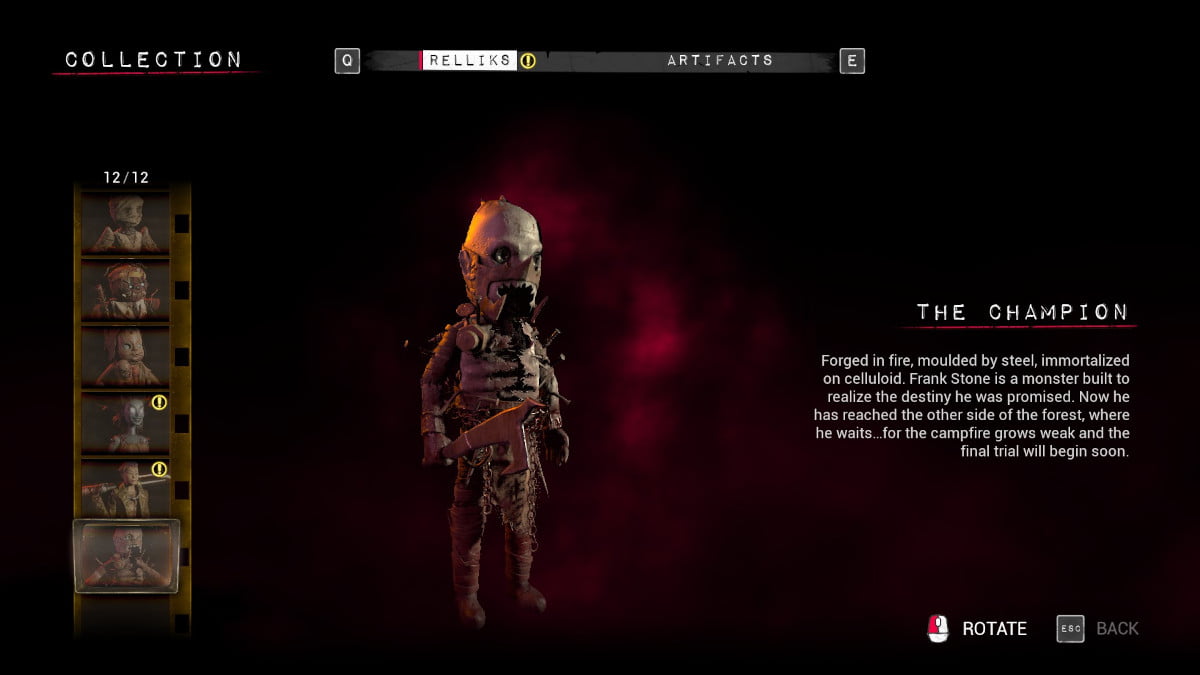
Achievement - The Champion: Collected all The Champion artifacts.
If Madi is dead and Linda is alone in this section, if you ride the elevator down, you can choose to shoot Augustine if you have Sam's gun.
Achievement - Nothing Personal: Shot Augustine.
The Storyteller Artifact 10 of 10: Augustine's Ring
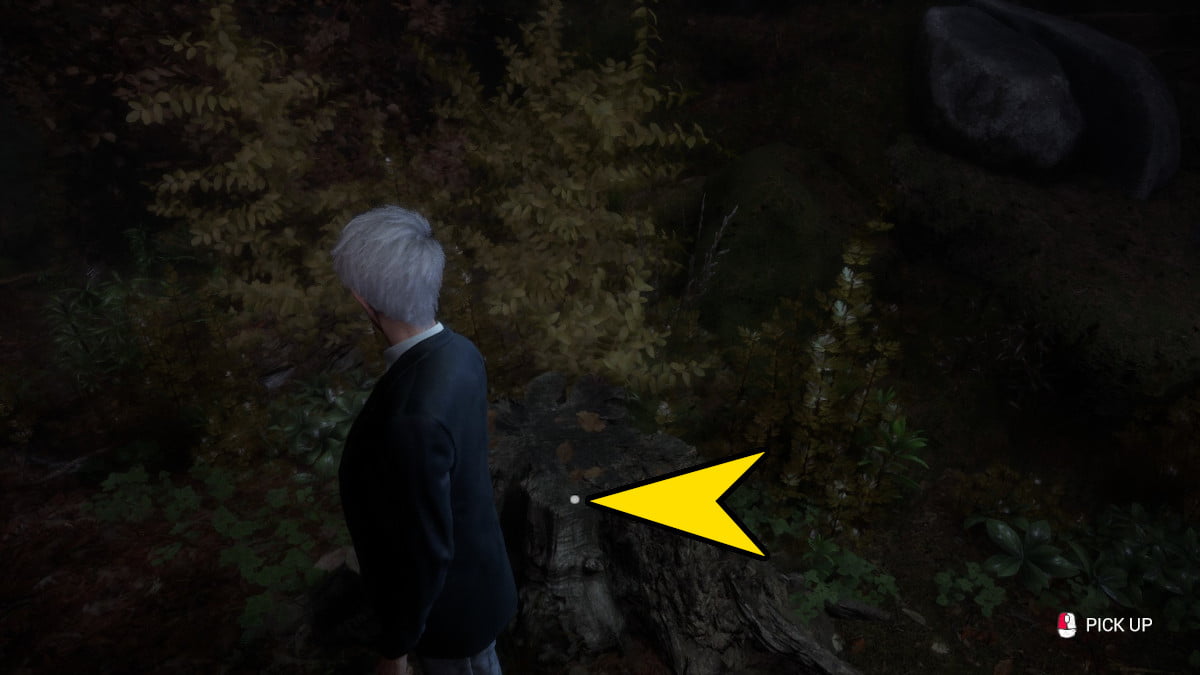
Before heading into the area with the bonfire, you can find Augustine's Ring on a tree stump.
Achievement - The Storyteller: Collected all The Storyteller artifacts.
Achievement - That Belongs in a Museum: Collected all Artifacts.
Rellik 11 of 12: The Trickster


The Trickster is located near the very end, where the bonfire is. Before squeezing into the clearing where the bonfire is, turn to the right, and there will be a long path with a door at the end. You will find this Rellik on the ground on the other side of the door.
All Endings
There are a bunch of endings for The Casting of Frank Stone, each ending slightly different depending on who has survived in 2024. Here is a brief description of what each ending looks like in this horror title.
- Nobody Survives: In this ending, everyone is dead (or in the case of Sam, escaped through the time machine). After you watch Augustine realize she has been betrayed by the Entity, you will focus in on Frank Stone, who is walking through the forest. Augustine watches through Frank's body, as she has been absorbed into him. You see a campfire in the distance, and it is surrounded by familiar faces for those who have played Dead By Daylight.
- Chris Survives: Alone, Chris runs through the forest, finding the campfire. She yells at the survivors, but no one reacts to her.
- Linda Survives: Linda finds the campfire in the forest, and she tells the survivors that they can't stay there; something is coming. None of the survivors react. Linda notices that Frank and the survivors appear to be waiting for something.
- Madison Survives: Madison asks the survivors for help, but no one answers. She yells that everyone needs to run and wonders why Frank isn't coming after her.
- Sam Survives: Sam starts to ask the survivors around the campfire for help, but he immediately notices something is wrong with them, and he realizes what is going on.
- Sam and Chris Survive: Sam wanders to the campfire and finds Chris. Chris asks what happened to the others, and she says that Augustine felt so familiar. Chris says that they have all been taken here, that this is what it all was about all along.
- Linda and Chris Survive: Linda finds the campfire and has the same conversation with Chris and Sam did. Linda explains who Augustine was like this: "She was the lie a cheater sees when they look in the mirror, and I hope that mirror is in pieces."
- Linda and Sam Survive: Linda and Sam talk about how no one else got out; they wonder what happened to Augustine. Linda looks at the survivors and wonders who they are, and Sam says that he doesn't know, but it appears they've been there a long time.
- Linda, Sam, and Chris Survive: They talk about how Stan and Madi didn't make it; they have the same conversation as when it's just Linda and Chris. Chris says: "Now everyone's arrived. We can begin."
- Madi and Chris Survive: They talk about who survived and who didn't. Madi tells Chris they need to move on, and Chris answers "But where would we go?"
- Sam and Madi Survive: They discuss how everyone else died, then Madi tries to talk to the survivors, but Sam says they have "been here a long time." He then says that the only thing they can do is help each other, "as much as we can be helped."
- Madi and Linda: Linda is sitting down with the survivors, and they talk about everyone else who died. Madi wants to know why they aren't moving on, and Linda continues to sit at the campfire, waiting for Frank. Linda says "This is all there is."
- Madi, Linda, and Chris Survive: They talk about the others who died, then Madison prods everyone to keep moving. The other two won't leave the campfire, though, and Frank appears.
- Madi, Linda, and Sam Survive: The three discuss Stan dying and Augustine. Linda says the survivors were there long before she was, and Sam and Madi wonder why Linda is still at the campfire. Sam says they need to all help each other "as much as we can be helped."
- Everyone Survives (Madi, Linda, Chris, and Sam): They discuss how Stan died, then Linda tells the group that "this is all there is."
- What happens if Sam escapes through the time machine? You have an option to put Sam through the horologium. If this happens, he is not at the campfire at the end, but you don't get to see where he ends up or what he decides to do once he has traveled through time.
- What happens to Chris if she pushed through the movie screen? There is a secret ending if Chris manages to push through the movie screen without dying; if you picked up the mirror at the curiosity shop, you will not be able to do this without dying. When you get the option, have Chris push inside the screen. She will appear back in 1980 when Jamie, Linda, and Chris were filming the first scene with the fake hand.
Achievement - The Campfire: Completed the story.
Achievement - Merciless Killer: Madison, Jaime, Chris, Sam, and Linda were killed.
Achievement - Entity Displeased: Everyone survived.
Rellik 12 of 12: The Champion
At the very end of the final cutscene, you will automatically get this final Rellik. All you have to do is watch the after-credits scene all the way through.
Achievement - Plangonologist: Collected all Relliks.
Achievement - All Seeing: Unlocked every branch in the Cutting Room Floor
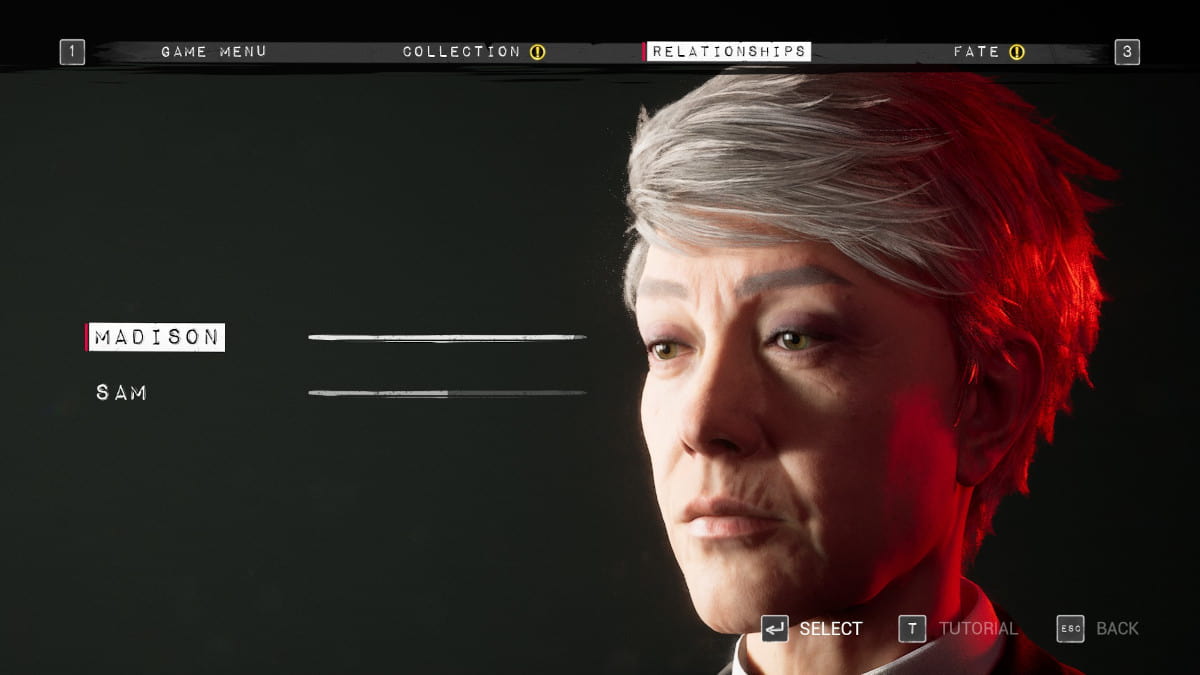
Relationship choices in The Casting of Frank Stone
In The Casting of Frank Stone, almost all choices you make will change your relationship with the people around you. If you want to max out your relationship with someone in order to get the achievement, here are all the choices and how they effect your characters' feelings.
- Chapter 2: You play as Madi
- While you are in the car as Madi, you will see someone on the side of the road.
- If you choose to pick up Linda when she is hitchhiking, you will raise your relationship with her.
- If you pick up Linda in the car and then what she does for work, you will raise your relationship with her.
- Not picking up Linda will lower your relationship.
- However, if you don't pick up Linda but tell her you were wary of picking up a stranger, it will raise your relationship.
- If you choose to pick up Linda when she is hitchhiking, you will raise your relationship with her.
- While you are in the car as Madi, you will see someone on the side of the road.
- Chapter 3: You play as Jamie, then Chris
- As Jamie, pass the QTE during filming, then choose not to give up your sister to raise your relationship with Chris.
- As Jamie, when you need to choose between defending Linda or defending Chris:
- Defend Linda to raise your relationship with Linda, lowering your relationship with Chris
- Defend Chris to raise your relationship with Chris, lowering your relationship with Linda.
- As Chris, if you suggest you want to steal a camera from the curiosity shop, Jamie's relationship with Chris will lower.
- As Chris, if you say you were kidding about stealing from the shop, you will raise her relationship with Jamie.
- Chapter 4: You play as Linda
- Ask Madi when she wakes if she's okay. This will raise Madi and Linda's relationship.
- When you are alone with Madi in the room after Stan leaves, if you chat with Madi, you have the choice between a Cynical and a Dubious reply. The Cynical reply will lower your relationship with Madi.
- When Madi is talking about how her mom passed away recently, you have two options.
- Comfort Madi when she talks about how her mom recently passed away, and it will raise their relationship.
- Instead of comforting Madi after she tells about where she got her film, ask Stan about his piece of the film to lower your relationship with Madi.
- After heading upstairs, Madi will walk off alone, talking to herself. Talk to her, and you will get two choices.
- Have Linda tell the story of Bonnie instead of the curt answer to raise their relationship.
- Give the curt answer about forgetting about the past to lower Linda and Madi's relationship.
- When Stan notices someone out the window, if you choose the options worrying about them stealing the films or the option where you accuse Augustine of knowing about the stranger, you will lower your relationship with Madi.
- Chapter 5: You play as Chris, Linda, and Jamie.
- While playing as Linda, right after the shoot, tell Jamie his acting was "...good." It will raise your relationship because Jamie appreciates your honesty.
- At the end of Chapter 5 when you are playing as Jamie, you will talk to Chris about the hand she is taking footage of.
- Choose "Apprehensive: Is moving that such a good idea?" to lower your relationship with Chris.
- Next, pick "Pessimistic: I'm not sure we can talk about this later" to lower the relationship with Chris further.
- Choose "Appreciative: Okay, sure" to raise your relationship with Chris.
- Choose "Apprehensive: Is moving that such a good idea?" to lower your relationship with Chris.
- When Chris is being pulled toward the green glowing door, you can choose several options. Choose to flee to lower your relationship.
- Chapter 8: You play as Linda.
- The first choice you can make as Linda is to question Sam several times.
- In your first reply, choose "What the hell are you doing here?" to lower your relationship with Sam.
- In your second reply, choose "Skeptical: You really think it's cursed" to lower your relationship with Sam.
- In the third interaction, choose "Hesitant: We haven't committed to anything yet" to raise your relationship with Sam.
- If you pick "It's a very generous offer" instead on the third question, you will lower your relationship with Sam.
- After Sam faints in the hallway, you can choose to:
- Be supportive and agree to help Sam to raise your relationship.
- Say he's making it hard for you to want to help him to lower it.
- The first choice you can make as Linda is to question Sam several times.
- Chapter 9: You play as Linda in 1980.
- If you have been hooked by Frank Stone and Jamie is still alive, your relationship improves when he saves you from the hook.
- Chapter 10:
- If Jamie didn't run away from Frank Stone when Chris was in danger, Chris and Jamie share a loving moment when they are reunited and it raises their relationship.
- Chapter 12: You play as Linda.
- Choose the left option when talking to Sam: "Prove anything you've said is true." It will raise your relationship between Linda and Sam.
- Chapter 13: You play as Linda.
- Choose to comfort Madi when Bonnie dies on screen, and you will raise your relationship with Madi.
- Chapter 14: You play as Linda.
- Choose to help Madi instead of running for the elevator to raise your relationship.
Achievement - Power of Two: Maximized Jaime and Chris' relationship.
All Achievements in The Casting of Frank Stone
Below you'll find a list of every achievement in the game. I have also included them throughout the walkthrough above.
- Savior: Sam stopped Frank Stone.
- Easy Money: Jaime accepted the bribe from Sam.
- Fellow Traveller: Madi picked up the hitchhiker.
- Motif: Played a familiar theme on the piano.
- 8 Bit Hero: Got the high score on the arcade machine.
- Five Finger Discount: Jaime stole money from Bonnie.
- Lumpkin and Livin': Learned that Tom stopped drinking due to Sam's kindness.
- Power of Two: Maximized Jaime and Chris' relationship.
- Open Sesame: Solved the gate puzzle.
- Stan of Cleaves: Stan was cut into pieces in the horologium.
- Back to the… Past: Chris was successfully sent back to 1980.
- Tsap …eht ot Kcab: Chris was sent to 1980, though something went wrong.
- Bad Dog: Found Merlin's collar.
- Escape Artist: Freed Jaime from the hook.
- Memento Mori: Jaime's jaw was removed by Frank Stone.
- Tinkerer: Repaired all generators.
- Nothing Personal: Shot Augustine.
- Friendly Fire: Sam shot Madi.
- Phagocytosis: Madi was hypnotized and absorbed by Frank Stone.
- Plunderer's Instinct: Collected all Trinkets.
- That Belongs in a Museum: Collected all Artifacts.
- Entity Displeased: Everyone survived.
- Merciless Killer: Madison, Jaime, Chris, Sam and Linda were killed.
- The Campfire: Completed the story.
- Plangonologist: Collected all Relliks.
- The Champion: Collected all The Champion artifacts.
- The Storyteller: Collected all The Storyteller artifacts.
- Murder Mill: Collected all Murder Mill artifacts.
- Skills? Check!: Succeeded 5 Skill Checks in a row.
- It's All in the Reflexes: Succeeded 10 Great Skill Checks.
- Camera Shy: Warded off the Killer with the 8mm camera.
- All Seeing: Unlocked every branch in the Cutting Room Floor.
For more Supermassive Games info, check out What is House of Ashes Based On? on Pro Game Guides.