
Windrose is a pirate survival game that's already taken Steam by storm before it even fully launched. But this isn't a game where you jump on a ship and start blasting cannons in five minutes. Windrose throws you onto a beach with nothing but a broken blade and expects you to figure things out.
The demo offers around four to six hours of gameplay across three islands, and trust me, it's very possible to waste a lot of that time being confused, dying to pigs, or staring at a ship wreck, wondering if you have to build the whole thing again. Our Windrose beginner's guide covers the most common questions and issues new players encounter in the demo.
What Difficulty Should You Pick in Windrose?
Choosing a difficulty only comes up when creating a new world, and it's permanent — you can't change it later. Windrose has four settings:
- Calm Waters — Reduced enemy damage and pressure across the board. The right pick if you're new to survival games or just want to focus on exploration, building, and story.
- High Seas — All modifiers at 100%. This is the intended, balanced experience.
- Storm's Edge — Enemies hit harder and have more health. Built for players who want a real challenge.
- Captain's Choice — Fully custom. You dial every individual modifier up or down yourself, with some modifiers going as high as 500%.
Which Difficulty to Choose as a Beginner?
If you're coming into this without much survival game experience, start on Calm Waters. There's no shame in it, and you can always run a fresh world on higher settings once you know what you're doing. What you can't do is adjust your current world mid-playthrough, so pick carefully.
How to Complete the Islander Quest
The Islander quest is the Windrose tutorial, and it's a long one. It triggers right after the prologue and walks you through several connected objectives, each building directly on the last. Here's the full rundown:
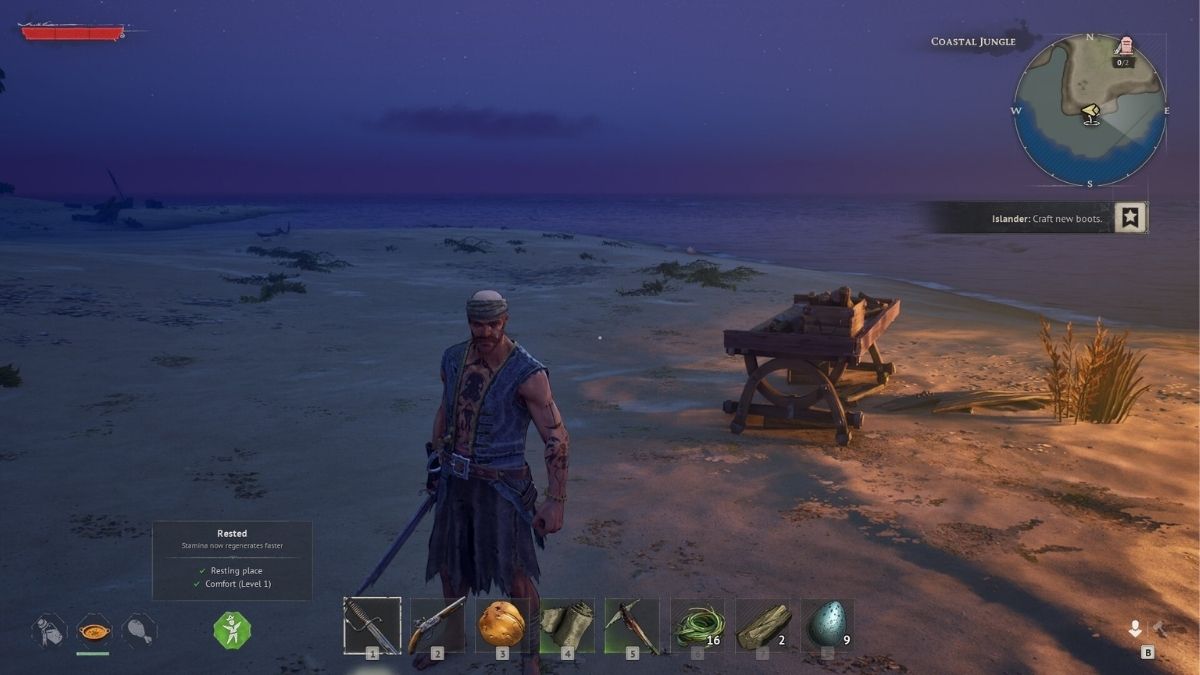
- Build a Bonfire — Collect five pieces of wood from branches on the ground and place the bonfire somewhere open. It becomes the center of your camp, so don't tuck it into a corner where it'll block other structures.
- Build a Workbench, Cooking Fire, and Tent — The Workbench needs 5 wood. The Cooking Fire needs 3 wood and 3 stones. The Tent needs 4 wood and 10 plant fibers (craft a Stone Axe at the Workbench first, using 3 stones and 3 wood, then harvest plant fibers from algae and plants near the shore).
- Kill a Boar and Get Rough Hide — Two boars will ambush you after the tent is up. A Sow is slightly smaller and easier to kill than a full Boar. Both can kill you quickly at this stage, so don't get greedy.
- Build an Armor and Clothing Workshop and Craft Survivor's Boots — The workshop requires 5 wood and 10 coarse fabric (craft coarse fabric at the Workbench using plant fibers). Important: this building requires a roof to function, so you'll need to put walls and a roof over it. Once built, craft the Survivor's Boots using 2 rough hides and 2 coarse fibers.
- Smelt Copper Ingots — First, mine copper ore from the cave marked on your mini-map (you'll need a Stone Pickaxe). Then build a Charcoal Kiln (25 wood + 20 clay) to produce charcoal — the conversion rate is 1 wood to 1 charcoal. Next, build a Smelting Furnace (15 clay + 30 stones). Feed it 6 Copper Ore + 1 Charcoal to make 1 Copper Ingot. You need at least two ingots to complete this step. Note: both structures need clay — see the clay section below if you're not sure where to find it.
- Craft a Melee Weapon — Build the Weaponsmith Workshop (10 wood + 5 copper ingots — also needs a roof). Then craft a Saber, Rapier, or Club. Don't make the Pistol here; it's not a melee weapon and won't count toward the objective.
Once these are done, the main quests open up, and you'll receive your first boat for free. The two quests that unlock are Rescuing the Crew and I Need a Bigger Boat — both will be marked on your map.
Related: Best Pirate Games to Play
How Does Combat Work in Windrose? - Fighting Guide
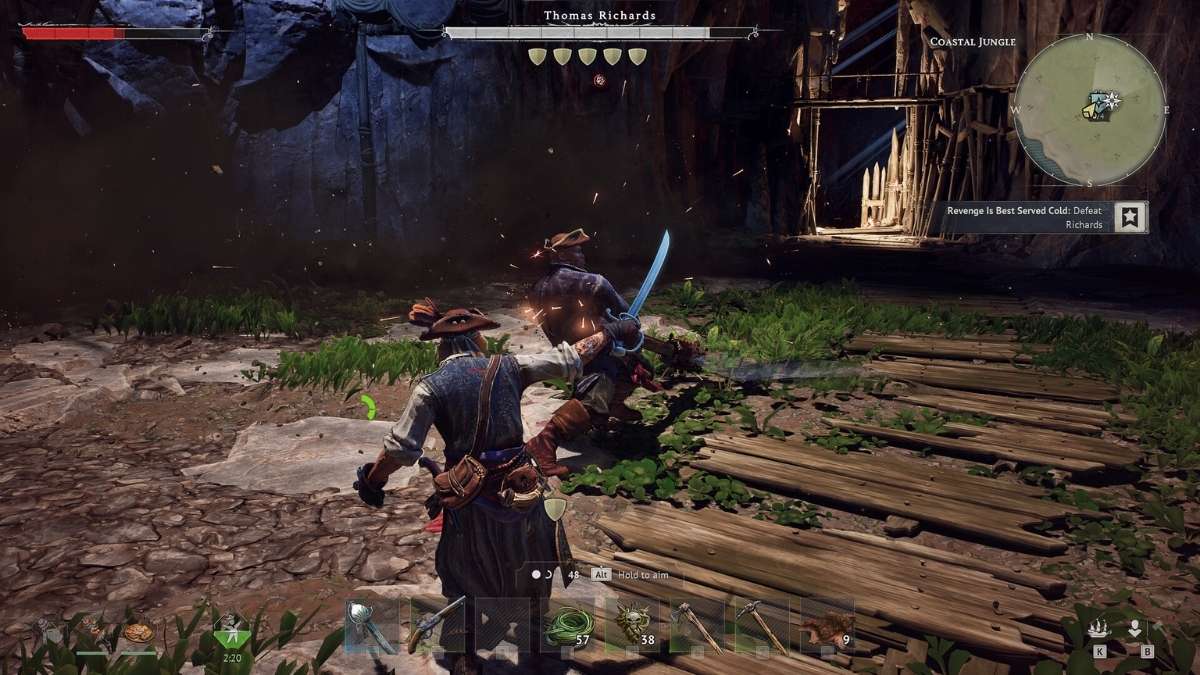
Windrose calls its combat system "soulslite," and it means it. This is not a game you can brute-force. Stamina management and positioning matter; enemies hit hard, and if you run in swinging, you will die. Here's what every beginner needs to know:
- Lock onto your target first. Press T to lock on. Without it, your dodges won't track the enemy, and your guard won't face the right direction. Always lock on before engaging.
- Watch your stamina bar. Every attack, dodge, and block drains it. If it hits zero, you go "winded" — you can't sprint or dodge while that lasts, which makes you extremely vulnerable. Lower your block briefly when you don't need it to speed up stamina recovery.
- Parrying is powerful. Time your block right as an attack lands to stagger the enemy. It works better against human enemies (Sailors) than animals (Boars), but learning the timing pays off.
- Red-glowing attacks can't be blocked — dodge them instead. The same goes for ground AOE effects like the Swollen Drowned's toxic spit.
- Don't fight enemies two levels above you. The level gap in this game is punishing. A level 3 Sow near the first dungeon can one-shot you right at the start. If something feels too dangerous, it probably is — come back when you're stronger. Dodos, on the other hand, are easy kills and drop food.
- Hunger affects your health bar directly. As your hunger drops, your health will start to decline with it. This isn't a separate starvation mechanic — you'll visibly lose health bars if you're not eating, so keeping food cooked and on hand matters just as much as having a good weapon. Cook bird meat and crab at the Cooking Fire whenever you can.
- Craft bandages early. Bandages are craftable at the Workbench from coarse fabric and restore health over time. They're inexpensive to make and should be on your hotbar at all times, especially before heading into caves or enemy camps.
How Do You Get Gunpowder in the Windrose Demo?
This one catches a lot of Windrose players completely off guard: you cannot craft gunpowder in the demo. In the full game, you'll be able to make it using Ash, Sulfur, and a Millstone — but the Millstone is disabled in the demo version. That means even if you have pistol and musket ammo, you have no way to fire them unless you find gunpowder in the world.
The only way to get it is by raiding Pirate Camps scattered across the islands. Kill the pirates — they occasionally drop gunpowder on death — and loot the supply boxes in their camps, which usually contain two or three units each.
Treat every unit like it's irreplaceable, because in the demo, it basically is. Save it for dungeon bosses where ranged damage genuinely matters. Do not waste it on Dodos or open-world wandering enemies.
How Do You Get Clay in Windrose?
Clay is one of the early resources the game never points you toward, but you'll need a lot of it for the Islander tutorial — 20 clay for the Charcoal Kiln and 15 clay for the Smelting Furnace.
You won't find it on the beaches. Head to the center of the starting island, to the area between the Ancient Ruins and the Copper Deposit. Look for dark, cracked, muddy patches on the ground — they look like wet soil or disturbed mud. That's clay.
NOTE: You need a Stone Pickaxe to harvest clay. You craft the Stone Pickaxe at the Workbench using 3 wood and 3 stone. Equip it and mine the muddy patch. One deposit typically yields 60–80 clay, so you should be well covered once you find it.
How to Fast Travel in Windrose
To fast travel in Windrose, you need to manually set up the infrastructure. Here's how it works:
Step 1: Craft a Fast Travel Bell. You'll find the recipe under Building Mode > Crafting & Utilities > Utilities. You get your first Fast Travel Bell from inside the Smuggler's Den on the starting island, so explore there early.
Step 2: Place Fast Travel Points. You need to place at least two Fast Travel Points to travel between them — one at your origin, one at your destination. They can't be placed via the map; you have to physically go to the location and place it there.
Step 3: Use a Bonfire to activate Wharf and vessel options. When using fast travel near your base or a docked ship, a Bonfire needs to be nearby to enable those options.
The good news is there's no limit on how many Fast Travel Points you can place, so set them up at every new island you land on, near every dungeon entrance, and at every point of interest you plan to revisit.
How Do You Repair or Recover Your Ship in Windrose?
If you lose your ship in Windrose, you can salvage the wreck. Keep in mind that when you lose your ship, your loot will float in the water where it went down. Here's how to get back your ship:
- Build a Wharf at your base. The Wharf is a building that manages your vessel. The bad news is that this option is locked in the build menu until you complete the specific quest that requires you to craft cannons. If you don't see it yet, check your active quests.
- Walk up to the Wharf and pay 20 Wood to Repair/Salvage the wreck.
- Press K to respawn the ship, fully repaired.
That same K key also summons your starter boat to your location at sea at any time, which is useful whenever you need to cross water quickly. It's one of the most important keybinds in the game and easy to miss if nobody tells you.
What Are the Mystery Crates You Can't Open?
Once you start boarding ships and looting camps, your inventory will fill up with sealed boxes labeled Naval Supplies, Medical Crates, Contraband, and similar names. You'll try to open them and find that you can't — and the game doesn't explain why.
These are trade goods, not regular loot. They're meant to be sold at dedicated Trader NPCs for profit, not cracked open yourself. The main trading hub where you'd sell them (Tortuga) isn't accessible in the demo. So for now, don't stress about them. Drop them in a storage chest at your base and forget about them until Early Access, when the full trading economy becomes available.
Does Windrose Demo Progress Carry Over to Early Access?
No, demo is not connected to early access. Your save progress from the Windrose demo does not carry over to Early Access. Whatever you build, craft, and unlock during the demo stays in the demo. You'll be starting fresh when the full game launches.
The one exception is cosmetic: if you play the demo at all, you unlock an exclusive decorative spyglass that will be available to you in the Early Access version. It's a small reward, but it's a nice little trophy for being an early supporter. So even if you're just trying the demo to decide whether to buy, make sure you actually launch and play it — not just download it.
Can You Play Windrose Demo in Co-op?
Yes, co-op is available in the demo—but with one important limitation: dedicated servers are not yet supported. That means co-op runs only through player-hosted sessions. One person in your group hosts the world, and others join through them.
The developers have noted there are some connection issues in the current demo build that they're actively working on, so if you have trouble connecting, that's a known issue rather than something you're doing wrong. Dedicated server support is planned for the Early Access launch. Co-op supports up to four players, and the full game will offer both self-hosted and dedicated server options.
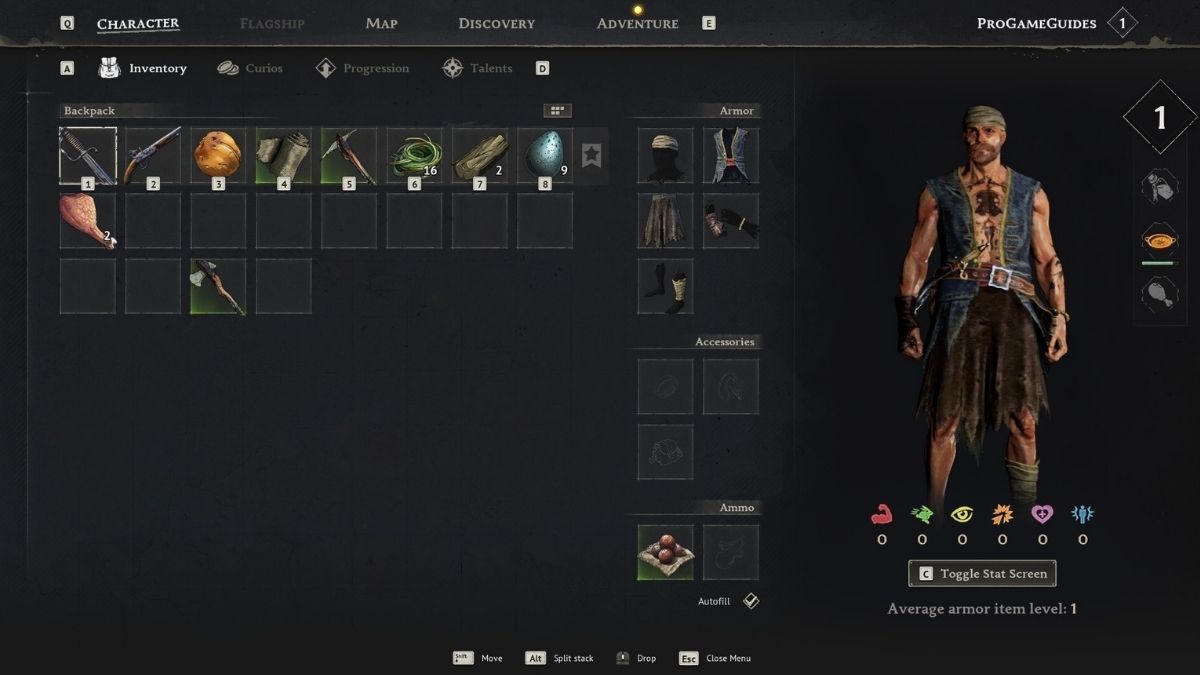
How Does the Windrose Leveling System Work?
Every time you complete objectives and defeat enemies, you gain XP. When you level up, you get two things to spend: attribute points and a talent pick.
Attribute points go toward three stats: Strength, Health, and Stamina. These aren't cosmetic choices — Strength influences which weapons you can use effectively, Health increases your maximum HP, and Stamina directly affects how long you can fight before going winded. If you find combat frustrating early on, putting points into Stamina or Health will make an immediate difference.
Talents are passive upgrades that you choose one at a time on each level-up. The options include things like a 20% stamina increase, improved slash damage, better critical hit chance, damage resistance, and Marathon Runner (which reduces stamina drain while moving). There's no wrong answer, but if you're struggling with the soulslite combat, the stamina or health-related talents will carry you further early on than damage bonuses will.
While you wait for the full game release, we have more pirate adventures for you! Check out Skull and Bones Review and Flint: Treasure of Oblivion Review here on PGG.