
During your Possessor(s) journey, you'll be facing many difficult bosses, some of them optional, that will test your skills and make you adapt to their moves. While some are indeed optional, and you can skip them entirely by accident, you're going to want to seek them out and face them head-on, not just because of the rewards they give, which are a big plus, but because each one represents a fun rush of adrenaline I couldn't get enough of.
All Possessor(s) Optional Bosses
The optional bosses in Possessor(s) are usually tucked away in secret corners of the map, so you'll have to stray from the path of progression to find them, or they can be hidden in plain sight, but you can't reach them since you lack the ability required to get to them. Every boss has its own unique moveset that you'll have to overcome, and once their HP drops to half, they enter an enraged mode, usually becoming faster and modifying their attacks in some way. Follow the list below to learn where to find them and how to deal with them.
The Sightless All-Star
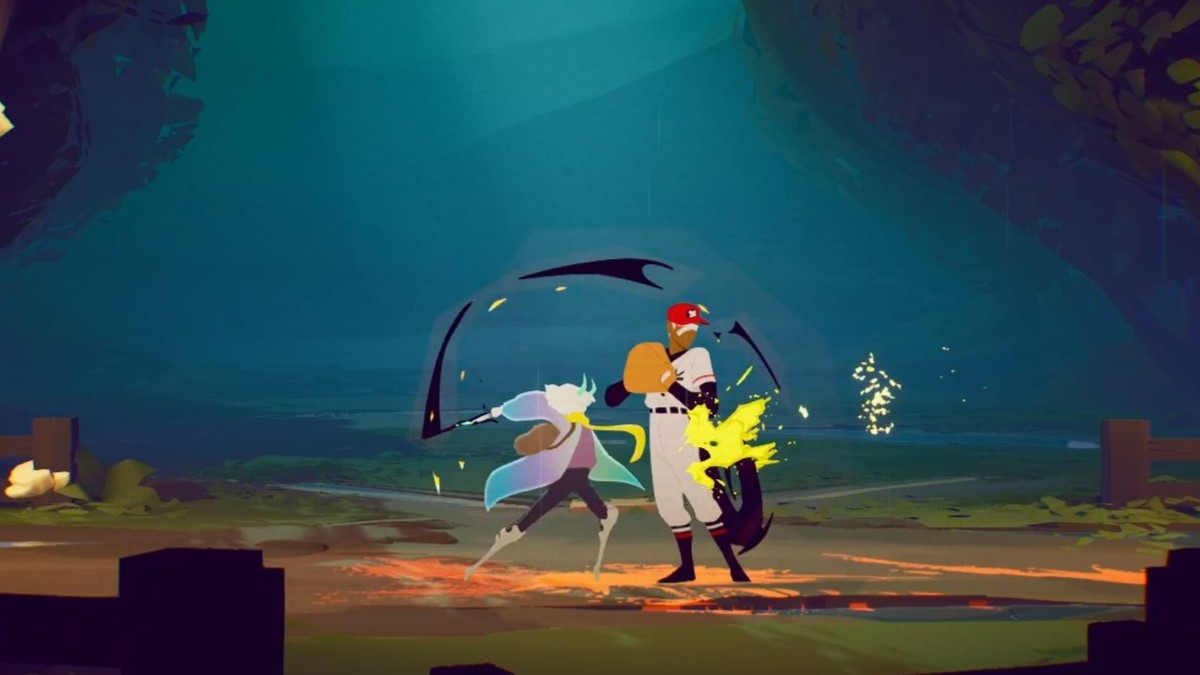
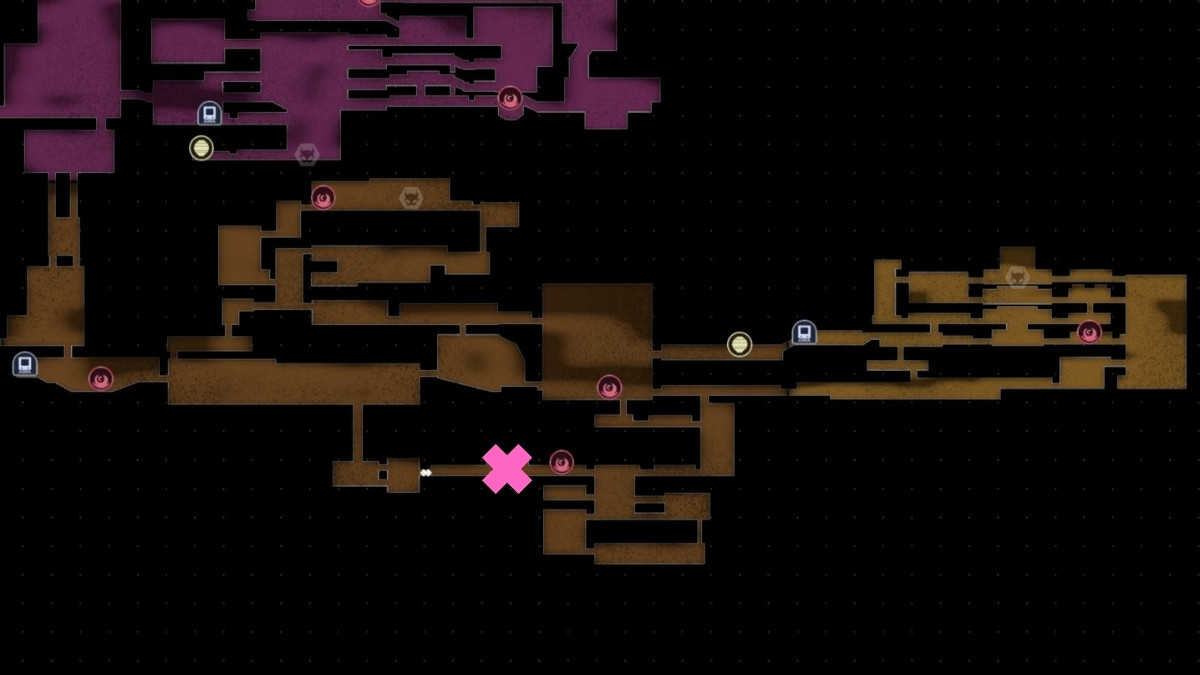
The Sightless All-Star is part of a side pursuit The Hunter's Test, and the earliest optional boss that you can find and fight. He's located on the eastern side of the Fluorescent Park, after the cabin where you meet the hunter Tens. You'll locate them by continuing to explore the areas to the right after unlocking the Dive Breaker ability, which is needed to boost yourself off the tree branches leading to the boss fight.
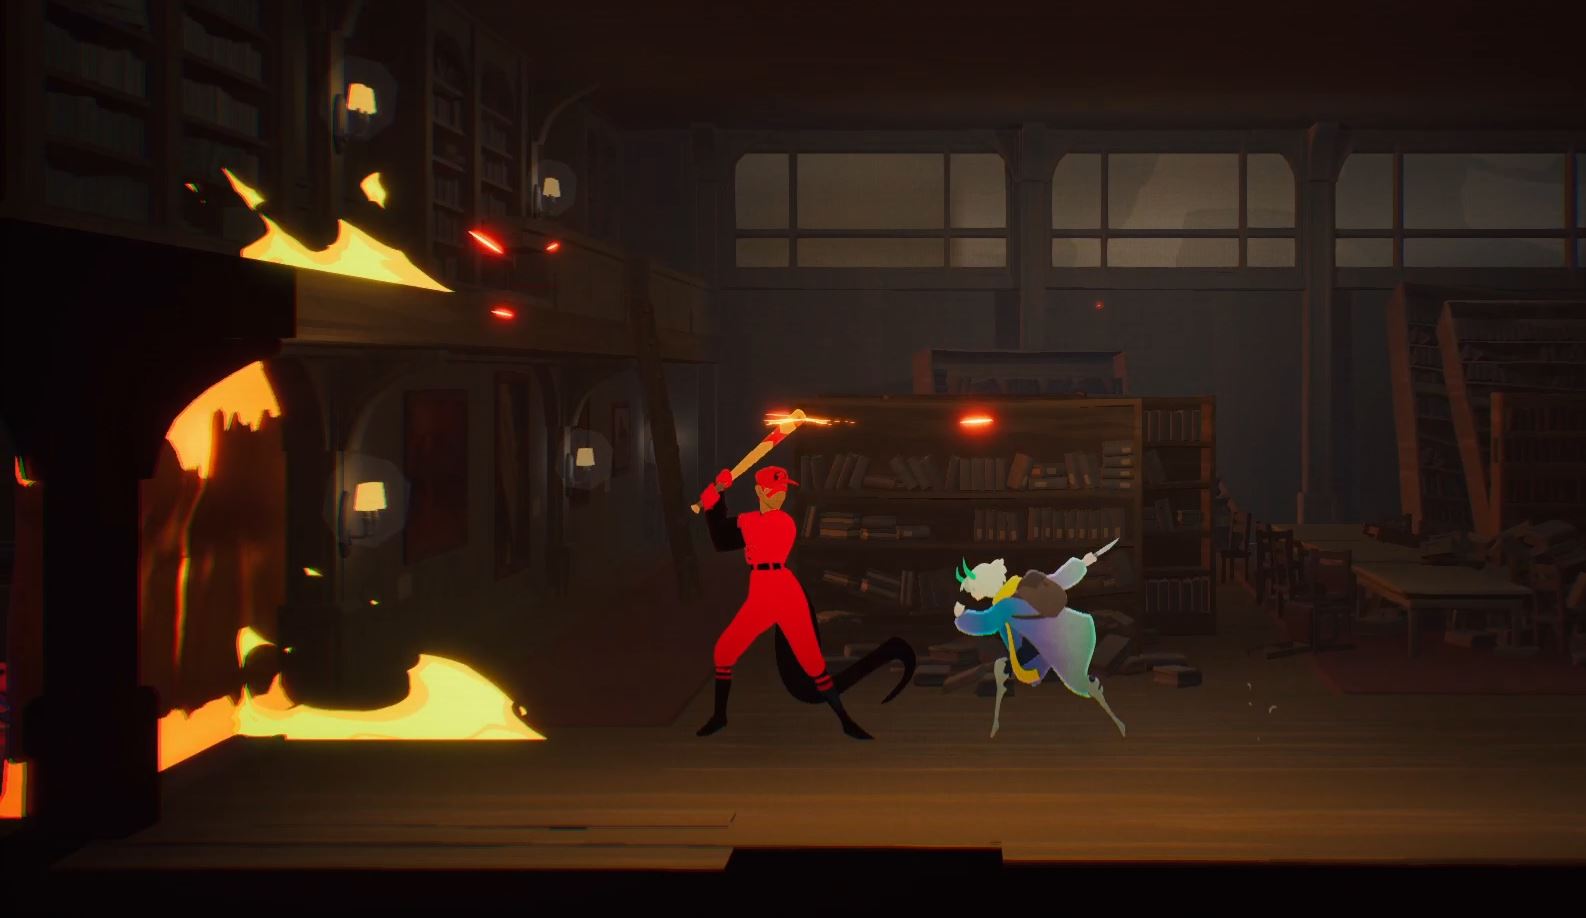
The Sightless All-Star is a demonic baseball player, using its baseball bat and ball for a combination of melee and ranged attacks. His moveset consists of:
- Long-range baseball swings that can catch you off guard with their reach.
- Teleporting around the arena, making it hard to land a hit or predict where he's coming from.
- Throwing his baseballs either up in the sky one at a time, with them shooting straight down at you, or teleporting to one of the corners and throwing multiple of them at you in a spread pattern.
The best way to deal with him is to parry his attacks, especially his baseball throws. The baseball bat attacks can be dodged if you can get the timing right, but his throws do a lot of damage if they hit you and are difficult to dodge out of the way properly, so make sure to time your parries and deflect them back. Halfway through the fight, he becomes enraged, all of his attacks become faster, and he starts throwing more balls at you than before, so be extra careful.
Mr Demars

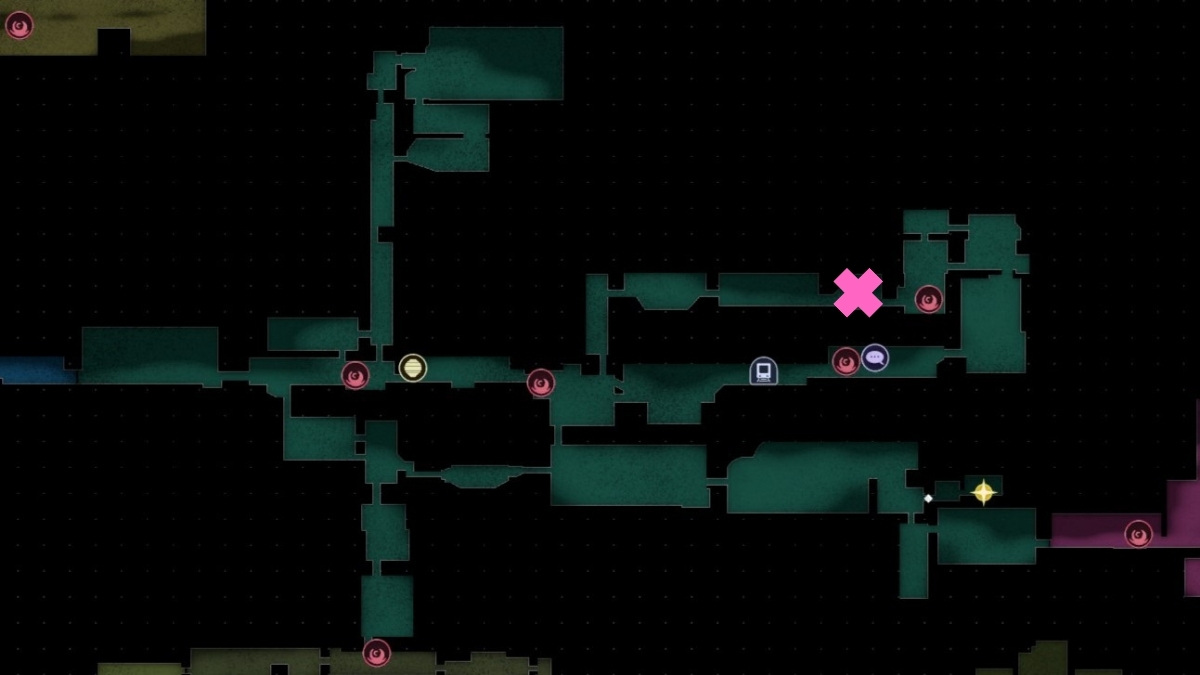
Mr Demars is located in the Campus Hill area near the entrance, but is inaccessible until you progress fully through it and unlock the Slide Breaker ability. He's in an isolated spot on the map, and you'll only stumble upon him if you're helping Professor Foss and doing the Broken Records side pursuit.
By exploring the area, you'll eventually find the Campus East fast travel station. From there, go left until you reach the courtyard that separates the western and eastern sides of the campus. Interact with the floating red plant to unlock a shortcut, but instead of going down, look up to see a spot where you can latch on with your Whip and use it to swing across to the other side. Once you get back inside, follow the path upward and you'll come face to face with Mr Demars in the gymnasium.
Mr Demars is a hulking behemoth, a disfigured abomination bursting through human skin. Luckily for you, he was pretty mean to Luca back in the day, so it's time for revenge. The moves you should watch out for are:
- A fast ground pound that does a lot of damage if it hits you and unleashes a wave of energy emanating from the point of impact.
- He'll quickly dash to one side of the arena and try to dive into you, pushing you away in the process.
- He can launch a projectile from the eye in its torso that doesn't seem that dangerous at first, but splits into multiple smaller ones that hone in on you.
- When in the enraged state, he can also fly up into the air and start shooting lasers at you that move around the arena.
He is surprisingly mobile and difficult to parry, so you're better off dodging his attacks. Make sure to jump after he does he ground pound move so you avoid the aftershock. The worst thing in his arsenal to deal with is the projectiles, because by the time they split up and start going for you, he'll be attacking you with another move, making it difficult to dodge either. He gets a new move when he enters the enraged state, but it's honestly the easiest one to avoid. The real problem is that he now fires two projectiles, each splitting into more smaller ones, making your life hell. Try to parry as many as you can if he's not attacking you with a different move and dodge the ones you can't.
The Document Eater
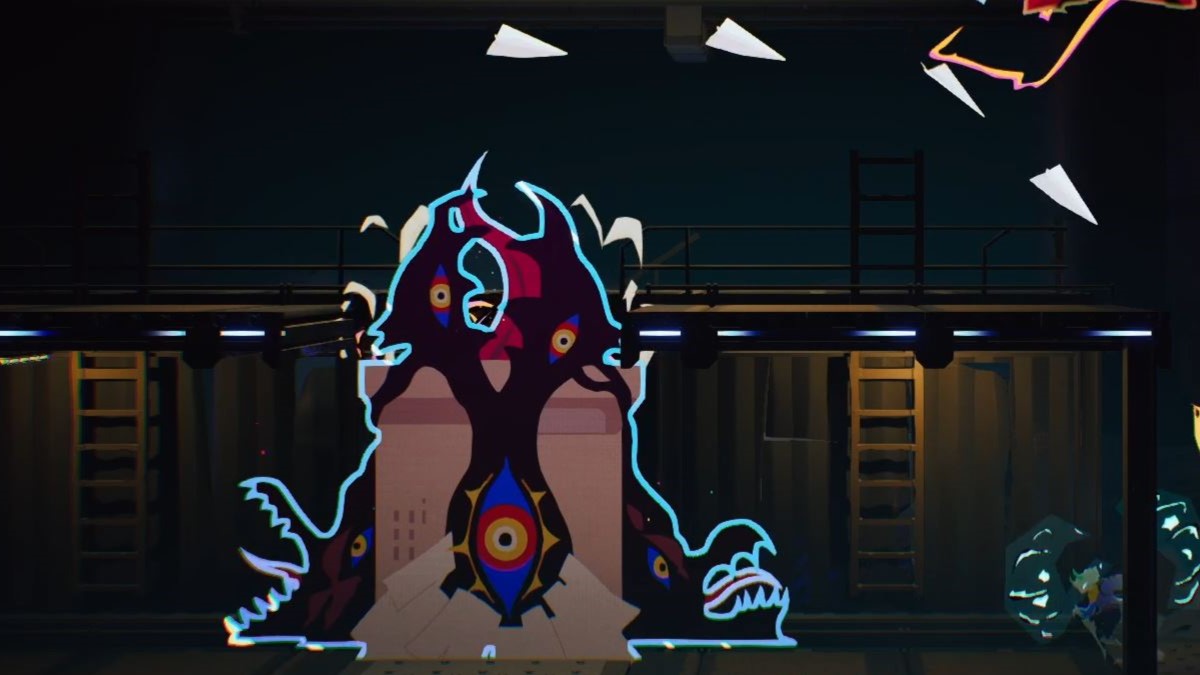
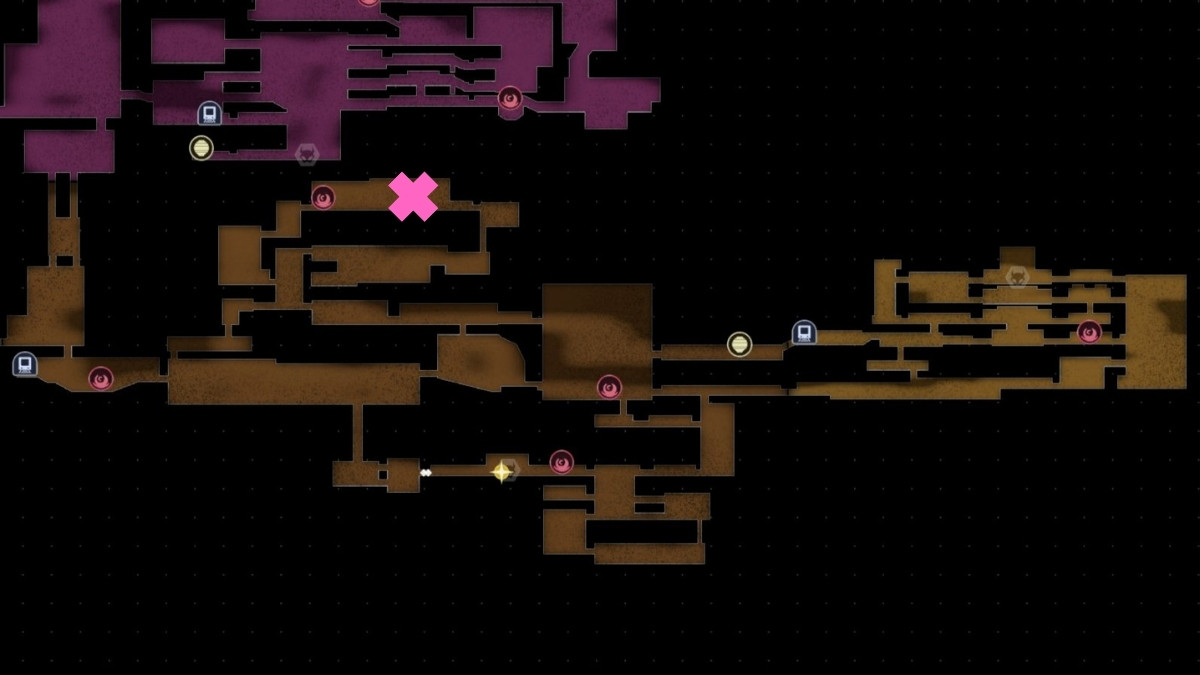
The Document Eater is a possessed printing machine located in the basement of the Campus Hill area. To access it, first locate all the microfilms for Professor Foss for the Broken Records side pursuit. Afterward, he'll give you the Campus Chem Lab Key, which unlocks the door leading to the basement. Once inside the basement part of the map, follow the path until you reach the boss, doing some time-limited platforming and destroying those red tentacles that block your progress along the way.
The Document Eater is unable to move so remains in place during the fight. You won't be able to damage it, not until you destroy the red decoy that it spawns in different areas of the arena. It will be attacking you with different projectiles while you're trying to hunt down the decoy, those being:
- Paper planes that slowly hone in on you and deal a lot of damage if you don't parry them.
- Paper talismans that float toward you and unleash a pillar of flame when close enough to hit you.
- Crumpled up balls of paper that can't be parried and stick around until you destroy them with your attack.
- If at any point you get close to one of its mouths before you deal with the decoy, it will bite down on you.
This is both a boss fight and a platforming challenge since you'll have to navigate your way around the arena while dodging various projectiles and the main body, so that you can deal with the decoy first and make the boss vulnerable. The enraged mode doesn't change much, except that it adds a glowing aura around the projectiles, making them do a lot more damage. Just make sure to figure out which ones you should dodge, parry, or attack, and you'll be fine.
The Benchwarmer
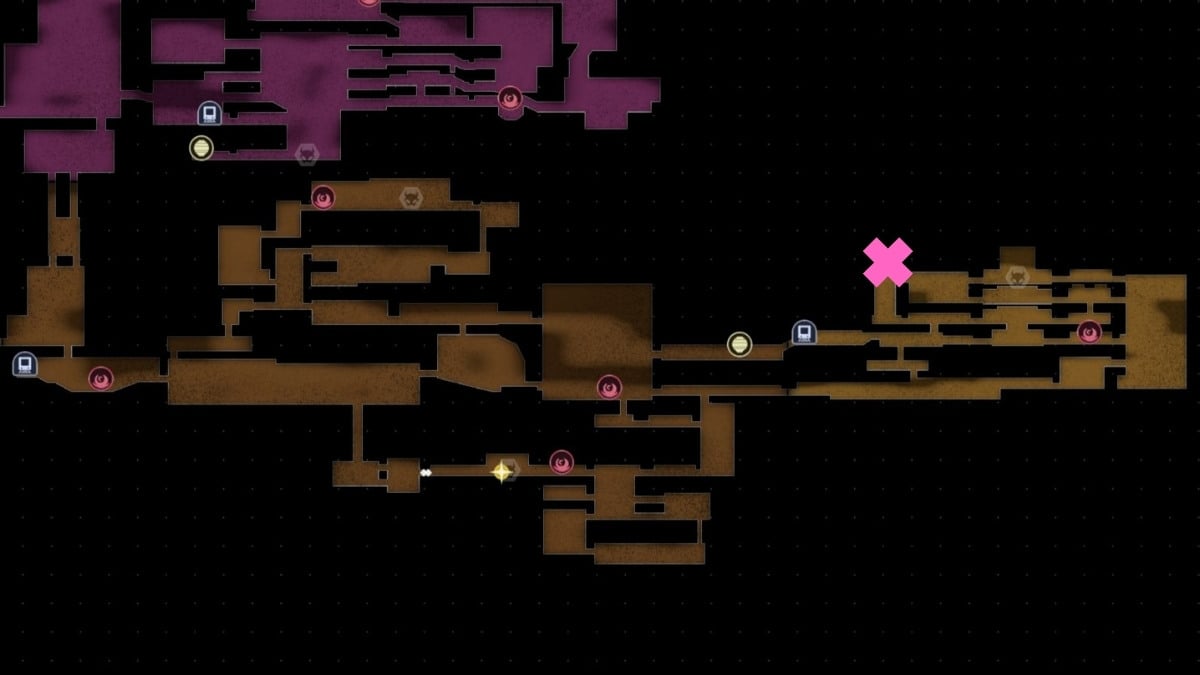
The Benchwarmer is the earliest nightmare version of a previous boss that you can track down for The Ones That Got Away side pursuit offered by Tens. He can be found in a secret room while exploring the eastern side of the Campus Hill area. You'll know you're in the right spot when you notice an out-of-place tree branch inside the campus. Bounce off it with your Dive Breaker ability, and you'll reach a room that is outside the map.
At first, you might think that he's just a red version of The Sightless All-Star, but he's a different beast altogether. The only things they have in common are teleporting around the arena and the basic baseball bat swing. The Benchwarmer will be using the following moves against you:
- A fast ground slam that he will repeat several times in a row, teleporting to the top of the screen each time.
- He'll be throwing glowing orbs at you in different patterns depending on your position, which explode after a few seconds.
- He dashes from one side of the screen to the other, often chaining them, and mixes in a groundpounding dash that launches large shockwaves from the impact.
- When enraged, he gains a new move where he does a bunch of small dashes around the screen, leaving purple decoys behind that shoot out a fireball toward you when they vanish.
He's pretty fast and punishes your mistakes. Your best bet is to dodge through his attacks or jump out of the way. The orbs he throws can't be parried, so don't bother trying. When he becomes enraged at half HP, he starts leaving behind orange decoys every time he does one of his moves. Destroy them as soon as you can, because if he interacts with them again, they will explode and do damage to you.
Dr. Michaels

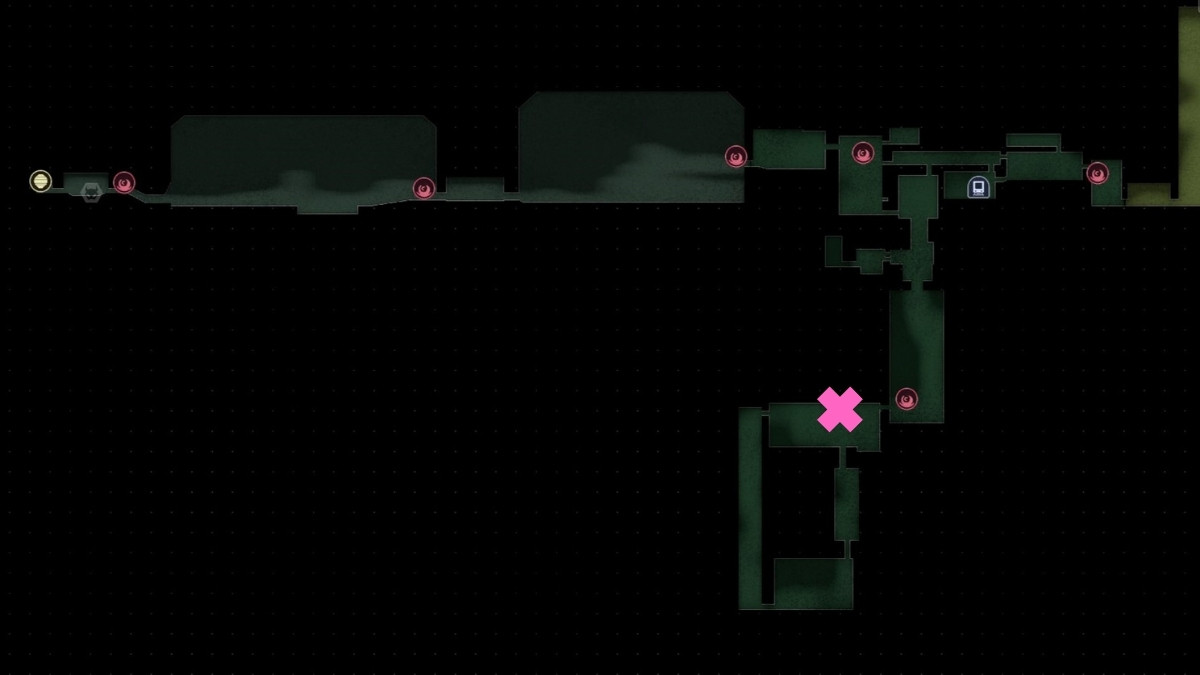
Dr Michaels can be found in the Rusted Dockyard area after unlocking the Water Dash ability. He can be easily missed while making your way back to the topside if you just follow the waterfalls leading you back. Be on the lookout for an office-looking space above you after you emerge from the first waterfall you climb with your new ability. If you reach your checkpoint in the area, know that you've gone too far.
Dr Michaels has experienced better days, seeing as he has a hole in his stomach and is missing both arms, but at least he has one tentacle as a replacement and way too many eyes. His moves are very telegraphed if you know what to look out for. Depending on the charging animation, he'll be unleashing one of the following moves:
- If he sticks his tentacle into the ground, quickly run around the arena, because it will emerge from under your feet if you stand still
- If he raises the tentacle behind his back, he'll charge an attack that covers the whole floor of the arena, but you can jump over it if you know it's coming.
- If he bends his knees, get away from him, or you'll be hit by tentacles that sprout around him.
- If he tilts his head back, quickly dash behind him as he'll spit out pure chroma at you, dealing a lot of damage if you get struck by it
- He can also charge up a flailing tentacle attack that repeats a few times from side to side.
The only attack you can potentially parry is the flailing tentacle one, but even that can be risky. Learn his tells and dodge his attacks, hitting him when he leaves himself exposed, which is pretty much after every attack. Just be careful that he doesn't surprise you with the close-range sprouting tentacles. After he gets enraged, he becomes much faster, with most attacks gaining increased area of effect or hitting multiple times, so be extra careful.
Possessor(s) Optional Bosses FAQ
The only point of no return is at the end of the game, right before the final confrontation. Until then, you're free to go back to any unexplored areas you might have missed.
Most of them will give you a lot of chroma and an upgrade to your HP, or your painkiller's potency or capacity.
No, they're here only as an additional challenge and a reward for exploring; you don't need to beat them to get a better ending to the story.
We hope our Possessor(s) Optional Bosses guide helps you prepare for these fun and intense fights. If you're looking for more Possessor(s) content, check out our guide on How to Find All Possessor(s) Weapons & Specials to complete your arsenal.