


Last Updated Juney 1, 2026
Meta is unchanged in Clash of Critters, but we continue to play the game and as soon as things change, we'll alter our list.
- The best Tataris in Clash of Critters are Blueflick (S Tier - AoE fire damage with Burn DoT), Zappur (S Tier - hybrid support/DPS that boosts nearby ally DMG), and Gibber (S Tier - defensive support that shields allies).
- This tier list ranks the top 25 Tataris by damage output, crowd control, team utility, and meta viability.
Clash of Critters is all about collecting and evolving creatures called Tataris, each filling distinct roles to defeat hordes of Zobos. With over 50 different Tataris spread across various rarities, how you build your team matters as much as the units themselves. So, to help you pick the best ones, this tier list ranks the top 25 Tataris by damage, CC value, team buffs, and how well they hold up in the current meta.
What Do the Tier Rankings Mean in Our Clash of Critters Tatari Tier List?
In Clash of Critters, our tier rankings are based on each Tatari's overall contribution across damage, crowd control, debuffs, and team support value. To help you get a better idea of what each tier means, here's a complete breakdown of each and what they mean:
| Tier | Meaning | Tataris |
|---|---|---|
| S | Meta-defining. Top-tier damage, crowd control, or team utility that holds up across all stages. | 11 |
| A | Excellent. Strong combat value, though slightly outclassed by S Tier in optimized teams. | 7 |
| B | Solid. Useful in early-to-mid game but falls short on consistency or requires specific conditions to perform. | 3 |
| C | Below average. Conditional mechanics that limit their use in most stages and modes. | 4 |
Clash of Critters Tier List - All Tataris Ranked
⇓ META UNITS ⇓

Ashlarva

Blueflick

Frostnip

Frugling

Gibber

Manteeny

Pandaroo

Pyropup

Rubblet

Sealing

Zappur
⇓ VERY GOOD UNITS ⇓

Droppit

Goonbug

Punchimp

Sparkit

Voltfawn

Voltkit

Waddledo
⇓ DECENT UNITS ⇓

Cribbler

Gopher

Zapuni
⇓ MID UNITS ⇓

Buddi

Joeyo

Shrimpyro

Sparkeet
Which Tataris Are S Tier in Clash of Critters?
| Tatari & Role | Why This Tier | Best For |
|---|---|---|
 Blueflick AoE DPS | + Blueflick's Ember Pop hits grouped enemies with AoE fire damage and applies Burn for continuous DoT between attacks. + The splash damage combined with the Burn effect makes Blueflick one of the strongest wave-clearers available. + The DPS holds up well through mid-game content without needing specific team support. | Core AoE DPS, Wave clearing, early-to-mid game |
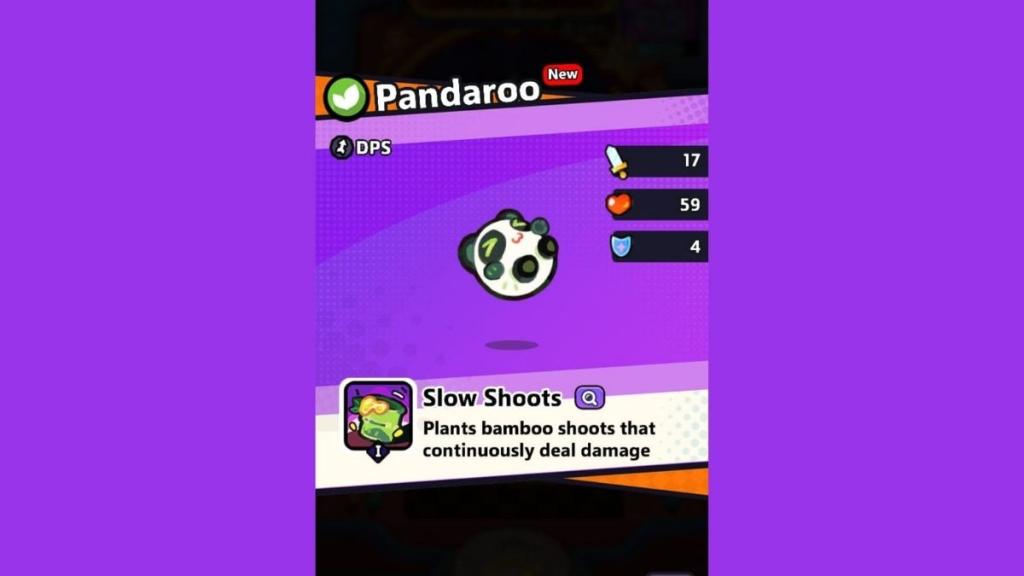
 Pandaroo CC/DPS | + Pandaroo fires Slow Shoots that continuously damage enemies and apply Slow for consistent CC throughout each fight. + Pandaroo's bamboo shots scale up in damage during longer battles, making it progressively stronger in longer fights. + One of the best Tataris for controlling enemy movement while maintaining steady pressure simultaneously. | Boss fights, crowd control, mid-game |
 Frostnip CC/Support | + Frostnip's Frigid Moon slows enemies on hit and splits into piercing shards that cover multiple targets in a single ability use. + Frostnip provides both CC and multi-target damage in one kit, making it one of the more efficient support critters. | Crowd control, mid-game, Support |
 Pyropup Burst DPS | + Pyropup's Scorching Strike deals massive AoE flame damage against clustered enemies while inflicting the Weak debuff, which reduces their DPS. + The combination of high burst AoE and the Weak debuff application makes Pyropup one of the strongest Tataris for taking down large enemy clusters quickly. | Burst DPS, Wave clearing, Debuffing |
 Frugling AoE DPS/CC | + Frugling's Bramble Bomb detonates repeatedly for sustained AoE damage and applies Slow to keep enemies in range for additional hits from other Tataris. + The frequent explosion triggers make Frugling one of the best wave-clearing units in the roster, especially in enemy-dense stages. | Wave clearing, AoE DPS, Debuffing |
 Rubblet DPS | + Rubblet's Atomic Ray fires a high damage AoE beam and activates a bonus-hit mechanic that increases burst damage output significantly when it triggers. + The combination of beam coverage and the burst hit bonus makes Rubblet one of the most consistent DPS options for clearing enemy waves at all stages. | DPS Core, Wave Clearing |
 Zappur Support/DPS | + Zappur's Thunder Roar deals AoE damage with Knockback utility while simultaneously granting nearby allies a Morale DMG boost. + It can cover both offensive and support roles in a single kit. The active AoE damage plus team-wide output boost makes Zappur one of the best DPS support Tataris for mid-to-late game. | Mid-to-late game, Support, Secondary DPS |
 Sealing AoE DPS | + Sealing's Splash Volley launches two bouncing projectiles that ricochet across wide enemy groups and inflicts the Weak debuff on hit for added value. + The ricochet coverage works well against both clustered and spread-out enemy formations, and the Weak application amplifies the damage output of every other DPS Tatari. | Wave clearing, Debuffing, AoE DPS |
 Manteeny DPS/Tank | + Manteeny deals continuous strike damage for high sustained DPS and inflicts Fragile, which increases the total damage all enemies take from the entire team. + Against tanky enemies in prolonged fights, the Fragile debuff alone makes Manteeny one of the highest-value Tataris available. | Boss fights, Secondary DPS, Tank |
 Gibber Tank | + Gibber's Guardian Gyro grants Shell Shield protection to allied Tataris while its piercing spinning shell hits multiple enemies simultaneously, covering both defense and offense in a single kit. + Gibber is the best dedicated defensive support on the roster, as it keeps the team alive under pressure without sacrificing the offensive contribution that pure support Tataris can't do. | Tank, Early to Late Game |
 Ashlarva Support/DPS | + Ashlarva's Gusty Flare creates a large flame ring that deals AoE damage while healing allies and granting them an ATK Boost simultaneously. + Ashlarva is most effective when allies stay inside the ring's range, as it can provide healing, buffing, and dealing damage in the same ability. | Support, Team Buffs |
Which Tataris Are A Tier in Clash of Critters?
| Tatari & Role | Why This Tier | Best For |
|---|---|---|
 Voltfawn DPS | + Voltfawn's Volt Storm fires piercing lightning that hits multiple enemies and applies paralysis to disrupt their actions. - The disruption is strong, but the piercing effect requires enemies to be well-aligned to hit more than one target consistently, which makes Voltfawn less reliable than S Tier crowd-controllers. | Mid-game, AoE CC, Core DPS |
 Droppit DPS/CC | + Droppit's Haze Hex continuously damages enemies inside its mist area and inflicts both Slow and Fragile simultaneously for two-stat crowd control in one ability. - The limitation is that fast enemies can simply leave the mist zone and negate the damage entirely, which makes Droppit significantly weaker. | AoE CC, Secondary DPS |
 Sparkit Burst DPS | + Sparkit's Flame Bloom fires intense flames that explode on impact for strong burst AoE damage against grouped enemies. - Sparkit delivers solid offensive numbers but brings no crowd control or team utility, which puts it below S Tier options that come with all of these. | Burst DPS, Wave Clearing |
 Goonbug Support/DPS | + Goonbug's Crime Crash grants Invincibility during the dash attack while inflicting both Fragile and Knockback on hit for strong combined utility. - The dash can miss fast-moving targets, which is a real limitation against fast enemy stages, but when it connects, the two-debuff combination is worthwhile. | CC, Support, Mid game |
 Punchimp AoE DPS | + Punchimp's Whirling Band summons clones for synchronized combo attacks, and its staff spinning provides strong AoE coverage for wave clearing. - Clone effectiveness depends heavily on enemy positioning, which is inconsistent, but Punchimp's AoE potential in the right setups is high enough to stay relevant in this tier. | Wave clearing, Mid-game, AoE DPS |
 Voltkit DPS | + Voltkit's Phantom Storm inflicts Paralysis to disrupt enemies and grants brief Invincibility during attacks for safer offensive engagements. - The Invincibility window is short and timing-sensitive, which limits how much defensive value it actually delivers, but the Paralysis application keeps Voltkit useful in most team builds. | AoE CC, Secondary DPS, Early to Mid game |
 Waddledo Tank/DPS | + Waddledo's Icewall Smash grants an Ice Shield for survivability while charging crystals that deal stronger AoE damage over time. - Waddledo performs significantly better in longer fights than short ones since the charge time requirement means it cannot reach full damage potential in quick stages. | Boss Fights, Tank |
Which Tataris Are B Tier in Clash of Critters?
| Tatari & Role | Why This Tier | Best For |
|---|---|---|
 Gopher DPS | + Gopher's Sludge Storm fires continuous mud balls for sustained DPS and can inflict Blind while using Burrow for damage reduction. - However, Gopher stops attacking entirely when enemies get too close, which is a hard weakness in melee-heavy stages and makes positioning very important. | Core DPS, early-to-mid game, Debuffing |
 Zapuni AoE DPS | + Zapuni's Volt Beam creates splash damage with powerful follow-up hits and deals bonus splash damage specifically against Water-type enemies. - The elemental bonus is strong in the right matchup, but Zapuni's overall efficiency drops significantly when splash targets are too spread out, making it inconsistent outside of Water-heavy stages. | Wave Clearing, AoE Damage |
 Cribbler AoE DPS | + Cribbler's Claw Storm deals strong AoE damage with wide claw swings, and inflicts Shredded while gaining an ATK Boost when healed for added offensive value. - The ATK Boost mechanic requires a healer present to trigger, which limits Cribbler to specific team builds and makes it far less effective as a standalone damage dealer without healing support. | AoE DPS, Support, Early game |
Which Tataris Are C Tier in Clash of Critters?
| Tatari & Role | Why This Tier | Best For |
|---|---|---|
 Shrimpyro DPS | - Shrimpyro's Flame Flurry deals bonus damage against Burning enemies, but the Burn trigger only activates sometimes rather than consistently. - The damage drops significantly against targets without Burn status. - Shrimpyro's entire kit depends on other Tataris applying Burn first. Without burn elsewhere on the team, Shrimpyro contributes little to any fight. | Burn-Heavy Teams, Secondary DPS |
 Buddi Support | + Buddi's Solar Seeds heal allies while granting both ATK and DEF boosts in a single ability, which covers multiple team needs simultaneously. - However, Buddi provides too little direct damage to compete with hybrid support options like Ashlarva or Gibber. - The sunlight dependency for maximizing utility limits how consistently Buddi performs across all stages. | Early game, Support only |
 Joeyo Burst DPS | + Joeyo's Thumpquake inflicts Fragile and increases both damage and range through a charge mechanic. - The charge requirement before reaching full potential is a significant liability in fights where enemies are fast. - Fragile debuff alone does not compensate for the downtime Joeyo spends charging while other Tataris are actively dealing damage. | Not useful in most stages |
 Sparkeet DPS | - Sparkeet's Twin Charge links allies and grants them an ATK Boost for team synergy, but deals weak electric attacks when no allies are nearby. - The ability only functions in coordinated team setups with consistent positioning. - In most lineups, Sparkeet contributes almost nothing offensively and falls well below even B Tier options in solo. | Not useful in most stages |
How to Reroll in Clash of Critters?


Now that you know about all the heroes in Clash of Critters, it is also important to know about rerolling. By rerolling, you can obtain a stronger Tatari right from the start, giving you a significant advantage in the early game. Below, we’ve mentioned all the steps on how to reroll in Clash of Critters.
- First, launch the game and create a new account by signing in as a guest.
- Then, play the game until you unlock the gacha feature. You can unlock this feature by playing through the first few minutes of the game.
- Once unlocked, use all your pinballs on the banner.
- If you are not satisfied with your pulls, go to device’s Settings->Account.
- Once you have found account settings, select Delete Account. Then restart the game.
NOTE: Don’t sync your account unless you get a top-tier hero from those pulls. However, if you obtain a top-tier Tatari, bind your account to any of your social media accounts, and you are good to go.
Frequently Asked Questions (FAQs)
Blueflick, Pandaroo, and Gibber cover the three most important roles for early-to-mid game progression. Blueflick handles AoE wave clearing with Burn damage, Pandaroo keeps enemies slowed and chips their HP, and Gibber provides protection that keeps your team alive. All three are S Tier and work well together without needing any specialized team setup.
The four best reroll targets are Blueflick, Pandaroo, Pyropup, and Zappur. Blueflick and Pyropup are the strongest pure damage options in the early game, Pandaroo provides CC, and Zappur adds support that no other Tatari can fully replace. Any of the four is worth stopping a reroll on.
For more on Game Tier Lists, check out Sword X Staff Tier List or Samsara Valley Tier List on Pro Game Guides!


