
As a fan of escape room horror games, I loved playing Samsara Room and experiencing its dark and mysterious atmosphere. If you've struggled with certain puzzles, here's a complete Samsara Room walkthrough to help you reach the end quickly.
Recommended Videos
Samsara Room Walkthrough Guide
Although Samsara Room takes place in one location, you'll need to traverse five dimensions, giving you unique variations of the same rooms. As a supernatural adventure escape mystery, it requires you to keep an eye for clues at all times and think outside the box to solve puzzles.
Part 1: The beginning
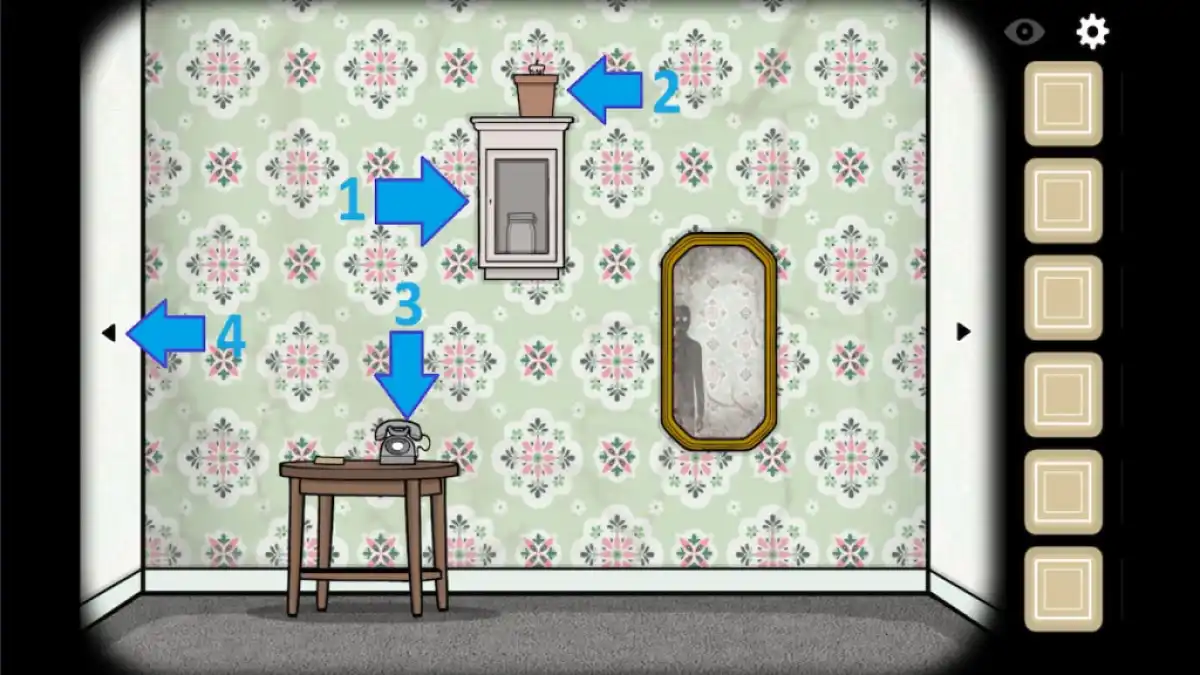


- Approach the cabinet (1) and take the candle from the flowerpot (2).
- Approach the phone (3) and lift the speaker to release floating letters.
- Spell ENLIGHTEN ME using the floating letters and take the matchbox on the table.
- Go back, and then go left (4).
- Approach the drawer cabinet (5) and drag all drawers to take the knife, the fish, and the second candle.
- Go back and approach the suitcase (6).
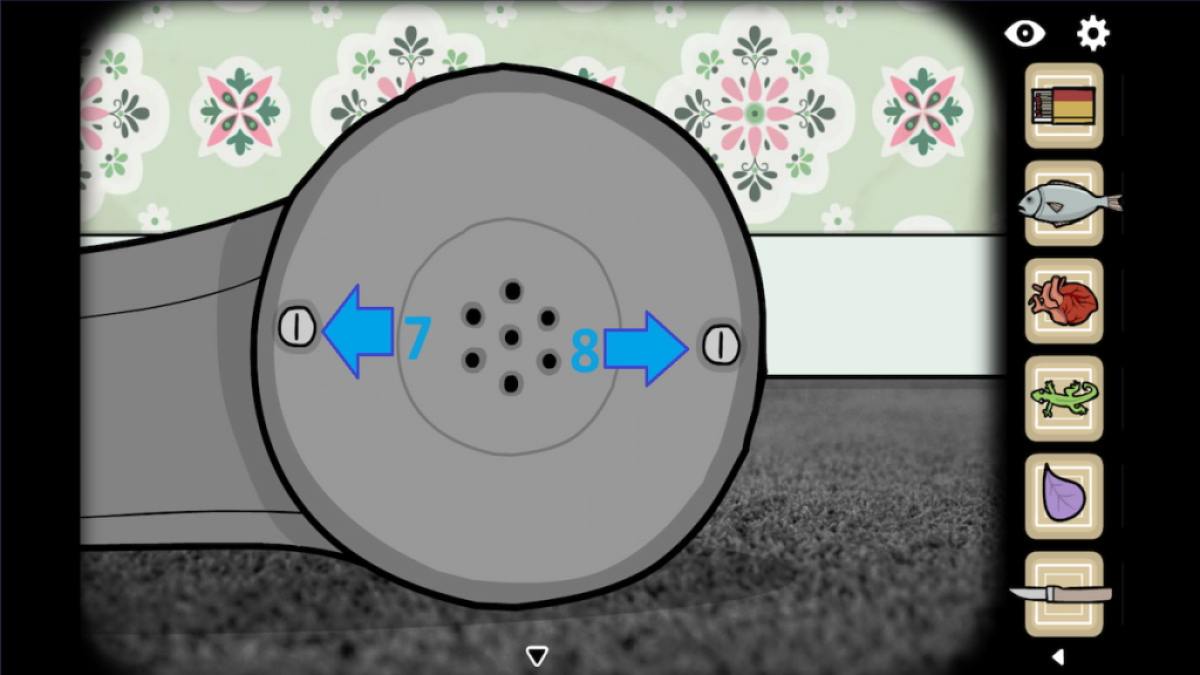
- Drag the puzzle pieces into the correct position (7, 8) and then drag the switches into the empty slots (9, 10).
- Lift the hook (11) to the right and lower the yellow switch (12).
- Take the candle from the open suitcase and go back.
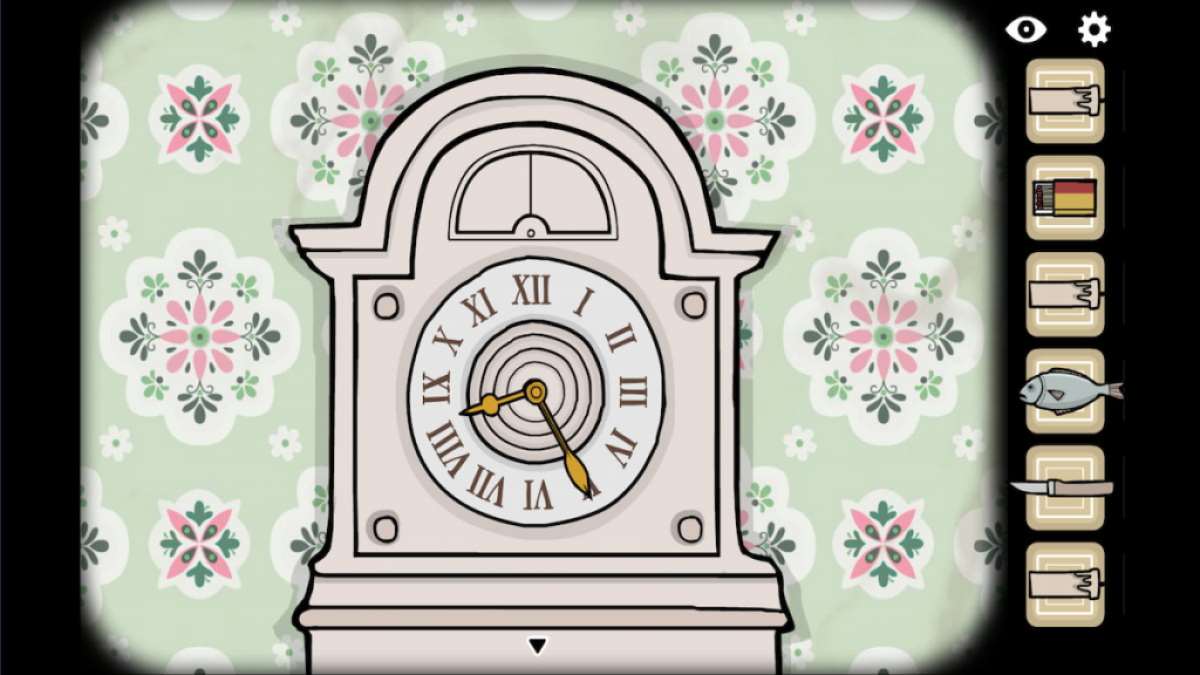
- Go left (13) and approach the grandfather clock.
- Move the hands on the clock to eight twenty-five (8:25) (Image 4).
- Go left and approach the window. (14)
- Open the window and use the knife to cut the wallpaper, then drag it downwards to reveal three empty candlesticks.
- Place the candles into the candlesticks (15-17) and the fish onto the bottom plate (18).
- Use the matches to light the candles and look through the portal window.
- Click on the cube twice to teleport.
Part 2: Second dimension


- Approach the mirror (1) and take the shell from the top.
- Go back and then approach the floating phone (2).
- Lift the phone handset and press the floating bubbles in the correct sequence (3-13) to receive the sentence LET IT SINK IN.
- Start clicking on the floating paper boat until the paper uncrumples, and take the key inside.
- Go back, and then go left.
- Click the floating suitcase (14) and take the second shell.
- Go back and then click on the floating cucumber (15).
- Click the correct buttons (16-25) to open it and receive a third shell.
- Go back and then left, and approach the floating bottle (26).
- Press the right end of the crack five times to break the bottle and take the fourth shell inside.
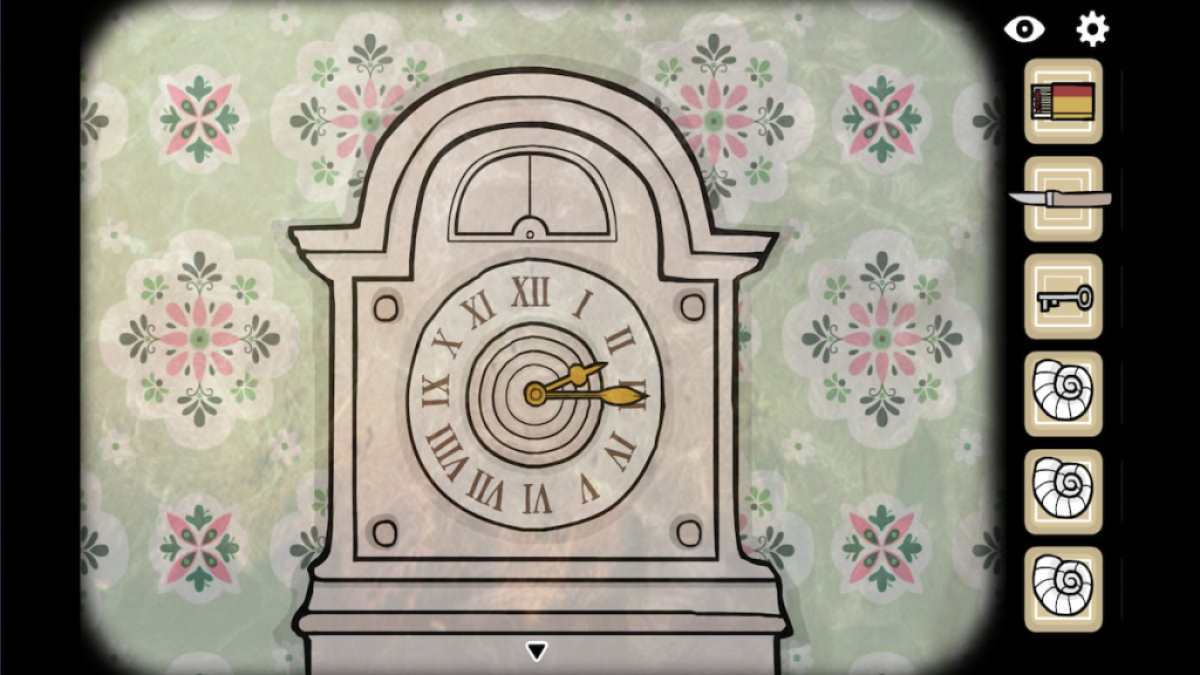
- Go back and approach the grandfather clock and move the hands to quarter past two (2:15) (Image 6).
- Inspect the nail in the clock (27) and use your knife to pull it out.
- Keep pulling items from the clock until a human hand pops out.
- Place your knife into the hand and click it again, and the human hand will give you a heart.
- Take the heart, go back and then go left twice.
- Approach the cabinet (28), use the key to unlock it and take the jar inside.
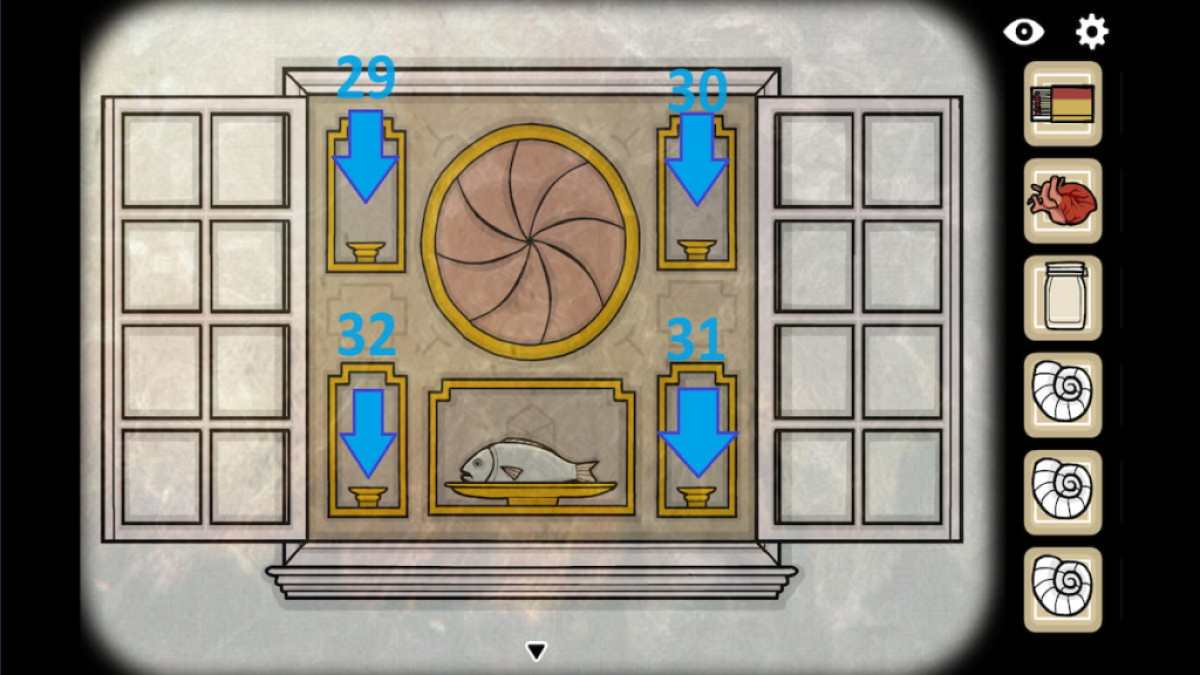
- Go back, then go right and open the window.
- Place the four seashells into the candlesticks (29-32), take the fish and place the heart in its place.
- Click the portal window and click the white cube twice to teleport again
Part 3: Inverted dimension
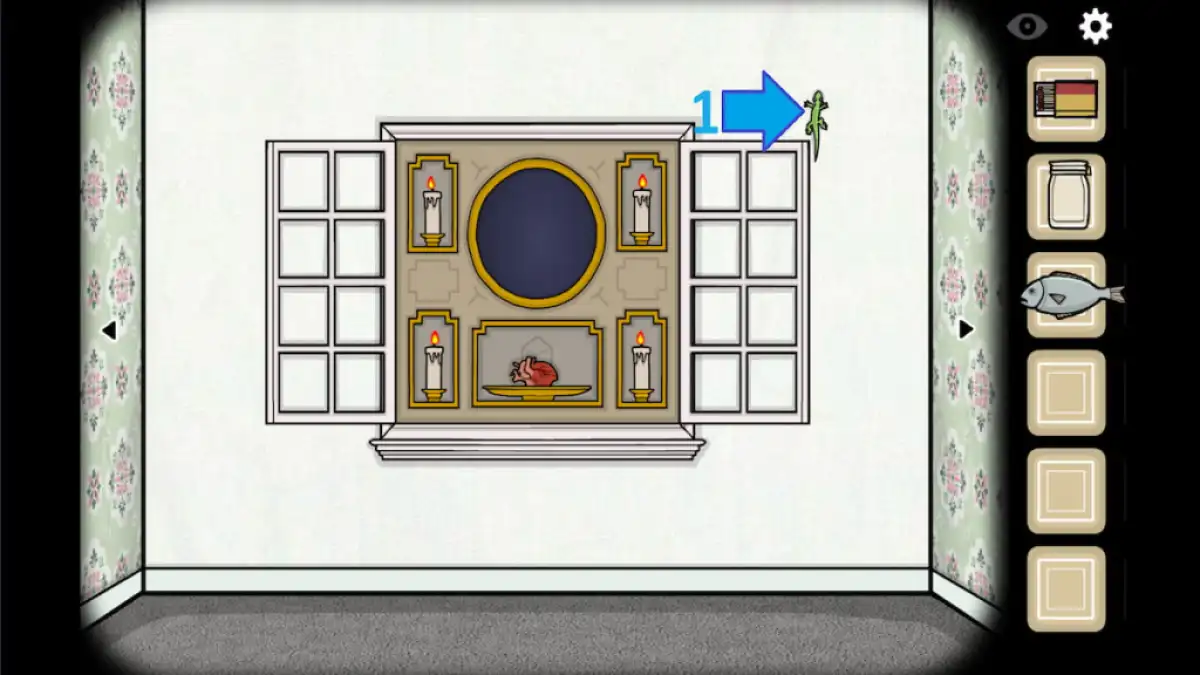


- Go right and use the jar on the lizard (1) to capture him.
- Approach the window, take the heart and put the lizard in its place.
- Click on the portal window and click the cube twice to enter the inverted dimension.
- Approach the flowerpot (2) and take the marble inside.
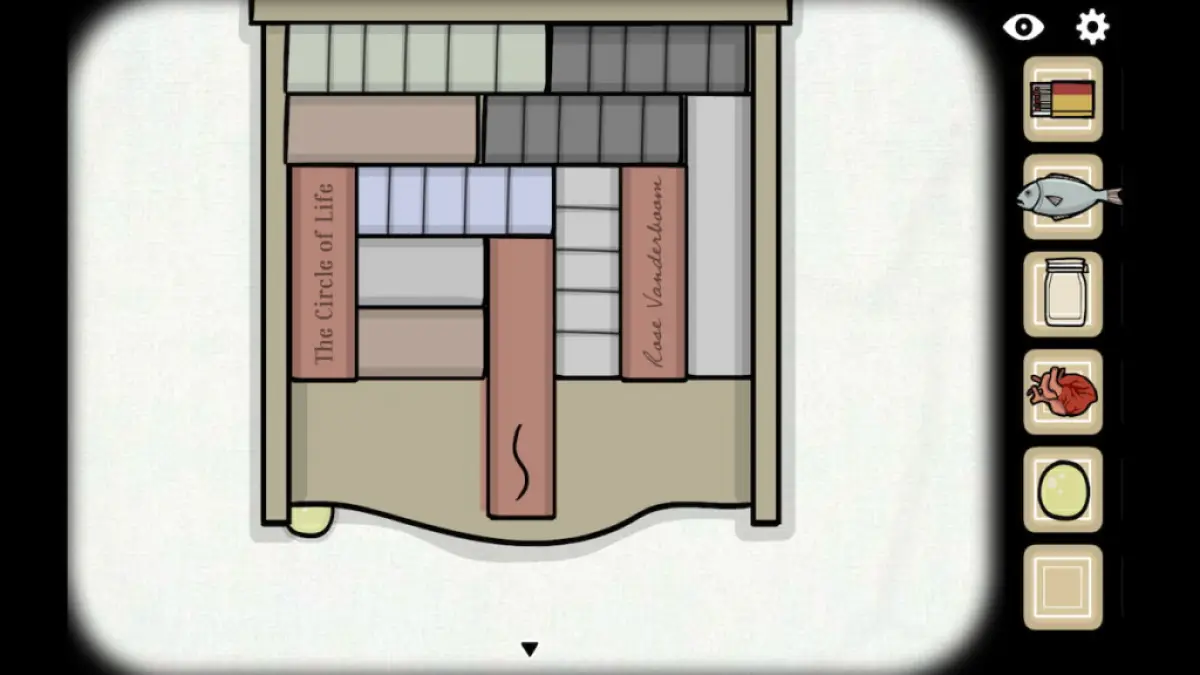
- Go back, then go left and approach the hanging bookshelf (3).
- Rearrange the books and the bookshelf parts in the correct order and collect the second marble in the bottom right corner (Image 4).
- Click on the largest book to remove it, go back, and then go left.
- Approach the picture on the left (4) and shake it until the paper starts coming off.
- Click the detached edge of the paper and drag it downward to get the third marble.
- Go back, approach the grandfather clock, and set the hands to four twenty-five (4:25) (Image 5).
- Take the triangle key from the opened compartment and go back.
- Go left and approach the chandelier (5).
- Light the candles on the chandelier in order from shortest to longest (6-11).
- Collect the fourth marble from the opened compartment and go back.
- Approach the window (12), open it and place all four marbles into four candlesticks.
- Replace the wizard with the fish, and click on the portal window.
- Click the cube twice to go back to the second dimension.
Part 4: Back to the second dimension


- Go right twice and use the jar on the bottle to fill it with water.
- Go back and approach the grandfather clock.
- Turn the handles to quarter past two (2:15) and take the second triangle key from the compartment above the clock. (Image 1)
- Go back, then left, and approach the window.
- Replace the fish with the heart and enter the portal window.
- Press the white cube twice to teleport to the normal dimension.
- Go right twice and approach the grandfather clock.
- Touch the handles to open the compartment and take the third triangle key.
- Go back and inspect the clock's cabinet (1), and place the triangle keys into the door lock.
- Press the lock and go back, and press the clock cabinet to open it and reveal a person's body.
- Click the body to make it fall out of the clock and approach it.
- Click on the body's arm to make it drop a seed, and collect the seed.
- Go right twice and place the seed into the flowerpot (2).
- Pour the jar with water into the flowerpot, go back and then go right.
- Approach the window, replace the heart with the lizard, and go through the portal window again.
Part 5: The miniature dimension


- Approach the flower (1) and remove the petals to collect the worm.
- Go back and then go right twice.
- Approach the window (2), replace the lizard with the worm, and enter the portal.
- Click the cube twice to teleport to the miniature dimension
- Click the phone handset three times to knock it down.
- Go left twice and approach the cabinet (3).
- Move the boards (4) to the side, take the petal behind them, and take the knife.
- Go back and then go left.
- Approach the book (5) use the knife to open it, and grab the second petal inside.
- Go left and approach the phone handset (6).
- Use the knife to unscrew the screws (7, 8) and arrange the handset parts in the correct order (Image 8)
- Press the microphone (9) a few times to drop the third petal and pick it up.
- Go right and click on the petal to move it to the right.
- Go right again and pick up the fourth falling petal.
- Approach the body, open its mouth, and enter (10).
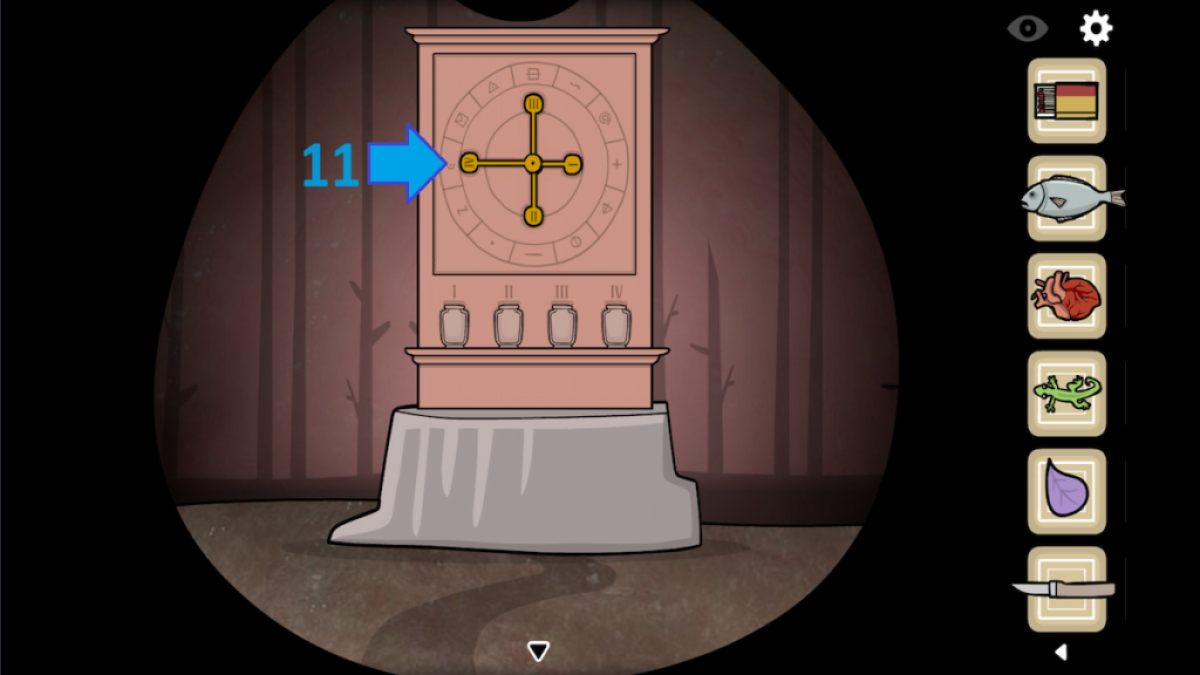
- Go forward five times and approach the clock puzzle (11).
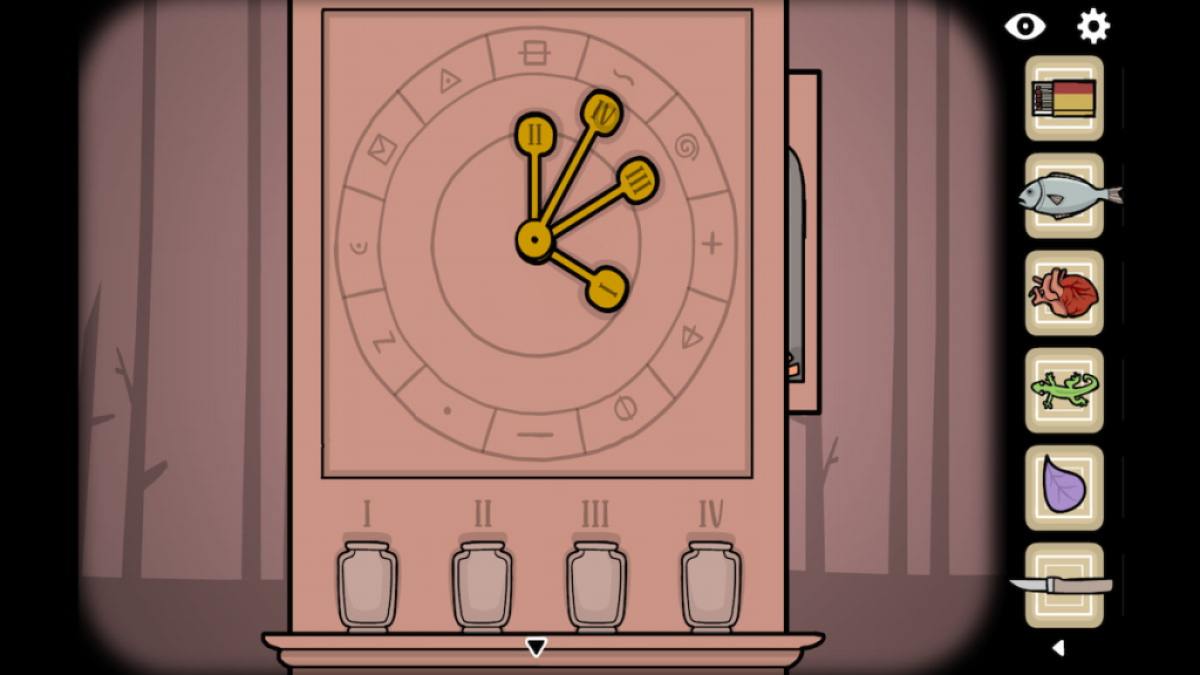
- Move the four hands to the correct symbols (Image 10) and take the shrimp from the opened compartment.
- Exit the mouth and go left.
- Approach the window above the book and place the petals into the candlesticks.
- Replace the worm with the shrimp and enter the portal window.
- Click the white cube twice to teleport.
Part 6: Distorted dimension

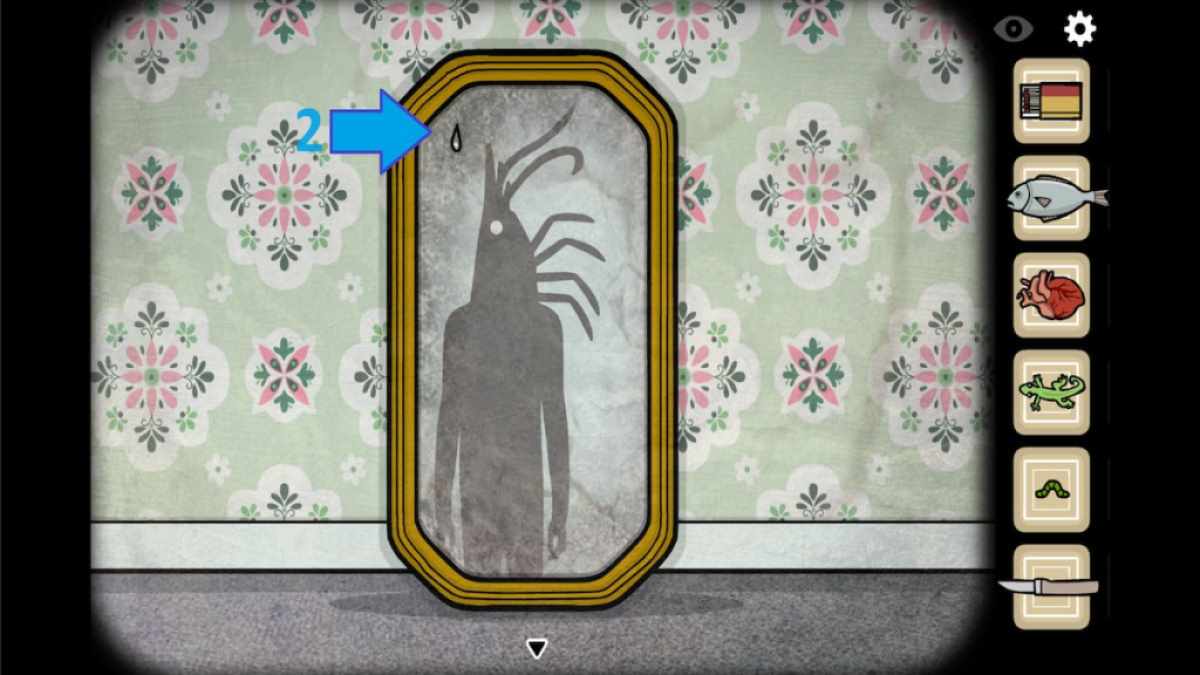


- Approach the mirror (1), click the water drop (2) twice to collect it.
- Go back and then go right, and approach the suitcase (3).
- Use the matches on the pile of branches to start a fire, and collect the fire.
- Go back and then approach the flowerpot (4).
- Click the flowerpot and collect earth.
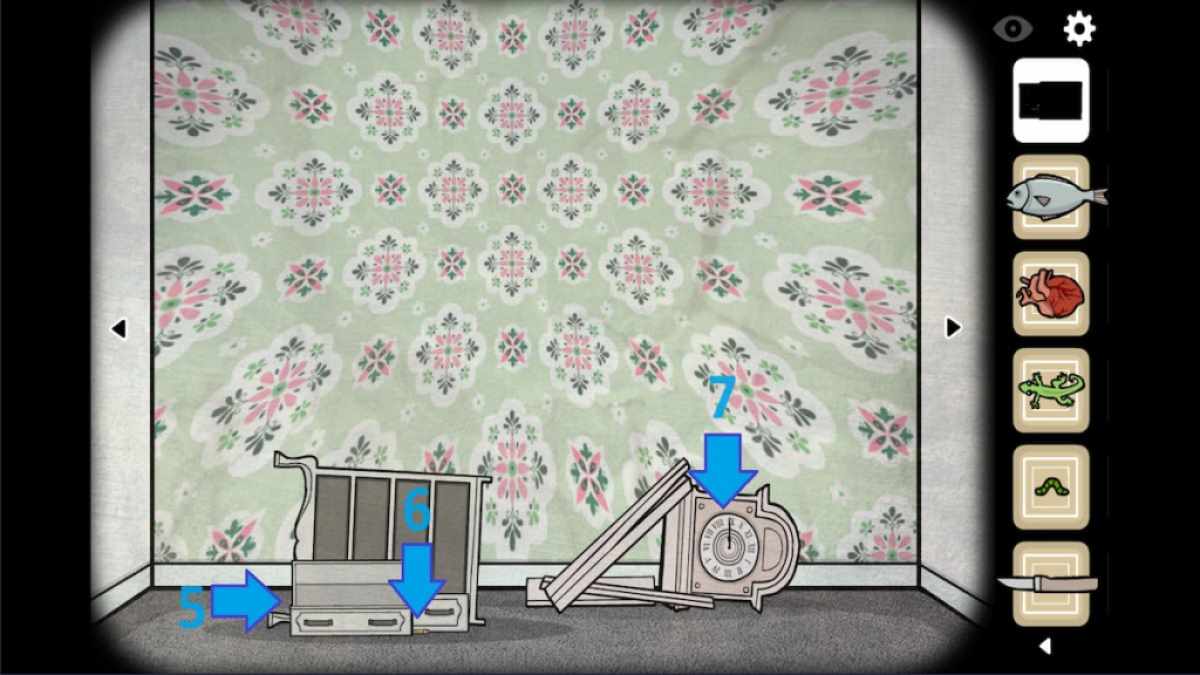
- Go back and then go right, and approach the broken drawer (5).
- Take the pencil (6), go back and approach the broken clock (7).
- Move the hands to two forty-five (2:45) (Image 5) and take the bottle from the open compartment.
- Go back and then go right, and approach the giant shrimp.
- Drag the shrimp's head to the left to reveal the body.
- Approach the body, open its mouth and use the bottle to collect the elixir.
- Go back twice, then go right and approach the paper (8).
- Use the pencil on the paper, and click the paper twice to reveal a key.
- Take the key, go back, and go to the cabinet (9).
- Use the key to open the cabinet, open the jar and take air.
- Go back, then go right and open the window.
- Place water, air, fire and earth onto four candlesticks, and replace the shrimp with the elixir.
- Enter the portal and press the white cube five times.
For more escape room games, check out 25 Best Free Virtual Escape Room Games on Pro Game Guides!