Trace (Cool Math Games) is a free browser-based escape room experience along the lines of games such as Escape Simulator. When you begin, you find yourself trapped in an unfamiliar place and have to break your way out. You’ll find some objects and clues in your inventory and need to collect more items and solve puzzles to progress. You can find the walkthrough and answers you need below if you want to know how to beat the Trace escape room with our walkthrough on Cool Math Games.
How to beat Trace - Walkthrough Guide
The key to beating Trace escape room is learning how clicking works. Unlike many point-and-click games, you don’t get hints from the scenes by hovering over parts of them. Instead, you need to click on an area to zoom into it, often more than once, before you can interact with an object. And even then, you’ll just have to click it, as there are no on-screen pointers. Once an item is in your inventory, you can click the magnifying glass next to it for potential clues in this game.
Related: Escape Academy Final Level Puzzle Guide and Walkthrough
The bathroom

Collect the half-pair of scissors from the sink. Note that if you click the picture under the bathroom mirror, you’ll find that a combination requires a four-digit code. To get the numbers you need:
- Use the toilet roll by clicking it once to reveal 5 as the first number of the combination.
- Open the gold box above the toilet: Note which lights are on above the mirror and click the same buttons (1, 3, 4) on the side of the box. This will give you 8 as the second number of a combination.
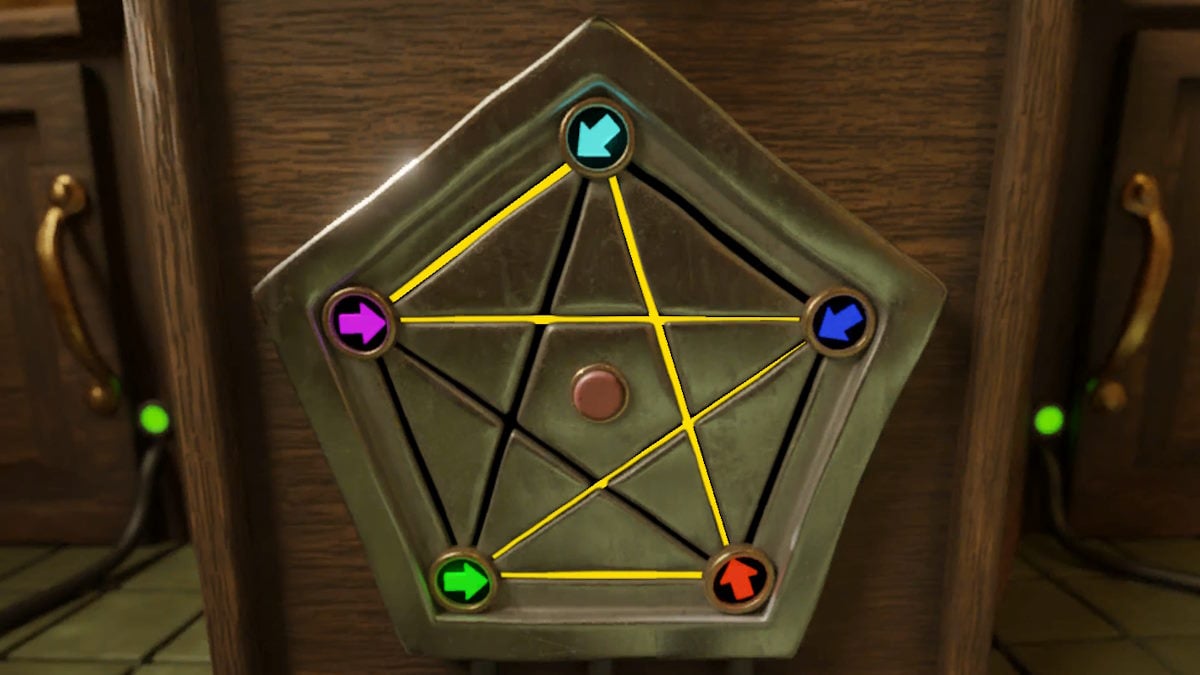
- Next, solve the star five-colored electricity puzzle. You’ll see a puzzle on the wooden casing around the toilet that matches the five-pointed star image hanging above it. Click the colored arrow on the puzzle so that when you click the central button, the yellow lines follow the same star pattern (see the image above). This will make the red light on the left-side door panel next to the toilet go green. You can now open that cupboard, getting the other half of the scissors and the fourth number of a combination, 16.
- Combine the two halves of scissors in your inventory to fix them, then use the scissors to cut the string holding the red key to the wall by the mirror. Use the red key to open the silver box above the toilet to find a crumpled piece of paper and the third number of a combination (.35).
The crumpled piece of paper is an image of the mirror and sink area, with an x-marks-the-spot where the small tiles are by the mirror. Click this area on the map to zoom in and find a loose tile. On the back of it is an image of a fish using the same color coding as the five-color puzzle beneath the toilet. Once again, make the arrows line up to copy the picture, and you’ll open the cabinet on the right side of it. Open that door to find more code numbers (1, 2, .05, 8) which are this time below the lines rather than above them. This indicates you need to divide them, which gives you the combination you need (5472).
Using this combination on the little safe behind the picture reveals a lightbulb. Take this and go back to the cabinet you opened on the left of the toilet, which also has a pumpkin in it. Open the lid of the pumpkin and insert the bulb to reveal five familiar-colored circles inside it, each with a stick pointing in a different direction. Apply these directions to the arrows on the colored electricity (see below) to open the final cabinet below the sink. Inside is a red tile with a key on it.
Take this and enter it into the panel on the bathroom door. This reveals a sliding puzzle. Move the pieces, so the large green and yellow pieces are all on the right, moving the red piece across the top as you do so until all you need to do is maneuver the small purple pieces and simply move the red key piece over the green lock square. This opens the door.
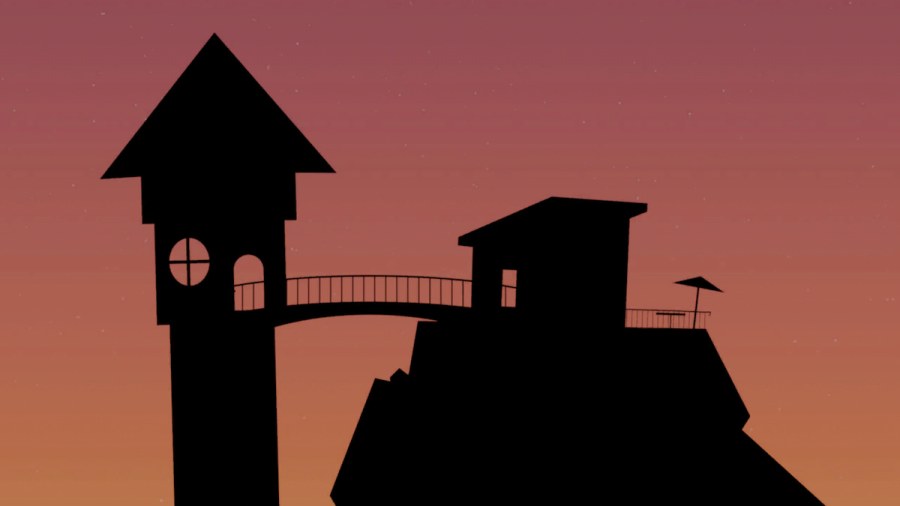
The house

Walk over to the couch and grab the metal star underneath it, a battery under the right couch cushion, and an ogre figure by the plant next to it. There’s another metal star stuck to the painting on the wall and a blue tin horse in the top desk drawer. Take all of these items into your inventory.
Walk to the bay window and use the camera to note the pattern of the planets. Now open the cabinet under the window and match the puzzle inside to look like the planet pattern (low, high, middle, high, middle). Then press the red button underneath the puzzle to open a small hatch and take the broken metal tablet inside. Now head back to the little hallway by the bathroom and use the tin horse on the image on the window by examining the horse in your inventory. Its neck will extend. Bend its neck until the (now giraffe) toy’s eye matches the blue diamond on the window image by following the maze route. Then click the button on the giraffe to get the missing piece of the metal tablet.
Click the tall piece of art on the wall opposite the bathroom door to reveal a metal puzzle. Make it match the (now complete) metal tablet to reveal a red button on the puzzle. Note the long picture on the wall above the fish tank has six symbols in a row. These equate to the six red buttons around the room, which need to be pressed in order: by the fish tank; on the fan on the shelf in the corner; on the computer; in the planet puzzle cabinet; behind the painting on the puzzle we just solved; then on the small grey box. Doing so will open the grey box, getting you a green key and a utility knife. Use the green key on the green door in the corner to go out onto the patio.
The patio

Grab the vampire figure on the shelf, then go to the circular image on the wall that contains four black cubes with potted plant images on each side. Left to right, top to bottom, set them to hanging, tall pot, tall plant, and painting. Press the red button in the middle and grab the metal star. Go to the corner of the patio, where you’ll be on the other side of the window with the giraffe puzzle. Do the giraffe puzzle again here, claiming a second battery from it. Grab the metal star on the table next to the mini piano. Walk to the main patio area and click thse table with the blue tablecloth. Grab the metal star underneath the table, and hidden in the jigsaw pieces on top of the table, giving you six. Complete the jigsaw on the table to find one piece that is missing. Head back inside.
Use the utility knife on the carpet under the desk to reveal a puzzle of red and black hearts. Inserting the two batteries in the lamp on the desk and turning it on will add arrows to the black hearts, helping you complete the puzzle. You need all the points of the hearts to go in the right direction by turning the black hearts (see above). Click the red button to open the box and grab the puzzle piece and yellow submarine. Pop the submarine into the fish tank.
Go back outside and put the last piece into the puzzle. This suggests using the utility knife on the arm of the sofa. Go back inside and click by the plant pot by the sofa, then on the chair arm, then use the knife to reveal a panel and take the pentagon key from inside it. Click under the desk where many numbers are written on the wall. Examine the key while zooming in on the numbers, and you’ll place the key over them, giving you the sequence 9, 2, 3. This is the password to log into the computer on the desk. Once logged in, you’ll have two icons to choose from. Click the water bowl on the screen to take control of the submarine in the fish tank. Use that to go into the castle in the tank to find the code 26336 6161 on the inside wall.
The tower

This code opens the panel on the barred door. Inside the panel is a series of colored squares into which you need to place your metal stars. First, you need the last star. Use the computer again, this time choosing the robot and making it climb to reveal some instructions. Go to the draws under the fish tank and use the instructions to open and close the draws in the order instructed (X, O, X, O), after which you’ll hear a click. You can now open the U draw to get a magnet. There’s a glass tube under the left side of the table with the hearts puzzle underneath it. Use the magnet to get the star.
Go back to the panel and put the stars in as shown above (so that each row, color, and column has a star with none being adjacent). This opens the front door and gives you access to the tower. Go inside and round to a small table with a vase containing red flowers. Above the table is another sliding puzzle. Set it to down arrow, s, jagged line, d, x. This opens a hole in the wall, from which you grab a third figure (phoenix) and a key for the umbrella. While in the tower, go upstairs and grab the robot hanging on the wire. Also, look out of the window at the bottom of the stairs, where you’ll see the words CABBAGE FACED written.
Use the key to unlock the umbrella on the porch. Opening the umbrella reveals an image on the porch chair, which you can take a picture of. While out here, hang the robot on the kite string. Now go to the tiny piano on the table and play the notes in the order CABBAGE FACED. This opens the piano and gets you the robotic arm inside. Go back inside, add the robotic arm to the submarine, pop it back in the tank, and then use the computer again.
Using the computer

On the computer, use the robot to first climb and then look right to see a row of symbols on the bridge (circle, square, triangle, star, square, triangle, circle). Use the submarine to go back into the tower, open the chest, and reveal a message saying I DID DEEDS – the reverse of the number code you saw earlier. Go back into the tower and open the drawer in the table with the flowers on and type I DID DEEDS into the machine, which gives you a fourth figure (a dragon). Now go into the central room in the tower through the door. On the wall at the back, use the pin board to trace out the same image that is on the chair on the porch you took a picture of (a wizard’s hat, above).
This reveals an eight-light puzzle above your head in the same room. Click the lights until they all go off. If you take the light just clockwise of 12-o-clock on a watch face as 1, click them in the following order: 12356784. This gives you an image on the stone plinth in the room. You now need to place the four figures on the X spaces on the plinth at their relevant crossover points (phoenix = fire and wings, vampire = wings and teeth, ogre = fire and teeth, dragon in the middle). For completing the puzzle, you gain a screwdriver. Go back upstairs in the tower to the machine lit by a golden lamp and enter the symbols on the bridge as you saw them through the eyes of the robot. This reveals a flight plan puzzle.
Mathemagic!

In the main house, use the screwdriver on the metal panel underneath the shelf with the fan which says password. This reveals six symbols, <0-|-<. Use this as the password to access the Tower part of the program on the computer. This in turn opens the Mathemagic program. Complete the program to understand the symbol combination that is on the safe under the desk. Basically, you’ll find out what maths symbol each symbol on the safe represents, which you then enter on the safe to make the numbers printed there work (see above). Inside the safe, you’ll find the companion book to the Adventures of a Wayward cosmonaut on the table.

Note the color order of planets visited in both books (orange, earth, white, orange, blue, white) and the launch date 2793, which you input into the machine upstairs in the tower. Screenshot the image this gives you on the table and head back into the house, to the pyramid object in the bay window. Click the triangle points so that the colors match those on your screenshot and the top of the pyramid pops up, giving you the pyramid key. Use the Pyramid Key to reopen the bathroom door, and the pentagon key to open the lid of the toilet, and victory is yours. It wasn’t a toilet at all, but an escape hatch. Congratulations, you have completed the Trace escape room.
If you enjoy digital escape rooms, you should also check out Fortnite Escape Room Codes (January 2023) – Best Escape Room Maps! and the Cafe Bacon Escape Room Walkthrough here at Pro Game Guides.