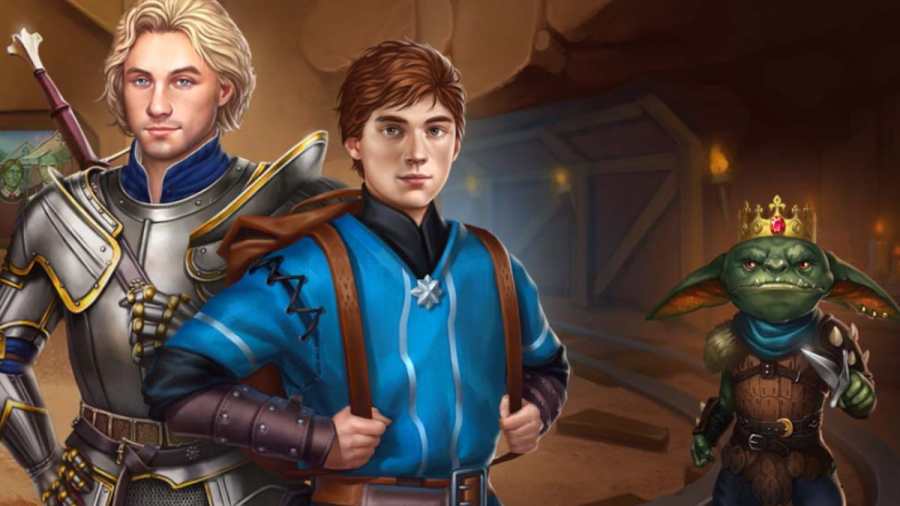
The Squire’s Tale is a point-and-click puzzle adventure in the AE Mysteries series. I really enjoy the series because the stories are well-written, and there’s plenty of humor and intrigue, as well as some tricky puzzles and object-finding. This one is listed as a beginner adventure, but if you want to complete it without using hints, it can still be testing, so read on for my full walkthrough (with puzzle solutions) to The Squire’s Tale.
If you’ve played any AE Mysteries games before, you’ll be on familiar ground with The Squire’s Tale. Click items on the screen to interact with them or pick them up and add them to your inventory. Items can also be used from your inventory in close-ups after you click particular details. Stars you collect can be used to provide you with clues if you get stuck, but that shouldn’t be necessary if you follow my walkthrough.
The Squire’s Tale Walkthrough - Chapter 1
In The Squire’s Tale, you’ll play as our squire hero, Martin, as he attempts to guide his foolhardy knight boss Cedrick to recover the Royal Ruby and then save the realm. You begin on the trail of goblins and have found your way to a cave entrance.
Entering The Goblin’s Lair

Pick up the Tunic (a1), Torch (a2), Statue Horn, and Statue Arm (a3). Select the torch in your inventory (the background of it will go dark blue) and use it to remove the plants (a4). Click the cave entrance this reveals for a close-up and take the Shovel and Hammer. Use the hammer on the pillar in the close-up (above the skull) to reveal an alcove and take the Goblin Dictionary and Animal Statues from inside.
Use the shovel on the dirt pile (a5) and click the box that’s revealed to find a locked box. To open the box, use the number 3574 and then take the Goblin Glue. Click the goblin statue (a6) and use the glue to affix the horn and arm back in place (use the glue on the close-up first, then the two broken items). Click the water bottle (a7) to get a Damp Tunic, then use the tunic on the Shield (a8) to clean it, revealing a goblin face.
Add the animal statues to the spare plinth next to the goblin statue in the close-up. Use the dictionary to read the plaque on it, which says Aided by one with the hard shell of a warrior. Click the animal statue until it is a red crab. Click the other plaque to see it says Gobby rose from the flames, so click the base until you see flames. If you look at the goblin sign (a9) you’ll note its arms are both raised, so move the central section to match. The cave will open.
Once inside, Cedrick will attack the goblins in a minigame. Do the following:
- Move right
- Attack up
- Whirlwind attack
On level two, follow this pattern:
- Move down
- Move down
- Attack right
- Charge up
On the final level:

- Move right
- Move up
- Move right
- Move down
- Move left (x2)
- Rush down
- Move up (x2)
- Move right
- Attack the King
Inside The Goblin’s Lair

Take the Crown (b1) and Dagger (b2), then use the dagger to open the box (b3) and take the Gear. Click the painting (b4) for a close-up and click the top-right corner, where it is coming away. Cedrick will rip it, revealing a sun. Note the positions (from top to bottom) of all the shapes that look out of place:
- Sun
- Diamond
- Spade
- Skull
- Crown

Back on the main image, click the door lock (b5), and enter the code above. With the door open, take the Second Gear. Click the rug (b6) to reveal and take the Third Gear. Open the box on the side of the elevator (b7), add the three gears, and the elevator will be fixed. Click the elevator to head down to the vault.
The Goblin Vault

Click the Pickaxe (c1) and Heavy Duck Statue (c2) to collect them, then click the note on the vault door (c3) for a clue on how to collect the three gems you need to continue. Click the torch (c4) to turn it off, revealing the Blue Gem. Use the pickaxe on the blue gem and collect it.
Click Cedrick, who’ll complain he needs something heavy to smash the door with. Give him the duck statue, which will lead to a box falling from a crack above the door. Take the Flint and Tinder from inside, then use the lift to go back to the goblin lair. Use the tinder to light the cauldron (b8), add the crown to it, and collect the Red Gem. Now you can use the pickaxe on the door (b5) here and knock down the book.
Open the book, turn to the chicken (red) section, and take the Yellow Gem from the hidden compartment in the book. Go back up to the vault and add the blue gem, red gem, and yellow gem to the Kaleidoscope (c5), starting a puzzle.

Twist the colored dials until they fit the squares (see image above). Now click the vault door mechanism (c6) and click all the squares that don’t have colors on the kaleidoscope. The vault door will open to reveal… another vault door.
All you need to do is click the puzzle in the middle of the door again and drag the square from the bottom left to the bottom right, then to the top, and then all the way left to the other circle. This should take you to the next vault door.

Follow the image above for the next door (draw from circle to diamond, down one, anticlockwise around the sun, clockwise around the right-hand sun, then down and right to the circle), and then the one below for the final door. With the vault open, click the Ruby to have Cedrick collect it and complete Chapter 1.

The Squire’s Tale Walkthrough - Chapter 2
Grim Tops Mountain

Once the story moves on, you’ll find yourself faced with two doors and a waterwheel. Click the Old Cloth on the dragon (d1) to pick it up and read the plaque underneath. Select the stairs (d2) and use the cloth to clean them and reveal symbols. Set them as follows by clicking each step symbol until this number of lights are on, top to bottom, 246353. You can now head through the door at the top of the steps.

Once you’re in the pump room, take the Bucket (e1) and click the stone (e2) to reveal and take the Wooden Gear. Click the other loose stone (e3) to get a Chest Key, use it to open the chest (e4), take the Axe from inside, and use the axe to remove the vines (e5) and get the Ladder.
Place the ladder below the other one, giving you access to the upper level above the door. Also, use the axe on the vines a second time to remove the rest of them completely. Click the base of the pump (where the ladder was) with the gear elected to add it to the bottom of the machine. Now, you can click the lever (e6) to fill the pool with water (see image below).

Use the bucket on the stream of water (f1) to enter a pipe puzzle. You can’t fail here, as you can keep moving pipes until it is complete. See the solution below.

Use the bucket again, this time on the big stream of water, to get a Bucket of Water. Use the bucket of water on the barrel (f2) and repeat the process twice more so that the barrel is on the ground and the pipe completes the system, meaning the water is going into the pipe on the left (f3).

You’ll now move outside once more, but clicking the door (g1) reveals something is missing. Click the box in the water (g2) and take the Compass, then add it to the center of the door (g1). To work out the directions to put the pointers on each symbol, you need to read the plaques on the dragons:
- Fire (red): East
- Life (blue): South
- Wind (white): West
- Earth (green): North

You can now head through the open door into the caves beyond.
The Sleeping Dragon

Select the broken statue (h1) and place the pieces on top of each other (by dragging them) to rebuild it (see image), then take the Gem from inside the base. Grab the Empty Flask (h2), then select the table (h3) for a close-up and take the Potion Book. Read the book, then add the flask to the table click the ingredients in the correct order (purple, blue, yellow, red, green, orange), and take the Strength Potion.
Click the boulder, and Cedrick will move it out of the way, letting you up to the Griffon’s Nest. Take the Hammer there, go back into the dragon’s cave, and use the hammer to open the box (h4) and get the Flint and Steel. Click the box once more to remove it and take the Black Powder underneath. Go back to the nest, add the powder to it, then use the flint on it, scaring off the Griffon. Take the Griffon Egg and give it to the dragon. Click the back of the cave (h5) to move out to the terrace.
The Terrace

Click the broken pillar (i1) to move it, then click the knight’s bag (i2) to get a Torch. Select the ornate picture (i3) for a close-up, noting the order of symbols in the images above the dragon (wind, sun, mountain, star, fire, cloud, moon). Now select the right-hand dish (i4) for a close-up, click the symbols on it in this order, and take a second Gem.
Add the two gems to the two floating rocks (i5) to fill the dishes with water and light the flame (i6). Use the torch on the flame to get a Lit Torch, then click the area behind the knight (i7) for a close-up, and use the torch to light the braziers and take the Net from the right side of the close-up.

Go back into the dragon cave and use the net in the water (h6) to fish out a cloth bundle. Click it to get the Dragon Bust. Now go back out to the terrace, add the bust to the central pedestal in the area behind the knight close-up (see image), and complete the stone ring puzzle. You first need to make a path from the white stone on the left to the left half of the central stone (at which point it turns blue), then do the same on the right-hand side. You can’t fail here. Once complete, the altar appears, and you’ve completed chapter 2!
The Squire’s Tale Walkthrough - Chapter 3
The Ruins of Recursia

Click the pots (a1) until you find a Key, then click the door on the far right and left to open them. Use the key on the red paint pot in the left cupboard (a2) to get a Red Key and use it to open the other door on the left (a3), taking the Alpha Orb from inside.
Place the orb in the left obelisk (a4), which raises a pedestal on the left. Click the pedestal for a close-up and press the buttons in the order indicated by the central statue (3,1,2), opening a staircase underneath it. Click the stairs to move on.
The Second Level

Click the roles of parchment (b1) and then collect the Bow behind them. Click the left desk (b2) and take the Arrow, getting you a Bow and Arrow. Use it on the rope (b3) to destroy the statue below, then collect the Beta Orb (b4).
Go back into the first room and recover the Alpha Orb from the obelisk, replacing it with the Beta Orb, which opens a hatch (a5). Take the Waders from inside, retrieve the orb, then go back downstairs and use the waders on the pool (b9) there to get the Painting Key. Place the Alpha Orb in the obelisk here (b5), dropping the painting (b6) low enough to access it. Use the painting key to open it and click it once more to take the Painting.
Take the Alpha Orb back and replace it with the Beta Orb, which opens the left-hand floor panel (b7). Place the painting on the blue glowing number grid that appears, which gives you a code (83146). Still wearing the waders, click the pool (b9) once more and click the pipes at the back in that order, which opens up a new set of stairs. Take the Beta Orb back and head down.
The Third Level

Use the Alpha Orb on the obelisk (c1) to find what it does, but then retrieve it and use the Beta Orb instead, revealing a stone arrows puzzle in front of the obelisk. You need to complete two to move on, and I’ve put the solutions below. Once complete, you’ll be able to take the Flower Key from beneath the puzzle.


Go back to the first room and use the key to open the final door on the right (a6), taking the Rubber Gloves and Watering Can from inside. Go down one floor and use the can on the pool to get a Full Watering Can and use the gloves to collect the Mossbottom Ooze (b8). Go down the lowest level and use the Alpha Orb to open the right pedestal (c2), then place the ooze on the stone ball there and then water it with the can, releasing Cedrick.
Now both heroes are available, pull the switches (c3) to reveal an abacus. Click it for a close-up, then click the battery panel on the right and retrieve the dead battery. Cedrick can now move the rubble (c4), allowing you to collect the Gamma Orb. Use it on the obelisk here, allowing you to take the Stone Slab from the statue (c5). Retrieve the Gamma Orb and head upstairs.
Restoring the Abacus
Back on the top floor, place the stone slab in the hands of the statue on the right (a7), then insert the Gamma Orb in the obelisk. Both pedestals will rise. What you need to do is use the buttons on the right to show a number of blue lights, starting at one and moving through to six, each time coming out of the close-up and noting the symbol being beamed onto the stone slab.

These are the symbols you need to select on the other panel. The sequence (using the image above) is 413225. This opens the right panel (a7), allowing you to take the Abacus Instructions and recharge the battery by placing it briefly inside the panel.
Retrieve the Gamma Orb and head to the middle floor. Insert the Gamma Orb, and a series of dominoes will appear in the pool. Note down the number total of each domino (74836), then retrieve the orb and head down to the bottom floor. Put the battery back in the abacus and check the instructions. They tell you that each stone on the lower part of the abacus is worth one if raised, and the one on the top counts as five if it is lowered. Move them to match the domino code, and you’ve solved the puzzle (see image below). Click the area behind the abacus to advance.

Place the three orbs in their correct spots to awaken the Golem and start a movement puzzle. The key is not to finish a turn in the red area marked (it appears after your first few moves), meaning sometimes you have to double back. The solutions are below.

- Map 1: Up, right, down, right, up, down, left, up, right, up, down, up, left, up, down, right, up, left, up.
- Map 2: Right, up, left, right, left, up, right, up, down, up, right, down, right, left, up, right, up, left, down, right, up.
Once complete, you’ll be done with Chapter Three after a couple of cut scenes.

The Squire’s Tale Walkthrough - Chapter 4
The Tournament in Morrocas

Click the cushion on the sofa (d1) and take the Key, then move into the tailor’s area (d2). Take the Scissors (e1) and then click the book (e2) to open and note the numbers on the invitation design (3 and 1 top row, 6 and 4 bottom row).

Select the scissors and use them on the fabric (e3) to get some Cloth. Use the key to open the chest (e4) and take the Folding Stool and Fabric Patterns from inside. Go back to the queue, place the stool to the left of the queuers (d3), then use the scissors to collect the Decorations (d4).
Go back into the tailor’s area and place the cloth on the table (e5), taking you into a close-up. Add the fabric patterns and decorations, then put them together to make the invitation. Follow the numbers above for the patterns, then place the decorations that match them (from top left to bottom right, that’s a stag, shield, lion, and eagle). Go back to the queue and give the invitation to Cedrick to advance.
The first task

Out in the bazaar, click the Basket on the right (f1) to pick it up, then click the tea stand (f2) to receive some free Tea Leaves from the person there. Select the coin and pop it into the sleeping man’s cup (f3). Once the man moves, take the Tassle he was sitting on. Now click the snake basket (f4) to find that two snake baskets are missing. You can return the one you have, but you need one more.

Click the background to return to the tent. Use the tassel on the curtain (g1) to tie it back and find another snake Basket. Take it, then add your tea to the pot (g2). Click the Teapot to pick it up, then place it on the brazier (g3) to get a Hot Teapot. Use it on the cup (g4) and then click the cup again to find that Ambrose would like some honey in it.

Go back to the bazaar and replace the other snake basket. After talking to Manid, grab the Flute (h1) and click the snakes to start a puzzle. Note the diamond pattern on each lamp above the snakes, then use the flute to change each snake’s head position to match its white diamond direction by clicking the snakes (see image below).

After the cut scene when Cedrick messes with the lights, it is a similar idea, but now you have to have the snakes match the diamond pattern that matches the height of the snake (so, from left, lamp 1 matches snake 2, lamp 2 snake 1, and lamp 3 snake 3).
For the final one, it is the same process, so snake 1 looks down, snake 2 left, and snake 3 up. You’ll receive some Honey from Manid for your efforts. Head inside, add the honey to the tea, and give it to Ambrose. He’ll give you a Pear.

Back outside, give the pear to the Donkey (h2), then click the spilled rugs to start a pattern-matching puzzle (see image above). On completion, Manid will give you a Fancy Rug. Hand over the rug as your competition entry, and you’ll be through to the second round.
The Second Task
For the first challenge of the second task, select the telescope for a moveable close-up of the night sky and add the star map Ambrose gave you to it. You’ll notice that the constellations in the notebook are all animals and that they match the golden fountains that are next to the telescope. You need to find each constellation by moving the telescope view and noting how many stars in each constellation are bright. Once you’ve done this, simply click each statue so the number of golden lights above it matches that number.
The numbers you need are:
- Frog: 3
- Duck: 4
- Seal:6
- Giraffe: 2
- Tortoise: 5

Once complete (see image above), Ambrose will appear and give you a Banner. Click the buildings in the background to go to the courtyard, select the banner in your inventory, and add it to the flagpole on the left. Return to the oasis for the next challenge.

After hearing the instructions, Cedrick jumps into the oasis. Click him to make him dive down and search for the object to open the chest. Click the seaweed (i1) and take the Old Sword behind it, then use the sword on the slab to uncover the chest (i2). Now, use the sword on the octopus holding the key (i3), which will disappear, leaving a cloud of ink. Click the cloud until it disperses, and take the Underwater Key.
Use the key to open the chest and take the Battle Horn, then click the mound to the right of the chest to reveal a clam. Use the sword to open the clam (i4) and reveal a Pearl, at which point a shark appears. Take the pearl, select the battle horn, then click the background anywhere, scaring off the shark. Click the surface of the water to swim out. Now, you can insert the pearl into the chest, which has a four-symbol combination.
The Stolen Banner
Swim back down to see there are 1 octopus, 2 clams, 3 fish, and 4 starfish. Put those symbols into the four spaces (octopus, clam, fish, starfish) to open it and take the second Banner. But when you return to the arena, you find your first banner gone.

After speaking to Manid, return to the arena and open the chest there (k1), taking the Boomerang from inside. Back at the oasis, use the boomerang on the Bananas, pick them up, and give them to Manid. He’ll give you the Fishing Net to scoop the Banner from the sea.
Return to the arena and click the sand near the barrels (k2) to find your Flag Pole buried there. Dig it up, collect it, then click the barrels (k3) to find the Pole Base. Place the base (k4), add the pole, then the banners, and you’ll be through to the final task.

Once the final puzzle begins, place your five diamonds in the positions above, then click the horn. Now, all that’s left is to enjoy the victory.
The Squire’s Tale Walkthrough - Chapter 5
Chapter Five sees our heroes teaming up with a new companion, Nira, as they sail to an island in frozen Mittenheim in search of the Sword of Light. Remember that if you do get stuck on any of the puzzles, you can use any remaining stars you have available (top right of the screen) to get clues. However, I’ve walked through the entire chapters step by step below if you want to save them or have run out of hints.

Pick up the Ice Scraper (a1) and use it on the metal crate (a2), which you can then open to find you’ll need to repair three electric boards via a connections puzzle. See the solutions below. In the first one, I just needed to connect the 1 in the top right down to the 2 below. In the second, the five on the right to the one below it.


Take the Letter from the door of the general store (a3) and click it to read it, noting the pin code. Now click the store window, where you can deduce the numbers for the pin code by matching the symbols on the price tags, giving you 3584.
Click the snowman (a4) and take the Buttons, then select the machine in front of the bank (a5). Add the buttons to it, enter the code 3584, and get the parcel containing the General Store Key. Select the store’s door (a3) for a close-up of the inside and take the Shovel. Back outside, use the shovel on the snow in front of the house (a6). Go inside.
Learning the Potion Ingredients

Open the box (b1) and take the Candle and Field Guide Page, get the Jar Opener from the shelf (b2), take a second Field Guide Page from the floor (b3), then click the panel on the front of the desk (b4) to get a third Field Guide Page and the Storage Key. Use the key to open the chest (b5) and take the Fishing Rod and Ice Drill. Now, you can select the field guide folder (b6) and add the pages to collect the Field Guide.
Using the Field Guide, you can deduce the ingredients you need. The blackboard (b7) shows four ingredients you can’t have (in red), while the line above shows what will work, and the paper taped to the wall next to the blackboard shows the chemical reactions.

The third (for the pink potion) chemical symbol matches with the lightning bolt. While using the book, you’ll find mixing Shimmer Fish, Hatch Flower, and Croaen Berries will give you the rest of the ingredients required. Enter their symbols onto the blackboard (see the solution on the blackboard above).
Head outside and return to the general store, using the jar opener on the jar on the table to get some Jerky. Back outside, give the jerky to the dog that has appeared outside the bank, who will then move to the sign at the back of the scene. Click the dog once more to follow it to the lake.
The Lake

Click the Christmas tree (c1) to get a Shiny Ornament. Use the ice drill on the ice (c2) and add the fishing rod to the clip (c3). Attach the ornament, and you’ll soon catch some Shimmer Scales.
Click the basket of berries (c4) to start a game with the Magic Snowman. Click the marked arrows to complete the battles (see images below). Once you’ve completed the three battles, the snowman will give you the Crosen Berries.


Select the purple plant (c5) to find out that it needs to be heated to be of any use to you. Head back into town and into the general store, and use the candle on the fire to get a Lit Candle. Return to the lake, use the candle on the plant, and take the Hatch Flower.
Making the Potion
Back in the lab, take the chemical (b8) from the desk and add it to the pot (b9). Add the other three ingredients from your inventory, and then click the pot again for a close-up. You now need to configure the pot and get the Defrosting Potion.
- Password: Top left, all three middle, bottom right (from the places visited on the map)
- Temperature: 238 (from the times and minute symbols on the clocks)
- Moisture setting: 2 (from the two blue beads on the light fitting)
Head outside and use the potion on the Yeti Scholar, then the ones in the general store and by the lake. Return to the scholar, and they will guide you to the altar.
The Altar

Grab the Ice Pick (d1) and then click the backpack (d2) to open it and then take the Rope. Take the Ox Statue (d3), use the rope to get the Penguin Statue (d4), and use the pick to get the Frog Statue (d5). Now you can click the scales (d6) and add the three statues, then the pick and rope, and finally the backpack itself. Click the altar to cross over the bridge to it and complete Chapter Five.
The Squire’s Tale Walkthrough - Chapter 6
The Forgotten Forest

After the initial chat with Kruk ends, click the left of the screen (e1) to move to the river. After more chit-chat, pick up the Stick (f1) and the Dead Fish (f2), then take a Tattered Shirt from the tree (f3).

Return to the first screen, put the stick next to the torch (e2), add the shirt, and collect the Lit Torch. With the torch selected in your inventory, click the right of the screen (e3) to move further into the woods.

Click the cobwebs (g1) to start a web mini-game. In the image below, I just need to move the final tile into the top-left space.

Once the spider has gone, use the torch to remove the webs (g1) and then receive some Spider Webs. Next, click the rope ladder below the door (g2) to get a bit of a surprise…

Select the area under the hut (h1) for a close-up of the spinning wheel. Click the pedal on the shelves on the left, add it to the spinning wheel, and then add the spider webs to the spinning wheel to get Spider Silk. While in the close-up, also collect the Dried Mushrooms and then add them to the pot on the right to get Mushroom Powder. Add the powder to the pot on the left, and a scroll will appear on the right. Pick up the Magic Scroll.
The Witch’s Hut

Back on the main screen, put the dead fish on the floor (h2) to attract the cat and get the Tumbler. Select the spider silk in your inventory and add it to the bow (h3) to also get the Shortbow. Use the shortbow on the coiled ladder (h4), dropping it within reach and allowing you to take the Dreamcatcher (h5).
Select the crows (h6) for a close-up of them, noting the amount of crows around each of the letters in the trees, which gives you a five-letter word. Now click the box (h7), add the tumbler to complete the lock, and enter the combination (LOVED) to open it and get the Wand.
Head back to the dam and place the dreamcatcher in the tree (f4), then give the magic scroll to Oakley (f5). Once he translates the spell for you, select the wand in your inventory and click the dam (f6) to cast it. Once Kruk has smashed the dam, he’ll open the gate.
Nightcap Gully

Click the windmill door (i1) for a close-up and take the Hand Rake. Click the daisies and pick up the Bow Drill, and the orange shelf to get the Garden Gloves. On the main screen, take the Mill Lever (i2), then use the gloves to pick some Stinkweed (i3). Click the door again (i1) and use the mill lever to the left of the table (see below).

Select the creature (i4) for a close-up and use the rake on its nose to get some Moss. Add the moss to the campfire and use the drill to light it, scaring off the flies. Click the hole you got the moss from with the stinkweed selected to wake up the Ancient Tortoise. After a brief talk, use the stinkweed to wake it up again (several times!) to discover the Path of Storms shortcut location. After your conversation, collect the Moon Mushrooms (i5, in the close-up) and use them on the fire to get Dried Moon Mushrooms.
Go back to the door close-up (i1) and grind the mushrooms to get Moon Powder. With the powder selected, click the rotating sails (i6) of the windmill to reveal a mushroom path. Click it to move forward to a route puzzle.
The path you need to take is below. Note that some moves take you multiple spaces powered by the wind symbols. My indicators below are the direction to choose from the space you land on after each move:

- Right, down, right, left twice to the bottom red mushroom (lightning),
- Right, right, right, up, right to the cream mushroom (lightning),
- Left, left, up, up, left to the purple mushroom (lightning),
- Right, right, right, up, left to the top red mushroom (lightning),
- Down, down, right, up, right, and out.
The Pond of Remembrance

Use the moon powder on the torch (k1) to reveal the image above. Click the six frogs (k2), who will jump onto lilypads, then click each of them once on the pads (in the correct order) to make them stand up. You can get the order by comparing the pattern on their lilypads to the symbols glowing in the trees—you need to click a tree (k3) for a close-up to see the order: Orange, Blue, White, Yellow, Purple, Pink.
The sword will rise from the water, and you’ll use the pendant to activate another puzzle. Select the symbols marked below to recreate the runes. And with that, you’ll be done with Chapter Six of The Squire’s Tale!


The Squire’s Tale Walkthrough - Chapter 7
The Monster King’s Lair
As we begin Chapter Seven, our heroes Martin, Cederick, and Nira are off to take on the Monster King despite having failed to collect the Sword of Light. I’ve walked through all the scenes and puzzles below, so expect lots of spoilers if you read on (You can click the section required in the contents list to avoid seeing sections you don’t want to see). Also, remember you can use any spare stars you have for clues!

Arriving at the elevator system, take the Old Key (a1), Gloves (a2), and Rope (a3). Use the key to open the red box (a4) and take the Can of Tuna and Screwdriver from inside. Click the rocks a few times (a5) to get a Shield, then use the screwdriver to open the grate (a6) and use the gloves to search the rubbish inside and get the Fishbone and Medallion Half.

Place the can of tuna and fishbone on the two offering discs (a7) and then click the anchor on the shark statue. Attach the rope to it to get an Anchor Hook and use it on the tower (a8). When the tower falls, click the hole in it (you can see a green wardrobe poking through) for a close-up and use the shield to move the rock (b1) blocking the wardrobe (b2). Click it to open it and take the Umbrella, then use that to snag the second Medallion Half (b3).
Go back to the main image and place the two medallion halves into the altar (a9). The lift appears, starting a ball-rolling puzzle. Only go through the circles where they are numbered below:

- Go through 1 heading north
- Go through 2 heading south
- Go back through 2 and then through 3, heading east
- Go north through 4 and 5, then east through 6, 5, and 7
- Head west through 8, then south through 6, 9, and 3
- Go north through 10, west through 11, then east through 12 and 10
- Head north through 12, 11, 13, and 7, then north through 8
- Go west through 14, and finally east through 1, 9, 4, and 13.
Now you can enter the elevator.
The Elevator

Take the Wooden Plank leaning against the wall, then click the two curtains to reveal the walls. Click the green mask (c1) take the Gemstone that falls from its mouth, and collect a second Gemstone from the elevator floor indicator (c2). Click the button panel (c3) and click the + button in the close-up, which opens the emergency kit (c4) below it. Take the Bandages and Hand Saw from inside.
Use the saw to cut the bars (c5) and use the plank on the torch (in the close-up of the other side of the bars) to get a Burning Plank. Select the rug on the floor (c6) to reveal the hatch, click it to open, then get a close-up of the hatch and use the bandages to fix the wires.
Now that the wires are fixed, select the button panel once more and click the button for floor B10 (on each floor you visit, note the number of statues you can see through the window on the right - you’ll need this info later). Add the two gems to the panel to open a panel and take the Candelabra. Now select the button panel and flip the switch at the bottom to turn off the elevator lights, noting the colors and positions (top to bottom) of the revealed faces.

Turn the lights back on in the lift and click button B30. Get a close-up of the panel and set the sliders (top to bottom) as follows: Orange, Green, Blue, Purple, and Red (see above). Take the Key. Now move to B20, get a close-up of the combination in the lift, and enter (top to bottom) 3532, which is the number of statues through the window on each floor (see below). A panel will open, giving you your second Key.

Head to floor B40 and place the candelabra in the slot in the lift. You need to light the correct candles with your torch to open the hatch and get the final key. For this, you’ll need to note which stars burn orange in the mural on the roof of the lift (click c7). Select the torch, light the correct candles (snuff out the ones in white in the mural; see below), and take the third Key.

Move back down to B50, use the keys on the locks (c8), and move forward to the forge.
The Forge

Grab the Bolt Cutters (d1) and use them on the cupboard lock (d2), taking the Tongs from inside. Turn the valve (d3) to find out that you need to make the forge hotter before you can use it. Use the tongs to pull down the ladder (d4), then take the Crowbar (d5) and use it to open the crate (d6) and take out the Valve Wheel.
Use the crowbar again to get the Gum from the switch (d7). You can now flick the switch to get the forge up to the second heat level. Use the gum to fix the pipe (d8) and add the valve to the pipe (d9) to fully power the furnace. You can now press the large button (d10) that opens the armory door (d11). Click it to go inside.

Take the Hammer (e1), then select the broken sword in your inventory and click and take the Spoon (e2), Shield (e3), and Jug (e4), then place them into the forge. Open the tray (d12) to get the Magic Ore and place it on the anvil (d13), starting a puzzle to remove the impurities. Press the up, down, left, and right keys in the following order: Right, Right, Left, Up, Right, Left, Up, Right, Right.
Put the sword on the anvil, add the Purified Magic Ore, then use the hammer on the sword to complete the chapter. Just one to go!
The Squire's Tale Walkthrough - Chapter 8
The Doomsday Device

Pick up the metal ball and use it to break the grate (f1) and get the Coin. Click the wall chain (f2) until the wall collapses, give the coin to the dungeon rat that appears, and then take the Silver Needle. Use the needle on the door lock (f3) and head into the hallway.

Take the Tin Ladle (g1) then click the switch on the wall (g2) to raise the pillar in the middle of the hallway. Click the back-left cell door (g3) for a close-up of the gelatinous cube and pick up a Handful of Rocks. Keep picking them up and adding them (along with the ladle) until it explodes. Take back the Tin Ladle, then grab the Torch and open the chest to get Cedrick’s Sword. Finally (still in the close-up) use the ladle on the toilet hole to fish out the Key.
Light the torch via the one burning in the hallway (g4), then use the key on the right-side cell door (g5) to open it. Click your lit torch in your inventory and then the dark close-up to reveal a skeleton. You can drag the light around the image and collect a Spear on the right, also noting the code scratched into the wall (24637).

Select the front-left cell door (g6) to reveal a grid. Move the stars with the buttons until the stars are in the positions (from left to right, top to bottom) that match the code from the cell (see above). You can now go in and speak to Cedrick. Give him his sword, and he’ll come with you. While still in the cell close-up, click the three loose stones to open a secret compartment and take the Gear (see below).

Add the gear to the pillar (g7), then use the spear on the hole (g8), finally clicking Cedrick to get him to help you turn it. You’ll first need to cheer him up, though. Choose the following options:
- The dragon (two points)
- The orb (two points)
- The mind tournament (two points)
- Shoveling snow (two points)
- Destroying the sword (two points)
Cedrick will now help if you click the spear, allowing you to escape the dungeon.
Getting to the Doomsday Device

Pick up the Fish Statue (h1) and the Hook (h2), then use the hook on the ladder on the right (h3). You can now enter the door at the top (h4).

Grab Another Shovel (i1) and use it to dig out the Ballista Bolt (i2). Also, take the Book (i3), alongside a Second Book and the Moon Chart from the other alcove (i4). Head back outside, add the bolt to the ballista (h5), and shoot it, revealing a moon puzzle. Use the moon chart to solve it, or check out the image below for the solution (all that is left to do in the image is change the bottom left moon to be completely dark). Once complete, take the second Fish Statue and Shadow Orb.

Head back into the room and put the two fish statues on the pedestal (i5), then alter the stone bowls so that the water flows into the ring on the ground (see image below). Take the Staff. Back in the main area, take the anchor back and use it on the opposite ladder (h6), taking the third Book from the top. Use the anchor to go through the right door once more, add the books to the shelves (i6), and take the Red Crystal.

Outside once more, add the staff to the statue on the right (h1) and the crystal to the one on the left (h7), revealing a puzzle in the center of the arena. Add the shadow orb to the center to start the puzzle. You need to energize each orb by making each area have four different symbols, so click the purple central orbs in the following order:
2, 4, 4, 3, 3, 3, 3, 1, 3, 3, 3, 1, 1, 1, 3, 3, 3, 1 (image below)

Click the stairs to head onwards.
Underneath the Device

Take the Crystal Shard (k1) and add it to the disc (k2), which opens the trapdoor (k3), so head down. Take the Horn Blueprint (l1), then click the skeleton (l2), revealing a scroll. Click the scroll, take the Winding Key, and read that you need the robot’s horns and heart to make it function.

Take the Hammer and Chisel (l3) and the Butter Knife from the cupboard (l4), then use the hammer on the crack in the floorboards (l5) to get the Filament. With the filament selected in your inventory, click the device (l6) to find you need to power it somehow.
Back upstairs, use the hammer on the crystals (k4) to get a second Crystal Shard and add it to the other disc (k5), powering up the stone (k6). Also, use the knife on the panel on the front of the robot (k7), taking the Plate Cover.
Go back downstairs to find the machine powered up. Add the filament to it in the close-up by clicking the cog (bottom-left) twice with the filament selected. It’s now ready to go. Use the blueprint in your inventory to find the six buttons you need to press (they’re bolded), or use my image below. Once selected, click the hammer button (bottom right) to make and collect the Metal Horns.

Now do the same, taking the symbols from the plate cover to make the and collect the Heart. Again, see my image below for the correct symbols to choose from.

Add the heart and horns to the robot to activate the Robot Yeti. When it turns around, use the key on its back to finish the repair. Reattach the front panel to the robot, then travel up in the elevator.
The Final Battle

Once Nira breaks up the platform you’re standing on, you’ll start a mini-game. The idea is to cover all the floor squares (turning them orange) while avoiding the lightning strikes (these go across from where the ball is after the number of turns indicated).For the solution:
- Up and then left (lightning)
- Down twice (lightning)
- Right and up (lightning)
- Left and down (lightning)
- Up twice (lightning)
- Down once.
Now Cedrick has to do the same on a slightly more difficult grid:
- Down 3 (lightning)
- Right twice, then up (lightning)
- Right, down, up (lightning)
- Up, left, left (lightning)
- Down, right, right (lightning)
- Left, up, up (lightning)
- Right, left, down (lightning)
- Up, left, left (lightning)
And once more, for the win:
- Down, down, left (lightning)
- Left, up, right (lightning)
- Up, left, up (lightning)
- Up, right, right (lightning)
- Down, left, down (lightning)
- Right, left, right (lightning)
- Right, up, up (lightning)
- Right, down, down (lightning)
- Right, right, left (lightning)
- Down, down, right (lightning)
- Up.
Enjoy the final cut scenes, and congratulations, you’ve completed The Squire’s Tale!
Want more Adventure Escape Mysteries in your life? Check out All Adventure Escape Mysteries Walkthrough Guides here on Pro Game Guides.