
It turns out that aside from the experiments she was conducting in her oubliette, Savathun had another secret spot atop her spire where she was collecting her own tithes. Players are sure to scratch their heads at the puzzles lined up for them.
No matter how clever the Witch Queen is, we can unravel her plots and schemes. Here's how to access the Imbaru Engine, solve each of its puzzles, and claim the hidden treasure locked inside.
How to complete the Imbaru Engine in Destiny 2
Guardians will get access to the Imbaru Engine, which is a special quest available in the H.E.L.M., after reaching the week five segment of The Bladed Path. Since then, two additional trials have been added alongside a final, hidden trial that culminates with each of the Seasonal Activities.
Imbaru Engine - Cunning Test
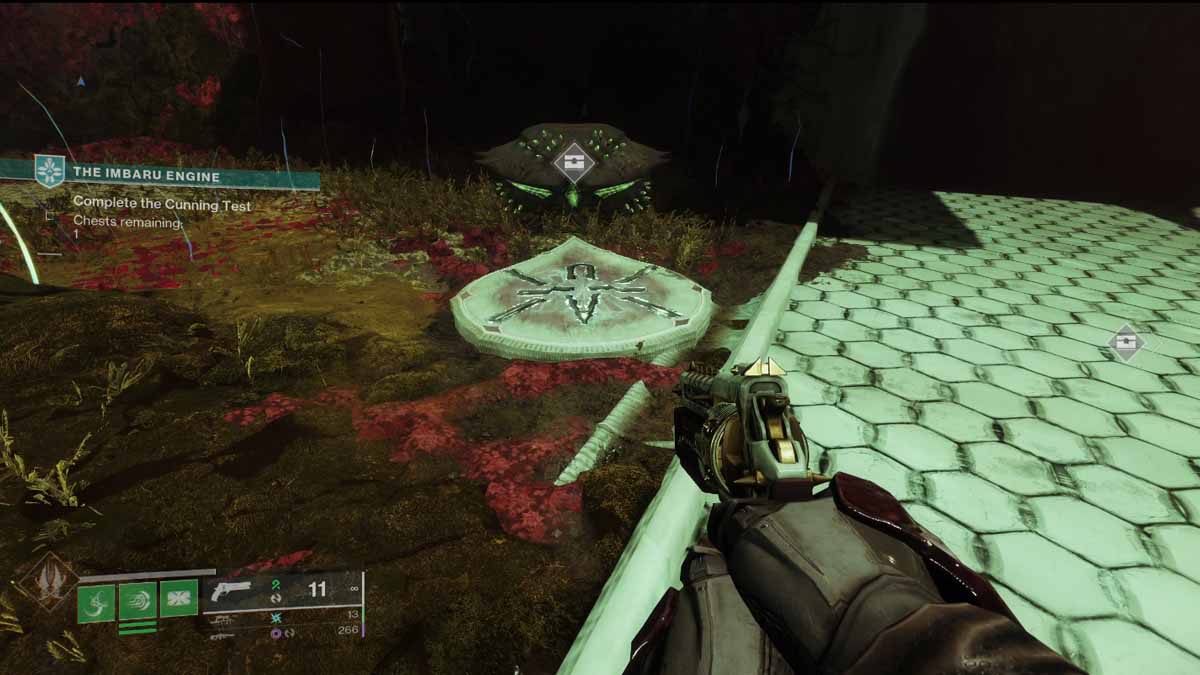
The trial is very low-stakes. There aren't any enemies to fight and, while death can be frequent, there's no real penalty. Upon beginning the test, players will need to open one of two chests. Choose incorrectly and death awaits. For the remainder of this trial, the symbol in the screenshot below is the one we're after. Opening a chest with any other symbol will result in death.
Opening that first chest will spawn three more on the opposite side of the room. Pop up there and you'll see the trio of chests. Look at the symbols near the chests and open the two with our magic key to trigger the next section.
Now that we've cleared the first two hurdles, Savathun reveals the enormity of the task ahead. Players must find the three correct chests spread throughout the Escher room. Their location is random, so keep an eye out for the symbol.
Imbaru Engine - Strength Test
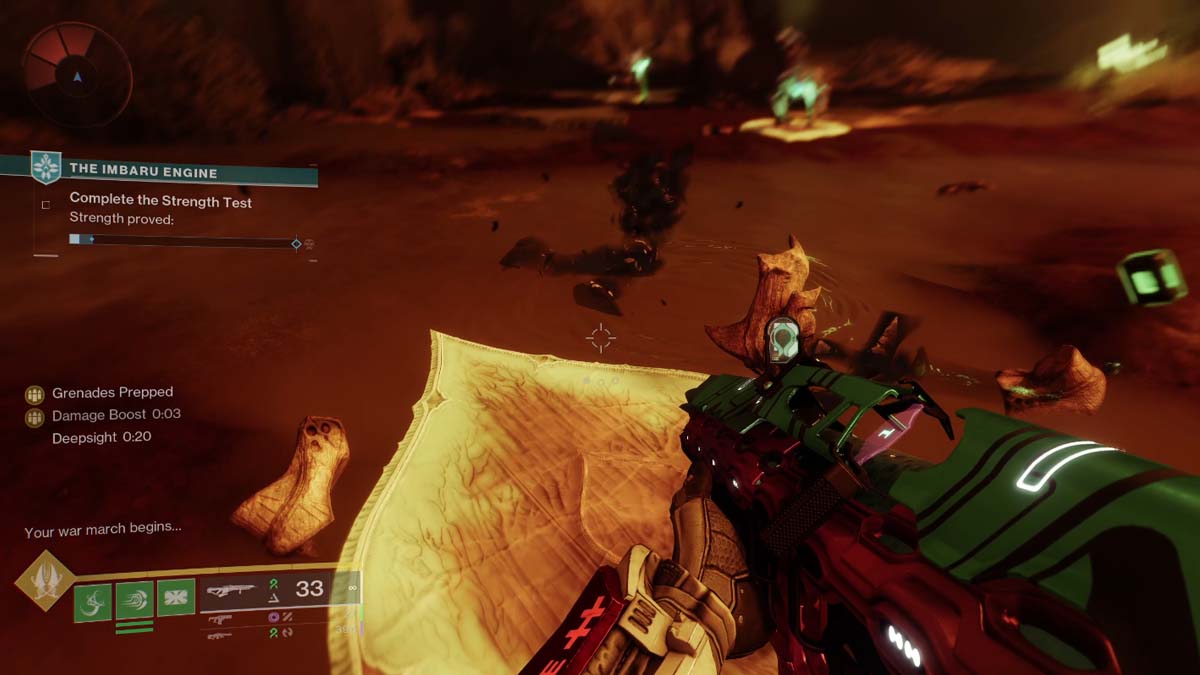
This test requires players to kill the correct enemy to fill the meter. To find out which to start with, activate the Deepsight on the ledge overlooking the room with the Knights and Cursed Thrall. You'll see footsteps leading to the first Knight. Once that Knight has been dispatched, look at the stone it was standing on. There will be a pointed end that directs you to the next target.
Use these arrows to determine the next target, kill it, and repeat. After killing the Knight on the slope, the stone will point to another room that you must jump into. Here is where it starts to get tricky. Rather than kill the next enemy the arrow points toward, you must skip that enemy and kill the target of the second arrow. This leapfrog pattern will continue for the rest of this test.
When you loop back into the first room, don't kill the Knight that the last arrow was pointing toward. Instead, follow its arrow to a third room filled with Cursed Thrall. Kill the first one that lines up with the previous arrow. This room follows the same leapfrog rule. Take care of these four and this test is complete.
Imbaru Engine - Navigation Test
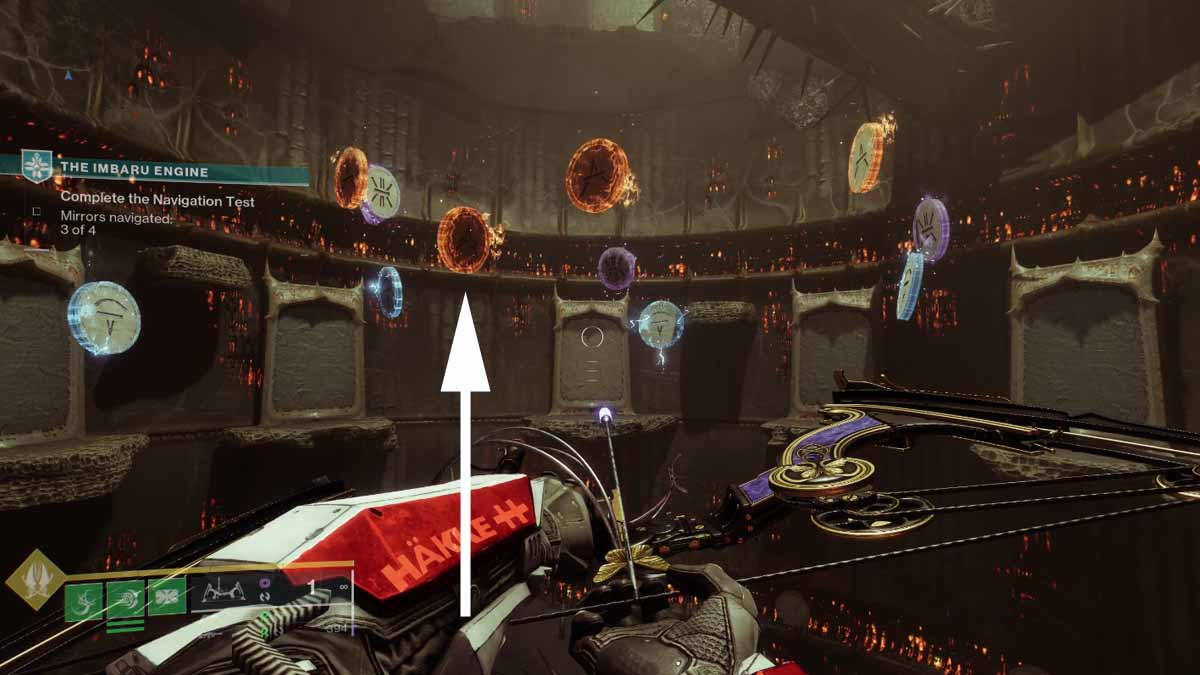
Upon entering the room for the third test, you'll see that it's a silo with multiple spinning crossbeams of death. The objective is to shoot the correct rune and jump through the activated portal four times. For simplicity's sake, I'll label each of the portals in front of you as 1-7 from left to right.
The trick is to look at the doorway behind you for the correct rune. For example, the first rune is Arc on the left side of the doorway. Using an Arc weapon, we want to shoot the only Arc rune on the left side of one of the six portals. In this case, it's #2.
- First Mirror: Arc, Left - Portal #2
- Second Mirror: Solar, Top - Portal #5
- Third Mirror: Void, Right - Portal #4
- This one is tricky as the rune is actually hidden behind another rune. You'll need to jump across to see and shoot it.
- Fourth Mirror: Solar, Right - Solar rune second from the left
- I don't actually know how to determine that this is the correct rune aside from trial and error.
Imbaru Engine - Parting Gift
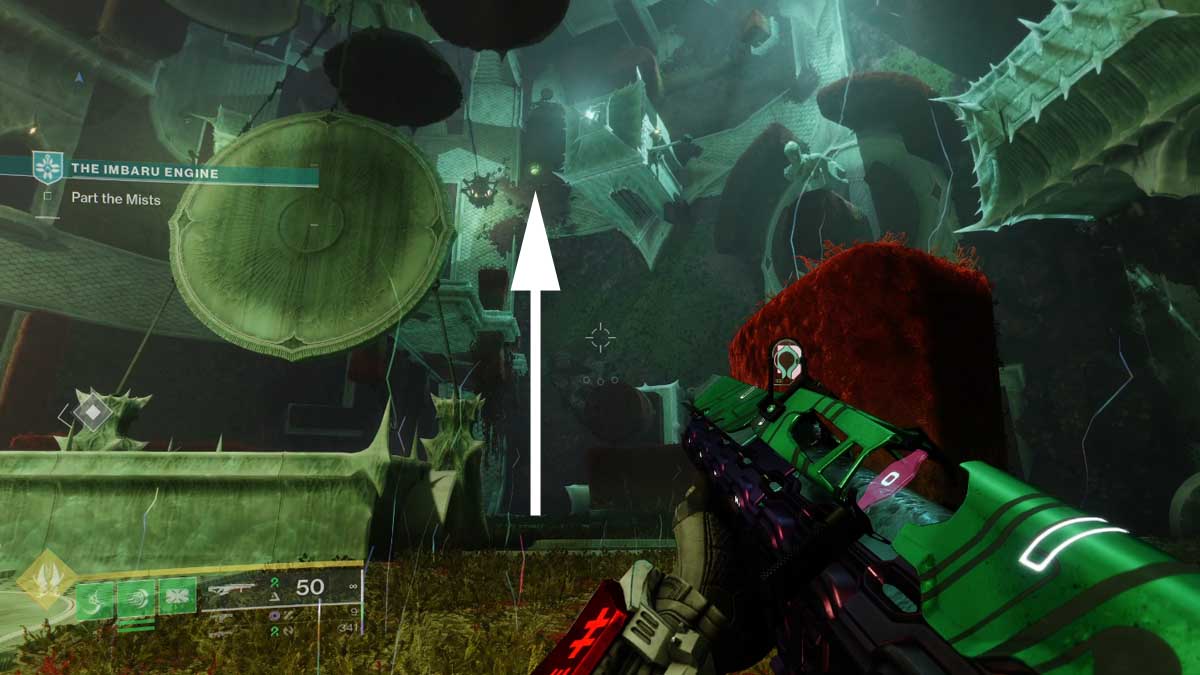
This room is only available after collecting the A Parting Gift Arcana Card. Once acquired, head to the top of the Imbaru Engine by solving all three puzzles or simply running up top if you've already cleared them. At the top will be a lone mirror with a portal. Go through and begin the ritual. This will make three braziers usable. To activate them, you'll need to claim a flame from the Imbaru Engine, Savathun's Spire, and the Altars of Summoning.
Light the braziers
The Imbaru Engine flame is located in the Cunning Test. It's about halfway up the wall, directly behind where you enter.
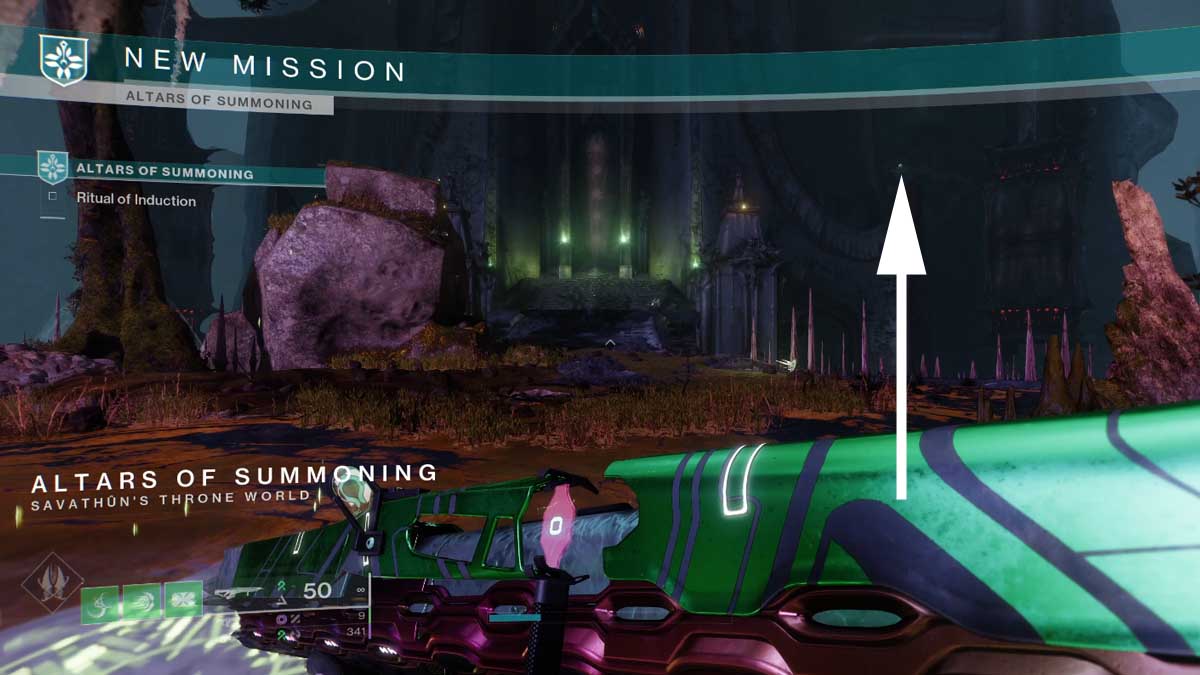
The Altars of Summoning flame is straight ahead of where you spawn. Climb the set of stairs and look to the right to find a Deepsight node. Activate it and follow the platforms to find the flame.
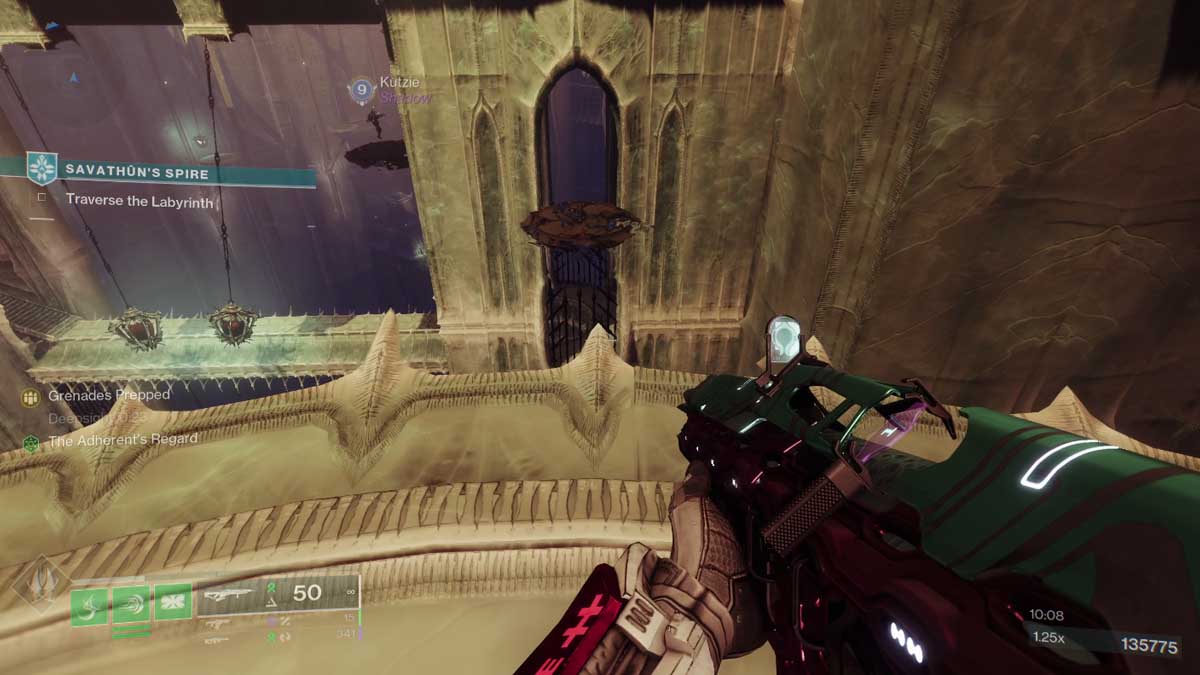
The Savathun's Spire flame is near the end of the activity. After reaching the section where you must take several elevators and avoid swinging spiked lights, you'll jump onto a column before taking the second to last portal in the activity. Trigger the Deepsight node and turn around to find the platforms. Follow them around the right side of the structure to find the final flame.
Two lies and a truth
Light the braziers after collecting the flames and ascending the Imbaru Engine once more. This will open the final room. Begin the ritual to activate the puzzle. There are a total of 16 runes spread throughout the room. The objective is to modify them before submitting the correct answer.
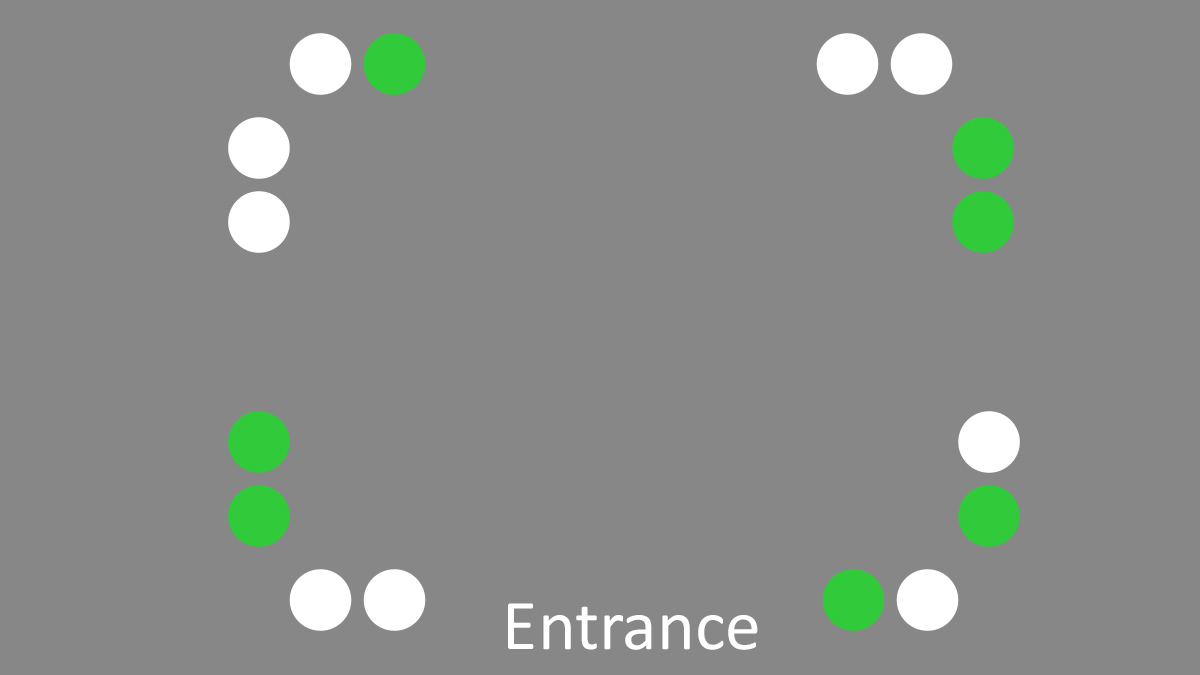
The mechanics of this puzzle are involved. Players must activate the altars on either side of the room to trigger some hints. From there, players can interact with each of the four statues which will put a triangle, circle, or even both around specific runes. The idea is to note all of these and head back to each test, check the runes against those that have now appeared, and then modify those in the final room before locking in your answer.
I'll leave the "showing your work part" to you if you want to figure it out yourself. Otherwise, here's the solution. Modify the runes to the green-colored dots in the image below.
Once you've solved this final puzzle, you're free to claim your prize and head back to the H.E.L.M. for a new cutscene.
For more Destiny 2 goodies, check out Warden's Law God Roll and Best Perks in Destiny 2 on Pro Game Guides!