Dungeons of Hinterberg is filled to the brim with puzzles, NPC interactions, and lots of upgrades and changing skills for you to explore. This Dungeon of Hinterberg walkthrough will answer the random questions you may ask yourself while traversing the town of Hinterberg.
How to open locked chests in Dungeons of Hinterberg
To open locked chests, you'll need to befriend Thea. After returning to Hinterberg for an evening, you will find Thea and her friend David sitting on the ground across from the cinema. Approach them and ask them to hang out. After doing so, Thea will become one of your acquaintances and give you an item that unlocks every locked chest in the game. I recommend befriending her first so you won't have to backtrack later.
Can you replay dungeons?
You can replay almost every dungeon by returning to its area and entering its portal again. The only exception is the final dungeon you enter. After completing it, you'll be sent automatically to the game's final scenes with no way to return.
How to unlock new Charm slots


To use Charms, Luisa needs to equip them in her Charm slots.
While Luisa starts with only 9 Charm slots, players can upgrade her to get 20 Charm slots.
- Becoming a level 3 friend with Albert gives you 3 extra Charm slots.
- Upgrading your friendship with Alex to level 3 gives you 3 extra Charm slots.
- Having a level 3 friendship with Klaus gives you 3 extra Charm slots.
- Complete the Monster Club's request for 400 Monster Parts to get 2 extra Charm slots.
How to shrink Charms


In Dungeons of Hinterberg, shrinking Charms makes them take up less Charm slots in your inventory. This allows you to fit more Charms in your slots, strengthening Luisa even more. After you traverse a few dungeons and begin making a name for yourself, a scientist will greet you after one of your dungeon runs. She'll explain that she needs you to get resources for her, then station herself near the sign where you enter Hinterberg.
Talk with her to shrink your charms. Shrinking charms requires you to gather "proto-goo" from all four areas of Hinterberg. Each area contains mostly one of the four kinds of proto-goo, but they will have the others as well.
- Doberkogel has Koboldyne.
- Hinterwald has Pitzlon.
- Kolmstein has Albsenic.
- Brünnelsumpf has Perchtassium.
Select the charm that you want to shrink and give her the requested Proto-Goo to make it one size smaller. All charms can be shrunk to fill only one Charm slot, giving you lots of options for customization.
How to enchant gear in Dungeons of Hinterberg
You can unlock sword enchantments by reaching the second level of friendship with Hannah. After doing so, talk to her at her shop and select the enchant your sword option. This will allow you to place up to three Enchantments from your inventory onto your sword. If you don't own any Enchantments, they can be purchased from Hannah's shop or found in chests around the world.
To upgrade your armor, you'll need to upgrade your friendship with Hannah to level three. When you visit her shop afterward, select the upgrade your armor! option to level up your armor. Every upgrade will cost Hinterbucks and increase your physical and magical defense.
How to get Wild Strawberries in Dungeons of Hinterberg


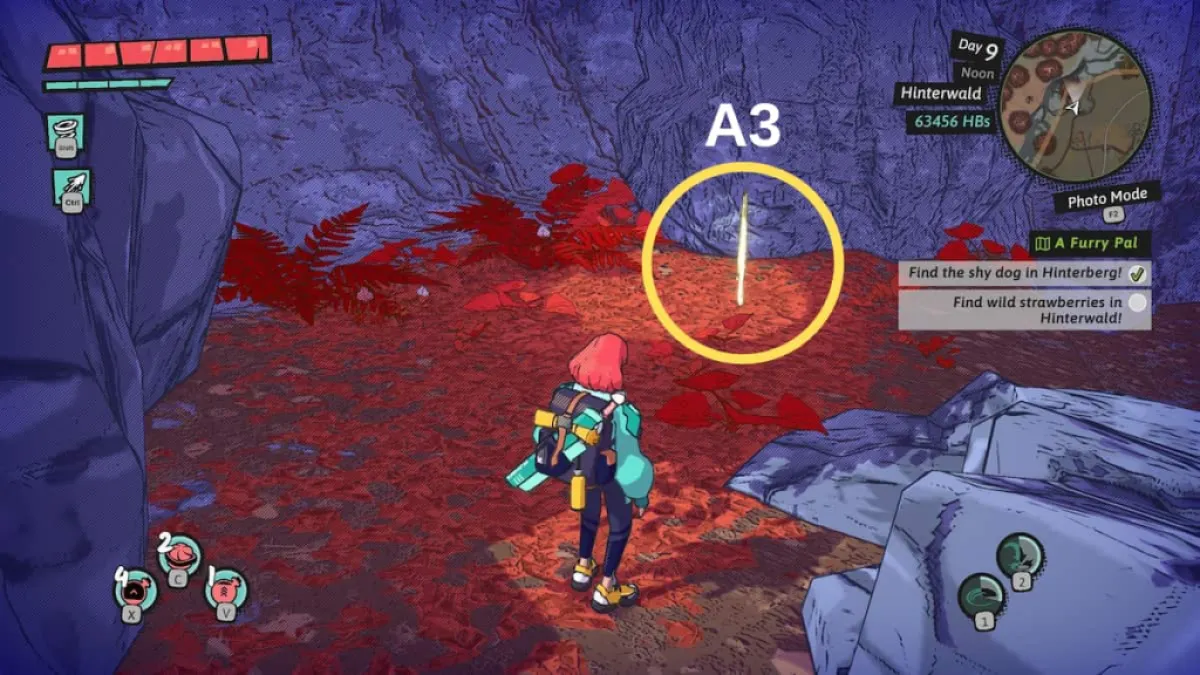


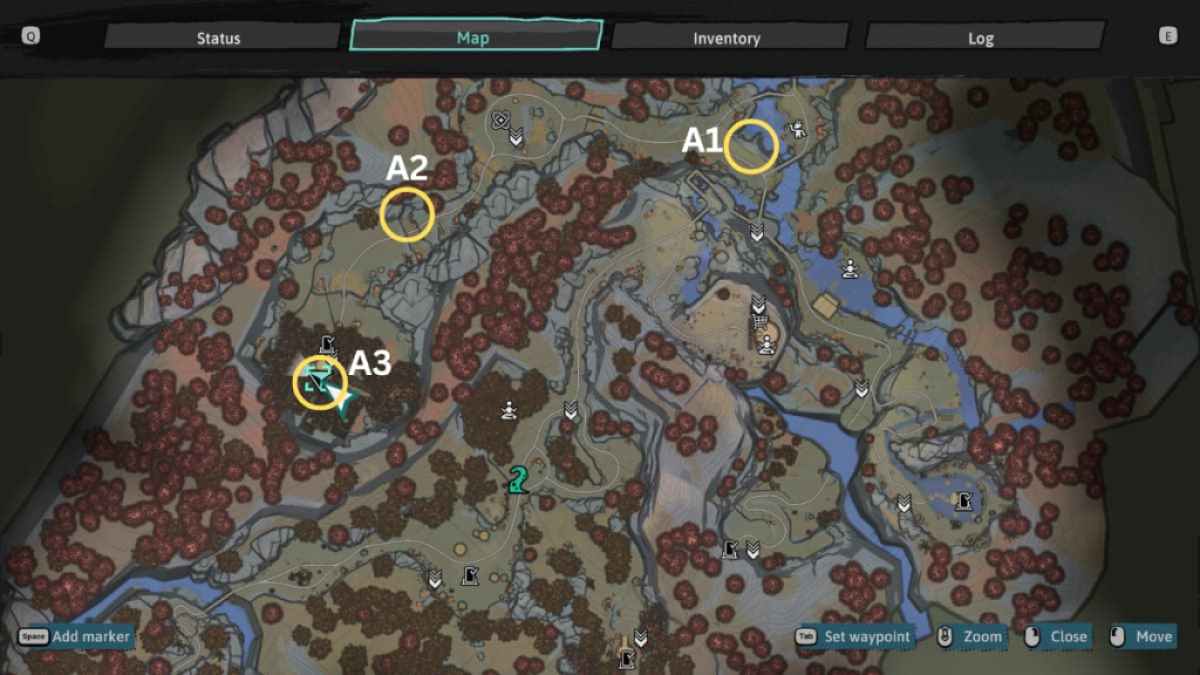
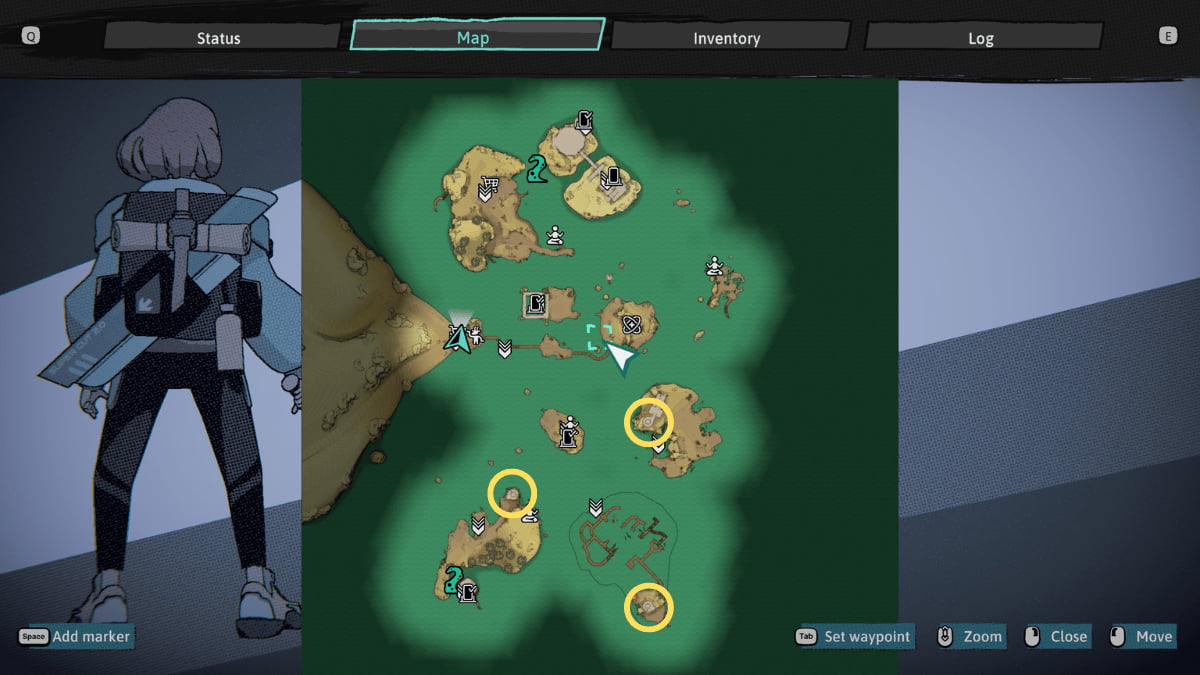
The Wild Strawberries needed to befriend the Dog are found in Hinterwald near the Ancient Tree. To reach them, head past the Ancient Tree dungeon to the back right corner of the area (A1). You'll see a ledge here. Use the Whirlwind spell to place Luisa on top of it (A2). Once on the path, all you need to do is follow it to the end. There will be a small yellow light coming up from the ground (A3). Grab it to get the Wild Strawberries (A4). If you're struggling to find them, I've included their location on the Hinterwald map in the final photo (A5).
Once you have the Strawberries, you can bring them to the Dog on any evening off!
How to get the Grove Trove Achievement - Every locked chest location in Hinterwald
To get the Grove Trove achievement, you'll need to find the three locked chests hidden in Hinterwald.


- The first chest (A1) is in a cave across the pond behind the Monster Club. Go through the gap in the fence to the left of the Monster Club and use Whirlwind to cross the water and reach the cave.
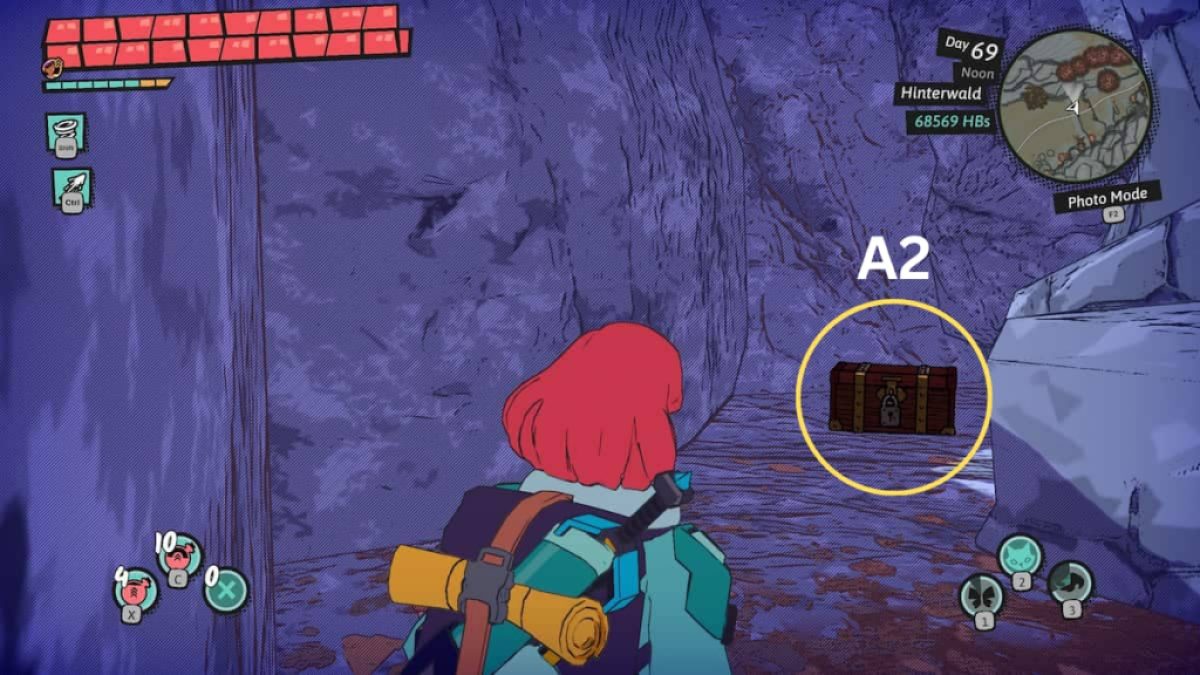
- The second chest (A2) is in the small ditch beneath the bridge leading to the Ancient Tree dungeon. Walk into the ditch and head to the far right side to find the locked chest.
- The third chest (A3) is on a small platform at the base of the Ancient Tree dungeon's tree. Climb up the stumps as if you were going to the dungeon, then turn to the left and take the platforms to the back of the tree.
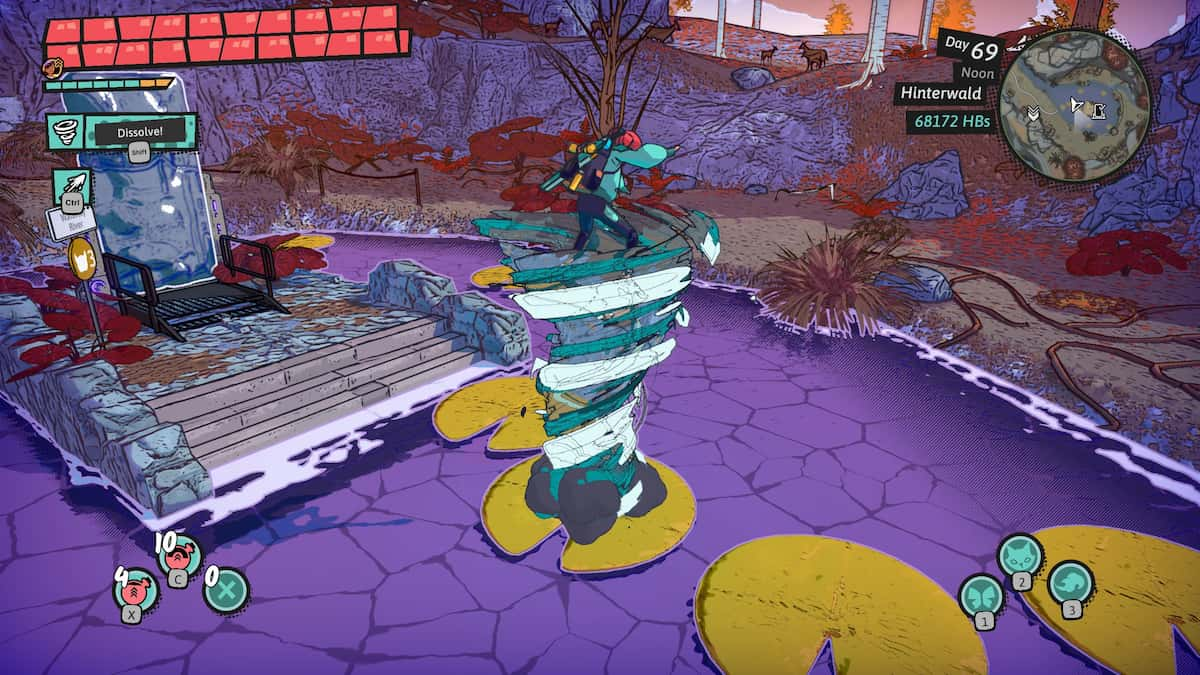
How to cross Lilypads in Dungeons of Hinterberg
To cross rivers with Lilypads, use the Whirlwind spell to pick up Luisa and cross over them with her in the air.
How to start the elevator in the Old Cavern dungeon


There are two puzzles in the main room of the Giant Cavern dungeon. The first, and hardest, is the multi-step puzzle that powers the elevator leading to the exit portal. Start by pushing the large yellow cart until it is between the ledge next to the ladder on the right side (A1). Climb the ladder and face the cart (A2), then jump across and enter the room on the other side (A3). Take the minecart out of the room and leave it in the main room to complete the first half of the puzzle (A4).
Now push the cart so it is next to the pile of rocks blocking the path to the upper ledge (A5). Return to the Minecart you just took and ride it back into the room (A6). Next, exit the room and walk to the right to the ledge marked with white. Use your Wrecking Ball spell here to place the ball on the cart, blowing it up to break the rocks (A7). You can now take the path up to the cave's highest ledge (A8). Defeat the enemies to reach the elevator's button (A9), then press it to start the elevator (A10). You can now take the elevator on the other side of the ledge to return to the main area of the room (A11).
How to solve the rail puzzle in the Minecart Workshop


The end of the Minecart Workshop dungeon features a large puzzle with multi-colored panels and separated pieces of a railway. The goal of this puzzle is to align all of the rails in the center so you can escape the dungeon using the nearby minecart. To align these pieces, you'll need to move the colored switches in a specific order using the ball-and-chain spell.
First, pull the lower green platform towards the right wall (A1). Walk to the left side of the room and pull the lower blue platform to the left (A2). Return to the right side of the room and walk to the second green platform. Pull it toward you to unlock the path toward the end of the puzzle (A3). Walk to the exit gate and pull the yellow puzzle toward you (A4). Complete the puzzle by returning to the start and pulling the lowest green platform to the right wall (A5). This will align all of the rails, allowing you to escape to the exit portal.
How to unlock the Lighthouse Reef dungeon
In Brünnelsumpf, the Lighthouse Reef dungeon will be revealed after lighting all three lighthouses on the islands to the right side of the map. Use the boat to sail to each island, defeat all their monsters, and climb each lighthouse. Use the plasma ball spell on the light at the top of a lighthouse to power it on. The Lighthouse Reef dungeon will appear once the third lighthouse has been lit.
More Dungeons of Hinterberg guides
These guides will help answer any questions you may have that aren't included in this walkthrough.
- All Social Stat activity locations
- Attack Conduit Tier List
- Charm Tier List
- How to get all Friendship Perks
For more Dungeons of Hinterberg, check out All Dungeon Coin Locations in Dungeons of Hinterberg here on Pro Game Guides.