
The first eight floors of the Spiral Abyss have bonuses for players to take advantage of in Genshin Impact. Getting through the floors and gaining stars will reward players based on how many stars they get. This is a great way to earn gems and for players to put their skills to the test.
How To Get Rewards
Each Floor has three Chambers that will reward up to three stars based on the player's performance. Rewards are given out at three, six, and nine stars, meaning players have to get the top score in order to get all the rewards. However, players can still get two of the rewards from the chamber by scoring a minimum of two stars in each Chamber, totaling six stars earned on that Floor.
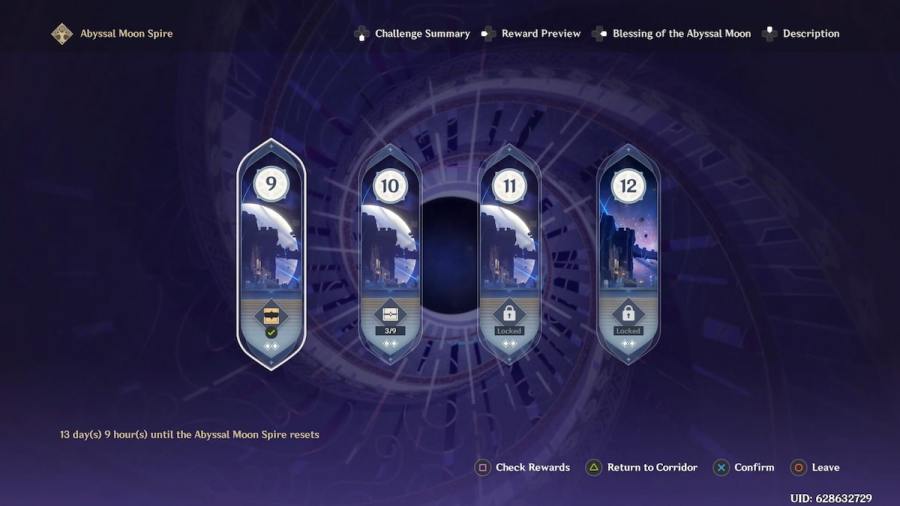
Floors 9-12 work differently and are instead reset on the 1st and 16th of each month. Each reward at three, six, and nine stars reward 50 Primogems and 150k, 200k, and 250k Mora. This totals out to 150 Primogems and 600k Mora for earning all nine stars on these floors.
Completing Chambers, no matter the stars, give different rewards for simply completing them.
Floor 1 Chamber 1 - Floor 2 Chamber 3
- 5k Mora, three Adventurer's Experience, four Wanderer's Advice, four Mystic Enhancement Ore, one Domain Reliquary: Tier III
Floor 3 Chamber 1 - Floor 4 Chamber 3
- 10k Mora, five Adventurer's Experience, six Wanderer's Advice, four Mystic Enhancement Ore, one Domain Reliquary: Tier III
Floor 3 Chamber 3 gives a Northlander Polearm Billet instead of a Domain Reliquary: Tier III.
Floor 4 Chamber 3 gives a Domain Reliquary: Tier II instead of a Domain Reliquary: Tier III.
Floor 5 Chamber 1 - Floor 6 Chamber 3
- 15k Mora, six Adventurer's Experience, eight Wanderer's Advice, five Mystic Enhancement Ore, one Domain Reliquary: Tier III
Floor 5 Chamber 3 and Floor 6 Chamber 2 give a Domain Reliquary: Tier II instead of a Domain Reliquary: Tier III.
Floor 6 Chamber 3 gives a Domain Reliquary: Tier I instead of a Domain Reliquary: Tier III.
Floor 7 Chamber 1 - Floor 8 Chamber 3
- 20k Mora, seven Adventurer's Experience, ten Wanderer's Advice, five Mystic Enhancement Ore, one Domain Reliquary: Tier III
Floor 7 Chamber 2 and Floor 8 Chamber 2 give a Domain Reliquary: Tier II instead of a Domain Reliquary: Tier III.
Floor 7 Chamber 3 and Floor 8 Chamber 3 give a Domain Reliquary: Tier I instead of a Domain Reliquary: Tier III.
Floor 9 Chamber 1-3
- 20k Mora, two Hero's Wit, three Adventurer's Experience, five Mystic Enhancement Ore, one Domain Reliquary: Tier II
Chamber 3 gives a Domain Reliquary: Tier I instead of a Domain Reliquary: Tier II.
Floor 10 Chamber 1-3
- 25k Mora, two Hero's Wit, three Adventurer's Experience, six Mystic Enhancement Ore, one Domain Reliquary: Tier II
Chamber 3 gives a Domain Reliquary: Tier I instead of a Domain Reliquary: Tier II.
Floor 11 Chamber 1-3
- 30k Mora, two Hero's Wit, four Adventurer's Experience, six Mystic Enhancement Ore, one Domain Reliquary: Tier II
Chamber 3 gives a Domain Reliquary: Tier I instead of a Domain Reliquary: Tier II.
Floor 12 Chamber 1-3
- 40k Mora, two Hero's Wit, four Adventurer's Experience, seven Mystic Enhancement Ore, one Domain Reliquary: Tier II.
Chamber 3 gives a Domain Reliquary: Tier I instead of a Domain Reliquary: Tier II.
Blessing of the Abyssal Moon
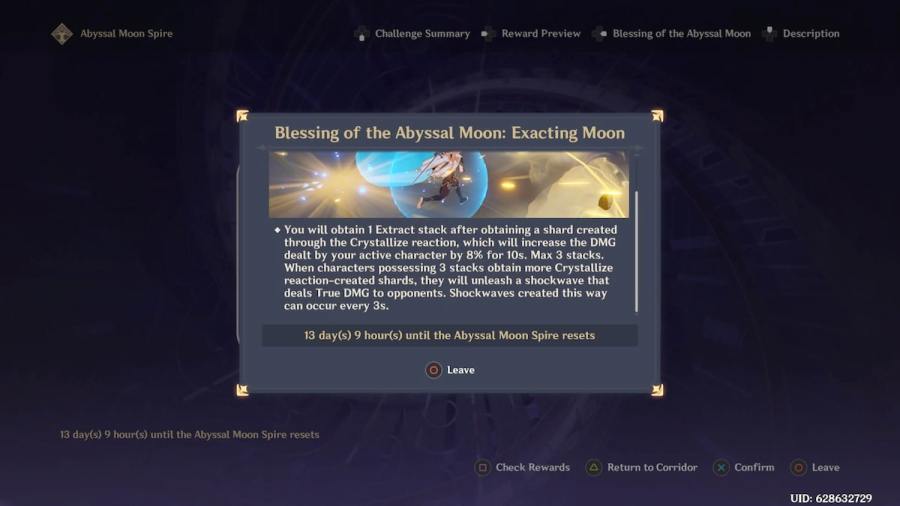
Every reset of the Abyss will offer a unique bonus for players fighting in the Abyss. The bonus applies to every Floor of the Abyss and stacks with the bonuses offered by each Floor as well. Taking advantage of these bonuses can change the way someone may build their team as it might involve using specific Elements. So far these bonuses have not been repeated in subsequent Moon phases.
Related: How does the Artifact Strongbox work in Genshin Impact
All Floors
Every floor offers a Leyline Disorder and an objective. Enemies for each Chamber can be looked at to make building a team much easier.
Floor 1
- Pyro DMG dealt by all party members increased by 75 percent.
- Overloaded DMG increased by 200 percent.
Floor 2
- Cryo DMG dealt by all party members increased by 75 percent.
- The duration of the Frozen status effect is greatly increased.
Floor 3
- Increases Swirl reaction DMG by 300 percent, and its AoE by 100 percent.
- Anemo DMG dealt by all party members increased by 75 percent.
Floor 4
- Electro DMG dealt by all party members increased by 75 percent.
- Electro-Charged DMG increased by 150 percent, and its AoE is increased by 100 percent.
Floor 5
- When your character's HP is greater than 50 percent, ATK and DEF are increased by 25 percent.
- When HP is greater than 80 percent, Normal Attack SPD is increased by 20 percent.
- When HP is greater than 80 percent, Movement SPD is increased by 20 percent.
- When HP is greater than 95 percent, CRIT Rate is increased by 10 percent and CRIT DMG is increased by 20 percent.
Floor 6
- Using an Elemental Burst increases all party members' ATK and DEF by 6 percent. Max 10 stacks. At 5 stacks and above, increases character Normal Attack SPD and Movement SPD by an additional 30 percent.
Floor 7
- CRIT hits will generate Elemental Particles and Orbs. Can only occur once every 15 seconds.
- CRIT DMG dealt by all party members increased by 120 percent.
Floor 8
- When HP is less than 60 percent, ATK is increased by 50 percent and DEF is increased by 50 percent.
- When HP is less than 45 percent, Normal Attack SPD is increased by 30 percent.
- When HP is less than 45 percent, Movement SPD is increased by 30 percent.
- When HP is less than 30 percent, CRIT Rate is increased by 20 percent, and CRIT DMG is increased by 40 percent.
Floor 9
- A plasma field will be generated at the edge of the challenge arena once the challenge begins. Characters outside the safe zone will take Electro damage every 5 seconds they are in the plasma field. The safe zone gradually shrinks in size as additional reinforcements appear.
Floor 10
- One of the enemies is designated as a Leader, who is accompanied by several Attendants. Each attendant provides the leader with 10 percent resistance to both elemental and physical damage. Every 12 seconds, the leader will heal for 5 percent health for every attendant on the field.
Floor 11
- Geo DMG dealt by party members increased by 60 percent.
- Physical DMG dealt by party members increased by 60 percent.
Floor 12
- For this floor only, the ley line flow will be normal.
For more guides on Genshin Impact, check out Worst Genshin Impact Characters on Pro Game Guides.