
Relay Stone puzzles are rampant in Inazuma. These puzzles are simple in theory—players must create an Electro Current by connecting Discharge and Cumulation Stones with Relay Stones. But with the game's penchant for putting in all sorts of confusing mechanics, these puzzles can be more troublesome than they initially seem. There are eight Relay Stone puzzles in Tsurumi Island—here's how to solve them.
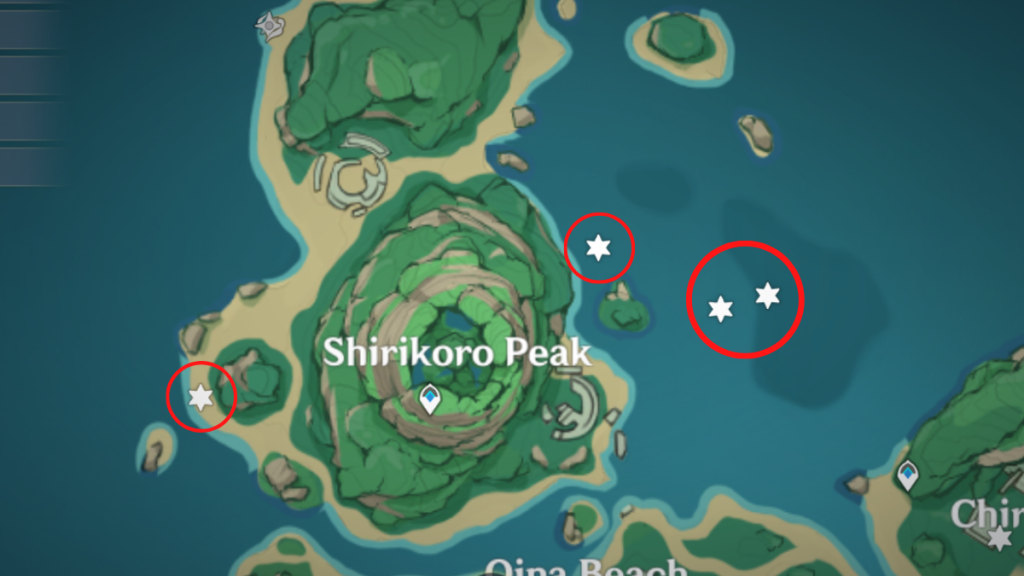
Shirikoro Peak
There are four Relay Stone puzzles in Shirikoro Peak, the first three of which are necessary to complete the A Particularly Particular Author World Quest, a prerequisite to unlocking the rest of the island.
Check out the four puzzle locations marked up in the image below.
First Puzzle
The first is a two-part puzzle where you have to place two Relay Stones to unlock the mechanism to open the door to the cave where the feathers had flown into.
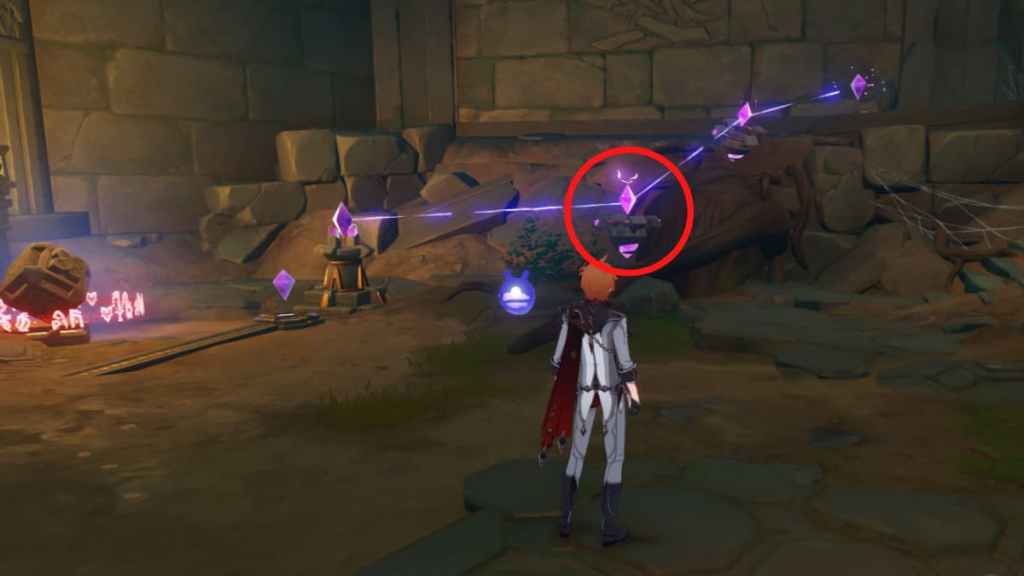
For the first part of the puzzle, pick up the Relay Stone by the bush on the right and place it on the blank space between the Discharge Stone and the existing Relay Stone. Once the Electro Current forms, this part is complete.
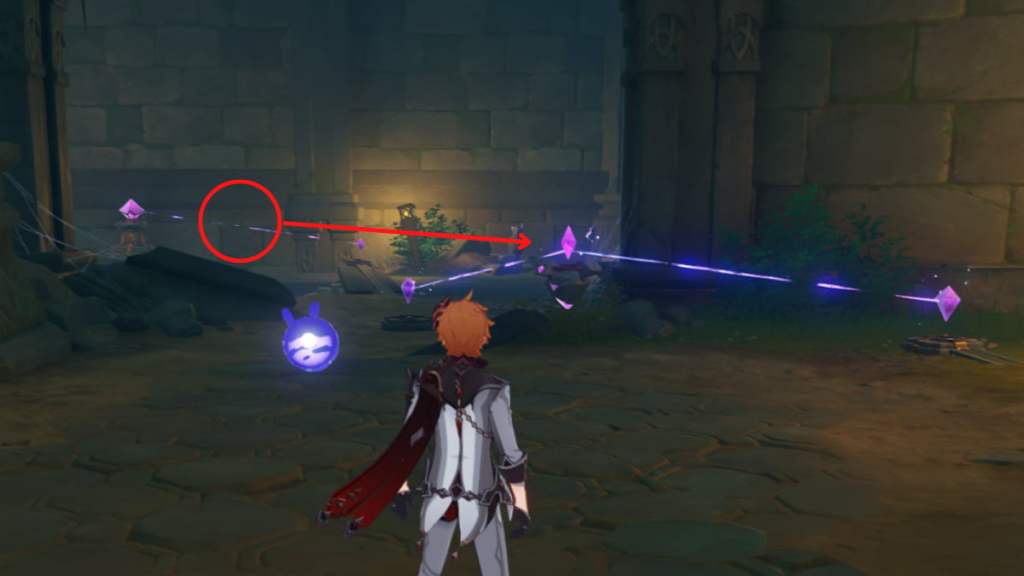
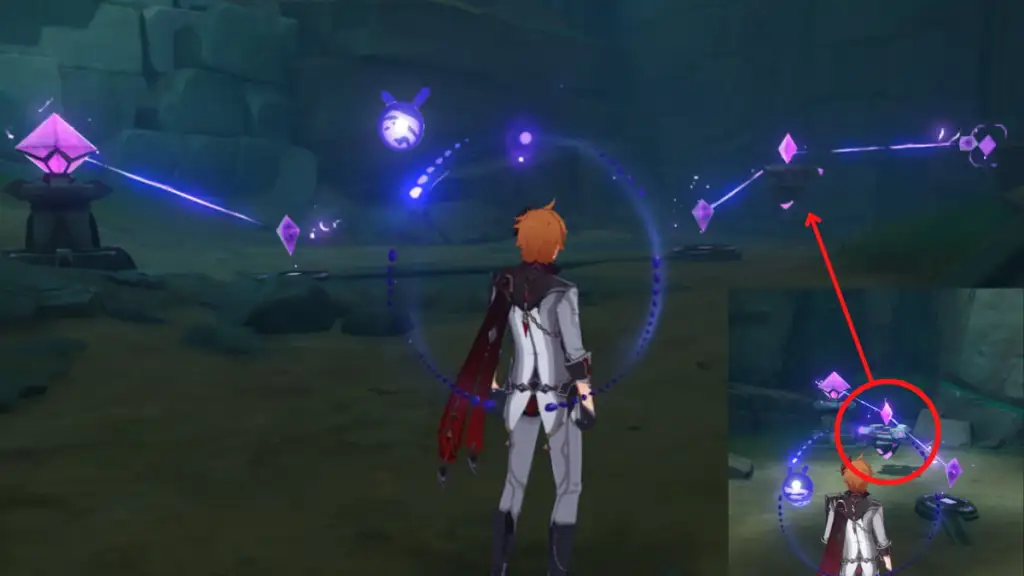
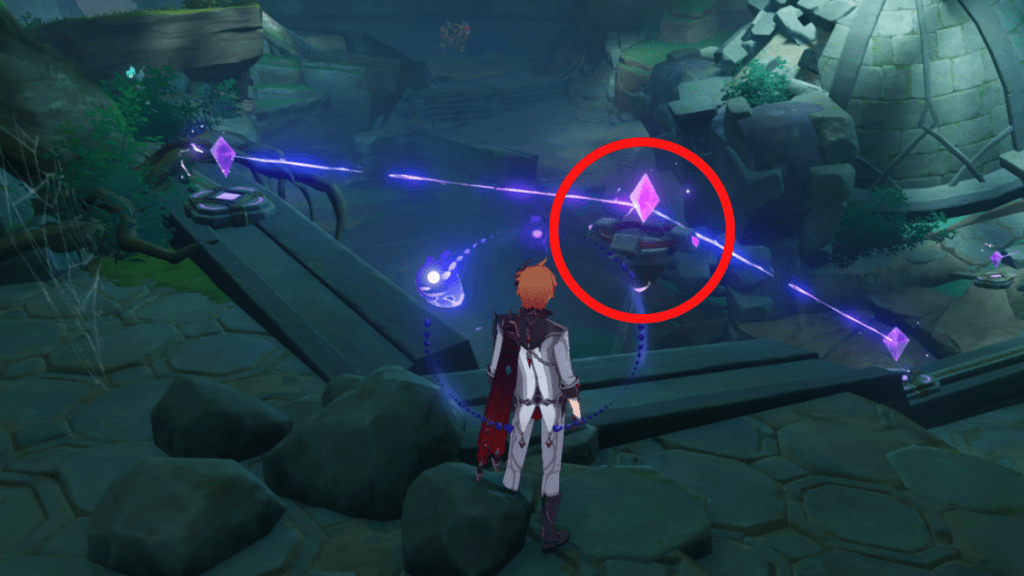
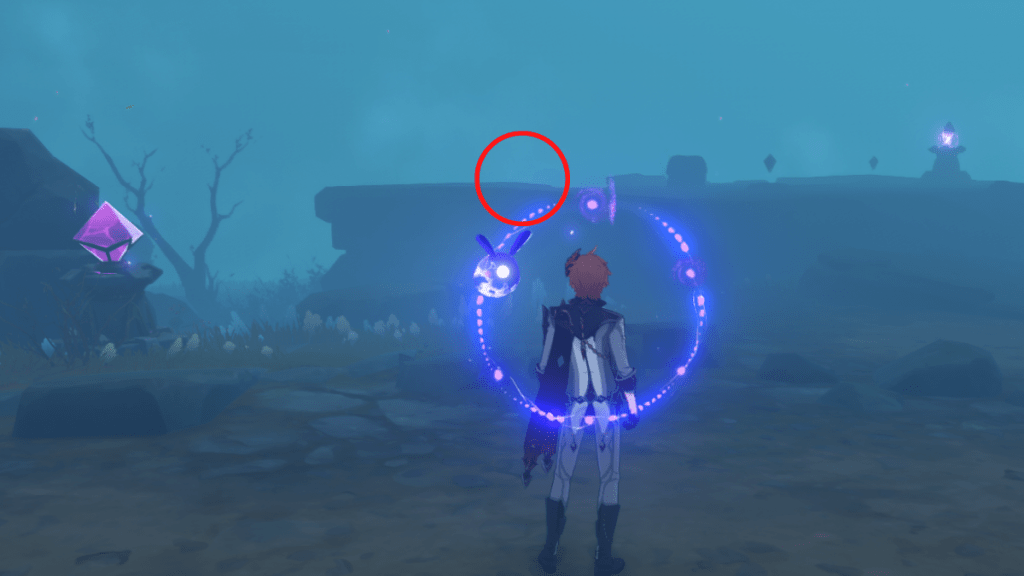
The second part of the puzzle is located to the left of the locked door. You'll find a blank puzzle and an existing Electro Current. Take the Relay Stone from the existing Electro Current deeper inside (marked with a circle on the image above) and transfer it to the middle of the blank puzzle. Doing so will unlock the mechanism and allow you to enter the door.
Second Puzzle
Upon entering the door, you'll find a locked mechanism and three Seelie Courts. Use Elemental Sight to search for the three Seelies and unlock the mechanism, which will drain the water and open a pathway below.
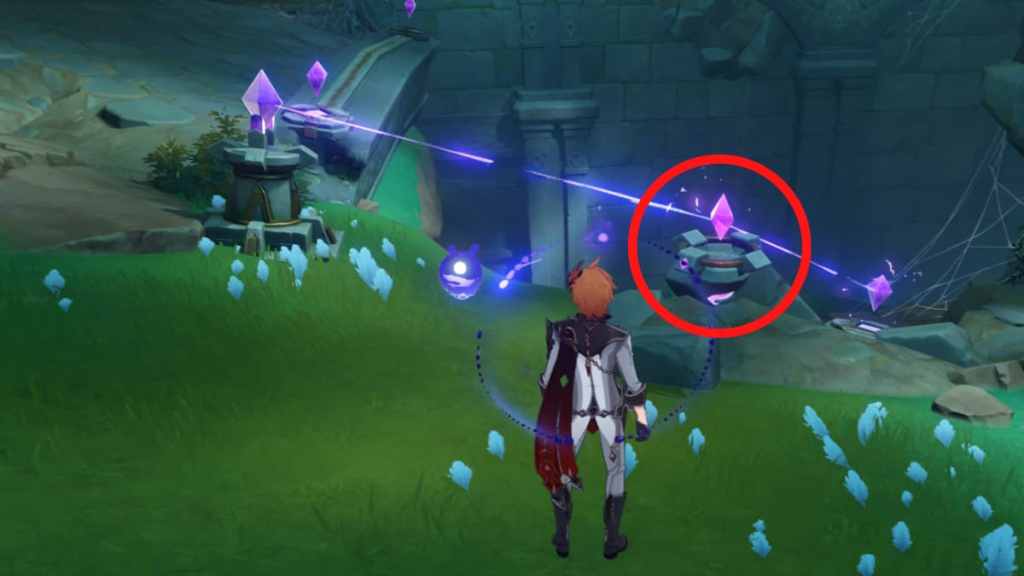
Head to the bottom, where you'll find a blank puzzle and an existing Electro Current. Like the first puzzle, pick up the Relay Stone from the existing Current and place it in the blank space between the Cumulation Stone on the ground and on the wall.
Third Puzzle
There's another Relay Stone by the cobwebs near the second puzzle. Pick that up and climb up, where you'll find another Relay Stone behind the dome. You can carry more than one Relay Stone at a time, so pick both up to solve the two-part puzzle number three.
Place the first Relay Stone between the two Cumulation Stones on the front-left of the dome. This puzzle requires careful positioning, so if the Electro Current doesn't appear on your first try, make micro-adjustments to your position and try again.
The second part is located to the right of the first. Simply place the Relay Stone between the Discharge and Cumulation Stones to complete the puzzle. Like the first, this Stone requires careful positioning, so keep trying if the Electro Current doesn't show up right away.
Fourth Puzzle
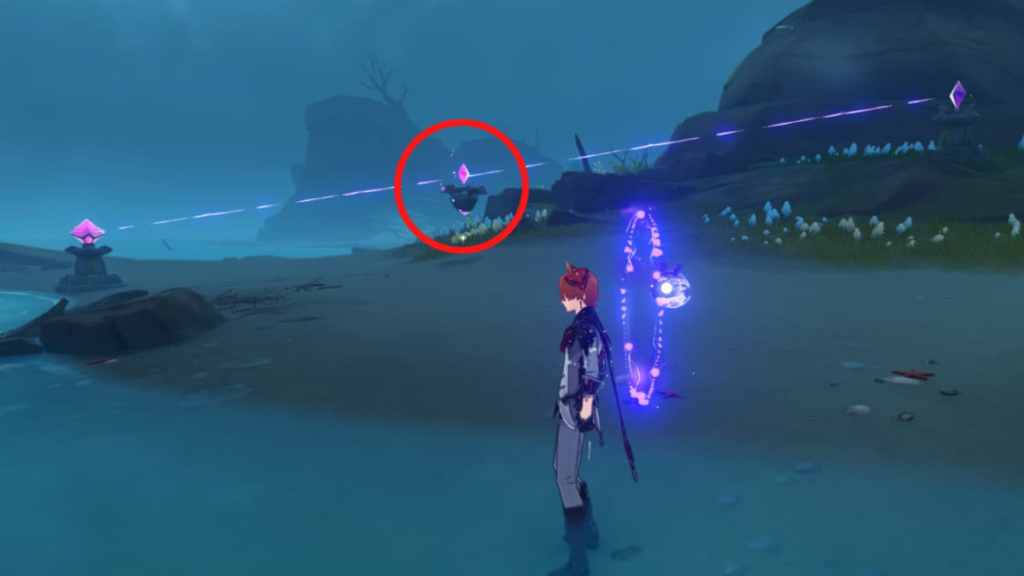
The fourth puzzle is located on the beach left of Shirikoro Peak and is also a two-part puzzle. First, head straight to the neighboring small island, which you can see from the puzzle's location. There, you'll find Electro Slimes and a Relay Stone. After picking up the Relay Stone, an Electro Whopperflower will appear, indicating that you're in the right location.
Simply place the Relay Stone between the Discharge and Cumulation stones to complete the first part of the puzzle.
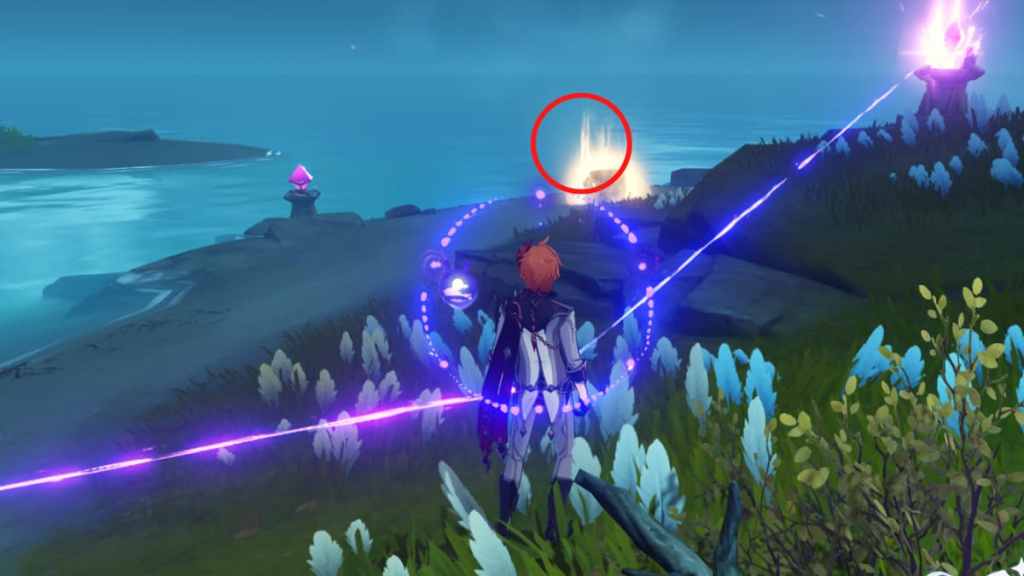
The second part is a bit tricky, so you might have to try multiple times to get it right. You'll find an Electro Seelie nearby. Instead of flying to a chest, it will follow your lead and help you create Electro Currents. Bring your character to the location by the grass in the image above, and the Seelie will fly to the area marked red. This will allow all the Stones to connect, completing the puzzle.
Chirai Shrine

Head to the location marked in the image above to find a clearing containing the Relay Stone puzzle in Chirai Shrine.
Pick up the Relay Stone beside the Thunderbird Statue and place it between the Discharge and Cumulation Stones, which will complete the puzzle.
Related: How to farm Concealed Claw, Unguis, and Talon in Genshin Impact
Mt. Kanna
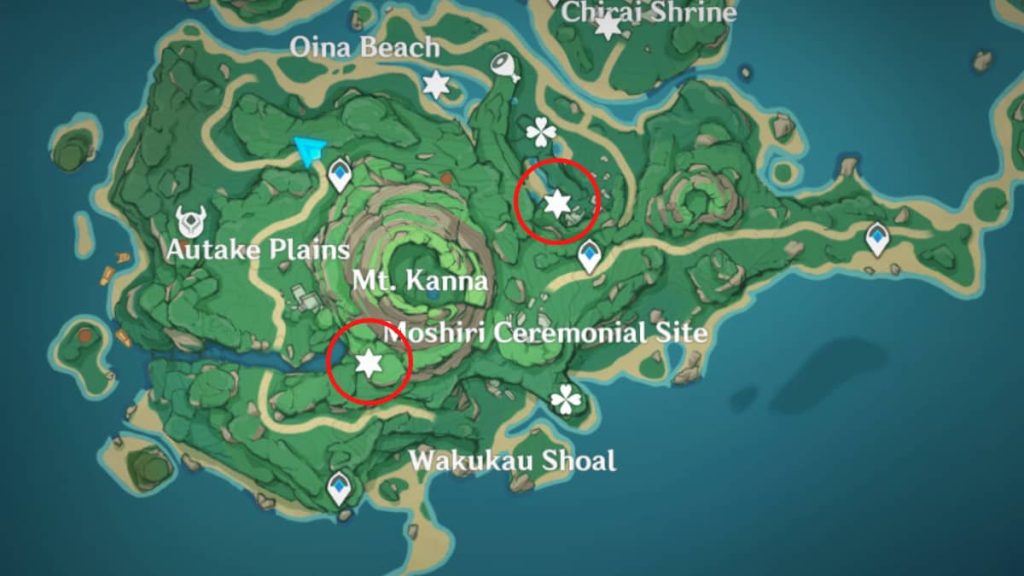
There are two Relay Stone puzzles in Mt. Kanna. Start by heading northeast, near the Moshiri Ceremonial Site.
First Puzzle
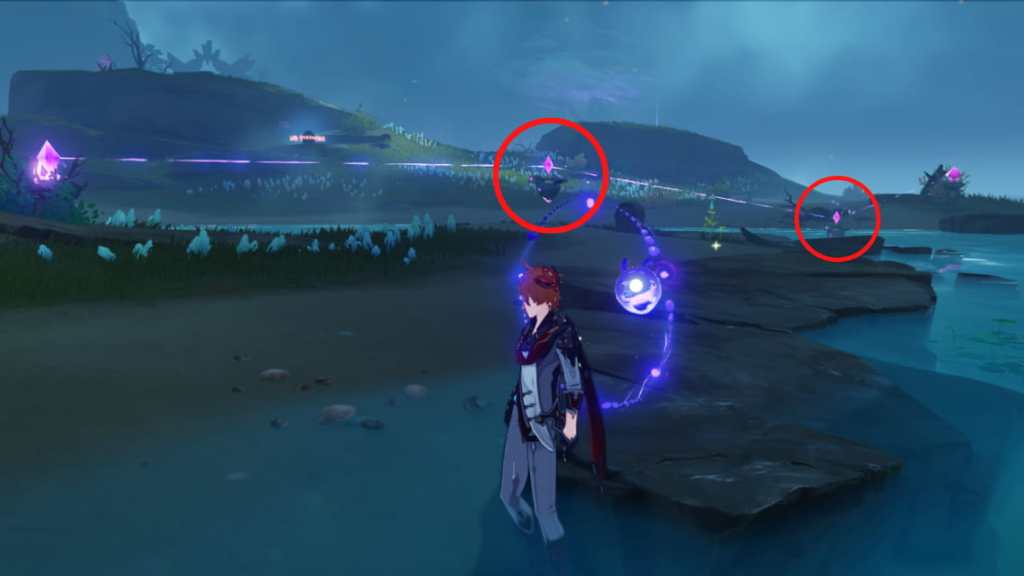
There are two Relay Stones in this puzzle. One is located by the mountain on the left. When you pick it up, Electro Slimes will appear. Eliminate them as they can change the flow of the Current, making it difficult to complete the puzzle. The second is behind the bushes after crossing the cliff on the right.
Place the first Relay Stone between the Discharge and Cumulation Stones on the left, and place the Second Relay Stone between the two on the right. Keep in mind that the second stone should be on the left cliff or the Electro Current won't connect.
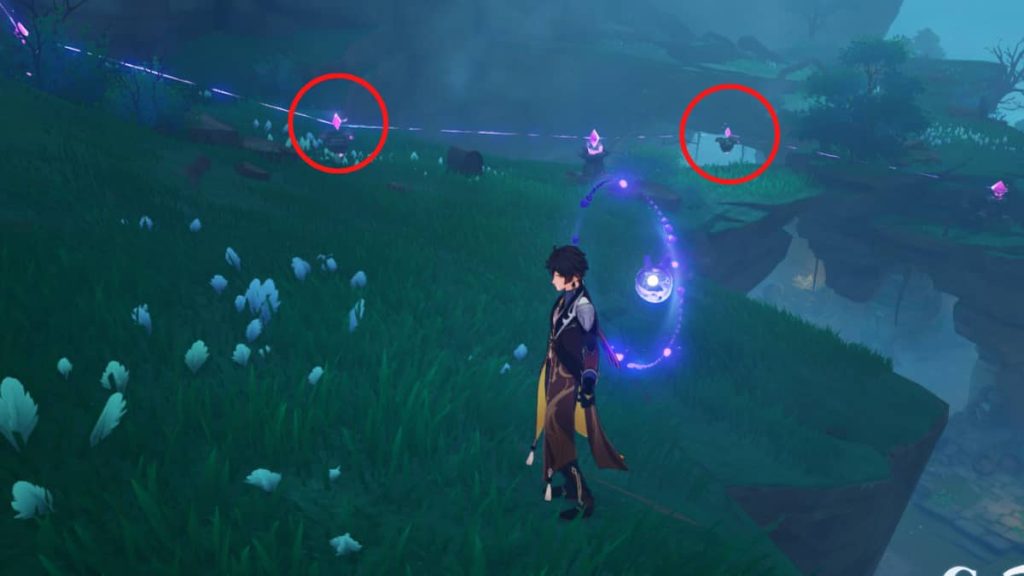
Second Puzzle
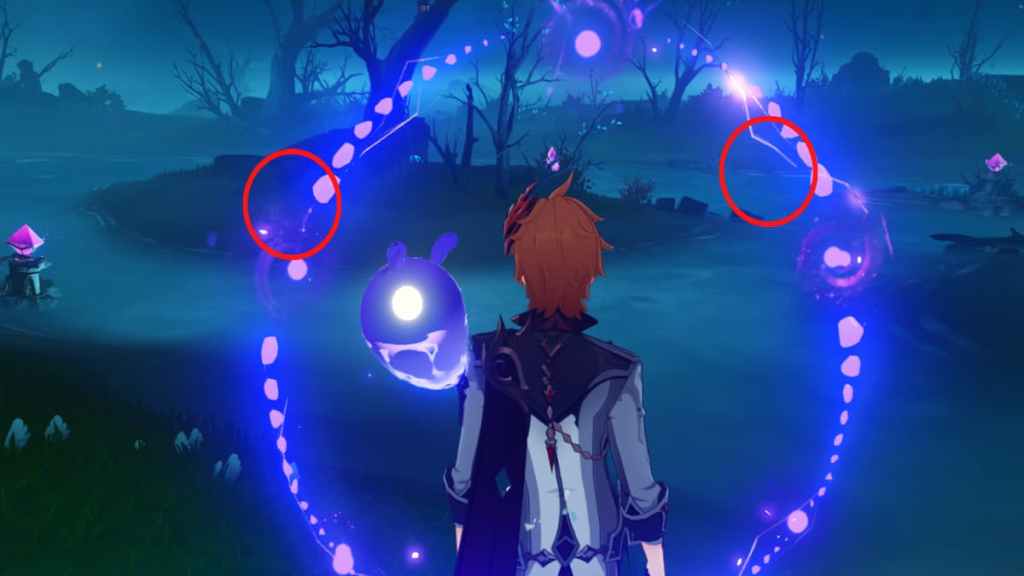
The second puzzle on Mt. Kanna also contains two Relay Stones. It's a little tricky to complete because the area is extremely foggy. Make sure to light up the Electro Torches to prevent getting lost in the mist.
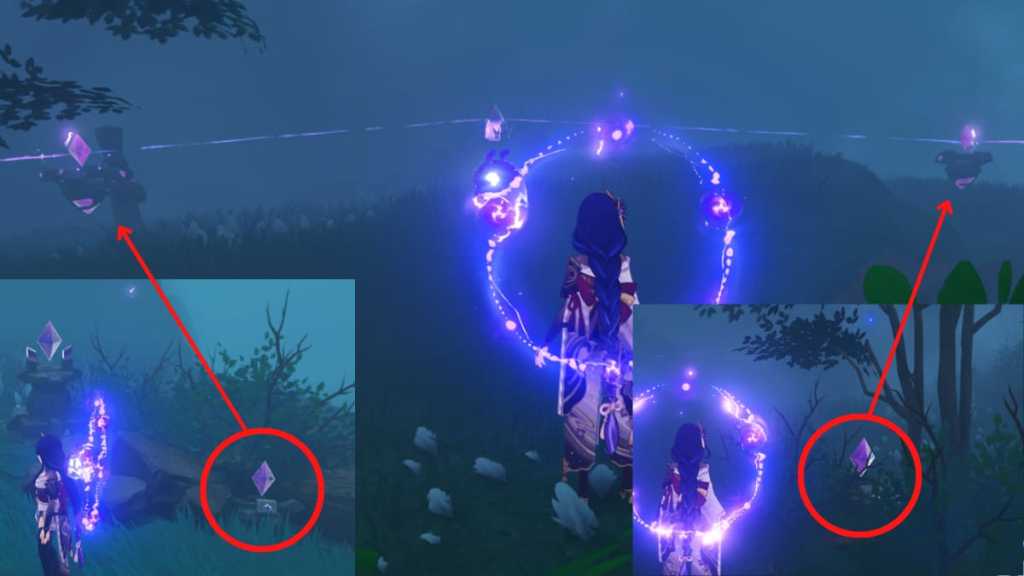
You can find the first Relay Stone beside the Cumulation Stone by the edge of the mountain. The other is beside a tree near the Electro Torch a little further in. Place these two stones on the left and right of the Cumulation Stone in the center, allowing the Electro Current to form.
Oina Beach
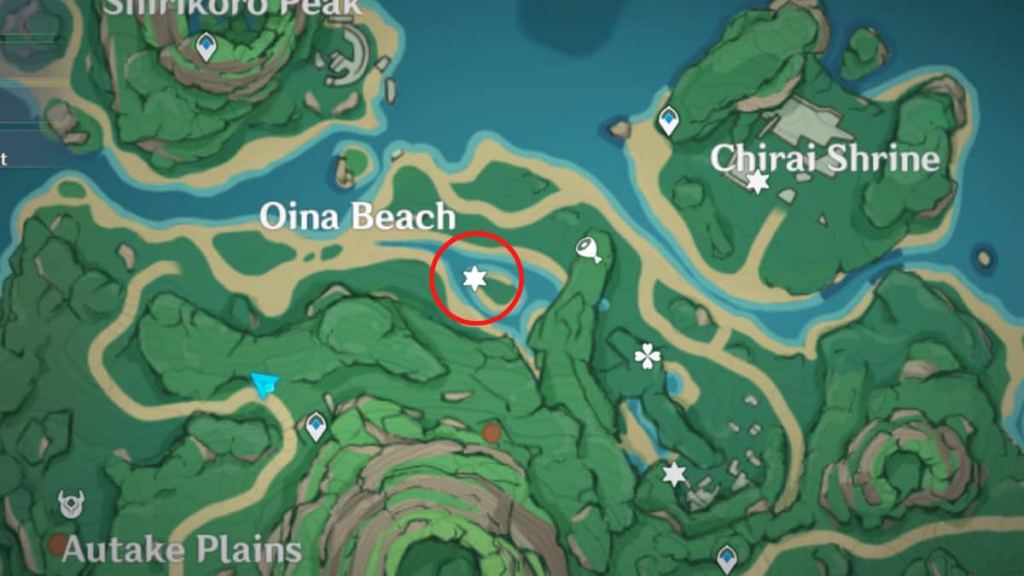
Head to the marked location in Oina Beach to find the puzzle, which contains two Relay Stones located by the water nearby.
Simply place the two Relay Stones between the two Discharge Stones on the left and right and the Cumulation Stone in the middle. Keep in mind that an Electro Current has to form after placing each Relay Stone or the puzzle won't be complete.
Wakukau Shoal
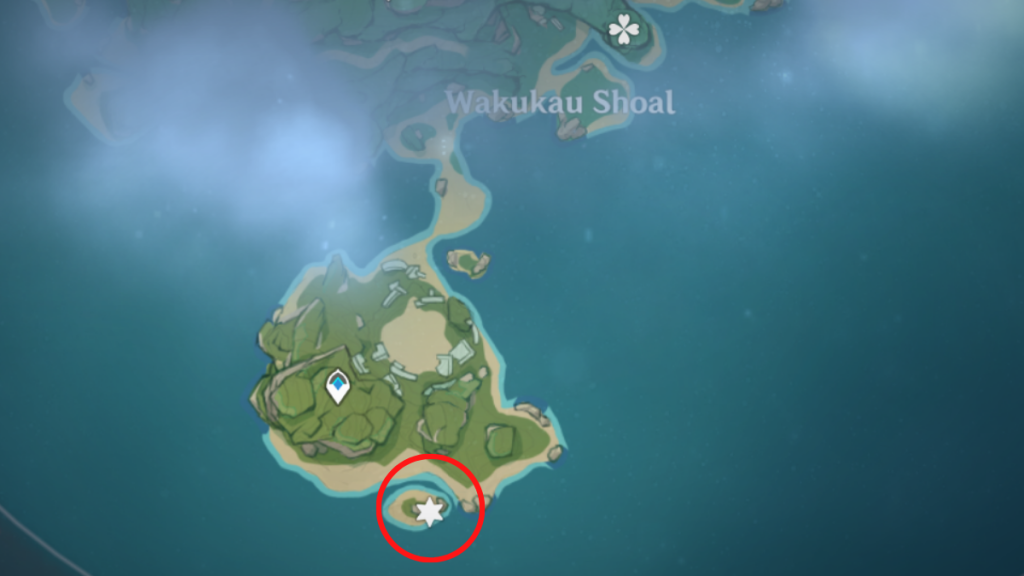
Typically, Relay Stones connect Discharge and Cumulation Stones to one another. But in Wakukau Shoal, you need to connect two Relay Stones to each other to complete the puzzle.
Start by picking up the Relay Stones on both sides of the landform where the puzzle is located. Place one Relay Stone near the Discharge Stone on the right and adjust its position until they connect. Positioning the second Relay Stone can be a bit tricky, as you'll have to find a happy balance between the existing Relay Stone and the Cumulation Stone on the left. If the second Relay Stone won't connect, adjust the position of the first until you form an Electro Current to complete the puzzle.
Start exploring Tsurumi Island with our guide on How to not get lost in the Fog on Tsurumi Island in Genshin Impact – A Particularly Particular Author World Quest Guide.