
The Reverie (Dreamscape) is a dizzying area within Honkai: Star Rail's Penacony, housing 29 Chests among other collectibles. The area unlocks after completing Trailblaze Missions in Penacony.
Follow the steps below to find all 29 Chests that count toward the in-game Chest counter. Puzzles, mini-bosses, and Mission-specific Chests are not included.
Where to find all Treasure Chests in Penacony's The Reverie (Dreamscape) in Honkai Star Rail
Since the map for The Reverie (Dreamscape) is huge, I split it up into sections to make your Chest hunt easier. You can search for the Chests in any order, but I recommend searching for the ones inside the Dreamscapes in the prescribed order below to avoid confusion.
F3 northwest
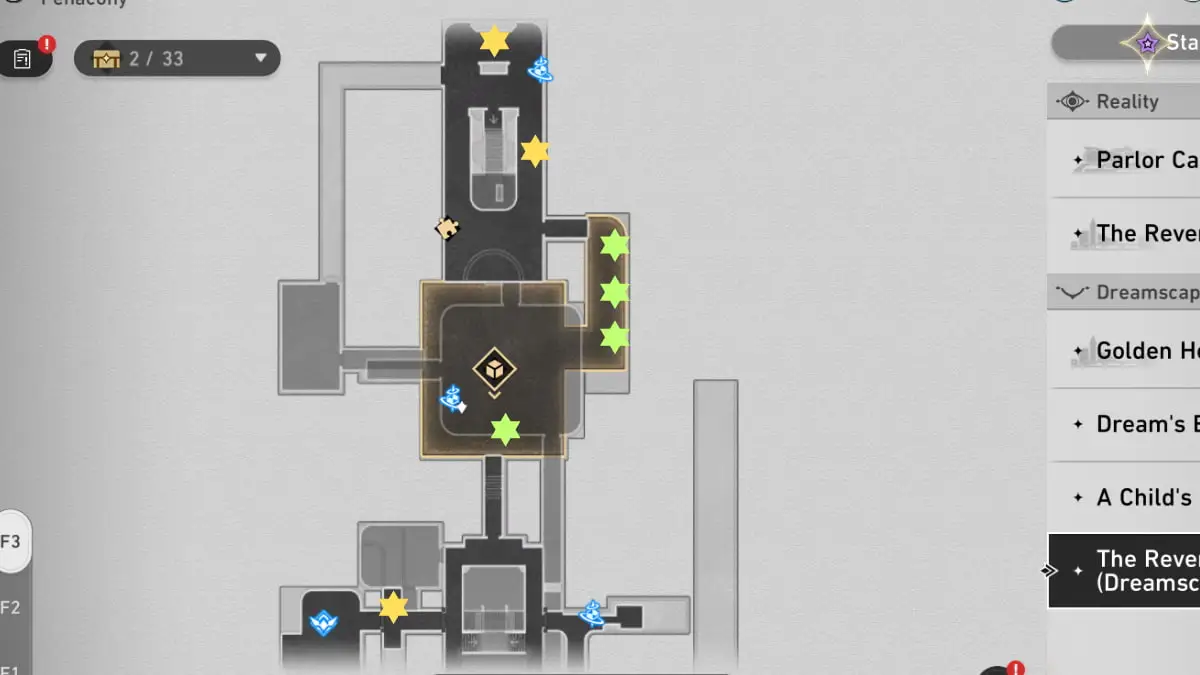
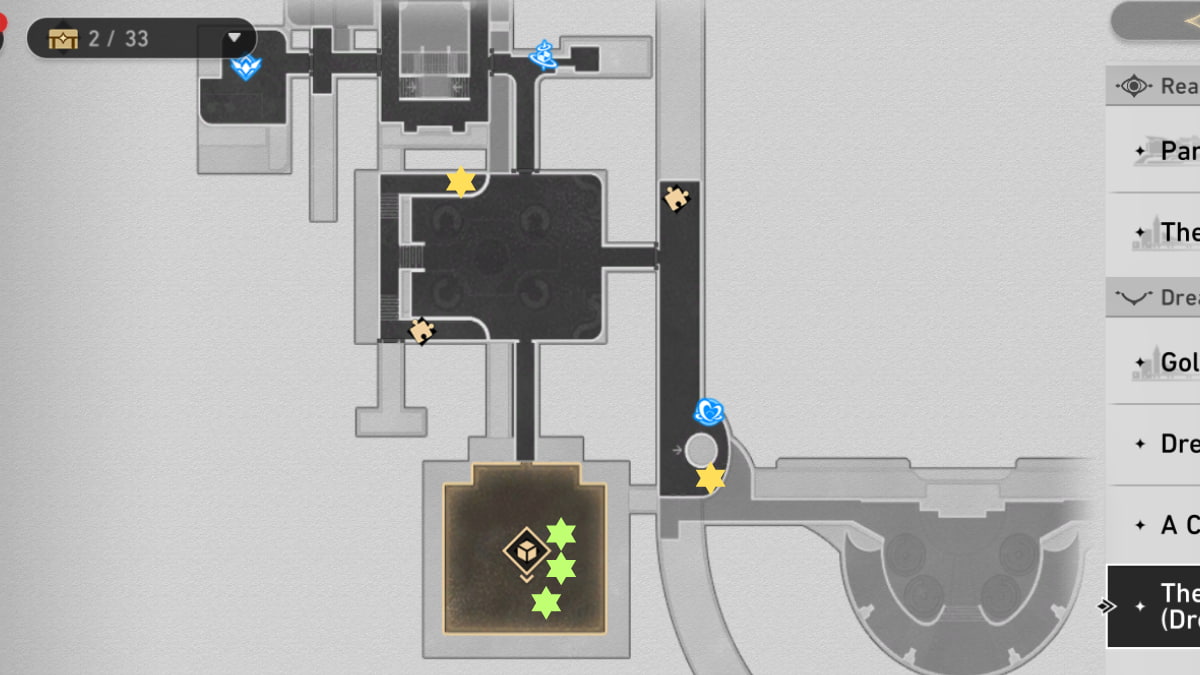
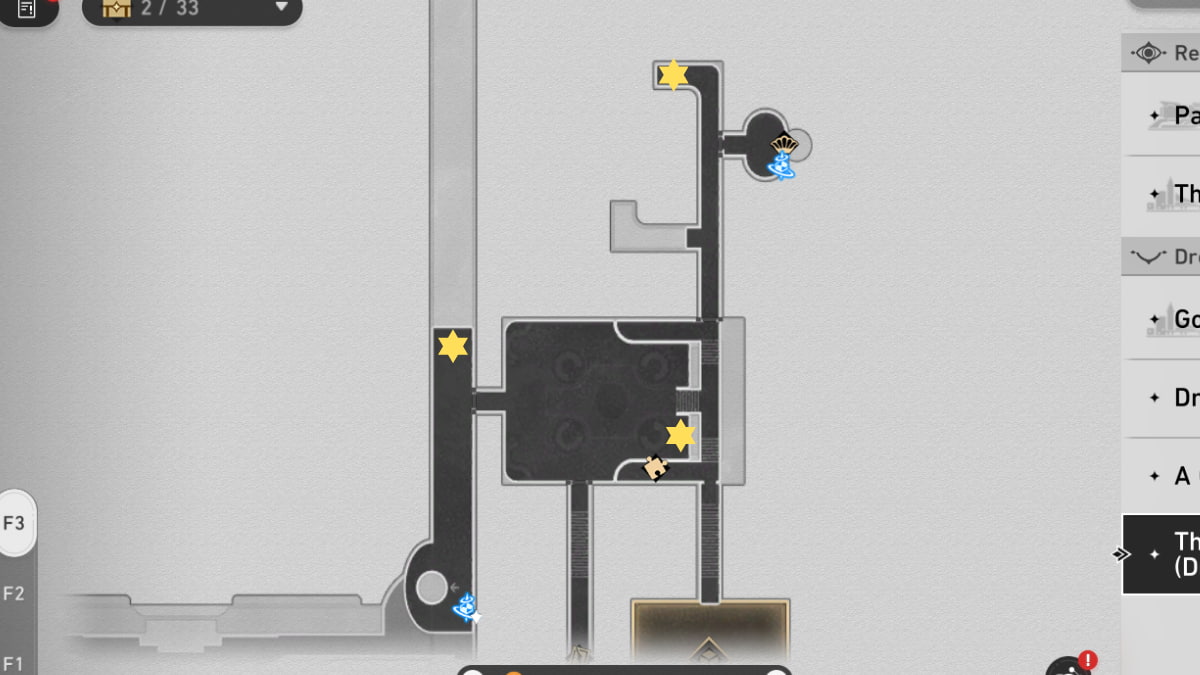
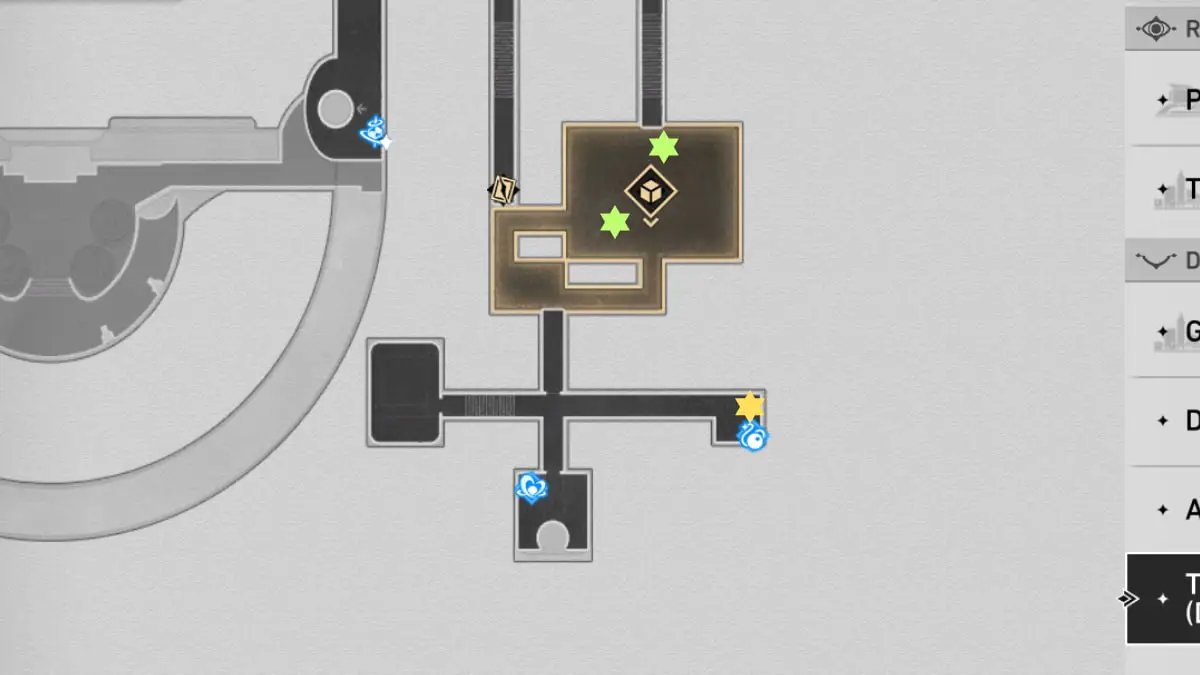
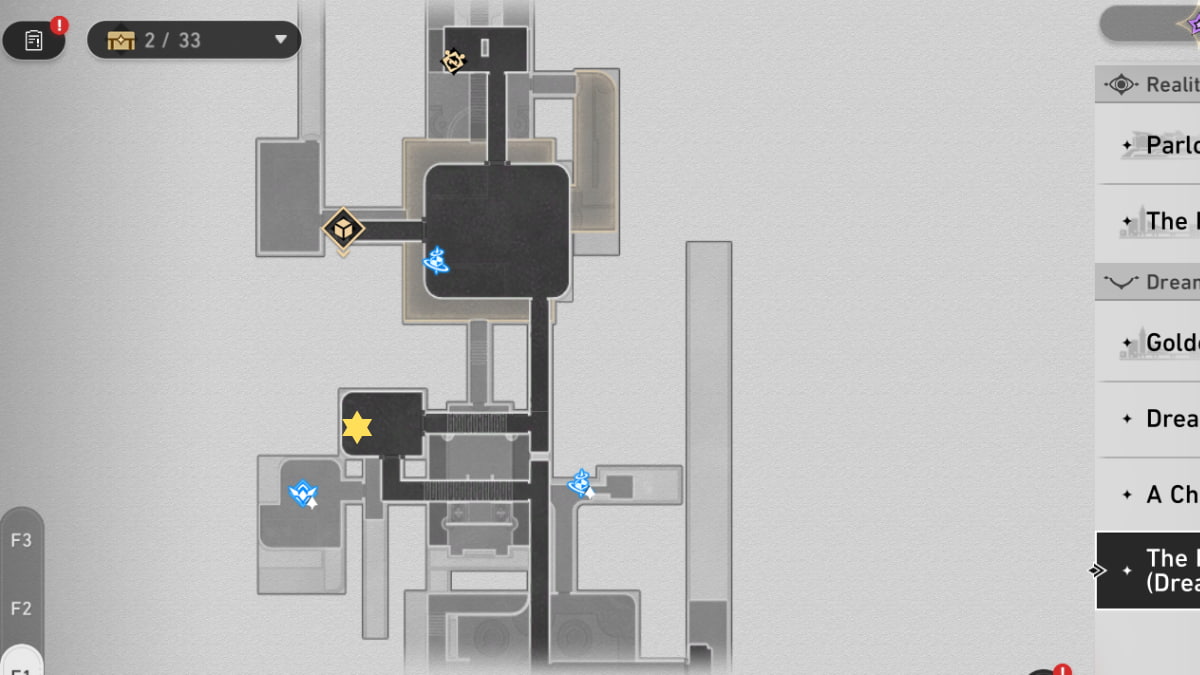
Refer to the yellow pins in the image above to find all Chests in the northwestern part of The Reverie (Dreamscape) F3. The pins marked in green are all inside the three-dimensional Dreamscapes and are harder to find, so follow the steps below to find them.
I recommend claiming the Dreamscape Chests in the exact order below to avoid confusion.
Dreamscape Chest #1

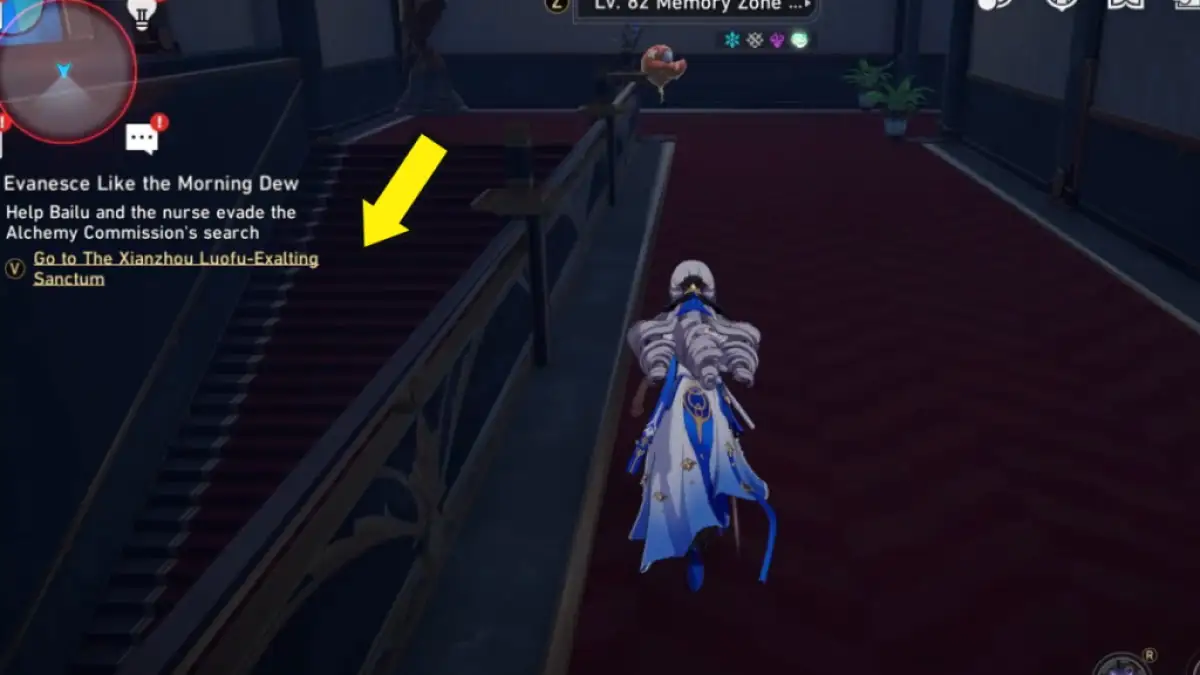
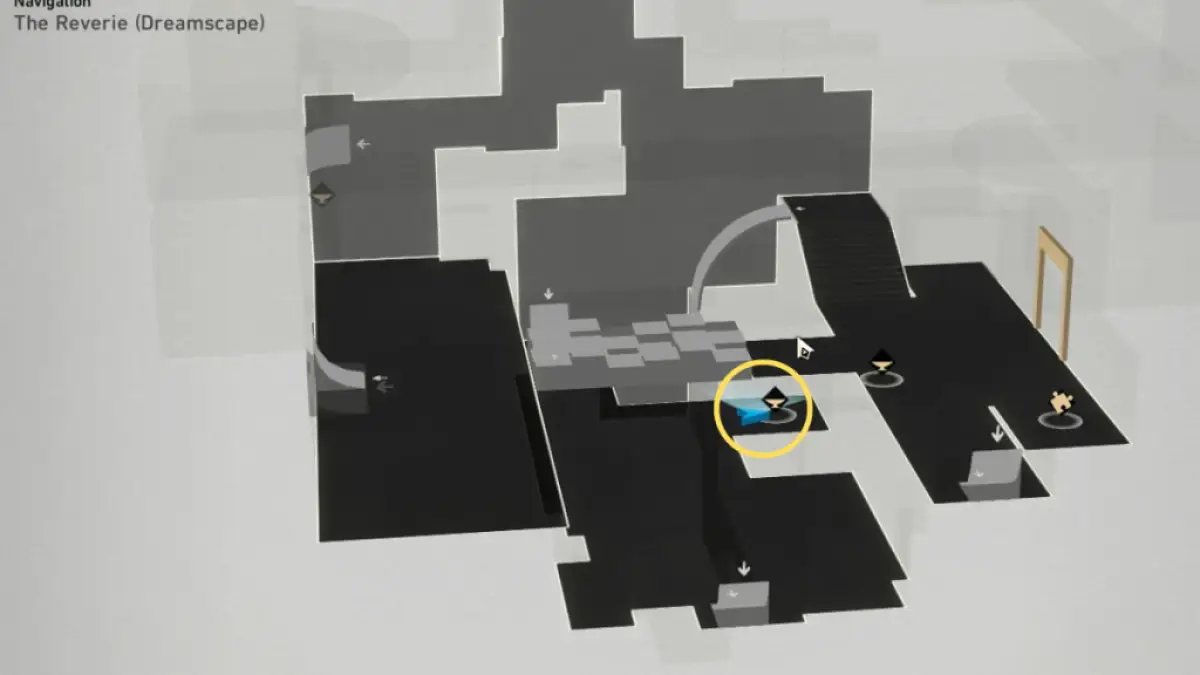
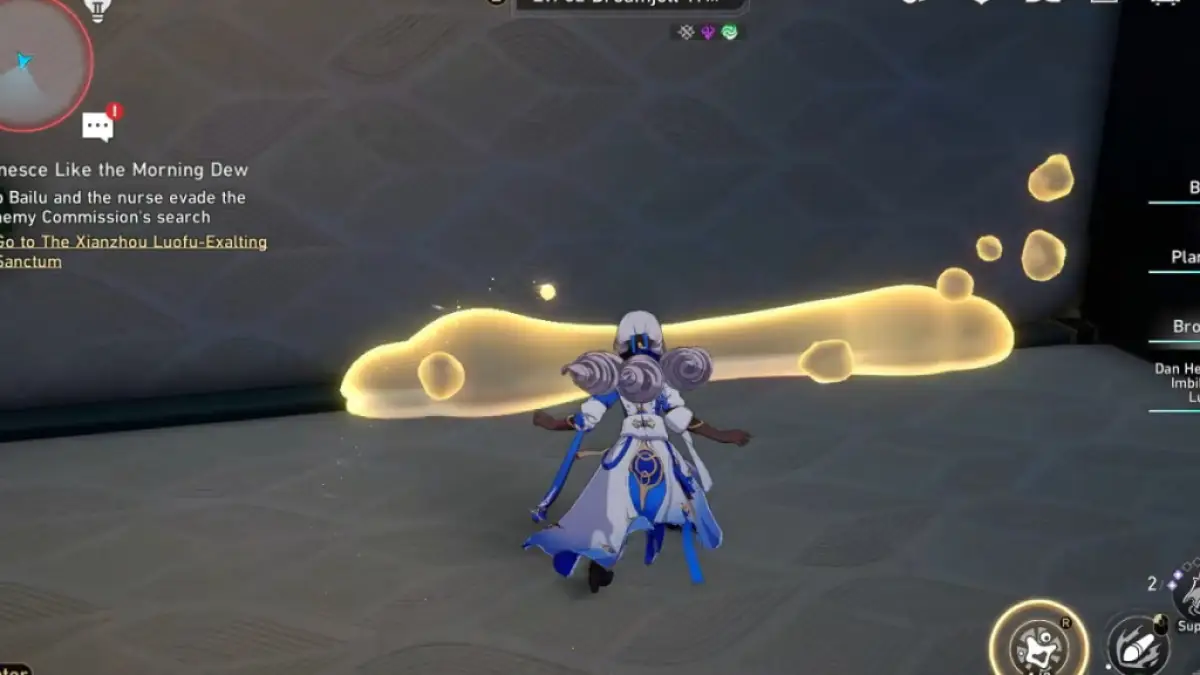
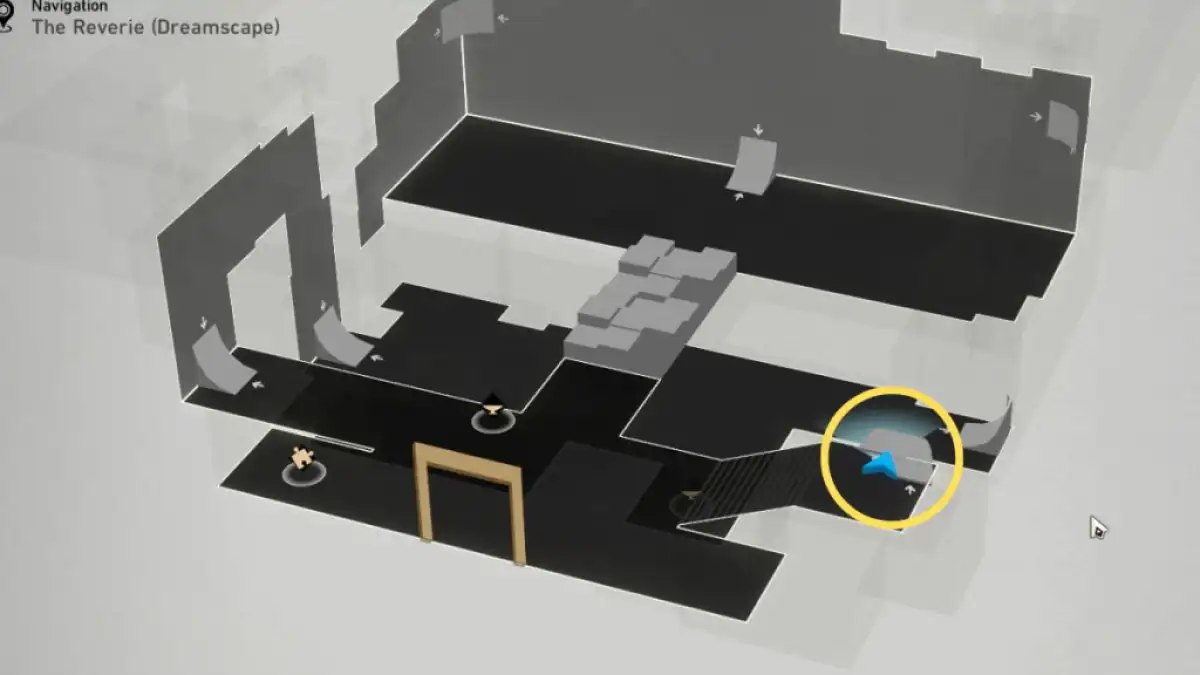
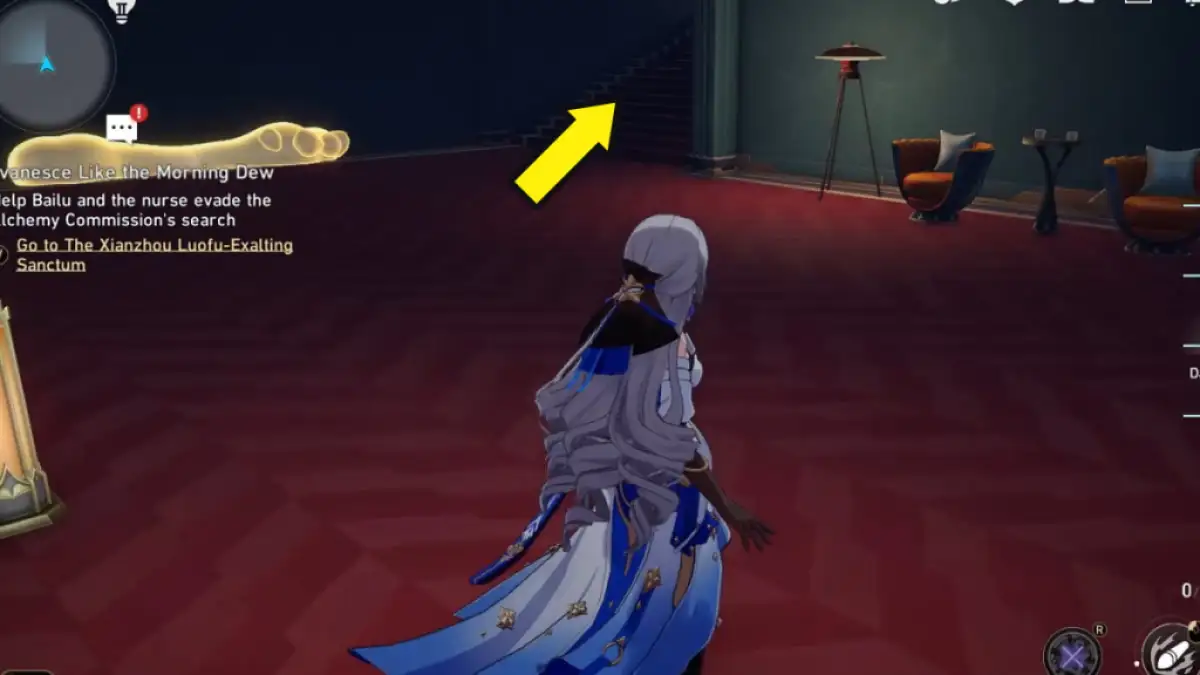
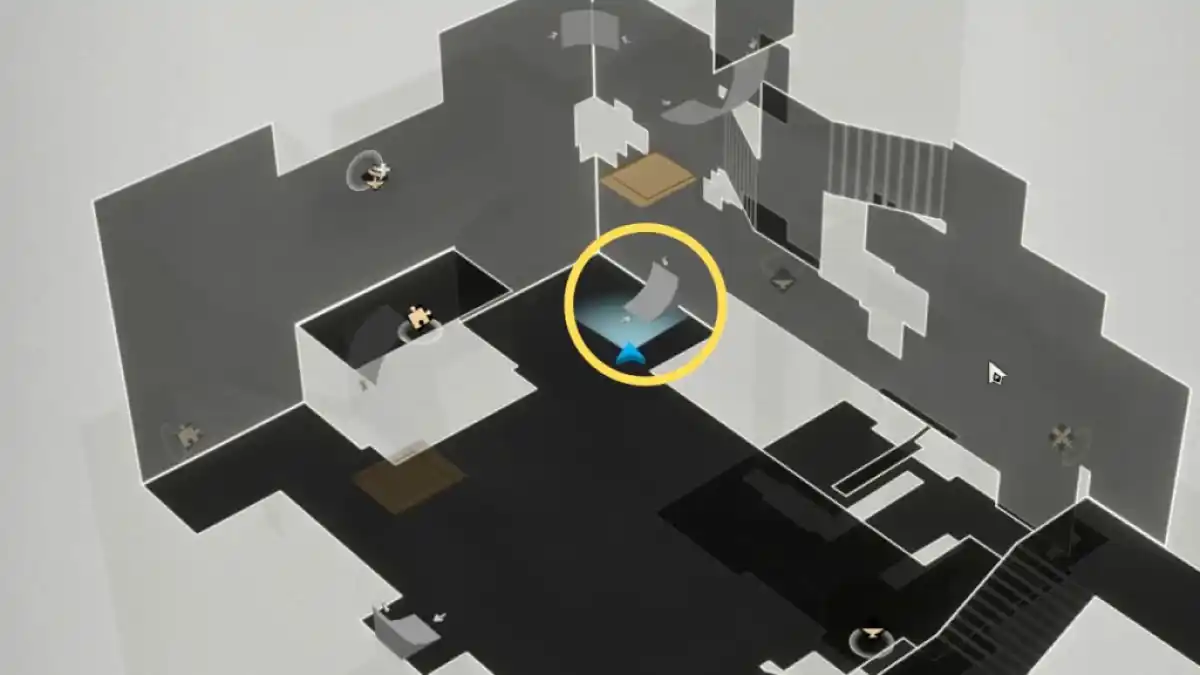
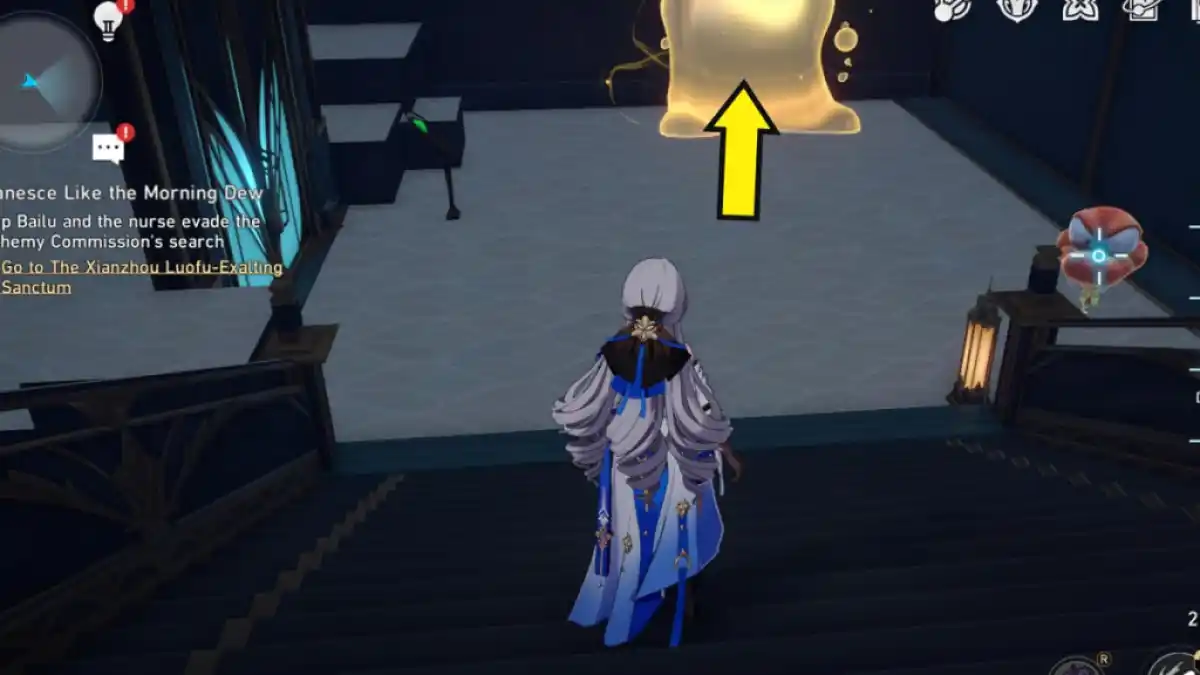
Head to the three-dimensional Dreamscape northwest of F3 via the northern entrance circled in the image above.
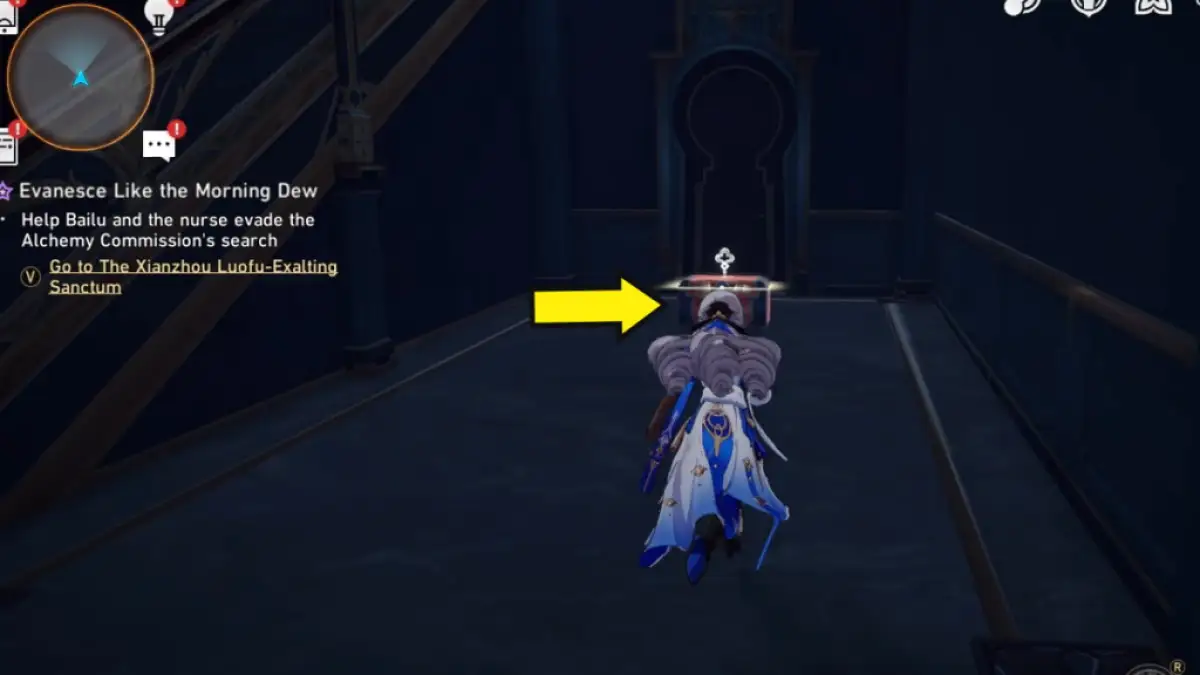
Once inside, go down two flights of stairs. Once on the lowest floor, ignore the room to the right. Instead, make a left u-turn toward the back of the staircase, where you'll find the Chest waiting.
Dreamscape Chest #2
Like the previous Chest, head toward the three-dimensional northwest of F3 through the northern entrance.

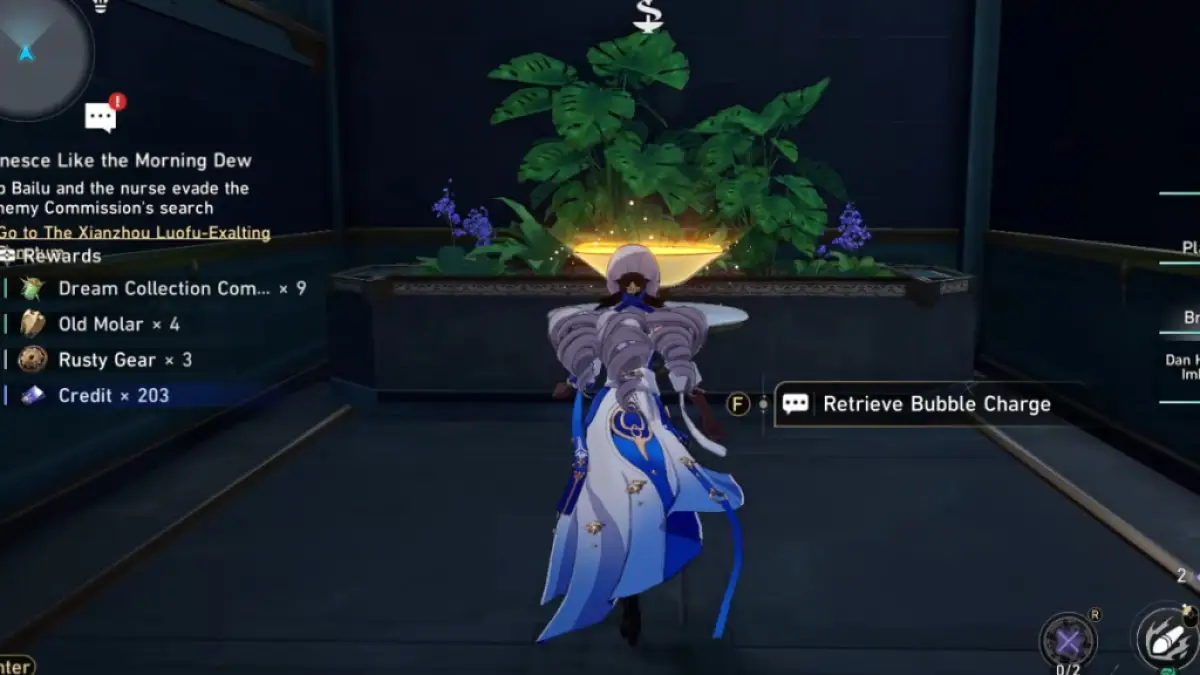
Once inside, go down two flights of stairs. This time, you must enter the room to the right. You'll find yourself in a large clearing with a Bubble Charger. Start by interacting with the Bubble Charger.
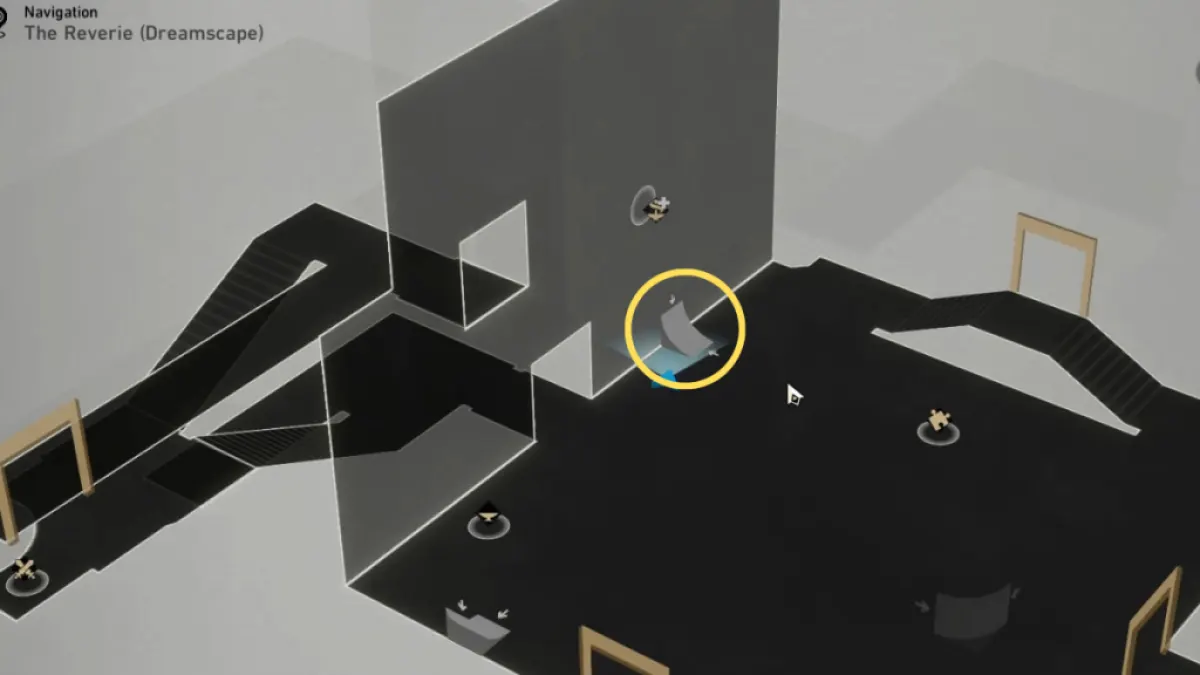

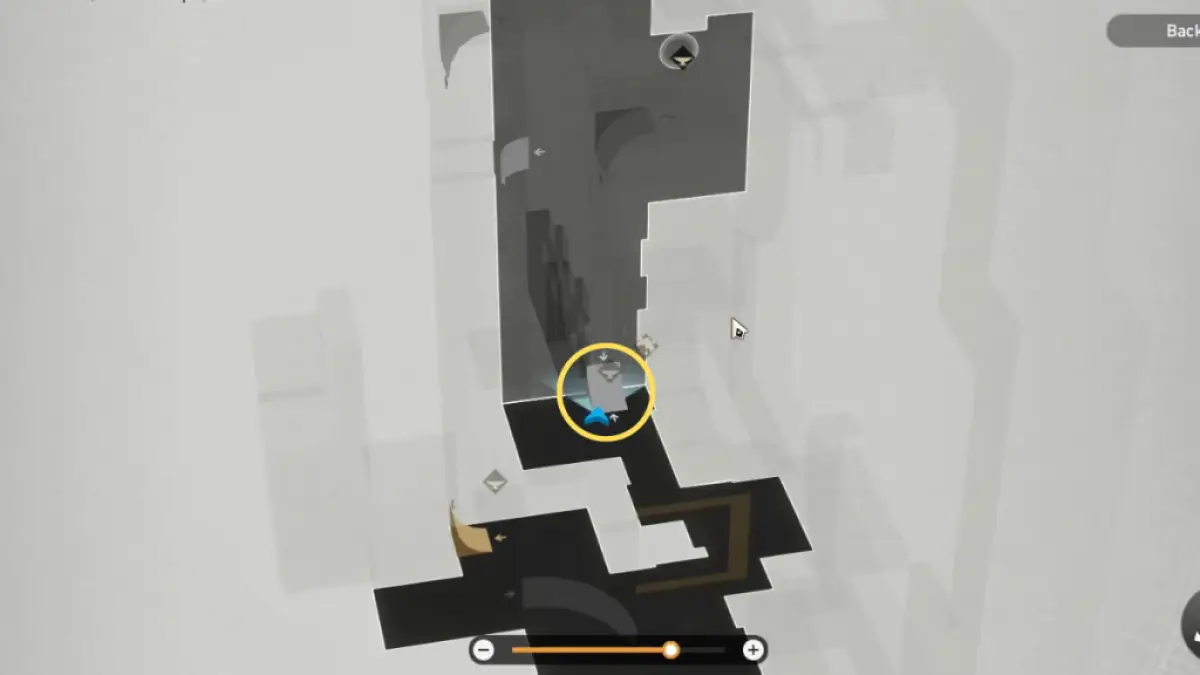
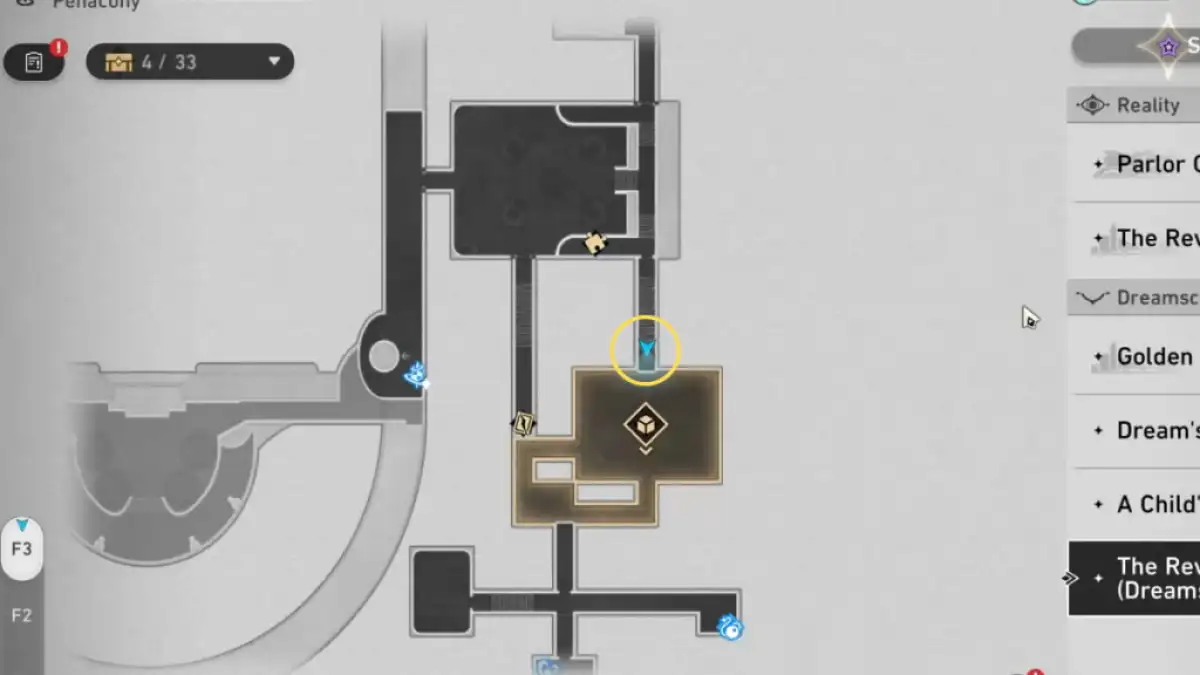
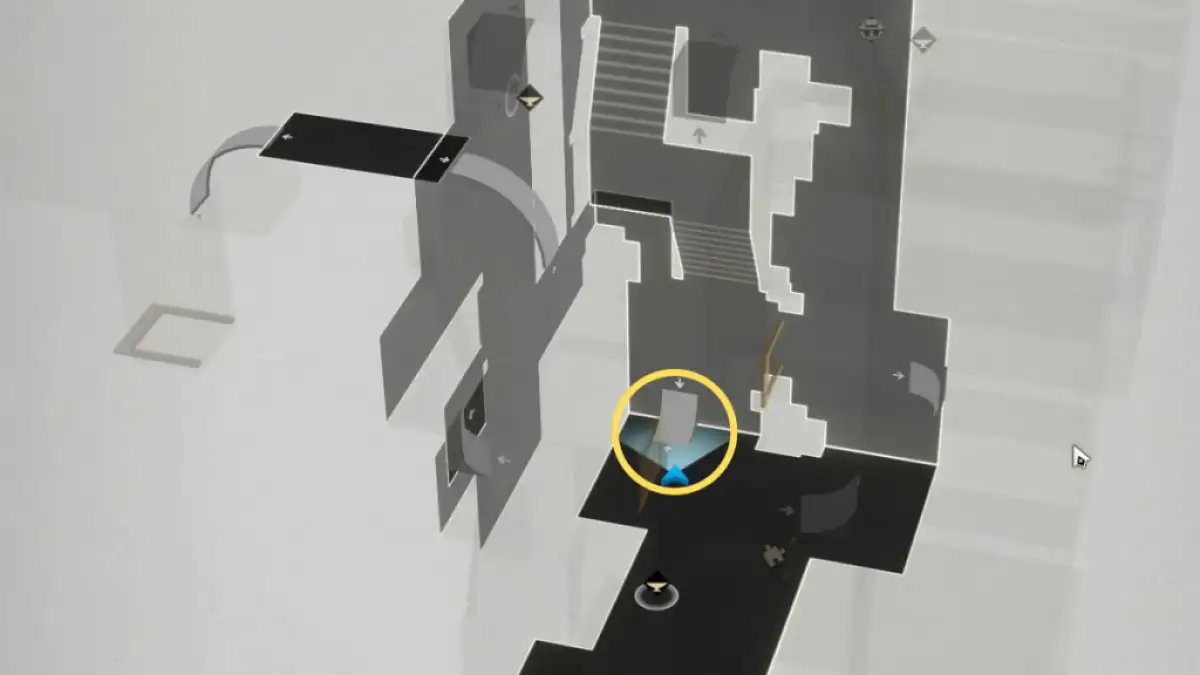
Once you've charged, head to the Bubble Bridge close to the entrance. The map is easy to read in this area, so I encourage you to open it and head to the exact location circled above. Use it to climb to the other side of the wall.
The Chest is hidden behind an arch just up ahead. There are multiple similar structures in the room, so use the balloons as landmarks to find the right one.
Dreamscape Chest #3

From the same room as the previous Chest, interact with the Bubble Charger to retrieve Bubble Charge. Doing so will increase your Charges from one to three. Once done, go back to the large clearing by crossing the same Bubble Bridge you used to enter.
In the large clearing, interact with the Bubble Charger to increase your Charge count to three. It's important as you need exactly three to get to the designated location. Once done, go up the Bubble Bridge up ahead—the exact location is circled in the second image above.
Next, turn left to find another Bubble Bridge. Use it to climb to another part of the wall. Up ahead, you'll find the third and last Bubble Bridge, which you also need to climb to reach your destination. There should have been a total of three Bridges at this point.
Once you reach the top, head to the area circled above to find the Bountiful Treasure, which is part of the official in-game Chest counter.
Dreamscape Chest #4

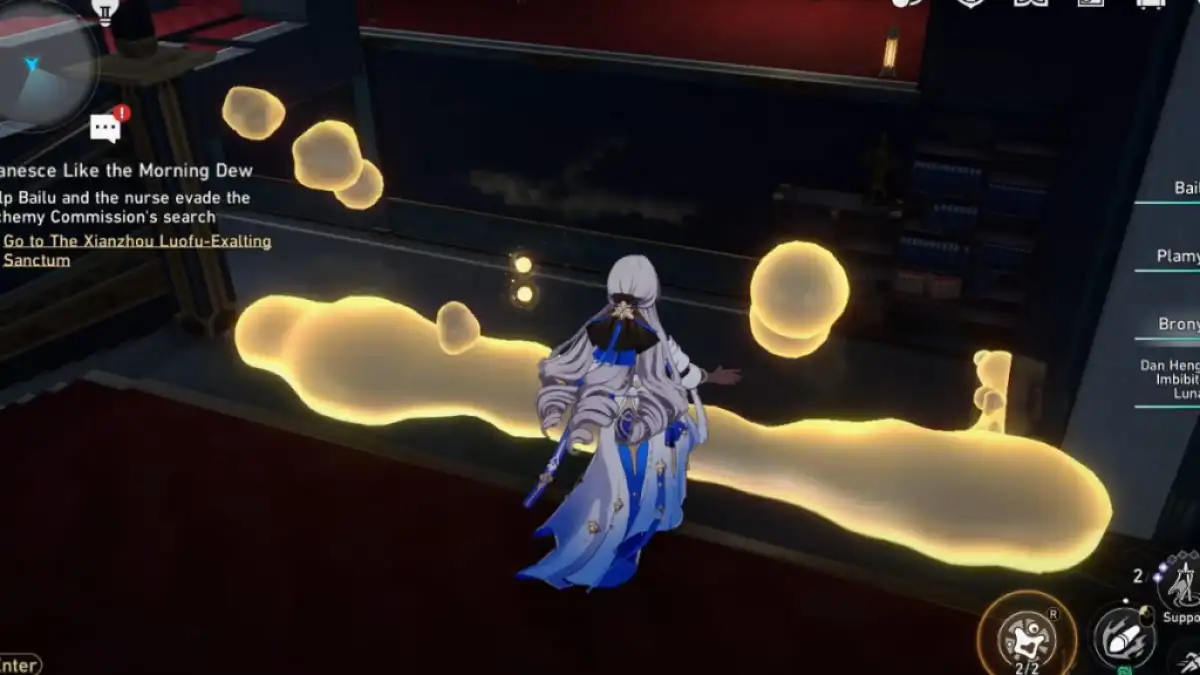
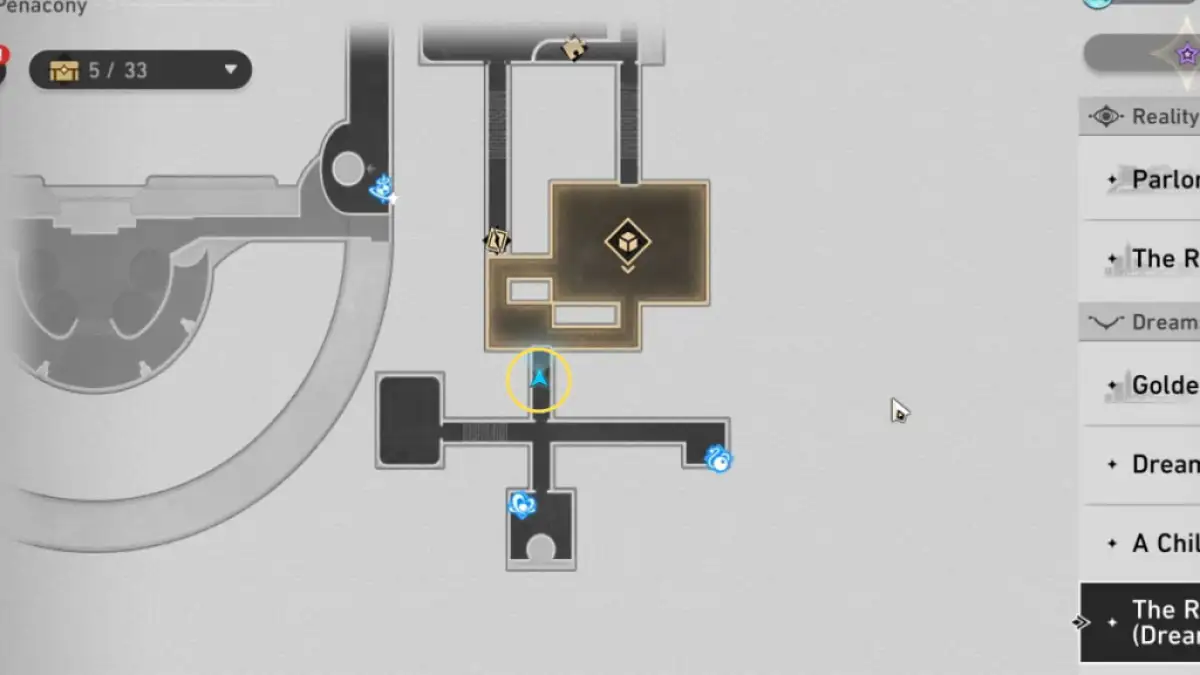
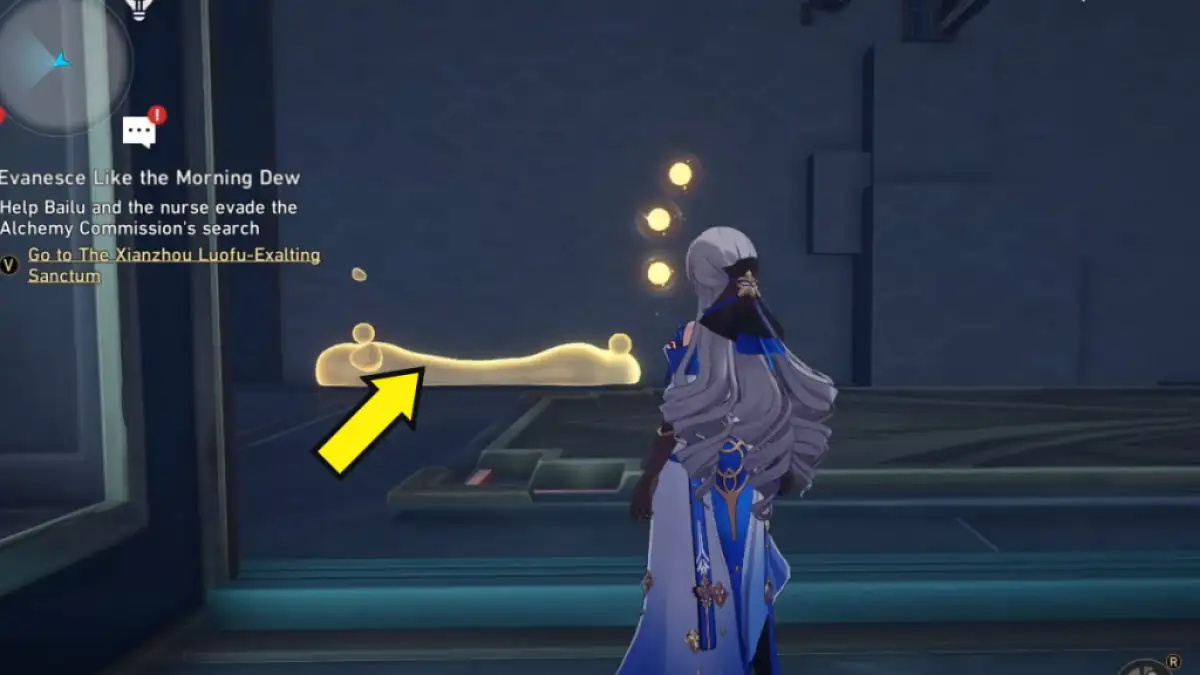
Head to the northwest Dreamscape in F3 via the southern entrance, pictured in the image above.

As soon as you enter the clearing, you'll find the Basic Treasure hiding behind a pillar to the left. Refer to the image above for its exact location.
Related: All Penacony Dream’s Edge Treasure Chest Locations (Map) in Honkai Star Rail
F3 southwest
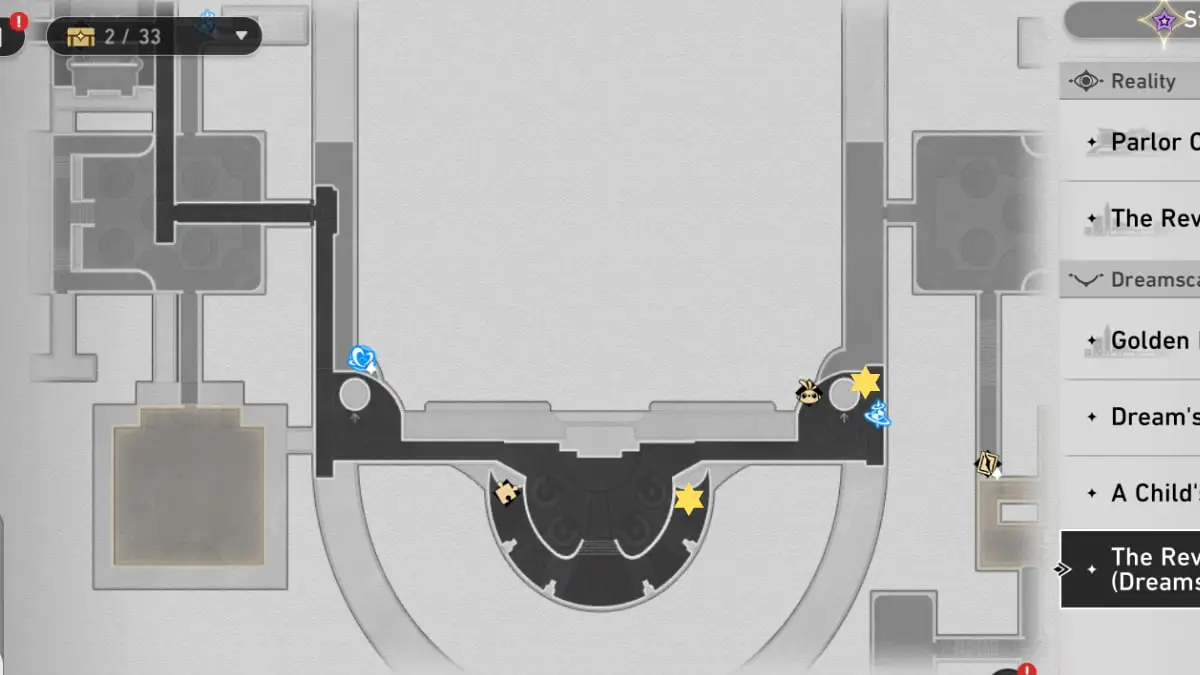
Head to the yellow pins above to find the Chests in the southwestern part of The Reverie (Dreamscape) F3.
The pins marked in green are located inside the three-dimensional Dreamscape. Follow the steps below in the prescribed order to find them.
Dreamscape Chests #1 & #2

Start by heading to the three-dimensional space southwest of F3. Once inside, you'll immediately see a Bubble Charger. Interact with the Bubble Charger, then turn left and go up the Bubble Bridge.
Once you've gone up, you'll find yourself in a narrow area with another Bubble Bridge and nothing else. Simply go up the Bubble Bridge to get to the third area.
Next, you need to recharge, so go straight ahead, then turn right to find a Bubble Charger. Use it to charge up.

Once done, go up the Bubble Bridge up ahead to lead you further into the dreamscape. You'll find yourself in a large, maze-like area. Here, you need to go up another Bubble Bridge.
Go through the path lined by boxes on the left to get to the Bubble Bridge circled above, then climb it to reach your destination.

As soon as you climb up, you'll find Bountiful Treasure, which is part of the in-game Chest counter. But we're not yet done—there's another Chest to claim. Interact with the Bubble Charger.

Once you've charged, go to the Bubble Bridge up ahead, as circled in the image above. Climb up to immediately spot the Basic Treasure.
Dreamscape Chest #3
Head to the southwest three-dimensional space in F3. Upon entering, immediately interact with the Bubble Charger to obtain Charges.
Finally, head to the Bubble Bridge circled in the image above. It slopes downward, so use it to go down and claim the Chest waiting for you.
F3 northeast
Head to the yellow pins above to find all the Chests located in the northeast section of The Reverie (Dreamscape) F3.
F3 southeast
Head to the yellow pin by the Cavern of Corrosion in the southwest part of The Reverie (Dreamscape) F3 to find a Chest.
The Chests marked with green pins are located inside the three-dimensional Dreamscape. Follow the steps below in the specified order to find them.
Dreamscape Chest #1

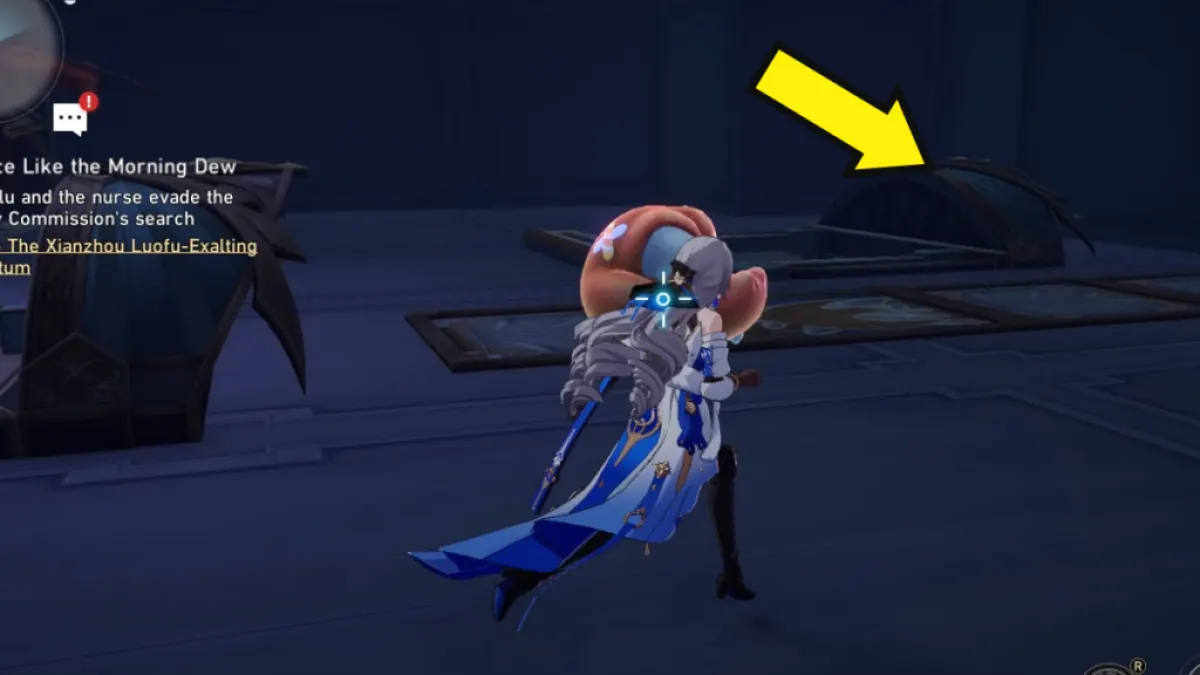
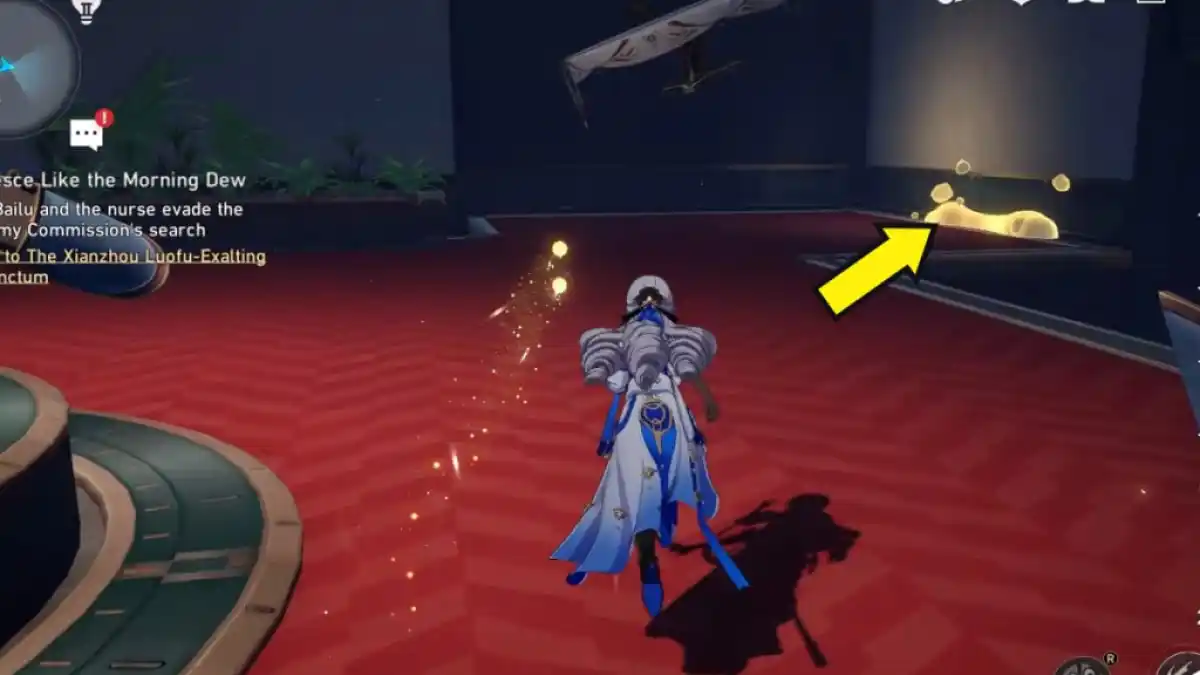
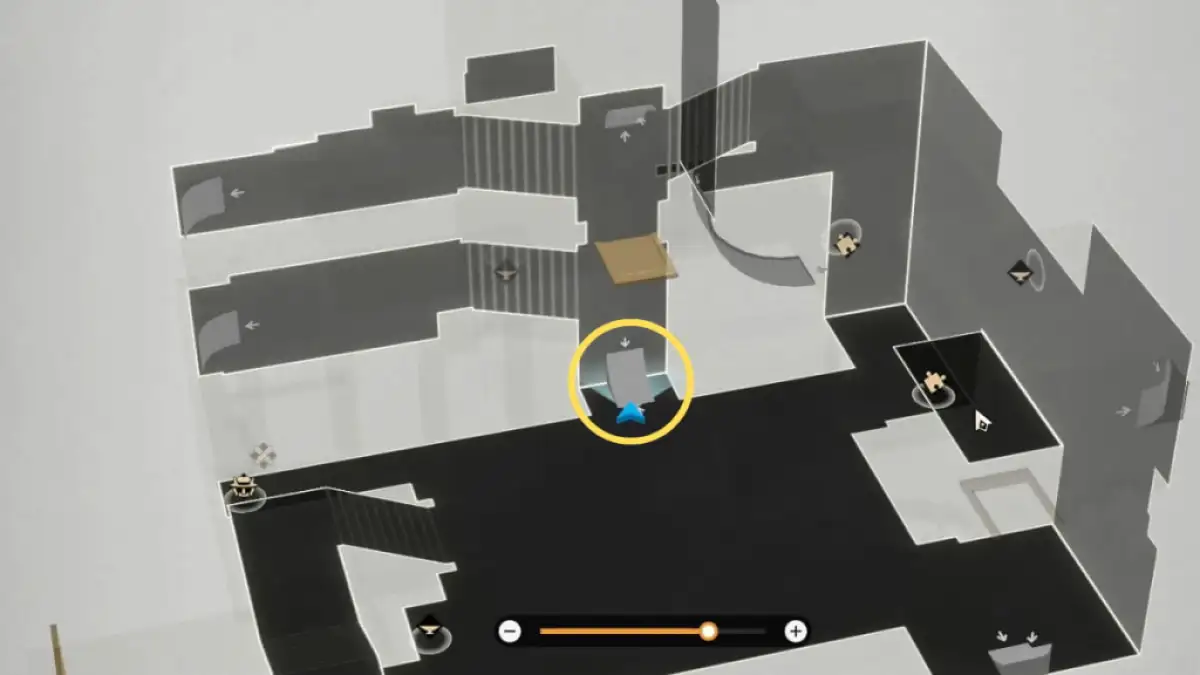
Start by heading to the three-dimensional Dreamscape east of F3 via the northern entrance, circled in the first image above. Once you're inside, interact with the Bubble Charger, then go up the Bubble Bridge ahead. There are a few Bubble Bridges in the room, so refer to the second image above for the exact one.
After climbing, you'll find yourself in a narrow room with another Bubble Bridge up ahead, so climb it.

You'll find yourself in a large, messy room with floating tables. Head to the center of the room to loot the Basic Treasure.
Dreamscape Chest #2
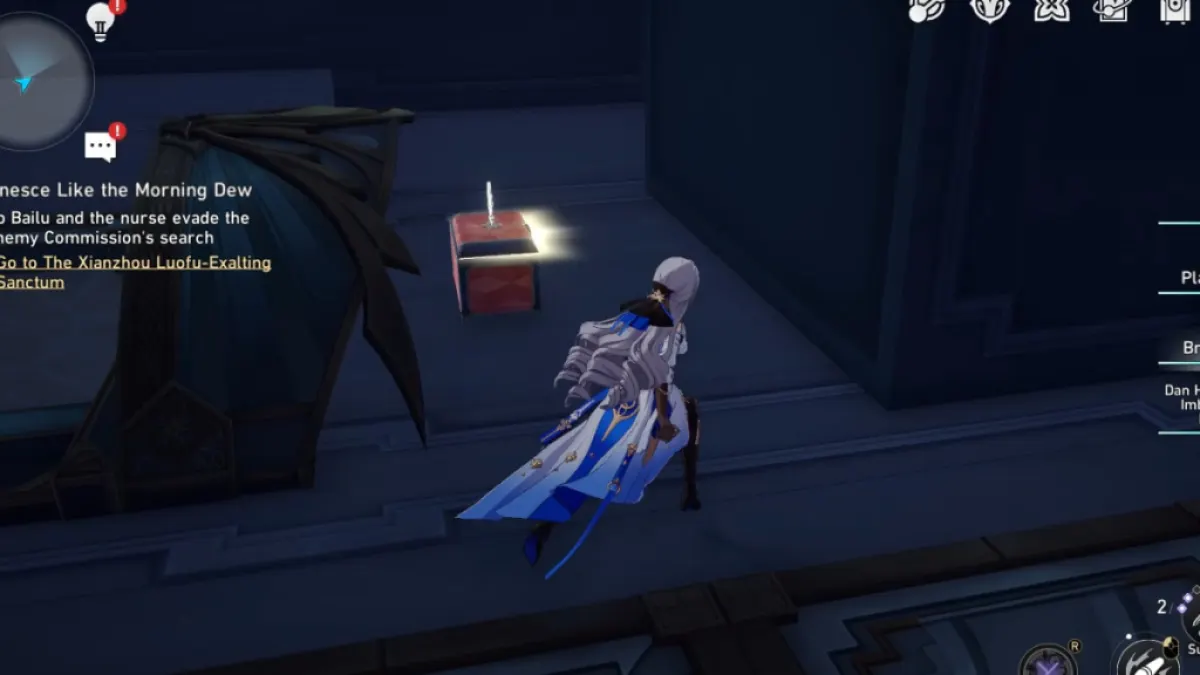
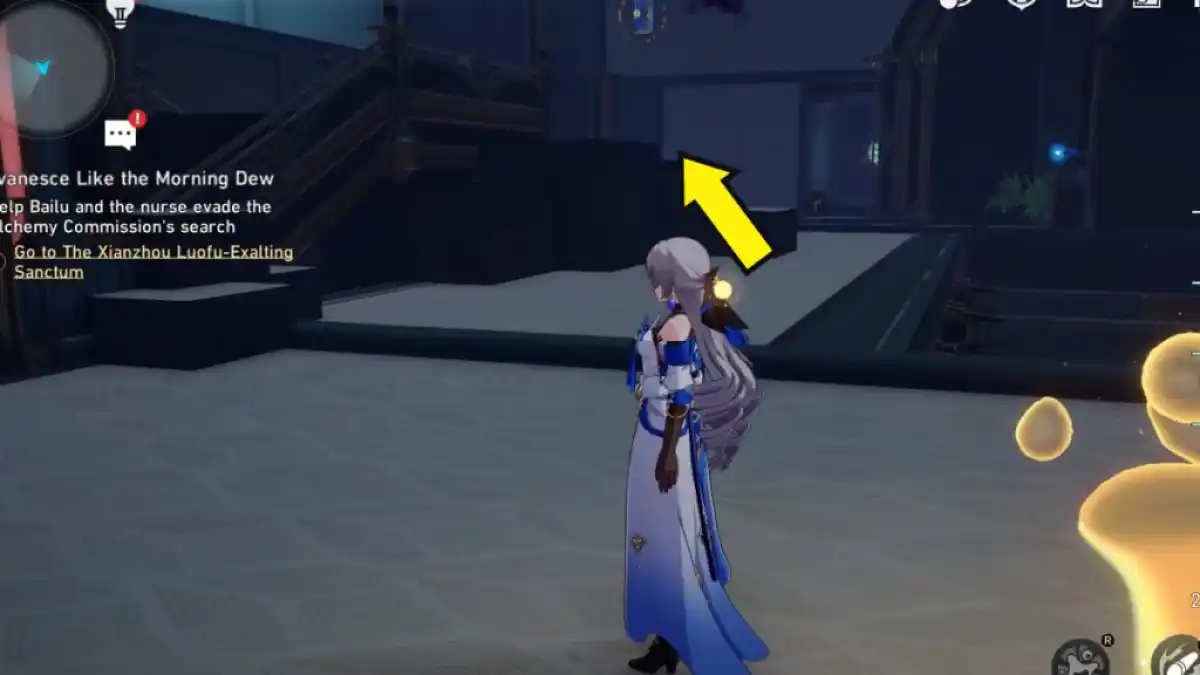
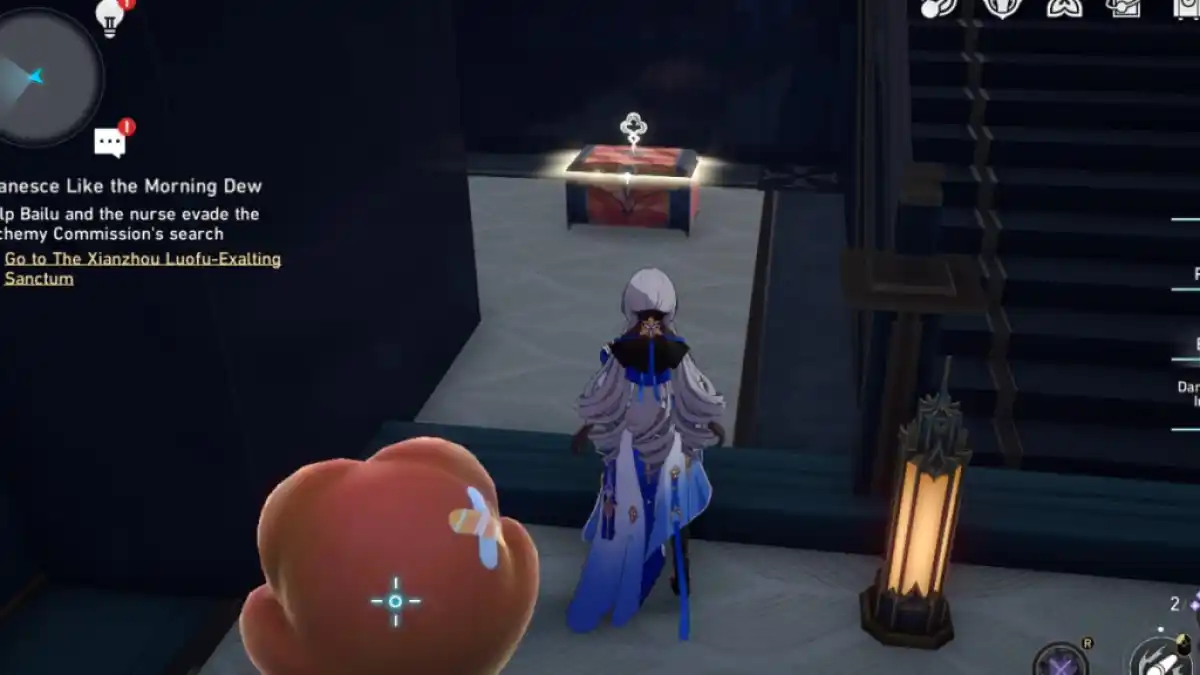
Head to the three-dimensional Dreamscape east of F3 via the southern entrance, circled in the first image above. Upon entering, you'll immediately spot a staircase up ahead. Climb the stairs to loot the Bountiful Treasure waiting for you.
F2

Head to the yellow pin above to find the Chest in F2. You can get there via the elevator northwest of F1.
Meanwhile, the pins marked in purple refer to Chests you can get from the Hanu's Adventure challenge in F2, which you can access by going down the stairs from the F3 Space Anchor on the right side.
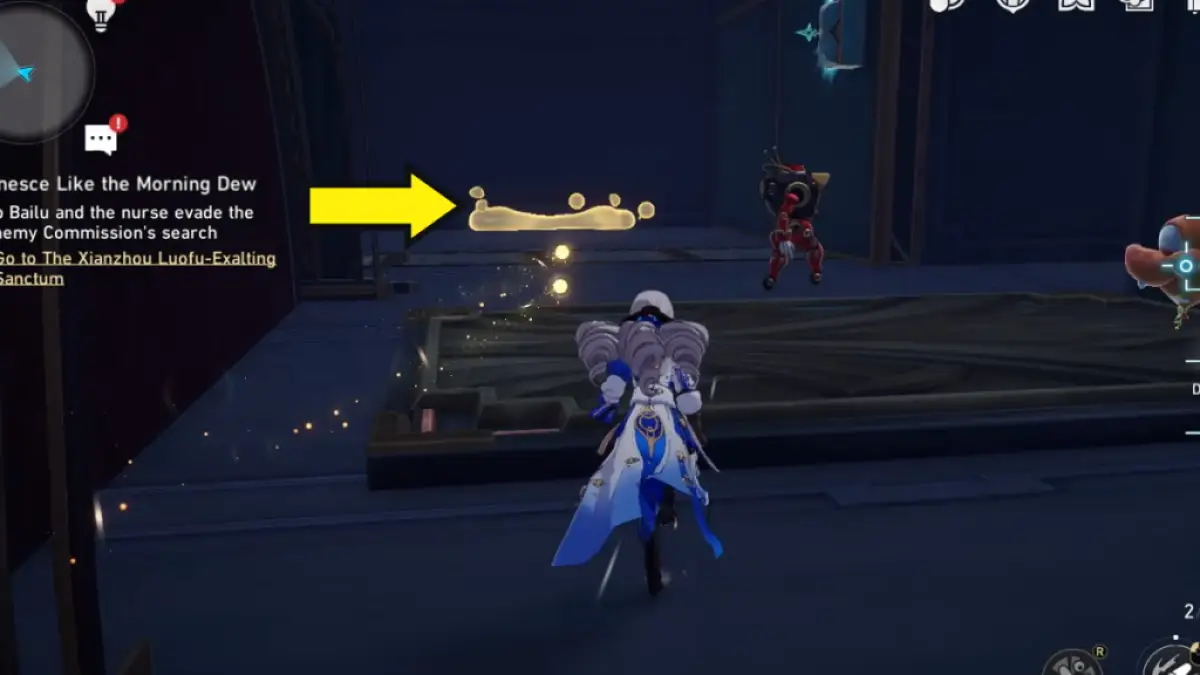
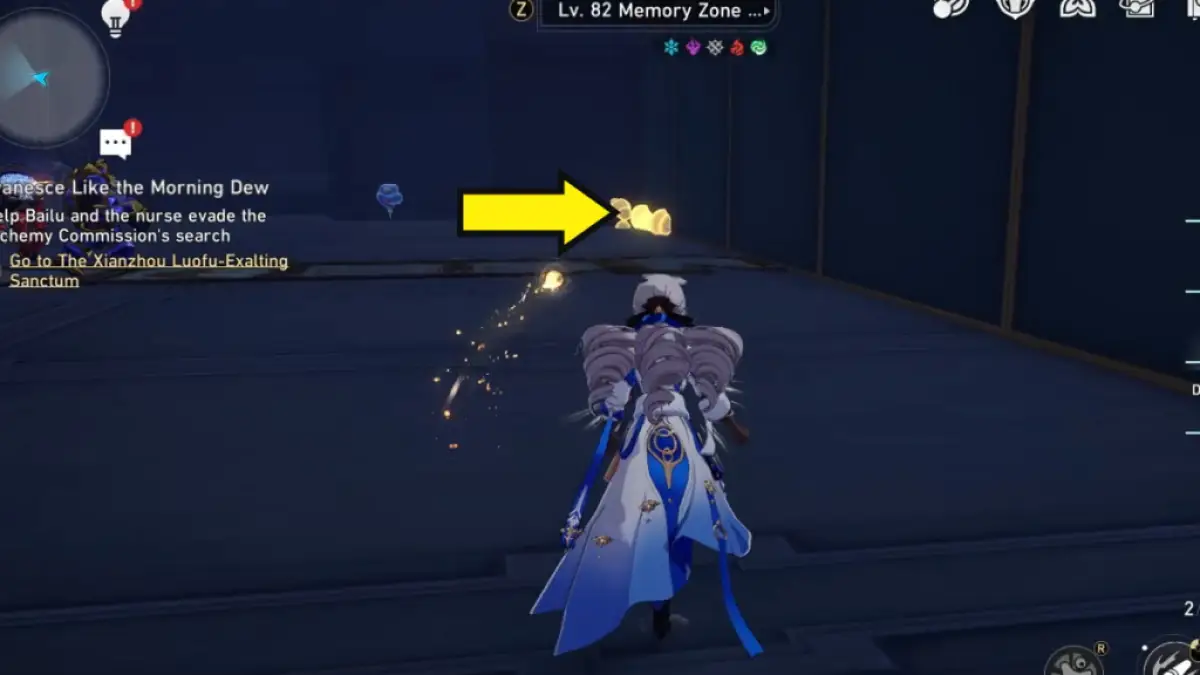
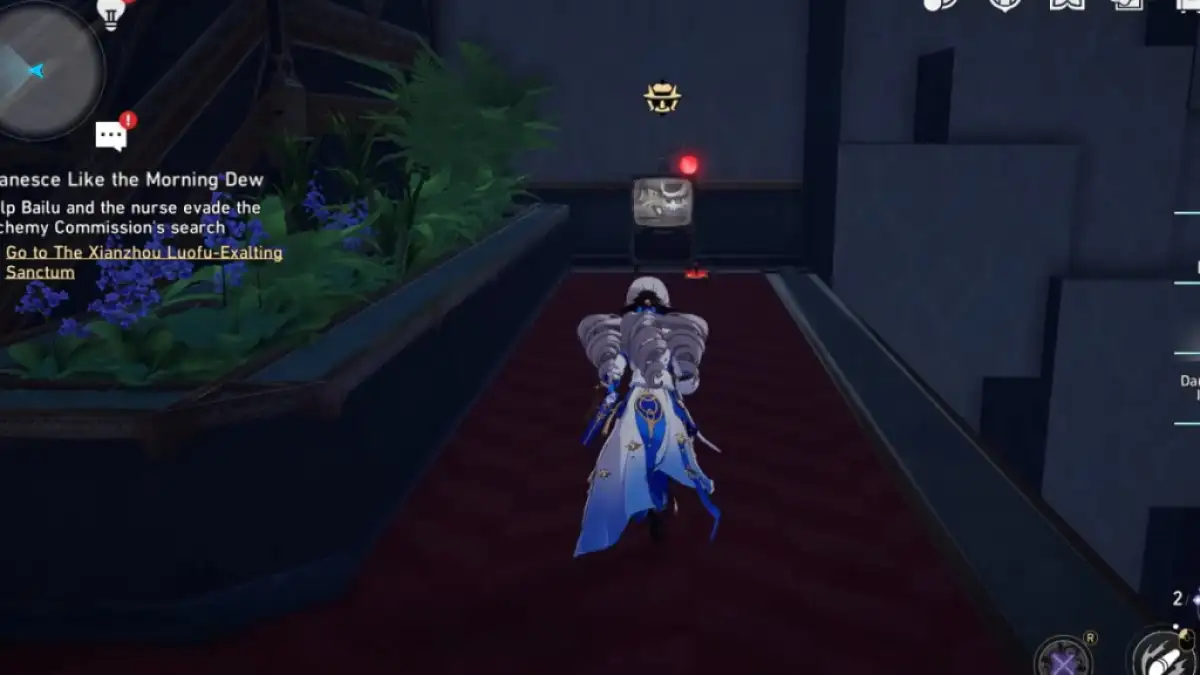
Refer to our Origami Bird guide (Brave Bird section) to solve the Hanu's Adventure challenge in this area. Once complete, re-enter Hanu's Adventure and use the rocket beside the broken enemy machine to enter a narrow space housing the second Chest.
Related: All Dreamscape Pass sticker locations (Map) in Honkai Star Rail
F1 northwest
Head to the yellow pin above located in the northwestern section of The Reverie (Dreamscape) F1 to find a Chest.
F1 center
Head to the central part of F1 to find the Chests marked in the pins pictured in the image above.
Arcane Artwork (F3 & F1)

The Arcane Artwork is located in the eastern part of F3. Upon entering the space, you'll be transported to the small area south of F1. The map of the area is shown below.

Once inside, you'll immediately spot the Treasure Chest up ahead. You'll also be able to find a few more Chests inside the three-dimensional space on the left, which you can access by interacting with another artwork.
Dreamscape Chest #1 & #2

Enter the Arcane Artwork, then head to the northwest side to find the entrance to a three-dimensional space in the form of another artwork. Once inside, interact with the Bubble Charger.
Next, head to the Bubble Bridge further away from the Bubble Charger, circled in the image above. Use it to climb to the other side of the wall.
Once you've climbed the Bubble Bridge, go behind the stack of boxes up ahead to find a staircase. Climb the staircase, then descend on the other side to find a door, Bubble Bridge, and balloon. Start by going to the back of the stairs, where the balloon is facing. You'll find a Basic Treasure.

Once done, go up the Bubble Bridge to enter another side of the room. You'll immediately spot the second Treasure Chest behind the Bubble Charger. Be careful as enemies are blocking the path.
Dreamscape Chest #3
For this Chest, I recommend re-entering the Dreamscape and starting from the beginning to avoid confusion. There's quite a long path to find the Treasure, so follow the steps below carefully. Upon entering the Dreamscape, interact with the Bubble Charger.
After charging, head to the Bubble Bridge pictured in the image above, then climb it.
Next, head to the back of the stacked boxes to find a staircase. Climb it and go down to the other side, where you must climb another Bubble Bridge to get to another room.
You will immediately spot a Bubble Charger. It's important to interact with it to increase the number of your charges from two to three. Once done, turn back and go up the Bubble Bridge, which will take you back to where you came from.

This time, you must go through the blue door where you'll be greeted by another Bubble Bridge. Climb the Bubble Bridge to return to the starting position. Interact with the Bubble Charger to proceed to the next part.
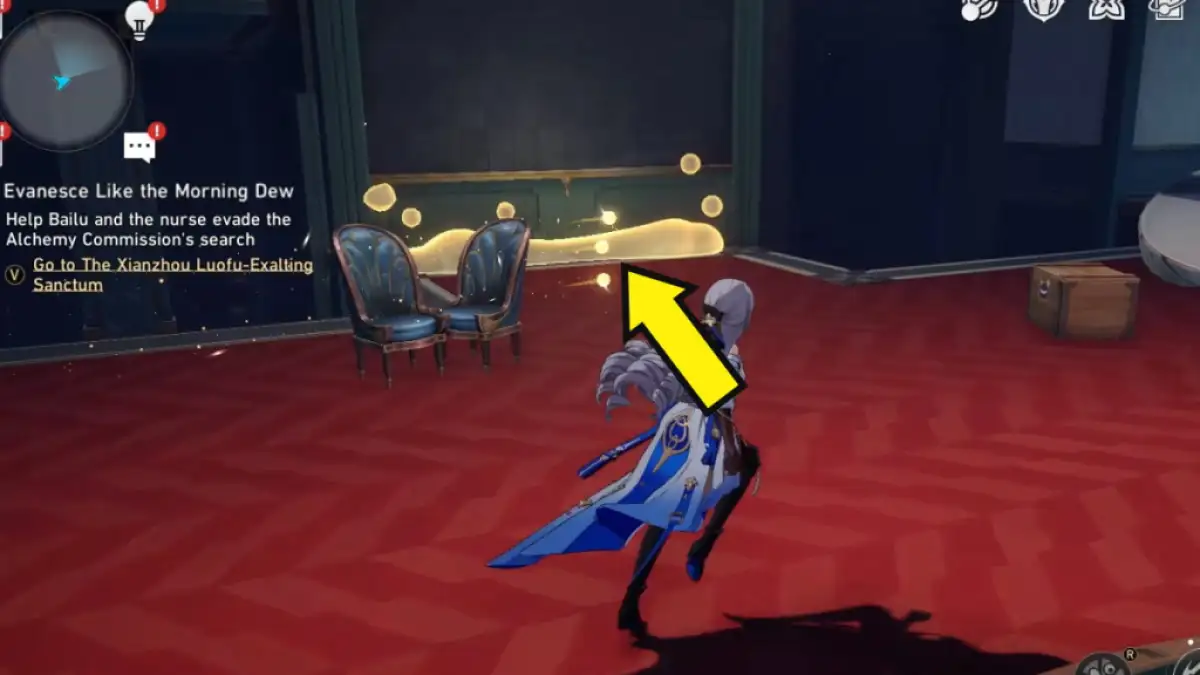
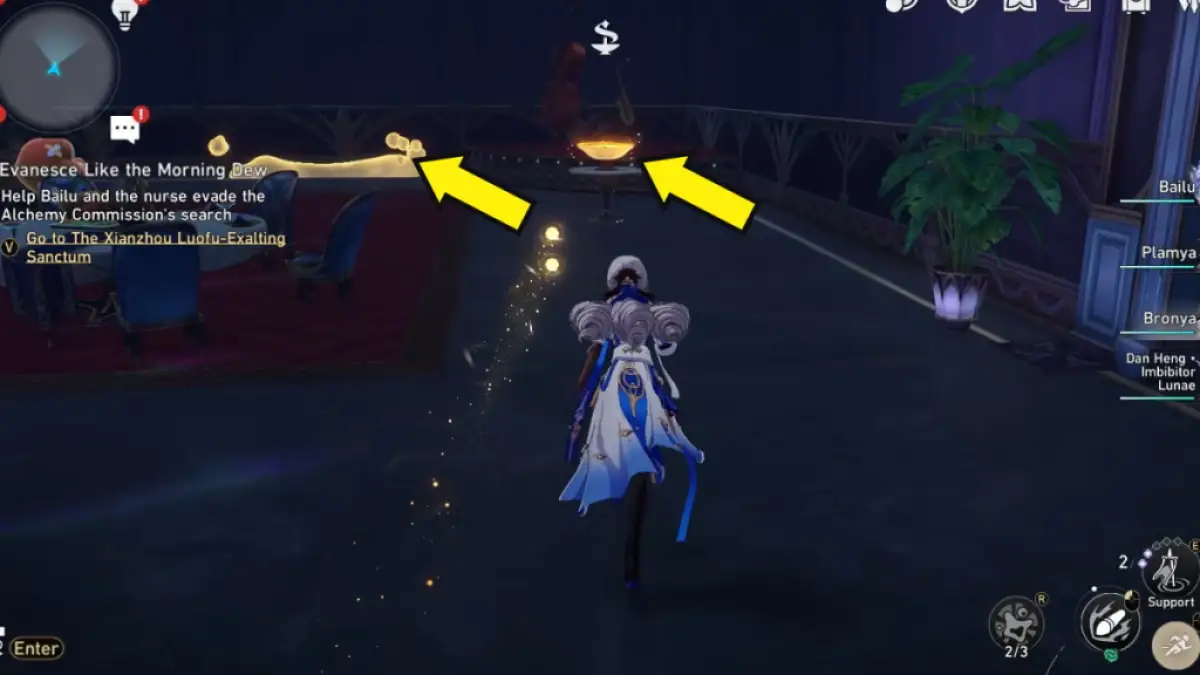
Next, go up the Bubble Bridge by the two chairs. Its exact location is circled in the image above.

Then, turn left and go down the stairs to find another Bubble Bridge. Climb the bridge to get to another room.

As soon as you climb up, make a sharp right to find another Bubble Bridge, then climb it to reach another side of the room.

Once you reach the top, go straight ahead and climb the staircase, then press the switch beside the door to unlock it. This is an important step for finding the Chest.
After that, go through the door and climb the Bubble Bridge to return to the starting area. Interact with the Bubble Charger one more time.
Like before, go up the Bubble Bridge located beside the two chairs. While this step may seem repetitive, your Dreamscape is now fully set up to allow you to reach the final destination.

After climbing, you'll immediately be greeted by the door, which was red earlier. But since we unlocked it, it should now be blue. Go through the door to find another Bubble Bridge, then climb it.

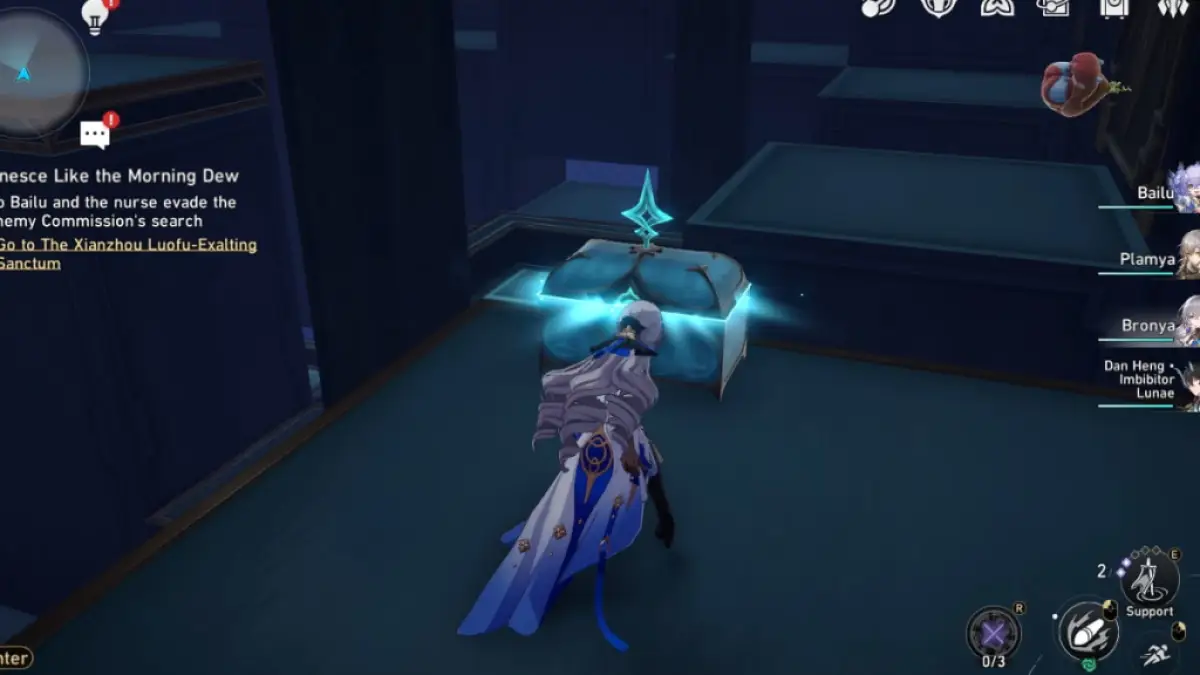
As soon as you enter the room, go down the Bubble Bridge on the right, which slopes downward. As soon as you go down, you'll spot a Precious Treasure, which counts toward the in-game Chest counter.
Hanu's Adventure
You can claim one Bountiful Treasure by completing the Hanu's Adventure challenge in the area. To get there, go back to the entrance of the Arcane Artwork and re-enter the Dreamscape.
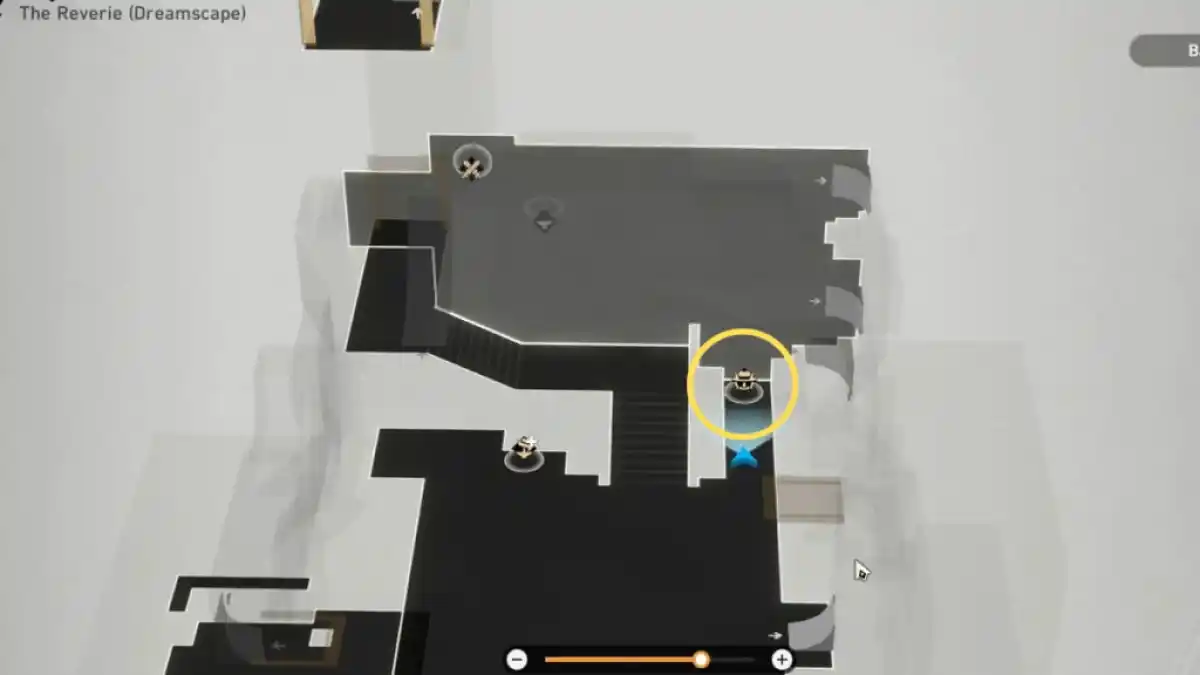
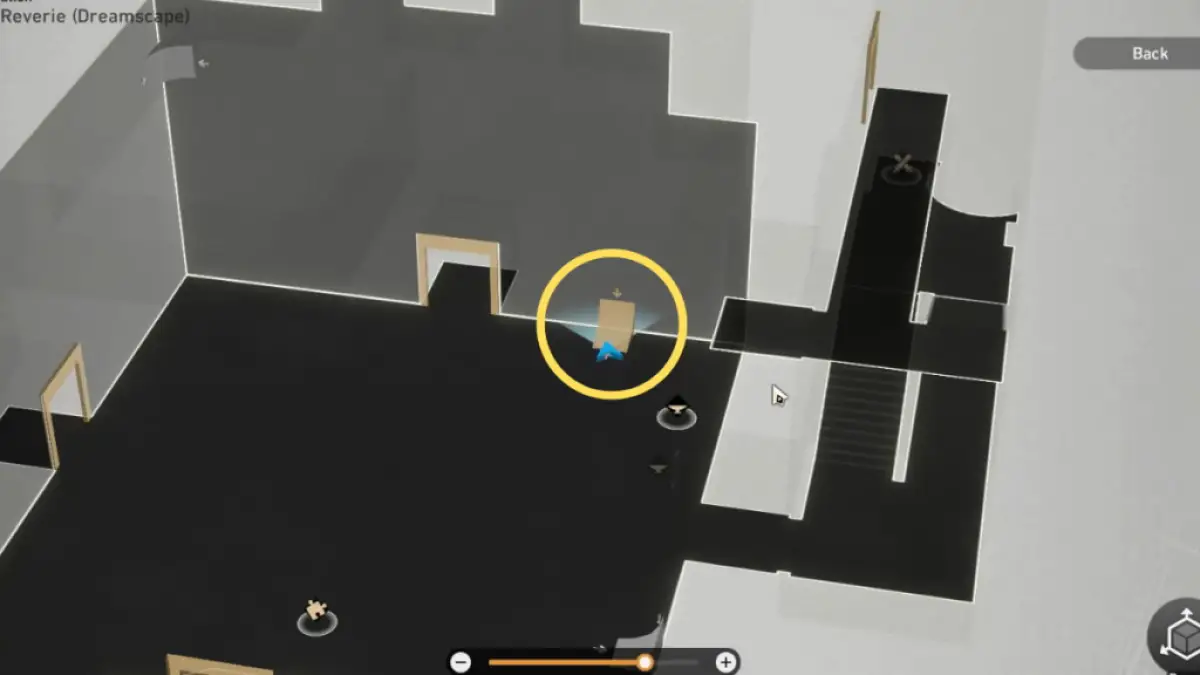
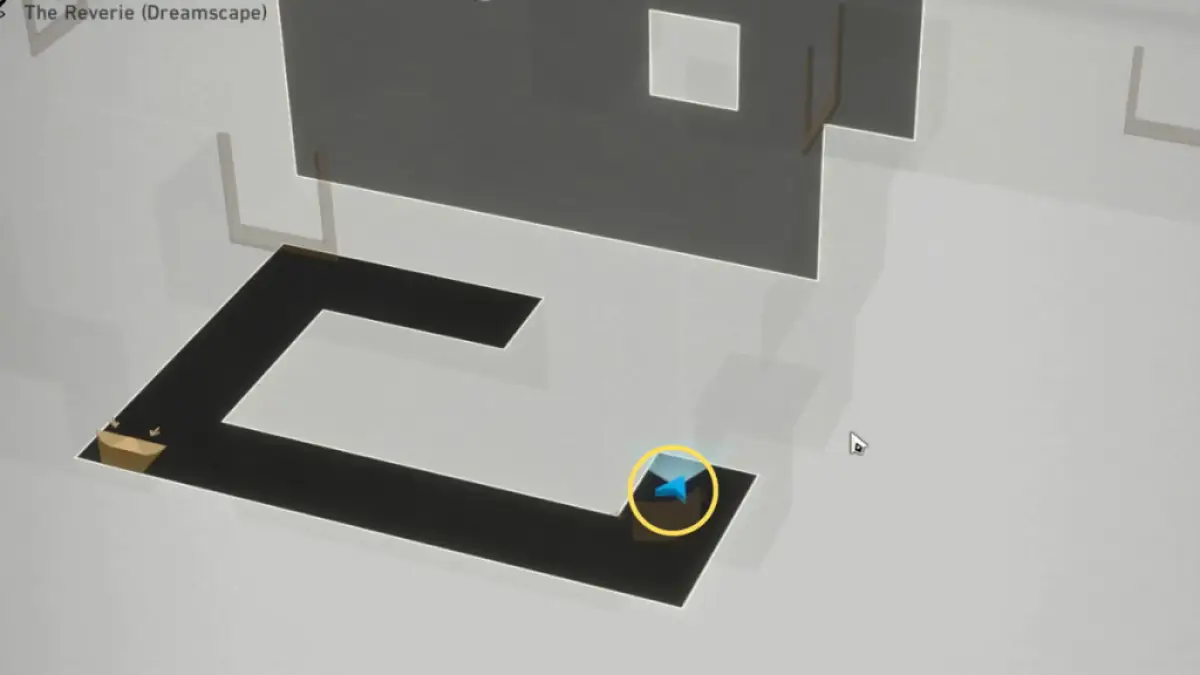
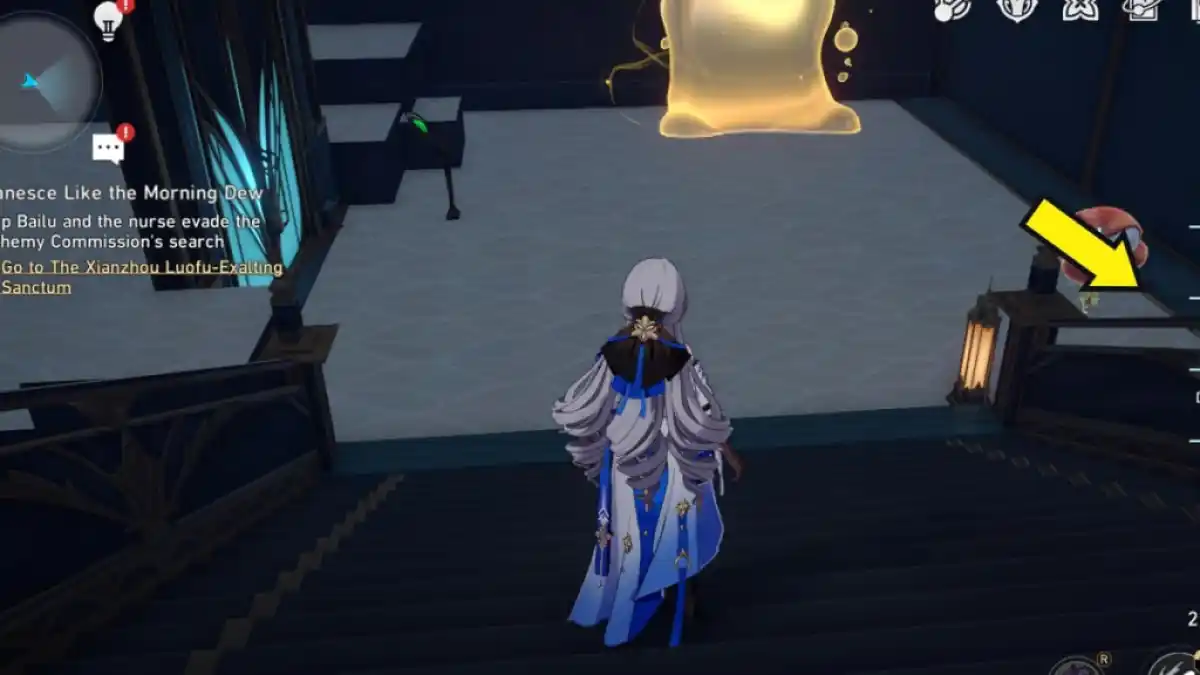
Upon entering, go down the staircase and make a left u-turn to find the challenge. Its exact location is circled in the image above. You can refer to our Origami Bird guide to complete the Hanu's Adventure challenge in the area.
For more on HSR, check out our guide on Hanu’s Prison Break Event All Puzzle Solutions – Honkai Star Rail here on Pro Game Guides.