If you love puzzle games and noir crime stories, especially with a Lovecraftian twist, you have to check New York Mysteries 5: Power of Art. This point-and-click RPG-style tale has you searching for hidden objects and completing puzzles as you follow the story. Here's our New York Mysteries 5 Walkthrough.
New York Mysteries 5 Power of Art Walkthrough Chapter 1
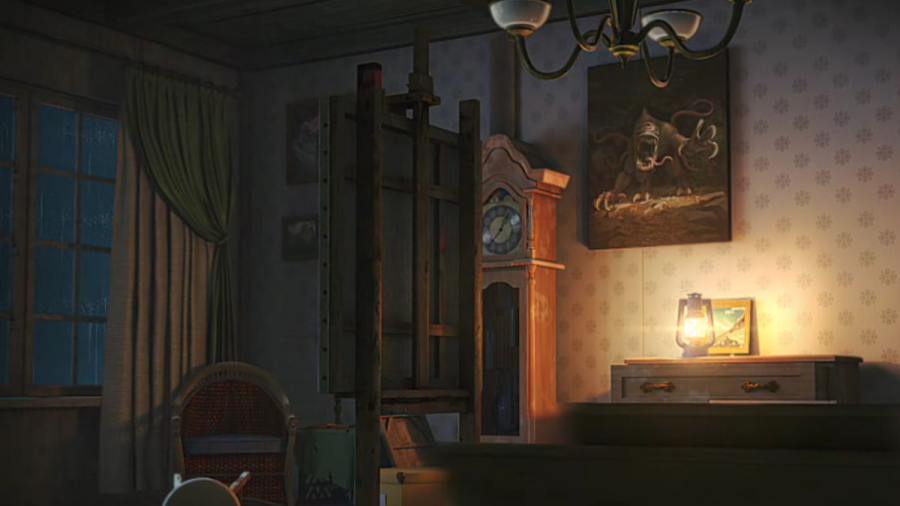
We play our hero Laura, a journalist investigating a mysterious incident at a gallery. A monster has disappeared from a painting on display, but there is no sign of forced entry. You head off to the gallery to investigate, and it's no surprise that you arrive in the dark and the rain, in true detective noir style.
I found the map (bottom right of your screen) very useful, as it allows you to quick-move between locations and also indicates where you currently have actions to do, as well as pointing out where you’re yet to find any collectibles.
Find Michael, the Gallery Director

Click the gallery doors (a1) to find them closed and the area deserted. Get a close-up of the car (a2) and take the Hair Pin from the floor on the front passenger side. The morphing object is in a window on the building above the car (a2). Also, look at the Glove compartment to see that you need a handle and the bag under the seat to realize you need to move the rusted car seat forward.
On the main image, grab the collectible (a3) and then click the phone booth (a4) to open the door, taking the Mosaic Piece from the returned coin slot inside. Note that the phone needs a specific token to operate it, and look at the advert for the gallery exhibition stuck next to the telephone. Notre, there is also a staff entrance (a5) at the bottom of the stairs that looks like it needs a key card to use.

Use the Hairpin to open the green cabinet (a6), starting your first puzzle. I’ve shown the solution above. Once complete, the lights will come on at the entrance to the gallery, and you can go inside (a1). The green cabinet also has a second Mosaic Piece just below the puzzle.
The Gallery Foyer

Collect the morphing object (b1), the Flashlight (b2), collection item (b3), and the Flower from getting a close-up of the damaged floor (b4). Select the damaged wall area (b5) to get your third Mosaic Piece, then select the door on the right (b6) and use the Flashlight in the close-up. Once it is lit, open the box and take the Utility Knife.
Click the red curtain at the end of the hall (b7) for a close-up and use the Utility Knife to cut the curtains, taking your fourth Mosaic Piece from the window sill that reveals. Now click behind the counter (b8) and select the colored mechanism on the bottom right of the close-up. Add your mosaic pieces to start a puzzle. The corners where each color needs to be are indicated just outside the square.
Simply rotate areas until they’re all correctly placed (you can’t fail this one). I found the best way was to do it in same-color sets of three, working from left to right, as once a whole row is complete, you don’t need to touch it again. Once complete, the draw opens. Take the Key from inside and use it on the door in the same close-up to gain access to the security Room.
The Security Room

Take the collection item (c1) and morphing object (c2), move the chair by clicking it, and grab the Ladder (c3) and the Fire Extinguisher (c4). Gwet a close-up of the jackets (c5) and take the Star from the pockets.
Get a close-up of the cabinet (c6) and use the Utility Knife to jimmy open the key case, taking the Keycard from inside. Go back outside and use the keycard to gain entry to the staff entrance outside (a5). Use the card on the door and head into the Restoration Room.
The Restoration Room

After speaking to Michael (click the background area anywhere near him), grab the collectible (d1), morphing object (d2), and Cart (d3). Select the workbench (d4) and take the Code (3681) from the table, also noting the details on the art director’s card (Michael Metaxas 37 00 23).
Next, select the lockers (d5) and enter the code (3681) to open the lock. I found this mechanism a little fiddly. You need to drag the code onto the lock close up, then drag the wheel around to each number in order so it is at the top (in the 2-o-clock position), and you’ll hear a click each time you leave the dial on the number. Once you’ve dragged it to all four numbers, it should pop open. Any issues, simply click reset and try again. Take the Wrench, Petal, and Star from inside.
Head back to the Security Room and use the two Stars on the cabinet (c7) to open it and take the Flower and Picture from inside. Step back into the Gallery and use the Picture on the door at the bottom of the steps (b6) to start a moving chips puzzle. Again, you can’t fail this one. It just takes a bit of patience.
Move each color so that the three inside pieces are all in place, making sure that the final four pieces are in the correct order so that they can simply be rotated into the right spots afterward (clockwise that is purple, green, red, yellow). Once complete, you have access to the Grounds Floor, so head inside.
The Ground Floor

Click the trapdoor (e1) to open it and take the collection item (e2) from the shelf and the morphing object from the painting (e3). Use the Wrench to open the toolbox (e4) and take the Insulating Tape and Lubricating Aerosol from inside.
Select the tub (e5) and move the items inside to reveal and collect a Handle. Use the ladder on the open trapdoor, then click it again for a close-up and begin an item-finding puzzle. Simply click items to collect them, noting that some items can be moved and switched on and that items in red are not available to collect until you’ve done something to reveal them. Completion will get you the UV Lamp.
Go back to the gallery and place the Cat next to the monster picture (b9), then click the picture once more to move it onto the cart. Finally, click the cart one final time to collect the Painting.
Back outside the gallery, select your car (a2) and use the Aerosol Lubricant on the seat, allowing you to operate, move the seat forward, and take your Purse. Now, click it in your inventory, open the book inside, and take Bishop’s Business Card. Afterward, take the Glove Box Handle which is underneath the purse and also under the seat. Use it on the glove box in the same close-up to get the Wire Cutters.
Authenticating the Painting
Head to the Restoration Room and use the handle on the refrigerator (d6) to get the Developer liquid from inside. Place the painting on the table (d4) and add your UV Bulb to the black lamp in the same close-up. Also, add the liquid to the table, then use the brush next to where it is placed to reveal the signature. Afterward, Michael will give you the second Petal.
Down on the ground floor, use the wire cutters on the wire holding the wheel in place (e6), then use the fire extinguisher on the handle before finally clicking it once more to turn it off. This gives you access to the door at the back of the room (e7). Click it for a close-up and take the third Petal from just above the flower puzzle on the door.
Return to the Restoration Room and add the three petals to the ornate wooden box (d7), revealing a triangles puzzle. Simply drag the triangles around until they drop into the right spots (you can’t fail or get stuck). Once complete, you’ll be able to take the Spool.
Go to the Security Room open the junction box in the close-up of the area above the security equipment (c8), and flip the switch down to off (the broken cable will stop sparking). Use the insulating tape on the wires here. Flick the switch back on, add the spool to the video equipment (c9), click the green play button, and watch the cut scene.
Go down to the Resotarion Room once more and speak to Michael, who will give you a Telephone Token. Head outside and use the Token in the telephone box to call Bishop. Use the token on the phone first, then use Bishop’s Business card on it before dialing his number (372134). After talking to Bishop, take the Floer Token from the coin return in the phone box. Go back to the Ground Floor and place the three flowers into the door (e7) to start a ball puzzle.

- Left-hand puzzle: 1 down, 2 right, 3 right, 4 down.
- Right-hand puzzle: 1 right, 2 down, 3 down, 1 left, 4 right, 1 right, 2 up, 4 left, 1 left, 3 up, 1 right, 3 down, 4 right, 1 left, 2 down, 1 right, 4 left
The door will now open and you can move into the Park Area.
The Yard and the Street

Grab the collection item (f1), then use the Utility Knife on the bin bag (f2) in close-up and take the Hose and Wire from the bag. Take the morphing object (f3) and then select the typewriter (f4) for a close-up and take the Lever Arm. Use the wire cutters on the gate at the back (f5) to open it up, gaining access to the Street.
Move to the street, take the collection item (g1) and morphing object (g2), then click the manhole (g3) and take the Pipe to the left of the hole in the close-up. Select the tree (g4) for a close-up and keep clicking the leaves to clear them, taking the Slingshot that’s revealed underneath.

Go back to the yard and use the slingshot on the vase (f6), which gets you the Medallion. Click the bike (f7) and use the medallion to open the satchel on it, gaining a Clue from inside. Add the clue to the typewriter (f4) and put in the code (BY4AE15). A secret compartment will be revealed, containing a Magnet.
Back in the street use the wire to get access to the construction vehicle (g5) by using it on the window. Take the Matches from inside, add the Lever Arm to the hole by the steering wheel, then click the arm to make the vehicle move the pipe blocking the manhole. Once it has finished, click the area the scoop had been (g6) for a close-up and take the Skateboard.
Go back to the yard and use the skateboard to collect the Boards leaning on the bins (f2). Return to the street and use the boards on the water (g7). Click the area you just placed the boards to start an object-finding puzzle.

- Click the gate (h1) to get the Knife.
- Click the tires (h2) to get the Clamp, and also the Socket Key after clicking away the wood and bricks.
- In the same close-up (h2), use the knife on the tires to get Rubber and reveal a second Socket Key.
- Use the two socket keys to open the metal box (h3). Move the nuts and bolts inside to get the Key, and also take the Wires and Screwdriver.
- Use the key to open the gate (h1) and take the Pump.
- Use the rubber to fix the pipe (h4) and use the clamp (with the screwdriver) to secure it. Once fixed, click the same area once more and collect the Hose.
- Add the generator to the pump (h5), connect the hose to the pump, then use the wires to connect the two.
Now you can click inside the hole to get the Ladder (h6). Use the ladder on the manhole (g3) and head down into the sewers.
The Sewerage

Grab the collection item (i1) and morphing object (i2). Select the grate on the left (i3) and use the pipe to drag the Lever Arm closer to you, then pick it up. Attach the lever arm on the door mechanism here, then use it to open the grate. You can now take the Board here and use it (i4) to make a bridge and then use the flashlight to get a close-up on the other side.
You need to move the flashlight around the image to spot the next exit (on the right) and click through, then do the same again (the exit is again on the right). In the next darker scene, pick up the Key. Your torch will die at his point, so just click the bottom of the screen three times to return to the sewerage and then back to the street.

Use the key to open the shed (g8), move the box that is on the middle shelf, and take the Kerosene Lamp. You can now head back into the sewerage, place the lamp by the fuel drum (i5), click the top of the drum to take the cap off, and then use the hose to get a Lamp With Fuel. Click the lamp in your inventory, click it again to remove the top, then use your matches to light it and get the Burning Lamp. You can now use the lamp on the dark side of the tunnel (i4) and re-enter the maze of dark tunnels.
Having followed the creature out of the gallery and down the street into the sewers, it seems to have escaped through a maze of tunnels beneath the city. Will you be able to track it through the sewerage maze?
The Maze

You need to find a way out of the tunnel maze. Go back into where you picked up the key and grab the Handle that is sitting on the same fuel drum, and move it to the left of the screen to the switch device on the floor. You can now decide which of the three grates in this room is open by setting it either to the left, right, or center. Leave it in the center for now and take the following route from this switch room:
- Middle tunnel, right, high left, straight on, high center, center
This takes you to the exit, but the rungs for the ladder are missing. You need to go back into the tunnels and find the 10 ladder rungs. Use your map to go back to the sewerage and re-enter the sewage. Now collect the 10 rungs:
- In the first room that you enter, to the left of the pipes.
- Click the exit on the left and collect the rung from the dead end by turning the faucet to empty the water.
- Go back to the first room and take the right exit. Click the manhole on the left and collect a rung at the dead end here.
- Go back one room and take the right exit into the switch room. Open the left tunnel in and go into it. Use the handle in the middle to turn off the steam, then take the rung on the left.
- Open the right tunnel in the switch room and go into it. There is a rung hidden behind the pipes on the left.
- Set the switch back to the center. Move forward, then forward again, and collect a rung on the right of this dead end.
- Go back one room, then go right. Take the lower tunnel and also collect a rung at this dead end.
- Go back one room, take the top exit, then go right and take the rung from this dead end too.
- Go back one room, go straight on this time, take the left fork, and grab the rung to the right of the lockers.
- Go back one room, take the right fork, and collect the rung in front of the crate.
Now go back one room, take the high central exit, move forward to the bottom of the ladder, and attach the rungs to make your exit into the park.
The Park

Pick the collectible up from the path (a1) and the morphing object from the corner (a2), then take the Fishing Rod from next to the viewing binoculars (a3). Select the bin (a4) and take the Reach Extender, Ticket, and Blade. Now click the machine (a5) and enter the ticket to start a sand-pouring puzzle. There is no one way to solve this, you just need to be patient and you can’t fail. Once complete, you’ll receive a Token. Use it on the viewing binoculars to get a cut scene.
Attach the magnet to the fishing rod to get a Fishing Rod With Magnet and head back into the sewerage. Click the sewer (b1) for a close-up and use the fishing rod to fish out the Star.

Return to the park, click the rocks (a6) next, and use the Reach Extender to grab a second Blade. Now select the bandstand (a7) to find your third Blade, then click the wharf (a8) to get the fourth and final Blade. Attach the four blades to the boat, and you’ll be transported to the Island.
The Island

Grab the collectible from the stairs (c1) and the morphing object from the crate (c2). Use your knife to open the sack (c3) and get the Windrose, then take the Fishing Net in the same close-up. Click the bouy (c4) and use the fishing net to bring it to shore, use the knife on it to cut the rope, and take the Key.
Select the canopy (c5), and in the close-up, use your knife to rip the canopy and take a second Key. In the same close-up. Grab the second Wind Rose from the top-left corner of the door frame. Click the door next (c6) and use the two keys on the two locks to open the door and start an object-finding puzzle.

- Click the mounted fish (d1) and then its nose to get the Pike Pole.
- In the same close-up, click the suitcase and take the Notebook.
- Select the pool (d2) and use the pike pole to get the Ship’s Wheel.
- Now click the back wall behind the bike (d3) and take the Fin.
- Choose the fish again (d1), add the fin, and take Anchor from the fish’s mouth.
- Select the machine (d4) and take the Brush.
- Use the brush on the fragments on the floor (d3), taking the Wind-up Key from underneath.
- Now, use the wind-up key to open the noticeboard (d5) and take the Glass.
- Also, use the notebook to copy the picture here and get the Notepad With Picture.
- Click the door (d6), add the glass, and then add the notebook. You need to click the lenses to make the central picture mimic the one on the notepad. Click the lenses the following amount of times: a twice, b once, c once, d once. Then click the handle to open the door (see below).
- Click the now open door (d6) and add the Ship’s Wheel and the Anchor to the filing cabinet and then take the Keycard.
- Use the keycard on the machine (d4) to complete the puzzle and exit through the gate.

Inside The Ship
Grab the collectible by the fan (e1) and the morphing object (e2) from the window next to it.. Use the knife on the flag (e3) to get the Eagle Figurine. Back at the bandstand in the park (a7), get a close-up of the stars on the top of the bandstand and add the star and the eagle figurine. Take the Hex Key Set from the secret compartment, then return to the ship.

Use the hex key set to unlock the cupboard (e4) and take the third Wind Rose from inside. Click the briefcase (e5), add the wind roses, read the note, then take the Tranquilizer Gun and Clue from inside.
Select the machine (e6), add the clue, and then press the colored buttons in the correct order. Simply follow the clue pattern from top to bottom (so click magenta twice, green once, yellow three times, red twice, blue four times, aqua once, then purple three times). This will begin a ship-moving puzzle.
The ship can move one or two spaces and has to land on a shaded space each time for you to succeed. You need to complete three increasingly tricky puzzles. The solutions are below. Once complete, enjoy a well-earned cut scene as you head upstairs to face the monster.

In Front of the Artist’s House

After talking to the former neighbor of the artist (f1), grab the collectible (f2) and the morphing object (f3) that are next to him. Select the car (f4), open the door by clicking it, and take the Umbrella. Next, click the red machine (f5) and click it once more to shake it, then take the Soda from the machine. Use the umbrella to pull down the fire escape (f6) and head up to the roof of the artist’s house.
The Roof of the Artist’s House

Take the collectible (g1) on the left and the morphing object near the stool (g2), then take the Stool (g3). Click the piano (g4) for a close-up, then click the hood to open it and take the Bottle Opener. Finally, click the rubbish at the back (g5) to enter a simple object-matching puzzle, after which you’ll receive the Latex Gloves.
Select the soda in your inventory and use the bottler opener to open it. Give the soda to the neighbor (f1), and in return, he’ll give you the Apartment Key. Head back to the roof and use the gloves on the wire blocking the doorway (g6), use the key to open the door, then head into the apartment.
The Artist’s Apartment

Grab the morphing object on the table (h1) and the collectible from the bed (h2). Then, move directly through the door on the left and into the artist’s kitchen and once again take the collectible on the chair (i1) and the morphing object (i2) by the table leg. This should complete both of these sets for this chapter.

Place the stool under the cupboard (i3), then select it to get the Kitchen Knife and Colander. Use the knife to cut the cloth on the window (i4) and take the Flower and Metal Sponge. Now, you can use the sponge on the wall (i5) to reveal the code 17.45.
Go back into the main room of the apartment and use the flower on the sewing machine (h3), which opens a secret compartment from which you can take a Lockpick. Head back out to the roof and use the lockpick to open the suitcase (g7) and get a Button. Now, use the knife on the washing line (g8) and pick up the Rope.
Clearing The Pests
Back in the apartment, use the rope on the hole (h4) and then get a close-up of the safe below. You’ll need all five buttons before you can tackle the puzzle, but take the Insecticide just above the safe in the close-up. Go back into the kitchen and open the fridge (i6), then use the insecticide to clear the insects inside and take the Canned Food.
Select the canned food in your inventory and use the opener to get the Open Food Can. Go back outside and give the food to the rats (f7) so that you can collect the Harp. Now, you can go to the bedroom and use the harp to open the box (h5) and start a figurine puzzle. Once complete, a drawer will open, and you’ll get another Button.
Move onto the roof, use the insecticide on the wasps (g8), and use the knife to take the Item in Wax. Go back out the front and place the colander on the burning bin (f8), then place the item in wax into it to burn the wax away. Take the Handle. You can now return to the bedroom and use the handle to open the cupboard above the bed to get the Clue and another Button.

Go to the roof and place the clue on the piano (g4) to start an image association puzzle. You need to hit the keys 14 times, once for each image. Using the image I’ve provided, use the following sequence: 7, 1, 4, 2, 5, 3, 6, 4, 2, 3, 7, 5, 6, 1. Once complete, take the Buttons and Clock Hands from the compartment that opens. You can now add the hands to the clock in the apartment (h6), set the clock to 5.45, and collect your final Buttons.
Opening the Safe
Select the hole in the apartment floor (h4), click the safe, then add the five buttons. There’s no one way to do this, and you can’t fail. I found it easiest to complete one row (I did the top red row first), then simply do it one button at a time on the second row, and so on. Take the Artist’s Diary from the safe. This will trigger the end of the first chapter.
New York Mysteries 5 Walkthrough Chapter 2
Despite having taken the monster down with the tranquilizer gun, our hero can’t stop the mysterious strangers from getting away with the prize. In chapter 2, the focus flips to Noah, the artist himself, as we learn more of his back story.
Note that you’ll find a lot of images below that contain spoilers for both item locations and puzzles. So, if you want to go to a specific piece of information, it may be easier to click on the content links below.
The Yard

Pick up the morphing item and collectible that are sat next to each other by the statue (a1), then move now the left side of the house into the Yard and take the morphing object from the chair (b1) and the collectible from the flowers (b2). You can also read the note on the table for some backstory.

Open the fuse box (b3) and take the Number, and then the workbench (b4) to get the Screwdriver. While at the workbench, you can click the pieces on the bench to put together and collect the Birdhouse. You need to click them in the correct order, but they’re all there. You can also pick up the Firewood Basket next to the shed (b5).
Back in the yard, use the screwdriver on the front door's mailbox (a2) to open it and get a second Number and the Barn Key. Use the key on the shed in the yard (b6) and open the door, then click it once more to start an item-finding puzzle.
The Shed Puzzle

- Take the Dial (c1) and the Screwdriver (c2).
- Collect the Rose in the close-up of the ladder (c3).
- Use the screwdriver to open the top of the box (c4) and get the Hammer and a second Rose.
- Close the cupboard door (c5) by clicking it, and take the third Rose that is revealed on the shelf behind it.
- Add the three roses to the clock (c6), which gets you the Code.
- Click the chart on the wall (c7), click it again to move it, and reveal a safe. Add the Dial and add the code (3054) to open it (by clicking the handle) and get the Key. I found this a bit annoying, as it gives no indication you’ve got the numbers right. You just need to drag the dial around to each number and it will open. Reset it if it doesn’t work the first time.
- Use the key to open the drawer (c8) and get the Hinge and Nails.
- Add the hinge to the ladder (c3), add the nails, then use the hammer to fix and collect the Ladder.
Head back out front and use the ladder on the lamppost (a3), then get a close-up of it to collect the Legs and Detail. Return to the yard and add the detail to the box on the floor in the workbench close-up (b4), click again to open it, and take the Plunger and Shears. You can also click the rug by the backdoor (b7) to move it back. There’s a puzzle you can’t try yet, but next to it, you’ll find your third Number.

Use the shears on the vines (a4) out front to get the Flower, and then use the flower on the base of the statue (a5) to open a secret compartment, taking your fourth and final Number from inside. Back in the yard, select the back door (b8) and add the four numbers to start a light beam puzzle. See the solution above. Once complete, the back door will open, and you can enter the hall.
The Hall

Click Grandpa Eugene for a cut scene and to move the quest along, then collect the morphing object from the table (d1) and the collectible from the floor by his feet (d2). Get the Matches from the coat pocket (d3) and click the bedroom door (d4) for a close-up, taking the Pattern that is hanging on the light switch. Select the door in the back-right of the room to move through to the Kitchen.

Take the morphing object from the table (e1) and the collectible from the floor by the stove (e2). Use the plunger in the bath (e3). Once the water drains, click the plughole twice and take the Detail. Next, select the stove (e4) and take the Meat, then use the matches to light the stove and pick up the Kettle With Boiling Water. Put the kettle on the table (e1), then click the teapot to pour tea into the cup. Take the Tea.
Go back out to the yard and hang the birdbox in the tree by clicking the owl (a6) for a close-up, then add the meat to the birdbox. The owl will fly into the birdbox, allowing you to collect the Vinyl Record from the tree.
Head into the hall and give the tea to Grandpa, then place the record on the record player (d5) and click the handle to operate it. When the hatch opens on the side, add the pattern to open a secret compartment and take the Paperclip and Head from inside. Click the chest of draws (d6) and use the paperclip to pick the lock, getting the Fuse Set by clicking the drawer again to open it.
Now, you can go into the backyard and add the fuse set to the fusebox. Click the fuse set once placed to pick up a fuse, then click the broken fuse to replace it. When you head back into the hall, you can now use the light switch (d4), giving you access to the bedroom.
The Bedroom

You’ll find the morphing object at the top of the fireplace (f1) and the collectible on the bed (f2), where you can also pick up the Book. Back in the hall, get a close-up of the cupboard (d7) and click the ornate image to open the central section. Add the book to the shelf to open a secret compartment and take the Brushes from inside. There is also a note on the floor to the left of the bed, slightly tucked under the rug that you can read for more back story.
Back in the bedroom, select the base of the chimney (f3) for a close-up and collect the Palette before adding the firewood basket. Click the wood in the basket to add it to the fire, then use the matches to light it. Next, click the doll on the bedside table (f4) and position it to look like the ballet dancer in the painting on the wall (see image below). Once done, the compartment in the table will open, and you can collect the second Detail.

With the fire burning, return to Grandpa and click him to get a cut scene. Afterward, he’ll give you the third and final Detail you need. Select the clock (d8) and add the details, starting a numbers puzzle (see solution below). Once the clock opens, take the Key and head into the kitchen, using the key on the door (e5) to gain entry to the basement.

The Basement

Once you’re in the basement, you can grab the morphing object at the base of the tall cabinet (g1) and the collectible from the base of the stairs (g2). Take the Oil from the artist’s stand (g3) and you can add the palette and brushes to it now too, just to get them out of your inventory.
Head back upstairs to the kitchen and use the oil on the stove door (e4), opening it afterward to get the Antler from inside the oven. Now go to the bedroom and add the antler to the shield on the wall (f5), revealing a secret compartment from which you can take a Key. Back in the basement, use the key to unlock the tall cabinet (g1). Click it again to open it, beginning a puzzle to find Grandpa’s paint.
You can’t fail here, so just keep clicking around until you’ve found all 15 paints. If you’re struggling, you need to click the buttons I, VII, and X to open the drawer and the knife in the drawer (I found it quite hard to see) to open the box inside. Once done, you’ll receive the Paints. Add the paints to the artist’s stand (g3), which will trigger a short scene as you complete the painting.
Once you’ve told Grandpa that you’ve completed the painting, the light in the bedroom goes off again, so head to the yard and check the fusebox (b3). Replace the fuse in the same way as you did last time, then return to the hall to find Grandpa gone.
Another World

Take the collectible and the Stick from the floor (h1) and the morphing object from near the gate (h2). Click the cloth on the wall (h3) and click it once more in close-up to get the Fabric, as well as the Gem that is behind it. Select the fountain (h4) and pick up your second Gem, then use the stick to get the Solvent that’s behind the metal grate (h5).

Select the wall detail (h6) and use the solvent to loosen it, then use the fabric to remove it and take the third and final Gem. Now, you can select the shield (h7), add the gems, and start a laser puzzle. The gems will always shoot their rays in the same direction, so they need to be in the exact right spots to complete the puzzle (see the solution above).

Use the crank on the lens (h8) twice to change its angle, which will lower the pulley lever (h9). Now, you can click the pulley to move to the shore. Once there, pick up the collectible (i1) from the sand and the morphing object (i2) from the top of the wall. You can’t do anything else here right now, so click the back-left of the scene (by the tree) to move forward to the wood.
The Wood and the Token Puzzle

Pick up the Bung (k1) and the collectible that is right next to it, and the morphing object by the tree roots (k2). Head back to the ruins and use the bung on the fountain (h4), then collect the Sun from the mouth of the statue that’s also in this close-up. Move to the shore and use the star on the gates (i3), starting a token-moving puzzle.
To complete the puzzle, make the following moves by looking at the image below (don’t forget to reset beforehand if you’ve already started to try and solve it previously): 1 to 2, 3 to 4, 2 to 1, 5 to 6, 7 to 8, 9 to 10, 11 to 12, 1 to 13, 14 to 15, 12 to 16, 16 to 17, 17 to 18, 19 to 20, 21 to 2, 22 to 23, and finally 18 to 24. Once complete, the doors to the lighthouse will open.

In the prologue to the main story that follows, painter Noah has followed his Grandpa through one of his paintings into another world. He has just opened the gates to the lighthouse as he tries to find him while avoiding waking the creature in the woods.
The Lighthouse

From the shore, click the gates to the lighthouse (a1) to begin a puzzle to find 15 octopuses. I found it a little annoying that once you’ve found all the octopuses in a close-up, you can still click it, but none of them are well hidden, so simply keep clicking around until you’ve got them all. I found the only tricky ones were the one on the red plant (keep clicking leaves until it is revealed), one in the pond (keep clicking shells until it is revealed), and one in the side pocket of the art bag.

Once complete, the steps to the lighthouse will appear. Click the lighthouse to move inside. After speaking to your Grandpa, take the morphing object from the window (b1) and the collectible from the top of the stairs (b2). Pick up the Handle to the right of the light (b3) before heading back down to shore.
Click the harpoon gun (a2) and add the handle in the close-up, collecting the Harpoon and Rope after using the attached handle. Now select the boat (a3) and use the harpoon to collect the Bucket from the water.
Recovering the Crystal

Go to the wood and use the bucket to get past the spike trap (c1). You’ll be attacked by the monster, but after defeating it in a cut scene, you’ll have the Detail. Add it to the pillar holding the crystal (c2) to reveal and then begin a slide puzzle. I found that the trick here is only the exact symbol or blanks can be in a given row. See the solution below if you’re stuck. Once complete, you can take the Crystal.

Click the left side of the tree roots (c3) for a close-up, click the roots to reveal an item, and then pick up the Rose. Go back to the shore and place the rose in the hands of the statue (a4), which will open a secret compartment. Take the Detail from Inside, then head back to the lighthouse.

Add the detail to the mechanism at the top of the light (b4), which opens the panel. Click the panel once more to start a light beam puzzle. You need to rotate the guides so that all of them are passed through. If you’re stuck, you’ll see the solution above. Once complete, take the Fish and Broken Crystal from inside the panel and then put in the new crystal.
Returning to the Real World
After a cut scene with Grandpa, he’ll give you a Machete and reveal the location of the portal back home. Go to the shore and use the machete on the green cloth of the boat (a3), taking the Torch from inside before adding the fish to the rotating ball puzzle and completing it. If you’re struggling, after a reset, you need to click left twice, right three times, left twice more, and finally right. This nets you the Hexagons and a Wrench.
Head back to the lighthouse and use the wrench to open the damaged floor panel (b5), taking the Statuette and Engraved Disc from underneath. Use the machete on the window mechanism (b6) to open it. In the same close up, select the backpack and use the engraved disc to open it and get the Bolts and a Door Knocker. You can also now attach the legs and head to the statuette, which makes your inventory less cluttered. Similarly, you can use the matches on the torch to light it.

Go to the wood and use the machete on the tree roots (c4), then attach the rope, giving you access to the cave. Head inside and get the collectible on the left (d1) and the morphing object behind the beetles (d2). Use the torch to scare away the beetles, then click the suitcase they were on (d3) to start a simple object-finding puzzle. Once complete, you’ll get the Shovel.
Use the shovel on the pile of dirt (d4) to reveal the main part of the door. Click it again and move it into the door frame (d5), then click the metal sections on the side and lock them all into place with your bolts. Add the door knocker, and the portal will be complete. You can now return home.
Collecting the Valuables

Head into the hall and collect the Painting (e1), then move to the bedroom and take the second (f1) and (f2) third Paintings. You’ll find the fourth Painting in the kitchen next to the stove and the fifth Painting in the basement (h1).

While in the basement, use the machete on the chez lounge (h2) to get the Planet. Next, add the hexagons to the pattern on the wall of the stairs here (h3), then click it once more to start a character-matching puzzle. This is very simple, and you can’t actually fail. Just note that some tiles flip over to reveal a new one when you match them, so don’t obsess over one match, as it may not be there from the beginning. Once complete, you’ll find the safe behind the puzzle. Collect the Hammer, plus the Contents of the Safe, from inside.

Move back to the bedroom and use the hammer to collect the large sixth Painting (f3), revealing a cupboard behind it. Take the Lampshade from inside. Go back to the hall and add the lampshade to the lamp (e2), which reveals a pattern you’ll need for a puzzle.
The Garden Puzzle

Head to the yard and click the backdoor mat, then get a close-up of the design on the floor. I found this puzzle really tricky, and it is quite hard to describe due to the mechanism, but here goes. use the image above for guidance, with the three numbers being push or pull rows and the two letters representing the spinning circles.
- Pull towards 1.
- Rotate a one space clockwise.
- Push from 1 so that the middle of the three tokens is in the center space.
- Rotate b two spaces clockwise.
- Pull towards 1 so that the lower token is in the middle space.
- Rotate a once anticlockwise.
- Push away from 3 to the end (one space).
- Rotate a two spaces anticlockwise.
- Pull towards 3 to the end (one space).
- Rotate a two spaces anticlockwise.
- Push away from 3 to the end (one space).
- Rotate b three spaces clockwise.
- Rotate a once anticlockwise.
- Pull towards 3 one space (so nothing is in the middle or at either end).
- Push away from 2 (so the only token is in the furthest space).
- Rotate b once anticlockwise.
- Pull towards 2 just one space.
Once complete, the panel will drop down, and you can collect the Wing from below. Add this to the rest of the statuette piece, and you’ll receive the completed Statuette.
Head back to the bedroom, get a close-up of the little room revealed behind the large painting (f3), and add the completed statuette to the base there. A ladder will appear, giving you access to the attic.
The Attic

Collect the morphing object from the box (k1) and the collectible from the shelves on the left (k2), which should complete all of your collectibles for this chapter (annoyingly, the hats bugged out for me). Click the globe (k3) and once again in the close-up to open it. Add the planet and click the globe once more to begin a ring puzzle.
Each ring can go clockwise or anticlockwise, and each ring you select will move itself and at least one other ring (highlighted in blue as you hover over them). You need to align the gaps. There’s no specific way to do this, and you can’t fail, so trial and error will get you there. Once complete, take the Hint (2974) from the compartment in the globe.
Select the telephone (k4), add the hint, click the phone for a closer close-up, and put in the number 2974 (you have to drag from each number clockwise, as with a traditional old telephone). Once done, the box will open to reveal a compartment. Take the Key from inside.
Now click the red box (k5) and use the key to open it, taking the Nails. In the same close-up, click the wrapped item once to peel off a layer. Use your machete to cut the string, then peel off another layer by clicking to reveal a picture. Read the note on the picture for some more backstory, then click the picture to get your seventh Painting.
Select the broken painting (k6) and add the nails. Then, use the hammer to fix the frame. You can now collect the final Painting and complete Chapter 2 of New York Mysteries 5: Power of Art.
New York Mysteries 5 Walkthrough Chapter 3
After chapter two fills in the backstory from artist Noah’s diary, including his trip to the other world, Laura steps up her investigation to try and track him down. You’re now heading off to the address of the investor who bought the paintings.
Getting into the Base

Take the collectible (a1) by the crashed car and the morphing object (a2) from the treestump it hit. Get a close-up of the suitcase (a3) and take the Key from the jacket pocket, then click the bridge to the right of the screen to move to the abandoned village.

Once there, grab the Bell Clapper next to the door on the left (b1), the morphing object from the wall above it (b2), and the collectible from the leaves on the right (b3). Use the key to open the door (b4), then get a close-up of the door to start an object-finding puzzle.

- Click the bag (c1) and when it falls, take the Tube.
- Select the scythe to knock it (c2) and then take the Piece of Fabric from the pocket of the green jacket.
- Get a close-up of the lampshade (c3) and take the Clock Hand.
- Select the artist’s gear on the bed (c4) to take the Knob and Tweezers. In the same close-up add the tube to the iron, then take the Button.
- Grab a second Piece of Fabric from the shelves (c5) and in the same close-up use the tweezers to get the second Button from the hedgehog.
- Use the two pieces of fabric to repair the lampshade (c3).
- Click the cupboard (c6) to open it, then again for a close-up. Add the buttons to the box. You need to press them in a specific order, which you get from the lampshade: cherry, blackberry, strawberry, then pear. This opens a compartment from which you can take a second Clock Hand.
- Add the hands to the clock (c7) and set the time to 9.30 (as seen on the side of the shelves). Take the second Knob.
- Go back to the cupboard (c5), add the knobs to the shelf, click them in the correct order (circle, triangle, square, hexagon), and then take the Adjustable Wrench.
Use the adjustable wrench on the Ladder (b5) and then take it. Also, take the Glass Cutter from the cart (b6), then head back to the crashed car (a1) and use it on the window, then open the car door. This starts a simple abject collection puzzle, after which you’ll receive the Matches (they’re found by closing the box on the floor in the front seat).
Use the detail to open the suitcase (a3) and take the Bandage. Go back to the abandoned village and get a close-up of the bell tower (b7), and add the ladder. Now you can climb up to the bell, take the Detail, and add the bell clapper to the bell. Attach the bandage, then light it with the matches to give yourself time to get back to the van before the bell rings, distracting the driver.
Select the front of the van (a4), take the Key, then click the back (a5) of it to unlock the boot with the key. Put the keys back in the front of the van, then climb into the back for a cut scene.
Escaping the Hanger

Take the morphing object from the tires (d1), and the collectible from the top of the van (d2), then move the cloth on the toolbox (d3) to get the Hint. Click the doors (d4), add the hint in the close-up, then rotate the dials to match the symbol to break out of the hangar (see the image below for the puzzle solution).

Outside the base, take the collectible from the boxes on the left (e1) and the morphing object from the roof (e2). Click the trailer (e3) and move the cloth in the close-up, taking the Handle from underneath. Go back into the hangar, use the handle to open the toolbox (d3), and take the Screwdriver and Wire.

Head back outside and use the wire to hook the Keys out of the drain (e4), then use them to open the truck in the hangar (d4) and take the Magnetic Key Card from the seat. In the same close-up, click the glove compartment and take the Ball. Go outside once more and use the keycard to open the shed (e5), taking the Magnet from near the floor and the Handle from the drawer.
Tile-moving Puzzle
While still in the shed close-up, click the screens twice to start a tile-moving puzzle. If you’re stuck, move the tiles in the following order (see image for key). I found this quite tricky, but this solution does work. You just need to keep a close eye on which tile is which once you start moving them.

- 3: left and then down
- 4: left and then up.
- 1: Right, then down, then right again.
- 3: Up.
- 4: Right.
- 3: Right and then down.
- 2: Right, then down, then left, then up.
- 4: Left
- 3: Up and then left.
- 2: Down and then right.
- 1: Left, then up, then right, then down, then right again.
- 4: Down.
- 1: Left, then up
- 2: Left, then up.
Once complete, the alarm will be switched off. Select the winch (e6) and add the handle, then click the wire to automatically attach it to the trailer. Click the winch close-up again and click the handle to move the trailer to below the balcony. Select the balcony, use the screwdriver on the window, and enter the base.
Inside the Base

Take the collectible from the table (f1) and the morphing object from the headboard (f2), then use the magnet on the fishtank (f3) to extract the Engraved Detail. Select the door at the back of the room and head out into the hall.

After getting the morphing object from the wall (g1) and the collectible from the floor (g2), take the Knife from the trolley (g3) and the second Engraved Detail from under the dish that’s also on it. You can now head back into the bedroom and add the two engraved details to the trunk at the end of the bed (f4), taking the Flower and Slides from inside. In the same close-up, use the knife on the pouch to retrieve the Wooden Detail.
Add the wooden detail to the portrait above the bed (f5), taking the Hexagon Tile and Golden Element from the secret compartment that opens up. Head back out to the hall and click the red box on the table (g4), adding the golden element to open it and start a tile-sliding puzzle. It’s simple, you can’t fail, and there are many ways to complete it (I suggest doing the corners early, or you’ll have to backtrack). Once done, you’ll get a Key and your second Ball. Exit the hall through the archway on the left into the library.
The Library

You can find a collectible in the vase on the right (i1) and a morphing object on the chandelier (i2). Click the mechanism on the right wall (i3) to pull back the curtain, click the room beyond for a close-up, and take your second Flower from next to the slide projector. Now add the slides to the projector, click the green button to switch it on, then flick through the slides until you get the quest update to contact Bishop.
While still in the library, select the ornate flooring and add the hexagon tile to begin a rotation puzzle. If you’re stuck, reset and do the following:
- Take two from the bottom, then one from the right, and add that one to the bottom. Then, add the two you last picked up to the bottom, completing the green pattern.
- Take the orange from the right, then the red from the top. Place the red on the right, the orange at the top, and then the final red to the right to complete the red pattern.
- Pick up the oranges so that two are in the middle which allows you to complete the blue section on the left and then the orange.

You can now collect the Lens and your third Ball from the compartment that opens on the right of the close-up. Add the lens to the telescope (i4) and then use it to observe the pattern on the opposite roof. Click the wall on the left (i5), duplicate the pattern (see image above), and the door will open. You can’t get access yet, though.
The Cabinet

Use the key to open the door on the right of the hall (g5), gaining entry to the Cabinet. Grab the morphing object (h1) and collectible (h2) from the table, then click the telephone (h3) and use the screwdriver to open the box behind it. Take the Miniature Shield from inside, then reconnect the red wire of the telephone to call Bishop.

After the cutscene, click the map on the back wall (h4) and take the second Miniature Shield from the device. Move back to the library and select the table (i6), adding the shields to the glass display case to open it and get the Figurine.
Back in the cabinet, add the figurine to the diorama on the chair (h5), then examine it in the close-up to start an item-moving puzzle (see image above). Note some items can’t be moved until the place they need to go has been cleared. Once complete, you’ll receive the Lens.
Add the lens to the viewer on the map (h4), revealing the word Niagra. Select the Newton’s cradle (h6) and add the three balls to it. Switch the balls until they spell Niagra, and you’ll get the Graphite Stick and Hourglass Symbol. Select the pad on the desk (h7), flip the page, then use the graphite to reveal a clue.
The Last Door in the Hallway
Back in the library, select the table (i7) and click the hourglass to flip it over. Add the hourglass symbol to it, and it will open up, allowing you to take your third Flower. Head to the hallway and add the flowers to the remaining closed door (g6). Open it to start an item-finding puzzle.

- Click the bucket (k1) to find the Razor Blade and Pipe Wrench.
- Get the Crowbar from the TV (k2).
- Select the draw (k3), move the cloth on the floor to take the Valve underneath, then open the drawer to get the Jeweler’s Tools. Now use the crowbar to remove the nails and get the Gear, then remove the false bottom of the draw and get the Key.
- Select the canisters (k4) and add the valve to the one on the right, turning it to stop the gas. Now use the wrench on the pipe to get the Drum for the Musicbox.
- Use the razor blade to cut the rope (k5) and get the Ballerina Figure.
- Add the ballerina to the music box (k6) and then open it. Add the drum, click the piece at the black of the box to add it, add the screws by clicking them, then use the jewelry tools to complete the job and take the Oiler.
- Use the key to open the box (k7), add the gear, oil the mechanism, then click the grate above to open it and take the Garden Spade.
Go into the bedroom, use the spade on the plant (f6), and take the Amulet. Go back to the library and use the amulet on the device by the doors (i5), gaining access to the elevator.
Next, at the start of the concluding part of the story, Laura has broken into the base of the shadowy group that has been collecting the paintings. It seems they have been luring the creatures from the painting and storing them in the basement. But how can you get down there to put together the final pieces of the puzzle?
The Dungeon

You’ll find a collectible on the fire extinguisher (a1) and the morphing object on the wire on the back wall (a2). Click the hatch on the floor (a3) and use the screwdriver to unlock it, taking the Handle from inside. Now use the knife on the box (a4) and take the Battery. Press the red button (a5) to send the elevator down, which opens the door on the right, giving access to the dungeon.

Take the collectible from the green cloth on the right (b1) and the morphing object from the wall (b2). Select the forklift (b3) for a close-up, click the floor panel, and add the battery. Connect the two wires, then pull the lever to raise the pallet. Take the Bolt Cutters from under the pallet, then go back into the elevator and use them on the chain on the back wall (a6). Take the Detail from the top of the box behind the gate. Add the detail to the mechanism by the door (b4), and the door will open. It looks like you found the monsters…
Recovering the Varnish

After picking up the collectible from the tree stump (c1) and the morphing object from behind the fence on the left (c2), grab the Pattern Part and Fire Iron from the barbeque (c3). Use the fire iron on the planks on the front door and head inside the house.

Take the morphing object (d1) and collectible (d2) from the floor, then get the Wax next to the radio (d3). Use the fire iron to move the beams (d4) and collect the Bucket, then take the Matches from the stove (d5), opening the oven in the same close-up to also get the Oil. Head back out to the barbecue (c3), use the matches to light it, and add the wax. Once it has melted, you can click the wax once more to take the second Pattern Part.
While still out front, use the bucket on the puddle (c4) to get Water, then use the water on the drain (c5) to flush out and pick up the Stone Tile. Use the Stone Tile on the statue (c6) to start a tile-matching puzzle.
The Tile and Flask Puzzles
This is a little time-consuming, and there’s no right way to do it, and you can’t fail. It just takes patience. My tactic was to move the tiles on the left so that the insect was to the left of the sun, then move those into their correct slots on the left. Then, use the same tactic to put the rest in place. Once complete, you’ll get the Radio Reciever Knob and a Hint.

Add the knob to the radio (d3), which will open so you can collect the final Pattern Part and a Key. Add the pattern parts to the wooden box (d6) to start the flasks puzzle. Use the image above as a reference, then click the buttons in the following order: 1, 5, 1, 1, 5, 1, 5, 2, 5, 5, 5, and finally 2. The box will open, and you can take the Handle and Tweezers. Use the key on the white door at the back of the room and head downstairs.

After taking the collectible on the floor by the wardrobe (e1) and the morphing object from the cloth (e2), use the handle on the fireplace (e3), then add the oil to loosen it, opening the grate to take the Corkascrew. Use the corkscrew to open the wine bottle in the winerack (e4), then use the tweezers to get the second Hint.

Now click the wardrobe (e5) to move it to one side. Select the safe behind and the two hints, starting a decryption puzzle. You need to enter the password by working it out from the hints. Following the code, the word you need is PICTURE. Once a letter is in the right place on the top section, click the next letter on the top section and find it on the dial. Once complete, the safe will open and you’ll have the Varnish. Take it to finish the section of the game.
Bring Back the Monsters

Take the collectible from the trolley on the left (f1) and the morphing object from the piping (f2). Select the machine (f3) and take the Button on it in the close-up, then use the handle on the storage locker (f4) and take the Hose from inside.
Move back to the dungeon area and then move down the corridor at the end to the Pier. Take your final collectible from the barrels (g1) and the last morphing object from next to the box (g2). If you’ve followed all of my guides to this point, you should now have all the extra items to unlock all the extra puzzles and content.

Click the boat (g3) for a close-up and take the second Button and Cannister (you can also click the hole to get ready to fill it with petrol). Take the Crystal from the boxes (g4) and use the knife on the ropes in the same close-up to get the Painting. Click the office (g5), click the suitcase for close-up, and take the Key.
Back in the dungeon, place the canister next to the fuel barrel (b4) and fill the canister to get the Gasoline. Go back to the pier, add the gasoline to the boat, then click the office once more and add the buttons to the suitcase. Open it and take the Fuse. Select the grate opening mechanism (g6), click the silver door in the close-up, and replace the fuse. Switch the machine on, open the gate, and your escape route is secured.
Now head to the monster cave and add the painting to the trolley (f5) then use the key in the machine (f3) to turn it on. Add the varnish to the painting and enjoy the cut scene. Congratulations! You have completed New York Mysteries 5: Power of Art.
For more point-and-click walkthrough guides, check out Victorian Mysteries The Yellow Room Walkthrough and Royal Legends 1 Walkthrough right here at Pro Game Guides!