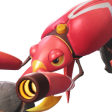
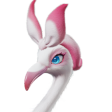
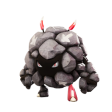
Aniimo Tier List – Best Aniimo (September 2026) [Global Launch]

Every Aniimo is worth catching, but only a select few deserve to carry your team rather than just look adorable while everything goes horribly wrong.

Updated September 16, 2026: Squashel and Sparkelf join the rankings, Hexxin replaces the old Witchin name, and several support picks move up after a closer look at their team synergies. Check out our Aniimo Tier List for the global launch on console and PC!

Recommended Videos

Want to know what the best Aniimo are at release? Aniimo, the heavily anticipated “next-gen” monster-catching game, is finally here. With so many intricate systems and robust gameplay mechanics, it can feel overwhelming, especially if you’re coming from games like Pokémon. That’s why we’ve created this Aniimo tier list - to help you decide which Aniimo are actually worth investing your time in.

Best Aniimo Tier List - Release Meta

S
Irisalis game image

Irisalis

DPSGRASS
Gracewing game image

Gracewing

HEALWIND
Inferlupa game image

Inferlupa

BREAKFIREDARK
Tubster game image

Tubster

BREAKWIND
A
Eklue game image

Eklue

SUPPORTWIND
Tromber game image

Tromber

SUPPORTWIND
Glacy game image

Glacy

HEALWATERICE
Leafy game image

Leafy

REGENGRASSWATER
Somniwing game image

Somniwing

REGENWINDGRASS
Tuckin game image

Tuckin

BREAKGRASS
Geoclaw game image

Geoclaw

BREAKICE
Melloblum game image

Melloblum

SUPPORTGRASS
Fulmintis game image

Fulmintis

DPSLIGHTNING
Rookey game image

Rookey

BREAKDARK
Grizbo game image

Grizbo

DPSEARTH
Luminelle game image

Luminelle

SUPPORTLIGHTNING
Lunara / Fennelun game image

Lunara / Fennelun

DPSLIGHT
Helion / Soleon game image

Helion / Soleon

DPSLIGHT
Scorchhowl game image

Scorchhowl

DPSFIRE
Stellarys game image

Stellarys

DPSDARK
Cornet game image

Cornet

DPSWIND
Irisal game image

Irisal

DPSGRASS
Turbo game image

Turbo

SUPPORTWIND
Shrubclaw game image

Shrubclaw

BREAKEARTHGRASS
Thornblade game image

Thornblade

DPSGRASS
Dazmand game image

Dazmand

SUPPORTLIGHTNING
Blazen game image

Blazen

BREAKLIGHTNING
Pawney game image

Pawney

DPSDARK
Minespine game image

Minespine

BREAKEARTH
Fragrancier game image

Fragrancier

SUPPORTDARK
Squashel game image

Squashel

BREAKFIRE
Sparkelf game image

Sparkelf

SUPPORTFIRE
B
Dreaple game image

Dreaple

SUPPORTDARK
Hexxin game image

Hexxin

REGENDARKGRASS
Pomawk game image

Pomawk

BREAKGRASS
Ignitis game image

Ignitis

DPSDARK
Glynsera game image

Glynsera

DPSICE
Piopiota game image

Piopiota

SUPPORTWATER
Panpanta game image

Panpanta

BREAKWATER
Sherro game image

Sherro

DPSWATER
Waleetle game image

Waleetle

DPSEARTH
Helgon game image

Helgon

BREAKWIND
Infergon game image

Infergon

DPSFIRE
Magmarex game image

Magmarex

BREAKFIREEARTH
Besauce game image

Besauce

REGENLIGHTNING
Erlath game image

Erlath

REGENWATER
Flamerion game image

Flamerion

REGENFIRE
Fenmane game image

Fenmane

DPSLIGHTNING
Bailite game image

Bailite

SUPPORTEARTH
C
Bouldus game image

Bouldus

SUPPORTEARTH

Our Aniimo tier list ranks the best Aniimo for general progression, PvE, boss encounters, PvP, and open-world exploration. Each final evolution is judged by its damage, survivability, Break potential, healing, support utility, team synergy, Pathfinding, Mobility, and Homeland Abilities, giving you a practical overview of which Aniimo are worth building around.

These are my early combat recommendations for final evolutions, branching endpoints, and standalone Aniimo. The main tier prioritizes PvE combat at comparable investment; boss and exploration ratings answer different questions. A specialist can perform above its tier with the right teammates. Rankings are editorial judgments, not measured damage standings.

Regional forms can change typing and available skills. Each row starts from the basic-form profile; do not assume every move or elemental bonus applies to every form. Evolution requirements below describe the basic branch; special forms can add conditions. TBA means not yet confirmed. PvP and Egg Heist ratings remain unranked until there is enough mode-specific testing.

Global Launch Aniimo Tier List

IMPORTANT NOTE: All stats are from the official Aniimo wiki page. This tier list ranks only the final forms of Aniimo, not all 95+ creatures currently available in the game.

Quick picks: Gracewing for flexible healing; Inferlupa for offensive Break support; Tubster for defensive Break support. Irisalis remains my provisional Grass carry pick, while Scorchhowl, Pawney, Fulmintis, and the two starters are useful damage options for different teams.

Build around your carry: Eklue for Wind, Fragrancier for Dark, Melloblum or Leafy for Grass, Dazmand or Luminelle for Lightning, and Sparkelf for Fire. The highest letter in your box is not always the best fourth slot.

AniimoEvaluation
S TierStandout choices for their combat role
Irisalis, a Grass DPS Aniimo
Irisalis SGrass · DPS · Final form

Evolution: Standalone | Obtain: Legendary tokens, personal Legendary Aniipod, then one exclusive encounter.

Pathfinding: Glide Lv.3 (launch check pending) | Mobility: TBA | Homeland Ability: Grass, Leisure

HP 90BRK 56ATK 130PD 78MD 78REG 108
PvE SBoss SPvP/Egg TBAExploration TBA
  • My Grass carry pick for a developed roster, with strong Attack and a kit built around ranged pressure and area damage. Give it a breaker and an elemental support instead of expecting one Legendary to do four jobs.
  • Leafy and Melloblum are the natural partners to consider when building around Grass damage. The team around your carry matters more than the shiny title above its head.
  • Treat this as an early recommendation, not a settled damage record. Its detailed launch rotation still needs testing, so keep reliable sustain alongside it while finding the safest damage windows.
Gracewing, a Wind HEAL Aniimo
Gracewing SWind · HEAL · Final form

Evolution: Flutternym → Gracewing | Obtain: Evolve Flutternym; exact branch requirements TBA

Pathfinding: Fly Lv.2 | Mobility: Luminous Prowl | Homeland Ability: Leisure, Wind

HP 110BRK 50ATK 98PD 85MD 85REG 104
PvE SBoss SPvP/Egg TBAExploration A
  • The safest general-purpose healer recommendation here. It combines ongoing recovery, debuff removal, shields, and a teamwide emergency heal rather than relying on one trick.
  • Its off-field healing rewards normal skill rotations, while Phantomflutter adds an energy pickup option. That is a useful support slot even when nobody is one hit from disaster.
  • Choose the healing, cleansing, or shielding tools your fight actually needs. Its limited Break pressure means you still want a dedicated breaker alongside your carry.
Inferlupa, a Fire/Dark BREAK Aniimo
Inferlupa SFire/Dark · BREAK · Final form

Evolution: Emberpup → Flameruff → Inferlupa | Obtain: Evolve Flameruff; exact branch requirements TBA

Pathfinding: TBA | Mobility: Hustle | Homeland Ability: Hauling, Fire, Dark

HP 95BRK 108ATK 89PD 70MD 80REG 99
PvE SBoss SPvP/Egg TBAExploration B
  • A top Break specialist because Unbroken Flameruff Spirit raises Break efficiency against affected targets. It helps the team create a damage window instead of merely padding its own damage.
  • Build Full Energy through basic attacks, then spend the empowered skill on the opening you need. Clones and ranged pressure give it options when standing in melee becomes unpleasant.
  • Its 108 base Break is strong, but the debuff and rotation are why I rank it here. Bring a damage dealer to cash in on the opening; this wolf is doing the setup.
Tubster, a Wind BREAK Aniimo
Tubster SWind · BREAK · Final form

Evolution: Chirpi → Tubster | Habitat: The Argent Strait | Obtain: Evolve Chirpi; exact branch requirements TBA

Pathfinding: TBA | Mobility: TBA | Homeland Ability: Wind

HP 108BRK 107ATK 80PD 66MD 109REG 80
PvE SBoss SPvP/Egg TBAExploration C
  • Shielding is part of its offensive Break engine: Victory Concerto increases Break efficiency while shielded. Use Gale Guard to establish that protection before committing to your pressure window.
  • Ceasefire Drum provides substantial damage reduction inside its field, giving Tubster real value when a difficult encounter threatens the whole team.
  • It is an excellent defensive breaker, not an invincible frontline. Its physical defense is much weaker than its magic defense, and stepping out of the protection field still has consequences.
A TierStrong picks with a clear team purpose
Eklue, a Wind SUPPORT Aniimo
Eklue AWind · SUPPORT · Final form

Evolution: Eko → Eklue | Habitat: Forest of Falling Stars | Obtain: Evolve Eko; exact branch requirements TBA

Pathfinding: Fly Lv.2 | Mobility: TBA | Homeland Ability: Hauling, Wind

HP 100BRK 49ATK 120PD 83MD 67REG 91
PvE ABoss APvP/Egg TBAExploration A
  • An excellent Wind enabler: Target Weakness lowers Wind resistance, while Judgment Storm rewards applying debuffs with a team Wind boost. Cornet and other Wind attackers make much better partners than a random carry.
  • Detect Weakness lowers critical resistance without spending EP, and marked targets enable follow-up control. That gives it useful work between ultimate windows.
  • Its 120 Attack gives it respectable personal pressure, but its biggest damage bonuses are element-specific. In a focused Wind team, its value can comfortably exceed this general A rating.
Tromber, a Wind SUPPORT Aniimo
Tromber AWind · SUPPORT · Final form

Evolution: Chirpi → Tromber | Habitat: The Argent Strait | Obtain: Evolve Chirpi; exact branch requirements TBA

Pathfinding: Fly Lv.2 | Mobility: Take Off | Homeland Ability: Wind

HP 113BRK 51ATK 119PD 79MD 81REG 88
PvE ABoss APvP/Egg TBAExploration A
  • Grouping and Wind resistance reduction make Tromber a strong partner for area damage. Zephyr’s Breath adds a team Wind buff, so plan around that element to get the full payoff.
  • Band Member restores energy to the next Chirpi-family member when you switch. Cornet or Tubster gives that family interaction a purpose; it is not free energy for every teammate.
  • Its profile favors personal damage over exceptional energy regeneration. Keep it for Wind synergy and crowd control, not as a universal battery or a guaranteed way to move bosses.
Glacy, a Water/Ice HEAL Aniimo
Glacy AWater/Ice · HEAL · Final form

Evolution: Skippy → Pranky → Glacy | Obtain: Evolve Pranky; exact branch requirements TBA

Pathfinding: Swim Lv.2 | Mobility: TBA | Homeland Ability: Ice, Water, Hauling

HP 120BRK 50ATK 95PD 72MD 110REG 88
PvE ABoss SPvP/Egg TBAExploration A
  • A dependable sustain choice with direct team healing and an ultimate that restores health inside a fixed water zone. High HP and magic defense help it survive while supporting.
  • Glimmer Shot adds a team damage buff, and water terrain reduces its energy costs. It can support your damage plan while keeping everyone upright.
  • Its healing is more dependable when allies stay within the recovery zone. Moving encounters can favor Gracewing’s broader toolkit; Glacy remains a good answer when you need straightforward healing.
Leafy, a Grass/Water REGEN Aniimo
Leafy AGrass/Water · REGEN · Final form

Evolution: Skippy → Pranky → Leafy | Habitat: The Mistwoods | Obtain: Evolve Pranky; exact branch requirements TBA

Pathfinding: Swim Lv.2 | Mobility: TBA | Homeland Ability: Water, Grass, Hauling

HP 120BRK 50ATK 95PD 82MD 82REG 106
PvE ABoss APvP/Egg TBAExploration A
  • A strong Grass-team engine. Vitality Blooms supplies energy to Grass teammates and can add healing through upgraded grass, while Lotus Bloom heals the team and boosts Grass damage.
  • Its off-field trait creates grass after teammates use skills, helping Grass attackers whose bonuses depend on terrain. This is real synergy, not decorative lawn care.
  • The elemental restriction matters. Do not expect its Grass-only recovery field to fuel a mixed team equally, and do not confuse its support package with a dedicated emergency healer.
Somniwing, a Wind/Grass REGEN Aniimo
Somniwing AWind/Grass · REGEN · Standalone

Evolution: Standalone; no evolution confirmed | Obtain: Sea of Flowers; precise spawn conditions TBA

Pathfinding: Glide Lv.2 | Mobility: TBA | Homeland Ability: Leisure, Grass, Wind

HP 111BRK 50ATK 92PD 80MD 80REG 115
PvE ABoss BPvP/Egg TBAExploration A
  • Extra team energy capacity and projectile absorption give Somniwing a useful support identity. Ethereal Light Wave also helps teammates recover energy, making it attractive beside hungry skill users.
  • Sleep can interrupt a vulnerable target, but damage wakes it and Grass targets are immune. Treat it as a short setup opportunity rather than uninterrupted crowd control.
  • Energy Orb is a charged attack, not a team damage buff. Charging takes time and energy, so prioritize support duties when your main carry can use that opening better.
Tuckin, a Grass BREAK Aniimo
Tuckin AGrass · BREAK · Final form

Evolution: Hummin → Tuckin | Obtain: Evolve Hummin; exact branch requirements TBA

Pathfinding: TBA | Mobility: TBA | Homeland Ability: Grass, Artisanship

HP 106BRK 100ATK 80PD 83MD 110REG 71
PvE ABoss APvP/Egg TBAExploration C
  • A summon-based breaker whose Hummin assistants matter to the rotation. Draw Nourishment sustains Tuckin and its summons while improving their Break efficiency.
  • Haunting Choir brings the summons to the target and adds a brief stun. Keeping those assistants active makes more sense than evaluating Tuckin as a lone attacker.
  • Its sustain is not general party healing, and its rooted setup costs energy. Bring a separate healer when necessary and avoid treating every boss as vulnerable to the stun.
Geoclaw, an Ice BREAK Aniimo
Geoclaw AIce · BREAK · Final form

Evolution: Budclaw → Geoclaw | Obtain: Evolve Budclaw; exact branch requirements TBA

Pathfinding: TBA | Mobility: Tunnel | Homeland Ability: Ice, Hauling

HP 93BRK 103ATK 80PD 113MD 79REG 82
PvE ABoss SPvP/Egg TBAExploration S
  • An excellent Ice breaker when you maintain Ice Debuff stacks: Frostbite Sunder raises Break output against sufficiently affected targets.
  • Strong physical defense, tunneling, and an ice-wall option give it more tools than a simple stagger button. It fits naturally beside Ice attackers such as Glynsera.
  • Its magic defense is less impressive, and freeze is not a universal answer to bosses. Build around the Ice interaction and use the terrain tools to create safe attack windows.
Melloblum, a Grass SUPPORT Aniimo
Melloblum AGrass · SUPPORT · Final form

Evolution: Budsquire → Melloblum | Habitat: Rosetower Woods | Obtain: Complete Flowers and Thorns; Lv.27 Budsquire with Faithful personality; Sprout Stone ×3 and Stamen of Cubbo’s Rose ×1.

Pathfinding: TBA | Mobility: TBA | Homeland Ability: Grass, Artisanship

HP 95BRK 91ATK 113PD 70MD 70REG 78
PvE ABoss APvP/Egg TBAExploration C
  • A Grass critical-damage specialist. Rose Garden rewards Grass crit teams, while Thorny Blessing adds follow-up damage when those critical hits land.
  • Basic attacks help reduce its energy costs, and Healing Rose needs critical hits to trigger its recovery. Pair it with a carry that can reliably activate the kit.
  • This is not a generic damage buff or a replacement for consistent healing. Its excellent ceiling depends on Grass damage, crits, and staying within the garden.
Fulmintis, a Lightning DPS Aniimo
Fulmintis ALightning · DPS · Final form

Evolution: Wisptis → Fulmintis | Obtain: Evolve Wisptis; exact branch requirements TBA

Pathfinding: Fly Lv.2 | Mobility: Cloak | Homeland Ability: Electric, Hauling

HP 99BRK 50ATK 130PD 66MD 70REG 105
PvE ABoss SPvP/Egg TBAExploration S
  • A strong Lightning carry with built-in critical-rate support and energy recovery from skill crits. That feedback loop is more valuable than Attack alone.
  • Its dash-and-slash sequence rewards staying on target, while ranged blade attacks add an aiming option. Dazmand or Luminelle can give a focused Lightning team a clear direction.
  • Channeling into a moving target still wastes time, and its defenses are thin. Let a breaker create the opening before committing to the expensive part of your rotation.
Rookey, a Dark BREAK Aniimo
Rookey ADark · BREAK · Final form

Evolution: Helmut → Rookey | Habitat: Russet Highlands | Obtain: Lv.45 Helmut; defeat an opponent with a defensive counter and learn Unwavering Rampart; Night Stone ×1.

Pathfinding: TBA | Mobility: Detection | Homeland Ability: Artisanship, Dark

HP 100BRK 105ATK 90PD 100MD 70REG 75
PvE ABoss SPvP/Egg TBAExploration S
  • A sturdy physical breaker with repeat slams, a short stun, and a defensive stance that helps it stay active under pressure.
  • Bouncy Sling increases Break damage taken by affected targets. Pair it with Pawney to turn successful breaks into a much more threatening damage window.
  • Its magic defense is the weak point, and Break vulnerability is not the same thing as a universal damage-taken debuff. Detection is a useful extra when you head back into the field.
Grizbo, an Earth DPS Aniimo
Grizbo AEarth · DPS · Final form

Evolution: Cubbo → Grizbo | Habitat: Rosetower Woods | Obtain: Evolve Cubbo; exact branch requirements TBA

Pathfinding: TBA | Mobility: Head Hammer | Homeland Ability: Hauling, Rock

HP 104BRK 50ATK 124PD 83MD 70REG 75
PvE ABoss SPvP/Egg TBAExploration B
  • A committed Earth carry whose Enraged state improves attack speed, skill damage, and energy recovery. Build Rage, then spend the window attacking rather than constantly swapping away.
  • Rock Smash fills Rage immediately, which gives you a way into the powered-up rotation without rebuilding everything from scratch. That gives you a clear way to start a burst window.
  • Bailite can support Earth damage; Bouldus becomes more interesting when Waleetle is also involved. Grizbo still needs safe uptime, so a breaker and sustain remain sensible investments.
Luminelle, a Lightning SUPPORT Aniimo
Luminelle ALightning · SUPPORT · Final form

Evolution: Bulbly → Veilfloat → Luminelle | Habitat: Tideblossom Coast | Obtain: Evolve Veilfloat; exact branch requirements TBA

Pathfinding: TBA | Mobility: Glow | Homeland Ability: Electric, Artisanship

HP 110BRK 50ATK 115PD 75MD 75REG 90
PvE ABoss APvP/Egg TBAExploration B
  • A Lightning-team support whose buffs improve matching teammates’ damage and Break efficiency. Put it beside Lightning attackers instead of assuming every member receives the full package.
  • Its beams provide healing options, but their targeting and elemental conditions matter. The ultimate creates a Lightning damage field rather than solving every team’s damage problem.
  • Its 90 REGEN does not make it an exceptional energy battery. Bring it for the Lightning buffs and secondary healing, and manage energy costs through the actual rotation.
Fennelun, a Light DPS Aniimo
Lunara / Fennelun ALight · DPS · Ultimate form

Evolution: No permanent evolution (Fennelun is a combat transformation) | Obtain: Starter choice. Fennelun activates through Selene's Judgment until combat ends.

Pathfinding: TBA | Mobility: Hustle | Homeland Ability: Light, Hauling

HP 100BRK 64ATK 116PD 72MD 72REG 90
PvE ABoss APvP/Egg TBAExploration B
  • A comfortable ranged starter with energy recovery, Light resistance reduction, and bonus Break damage through Lunar Eclipse. Silver Moon Marks also reward weaving basic attacks into the rotation.
  • Its trait adds damage when you are not attacking with elemental advantage, helping it remain useful across mixed encounters. You do not need to discard your starter just because something rarer turns up.
  • Fennelun is the ultimate’s temporary combat transformation, not a separate permanent evolution. Its 64 base Break does not replace a specialist breaker.
Soleon, a Light DPS Aniimo
Helion / Soleon ALight · DPS · Ultimate form

Evolution: No permanent evolution (Soleon is a combat transformation) | Obtain: Starter choice. Soleon activates through Helios' Judgment until combat ends.

Pathfinding: TBA | Mobility: Hustle | Homeland Ability: Light, Hauling

HP 100BRK 64ATK 116PD 72MD 72REG 90
PvE ABoss APvP/Egg TBAExploration B
  • The more direct melee starter, with Light-damage stacking, energy recovery, and Holy Storm to group vulnerable targets and apply bonus Break damage.
  • Build Solar Halo with basic attacks, then spend the enhanced skill where it matters. The trait’s non-advantage damage bonus helps keep Helion relevant across varied matchups.
  • Soleon is a temporary ultimate transformation. Do not budget for a separate evolution, and bring separate healing when the fight demands sustained recovery.
Scorchhowl, a Fire DPS Aniimo
Scorchhowl AFire · DPS · Final form

Evolution: Emberpup → Flameruff → Scorchhowl | Habitat: Beast Fang Ridge | Obtain: Evolve Flameruff; exact branch requirements TBA

Pathfinding: TBA | Mobility: Hustle | Homeland Ability: Fire, Hauling

HP 95BRK 52ATK 119PD 80MD 75REG 90
PvE ABoss APvP/Egg TBAExploration B
  • A strong practical Fire carry. Fire Kick costs no EP and rewards a successful dodge, while Scorching Flames adds damage against elementally countered targets.
  • Burn Breaker converts extra energy into a stronger charged attack, so save it for a clear opening instead of emptying your tank into a boss that is already moving.
  • Sparkelf gives a Fire-focused team a useful support option. Scorchhowl still needs a breaker, but efficient damage and dodge utility are perfectly good reasons to invest.
Stellarys, a Dark DPS Aniimo
Stellarys ADark · DPS · Final form

Evolution: Celestis → Stellarys | Habitat: Forest of Falling Stars | Obtain: Evolve Celestis; exact branch requirements TBA

Pathfinding: Fly Lv.1 | Mobility: TBA | Homeland Ability: Leisure, Dark

HP 95BRK 54ATK 125PD 68MD 69REG 94
PvE ABoss APvP/Egg TBAExploration B
  • Shadow Magic provides a control escape, a damage-copying clone, and a position swap. Those tools give a fragile ranged attacker useful ways to keep dealing damage.
  • Tracking stars build damage, and its sustained attacks reward maintaining uptime. Fragrancier is a meaningful partner when you commit to Dark damage.
  • It remains vulnerable when you mismanage positioning or energy. The clone has a distance limit, so running halfway across the arena is not a sophisticated damage rotation.
Cornet, a Wind DPS Aniimo
Cornet AWind · DPS · Final form

Evolution: Chirpi → Cornet | Habitat: The Argent Strait | Obtain: Evolve Chirpi; exact branch requirements TBA

Pathfinding: Fly Lv.3 | Mobility: Take Off | Homeland Ability: Wind

HP 96BRK 54ATK 121PD 74MD 70REG 94
PvE ABoss APvP/Egg TBAExploration S
  • A ranged Wind carry with a coherent support shell: Eklue lowers Wind resistance, while Tromber adds Wind buffs and family-based energy support.
  • Air Superiority rewards flying with extra critical rate. Its cheaper setup attacks matter just as much as the expensive Wind Bomb Rush.
  • The barrage needs a reliable opening, and Take Off increases incoming damage while airborne. Fly Lv.3 is excellent traversal utility, but flying is not the same as being safe.
Irisal, a Grass DPS Aniimo
Irisal AGrass · DPS · Final form

Evolution: Iris → Irisal | Habitat: Sea of Flowers | Obtain: Evolve Iris; exact branch requirements TBA

Pathfinding: TBA | Mobility: Blooming | Homeland Ability: Grass, Leisure

HP 100BRK 52ATK 118PD 70MD 70REG 94
PvE ABoss APvP/Egg TBAExploration B
  • A Grass damage dealer with a real terrain payoff: its trait increases damage while standing on grass. Leafy is a particularly useful partner for creating that setup.
  • Repeated skill hits build Dance Power toward a free cast, helping offset the beam’s high energy cost. Plan the cycle instead of judging every beam at its full price.
  • Movement and lost uptime can disrupt the payoff. Irisal evolves from Iris; it is not a stepping stone you should expect to turn into the separate Legendary Irisalis.
Turbo, a Wind SUPPORT Aniimo
Turbo AWind · SUPPORT · Final form

Evolution: Nimbi → Turbo | Habitat: Nimbus Fields | Obtain: Evolve Nimbi; exact branch requirements TBA

Pathfinding: Fly Lv.2 | Mobility: Cloudwalk | Homeland Ability: Leisure, Wind

HP 95BRK 50ATK 110PD 80MD 96REG 87
PvE ABoss APvP/Egg TBAExploration S
  • A useful general support with damage and Break assistance, self-protection, and healing pickups. Nimbi Burst gives it a useful way to support both damage and Break pressure.
  • Build Shrouded in Mist through basic attacks before using the skill you want to enhance. That preparation is the difference between a basic button press and a proper support rotation.
  • Cloudwalk adds excellent travel value. Its shield protects itself, however, and collecting healing drops is less reliable than an immediate team heal during heavy pressure.
Shrubclaw, an Earth/Grass BREAK Aniimo
Shrubclaw AEarth/Grass · BREAK · Final form

Evolution: Budclaw → Shrubclaw | Habitat: Berylline Causeway | Obtain: Evolve Budclaw; exact branch requirements TBA

Pathfinding: TBA | Mobility: Tunnel | Homeland Ability: Rock, Grass, Hauling

HP 95BRK 104ATK 80PD 109MD 77REG 85
PvE ABoss APvP/Egg TBAExploration S
  • A physical-frontline breaker with a useful trait loop: skill hits build Momentum, tunneling accelerates that buildup, and the payoff increases Break efficiency.
  • Its charged attack allows movement during the wind-up. That helps you reposition during setup, while Tunnel adds defensive and exploration utility.
  • Magic-heavy encounters are less comfortable, and reaching the trait’s payoff still takes setup. Choose it for sustained Break pressure rather than instant burst.
Thornblade, a Grass DPS Aniimo
Thornblade AGrass · DPS · Final form

Evolution: Budsquire → Thornblade | Habitat: Sea of Flowers | Obtain: Evolve Budsquire at Lv.27 after defeating Thornblade with only Budsquire in the party; Sprout Stone ×1.

Pathfinding: TBA | Mobility: TBA | Homeland Ability: Grass, Artisanship

HP 96BRK 53ATK 121PD 74MD 73REG 92
PvE ABoss APvP/Egg TBAExploration C
  • Sword Dance rewards alternating skills and basic attacks with empowered basic hits. The damage plan does not disappear simply because you miss a perfect counter.
  • A well-timed defensive skill adds critical-rate support, while Thorny Impact provides another route to improving crits. Melloblum is an obvious partner for a Grass crit setup.
  • You still need to manage stacks and stay in melee. It rewards clean execution, with proactive damage tools as well as reactive counters.
Dazmand, a Lightning SUPPORT Aniimo
Dazmand ALightning · SUPPORT · Final form

Evolution: Pomegg → Dazmand | Obtain: Evolve Pomegg; exact branch requirements TBA

Pathfinding: TBA | Mobility: TBA | Homeland Ability: Electric, Hauling

HP 100BRK 55ATK 108PD 81MD 90REG 88
PvE ABoss APvP/Egg TBAExploration C
  • A Lightning enabler that combines grouping, Lightning critical-rate support, and debuff application. Fulmintis and Blazen give those bonuses an immediate purpose.
  • Its entry trait makes the first skill free within a short window. Switch with a plan and spend that benefit on a useful setup skill.
  • Its 55 base Break makes a dedicated breaker worthwhile. Choose Dazmand for Lightning synergy and efficient entry, then let another teammate handle the heavy stagger work.
Blazen, a Lightning BREAK Aniimo
Blazen ALightning · BREAK · Final form

Evolution: Bolty → Blazen | Habitat: Blitzwood | Obtain: Defeat Alpha Blazen; evolve Lv.33 Bolty under the Blitz Tree in Blitzwood; Roar Stone ×1.

Pathfinding: Climb Lv.3 | Mobility: High Jump | Homeland Ability: Electric, Artisanship

HP 100BRK 104ATK 100PD 70MD 70REG 86
PvE ABoss APvP/Egg TBAExploration A
  • Critical hits feed Overcharged, reducing skill costs and giving a small shield. Several attacks already improve their own crit rate, so the loop is less demanding than the old ranking suggested.
  • Dazmand and Luminelle are useful Lightning partners. Its 104 base Break also lets it contribute pressure without being a pure support passenger.
  • Overcharged prevents ultimate-energy gain while active. Manage that trade-off, and remember that a small shield does not make its modest defenses disappear.
Pawney, a Dark DPS Aniimo
Pawney ADark · DPS · Final form

Evolution: Helmut → Pawney | Obtain: Pull out the Sword of Bravery; Lv.45 Helmut; Night Stone ×1.

Pathfinding: TBA | Mobility: Hookshot | Homeland Ability: Artisanship, Dark

HP 90BRK 55ATK 125PD 84MD 70REG 81
PvE ABoss SPvP/Egg TBAExploration S
  • A convincing Break-window carry. Pursuit improves damage against controlled or broken enemies, while its ultimate stance adds another reason to attack during a break.
  • Rookey is a natural partner for creating those windows. Use the stance and follow-up strike deliberately instead of treating the ultimate as a single damage button.
  • It is less impressive when the target cannot be controlled and you fail to create breaks. Hookshot adds useful field value without being the reason for its combat promotion.
Minespine, an Earth BREAK Aniimo
Minespine AEarth · BREAK · Final form

Evolution: Pebbling → Geodeback → Minespine | Obtain: Defeat Alpha Minespine; evolve Lv.48 Geodeback with Loam Stone ×3.

Pathfinding: TBA | Mobility: Tunnel | Homeland Ability: Hauling, Rock

HP 110BRK 105ATK 90PD 97MD 60REG 78
PvE ABoss APvP/Egg TBAExploration S
  • Tunnel is part of its combat kit: Earth Affinity improves Break damage while tunneling, and the underground state protects against ranged attacks while consuming stamina.
  • This gives Minespine a valuable way to keep applying pressure in ranged-heavy encounters. Its strong physical durability adds another reason to consider it.
  • Its magic defense is low, and Seismic Wave is an expensive sustained cast. Use the tunneling interaction thoughtfully rather than treating its base Break number as the whole story.
Fragrancier, a Dark SUPPORT Aniimo
Fragrancier ADark · SUPPORT · Final form

Evolution: Dewy → Fragrancier | Habitat: Sea of Flowers | Obtain: Evolve Dewy; exact branch requirements TBA

Pathfinding: Fly Lv.2 | Mobility: Take Off | Homeland Ability: Perfumery, Dark, Leisure

HP 84BRK 81ATK 111PD 68MD 65REG 110
PvE ABoss APvP/Egg TBAExploration A
  • A valuable Dark-team enabler. Its trait lowers Dark resistance, Fragrance Marking improves Dark basic-attack damage, and its ultimate boosts team Dark damage.
  • Pawney, Stellarys, and Ignitis can actually use those bonuses. Withering Bloom adds secondary healing, with a stronger heal when only one target is in range.
  • It is fragile and is not a universal healer. Build around Dark damage and the support slot makes sense; drop it into an unrelated team and much of the value disappears.
Squashel Aniimo
Squashel AFire · BREAK · Final form

Evolution: Squarrel → Squashel | Obtain: Evolve Lv.47 Squarrel with Wave Stone ×1.

Pathfinding: Climb Lv.2 | Mobility: TBA | Homeland Ability: Fire, Artisanship

HP 110BRK 108ATK 82PD 80MD 80REG 88
PvE ABoss APvP/Egg TBAExploration B
  • A missing Fire breaker with 108 base Break, good HP, and a Pinecone-mark combo. Apply the mark, then spend it on the follow-up that fits your opening.
  • Heavy Tail Strike adds control against vulnerable targets, while Blazing Fist Barrage empowers a follow-up basic attack. Its trait also rewards using basics between skills.
  • The mark requirements add setup, and it lacks Tubster’s team protection. It is still a credible offensive breaker, with Climb Lv.2 as a useful field extra.
Sparkelf Aniimo
Sparkelf AFire · SUPPORT · Standalone

Evolution: Standalone; no evolution confirmed | Obtain: TBA

Pathfinding: TBA | Mobility: TBA | Homeland Ability: Fire

HP 107BRK 50ATK 113PD 60MD 88REG 99
PvE ABoss APvP/Egg TBAExploration TBA
  • A Fire-team support worth adding to the list. Its passive and active buffs reward a Fire-focused party, with Inspiration providing a zero-EP damage-buff option.
  • Treat Feed adds single-target recovery, while its fireball options give it something useful to do between buffs. Scorchhowl or Infergon are natural partners.
  • Its physical defense is low, and most of its offensive support is Fire-specific. Treat it as a specialist enabler with backup healing, not a universal replacement for Gracewing.
B TierSolid picks and more conditional specialists
Dreaple, a Dark SUPPORT Aniimo
Dreaple BDark · SUPPORT · Final form

Evolution: Nimbi → Dreaple | Obtain: Evolve Nimbi; exact branch requirements TBA

Pathfinding: Fly Lv.2 | Mobility: TBA | Homeland Ability: Leisure, Dark

HP 100BRK 50ATK 110PD 77MD 103REG 80
PvE BBoss BPvP/Egg TBAExploration A
  • A Dark-team specialist built around Drowsiness and Nightmare. Its resistance reduction and team Dark buff can make it much more useful than B suggests in the right lineup.
  • Nightmare Devourer provides recovery and consumes nearby Nightmare effects. Decide whether you need the healing or want to preserve the offensive setup.
  • The ramp and damage-breaking control make it less immediate than simpler supports. It rewards a planned Dark rotation rather than being a universal flex slot.
Hexxin (formerly Witchin), a Dark/Grass REGEN Aniimo
Hexxin (Witchin) BDark/Grass · REGEN · Final form

Evolution: Hummin → Hexxin | Habitat: The Mistwoods | Obtain: Evolve Hummin; exact branch requirements TBA

Pathfinding: TBA | Mobility: Luminous Seed | Homeland Ability: Artisanship, Grass, Dark

HP 115BRK 50ATK 88PD 84MD 90REG 115
PvE BBoss BPvP/Egg TBAExploration B
  • Hexxin, formerly Witchin, specializes in disruption: grouping, energy recovery, and attacks that reduce incoming healing or future shields on enemies.
  • Use it when those debuffs solve an actual problem. Its value rises against sustain-heavy opponents, while ordinary damage races may favor a more direct support.
  • Malicious Outburst is not self-healing, and REGEN does not mean it replaces your healer. Build it for disruption and energy management while keeping a separate source of healing.
Pomawk, a Grass BREAK Aniimo
Pomawk BGrass · BREAK · Final form

Evolution: Pomegg → Pomawk | Habitat: Rosetower Woods | Obtain: Evolve Pomegg; exact branch requirements TBA

Pathfinding: TBA | Mobility: TBA | Homeland Ability: Grass, Hauling

HP 87BRK 107ATK 90PD 80MD 76REG 100
PvE BBoss APvP/Egg TBAExploration C
  • A focused Grass breaker with strong base Break and a charged attack that rewards a well-timed release with extra Break damage.
  • Rhythm Combo helps build Volume, and the kit includes control options depending on your available skills. Those options give it tools beyond simply filling the stagger bar.
  • It still offers less protection than Tubster or sturdier defensive breakers. Pick it when you want active, timing-based pressure and can cover healing elsewhere.
Ignitis, a Dark DPS Aniimo
Ignitis BDark · DPS · Final form

Evolution: Wisptis → Ignitis | Habitat: Berylline Causeway | Obtain: Lv.29 Wisptis; defeat three Wisptis of the same form consecutively; Night Stone ×1.

Pathfinding: Fly Lv.2 | Mobility: Cloak | Homeland Ability: Artisanship, Dark

HP 90BRK 52ATK 125PD 77MD 70REG 91
PvE BBoss BPvP/Egg TBAExploration S
  • A strong cleanup attacker: defeating targets builds Battlelust, and Dark Soul rewards attacking weakened enemies with the possibility of a free recast after a kill.
  • Dark Dash and Scythe Dance provide a damage loop between finishers. Fragrancier can make a Dark-focused setup considerably more attractive.
  • A lone healthy boss denies the easy kill-chain payoff, so its mob-clearing strength should not automatically become an S boss rating. Cloak remains useful outside combat.
Glynsera, an Ice DPS Aniimo
Glynsera BIce · DPS · Final form

Evolution: Bonesky → Fenrier → Glynsera | Habitat: Beast Fang Ridge | Obtain: Evolve Lv.34 Fenrier with Freeze Stone ×1.

Pathfinding: TBA | Mobility: Hustle | Homeland Ability: Ice, Artisanship

HP 95BRK 53ATK 118PD 72MD 76REG 98
PvE BBoss APvP/Egg TBAExploration B
  • An Ice carry that rewards maintaining Ice Debuff stacks. Its trait improves crit rate against sufficiently affected targets, while Frost Tail Strike can cash stacks in for extra damage.
  • Geoclaw provides a sensible breaker partner for that Ice setup. Decide when to maintain stacks and when to spend them rather than pressing every available button.
  • Energy use and sustained contact matter to its spinning attacks. It is a good specialist, but interruptions and short encounters make its payoff less consistent.
Piopiota, a Water SUPPORT Aniimo
Piopiota BWater · SUPPORT · Final form

Evolution: Susuta → Popota → Piopiota | Obtain: Lv.39 Popota; attract an opposite-sex Susuta to follow; Wave Stone ×3.

Pathfinding: Swim Lv.3 | Mobility: TBA | Homeland Ability: Leisure, Water

HP 102BRK 50ATK 108PD 99MD 75REG 88
PvE BBoss BPvP/Egg TBAExploration S
  • A Water support built around puddles, healing, and team Water bonuses. Surf creates the terrain that helps the rest of its kit function.
  • Radiant Charm depends on teammates of the opposite sex. Check the actual team before counting that bonus as active on every member.
  • Its 50 base Break means it should fill a support slot rather than your dedicated breaker slot. Swim Lv.3 remains a strong reason to keep it available for exploration.
Panpanta, a Water BREAK Aniimo
Panpanta BWater · BREAK · Final form

Evolution: Susuta → Popota → Panpanta | Habitat: Echoback Landing | Obtain: Defeat Alpha Panpanta; evolve Lv.39 Popota with Wave Stone ×3.

Pathfinding: Swim Lv.1 | Mobility: TBA | Homeland Ability: Leisure, Water

HP 104BRK 100ATK 85PD 70MD 106REG 80
PvE BBoss APvP/Egg TBAExploration B
  • A Water breaker that gains extra value from nearby water and a suitable Susuta-family teammate. Build around those conditions to get more than the basic statline.
  • Hydro Roll adds sustained pressure, while Splash Shield helps keep the rotation going. Water teams can support its setup much more naturally than random mixed lineups.
  • Appeal requires an opposite-sex family member, and its strongest rotation asks for terrain and stamina management. Without that support, a more self-contained breaker is easier to recommend.
Sherro, a Water DPS Aniimo
Sherro BWater · DPS · Final form

Evolution: Shelly → Sheldon → Sherro | Obtain: Defeat Omega Sherro; evolve Lv.39 Sheldon with Wave Stone ×1.

Pathfinding: TBA | Mobility: TBA | Homeland Ability: Leisure, Water

HP 100BRK 50ATK 121PD 75MD 75REG 88
PvE BBoss APvP/Egg TBAExploration C
  • A physical Water attacker whose damage improves around water terrain. Its slash-based kit benefits from setting up the fight before committing to melee.
  • Hydro Roll can create a puddle, giving it some control over its own terrain requirements. Erlath or Piopiota can make a focused Water team more coherent.
  • Its core damage plan asks you to commit to close-range attacks. Mobile targets and interrupted sequences can still cut into its damage, so use a breaker to secure openings.
Waleetle, an Earth DPS Aniimo
Waleetle BEarth · DPS · Final form

Evolution: Baleetle → Waleetle | Habitat: Berylline Causeway | Obtain: Evolve Baleetle; exact branch requirements TBA

Pathfinding: TBA | Mobility: Hustle | Homeland Ability: Leisure, Rock

HP 90BRK 52ATK 114PD 80MD 80REG 100
PvE BBoss APvP/Egg TBAExploration B
  • A sustained Earth attacker whose moving and spinning kit builds toward an empowered skill. Sandstorm Spin rewards uptime and deals extra damage to broken targets.
  • Bouldus has a specific partnership here: Waleetle can break its Rock Piles to trigger resistance-reducing shock waves. That is a much better reason to pair them than shared typing alone.
  • Spinning consumes energy and needs a target that stays reachable. A strong setup can outperform this general rating, but it asks for more commitment than a quick burst carry.
Helgon, a Wind BREAK Aniimo
Helgon BWind · BREAK · Final form

Evolution: Jawling → Helmwhelp → Helgon | Habitat: Russet Highlands | Obtain: Open 30 world chests; evolve Lv.48 Helmwhelp with Gust Stone ×3.

Pathfinding: Fly Lv.2 | Mobility: Bilateral | Homeland Ability: Hauling, Wind

HP 104BRK 102ATK 87PD 98MD 68REG 84
PvE BBoss APvP/Egg TBAExploration A
  • A defensive Wind breaker that rewards receiving attacks and timing counters. Its trait and Wind Counter can improve Break efficiency during frontline pressure.
  • Wind Tackle adds damage reduction, giving it tools to stay engaged against physical attackers. It fits players who enjoy reacting to enemy patterns.
  • Its magic defense is weaker, and enemies that refuse to attack you deny part of the payoff. Use it for the matchup rather than assuming every fight is a perfect counter demonstration.
Infergon, a Fire DPS Aniimo
Infergon BFire · DPS · Final form

Evolution: Jawling → Helmwhelp → Infergon | Obtain: Defeat Omega Infergon; Lv.48 Helmwhelp with Perfect Potential; Blaze Stone ×1.

Pathfinding: Fly Lv.2 | Mobility: Bilateral | Homeland Ability: Fire, Hauling

HP 95BRK 50ATK 125PD 70MD 85REG 80
PvE BBoss APvP/Egg TBAExploration A
  • A Fire damage dealer whose attacks reward keeping pressure on the target and maintaining its fire-based setup. Sparkelf can support that elemental plan.
  • Its 125 Attack provides a strong offensive foundation, but its defenses are less forgiving. Treat it as a carry that wants a clean opening.
  • It lacks the general safety and setup tools of the best all-purpose picks. Bring Break support, avoid overcommitting to attack animations, and keep Bilateral as a separate field benefit.
Magmarex, a Fire/Earth BREAK Aniimo
Magmarex BFire/Earth · BREAK · Final form

Evolution: Pebbling → Lavazar → Magmarex | Habitat: Zephyrus Landbridge | Obtain: Defeat Alpha Magmarex; Lv.48 Lavazar; soak in a hot spring; Blaze Stone ×1.

Pathfinding: TBA | Mobility: Fast and Furious | Homeland Ability: Rock, Fire, Hauling

HP 110BRK 104ATK 91PD 70MD 89REG 75
PvE BBoss APvP/Egg TBAExploration B
  • A Fire/Earth breaker whose attacks apply and spend Fire Debuff stacks. Lava Punch cashes stacks in, while the ultimate rewards targets that already carry them.
  • Its zero-EP Lava Breath helps establish pressure without immediately draining the resource bar. A Fire-focused lineup can make the setup easier to sustain.
  • The stack conditions and short stun make it less universally convenient than the leading breakers. Do not budget an entire boss strategy around repeatedly stunning a target that resists it.
Besauce, a Lightning REGEN Aniimo
Besauce BLightning · REGEN · Standalone

Evolution: Standalone; no evolution confirmed | Obtain: TBA

Pathfinding: TBA | Mobility: TBA | Homeland Ability: Electric, Artisanship

HP 88BRK 90ATK 92PD 75MD 75REG 118
PvE BBoss BPvP/Egg TBAExploration C
  • A Lightning rotation specialist with cheap energy recovery and an ultimate that lowers Lightning resistance. That is useful support for a matching carry.
  • Power Surge helps when you cast at low energy, giving it a reason to keep its own rotation moving rather than hoarding a full bar.
  • Its 118 REGEN is healthy, but the stat alone does not make every teammate regenerate faster. It offers little emergency protection, so cover sustain and Break elsewhere.
Erlath, a Water REGEN Aniimo
Erlath BWater · REGEN · Final form

Evolution: Fahloo → Erlath | Habitat: Tideblossom Coast | Obtain: Evolve Fahloo; exact branch requirements TBA

Pathfinding: Fly Lv.3, Swim Lv.2 | Mobility: Floaty Bubble | Homeland Ability: Water

HP 120BRK 50ATK 90PD 80MD 90REG 110
PvE BBoss BPvP/Egg TBAExploration S
  • A Water-team energy engine. Its bubble field rewards Water skill casts, while the ultimate creates bubbles and boosts teammates’ Water damage.
  • Puddles improve the energy payoff, so Sherro and other Water-focused teammates give it a clearer job. It is substantially less universal than a generic “team battery” label suggests.
  • It provides limited emergency healing or hard control. Excellent traversal keeps it useful in the field, but bring a dedicated healer when incoming damage becomes the real problem.
Flamerion, a Fire REGEN Aniimo
Flamerion BFire · REGEN · Final form

Evolution: Sparki → Flamerion | Habitat: Beast Fang Ridge | Obtain: Evolve Sparki; exact branch requirements TBA

Pathfinding: TBA | Mobility: TBA | Homeland Ability: Fire

HP 80BRK 50ATK 113PD 70MD 89REG 115
PvE BBoss BPvP/Egg TBAExploration C
  • A Fire-debuff specialist that can restore energy with Phantom Barrage. Fire Orb and Trick Fire Ring help establish the stacks its resource loop wants.
  • Its ring rewards spacing, and the ultimate supplies a larger batch of Fire Debuff stacks. A coordinated Fire team gives it more purpose than treating it as an awkward generic attacker.
  • Low HP makes mistakes expensive. Its free recovery tool makes it worth considering when your team can maintain the Fire stacks it needs.
Fenmane, a Lightning DPS Aniimo
Fenmane BLightning · DPS · Final form

Evolution: Fentuft → Fenmane | Habitat: Driftwise Meadow | Obtain: Evolve Fentuft; exact branch requirements TBA

Pathfinding: Fly Lv.3 | Mobility: Scurry | Homeland Ability: Electric, Hauling

HP 100BRK 50ATK 125PD 70MD 70REG 90
PvE BBoss APvP/Egg TBAExploration S
  • Thunder Field and Thunder Imprint reward repeated Lightning hits and debuff buildup. Evaluate that sustained damage loop rather than dismissing it because the ultimate has a modest headline Power.
  • Thunderwing Stance strengthens the volley, and a Lightning-focused team helps make the setup worthwhile. Dazmand is worth considering for coordinated debuff pressure.
  • The ramp is still a drawback in short fights, so this is a specialist promotion rather than an S-tier declaration. Fly Lv.3 and Scurry also make it a strong exploration companion.
Bailite, an Earth SUPPORT Aniimo
Bailite BEarth · SUPPORT · Final form

Evolution: Cozite → Bailite | Habitat: Zephyrus Landbridge | Obtain: Evolve Cozite; exact branch requirements TBA

Pathfinding: TBA | Mobility: TBA | Homeland Ability: Hauling, Rock

HP 90BRK 50ATK 116PD 100MD 83REG 75
PvE BBoss BPvP/Egg TBAExploration C
  • An Earth support with stacking Earth resistance reduction and a sentry that follows up team skill use. Its job is to help matching carries convert repeated attacks into stronger Earth pressure.
  • Grizbo or Waleetle can use its elemental debuff. Its 90 HP and 100 physical defense give it reasonable protection against physical pressure.
  • Turret Mode spends energy and limits your movement, while base Break is only 50. Pair it with a separate breaker and use its slot to improve Earth damage.
C TierNarrow picks that need a specific setup
Bouldus, an Earth SUPPORT Aniimo
Bouldus CEarth · SUPPORT · Final form

Evolution: Baleetle → Bouldus | Habitat: Berylline Causeway | Obtain: Evolve Baleetle; exact branch requirements TBA

Pathfinding: TBA | Mobility: TBA | Homeland Ability: Leisure, Rock

HP 91BRK 52ATK 114PD 101MD 54REG 104
PvE CBoss BPvP/Egg TBAExploration C
  • A narrow Earth setup piece whose main selling point is its partnership with Waleetle. Rock Piles become resistance-reducing shock waves when Waleetle breaks them with Stone Ball Drift.
  • That interaction gives it a real team purpose, and the ultimate creates more piles. In that specific pairing, it deserves more consideration than its general C rating suggests.
  • Outside the pairing, the expensive rolling mode and very low magic defense are hard to justify over more flexible supports. Specialist does not mean useless; it means bring the actual partner.

RELATED: Aniimo Codes

How I Rank Aniimo Tier List

I judge every Aniimo within its intended role. A healer doesn't need to match a DPS unit’s damage, but it must provide enough recovery, protection, or utility to justify taking a team slot.

  • Role performance: Damage dealers need reliable output, Break specialists must create consistent openings, and supports should noticeably improve the entire team.
  • Consistency: Accurate attacks, manageable EP costs, short setup times, and forgiving rotations matter more than an impressive ability that rarely lands cleanly.
  • Survivability: Strong defenses, healing, shields, mobility, and safe attack animations help an Aniimo stay useful during difficult encounters.
  • Team contribution: Buffs, resistance reduction, crowd control, EP recovery, and enemy grouping can be more valuable than personal damage.
  • Content performance: General PvE, bosses, PvP or Egg Heist, and exploration are considered separately. A specialist is not treated as universally powerful because it dominates one activity.
  • Team-building flexibility: Aniimo that work in several compositions rank above alternatives that require a specific element, teammate, or setup.
  • Investment value: Evolution requirements and availability matter, although accessibility does not completely override combat power.
  • Exploration and Homeland utility: Pathfinding, Mobility skills, and Homeland Abilities add value, especially when two combat options perform similarly.
  • Known Limitations: Expensive skills, long animations, unreliable targeting, elemental weaknesses, and dependence on stacks or transformations can all lower a placement.

RELATED: Aniimo vs Palworld vs Pokemon – Similarities & Differences Explained

Best Aniimo for Beginners

Helion and Lunara are the natural starting points because you choose between them at the beginning. Helion is the more straightforward option, combining physical damage, grouping, mobility, healing, and useful AoE attacks. Lunara requires slightly more attention to stacks and resistance reduction, but its mix of damage, Break support, sustain, and EP recovery makes it easy to fit into most early teams. Neither starter’s ultimate transformation counts as a permanent evolution.

Gracewing is one of the safest long-term targets for new players. Its healing, cleansing, and persistent recovery zones can stabilize an imperfect team while you learn enemy patterns. It does very little damage or Break damage, so it works best beside an attacker and a dedicated breaker.

For that breaker slot, Wavwal is particularly beginner-friendly. It combines strong Break pressure with good defenses and a team shield, making mistakes less punishing. Coraliz offers more control and EP utility, but traps and positioning require slightly more planning.

Tromber is another excellent general-purpose choice. Grouping, resistance reduction, critical support, and EP recovery improve several different team styles. It also brings Fly Lv.2 and Take Off for exploration, so the investment remains useful even when it is not part of your current combat lineup.

Best Aniimo by Role

  • Best all-purpose DPS: Irisalis
    • High attack, tracking damage, AoE pressure, healing, and a self-revival interaction give it an unusually complete kit. Fly Lv.3 and excellent Homeland abilities make it valuable beyond combat as well.
  • Best physical boss DPS: Grizbo
    • Its high attack, stacking mechanic, stun, and powerful ultimate shine during longer encounters. It needs time to build momentum, so it is less impressive when enemies disappear before the rotation gets going.
  • Best self-sustaining carry: Malevsera
    • Demonic State combines offense, healing, damage reduction, and transformation-based pressure. It works especially well when you want a carry that does not constantly need babysitting.
  • Best universal breaker: Wavwal
    • Strong Break, excellent durability, cheap pressure tools, and a party shield make it one of the safest choices for difficult encounters.
  • Best control breaker: Coraliz
    • Traps, vulnerability effects, Coral Prison, and EP generation let it control the battlefield while preparing burst windows for teammates.
  • Best boss breaker: Inferlupa
    • Repeated Break pressure and clone-assisted attacks make it excellent at opening damage windows against durable targets.
  • Best offensive support: Eklue
    • Resistance reduction, critical support, stuns, and unusually high attack allow it to strengthen the team without becoming passive baggage.
  • Best crowd-control support: Tromber
    • Grouping, resistance pressure, critical buffs, and EP recovery make it ideal for AoE teams and enemy-heavy encounters.
  • Best healer: Gracewing
    • Reliable healing, cleansing, recovery zones, and emergency assistance cover almost everything a dedicated sustain slot needs to do.
  • Best defensive healer: Glameep
    • High defenses, repeated healing, shields, and AoE recovery make it particularly comfortable in difficult PvE and longer boss fights.
  • Best exploration Aniimo: Irisalis
    • Fly Lv.3 gives it elite Pathfinding, while its combat strength ensures you are not carrying a weak party member purely for traversal.
  • Best specialist explorers:
    • Piopiota and Gachapus offer Swim Lv.3, Blazen provides Climb Lv.3 and High Jump, Pawney has Hookshot, while Rookey’s Detection helps uncover nearby objects and cloaked Aniimo.
  • Best Homeland worker: Somniwing
    • Leisure Lv.4, Grass Lv.4, and Wind Lv.4 give it the broadest high-level Homeland package in the current roster. Irisalis is another premium worker with Grass Lv.4 and Leisure Lv.4.

RELATED: Aniimo Beginner’s Guide – What to Do First and Mistakes to Avoid

And there you have it, my Aniimo Tier List has come to an end. As I’ve already mentioned, this is just a preliminary ranking based on my previous experience, educated guesses from early evaluations, and some objective reasoning. Make sure to bookmark this page, as I’ll continue updating the rankings as I spend more time with each Aniimo and get a better understanding of the meta.

Thanks for reading, and since you've come this far, why not take a look at some of our other Aniimo guides? Over at our hub page, you'll find all sorts of tier lists, walkthroughs, guides, how-tos, and much more.


Recommended Articles
Follow us on Twitter and Facebook to get updates on your favorite games!

About the Author

Nikola Savic

Senior Staff Writer

Nikola is a Senior Staff Writer at Pro Game Guides with over 14 years of experience in gaming and esports journalism. A former editor-in-chief of the Serbian gaming publication Play!Zine and the RUR Esports portal, he has covered games professionally since 2012 across both Serbian and international media (senior editor at GINX Esports and GosuNoob). At PGG, he focuses on Roblox guides and tier lists, with particular depth in anime-inspired action RPGs and horror experiences like Paradox. Having been gaming since the early ’90s, he is a longtime PC gamer, and he brings an RPG and strategy game mindset to evaluating builds, meta picks, and game mechanics.

Topics covered: Roblox, RPG, Horror, Strategy, Arc Raiders

Find Nikola Savic on: Twitter

Forgot password
Enter the email address you used when you joined and we'll send you instructions to reset your password.
If you used Apple or Google to create your account, this process will create a password for your existing account.
This site is protected by reCAPTCHA and the Google Privacy Policy and Terms of Service apply.
Reset password instructions sent. If you have an account with us, you will receive an email within a few minutes.
Something went wrong. Try again or contact support if the problem persists.