Our The Last Word Guide for Destiny 2: Forsaken & Black Armory will show you step-by-step how-to obtain this Exotic Hand Cannon! We've got all the quest steps below, and we've added a bunch of tips and explanations on how to best complete them.
The Last Word Release Date
The Last Word was released on January 29th, 2019!
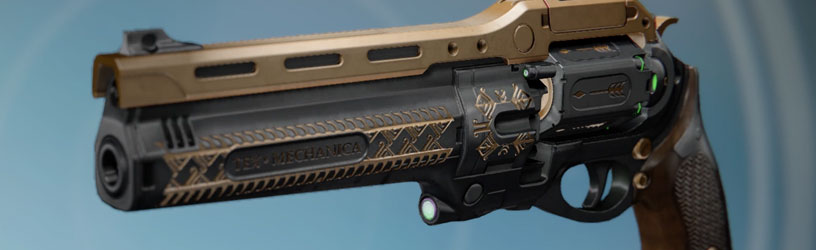
The Last Word - Exotic Kinetic Hand Cannon
"Yours, until the last flame dies and all words have been spoken." - Shin Malphur to you, as you journey forth into the unknown
The Last Word Perks
- Fan Fire: This weapon can be fired quickly and continuously. Faster reload and increased accuracy on successive hip-fire damage.
- Corkscrew Rifling: Balanced barrel. - Slightly increases range and stability - Slightly increases handling speed
- Accurized Rounds: This weapon can fire longer distances. - Increases range
- Hip-Fire Grip: Ergonomic grips that increase accuracy and stability when firing from the hip.
- Textured Grip: The friction on this weapon's grip is particularly strong. - Greatly increases handling speed - Slightly decreases stability
The Last Word Lore
Knew this day would come, and with it, one last lesson…
There's an end to all things, kid. Good and bad.
Sure, the best times seem small, and the bad tend to linger, but the only permanent is eternity.
I'm off to meet it.
If you're lucky, someday you will too.
For now, though, you've got road yet traveled and lives yet lived.
I know you got hate in you. Most do. Trick is to use it, 'stead of it usin' you.
But you know this—vengeance is a motivator, not the motive.
Meant to—hoped to—say these words to you one last time in person, but writin' 'em down seems the safe bet with the prey we're trackin'.
Worst part about bein' a good guy? As much as you may want it, you can't always win. But that truth don't bother me. We do the right thing, 'cause the right thing needs doin'. So, when another does harm—casts their shadow upon you or your kin—you go 'head and hunt for the justice needed to answer any sins inflicted.
Don't hunt 'em 'cause you been wronged.
Hunt 'em 'cause what they did was wrong.
There's a world of difference there, kid.
One makes you selfish. The other makes you a hero.
And I see a hero in you.
And with this last good lesson, a gift. I know it feels right in your hand—its weight easy, its trigger smooth. Use it as you will—I know you'll use it right.
It's yours now, 'til the last flame dies and all words've been spoken.
‘Til that time.
Safe journeys. Straight aim. And good huntin'.
J.
—A letter to Shin Malphur from his third father, Jaren Ward, written before Ward's ill-fated showdown with the infamous Dredgen Yor in the wooded hollow beyond Beggars' Gulch
The Last Word Quest Steps
You will be doing a mix of Crucible PvP stuff, and then running around and killing a lot of Hive to complete these steps.
Step 1: Tainted Artifact
Seek the guidance of one who dabbles in the arcane to learn more. This unknown artifact seethes with an odd, familiar sickness.
Head on over to The Drifter to start in on this Exotic quest.
Step 2: The Cleansing
Purge the artifact of its sickness.
"Some who walk a darker path believe what we call 'Weapons of Sorrow' ain't a complete science. This artifact could be key to a new understanding- if you're willing to risk temptation." - The Drifter
This requires the following steps that you'll need to complete:
- Defeat Hive with Solar damage
- Collect 75 Hive Tablets
- Defeat 3 Hive bosses
Hive Tablets will naturally drop as you defeat Hive on your way to completing this step of the quest. One of the best spots to complete this is on Mars and doing Escalation Protocol. You'll fight a ton of Hive and you'll be able to collect all the tablets and defeat the bosses required.
Step 3: A Cleansed Artifact
The artifact is now cleansed. But what is its purpose?
"The artifact is free of disease now. I might be able to see what it's for. Bring it to me. Let's see how far down this dead-end leads." - The Drifter
This step just leads directly into the next one.
Step 4: The Temptation
Want to see what this artifact can do? Feed it Light by defeating Guardians in the Crucible. Being defeated will impede progress.
"The 7th Book of Sorrow speaks of a great Unmaking. Old friends of mine believe it's the blueprint for terrible weapons made in its name. I think they're mostly right, but to find out some of your friends are gonna have to suffer." - The Drifter
It's time to head into the Crucible and get some kills. However, you are going to want to make sure to not get yourself kill too often. For every kill you get, you get 2% towards the goal, and each time you are eliminated you will lose 1%. Play pretty safe so you don't end up having to continue this step indefinitely.
Step 5: The Damnation
The artifact is calling to something dark. Uncover a dark ritual on Titan and stop the twisted ceremony.
"The artifact is in pain. Can you hear it? It's made to feed on Light, and that Light is feeding something other. The trail is faint, but the screams don't lie. Get to Titan. Answers wait where dead things play." - The Drifter
This is a pretty easy mission that just recommends that you have a 500 power level to complete. It shouldn't be an issue to finish.
Step 6: A New Jagged Purpose
You found a Guardian's helmet penetrated by a unique bullet.
"The artifact was part of a Hive ritual tied to their efforts to perfect the Weapons of Sorrow. But that helm you found? Only one thing can cut through a Guardian like that. We may be too late. New weapons may already be in play." - The Drifter
Another quick step, this leads into one of the longest parts of the chain.
Step 7: Sullied Light
The Hive weapon master is creating new Weapons of Sorrow. You need to stop it. Gather powerful objects to sully your Light and complete the ritual.
- Collect Etched Crystals from Lost Sector wanted escapees.
- Earn multiple "Best served cold" and "Blood for blood" medals in the crucible.
- Defeat Hive with precision damage to collect larvae.
- Sacrifice Hive bosses summoned in witches' rituals.
"This is it, Guardian- the furthest you've gone down sorrow's road. There ain't no turnin' back. If the Hive are upgrading their arsenal, we need to know where and how, so we can stop it and learn from it. Don't worry. This ritual won't make you a bad guy It'll just feel like it." - The Drifter
This is a much longer portion of the quest that you'll need to complete. The first part requires you to run Lost Sectors over and over until you collect 15 Etched Crystals. You can do this in any Lost Sector as long as it has a wanted boss at the end.
Time to head back to the Crucible for some more PvP action. You will need to get either the "Best served cold" or "Blood for blood" medal when you play 25 times. To get "Best served cold" you will need to eliminate a person who last eliminated you (getting revenge on them). "Blood for blood" is given for killing an enemy that kill your teammate most recently. Best served cold is likely going to be harder to do and you'll just get it randomly, but if you keep an eye on your teammates and they get eliminated, you can immediately try to get the kill and will hopefully be able to rack up these medals.
To collect the Hive Larvae, you just need to kill Hive with precision hits (headshots).
You'll need to do three Heroic Hive rituals, there's a pretty common one on Titan. This has to be done in Heroic, so you'll need to stand in the circular green areas and shoot the crystals in the top corners of the room to trigger the Heroic event.
Step 8: Sorrow's Road
You have all you need to track the Hive weapon master.
"Using the thorn from your dead friend's helm and lettin' corruption touch your Light ain't an easy call. But you didn't back down. Come see me and we'll track the weapon that fired that jagged bit of death." - The Drifter
Almost done, time for one more mission!
Step 9: The Conversation
Enkaar, the Hive weapon master, is hiding in Hellrise Canyon in the Tangled Shore. Hunt him down!
"Time to hunt us a Hive weapons master and put an end to whatever he's cookin' up. This is where you get to be a hero, and we both get to learn a little bit more about things best left undiscovered. Careful out there, you'll be alone, and the odds'll be stacked. Hope you make it back." -The Drifter
This is a cool little mission, and all you really need to know is that you need to shoot the guns out of the Hives hands to complete it.
Step 10: A Darker Path
You defeated the Hive weapon master thanks to a mysterious gift, the Last Word. What would the Drifter say about that?
"The hunt is over. Our weapon master is defeated, thanks to you. And in his wake, you've found the Last Word? Well I'll be. Hm. It's probably best we close this case down. For now." - The Drifter
Once you've completed the previous mission, you will earn yourself this sweet new Hand Cannon!